class ‐ viii - edusys · 7. activity building a life 19 8. explore tricking the brain 20 9....
TRANSCRIPT

8

3 Eduheal Foundation Class - VIII
CLASS ‐ VIII Sl. No. Category Topic Page No.
1. Syllabus Guide Line 04
2. Invent Lemon Power 08
3. Experiment Fun Science with Balloons 11
4. Explore Heat-Energy Extraordinaire! 15
5. Discover Cell & City 16
6. Activity Shaped for the Job 18
7. Activity Building a Life 19
8. Explore Tricking The Brain 20
9. Discover Challenge To Brain 22
10. Experiment Magic In Kitchen 24
11. Experiment Mold Terrarium 25
12. Discover Building Blocks 28
13. Invent Simple Electroplating 31
14. Experiment Volcanic Eruption 35
15. Explore Colour Changing Milk 36
16. Experiment Fizzing and Foaming 38
17. Invent Super Sparker 40
18. Discover Bubbularium 43
19. Explore Go Round Round 45
20. Activity Paper Comet Model 47
21. Explore Space Suit 49
22. Discover Bubble Lens 52
23. Activity Compass Point 53
24. Interactive Activity Mission to Jupiter 54
25. Experiment The Green House Effect in a Jar 59
26. Activity Galaxy at Home 62
4 Class - VIII Eduheal Foundation
Ques t ions
Food Crop production Crop production : How are different food crops produced? What are the various foods we get from animal sources?
Microorganism What living organisms do we see under a microscope in a drop of water? What helps make curd? How does food to bad? How do we preserve food?
2. Materials Materials in daily life Are some of our clothes synthetic? How are they made? Where do the raw materials come from? Do we use other materials that are synthetic?
Do we use cloth (fabric) for purposes other than making clothes to wear? What kind of fabric do we see around us? What are they used for?
Different kinds of materials and their reaction. Can a wire be drawn our of wood? Do copper or aluminium also rust like iron? What is the black material inside a pencil? Why are electrical wires made of aluminium or copper?
How things change/react with one another What happens to the wax when a candle is burnt? Is it possible to get this wax back? What happens to kerosene/natural gas when it is burnt? Which fuel is the best? Why?
Key concepts
Crop production: Soil preparation, selection of seeds, sowing, applying fertilizers, irrigation, weeding harvesting and storage; nitrogen fixation, nitrogen cycle.
Micro organismsuseful and harmful.
Synthetic clothing materials. Other synthetic materials, especially plastics; usefulenss of plastics and problems associated with their excessice use.
There are a variety of fibrous materials in use. A material is chosen based on desired property.
Metals and nonmetals.
All fuels release heat on burning. Fuels differ in efficiency, cost etc. Natural resources are limited. Burning of fuels leads to harmful by products.
Activities/ Processes
Preparing herbarium specimens of some crop plants; collection of some seeds etc; preparing a table/chart on different irrigation practice and sources of water in different parts of India; looking at roots of any legume crop for nodules, hand section of nodules.
Making a lens with a bulb; Observation of drop of water, curd, other sources, bread mould, orange mould under the microscope; experiment showing fermentation of dough increase in volume (using yeast) collect gas in balloon, test in lime water.
Survey on use of synthetic materials. Discussion.
Testing various materialsfor action of water, reaction on heating, effect of flame, electrical conductivity, thermal conductivity, tensile strength.
Simple observations relating to physical properties of metals and nonmetals, displacement reactions, experiments involving reactions with acids and bases. Introduction of word equations.
Experiments with candles.
Collecting information. Discussions involving whole class.
CLASS VIII

5 Eduheal Foundation Class - VIII
Discussion on whether we find as many diverse plants/ animals in a ‘well kept area’ like a park or cultivated land, as compared to any area left alone. Discussion on depletion of wild life why it happens, on poaching, economics.
Use of a microscope, preparation of a slide, observation of onion peel and cheek cells, other cells from plants e.g. Hydrilla leaf, permanent slides showing different cells, tissues, blood smear; observation of T.S. steam to see tissues; observing diverse types of cells from plants and animals (Some permananet slide).
Discussion with counsellors on secondary sexual characters, on how sex of the child is determined safe sex, productive health observation on eggs, young one, life cycles.
Observing and analysing the relation between force and motion in a variety of dailylife situation. Demonstrating change in speed of a moving object, its direction of motion and shape by applying force. Measuring the weight of an object, as a force (pull) by the earth using a spring balance.
Demonstrating friction between roughtsmooth surfaces of moving objects in contact, and wear and teat of moving objects by rubbing (earaser on paper, ard board, sand paper). Activities on static, sliding and rolling friction. Discussion on other methods of reducing friction and ways of increasing friction.
Observing the dependence of pressure exerted by a force on surface area of an object. Demonstrating that air exerts pressure in a variety of situations.
Conservation of biodiversity/wild life/ plants; zoo, sanctuaris, forest reserves etc. flora, fauna endangered species, red data book; endemic species, migration.
Cell structure, plant and animal cells, use of stain to observe, cell organelles nucleus, vacuole, chloroplast, cell membrane, cell wall.
Sexual reproduction and endocrine system in animals, secondary sexual characters, reproductive health; internal and external fertilisation.
Idea of forcepush or pull; change in speed, direction of moving objects and shape of objects by applying force; contact and noncontact forces.
Frictionfactors affecting friction, sliding and rolling friction, moving; advantages and disadvantages of friction for the movement of automobiles, aeroplanes and boats/ ships; increasing and reducing friction.
Idea of pressure; pressure exerted by air/liquid; atmospheric pressure.
3. The World of the Living Why conserve What are reserve forests/sanctuaries etc? How do we keep track of our plants and animals? How do we know that some species are in danger of disappearing? What would happen if you continuously cut trees?
The cell What is the internal structure of a plant what will we see if we look under the microscope? Which cells from our bodies can be easily seen? Are all cells similar?
How babies are formed How do babies develop inside the mother? Why does our body change when we reach our teens? How is the sex of the child determined? Who looks after the babies in your homes? Do all animals give birth to young ones?
4. Moving things, People and Ideas Idea of force What happens when we push or pull anything? How can we change the speed, direction of a moving object? How can we shape the shape of an object?
Friction What makes a ball rolling on the ground slow down?
Pressure Why are needles made pointed? Why does a balloon burst if too much air is blown into it? Why does an inverted glass/bottle/pitcher resist being pushed down into water? How can air/liquids exert pressure?

6 Class - VIII Eduheal Foundation
Sound How do we communicate through sound? How is sound produced? What characterises different sounds?
5. How Thing Work Electric current and circuits Why do we get a shock when we touch an electric appliance with wet hands?
What happens to a conducting solution when electric current flows through it?
How can we coat an object with a layer of metal?
6. Natural Phenomena Rain, thunder and lightning What is lightning? What safety measures should we take against lightning strickes?
Light What are the differences between the image formed on a new utensil and an oil one? Why is there this difference?
When you see your image in the mirror in appears as if the left is on the right why?
Why don’t we see images on all surfaces around us? What makes things visible?
How do we see image of our back in a mirror?
Various types of sound; sources of sound; vibration as a cause of sound; frequency; medium for propagation of sound; idea of noise as unpleasant and unwanted sound and need to minimise noise.
Water conducts electricity depending on presence/ absence of salt in it. Other liquids may or may not conduct electricity. Chemical effects of current.
Basic idea of electroplating.
Clouds carry electric charge. Positive and negative charges, attraction and repulsion. Principle of lightning conductor.
Law of reflection.
Characteristics of image formed with a plane mirror.
Regular and diffused reflection
Reflection of light from an object to the eye
Multiple reflection.
Demonstrating that liquids exert pressure. Designing an improvised manometer and measuring pressure exerted by liquids. Designing improvised pressure detector and demonstrating increase in pressure exerted by a liquid at greater depths.
Demonstrating and distinguishing different types (loud and feeble, pleasant/musical and unpleasant/noise, audible and inaudible) of sound. Producing different types of sounds. using the same source. Making a ‘Jal Tarang’. Demonstrating that vibration is the cause of sound. Designing a toy telephone. Identifying various sources of noise. (unpleasant and unwanted sound) in the locality and thinking of measures to minimise noise and its hazards (noisepollution).
Activity to study whether current flows through various liquid samples (tap water, salt, solution, lemon juice, kerosene, distilled water if available). Emission of gases from salt solution. Deposition of Cu from copper sulphate solution. Electric pen using KI and starch solution. Simple experiment to show electroplating.
Discussion on sparks. Experiments with comb and paper to show positive and negative charge. Discussion on lightning conductor.
Exploring laws of reflection using ray source and another mirror.
Locating the reflected image using glass sheet and candles
Discussion with various examples Activity of observing an object through an object through a straight and bent tube; and discussion. Observing multiple image formed by mirrors placed at angles to each other. Making a kaleidoscope.

7 Eduheal Foundation Class - VIII
Why do we sometimes see colours on oil films on water?
What is inside our eye that enables us to see? Why are some people unable to see?
Night sky What do we see in the sky at night? How can we identify stars and planets?
Earthquakes What happens during an eqrthquake? What can we do minimise its effects?
7.Natural Resources Man’s intervention in phenomena of nature What do we do with wood? What if we had no wood? What will happen it we go on cutting trees / grass without limit?
What do we do with coal and petroleum? Can we create coal and petroleum artificially?
Pollution of air and water What are the various activities by human beings that make air impure? Does clear, transparent water indicate purity?
Dispersion of light
Structure of the eye
Lens becomes opaque, light not reaching the eye. Visually challenged use other sense to make sense of the world around. Alternative technology available Role of nutrition in relation to blindness.
Idea about heavenly bodies/celestial objects and their classification moon, planets, stars, constellations. Motion of celestial objects in space; the solar system.
Phenomena to earthquakes.
Consequences of deforestation: scarcity of products for humans and other living beings, change in physical properties of soil, reduced rainfall. Reforestation; recycling of paper
Formation of coal and petroleum in nature. (fossil fuels?) Consequences of occr extraction of coal and petroleum.
Water and air are increasingly getting polluted and therefore become scarce for use. Biological and chemical contamination of water on soil and living beings; effect of soil containing excess of fertilisers and insecticides on water resources. Potable water.
Observing spectrum obtained on a white sheet of paper/wall using a plane mirror inclined on a water surface at an angle of 45° Observing reaction of pupil to a shining torch. Demonstration of blind spot. Description of case histories of visually challenged people who have been doing well in their studies and careers. Activities with Braille sheet.
Observing and identifying the objects moving in the sky during the day and at night. Observing and identifying some prominent stars and constellations. Observing and identifying some prominent planets, visible to the naked eye, (Venus, Mars, Jupiter) in the night sky and their movement. Design and preparing models and charts of the solar system, constellations, etc. Role play and games for understanding movement of planets, stars etc.
Looking at structures/ large objects and guessing what will happen to them in the event of an earthquake; activities to explore stable and unstable structures.
Narration and discussions. Project Recycling of paper.
Discussion
Case study and discussion. Purification of water by physical and chemical methods including using sunlight. Discussion on other methods of water purification.
* Kindly note that Syllabus guidelines are given for present class but 90% question paper of NISO will be based on previous class syllabus
8 Class - VIII Eduheal Foundation
Everyone of us is very much familiar with lemon or ‘nimbu‛. Besides making refreshing ‘nimbu-pani‛, can you imagine what else can you make from lemon? Make batteries! Sounds strange isn‛t it? Yes, you are going to make lemon-battery here.
What do you need? Thick copper wire (Thin wires will also work, but thick wire
is stiffer)
Wire clippers
Steel paper clip
Sheet of coarse sandpaper
Lemon
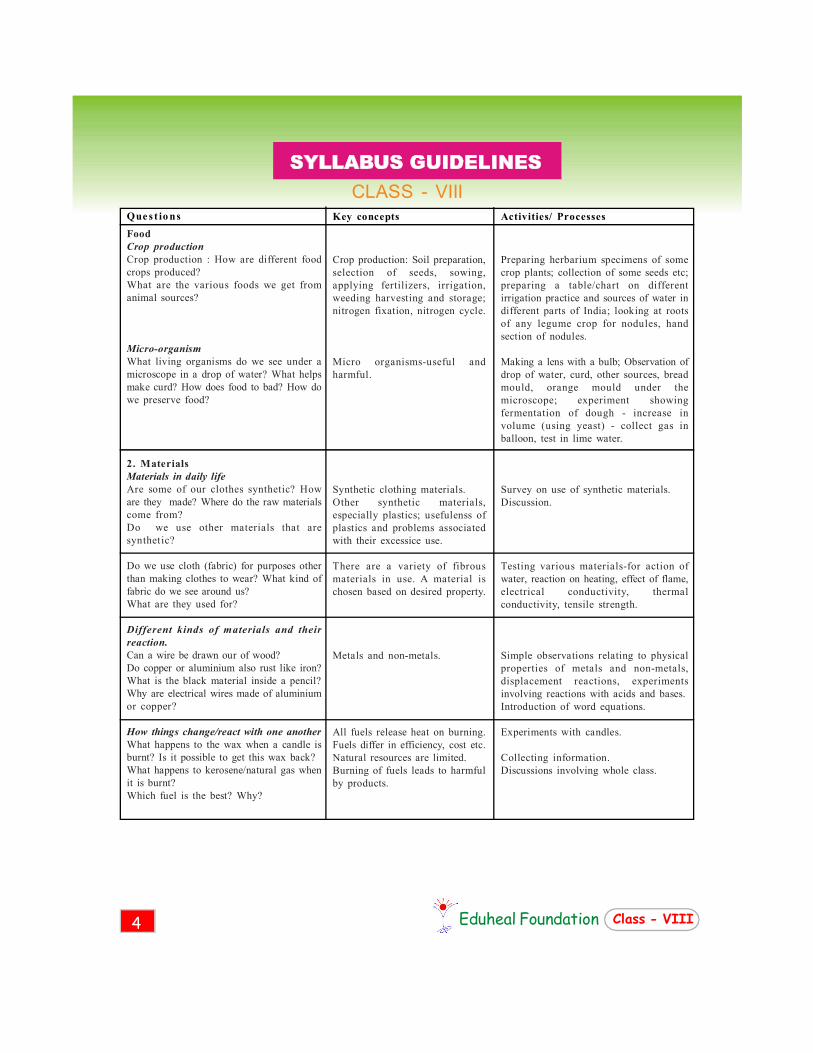
What to do? 1 Have your older friend or an adult strip 5 cm of insulation off the copper wire. Clip the 5 cm of bare wire with the clippers.
2 Straighten out the paper clip and cut about 5 cm of the straightened steel wire.
3 Use sandpaper to smooth any rough spots on the ends of the wire and paper clip.
Lemon Power

9 Eduheal Foundation Class - VIII
4 Squeeze the lemon gently with your hands. But don‛t rupture the lemon‛s skin. Rolling it on a table with a little pressure works great.
5 Push the pieces of the paper clip and the wire into the lemon so they are as close together as you can get them without
touching.
6 Moisten your tongue with saliva. Touch the tip of your wet tongue to the free ends of the two wires.
You should be able to feel a slight tingle on the tip of your tongue and taste something metallic.
What’s going on ? The lemon battery is called a voltaic battery, which changes chemical energy into electrical energy.
The battery is made up of two different metals (the steel paper clip and the copper wire). These are called electrodes, which are the parts of a battery where electric current enters or leaves the battery. The electrodes are placed in a liquid containing an electrolyte, which is a solution that can conduct electricity.
In a solution of water and an electrolyte, like the citric acid in the lemon, an excess of electrons collects on one end of

10 Class - VIII Eduheal Foundation
the electrodes. At the same time, electrons are lost from the other electrode.
Touching the electrodes to your tongue closes the circuit and allows small electric current to flow. A single lemon produces about 7/10 of a volt of electricity. If you connected two lemons together, you can power LED (light emitting diode). (Use a length of thin, flexible wire to connect the steel wire of one lemon to the copper wire of the other lemon. Then attach thin wires from the other two wires in the lemons to where a battery‛s positive and negative poles connect to power the watch.)
The tingle felt in your tongue and the metallic taste is due to the movement of electrons through the saliva on your tongue.
Note About Lemon Energy The lemon “battery” cannot be used to light a small torchlight‛s light bulb. Why? The reason is that the lemons produce only a very small current (about one milliampere). This is not enough electric current to light the bulb. Even with multiple lemons, the amount of current flowing through the wire is not enough. Though the voltage is high enough (1.5 volts with two lemons), the current is too weak. But it is a great experiment!
11 Eduheal Foundation Class - VIII
Isn‛t it great fun to pop balloons filled with chocolates and colourful, shining fillers on your or your friend‛s birthday? Since, balloons are very fragile things, they get easily popped on pricking with a sharp object like needle or on getting heat weaken the rubber and cause it to burst. However, in the following experiment you will find out how you can hold a balloon directly in a flame without breaking the balloon; and also stick a needle through a balloon without bursting it.
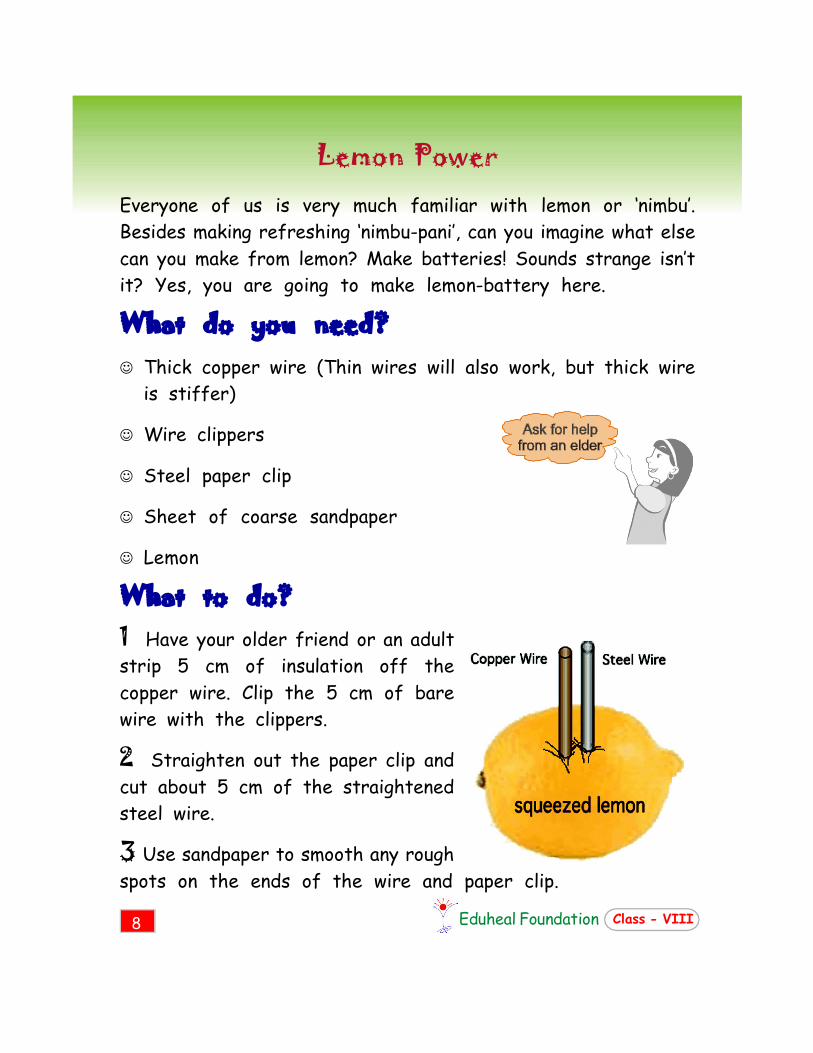
The Fireproof Balloon You will need: two round balloons, not inflated
several matches
water
Here’s How :‐ 1. Inflate one of the balloons and tie it closed. Place 60 milliliters (¼ cup) of water in the other balloon, and then inflate it and tie it shut.
2. Light a match and hold it under the first balloon. Allow the flame to touch the balloon. What happens? The balloon bursts, perhaps even before the flame touches it.
3. Now light another match. Hold it directly under the
Fun Science with Balloons

12 Class - VIII Eduheal Foundation
water in the second balloon. Allow the flame to touch the balloon. What happens with this balloon? The balloon doesn‛t break. You may even see a black patch of soot form on the outside of the balloon above the flame.
You know why? Why does the balloon with no water break in the flame? The flame heats the rubber of both the balloons. The rubber of the balloon without water becomes so hot, that it becomes too weak to resist the pressure of the air inside the balloon.
How does the balloon with water in it resist breaking in the flame? When water inside the balloon is placed in the flame, the water absorbs most of the heat from the flame. Then, the rubber of the balloon does not become very hot. Because the rubber does not become hot, it does not weaken, and the balloon does not break.
Water is a particularly good absorber of heat. It takes a lot of heat to change the temperature of water as much heat to raise the temperature of 1 gram of water by 1ºC than it does to raise the temperature of 1 gram of iron by the same amount. On the other hand, when water cools, it releases a great deal of heat. Water takes longer time to get heated and takes very less time to release the heat.
Find out 1. Why the areas near oceans or other large bodies of water donot get as cold in winter as areas at the same latitude further in land?
2. Why Mumbai enjoys a maritime climate all round the year?
13 Eduheal Foundation Class - VIII
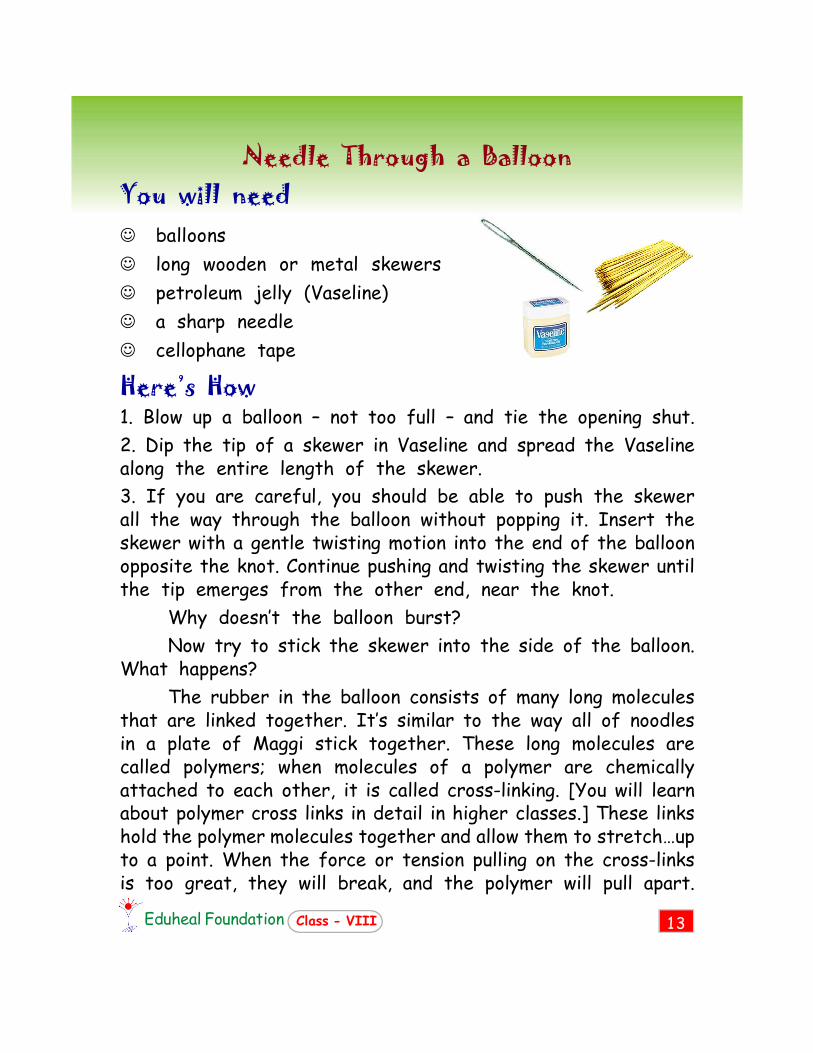
Needle Through a Balloon You will need balloons long wooden or metal skewers petroleum jelly (Vaseline) a sharp needle cellophane tape
Here’s How 1. Blow up a balloon – not too full – and tie the opening shut. 2. Dip the tip of a skewer in Vaseline and spread the Vaseline along the entire length of the skewer. 3. If you are careful, you should be able to push the skewer all the way through the balloon without popping it. Insert the skewer with a gentle twisting motion into the end of the balloon opposite the knot. Continue pushing and twisting the skewer until the tip emerges from the other end, near the knot.
Why doesn‛t the balloon burst? Now try to stick the skewer into the side of the balloon.
What happens? The rubber in the balloon consists of many long molecules
that are linked together. It‛s similar to the way all of noodles in a plate of Maggi stick together. These long molecules are called polymers; when molecules of a polymer are chemically attached to each other, it is called cross-linking. [You will learn about polymer cross links in detail in higher classes.] These links hold the polymer molecules together and allow them to stretch…up to a point. When the force or tension pulling on the cross-links is too great, they will break, and the polymer will pull apart.
14 Class - VIII Eduheal Foundation
Look at the rubber near the ends of the balloon where you first inserted the skewer. Does it look lighter or darker than the rubber in the rest of the balloon?
The rubber at the ends of the balloon is stretched out less than in the middle of the balloon. Therefore, there is less force pulling on it. This allows the tip of the skewer to break some polymer cross-links, push aside the molecules of rubber, and slide into the balloon. However, enough cross-links remain so that the balloon holds together.
In the side of the balloon, there are fewer polymer molecules. When you push the tip of the skewer through the rubber in the side of the balloon and the skewer breaks a few of the cross-links, the tension on the remaining cross-links is too great, and the balloon bursts.
Do you think there is a way to stick a sharp needle through the side of a balloon without popping it?
Put a small piece of cel- lophane tape on the side of the balloon and press it down well. Now take the needle and press it through the tape and into the balloon. Does the balloon burst?
The tape sticks to the rubber in the balloon and will not allow the rubber to stretch to the breaking point when the needle pierces the balloon. In other words, the tape reinforces the cross links, and the balloon stays together.
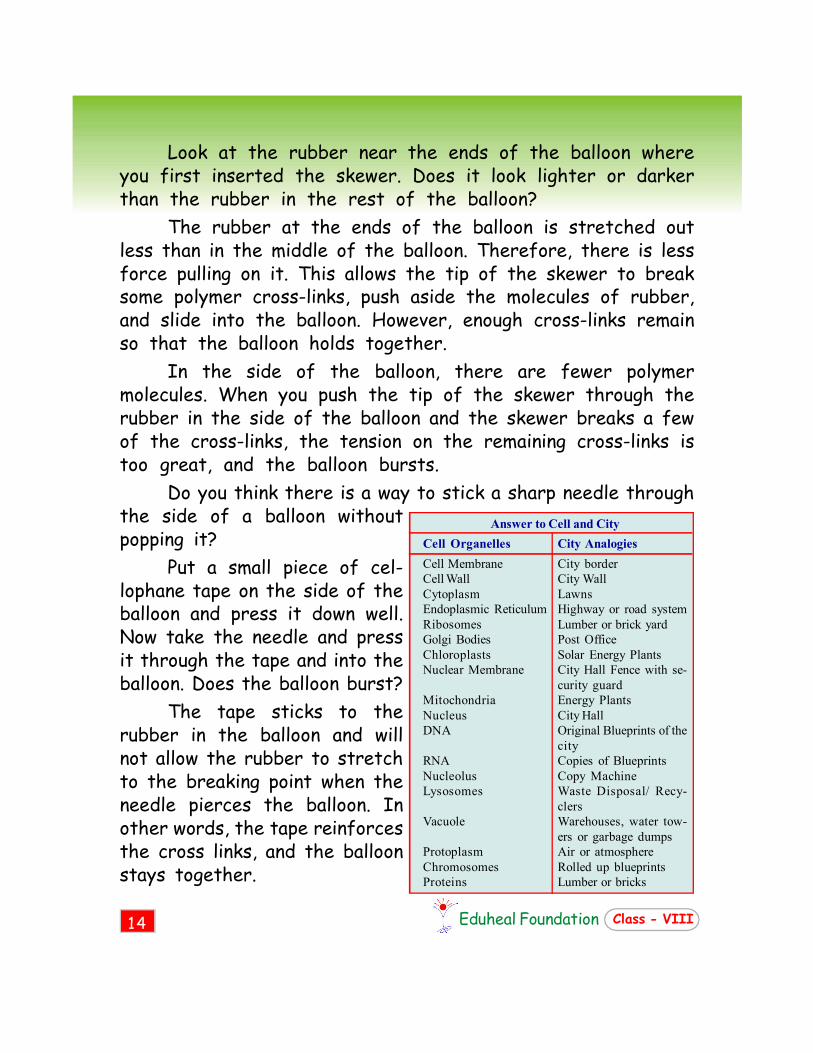
Answer to Cell and City Cell Organelles City Analogies Cell Membrane City border Cell Wall City Wall Cytoplasm Lawns Endoplasmic Reticulum Highway or road system Ribosomes Lumber or brick yard Golgi Bodies Post Office Chloroplasts Solar Energy Plants Nuclear Membrane City Hall Fence with se
curity guard Mitochondria Energy Plants Nucleus City Hall DNA Original Blueprints of the
city RNA Copies of Blueprints Nucleolus Copy Machine Lysosomes Waste Disposal/ Recy
clers Vacuole Warehouses, water tow
ers or garbage dumps Protoplasm Air or atmosphere Chromosomes Rolled up blueprints Proteins Lumber or bricks
15 Eduheal Foundation Class - VIII
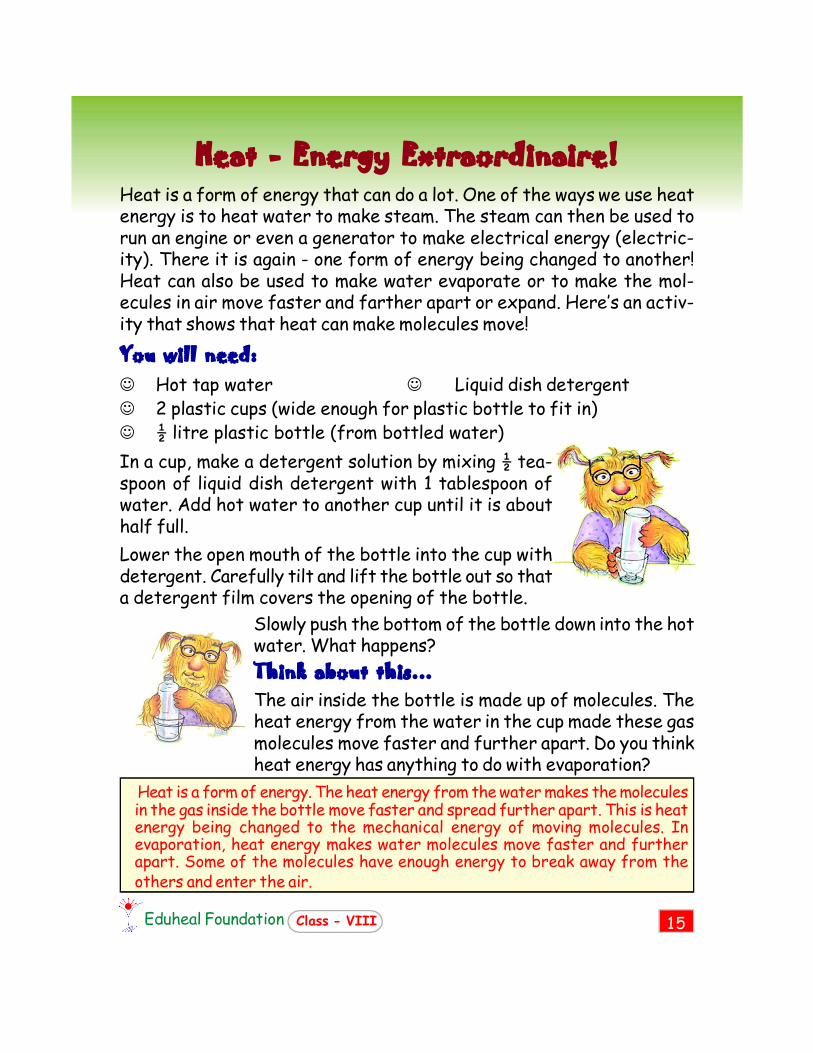
Heat ‐ Energy Extraordinaire! Heat is a form of energy that can do a lot. One of the ways we use heat energy is to heat water to make steam. The steam can then be used to run an engine or even a generator to make electrical energy (electric- ity). There it is again - one form of energy being changed to another! Heat can also be used to make water evaporate or to make the mol- ecules in air move faster and farther apart or expand. Here‛s an activ- ity that shows that heat can make molecules move! You will need: Hot tap water Liquid dish detergent 2 plastic cups (wide enough for plastic bottle to fit in) ½ litre plastic bottle (from bottled water) In a cup, make a detergent solution by mixing ½ tea- spoon of liquid dish detergent with 1 tablespoon of water. Add hot water to another cup until it is about half full. Lower the open mouth of the bottle into the cup with detergent. Carefully tilt and lift the bottle out so that a detergent film covers the opening of the bottle.
Slowly push the bottom of the bottle down into the hot water. What happens? Think about this... The air inside the bottle is made up of molecules. The heat energy from the water in the cup made these gas molecules move faster and further apart. Do you think heat energy has anything to do with evaporation?
Heat is a form of energy. The heat energy from the water makes the molecules in the gas inside the bottle move faster and spread further apart. This is heat energy being changed to the mechanical energy of moving molecules. In evaporation, heat energy makes water molecules move faster and further apart. Some of the molecules have enough energy to break away from the others and enter the air.

16 Class - VIII Eduheal Foundation
Team Page:
All living organisms are composed of cells, They are the functional & structural unit of life. Their details are visible only through a microscope. As a basis for understanding this concept, know these :
a. cells function similarly in all living organisms.
b. the characteristics that distinguish plant cells from animals cells include chloroplasts and cell walls.
c. the nucleus is the centre for genetic information in plant and animal cells.
d. mitochondria liberate energy for the work that cells do, and chloroplasts capture sunlight for photosynthesis.
Here’s how In this activity you need to match the city part with the cell part based upon the functions performed by them. Some of the suggested city analogies are given in the table. These are jumbled up.
a. Prepare a table of cell organelles & city analogies.
b. Match the cell organalles & suggested, city organelles on the table prepared.
Cell and City
17 Eduheal Foundation Class - VIII
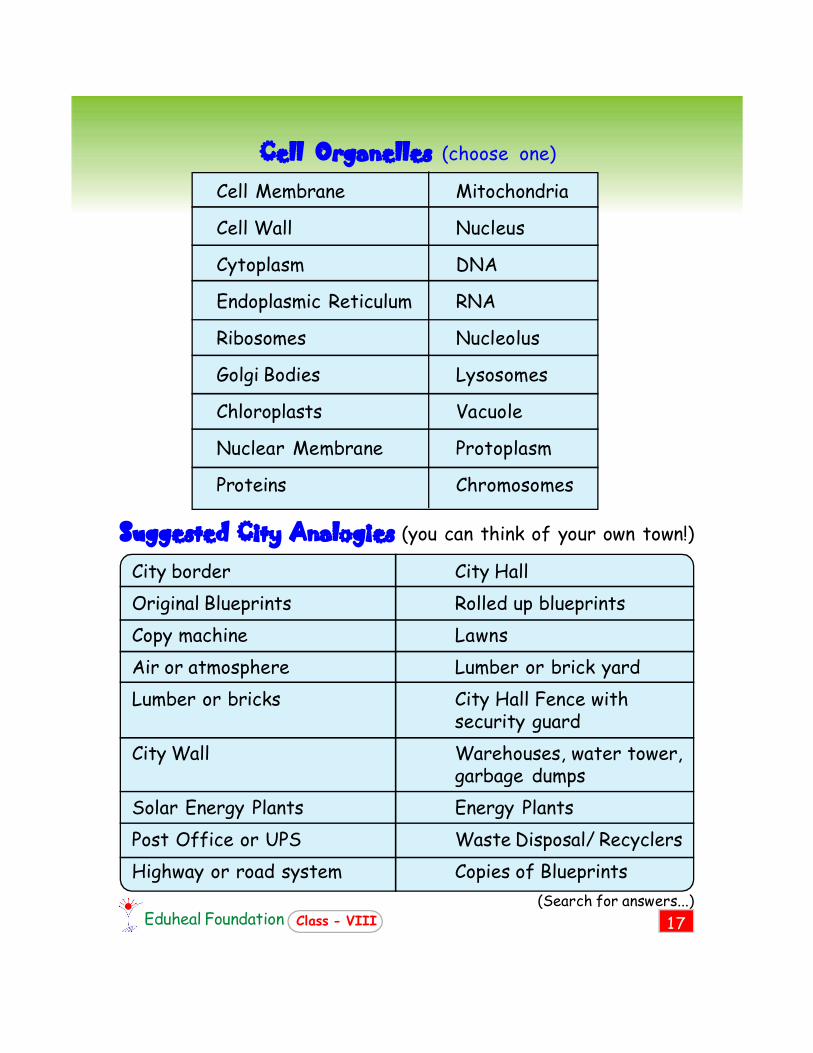
Cell Organelles (choose one)
Cell Membrane Mitochondria
Cell Wall Nucleus
Cytoplasm DNA
Endoplasmic Reticulum RNA
Ribosomes Nucleolus
Golgi Bodies Lysosomes
Chloroplasts Vacuole
Nuclear Membrane Protoplasm
Proteins Chromosomes
Suggested City Analogies (you can think of your own town!)
City border City Hall Original Blueprints Rolled up blueprints Copy machine Lawns Air or atmosphere Lumber or brick yard Lumber or bricks City Hall Fence with
security guard City Wall Warehouses, water tower,
garbage dumps Solar Energy Plants Energy Plants Post Office or UPS Waste Disposal/ Recyclers Highway or road system Copies of Blueprints
(Search for answers...)

18 Class - VIII Eduheal Foundation
Shaped for the job
muscle cell strands wave about to move
things
root hair cell movement of the various body
parts
cell with cilia it takes water from the soil
palisade leaf cell
it carries messages
nerve cell
it has lots of chloroplasts to help the plant
make food
Cell is the structural and functional unit of life. Each organ of both plants and animals are made up of a particular type of cell. They are variously shaped because they do different jobs.
Match up the picture with the name of the cell and its job. Cell Name Job

19 Eduheal Foundation Class - VIII
Building a Life
# glue Lets things in and out
# glue Controls the cell
# glue Jelly-like substance
# glue Storage space
# glue Helps to make food
# glue Supports the cell
# glue
Label the parts in plant and animal cells shown below
Animal cell Plant cell
Cut out the words below. Match each word to its box. Put glue where you see . You can then lift the flap.
cell surface membrane nucleus
Cytoplasm Chloroplast
Vacuole cell wall
After performing this activity you can use this as flash card (a memory tool) you can also make similar other flash cards of discoveries, definitions, functions etc.

20 Class - VIII Eduheal Foundation
Tricking The Brain
Have you ever realized that you can notice your friend, your favourite cartoon character like Mickey or Chacha Choudhary or your favourite actor - full face in profile, by the back of his head or even by his eyes?
Yes, we can recognize instantly. We can distinguish millions of shades of colour, as well as 10,000 smells. We can feel a feather as it brushes our skin, hear the faint rustle of a leaf. It all seems so effortless: we open our eyes or ears and the whole world streams in.
Yet anything we see, hear, feel, smell, or taste requires billions of nerve cells to send urgent messages along cross-linked pathways and feedback loops in our brain performing intricate functions Therefore, these processes are not that simple as we think.
You can think of sensory systems as little scientists that create assumptions about the world. Where did that sound come from? What colour is this? The brain makes an intelligent guess, based on the information at hand and on some simple assumptions.
When you look at the illustration given on right, for instance, you see an X made of spheres surrounded by cavities. But if you turn the image upside down, all the cavities become spheres, and vice versa.
In each case, the shapes seem real because “your brain assumes there is a single light source— and that this light comes from above,” this is a good rule of thumb in our sunlit world.

21 Eduheal Foundation Class - VIII
To resolve ambiguities and make sense of the world, the brain also creates shapes from incomplete data. You can see an apparent triangle which was developed by the Italian psychologist Gaetano Kanizsa (see right). If you hide part of this picture, depriving the brain of certain clues it uses to form conclusions, the large white triangle disappears.
We construct such images unconsciously and very rapidly. Our brains are just as fertile when we use our other senses. In moments of anxiety, for instance, we sometimes “hear things” that are not really there.
Fun Science Facts The fun facts given below are gleaned from essays, exams and classroom discussion; mostly from middle class students. l Question: What is one horsepower? Answer: One horsepower
is the amount of energy it takes to drag a horse 150 meter in one second.
l Talc is found in rocks and on babies. l The law of gravity says no fair jumping up without coming
back down. l When scientists broke open molecules, they found they were only stuffed
with atoms. But when they broke open atoms, they found them stuffed with explosions.
l Rainbows are just to look at, not to really understand. l A vibration is a motion that cannot make up its mind which way it wants to go. l Genetics explain why you look like your father and if you don‛t why you
should. l To most people solutions mean finding the answers. But to chemists solutions
are things that are still all mixed up. l Humidity is the experience of looking for air and finding water. l In making rain water, it takes everything from H to O.
22 Class - VIII Eduheal Foundation
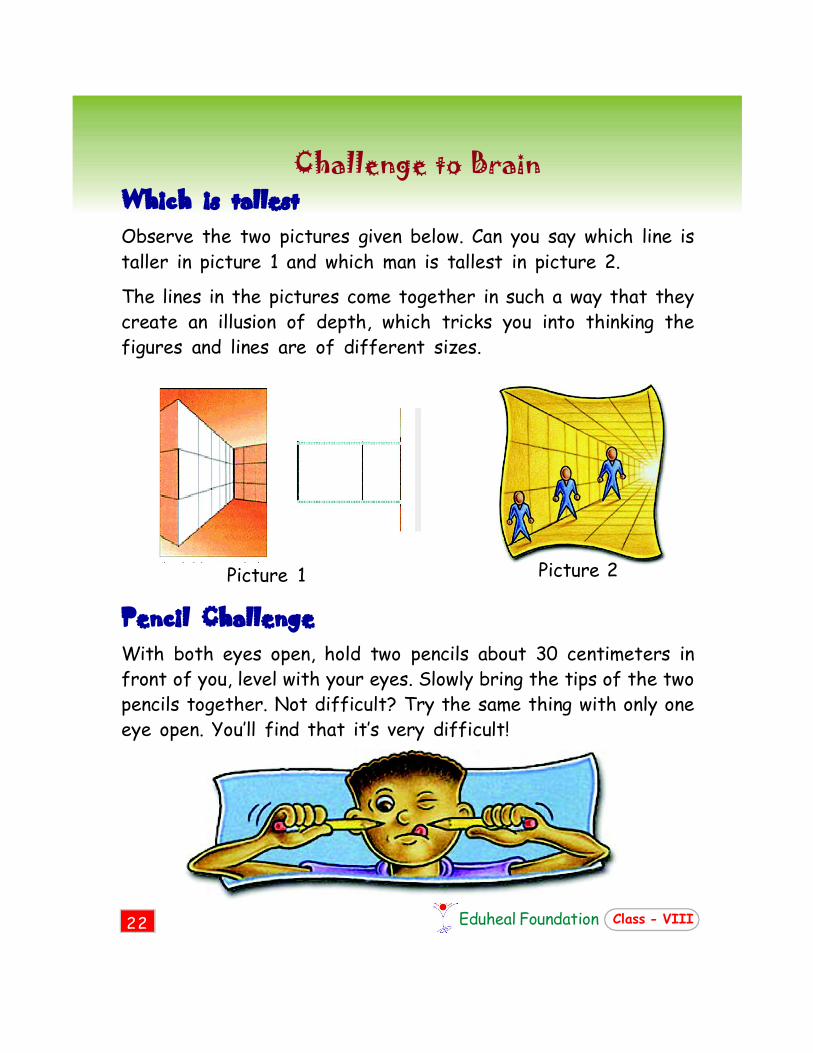
Challenge to Brain Which is tallest Observe the two pictures given below. Can you say which line is taller in picture 1 and which man is tallest in picture 2.
The lines in the pictures come together in such a way that they create an illusion of depth, which tricks you into thinking the figures and lines are of different sizes.
Pencil Challenge With both eyes open, hold two pencils about 30 centimeters in front of you, level with your eyes. Slowly bring the tips of the two pencils together. Not difficult? Try the same thing with only one eye open. You‛ll find that it‛s very difficult!
Picture 1 Picture 2
23 Eduheal Foundation Class - VIII
Why? Each eye sees from a slightly different angle. Both eyes work together to give you depth perception—the ability to see things in three dimensions. You need depth perception for your brain to be able to judge distance. When you use just one eye, you have no depth perception.
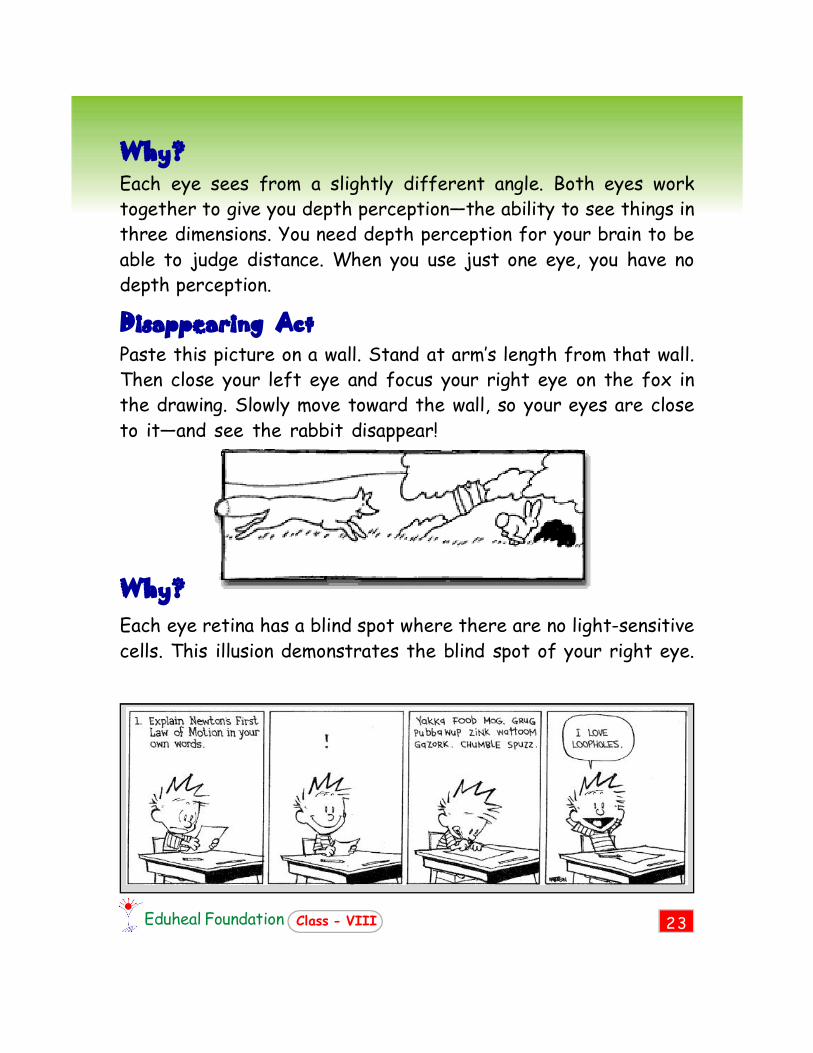
Disappearing Act Paste this picture on a wall. Stand at arm‛s length from that wall. Then close your left eye and focus your right eye on the fox in the drawing. Slowly move toward the wall, so your eyes are close to it—and see the rabbit disappear!
Why? Each eye retina has a blind spot where there are no light-sensitive cells. This illusion demonstrates the blind spot of your right eye.

24 Class - VIII Eduheal Foundation
Magic in Kitchen
You will need 1/4 cup grape juice
Small, clear glass
1 tablespoon of baking soda
1 tablespoon of white vinegar
Here’s how First get permission to use kitchen equipment and ingredients.
1. Pour the grape juice into the glass.
2. Slowly mix the baking soda into the grape juice. The colour at the top of the juice will change to blue.
3. Now add the vinegar to the mixture, a drop at a time. The colour will change to pink where the vinegar drips.
4. When you pour out the liquid in the sink, notice how dark it has become.
Why? Grape juice looks purple because its molecules are arranged in such a way that it absorbs all the colours of light except purple. The purple reflects back to your eyes. This is how you see colour. Adding other substances change the molecular structure of grape juice, so its colour changes.
25 Eduheal Foundation Class - VIII
Mold Terrarium
Note DO NOT use anything with meat or fish in it—after a few days, these would start to smell very, very bad.
What you need? A clear container with a lid. (Big
glass jars and clear plastic containers work great, but you‛ll have to throw away the container after the experiment)
Cellophane tape Water
Some leftover food such as bread, fruit (like oranges, lemons, or grapes), vegetables etc.
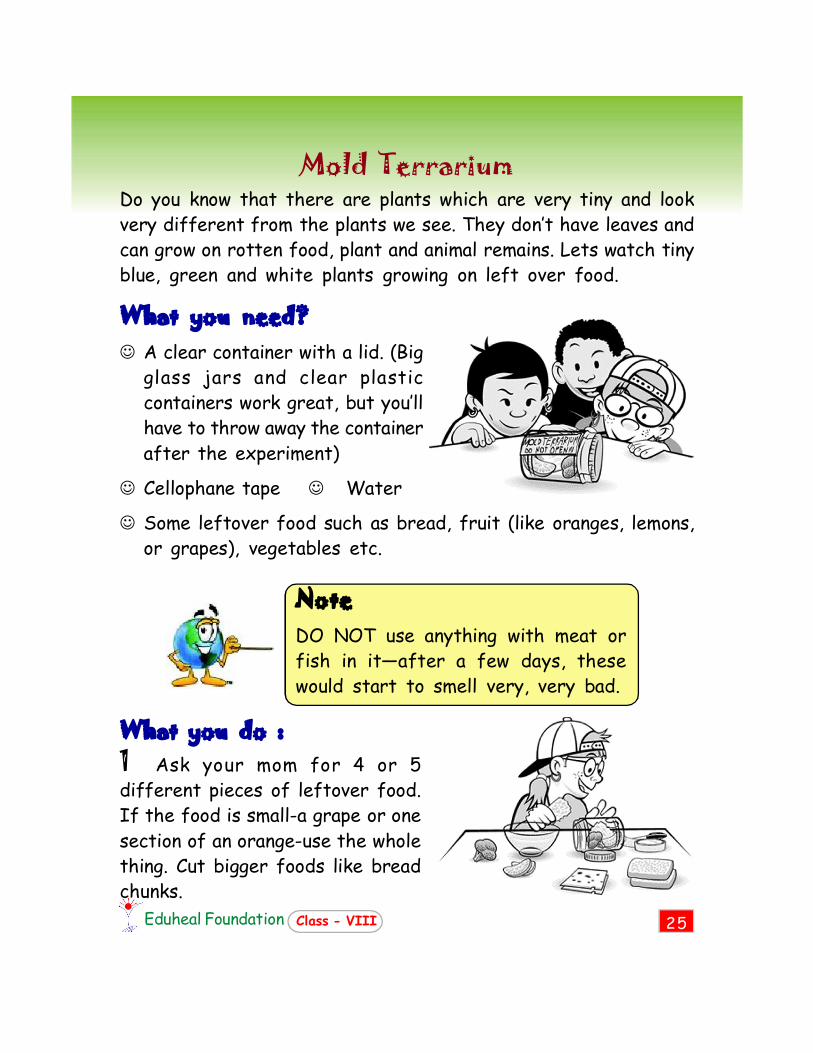
What you do : 1 Ask your mom for 4 or 5 different pieces of leftover food. If the food is small-a grape or one section of an orange-use the whole thing. Cut bigger foods like bread chunks.
Do you know that there are plants which are very tiny and look very different from the plants we see. They don‛t have leaves and can grow on rotten food, plant and animal remains. Lets watch tiny blue, green and white plants growing on left over food.
26 Class - VIII Eduheal Foundation
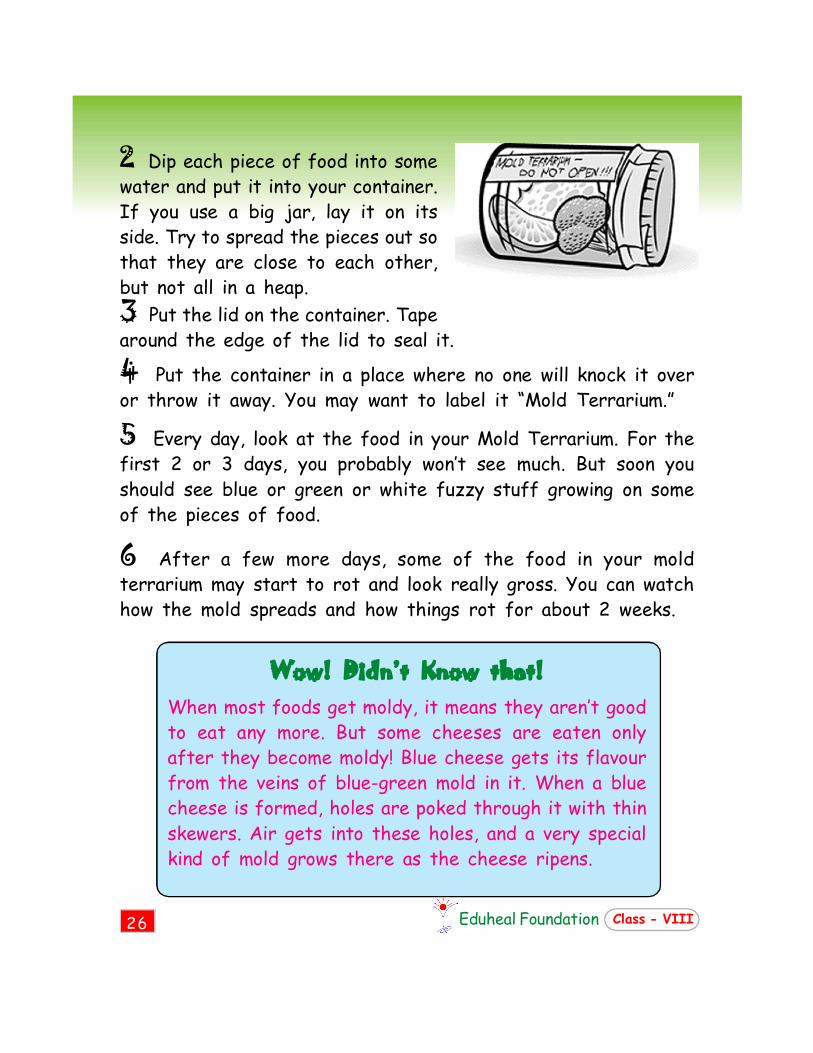
2 Dip each piece of food into some water and put it into your container. If you use a big jar, lay it on its side. Try to spread the pieces out so that they are close to each other, but not all in a heap. 3 Put the lid on the container. Tape around the edge of the lid to seal it.
4 Put the container in a place where no one will knock it over or throw it away. You may want to label it “Mold Terrarium.”
5 Every day, look at the food in your Mold Terrarium. For the first 2 or 3 days, you probably won‛t see much. But soon you should see blue or green or white fuzzy stuff growing on some of the pieces of food.
6 After a few more days, some of the food in your mold terrarium may start to rot and look really gross. You can watch how the mold spreads and how things rot for about 2 weeks.
Wow! Didn’t Know that! When most foods get moldy, it means they aren‛t good to eat any more. But some cheeses are eaten only after they become moldy! Blue cheese gets its flavour from the veins of blue-green mold in it. When a blue cheese is formed, holes are poked through it with thin skewers. Air gets into these holes, and a very special kind of mold grows there as the cheese ripens.

27 Eduheal Foundation Class - VIII
Think & say
1. Which fungus do you eat?
2. Are Algae useful to humans?
3. Have you ever thought where else you have seen the algae, fungi or other micro organisms ?
Danger ! When your experiment with your Mold Terrarium is over, throw it in the garbage. Don‛t reuse the container. Don‛t even open the lid! Mold is not a good thing for some people to smell or breathe as it can cause allergic reactions
Nuclear Fission How to make a nuclear reactor
Stick four graphite pencils into an apple core & balance on top of a pile of six luminous watches. Enclose reactor in clay or plasticine for safety. Now gently lift two graphite ‘control rods’ out of core & pile will start to warm up. If all the rods are removed there will be a small pop & a miniature mushroom cloud will appear.
Pencils
Apple
Clay or Plasticine
Luminous watches

28 Class - VIII Eduheal Foundation
Building Blocks
You can’t See it but it isn’t Gone There was once a story about the “Incredible Shrinking Man” wherein the man somehow did something that caused him to start shrinking. He shrank until he was the size of an ant. At that point, he thought he couldn‛t possibly get any smaller. He was mistaken. He got smaller and even smaller, until he was the size of a bacterium, and could be seen by a microscope. What a drag! The point of the story was that the fact that something cannot be seen does not necessarily mean that it is gone. We have observed several times that everything has to be somewhere.
Try this: Set a lump of sugar on a sheet of black paper. Cut the sugar cube in half with a knife. Set half of the lump aside. Cut the remaining portion of the cube in half again.
Cut each new portion in half until the cube is too small for you to cut it in half. How can the sugar be divided into even smaller particles?
One way is to dissolve the sugar in water. We‛ll do this with the half-lump of sugar that was set aside, and drop it into a glass of warm water.
The lump will get smaller and smaller until you can no longer see the sugar. The lump of sugar has broken up into particles so small that they cannot be seen even through a microscope.
If you have a microscope, place a drop of the sugar water on a glass slide and observe it through the microscope. Don‛t you see anything? Does that mean it is gone forever?

29 Eduheal Foundation Class - VIII
Taste the water. You can tell that the sugar is still in the water and that it did not disappear. What happened? How can the sense of taste “see” the particles of sugar better than the eyes?
These particles which cannot be seen are nothing but atoms. They are the smallest particle of an element which cannot be broken further
If there is too much lemon juice for the amount of water, we just add water. If we keep adding water, eventually, we not only can‛t see the lemon juice, but the lemon taste is also gone. Where did it go? Atoms combine to form molecules Even though molecules are extremely small, there is a great amount of space between them. Here are three activities which provide evidence of this: Here’s How ask your teacher to demonstrate a.Fill one cup with water and another with alcohol. Where do you think the level of the mixture will be when the two liquids are poured into a single 2-cup measuring cup? When the water and the alcohol are poured together, the volume is visibly less than two cups. What happened? Try mixing one large jar of walnuts with an identical jar filled with dried peas. When the walnuts and peas are poured together, the mixture will be considerably less than expected, because the peas fit in the spaces between the walnuts.
Imagine that the walnuts represent molecules of alcohol (the

30 Class - VIII Eduheal Foundation
larger molecules), and the peas represent the water molecules (the smaller molecules). b. Fill one cup measuring cup graduated cylinder with water and
another with cotton. What will happen when the water is added to the cotton? Think about it a little, then slowly add the water to the cotton, a little at a time. (The cotton should not cause the water to overflow.) How do you account for what happened?
c. Fill a glass to the brim with water. When not a single drop can be added without causing an overflow, slowly add sugar, a little bit at a time. (The water will still not overflow.)
Suspend torch from strings over camera (as above) in a darkened room. Turn on torch, set it swinging & open camera shutter for about 30 sec (exposure varies with the speed of film & darkness of room). The resulting photo will show the path of the pendulum.
Get friend to stand 3 metres away & swing pendulum from side to side. Hold sunglasses over right eye & with both eyes open, pendulum will appear to swing in a clockwise circle. Now hold sunglasses over left eye & pendulum will seem to change direction & swing anticlockwise. The cause of this illusion is not known.
Pendulum Experiment How to photograph the
path of a pendulum How to make a pendulum
rotate mysteriously
31 Eduheal Foundation Class - VIII
Simple Electro Plating
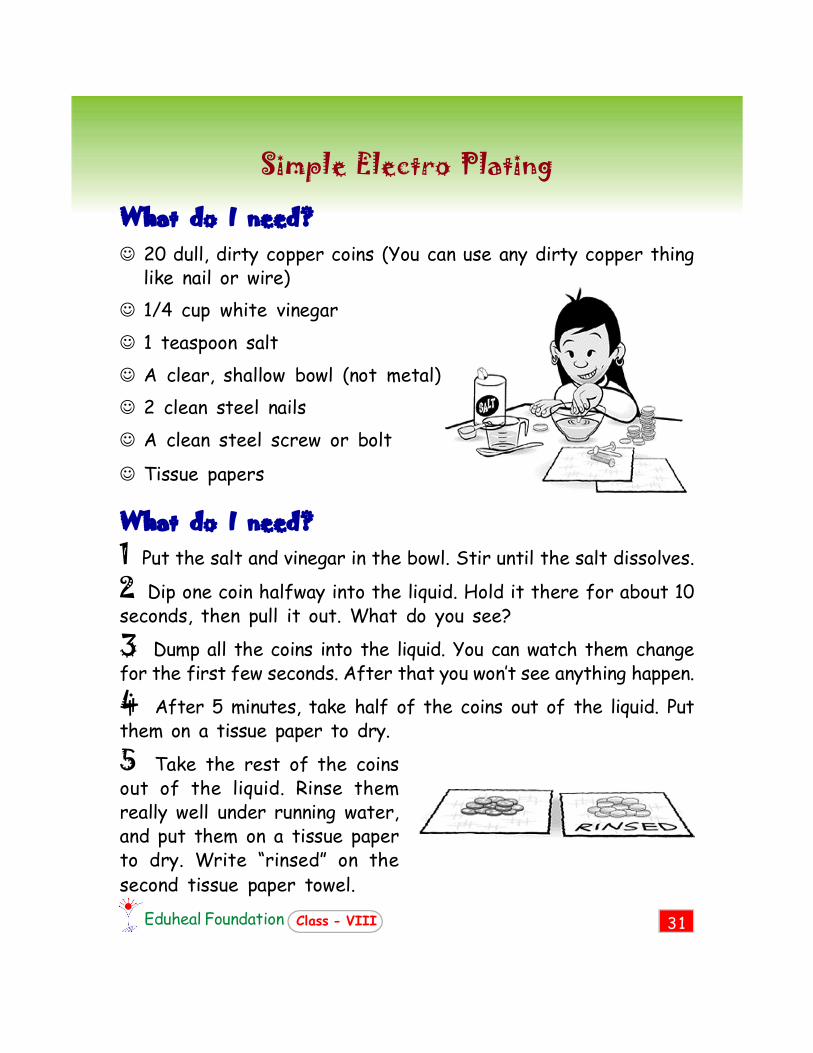
What do I need? 20 dull, dirty copper coins (You can use any dirty copper thing
like nail or wire) 1/4 cup white vinegar 1 teaspoon salt A clear, shallow bowl (not metal) 2 clean steel nails A clean steel screw or bolt
Tissue papers
What do I need? 1 Put the salt and vinegar in the bowl. Stir until the salt dissolves.
2 Dip one coin halfway into the liquid. Hold it there for about 10 seconds, then pull it out. What do you see? 3 Dump all the coins into the liquid. You can watch them change for the first few seconds. After that you won‛t see anything happen. 4 After 5 minutes, take half of the coins out of the liquid. Put them on a tissue paper to dry. 5 Take the rest of the coins out of the liquid. Rinse them really well under running water, and put them on a tissue paper to dry. Write “rinsed” on the second tissue paper towel.

32 Class - VIII Eduheal Foundation
6 Put a nail and a screw into the liquid. Lean another nail against the side of the bowl so that only part of it is in the liquid
7 After 10 minutes, take a look at the nails. Are they a different colour than they were before? Is the leaning nail 2 different colours? If not, leave the nails in the bowl and check them again in an hour or so.
8 What‛s happening to the screw? You may see lots and lots of fizzing bubbles coming from the threads. Is the screw changing colour? Leave it in the liquid for a while and see what happens.
9 After about an hour, look at the coins on the tissue paper. What‛s happened to the ones you rinsed? What‛s happened to the others? What colour is the tissue paper under the unrinsed coins?
Now explore the following questions Why did the coins look dirty before those were put in the vinegar?
Everything around you is made up of tiny particles called atoms. Some things are made up of just one kind of atom. The copper of a coin, for example, is made up of copper atoms. But sometimes atoms of different kinds join to make molecules. Copper atoms can combine with oxygen atoms from the air to make a molecule called copper oxide. The coins looked dull and dirty because they were covered with copper oxide.

33 Eduheal Foundation Class - VIII
Why did the vinegar and salt clean the coins?
Copper oxide dissolves in a mixture of weak acid and table saltand vinegar is an acid. You could also clean your coins with salt and lemon juice or orange juice, because those juices are acids, too.
Why did the unrinsed coins turn blue-green?
When the vinegar and salt dissolve the copper-oxide layer, they make it easier for the copper atoms to join oxygen from the air and chlorine from the salt to make a blue-green compound called malachite.
How did the nail and the screw get coated with copper?
To understand how the nail and screw got coated with copper, you need to understand a little bit more about atoms. Atoms are made up of even smaller particles called protons, neutrons, and electrons. Electrons and protons are both electrically charged particles. Electrons are negatively charged and protons are positively charged. Negative charges attract positive charges, so electrons attract protons.
When you put your dirty coins in the vinegar and salt, the copper oxide and some of the copper dissolve in the water. That means some copper atoms leave the coin and start floating around in the liquid. But when these copper atoms leave the coin, they leave some of their electrons behind. Rather than having whole copper atoms in the liquid, you‛ve got copper ions, copper atoms that are missing two electrons. These ions are positively charged.
34 Class - VIII Eduheal Foundation
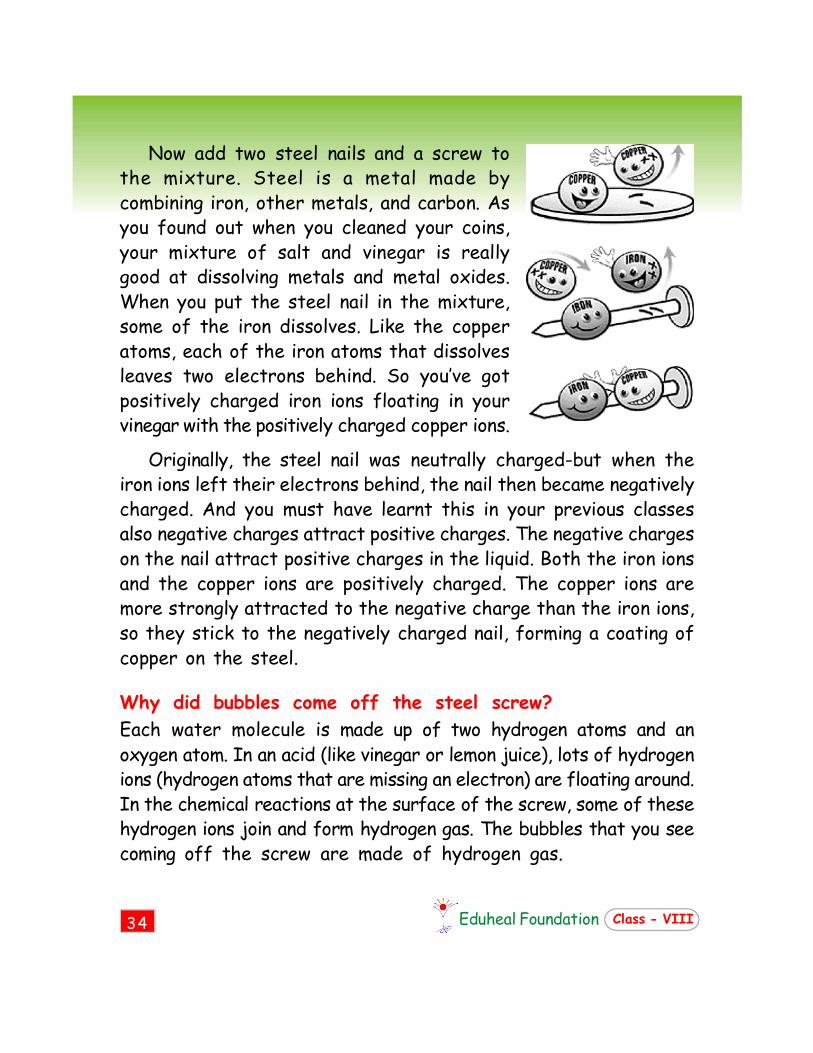
Now add two steel nails and a screw to the mixture. Steel is a metal made by combining iron, other metals, and carbon. As you found out when you cleaned your coins, your mixture of salt and vinegar is really good at dissolving metals and metal oxides. When you put the steel nail in the mixture, some of the iron dissolves. Like the copper atoms, each of the iron atoms that dissolves leaves two electrons behind. So you‛ve got positively charged iron ions floating in your vinegar with the positively charged copper ions.
Originally, the steel nail was neutrally charged-but when the iron ions left their electrons behind, the nail then became negatively charged. And you must have learnt this in your previous classes also negative charges attract positive charges. The negative charges on the nail attract positive charges in the liquid. Both the iron ions and the copper ions are positively charged. The copper ions are more strongly attracted to the negative charge than the iron ions, so they stick to the negatively charged nail, forming a coating of copper on the steel.
Why did bubbles come off the steel screw? Each water molecule is made up of two hydrogen atoms and an oxygen atom. In an acid (like vinegar or lemon juice), lots of hydrogen ions (hydrogen atoms that are missing an electron) are floating around. In the chemical reactions at the surface of the screw, some of these hydrogen ions join and form hydrogen gas. The bubbles that you see coming off the screw are made of hydrogen gas.
35 Eduheal Foundation Class - VIII
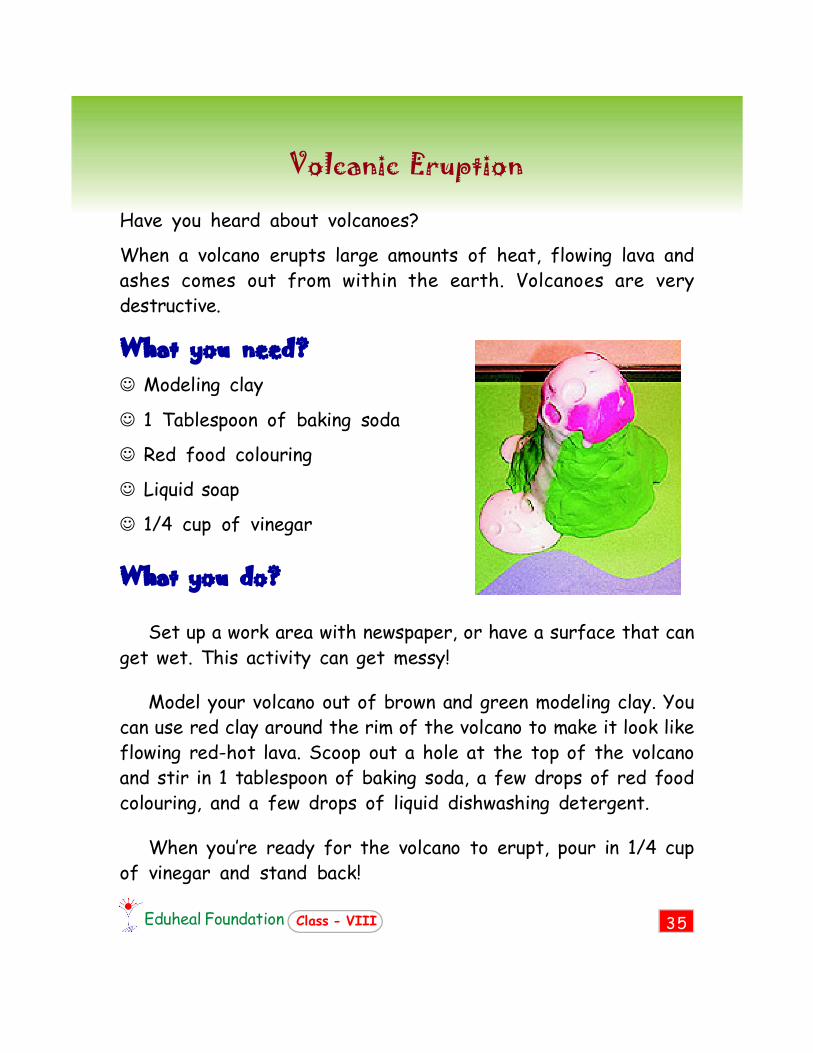
Volcanic Eruption
Have you heard about volcanoes?
When a volcano erupts large amounts of heat, flowing lava and ashes comes out from within the earth. Volcanoes are very destructive.
What you need? Modeling clay
1 Tablespoon of baking soda
Red food colouring
Liquid soap
1/4 cup of vinegar
What you do?
Set up a work area with newspaper, or have a surface that can get wet. This activity can get messy!
Model your volcano out of brown and green modeling clay. You can use red clay around the rim of the volcano to make it look like flowing red-hot lava. Scoop out a hole at the top of the volcano and stir in 1 tablespoon of baking soda, a few drops of red food colouring, and a few drops of liquid dishwashing detergent.
When you‛re ready for the volcano to erupt, pour in 1/4 cup of vinegar and stand back!
36 Class - VIII Eduheal Foundation
Colour Changing Milk
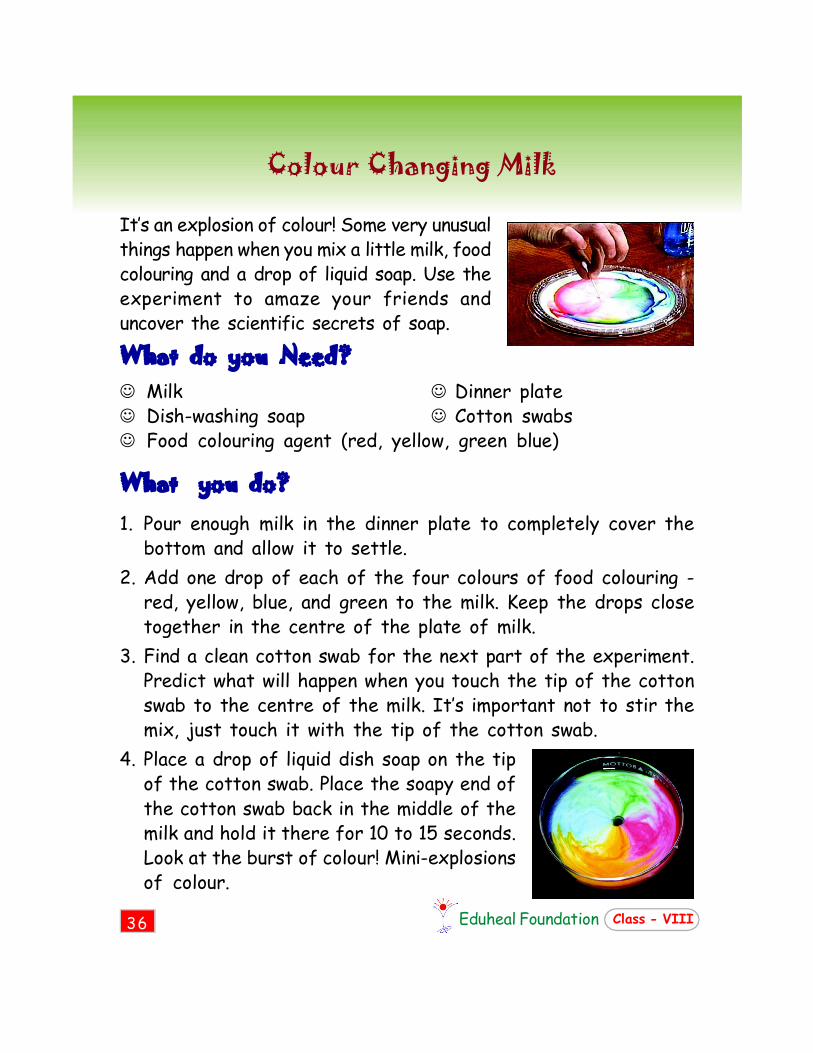
It‛s an explosion of colour! Some very unusual things happen when you mix a little milk, food colouring and a drop of liquid soap. Use the experiment to amaze your friends and uncover the scientific secrets of soap.
What do you Need? Milk Dinner plate Dish-washing soap Cotton swabs Food colouring agent (red, yellow, green blue)
What you do? 1. Pour enough milk in the dinner plate to completely cover the
bottom and allow it to settle. 2. Add one drop of each of the four colours of food colouring -
red, yellow, blue, and green to the milk. Keep the drops close together in the centre of the plate of milk.
3. Find a clean cotton swab for the next part of the experiment. Predict what will happen when you touch the tip of the cotton swab to the centre of the milk. It‛s important not to stir the mix, just touch it with the tip of the cotton swab.
4. Place a drop of liquid dish soap on the tip of the cotton swab. Place the soapy end of the cotton swab back in the middle of the milk and hold it there for 10 to 15 seconds. Look at the burst of colour! Mini-explosions of colour.

37 Eduheal Foundation Class - VIII
5. Add another drop of soap to the tip of the cotton swab and try it again. Experiment with placing the cotton swab at different places in the milk. Notice that the colours in the milk continue to move even when the cotton swab is removed. What makes the food colouring in the milk move?
How does it work? Milk is mostly water but it also contains vitamins, minerals, proteins, and tiny droplets of fat suspended in solution. Fats and proteins are sensitive to changes in the surrounding solution (the milk).
When you add soap, the weak chemical bonds that hold the proteins in solution are altered. It‛s The molecules of protein and fat bend, roll, twist, and contort in all directions. The food colour molecules are bumped and shoved everywhere, providing an easy way to observe all the invisible activity. At the same time, soap molecules combine to form a micelle, or cluster of soap molecules. These micelles distribute the fat in the milk.
The rapidly mixing fat and soap causes swirling and churning where a micelle meets a fat droplet. When there are micelles and fat droplets everywhere the motion stops, but not until after you‛ve enjoyed the show!
There is another reason the colours explode the way they do. Since milk is mostly water, it has surface tension like water. The drops of food colouring floating on the surface tend to stay. Liquid soap wrecks the surface tension by breaking the cohesive bonds between water molecules and allowing the colours to zing throughout the milk.
Repeat the experiment using water in place of milk. Will you get the same eruption of colour? Why or why not?
Micelle
38 Class - VIII Eduheal Foundation
With few chemicals easily available at home, we can perform chemical reactions and also know about the products formed during the reaction & the changes that are brought about.
You will need: 1 tablespoon of baking soda (sodium bicarbonate) 1 tablespoon of washing soda (sodium carbonate) 3/4 cup of water 1/4 cup of vinegar Several drops of food colouring (optional) A drinking glass A plastic tray A teaspoon
Here’s How Place the drinking glass on the tray. Put 1 table spoon of baking soda and 1 tablespoon of laundry detergent to the glass. Add 1 cup of water and a few drops of optional food colouring. Gently stir the mixture to mix the contents of the glass. To display and observe the fizzing and foaming, quickly pour the vinegar into the glass. The mixture will foam up and over the top of the glass, covering the tray with a froth of tiny bubbles.
In this experiment, the fizz is produced by a chemical reaction between baking soda and vinegar. Baking soda and vinegar react, and one of the products of the reaction is carbon dioxide gas. This
Fizzing and Foaming

39 Eduheal Foundation Class - VIII
gas forms bubbles that are surrounded by the liquid. The laundry detergent makes the bubbles last longer, and a foam is produced. The volume of the gas produced and trapped in the foam is much greater than the glass can hold, so some of it spills over the top of the glass.
Baking soda is sodium bicarbonate. Vinegar contains acetic acid dissolved in water. Sodium bicarbonate reacts with most acids. The products of the reaction with vinegar are carbon dioxide gas, sodium acetate, and water.
The reaction of sodium bicarbonate to form carbon dioxide gas is the basis of its use as a leavening agent in baking. Cakes are solid foams. The foam is produced when bubbles of carbon dioxide from the reaction of sodium bicarbonate are trapped in the batter. As the cake bakes, the batter dries, and the trapped bubbles of carbon dioxide form the holes in the cake.
They can be difficult to get rid of. Get him to take two asteroid impacts, then call me in a millennium.
HMMM, This is not so good.
Your child is suffering from an excess of greenhouse gases and is running a fever. It would seem he has a bad case of
human infestation.
40 Class - VIII Eduheal Foundation
Have you ever seen a spark? Electrical faults often give sparks. In this experiment you are going to develop sparks, don‛t hesitate, it is safe.
What do I need? Scissors
Thermocol tray
Masking tape
Aluminum plate
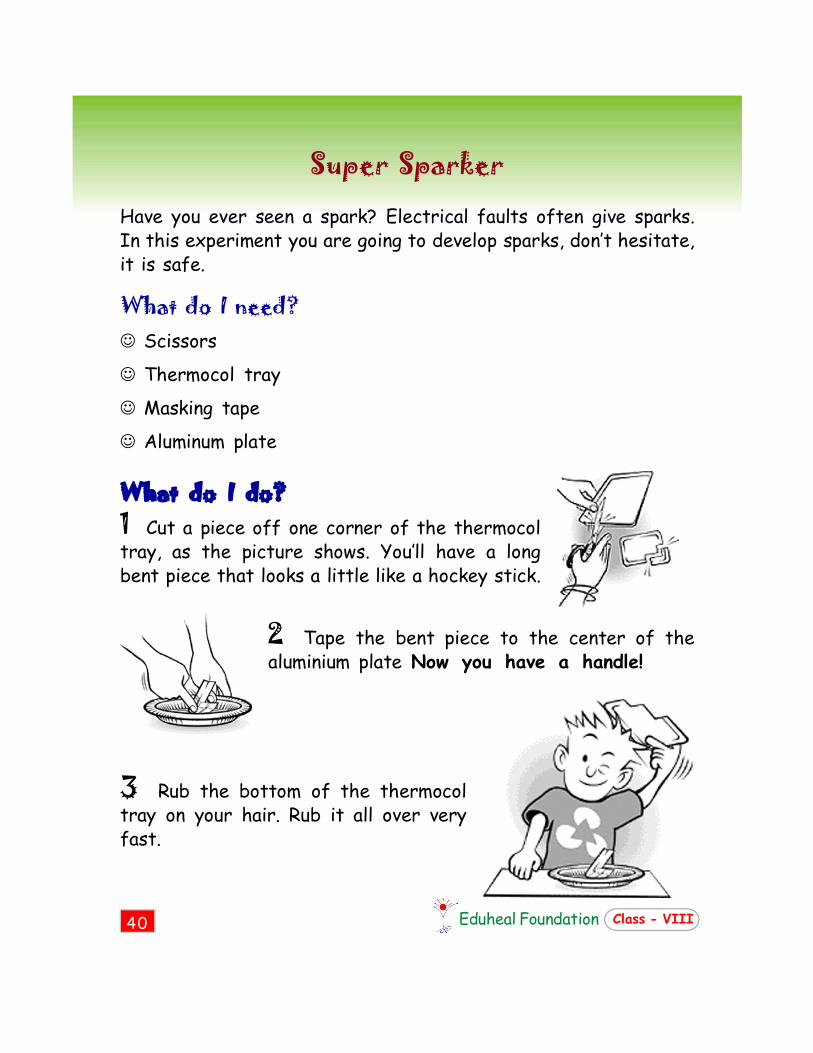
What do I do? 1 Cut a piece off one corner of the thermocol tray, as the picture shows. You‛ll have a long bent piece that looks a little like a hockey stick.
2 Tape the bent piece to the center of the aluminium plate Now you have a handle!
3 Rub the bottom of the thermocol tray on your hair. Rub it all over very fast.
Super Sparker

41 Eduheal Foundation Class - VIII
4 Put the thermocol tray upside down on a table or on the floor.
5 Use the handle to pick up the aluminium plate. Hold it about 30 cm over the thermocol tray and drop it.
6 Now—very slowly—touch the tip of your finger to the aluminium plate. Wow! What a spark! (Be careful. DON‛T touch the thermocol tray. If you do, you won‛t get a spark.)
7 Use the handle to pick up the aluminium plate again. Touch the plate with the tip of your finger. Wow! You get another great spark.
8 Drop the plate onto the thermocol tray again. Touch the plate. Another spark! Use the handle to pick up the plate. More sparks!
9 You can do this over and over for a long time. If the plate stops giving you a spark, just rub the tray on your head again, and start over.
Sparks in the Dark Try using your Super Sparker in the dark. Can you see the tiny lightning bolts you make? What colour are they?

42 Class - VIII Eduheal Foundation
What’s Going On? What makes the Super Sparker spark?
When you rub thermocol on your hair, you pull electrons off your hair and pile them up on the thermocol. When you put an aluminum plate on the thermocol, the electrons on the thermocol pull on the electrons. Some of the electrons in metals are free electrons — they can move around inside the metal. These free electrons try to move as far away from the thermocol as they can. When you touch the plate, those free electrons leap to your hand, making a spark.
After the electrons jump to your hand, the plate is short of some electrons. When you lift the plate away from the thermocol plate, you‛ve got a plate that attracts any and all nearby electrons. If you hold your finger close to the metal, electrons jump from your finger back to the plate, making another spark. When you put the plate back on the thermocol plate, you start the whole process over again.
What does all this have to do with lightning?
The lightning bolt is a dramatic example of static electricity in action. You see lightning when a spark of moving electrons races up or down between a cloud and the ground (or between two clouds). The moving electrons bump into air molecules along the way, heating them to a temperature five times hotter than the surface of the sun. This hot air expands as a supersonic shock wave, which you hear as thunder.
43 Eduheal Foundation Class - VIII
Have you ever noticed the beautiful colours produced by soap bubbles? Here you will make an observatory to see the amazing colours in bubbles.
What you need? small clear plastic lid clear plastic tape
torchlight that works bubble juice (see recipe below)
spoon straw
room you can make dark
Recipe : Bubble Juice: 1 bucket water
2/3 cup dishwashing soap
Mix the ingredients together in a big bucket. If you make your bubble juice the day before you want to use it, you‛ll get bigger, stronger bubbles, but it‛s pretty good right away, too.
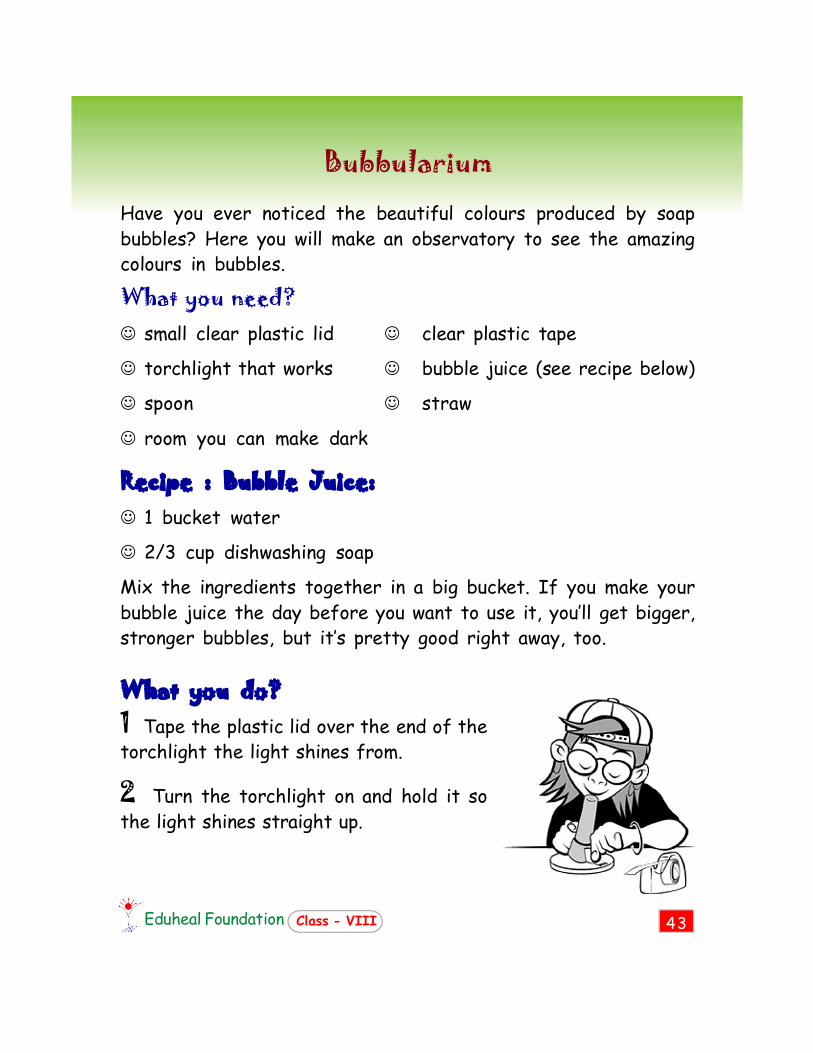
What you do? 1 Tape the plastic lid over the end of the torchlight the light shines from.
2 Turn the torchlight on and hold it so the light shines straight up.
Bubbularium

44 Class - VIII Eduheal Foundation
3 Dip your finger in the bubble juice and wet the lid. Put a spoonful of bubble juice on the lid. With a straw, blow one big bubble to make a bubble dome that covers the whole lid.
4 Turn off the lights and hold the flashlight so that the bottom of the bubble dome is just above your eyebrows.
5 Watch the swirling colours. If you put the wet straw into the bubble dome and blow very gently, you can move the colours around.
6 Watch the colours. How many do you see? If you watch a bubble for a few minutes, do the colours change? What colours do you see right before the bubble pops? Do you ever see black and white polka dots?
Wow! Didn’t know that! Right before it pops, the skin of a soap bubble is only one-millionth of an inch thick!
What’s Going On? Why are soap bubbles so colourful?
The colours of a soap bubble come from white light, which contains all the colours of the rainbow. When white light reflects from a soap film, some of the colours get brighter, and others disappear.

45 Eduheal Foundation Class - VIII
Come, lets do this small but interesting activity....... spin the bottle and you see beautiful swirling shapes...... What do you need? A clear plastic bottle
Water
Liquid hand soap that has glycol stearate in it (check the ingredients on the label).
Food colouring Clear tape What to do: 1 Fill the bottle or jar about 1/4 full with liquid soap. Add a drop or two of food colouring. The colouring will make the swirls easier to see. 2 Turn on your faucet so you have just a trickle of water. Use that to fill up the rest of the bottle. (If you run the water too hard, you‛ll get foam.) Make sure that the water fills the bottle all the way to the very top. 3 Screw the cap on the bottle. Turn the bottle upside-down a few times to mix the soap and water. If you get foam, take the cap off and trickle some more water into the bottle. The foam will run over the edge. Recap the bottle tightly. 4 Dry the bottle and the cap, then wrap clear tape around it so the bottle won‛t leak. 5 Twirl the bottle slowly. What do you see? What happens when you stop twirling the bottle? What happens if you spin it quickly?
Go Round , Round...

46 Class - VIII Eduheal Foundation
6 Try shaking the bottle up and down or side to side. What different patterns do you see inside the bottle? 7 If the liquid inside the bottle looks like it‛s all one solid colour, just twirl or shake it again to make more patterns. What’s Going On? Why can I see patterns in the water?
Normally, you can‛t see how the water is moving inside a full jar of water. Water that‛s moving in one direction looks the same as water that‛s moving in another direction. But glycol stearate, the chemical that gives some liquid hand soaps a pearly look, lets you see patterns flow in water.
What kinds of patterns can I see in my jar?
When you turn the bottle slowly, you‛ll probably see smooth streaks in the water. When layers of water are moving slowly and smoothly past each other, you get this pattern, which scientists call laminar flow.
When you suddenly stop turning the bottle, or when you turn it very fast, you may see lots of swirls and wavy patterns. When one layer of water moves rapidly past another layer of water, it causes turbulence, which you see as swirly patterns. Who cares about these patterns?
When people design aeroplanes, cars, boats, golf balls, and other things that move through air or water, they study the patterns of blowing air or flowing water makes as the object moves through it. Differences in the flow of air or water can affect how well an aeroplane flies, how much mileage a car gets per litre of fuel, how fast a boat can go, or how far a golf ball will fly when you smack it with a club.
47 Eduheal Foundation Class - VIII
Paper Comet Model
You can make a comet like this!
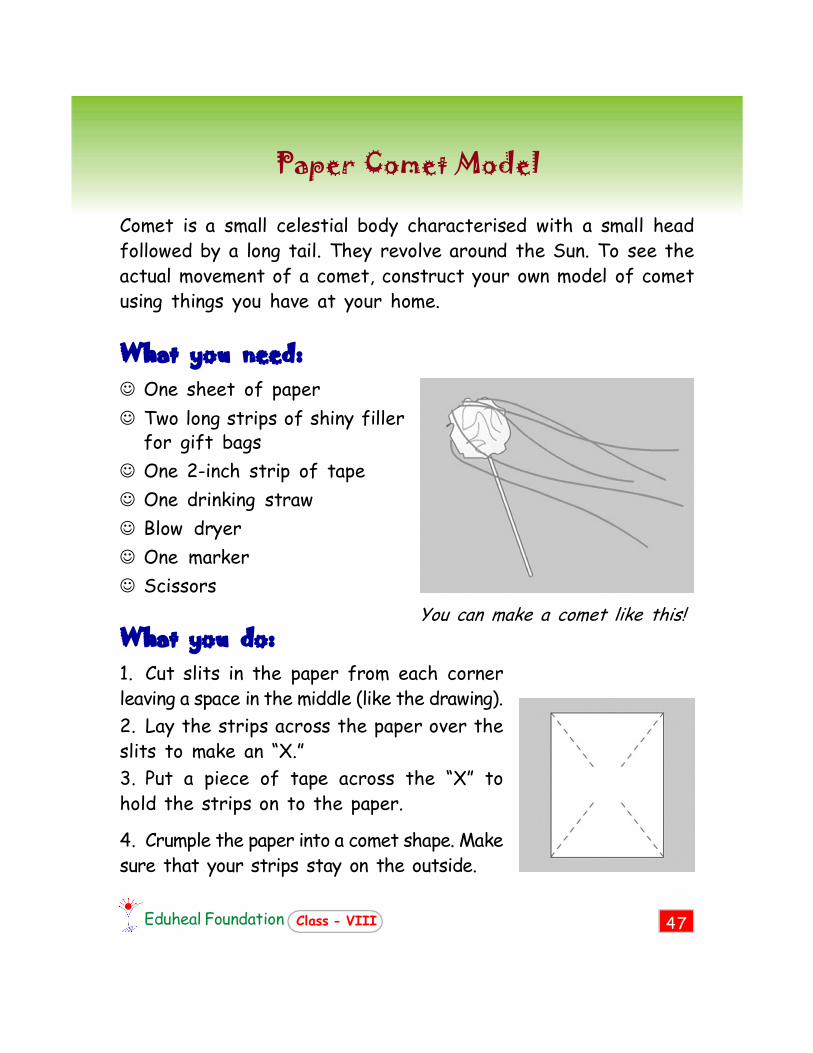
Comet is a small celestial body characterised with a small head followed by a long tail. They revolve around the Sun. To see the actual movement of a comet, construct your own model of comet using things you have at your home.
What you need: One sheet of paper Two long strips of shiny filler
for gift bags One 2-inch strip of tape One drinking straw Blow dryer One marker Scissors
What you do: 1. Cut slits in the paper from each corner leaving a space in the middle (like the drawing). 2. Lay the strips across the paper over the slits to make an “X.” 3. Put a piece of tape across the “X” to hold the strips on to the paper.
4. Crumple the paper into a comet shape. Make sure that your strips stay on the outside.

48 Class - VIII Eduheal Foundation
5. Use the scissors to poke a hole through the comet.
6. Push the straw into the hole.
7. Hold the comet by the straw.
8. Use a hairdryer to show how the Sun‛s energy makes parts of the comet blow off to a tail.
9. Here is something you can do with a friend. He or she can be the Sun. Walk around the Sun holding the comet. The Sun‛s energy should blow on your comet as you walk.
10. See how the tail moves as you get closer to the Sun.
11. Does it look like the one shown in figure. Path of comet
Halley’s Comet Halley‛s Comet has been known since at least 240 BC and possibly since 1059 BC. It was named after Edmund Halley, who calculated its orbit. He determined that the comets seen in 1531 and 1607 were the same object that followed a 76- year orbit. Unfortunately, Halley died in 1742, never living to see his prediction come true when the comet returned on Christmas Eve 1758. Halley‛s Comet put on bright shows in 1835 and in
1910. Then in 1984 and 1985, five spacecraft from the USSR, Japan and Europe were launched to make a rendezvous with Halley‛s Comet in 1986. The nucleus of Halley is ellipsoidal in shape and measures approximately 16 by 8 by 8 kilometres. Halley‛s Comet last appeared in the inner Solar System in 1986, and will next appear in mid 2061.
The head of Halley’s Comet

49 Eduheal Foundation Class - VIII
Have you seen an astranaut an television or in photograph. They wore a special type of cloths. Have you ever thought why they wear to heavy and closed cloths. Let‛s explore why... To be able to explore and work in space, humans have to take their environment with them because there is no atmosphere to supply the pressure and oxygen necessary to support life. Without sufficient atmospheric pressure, body fluids will start to heat up and boil. Without oxygen, we would be unable to breathe. So they need special clothes to protect them. They have a special suit they wear during launch and re-entry. It protects them from the changes in pressure that happen when you go from space. This suit has a helmet, gloves, and boots.
The spacesuits that today‛s astronauts wear while on a spacewalk have changeable parts.
Space Suit

50 Class - VIII Eduheal Foundation
True or False While in space, an astronaut must wear a helmet and gloves at all times.
Before each launch, the astronauts are given their own space wardrobe. It includes shirts, pants, sleep shorts, slippers, and even underwear!
Spacesuits serve many functions. Today‛s spacesuits are pressurized, have an oxygen supply, protect the astronaut from micrometeoroid bombardment while spacewalking, and insulate the astronaut from the severe temperature changes experienced in space. The Space Shuttle astronauts have more than one “outfit” for space travel. What they wear while on a mission is determined by the job they are doing. During the launch and re-entry, the astronauts wear a partially pressurized suit and a parachute pack. The suit has a helmet, gloves, and boots which all serve as protection
for the astronaut. Within the suit are bladders that automatically fill with air at reduced cabin pressures. At low pressure, the blood will pool in the lower body causing the astronaut to black out. The bladders maintain the pressure on the lower body to prevent this from happening. While working in the Shuttle during orbit, astronauts work in comfortable clothes such as knit shirts, pants, or flight suits. In addition, prior to each mission, flight crews are outfitted with lined jackets, sleep shorts, slippers, and underwear.

51 Eduheal Foundation Class - VIII
While working outside of the Shuttle during a mission, astronauts wear an extravehicular mobility unit (EMU). This suit has inter changeable parts so it can be assembled to fit different astronauts. This makes the suit more cost effective since it can be reused. The EMU has a liquid cooling garment, which is a one piece suit made of spandex, and keeps the astronaut cool while in the suit. The unit also contains headphones and microphones, a drink bag which carries water, a life support system containing oxygen, and a urine collection device. Gloves are included with the unit along with a helmet and a visor. All of this is necessary to protect the astronaut from micrometeoroids, solar radiation, infrared radiation, temperature changes, pressure changes, and oxygen deprivation.
To help the astronaut get around freely while performing a spacewalk, a manned maneuvering unit (MMU) can be attached to the EMU. The MMU is a nitrogen propelled backpack that allows the astronaut to fly with precision. The MMU has a 35mm camera attached to it so that the astronaut can take pictures while in flight. Wearing these suits, the astronauts go and carry out experiments in the space. Can you name two Indian womans who visited the space?
Can you recognise these Indian women who visited space
Write their name
52 Class - VIII Eduheal Foundation
The surface of the lens is the most important part because that‛s what bends light as it moves into and out of the lens. Augustin Fresnel in 1820 made this discovery and then created lenses that eliminated the glass in the middle, making a lens that was all flat.
Here’s What you Need Clear plastic wrap
A newspaper
A dropper
Water
Here’s What you do 1 Tear off a piece of plastic wrap and put it on top of a sheet of newspaper.
2 Using the dropper (or your finger if necessary), put different- sized drops of water in random spots on the plastic wrap.
3 Look at the words on the newspaper through the drops. Do the words appear bigger?
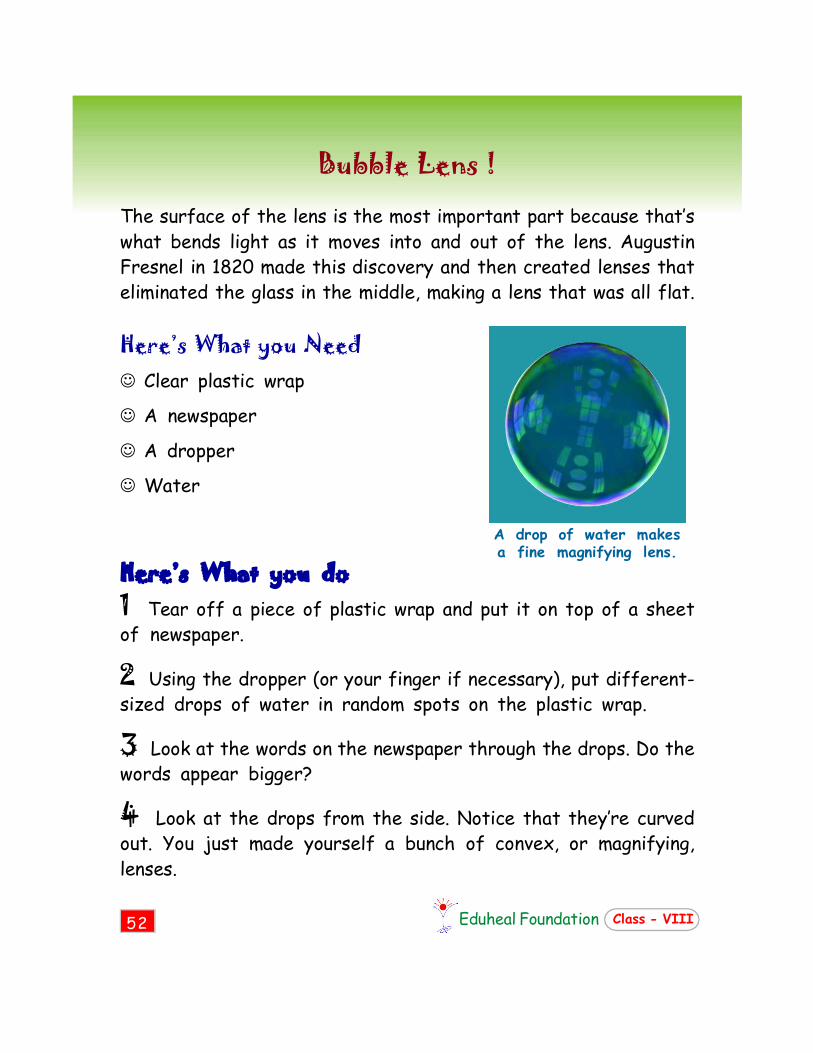
4 Look at the drops from the side. Notice that they‛re curved out. You just made yourself a bunch of convex, or magnifying, lenses.
Bubble Lens !
A drop of water makes a fine magnifying lens.
53 Eduheal Foundation Class - VIII
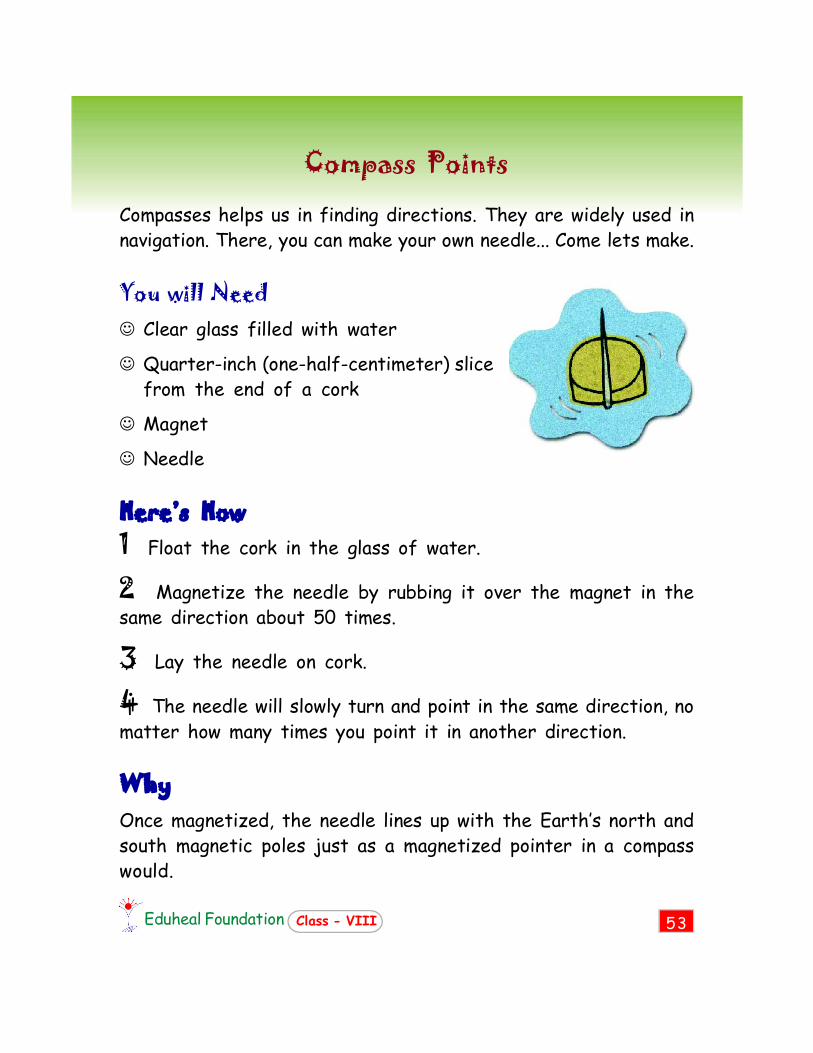
Compasses helps us in finding directions. They are widely used in navigation. There, you can make your own needle... Come lets make.
You will Need Clear glass filled with water
Quarter-inch (one-half-centimeter) slice from the end of a cork
Magnet
Needle
Here’s How 1 Float the cork in the glass of water.
2 Magnetize the needle by rubbing it over the magnet in the same direction about 50 times.
3 Lay the needle on cork.
4 The needle will slowly turn and point in the same direction, no matter how many times you point it in another direction.
Why Once magnetized, the needle lines up with the Earth‛s north and south magnetic poles just as a magnetized pointer in a compass would.
Compass Points

54 Class - VIII Eduheal Foundation
Sample Interactive Activity for Nationwide Interactive Science Olympiad (NISO)
MISSION TO JUPITER You have been chosen to help with the planning of the first bases
on another world - the moons of Jupiter!
Each of Jupiter‛s four large satellites have different resources and different problems to overcome. You will have to gather infor- mation (as you go through this activity) about Jupiter and its moons to help plan your team‛s base.
Keep in mind that Jupiter is far from the Sun and from Earth. It is expensive to launch rockets from the Earth to Jupiter, so your bases will have to come up with a way to supply themselves with food, water and power.
Can you think of ways to use the materials found on Jupiter‛s moons to keep your base alive? Supply ships from Earth will come once every 13 months! Good luck!
The Planet
Jupiter is the largest planet in the solar system - you could put over 1400 Earths inside of Jupiter if it were hollow. Jupiter is made

55 Eduheal Foundation Class - VIII
up of gases and liquids. There is nowhere to rest your feet since there is no ground! It is a good thing that you can‛t stand on Jupiter its gravity is 2.5 times greater than Earth‛s! That means that if something weighed 45kg on Earth, it would weigh 113 kg on Jupiter. Heavy stuff!
Jupiter is also surrounded by a large radiation belt that tends to fry electronics and people. Some of the satellites are in the radiation belt, so be careful!
The Moons It is your job to find a way to keep your team alive while living on
Jupiter‛s moons. Each moon has different properties and will present different challenges. Following are the moons of Jupiter & some information about the moons to help you plan your bases.
Io A Volcanic Satellite Io is a little powerhouse. When the Voyager spacecrafts flew by
in 1979, they recorded nine volcanoes erupting. The spacecraft found over 200 other volcanoes on the surface.
Scientists think that Jupiter is powering the volcanoes by squishing Io a little everytime it goes around Jupiter. Io‛s inside heats up each time it gets squeezed. The heat builds up until the inside of Io melts. The volcanoes help Io get rid of some of that heat.
Important Points :
∙ Volcanoes tend to erupt without warning ∙ Io is deep inside Jupiter‛s radiation belts ∙ Jupiter is far from the sun so sunlight is
very dim
If you look carefully, you can see dozens of volcanoes on the surface. The large circular patch was made by sulphur ash falling from the sky from the volcano in the center.
56 Class - VIII Eduheal Foundation
∙ It is also cold out there - between 100 to 200 degrees below zero Centigrade, except near the hot volcanoes
∙ Gravity is only about 1/3rd as strong on Io as it is on Earth - how will this affect you and your buildings?
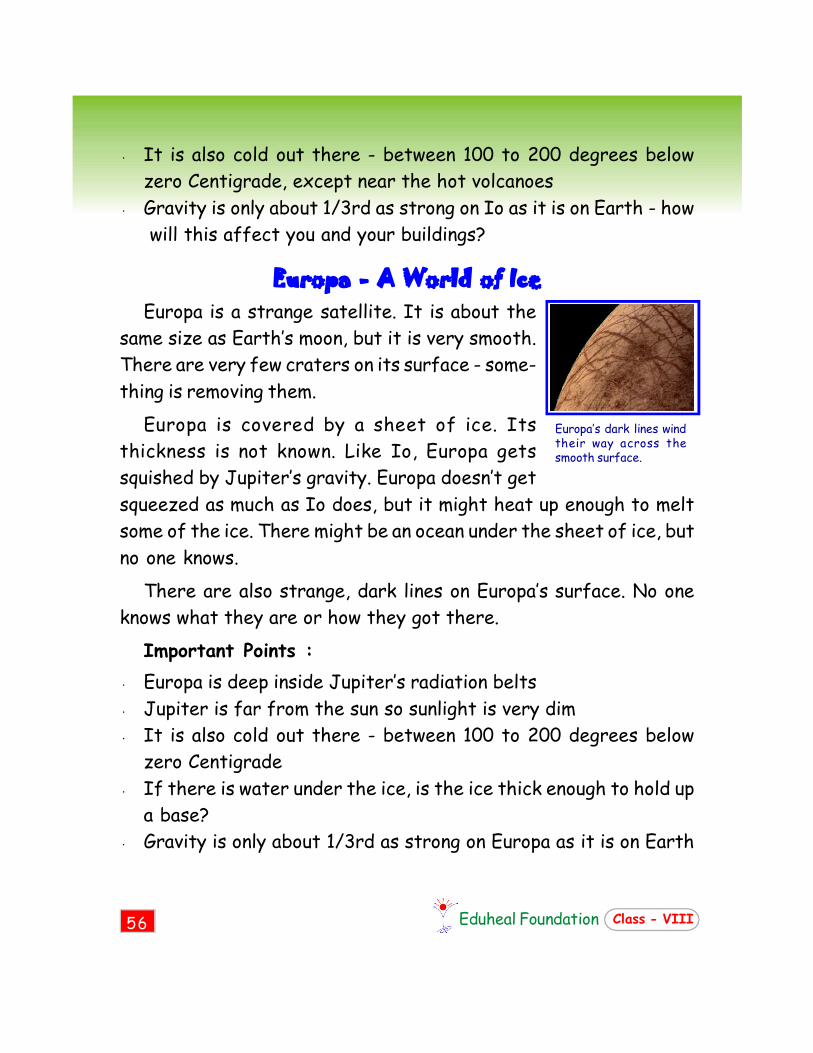
Europa ‐ A World of Ice Europa is a strange satellite. It is about the
same size as Earth‛s moon, but it is very smooth. There are very few craters on its surface - some- thing is removing them.
Europa is covered by a sheet of ice. Its thickness is not known. Like Io, Europa gets squished by Jupiter‛s gravity. Europa doesn‛t get squeezed as much as Io does, but it might heat up enough to melt some of the ice. There might be an ocean under the sheet of ice, but no one knows.
There are also strange, dark lines on Europa‛s surface. No one knows what they are or how they got there.
Important Points :
∙ Europa is deep inside Jupiter‛s radiation belts ∙ Jupiter is far from the sun so sunlight is very dim ∙ It is also cold out there - between 100 to 200 degrees below
zero Centigrade ∙ If there is water under the ice, is the ice thick enough to hold up
a base? ∙ Gravity is only about 1/3rd as strong on Europa as it is on Earth
Europa‛s dark lines wind their way across the smooth surface.

57 Eduheal Foundation Class - VIII
Ganymede ‐ The Giant Moon Ganymede is the largest moon in the solar system, but it is still
much smaller than the Earth. Ganymede is covered with light and dark markings. The light
areas are made up of rows of mountains and the dark areas are very old, heavily cratered regions. There might be some ice on Ganymede, but it could be hard to find.
Important Points :
∙ Ganymede is inside Jupiter‛s radiation belts. ∙ Jupiter is far from the sun so sunlight is very dim. ∙ It is also cold out there - between 100 to 200 degrees below
zero Centigrade. ∙ Gravity is only about 1/3rd as strong on Ganymede as it is on
earth Callisto ‐ A Cratered World
Callisto is a satellite covered by a thick crust of ice. The ice has been hit by millions of objects over the years, making craters. There are so many craters on Callisto that you can‛t make any new ones without wiping out an older one. All of these craters tell scientists that Callisto‛s surface is very old. Some scientists think that parts of Callisto have not changed in over 4 billion years.
Callisto is also further from Jupiter than any other of the large moons - it is far enough away from Jupiter to be out of the radiation belts!
Callisto is outside of Jupiter‛s radiation belt, although you will still get radiation from the sun
Important Points : ∙ Jupiter is far from the sun so sunlight is very dim ∙ It is also cold out there - between 100 to 200 degrees below

58 Class - VIII Eduheal Foundation
zero Centigrade ∙ Gravity is only about 1/3rd as strong on Callisto as it is on Earth
Now Answer the following Questions : 1. On which of the satellites of Jupiter volcanoes frequently occure?
(a) Io (b) Europa (c) Callisto (d) All the above 2. Which of the Jupiter‛s satellite‛s has a smooth surface?
(a) Ganymede (b) Europa (c) Callisto (d) None of these 3. Which of the Jupiter‛s satellite is about the same size as earth‛s
moon? (a) Europa (b) Callisto (c) Io (d) Ganymede
4. Which one of the four satellites of Jupiter is the oldest? (a) Europa (b) Ganymede(c) Io (d) Callisto
5. How much time does a space ship takes to reach Jupiter‛s moon from earth? (a) 1 year and 1 month (b) 13 days (c) 365 days (d) None of these
6. Which is the largest moon in the solar system?
(a) Io (b) Callisto (c) Europa (d) Ganymede
7. After studying about the four moons of Jupiter, which of them do you think is best suited as your base? (a) Ganymede (b) Europa (c) Callisto (d) All of these
8. Why do you think the satellite you have chosen is best suited as your base? (a) Because it is less effected by radiation (b) Because it has a smooth surface & a possibility of water is
there (c) Because it is less squeezed by the Jupiter‛s gravity (d) None of these
Search for answers

59 Eduheal Foundation Class - VIII
The gases in the atmosphere, traps the sun‛s heat thereby increasing the temperature on earth. This phenomenon is called greenhouse effect & the gases responsible for greenhouse effect are called green house gases. These gases are mainly carbon dioxide, methane, nitrous oxide & chlorofluoro carbons. This greenhouse effect is causing global warming, thereby threatening life on earth in the near future.
This simple experiment serves as an introduction to the greenhouse effect. Students can see for themselves the effects of a greenhouse, and relate this understanding to what occurs in our atmosphere.
You will Need: 2 small thermometers
1 Jar or other see-through container
1 Clock or watch
1 copy of the worksheet
A sunny area to perform the experiment
Here’s How: Place your thermometers a few centimetres apart from direct sunlight.
Wait about three minutes so the thermometers will be giving accurate readings, and then record the temperature readings on both thermometers as well as the time.
The Greenhouse Effect In A Jar

60 Class - VIII Eduheal Foundation
Now place the jar over one of your themometers, taking care that the jar does not cast a shadow over the uncovered thermometer. If the thermometers are too large to remain horizontal inside the jars make them stand against an inner side of the jar. Every minute, for ten minutes record the reading of the both the thermometers.
What’s going on: The air over the exposed thermometer is constantly changing, and as it gets warm it is replaced by cooler air. Because the air in the jar cannot circulate to the rest of the room, this air stays in the sunlight and gets warmer and warmer. A similar trapping of heat happens in the Earth‛s atmosphere. Sunlight passes through the atmosphere and warms the Earth‛s surface. The heat radiating from the surface is trapped by greenhouse gasses. Without an atmosphere, the Earth‛s temperature would average about –18ºC. This warming due to heat-trapping gasses is called the “Greenhouse Effect.” Both the atomosphere and the jar allow light to enter, but then trap that energy when it is converted to heat. They work differently, however, because the jar keeps in the heated air, while the greenhouse gases absorb radiating heat.
Go Further: You can graph the data. To simulate global warming, the experiment can be done using two jars, one filled with air and the other with carbon dioxide.
Answer to the questions of interactivity on page 57 1. (a) 2. (b)3. (a) 4. (d) 5. (a) 6. (d) 7. (b) 8. (b)

61 Eduheal Foundation Class - VIII
The Greehouse Effect Record Your Findings:
1. Place the two thermometers in the sunlight for a few minutes to let them get warm.
2. Record the readings of both thermometers at the top of the columns.
3. Record the time next to the starting temperatures and place the jar over themometer #1.
4. Every minute, record the reading of both thermometers without disturbing them.
Data Sheet Observation Time Start Thermometer#1 Thermometer # 2 Number
1
2
3
4
5
6
7
8
9
10

62 Class - VIII Eduheal Foundation
A galaxy is a large system of stars, planets & other heavenly bodies including huge clouds of gases. Our solar-system belongs to the galaxy called the Milky way or Akash Ganga.
What you need: Circle of 15 cm radius cut out from a
cardboard box 4 large sheets of black
construction paper Glitter—gold, silver, red, orange,
yellow, blue, purple, or any other colour you like
glue Paintbrush, about 1/4 to 1/2 inch
wide Scissors Thread (black is best) Small, 4-holed button Large, sewing needle 16 small beads, black (optional) Tape measure or meter stick First, make the galaxies: 1 Draw the patterns for the galaxies. 2 Cut the galaxy patterns apart on the dotted lines. 3 Use the patterns to cut each galaxy out of construction paper.
Galaxy At Home!
Take help from an adulat
63 Eduheal Foundation Class - VIII
4 Now decorate the galaxies with glitter. Imagine each speck of glitter is a star! Remember, galaxies are brighter in the center becoming fainter at the edges or on the spiral arms.
Make the frame for the mobile: 5 Use the circle cut out from card board to draw a circle in the center of each of two pieces of construction paper. If the paper is big enough, cut the two paper circles a little larger than the cardboard. 6 Glue the paper circles to the top and bottom of the cardboard.
Note: Instead of covering the cardboard with paper, if you wish, you can paint both sides of the cardboard with black paint.
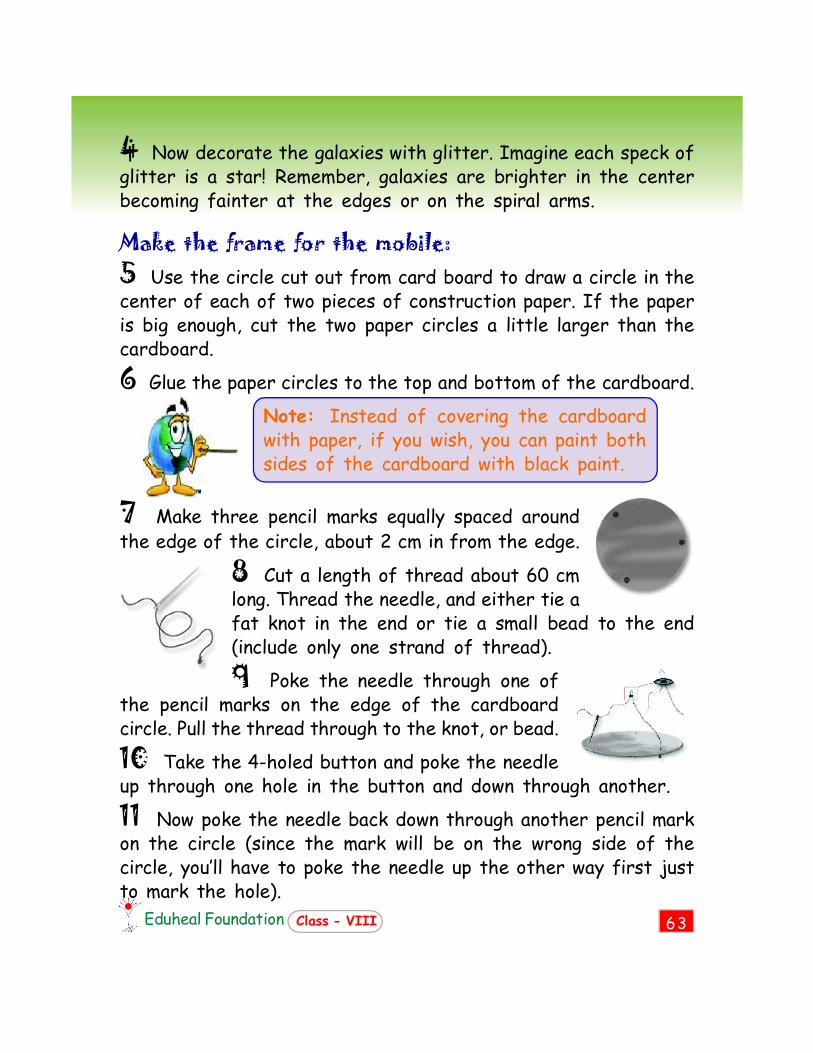
7 Make three pencil marks equally spaced around the edge of the circle, about 2 cm in from the edge.
8 Cut a length of thread about 60 cm long. Thread the needle, and either tie a fat knot in the end or tie a small bead to the end (include only one strand of thread). 9 Poke the needle through one of
the pencil marks on the edge of the cardboard circle. Pull the thread through to the knot, or bead. 10 Take the 4-holed button and poke the needle up through one hole in the button and down through another. 11 Now poke the needle back down through another pencil mark on the circle (since the mark will be on the wrong side of the circle, you‛ll have to poke the needle up the other way first just to mark the hole).
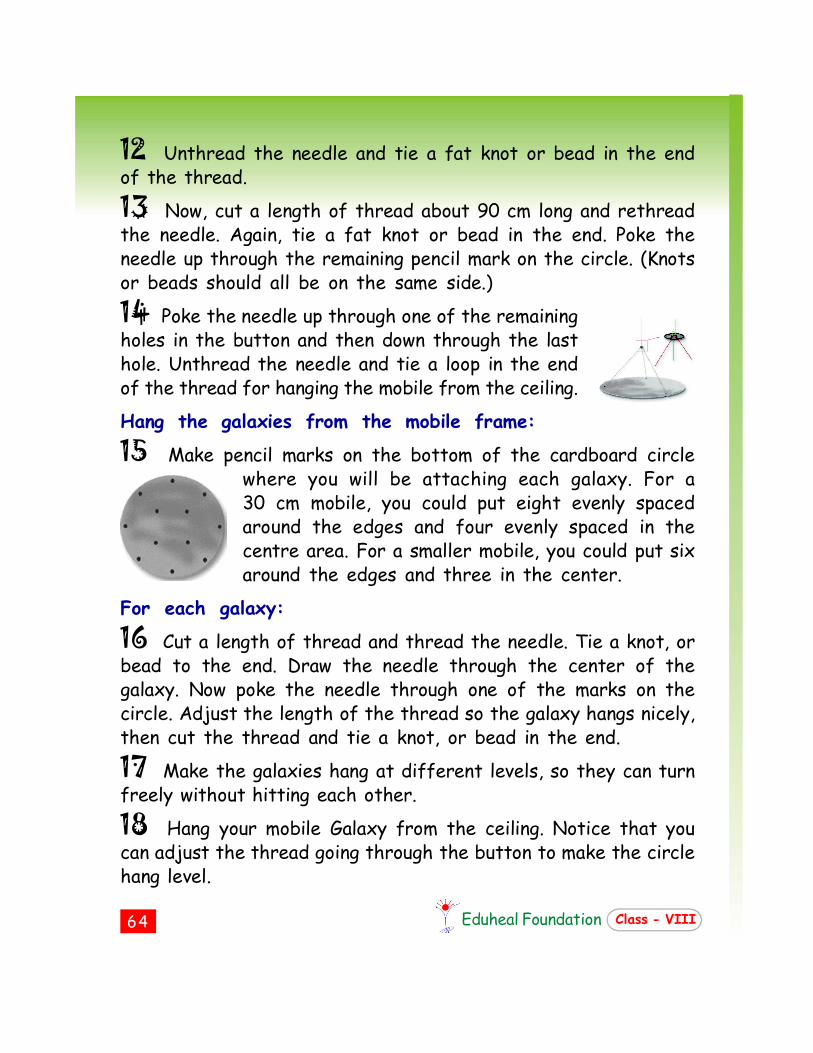
64 Class - VIII Eduheal Foundation
12 Unthread the needle and tie a fat knot or bead in the end of the thread. 13 Now, cut a length of thread about 90 cm long and rethread the needle. Again, tie a fat knot or bead in the end. Poke the needle up through the remaining pencil mark on the circle. (Knots or beads should all be on the same side.) 14 Poke the needle up through one of the remaining holes in the button and then down through the last hole. Unthread the needle and tie a loop in the end of the thread for hanging the mobile from the ceiling.
Hang the galaxies from the mobile frame: 15 Make pencil marks on the bottom of the cardboard circle
where you will be attaching each galaxy. For a 30 cm mobile, you could put eight evenly spaced around the edges and four evenly spaced in the centre area. For a smaller mobile, you could put six around the edges and three in the center.
For each galaxy: 16 Cut a length of thread and thread the needle. Tie a knot, or bead to the end. Draw the needle through the center of the galaxy. Now poke the needle through one of the marks on the circle. Adjust the length of the thread so the galaxy hangs nicely, then cut the thread and tie a knot, or bead in the end. 17 Make the galaxies hang at different levels, so they can turn freely without hitting each other. 18 Hang your mobile Galaxy from the ceiling. Notice that you can adjust the thread going through the button to make the circle hang level.