cindy loo -...
TRANSCRIPT
Cindy Loo
Contents • Table des Matières • Indice • InhaltEnglishWhat is Real Dial Size? . . . . . . . . . . . . . . . . . . . . . . . . . . . . . . . . . .3Quick Start Project . . . . . . . . . . . . . . . . . . . . . . . . . . . . . . . . . . . . . .5Icon Gallery . . . . . . . . . . . . . . . . . . . . . . . . . . . . . . . . . . . . . . . . . . . . . 13Contact Us . . . . . . . . . . . . . . . . . . . . . . . . . . . . . . . . . . . . . . . . . . . . .67
Español¿Qué hace el Real Dial Size? . . . . . . . . . . . . . . . . . . . . . . . . . . . .4Proyecto de Iniciación Rápida . . . . . . . . . . . . . . . . . . . . . . . . . .9Galería de Iconos . . . . . . . . . . . . . . . . . . . . . . . . . . . . . . . . . . . . . . . 15Contáctenos . . . . . . . . . . . . . . . . . . . . . . . . . . . . . . . . . . . . . . . . . . .68
FrançaisQu’est-ce qui le Real Dial Size fait? . . . . . . . . . . . . . . . 3Projet de commencement rapide . . . . . . . . . . . . . . . . .7Galerie d’Icônes . . . . . . . . . . . . . . . . . . . . . . . . . . . . . .14Contactez-nous . . . . . . . . . . . . . . . . . . . . . . . . . . . . . .67
DeutschWas ist Real Dial Size? . . . . . . . . . . . . . . . . . . . . . . . . . . . . . . . . . .4Schnellstartprojek . . . . . . . . . . . . . . . . . . . . . . . . . . . . . . . . . . . . . .11Bildergalerie . . . . . . . . . . . . . . . . . . . . . . . . . . . . . . . . . . . . . . . . . . . . 16Verbinden Sie sich mit uns . . . . . . . . . . . . . . . . . . . . . . . . . . . . .68
For complete instructions see your Cricut® user manual or visit www .cricut com
Pour des instructions complètes veuillez vous référer au Manuel de l’Utilisateur Cricut® ou visiter le site www .cricut com
Para instrucciones detalladas refiérase a su Manual del Usuario Cricut® o visite la página www .cricut com
Finden Sie vollständige Anweisungen in Ihrem Cricut® Benutzerhandbuch oder besuchen Sie www .cricut com
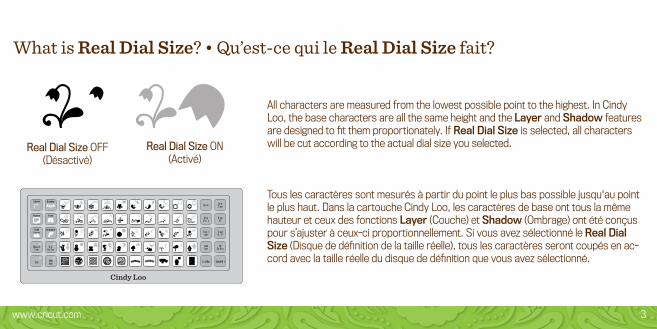
What is Real Dial Size? • Qu’est-ce qui le Real Dial Size fait?
Real Dial Size OFF(Désactivé)
Real Dial Size ON(Activé)
All characters are measured from the lowest possible point to the highest . In Cindy Loo, the base characters are all the same height and the Layer and Shadow features are designed to fit them proportionately. If Real Dial Size is selected, all characters will be cut according to the actual dial size you selected .
Tous les caractères sont mesurés à partir du point le plus bas possible jusqu'au point le plus haut . Dans la cartouche Cindy Loo, les caractères de base ont tous la même hauteur et ceux des fonctions Layer (Couche) et Shadow (Ombrage) ont été conçus pour s’ajuster à ceux-ci proportionnellement . Si vous avez sélectionné le Real Dial Size (Disque de définition de la taille réelle), tous les caractères seront coupés en ac-cord avec la taille réelle du disque de définition que vous avez sélectionné.
Cindy Loo
Ma er alS ver
R al D a S ze
Sh ft ShiftLock
Sp ce Ba kS ace
Cl arD s l y
R setA l
R pe tLast
S undO / ff
LoadLast
SetCu Ar a
Lo d Mat Unload M t
www .cricut .com 3
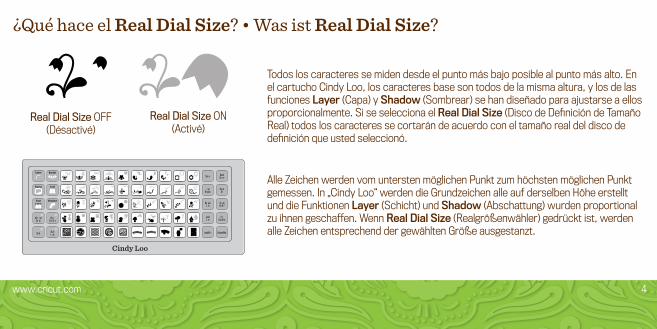
¿Qué hace el Real Dial Size? • Was ist Real Dial Size?
Todos los caracteres se miden desde el punto más bajo posible al punto más alto . En el cartucho Cindy Loo, los caracteres base son todos de la misma altura, y los de las funciones Layer (Capa) y Shadow (Sombrear) se han diseñado para ajustarse a ellos proporcionalmente . Si se selecciona el Real Dial Size (Disco de Definición de Tamaño Real) todos los caracteres se cortarán de acuerdo con el tamaño real del disco de definición que usted seleccionó.
Alle Zeichen werden vom untersten möglichen Punkt zum höchsten möglichen Punkt gemessen . In „Cindy Loo“ werden die Grundzeichen alle auf derselben Höhe erstellt und die Funktionen Layer (Schicht) und Shadow (Abschattung) wurden proportional zu ihnen geschaffen . Wenn Real Dial Size (Realgrößenwähler) gedrückt ist, werden alle Zeichen entsprechend der gewählten Größe ausgestanzt .
Cindy Loo
M t r alSa er
Re l D a Si e
Sh ft Sh ftL ck
Spa e BackSp ce
l arD splay
Re etA l
Re eatL st
So ndOn O f
LoadL st
S tCut Area
Load M t Unload Mat
Real Dial Size OFF(Désactivé)
Real Dial Size ON(Activé)
www .cricut .com 4
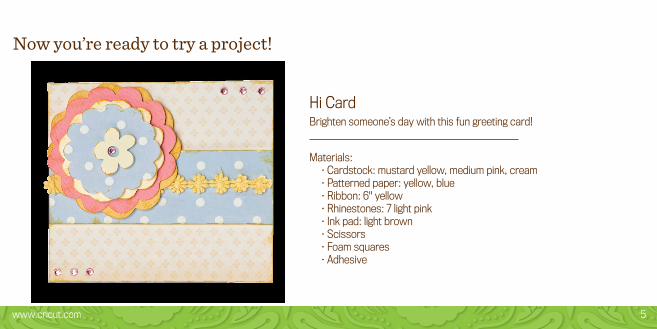
Now you’re ready to try a project!
Hi CardBrighten someone’s day with this fun greeting card!
Materials:• Cardstock: mustard yellow, medium pink, cream• Patterned paper: yellow, blue• Ribbon: 6" yellow• Rhinestones: 7 light pink• Ink pad: light brown• Scissors• Foam squares• Adhesive
www .cricut .com 5
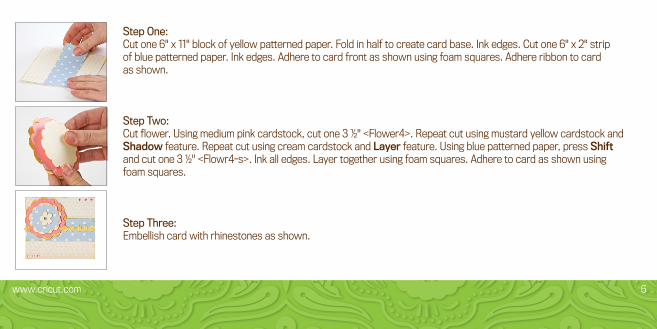
Step One:Cut one 6" x 11" block of yellow patterned paper. Fold in half to create card base. Ink edges. Cut one 6" x 2" strip of blue patterned paper . Ink edges . Adhere to card front as shown using foam squares . Adhere ribbon to card as shown .
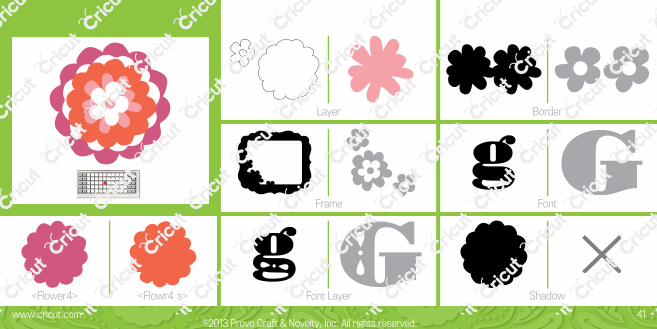
Step Two:Cut flower. Using medium pink cardstock, cut one 3 ½" <Flower4>. Repeat cut using mustard yellow cardstock and Shadow feature . Repeat cut using cream cardstock and Layer feature . Using blue patterned paper, press Shift and cut one 3 ½" <Flowr4-s>. Ink all edges. Layer together using foam squares. Adhere to card as shown using foam squares .
Step Three:Embellish card with rhinestones as shown .
www .cricut .com 6
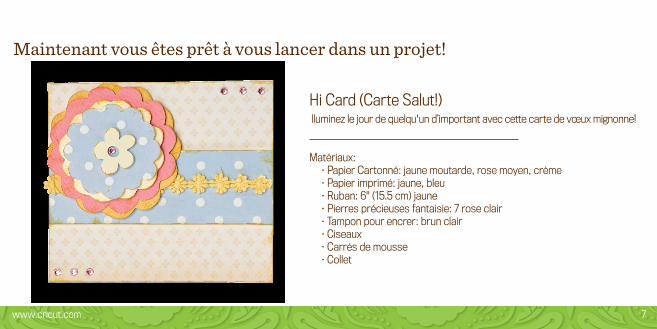
Maintenant vous êtes prêt à vous lancer dans un projet!
Matériaux:• Papier Cartonné: jaune moutarde, rose moyen, crème• Papier imprimé: jaune, bleu• Ruban: 6" (15.5 cm) jaune • Pierres précieuses fantaisie: 7 rose clair• Tampon pour encrer: brun clair• Ciseaux• Carrés de mousse• Collet
Hi Card (Carte Salut!)lluminez le jour de quelqu'un d’important avec cette carte de vœux mignonne!
www .cricut .com 7
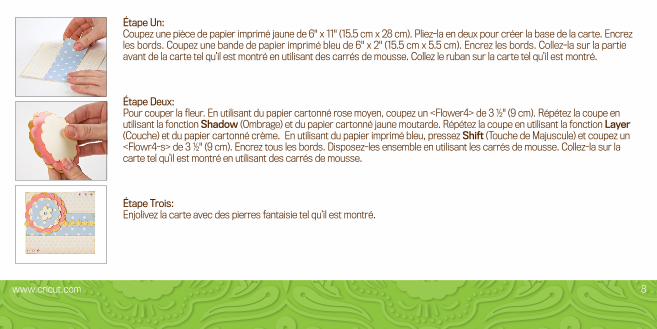
Étape Un:Coupez une pièce de papier imprimé jaune de 6" x 11" (15.5 cm x 28 cm). Pliez-la en deux pour créer la base de la carte. Encrez les bords. Coupez une bande de papier imprimé bleu de 6" x 2" (15.5 cm x 5.5 cm). Encrez les bords. Collez-la sur la partie avant de la carte tel qu’il est montré en utilisant des carrés de mousse . Collez le ruban sur la carte tel qu’il est montré .
Étape Deux:Pour couper la fleur. En utilisant du papier cartonné rose moyen, coupez un <Flower4> de 3 ½" (9 cm). Répétez la coupe en utilisant la fonction Shadow (Ombrage) et du papier cartonné jaune moutarde . Répétez la coupe en utilisant la fonction Layer (Couche) et du papier cartonné crème . En utilisant du papier imprimé bleu, pressez Shift (Touche de Majuscule) et coupez un <Flowr4-s> de 3 ½" (9 cm). Encrez tous les bords. Disposez-les ensemble en utilisant les carrés de mousse. Collez-la sur la carte tel qu’il est montré en utilisant des carrés de mousse .
Étape Trois:Enjolivez la carte avec des pierres fantaisie tel qu’il est montré .
www .cricut .com 8
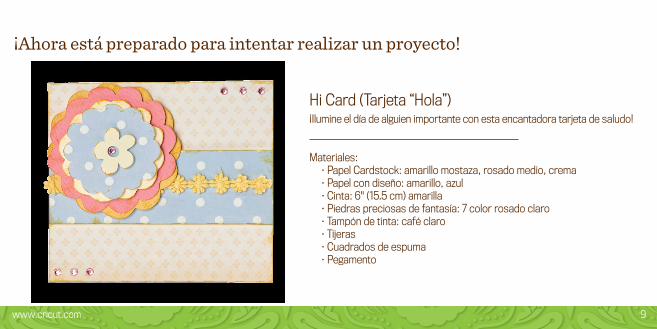
¡Ahora está preparado para intentar realizar un proyecto!
Materiales:• Papel Cardstock: amarillo mostaza, rosado medio, crema• Papel con diseño: amarillo, azul• Cinta: 6" (15.5 cm) amarilla • Piedras preciosas de fantasía: 7 color rosado claro• Tampón de tinta: café claro• Tijeras• Cuadrados de espuma• Pegamento
Hi Card (Tarjeta “Hola”)¡Ilumine el día de alguien importante con esta encantadora tarjeta de saludo!
www .cricut .com 9
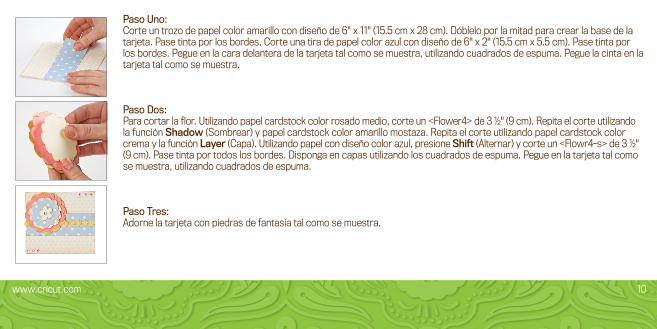
Paso Uno:Corte un trozo de papel color amarillo con diseño de 6" x 11" (15.5 cm x 28 cm). Dóblelo por la mitad para crear la base de la tarjeta. Pase tinta por los bordes. Corte una tira de papel color azul con diseño de 6" x 2" (15.5 cm x 5.5 cm). Pase tinta por los bordes . Pegue en la cara delantera de la tarjeta tal como se muestra, utilizando cuadrados de espuma . Pegue la cinta en la tarjeta tal como se muestra .
Paso Dos:Para cortar la flor. Utilizando papel cardstock color rosado medio, corte un <Flower4> de 3 ½" (9 cm). Repita el corte utilizando la función Shadow (Sombrear) y papel cardstock color amarillo mostaza . Repita el corte utilizando papel cardstock color crema y la función Layer (Capa) . Utilizando papel con diseño color azul, presione Shift (Alternar) y corte un <Flowr4-s> de 3 ½" (9 cm) . Pase tinta por todos los bordes . Disponga en capas utilizando los cuadrados de espuma . Pegue en la tarjeta tal como se muestra, utilizando cuadrados de espuma .
Paso Tres:Adorne la tarjeta con piedras de fantasía tal como se muestra .
www .cricut .com 10
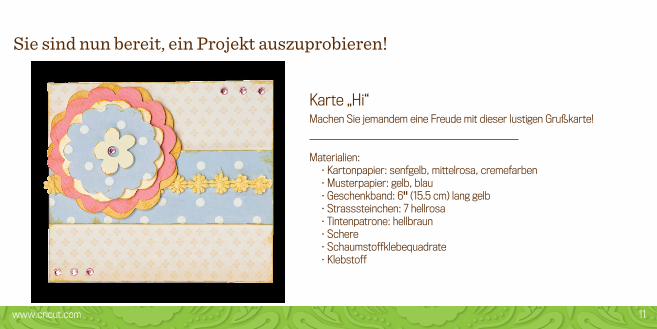
Sie sind nun bereit, ein Projekt auszuprobieren!
Materialien:• Kartonpapier: senfgelb, mittelrosa, cremefarben• Musterpapier: gelb, blau• Geschenkband: 6" (15 .5 cm) lang gelb• Strasssteinchen: 7 hellrosa• Tintenpatrone: hellbraun• Schere• Schaumstoffklebequadrate• Klebstoff
Karte „Hi“Machen Sie jemandem eine Freude mit dieser lustigen Grußkarte!
www .cricut .com 11
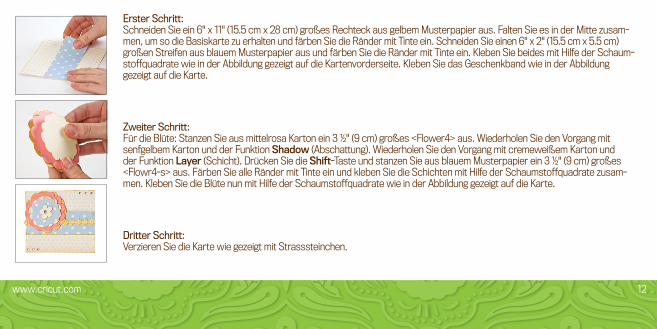
Erster Schritt: Schneiden Sie ein 6" x 11" (15.5 cm x 28 cm) großes Rechteck aus gelbem Musterpapier aus. Falten Sie es in der Mitte zusam-men, um so die Basiskarte zu erhalten und färben Sie die Ränder mit Tinte ein. Schneiden Sie einen 6" x 2" (15.5 cm x 5.5 cm) großen Streifen aus blauem Musterpapier aus und färben Sie die Ränder mit Tinte ein. Kleben Sie beides mit Hilfe der Schaum-stoffquadrate wie in der Abbildung gezeigt auf die Kartenvorderseite. Kleben Sie das Geschenkband wie in der Abbildung gezeigt auf die Karte.
Zweiter Schritt:Für die Blüte: Stanzen Sie aus mittelrosa Karton ein 3 ½" (9 cm) großes <Flower4> aus. Wiederholen Sie den Vorgang mit senfgelbem Karton und der Funktion Shadow (Abschattung). Wiederholen Sie den Vorgang mit cremeweißem Karton und der Funktion Layer (Schicht) . Drücken Sie die Shift-Taste und stanzen Sie aus blauem Musterpapier ein 3 ½" (9 cm) großes <Flowr4-s> aus. Färben Sie alle Ränder mit Tinte ein und kleben Sie die Schichten mit Hilfe der Schaumstoffquadrate zusam-men. Kleben Sie die Blüte nun mit Hilfe der Schaumstoffquadrate wie in der Abbildung gezeigt auf die Karte.
Dritter Schritt:Verzieren Sie die Karte wie gezeigt mit Strasssteinchen.
www .cricut .com 12
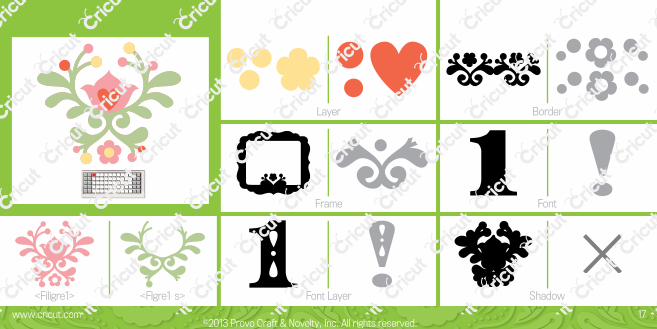
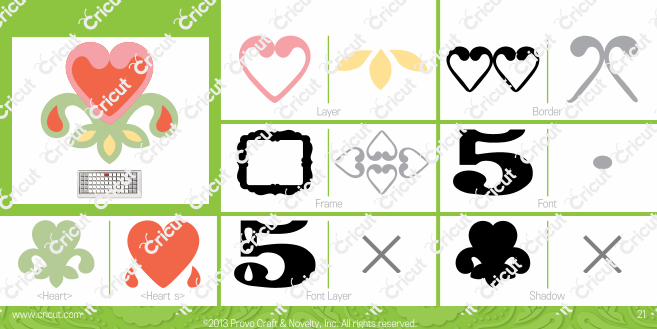
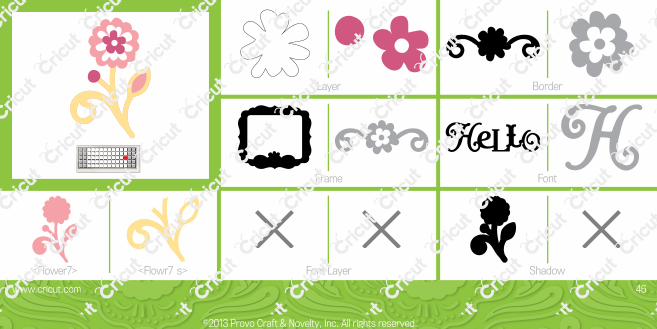
Font Layer Shadow
Frame Font
Layer Border
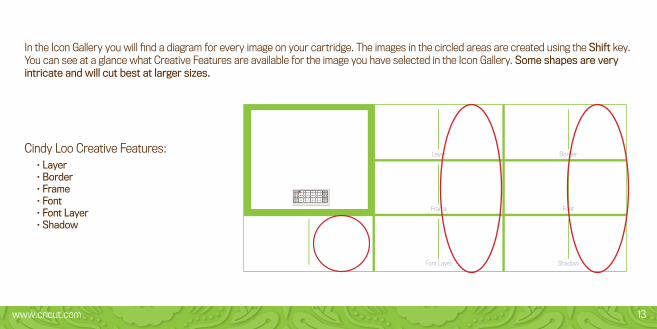
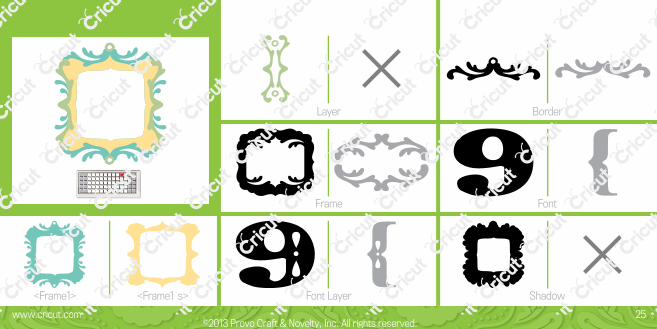
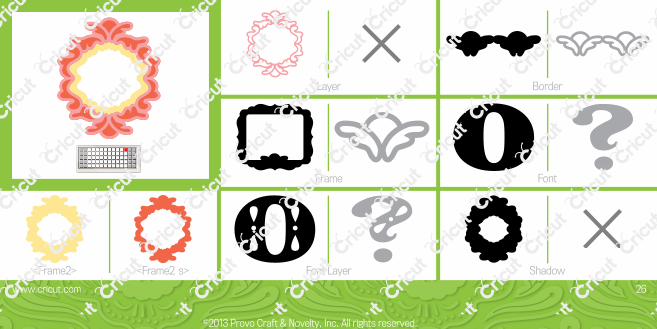
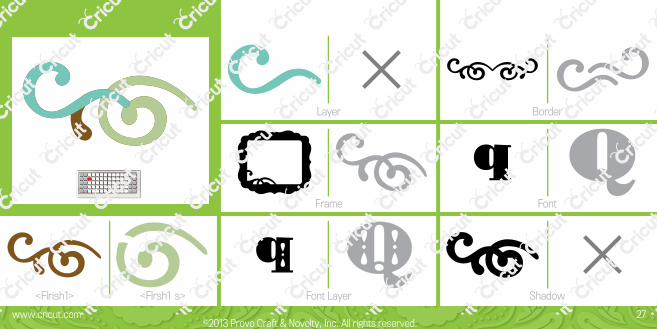
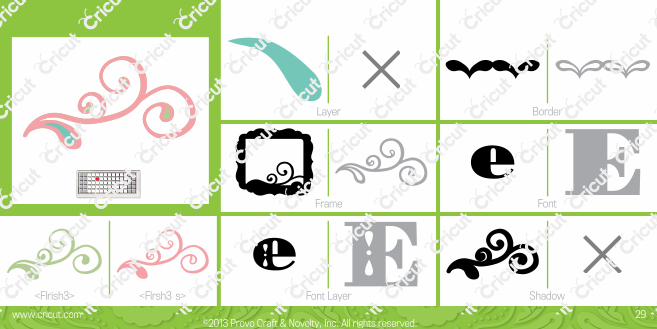
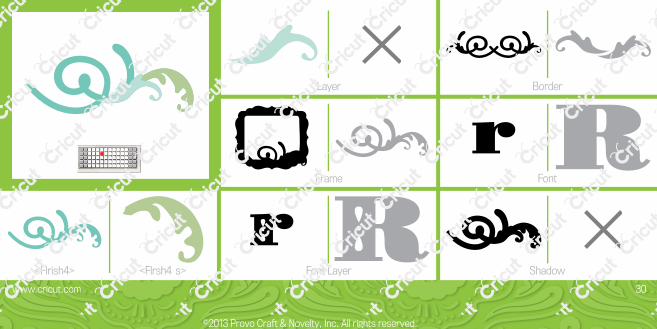
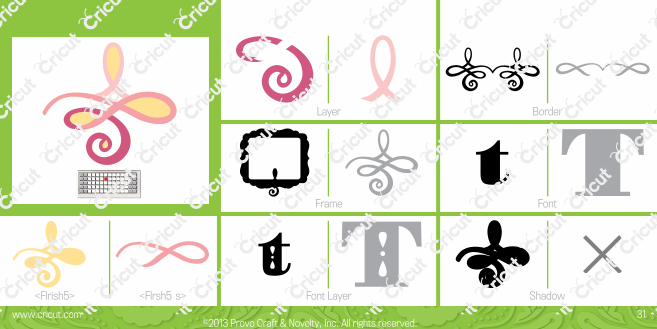
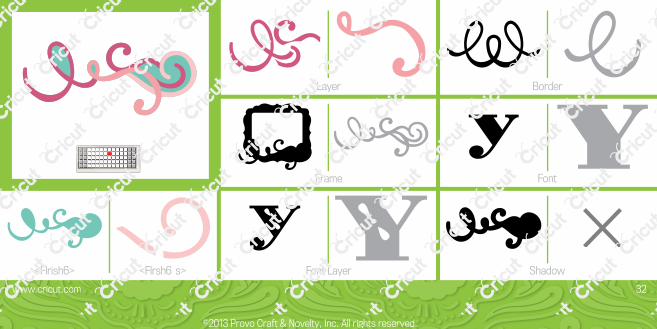
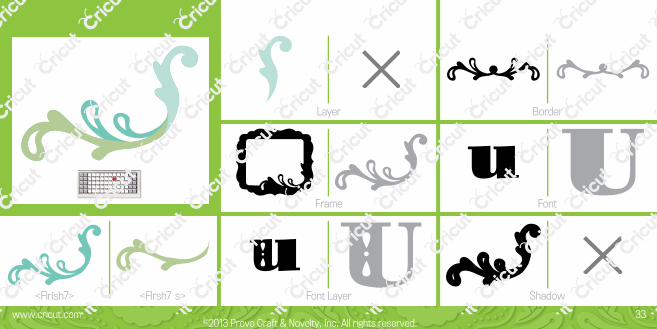
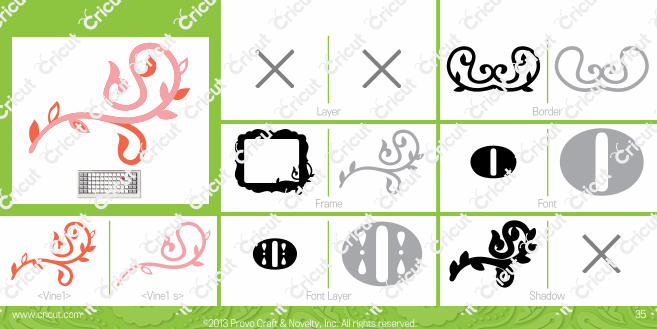
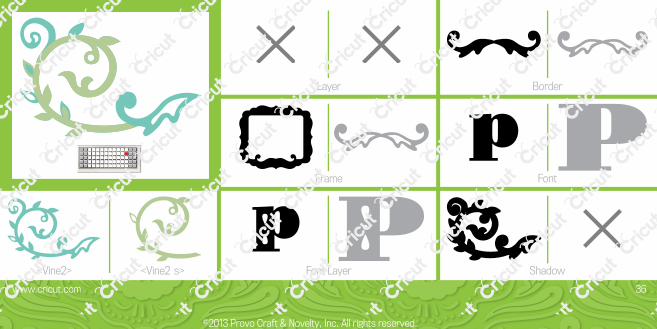
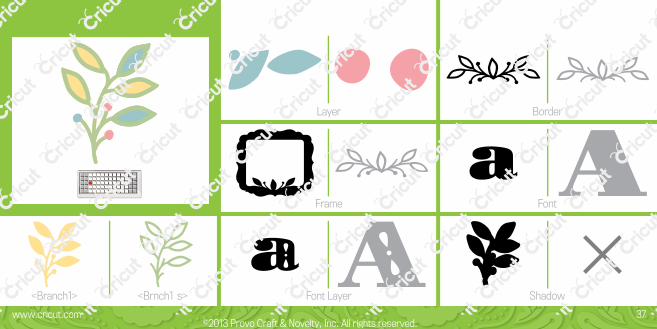
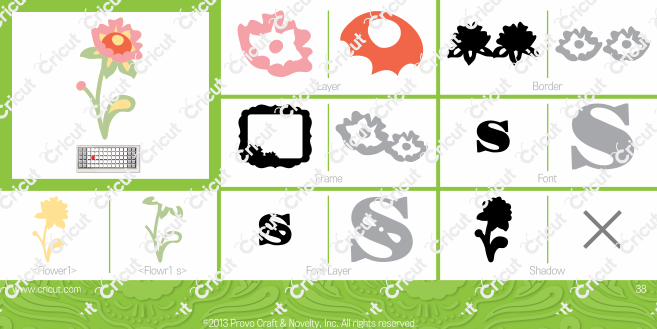
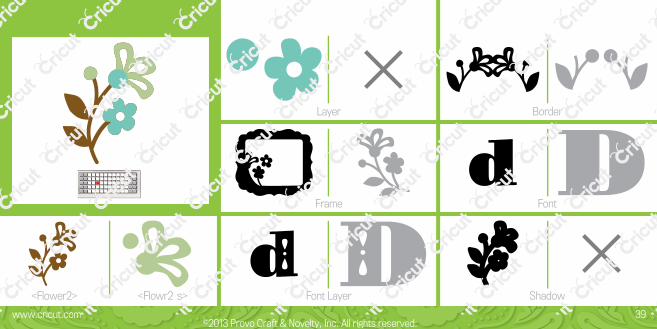
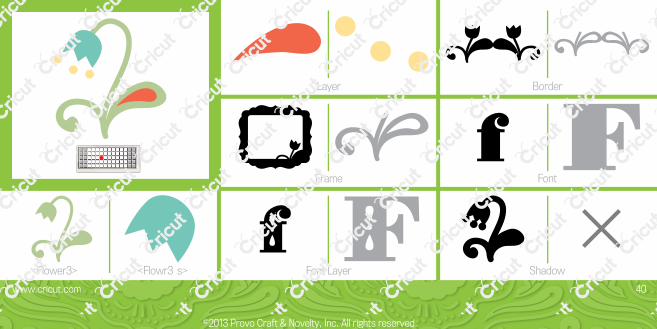
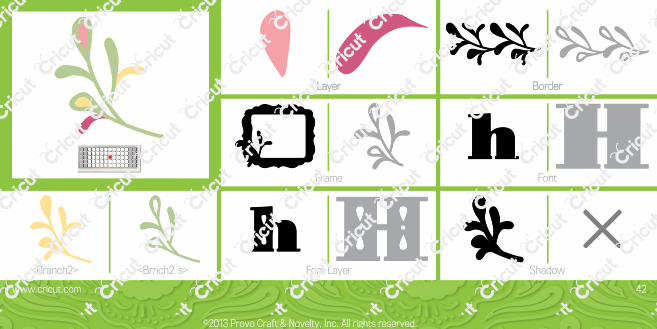
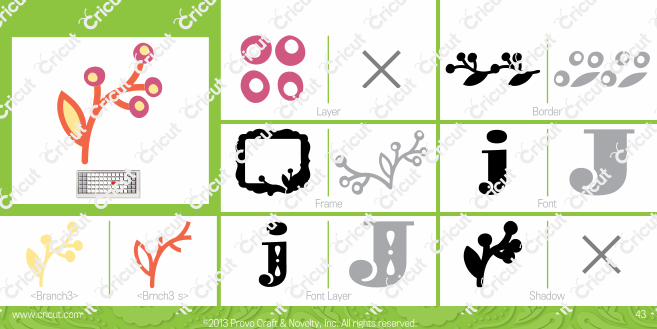
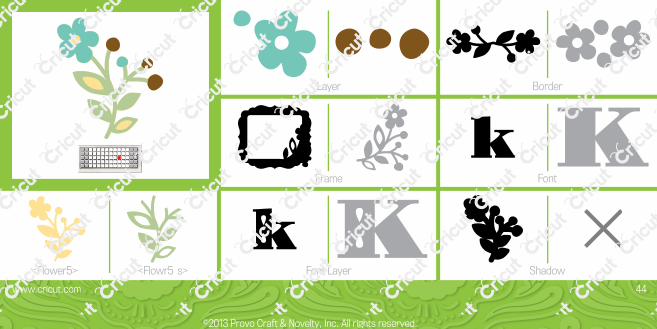
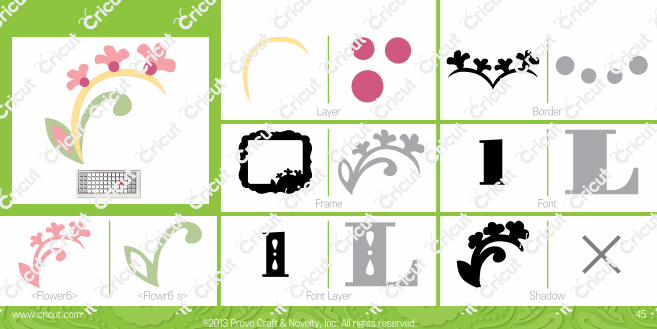
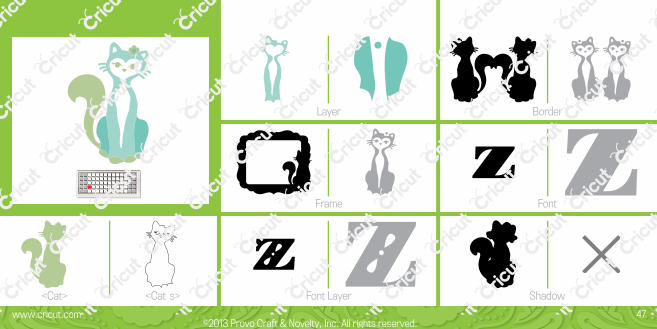
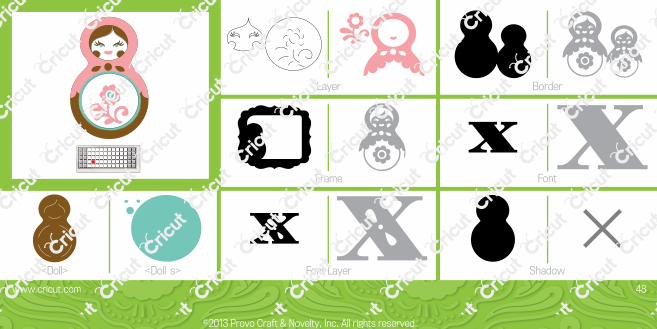
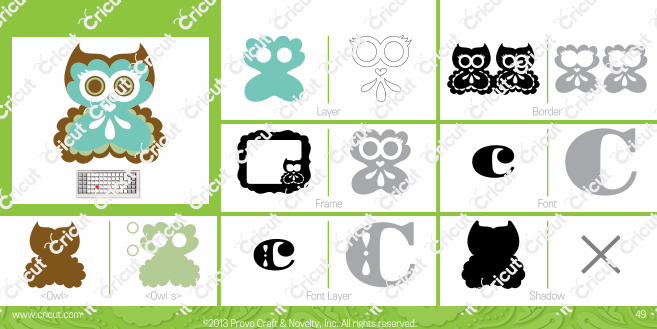
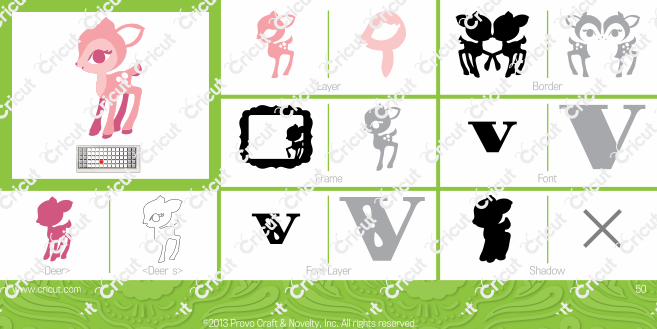
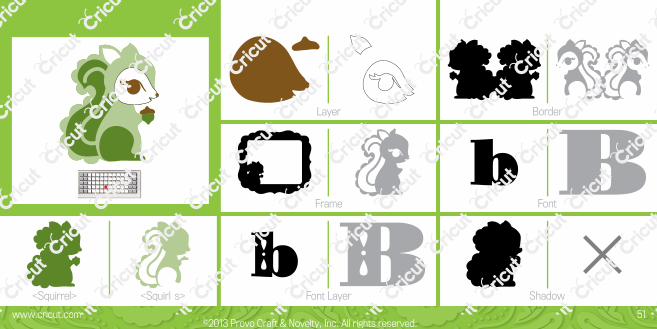
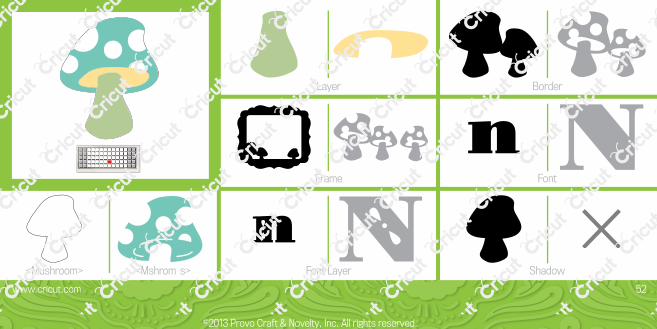
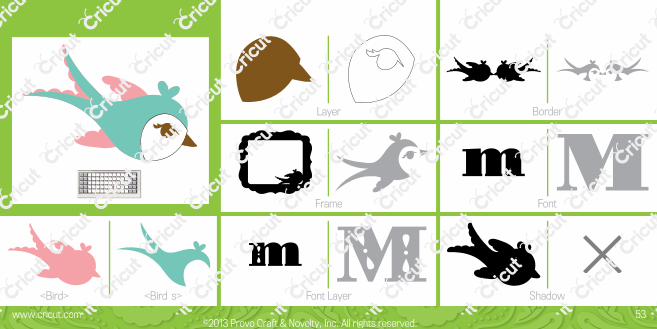
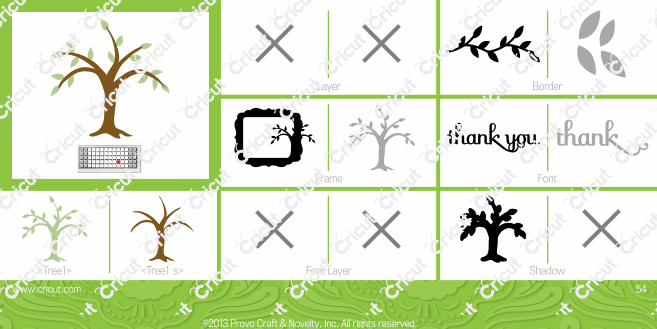
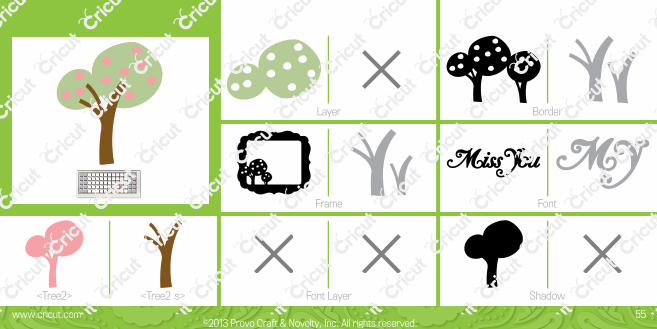
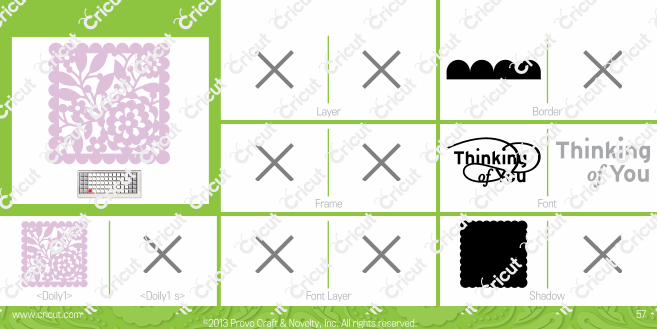
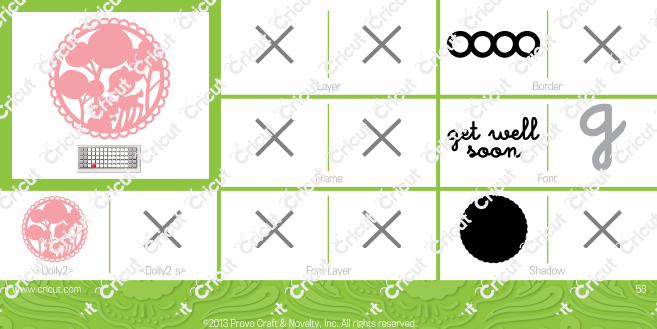
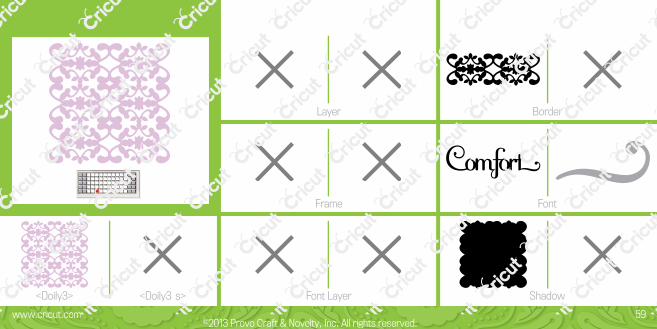
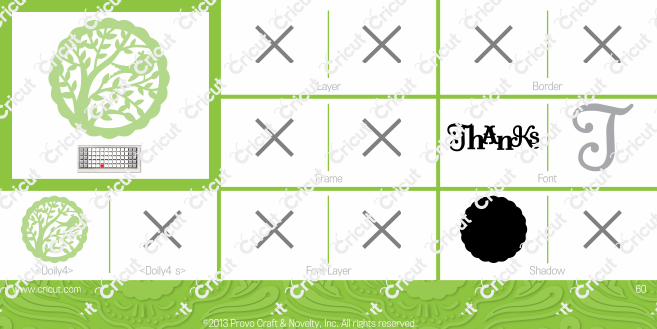
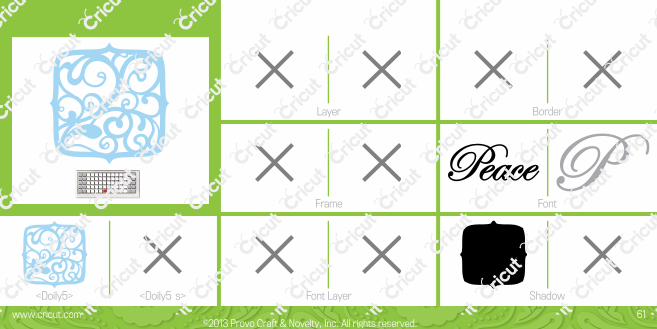
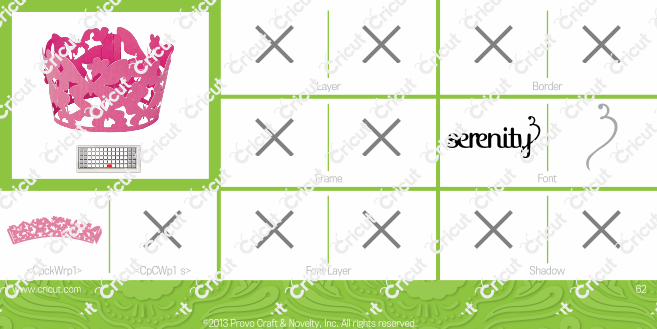
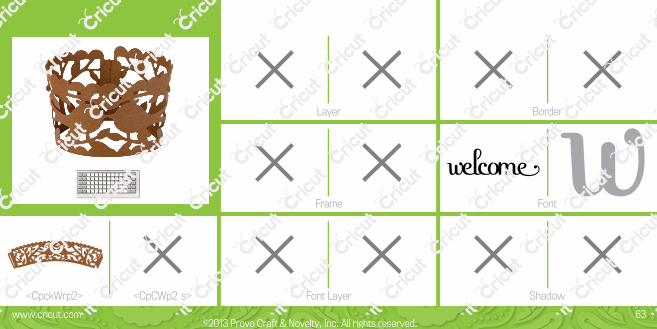
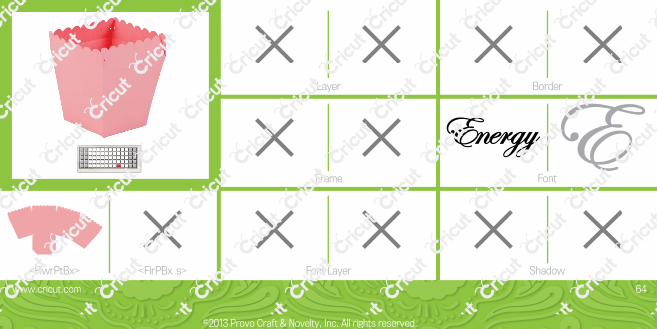
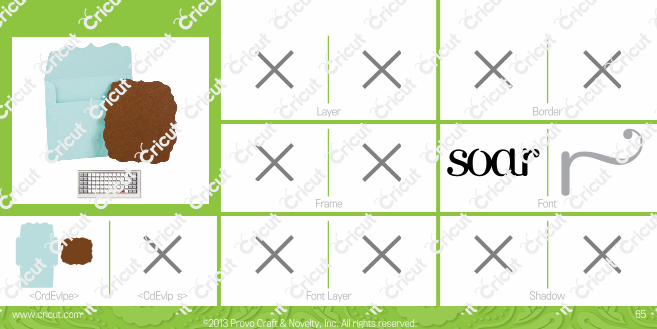
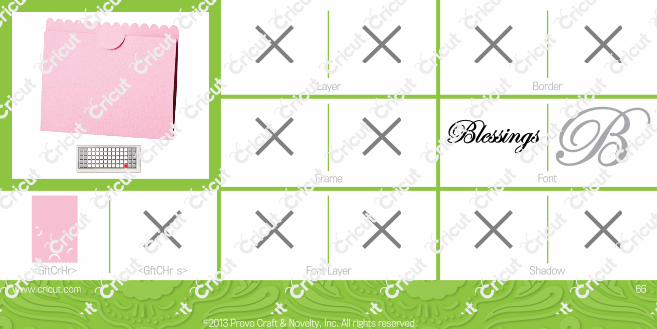
In the Icon Gallery you will find a diagram for every image on your cartridge. The images in the circled areas are created using the Shift key . You can see at a glance what Creative Features are available for the image you have selected in the Icon Gallery . Some shapes are very intricate and will cut best at larger sizes.
Cindy Loo Creative Features:• Layer• Border• Frame• Font• Font Layer• Shadow
www .cricut .com 13
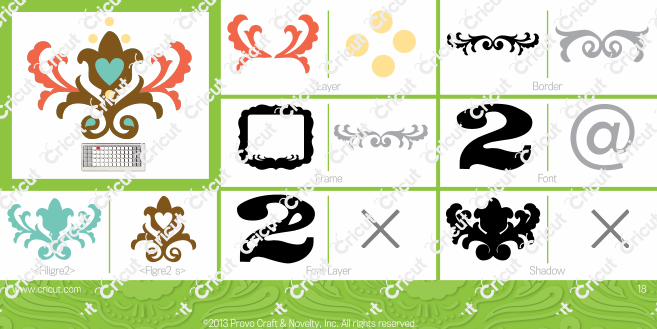
Font Layer Shadow
Frame Font
Layer Border
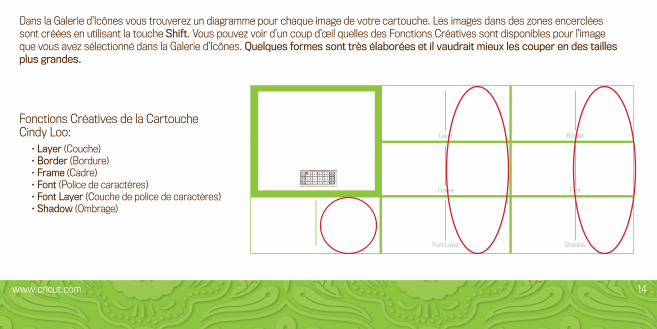
Dans la Galerie d’Icônes vous trouverez un diagramme pour chaque image de votre cartouche . Les images dans des zones encerclées sont créées en utilisant la touche Shift . Vous pouvez voir d’un coup d’œil quelles des Fonctions Créatives sont disponibles pour l’image que vous avez sélectionné dans la Galerie d’Icônes . Quelques formes sont très élaborées et il vaudrait mieux les couper en des tailles plus grandes.
Fonctions Créatives de la Cartouche Cindy Loo:
• Layer (Couche)• Border (Bordure)• Frame (Cadre)• Font (Police de caractères)• Font Layer (Couche de police de caractères)• Shadow (Ombrage)
www .cricut .com 14
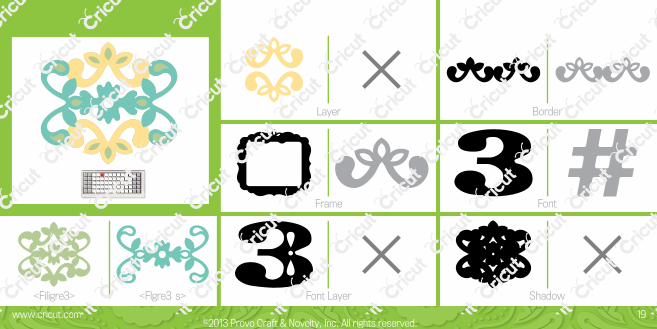
Font Layer Shadow
Frame Font
Layer Border
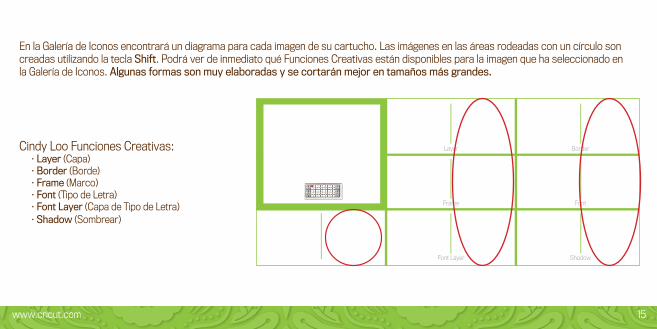
En la Galería de Iconos encontrará un diagrama para cada imagen de su cartucho . Las imágenes en las áreas rodeadas con un círculo son creadas utilizando la tecla Shift . Podrá ver de inmediato qué Funciones Creativas están disponibles para la imagen que ha seleccionado en la Galería de Iconos . Algunas formas son muy elaboradas y se cortarán mejor en tamaños más grandes.
Cindy Loo Funciones Creativas:• Layer (Capa)• Border (Borde)• Frame (Marco)• Font (Tipo de Letra)• Font Layer (Capa de Tipo de Letra)• Shadow (Sombrear)
www .cricut .com 15
Font Layer Shadow
Frame Font
Layer Border
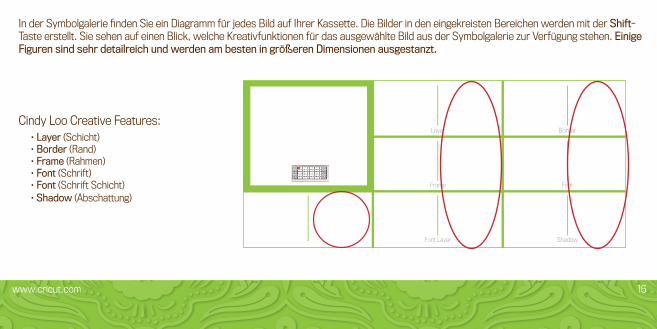
In der Symbolgalerie finden Sie ein Diagramm für jedes Bild auf Ihrer Kassette. Die Bilder in den eingekreisten Bereichen werden mit der Shift-Taste erstellt. Sie sehen auf einen Blick, welche Kreativfunktionen für das ausgewählte Bild aus der Symbolgalerie zur Verfügung stehen. Einige Figuren sind sehr detailreich und werden am besten in größeren Dimensionen ausgestanzt.
Cindy Loo Creative Features:• Layer (Schicht)• Border (Rand)• Frame (Rahmen)• Font (Schrift)• Font (Schrift Schicht)• Shadow (Abschattung)
www .cricut .com 16
Font Layer Shadow
Frame Font
Layer Border
<Filigre1> <Flgre1 s>
www .cricut .com 17
Font Layer Shadow
Frame Font
Layer Border
<Filigre2> <Flgre2 s>
www .cricut .com 18
Font Layer Shadow
Frame Font
Layer Border
<Filigre3> <Flgre3 s>
www .cricut .com 19
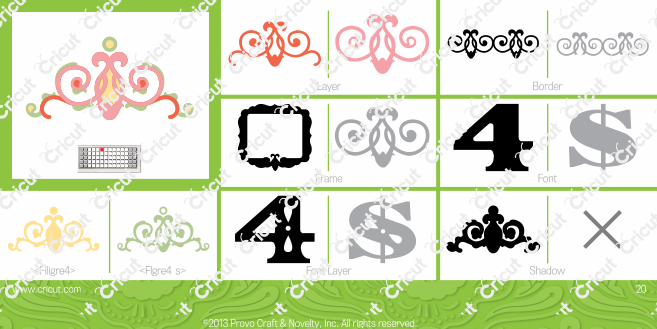
Font Layer Shadow
Frame Font
Layer Border
<Filigre4> <Flgre4 s>
www .cricut .com 20
Font Layer Shadow
Frame Font
Layer Border
<Heart> <Heart s>
www .cricut .com 21
Font Layer Shadow
Frame Font
Layer Border
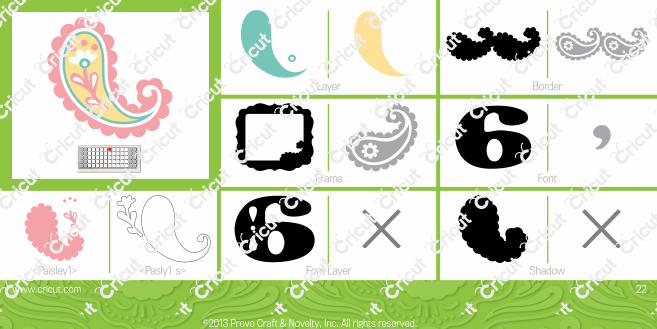
<Paisley1> <Pasly1 s>
www .cricut .com 22
Font Layer Shadow
Frame Font
Layer Border
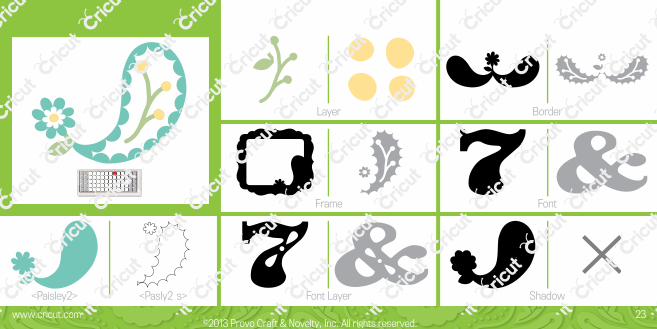
<Paisley2> <Pasly2 s>
www .cricut .com 23
Font Layer Shadow
Frame Font
Layer Border
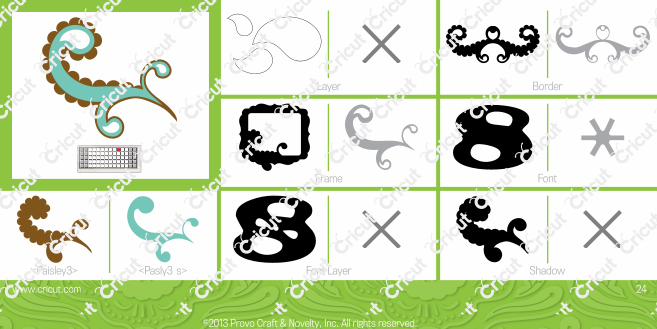
<Paisley3> <Pasly3 s>
www .cricut .com 24
Font Layer Shadow
Frame Font
Layer Border
<Frame1> <Frame1 s>
www .cricut .com 25
Font Layer Shadow
Frame Font
Layer Border
<Frame2> <Frame2 s>
www .cricut .com 26
Font Layer Shadow
Frame Font
Layer Border
<Flrish1> <Flrsh1 s>
www .cricut .com 27

Font Layer Shadow
Frame Font
Layer Border
<Flrish2> <Flrsh2 s>
www .cricut .com 28
Font Layer Shadow
Frame Font
Layer Border
<Flrish3> <Flrsh3 s>
www .cricut .com 29
Font Layer Shadow
Frame Font
Layer Border
<Flrish4> <Flrsh4 s>
www .cricut .com 30
Font Layer Shadow
Frame Font
Layer Border
<Flrish5> <Flrsh5 s>
www .cricut .com 31
Font Layer Shadow
Frame Font
Layer Border
<Flrish6> <Flrsh6 s>
www .cricut .com 32
Font Layer Shadow
Frame Font
Layer Border
<Flrish7> <Flrsh7 s>
www .cricut .com 33
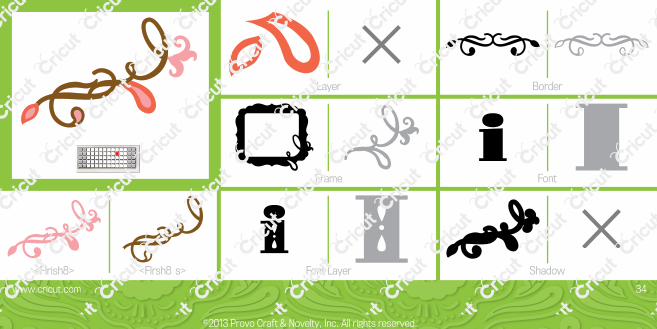
Font Layer Shadow
Frame Font
Layer Border
<Flrish8> <Flrsh8 s>
www .cricut .com 34
Font Layer Shadow
Frame Font
Layer Border
<Vine1> <Vine1 s>
www .cricut .com 35
Font Layer Shadow
Frame Font
Layer Border
<Vine2> <Vine2 s>
www .cricut .com 36
Font Layer Shadow
Frame Font
Layer Border
<Branch1> <Brnch1 s>
www .cricut .com 37
Font Layer Shadow
Frame Font
Layer Border
<Flower1> <Flowr1 s>
www .cricut .com 38
Font Layer Shadow
Frame Font
Layer Border
<Flower2> <Flowr2 s>
www .cricut .com 39
Font Layer Shadow
Frame Font
Layer Border
<Flower3> <Flowr3 s>
www .cricut .com 40
Font Layer Shadow
Frame Font
Layer Border
<Flower4> <Flowr4 s>
www .cricut .com 41
Layer Border
Font Layer Shadow
Frame Font
Layer Border
<Branch2> <Brnch2 s>
www .cricut .com 42
Font Layer Shadow
Frame Font
Layer Border
<Branch3> <Brnch3 s>
www .cricut .com 43
Font Layer Shadow
Frame Font
Layer Border
<Flower5> <Flowr5 s>
www .cricut .com 44
Font Layer Shadow
Frame Font
Layer Border
<Flower6> <Flowr6 s>
www .cricut .com 45
Font Layer Shadow
Frame Font
Layer Border
<Flower7> <Flowr7 s>
www .cricut .com 46
Font Layer Shadow
Frame Font
Layer Border
<Cat> <Cat s>
www .cricut .com 47
Font Layer Shadow
Frame Font
Layer Border
<Doll> <Doll s>
www .cricut .com 48
Font Layer Shadow
Frame Font
Layer Border
<Owl> <Owl s>
www .cricut .com 49
Font Layer Shadow
Frame Font
Layer Border
<Deer> <Deer s>
www .cricut .com 50
Font Layer Shadow
Frame Font
Layer Border
<Squirrel> <Squirl s>
www .cricut .com 51
Font Layer Shadow
Frame Font
Layer Border
<Mushroom> <Mshrom s>
www .cricut .com 52
Font Layer Shadow
Frame Font
Layer Border
<Bird> <Bird s>
www .cricut .com 53
Font Layer Shadow
Frame Font
Layer Border
<Tree1> <Tree1 s>
www .cricut .com 54
Font Layer Shadow
Frame Font
Layer Border
<Tree2> <Tree2 s>
www .cricut .com 55

Font Layer Shadow
Frame Font
Layer Border
<BrdHouse> <BrdHse s>
www .cricut .com 56
Font Layer Shadow
Frame Font
Layer Border
<Doily1> <Doily1 s>
www .cricut .com 57
Font Layer Shadow
Frame Font
Layer Border
<Doily2> <Doily2 s>
www .cricut .com 58
Font Layer Shadow
Frame Font
Layer Border
<Doily3> <Doily3 s>
www .cricut .com 59
Font Layer Shadow
Frame Font
Layer Border
<Doily4> <Doily4 s>
www .cricut .com 60
Font Layer Shadow
Frame Font
Layer Border
<Doily5> <Doily5 s>
www .cricut .com 61
Font Layer Shadow
Frame Font
Layer Border
<CpckWrp1> <CpCWp1 s>
www .cricut .com 62
Font Layer Shadow
Frame Font
Layer Border
<CpckWrp2> <CpCWp2 s>
www .cricut .com 63
Font Layer Shadow
Frame Font
Layer Border
<FlwrPtBx> <FlrPBx s>
www .cricut .com 64
Font Layer Shadow
Frame Font
Layer Border
<CrdEvlpe> <CdEvlp s>
www .cricut .com 65
Font Layer Shadow
Frame Font
Layer Border
<GftCrHr> <GftCHr s>
www .cricut .com 66
www .cricut .com 67
For in-depth information about using your Cricut® cutting system refer to the User Manual included with your Cricut® machine. If you don’t find the answers you need, support is available in the following two ways:
You will find the most current help and documentation on the web site. Find answers to FAQs and Troubleshooting problems any time of the day.INTERNET: www.cricut.com
Refer to the Customer Support information that came with your Cricut® machine(s) or call for Customer Support options at:PHONE: 1-877-7CRICUT (727-4288) Monday–Friday 7:00 a.m.–6:00 p.m., Mountain Time
Pour une information plus exhaustive sur comment utiliser le système de découpage Cricut® veuillez vous référer au Manuel de l’Utilisateur inclus avec votre machine Cricut® . Au cas où vous ne trouverez pas de réponse à vos questions, vous trouverez l’appui nécessaire à travers la manière suivante :
Vous trouverez l’aide et la documentation la plus mise à jour dans l’emplacement Web. Trouvez les réponses dans des Questions Fréquentes et dans Détection et Solution de Problèmes à tout moment du jour.INTERNET: www.cricut.com

www .cricut .com 68
Para una información más exhaustiva acerca de cómo usar el sistema de corte Cricut® le rogamos referirse al Manual del Usuario incluido con su máquina Cricut® . En el caso de que no encontrara respuesta a sus preguntas, encontrará el apoyo necesario a través de la forma siguiente:
Encontrará la ayuda y documentación más actualizada en el sitio Web. Encuentre las respuestas en Preguntas Frecuentes y en Detección y Solución de Problemas en cualquier momento del día.INTERNET: www.cricut.com
Ausführlichere Information über die Benutzung Ihrer persönlichen Cricut® Schneidesystems finden Sie im Benutzerhandbuch, das mit der Cricut® Maschine mitgeliefert wird . Wenn Sie die von Ihnen benötigten Antworten nicht finden, gibt es eine Unterstützungshilfe, die auf den folgenden Wegen erhältlich ist:
Sie werden die aktuellste Hilfe und Dokumentation auf der Webseite finden. Finden Sie Antworten auf häufig gestellte Fragen und zu Fehlerbehebungsproblemen zu jeder Tageszeit. INTERNET: www.cricut.com

www .cricut .com 69

©2012 Provo Craft & Novelty, Inc.All rights reserved/Tous droits réservés/Todos los derechos reservados10876 South River Front Parkway, Suite 600, South Jordan, UT 84095Made in China/Fabriqué en Chine/Hecho en ChinaManufactured for Provo Craft & Novelty, Inc./Fabriqué pour ProvoCraft & Novelty, Inc./Fabricado para Provo Craft & Novelty, Inc. www.provocraft.com • 02/10-8490