chaska baseball association coaches handbook 2011 baseball association coaches handbook 2011...
TRANSCRIPT

Coaches Handbook
2011
Chaska Baseball Association
Coaches Handbook
2011
Philosophy, expectations, and procedures of the Chaska
High School Baseball Coaching Staff prepared for The
Chaska Baseball Association Coaches.
Every day is a great day to be a Chaska Hawk!
Dear Youth Baseball Coach:
Thank you for volunteering to serve the Chaska Baseball Association by serving as a coach. I greatly
appreciate the fact that you have made this commitment to help our youth not only develop their baseball skills
but more importantly to help them develop into fine young people and leaders. We think the rewards to you
will be significant and it is our hope that you will find your work this spring and summer to be rewarding and
fun!
The coaches’ handbook was developed to provide consistency in the methods used by the Chaska Baseball
Association coaches and the Chaska High School Baseball Coaching Staff to develop our baseball players. It is
our belief that the more we (Chaska Area Baseball and Chaska High School) can align our expectations, the
better the each individual will realize his full potential as a baseball player.
We are here to assist you in being successful baseball coaches. Most importantly, we expect that the coaches
working with our community’s most valuable asset, our youth, will serve as positive role models by keeping the
game of baseball in perspective.
I hope that each coach will take the time to study this handbook and implement many of the ideas from it into
their daily routines. If you have a question about any part of this handbook, please feel free to contact me at:
Sincerely,
Craig Baumann Head Baseball Coach
Chaska High School
Table of Contents
TOPIC PAGE(S)
Pre-Season Player Information Guide.………………………………………………..1
Goals……………………………………………………………………………….….2-4
Coaching Tips.……………………………………………………………………….. 5
Game Etiquette………………………………………………………………………..6
Warm-Up Routine…………………………………………………………………….7
Shoulder Strength Exercises…………………………………………………….….....8-9
Throwing………………………………………………………………………….…..10-11
Pitch Counts…………………………………………………………………………..12
Catching………………………………………………………………………………13
Infield Defense…………………………………………………..................................14-19
Defensive Skills Checklist……………………………………....................................20-21
Rundowns…………………………………………………………………………….22
Hitting………………………………………………………………………………...23-29
Base running…………………………………………………………………………..30-34
Base running Teaching Checklist……………………………………………………..35
Double Steal Offense (1st and 3
rd situations)…………………………………………36
Practice Plan(s)……………………………………………………………………….37
Player Motivation…………………………………………………………………….38
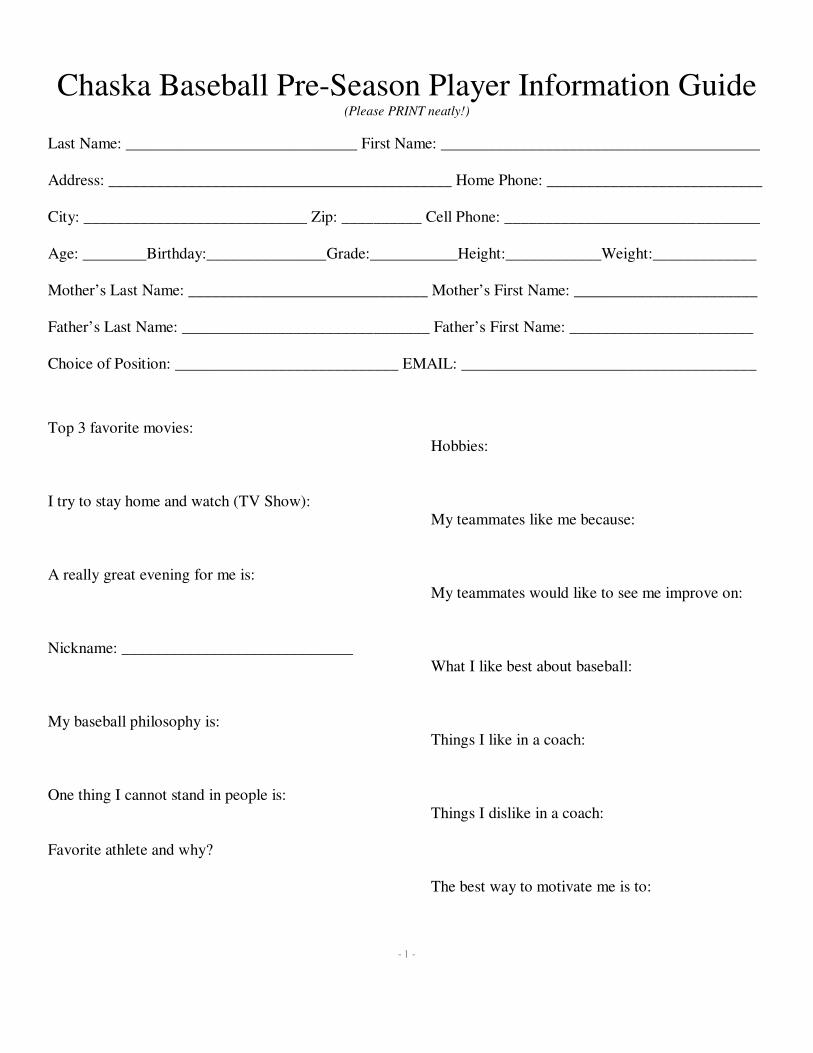
Chaska Baseball Pre-Season Player Information Guide (Please PRINT neatly!)
Last Name: _____________________________ First Name: ________________________________________
Address: ___________________________________________ Home Phone: ___________________________
City: ____________________________ Zip: __________ Cell Phone: ________________________________
Age: ________Birthday:_______________Grade:___________Height:____________Weight:_____________
Mother’s Last Name: ______________________________ Mother’s First Name: _______________________
Father’s Last Name: _______________________________ Father’s First Name: _______________________
Choice of Position: ____________________________ EMAIL: _____________________________________
Top 3 favorite movies:
I try to stay home and watch (TV Show):
A really great evening for me is:
Nickname: _____________________________
My baseball philosophy is:
One thing I cannot stand in people is:
Favorite athlete and why?
Hobbies:
My teammates like me because:
My teammates would like to see me improve on:
What I like best about baseball:
Things I like in a coach:
Things I dislike in a coach:
The best way to motivate me is to:
- 1 -
- 2 -
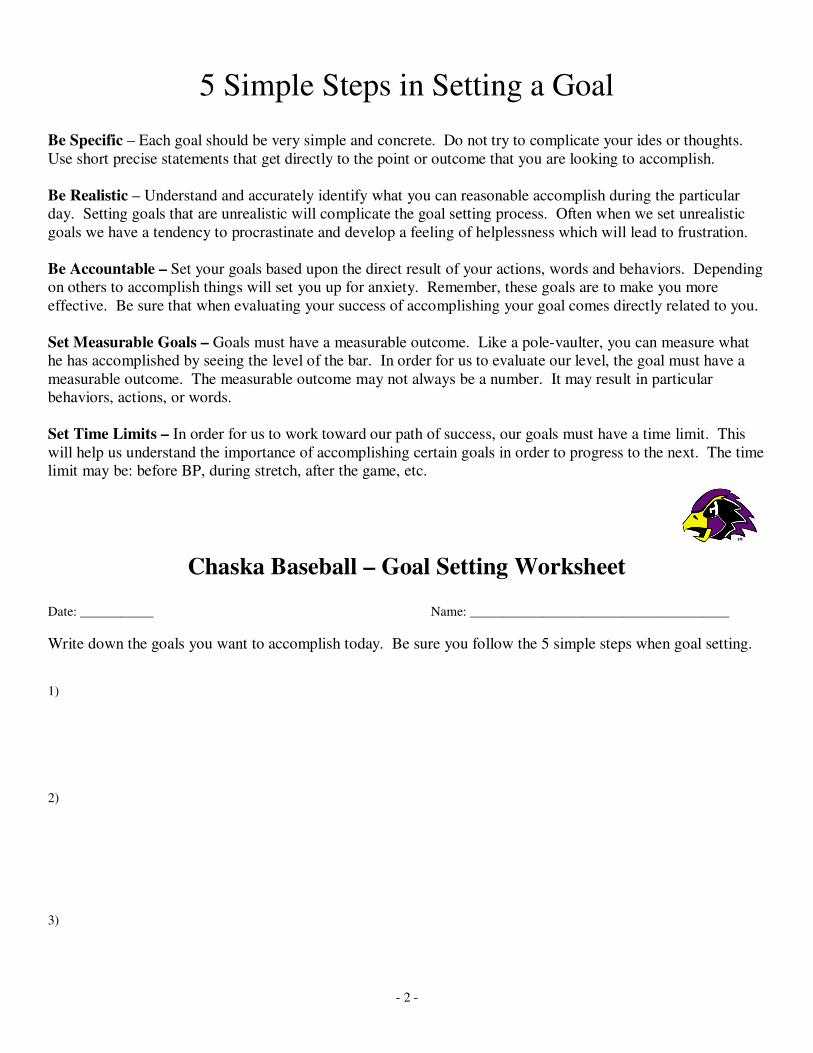
5 Simple Steps in Setting a Goal
Be Specific – Each goal should be very simple and concrete. Do not try to complicate your ides or thoughts.
Use short precise statements that get directly to the point or outcome that you are looking to accomplish.
Be Realistic – Understand and accurately identify what you can reasonable accomplish during the particular
day. Setting goals that are unrealistic will complicate the goal setting process. Often when we set unrealistic
goals we have a tendency to procrastinate and develop a feeling of helplessness which will lead to frustration.
Be Accountable – Set your goals based upon the direct result of your actions, words and behaviors. Depending
on others to accomplish things will set you up for anxiety. Remember, these goals are to make you more
effective. Be sure that when evaluating your success of accomplishing your goal comes directly related to you.
Set Measurable Goals – Goals must have a measurable outcome. Like a pole-vaulter, you can measure what
he has accomplished by seeing the level of the bar. In order for us to evaluate our level, the goal must have a
measurable outcome. The measurable outcome may not always be a number. It may result in particular
behaviors, actions, or words.
Set Time Limits – In order for us to work toward our path of success, our goals must have a time limit. This
will help us understand the importance of accomplishing certain goals in order to progress to the next. The time
limit may be: before BP, during stretch, after the game, etc.
Chaska Baseball – Goal Setting Worksheet Date: ___________ Name: _______________________________________
Write down the goals you want to accomplish today. Be sure you follow the 5 simple steps when goal setting.
1)
2)
3)

- 3 -
Chaska Baseball Pre-Season Goal Sheet
Name:_____________________________________________________
1. What do you want to accomplish as a baseball player this summer?
2. What specific role do you see yourself playing on this team? (For example: starter, role player, practice
player, etc.)
3. What are your strengths as a baseball player? What do you need to improve as a baseball player? (Please
list 3 for each)
Strong Points Needs Improvement
4. List what you are doing to prepare yourself to have the best season possible this summer.
- 4 -
Chaska Baseball Mid-Season Goals and Evaluations
Name: _______________________________________
1. Briefly explain what you feel your role is on this team.
2. Have you accepted that role? Do you have questions about that role? Do you feel that is the best role to
help our team succeed? If not, what role is better suited
3. What are your strengths as a baseball player so far this first half of the season? What do you need to
improve upon as a baseball player for the second half? (Give at least 3 each)
Strong Points Need to improve
4. What are our strengths as a baseball team so far this first half of the season? What do you feel we need to
improve as a baseball team for the second half? (Give at least 3 each)
Strong Points Need to improve
5. What are the strengths of the coaches so far this first half of the season? What do you feel the coaches need
to improve for the second half? (Give at least 3 each)
Strong Points Need to improve
- 5 -
Coaching Tips
1. Work on your attitude everyday!
• Greet players first - be there.
• Create the environment – Enthusiasm.
2. Be organized.
• Have a plan & work your plan
• Hit them hard with intensity and move on
3. Have a central theme for everyday.
• What is important to you
• Hammer it in for the day
4. Improvement can happen only with security and
trust.
• Develop trust and a secure place first.
5. Give positive, functional advice.
• Tell them what to do, not what not to do.
• Do they know what you mean - don’t assume,
ask them for an interpretation?
6. Attention to details is a must.
• Consistency is better than greatness
• Create competition wherever possible
• Make practice fun & stay positive
7. Show up everyday with a great attitude and great
work ethic.
8. Hold yourself accountable for your own attitude.
Players should run from station to station during practice in which they have 4-5 minutes to work on a
certain drill. Here are a couple of tips to keep the rotation running smoothly:
• The kids should already know how to perform the drill before the rotation begins.
• If you have parents helping you out at different stations, have them look for 1 or 2 common flaws and help
the player correct that flaw. Don't assume the parent understands what those flaws are; you may need to
show them exactly what to look for.
• While the kids are stretching and warming up, take each parent to the station they will be helping with.
Explain what they will be doing and what to look for.
• Emphasize quality over quantity by:
• Being flexible with time given to the rotation. The rotation will usually take longer than you expect.
The younger the kids the more difficult it will be.
• If you’re behind, don't rush through to finish.
• Don't have stations set up where they need to perform a skill X number of times. Always have them
perform the skill for the duration of the time. They will then feel no need to rush through the drill in
an attempt to complete it.
• Communicate with the kids that you want them to hustle to each station, but at the station they need
to take their time and work hard on improving.
• Get a parent on the side to keep time for you. This will allow you to help and coach without having to worry
about when to yell, "Rotate!"
• Many of the drills listed in this handbook can be played as games. Games promote competition during the
practice and give the players the opportunity to perform the skill with a bit of pressure to succeed. This will
help them when it comes time for the game and helps them to focus during practice. In addition, kids love to
compete and will work hard to try and win. It's fun, which translates into a better learning environment.
Have a competition at one station, then a couple without, and then another station with a different
competition. I think you will find that your players will improve much faster if they enjoy practice and
enjoy the drills that you have them work on.
6
Chaska Baseball Game Etiquette Hustle is all about Pride
Players • Always dress appropriately. Pants pulled up, jersey tucked in, hat straight, proper team color undershirt,
and no jewelry. Individuals should not draw attention to themselves.
• Anytime we step onto the baseball playing field we jog to where we want to go. (Jog to OF to start catch,
jog to a batting cage, jog to the bullpen.
• Always play catch in the outfield, and stay off the foul line. Take pride in taking care of your field!
Baseball fields are sacred grounds.
• Respect the ballpark, equipment and the game.
• Stay focused while on the bench. Play the game even though you might not be on the field.
• One minute between innings. During game time, Chaska teams will sprint on and off the field of play!
This is the ultimate source of pride in our program. NO TEAM even competes with how hard we sprint!
By doing this we show the other team that we want to hit and we want to play defense – mental preparation.
• Pick up other teammates’ gloves if they make the last out or if they are on left on base! Know in advance.
• Players NEVER talk to umpires about a play or call. This is the coaches’ responsibility only.
• Positive infield/outfield chatter directed at our own teammates.
• Champions pay attention to the fundamental details of the game
• Be the best two base team on the field. Always looking to take an extra base!
• 1B and OF have warm-up balls.
• Do not react negatively to questionable called strikes (i.e., rolling of the eyes, pointing, shaking your head,
or glaring), for these things can sway an umpire’s future call and can also tip off an opposing pitcher that
you are frustrated!
• Think the ball will come to you!
• Control what you can control. Physical mistakes happen, mental ones should not.
Coaches Parents
• While sprinting off the field (after playing
defense), form a quick huddle to talk about our
last defensive session. What can we learn from
the last ½ inning?
• Both pre-game and during the game, the dugout
and playing field are for players and coaches
only.
• Bench player has to be assigned and ready to
pick-up the catcher if he is last out.
• Positive talk in front of your son or at the ball
field.
• Coaches treat all umpires like the coaches
themselves would want to be treated - with
respect.
• Cheer as loudly for the rest of the team as you
would for your own son.
• Pre-assign who warms up pitcher and extra
outfielder.
• Every player has a role on the team and
regardless of what it is, that role is important.
• Positive feedback given loudly. Constructive
criticism given privately.
• Players play, coaches coach, umpires do their
best, parents support. Just as every player has a
role, so do the parents.
7
Hawk’s Warm-up Routine
1. Jog – one lap around the field. Run with your glove, keeping it open.
2. Slow High Knees (90 ft – minimum)
3. Fast High Knees
4. Majorettes (Straight leg kick)
5. Butt Kicks
6. Karaoke
7. Wrong foot play
8. Leads and break (off the first guy)
10. One-way lead – First Movement vs. LHP
11. Stretch on their own – (2-5 minutes, if the players feel like they need to do more
stretching, this is the time to do it. After they have the blood flowing)
12. THROWING (see Throwing Routine)
13. Pick-Offs
14. Rundowns
8
Shoulder Strength Exercises
These drills strengthen the rotator cuff area. These drills are to be performed 3 times a week, using very light
weight (no more than two pounds for HS – Adults, and one pound or less for any one younger than 15). These
are progressive exercises; do not perform these with weights until the number of repetitions can be achieved. In
other words, the reps count more than the amount of weight loading. The progression is:
No weight
Baseball weight (5 oz)
8 oz
12 oz
16 oz
24 oz (High school, adult)
32 oz (High school, adult)
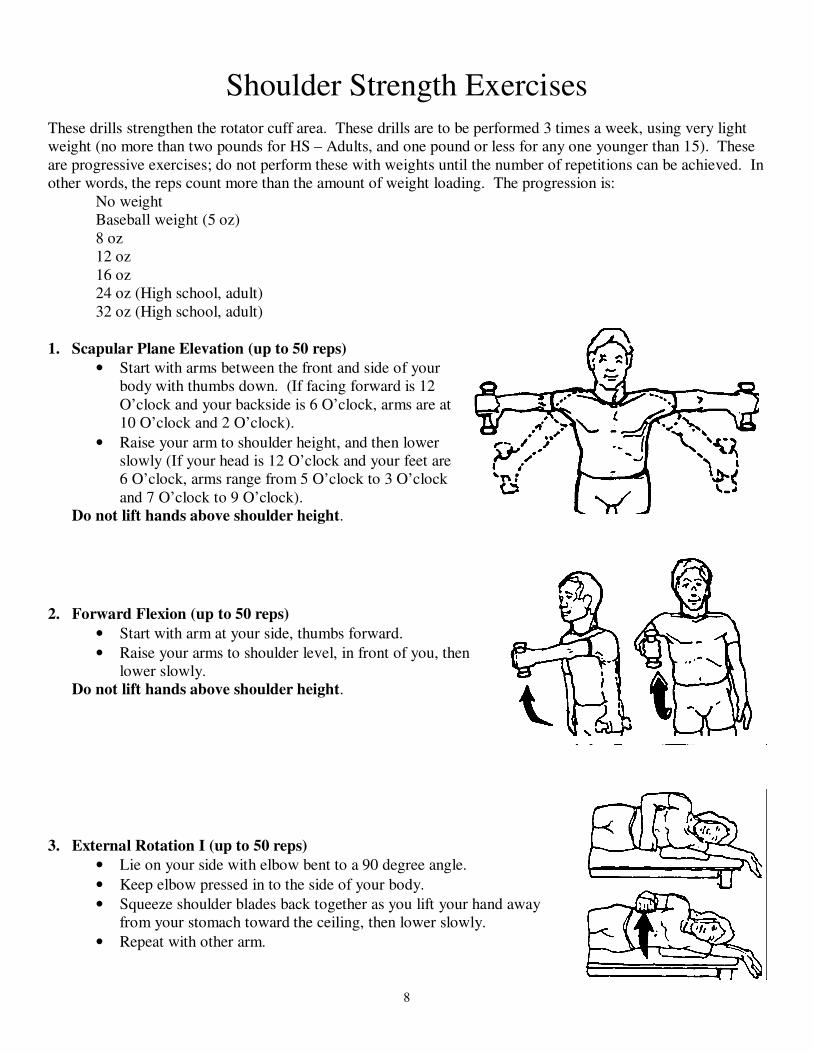
1. Scapular Plane Elevation (up to 50 reps)
• Start with arms between the front and side of your
body with thumbs down. (If facing forward is 12
O’clock and your backside is 6 O’clock, arms are at
10 O’clock and 2 O’clock).
• Raise your arm to shoulder height, and then lower
slowly (If your head is 12 O’clock and your feet are
6 O’clock, arms range from 5 O’clock to 3 O’clock
and 7 O’clock to 9 O’clock).
Do not lift hands above shoulder height.
2. Forward Flexion (up to 50 reps)
• Start with arm at your side, thumbs forward.
• Raise your arms to shoulder level, in front of you, then
lower slowly.
Do not lift hands above shoulder height.
3. External Rotation I (up to 50 reps)
• Lie on your side with elbow bent to a 90 degree angle.
• Keep elbow pressed in to the side of your body.
• Squeeze shoulder blades back together as you lift your hand away
from your stomach toward the ceiling, then lower slowly.
• Repeat with other arm.
9
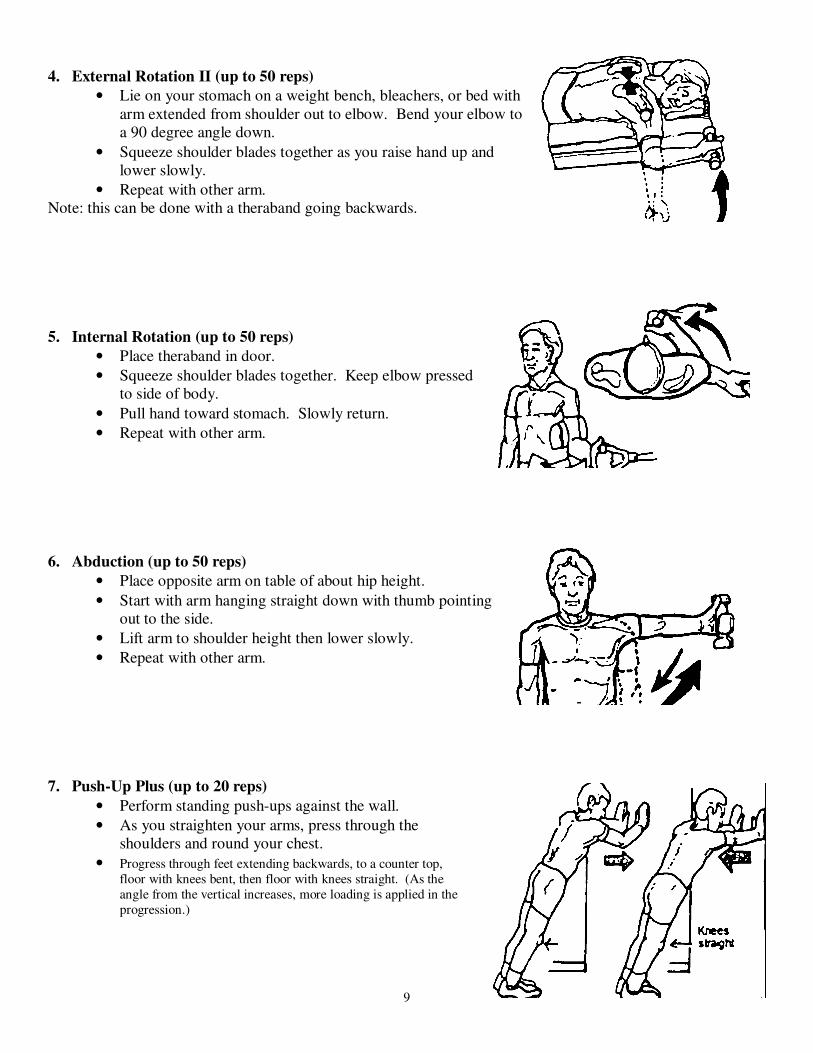
4. External Rotation II (up to 50 reps)
• Lie on your stomach on a weight bench, bleachers, or bed with
arm extended from shoulder out to elbow. Bend your elbow to
a 90 degree angle down.
• Squeeze shoulder blades together as you raise hand up and
lower slowly.
• Repeat with other arm.
Note: this can be done with a theraband going backwards.
5. Internal Rotation (up to 50 reps)
• Place theraband in door.
• Squeeze shoulder blades together. Keep elbow pressed
to side of body.
• Pull hand toward stomach. Slowly return.
• Repeat with other arm.
6. Abduction (up to 50 reps)
• Place opposite arm on table of about hip height.
• Start with arm hanging straight down with thumb pointing
out to the side.
• Lift arm to shoulder height then lower slowly.
• Repeat with other arm.
7. Push-Up Plus (up to 20 reps)
• Perform standing push-ups against the wall.
• As you straighten your arms, press through the
shoulders and round your chest.
• Progress through feet extending backwards, to a counter top,
floor with knees bent, then floor with knees straight. (As the
angle from the vertical increases, more loading is applied in the
progression.)
10
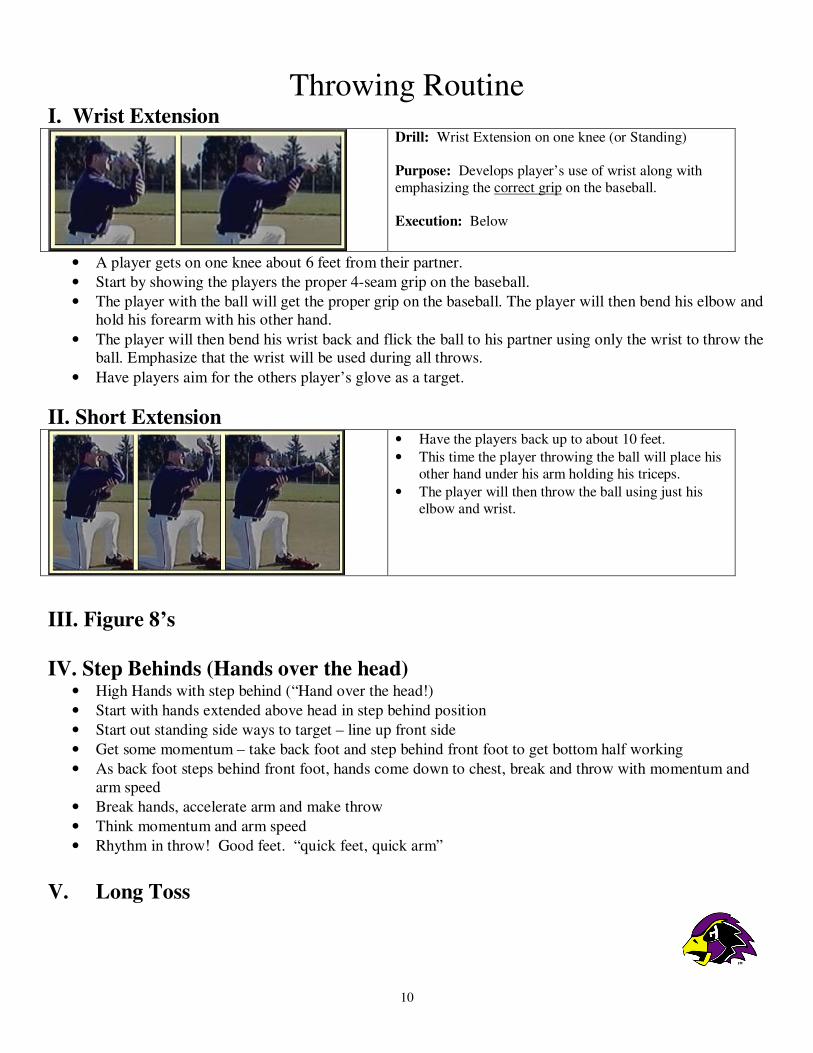
Throwing Routine I. Wrist Extension
Drill: Wrist Extension on one knee (or Standing)
Purpose: Develops player’s use of wrist along with
emphasizing the correct grip on the baseball.
Execution: Below
• A player gets on one knee about 6 feet from their partner.
• Start by showing the players the proper 4-seam grip on the baseball.
• The player with the ball will get the proper grip on the baseball. The player will then bend his elbow and
hold his forearm with his other hand.
• The player will then bend his wrist back and flick the ball to his partner using only the wrist to throw the
ball. Emphasize that the wrist will be used during all throws.
• Have players aim for the others player’s glove as a target.
II. Short Extension
• Have the players back up to about 10 feet.
• This time the player throwing the ball will place his
other hand under his arm holding his triceps.
• The player will then throw the ball using just his
elbow and wrist.
III. Figure 8’s
IV. Step Behinds (Hands over the head) • High Hands with step behind (“Hand over the head!)
• Start with hands extended above head in step behind position
• Start out standing side ways to target – line up front side
• Get some momentum – take back foot and step behind front foot to get bottom half working
• As back foot steps behind front foot, hands come down to chest, break and throw with momentum and
arm speed
• Break hands, accelerate arm and make throw
• Think momentum and arm speed
• Rhythm in throw! Good feet. “quick feet, quick arm”
V. Long Toss
11
Throwing Drills
Drill: Game of 21 to close out throwing. (3 pts. head, 2 pts. chest, 1 pts. no move to catch)
Drill: Relay Throwing Race
Purpose: This is a fun team competition that helps players develop good footwork, a
quick transfer of the ball from the glove to the hand, and a quick release.
Setup: 2 or more lines of equal teams. Have the players’ space themselves equal
distances apart, determine spacing based on age and average throwing ability. Start with
a distance that will allow them to focus on footwork and transferring the ball, not running
down an errant throw.
Execution:
• Start the ball on the same side of the line. On your signal the player with the ball will
throw the ball to the next player in line. The team will continue to throw it down the
line from player to player.
• Once the ball has got to the end of the line, the ball will be thrown back down the line
to the start.
• First team to get the ball back to the start wins.
• Play the game a few times increasing the distance between the players each time or
switching up teams.
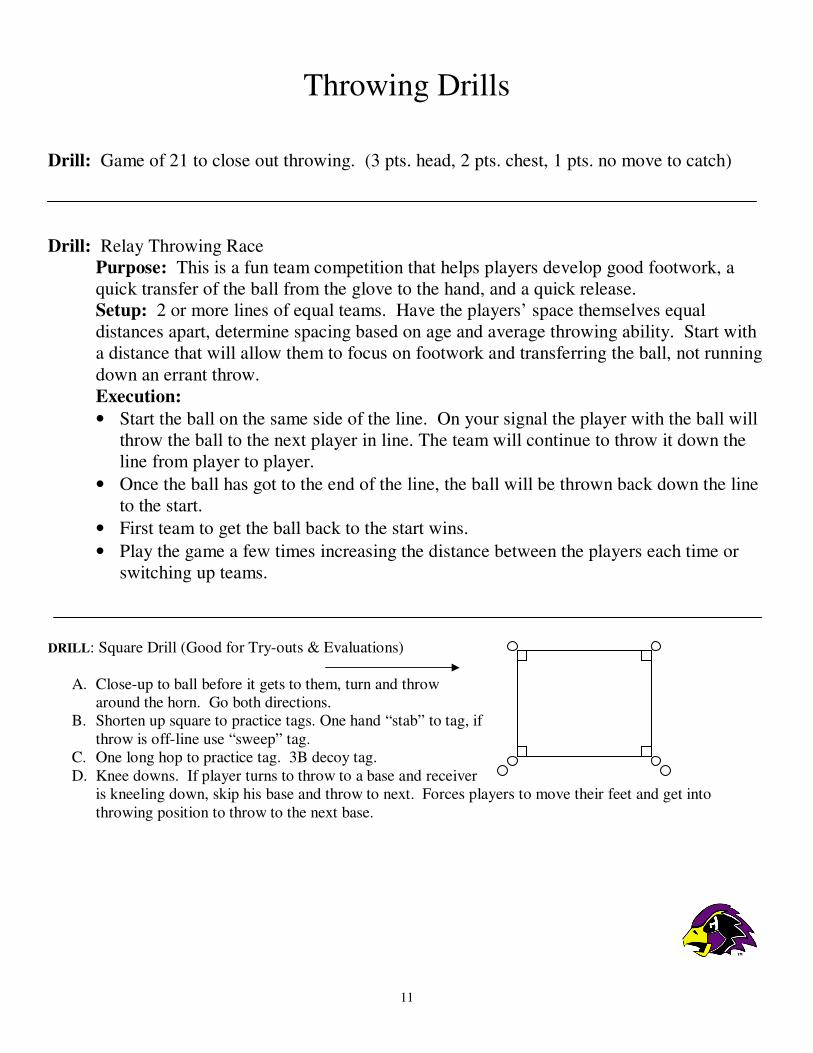
DRILL: Square Drill (Good for Try-outs & Evaluations)
A. Close-up to ball before it gets to them, turn and throw
around the horn. Go both directions.
B. Shorten up square to practice tags. One hand “stab” to tag, if
throw is off-line use “sweep” tag.
C. One long hop to practice tag. 3B decoy tag.
D. Knee downs. If player turns to throw to a base and receiver
is kneeling down, skip his base and throw to next. Forces players to move their feet and get into
throwing position to throw to the next base.
12
Pitch Counts
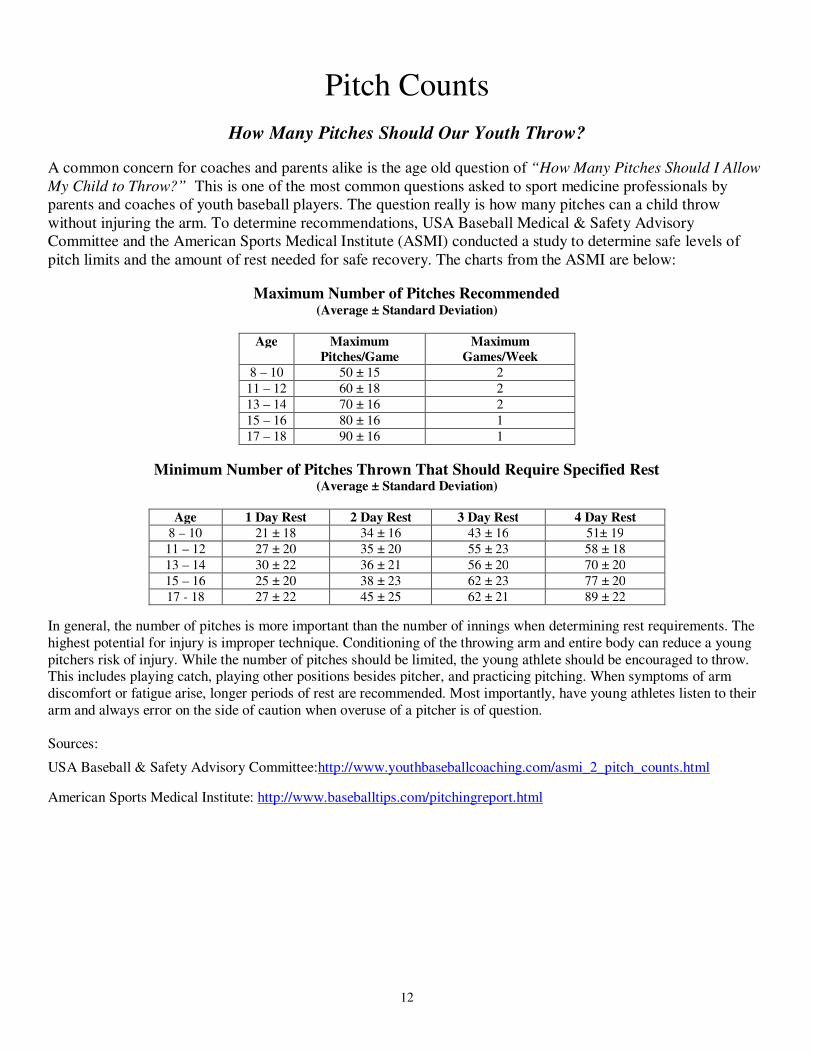
How Many Pitches Should Our Youth Throw?
A common concern for coaches and parents alike is the age old question of “How Many Pitches Should I Allow
My Child to Throw?” This is one of the most common questions asked to sport medicine professionals by
parents and coaches of youth baseball players. The question really is how many pitches can a child throw
without injuring the arm. To determine recommendations, USA Baseball Medical & Safety Advisory
Committee and the American Sports Medical Institute (ASMI) conducted a study to determine safe levels of
pitch limits and the amount of rest needed for safe recovery. The charts from the ASMI are below:
Maximum Number of Pitches Recommended (Average ± Standard Deviation)
Age Maximum
Pitches/Game
Maximum
Games/Week
8 – 10 50 ± 15 2
11 – 12 60 ± 18 2
13 – 14 70 ± 16 2
15 – 16 80 ± 16 1
17 – 18 90 ± 16 1
Minimum Number of Pitches Thrown That Should Require Specified Rest (Average ± Standard Deviation)
Age 1 Day Rest 2 Day Rest 3 Day Rest 4 Day Rest
8 – 10 21 ± 18 34 ± 16 43 ± 16 51± 19
11 – 12 27 ± 20 35 ± 20 55 ± 23 58 ± 18
13 – 14 30 ± 22 36 ± 21 56 ± 20 70 ± 20
15 – 16 25 ± 20 38 ± 23 62 ± 23 77 ± 20
17 - 18 27 ± 22 45 ± 25 62 ± 21 89 ± 22
In general, the number of pitches is more important than the number of innings when determining rest requirements. The
highest potential for injury is improper technique. Conditioning of the throwing arm and entire body can reduce a young
pitchers risk of injury. While the number of pitches should be limited, the young athlete should be encouraged to throw. This includes playing catch, playing other positions besides pitcher, and practicing pitching. When symptoms of arm
discomfort or fatigue arise, longer periods of rest are recommended. Most importantly, have young athletes listen to their
arm and always error on the side of caution when overuse of a pitcher is of question.
Sources:
USA Baseball & Safety Advisory Committee:http://www.youthbaseballcoaching.com/asmi_2_pitch_counts.html
American Sports Medical Institute: http://www.baseballtips.com/pitchingreport.html
13
Catching Priorities – Receive, Block, Throw, and Field I. Setup
a. Expand the outside portion of the plate
b. Stance without runner and with runners
c. Protect throwing hand
II. Receiving Drills i. Paddle (flip the ball to the catcher, make them deflect to center of plate)
ii. Bare Hand Drill – catch and frame with tennis balls
iii. 6 Ball Drill (Stand in front with 3 balls each. Catch barehanded & stick)
iv. Bullpens (always work on framing!)
III. Blocking Drills i. 3 Ball Drill.
• Set up in triangle (Middle, Left and Right)
• Use Blocking technique for all 3 balls
• Use the glove to stay low and lead the way!
ii. Regular partner blocking (after block, crawl to ball)
• Do a little everyday
• use tennis or soft balls
• Competition – goal is to use the chest.
• Inhale/exhale breathe to raise or lower shoulders.
iii. Mess up Drill
• Coach or player will randomly throw balls in dirt or strikes to the catcher.
• Catcher has to react to what’s in front of him. Either block, stick, or throwing
footwork if calls “runner”
IV. Throwing
a. Techniques / Philosophy
i. Butt must stay below ball
ii. Shoulder must be squared up with pitcher
iii. Transition / transfer
• glove angle
• misdirection
iv. Glove should never pass midline and get the ball out early
v. two step approach
b. Drills
i. Paddle walk through
ii. wall drills
iii. time them throwing once a week (time them glove to glove)
Walk out Drill 1. Just catch and bring in and walk out…(1-2)
2. catch, walk out and call up and down
3. catch, walk out and throw
14
FUNDAMENTALS OF INFIELD PLAY
CHARACTERISTICS OF A GOOD DEFENSIVE PLAYER
A. A sound defensive player:
1. Expects/ANTICIPATES the ball hit to him every pitch.
2. Knows/analyzes the situation every pitch.
3. Fields the ball on the big hop, down hop, and short hop.
4. Knows the physical abilities of all opponents.
5. Uses sound fundamentals in execution of every play.
6. Makes the routine play every time.
7. Leaves his offensive game in the dugout.
8. Always looks for another play.
9. Always keeps his feet moving.
B. A sound defensive player NEVER:
1. Compounds one mistake by making another.
2. Makes a throw when he has NO play.
3. Loses sight of the baseball.
4. Expects a good hop or a good throw.
5. Drops his head after making a mistake.
6. Gets back on his heels or stops moving his feet.
7. Leaves a base uncovered because of lack of hustle.
8. Turns a routine play into a tough play.
9. Assumes anything.
FIELDING GROUND BALLS PROGRESSION: A. Relax Position
1. Get a comfortable position. Things to think about: count, pitch, where to go with ball, all
situations!
B. Ready Position
1. Left foot slightly ahead of right (if right handed).
2. Athletic position (do not bend back, use legs).
3. Closer you are to plate, the lower you set up.
4. Hands out in front with elbow in, palm of glove to sky.
C. Approach
1. Try to work body momentum in the direction you will be throwing.
2. Lower body gradually while approaching the baseball (flatten back).
D. Fielding Position
1. Footwork is “Right-Left-Field” (R-L-Field).
2. Thigh is parallel to ground.
3. Bare hand fingers UP!
E. Throw
1. Footwork is R-L-Throw
2. If the ball is low stay low; if the ball is high stay high.
3. Open-Close-Throw.
15
FOUR TYPES OF GROUND BALLS
A. Ground Ball (routine)
1. Line up off of glove side shoulder on approach.
2. Keep hands out front with palm of glove to sky.
3. Glide to the ball keeping head level.
4. As you approach the ball, shorten your steps.
5. Feet are outside the shoulder-width, butt is down, back is flat, glove is out front of toes, and eyes
follow ball into glove.
6. Set the ball in front with both hands, bring hands to waist and stay strong to throw. Have top
hand fingers over glove and pointing to the sky until the ball enters the glove. Make the
exchange as soon as possible and prepare to throw.
7. Field through the ball, use a two step shuffle pointing glove side to target and throw.
B. Ground Ball (forehand)
1. First move is drop step, then crossover.
2. Angle back depending on the speed of the ball.
3. Keep head level at all times.
4. Sink to the ball the last few steps and lead with our glove. Bend your knees and take the glove
out to get the ball.
5. Catch the ball outside/in front of your left foot.
6. Look the ball in to your glove, pivot on the back hip and point the glove side shoulder to the
target and throw.
C. Ground Ball (backhand)
1. First move is drop step, then crossover.
2. Angle back depending on the speed of the ball.
3. Keep head level at all times.
4. Sink to the ball the last few steps and lead with our glove. Bend your knees and take the glove
out to get the ball.
5. Right foot lead for set-up backhand. Out of this, simply turn and throw with a weight shift to
your right foot.
6. Left foot lead for moving backhand. Your next step is big to stop momentum of your body.
Catch the ball out front and give with the ball. Turn to the target and throw.
D. Ground Ball (slow roller)
1. As you approach the ball, shorten your steps. Line up ball with left side.
2. If ball is rolling, use glove, if stopped, use bare hand.
3. Left foot leads when fielding the ball and throw when right foot hits the ground.
4. Throw from where you field the ball and to the outfield side of first base. The ball will tail back
to the base.
16
Infield Defensive Drills
Infield Glove work technique and warm-up: Make it competitive!
1. Knees: Short-hops and attack the ball.
2. Standing: Wide base and butts down as glove fields ball.
3. Forehand
4. Backhand
5. Roll ball back and forth.
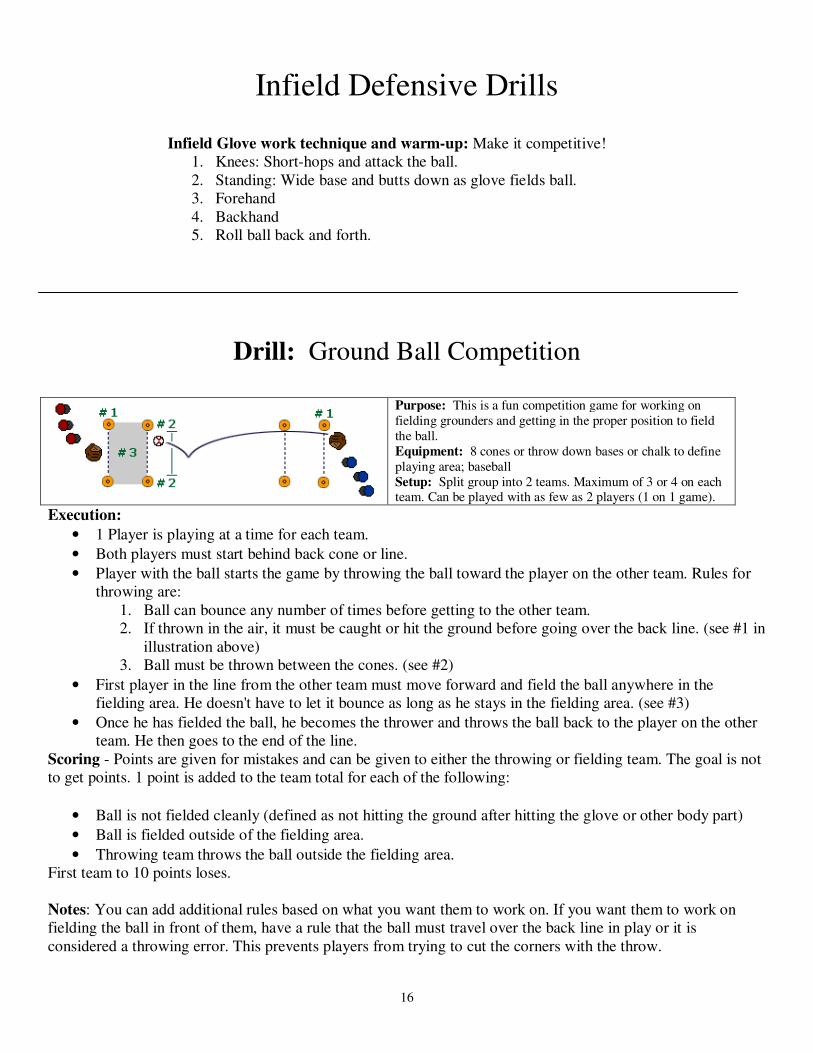
Drill: Ground Ball Competition
Purpose: This is a fun competition game for working on
fielding grounders and getting in the proper position to field
the ball.
Equipment: 8 cones or throw down bases or chalk to define
playing area; baseball
Setup: Split group into 2 teams. Maximum of 3 or 4 on each team. Can be played with as few as 2 players (1 on 1 game).
Execution:
• 1 Player is playing at a time for each team.
• Both players must start behind back cone or line.
• Player with the ball starts the game by throwing the ball toward the player on the other team. Rules for
throwing are:
1. Ball can bounce any number of times before getting to the other team.
2. If thrown in the air, it must be caught or hit the ground before going over the back line. (see #1 in
illustration above)
3. Ball must be thrown between the cones. (see #2)
• First player in the line from the other team must move forward and field the ball anywhere in the
fielding area. He doesn't have to let it bounce as long as he stays in the fielding area. (see #3)
• Once he has fielded the ball, he becomes the thrower and throws the ball back to the player on the other
team. He then goes to the end of the line.
Scoring - Points are given for mistakes and can be given to either the throwing or fielding team. The goal is not
to get points. 1 point is added to the team total for each of the following:
• Ball is not fielded cleanly (defined as not hitting the ground after hitting the glove or other body part)
• Ball is fielded outside of the fielding area.
• Throwing team throws the ball outside the fielding area.
First team to 10 points loses.
Notes: You can add additional rules based on what you want them to work on. If you want them to work on
fielding the ball in front of them, have a rule that the ball must travel over the back line in play or it is
considered a throwing error. This prevents players from trying to cut the corners with the throw.
17
Drill: Carnival Grounders
Purpose: Players get practice fielding grounders while moving toward the ball. Helps them concentrate on
fielding and making an accurate throw.
Equipment: balls and cones or other equipment to mark off starting and scoring area.
Setup: Players will start at a specific spot, outfield grass will work if you have it. Otherwise use a couple of
cones or something else to mark the starting spot.
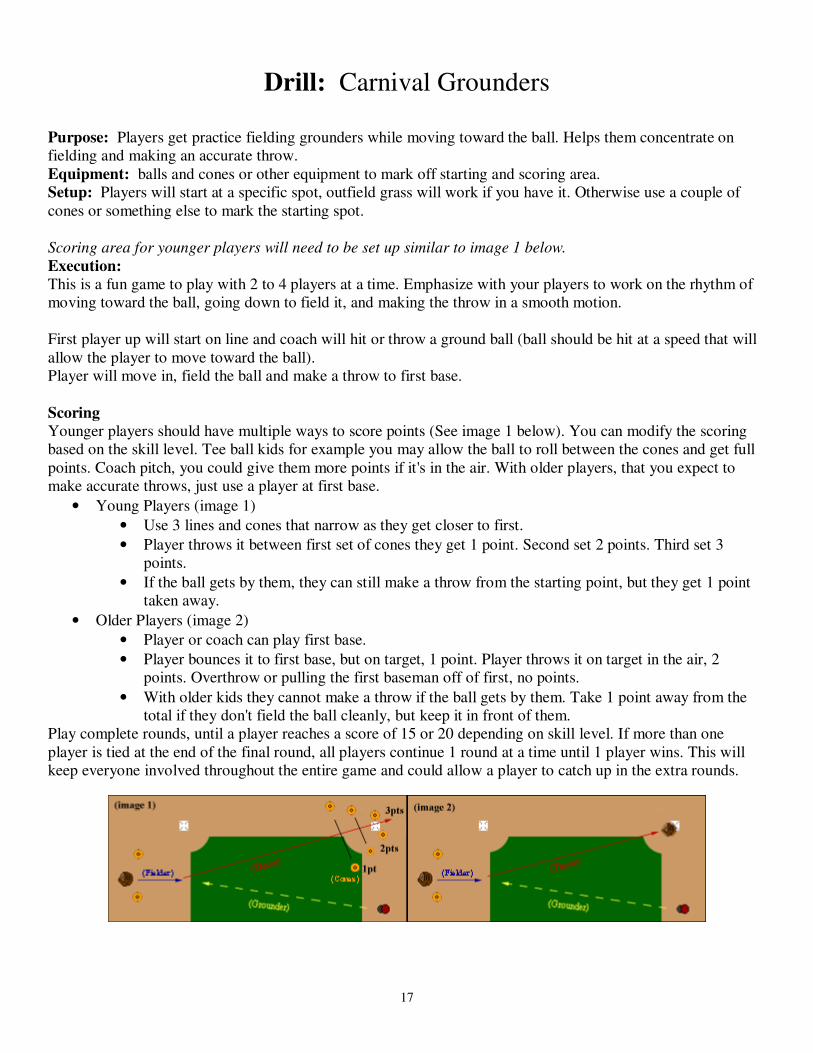
Scoring area for younger players will need to be set up similar to image 1 below.
Execution:
This is a fun game to play with 2 to 4 players at a time. Emphasize with your players to work on the rhythm of
moving toward the ball, going down to field it, and making the throw in a smooth motion.
First player up will start on line and coach will hit or throw a ground ball (ball should be hit at a speed that will
allow the player to move toward the ball).
Player will move in, field the ball and make a throw to first base.
Scoring
Younger players should have multiple ways to score points (See image 1 below). You can modify the scoring
based on the skill level. Tee ball kids for example you may allow the ball to roll between the cones and get full
points. Coach pitch, you could give them more points if it's in the air. With older players, that you expect to
make accurate throws, just use a player at first base.
• Young Players (image 1)
• Use 3 lines and cones that narrow as they get closer to first.
• Player throws it between first set of cones they get 1 point. Second set 2 points. Third set 3
points.
• If the ball gets by them, they can still make a throw from the starting point, but they get 1 point
taken away.
• Older Players (image 2)
• Player or coach can play first base.
• Player bounces it to first base, but on target, 1 point. Player throws it on target in the air, 2
points. Overthrow or pulling the first baseman off of first, no points.
• With older kids they cannot make a throw if the ball gets by them. Take 1 point away from the
total if they don't field the ball cleanly, but keep it in front of them.
Play complete rounds, until a player reaches a score of 15 or 20 depending on skill level. If more than one
player is tied at the end of the final round, all players continue 1 round at a time until 1 player wins. This will
keep everyone involved throughout the entire game and could allow a player to catch up in the extra rounds.
18
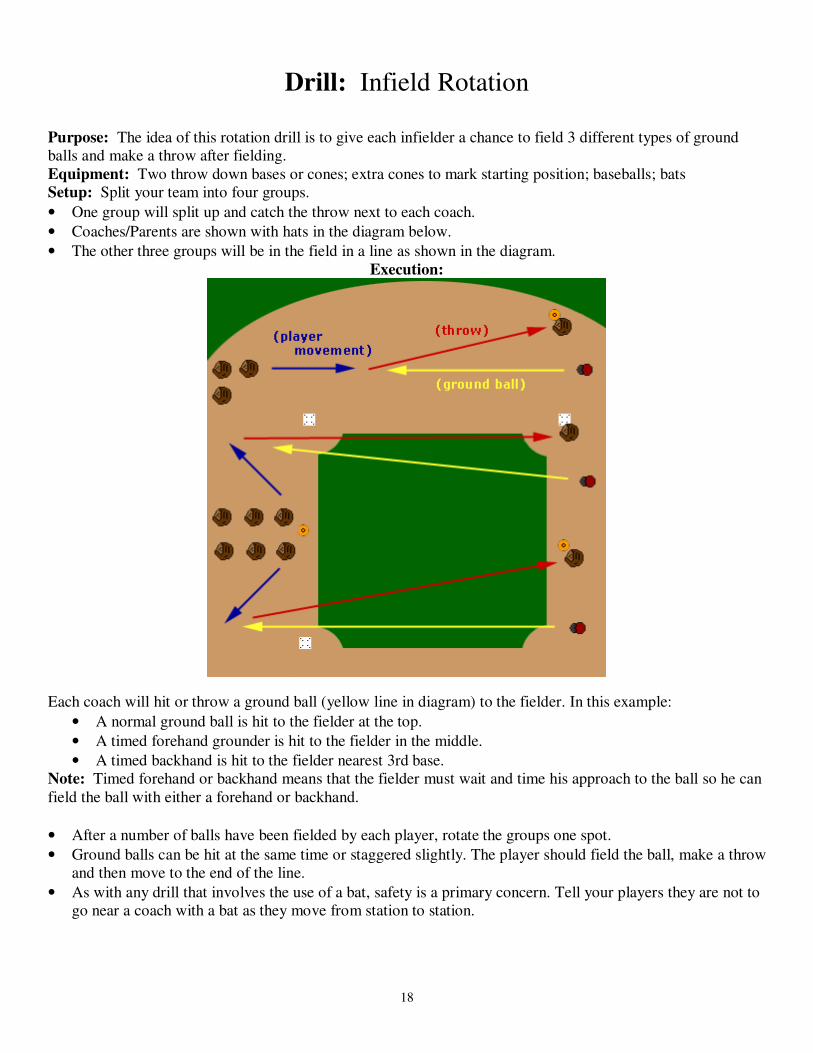
Drill: Infield Rotation
Purpose: The idea of this rotation drill is to give each infielder a chance to field 3 different types of ground
balls and make a throw after fielding.
Equipment: Two throw down bases or cones; extra cones to mark starting position; baseballs; bats
Setup: Split your team into four groups.
• One group will split up and catch the throw next to each coach.
• Coaches/Parents are shown with hats in the diagram below.
• The other three groups will be in the field in a line as shown in the diagram.
Execution:
Each coach will hit or throw a ground ball (yellow line in diagram) to the fielder. In this example:
• A normal ground ball is hit to the fielder at the top.
• A timed forehand grounder is hit to the fielder in the middle.
• A timed backhand is hit to the fielder nearest 3rd base.
Note: Timed forehand or backhand means that the fielder must wait and time his approach to the ball so he can
field the ball with either a forehand or backhand.
• After a number of balls have been fielded by each player, rotate the groups one spot.
• Ground balls can be hit at the same time or staggered slightly. The player should field the ball, make a throw
and then move to the end of the line.
• As with any drill that involves the use of a bat, safety is a primary concern. Tell your players they are not to
go near a coach with a bat as they move from station to station.
19
More Infield Drills…
1. Bare hands Drill: Roll baseball back and forth with partner. Working on soft hands.
2. Flat Glove Drill: Roll ground ball (10’ apart) 10 times. R-L-FIELD. Quality not quantity. Switch.
3. Shuffle Drill: Roll baseball 3 feet to either side, receiver must “shuffle” feet to get into position.
4. Cross-over Drill: Partner rolls baseball 10 feet to either side with correct fielding technique.
5. Back Hand Drill: Partner rolls baseball 10 times to backhand side. Must cross-over step with emphasis on
keeping glove open (turn thumb).
6. Soft Hand Drill: Partner will throw a one hopper in front of fielder. Emphasis is bringing hands out-up-in.
7. Wrong Foot Drill: Fielders will charge very slowly rolling baseball. Emphasis is on proper technique of
picking ball up with bare hand and throwing off wrong foot (do this with glove and without).
10. INFIELD GROUND BALL DRILLS: (two fungo hitters)
A. 5-4-3 DP & 6-3
B. 4-6-3 DP & 5-3
C. 3-6-3 DP & 4 “Skip” throw to 3rd
, practice decoy
D. 6-5 backhand to 3B & 4-3 1B deep and run
to base. Chopper for 2b (charge).
E. 3-6 “Skip” throw to 3B &
Ground balls to 4.
NOTE: Skip throw = fake DP throw to 1B,
Throw to 3B.
8. Twenty-one outs:
A. Game in which team must make 21 outs in a row. Have 9 defenders, the rest are baserunners.
20
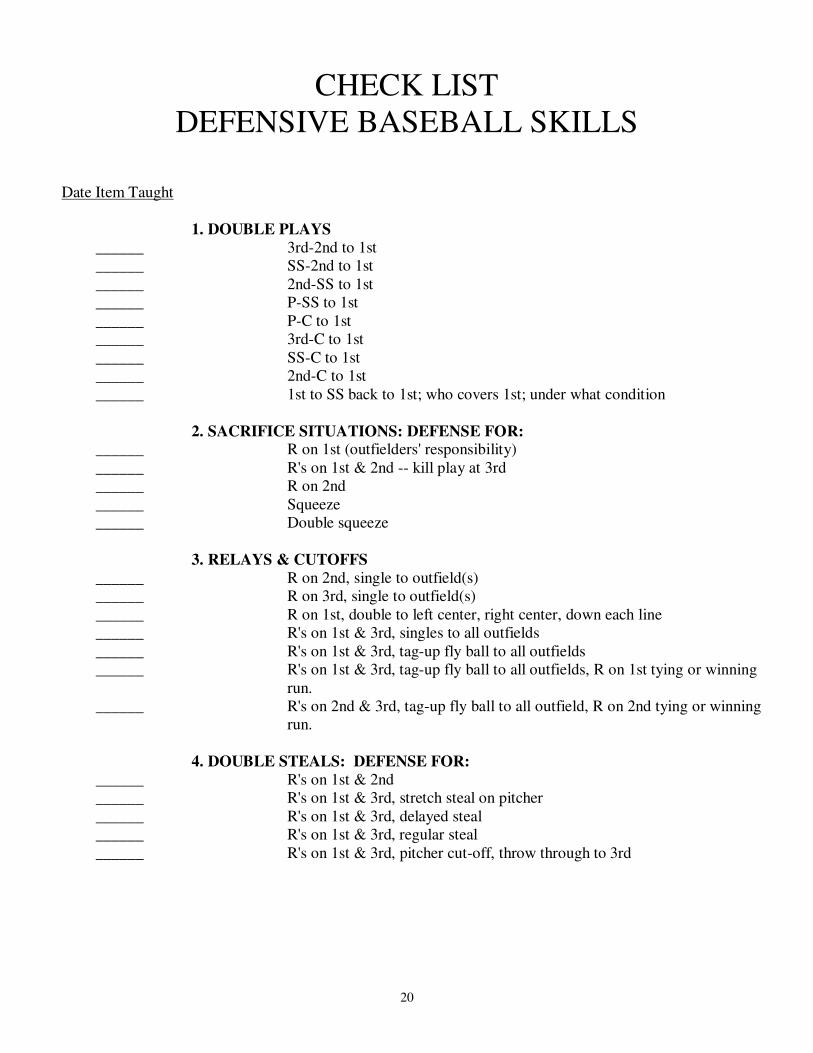
CHECK LIST
DEFENSIVE BASEBALL SKILLS Date Item Taught
1. DOUBLE PLAYS
______ 3rd-2nd to 1st
______ SS-2nd to 1st
______ 2nd-SS to 1st
______ P-SS to 1st
______ P-C to 1st
______ 3rd-C to 1st
______ SS-C to 1st
______ 2nd-C to 1st
______ 1st to SS back to 1st; who covers 1st; under what condition
2. SACRIFICE SITUATIONS: DEFENSE FOR: ______ R on 1st (outfielders' responsibility)
______ R's on 1st & 2nd -- kill play at 3rd
______ R on 2nd
______ Squeeze
______ Double squeeze
3. RELAYS & CUTOFFS
______ R on 2nd, single to outfield(s)
______ R on 3rd, single to outfield(s)
______ R on 1st, double to left center, right center, down each line
______ R's on 1st & 3rd, singles to all outfields
______ R's on 1st & 3rd, tag-up fly ball to all outfields
______ R's on 1st & 3rd, tag-up fly ball to all outfields, R on 1st tying or winning
run.
______ R's on 2nd & 3rd, tag-up fly ball to all outfield, R on 2nd tying or winning
run.
4. DOUBLE STEALS: DEFENSE FOR:
______ R's on 1st & 2nd
______ R's on 1st & 3rd, stretch steal on pitcher
______ R's on 1st & 3rd, delayed steal
______ R's on 1st & 3rd, regular steal
______ R's on 1st & 3rd, pitcher cut-off, throw through to 3rd
21
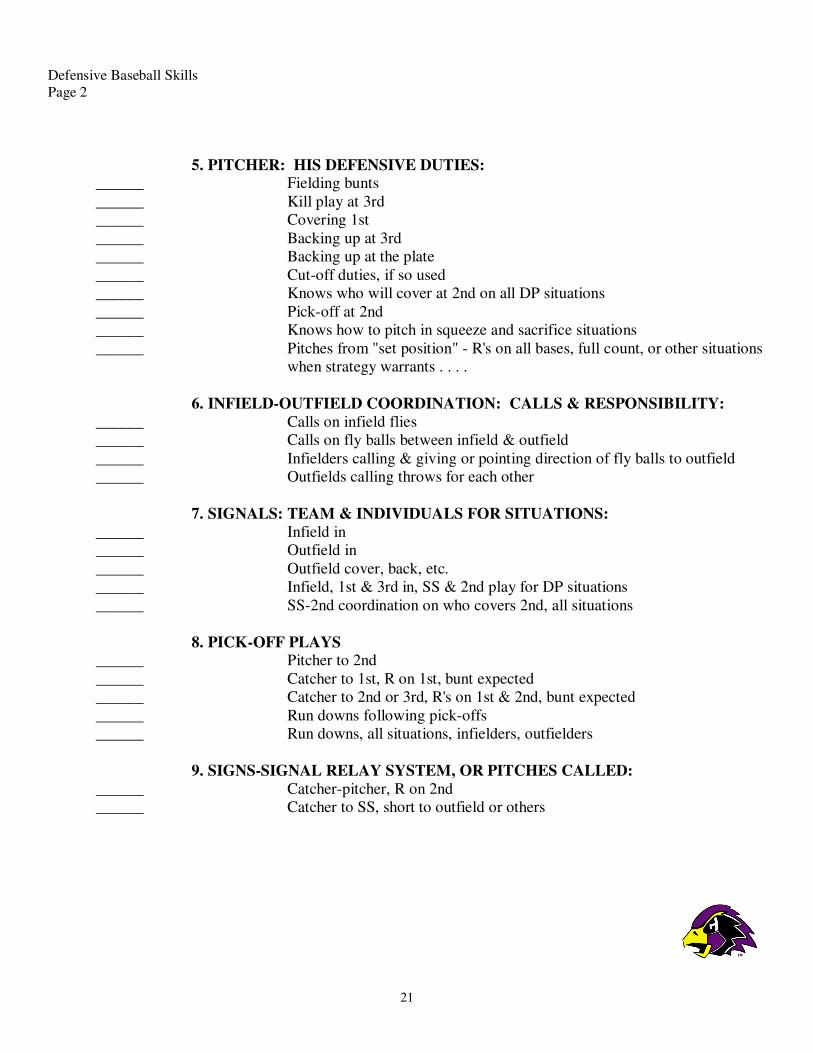
Defensive Baseball Skills
Page 2
5. PITCHER: HIS DEFENSIVE DUTIES: ______ Fielding bunts
______ Kill play at 3rd
______ Covering 1st
______ Backing up at 3rd
______ Backing up at the plate
______ Cut-off duties, if so used
______ Knows who will cover at 2nd on all DP situations
______ Pick-off at 2nd
______ Knows how to pitch in squeeze and sacrifice situations
______ Pitches from "set position" - R's on all bases, full count, or other situations
when strategy warrants . . . .
6. INFIELD-OUTFIELD COORDINATION: CALLS & RESPONSIBILITY:
______ Calls on infield flies
______ Calls on fly balls between infield & outfield
______ Infielders calling & giving or pointing direction of fly balls to outfield
______ Outfields calling throws for each other
7. SIGNALS: TEAM & INDIVIDUALS FOR SITUATIONS:
______ Infield in
______ Outfield in
______ Outfield cover, back, etc.
______ Infield, 1st & 3rd in, SS & 2nd play for DP situations
______ SS-2nd coordination on who covers 2nd, all situations
8. PICK-OFF PLAYS ______ Pitcher to 2nd
______ Catcher to 1st, R on 1st, bunt expected
______ Catcher to 2nd or 3rd, R's on 1st & 2nd, bunt expected
______ Run downs following pick-offs
______ Run downs, all situations, infielders, outfielders
9. SIGNS-SIGNAL RELAY SYSTEM, OR PITCHES CALLED:
______ Catcher-pitcher, R on 2nd
______ Catcher to SS, short to outfield or others
22
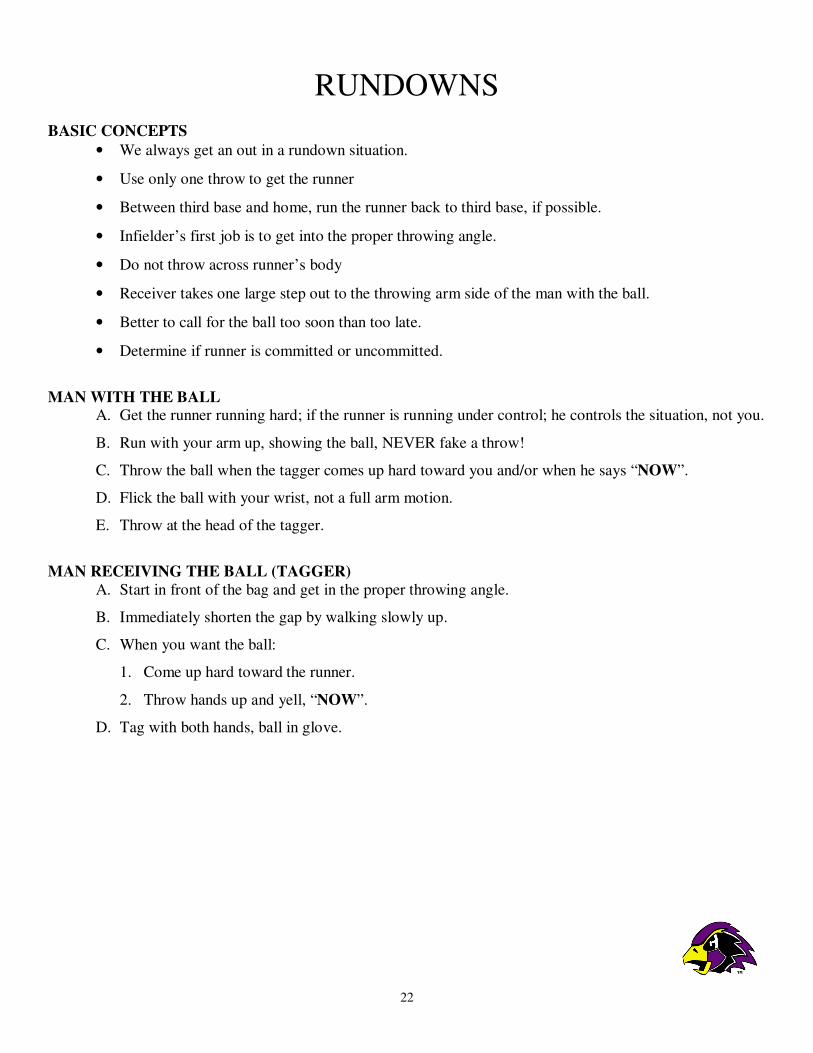
RUNDOWNS
BASIC CONCEPTS
• We always get an out in a rundown situation.
• Use only one throw to get the runner
• Between third base and home, run the runner back to third base, if possible.
• Infielder’s first job is to get into the proper throwing angle.
• Do not throw across runner’s body
• Receiver takes one large step out to the throwing arm side of the man with the ball.
• Better to call for the ball too soon than too late.
• Determine if runner is committed or uncommitted.
MAN WITH THE BALL A. Get the runner running hard; if the runner is running under control; he controls the situation, not you.
B. Run with your arm up, showing the ball, NEVER fake a throw!
C. Throw the ball when the tagger comes up hard toward you and/or when he says “NOW”.
D. Flick the ball with your wrist, not a full arm motion.
E. Throw at the head of the tagger.
MAN RECEIVING THE BALL (TAGGER)
A. Start in front of the bag and get in the proper throwing angle.
B. Immediately shorten the gap by walking slowly up.
C. When you want the ball:
1. Come up hard toward the runner.
2. Throw hands up and yell, “NOW”.
D. Tag with both hands, ball in glove.
23
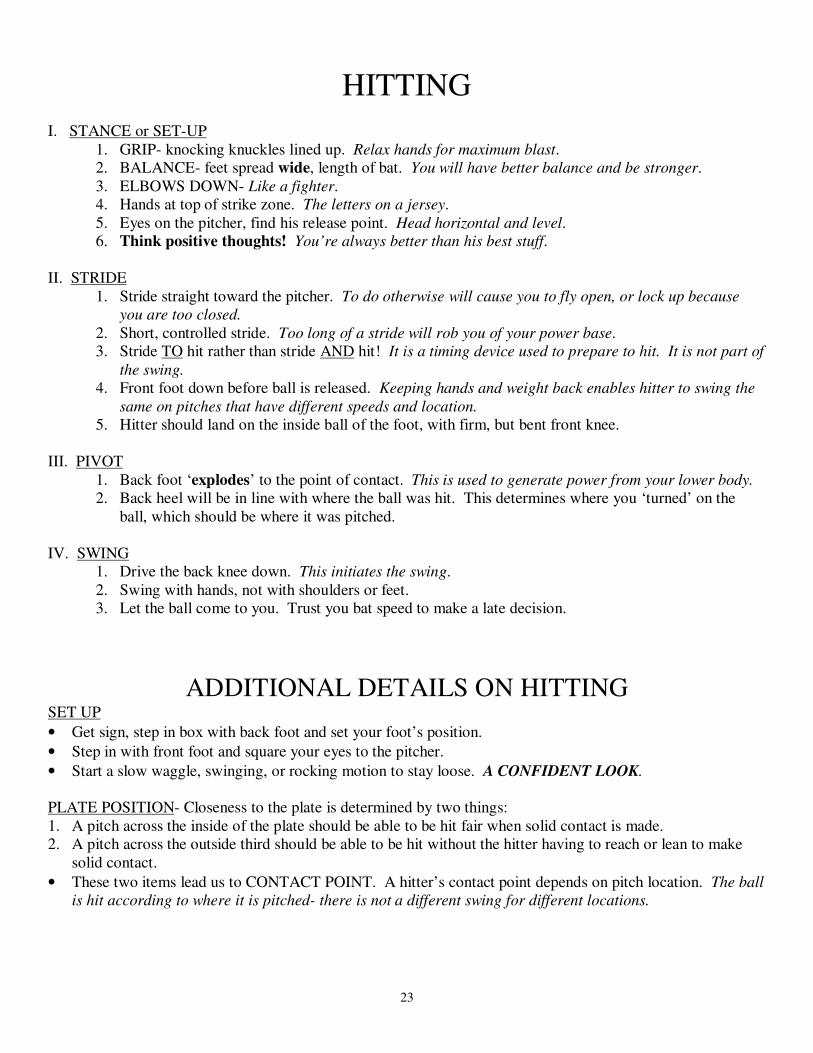
HITTING
I. STANCE or SET-UP
1. GRIP- knocking knuckles lined up. Relax hands for maximum blast.
2. BALANCE- feet spread wide, length of bat. You will have better balance and be stronger.
3. ELBOWS DOWN- Like a fighter.
4. Hands at top of strike zone. The letters on a jersey.
5. Eyes on the pitcher, find his release point. Head horizontal and level.
6. Think positive thoughts! You’re always better than his best stuff.
II. STRIDE
1. Stride straight toward the pitcher. To do otherwise will cause you to fly open, or lock up because
you are too closed.
2. Short, controlled stride. Too long of a stride will rob you of your power base.
3. Stride TO hit rather than stride AND hit! It is a timing device used to prepare to hit. It is not part of
the swing.
4. Front foot down before ball is released. Keeping hands and weight back enables hitter to swing the
same on pitches that have different speeds and location.
5. Hitter should land on the inside ball of the foot, with firm, but bent front knee.
III. PIVOT
1. Back foot ‘explodes’ to the point of contact. This is used to generate power from your lower body.
2. Back heel will be in line with where the ball was hit. This determines where you ‘turned’ on the
ball, which should be where it was pitched.
IV. SWING
1. Drive the back knee down. This initiates the swing.
2. Swing with hands, not with shoulders or feet.
3. Let the ball come to you. Trust you bat speed to make a late decision.
ADDITIONAL DETAILS ON HITTING SET UP
• Get sign, step in box with back foot and set your foot’s position.
• Step in with front foot and square your eyes to the pitcher.
• Start a slow waggle, swinging, or rocking motion to stay loose. A CONFIDENT LOOK.
PLATE POSITION- Closeness to the plate is determined by two things:
1. A pitch across the inside of the plate should be able to be hit fair when solid contact is made.
2. A pitch across the outside third should be able to be hit without the hitter having to reach or lean to make
solid contact.
• These two items lead us to CONTACT POINT. A hitter’s contact point depends on pitch location. The ball
is hit according to where it is pitched- there is not a different swing for different locations.
24
TRIGGER
1. Definition: Anything that gets weight back and centered on the inside of your back foot, with your hands
back and in a strong hitting position.
2. Common triggers are:
a. Hands go back and up on the stride, with a slight inward rotation on the front foot.
b. The front knee initiates an inward rotation of the front side.
3. As you stride your hands move slightly back and up.
4. Your head still remains quiet.
WEIGHT SHIFT
1. On the trigger, weight is shifted to the inside of the back leg. Back leg is bent, but firm as it “catches” your
weight shift.
2. Weight shift forward stops with the planting of the front heel and the beginning of the swing.
GENERAL PHILOSOPHY
• Strive for high well-hit average.
• Be aggressive early in the count!
• Strive for high OB%- more walks than K’s.
• Our ability to hit the ball to ALL fields will sustain big innings.
• HUSTLE all the time.
• Look for the extra base at all times after you hit!
• When you are at the plate: Know what you are doing, why you are doing it, and then master it!
“The will to win is nothing unless you have the will to prepare”
25
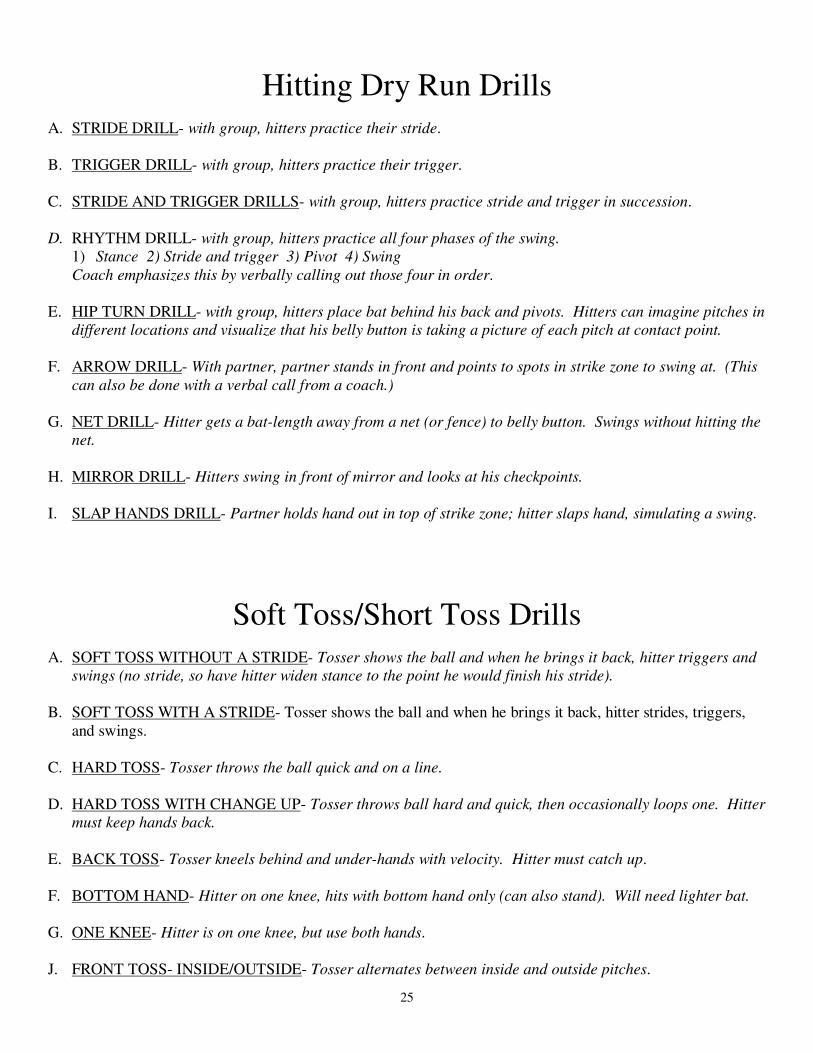
Hitting Dry Run Drills
A. STRIDE DRILL- with group, hitters practice their stride.
B. TRIGGER DRILL- with group, hitters practice their trigger.
C. STRIDE AND TRIGGER DRILLS- with group, hitters practice stride and trigger in succession.
D. RHYTHM DRILL- with group, hitters practice all four phases of the swing.
1) Stance 2) Stride and trigger 3) Pivot 4) Swing
Coach emphasizes this by verbally calling out those four in order.
E. HIP TURN DRILL- with group, hitters place bat behind his back and pivots. Hitters can imagine pitches in
different locations and visualize that his belly button is taking a picture of each pitch at contact point.
F. ARROW DRILL- With partner, partner stands in front and points to spots in strike zone to swing at. (This
can also be done with a verbal call from a coach.)
G. NET DRILL- Hitter gets a bat-length away from a net (or fence) to belly button. Swings without hitting the
net.
H. MIRROR DRILL- Hitters swing in front of mirror and looks at his checkpoints.
I. SLAP HANDS DRILL- Partner holds hand out in top of strike zone; hitter slaps hand, simulating a swing.
Soft Toss/Short Toss Drills
A. SOFT TOSS WITHOUT A STRIDE- Tosser shows the ball and when he brings it back, hitter triggers and
swings (no stride, so have hitter widen stance to the point he would finish his stride).
B. SOFT TOSS WITH A STRIDE- Tosser shows the ball and when he brings it back, hitter strides, triggers,
and swings.
C. HARD TOSS- Tosser throws the ball quick and on a line.
D. HARD TOSS WITH CHANGE UP- Tosser throws ball hard and quick, then occasionally loops one. Hitter
must keep hands back.
E. BACK TOSS- Tosser kneels behind and under-hands with velocity. Hitter must catch up.
F. BOTTOM HAND- Hitter on one knee, hits with bottom hand only (can also stand). Will need lighter bat.
G. ONE KNEE- Hitter is on one knee, but use both hands.
J. FRONT TOSS- INSIDE/OUTSIDE- Tosser alternates between inside and outside pitches.

26
K. LAG BAT DRILL (WATCHDOG)- Hitter has post on side of him, if hitter loops he hits the post.
L. BOUNCE DRILL- Instead of tossing ball, bounce (hard floor or off brick) a tennis ball to hitter. Works on
staying back.
M. DROP DRILL- Partner stands on a chair and drops ball onto the middle of the plate. Drop the ball when
the hitter strides and triggers.
N. REVERSE TOSS DRILL- Tosser kneels just behind the hitter. Makes a firm toss to the back corner of the
plate, forcing the hitter to go the other way.
O. OPPOSITE BP WITH BIRDIES- Pitcher stands just off center of the mound. Throws birdies to the outside
third of the plate, forcing the hitter to go the other way.
P. MATTINGLY DRILL- Partner gives the hitter a high toss. Hitter must get on top and drive the ball into
the middle of the net.
Q. RAPID FIRE DRILL- Partner feeds five (ONLY FIVE) balls to the hitter in a very fast action, one right
after another.
TEE DRILLS
A. STANDARD- Hitter always looks out at a pitcher and tracks ball down to the tee (visualize).
B. OPPOSITE FIELD- Line up tee with belly bottom and outside third of the plate.
C. INSIDE/OUTSIDE DRILL- Balls on two tees, partner calls inside or outside just after trigger.
D. PULL DRILL- Line up tee with front foot at the stride position and inner third of the plate.
E. EXTENSION DRILL- using a double tee, two tees of the same height are placed in line. Hitter tries to
drive through both balls.
F. CLEMENTE DRILL- On backside knee use a short tee and drive ball using the hands.
27
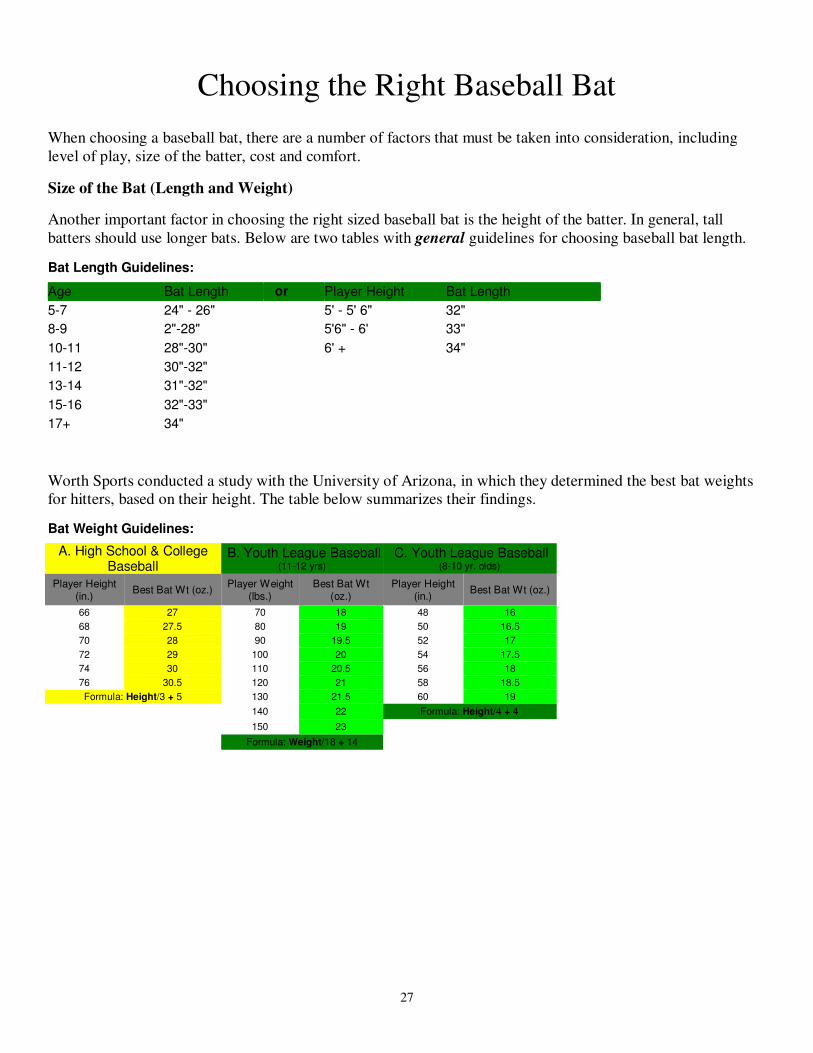
Choosing the Right Baseball Bat
When choosing a baseball bat, there are a number of factors that must be taken into consideration, including
level of play, size of the batter, cost and comfort.
Size of the Bat (Length and Weight)
Another important factor in choosing the right sized baseball bat is the height of the batter. In general, tall
batters should use longer bats. Below are two tables with general guidelines for choosing baseball bat length.
Bat Length Guidelines:
Age Bat Length or Player Height Bat Length
5-7 24" - 26" 5' - 5' 6" 32"
8-9 2"-28" 5'6" - 6' 33"
10-11 28"-30" 6' + 34"
11-12 30"-32"
13-14 31"-32"
15-16 32"-33"
17+ 34"
Worth Sports conducted a study with the University of Arizona, in which they determined the best bat weights
for hitters, based on their height. The table below summarizes their findings.
Bat Weight Guidelines:
A. High School & College Baseball
B. Youth League Baseball (11-12 yrs)
C. Youth League Baseball (8-10 yr. olds)
Player Height (in.)
Best Bat Wt (oz.) Player Weight
(lbs.) Best Bat Wt
(oz.) Player Height
(in.) Best Bat Wt (oz.)
66 27 70 18 48 16 68 27.5 80 19 50 16.5 70 28 90 19.5 52 17 72 29 100 20 54 17.5 74 30 110 20.5 56 18 76 30.5 120 21 58 18.5 Formula: Height/3 + 5 130 21.5 60 19 140 22 Formula: Height/4 + 4
150 23 Formula: Weight/18 + 14
28
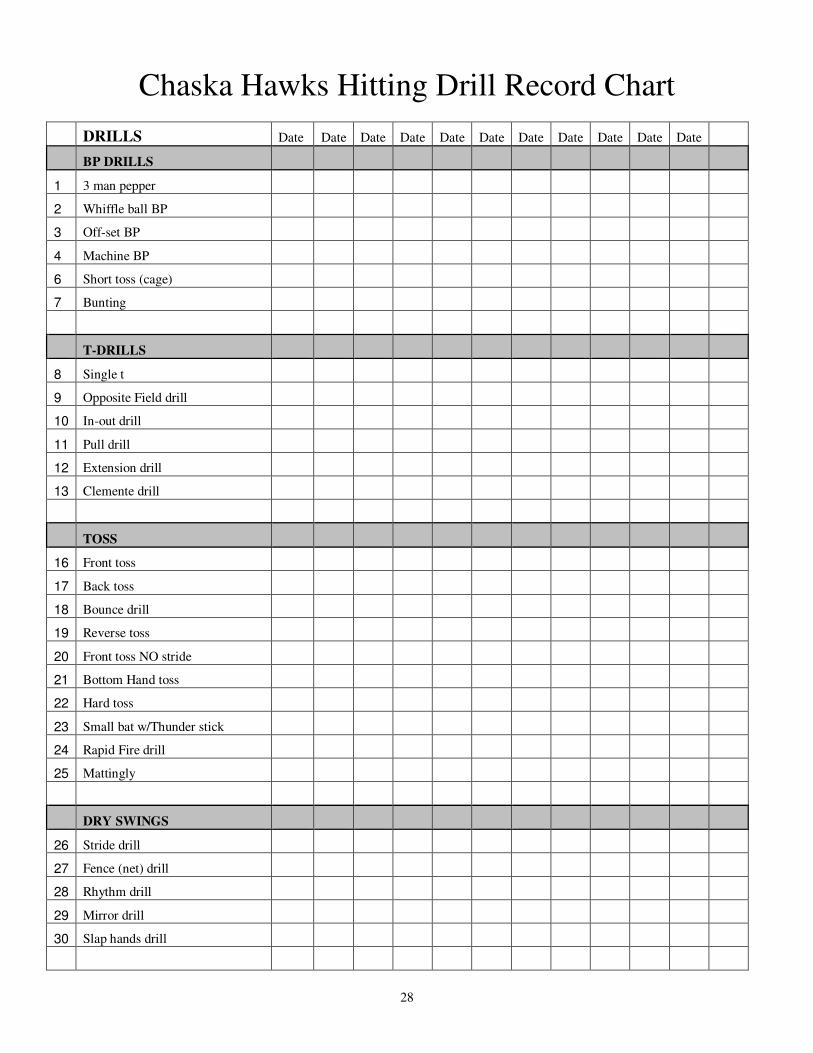
Chaska Hawks Hitting Drill Record Chart
DRILLS Date Date Date Date Date Date Date Date Date Date Date
BP DRILLS
1 3 man pepper
2 Whiffle ball BP
3 Off-set BP
4 Machine BP
6 Short toss (cage)
7 Bunting
T-DRILLS
8 Single t
9 Opposite Field drill
10 In-out drill
11 Pull drill
12 Extension drill
13 Clemente drill
TOSS
16 Front toss
17 Back toss
18 Bounce drill
19 Reverse toss
20 Front toss NO stride
21 Bottom Hand toss
22 Hard toss
23 Small bat w/Thunder stick
24 Rapid Fire drill
25 Mattingly
DRY SWINGS
26 Stride drill
27 Fence (net) drill
28 Rhythm drill
29 Mirror drill
30 Slap hands drill
29
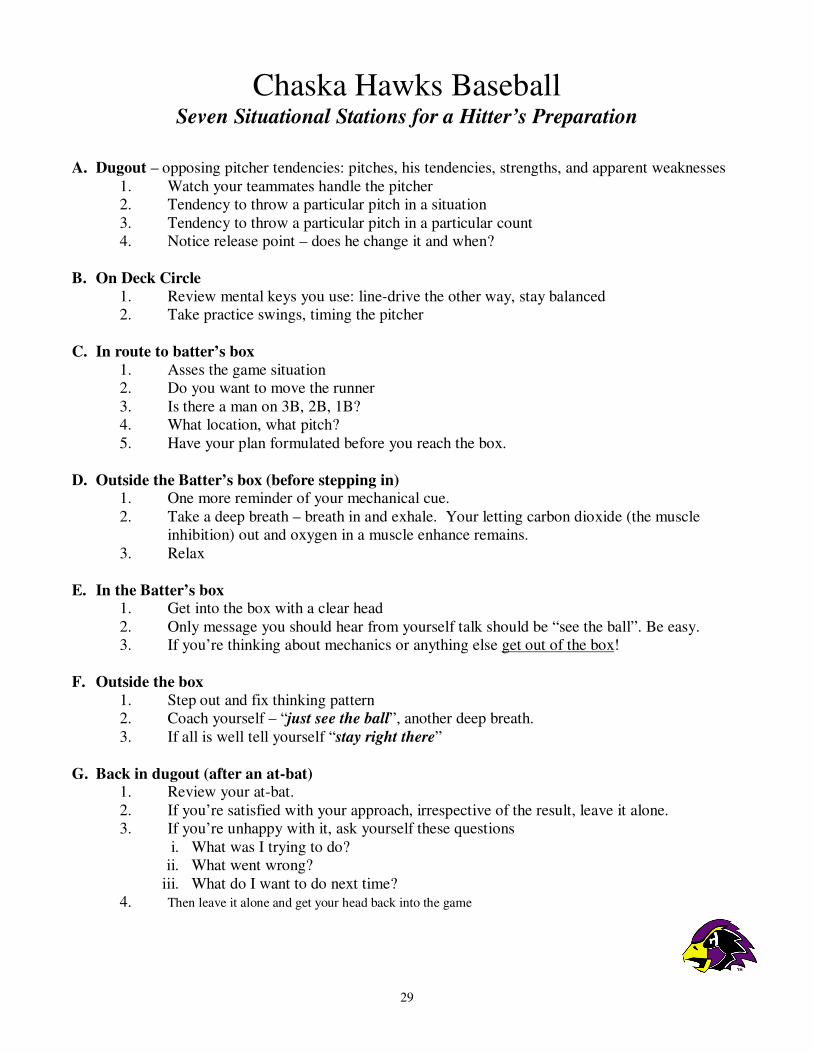
Chaska Hawks Baseball Seven Situational Stations for a Hitter’s Preparation
A. Dugout – opposing pitcher tendencies: pitches, his tendencies, strengths, and apparent weaknesses
1. Watch your teammates handle the pitcher
2. Tendency to throw a particular pitch in a situation
3. Tendency to throw a particular pitch in a particular count
4. Notice release point – does he change it and when?
B. On Deck Circle
1. Review mental keys you use: line-drive the other way, stay balanced
2. Take practice swings, timing the pitcher
C. In route to batter’s box
1. Asses the game situation
2. Do you want to move the runner
3. Is there a man on 3B, 2B, 1B?
4. What location, what pitch?
5. Have your plan formulated before you reach the box.
D. Outside the Batter’s box (before stepping in) 1. One more reminder of your mechanical cue.
2. Take a deep breath – breath in and exhale. Your letting carbon dioxide (the muscle
inhibition) out and oxygen in a muscle enhance remains.
3. Relax
E. In the Batter’s box 1. Get into the box with a clear head
2. Only message you should hear from yourself talk should be “see the ball”. Be easy.
3. If you’re thinking about mechanics or anything else get out of the box!
F. Outside the box
1. Step out and fix thinking pattern
2. Coach yourself – “just see the ball”, another deep breath.
3. If all is well tell yourself “stay right there”
G. Back in dugout (after an at-bat) 1. Review your at-bat.
2. If you’re satisfied with your approach, irrespective of the result, leave it alone.
3. If you’re unhappy with it, ask yourself these questions
i. What was I trying to do?
ii. What went wrong?
iii. What do I want to do next time?
4. Then leave it alone and get your head back into the game
30
Base Running
Base running defines the PERSONALITY of a baseball team. It is essential that we understand who we are and
that our PHILOSOPHY of how we play baseball is expressed through our base running.
• Our base running is AGGRESSIVE, we look to put PRESSURE on the defense, causing mistakes
and creating favorable offensive opportunities. To do this, we must PLAY HARDER than our
opponents and show them that!
• We ANTICIPATE situations and we always HUSTLE to ensure we are ready for any
OPPORTUNITY.
• In our system, the base runner is ACCOUNTABLE for his actions and he must use his own
JUDGEMENT to make good decisions.
• Good base running is a matter of CHARACTER; bad base running usually is a lack of
CONCENTRATION.
1. There are no excuses for missing a sign. If you missed a sign, ASK!
2. As soon as you reach base find the coach for signs.
3. Look for signs before you step into the batter’s box.
4. A move to first does not change or take off the signs.
Home Plate to 1B
I. THE 45 FOOT RETAINING LINE
A. The retaining line is marked halfway down the first baseline (double white lines).
B. The rule states that a runner must stay between, or within, the foul side of the retaining line, when
running to first base.
C. This rule usually comes into play on a bunt, or a slow roller out in front of home plate that is fielded
by the pitcher or catcher.
D. You are safe and the ball is still “live” if the throw hits you when you are running between the lines.
E. You are out and all runners go back to their bases if the throw hits you.
II. HIGH THROW FROM THE OUTFIELD
A. Make sure you always run hard out of the box after a base hit.
B. The throw from the outfielder going to home plate (or Middle infielders), read the ball out of his
hand.
C. High throw, keep going to second base.
D. Low throws, freeze and read the play.
E. When runners are in front of you on the bases, make sure they read the throw so you don’t run them
off a base.
F. Make the defense cut the throw to the plate if you need the run to score (good 2 out situation).
31
First Base Runner
I. BUNT PLAY
A. Be less aggressive on your secondary lead.
B. Do NOT anticipate a good bunt; make sure you see the ball roll down on the ground before you
break for second base.
C. Do NOT crossover with your feet until the ball is on the ground.
D. If the hitter makes a bad bunt, you’re going to be out at second.
E. Make sure you do your job, and do not get doubled up on at first on a bunted pop-up.
II. ONE-WAY LEAD VS. THE LEFT-HANDED PITCHER
• As the pitcher lifts his leg, your weight should be OBVIOUSLY on your left leg and lean back
towards first base. DO NOT get into your secondary lead until you are sure the ball is going to the
plate.
III. SECONDARY LEADS
A. When the pitcher starts to the plate, bounce three times so that your weight is on your right foot
when the ball is in the hitting zone. STAY LOW.
B. Do not cross your feet. Do not swing your arms.
C. The key is to not attract attention. Same secondary lead every time.
IV. STEALING MOTION
A. Create a “walking lead” to start your momentum
B. Left arm starts with a quick punch forward to turn the upper body toward second. The left leg drives
across the body in a quick, explosive crossover step. The arms are “on time” and working. This
immediately puts you into proper running position.
V. STANCE
A. Start from the basic athletic position.
B. Hands are loose and out in front of the body. The arms are at right (90 degree) angles.
C. Knees are slightly bent for good balance with your weight on the balls of your feet.
D. Feet are approximately shoulder-width apart, with an open stance facing towards second base. Your
front foot is slightly open. The back foot points straight ahead and is approximately a quarter step
behind the front.
VI. GETTING OFF THE BASE
A. Left-Right-Shuffle-Shuffle. Eyes on the pitcher! Further from the base use small shuffle steps.
B. Your lead should be in a direct line to second base from off the back edge of first base.
VII. GETTING BACK TO BASE
A. Go back on your stomach—get dirty!
VIII. THE LINE DRIVE
A. On infield line drives you must freeze and start back towards first.
B. On outfield line drives or fly balls, go as far as you can without getting doubled up. Do not plan 2B
unless you are positive the ball cannot be caught.
IX. SLOW ROLLER TO SECOND BASE
A. A slow ground ball is hit towards the second baseman. If the second baseman comes up into the
baseline to field the ball, stop. Make him turn the double play to second (4-6-3), or to first base (4-
3-6).
X. THIRD/FIRST FAKE
A. Base runners are on first and third bases.
B. If the first base runner takes off for second, make sure that the pitcher throws the ball to home, just
as in a hit-and-run situation.

32
First Base Runner/Left-Handed Pitcher Situations
I. LEAD OFF AND THE SECONDARY LEAD
A. One way lead. Your secondary lead starts when the LHP’s front foot hit the ground (two shuffles).
II. STEALING FIRST MOVE
A. You are reading the first move of the LHP’s right foot/leg.
B. Keep your head on the pitcher for your first three or four steps to protect from the glide step to
home. If he glide steps, stop, and keep your feet moving. DO NOT steal against the glide!
III. STEALING KEYS WITH A LEFT-HANDED PITCHER
A. Pitcher that looks at First vs. pitcher that looks toward Home: Many pitchers try to deceive the
runner by looking in the opposite direction in which they are going to throw. If he looks to First, he
is going to the plate, if he looks toward the plate, he is coming to first base.
B. High leg kick vs. low leg kick: The pitcher will kick low when he comes to first base. To get more
on his throw to the plate, he tends to kick higher.
C. Toe pointing down vs. toe pointing up: Another point to key in on is the direction the left-hander
points his lead foot on his kick. If his shoe is pointing down, he is coming to first base. If his toe is
pointing up, he is coming toward the plate.
D. Erect upper body vs. arching upper body: As the pitcher kicks, he will tilt his upper body to try to
deceive the runner. If his upper body is erect, he is going to the plate.
E. Breaking the plate: The plane of the rubber is an imaginary line running from the front edge of the
rubber to first base. Whenever any part of the left-hander’s right leg (foot, knee) breaks the “plane”,
the pitcher must go to the plate. If he kicks straight up and doesn’t break the plane, then he is
coming to first base.
F. Legs spread vs. legs closer together: When the pitcher is coming to first base, the legs will be spread
a little to try to deceive the runner. When he is going to the plate, he will have his legs closer
together which will enable him to drive toward the plate better. This gap will be noticed when he
kicks straight up. A good base runner will be able to detect the gap between the legs and not get
picked off First. Then when the legs are closer together, he will be able to get a good jump toward
Second.
G. Hands higher vs. hands lower: Some pitchers will lift their hands higher when they throw to first
base. When they throw to the plate the hands are a little lower and they tend to bring them back
more.
H. Big lead vs. short lead: One of the best ways to steal on a left hander is to try to deceive him by
getting a big lead (15 feet). As soon as he kicks, you go back toward first. The next step is to
shorten up and go on his first move. The pitcher usually thinks that he has you fooled and that you
are not going anywhere. You want to keep running toward Second even if he throws to First. It will
take two throws, two catches, and a tag to get you out. The only exception would be if the pitcher
made a quick throw to First, then you would read that and get back. Try to entice the pitcher to
throw over when you have the 15-foot one-way lead. Lefties seldom throw over twice unless they
have an outstanding move.
33
First Base Runner/Stealing Keys against a Right-Handed Pitcher
A. Lifting right heel vs. left heel: If he picks up his right heel he is coming to first base. If he picks up
his left heel, he is going to the plate.
B. Cap bill pointing down vs. cap bill pointing up: If his cap bill is pointing down, then he is going to
the plate. If his cap bill is pointing up, he is coming to first base. Also, you will find that some
pitchers will fake their head up and down several times before they throw to the plate. If you find
them doing a certain amount every time, then you just count and then go.
C. Open shoulder vs. closed shoulder: If he comes set with an open shoulder you have an advantage.
Then when he moves it in he must go to the plate. Some pitchers will close their shoulder a little
when they come to first or vice versa.
D. Front elbow: When the front elbow opens up he is coming to first base. When the front elbow closes
or tucks in, he is going to the plate.
E. Shoulder leaner: Usually a pitcher that has a low leg kick will be a shoulder leaner. As soon as he
starts to lean toward the plate, you can get a great jump toward second. It may be a slight lean but
just enough to get a good jump.
F. Pitcher that throws from the top vs. pitcher that comes set: The pitcher that throws only from the top
of his stretch is an excellent pitcher to steal on. After he comes set you know that 99% of the time,
he never throws over. This allows you as a base runner to feel very confident; now you can study
his moves toward the plate.
G. Rhythm pitcher: Some pitchers will get in a certain rhythm and you will be able to count 1001,
1002,…, then break toward second simultaneously with him as he moves toward the plate.
H. Pitcher looking toward third base vs. pitcher looking toward the plate: Some pitchers will always
look toward third base before they throw to first base. Then they will look toward the plate and
always go to the plate without exception. Sometimes they will look to the plate and when they want
to try to pick-off, they will look toward Third before coming to First.
I. BALL IN THE DIRT
A. Follow the ball out of the pitcher’s hand. Read the path of the ball, ANY pitch that is thrown down
near home plate – GO!
B. You must have a good, aggressive secondary lead. If you do not, you will not have the momentum
you’ll need to take the extra base.
C. ANTICIPATE the ball in the dirt. The count…is this a situation for a breaking ball?
D. Blocking a pitch, then getting up on his feet quickly, and making a throw is difficult for a catcher;
WE WILL TAKE ADVANTAGE OF THIS!
II. DELAY STEAL
A. Do not need a great jump.
B. Initial lead. When the pitcher goes to the plate, base runner takes a HOP HOP HOP (3 good hops)
and then runs to second base.
C. The key is to NOT be too quick on the hops. We play this like our normal secondary lead, only run
after the hops.
D. If we leave too early, they will throw us out by 10 feet.
34
The Second Base Runner
I. THE LEAD FROM THE BASE
A. Lead as far enough so that no matter what the pitcher or middle infielders do you can always dive
back safe.
B. Keep your eyes focused on the pitcher. He has the ball and is the only one that can pick you off.
C. Once initial lead is taken, do not jump around. Just watch the pitcher
II. SECONDARY LEAD OFF 2B
A. After pitch is delivered, turn hips and start to run to 3B. When the ball is in the strike zone you
should be landing on your right foot and reading the play.
B. Deepen lead with two outs to get a better angle to score
C. Ground ball rule: ball at you or to your left – GO!
III. BALL IN THE DIRT
A. This is a good spot to READ the pitch. Behind the pitcher, you can read the ball going in a
downward angle. IF you read the ball in the dirt – GO!
IV. TWO OUTS/TWO STRIKES
A. Runner on 2B. Two outs and two strikes on the hitter.
B. Once the hitter starts swinging his bat downward into the contact zone, start your break for third
base.
• Three things will happen on the pitch:
1. The ball will be put into play.
2. The hitter will foul the ball off. Return to 2B
3. Hitter swings through the pitch for strike three and makes the third out.
Base Runner on Third
KEYS
1. Lead off foul – return in fair territory.
2. As pitch is being made, turn and walk down towards H-plate timing things so that your right foot
hits the ground as ball crosses plate (just like at 2B). That way you can push off and go back to third
or push off and go.
3. Freeze on line drive. Tag on anything off ground. If it falls you’ll score anyway.
4. Suicide squeeze: take normal initial lead. Break for plate when pitcher’s front foot is hitting ground
towards homeplate.
35
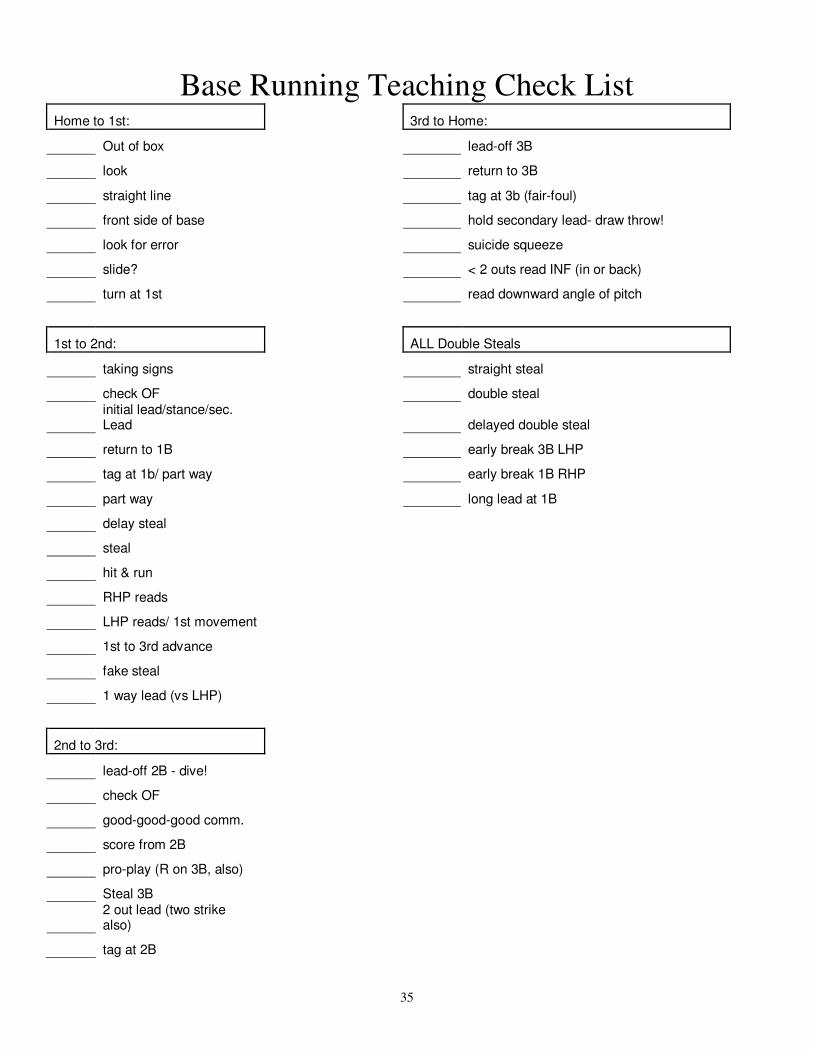
Base Running Teaching Check List Home to 1st: 3rd to Home:
Out of box lead-off 3B
look return to 3B
straight line tag at 3b (fair-foul)
front side of base hold secondary lead- draw throw!
look for error suicide squeeze
slide? < 2 outs read INF (in or back)
turn at 1st read downward angle of pitch
1st to 2nd: ALL Double Steals
taking signs straight steal
check OF double steal
initial lead/stance/sec. Lead delayed double steal
return to 1B early break 3B LHP
tag at 1b/ part way early break 1B RHP
part way long lead at 1B
delay steal
steal
hit & run
RHP reads
LHP reads/ 1st movement
1st to 3rd advance
fake steal
1 way lead (vs LHP)
2nd to 3rd:
lead-off 2B - dive!
check OF
good-good-good comm.
score from 2B
pro-play (R on 3B, also)
Steal 3B
2 out lead (two strike also)
tag at 2B
36
DOUBLE STEAL OFFENSE 1. Straight Steal
A. Runner at 1B steals 2B (optional or mandatory steal).
B. 3B runner extends lead with a 3-step fake break from 3B to try and freeze catcher.
2. Regular Double Steal
A. Runner at 1B steals 2B if he gets a jump.
B. Runner at 3B increases lead with pitch beyond a normal secondary lead and moves into line.
C. Runner at 3B steals home if catcher releases baseball to 2B. Do not wait to read defense after catcher
releases – just break for home.
3. Delayed Double Steal
A. Runner at 1B uses delay steal technique.
B. Runner at 3B increases lead with pitch and takes aggressive secondary lead. Look for the middle
infielders to be late for bag or bad feed by catcher to determine if you should try to steal from 3B.
4. Early Break from 3B – LHP
A. Both runners wait for LHP to get to set position and make eye contact with runner at 1B.
B. Runner at 3B breaks for home at the end of situation A above, and runner at 1B breaks for 2B.
C. LHP is facing runner at 1B and we are trying to get LHP to throw to 1B so runner at 3B can score if
defense plays on back runner. If you are an out, get in rundown and look for someone on defense to run
into for obstruction call.
D. Split second of indecision on the part of the pitcher may allow the runner from 1B to reach 2B and
runner from 3B to score.
E. IF pitcher goes to plate, runner at 3B must stop and retreat to 3B.
5. Early Break from 1B – RHP
A. Runner at 1B breaks when pitcher is in set position.
B. Runner at 3B increases lead when runner at 1B breaks and if pitcher turns to throw to 2B without
checking runner at 3B – he breaks for home.
C. If pitcher checks runner at 3B first, the back runner steals 2B.
6. First Movement Double Steal – LHP
A. Runner at 3B should take a long initial lead.
B. When LHP picks stride leg up (first movement), runner at 3B and 1B breaks for home and 2B. IF LHP
goes to 1B, we are trying to beat the relay from the 1B back to the catcher. If either runner is a sure out,
get in a run down.
C. IF pitcher goes to plate, runner at 3B must stop and retreat to 3B.
7. Long Lead at 1B – RHP
A. Runner at 1B takes extra long lead to draw throw from pitcher. If RHP steps off, get in a run down. We
want to create a run down situation and get defense to make a mistake or get an obstruction/interference
call.
B. Runner at 3B looks for the right situation to break for home during run down. Good time is when 2B or
SS release throw back to 1B man.
8. Fake Suicide Squeeze
A. Hitter fake bunts. 1B runner steals on pitch. 3B runner (starting close to 3B) fakes steal home. Catcher
will come up looking to throw to 3B, runner must be in position to dive back safely. Now we have
runners on 2nd
and 3rd
.
37
Practice Organization
Below you will find a generalized practice plan for a typical Chaska Hawks Baseball practice. See attached practice
plans for specific dates of last years first two weeks of practice.
1. Announcements
2. Warm-up Routine (see page 7)
3. Throwing Routine (see page 10)
4. Square Drill
5. Basic Throws
• Start with catcher (4)
• Call out base to throw ball to: C-2-1-4-3-1-2-4-repeat
6. Pre-Game Infield and Outfield
Relay and Cutoff Information
• Relay Man: SS or 2B go into outfield and receive a throw from OF on an extra base hit and
then “relay” that throw to 2nd
, 3rd
, or Home Plate.
• Cutoff Man: 1B, 3B, SS, 2nd
positions himself 30’ – 70’ from the base where the play will
occur and be in line with the throw from the OF. He will “cutoff” the throw if it is off target,
weak, too late. Then will complete throw or throw to another base where a runner is
attempting to advance.
7. Rundowns
8. Leads and Breaks
9. 3 line pickoffs (3 pitchers on the mound each going to a different base)
10. Team Defense
11. Team Offense
12. Batting Practice
Stations
1. Home plate (2 bunts, 5 swings, 4 swings, 3 swings)
2. Base running (react to ball off bat)
3. Defense (shag)
4. Defense (live off bat)
5. Batting Cage (drill work)
6. Pickle ball batting practice
7. Bunting (sacrifice, drag, suicide)
13. Closure/Clean-up
38
Chaska Hawks 2011
What will you do to win a Missota Conference Championship?
An elderly carpenter was ready to retire. He told his boss of his plans to leave the house-building business and
live a more leisurely life with his wife. He would miss the paycheck, but the time was right to retire. They
could get by.
The boss was sorry to see his good worker go and asked if he could build just one more house as a personal
favor. The carpenter said yes, but in time, it was easy to see his heart was not in his work. He resorted to
shoddy workmanship and used inferior materials. It was an unfortunate way to end a dedicated career.
When the carpenter finished his work, the boss came to inspect the house. He handed the front door key to the
carpenter. “This is your house,” he said, “my gift to you.” The carpenter was shocked! What a shame! If he
had only known he was building his own house, he would have done it all so differently.
So it is with us. We build our lives, a day at a time, often putting less than our best into the building. Then,
with a shock, we realize we have to live in the house we have built. If we could do it over, we’d do it much
differently. But we cannot go back.
You are a carpenter in everything you do. Each day you hammer a nail, place a board, or erect a wall. Life is a
do-it-yourself project. Your attitude and the choices you make today, build the “house” you live in tomorrow.
Build wisely!
Give 3 things you can improve upon in building your house!
Personally/socially as a member of this team: Your approach to the Game: