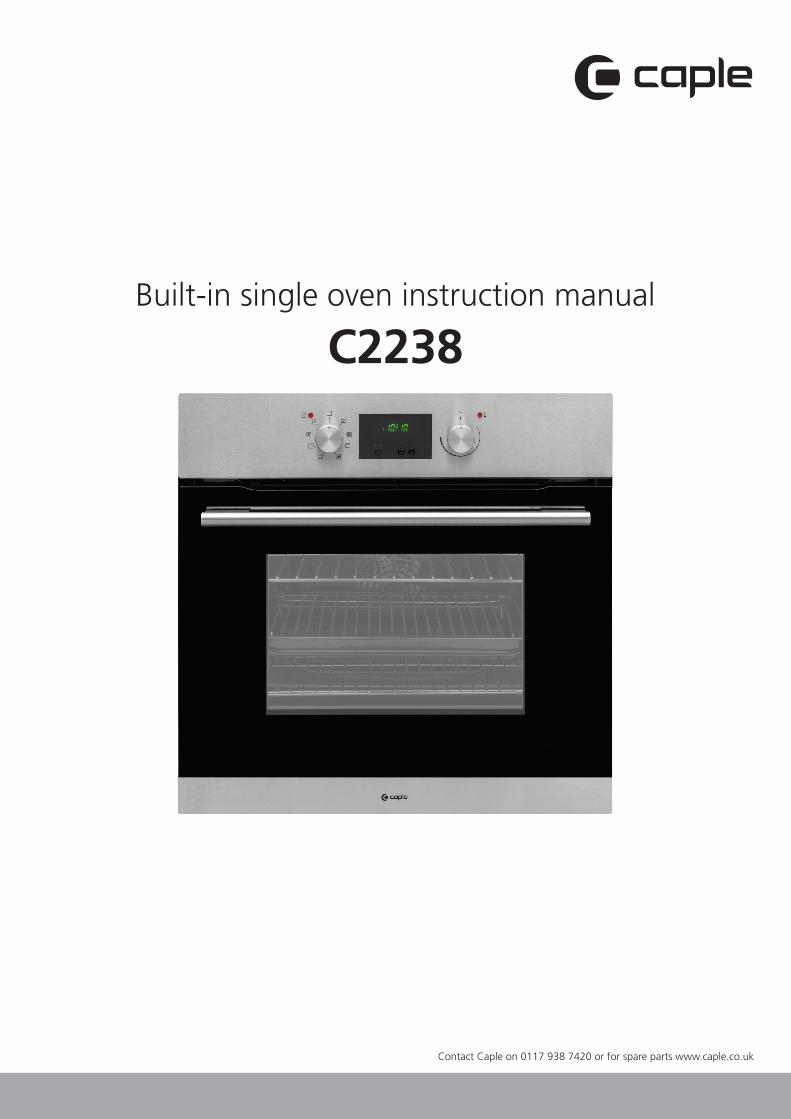
built-in single oven instruction manual c2238
TRANSCRIPT
Contact Caple on 0117 938 7420 or for spare parts www.caple.co.uk
Built-in single oven instruction manual
C2238
Instruction manual C22382
Please keep this instruction manual for future reference
CONTENTS
Safety instructions 3
Environmental protection 6
Preparation for installation and use 7
Oven installation 8
Maintenance and Cleaning 17
Troubleshooting 17
Transport 18
Caple Service contact details 20

Instruction manual C2238 3
Please keep this instruction manual for future reference
SAFETY INSTRUCTIONS Read these instructions carefully and completely before using your appliance, keep it in a convenient place for reference when necessary.
- This appliance can be used by children aged from 8 years and above.- Persons with reduced physical, sensory or mental capabilities or lack of
experience and knowledge must be supervised and given appropriate instruction concerning the use of the appliance in a safe way and understand the hazards involved.
- Children shall not play with the appliance.- Cleaning and user maintenance should not be carried out by children
without supervision.- The appliance is not intended to be operated by means of an external timer
or separate remote control system.
WARNING: - The appliance and its accessible parts become hot during use. Care should
be taken to avoid touching heating elements. - Children less than 8 years of age should be kept away unless continuously
supervised.- To prevent fire hazards do not store items on the cooking surfaces.- If the surface is cracked, switch off the appliance to avoid the possibility of
electric shock.
WARNING: - During use, handles can get hot.- Do not use harsh abrasive cleaners or sharp metal scrapers to clean the
oven door glass or any other surface of the appliance as it can scratch the surface which may result in the glass shattering or permanent damage to the surface.
- Do not use steam cleaners for cleaning the appliance.- Ensure the appliance is switched off before replacing the lamp to avoid the
possibility of electric shock.
CAUTION: - Accessible parts may be hot when the cooking or grilling is in use. Young
children should be kept away.- During pyrolytic options, excess spillage, oven shelves, shelf supports, wire
shelves and all accessories must be removed before cleaning.

Instruction manual C22384
Please keep this instruction manual for future reference
- Your appliance is produced in accordance with all applicable local and international standards and regulations.
- Maintenance and repair work must be made only by authorised Caple service technicians. Installation and repair work that is carried out by unauthorised technicians may endanger you.
- It is dangerous to alter or modify the specifications of the appliance in any way.
- Prior to installation, ensure that the local distribution conditions (electricity voltage and frequency) and the requirements of the appliance are compatible. The requirements for this appliance are stated on the rating label.
- This appliance is designed only for cooking food and is intended for indoor use.
- This product is not designed for commercial use, it is a household appliance only. It is not intended to be used in:
- Staff kitchen areas in shops, offices and other working environments. - Bed and breakfast type environments - By clients in hotels, motels and other residential type environments- Do not try to lift or move the appliance by pulling the door handle.- All possible security measures have been taken to ensure your safety.
Since the glass may break, you should be careful while cleaning to avoid scratching.
- Avoid hitting or knocking on the glass with accessories.- Ensure that the supply cord is not wedged during the installation. If the
supply cord is damaged, it must be replaced by a Caple service technician or similarly qualified persons in order to prevent a hazard.
- While the oven door is open, do not let children climb on the door or sit on it.
INSTALLATION WARNINGS- Do not operate the appliance before it is fully installed.- The appliance must be installed by an authorised technician. - Caple is not responsible for any damage that may be caused by defective
placement and installation by unauthorised persons.- When unpacking the appliance, make sure that it is not damaged during
transportation. In the case of any defect; do not use the appliance and contact your retailer or Caple Service immediately.
- Materials used for packaging (nylon, staplers, styrofoam etc) may cause harmful effects to children they should be disposed of immediately.
- Protect your appliance against atmospheric effects. Do not expose it to

Instruction manual C2238 5
Please keep this instruction manual for future reference
effects such as sun, rain, snow etc.- The surrounding materials of the appliance (i.e. kitchen cabinet or furniture)
must be able to withstand a minimum temperature of 90°C.
DURING USAGE- Heat the empty oven at max. temperature for 1 hour – removing any unpleasant smells
and smoke caused by working residues and thermal insulation. Make sure you do this in a well ventilated area.
- During usage, the outer and inner surfaces of the oven get hot. While opening the oven door, step back to avoid the hot steam coming out of the oven as there may be a risk of burns.
- Do not put flammable or combustible materials in or near the appliance when it is operating.
- Always use oven gloves to remove and replace food in the oven.- Pay close attention to the oven while cooking with solid or liquid oils as they could
potentially catch fire when oven is hot. - Never pour water on flames that are caused by oil. Cover the saucepan or frying pan
with its lid in order to choke the flame and turn the oven off.- If you know you will not be using the appliance for a while switch it off from the main
supply and unplug it.- Make sure the appliance control knobs are always in the ‘0’ (stop) position when it is
not used.- The oven shelves and trays incline when pulled out. Be careful not to let hot liquid spill
over.- When the door of the oven is open, do not leave anything on it. It may unbalance your
appliance or damage the door.- Do not put anything heavy, flammable or ignitable (nylon, plastic bag, paper or cloth
etc) into the oven. This includes cookware with plastic accessories (e.g. handles).Do not hang towels, dishcloths or clothes from the appliance or its handles.
DURING CLEANING AND MAINTENANCE- Always switch off the appliance from the mains isolating the electrical supply before
any cleaning or maintenance. - Do not remove the control knobs to clean the control panel.
To maintain the efficiency and safety of your appliance, we recommend you always use original spare parts and to call only our authorised Caple Service agents in case of need.
Instruction manual C22386
Please keep this instruction manual for future reference
ENVIRONMENTAL PROTECTIONWaste electrical products should not be disposed of with household waste. Please recycle where facilities exist. Check with your Local Authority or retailer for recycling advice.
This appliance is marked according to the European directive 2002/96/EC on Waste Electrical and Electronic Equipment (WEEE). By ensuring this product is disposed of correctly, you will help prevent potential negative consequences for the environment and human health, which could otherwise be caused by inappropriate waste handling of this product. The symbol on the product indicates that this product may not be treated as household waste. Instead it shall be handed over to the applicable collection point for the recycling of electrical and electronic equipment. Disposal must be carried out in accordance with local environmental regulations for waste disposal.
For more detailed information about treatment, recovery and recycling of this product, please contact your local council, your household waste disposal service or the retailer where you purchased the product.
WARRANTY Your new appliance is covered by warranty. The warranty card is enclosed - if it is missing, you must provide the following information to your retailer in order to receive a replacement: date of purchase, model and serial number (placed on the inside of the appliance storage drawer). Registration can also be completed online by visiting www.caple.co.uk.Ensure you keep your warranty card safe, you may need to show it to Caple Service together with proof of purchase. If you fail to show your warranty card you will incur all repair charges. Spare parts are only available from Caple Service and spare parts authorised centres.
ATTENTION- Before use, remove all plastic films protecting some parts of the appliance(fascia - panel, parts in stainless steel, etc)- Do not use the appliance to heat a room. - When the appliance is not in use, we recommend you turn it off, isolate it from the
electrical supply and ensure all gas taps are closed.
CE DECLARATIONS OF CONFORMITYThis appliance has been designed, constructed and marketed in compliance with safety requirements in force. This appliance has been manufactured to the strictest standards and complies with all applicable legislation.
Instruction manual C2238 7
Please keep this instruction manual for future reference
Preparation for installation and use
Manufactured with best quality parts and materials, this modern, functional and practical oven will meet your needs in all respects. Please read the manual thoroughly before use for best results to ensure you do not experience any problems in the future. The information in this manual outline the necessary procedures for correct positioning and service operations. They should be read without fail especially by the technician installing the appliance.Contact an authorised installer for the installation of your oven.
Choosing a place for the oven
There are several points to pay attention to when choosing a place for your oven. Make sure to take into account our recommendations in order to prevent any problems and dangerous situations, which might occur later
- When choosing a place for the oven, attention should be paid that there are no flammable or combustible materials in close vicinity, such as curtains, oil, cloth etc. which quickly catch fire.
- Furniture surrounding the oven must be made of materials resistant to heat of at least 90°C.
- The dimensions and materials in which the oven will be installed must be correct and resistant to increases in temperature. Installing the appliance in close vicinity of a refrigerator or freezer is not recommended as it may affect their performance due to emanating heat from the oven.
- Once positioned and packaging is removed, check the oven is in a good condition, if the oven is damaged do not use it and contact your retailer immediately.

Instruction manual C22388
Please keep this instruction manual for future reference
OVEN INSTALLATION
- Insert the oven by pushing it into the cabinet.
- Open the oven door and insert 2 screws in the holes located on the oven frame.
- While the product frame touches the wooden surface of cabinet, tighten the screws.
- If the oven is installed under a hob, the distance between the top surface of the worktop and the top panel of the oven must be a minimum of 50 mm and the distance between the top surface of the worktop and the top of control panel must be minimum 25 mm.
Wiring and safety
The instructions given below must be followed without fail during wiring:
- The earthing cable must be connected via the screw with the earthing mark. Supply cable connection must be as shown in Figure 2. If there is no earthed outlet conforming to regulations in the installation environment, call Caple Service immediately.
- The installation must include a suitable isolating switch with a minimum contact opening of 3mm between the appliance and the mains. The isolating switch should be sized according to the load on the rating plate and should comply with current regulations.
- The earthed outlet must be in close vicinity of the appliance. Never use an extension cord.
- The fuse rating for this appliance is 13A
- The supply cable should not make contact with the product’s hot surface.
- In case of any damage to the supply cable, make sure to call Caple Service. The cable must be replaced by Caple Service.
- Wiring of the appliance must be performed by an authorised installer. H05VV-F type supply cable must be used.
- Faulty wiring may damage the appliance, such damage will not be covered by the warranty.
- The appliance is designed to connect to 220-240V~ if the electrical supply is different than the value given above, call Caple Service immediately.
min
. 600m
m min. 555mm
min. 560mm
max. 580mm
min
. 590m
m
595mm
595m
m
550mm
575mm
557mm
576m
m
min. 555mm
min
. 600m
mm
in. 600m
mm
in.
5m
mm
in. 590m
m
min. 560mm
max. 580mm
595mm
595m
m
550mm
575mm
557mm
576m
m
Worktop
min. 50 mm
min. 25 mm
Built-inhob
Built-inoven
Figure 2
BL
UE
BR
OW
NY
EL
LO
W+
GR
EE
N

Instruction manual C2238 9
Please keep this instruction manual for future reference
Caple declares that its bears no responsibility whatsoever for any kind of damage and loss arising from not complying with safety norms.
Product description
List of components:
1. Control panel2. Handle 3. Oven door4. Lower heating element (behind the plate) 5. Upper heating element (behind the plate)6. Wire shelf 7. Shelf supports 8. Oven light 9. Turbo heating element (behind the plate)10. Fan (behind the plate)11. Air outlet shutters
USING THE OVEN
Control panel
Oven function control knob:- To select the desired cooking function, turn the knob to the related symbol.
Please see page 10 and 11 for cooking functions and a description of each.
Oven thermostat control knob:- After the cooking function has been set, the desired temperature can be
adjusted by the oven thermostat knob. The oven will then start to operate (time must be set, if available).
- The thermostat signal light will turn on when the knob is turned to the required temperature. The light will turn off once the oven reaches the required temperature.
1
2
3
4
5
8
9
11
10
6
7
Figure 4
Figure 5
Digital TimerOven Thermostat ButtonOven Function
Control Button
Oven Thermostat LightDoor Lock Light
Figure 4
Figure 5
Digital TimerOven Thermostat ButtonOven Function
Control Button
Oven Thermostat LightDoor Lock Light
Figure 4
Figure 5
Digital TimerOven Thermostat ButtonOven Function
Control Button
Oven Thermostat LightDoor Lock Light

Instruction manual C223810
Please keep this instruction manual for future reference
TURBO DEFROST
The oven’s warning lights will be turned on, the fan starts operating.
To use the defrost function, take your frozen food and place it in the oven on a shelf placed in the third slot from the bottom. It is recommended that you can place an oven tray under the defrosting food, to catch the water accumulated due to melting ice. This function will not cook or bake your food, it will only help to defrost it.
FAN HEAT
The oven’s thermostat and warning lights will be turned on, the ring heating element and fan will start operating.
The fan heat function evenly disperses the heat in the oven. All foods on all racks will be cooked evenly. It is recommended to pre-heat the oven about 10 minutes.
CONVENTIONAL HEAT
The oven’s thermostat and warning lights will be turned on, the lower and upper heating elements will start operating.
The static cooking function emits heat, ensuring even cooking of the lower and upper food. This is ideal for making pastries, cakes, baked pasta, lasagne and pizza. Preheating the oven for 10 minutes is recommended and it is best to cook on only one shelf at a time in this function.
TURBO CONVENTIONAL HEAT
The oven’s thermostat and warning lights will be turned on, the upper and lower heating elements and fan will start operating.
This function is very good for obtaining results in baking pastry. Cooking is carried out by the lower and upper heating element within the oven and by the fan providing air circulation, which will give a slight grill effect to the food. It is recommended to pre-heat the oven about 10 minutes.
ECO GRILL
The oven’s thermostat and warning lights will be turned on, the grill heating element will start operating.
The function is used for grilling and toasting foods, use the upper shelves of oven. Lightly brush the wire grid with oil to stop foods sticking and place foods in the centre of the grid. Always place a tray beneath to catch any drips of oil or fat. It is recommended to pre-heat the oven about 10 minutes.
WARNING: When grilling, the oven door must be closed and the oven temperature should be adjusted to 190˚C.
FULL GRILL
The oven’s thermostat and warning lights will be turned on, the grill and upper heating elements will start operating.
The function is used for faster grilling and for covering a larger surface area, such as grilling meats, use the upper shelves of oven. Lightly brush the wire grid with oil to stop foods sticking and place foods in the centre of the grid. Always place a tray beneath to catch any drips of oil or fat. It is recommended to pre-heat the oven about 10 minutes.
WARNING: When grilling, the oven door must be closed and the oven temperature should be adjusted to 190˚C.
TURBO GRILL
The oven’s thermostat and warning lights will be turned on, the grill, upper heating elements and fan will start operating.
The function is used for faster grilling of thicker foods and for covering a larger surface area. Both the upper heating elements and grill will be energised along with the fan to ensure even cooking. Use the upper shelves of oven. Lightly brush the wire grid with oil to stop foods sticking and place foods in the centre of the grid. Always place a tray beneath to catch any drips of oil or fat. It is recommended to pre-heat the oven about 10 minutes.
WARNING: When grilling, the oven door must be closed and the oven temperature should be adjusted to 190˚C.
Oven functions
0
0
0
0
0
0
0

Instruction manual C2238 11
Please keep this instruction manual for future reference
PRYRO
Before activating the pyrolytic cleaning function, remove any excessive spillage and make sure that the oven is empty.
Do not leave anything inside the oven cavitiy (e.g.pans, grids, baking tray, dripping pan, etc.) as this could seriously damage them.
Before activating the pyrolytic function, remove the oven shelves, shelf supports and wire shelves.
Ensure that the oven door is closed before activating the pyrolytic cleaning function.
When the pyrolytic cleaning function is on, it is advisable not to use a hob if it is fitted above the oven.This could cause overheating and damage to both appliances.
During the pyrolytic cleaning cycle the oven door becomes hot. Children should be kept away until it has cooled.
At the end of pyrolytic cleaning process, the display shows the time of day. The oven door will lock automatically when the pyrolytic function starts.
Pyrolytic Cleaning:
The oven cavity is coated with a special emanel resistant to high temperatures. During the pyrolytic cleaning operation, the temperature inside the oven can reach about 475˚C to burn food residue.
For your security, during the pyrolytic cleaning operation, the oven door automatically locks.
Upon completion of the cleaning operation the oven door will be locked until the oven cavity has cooled down.
The cooling fan operates during cooking until the oven has cooled down. After cooking, it is advisable to remove all the food residues with a wet sponge.
It is advisable to wipe the oven over with a sponge soaked in warm water after each pyrolytic cleaning cycle is carried out.
During the Pyrolytic operation, some smells will emulate due to destruction of the food residue - this is normal.
During the Pyrolytic operation, the room where the oven is installed must be ventilated sufficiently.
P

Instruction manual C223812
Please keep this instruction manual for future reference
TimerSELECTING MANUAL OPERATION MODE
‘’Auto’’ function symbol
‘’Minute Minder’’ symbol
‘’Manual operation’’ symbol
Figure 6
After your appliance is connected to the mains supply for the first time, the numbers on the timer display will flash. Before you can select a cooking function or set a temperature, you must set the appliance into ‘manual operation’ mode.
To select manual operation mode, press the ‘minus’ or ‘plus’ button on the control panel while oven function switch is at ‘0’ position.
SETTING THE TIME
After setting your oven for manual operation, you should also set the time of day. Use the ‘minus’ button and ‘plus’ button to adjust the time that appears in the display. After getting the display to the correct time, release the ‘minus’ and ‘plus’ buttons. After 5 seconds the time will fix in the display and you will be able to use your oven.
SETTING THE MINUTE MINDER
Set the minute minder at any time regardless of whether an oven function has been selected. You can set a period of time using the minute minder function and an alarm will sound when this period of time has elapsed.
Press the ‘mode’ button once, the display will show ‘00:00’ and ‘minute minder symbol’. Set the period of time that you wish the minute minder to countdown from by using the ‘minus’ and ‘plus’ buttons. Once the display has got to your desired countdown time, let go of the ‘minus’ and ‘plus’ buttons.
The minute minder symbol will appear on the time display. Once a countdown time has been set, it is possible to shorten or lengthen the time by using the ‘minus’ or ‘plus’ buttons after pressing the ‘mode’ button once. An alarm will sound when the countdown time has elapsed. The alarm can be silenced by pressing the ‘mode’, ‘plus’ or ‘minus’ buttons.
SETTING THE DURATION TIMER
This function will allow you to set a countdown time similar to the minute minder function. However the oven will no longer continue to heat, once the countdown period has elapsed.
Use the thermostat control knob to set the temperature and oven function selector knob to select mode of cooking that you require. The manual operation symbol will appear on the display. It is then possible to set the duration of the cooking time that you require. Press the ‘mode’ button twice (until you see ‘dur’ on display) and the display will show ‘00:00’.
Set the period of time that you wish the duration function to countdown for, by using the ‘minus’ and ‘plus’ buttons. Once the display has got to your desired countdown time, let go of the ‘minus’ and ‘plus’ buttons. The countdown will start immediatel, ‘A’ will appear on the time display.
Once a countdown time has been set, it is possible to shorten or lengthen the time by using the ‘minus’ or ‘plus’ buttons after pressing the ‘mode’ button twice.
An alarm will sound when the countdown time has elapsed and the oven will switch off. ‘A’ will flash and the heating symbol will disappear. To silence the audible signal and return the oven to manual operation mode once cooking duration has finished, press the ‘mode’, ‘plus’ or ‘minus’ button, ‘A’ will disappear from the display and the manual operation symbol will appear instead.
Important: If you do not turn the thermostat control knob and oven function selector knob to ‘0’, the appliance will continue to operate as soon as you press the ‘mode’,’plus’ or ‘minus’ button.

Instruction manual C2238 13
Please keep this instruction manual for future reference
SETTING THE END OF COOKING TIMER
This function is similar to the duration function, however instead of selecting a period of time that you wish the oven toswitch off after, you select the time of day that you wish the oven to switch off.
Use the thermostat control knob to set the temperature and oven function selector knob to select the mode of cookingthat you require. The manual operation symbol will appear on the display. Press the ‘mode’ button three times (until ‘end’is seen on the display), the display will show a value of 00:00.
Set time of day that you wish the oven to stop cooking at by using the ‘minus’ and ‘plus’ buttons. The timer will calculatehow long the cooking time will be, based on the time of day that you have selected and show it on the display. Once thedisplay has got to time of day that you want the oven to stop cooking, let go of the ‘minus’ and ‘plus’ buttons.
Once a countdown time has been set, it is possible to shorten or lengthen the time by using the ‘minus’ or ‘plus’ buttonsafter pressing ‘mode’ button for three times. When the time of day reaches the end of cooking time that you set, the ovenwill switch off and an alarm will sound.
‘A’ will flash and the heating symbol will disappear. To silence the audible signal and return the oven to manual operationmode once cooking duration has finished, press the ‘mode’, ‘plus’ or ‘minus’ button, ‘A’ will disappear from the displayand the manual operation symbol will appear instead.
SETTING THE START AND END TIMER
Full Automatic Program Setting (Cooking Period and Finish Time)
1. This feature allows an automatic switching on and off time of the oven at pre-set times.
2. To set the timer to switch on automatically at a pre-set time, press the mode button repeatedly until ‘Dur’ shows and the ‘A’ symbol flashes.
3. Without delay after the previous step, press the + or - buttons to select the desired cooking duration period.
4. Set the finish time by pressing the mode button again until the display shows ‘End’ and the ‘A’ symbol flashes.
5. Without delay after the previous step, press the + or - buttons to select the desired finish time.
6. After a few seconds the timer will show the time of day and the ‘A’ symbol will be displayed confirming that the timer has been programmed.
7. Rotate both the oven function and the oven temperature controls to the desired settings.
8. The oven will start cooking at the required time and will switch off automatically at the selected finish time.
9. When the oven switches off automatically, the audible warning signal will be heard. Pressing any of the timer buttons will silence the timer and reset the oven to manual cooking mode.
ADJUSTING THE AUDIBLE SIGNAL
To adjust the level of audible signal when it is sounding, if ‘mode’ button is pressed for three times while oven function selector knob is at ‘0’ position, ‘L3’ will be seen on display. By pressing the ‘minus’ or ‘plus’ button the desired sound level can be adjusted. Release the minus button and the sound level of the audible signal will be set.

Instruction manual C223814
Please keep this instruction manual for future reference
Recommended cooking times and shelf position
Accessories in the oven
- It is recommended that you use the accessories supplied with the oven to cook food.
- You can also use glass containers, cake cutters, special oven trays suitable for use in your oven. Pay attention to any information given by the manufacturer of these accessories.
- If small sized containers are used, place in the centre of the shelf.
- The information given below should be implemented for enamelled containers.
- Deformation may be observed on the tray due to high temperatures forming during the cooking. This is a normal result due to the heat transfer, this is more prevalent if:
The food you are cooking does not completely cover the oven tray The food is frozen The tray is used to collect the dripping juices of food during the grill operation.
- Do not leave a glass tray or container in a cold environment immediately after cooking in them. - Do not put hot trays on cold or wet surfaces. - Ensure that they slowly cool off placing them on a dry piece of cloth. Otherwise, the glass tray or container might break. - If you are using the grill, we recommend that use it with the tray supplied with your product. This way, splattering and
dripping oils will not make the oven interior dirty. - If you are going to use the large wire shelf, insert a tray into one of the lower racks to avoid accumulation of the oils. To
make cleaning easier, add some water into it as well. In a grilling operation, use the third or fourth rack to prevent the food sticking to the grill.
Dishes
Pastry
Temperature (˚C)
Rack position Cooking time(mins)
170-190 1-2-3 35-45
150-170 1-2-3 30-40
150-170 1-2-3 25-35
160-180 1-4 30-40
170-190 1-4 35-45
170-190 1-2 35-45
170-190 1-2 30-40
170-190 1-2 30-40
200 1-2 45-60 200 1-2 45-60 200 3-4 50-60
200 3-4 15-25
200 4 15-25
170-190 1-2 25-35
150-170 1-2-3 25-35
150-170 1-2-3 25-35
200 4 10-15
Temperature (˚C)
Rack position Cooking time(mins)
Temperature (˚C)
Rack position Cooking time(mins)
Temperature (˚C)
Rack position Cooking time(mins)
Cakes
Cookies
Grilled meatballs
Chicken
Pork chop
Beef steak
Two tray cakes
Two tray pastry
Fan heat Conventional heat Turbo conventional heat Grill

Instruction manual C2238 15
Please keep this instruction manual for future reference
Shelf positions
The wire shelf should be used to grill or place different cookware on.
Warning Fit the wire shelf correctly into any corresponding rack in the oven cavity and push all the way back into the oven.
5. rack4. rack3. rack2. rack1. rack
Figure 5
5. rack4. rack3. rack2. rack1. rack
Figure 5
5. rack4. rack3. rack2. rack1. rack
Figure 5Shelf position:54321

Instruction manual C223816
Please keep this instruction manual for future reference
Removal of wire shelf supports
- Pull the wire shelf support as shown in the picture.- After releasing it from clips, lift it up.
Tray, wire grid and handle set
Grill pan set is for use when grilling steaks etc.
Warning: The grill pan has a detachable handle. Ensure when using the grill pan handle that it is centralised and secure as shown in the picture. Use the grill pan handle by two hands. Do not leave the handle in position when grilling.
12
12
Instruction manual C2238 17
Please keep this instruction manual for future reference
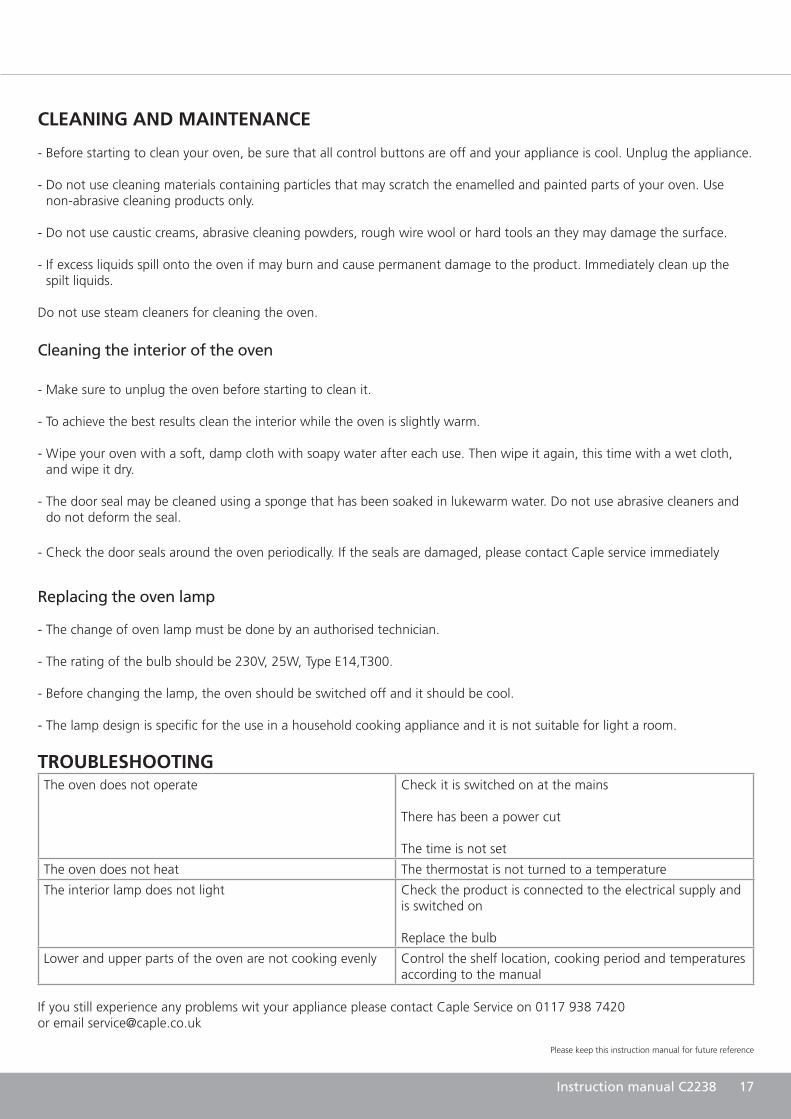
CLEANING AND MAINTENANCE
- Before starting to clean your oven, be sure that all control buttons are off and your appliance is cool. Unplug the appliance.
- Do not use cleaning materials containing particles that may scratch the enamelled and painted parts of your oven. Use non-abrasive cleaning products only.
- Do not use caustic creams, abrasive cleaning powders, rough wire wool or hard tools an they may damage the surface.
- If excess liquids spill onto the oven if may burn and cause permanent damage to the product. Immediately clean up the spilt liquids.
Do not use steam cleaners for cleaning the oven.
Cleaning the interior of the oven
- Make sure to unplug the oven before starting to clean it.
- To achieve the best results clean the interior while the oven is slightly warm.
- Wipe your oven with a soft, damp cloth with soapy water after each use. Then wipe it again, this time with a wet cloth, and wipe it dry.
- The door seal may be cleaned using a sponge that has been soaked in lukewarm water. Do not use abrasive cleaners and do not deform the seal.
- Check the door seals around the oven periodically. If the seals are damaged, please contact Caple service immediately
Replacing the oven lamp
- The change of oven lamp must be done by an authorised technician.
- The rating of the bulb should be 230V, 25W, Type E14,T300.
- Before changing the lamp, the oven should be switched off and it should be cool.
- The lamp design is specific for the use in a household cooking appliance and it is not suitable for light a room.
TROUBLESHOOTINGThe oven does not operate Check it is switched on at the mains
There has been a power cut
The time is not set
The oven does not heat The thermostat is not turned to a temperature
The interior lamp does not light Check the product is connected to the electrical supply and is switched on
Replace the bulb
Lower and upper parts of the oven are not cooking evenly Control the shelf location, cooking period and temperatures according to the manual
If you still experience any problems wit your appliance please contact Caple Service on 0117 938 7420 or email [email protected]

Instruction manual C223818
Please keep this instruction manual for future reference
TRANSPORT
If you need to transport the oven:
- Keep the original packaging - Follow the transport symbols on packaging- Remove all accessories including shelves, pans and handle to avoid damaging the product
If the original packaging is not available:
- Ensure oven is secure and the external parts are well protected to avoid any damage.
Brand
Model C2238
Type of oven Electric
Mass kg 38
Energy efficiency index – conventional 117.3
Energy efficiency index – fan heat 104.1
Energy class A
Energy consumption (electricity) – conventional
kWh/cycle 0.98
Energy consumption (electricity) – fan heat
kWh/cycle 0.87
Number of cavities 1
Heat source Electric
Volume l 68
This oven complies with EN 60350-1
Energy saving
- Cook different meals together when possible - Keep pre-heating time as short as possible - Do not extend cooking time unnecessarily- Do no forget to turn off the oven at the end of cooking- Do not open the oven door during cooking period

Instruction manual C2238 19
Please keep this instruction manual for future reference

Instruction manual C223820
Please keep this instruction manual for future reference
Caple ServiceFourth Way AvonmouthBristolBS11 8DW
t: 0117 938 7420 e: [email protected]