bpm-1200 1010 manual ver1.0 en 121004 - …ebionics.co.kr/bbs/download2.asp?filename=bpm-1200_1010_...
TRANSCRIPT

BIONICS Patient Monitor Series
Operation Manual
BPM-1200(PATRON) /1010(MATRON) Patient Monitor (Ver 1.0) 2012.10.04
www.ebionics.co.kr

2
CONTENTS
◆ Before using the product ---- 3 ◆ ECG Measurement ------------ 37
◆ Contacts ---------------- 3 ▶ How to Connect ECG Cable ------- 37
◆ Product Guarantee -------- 4 ▶ Change of ECG Lead ------------ 38
◆ Symbols in the Manual ------ 5 ▶ Arrhythmia setting --------------- 39
◆ Precautions for use -------- 6 ▶ ST SEGMENT setting ------------ 40
◆ Precautions for Electrical Safety - 10 ◆ Respiration Measurement ---- 42
◆ Characteristics and Principles 11 ▶ How to measure Respiration ------- 42
◆ Composition(accessory) ---- 12 ▶ Change of Respiratory mode ------ 43
◆ How to set BPM-1200(1010) - 13 ◆ Blood Pressure Measurement ---- 44
▶ Precautions for Setting ------- 13 ▶ How to Measure Blood Pressure ----- 45
▶ Checkpoints Before Use ------ 13 ▶ Change of NIBP Mode ------------ 46
▶ Maintenance and Cleaning After
Use --------------------- 15 ◆ SpO2 Measurement --------- 47
▶ Precautions for Use ---------- ▶ How to Measure SpO2 ----------- 47
◆ C o m p o n e n t s O f B P M -
1200(1010) ------------- 19 ▶ Change of SpO2 Mode ----------- 49
▶ Front & Operation Panel ------ 19 ◆ Body Temperature Measurement - 50
▶ Right side ----------------- 20 ▶ How to Measure Body Temperature -- 50
▶ Left side ------------------ 21 ▶ Change of Temp Mode ----------- 50
▶ Back side ----------------- 23 ◆ Press Measurement (Optional) ---- 51
◆ Desc r i p t i on o f P r oduc t
Symbols --------------- 24 ▶ Press Setting ------------------- 51
▶ Initial Screen --------------- 25 ▶ Change of IBP Mode ------------- 56
◆ How to Use BPM-1200(1010) 28 ◆ EtCO2 Measurement (Optional) --- 58
▶ How to Use ---------------- 28 ▶ CO2 Gas Measurement ----------- 58
▶ Alarm -------------------- 29 ▶ Sidestream CO2 ---------------- 60
▶ Trend -------------------- 31 ▶ CO2 Calibration ------------- 61
▶ Setup Setting -------------- 33 ◆ Before Requesting After – Sale
Service ------------------- 66
◆ Print setup (Optional) ------ 34 ◆ Product Specifications --------- 69
◆ Power & Battery Specifications 35 ◆ Product Warranty ------------- 76
▶ AC Power ----------------- 35
▶ Battery Specifications -------- 36

3
Before Using the Product
Thank you for purchasing Patient Monitor
l For safe and efficient operation please read the manual to learn
about the functions of the product before use.
l Please keep this manual nearby to assist you with operating the
functions of the product.
The product should be used under the supervision of a medical-
related certified professional.
The product is used for examining patient’s abnormal condition. For
the safety of the patient, only the components or the accessories
recommended by our company should be used.
If you connect any accessories to the product that are not specified
in the manual, please be sure to notify our company or an agency
authorized to distribute our products.
For various services and product information, please feel free to contact our
salesperson at the following number.
For any questions about use or setup of the product, please contact the
following number.
Technical Support : BIONICS Co.,Ltd. Tel: 82-2-714-2962
* For reporting defects or abnormalities, please note the model name, product
serial number, purchasing date, and abnormal points before contacting us.
Contacts

4
Product Guarantee
l The product you have purchased comes with a 1-year warranty
from the purchasing date covering inferior materials and the
manufacturing process. For the disposable products, a warranty is
given for 6 months from the purchasing date or 6 months from its
first use covering inferior materials and the manufacturing process.
This warranty cannot be applied to consumption supplies such as
the battery, external cables, sensors, compress, hose and stands.
l We are not responsible for any physical, financial and mental loss
or damage and direct or indirect expenses caused by, or resultant
from, accidental or special circumstances during the use of the
product. The warranty is limited to the repair or exchange of the
product by the authority of the company or the agency, for
problems in materials or the manufacturing process which occurred
during use under normal circumstances.
l The company has no legal responsibility for the confirmation of
services, declarations or whole warranty beyond the warranty
specified above, which were supplied or will be supplied by the
agency or the staff of the company at their own discretion. The
user cannot request the company of services, declarations or
whole warranty which were supplied or will be supplied by the
agency or the staff of the company at their own discretion based
on the statements above.
l The contents of this warranty represent all other warranties
indicated or implied, and also represent all kinds of service- related
responsibilities of the product sellers for the product they sell.
l The product was manufactured under strict quality controls and the
inspection process of the company. The indemnification standard
for product repair and exchange is according to the Economic
Planning Board notification “Regulation for the indemnification of
consumer damage”
5
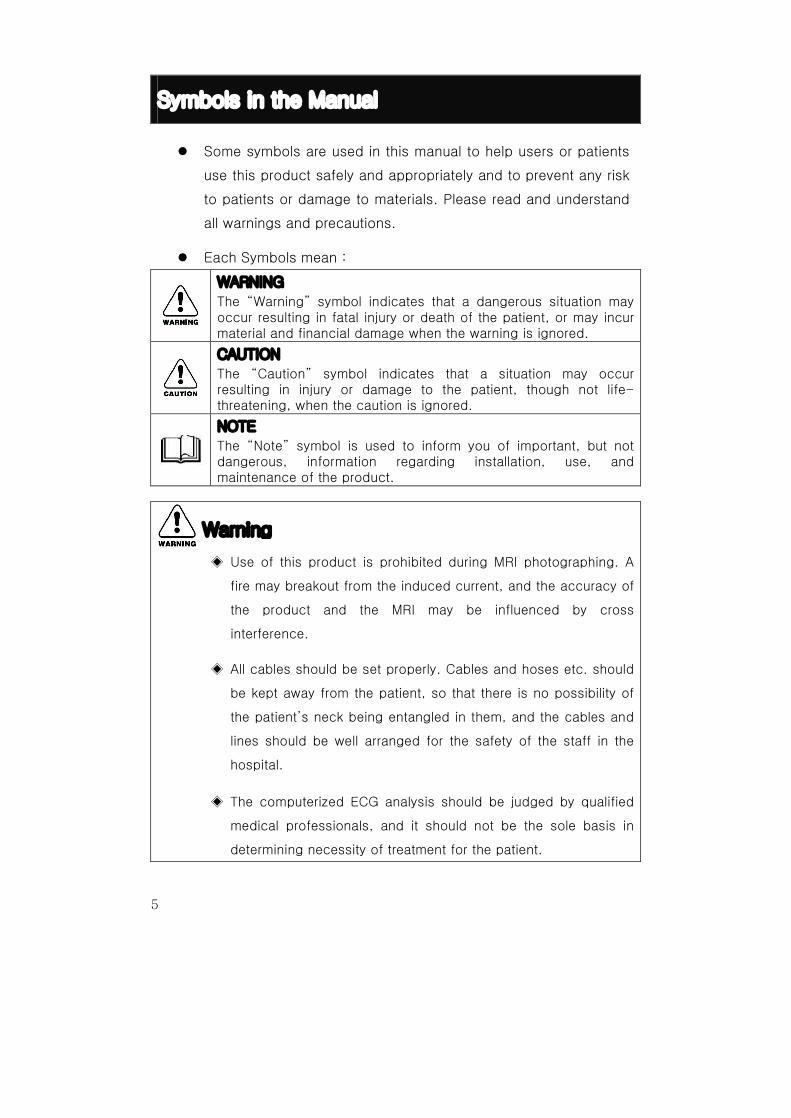
Symbols in the Manual
l Some symbols are used in this manual to help users or patients
use this product safely and appropriately and to prevent any risk
to patients or damage to materials. Please read and understand
all warnings and precautions.
l Each Symbols mean :
WARNING
The “Warning” symbol indicates that a dangerous situation may occur resulting in fatal injury or death of the patient, or may incur material and financial damage when the warning is ignored.
CAUTION
The “Caution” symbol indicates that a situation may occur resulting in injury or damage to the patient, though not life-threatening, when the caution is ignored.
NOTE
The “Note” symbol is used to inform you of important, but not dangerous, information regarding installation, use, and maintenance of the product.
◈ Use of this product is prohibited during MRI photographing. A
fire may breakout from the induced current, and the accuracy of
the product and the MRI may be influenced by cross
interference.
◈ All cables should be set properly. Cables and hoses etc. should
be kept away from the patient, so that there is no possibility of
the patient’s neck being entangled in them, and the cables and
lines should be well arranged for the safety of the staff in the
hospital.
◈ The computerized ECG analysis should be judged by qualified
medical professionals, and it should not be the sole basis in
determining necessity of treatment for the patient.
Warning

6
Precautions for Use
l Do not operate or store the equipment under the following
environments.

7
▶ Standard operational conditions are as follows.
- Temperature : 10℃ ~ 45℃ (50 ~ 113℉)
- Altitude : 70 ~ 106Kpa
- Humidity : 30 ~ 85%
▶ Standard storage and transportation conditions are as follows.
- Temperature : -10℃ ~ 50℃ (14 ~ 122℉)
- Altitude : 50 ~ 106Kpa
- Humidity : 20 ~ 95%

8
◈ Interpretation of the measurement value of arterial blood
pressure should be performed by medical professionals.
◈ Arterial blood pressure may be influenced by the patient’s
posture, physical condition and other factors such as a patient’s
movement.
◈ The product may not work well when it is kept or operated
beyond the temperature and humidity specified.
◈ Since the use of the inappropriate sensors such as a sensor
that is too tightly wrapped with adhesive tape or use of
additional adhesive tape, lack of a periodical check, or
inappropriate setting of sensors may lead to skin injuries and
inaccurate measurement results. The user should read the
manual and the precautions carefully before use.
◈ Premature neonates and patients with chronic pulmonary
disease should be checked for oxygenation levels before
starting treatment.
◈ Sensor-attached sites should be checked at least every 8 hours
(every 4 hours for reusable finger sensors on adults). Please
check if the sensors are properly attached, if the skin condition
is normal, and if the sensors are well positioned. Nail polish or
calluses may obstruct measurement. Special care is required for
patients with poor blood flow. If the sensor attachment status is
not checked periodically, it may lead to skin injury by extended
contact and necrosis from the pressure. Patients with weak
blood flow should be checked every 2 hours.
◈ If you want to turn off the BPM-1200(1010) while you’re
operating, please use the power switch where is the front of the
product.
CAUTION

9
◈ Leakage, heating, firing or disruption of the battery may cause
fire or injury.
u Do not use batteries beyond those specified in this manual.
u Do not short-circuit the battery and do not heat, integrate,
or dispose of it in a fire.
u Do not use the battery currently in use with a new battery,
another kind of battery, or batteries from other suppliers.
u Do not insert batteries with (+) and (-) ends reversed.
◈ When the product is not used for a long time, separate the
battery from the product.
◈ When the product has been moved, make sure to turn it off and
arrange the accessories in order, Injured cord or cables may
cause fire or electric shock.
◈ In order to obtain the best results, theses instructions for use
are especially important when applying the specified sensors,
and all warnings and cautions should be obeyed. If the
sensors are exposed to excess natural light, we recommend
that you cover the sensors with an opaque material.
Excessive light from operating lamps (especially xenon gas
lamps), bilirubin (red-yellow) lamps, fluorescent lamps and
direct sunlight may influence the measurement results.
◈ If results are not available at all or are inaccurate, please
check the following:
u If the patient has poor blood flow, attach the sensors to
other fingers or toes.
u Check if the sensor is properly placed.
u When the electric operation equipment is used, make
sure the sensors are not positioned close to the cables.
u The Sensor-attached site should be kept clean and not
oily, Clean the sensor and skin if necessary.
CAUTION
NOTE

10
Precautions for Electric Safety.
Please check the following points before use.
l Is the product supplied with the appropriate power? (100-240V~)
l Are all connecting parts (power cables or the product) properly
connected?
l Is the product completely grounded? (If not, noise may occur.)
l Before turning the power on, is the accessory for measuring the
target parameter well connected to the product?
To prevent electric noise during use, the product should be installed
apart from dynamo, X-ray equipment, broadcast equipment or portable
cables. An inaccurate result may occur when these equipment are placed
near the product. BPM-1200(1010) requires an independent power circuit
and a stable earth connection. Sharing power with other electric
equipment may result in inexact results.
BPM-1200(1010) is classified as follows :
◈ Type 1 for electric shock, CF grade for ECG, Resp, ICO and IBP
and BF grade for EtCO2, SpO2, NIBP and Temp.
◈ Please do not use this product near inflammable anesthetics
and diluents.
◈ The noise level is “B”Class according to the IEC/EN 60601-1
(Safety of Electric Medical Product), and the noise redemption
is “b”Level according to the IEC/EN 60601-1-2
(Electromagnetic Compatibility Requirements).
◈ Protection grade against water is “IPX 1”
NOTE
NOTE

11
Characteristics and Principles of BPM-1200(1010)
BPM-1200(1010) is a Patient-monitoring equipment. BPM-1200(1010)
measures the patient’s ECG, blood pressure (invasive and noninvasive at
two points), end-tidal partial pressure respiration (EtCO2), body
temperature(Temp), oxygen saturation of arterial blood and pulse (SpO2).
Information on the patient’s condition is displayed as numeric values and
waveforms.
BPM-1200(1010) provides a variety of information about the patient. The
user can choose the functions they want to use. The vital sign information
provided by the product includes ECG, heart rate, respiratory rate based
on respiration, maximum, minimum and mean blood pressure by invasive
and noninvasive methods, percentage of blood oxygen
concentration measured by the changes during a pulse cycle of arterial
blood, pulse, and temperature at two sites.
The patient’s vital signs and condition is displayed on an LCD screen in
real-time. The user can set alarms or adjust the setting values using the
buttons on the front.
BPM-1200(1010) provides the basic vital sign information of the patient to
the user.

12
Composition of BPM-1200(1010) (Accessories)
Standard Accessories
Main 1 set
ECG Cable
5 lead type (1EA)
SpO2 Finger Probe
(1EA)
3M Electrode
(5PCS/1set)
NIBP Hose (1EA)
Adult Cuff (1EA)
Power Cord (1EA)
Operation Manual
(1EA)
l Optional
- ECG Cable 3 lead type
- ECG Cable 10 lead type
- SpO2 extension Cable
- IBP Measuring Kit
- Printer Module
- Roll Paper
- EtCO2 Kit set
- TROLLEY
- Wall Mount
- DISPOSABLE SPO2 SENSOR
- NEONATE CUFF
- Temp Sensor (Rectal/Skin)
- 3M Electrode (50 PCS/1SET)

13
How to Set BPM-1200(1010)
(1) Precautions for Settings
Pay attention when setting BPM-1200(1010) for the following points
- Use BPM-1200(1010) under conditions of 10℃∼45℃ of
circumstantial temperature and 30%∼85% humidity.
- Check the connection status of the power cord.
- Do not connect multiple cords to the power supply.
- Place the main body on a flat area.
- If noise occurs, ground the equipment further.
- Do no use any electric cords generating connecting noise.
- Take care since the product can be broken by mechanical
shock.
- Get rid of dust or inflammable material near the product when setting it up.
(2) Checkpoints before Use
Check the following points before measuring the patient’s condition.
- Make sure there is no mechanical risk.
- Check the lead, power plug, and accessories connected on the
outside.
◎ Precautions Before Use ECG
① Do Not use product near dynamo, X-ray equipment, broadcast
equipment.
② Use disposable electrodes.
③ Do not twist the cable.
④ Attach each Lead properly.
⑤ Keep the patient motionless with comfortable position while
measuring.
⑥ Sterilize Lead periodically.

14
◎ Precautions Before Use SpO2
① Do Not use product near dynamo, X-ray equipment, broadcast
equipment.
② Keep the patient motionless with comfortable position while
measuring.
③ Sterilize sensor periodically.
◎ Precautions Before Use Temp
① Do Not use product near dynamo, X-ray equipment, broadcast
equipment.
② Sterilize sensor periodically.
③ Use disposable hygiene cover.
◎ Precautions Before Use NIBP
① Do Not use product near dynamo, X-ray equipment, broadcast
equipment.
② Do not twist hose.
③ Keep the patient motionless with comfortable position while
measuring.
◎ Precautions Before Use IBP
① Do Not use product near dynamo, X-ray equipment, broadcast
equipment.
② Keep the patient motionless with comfortable position while
measuring.
③ Do not twist cable

15
◎ Precautions Before Use EtCo2
① Do Not use product near dynamo, X-ray equipment, broadcast
equipment.
② Keep the patient motionless with comfortable position while
measuring.
③ Do not twist cable
◎ Precautions Before Use CO
① Do Not use product near dynamo, X-ray equipment, broadcast
equipment.
② Keep the patient motionless with comfortable position while
measuring.
③ Do not twist cable
(1) Maintenance and Cleaning After Use
A. Keep the product cleans by cleaning it using a soft cloth at least
once a month. Do not use thinner, ethylene, oxidant or lacquer
since these may damage the product.
B. Keep the accessories clean of dust or foreign materials. For
cleaning, use a soft cloth and clinical alcohol.
C. Do not soak the accessories in liquid or detergents. Keep the
product and accessories out of any liquid.
◎ Maintenance and Cleaning after using ECG
① Sterilize Lead periodically after using.
② Discard the disposable electrodes in designated locations.
③ Store the cable without twisting.
◎ Maintenance and Cleaning after using SpO2

16
① Sterilize the Probe periodically after using.
② Store the cable without twisting.
◎ Maintenance and Cleaning after using Temp
① Sterilize the Probe periodically after using.
② Discard the disposable covers in designated locations.
③ Store the cable without twisting.
◎ Maintenance and Cleaning after using NIBP
① Sterilize the hose after using.
② Store the hose without twisting.
◎ Maintenance and Cleaning after using IBP
① Not to impact the IBP Kit after sterilizing.
② Store the cable without twisting.
◎ Maintenance and Cleaning after using EtCo2
① Not to impact the EtCo2 module after sterilizing.
② Store the cable without twisting.
◎ Maintenance and Cleaning after using CO
① Store the cable without twisting.

17
(2) Precautions for Use
① Precautions for Equipment
ⅰ. Avoid the damp locations, and do not operate the equipment
with wet hands.
ⅱ. Use BPM-1200(1010) under conditions of 10℃∼45℃ of
circumstantial temperature and 30%∼85% humidity.
ⅲ. Do not use the locations where moisture level could go up
considerably or where air is not ventilated properly.
ⅳ. Do not use the locations close to electrical heating apparatuses.
ⅴ. Do not use the locations where exposed to direct sunlight.
ⅵ. Do not use the locations where sudden impact or vibration
could be received.
ⅶ. Do not use the locations exposed to chemical or explosive gas.
ⅷ. Make sure to prevent dust and especially metal debris, from
penetrating in.
② Precautions for Electric Safety.
ⅰ. To prevent electric noise during use, the product should be
installed apart from dynamo, X-ray equipment, broadcast
equipment or portable cables. An inaccurate result may occur
when these equipment are placed near the product.
ⅱ. Check the appropriate power supply of the product is suitable.
ⅲ. Check all connecting part is properly connected.
ⅳ. If The product is not completely grounded, the noise may occur.
③ Precautions for Use
ⅰ. Do not disassemble or Dismantle the product.
ⅱ. Completely unfinished product installation Do not connect the
power from the state.
18
ⅲ. Interpretation of the measurement value of arterial blood
pressure should be performed by medical professionals.
ⅳ. Arterial blood pressure may be influenced by the patient’s
posture, physical condition and other factors such as a patient’s
movement.
ⅴ. Since the use of the inappropriate sensors such as a sensor
that is too tightly wrapped with adhesive tape or use of
additional adhesive tape, lack of a periodical check, or
inappropriate setting of sensors may lead to skin injuries and
inaccurate measurement results. The user should read the
manual and the precautions carefully before use.
ⅵ. Premature neonates and patients with chronic pulmonary
disease should be checked for oxygenation levels before
starting treatment.
ⅶ. Sensor-attached sites should be checked at least every 8 hours
(every 4 hours for reusable finger sensors on adults). Please
check if the sensors are properly attached, if the skin condition
is normal, and if the sensors are well positioned. Nail polish or
calluses may obstruct measurement. Special care is required for
patients with poor blood flow. If the sensor attachment status is
not checked periodically, it may lead to skin injury by extended
contact and necrosis from the pressure. Patients with weak
blood flow should be checked every 2 hours.
ⅷ. Do not reuse electrodes. (noise can be a cause)
ⅸ. Do not short-circuit the battery and do not heat, integrate, or
dispose of it in a fire.
ⅹ. Do not insert batteries with (+) and (-) ends reversed.

19
Components of BPM-1200(1010)
(1) Front & Operation Panel
① Power Button ⑦ NIBP START/STOP Button
② Freeze Button ⑧ EXIT Button
③ ALARM ON/OFF Button ⑨ Information status LED
④ CHANGE SCREEN Button ⑩ Operating/ALARM status LED
⑤ EVENT Button ⑪ Joystick & push Button
⑥ PRINT START Button
① ② ③ ④ ⑤ ⑥ ⑦ ⑧ ⑨ ⑩ ⑪

20
(1) 우측면
① ② ③ ④ ⑤ ⑥ ⑦ ⑧ ⑨
① AC power LED ② Battery LED ③ Wave Go/ Freeze mark
④ Alarm ON/Mute/OFF mark ⑤ SCREEN CHANGE ⑥ Event Mode makr
⑦ Print operating (manual/auto) mark
⑧ NIBP Measurement mark(GO/STOP/AUTO)

21
(2) Right Side
(1)(2)(3)
(4)
(5)
(6)
(7)
(1) PRINT FEED button (2) PRINT ERROR LED (3) PRINT POWER LED
(4) RS-232C PORT (5) LAN PORT (6) VGA PORT
(7) Speaker

22
(3) Left Side
(1) ECG/RESP Connection Terminal (2) IBP 1/2 Connection Terminal (Option)
(3) SpO2 Connection Terminal (4) TEMP Connection Terminal 1/2/3/4(Option)
(5) EKG Connection Terminal (Option) (6) IBP 3/4 Connection Terminal (Option)
(7) GAS Module Connection Terminal (Option) (8) ICO Connection Terminal (Option)
(9) NIBP Connection Terminal (10) SD Card(Option)

23
(4) Back Side
(1) PORTABLE HANDLE (2) MAIN POWER SWITCH (3) GROUNDING PORT
(4) Battery Cover (5) AC POWER PORT
①
④
③
②
⑤

24
Icon Comments Icon Comments
Type CF Product,
Defibrillation protected Alarm On/Off
Type BF Product,
Defibrillation protected
Screen Change
(Screen)
Power stand-by switch
Stop Waveforms
(Freeze)
Attention, consult
Accompanying
documents
Non Invasive Blood
Pressure Manual
Measurement(NIBP)
Ground
Start Printing (Printer)
I / O SYSTEM POWER
On/Off Initial Screen (Exit)
Signal Output
Signal Input
IBP Invasive Blood Pressure TEMP Temperature
ECG/RESP Electrocardiograph/
Respiration SpO2 Oxygen Saturation
NIBP Non Invasive Blood
Pressure
RS-232C
Port
Use for Program
Upgrade
LAN Port Use for Central Monitoring VGA Port Screen transfer
SD Card Trend Data save IPX 1 Protection against vertically
falling drops of water (SpO2)
CE Mark IPX 7
Protected against the water from immersion
between 15cm and 1m. (Temp, IBP)
Description of Product Symbols

25
(1) Initial Screen
(1) ECG Wave(Depending on the ECG CABLE can be selected MAX: 12Wave)
(2) SpO2 Wave
(3) IBP Wave (Depending on IBP Wave CH can be selected MAX: 4Wave)
(4) EtCo2 & Resp Wave (5) HR (6) ST (7) SpO2
(8) RESP (9) IBP (10) NBP (11)TEMP (12) CO2 (13) Date
①
②
③
④
⑤
⑥
⑦
⑧
⑨
⑩
⑪
⑫
⑬

26
◈ BPM-1200(1010) provides 4 different screens to use “SCREEN
CHANGE” button.
- 4 screens are as follows.
A. Full Parameters Screen (Main Screen)
B. 4 Waves(select) and 4개 Parameters(select) Screen
C. 2 Waves(select) and Parameters(select) Screen
D. TREND Screen
(A)
(B)
(C)
(D)
NOTE

27
(Table 1). Explanation of Screen Icons
Icon Meaning How to display
NIBP Auto pressurization Fixed. Fixed
Battery in use Fixed
Alarm Status
Non-Fixed
(1-second interval)
NIBP Measurement mark.(Go)
Non-Fixed
(1-second interval)
NIBP Measurement mark.(Stop) Non-Fixed
Printer Action mark.(Go)
Non-Fixed
(1-second interval)
Printer Action mark.(Stop) Non-Fixed
Waveform stop
Non-Fixed
(1-second interval)
Touch screen Unlock Fixed
Touch screen lock Fixed
Menu to right move Fixed
Menu to left move Fixed

28
How to Use BPM-1200(1010)
(1) How to Use
Install on the main power switch at the back of the product.
Check the light-on status of the AC LED in the front, and
push the power switch 1~2 seconds to turn it on. (if any
problems occur, refer to the “How to solve the problems”
section in the manual)
If you want to change the setting value etc. during use,
push the Menu button to change the setting values per
each measurement parameter.
When the measurement sensor is connected to the patient, the
information on the patient is displayed as values and
waveforms on the LCD screen.
◈ Push the Power button 1~2 seconds when turn it off, display the
“Power off” massage on the screen.
Refer to the table below for the details of how to measure
each parameter.
- ECG measurement Page 39
- Respiration measurement Page 44
- Blood pressure measurement Page 46
- SpO2 measurement Page 48
- Body temperature measurement Page 51
- IBP(Press) measurement(optional) Page 52
- EtCO2 measurement(optional) Page 59
Step 1
Step 2
Step 3
NOTE
Step 4

29
(2) Alarm
Different alarms are provided in BPM-1200(1010) for the sake of the
user’s convenience. Please read carefully the contents of this section in
order to learn how to interpret and react appropriately to the alarms.
◈ The alarms in the product conform to the international standard
“IEC 60601-1-8 (2006).
- A High/Medium/Low/Information alarm and Information alarm
were adopted in BPM-1200(1010).
◈ We recommend that you listen to the alarms before using the
product.
l High Alarm
- The High alarm will sound when the measurement values
exceed the proper range.
- In High alarm, 5 alerting sounds ring for 2 seconds, for a
total of 10 times. After 8seconds, the alerting sounds are
repeated.
l Information Alarm
- Information Alarm rings to notify you of any announcements
or if there has been an error measurement.
- The information alarm sound like a chime bell, and rings at
an interval 5seconds to alert the user.
- The information alarm rings for the following situations:
a. If there is a failure in the NIBP measurement or
overpressure.
b. At Lead fault or Lead off during measurement.
c. If the finger is not attached to the finger probe during
measurement of SpO2.
d. If the battery is low.
- When the information alarm rings, it can be cancelled by
operating the function switch.
Note

30
l How to set the alarm
To change the alarm setting, touch the screen once to
wave or display. And touch the Bottom Alarm.
▶ Alarm Range
Parameter Setting range
HIGH LOW
ECG [bpm] 50 ~ 300, OFF OFF, 30 ~ 280
SpO2 [%] 21 ~ 99, OFF OFF, 20 ~ 98
IBP
[mmHg]
Systolic 40 ~ 295, OFF OFF, 30 ~ 290
Diastolic 30 ~ 289, OFF OFF, 25 ~ 280
Mean 35 ~ 290, OFF OFF, 26 ~ 285
RESP [rpm] 5 ~ 149, OFF OFF, 1 ~ 145
NIBP
[mmHg]
Systolic 40 ~ 295, OFF OFF, 30 ~ 290
Diastolic 30 ~ 285, OFF OFF, 25 ~ 280
Mean 35 ~ 290, OFF OFF, 30 ~ 285
TEMP [℃] 20.0℃ ~ 49.9℃, OFF OFF, 10.0℃ ~ 40.0℃
EtCO2 [%] 2% ~ 99%, OFF OFF, 1% ~ 98%
◈ For the sake of the user’s convenience. The function of Alarm
On/Off functions are added to each parameter. The state of Alarm
On/Off does not affect the setting values of the alarm.
Step 1
NOTE

31
(3) Trend
◈ BPM-1200(1010) Trend Data provides 43260 data in total at an
interval of 1minute for 720 hours.(30Day)
To check the Trend date for the
patient being measured, touch the
File Load in Trend Screen.
Note
Can be selected After Trend Data
Load
Check Day/Hour/Minute to touch
operation.
Display Wave/Date Recall when
Trend Data played.

32
①
① ② ③
(그림2. Trend 화면)
① Parameter name for measurement
② Time of the storage
③ Standard wave measurement parameter
◈ If you are touched ‘Play, Stop, Left navigation and Right
navigation’, function will be executed.
(4) Setup Setting
l The setting of system setup, time, print, unit selection can
be changed at the user’s convenience.
l Setup is as follows.
To change the SETUP setting, push the touch screen
once to select SETUP.
Step 1
NOTE

33
▶ By operating as detailed above, you can change the setting of each
SETUP menu.
Setting List Subsection
System Setup BED Number
Demo
Patient Mode
Nurse Call
1 ~ 99
On / Off
Adult / Neonate
On / Off
Time Clock Set
Time Format Change Setting
Sync
Mode
Paper Length
Select Wave1
Select Wave2
Select Wave3
Manual / Alarm
Wave / Trend / Wave+Trend
150 mm ~ 300 mm
Change Wave1
Change Wave1
Change Wave1
Unit
BP Unit
TEMP Unit
Co2 Unit
mmHg / kPa
℃ / ℉
% / mmHg / kPa
Print Setup (Optional)
The patient’s information can be printed out using the printer.
To change the printer setup, push the menu button once
to select setup. 단계 1

34
▶ By operating as detailed above, you can select the function you
want for the Printer mode.
Setting Mode Range of change Explanation
Sync. Alarm / Manual When “Alarm” is selected, the date is automatically printed out if the data is out of range
Mode Wave+Trend / Wave
/ Trend Print the waveform and Trend Data/ waveform only/ Trend Data only.
Select Wave 1/2/3 ECG2/SpO2/IBP/
RESP
Select the waveform to be printed out (ECG waveform is printed out as a basic factor)
Paper Length 150 ~ 300mm
(To be adjusted at 25mm unit)
Select the length of printed paper.
◈ Do not print greater than consecutive 3 times
◈ There is possibility of fire, Do not use printing for 5min. after consecutive 3 times of printing.
<Ex: Trend printing>
<Ex: Wave printing>
CAUTION

35
Power & Battery Specifications
Both AC and DC power is used for BPM-1200(1010). Basically, AC
power is used and a rechargeable battery is available for portable use.
1. AC Power (110~240VAC)
If the AC power is connected to the main body of the product, a
blue color lights up on the AC LED on the front. If the product is not
being used, the power changes automatically to the recharging
mode.
◈ During operation using AC power, noise may occur in the
waveform. If this is the case, ground the product soundly.
◈ An AC power connection in a wet or damp area may cause
electric shock or fatal damage to the product.
2. Battery Specifications
When the AC power is disconnected and the switch is turned on, the
power is supplied using the battery, signaled by the orange light on
the battery LED.
A. Signs for Battery
Battery status Explanation
Battery full
After use for 10 ~ 15 minutes
Requiring recharging
Low Battery requiring recharging
B. Time for 1ea of Battery
Recharging time : 7 Hours or more
Use time : 60 Minutes
(optional : 2ea battery )
(recharging : 12hour, use time : 5hour))
CAUTION

36
◈ When the battery is disconnected, all data (Trend, Setup values
and time etc.) are saved in the memory within
PATRON/MATRON(BPM-1200/1010) for about 3 days. If the
product is kept off of the battery for more than 3 days, all the
data may be deleted.
C. Natural lifetime for spontaneous discharge of battery
The table below shows the lifetime for spontaneous discharge of
the battery when the product is unused
Storage temperature Life for spontaneous discharge
0℃ ~ 20℃ 9 months
21℃ ~ 30℃ 6 months
31℃ ~ 45℃ 3 months
D. Type of Battery
The Same sort of battery should be used for replacement.
- Model : 3S1P(LS18650)
– Type : LI-Ion
- Manufacturer : Ti-won tech
E. Time for the Battery exchange
The lifetime of the battery gets shorter if it is not 100%
recharged for use.
Charge / Discharge ration Number for use
100 % Charge / discharge 1200 times
50 % Charge / discharge 500 times
30 % Charge / discharge 200 times
The battery is recharged when AC power is confirmed and the
main switch is on at the back of the product.
◈ For the protection of the environment, please contact the
agency you purchased the product from when you wish to
discard the battery.
◈ Please contact the agency when exchange the Battery.
CAUTION
CUATION

37
ECG Measurement
(1) How to Connect the ECG Cable
◈ With the use of an electric pacemaker, do not touch the patient,
table, or other equipment.
◈ Check if the ECG cable is damaged before taking the ECG
measurement. (A damaged ECG cable cannot protect the
patient.)
◈ Do not use disposable electrodes. (They may cause noise.)
Connect the ECG cable to the ECG/RESP connection
terminal of the measurement module.
단계 1
WARNING

38
Attach the patient’s electrode to the sites shown blow.
<IF 5 lead are attached> <IF 3 lead are attached>
Lead Color of
electrode Attaching site
RA (R) White Just below the clavicle (scapula) near the right shoulder
LA (L) Black Just below the clavicle (scapula) near the left shoulder
LL (F) Red Lower area of the left side of the abdomen
RL (N) Green Lower area of the right side of the abdomen
V (C) Brown Select the candidate lead for measurement among the
chest leads
(2) Change of ECG Lead
▶ To change the setting of the ECG Lead waveform, touch the
ECG WAVE screen once to obtain the screens below.
단계 2
RA: White
LA: Black
V: Brown
RL: Green LL: Red
RA: White
LA: Black
LL: Red

39
(3) Arrhythmia
Arrhythmia on ECG is provided the function of the analysis that
Ventricle has problems or not. The diagnosis program “A” of
BIONICS Arrhythmia is provided the function of the 3 kind’s
arrhythmia analysis affecting the fatal injury of the patient.
– Asystole (ASY)
– Ventricular Tachycardia (V-TAC)
– Ventricular Fibrillation (V-TAC/V-FIB)
The diagnosis program “B” of BIONICS Arrhythmia has more
function as below besides of 3 kind’s arrhythmia analysis.
–Ventricular Contraction (PVC)
–Ventricular (VENT)
–Ventricular Fibrillation (VFIB)
–Bradycardia (BRD)
–Bigeminy (BGM)
–Trigeminy (TGM)
–Couplet (COP)
–Missed Beat (MIB)
–R on T (ROT)
◈ The diagnosis program of Arrhythmia is designed to analyze that
Ventricular has problems or not. Guardian may happen to wrong
analyze about the existence of Arrhythmia. When Arrhythmia
displayed, it is necessary to judgment of a medical specialist
◈ When using of Arrhythmia analysis, please fix the LEAD of
channel 1 in LEAD II
WARNING

40
(4) ST SEGMENT Setting
ST Level value is going to be up and down, when myocardial
infarction occurs. According to clinical study, all ST Level value
should be examined.
The program of BIONICS ST Level analyzes each ST Level value
regarding the LEAD I and LEAD II. It displayed fixed screen CH-1 to
LEAD 1 and CH-2 to LEAD II.
ST Level unit is mV, it displayed + during up and – during down.
1) ST Level Condition
As shown on the picture 22 , BIONICS ST Level program
measured by datum point -78ms(ISO) + 109ms (ST) and
centering of R Peak.
[picture 22] Datum point ST Level measurement
ST Point Range of Change
ST Point
J Point + 0ms
J Point + 30ms
J Point + 40ms
J Point + 50ms
J Point + 60ms
J Point + 80ms
▶ By operating as detailed above, you can select each function of
the ECG mode.. (Menu of ST Level J Point setup change in
bottom)

41
ST Level Setup

42
Respiration Measurement
Changes in the chest impedance resulting from the patient’s respiration
is measured and displayed as a waveform and the values will appear on
the screen.
(1) How to Measure Respiration
◈ Respiration is measured with the ECG and HR etc., using the
ECG cable.
◈ Do not judge the patient’s condition only with the respiratory
value and the waveform.
Connect the ECG cable to the ECG/Res connection
terminal of the measurement module.
Attach the electrodes for respiration measurement by
referring to the figures below.
<Sites for 3 Leads attachment> <Sites for 5 Leads attachment>
Step 1
NOTE
Step 2
RA: White
LL: Red
RA: White
LL: Red
LA: Black
RL: Green
V: Brown

43
(2) Change of Respiration Mode
▶ To change the setting of respiratory waveform, touch the
RSP Wave once to select Config.
▶ By operating as detailed above, you can select each function
of the RESP mode.
Setting
Mode Range for Change Explanation
SIZE 1, 2, 3, 4, 5x Scale Set the size of RESP waveform
SPEED 3.12, 6.3, 12.5, 25, 50 mm/sec Set the speed of RESP waveform
RR Source RSP, CO2 Set the Detection Properties of
REST RR Rate
RESP LEAD LEAD I / LEAD II Set the Lead select of RESP
Apnea Suspend,15~60sec(unit:5sec) Set the Apnea
◈ Setup the APENA to use the RSP Wave Controls à Config MENU.
■ APNEA Range : Suspend, 15 ~ 60 second
(Change the 5 second interval)
NOTE

44
Blood Pressure Measurement
(1) How to Measure Blood Pressure
◈ Do not use the NIBP Cuff for other purposes than blood pressure
measurement. Blood pressure cannot be measured on the upper
arm of the patient, the artificial infusion set or catheter is inserted
at the site.
◈ Check if the cuff and hose are damaged before measuring blood
pressure. A damaged apparatus may cause inaccurate results.
◈ A patient’s movement during measurement may cause inaccurate
results.
◈ Choose the cuff type which is appropriate to the patient.
Connect the product with the gray hose as shown below.
NOTE
WARNING
Step 1
Cuff Hose

45
The cuff too tight or too loose on the measuring site may
cause errors in the value.
(2) Change of NIBP Mode
▶ To change the setting of NIBP mode, push the Menu button
once to select NIBP.
▶ By Operating as detailed above, you cans select each
function of the NIBP mode.
Set Mode Range for Change Explanation
Mode Adult / Neonate Set Adult / Neonate measurement Mode
Auto Interval 1Min~5Min / 10Min~30Min /
1Hour~10Hour
Select the time interval, when set to
automatic measurement
STAT
Duration
5Min~15Min Select the time interval, when set to
automatic measurement
Max
Pressure 50mmHg ~ 300mmHg Set the limit of max pressure.
VenousSTAT 20mmHg ~ 120mmHg Select the time 1min Venous Press.
Step 2

46
◈ The automatic measurement mode (AUTO pressing) is cancelled
in the following cases:
■ When the blood pressure measurement fails 3 consecutive
times.
■ When overpressure occurs. (Cuff pressure over 300 mmHg)
■ When the power is On/Off.
◈ When the automatic measurement mode is cancelled, the user
should reset the AUTO pressing to let it operate normally.
◈ After measuring Blood Pressure, push the “EXIT” button,
measuring data is going to be deleted on the screen (measuring
date stores Trend automatically.)
CAUTION
NOTE

47
SpO2 Measurement
The concentration of oxygen saturation means the saturation level of
hemoglobin which can transport the oxygen of the arterial blood. The
current transport level for the capacity of hemoglobin to transport the
oxygen is expressed as a percentage.
(1) How to Measure SpO2
◈ While the MRI is used, measurement using the sensor may cause
severe burning. If this occurs during normal use, remove the
product immediately from the patient.
◈ Do not place the probes at the site where the arterial catheter or
the venous infusion set is connected.
◈ For neonates, measurement should be made outside the
incubator using the disposable sensor. (Humid conditions in the
incubator may affect the measurement, resulting in inappropriate
data.)
◈ Strong light interferes with accurate measurement. In this case,
cover the sensor with an opaque material.
◈ For patients with thick or dark skin, or with weak blood flow and
weak signs, the oxygen concentration level may appear lower
than it is.
◈ In patients with abnormalities in the peripheral nervous system
including hypothermia, hypovolemia, hyperdynamia of vessels or
reduction in heart rate, the vital signs may not read properly due
to these abnormalities.
◈ In patients with an abnormal increase in oxyhemoglobin or
methemoglobin, the data for SpO2 will not be accurate.
◈ Check if the sensors release light, if the sensors are positioned
properly opposite, and if the light release to the patient’s tissue.
CAUTION
WARNING

48
Connect the SpO2 Probe to the connection terminal of the
measurement module.
The probe to the finger, (if measured with NIBP at the same
time, the SpO2 probe should be positioned on the opposite
arm. Concurrent use of other medical devices affecting
blood flow should be avoided. The probe should be
attached at a site that avoids those affected by medical
interference.)
For stable measurement, have the patient minimize their
movement and band the probe cable with the finger. Care
should be taken to not let the banding interfere with blood
flow.
단계 1
Step 2
Step 3
SpO2 Probe

49
(2) Change of SpO2 Mode
▶ To change SpO2 Mode, touch the SpO2 Wave once to select
Graph.
▶ By operating as detailed above, you can select each function
of the SpO2 mode.
Set Mode Range for Change Explanation
Size X 0.25, x 0.5, x 1, x 2, x 4 Set the size of SpO2 wave
SPEED 6.3, 12.5, 25 mm/sec Set the speed of SpO2 wave
APG Suspend / Expression APG Select
TRACE ON / OFF Set the display of waveform

50
Body Temperature Measurement
Changes in impedance according to the change in the patient’s body
temperature is perceived by the temperature sensor, and then displayed
numerically on the screen after a series of calculations.
(1) How to Measure Body Temperature
◈ The temperature sensor provided with the product is of the rectal
type.
◈ The temperature sensor should be sterilized before application to
another patient.
Connect the temperature sensor to the connection
terminal of the measurement module.
(2) Change of TEMP Mode
▶ To change Temp mode, touch the TEMP Numeric once to
select Temp.
▶ By operating as detailed above, you can select each function
of the TEMP mode.
Set Mode Range for change Explanation
High limit 20 ~ 49 ℃ Set the maximum limit of alarm
Low limit 10 ~ 40 ℃ Set the minimum limit of alarm
ON / OFF ON, OFF Alarm ON, OFF
Step 1
NOTE

51
Press Measurement (Optional)
(1) Press Setting
◈ Only the transducer specified by the company can be used.
A transducer which can be protected from electric shock and
electrical impulses should be used. It can be used during the electric
operation of the device.
During defibrillation of a patient, the measurement values may be
inaccurate. After defibrillation and a continuous nomal state. Accurate
measurement values will return.
◈ Do not reuse the disposable transducer.
Composition of monitoring accessories
Connect the monitor interface cable to the press
connection terminal of the measurement module.
CAUTION
WARNING
Step 1

52
In a clean environment, open the package to check if all
parts are well connected and if the handle of the stopcock
is positioned properly.
All side ports of the stopcock are protected by the outlet
plugs and may not be removed till the system is full and the
foam have been removed. These outlet plugs should always
be replaced with other outlet plugs. (A pouch is included in
the kit.)
Connection of the converter interface cable.
1. Hold the backside of the clear cover surrounding the connector,
and connect the converter to the reusable monitor interface.
2. Push the connecter gently into position. If it is will fit the slot of the
reusable connecter snugly.
◈ Do not use the blood pressure monitoring kit with the non-
separated blood pressure monitor. Do not twist the cable.
Reusable interface cable cannot be sterilized by autoclaving.
Step 2
IBP 1/2
IBP 3/4
Step 3
CAUTION

53
Connecting area of transducer Monitor interface cable
3. To remove the converter from the cable, push the tap gently inside the
clear cover and then separate the reusable interface cable.
Hold both sides of the flush operator and pull upward gently.
Do not revolve the operator and take care not to put the
power on one side.
◈ If a fast flush is performed on the patient, the user should check
carefully for the presence of foam and particulate matter. If a
large volume is flushed by force, a short flush with an increase
rate less than 2cc is recommended to avoid central embolism.
◈ Blood pressure for a liquid infusion line over 300mmHg requires
an infusion of more than 3cc per hour. In this case, the blood
pressure must not exceed 15psi (775mmHg). A protective
function is set in the flush device, which prevents overpressure
of the converter by making the liquid bypass the device. If a
more precise control of fluid volume is required, it is necessary to
connect the infusion pump around the flush device.
Step 4
CAUTION

54
Priming and Tips
Priming should be done slowly! – Slow priming will lessen the effort to
remove air bubbles afterward.
Prime using gravity! – Pressing may result in leakage of liquid or bubbles
by forcing the liquid to flow into the system. If small bubbles flow too
slowly inside the system, lift up the supply bag.
1 inch corresponds to 2mmHg, and the primed 4-feet line gives a
pressure of about 100mmHg if it is completely spread out The solution
bag should be placed at a higher position than the converter and the
pressing tube, in order for priming using gravity.
1. Twist the sterilized solution bag lightly using a drip chamber spike.
2. Open the roller clamp and remove the air inside the bag completely
by squeezing using an infusion set or an 18-gauge needle inserted
into the injection port in the back. By emptying the back this way, it
can prevent air input into the patient’s body.
3. Before inputting the solution into the infusion set, push both sides
and fill the drip chamber partially.
4. Operate the flush device gently. Since air rises from the bottom,
make sure that the solution is in the bottom at all times.
5. Prime the side ports and the plug of the zero point stopcocks in
the converter using a door-lock plug. <Caution: The stopcocks of
the converter or the outlet should be locked before connecting the
door- lock plug.>
6. Check if bubbles are present in the monitoring system. To check
the presence of invisible bubbles, rap it lightly.
◈ If air foam or bubbles are present inside the system, it may cause
significant bias of the pressure waveform or air embolism.
7. Add pressure to the system up to 300mmHg using C-fusor or the
Step 5
CAUTION

55
clear cuff. Flush the system for 2~3 seconds. Check for the
presence of air bubbles which may result from a fast flush. Now,
the system is ready for zero point setting and measuring. Place the
stopcock in a 90 degree position to let it off state. Be sure to never
position it at 45 degrees. A wrong setting of the stopcock handle may
cause infection, bleeding, or air embolisms in the patient.
◈ Care should be taken not to let air bubbles inside the 3-way
outlet stopcock or the cannula reflush into the patient. To check,
confirm if the monitoring line is fully filled with liquid before
connecting the monitoring line and let a small volume of blood
flow through the cannula.
Zero Point Adjustment of the Converter
1. Place the zero point port at the area of the right atrium, the middle
of the axilla, and the fourth intercostals area, and then place the
converter and the kit in a proper operating site. Some version of
the blood pressure conversion kit is provided with the patient’s IV
rod or the accessories needed for various settings.
2. Lock the zero point stopcock (toward OFF) and release the
converter according to the air pressure.
3. Conduct zeroing by pushing the zeroing button of the module or
select zeroing-one from the menu in the IBP setting menu.
CAUTION
Step 6

56
If the fix plate is used, fix it as below
< Table for labels according to the site of measurement >
ABP Arterial blood pressure Artery group throughout the whole
body (systemic)
CVP Central venous pressure Central vein / atrium group
ICP Intracranial pressure Intracranial group
PAP Pulmonary arterial pressure Pulmonary artery group
(2) Change of IBP Mode
▶ To change IBP Mode, touch the IBP Wave area once.

57
▶ By operating as detailed above, you can select each function of
the IBP mode.
Set Mode Range for Change Explanation
Mode ABP, FEM, PA, CVP, LA,
RA, ICP, SP
Set the level according to the
measurement site of BP.
Change the alarm setting range
according to level.
Speed 6.25, 12.5, 25, 50mm/sec Set the speed of IBP waveform
Scale Maximum / 10 ~ 80mmHg Set the scale of IBP waveform
Center 0 ~ 120mmHg Set the base line of IBP waveform
Calibration Start / Cancel Adjust the zero point of the
transducer
TRACE ON / OFF Set the display of waveform
* Adjust the zeropoint of the transducer : In order to obtain accurate results, make
sure to adjust the zeropoint of the transducer before measuring the patient.
* Fixed : Basic value according to the established label (ABP:0~200,
CVP:0~50, ICP:0~50, PAP:0~50)
<Composition of IBP KIT>
BIOTRANS Model Name Explanation
BT4812-3 IBP D.P.T Monitor kit
AY-IBP-010 IBP Cable Y-Type(Double)

58
EtCO2 Measurement (Optional)
(1) CO2 Gas Measurement
The Resprionics of CO2 Module can be fitted onto BPM-1200(1010).
The Respironics CO2 Provides the function of EtCO2, and the
function to measure respiratory CO2 and respiration number using
the Side Stream/Main Stream.
◈ The maximum sampling rate of the nose tube is 50mL/min. The
product should not applied to patients who may experience
respiratory distress by the vacuum flow level.
◈ To prevent infection of the medical staff by the patient’s
respiration sample, the outlet of BPM-1200(1010) should be
connected to the air elimination system of the hospital.
Connection method (Respironics_Mainstream Co2)
Co2 module connector portion connected "click" until you hear the connections.
(Respironics_Sidestream Co2)
WARNING

59
Co2 module connector portion connected "click" until you hear the connections.
(PHASEIN_Co2)
Co2 module connector portion connected "click" until you hear the connections.

60
(2) Sidestream CO2
A. Connect on side of the gas outlet to the gas outlet of BPM-
1200(1010), and the other side to the air elimination system
of the hospital.
B. Open the spring-type door and connect the Filter-line
appropriately to the equipment. The other end is then
connected to the patient.
◈ The gas inspiring vacuum pressure (negative pressure) of the
gas elimination system should not exceed the pump outlet
standard of BPM-1200(1010), 1mmHg. Excessive pressure will
display the message of “OCCULSION” and it may damage the
BPM-1200(1010) product pump. During zeroing, the air
elimination system should be operating.
C. Respiratory is automatically changed during EtCO2
measurement. After stop the measurement, display the
calibrated impedance of chest.
◈ Connection of all tubes should be safe, and the nose cannula
should be kept away from the CO2-present area during the
warming up period (including the outlet of the ventilator and the
respiration of the user).
◈ Range for Measuring : 0 ~ 150bpm
D. If BPM-1200(1010) senses proper respiratory movement, it
displays EtCO2, FiCO2, and respiration rate after 3 seconds.
E. The respiratory waveform and data of EtCO2 is displayed. If
the waveform does not appear, set the Menu --> EtCO2 --->
TRACE -->ON.
F. If necessary, the size of the CO2 waveform can be adjusted
CAUTION
NOTE

61
using the menu.
◈ Waste from SideStream/MainStream and CO2 filter should be
treated as fatal biological materials for the human body.
(3) CO2 CALIBRATION
The accuracy calibration for the Respironics CO2 is performed once a
year or when the measurement results are not accurate.
◈ For the best accuracy, a warm-up of about 20 minutes is
required.
A. Touch the EtCO2 Graph → Zero Calibration.
B. The message of “CALBRATION IN PROGRESS” will be displayed
on the screen of EtCO2 Wave.
C. The message “Zero In Progress” will be displayed and it means
calibration is completed.
◈ Refer to the following diagrams during the EtCO2 measurement.
* During measurement mode
Massage Explanation
Sensor For Wait Initialize the EtCO2 Module when power on
CAUTION
NOTE
NOTE

62
(It doesn’t measure during this period.)
Check Adaptor Not connected to the accessory
Zero Require Need the Calibration
* During calibration mode
Massage Explanation
Zero In Progress Progressing the CALIBRATION

63
Explanation of ICO (Optional)
(1) ICO Measurement Heart (Left or Right Ventricular) for 1 minute to export this amount of
blood "CO - Cardiac output" is called.
CO units of L / min is.
As a time of ventricular contraction is the release of blood, the amount
of SV (Stroke Volume) is called,
The formula CO = SV x HR will be established.
Thermodilution measurement of the use of ICO, and is measured by
calculating the following:
CO = V x (TB - TI) x (SI x CI) x 60 x CT x K
A (SB x CB) 1
WHERE:
CO = cardiac output
V = volume of injectate (ml)
A = area of thermodilution curve in square mm divided by paper speed (mm/sec)
K = calibration constant in mm/°C
TB, TI = temperature of blood (B) and injectate (I)
SB, SI = specific gravity of blood and injectate
CB, CI = specific heat of blood and injectate
(SI x CI ) = 1.08 when 5% dextrose is used
(SB x CB)
60 = 60 sec/min
CT = correction factor for injectate warming
Catheter's the Edwards Swan-Ganz Standard Thermodilution Pulmonary Artery
Catheter Use.
.
◈ Edward is validated in the company, Bionics other products in
the supply cable or the sensor should not be used ICO
WARNING

64
Connection method
ICO cable in connect to the ICO Terminal. Swan-Ganz Standard Thermodilution Pulmonary Artery Catheter
Thermistor Connector
Thermistor connector cable to connect to the ICO of the Catheter.
ICO screen the feature is activated (ICO automatic measurement)

65
1) ICO injection quantity and the temperature and constant.
2) ICO's measurements, and edit and save information about the measure.

66
Before Requesting After-Sales Service
This section shows how to treat simple problems encountered during
use.
Please check the following points before requesting after-sales service.
▣ Problems in Display
Sign How to treat
The power of the product is
not turned on.
1. Check if the AC power is supplied.
2. Press and hold the power button for 1-2 seconds.
The power of the product
turns off suddenly during us
1. Check if the power is off due to battery release.
2. Check if AC power is supplied to the product
The power of the product
doesn’t turn off
1. Press and hold the power button for 1-2 seconds and then
check the “Power off” massage on the screen.
The waveform is not normal.
1. Check if there is any equipment with a strong magnetism
around the product.
2. Check if the cable connection is stable.
3. Check if the product is grounded.
▣ Problems in ECG / Respiration measurement
Sign How to treat
The message “LEAD FAULT”
is displayed.
1. Check the ECG cable and ensure that the gel in the
electrode is not dry.
2. Try using another ECG cable.
The ECG waveform is not
displayed.
1. Check if the cable connection is stable.
2. Check if the ECG cable is damaged.
Severe noise on the
waveform
1. Check if the electrode attached to the patient is stable.
2. Check if the disposal electrode is one provided by the
company. (Noise may occur according to the kind of
electrode.)

67
▣ Problems in SpO2 Measurement
Sign How to treat
SpO2 measurement is
unstable.
1. Check if the probe is affected by strong light in
the area.
2. Check if the connection is normal; if the red
light of the sensor flickers or does not turn on,
it is an inferior probe.
3. Check if there are any factors interfering with
the patient’s blood flow. (For example, if the
device is connected to the arm being measured
for blood pressure, or if the probe is banded
on the finger for too long a time.)
4. Check if the probe is properly positioned to the
patient.
5. Check if the patient is shaking their finger or
pressing the probe.
6. Check if the probe is damaged.
▣ Problems in NIBP Measurement
Sign How to treat
NIBP measurement is
patient or the unstable.
1. Check if air has leaked out due to bending or
damage of the NIBP cuff or hose.
2. Check if the proper type of cuff is used for the
patient.
3. Check if the posture of the measurement site is
proper.
4. Check if the patient moves during
measurement.
5. Check if the cuff is attached too loose or too
tight.

68
▣ Problems in IBP Measurement
Sign How to teat
Blood pressure
measurement is
unstable.
Pour out the contents of the tube carefully and
remove the bubble, then shorten the tubing length.
Severe noise or bias in
the waveform.
Do not shake or touch the connection area of the
IBP sensor.
▣ Problems in EtCO2 Measurement
Sign How to treat
Check Adaptor The filter-line and Airway Adaptor is not connected
to the main body. Try again.
Failure Contact the agency.
Occlusion
Check if the sampling line and filter is obstructed,
and clean it up if possible. It should be changed if
necessary. To remove this message, disintegrate
the filter-line and then reconnect it.
▣ Problems in PRINTER Measurement (Optional)
Sign How to treat
No printing
1. Check if the message “PRINTER” is displayed
on the screen.
2. Check if the power LED lights up on the printer.
3. Check if the paper is set normally.
4. Check if the printer door is closed.
Noise during printing
1. Check if the roller is contaminated with foreign
materials or if the gear is out of position.
2. Check if the problem is due to a paper jam.
(change the paper)

69
Product Specifications
1) Measurement Parameter
ECG, SpO2, NBP, 4IBP, RESP, 4TEMP, EtCO2, Multi Gas, ICO, HRV,
OXY-CRG, APG detect analysis, ST level display, mini trend, ECG
Recall, Drug Dose, Color change, Temp TD, NIBP Text trend.
2) Monitor Performances Specifications (Display Method)
- TFT Color LCD Display
- Waveform Display Method : Scrolling Method
- Display Size : 12.1inch (10.4inch)
- Resolution : VGA (800Х600)
- Sweep Speed : 3.12, 6.25, 12.5, 25, 50mm/sec
- Display waveform Time : 4 sec
- Waveform Freeze : Function of waveform freeze
- Waveform Display : ECG, SpO2, IBP 4ch, Resp, EtCO2
- Waveform Traces : 12 Trace
- Measurements Value Display : Heart Rate, SpO2, Pulse Rate, NIBP,
IBP, Temp, EtCO2, FiCO2, Multi Gas
3) ECG Measurement
- ECG Lead : 3 lead / 5 lead( I, II, III, / aVR, aVL, aVF, C1 )
10 lead (I, II, III, aVR, aVL, aVF, C1, C2, C3, C4, C5 C6)
- Input : Installed the circuit for protecting form the high frequency
electric potential of ESU, Defibrillator and so on.
- Frequency Filter : High frequency noise remove filter / Install the
50/60Hz power noise remove filter.
- Input Impedance : Greater 5 M ohm (50/60 Hz)
- Input for Initial Electric currency : Below 50 μA
- CMRR : 120dB
- Frequency Bandwidth) : 0.5 ~ 20 Hz, 0.5Hz ~ 40Hz, 0.05Hz ~
80Hz

70
- Gain : 2.5, 5, 10, 15, 20 mm/mV
- QRS Detection range : -0.5mVpp ~ + 5mVpp
- ST-Level : -0.2mV ~ +0.2mV(Max : 0.01mV~0.99mV ,
Min : -0.99mV~ 0.01mV)
- Alarm Range : High alarm limit : 10~300bpm ,
Low alarm limit : 5~295bpm
- ARRHYHMIA Detect
① Asystole
② Ventricular Tachycardia
③ Ventricular Bradycardia
④ Ventricular Fibrillation
⑤ PVC
⑥ R-on-T
⑦ Missed Beat
⑧ Tachycardia
⑨ Bradycardia
⑩ Bigeminy
⑪ Trigeminy
⑫ Couplet
4) HR (Heart RATE)
- Measurement Range : 0 ~ 300bpm
- Accuracy : ± 2bpm (Measurement Value)
- HR Calculation : 4 ~ 16QRS wave
- Alarm Range : High alarm limit - 10 ~ 300, OFF
Low alarm limit - 5 ~ 295
5) SpO2, Pulse Oximetery
- Measurement Range : 0~ 100%SpO2
- Accuracy : 70 ~ 100% SpO2 : ± 2%
50 ~ 69% SpO2 : ± 3%
0~ 49% SpO2 : Unspecified

71
- Alarm Range : High limit - 21 ~ 99%, OFF SpO2
Low limit - OFF, 20 ~ 98% SpO2
- Pulse Range : 0 ~ 300bpm
- Pulse measurement Accuracy : ±2 bpm
- Low Perfusion : 0.1% up to
6) NIBP (Non-invasive Blood Pressure Measurement)
- Measurement Method : Oscillometric, Automatic measurement
- Display Value : Systolic, Diastolic, Mean Pressure
- Measurement Range :
PRESSURE ADULT NEONATE
SYSTOLIC 60~270 mmHg 50~130 mmHg
MEAN 45~255 mmHg 40~120 mmHg
DIASTOLIC 40~245 mmHg 30~100 mmHg
- Accuracy : 0~200mmHg : ± 3mmHg ,
200~270mmHg : ± 4mmHg
- Range : 0~300mmHg
- Alarm Range
NIBP
[mmHg]
Display High Low
Systolic 40 ~ 295, OFF OFF, 30 ~ 290
Diastolic 30 ~ 285, OFF OFF, 20 ~ 280
Mean 35 ~ 290, OFF OFF, 25 ~ 285
-Auto Pressure : Manual, Automatic (1~59Min,1~12Hour interval)
-Measurement Sensitivity : 1mmHg
7) Respiration
- Measurement Range : 0 ~ 150 bpm
- Accuracy : ± 2 bpm
- Measurement Sensitivity : 1bpm
- Apnea Alarm Range : OFF, 10 ~ 60sec
- Apnea Alarm Range : High : 5~149 , low : 1~145

72
8) IBP (Invasive Blood Pressure) – Optional
- Measurement Range : -50 ~ 400mmHg
- Accuracy : ± 2mmHg
- Measurement Sensitivity : 1mmHg
- Alarm Range
IBP
[mmHg]
Display High Low
Systolic 40 ~ 295, OFF OFF, 30 ~ 290
Diastolic 30 ~ 285, OFF OFF, 25 ~ 280
Mean 35 ~ 290, OFF OFF, 30 ~ 285
9) Temp
- Measurement Range : 0 ~ 50℃
- Measurement Sensitivity : 0.1℃
- Accuracy : ± 0.1℃ (25.0 ~ 50.0℃)
± 0.2℃ (0.0 ~ 24.9℃)
- Alarm range : High alarm limit 20.0℃ ~ 49.0℃
Low alarm limit 10.0℃ ~ 40.0℃
10) EtCO2 : End-Tidal CO2 – Optional
- Transducer Type: Mainstream/Sidestream CO2 Sensor
- Range : 0~150mmHg(0~19.7%)
- Measurement Temperature : 0~45℃
- Accuracy:
- Alarm Range : High: 2~99mmHg , Low : 1~98mmHg
CO2 Density Accuracy
0~40mmHg ±2mmHg
41~70mmHg ±5% of reading
71~100mmHg ±8% of reading
101~150mmHg ±10% of reading

73
11) Multi Gas – Optional
- Transducer Type: Mainstream CO2 Sensor
- Range(Accuracy) :
Co2 : 0~15% ±(0.2% +2% of reading)
N20 : 0~100% ±(2% +2% of reading)
HAL, ISO, ENF : 0 ~ 8% ±(0.15% +5% of reading)
SEV : 0~10% ±(0.15% +5% of reading)
DES : 0~22% ±(0.15% +5% of reading)
- Measurement Temperature : 0~45℃
- Alarm Range :
Co2 High: 1~15% , Low : 0~14%
N20 High: 1~100% , Low : 0~99%
HAL, ISO, ENF High: 1~8% , Low : 0~7%
SEV High: 1~10% , Low : 0~9%
DES High: 1~22% , Low : 1~21%
12) Cardiac Output - Optional
- Measurement Method : Thermodilution
- Measurement range : 0.1 ~ 20 L/min
- Repeatability : 2% or 0.2 L/min
- Injectate temperature range : 0 ~ 27 ℃
- Blood temperature range : 30 ~ 40 ℃
- Injectate volume: 3, 5, 10cc
- Catheter : Swan-Ganz Standard Thermodilution
Pulmonary Artery Catheter
(Edward’s Life Sciences)
13) Printer – Optional
- Print Method : Thermal
- Type : Internal
- Paper width : 58 mm
- Valid Width : 150 ~ 300mm (Change to 25mm unit)
- Wave Printer : 3CH (All Parameter Selection.)

74
14) Trend
- Parameter : Heart Rate, SpO2, Pulse Rate, NIBP, IBP,
Temperature, EtCO2
- 720 Hours (1 minute step : Saving data 43,200ea)
15) Interface
- RS-232C port (SW Update)
- SD Port (SW Update or Trend Data Backup)
- LAN Port (Central Monitor)
- VGA Port (Display Transferring)
16) Physical Specifications
- Size: 310 × 160 × 290 ㎜ (W×D×H)
- Weight : 7.0Kg(Include battery)
- Power Requirement : 100~240 V~ , 50/60 ㎐ , 120VA
- Battery: LI-Ion , 10.8Vd.c , 2600mAh
Optional (Battery 2Pack : 10.8Vd.c 4400mAh x 2)
17) Operating Environment - Temperature : (Operating : 10°C ~ 45°C / Storage : -10°C ~ 50°C)
- Humidity : (Operating : 30 ~ 85% / Storage : 20 ~ 95%)
- Atmospheric Pressure : (Operating : 70 ~ 106kPa
/ Storage : 50 ~106kPa)
18) Standard Accessories
- Patient Cable 1 ea
- NIBP cuff for adult 1 ea
- Hose for NIBP cuff 1 ea
- Power Code 1 ea
- Electrode (5pcs/set) 1 set
- SpO2 Sensor (Reusable) 1 ea
- Operation Manual 1 copy

75
19) Option
- ECG Cable (3 lead type)
- ECG Cable (10 lead)
- SpO2 Extension Cable
- Press Measuring Kit
- Printer Module
- Roll Paper
- EtCO2 Kit set (EtCO2 when installing)
- 3M Electrode (50 PCS/1SET)
- Battery
- TROLLEY (=CART)
- Wall Mount
- SKIN/ TEMP PROBE
- DISPOSABLE SpO2 SENSOR
- NIBP CUFF for Child
- NIBP CUFF for Neonate

76
Product Name Patient Monitor
Model Code BPM-1200(1010)
(BRAND NAME : PATRON(MATRON)
Manufacture Approval No.
Manufacture Approval Date
Manufacture Serial No.
Warranty Period One year after the purchase date
Purchase Date Date Month Year
Customer
Information
Name of
Hospital
Address
Name
Tel Tel) Fax)
Name of Distributor
Name of Manufacture BIONICS Co., Ltd.
● Thank you for using BPM-1200(1010).
● Only the products that have Passed our extensive and thorough
quality tests are offered to our customers.
● This product is a medical device.
● Our policies on repairing, exchange and refund complies with”
Regulation on Consumer Protection & Compensation Standards”
issued by Economic Planning Board of Korea.
Product Warranty
0120