bhmd stemcell freecontent d - beverly hills mdbevhillsmd.com/pdfs/advanced_skincare_guide.pdf ·...
TRANSCRIPT

2016ADVANCED SKINCARE GUIDE

This guide is designed to help you get the best results from your daily skincare regimen.
A beautiful appearance starts with healthy, youthful skin…
And we know you’re serious about looking your best!
Here, you’ll will find valuable tips and techniques for achieving younger-looking skin and a radiant complexion.
These secrets are exclusive to the world’s leading dermatologists and skincare experts…
And normally, they’re only revealed during private seminars that A-list celebrities pay THOUSANDS to attend.
But I want all of my clients to have this important information...
After all, when every member of the Beverly Hills MD family is on the same page, it allows us to help our clients achieve their anti-aging goals faster and more effectively than ever.
Which is why I want you to have this exclusive information free of charge!
Now, one of the things that makes this guide so unique is that it’s intended to help you enhance each step of your everyday skincare routine, by tailoring it to your specific skin type.
Oily SkinLarge, visible pores
Shiny complexion (with extra shine on your forehead, nose, and chin)
Blackheads, pimples, or other blemishes
So before you get started, let’s determine what type of skin you have.
Welcome to Advanced Skincare with Beverly Hills MD
Dr. John LaykeBeverly Hills Plastic Surgery Group
Dry SkinSmall or virtually invisible pores
Excess of lines, creases, and wrinkles Lack of elasticityRed patches
Dull or flaky complexion
01

As you go through the guide, follow the instructions that pertain to your skin type (when applicable).
If you have NORMAL skin (a balance between dry and oily, with no significant characteristics from either group)...
Or COMBINATION skin (oily in some areas, while dry in others)...
You can mix and match techniques as needed.
Throughout the day—and even while you sleep—dirt, oil, and other impurities latch onto the surface of your skin. These toxins can clog pores, cause wrinkles, and cause your skin’s overall appearance to age much faster than it should.
Which is why cleansing isn’t just the first step of any good daily skincare routines…it’s one of the most important.
But to get the best possible results, it’s also important that your cleansing regimen match your skin type. Otherwise, you actually run the risk of doing more harm than good each time you wash.
Overview
Which is why cleansing isn’t just the first step of any good daily skincare routines…it’s one of the most important.
But to get the best possible results, it’s also important that your cleansing regimen match your skin type. Otherwise, you actually run the risk of doing more harm than good each time you wash.
Advanced cleanings is all about attention to detail…right down to the kind of water you use.
Use a gentle face wash every night to remove that day’s makeup, sweat, and airborne dirt particles.
But in the morning — skip the soap altogether!
Instead, rinse your face with plain water…
02
2. Cleansing
Dry Skin

While your skin is still damp, use a soft washcloth to gently remove excess oil off its surface (this will also keep any remaining overnight product residue from getting lodged in your pores).
Cutting back on soap will allow you to get rid of problem-causing impurities — but without losing any youth-boosting natural oils, or dehydrating your dry skin even further.
TIP: On days when your skin feels extra dehydrated, add a drop of soothing rose or lavender oil to your face wash. This will neutralize the drying effects of soap, and actually boost moisture while you cleanse.
Oily skin has its perks. It retains moisture and essential oils better than other skin types — which preserves its youthful appearance and makes it harder for lines and wrinkles to form.
Unfortunately, it also has some drawbacks. It can look shiny, or even greasy (especially towards the end of the day). Oily skin also traps dirt faster — causing frequent breakouts and adult acne.
To keep oil levels from ruining your look, you should always wash your face TWICE daily.
Use a rich, deep-cleansing, oil-free formula at night.
But switch to a gentle soap in the morning (because if you over-dry your skin with soap, it starts producing even more oil!)
03
Oily Skin
TIP: For an ever deeper clean, let your face wash sit for 30-60 seconds before rinsing it off.
You can also add a few drops of tea tree oil to your cleanser before lathering up — it helps fight bacteria, absorbs excess oil, and prevents inflammation!

3. Product Application
In addition to your daily cleansing regimen, you should also purge your pores of deeply set dirt and toxins with a more thorough “steam cleaning” every month.
You can use a special steam facial device. Or simply boil some water, remove it from the stove top, and comfortably position your face about 10 inches above its surface. (Remember to place a clean towel over your head to trap the steam on your skin).
Hold this position for 15-20 minutes — then rinse with cold water.
Repeat every 30 days to maintain a fresh complexion and an extra healthy glow!
Routine Cleaning for ALL Skin types:
The way you apply your products can make a big difference — and different products require different application techniques.
Facial Serums & Creams
BONUS TIP: Most people have hard water in their homes (which contains certain skin-drying minerals), so it’s best to perform your cleansing regimen using bottled or filtered water.
This may seem like a “minor detail” but when I made the switch from tap water, I noticed a significant improvement — and my clients in Beverly Hills now swear by this trick as well!
04
A monthly at-home ‘steam treatment’ will give your skin a healthy color and lasting glow.
Take a small quarter-sized amount of the product.1

Wait 2-3 minutes before applying your next formula.5
05
Apply the product to your skin using firm upward strokes (never stroke your skin downward as this can lead to premature or excess sagging).
2
Once the product is evenly distributed over your face and neck, gently massage it into your skin with your fingertips, using a circular motion. Keep your circles as small as possible, so you don’t pull at your skin.
Adding this step will help the product to absorb deeper into your skin — making its active ingredients work more efficiently and allowing you to get the formula’s full range of benefits.
3
Give the skin on your cheeks and underneath your chin 10-15 quick, firm pats. This will push the product even further into the skin (“locking” it inside) and invigorate your skin cells (by boosting blood circulation) for a rosy, healthy glow.
NOTE: Don’t use too much force. Facial patting should cause a tingling sensation, without being painful.
4

Eye Serums & Creams
Put a dime-sized amount of the product onto the tip of your finger.1
06
Very gently, apply the formula to the skin under and around each eye (including the eyelid and under-eyebrow area), using a light tapping motion.
2
Continue tapping until the formula has fully absorbed. Never rub, stroke, or massage.
This may add an extra minute to the application process, but because the skin around your eyes is very thin and extra-delicate, even the smallest amount of friction can cause it to crease and/or sag. Tapping greatly reduces the risk of damage.
3
Allow product to set for 2-3 minutes before applying sunscreen, makeup, or lash serum.
4

Toner
Facial SerumFacial cream/moisturizer (When using multiple creams, apply your formulas in order from thinnest consistency to thickest).
Eye moisturizer
Sunscreen (SPF 30 or more)
Primer
Foundation
1
23
4
5
6
7
Daytime
Sunscreen
Product Application Order (How to Layer Your Products)
Apply your sunscreen each morning. Use the same application technique as you use for facial serums and creams. See page 4-5.
1
07
If you are not planning to spend extended periods of time outdoors, applying sunscreen just once per day (as part of your morning skincare routine) is enough.
However, when you’re doing outdoor activities — especially on days warm days when your skin tends to perspire more than normal — sunscreen should be reapplied (to all areas of exposed skin) every 2-4 hours.
While swimming outdoor, sunscreen should be reapplied after each time you go in the water.
*Never apply products without performing your cleansing regimen first. Wash your hands with soap and dry thoroughly with a clean towel before beginning the application process.
Nighttime facial serum
Anti-aging facial cream/moisturizer (When using multiple creams, apply your formulas in order from thinnest consistency to thickest).
Eye cream
1
2
3
Nighttime
BONUS TIP: Since you won’t be using sunscreen or makeup, you can apply an extra-heavy coat of each product at night, to give your skin a more potent dose of their active ingredients.

All-natural masks are an easy way to add even more beauty and anti-aging benefits to your usual daily skincare routine...and achieve even more stunning results!
Masks are best when used 1-2 times per week, however they can also be applied ‘as-needed’ to address a specific skin issue (like dryness, sagginess, redness, inflammation, and more).
The best part is that some of the most effective at-home mask treatments can be made with many of the same ingredients you already have in your kitchen.
Here is a list of ordinary foods that have extraordinary, age-defying benefits.
Some can be applied alone (for an easy single-ingredient treatment).
You can also choose a ‘base’ that best suits your skin type…
And then enhance it with additional beauty-boosting foods for a customized, multi-benefit treatment.
Base Ingredients
Rich in vitamins E for deep hydration and long-lasting moisture
08
Avocado Skin type: Dry / Combination
Benefits:
4. Mix and Match DIY Masks (To Meet the Specific Needs of YOUR skin)
Rich in vitamin A - which stimulates collagen production to fight signs of aging like lines, wrinkles, and thinning skinAntioxidants help to repair damage, remove toxins from the skin, and brighten dull-looking skin.
Masks should be worn for 15-20 minutes, then removed with warm water and a soft washcloth.
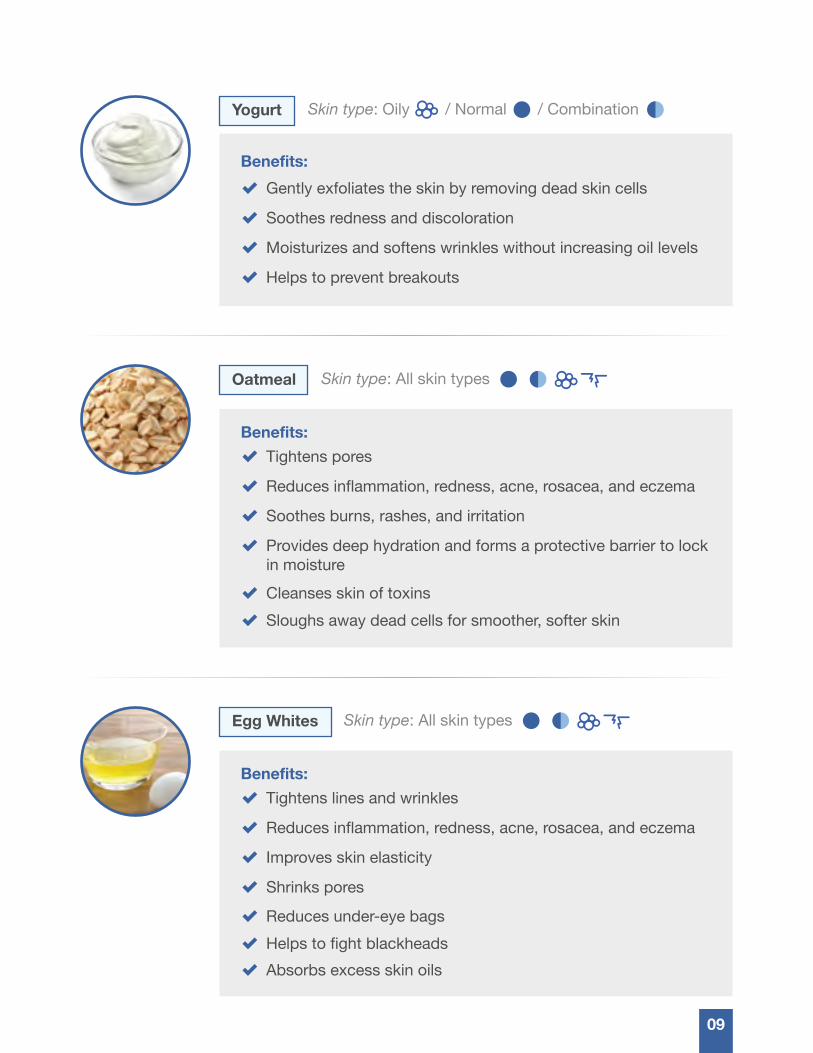
Skin type: Oily / Normal / Combination
Gently exfoliates the skin by removing dead skin cells
09
Yogurt
Benefits:
Soothes redness and discoloration
Moisturizes and softens wrinkles without increasing oil levels
Helps to prevent breakouts
Skin type: All skin types
Tightens pores
Oatmeal
Benefits:
Reduces inflammation, redness, acne, rosacea, and eczema
Soothes burns, rashes, and irritation
Cleanses skin of toxinsSloughs away dead cells for smoother, softer skin
Provides deep hydration and forms a protective barrier to lock in moisture
Skin type: All skin types
Tightens lines and wrinkles
Egg Whites
Benefits:
Reduces inflammation, redness, acne, rosacea, and eczema
Improves skin elasticity
Reduces under-eye bagsHelps to fight blackheadsAbsorbs excess skin oils
Shrinks pores

Enhancers
Helps fight breakouts and inflammation
Honey
Benefits:
Antioxidants prevent damage and slow the signs of aging
Replenishes moisture to boost skin luminosity
Unclogs pores
Skin type: Dry / Combination
Replenishes moisture
These ‘Base’ ingredients are great by themselves...
But they work even better when you combine them with ‘Enhancer’ ingredients — which can zero in on specific problems.
Add one or more of these ingredients for a mask that’s custom-made just for your skin...and you’ll get custom-made results every time!
10
Banana
Benefits:
Softens
High Vitamin C content helps to reduce skin discoloration
Supports a healthy glow
Skin type: All skin types

Helps lighten skin discoloration
11
Lemon Juice
Benefits:
Citric acid removes dead skin cells
Evens skin texture and tone
Targets skin-aging toxins and free radicals
High-power exfoliant (for dramatically smoother, softer skin)
Turmeric
Benefits:
Stimulates blood circulation (for instant radiance)
Absorbs excess skin oils
Reduces the looks of wrinklesBrightens skin
Skin type: All skin types
Skin type: All skin types
Reduces discoloration
Strawberries
Benefits:
Cleansing properties purify pores and prevents breakouts
Tightens skin
Softens wrinklesSupports healthy, youthful glow
Moisturizes without feeling ‘oily’
Skin type: Oily / Combination

Skin type: Dry / Normal
Helps to maintain healthy pH levels in the skin
12
Beer
Benefits:
Cleansing properties give skin a purified look and feel
Yeast helps to kill bad bacteria, fight breakouts
Removes dry/dead skin cells for an extra-smooth complexionBrightens skin tone
Contains 3 major antioxidants to fight damage and prevents signs of aging
Olive Oil
Benefits:
Provides maximum moisture without clogging pores
Relaxes deeply-set lines and wrinkles
Improves skin elasticityPenetrates deeply for long-lasting hydration and softness
Skin type: Oily / Combination
NOTE: Always do a “patch” test before applying any new ingredient to your face. Allergic reactions and irritation are very rare, but have been known to occur on certain types of skin.

5. 5 Look-Younger Tricks
The way you apply your products can make a big difference — and different products require different application techniques.
The good news is, you can minimize squinting by wearing sunglasses every time you step outside.
That’s right, EVERY time — because, it’s not just bright sunlight that makes you squint. Any kind of outdoor lighting can strain the eyes. So even on overcast days, most people still narrow their eyes enough for unwanted wrinkles to develop overtime.
Not to mention, damaging UV rays can reach your skin even through a thick layer of dark clouds. These rays cause signs of aging — like discoloration, visible lines, loss of collagen, and thinning skin — to show up around your eyes much faster than they otherwise would.
So in addition to daily sunscreen, a pair of UV-blocking sunglasses is essential to any anti-aging eye care plan.
13
Sunglasses Outside of age-related collagen loss, squinting is the #1 cause of crow’s feet and other unsightly creases around your eyes.
1
But the wrong bedding can set back your body’s nightly anti-aging process immeasurably:
Skin-Smart BeddingYou can’t maintain a fresh, youthful look without beauty sleep. Nighttime is when your skin goes into intense ‘repair mode’ — restoring damaged cells and producing natural oils to fight wrinkles.
2
Sleeping on your side causes the skin on your face to bend and crease, leaving with you deep lines and sagging skin.
—
Pillow cases made out of fabrics such as cotton, linen, flannel, and nylon contribute to skin damage. Even though they might feel soft, your skin actually catches on these rough fibers — which causes it to bend and crease in natural ways.
—

However, you can prevent these problems by:
And this leads to another problem: Pucker lines.
As your lips lose their former shape, fullness, and hydration levels, they start to develop vertical wrinkles called “pucker lines” — which eventually extend past the edges of your mouth and onto your face.
These pucker lines are most visible on the area of skin between your nose and upper lip, so it’s important to keep both your lips and the skin around them extra hydrated.
However, there are certain daily habits which can cause pucker lines to form — making the natural signs of aging even harder to reverse.
Avoid Things That Make You PuckerSome of the most prominent signs of aging start at your lips. As you get older, you lose collagen and other structural proteins, which causes your “deflate,” thin out, and retain less moisture.
3
Sleeping on your back, rather than on your side or stomach. There are even specially contoured pillows designed to keep your head centered throughout the night. They’re extremely popular among my celebrity clients — but you can easily order your own skin-protecting pillow online.
—
Using silk pillowcases to minimize friction, and prevent skin from bending and creasing while you sleep.
—
Changing your pillowcases every 3 days to ensure your skin always rests on a clean, breathable surface.
—
Drinking through a straw—
Pulling on a cigarette —
Whistling —
Tensing your mouth in stressful situations—
14
Pillow cases also trap dirt and oil, which then seep into your freshly cleansed pores while you sleep — causing breakouts, dullness, and actually weaken your skin’s structure.
—

1Tbsp plain yogurt1/2 Tbsp ground black pepper.
——
All of these common habits cause you to repeatedly purse your lips on a regular basis. Fortunately they are easy to minimize (or avoid altogether), once you become mindful of their harmful effects on your appearance.
These dark specks of oxidized dirt and oil make your skin dull, enlarge your pores, and can potentially lead to infection.
And blackheads are notoriously hard to get rid of.
But there’s a unique solution that’s not only easier and more affordable than a trip to the dermatologist — or even a pack of sticky pore strips from the pharmacy…
It’s also incredibly effective and requires just 2 ingredients — which you probably have in your kitchen right now!
You will notice fewer blackheads immediately...and using this simple treatment once a week will help to keep them from coming back!
Banish Blackheads with Yogurt and Black PepperBlackheads are especially common in people with oily complexions, but can appear on other types of skin as well.
4
15
Combine:
Stir until evenly blended.
1
2
Leave on for 15 minutes, then rinse with warm water. 4
Apply the paste to any affected areas of skin (typically, blackheads appear on the nose, cheeks, and chin. Make sure to avoid getting this mixture in, or near, your eyes).
3
NOTE: Black pepper may irritate certain types of sensitive skin. Remember to do a patch test on your wrist or neck before applying this treatment to your face.

The DIY Facial RejuvenatorYou can temporarily give your face a tighter, more lifted look with this quick-and-easy hair trick.
5
16
Take a small (about ½ inch) section of hair from just above each of your temples.
Twist both sections tightly from root to tip.
1
2
From there, you can pull the rest of your hair up into a bun or ponytail (for maximum lift). Or, you can use this tightening technique as a base for any of your favorite hairstyles.
4
Pin the sections securely at the upper-back of your head.
You will notice that the skin around your eyes, eyebrows, and even your jawline instantly look tighter and more lifted.
3
NOTE: This trick is straight out of the ‘celebrity stylist’s secret handbook’...and it’s a Red Carpet go-to for many of Hollywood’s most beautiful stars!

17
Thank you for reading. I hope you’ve found our Advanced Skin Care Guide beneficial. By turning these tips and techniques into everyday beauty habits, you’ll be able to achieve the same accelerated results as our A-list clients.
Because a few extra steps — and a little expert advice — really can make the difference between living with your appearance...and LOVING it!Your Beverly Hills MD,
Dr. John Layke
Remember, my #1 secret to age-defying skin can be yours this Friday, February 26th…
BHMD Deep Regenerating Stem Cell Moisturizer
Be among the first to experience this cutting-edge anti-aging solution — sign up for the Early Access List today (supply is extremely limited).
Click here to register for Early Access today!
*This will allow you to access the Deep Regenerating Stem Cell Moisturizer order page 1 hour before it goes on sale. This 60 minute ‘head start’ will significantly improve your chances of getting you order in before this limited batch of only 5,000 jars is SOLD OUT.