belkin f5u012
DESCRIPTION
Thank you for purchasing the Belkin ComponentsExpressBus™ Plus! Now you have even more connectivitywithout the headache of configuring cables, switches, orcomplicated software and hardware setups. With theExpressBus™ Plus, you can add three more USB ports, aparallel printer port, and a serial (RS232) port, all from onecable. Simply plug it in, pop in the floppy disk, and you’redone! You don’t even have to reboot. Requires Windows® 98.TRANSCRIPT
P73213-A F5U012
ExpressBus™ Plus
User Manual

Thank you for purchasing the Belkin ComponentsExpressBus™ Plus! Now you have even more connectivitywithout the headache of configuring cables, switches, orcomplicated software and hardware setups. With theExpressBus™ Plus, you can add three more USB ports, aparallel printer port, and a serial (RS232) port, all from onecable. Simply plug it in, pop in the floppy disk, and you’redone! You don’t even have to reboot. Requires Windows® 98.
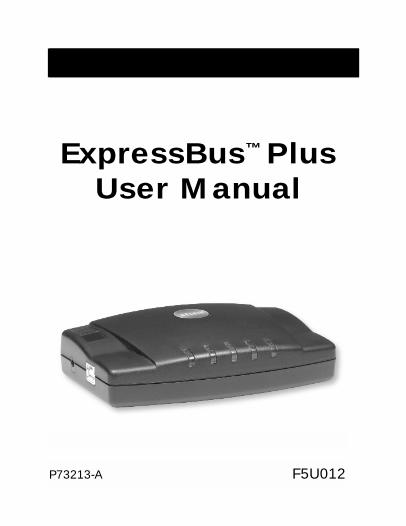
Package Contents(1) ExpressBus™ Plus F5U012
(1) USB Device Cable 6 ft. (1.8m) F3U133-06
(1) Power Adapter
5 V DC, 2.0A
Registration Card P72009
Software Driver Diskette
This Manual
Introduction
1

Product Detail
2
Front View:Power LEDUSB_1 LEDUSB_2 LEDUSB_3 LEDSerial Port LED
Right Side View:USB Downstream PortsUSB_1USB_2USB_3
Left Side View:USB Upstream PortPower Adapter Jack
Rear View:Serial PortParallel Printer Port

Hardware Installation
1. Plug the Power Adapter into a walloutlet, and the other end into thePower Jack of the ExpressBus™ Plus.
2. Plug in the included USB Device Cableto the USB port of your PC. This endof the cables has the flat connector.
3. Plug in the other end of the cable into the upstream portof the ExpressBus™ Plus. This end of the cable has a moresquare shape. The first LED will light up in green.
At this point, a message in Windows® 98 should appearsaying “New Hardware Found”.
3

Software Installation
4
Windows® 98 Driver Installation1. Windows® will detect "Generic USB Hub". Click “Next”.
2. Leave on "Search" and click “Next”.
3. Uncheck everything and click “Next”.
Windows® may prompt you to insert a Windows® 98installation CD. If so, insert the installation CD into yourCD-ROM drive and follow the system prompts.

4. Windows® will find the driver for "Generic USB Hub". Click “Next”.
5. Windows® will install the Generic USB Hub driver. Click “Finish”.
6. Windows® will detect "USB Ver 1.1 Device". Click “Next”.
7. Leave on “Search for the best driver for your device(Recommended)”.
8. Select the “Floppy Disk Drives” box, make sure your BelkinWindows® 98 Driver Installation diskette has been insertedinto your floppy disk drive, and click “Next”.
9. Windows® will find the drivers for “Belkin F5U012(P) USBBay Serial Interface Controller”. Click “Next”.
10. Windows® will install the Belkin F5U012(P) USB Bay SerialInterface Controller driver. Click “Finish”.
11. Windows® will detect "Unknown Device". Click “Next”.
12. Leave on "Search for the best driver for your device(Recommended)" and click “Next”.
Software Installation (continued)
5

13. Select the "Floppy Disk Drives" box, make sure your BelkinWindows® 98 Driver Installation diskette is still inserted intoyour floppy disk drive and click “Next”.
14. Windows® will find the drivers for "Belkin F5U012(P) USBBay Parallel Interface Controller". Click “Next”.
15. Windows® will install the Belkin F5U012(P) USB Bay ParallelInterface Controller driver. Click “Finish”.
16. Windows® will detect "Serial on USB Port" and install thedriver automatically.
Driver installation is now complete.
Software Installation (continued)
6

Software Installation (continued)
7
Windows® 98 SE Driver Installation1. Windows® will detect "USB Ver 1.1 device". Click "Next".
2. Leave on "Search" and click "Next".
3. Select the "Floppy disk drives" box and make sure theBelkin Driver Installation Diskette has been inserted intoyour floppy drive. Click “Next”.
4. Windows® will find the drivers for "Belkin F5U012(P) USBBay Serial Interface Controller". Click "Next".

Software Installation (continued)
8
5. Windows® will install the Belkin F5U012(P) USB Bay SerialInterface Controller driver. Click "Finish".
6. Windows® will detect "USB Device". Click “Next”.
7. Leave on "Search for the best driver for your device(Recommended)".
8. Select the "Floppy Disk Drives" box, make sure your BelkinWindows® 98 Driver disk is still in your floppy disk driveand click “Next”.
9. Windows® will find the drivers for "Belkin F5U012(P) USBBay Parallel Interface Controller". Click “Next”.
10. Windows® will install the Belkin F5U012(P) USB Bay ParallelInterface Controller drivers. Click “Finish”.
11. Windows® will detect "Serial on USB Port", and willautomatically install the proper drivers.
Driver Installation is now complete.

Software Installation (continued)
9
To verify that the drivers are loaded, right-click on “MyComputer” and select properties. Click on the “DeviceManager” tab and you will see the device list as shown below.The encircled devices are parts of the ExpressBus™ Plus.

Features and Usage
10
Built-in 3-Port HubThe built-in 3-Port hub of the ExpressBus™ Plus functions as anyother USB Hub. Simply plug in any USB device and Windows®
will automatically recognize the device and configure the drivers.
Each downstream port supports both full-speed and low-speeddevices. Each port can provide a maximum of 500mA of current aslong as the power adapter is connected to the ExpressBus™ Plus.
The ExpressBus™ Plus also features Overcurrent Protection andAuto Recovery. If a USB device plugged into the ExpressBus™
Plus draws more than 500mA of current, OvercurrentProtection shuts off all power to the faulty downstream portand changes the appropriate LED color to red. When the faultydevice is unplugged from the ExpressBus™ Plus, the AutoRecovery feature automatically resets the OvercurrentProtection and in approximately 5 seconds, the LED is greenagain and the port is free to be used.
Parallel Printer PortThe Parallel Printer Port of the ExpressBus™ Plus allows you toconnect any parallel printer to your computer, without using upthe current parallel port. All you need is a standard printer cable.
If you are connecting a newprinter to the ExpressBus™ PlusAFTER the ExpressBus™ Plusdrivers have been installed, besure to select the correct port.“PB1284-1” is the Parallel PrinterPort of the ExpressBus™ Plus:

11
Features and Usage (continued)
If your printer has been installed previously on the local parallelport of your computer (LPT1 – the one on the back of yourmachine), you can now free up that parallel port and connectyour printer to the ExpressBus™ Plus. To do that, you must tellWindows® that the printer is attached to a new port. Click on“Start”, select “Settings” and right-click on your printer.Choose “Properties” and click on the “Details” tab:
In the “Print to the following port:” box, make sure you select“PB1284-1”. Click on OK to save your settings.

Features and Usage (continued)
12
Some printers may not function correctly because their driversare expecting a true LPT port for communication. If youencounter problems with bi-directional communication, check tosee if your printer driver allows you to DISABLE bi-directionalcommunication. You can do this also by clicking on “Start”, select“Settings” then right-click on your printer, choose “Properties”and then the “Details” tab. Then, click on “Spool Settings”:
Click on “Disable bi-directional support for this printer” thenclick OK. If it is grayed out, then your printer driver does notsupport bi-directional communication in the first place.
You can also try replacing the current printer driver with aRaster or Output-only driver. This can be obtained from yourprinter manufacturer’s web site, or from their technical support.

13
Features and Usage (continued)
IMPORTANT NOTE:
THE PARALLEL PRINTER PORT OF THE ExpressBus™ Plus ISDESIGNED TO BE USED AS OUTPUT-ONLY FOR PARALLELPRINTERS. OTHER PARALLEL DEVICES SUCH ASREMOVABLE-MEDIA DRIVES, SCANNERS, CD-ROMS ANDCAMERAS CANNOT COMMUNICATE TO THE COMPUTERTHROUGH THE THIS PORT.
Hence, it is preferable to have your printer connected to theParallel Printer Port of the ExpressBus™ Plus and other non-printer parallel devices to the LPT1 parallel port at the back ofyour computer. If you have more than one printer and still needthe LPT1 parallel port to connect to a non-printer device,obtain Belkin Components USB Parallel Printer Adapters andconnect all your printers to the USB ports of the ExpressBus™
Plus. Out of USB ports? Just get a Belkin ComponentsExpressBus® 4-Port or 7-Port Hub, and give your computermore USB ports to connect with!
USB Serial PortThe Serial Port of the ExpressBus™ Plus gives your system a fullyfunctional serial port for Windows® capable of speeds of up to115.2kbps. Any serial device will function normally in Windows®
applications through the ExpressBus™ Plus Serial Port.
Note: There is no DOS-box support for the serial port.This means DOS applications running overWindows® will not be able to access serial devicesconnected to the serial port of the ExpressBus™
Plus. For these situations, obtain a BelkinComponents USB Serial Adapter, Part# F5U003.

USB Serial Port
14
Certain serial mice may not function properly throughthe ExpressBus™ Plus Serial Port.
The most important part about making sure a serial device willwork on your computer is to be certain that you have thecorrect serial cable. External modems require a straight-throughcable, while serial printers require a crossed cable.
Connecting serial devices to the ExpressBus™ Plus requires youto indicate to the software the correct serial port. For instance,when installing an external modem, be sure to select the “Serialon USB” port as shown below:

15
USB Serial Port (continued)
If your modem has already been installed previously on oneof the serial ports on the back of your PC and you wish toconnect it now to the ExpressBus™ Plus, you will have tochange the port setting. To do this, click on “Start”,“Settings”, “Control Panel” and double-click on “Modems”.Click on your modem and click on the “Properties” button:

USB Serial Port (continued)
16
In the “Port:” box, change the setting to “Serial on USB”. Clickon OK to save your settings. Now your modem communicatesthrough the ExpressBus™ Plus Serial Port and the serial ports on the back of your computer are free to connect to otherserial devices.
Still need more serial ports? Grab yourself Belkin ComponentsUSB Serial Adapters (Part# F5U003) and ExpressBus™ Hubs (4-Port is F5U001 and 7-Port is F5U010). Adding serial ports isas easy as plugging in a cable!

Information
FCC Statement
DECLARATION OF CONFORMITY WITH FCC RULES FOR ELECTROMAGNETIC COMPATIBILITY
We, Belkin Components, of 501 West Walnut Street, Compton CA 90220,declare under our sole responsibility that the product:
F5U012to which this declaration relates:Complies with Part 15 of the FCC Rules. Operation is subject to the followingtwo conditions: (1) this device may not cause harmful interference, and (2) thisdevice must accept any interference received, including interference that maycause undesired operation.
CE Declaration of ConformityWe, Belkin Components, declare under our sole responsibility that the F5U012, to whichthis declaration relates, is in conformity with Generic Emissions Standard EN50081-1 andwith Generic Immunity Standard EN50082-1 1992.
Belkin Components Limited Lifetime Product WarrantyBelkin Components warrants this product against defects in materials and workmanshipfor its lifetime. If a defect is discovered, Belkin will, at its option, repair or replace theproduct at no charge provided it is returned during the warranty period, withtransportation charges prepaid, to the authorized Belkin dealer from whom you purchasedthe product. Proof of purchase may be required.
This warranty does not apply if the product has been damaged by accident, abuse,misuse, or misapplication; if the product has been modified without the written permissionof Belkin; or if any Belkin serial number has been removed or defaced.
THE WARRANTY AND REMEDIES SET FORTH ABOVE ARE EXCLUSIVE IN LIEU OF ALLOTHERS, WHETHER ORAL OR WRITTEN, EXPRESSED OR IMPLIED. BELKIN SPECIFICALLYDISCLAIMS ANY AND ALL IMPLIED WARRANTIES, INCLUDING, WITHOUT LIMITATION,WARRANTIES OF MERCHANTABILITY AND FITNESS FOR A PARTICULAR PURPOSE.
No Belkin dealer, agent, or employee is authorized to make any modification, extension,or addition to this warranty.
BELKIN IS NOT RESPONSIBLE FOR SPECIAL, INCIDENTAL, OR CONSEQUENTIALDAMAGES RESULTING FROM ANY BREACH OF WARRANTY, OR UNDER ANY OTHERLEGAL THEORY, INCLUDING BUT NOT LIMITED TO LOST PROFITS, DOWNTIME,GOODWILL, DAMAGE TO OR REPROGRAMMING, OR REPRODUCING ANY PROGRAMOR DATA STORED IN OR USED WITH BELKIN PRODUCTS.
Some states do not allow the exclusion or limitation of incidental or consequentialdamages or exclusions of implied warranties, so the above limitations of exclusions maynot apply to you. This warranty gives you specific legal rights, and you may also haveother rights that vary from state to state.

Belkin Components B.V.Diamantlaan 8 • 2132 WV
Hoofddorp • The NetherlandsTel: +31 (0) 235698765Fax: +31 (0) 235612694
Belkin Components, Ltd.Unit 13 • Gatelodge Close • Round Spinney
Northampton • Northants • NN3 8RX • United KingdomTel: +44 (0) 1604678300Fax: +44 (0) 1604678330
belkin.com
Belkin Components501 West Walnut Street
Compton • CA • 90220 • USATel: 310.898.1100Fax: 310.898.1111
© 2000 Belkin Components. All rights reserved. All trade names are registered trademarks ofrespective manufacturers listed.