basic emergent airway management. learning objectives: review of important facts and concepts airway...
TRANSCRIPT

Basic Emergent Airway Basic Emergent Airway ManagementManagement

Learning Objectives:• Review of important facts and concepts• Airway Management equipment and Skills
(primarily hands on simulation skills stations)• Integration of Knowledge Skills and Judgment
through Simulated Clinical (simulation based practice)
• Formal assessment of skills (simulation-based clinical skills and case management)

Basic Emergent Airway Basic Emergent Airway ManagementManagement

Review of Important Facts and Concepts:
Practical “Basic Emergent Airway GuidelinesAvoiding airway emergencies through judicious
patient selectionMonitoring Oxygenation and VentilationSigns and Symptoms of respiratory Distress

Practical “Basic Emergent Airway Guidelines:
• A, B, C, D
• A—Airway– LOOK & LISTEN– LOOK (overall patient & specifically in mouth)
• B---Breathing (ASK, LOOK, LISTEN)
• Circulation---check pulse, Get monitors on!
• IMMEDIATELY ASK YOURSELF ARE THEY SAFE or in IMMEDIATE TROUBLE!
• Do ACT----- Get HELP!!!

Initial introduction to guidelines:

Take home points to make this easy:
1. The best way to handle an airway emergency is to avoid getting into the situation in the first place through judicious patient selection based on pre-procedural patient airway examination and history. This coupled with attentive monitoring of oxygenation and ventilation can avoid many bad situations.
2. When managing an airway problem focus on oxygenation signs and symptoms (i.e. SpO2, Resp. rate, LOC, EtCO2) then decide to either to:
a. “Supplement” NC O2, face mask, Non-rebreatherb. “Assist” BMV + a nasal airwayc. “Control” BMV + a nasal and or oral airway, LMA if OMV fails
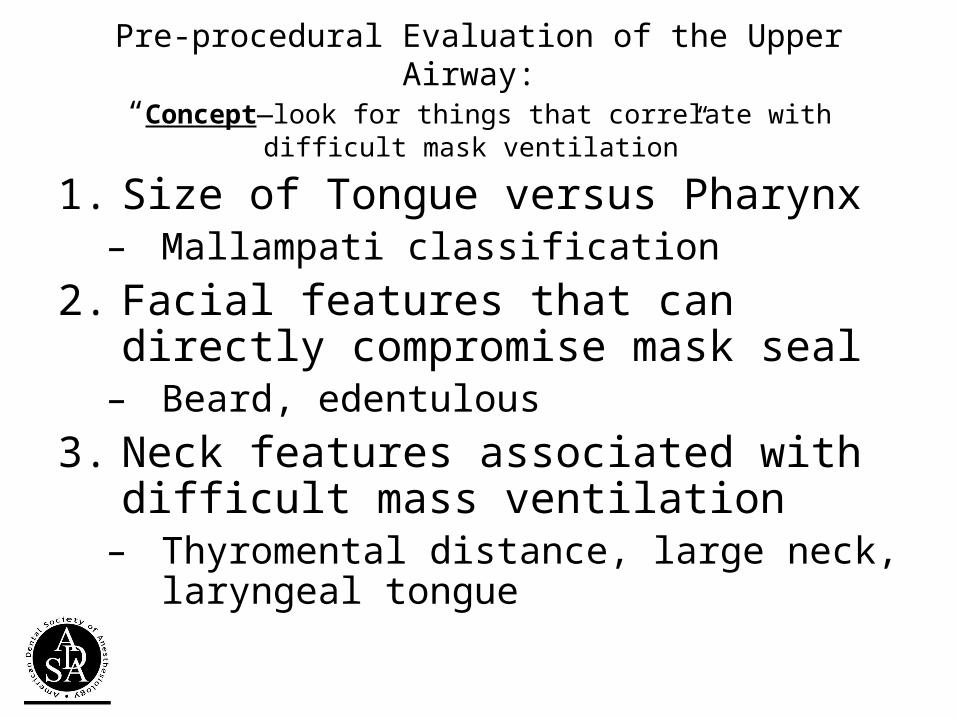
Pre-procedural Evaluation of the Upper Airway: “Concept—look for things that correlate with difficult mask ventilation”
1. Size of Tongue versus Pharynx– Mallampati classification
2. Facial features that can directly compromise mask seal– Beard, edentulous
3. Neck features associated with difficult mass ventilation– Thyromental distance, large neck, laryngeal
tongue

Understanding Upper Airway Obstruction—”cork in the bottle”

1. Size of Tongue vs Pharynx“Mallampati Classification”
Concept: Patient’s with a Class 3-4 airway have a relatively large tongue relative to the volume of their pharynx which can lead to difficulty performing positive pressure ventilation.

2. Facial features:Concept: Be wary of facial features in sedation candidates that could make
trying to obtain a mask seal very difficult (they all leak).

3. ↓ Anterior Mandibular Space& Large Neck
Concept: “neck features that in the presence of sedation, relaxed airway, recumbent position: a) place a patient at higher risk for obstruction and b) that if needed, could make positive pressure ventilation difficult”.

Monitoring Oxygenation and Ventilation
• Respiratory Distress Signs & Symptoms• Monitors

SIGNS OF RESPIRATORY DISTRESS
• Anxiety/altered mental status
• Diaphoresis• Tachypnea• Bradypnea• Pursed lip breathing• Short sentences• Abnormal phonation
• Prolonged expirations• Nasal flaring• Retractions• Accessory muscle use• Paradoxical movement• Snoring• Crackles• Wheezing

RESPIRATORY DISTRESS --MONITORS
• Pulse Oximetry (OXYGENATION, ventilation)
• Capnography (VENTILATION, oxygenation)• Common Sensometer (look/listen/feel)

Pulse Oximetry
• Simulated desaturation example on simulator• “Listen to the tone” (insert video/audio of
desat)• Concept: The Pulse oximeter tone is a good
monitor that allows you to work at the same time (this requires training yourself to listen to the tone).
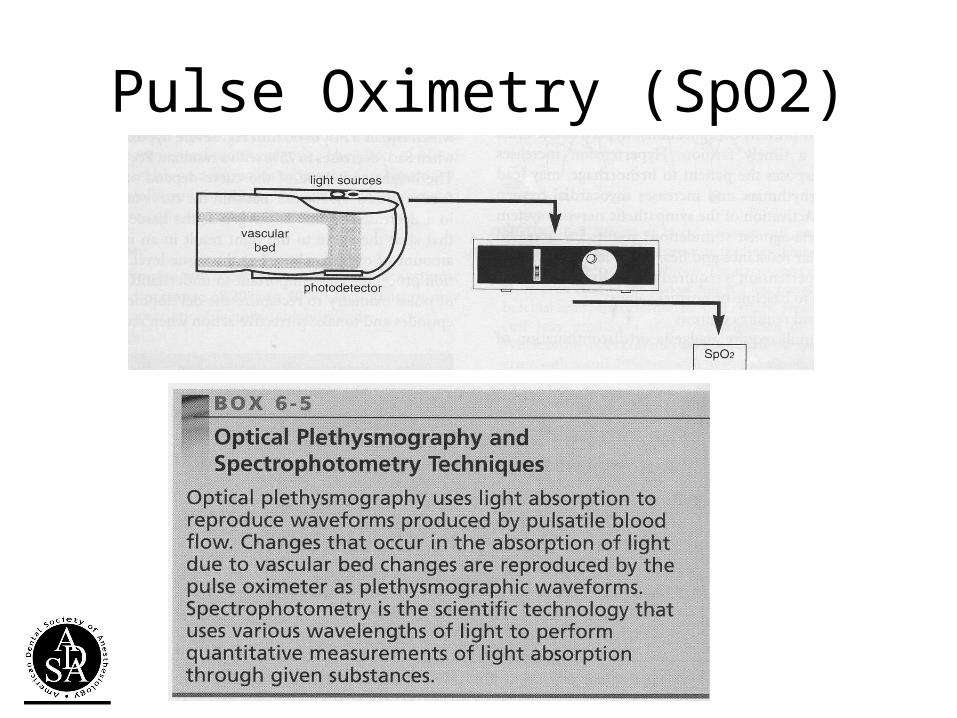
Pulse Oximetry (SpO2)

Pulse Oximetry• SpO2 ~ SaO2• SpO2 90%~PaO2 60 mmHg (30-60, 60-90)
Factors that influence accuracy of Pulse Oximetry• Low blood flow states• Patient movement• Dysfunctional hemoglobins• Altered oxyhemoglobin dissociation curve
Note: oxygenation is not necessarily ventilation

Hg-SaO2 Concepts:

Capnography

Capnography

Causes of changes in the exhaled concentrations of CO2
Increase• Hypoventilation• Rebreathing• Admin. NaHCO3• Metabolic
Decrease• Hyperventilation• Hypothermia• Low Cardiac output• Pulmonary embolism• Cardiac arrest

Common Sensometer: (look/listen/feel)“How you doing---”

Common Sensometer: (look/listen/feel)
• Simulated “respiratory distress” example on simulator

Basic Emergent Airway Management:
• A, B, C, D
• A—Airway– LOOK & LISTEN– LOOK (overall patient & specifically in mouth)
• B---Breathing (ASK, LOOK, LISTEN)
• Get monitors on!
• IMMEDIATELY ASK YOURSELF ARE THEY SAFE or in IMMEDIATE TROUBLE!
• ACT----- Get HELP!!!

© 2007 John J. Schaefer III, MD

ROTATE TO NEXT STATION:

Basic Emergent Airway Basic Emergent Airway ManagementManagement

Station A: Airway Management equipment and Skills
– Supplemental O2• Setting up O2 tank• Nasal Cannula• Simple Face Mask• Non-Rebreather Face Mask• Take home points
– Jaw thrust, Nasal & Oral Airways• Jaw thrust• Nasal Airway• Oral Airway• Take home points

Setting up an O2 Tank:
• --need to finish---

Supplemental Oxygen:
• Nasal Cannula• Simple Face Mask• Non-rebreather Face Mask

Nasal Cannula
• Increases in FiO2 varies with respiratory rate, depth, and mouth breathing
• Each ^ 2 LPM =^ FiO2 2-4%• Intolerable > 8-10 LPM

Simple Facemask:
• FiO2 = 30-60%• 6-10 LPM

Nonrebreathing Mask:
• FiO2 = 60-90% • 15 LPM

Jaw Thrust Concept:

Nasopharyngeal Airway:
• Secure air passage from nose to posterior pharynx, bypassing tongue
• Tolerated in conscious patients
• Can lead to epistaxis

Nasopharyngeal Airway: How to--
1. Observe nares for deviated septum
2. Lubricate nasal airway
3. Direct airway posterior approximately perpendicular, not in same direction as nasal bridge
4. Important concept is that it needs to be long enough to get pass base of tongue

Oropharyngeal Airway
• Secure air passage from mouth to pharynx, bypassing tongue
• Patient must be areflexic/unresponsive

Oropharyngeal Airway: How to--

Oral & Nasal Airway Practice:
• Do on each other!----or simulator

Supplemental O2 Safety Reminder---
Be extremely careful and avoid if possible use of an ignition source in the presence of supplemental O2!

ROTATE TO NEXT STATION:

Basic Emergent Airway Basic Emergent Airway ManagementManagement

Station: Bag-Mask ventilation
• Setting up equipment• How to get a face mask seal & basic bag mask ventilation
– Concept and demonstration– Simulation-based practice
• Two person bag mask ventilation – Concept and demonstration– Simulation-based practice
• Optimal Mask ventilation – Concept and demonstration– Simulation-based practice
• Assisted mask ventilation – Concept and demonstration– Simulation-based practice
• Take home points

Bag-Mask:
• Assist or control ventilation
• Combine with NPA/OPA if possible
• TV: 5-7 ml/kg• Ventilation rate: 1 breath
every 5-6 secs• Avoid hyperventilation

Masking Concepts & Tips:
• Tip #1 USE AN AIRWAY! It is too hard to both seal and do a good jaw thrust. By using an airway, one can focus on mask seal which is hard enough and not worry about trying to do a good jaw thrust at the same time.

Masking Concept: “It is all about the seal”
“Correct” “Classic --mistake”

How to obtain a mask seal– the key is understanding and applying how to apply force to all parts of the mask!
• The most common mistake leading to leakage is positioning your hand such that mask seal is sacrificed for jaw thrust.

How to obtain a mask seal– the key is understanding and applying how to apply force to all parts of the mask!
• In theory the reason why jaw thrust is emphasized is to “open the airway”
• The reality is that unless one has a very large hand, this is extremely difficult to do at the same time one extends their fingers to the distal side of the mask

Solution! –how to both seal the mask and “open the airway”-4 step process-
1. Use either a nasal (reflexes present) and or oral airway (reflexes absent) “to open the airway” –same function as “jaw thrust”

Solution! –how to both seal the mask and “open the airway”
2. Place web of thumb-index finger as close as possible to center of mask (this allows your fingers to maximally spread around the entire mask) and through a combination of palm and finger pressure, apply pressure around the entire mask.
3. Hook 1-2 fingers anywhere comfortable along the mandible to facilitate applying leverage with your other fingers and palm (this should not be confused with trying to perform a “jaw thrust”).

Solution! –how to both seal the mask and “open the airway”
4. For mechanical advantage and comfort, the wrist should not be flexed. This means that instead of standing directly behind the patient, one should move a little to the same side of the patient you are masking with (usually left side).

Tricks that help--• Place the mask from the bridge of the nose first to
affect a better seal.
• Position the patient supine and at about waist height (if chair can be adjusted). If necessary to achieve the equivalent position (chair doesn’t adjust enough) use a step stool. Use part of your weight by leaning into the mask to assist in obtaining a mask seal (note: only do this with an airway in place or one can cause obstruction).
• If the mask you are using has mask strap bracket on it, take it off so your hand can get closer to the center of the mask.
Optimal Mask Ventilation
• Bag-Mask• Nasal Airway• Oropharyngeal Airway• Two-person mask ventilation


“Assist” BMV
• Time it with inhalation by either a) watching chest rise or b) watching abdominal rise (non-compliant chest)
• If you time it wrong you can make things worse

Training exercise:
1. Demonstrate competent mask ventilation on simulator
2. Demonstrate optimal mask ventilation3. Demonstrate two person mask ventilation4. Demonstrate “assisted” mask ventilation
Facilitator Note: use “mask ventilation practice” scenario

ROTATE TO NEXT STATION:

Basic Emergent Airway Basic Emergent Airway ManagementManagement

Station: Laryngeal Mask Ventilation—Rescue airway and Applied Guidelines practice
-LMA• Indications, contraindications, complications• LMA placement
– Concept and demonstration– Simulation-based practice
-Integration of Knowledge Skills and Judgment through Simulated Clinical Practice– Review of guidelines– Simulation practice

Laryngeal Mask Airways (LMA), Indications and Use

Introduction
• The LMA was invented by Dr. Archie Brain at the London Hospital, Whitechapel in 1981
• The LMA consists of two parts:– The mask– The tube
• The LMA has proven to be very effective in the management of bag mask ventilation

Introduction
• The LMA design: – Provides an “oval seal around
the laryngeal inlet” once the LMA is inserted and the cuff inflated.
– Once inserted, it lies at the crossroads of the digestive and respiratory tracts.

Indications for theuse of the LMA
• Situations involving a difficult mask (BVM) fit.
• May be used as a back-up device where optimal mask ventilationis not successful.
• Patient must be areflexic (pharynx)

Relative Contraindicationsof the LMA
• Greater than 14 to 16 weeks pregnant
• Patients at risk of aspiration
• NOTE: Not all contraindications are absolute

Complications of the LMA
• Throat soreness
• Dryness of the throat and/or mucosa
• Side effects due to improper placement vary based on the nature of the placement

Preparation of theLMA for Insertion
• Step 1: Size selection
• Step 2: Examination of the LMA
• Step 3: Check deflation and inflation of the cuff
• Step 4: Lubrication of the LMA
• Step 5: Position the Airway

Step 1: Size Selection
• Verify that the size of the LMA is correct for the patient
• Recommended Size guidelines:– Size 1: under 5 kg– Size 1.5: 5 to 10 kg– Size 2: 10 to 20 kg– Size 2.5: 20 to 30 kg– Size 3: 30 kg to small adult– Size 4: adult– Size 5: Large adult/poor
seal with size 4

Step 2: Examinationof the LMA
• Visually inspect the LMA cuff for tears or other abnormalities
• Inspect the tube to ensure that it is free of blockage or loose particles
• Deflate the cuff to ensure that it will maintain a vacuum
• Inflate the cuff to ensure that it does not leak

Step 3: Deflation and Inflation of the LMA
• Slowly deflate the cuff to form a smooth flat wedge shape which will pass easily around the back of the tongue and behind the epiglottis.
• During inflation the maximum air in cuff should not exceed:– Size 1: 4 ml– Size 1.5: 7 ml– Size 2: 10 ml– Size 2.5: 14 ml– Size 3: 20 ml– Size 4: 30 ml– Size 5: 40 ml

Step 4: Lubricationof the LMA
• Use a water soluble lubricant to lubricate the LMA
• Only lubricate the LMA just prior to insertion
• Lubricate the back of the mask thoroughly

LMAInsertionTechnique

LMA Insertion Step 1
• Grasp the LMA by the tube, holding it like a pen as near as possible to the mask end.
• Place the tip of the LMA against the inner surface of the patient’s upper teeth
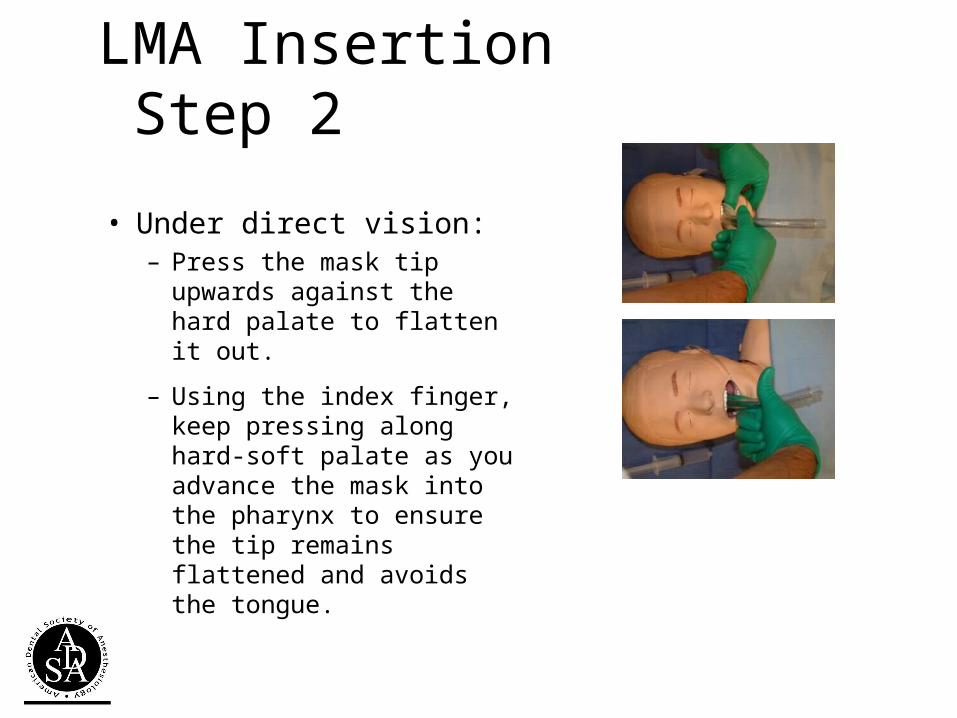
LMA Insertion Step 2
• Under direct vision:– Press the mask tip upwards
against the hard palate to flatten it out.
– Using the index finger, keep pressing along hard-soft palate as you advance the mask into the pharynx to ensure the tip remains flattened and avoids the tongue.

LMA Insertion Step 3
• Continue pushing with your index finger. – Guide the mask downward
into position.

LMA Insertion Step 4
• Grasp the tube firmly with the other hand– then withdraw your index
finger from the pharynx.
– Press gently downward with your other hand to ensure the mask is fully inserted.

LMA Insertion Step 5
• Inflate the mask with the recommended volume of air.
• Do not over-inflate the LMA.
• Do not touch the LMA tube while it is being inflated unless the position is obviously unstable.
– Normally the mask should be allowed to rise up slightly out of the hypopharynx as it is inflated to find its correct position.

Confirmation of Tube Placement
• End-tidal PCO2• Symmetric bilateral chest movements– Bilateral breath sounds
• Feel of compliance while manually inflating the lungs– Presence of expiratory refilling of bag
• Condensation of water in the tube lumen• Hemoglobin oxygen saturation

Securing the LMA
• Insert a bite-block or roll of gauze to prevent occlusion of the tube should the patient bite down.
• Now the LMA can be secured utilizing the same techniques as those employed in the securing of an endotracheal tube.
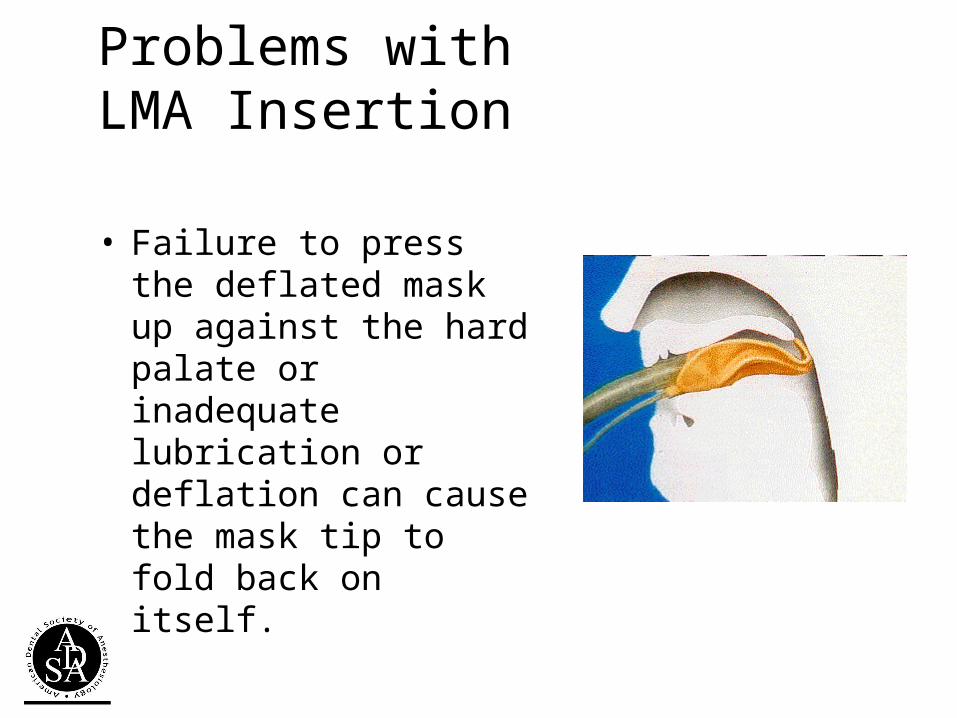
Problems withLMA Insertion
• Failure to press the deflated mask up against the hard palate or inadequate lubrication or deflation can cause the mask tip to fold back on itself.

Training Exercise:
1. Practice placement of LMA until advanced beginner on simulator.
2. Understand the basic problem solving when placement fails.
3. Demonstrate how to secure an LMA.
Facilitator Note: use “LMA Training” scenario

Part B.
Practice putting it all together“Basic Emergency Airway Guidelines”
Mega-airway code

Basic Emergent Airway Management:
• A, B, C, D
• A—Airway– LOOK & LISTEN– LOOK (overall patient & specifically in mouth)
• B---Breathing (ASK, LOOK, LISTEN)
• Get monitors on!
• IMMEDIATELY ASK YOURSELF ARE THEY SAFE or in IMMEDIATE TROUBLE!
• ACT----- Get HELP!!!

© 2007 John J. Schaefer III, MD

Training exercise:
1. Demonstrate applying BAM guidelines in real time---group practice
Facilitator Note: use “guidelines practice” scenario

ROTATE TO NEXT STATION:
Each individual is tested (post-test)

Basic Emergent Airway Basic Emergent Airway ManagementManagement

Individual Simulation Assessment:
1. BMV competency2. LMA placement competency3. “Basic Emergency Guidelines” competency

Final Step: post-course survey—help us make this better
• Certificate upon completion of survey—found in classroom--