aviva pressure cooker - sunbeam australia · aviva™ pressure cooker with slow cooker, rice...
TRANSCRIPT

Aviva™ Pressure Cookerwith Slow Cooker, Rice Cooker, Steamer and Frypan functions
Instruction/Recipe Booklet PE6100
Please read these instructions carefully and retain for future reference.

Sub HeadingBody copy with not indent applied.• Bullet copy Bullet copy Bullet copy Bullet
copy Bullet copy Bullet copy Bullet copy Bullet copy
2
Heading

Contents
Important instructions – retain for future use.
Sunbeam’s Safety Precautions 1Features of your Pressure Cooker 3The Control Panel 6Before the first use 8The Safety Lid 9Cooking menus overview 10Cooking menus settings table 13Cooking Pot markings 14Using the Pressure Cooker menu 15Using the Slow Cooker menu 16Using the Rice menu 17Rice Cooking Charts 19Types of Rice 20Using the Steam menu 21Using the Brown, Sauté, Simmer menus 22How to use the Time Delay 23Care and Cleaning 24Hints and Tips 26Trouble Shooting Guide 30Recipes 33
Sunbeam’s Safety Precautions
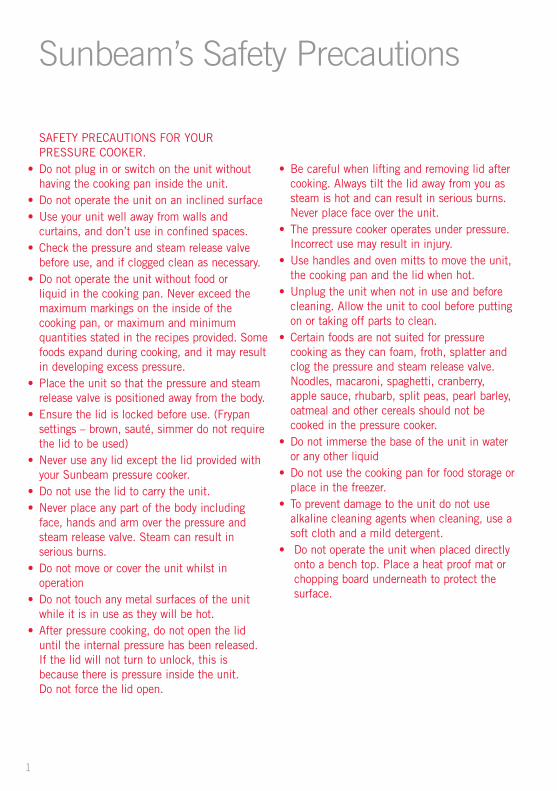
SAFETY PRECAUTIONS FOR YOUR PRESSURE COOKER.
• Do not plug in or switch on the unit without having the cooking pan inside the unit.
• Do not operate the unit on an inclined surface• Use your unit well away from walls and
curtains, and don’t use in confined spaces.• Check the pressure and steam release valve
before use, and if clogged clean as necessary. • Do not operate the unit without food or
liquid in the cooking pan. Never exceed the maximum markings on the inside of the cooking pan, or maximum and minimum quantities stated in the recipes provided. Some foods expand during cooking, and it may result in developing excess pressure.
• Place the unit so that the pressure and steam release valve is positioned away from the body.
• Ensure the lid is locked before use. (Frypan settings – brown, sauté, simmer do not require the lid to be used)
• Never use any lid except the lid provided with your Sunbeam pressure cooker.
• Do not use the lid to carry the unit.• Never place any part of the body including
face, hands and arm over the pressure and steam release valve. Steam can result in serious burns.
• Do not move or cover the unit whilst in operation
• Do not touch any metal surfaces of the unit while it is in use as they will be hot.
• After pressure cooking, do not open the lid until the internal pressure has been released. If the lid will not turn to unlock, this is because there is pressure inside the unit. Do not force the lid open.
• Be careful when lifting and removing lid after cooking. Always tilt the lid away from you as steam is hot and can result in serious burns. Never place face over the unit.
• The pressure cooker operates under pressure. Incorrect use may result in injury.
• Use handles and oven mitts to move the unit, the cooking pan and the lid when hot.
• Unplug the unit when not in use and before cleaning. Allow the unit to cool before putting on or taking off parts to clean.
• Certain foods are not suited for pressure cooking as they can foam, froth, splatter and clog the pressure and steam release valve. Noodles, macaroni, spaghetti, cranberry, apple sauce, rhubarb, split peas, pearl barley, oatmeal and other cereals should not be cooked in the pressure cooker.
• Do not immerse the base of the unit in water or any other liquid
• Do not use the cooking pan for food storage or place in the freezer.
• To prevent damage to the unit do not use alkaline cleaning agents when cleaning, use a soft cloth and a mild detergent.
• Do not operate the unit when placed directly onto a bench top. Place a heat proof mat or chopping board underneath to protect the surface.
1

2
Sunbeam is very safety conscious when designing and manufacturing consumer products, but it is essential that the product user also exercise care when using an electrical appliance. Listed below are precautions which are essential for the safe use of an electrical appliance:
• Read carefully and save all the instructions provided with an appliance.
• Always turn the power off at the power outlet before you insert or remove a plug. Remove by grasping the plug - do not pull on the cord.
• Turn the power off and remove the plug when the appliance is not in use and before cleaning.
• Do not use your appliance with an extension cord unless this cord has been checked and tested by a qualified technician or service person.
• Always use your appliance from a power outlet of the voltage (A.C. only) marked on the appliance.
• This appliance is not intended for use by persons (including children) with reduced physical, sensory or mental capabilities, or lack of experience and knowledge, unless they have been given supervision or instruction concerning use of the appliance by a person responsible for their safety.
• Children should be supervised to ensure that they do not play with the appliance.
• The temperature of accessible surfaces may be high when the appliance is operating.
• Never leave an appliance unattended while in use.
• Do not use an appliance for any purpose other than its intended use.
• Do not place an appliance on or near a hot gas flame, electric element or on a heated oven.
• Do not place on top of any other appliance.• Do not let the power cord of an appliance hang
over the edge of a table or bench top or touch any hot surface.
• Do not operate any electrical appliance with a damaged cord or after the appliance has been damaged in any manner. If damage is suspected, return the appliance to the nearest Sunbeam Appointed Service Centre for examination, repair or adjustment.
• For additional protection, Sunbeam recommend the use of a residual current device (RCD) with a tripping current not exceeding 30mA in the electrical circuit supplying power to your appliances.
• Do not immerse the appliance in water or any other liquid unless recommended.
• Appliances are not intended to be operated by means of an external timer or separate remote control system.
• This appliance is intended to be used in household and similar applications such as: staff kitchen areas in shops, offices and other working environments; farm houses; by clients in hotels, motels and other residential type environments; bed and breakfast type environments.
If you have any concerns regarding the performance and use of your appliance, please visit www.sunbeam.com.au or contact the Sunbeam Consumer Service Line.
Ensure the above safety precautions are understood.
Sunbeam’s Safety Precautions
3
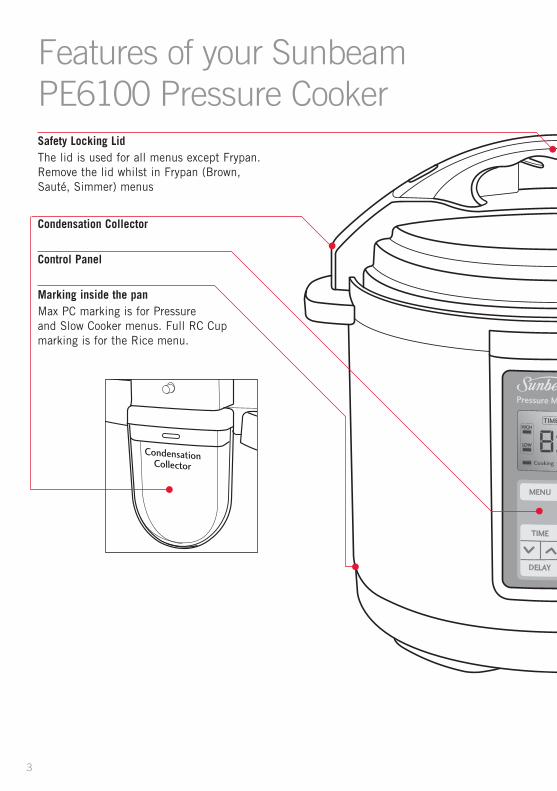
Features of your Sunbeam PE6100 Pressure CookerSafety Locking LidThe lid is used for all menus except Frypan. Remove the lid whilst in Frypan (Brown, Sauté, Simmer) menus
Condensation Collector
Control Panel
Marking inside the panMax PC marking is for Pressure and Slow Cooker menus. Full RC Cup marking is for the Rice menu.

4
Non-stick Removable Cooking PanThe removable cooking pan is to be used inside the unit for all cooking menus. It is non-stick for easy cleaning. 6L capacity is perfect for a large family.
Cool Touch Handles
Non-slip feetKeeps the unit secure on the bench top during use and prevents scratching of bench top surfaces.
Rice Spoon
Serving Spoon
Rice Measuring Cup
Ensures accurate measuring of rice to achieve perfect results every time. Rice cup measurements are not the same as metric cups.

5
Features of your Sunbeam PE6100 Pressure Multi Cooker continued
Lid Lock Valve
Steam Release Valve Cover
Sealing Gasket
Cooking RackCooking rack is suitable for steaming
Pressure & Steam Release Valve
Lid Lock Rod

6
The Control Panel
The control panel on the Pressure Cooker is designed to ensure easy use and to show the progress of your cooking. Choose from the 7 cooking menus – Pressure Cook, Slow Cook, Rice, Steam and Frypan (Brown, Sauté, Simmer). Choose your cooking menu, set the time and start cooking.
1. Menu Button Scroll through the Cooking menus available
by pressing the MENU button.
2. Cooking Menu indicator A light will display next to the various
cooking menus, when the MENU button is selected.
Pressure Cook Menu The Pressure Cook menu has two
selectable heat settings LOW (30kpa) and HIGH (70kpa).
Slow Cook Menu The Slow Cook menu has two selectable
heat settings LOW and HIGH.
Rice Cook Menu
Steam Menu
Frypan Menu (Brown, Sauté, Simmer) The Frypan menu has three heat settings
Brown, Sauté and Simmer.
3. Time Button After you’ve selected your Cooking menu,
set the cooking time required by pressing the and buttons. (No need to set for frypan menus).
4. Delay Button You can delay the start of your cooking on
all menus except the Frypan. DELAY is displayed when the unit is in Delay setting.
1.
3.
4.
7.
6.
2.
5.

7
5. Start/ Stop button Press the START button to begin the
selected cooking menu once all settings have been chosen. Press and hold the STOP button for 3 seconds if you wish to change your setting.
6. LCD Screen The unit needs to gain pressure and/
or temperature before cooking can commence.
Cooking and Keep Warm These lights indicate if the unit is in
cooking or keep warm mode. When the COOKING light is flashing, the unit is gaining pressure or gaining temperature. When the COOKING light is solid the unit has commenced cooking. When KEEP WARM light is on, cooking time is completed and the unit has automatically switched to Keep Warm setting.
High and Low When you’ve selected Pressure or Slow
Cook menu, HIGH or LOW setting will display in the LCD Screen.
Clock display Will show the remaining time in the
COOKING menus, or elapsed time in the KEEP WARM mode.
Time and Delay DELAY will display when the unit is in
the delay start setting. TIME will display otherwise.
7. Power Light This light will illuminate when the power is
switched on. When the unit is not in use, switch off power at the power outlet.
Tip: During programming if no button has been pressed after 20 minutes, the unit will enter the stand-by mode, and the LCD screen will turn off.
The Control Panel continued

8
1. Remove all packaging, plastic, paper and cardboard from the unit.
2. The LCD screen (timer panel) has an electrostatic sticker on the screen. This is part of the packaging. Please remove prior to use.
3. Ensure the power is switched off at the power outlet, and remove the power cord from the unit.
4. Remove the safety locking lid by turning clockwise to unlock. Remove the sealing gasket from the lid and wash the gasket and the lid in warm soapy water. Dry the sealing gasket and lid thoroughly before reattaching the sealing gasket to the lid. See figure below. Ensure the sealing gasket is smoothly and securely in place in the gasket holder. If the sealing gasket is not in the correct position the lid will not be able to form a seal and will not be able to gain pressure.
5. Remove the cooking pan and the condensation collector and wash in warm, soapy water. Dry thoroughly before replacing back in the unit.
Before the first use
Press downward
Install
Pull upward
Remove

9
The Safety Lid
The Sunbeam Pressure Cooker has been designed with safety in mind and has various switch off safety measures.1. Pressure will not build if the lid is not shut
correctly and has not sealed. 2. Pressure will not build if the lid is not
locked in the LOCK position.3. Pressure will not build if the pressure and
steam valve has not been switched to the ‘SEAL’ position.
4. Pressure will not build if the gasket or the valves have become clogged. The gasket and the valves can be removed for cleaning. (See page 24).
5. The pressure and steam release valve has an extended finger tab, designed to keep the hand away from the top of the steam valve. Flick the tab to ‘RELEASE’ position to release pressure.
6. Once the pressure increases, the lid can not be opened. Safety sensors ensure the pressure remains within the set range.
7. The pressure cooker requires liquid to work. If the unit has become dry, a Dry error will appear in the LCD screen.
8. At the end of cooking the lid can not be unlocked until all the pressure is released. This can be done using the natural release or quick release methods listed below.
Releasing Pressure at the End of Cookinga. Natural Release Method. The unit is
turned off and left to cool gradually until the pressure releases on its own. The lid is then able to be removed. Depending on the volume of food, this can take 5 – 20 minutes.
b. Quick Release Method. Using an oven mitt flick the tab on the pressure and steam release valve to the ‘RELEASE’ setting. Do not place any part of your hand or body over the steam outlet on the top of the valve as steam is very hot and may scald. Never use this method when cooking liquid ingredients such as casseroles, stocks and soups. The pressure is released when steam is no longer escaping from the valve and the lid opens freely with no force. Only then is it safe to remove the lid and serve food.
Note: Do not force the lid to open. If it does not open freely this means that the unit is still under pressure.
Note: During cooking, steam will build up in the unit, so when lifting the lid use a kitchen glove or mitt to protect your hand.
Tip: Remember if the lid is not shut correctly, if the valves and gasket are clogged and if the pressure and steam valve is not in the ‘SEAL’ position, the unit can not gain pressure and an ERROR message will appear in the LCD screen. Check the gasket seal is placed evenly in the lid. Program Errors are summarised in the Trouble Shooting Display Information Guide on page 30.
10
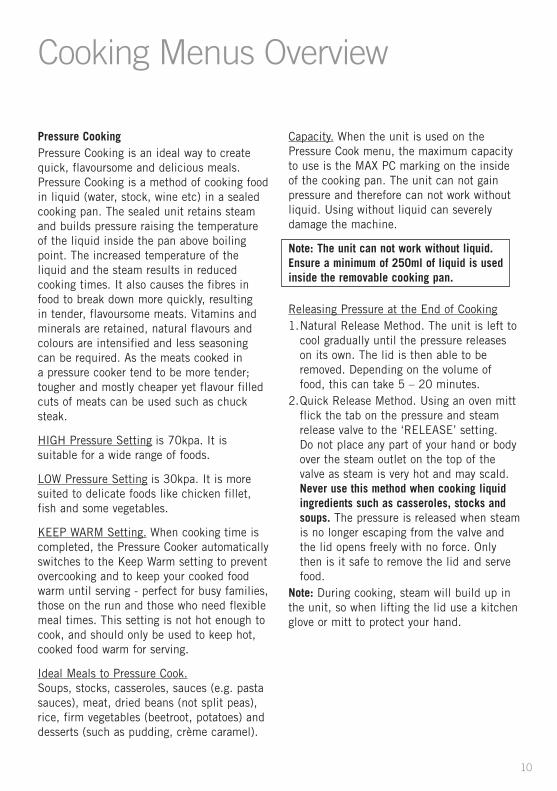
Pressure CookingPressure Cooking is an ideal way to create quick, flavoursome and delicious meals. Pressure Cooking is a method of cooking food in liquid (water, stock, wine etc) in a sealed cooking pan. The sealed unit retains steam and builds pressure raising the temperature of the liquid inside the pan above boiling point. The increased temperature of the liquid and the steam results in reduced cooking times. It also causes the fibres in food to break down more quickly, resulting in tender, flavoursome meats. Vitamins and minerals are retained, natural flavours and colours are intensified and less seasoning can be required. As the meats cooked in a pressure cooker tend to be more tender; tougher and mostly cheaper yet flavour filled cuts of meats can be used such as chuck steak.
HIGH Pressure Setting is 70kpa. It is suitable for a wide range of foods.
LOW Pressure Setting is 30kpa. It is more suited to delicate foods like chicken fillet, fish and some vegetables.
KEEP WARM Setting. When cooking time is completed, the Pressure Cooker automatically switches to the Keep Warm setting to prevent overcooking and to keep your cooked food warm until serving - perfect for busy families, those on the run and those who need flexible meal times. This setting is not hot enough to cook, and should only be used to keep hot, cooked food warm for serving.
Ideal Meals to Pressure Cook. Soups, stocks, casseroles, sauces (e.g. pasta sauces), meat, dried beans (not split peas), rice, firm vegetables (beetroot, potatoes) and desserts (such as pudding, crème caramel).
Capacity. When the unit is used on the Pressure Cook menu, the maximum capacity to use is the MAX PC marking on the inside of the cooking pan. The unit can not gain pressure and therefore can not work without liquid. Using without liquid can severely damage the machine.
Note: The unit can not work without liquid. Ensure a minimum of 250ml of liquid is used inside the removable cooking pan.
Releasing Pressure at the End of Cooking1. Natural Release Method. The unit is left to
cool gradually until the pressure releases on its own. The lid is then able to be removed. Depending on the volume of food, this can take 5 – 20 minutes.
2. Quick Release Method. Using an oven mitt flick the tab on the pressure and steam release valve to the ‘RELEASE’ setting. Do not place any part of your hand or body over the steam outlet on the top of the valve as steam is very hot and may scald. Never use this method when cooking liquid ingredients such as casseroles, stocks and soups. The pressure is released when steam is no longer escaping from the valve and the lid opens freely with no force. Only then is it safe to remove the lid and serve food.
Note: During cooking, steam will build up in the unit, so when lifting the lid use a kitchen glove or mitt to protect your hand.
Cooking Menus Overview

11
Cooking menus overview continued
Slow CookingSlow Cooking achieves flavour filled meals, and tender moist meats cooked to perfection. As the name suggests, meals are not cooked under pressure but are cooked over a long period of time. Slow Cooking provides healthy, simple and economical cooking. It requires minimal supervision, short preparation times and quick clean up times.
LOW Setting. This is suitable for simmering and slow cooking.
HIGH Setting. This is for faster cooking. Typically 1 hour on HIGH = approximately 2 - 2.5 hours on LOW.
KEEP WARM Setting. When cooking time is completed, the Aviva automatically switches to the Keep Warm setting to prevent overcooking and to keep your cooked food warm until serving - perfect for busy families, those on the run and those who need flexible meal times. This setting is not hot enough to cook, and should only be used to keep hot, cooked food warm for serving.
The Slow Cook menu does not require pressure to cook. It cooks similar to standard slow cookers and uses low temperatures and longer cooking times to achieve tender, flavoursome meals.
Capacity. When the unit is used on the Slow Cook menu, the maximum capacity to use is the MAX PC marking on the inside the cooking pan.
Rice CookingWhen cooking rice, use the ‘Rice’ menu. This is suitable for all types of rice including White and Brown rice.The Rice menu cooks under pressure for faster cooking. When using the Rice Menu, for rice measurements use the Sunbeam Rice measuring cup included with your Aviva Pressure Cooker.
Capacity. When the unit is used on the Rice menu, the maximum capacity is the 12 CUP marking inside the cooking pan.
Sunbeam Rice CupUse the Sunbeam rice cup provided for all rice dishes. Rice cup measurements are not the same as metric cups. One rice cup is approximately 2/3 standard cup measurement.
SteamingThe Steam menu is perfect for gently steaming fish and vegetables. It is pre-programmed to use the Low pressure cooking setting. When steaming, use the cooking rack.The Steam menu does not cook under pressure as foods tend to be more delicate.
Capacity. When the unit is used on the Steam menu, the maximum capacity of liquid should be just under the rack wires, so that the liquid is not touching the food.

12
Cooking Menu Settings continued
Brown, Sauté, SimmerThe Frypan mode has three heat settings Brown, Sauté and Simmer. Change the heat setting depending on the food that you are cooking, and your style of cooking. It is ideal to use prior to Pressure Cooking, and Slow Cooking to brown meats, sauté onions, vegetables etc for easy one pot cooking. The Brown, Sauté and Simmer menus do not cook under pressure but cook similar to a frypan. Therefore unless instructed in your recipe, do not use the lid on these menus.
Brown is the highest heat setting and can be used to sear meats for casseroles and soups. Browning meat prior to pressure cooking and slow cooking not only gives your food great colour, it also seals in the juices and flavours and keeps the meat tender.
Sauté is a medium temperature and is suitable to sauté onions, and mire poix (mixture of chopped onion, carrot, celery) often used in pressure cooker and slow cooker recipes. Sautéing onions allows caramelisation which contributes to flavour and colour in the end dish.
Simmer is a lower temperature, around boiling point. Use it to gently simmer sauces.
Capacity. When the unit is used to Brown, Sauté or Simmer it may be best to cook in batches to ensure the food is evenly cooked.

13
Pressure Slow Cook Rice Steam Frypan
Cooking Menu Pressure Cook Slow Cook Rice SteamBrown Sauté
Simmer
Cooking Method
PressureTemperature
(not Pressure)Pressure
Temperature (not Pressure)
Temperature (not Pressure)
Pressure & Steam Valve
SettingSEAL RELEASE SEAL SEAL NA
Maximum Programmable Cooking Time
High - 2 hoursLow - 2 hours
High - 9 hoursLow – 9 hours
40 mins 30 mins NA
Minimum Programmable Cooking Time
High – 2 minsLow – 2 mins
High – 30 minsLow – 30 mins
2 mins 1 min NA
Default Cooking Time
High – 15 minsLow – 30 mins
(Warm – 4 hours)
High – 4 hoursLow – 8 hours
(Warm – 4 hours)
5 mins(Warm – 30
mins)5 min NA
Time Increments
1 min to 20mins.
5 min onwards30 mins 1 min 1 min NA
SettingsHighLow
(Warm)
HighLow
(Warm)
High(Warm)
LowBrown Sauté
Simmer
Maximum Time Delay
4 hours 4 hours 4 hours 4 hours NA
Cooking Pan Maximum Capacity
MAX PC line MAX PC lineFULL RC CUP
lineNA NA
Uses Pressure to Cook 3 5 3 5 5
Locked Lid Required 3 5 3 5 5
Cooking Menu Settings Table

14
Cooking Pot markings
Inside the removable cooking pan are two sets of markings. One side is marked MAX PC which indicates the maximum fill line when cooking any food other than rice. The other side is marked FULL RC CUP. For white rice, the maximum is the 12 cup line (rice and water combined should not exceed 12 cup line). For brown rice, the maximum is the 10 cup line (rice and water combined should not exceed 10 cup line). The 1/5, 2/5, 3/5, 4/5 and 2/3 markings are handy guides to use in your recipes.
Note: Except when cooking rice, never load the cooking pan above the maximum ingredient level line marked MAX PC on the inside of the cooking pot. Foods that expand during cooking (e.g. legumes) should never go above the 3/5 mark.
NOTE: The unit can not work without liquid. Ensure a minimum of 250ml of liquid is used inside the removable cooking pan.

15
Using the Pressure Cooker menu
Place the Pressure Cooker on a flat, level surface.Plug in the unit. The unit will beep, and the indicator lights and the LCD screen will illuminate. The Pressure Cooker will default to the Pressure Cooker menu, on the HIGH (70kpa) setting. ‘Pressure’ and ‘HIGH’ will flash on the display. 1. Place your food and liquid inside the
removable cooking pan.
2. Place the lid on, and lock by rotating anti-clockwise to the LOCK position.
3. Using the finger tab, flick the pressure and steam valve to the ‘SEAL’ position.
4. If the menu is not set to Pressure Cook, set the cooking menu by scrolling through the MENU button until a light appears next to Pressure on the control panel, and HIGH is flashing in the LCD screen.
5. To select the pressure setting of LOW (30kpa), press the MENU button, and LOW will flash in the LCD screen.
6. To select the cooking time, press the TIME button, and then press the and buttons, until your desired time appears in the LCD screen. Each button press will adjust the time by 1 minute up to 20 minutes, and increments of 5 mins thereafter to a maximum cooking time of 2 hours.
Note: the minimum cooking time is 2 minutes, and the maximum cooking time is 2 hours.7. Once you have set the desired MENU and
cooking TIME settings, press START.
8. The Pressure Cooker needs to gain pressure before pressure cooking can commence. When the unit is gaining pressure, ‘Cooking’ will flash in the LCD screen and the time will not count down. When pressure has been reached, ‘Cooking’ will stop flashing and the time will begin to count down.
9. After the set cooking time has elapsed, the unit will beep and will automatically switch to the KEEP WARM setting. The LCD screen will therefore change from ‘Cooking’ to ‘Keep Warm’. The Pressure Cooker can stay in the Keep Warm setting for 4 hours.
TIP: The Pressure Cooking settings are in the Cooking Menu Settings Table on page 13.
NOTE: The unit can not work without liquid. Ensure a minimum of 250ml of liquid is used inside the removable cooking pan.
Note: During cooking, steam will build up in the unit, so when lifting the lid use a kitchen glove or mitt to protect your hand.

16
Using the Slow Cooker menu
The Slow Cook menu does not cook under pressure, but does need the lid locked to commence cooking. It cooks similar to standard slow cookers and uses low temperatures and longer cooking times to achieve tender, flavoursome meals.Place the Pressure Cooker on a flat, level surface.Plug in the unit. The unit will beep, and the indicator lights and the LCD screen will illuminate. The Pressure Cooker will default to the Pressure Cooker menu, on the HIGH setting. ‘Pressure’ and ‘HIGH’ will flash on the display. 1. Place your food and liquid inside the
removable cooking pan.
Note: All food must be completely covered by liquid to ensure even cooking results.2. Place the lid on, and lock by rotating anti-
clockwise to the LOCK position.
3. Using the finger tab, flick the pressure and steam valve to the ‘RELEASE’ position.
4. If the menu is not set to Slow Cook, set the cooking menu by scrolling through the MENU button until a light appears next to ‘Slow Cooker’ on the control panel, and HIGH is flashing in the LCD screen.
5. To select the slow cooker setting of LOW, press the MENU button, and LOW will flash in the LCD screen.
6. To select the cooking time, press the TIME button, and then press the and buttons, until your desired time appears in the LCD screen. Each button press will adjust the time by 30 minutes to a maximum cooking time of 9 hours.
Note: The minimum cooking time is 30 minutes, and the maximum cooking time is 9 hours.
7. Once you have set the desired MENU and cooking TIME settings, press START.
8. ‘Cooking’ will show in the LCD screen and the time will begin to count down. (Note that in the Slow Cooker menu setting, the unit does not cook using pressure but works like a standard slow cooker.
9. After the set cooking time has elapsed, the unit will beep and will automatically switch to the KEEP WARM setting. The LCD screen will therefore change from ‘Cooking’ to ‘Keep Warm’. The Pressure Cooker can stay in the Keep Warm setting for 4 hours.
Note: As the Slow Cook menu does not cook under pressure, you can remove the lid during cooking to check your slow cooking progress. Only lift the lid if necessary as slow cooking uses very low temperatures to cook, so the unit does not recover lost heat quickly. TIP: The Slow Cooking settings are in the Cooking Menu Settings Table on page 13.
NOTE: The unit can not work without liquid. Ensure a minimum of 250ml of liquid is used inside the removable cooking pan.
Note: During cooking, steam will build up in the unit, so when lifting the lid use a kitchen glove or mitt to protect your hand.
17
Using the Rice menu
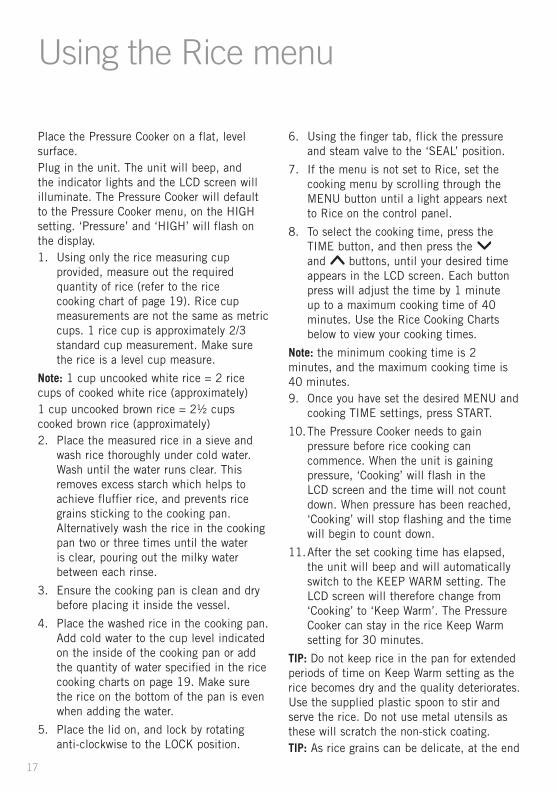
Place the Pressure Cooker on a flat, level surface.Plug in the unit. The unit will beep, and the indicator lights and the LCD screen will illuminate. The Pressure Cooker will default to the Pressure Cooker menu, on the HIGH setting. ‘Pressure’ and ‘HIGH’ will flash on the display.1. Using only the rice measuring cup
provided, measure out the required quantity of rice (refer to the rice cooking chart of page 19). Rice cup measurements are not the same as metric cups. 1 rice cup is approximately 2/3 standard cup measurement. Make sure the rice is a level cup measure.
Note: 1 cup uncooked white rice = 2 rice cups of cooked white rice (approximately)1 cup uncooked brown rice = 2½ cups cooked brown rice (approximately)2. Place the measured rice in a sieve and
wash rice thoroughly under cold water. Wash until the water runs clear. This removes excess starch which helps to achieve fluffier rice, and prevents rice grains sticking to the cooking pan. Alternatively wash the rice in the cooking pan two or three times until the water is clear, pouring out the milky water between each rinse.
3. Ensure the cooking pan is clean and dry before placing it inside the vessel.
4. Place the washed rice in the cooking pan. Add cold water to the cup level indicated on the inside of the cooking pan or add the quantity of water specified in the rice cooking charts on page 19. Make sure the rice on the bottom of the pan is even when adding the water.
5. Place the lid on, and lock by rotating anti-clockwise to the LOCK position.
6. Using the finger tab, flick the pressure and steam valve to the ‘SEAL’ position.
7. If the menu is not set to Rice, set the cooking menu by scrolling through the MENU button until a light appears next to Rice on the control panel.
8. To select the cooking time, press the TIME button, and then press the and buttons, until your desired time appears in the LCD screen. Each button press will adjust the time by 1 minute up to a maximum cooking time of 40 minutes. Use the Rice Cooking Charts below to view your cooking times.
Note: the minimum cooking time is 2 minutes, and the maximum cooking time is 40 minutes.9. Once you have set the desired MENU and
cooking TIME settings, press START.
10. The Pressure Cooker needs to gain pressure before rice cooking can commence. When the unit is gaining pressure, ‘Cooking’ will flash in the LCD screen and the time will not count down. When pressure has been reached, ‘Cooking’ will stop flashing and the time will begin to count down.
11. After the set cooking time has elapsed, the unit will beep and will automatically switch to the KEEP WARM setting. The LCD screen will therefore change from ‘Cooking’ to ‘Keep Warm’. The Pressure Cooker can stay in the rice Keep Warm setting for 30 minutes.
TIP: Do not keep rice in the pan for extended periods of time on Keep Warm setting as the rice becomes dry and the quality deteriorates. Use the supplied plastic spoon to stir and serve the rice. Do not use metal utensils as these will scratch the non-stick coating. TIP: As rice grains can be delicate, at the end

18
Using the Rice menu continued
of cooking wait until the pressure releases naturally, rather than using the Quick Release Method (using the finger tab on the pressure release valve).TIP: The Rice Cooking settings are in the Cooking Menu Settings Table on page 13.Note: During cooking, steam will build up in the unit, so when lifting the lid use a kitchen glove or mitt to protect your hand.

19
Rice Cooking Chart – White Rice
The maximum quantity of White Rice is 12 cups.
Uncooked Rice Quantity - Using Rice Cup
Fill to Water Indicator Approximate Cooking Time (excluding time to gain pressure)
3 3 6 minutes
4 4 7 minutes
5 5 8 minutes
6 6 9 minutes
7 7 10 minutes
8 8 11 minutes
9 9 12 minutes
10 10 13 minutes
11 11 14 minutes
12 12 15 minutes
Rice Cooking Chart – Brown RiceThe maximum quantity of Brown Rice is 10 cups.
Uncooked Rice Quantity - Using Rice Cup
Fill to Water Indicator Approximate Cooking Time (excluding time to gain pressure)
3 3 17 minutes
4 4 20 minutes
5 5 23 minutes
6 6 26 minutes
7 7 28 minutes
8 8 30 minutes
9 9 32 minutes
10 10 35 minutes
Note: The provided rice cup is approximately 2/3 standard cup measurement.

20
Types of Rice
There are three main types of rice:
Short Grain: The grains are short and plump. When cooked the grains are soft and sticky with a glossy appearance.
Varieties of short grain rice:
Japanese Koshihikari - a soft sticky rice, sold as “sushi rice” and used to make sushi
Pearl – a soft sticky rice used to make puddings and desserts.
Medium Grain: The grains are medium in size. When cooked the grains are tender, moist and tend to stick together.
Varieties of medium grain rice:
Arborio – a soft cooking chalky rice used to make risotto and paella.
Medium white and brown rice
White calrose - a soft cooking rice used to make paella.
Medium brown – is whole grain that has been hulled but not polished. It has a nutty flavour and is slightly chewy in texture. It can be used as an all-rounder.
Long Grain: the grains are long and narrow. When cooked the grains remain fluffy, dry and separate.
Varieties of long grain rice are:
Long – a perfect all-round rice used in a wide variety of cuisines.
Jasmine – a fragrant rice which is suited to Asian type cuisine.
Basmati – has a fragrant aroma which is suited to Indian type cuisine.
21
Using the Steam menu
Place the Pressure Cooker on a flat, level surface.Plug in the unit. The unit will beep, and the indicator lights and the LCD screen will illuminate. The Pressure Cooker will default to the Pressure Cooker menu, on the HIGH setting. ‘Pressure’ and ‘HIGH’ will flash on the display. 1. Place water in the bottom of the
removable cooking pan and insert the cooking rack. Ensure water is just under the wires of the rack so that food is not touching water.
2. Place your food on the cooking rack.
3. Place the lid on, and lock by rotating anti-clockwise so that the two triangle icons are aligned to the LOCK position.
4. Using the finger tab, flick the pressure and steam valve to the ‘SEAL’ position.
5. If the menu is not set to Steam, set the cooking menu by scrolling through the MENU button until a light appears next to Steam on the control panel.
6. To select the cooking time, press the TIME button, and then press the and buttons, until your desired time appears in the LCD screen. Each button press will adjust the time by 1 minute up to a maximum cooking time of 30 minutes.
Note: The minimum cooking time is 1 minute, and the maximum cooking time is 30 minutes.7. Once you have set the desired MENU and
cooking TIME settings, press START.
8. The Pressure Cooker needs to gain temperature before steam cooking can commence. When the unit is gaining temperature, ‘Cooking’ will flash in the LCD screen and the time will not count down. When temperature has been reached, ‘Cooking’ will stop flashing and the time will begin to count down.
9. After the set cooking time has elapsed, the unit will beep and cooking will end.
Note: As steamed food is delicate, there is no Keep Warm setting on the Steam menu. TIP: The Steam Cooking settings are in the Cooking Menu Settings Table on page 13.
Note: The unit can not work without liquid. Ensure a minimum of 250ml of liquid is used inside the removable cooking pan.
Note: During cooking, steam will build up in the unit, so when lifting the lid use a kitchen glove or mitt to protect your hand.

Using the Brown, Sauté, Simmer menusThese 3 Frypan menus do not cook under pressure. They work similar to standard frypan cooking, requiring dry heat and therefore do not need a lid. Do not use a lid on these 3 menus. If you wish to cover the pan with the lid (e.g. to prevent splatters) do not lock the lid and use the finger tab to turn the pressure and steam valve to the ‘RELEASE’ position. Place the Pressure Cooker on a flat, level surface.Plug in the unit, and ensure the removable cooking pan is inside the unit. The unit will beep, and the indicator lights and the LCD screen will illuminate. The Pressure Cooker will default to the Pressure Cooker menu, on the HIGH setting. ‘Pressure’ and ‘HIGH’ will flash on the display.1. If the menu is not set to Brown, Sauté or
Simmer, set the cooking menu by scrolling through the MENU button until a light appears next to the desired frypan setting on the control panel.
2. Press START.
Note: No TIME setting is needed for these 3 frypan menus.Note: No lid is to be used for these 3 frypan menus.
3. When the unit is gaining temperature, ‘Cooking’ will flash in the LCD screen. When the temperature has been reached, ‘Cooking’ will stop flashing and using tongs carefully add your food to the hot pan.
Note: There is no Keep Warm setting on the Brown, Sauté and Simmer menus.TIP: Brown, Sauté and Simmer settings are in the Cooking Menu Settings Table on page 13.
NOTE: Do not use the lid on Brown, Saute and Simmer menus.
22
How to use the Time Delay
Time Delay is available on the Pressure Cooker, Slow Cooker, Rice and Steam menus only. The Pressure Cooker allows you to delay the start of your cooking so that cooking finishes when you need it.Note: Do not use the Time Delay when the recipe has perishable ingredients such as meat, fish, eggs, or dairy as these may spoil. 1. Set the MENU and cooking TIME using
the instructions on pages 15 to 22.
2. After setting the cooking TIME, press the DELAY button, 0:00 and DELAY will flash on the LCD screen to indicate the unit is being programmed on the delay setting.
3. Press the and buttons, until you reach the number of hours and minutes your want your cooked to be delayed. I.e. set the amount of time you wish to start the delay of your cooking cycle.
4. Press START button to commence the delay program. DELAY will stop flashing to indicate the unit has been set on the delay setting. The LCD screen will countdown the delay time until 0:00 is reached. When 0:00 is reached, DELAY will remove from the screen to show that time delay has finished, and TIME will be display to show that cooking time will commence. The unit will begin to gain pressure. As per the previous menu instructions, when the unit is gaining pressure, ‘Cooking’ will flash in the LCD screen and the time will not count down. When pressure has been reached, ‘Cooking’ will stop flashing and the time will begin to count down.
Example.
It’s 4pm and you want to have 12 cups of white rice cooked and ready in 2 hours time for dinner at 6pm. You want to set the machine now so you are free to do other things.By looking at the Rice Cooking chart on page 19, you see it takes 15 minutes to cook. Time to gain pressure varies according to humidity and water temperature, but say it takes 15 minutes to gain pressure. Therefore total time is 30 minutes. Therefore to have the rice ready by 6pm, you will need to delay the start of your cooking by approximately 1 hour and 30 minutes.1. Set the MENU to rice2. Set the cooking TIME to 00:153. Press the DELAY button and set for 01:304. Press START
23

Care and Cleaning
Cleaning should only be carried out when the Pressure Cooker is switched off and the plug removed from the socket. Allow the unit to completely cool before cleaning.Do not use the removable cooking pan on the stovetop, inside a microwave oven or inside an oven. Use the pan only inside the Pressure Cooker unit.Wash the sealing gasket and lid by hand in warm, soapy water. Dry all parts thoroughly.
Cooking PanTo remove food that is cooked onto the bottom of the removable cooking pan, soak the pan in warm water before cleaning. Wash the removable cooking pan by hand in warm, soapy water. Dry thoroughly before replacing the pan in the unit.
ExteriorWipe the exterior of the Pressure Cooker with a damp cloth and polish dry. DO NOT use harsh abrasives, scourers or chemicals as these will damage the surfaces. To prevent damage to the unit do not use alkaline cleaning agents when cleaning, use a soft cloth and mild detergent.
Condensation CollectorEmpty the condensation collection of water after each use. Wash in warm, soapy water.
Lid and Sealing Gasket Always examine the gasket before each use. The silicon sealing gasket on the inside of your pressure cooker lid may deteriorate over time. Remove and replace the sealing gasket for cleaning as per Figure 1 below. Hand clean using warm, soapy water and dry thoroughly. Leave the lid upturned for storage as this will also extend the life of the gasket. Sealing gaskets will need to be replaced every 1 – 2 years depending on regular use. Contact your nearest Sunbeam Service Centre.
Figure 1. Removing and reaffixing the sealing gasket.
Press downward
Install
Pull upward
Remove
24

Figure 2. Clearing the steam release valve cover.
Pull upward
Remove
Press downward
Install
25
Pressure and Steam Release Valve Ensure the pressure and steam release valve is clear from debris before you commence using the unit. Remove the valve and gently clean. Ensure it is completely dry before replacing.
Steam Release Valve Cover The steam release valve cover is on the underside of the lid. Ensure it is clear from debris before you commence using the unit. Gently hand clean the cover using warm, soapy water. Do not try to remove the valve cover, just gently lift it up and down to clear debris. Ensure it is completely dry before returning it to your unit.
Lid Lock Valve Gently lift the valve and ensure it is clear from debris before you commence using the unit.Note: Condensation may collect inside the unit under the removable cooking pan. This is normal. Wait and until cool, and then remove using paper towelling or kitchen cloth.
Note: Always make sure that each component (pan, valves, gasket) is completely dry before you put them back into your unit.
Care and Cleaning continued
26
Hints and Tips
With your Pressure Cooker you can create an large variety of delicious meals, snacks and desserts. Various foods take different times to cook perfectly, so sometimes it may take a little trial and error to get the cooking times right for you.
Converting Traditional Recipes • After becoming familiar with your pressure
cooker, you can convert conventional recipes for pressure cooking. In general, reduce cooking times by two thirds. The amount of liquid used may also have to be adjusted because there is very little evaporation from the pressure cooker. Reduce the amount of liquid so there is only about ½ cup more than desired in the finished meal. Remember there must always be some liquid in the pressure cooker to form the necessary steam. Try this formula 1 cup of liquid for the first 15 minutes of pressure cooking then 1/3 cup of liquid for each subsequent 15 minutes.
• Since flavours are more concentrated, reduce amounts of herbs and seasonings when converting recipes. Fresh herbs are better for pressure cooking than dried herbs.
• Generally speaking, pressure cookers cook foods in about a third of the time of conventional cooking methods.
• When using frozen meats in your recipes, the cooking time does not need to be altered. Pressure will not be achieved until the internal temperature in the cooking pot is higher than the boiling point of water. The cooking time will not begin until pressure is achieved, it will just take longer to achieve pressure.
Liquid Do not use the pressure cooker without liquid as this could severely damage the unit. Pressure cooking works by cooking food in liquid to create steam and pressure. Without liquid the unit can not work. Ensure that a minimum of 250ml of liquid is placed inside the removable cooking pan.
Liquid Based Recipes Never use the Quick Pressure Release method (opening the valve) when cooking liquid ingredients such as casseroles, stocks and soups.
Capacity Don’t overfill your pressure cooker. Never fill more than 2/3 full and only ½ full when cooking with legumes, lentils and pulses as these foods can expand and debris can clog the valve.
Foods to Avoid Certain foods are not suited for pressure cooking as they can foam, froth, splatter and clog the pressure and steam release valve. Noodles, macaroni, spaghetti, cranberry, apple sauce, rhubarb, split peas, pearl barley, oatmeal and other cereals should not be cooked in the pressure cooker.

27
Slow Cooking• If you are slow cooking, you can use the
Brown menu first which allows you to sear meat and vegetables at the beginning, but also allows you to thicken sauces and make gravies at the end. Browning meat prior to slow cooking not only gives your food great colour, it also seals in the juices and flavours and keeps the meat tender.
• To thicken a casserole at the end of cooking, use the Brown menu and stir through a little cornflour combine with water. Allow to simmer, stirring until thickened.
• Slow Cooking is perfect for the cheaper, tough cuts of meats, as the lengthy cooking process tenderises these cuts.
• When in Slow Cooker mode, the unit does not recover lost heat quickly. So only lift the lid if necessary or if instructed to do so in the recipe. It’s a good idea to monitor your slow cooking results throughout the cooking cycle by quickly removing the lid and checking, then replacing the lid. Different cuts and thickness of meats and vegetables can vary cooking times.
• It is not uncommon for meat to cook faster than root vegetables. It is for this reason that we recommend chopping all vegetables to a similar small size. Meat can be cut into larger chunks because if it is cut too small, it will break up once cooked and tenderised.
• Slow Cooking prevents evaporation, resulting in the flavours and juices being maintained. Keep this in mind when creating your own recipes, as you may not require as much liquid as you would when using other cooking methods.
Roasts• You can roast a whole chicken as well as
whole pieces of meat, such as lamb, beef, veal and pork by using the Slow Cook menu.
• To make a sauce or gravy with the roast juices, remove the meat and cover with foil to keep warm. Set the Brown menu and stir through some cornflour mixed with a little water. Allow to simmer, stirring until thickened. You can also add some stock or wine to stretch the gravy a little further and add great flavour.
• Roasting in the Slow Cooker will not brown your meat or chicken, as roasting in an oven does. If you want your roast to be golden, we recommend using the Brown menu to sear the meat first.
• Leftover roast makes great sandwiches the next day. Try the caramelised onion or tomato chutney recipe and make burgers with the leftovers!
Hints and Tips continued

28
Roasting Meat (such as beef, lamb and veal)• To get the best roasting results, we
recommend sealing your meat first. Trim away any excess fat. Rub the meat with a little oil and season with salt and pepper (or any other flavourings or spices you wish to use). Use the Brown menu, and when pre-heated, cook meat for a few minutes on each side. Set the Slow Cooker mode to LOW or HIGH and cook for the appropriate time.
Approximate cooking times for well done:
LOW 2 hours per 500g
HIGH 1 hour per 500g
Note: Unlike roasting in your oven, meat cooked to well done in the slow cooker will still be very tender.
Roasting Chicken• Wash the chicken in cold running water
and pat dry with an absorbent paper towel. Rub with a little olive oil and season all over with salt and pepper (or any other spices you wish). Use the Brown menu, and when pre-heated, cook the chicken for a few minutes on each side until golden. Set the Slow Cooker mode to LOW or HIGH and cook for the appropriate time.
Approximate cooking times:
LOW 2 hours per 500g
HIGH 1 hour per 500g
Note: Ensure chicken is cooked all the way through by inserting a skewer or knife into the meatiest part of the chicken. The juices will be clear when the chicken is cooked through. If the juices are pink, a little more cooking is required.
Stocks• You can easily make stocks. Many slow
cooker recipes use stock as part of the ingredients. A good stock is also the base of a great soup. Stocks can be bought at supermarkets; however, nothing beats the flavour of a homemade stock.
• Making your own stock is a great way to use up bones or carcasses that would normally be thrown away.
• There is no need to peel your vegetables when making a stock. Just ensure you wash them well before use.
• Fresh made stock will keep in the refrigerator for up to 4 days, but can be frozen for up to 3 months.
• Always label and date your stock before storing. It’s a good idea to freeze stock in portioned sizes. So for example if you generally use stocks in stews, casseroles, curries etc, then freeze your stock in 1 cup portions. If you tend to use your stock more for gravies and sauces, then freeze it in smaller ¼ cup portions or even in ice cube trays, so that you don’t need to defrost large quantities at a time.
• To remove the excess fat, place the stock in the fridge overnight, then skim the solidified fat from the surface.
Hints and Tips continued

29
Rice• Use only the Sunbeam rice measuring
cup provided. Rice measuring cups and standard measuring cups are not the same. One rice cup is approximately 2/3 standard cup measurement.
• For fluffier rice, add a little extra water and for firmer rice add a little less water.
• Wash rice thoroughly until the water runs clear. This removes excess starch which helps to achieve fluffier rice, and prevents rice grains sticking to the cooking pan.
• Rice cooking can result in a build up of starchy water and bubbles forming around the valve and lid which can cause spitting from the steam valve. Keep a clear area around the unit when cooking rice. Make sure white and brown rice is rinsed well before cooking.
• As rice grains can be delicate, at the end of cooking wait until the pressure releases naturally, rather than using the Quick Release Method (using the finger tab on the pressure release valve).
Brown, Sauté, Simmer• When the unit is used to Brown, Sauté or
Simmer it is best to cook in batches to ensure the food is evenly cooked.
Lid and Gasket • Sealing Gasket. The rubber gasket on
the inside of your pressure cooker lid may deteriorate over time. Leave the lid upturned for storage as this will also extend the life of the gasket.
• Pressure and Steam Release Valve. Ensure the pressure and steam valve is clear from debris before you commence using the unit. Remove the valve and gently clean using a pipe cleaner. When on the ‘SEAL’ setting the valve is lowered onto the valve housing. When the valve is in the ‘RELEASE’ setting, the valve is raised above the housing so that pressure can not form in the unit.
• Lid Lock Valve. This is on the underneath of the lid. Ensure the valve is clear from debris before you commence using the unit. Lift the valve and gently clean using a pipe cleaner.
• Steam Release Valve Cover. This cover is on the underneath of the lid. Ensure the cover is clear from debris before you commence using the unit. Lift the cover and clean with warm, soapy water.
• During cooking, steam will build up in the unit, so when lifting the lid use a kitchen glove or mitt to protect your hand.
Hints and Tips continued

30
Trouble Shooting Guides
Problem Possible Reason Solution
Menu lights on the control panel are flashing
The program has not been set
Set the MENU, TIME and press START
‘Cooking’ light is flashing on the LCD screen
The unit is warming up and/or gaining pressure. For the frypan menus, the unit is warming up to the set temperature
Wait until ‘Cooking’ light stops flashing. For the frypan menus, wait until the set temperature has been reached, the ‘Cooking’ light stops flashing and then add food.
The unit can not gain pressure as the sealing gasket may not be correctly positioned
Carefully remove the lid, and check the sealing gasket is smoothly in place in the gasket holder. Alternatively the sealing gasket may need to be replaced.
The unit can not gain pressure as the pressure and steam safety valve is not in the ‘Seal’ position
Check the valve and flick to the ‘Seal’ position
The LCD screen is blank
The unit has no power Check the cord is inserted into the machine, and that the power is switched on at the power outlet
The unit is in standby mode as the programming has not been completed and no button has been pressed in 20 minutes
Press any button to return to default screen
Difficult to close the lid
The sealing gasket may not be correctly positioned
Carefully remove the lid, and check the sealing gasket is smoothly in place in the gasket holder. Alternatively the sealing gasket may need to be replaced.

31
Trouble Shooting Guides continued
Problem Possible Reason Solution
Unit not gaining pressure
The pressure and steam safety valve is not in the ‘Seal’ position
Check the valve and flick to the ‘Seal’ position
The sealing gasket may not be correctly positioned
Carefully remove the lid, and check the sealing gasket is smoothly in place in the gasket holder. Alternatively the sealing gasket may need to be replaced.
The Pressure and Steam release valve and the safety valve may be clogged
Ensure the valves are clear of debris.
Difficult to open the lid
The unit still has pressure
Wait for the unit to release the pressure. See ‘Releasing Pressure at the end of Cooking’ on page 10. Alternatively check to see if the lid lock rod on the top of the lid is raised. If it’s raised, press gently with a small pencil or chopstick to allow the steam to release.
32
Trouble Shooting Guides continued
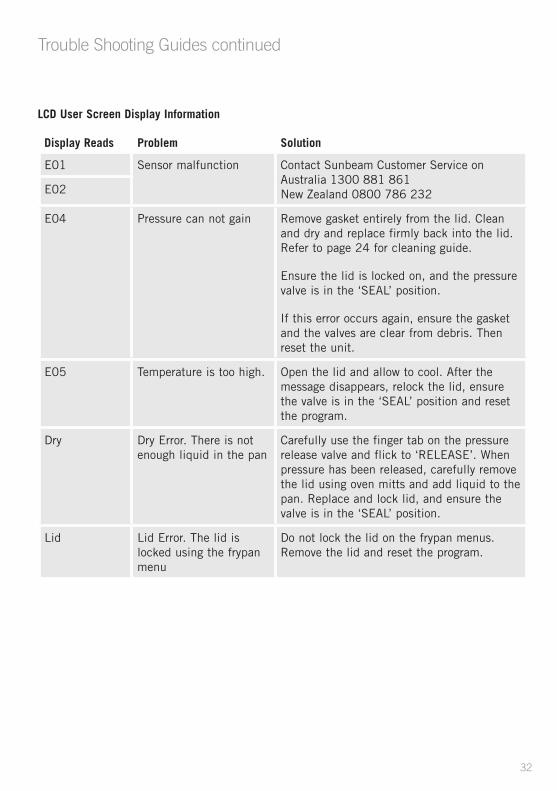
LCD User Screen Display Information
Display Reads Problem Solution
E01 Sensor malfunction Contact Sunbeam Customer Service on Australia 1300 881 861New Zealand 0800 786 232E02
E04 Pressure can not gain Remove gasket entirely from the lid. Clean and dry and replace firmly back into the lid. Refer to page 24 for cleaning guide.
Ensure the lid is locked on, and the pressure valve is in the ‘SEAL’ position.
If this error occurs again, ensure the gasket and the valves are clear from debris. Then reset the unit.
E05 Temperature is too high. Open the lid and allow to cool. After the message disappears, relock the lid, ensure the valve is in the ‘SEAL’ position and reset the program.
Dry Dry Error. There is not enough liquid in the pan
Carefully use the finger tab on the pressure release valve and flick to ‘RELEASE’. When pressure has been released, carefully remove the lid using oven mitts and add liquid to the pan. Replace and lock lid, and ensure the valve is in the ‘SEAL’ position.
Lid Lid Error. The lid is locked using the frypan menu
Do not lock the lid on the frypan menus. Remove the lid and reset the program.
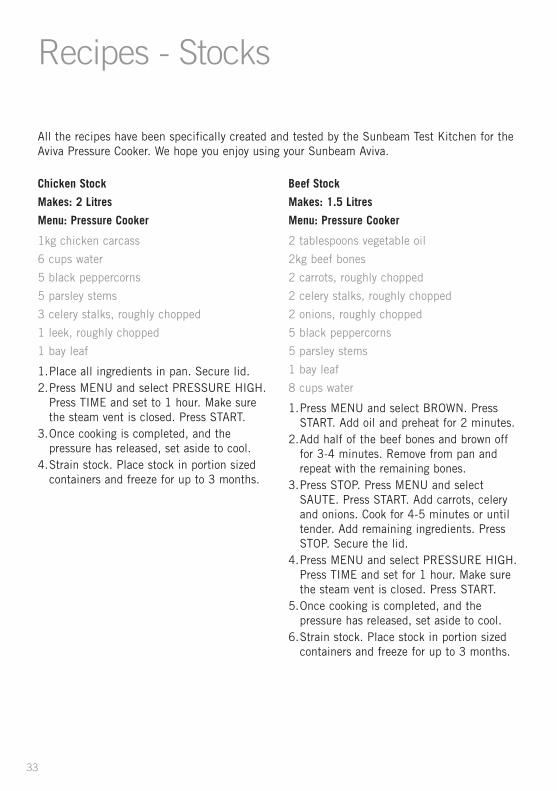
Chicken Stock
Makes: 2 Litres
Menu: Pressure Cooker
1kg chicken carcass
6 cups water
5 black peppercorns
5 parsley stems
3 celery stalks, roughly chopped
1 leek, roughly chopped
1 bay leaf
1. Place all ingredients in pan. Secure lid. 2. Press MENU and select PRESSURE HIGH.
Press TIME and set to 1 hour. Make sure the steam vent is closed. Press START.
3. Once cooking is completed, and the pressure has released, set aside to cool.
4. Strain stock. Place stock in portion sized containers and freeze for up to 3 months.
Beef Stock
Makes: 1.5 Litres
Menu: Pressure Cooker
2 tablespoons vegetable oil
2kg beef bones
2 carrots, roughly chopped
2 celery stalks, roughly chopped
2 onions, roughly chopped
5 black peppercorns
5 parsley stems
1 bay leaf
8 cups water
1. Press MENU and select BROWN. Press START. Add oil and preheat for 2 minutes.
2. Add half of the beef bones and brown off for 3-4 minutes. Remove from pan and repeat with the remaining bones.
3. Press STOP. Press MENU and select SAUTE. Press START. Add carrots, celery and onions. Cook for 4-5 minutes or until tender. Add remaining ingredients. Press STOP. Secure the lid.
4. Press MENU and select PRESSURE HIGH. Press TIME and set for 1 hour. Make sure the steam vent is closed. Press START.
5. Once cooking is completed, and the pressure has released, set aside to cool.
6. Strain stock. Place stock in portion sized containers and freeze for up to 3 months.
33
Recipes - Stocks
All the recipes have been specifically created and tested by the Sunbeam Test Kitchen for the Aviva Pressure Cooker. We hope you enjoy using your Sunbeam Aviva.

34
Legumes
Makes: 1.5 Litres
Menu: Pressure Cooker
3 cups water
1 cup dried beans1. Place all ingredients in pan. Secure lid. 2. Press MENU and select PRESSURE HIGH. Press TIME and set desired time. Make sure the
steam vent is closed. Press START. 3. Once cooking is completed, and the pressure has released, set aside to cool. 4. Strain.
Recipes - Side Dishes
Legume Cooking Times
Ratio Cooking Time(soaking not
required)
Traditional Cooking Time(excluding overnight soaking)
Chickpeas3 cups of water to every 1 cup of fried beans
45 minutes 45 minutes- 1 hour
Cannellini Beans 25 minutes 1 – 1 ½ hours
Kidney Beans 25 minutes 1 – 1 ½ hours
Lentils 6 minutes 45 minutes – 1 hour
Lima Beans 12-16 minutes 1 hour

35
Recipes - Side Dishes continued
HummusMakes: 5 cups
Menu: Pressure Cooker
6 cups water
2 cups or 375g dried chickpeas
1 cup olive oil
3 cloves garlic, peeled
¼ cup tahini
½ cup water
Juice of 2 lemons
1 tablespoon good quality soy sauce
Salt and freshly ground black pepper, to taste
1. Place chickpeas and water in the pan. Secure lid.
2. Press MENU and select PRESSURE HIGH. Press TIME and set for 45 minutes. Make sure the steam vent is set to the seal position. Press START.
3. Once cooking is completed, and the pressure has released, set aside to cool.
4. Drain. Place all remaining ingredients in food processor and process to form a smooth paste. Season to taste with salt and pepper.
5. Store in a clean, covered container in the refrigerator for up to one week.

36
Recipes - Main Meals
Char Sui PorkServes: 6
Menu: Pressure Cooker
¼ cup hoisin sauce
¼ cup honey
¼ cup tomato ketchup
¼ cup light soy sauce
2 cloves garlic, crushed
2 cm piece ginger, peeled, grated
1 teaspoon Chinese five spice powder
1 teaspoon sesame oil
1kg pork shoulder, bone removed
½ cup chicken stock
Salt and freshly ground black pepper, to taste
Jasmine rice and Asian greens, to serve
1. In a bowl combine hoisin sauce, honey, ketchup, soy, garlic, ginger, five-spice powder and sesame oil. Rub over pork and place in refrigerator to marinate for 2 hours.
2. Place pork and remaining ingredients in the pan. Secure the lid.
3. Press MENU and select PRESSURE HIGH. Press TIME and set to 2 hours. Press START. Make sure the steam vent is set to the seal position.
4. Once cooking is completed, and the pressure has released, set aside to cool.
5. Shred pork. Season to taste with salt and pepper. Serve over rice with steamed Asian greens.
Chili Con CarneServes: 8 - 10
Menu: Pressure Cooker
1 tablespoon vegetable oil
2kg gravy beef
1 tablespoon olive oil
2 cloves garlic, crushed
2 onions, roughly chopped
1 large red capsicum, seeds removed, chopped
2 x 400g cans chopped tomatoes
2 cups beef stock
½ cup fresh coriander, roughly chopped
¼ cup cocoa powder
2 teaspoons ground cumin
2 teaspoons ground oregano
1 teaspoon ground cloves
1 teaspoon chili flakes
1 cinnamon stick
2 x 400g cans kidney beans, drained, rinsed
Salt and freshly ground black pepper, to taste
1. Press MENU and select BROWN. Press START. Add oil and preheat for 2 minutes.
2. Add half of the beef and brown off in pan for 3-4 minutes. Remove from pan. Repeat with the remaining beef. Remove from pan. Press STOP.
3. Remove any excess beef juice from the pan and discard.
4. Press MENU and select SAUTE. Add olive oil, garlic, onions and capsicum. Cook for 4-5 minutes or until tender. Return beef to the pan and add remaining ingredients, except beans. Press STOP. Secure the lid.

37
5. Press MENU and select PRESSURE HIGH. Press TIME and set for 45 minutes. Make sure the steam vent is set to the seal position. Press START.
6. Once cooking is completed, and the pressure has released, set aside to cool.
7. Press MENU and select SIMMER. Add the kidney beans and bring the chili con carne to simmer for 15 minutes or until thickened.
8. Season to taste with salt and pepper. Serve.
TIP: This chilli is great served with sour cream and fresh coriander.
Chicken ProvençalServes: 6
Menu: Pressure Cooker
1 tablespoon olive oil
2 cloves garlic, crushed
2 onions, sliced
1 red capsicum, deseeded, sliced
1 yellow capsicum, deseeded, sliced
¾ cup white wine
800g can chopped tomatoes
1 cup kalamata olives, stones removed
10 chicken thigh fillets, skin removed
8 sprigs fresh thyme
2 anchovies
Salt and freshly ground black pepper, to taste
1. Press MENU and select SAUTE. Press START. Add oil and preheat for 2 minutes.
2. Add garlic, onions and capsicums. Cook for 4-5 minutes or until tender.
3. Add wine and allow to reduce by half. Add remaining ingredients to pan. Press STOP. Secure the lid.
4. Press MENU and select PRESSURE HIGH. Press TIME and set for 30 minutes. Make sure the steam vent is set to the seal position. Press START.
5. Once cooking is completed, and the pressure has released, set aside to cool.
6. Season to taste with salt and pepper. Serve.
Recipes - Main Meals continued
38
Recipes - Main Meals continued
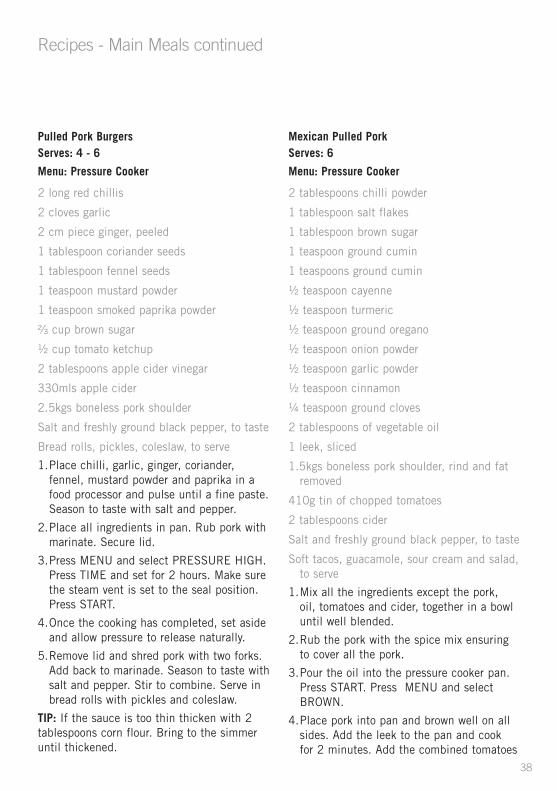
Pulled Pork BurgersServes: 4 - 6
Menu: Pressure Cooker
2 long red chillis
2 cloves garlic
2 cm piece ginger, peeled
1 tablespoon coriander seeds
1 tablespoon fennel seeds
1 teaspoon mustard powder
1 teaspoon smoked paprika powder
²⁄³ cup brown sugar
½ cup tomato ketchup
2 tablespoons apple cider vinegar
330mls apple cider
2.5kgs boneless pork shoulder
Salt and freshly ground black pepper, to taste
Bread rolls, pickles, coleslaw, to serve
1. Place chilli, garlic, ginger, coriander, fennel, mustard powder and paprika in a food processor and pulse until a fine paste. Season to taste with salt and pepper.
2. Place all ingredients in pan. Rub pork with marinate. Secure lid.
3. Press MENU and select PRESSURE HIGH. Press TIME and set for 2 hours. Make sure the steam vent is set to the seal position. Press START.
4. Once the cooking has completed, set aside and allow pressure to release naturally.
5. Remove lid and shred pork with two forks. Add back to marinade. Season to taste with salt and pepper. Stir to combine. Serve in bread rolls with pickles and coleslaw.
TIP: If the sauce is too thin thicken with 2 tablespoons corn flour. Bring to the simmer until thickened.
Mexican Pulled PorkServes: 6
Menu: Pressure Cooker
2 tablespoons chilli powder
1 tablespoon salt flakes
1 tablespoon brown sugar
1 teaspoon ground cumin
1 teaspoons ground cumin
½ teaspoon cayenne
½ teaspoon turmeric
½ teaspoon ground oregano
½ teaspoon onion powder
½ teaspoon garlic powder
½ teaspoon cinnamon
¼ teaspoon ground cloves
2 tablespoons of vegetable oil
1 leek, sliced
1.5kgs boneless pork shoulder, rind and fat removed
410g tin of chopped tomatoes
2 tablespoons cider
Salt and freshly ground black pepper, to taste
Soft tacos, guacamole, sour cream and salad, to serve
1. Mix all the ingredients except the pork, oil, tomatoes and cider, together in a bowl until well blended.
2. Rub the pork with the spice mix ensuring to cover all the pork.
3. Pour the oil into the pressure cooker pan. Press START. Press MENU and select BROWN.
4. Place pork into pan and brown well on all sides. Add the leek to the pan and cook for 2 minutes. Add the combined tomatoes
39
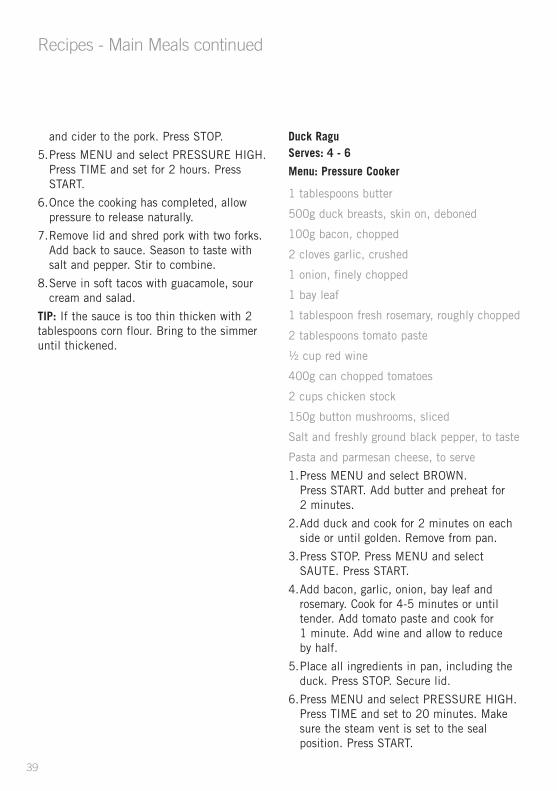
Recipes - Main Meals continued
and cider to the pork. Press STOP.
5. Press MENU and select PRESSURE HIGH. Press TIME and set for 2 hours. Press START.
6. Once the cooking has completed, allow pressure to release naturally.
7. Remove lid and shred pork with two forks. Add back to sauce. Season to taste with salt and pepper. Stir to combine.
8. Serve in soft tacos with guacamole, sour cream and salad.
TIP: If the sauce is too thin thicken with 2 tablespoons corn flour. Bring to the simmer until thickened.
Duck RaguServes: 4 - 6
Menu: Pressure Cooker
1 tablespoons butter
500g duck breasts, skin on, deboned
100g bacon, chopped
2 cloves garlic, crushed
1 onion, finely chopped
1 bay leaf
1 tablespoon fresh rosemary, roughly chopped
2 tablespoons tomato paste
½ cup red wine
400g can chopped tomatoes
2 cups chicken stock
150g button mushrooms, sliced
Salt and freshly ground black pepper, to taste
Pasta and parmesan cheese, to serve
1. Press MENU and select BROWN. Press START. Add butter and preheat for 2 minutes.
2. Add duck and cook for 2 minutes on each side or until golden. Remove from pan.
3. Press STOP. Press MENU and select SAUTE. Press START.
4. Add bacon, garlic, onion, bay leaf and rosemary. Cook for 4-5 minutes or until tender. Add tomato paste and cook for 1 minute. Add wine and allow to reduce by half.
5. Place all ingredients in pan, including the duck. Press STOP. Secure lid.
6. Press MENU and select PRESSURE HIGH. Press TIME and set to 20 minutes. Make sure the steam vent is set to the seal position. Press START.

40
Recipes - Main Meals continued
7. Once cooking is completed, and the pressure has released, set aside to cool.
8. Season to taste with salt and pepper. Serve over pasta with grated parmesan cheese.
Tomato Braised CalamariServes: 4 - 6
Menu: Pressure Cooker
20g butter
3 cloves garlic, crushed
3 onions, chopped
2 cups fresh breadcrumbs
¼ cup fresh flat-leaf parsley, roughly chopped
2 tablespoons lemon zest
2 tablespoons fresh oregano, chopped
2 tablespoons grated parmesan cheese
2 teaspoons sweet paprika
8 squid tubes, rinsed
¼ cup olive oil
3 anchovy fillets
½ cup white wine
2 400g cans cherry tomatoes
½ cup fresh basil, roughly chopped
Salt and freshly ground black pepper, to taste
1. Press MENU and select SAUTE. Press START. Add butter and preheat for 2 minutes.
2. Add garlic and onions. Cook for 4-5 minutes or until tender. Remove half of the onion mixture. Press STOP.
3. In a large bowl combine half of the onion mixture with breadcrumbs, parsley, lemon,
oregano, parmesan and paprika. Season with salt and pepper. Stuff each squid tube with equal amounts of crumb mixture. Secure ends with a toothpick.
4. Add all remaining ingredients to the pan. Secure lid.
5. Press MENU and select PRESSURE HIGH. Press TIME and set to 20 minutes. Make sure the steam vent is set to the sealed position. Press START.
6. Once cooking is completed, and the pressure has released, remove calamari from the sauce and set to one side.
7. Press MENU and select SIMMER, cook sauce for a further 15 minutes. Return calamari and basil to the pan and heat through. Season to taste with salt and pepper. Serve.

41
Recipes - Main Meals continued
Massaman Curry Serves: 6 to 8 Menu: Slow Cooker
2 tablespoons vegetable oil
1kg beef chuck steak, cut into 2cm cubes
1 ½ cups coconut cream
½ cup massaman curry paste
1 ½ cups chicken stock
1 ½ cups coconut milk
½ cup roasted peanuts
¼ cup brown sugar
2 tablespoons fish sauce
2 tablespoons tamarind paste
6 cardamom pods, crushed
2 potatoes, peeled, cut into 2cm cubes
2 bay leaves
1 cinnamon stick
Salt and freshly ground black pepper, to taste
Jasmine rice, to serve
1. Press MENU and select BROWN. PressSTART. Add oil and preheat for 2 minutes.
2. Add half of the beef and brown off inpan for 3-4 minutes. Remove from pan.Repeat with the remaining beef.
3. Press STOP. Press MENU and selectSIMMER. Press START. Add coconut creamand curry paste. Bring to a simmer and stiruntil fragrant.
4. Add remaining ingredients into the pan.Press STOP. Secure the lid.
5. Press MENU and select SLOW COOKHIGH. Press TIME and set to 4 hours.Make sure the steam vent is in theRELEASE position. Press START.
6. Once cooking has completed, and thepressure has released, season to taste withsalt and pepper. Serve with rice.
Lamb TagineServes: 6 to 8
Menu: Slow Cooker
1kg lamb shoulder, cut into 2cm cubes
2cm piece ginger, peeled, grated
2 tablespoons smoked paprika
1 tablespoon ground turmeric
2 teaspoons ground cinnamon
1 teaspoon ground cayenne pepper
2 tablespoons olive oil
3 cloves garlic, crushed
2 onions, chopped
1 ½ cups beef stock
½ cup dried apricots, chopped
½ cup flaked almonds
¹⁄³ cup dried dates, chopped
¹⁄³ cup sultanas
1 tablespoon honey
Salt and freshly ground black pepper, to taste
Cous cous and fresh coriander, to serve
1. Rub lamb with ginger, paprika, turmeric,cinnamon and cayenne. Cover andrefrigerate for 30 minutes.
2. Press MENU and select BROWN. PressSTART. Add oil and preheat for 2 minutes.
3. Add lamb and brown off in pan for 3-4minutes. Remove from pan.
4. Press STOP. Press MENU and selectSAUTE. Press START. Add garlic and

42
Recipes - Main Meals continued
onions cooking for 4-5 minutes or until tender. Add remaining ingredients into the pan. Press STOP. Secure the lid.
5. Press MENU and select SLOW COOK HIGH. Press TIME and set to 4 hours. Make sure the steam vent is set to the RELEASE position. Press START.
6. Once cooking has completed, and the pressure is released, season to taste with salt and pepper. Serve over cous cous with fresh coriander.
Lamb Shanks with Lemon and DillServes: 4
Menu: Slow Cooker
4 lamb shanks
¼ cup plain flour
¼ cup olive oil
2 cloves garlic, crushed
2 onions, chopped
¾ cup chicken stock
4 fresh dill sprigs
1 lemon, finely sliced
2 tablespoons lemon juice
Salt and freshly ground black pepper, to taste
Fresh dill, to serve
1. Dust lamb shanks in flour.
2. Press MENU and select BROWN. Press START. Add half of the oil and preheat for 2 minutes.
3. Add lamb cooking for 3-4 minutes or until golden. Remove from pan.
4. Press STOP. Press MENU and select SAUTE. Press START. Add remaining oil, garlic and onion. Cook for 4-5 minutes or until tender.
5. Add shanks, stock, dill and lemon slices and lemon juice to the pan. Press STOP. Secure the lid.
6. Press MENU and select SLOW COOK HIGH. Press TIME and set to 4 hours. Make sure the steam vent is set to the RELEASE position. Press START.
7. Once cooking has completed, and the pressure is released, season to taste with salt and pepper. Top with extra dill and serve.

43
Recipes - Main Meals continued
Beef BologneseServes: 4 - 6
Menu: Slow Cooker
½ cup olive oil
3 onions, chopped
2 carrots, peeled, chopped
2 stalks celery, chopped
2 cloves garlic, crushed
4 sprigs fresh thyme
1 kg beef mince
1 cup red wine
2 400g can cherry tomatoes
Salt and freshly ground black pepper, to taste
Pasta and parmesan cheese, to serve
1. Press MENU and select SAUTE. Press START. Add oil and preheat for 2 minutes.
2. Add onion, carrot, celery, garlic and thyme. Cook for 6-8 minutes or until tender. Set aside.
3. Press STOP. Press MENU and select BROWN. Press START. Add beef mince and cook for 3-4 minutes or until browned. Add wine and allow to reduce by half.
4. Add remaining ingredients into the pan. Press STOP. Secure the lid.
5. Press MENU and select SLOW COOK LOW. Press TIME and set to 8hours. Make sure the steam vent is set to the RELEASE position. Press START.
6. Once cooking has completed, and the pressure is released, season to taste with salt and pepper. Serve over pasta with parmesan cheese.
Coq au VinServes: 4 - 6
Menu: Slow Cooker
1 leek, halved
5 sprigs fresh flat-leaf parsley
3 sprigs fresh thyme
1 bay leaf
2 tablespoons olive oil
1.5kg chicken thighs, fat removed
30g butter
200g bacon, chopped
200g button mushrooms, left whole
4 shallots, sliced
3 cloves garlic, crushed
¼ cup plain flour
¼ cup tomato paste
3 carrots, peeled, diced
500mls red wine
1 cup chicken stock
Salt and freshly ground black pepper, to taste
1. Place one half on the leek cut side up on a flat surface. Place parsley, thyme and bay leaf in the middle of the leek. Cover with other half of leek. Tie leek together so all herbs are incased.
2. Press MENU and select BROWN. Press START. Add oil and preheat for 2 minutes.
3. In batches brown chicken off in pan for 3-4 minutes. Remove from pan.
4. Press STOP. Press MENU and select SAUTE. Press START. Add butter and bacon cooking until crisp. Add mushrooms, shallots, leek and garlic. Cook for 6-8 minutes or until tender.
44
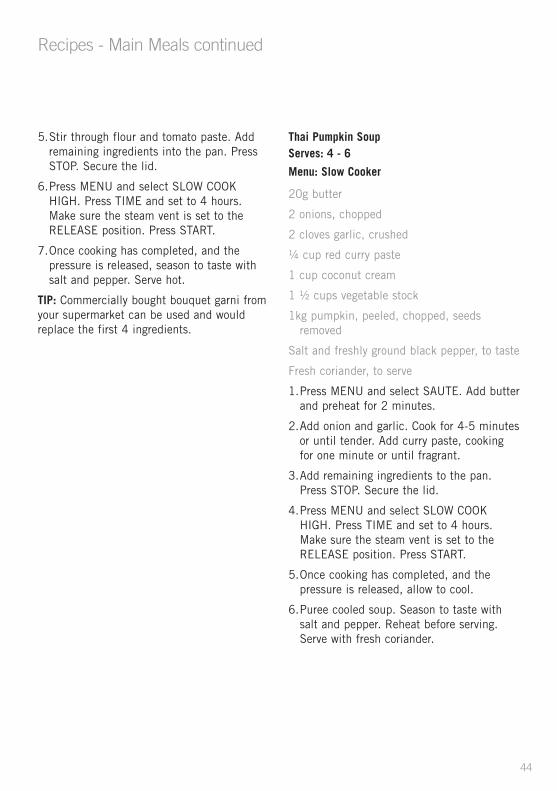
Recipes - Main Meals continued
5. Stir through flour and tomato paste. Add remaining ingredients into the pan. Press STOP. Secure the lid.
6. Press MENU and select SLOW COOK HIGH. Press TIME and set to 4 hours. Make sure the steam vent is set to the RELEASE position. Press START.
7. Once cooking has completed, and the pressure is released, season to taste with salt and pepper. Serve hot.
TIP: Commercially bought bouquet garni from your supermarket can be used and would replace the first 4 ingredients.
Thai Pumpkin SoupServes: 4 - 6
Menu: Slow Cooker
20g butter
2 onions, chopped
2 cloves garlic, crushed
¼ cup red curry paste
1 cup coconut cream
1 ½ cups vegetable stock
1kg pumpkin, peeled, chopped, seeds removed
Salt and freshly ground black pepper, to taste
Fresh coriander, to serve
1. Press MENU and select SAUTE. Add butter and preheat for 2 minutes.
2. Add onion and garlic. Cook for 4-5 minutes or until tender. Add curry paste, cooking for one minute or until fragrant.
3. Add remaining ingredients to the pan. Press STOP. Secure the lid.
4. Press MENU and select SLOW COOK HIGH. Press TIME and set to 4 hours. Make sure the steam vent is set to the RELEASE position. Press START.
5. Once cooking has completed, and the pressure is released, allow to cool.
6. Puree cooled soup. Season to taste with salt and pepper. Reheat before serving. Serve with fresh coriander.

45
Recipes - Main Meals continued
Express PaellaServes: 6 - 8
Menu: Rice Cooker
2 tablespoons olive oil
500g chorizo, sliced
3 cloves garlic, crushed
1 onion, chopped
1 red capsicum, seeds removed, diced
1 cup chicken stock
1 ½ cups long grain rice*
2 tablespoons freshly chopped flat-leaf parsley
½ teaspoon caster sugar
500g shrimp, peeled, deveined
400g can crushed tomatoes
Salt and freshly ground black pepper, to taste
1. Press MENU and select BROWN. Press START. Add oil and preheat for 2 minutes.
2. Add chorizo and brown off in pan for 3-4 minutes. Remove from pan.
3. Press STOP. Press MENU and select SAUTE. Press START. Add garlic, onion and capsicum. Cook for 4-5 minutes or until tender.
4. Add remaining ingredients to the pan. Press STOP. Secure the lid.
5. Press MENU and select RICE. Press TIME and set to 10 minutes. Make sure the steam vent is set to the seal position. Press START.
6. Once cooking has completed and the pressure is released, season to taste with salt and pepper. Serve hot.
* Use the Sunbeam rice cup provided.
Mushroom and Gorgonzola RisottoServes: 6 - 8
Menu: Rice Cooker
2 tablespoons olive oil
2 cloves garlic, crushed
2 onions, chopped
500g Portobello mushrooms, sliced
4 cups Arborio rice*
¾ cup white wine
6 cups chicken stock
¾ cup grated parmesan cheese
150g gorgonzola cheese, crumbled
½ cup continental parsley, roughly chopped
40g butter, room temperature
Salt and freshly ground black pepper, to taste
1. Press MENU and select SAUTE. Press START. Add oil and preheat for 2 minutes.
2. Add garlic, onion and mushrooms. Cook for 4-5 minutes or until tender.
3. Add rice and stir to coat all grains. Pour in wine and allow to reduce by half. Add stock. Press STOP. Secure the lid.
4. Press MENU and select RICE. Press TIME and set to 12 minutes. Make sure the steam vet is set to the seal position. Press START.
5. Once cooking has completed and the pressure is released, fold through Parmesan, gorgonzola, parsley and butter. Season to taste with salt and pepper. Serve hot.
* Use the Sunbeam rice cup provided.

46
Recipes - Main Meals continued
Basil and Lemon RisottoServes: 6
Menu: Rice Cooker
30g butter
1 clove garlic, crushed
1 onion, chopped
3 ½ cups Arborio rice*
½ cup white wine
6 cups chicken stock
1 cup fresh basil leaves, roughly chopped
1 cup grated parmesan cheese
2 tablespoons lemon zest
1 tablespoon lemon juice
Salt and freshly ground black pepper, to taste
1. Press MENU and select SAUTE. Press START. Add Butter and preheat for 2 minutes.
2. Add garlic and onion. Cook for 4-5 minutes or until tender.
3. Add rice and stir to coat all grains. Pour in wine and allow to reduce by half.
4. Add stock. Press STOP. Secure the lid.
5. Press MENU and select RICE. Press TIME and set to 11 minutes. Make sure the steam vent is set to the seal position. Press START.
6. Once cooking has completed and the pressure is released, stir through basil, parmesan and lemon. Season to taste with salt and pepper. Serve immediately.
TIP: Add grilled chicken to the finished risotto.
* Use the Sunbeam rice cup provided.
Classic RisottoServes: 6
Menu: Rice Cooker
Pinch saffron threads
30g butter
2 onions, finely chopped
2 cloves garlic, crushed
3 ½ cups Arborio rice*
6 cups chicken stock
1 ½ cup frozen peas, thawed
½ cup grated parmesan cheese
Salt and freshly ground black pepper, to taste
Grated parmesan cheese, to serve
1. Soak saffron threads in 1 tablespoon boiling water for 5 minutes.
2. Press MENU and select SAUTE. Press START. Add butter and preheat for 2 minutes.
3. Add onion and garlic. Cook for 4-5 minutes or until tender.
4. Add rice and stir to coat all grains. Add stock and saffron. Stir to combine. Press STOP. Secure the lid.
5. Press MENU and select RICE. Make sure the steam vent is set to the seal position. Press START.
6. Once cooking has completed and the pressure is released, stir through peas and parmesan cheese. Season to taste with salt and pepper. Serve hot.
* Use the Sunbeam rice cup provided.

47
Recipes - Main Meals continued
Spanish RiceServes: 6
Menu: Rice Cooker
2 tablespoons olive oil
2 red onions, sliced
2 cloves garlic, crushed
2 long red chillies, sliced
1 teaspoon ground turmeric
2 cups long grain white rice*
1 ½ cups vegetable stock
400g can chopped tomatoes
400g can red kidney beans, rinsed, drained
Salt and freshly ground black pepper, to serve
Fresh coriander and sour cream, to serve
1. Press MENU and select SAUTE. Press START. Add oil and preheat for 2 minutes.
2. Add onion, garlic and chilli. Cook for 4-5 minutes or until tender.
3. Add turmeric and rice. Stir to coat all grains. Add stock, tomatoes and kidney beans. Secure the lid.
4. Press STOP. Press MENU and select RICE. Press TIME and set to 10 minutes. Make sure the steam vent is set to the seal position. Press START.
5. Once cooking has completed and the pressure is released, season to taste with salt and pepper. Serve with coriander and sour cream.
* Use the Sunbeam rice cup provided.
Steamed Ricotta Stuffed ZucchinisServes: 6
Menu: Steamer
¼ cup olive oil
3 cloves garlic, crushed
1 onion, finely chopped
2 cups ricotta cheese
¾ cup fresh breadcrumbs
¾ cup grated parmesan cheese
¼ cup fresh flat-leaf parsley, chopped
1 tablespoon fresh mint, chopped
1 tablespoon fresh oregano, chopped
1 tablespoon lemon zest
2 egg yolks
6 zucchini, halved lengthwise
Salt and freshly ground black pepper, to taste
1. Press MENU and select SAUTE. Press START. Add oil and preheat for 2 minutes.
2. Add onions and garlic. Cook for 4-5 minutes or until tender. Remove from pan. Press STOP.
3. In a large bowl combine onion mixture, ricotta, breadcrumbs, cheese, parsley, mint, oregano, lemon zest and egg yolks. Season to taste with salt and pepper.
4. Scoop out the middle of the zucchinis. Place equal amounts of filling in each zucchini.
5. Place 2 cups of water in the base of the pan. Place rack in pan, cover with baking paper. Place zucchinis on the rack. Secure the lid.
6. Press MENU and select STEAM. Press TIME and set to 7 minutes. Make sure the steam vent is set to the seal position. Press START.
48
7. Once cooking has completed and the pressure is released, carefully remove zucchinis and repeat with remaining zucchinis. Serve hot or cold.
Herbed Salmon ParcelsServes: 4
Menu: Steam
4 x 200g fillets salmon, skin on
1 lemon, finely sliced
1 bunch fresh basil
1 bunch fresh dill
50g butter, room temperature
Salt and freshly ground black pepper, to taste
1. Place each piece of salmon in the middle of a 20cm square of baking paper.
2. Evenly divide lemon, basil and dill and place over salmon. Dot with butter. Bring corners of baking paper to the centre and secure to form a parcel.
3. Place 2 cups of water in the base of the pan. Place rack in pan. Place salmon on the rack. Secure the lid.
4. Press MENU and select STEAM. Press TIME and set to 8 minutes. Make sure the steam vent is set to the seal position. Press START.
5. Once cooking has completed and the pressure is released, carefully remove salmon from pan. Serve.
Asian Steamed ChickenServes: 4
Menu: Steamer
2 long green onions, sliced
2 cloves garlic, crushed
2 tablespoons lime juice
1 tablespoon fish sauce
1 tablespoon soy sauce
1 teaspoon sesame oil
1cm piece ginger, peeled, grated
4 chicken breasts, skin removed
1 tablespoon sesame seeds
Salt and freshly ground black pepper, to taste
1. Place onion, garlic, lime, fish sauce, soy sauce, sesame oil and ginger in a bowl and stir to combine.
2. Place each piece of chicken in the middle of a 20cm square of baking paper.
3. Evenly divide the sauce between chicken breasts. Bring corners of baking paper to the centre and secure to form a parcel.
4. Place 2 cups of water in the base of the pan. Place rack in pan. Place chicken on the rack. Secure the lid.
5. Press MENU and select STEAM. Press TIME and set to 10 minutes. Make sure the steam vent is set to the seal position. Press START.
6. Once cooking has completed and the pressure is released, carefully remove chicken parcels. Season to taste with salt and pepper. Serve.
Recipes - Main Meals continued

49
Red Wine Poached PearsServes: 6
Menu: Pressure Cooker
6 bosc pears, peeled, core removed
2 cardamom pods, crushed
2 cloves
1 cinnamon stick
1 vanilla bean, split
750ml red wine
1 ¼ cups caster sugar
2 tablespoons lemon zest
Cointreau Cream
1 ½ cups thickened cream
1 tablespoon Cointreau
2 tablespoons soft icing sugar
1. Place all ingredients except cream, into pan. Secure lid.
2. Press MENU and select PRESSURE LOW. Press TIME and set to 15 minutes. Make sure the steam vent is set to the seal position. Press START.
3. Once cooking is completed, and the pressure has released, remove pears from sauce.
4. Press START/STOP twice. Press MENU and select SIMMER. Press START. Cook sauce until reduced by half. Serve pears with sauce and Cointreau Cream.
5. To make Cointreau Cream, whip all ingredients together until soft peaks form.
Chocolate Orange Rice PuddingServes: 8
Menu: Pressure Cooker
4 cups milk
2 cups Arborio rice
1 cup caster sugar
2 cups thickened cream
2 tablespoons orange zest
220g dark chocolate, melted
1. Place milk, rice and sugar in pan. Secure the lid.
2. Press MENU and select RICE. Press TIME and set to 10 minutes. Make sure the steam vent is set to the seal position. Press START.
3. Once cooking has completed, and the pressure is released, stir through cream and orange zest.
4. Allow to stand covered, until desired consistency. Plate up into 8 dessert bowls. Drizzle the melted chocolate over the pudding before serving.
Recipes - Desserts

50
Recipes - Desserts continued
Butterscotch Steamed PuddingServes: 8
Menu: Steamer
175g butter, room temperature
1 cup brown sugar
1 teaspoon vanilla extract
3 eggs
1 ¾ cups self-raising flour
1 teaspoon baking powder
SAUCE:
1 cup thickened cream
¾ cup brown sugar
60g butter
2 teaspoons vanilla extract
1. Grease a 6 cup capacity pudding dish.
2. Using an electric mixer beat butter and sugar until light and fluffy. Add vanilla extract and eggs one at a time, making sure to beat well between each addition. Fold through flour and baking powder.
3. Pour mixture into prepared pudding dish. Cover with baking paper and secured tightly with string.
4. Fill the cooking pan with enough hot water to reach the 8 cup measurement. Place steamer rack in pan.
5. Press MENU and select PRESSURE HIGH. Press TIME and set to 60 minutes. Make sure the steam vent is set to the seal position. Press START.
6. Once cooking has completed and the pressure is released, allow to cool for 5 minutes before removing from pan. Empty water from the cooking pan.
7. SAUCE: Place all ingredients in pan. Press
MENU and select SIMMER. Stir constantly for 5 minutes or until all sugar has dissolved and sauce has thickened. Serve hot sauce over steamed pudding.
Steamed Chocolate PuddingsServes: 6
Menu: Steamer
1 cup milk
2 tablespoons molasses
1 egg
60g butter, melted
1 ½ cups plain flour
¾ cup cocoa powder
½ cup brown sugar
1 tablespoon baking powder
½ teaspoon salt
1 ½ cups milk chocolate chips
1. Grease 6 by 1 cup capacity pudding (ramekin) dishes.
2. In a large bowl combine milk, molasses, egg and butter.
3. In a large bowl combine flour, cocoa, baking powder, brown sugar and salt. Add butter and milk mixture, stir to combine. Gently fold through chocolate chips and pour into prepared dishes.
4. Cover ramekin dishes with a piece of buttered baking paper.
5. Fill the cooking pan with 2 cups of hot water. Place steamer rack in pan. Sit 3 of the puddings onto the rack. Secure lid.
6. Press MENU and select STEAM. Press TIME and set to 30 minutes. Make sure the steam vent is set to the seal position. Press START.

Recipes - Desserts continued
7. Once cooking has completed and the pressure is released, allow puddings to cool for 5 minutes before removing from ramekins. Repeat process with remaining puddings. Serve hot or cold.
TIP: This pudding is great when served with ice-cream, chocolate sauce or raspberry coulis.
Double Chocolate Centred PuddingsServes: 8
Menu: Pressure Cooker
150g butter, room temperature
²⁄³ cup brown sugar
1 teaspoon vanilla extract
100g good quality dark chocolate, melted
2 eggs, lightly whisked
¾ cup self-raising flour
¼ cup plain flour
¼ cup cocoa powder
¹⁄³ cup milk
100g good quality dark chocolate, extra, chopped
1. Grease 8 small (½ cup capacity) ramekin dishes.
2. Using a mix master, cream together the butter, sugar and vanilla until pale and creamy.
3. Add one egg. Mix to combine. Pour in melted chocolate and beat well. Add remaining egg, beat well.
4. Sift together the flours and cocoa into a bowl. On low speed, slowly add flour mix and milk to the creamed mixture until just combined.
5. Fill ramekin dishes 1/3 full, place a piece of dark chocolate onto mix then place more pudding mixture on top of chocolate. Repeat with all ramekins.
6. Cover the top of each ramekin with foil ensuring no water can get into puddings.
7. Pour 2 cups of water into pressure cooker. Place ramekins on the rack. Turn POWER ON, select the PRESSURE HIGH option on the MENU, press TIME and select 25 minutes cooking time, press START.
8. When cooking time is complete, release the pressure valve, remove lid and take out puddings.
9. Serve puddings with raspberry coulis and cream.
51
52
Recipes - Desserts continued
Fruits of the Garden with a Trio of Nut ToppingServes: 8
Menu: Pressure Cooker
2 plums, peeled, halved, deseeded
2 pears, peeled, cored, halved
2 apples, peeled, cored, halved
10 medjool dates, stones removed
415g can sliced peaches
415g can sliced apricots
415g can black cherries
4 tablespoons light brown sugar
2 cinnamon quills
4 tablespoons fresh orange juice
TOPPING
1 tablespoon butter
½ cup almond flakes
½ cup walnuts, whole
½ cup macadamia nuts, whole
1 cup shredded coconut
1. Place all but the topping ingredients into the pressure cooker pan. Secure lid and set the pressure valve to the LOCK position.
2. Press START, press MENU and select HIGH PRESSURE. Press TIME and select 30 minutes. Press START.
3. Whilst the fruit is cooking, melt the butter in a pan and add the topping ingredients. Stir until the coconut has turned a golden brown. Set aside to cool.
4. Once the fruit is cooked, serve warm topped with the trio of nuts.
Steamed Flourless Orange and Poppy Seed PuddingsServes: 8
Menu: Steamer
2 oranges
2 eggs
1 egg yolk
½ cup caster sugar
1 cup almond meal
1 cup hazelnut meal
½ teaspoon baking powder
2 teaspoons poppy seeds
1. Fill the non-stick removable pan with water to the 8 cup mark. Place oranges inside. Press MENU and select PRESSURE HIGH. Press TIME and set for 30 minutes. Make sure the steam vent is set to the sealed position. Press START.
2. Once cooking has completed and the pressure is released, remove oranges, place in a food processor and pulse oranges until well pureed. Allow to cool for 10 minutes.
3. In the meantime, grease 8 by 1 cup capacity pudding (ramekin) dishes.
4. Beat the eggs and sugar on medium speed of an electric mixer until light and fluffy.
5. Fold the dry ingredients through the egg mixture and then mix through the orange pulp.
6. Divide mixture evenly between the ramekin moulds and cover with lightly greased baking paper.
7. Fill the non-stick removable pan with water up to the 3 cup measurement mark. Place the steamer rack in the pan and sit 4 of the puddings on the rack. Secure lid.

53
Recipes - Desserts continued
8. Press MENU and select STEAM. Press TIME and set to 30 minutes. Make sure the steam vent is set to the seal position. Press START.
9. Once cooking has completed and the pressure is released, allow puddings to cool for 5 minutes before removing from ramekins. Repeat process with remaining puddings. Serve hot or cold with Cardamom Ice-cream.
TIP: Silicone pudding containers work very well in the Aviva Pressure Cooker and do not require greasing.

Notes

Notes

Should you experience any difficulties with your product during the warranty period, please contact our customer service line for advice on 1300 881 861 in Australia, or 0800 786 232 in New Zealand.
Alternatively, you can send a written claim to
Sunbeam to:
AustraliaUnits 5 & 6, 13 Lord Street Botany NSW 2019 Australia
New ZealandLevel 6, Building 5, Central Park
660-670 Great South Road
Greenlane, Auckland New Zealand
Upon receipt of your claim, Sunbeam will seek to resolve your difficulties or, if the product is defective, advise you on how to obtain a replacement or refund.
To assist us in managing warranty claims, we recommend you register your product as soon as practicable after purchase by creating a MySunbeam account on our website and send a copy of your original receipt to Sunbeam.
In order to make a claim under our warranty, you must have the original proof of purchase documentation for the product and present it when requested .
Should your product develop any defect within 12 months of purchase because of faulty materials or workmanship, we will replace or repair it, at our discretion, free of charge. A product presented for repair may be replaced by a refurbished product of the same type rather than being repaired. Refurbished parts may be used to repair the product.
Our replacement or repair warranty only applies where a defect arises as a result of faulty material or workmanship during the warranty period. Your warranty does not cover misuse or negligent handling (including damage caused by failing to use the product in accordance with this instruction booklet), accidental damage, or normal wear and tear.
Your warranty does not:
• cover freight or any other costs incurred in making a claim, consumable items, accessories that by their nature and limited lifespan require periodic renewal (such as filters and seals) or any consequential loss or damage; or
• cover damage caused by:
- power surges, power dips, voltage supply problems, or use of the product on incorrect voltage;
- servicing or modification of the product other than by Sunbeam or an authorised Sunbeam service centre;
- use of the product with other accessories, attachments, product supplies, parts or devices that do not conform to Sunbeam specifications; or
- exposure of the product to abnormally corrosive conditions; or
• extend beyond 3 months if the product is used in commercial, industrial, educational or rental applications.
The benefits given to you by our warranty are in addition to other rights and remedies under law in relation to the product.
In Australia our goods come with guarantees that cannot be excluded under the Australian Consumer Law. You are entitled to a replacement or refund for a major failure and for compensation for any other foreseeable loss or damage. You are also entitled to have the goods repaired or replaced if the goods fail to be of acceptable quality and the failure does not amount to a major failure.
Our goods also come with guarantees that cannot be excluded under the New Zealand Consumer Guarantees Act.
If your warranty claim is not accepted, we will inform you and if requested to do so by you, repair the product provided you pay the usual charges for such repair. You will also be responsible for all freight and other costs.
Should your product require repair or service after the warranty period, contact your nearest Sunbeam service centre. For a complete list of Sunbeam’s service centres, visit our website or call our customer service line for advice on 1300 881 861 in Australia, or 0800 786 232 in New Zealand.
This Sunbeam product is covered by a 12 month replacement or repair warranty, which is in addition to your rights under the Australian Consumer Law (if your product was purchased in Australia) or New Zealand Consumer Guarantees Act (if your product was purchased in New Zealand).
12 Month Warranty

8/14
is a registered trademark.
Need help with your appliance?Contact our customer service team or visit our website for information and tips on getting the most from your appliance.
In Australia
Visit www.sunbeam.com.au
Or call 1300 881 861
In New Zealand
Visit www.sunbeam.co.nz
Or call 0800 786 232
‘Aviva’ is a trademark of Sunbeam Corporation.Made in China. Due to minor changes in design or otherwise, the product may differ from the one shown in this leaflet. © Copyright. Sunbeam Corporation Limited 2014.ABN 45 000 006 771
Units 5 & 6, 13 Lord Street Botany NSW 2019 AustraliaLevel 6, Building 5, Central Park 660-670 Great South Road Greenlane, Auckland New Zealand Sunbeam Corporation is a division of GUD Holdings Ltd.