auto balloon in autodesk inventor 2010-2011 · auto balloon in autodesk inventor 2010/2011 this...
TRANSCRIPT
MS2011019 3rd
August 2010
Guide by Clinton Brown
Auto Balloon in Autodesk Inventor
2010/2011
This White Paper will guide you through the steps required to use the Auto-
Balloon feature within Autodesk Inventor
New users of Autodesk Inventor
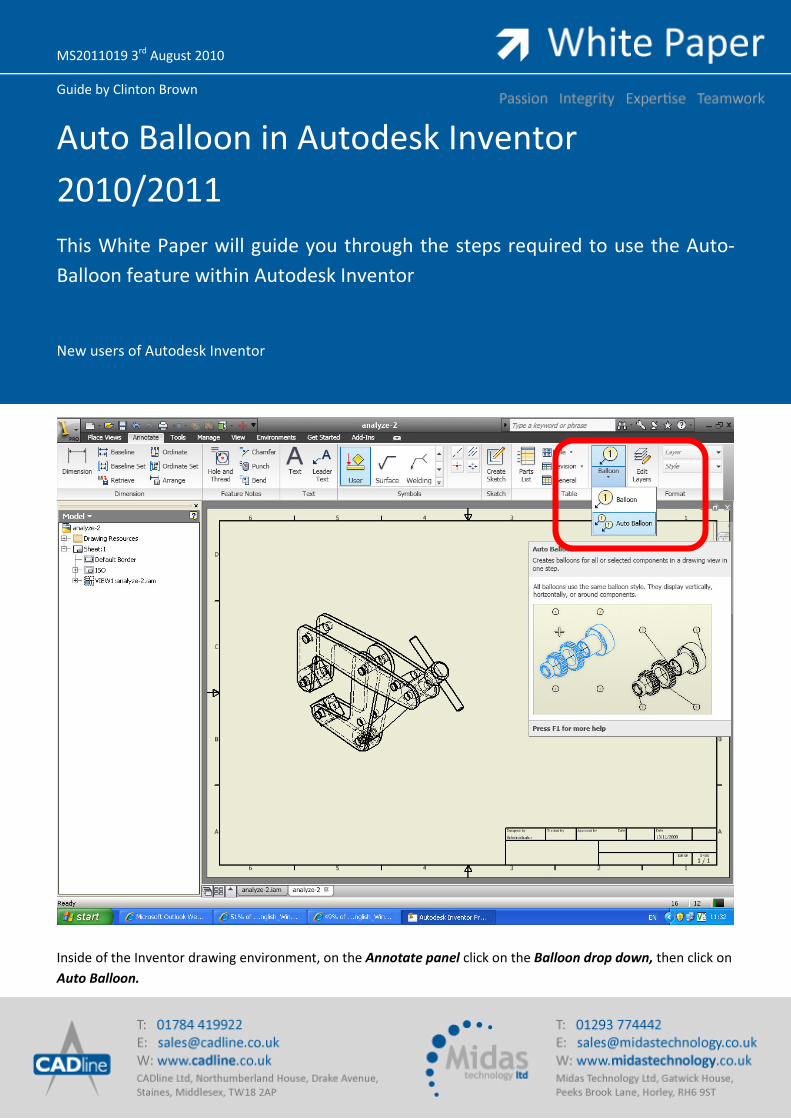
Inside of the Inventor drawing environment, on the Annotate panel click on the Balloon drop down, then click on
Auto Balloon.

Select the components for Ballooning (in this example I have dragged a box over all of the components in the
view)
Click on Select Placement and choose a placement method of either Around, Horizontal or Vertical. Balloons will
follow your cursor, a left click will place them
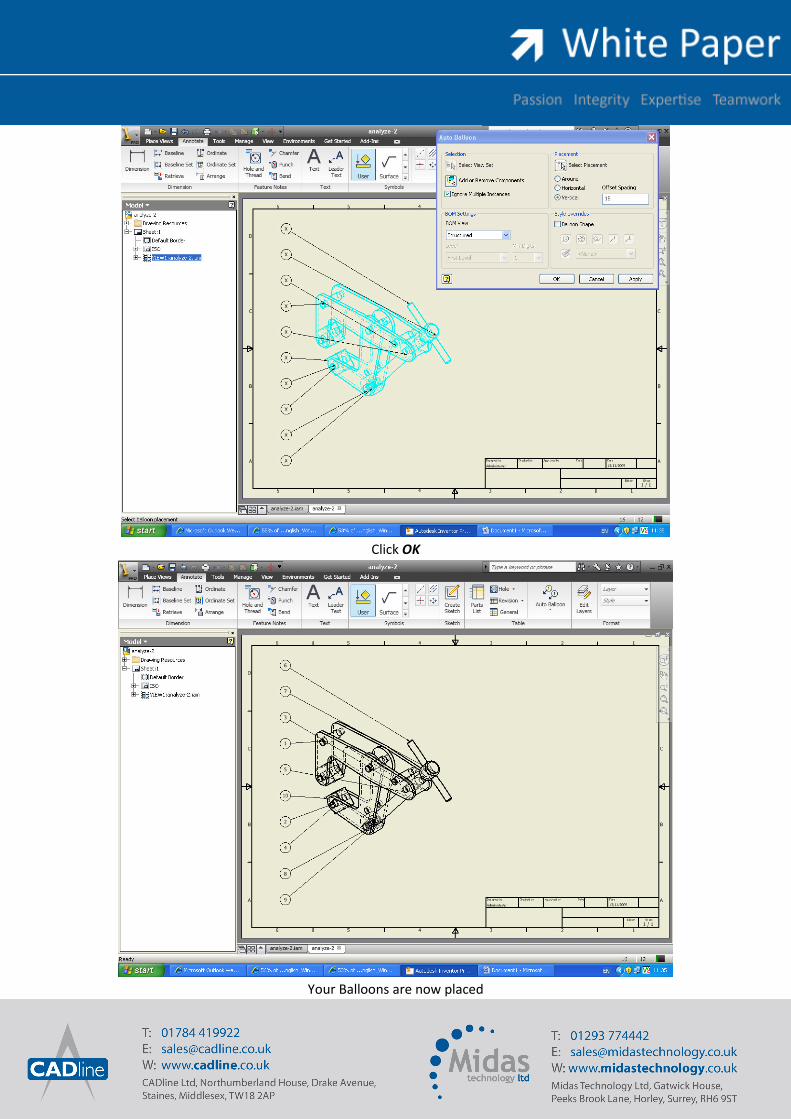
Click OK
Your Balloons are now placed
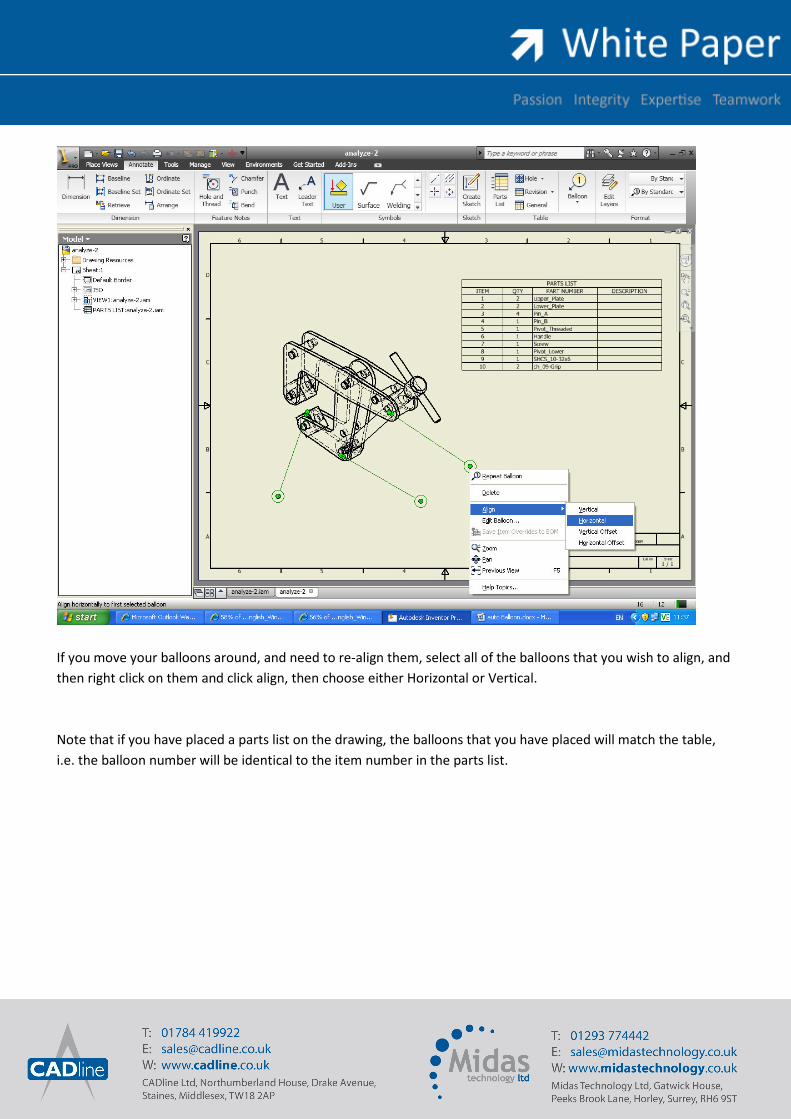
If you move your balloons around, and need to re-align them, select all of the balloons that you wish to align, and
then right click on them and click align, then choose either Horizontal or Vertical.
Note that if you have placed a parts list on the drawing, the balloons that you have placed will match the table,
i.e. the balloon number will be identical to the item number in the parts list.

White Paper Content Continued……