ansys electromagnetics suite 17.0 windows installation … ·...
TRANSCRIPT

ANSYS Electromagnetics Suite 17.0Windows Installation Guide
ANSYS, Inc.Southpointe2600 ANSYS DriveCanonsburg, PA [email protected]://www.ansys.com(T) 724-746-3304(F) 724-514-9494
Release 17.0 December 2015
ANSYS Inc. iscertified to ISO9001:2008.

ANSYS Electromagnetics Suite 17.0Windows Installation Guide
Copyright and Trademark Information© 2015 SAS IP, Inc. All rights reserved. Unauthorized use, distribution or duplication is prohibited.ANSYS, ANSYSWorkbench, Ansoft, AUTODYN, EKM, Engineering KnowledgeManager,CFX, FLUENT, HFSS and any and all ANSYS, Inc. brand, product, service and feature names,logos and slogans are registered trademarks or trademarks of ANSYS, Inc. or its subsidiaries inthe United States or other countries. ICEMCFD is a trademark used by ANSYS, Inc. underlicense. CFX is a trademark of SonyCorporation in Japan. All other brand, product, service andfeature names or trademarks are the property of their respective owners.Disclaimer NoticeTHIS ANSYS SOFTWARE PRODUCT AND PROGRAMDOCUMENTATION INCLUDETRADE SECRETS AND ARE CONFIDENTIAL AND PROPRIETARY PRODUCTS OFANSYS, INC., ITS SUBSIDIARIES, OR LICENSORS. The software products and doc-umentation are furnished by ANSYS, Inc., its subsidiaries, or affiliates under a software licenseagreement that contains provisions concerning non-disclosure, copying, length and nature of use,compliance with exporting laws, warranties, disclaimers, limitations of liability, and remedies, andother provisions. The software products and documentationmay be used, disclosed, transferred,or copied only in accordance with the terms and conditions of that software license agreement.ANSYS, Inc. is certified to ISO9001:2008.U.S. Government RightsFor U.S. Government users, except as specifically granted by the ANSYS, Inc. software licenseagreement, the use, duplication, or disclosure by the United StatesGovernment is subject torestric-tions stated in the ANSYS, Inc. software license agreement and FAR 12.212 (for non-DODlicenses).Third-Party SoftwareSee the legal information in the product help files for the complete Legal Notice for ANSYS pro-prietary software and third-party software. If you are unable to access the Legal Notice, pleasecontact ANSYS, Inc.
2
ANSYSElectromagnetics Suite 17.0 - © SAS IP, Inc. All rights reserved. - Contains proprietary and confidential
information of ANSYS, Inc. and its subsidiaries and affiliates.

Conventions Used in this GuidePlease take amoment to review how instructions and other useful information are presented inthis guide.
l Procedures are presented as numbered lists. A single bullet indicates that the procedurehas only one step.
l Bold type is used for the following:o Keyboard entries that should be typed in their entirety exactly as shown. For example,“copy file1” means the word copymust be typed, then a spacemust be typed, and thenfile1must be typed.
o On-screen prompts andmessages, names of options and text boxes, andmenu com-mands. Menu commands are often separated by carats. For example, “clickHFSS>Exci-tations>Assign>Wave Port.”
o Labeled keys on the computer keyboard. For example, “PressEnter” means to press thekey labeledEnter.
l Italic type is used for the following:o Emphasis.o The titles of publications.o Keyboard entries when a name or a variablemust be typed in place of the words in italics.For example, “copy file name” the word copy must be typed, then a spacemust betyped, and then name of the file must be typed.
l The plus sign (+) is used between keyboard keys to indicate that you should press the keysat the same time. For example, “Press Shift+F1” means to press the Shift key and the F1key at the same time.
l Toolbar buttons serve as shortcuts for executing commands. Toolbar buttons are displayedafter the command they execute. For example,
l “On the Draw menu, click Line ” means that you can click the Draw Line toolbar buttonto execute the Line command.
Getting Help: ANSYS Technical SupportFor information about ANSYS Technical Support, go to the ANSYS corporate Support website,http://www.ansys.com/Support. You can also contact your ANSYS account manager in order toobtain this information.All ANSYS software files are ASCII text and can be sent conveniently by e-mail. When reportingdifficulties, it is extremely helpful to include very specific information about what stepswere takenor what stages the simulation reached, including software files as applicable. This allowsmorerapid and effective debugging.Help MenuTo access online help from themenu bar, clickHelp and select from themenu:<Product> Contents - click here to open the contents of the online help.<Product> Search - click here to open the search function of the online help.
3
ANSYSElectromagnetics Suite 17.0 - © SAS IP, Inc. All rights reserved. - Contains proprietary and confidential
information of ANSYS, Inc. and its subsidiaries and affiliates.
ANSYS Electromagnetics Suite 17.0Windows Installation Guide

ANSYS Electromagnetics Suite 17.0Windows Installation Guide
Context-Sensitive HelpTo access online help from the user interface, do one of the following:
l To open a help topic about a specificmenu command, pressShift+F1, and then click thecommand or toolbar icon.
l To open a help topic about a specific dialog box, open the dialog box, and then pressF1.
4
ANSYSElectromagnetics Suite 17.0 - © SAS IP, Inc. All rights reserved. - Contains proprietary and confidential
information of ANSYS, Inc. and its subsidiaries and affiliates.

Table of ContentsTable of Contents Contents-1
1 - Getting Started 1-1
Installation Prerequisites 1-1
ANSYS Electromagnetics Suite Software 1-1
License File 1-1
License Server 1-1
TCP/IP 1-2
OpenGL 1-2
Firewall Exceptions 1-3
WindowsRequirements 1-3
Additional Product-Specific Prerequisites 1-3
Additional Resources 1-3
2 - Installing ANSYS Electromagnetics Suite Software 2-1
Obtaining a License File 2-1
Installing the Software 2-1
Integrating ANSYS Electromagnetics Products with ANSYSWorkbench 2-7
Integration with ANSYSWorkbench during ANSYS Electromagnetics Product Install-ation 2-7
Integration with ANSYS after ANSYS Electromagnetics Product Installation 2-8
3 - High Performance Computing 3-1
Options for Distributed Analysis 3-1
Remote SimulationManager (RSM) 3-2
When do you need RSM? 3-3
Installing RSM 3-4
Registering ANSYS Electromagnetics Product Engines for use with RSM 3-6
Supported Job Schedulers 3-6
ANSYS Electromagnetics Suite 17.0Windows Installation Guide
Contents-1
ANSYSElectromagnetics Suite 17.0 - © SAS IP, Inc. All rights reserved. - Contains proprietary and confidential
information of ANSYS, Inc. and its subsidiaries and affiliates.
ANSYS Electromagnetics Suite 17.0Windows Installation Guide
CustomScheduler Integration 3-7
Running HPC Test Jobs on a Cluster 3-7
Non-distributed job 3-8
Non-MPI job distributed tomultiple hosts 3-9
MPI job distributed tomultiple hosts 3-9
Submitting and Running the Tests 3-10
Submitting and running a non-distributed job 3-11
Submitting and running a non-MPI job distributed tomultiple hosts 3-12
Submitting and running anMPI job distributed tomultiple hosts 3-14
Scheduler Specific Configuration and Testing 3-16
WindowsHPC 3-16
Cluster Configuration Guidelines 3-16
Running Test Jobs 3-17
Non-distributed job 3-17
Non-MPI job distributed tomultiple hosts 3-18
MPI job distributed tomultiple hosts 3-18
IBMPlatform LSF 3-19
Cluster Configuration Guidelines 3-19
Running Test Jobs 3-19
Non distributed job 3-19
Non-MPI job distributed tomultiple hosts 3-19
MPI job distributed tomultiple hosts 3-20
4 - Install Common Libraries 4-1
Procedure for Installing Libraries 4-1
5 - Updating Software and Licenses 5-1
UsingMaintenanceMode 5-1
Updating a Software License 5-2
6 - Message Passing Interface (MPI) Installation 6-1
Contents-2
ANSYSElectromagnetics Suite 17.0 - © SAS IP, Inc. All rights reserved. - Contains proprietary and confidential
information of ANSYS, Inc. and its subsidiaries and affiliates.

ANSYS Electromagnetics Suite 17.0Windows Installation Guide
Windows 6-1
Install Intel MPI 6-1
Install IBMPlatformMPI 6-3
General Notes 6-9
Scenario 1 6-10
Scenario 2 6-10
Scenario 3 6-10
WindowsHPC Scheduler 6-11
Network Installation 6-12
Troubleshooting Section 6-13
A - Silent Installation A-1
Running the Silent Installation A-1
B - License hostid B-1
Network Interface Card B-1
Windows B-1
Linux B-2
Hardware Key B-2
Installing a Hardware Key on a USB Port B-2
Contents-3
ANSYSElectromagnetics Suite 17.0 - © SAS IP, Inc. All rights reserved. - Contains proprietary and confidential
information of ANSYS, Inc. and its subsidiaries and affiliates.

Contents-4
ANSYSElectromagnetics Suite 17.0 - © SAS IP, Inc. All rights reserved. - Contains proprietary and confidential
information of ANSYS, Inc. and its subsidiaries and affiliates.
ANSYS Electromagnetics Suite 17.0Windows Installation Guide
1 - Getting Started
Installation PrerequisitesBefore installing ANSYS Electromagnetics Suite software, you need the following:
l The ANSYS Electromagnetics product CD or product download (see "AdditionalResources" on page 1-3 for download information).
l A license file based on the ansoftd vendor daemon.l The ANSYS LicenseManager software download.l A computer with TCP/IP installed, for counted evaluation and purchased licenses.l A computer that meets theminimumor recommended system requirements, which dependson the specific ANSYS Electromagnetics products you plan to run.
ANSYS Electromagnetics Suite SoftwareThe ANSYS Electromagnetics product or equivalent download contains:
l The ANSYS Electromagnetics Suite software and project examples.l Third-party software, when necessary, for viewing online documentation (for example,HTMLHelp or Adobe Acrobat Reader).
l Documentation files.
License FileMost ANSYS Electromagnetics products require a license, which is sent as an e-mail attachment.After you receive a license file, save it to a temporary location.The license file requires a license hostid, which is a hardware device used to validate the license. Alist of supported hostids, and a general explanation of hostids, is avail-able in "License hostid" onpage B-1If you do not have a license file for the ANSYS Electromagnetics software you are about to install,please contact your ANSYS sales representative.
License ServerOnce you have purchased the software, youmust designate amachine on your net-work to act as alicense server. The ANSYS LicenseManager must be installed in one of the following two loc-ations:
ANSYS Electromagnetics Suite 17.0Windows Installation Guide
Getting Started 1-1
ANSYSElectromagnetics Suite 17.0 - © SAS IP, Inc. All rights reserved. - Contains proprietary and confidential
information of ANSYS, Inc. and its subsidiaries and affiliates.

ANSYS Electromagnetics Suite 17.0Windows Installation Guide
l On the computer where the software will be installed.l On another machine accessible over the network.Note You can install the ANSYS LicenseManager before or after you install the
ANSYS Electromagnetics software.
See the ANSYS LicenseManager instructions available as part of the ANSYS LicenseManagerdownload.
TCP/IPTransmission Control Protocol/Internet Protocol (TCP/IP) is required for any ANSYS Elec-tromagnetics software—even for a single computer in stand-alonemode.
l TCP/IP must be installed on themachine that is running ANSYS LicenseMan-ager (theserver) and on eachmachine that obtains licenses from that server.
l By default, TCP/IP is usually already installed on a computer running aWindows platform.l TCP/IP is usually bound to a network card. If a network card is already installed and set upfor TCP/IP, no additional action is needed during installation.
l If a network card is not installed, then you can satisfy the TCP/IP requirement by installingtheMicrosoft Loopback Adapter (MLA). TheMLA is a softwaremod-ule that emulates a net-work card. For more details, see the appropriate help topics in Microsoft Windows (on theWindows taskbar, clickStart>Help or Start>Help and Support, depending on the oper-ating system).
OpenGLAll ANSYS Electromagnetics software (excluding ANSYS LicenseManager) requires that theOpenGL libraries be accessible from themachine running ANSYS Electromagnetics software.Most graphics card drivers automatically comewith OpenGL software for Windows.Graphics Card and PerformanceNote For some graphics cards, theremay be slowdown for Field animations, Rotating and
zooming for complexmodels, and selection display. This includes
NVidia Quadro 2000M
NVidia Quadro FX 3800M
NVidia Quadro 4000
NVidia Quadro FX 1800
The problem does not show on the following graphic adapters:
ATI FirePro V5800
Quadro NVS 295
Getting Started 1-2
ANSYSElectromagnetics Suite 17.0 - © SAS IP, Inc. All rights reserved. - Contains proprietary and confidential
information of ANSYS, Inc. and its subsidiaries and affiliates.

ANSYS Electromagnetics Suite 17.0Windows Installation Guide
Quadro NVS 290
To correct the problem, set theNVIDIA Control Panel>3D Settings>Manage 3D Set-tings>Global Settings>Global Presets: Workstation App - Dynamic Streaming
Firewall ExceptionsFirewall exceptions are needed for the COMengines and ANSYS Electromagnetics products ifsolving remotely (something that does not necessarily require RSM). Exceptions are also requiredfor RSMaswell if it is installed. This comes upmost frequently with theWindows firewall.
Windows RequirementsFor supported platforms and system requirements, go to:http://www.ansys.com/Support/Platform+Support
Additional Product-Specific PrerequisitesThe readme file (readme.txt) may show additional product-specific prerequisites, includ-ing systemrequirements. You can find the readme file in the AnsysEMdirectory of the installation program orin the Help directory after installing the soft-ware.
Additional ResourcesGeneral: The ANSYS web site: http://www.ansys.com.
Downloads: Software downloads (including ANSYS LicenseManager) and installation-related documentation are available at the ANSYS customer portal,http://www.ansys.com/customerportal
Online Tech-nical Support:
Available through the ANSYS customer portal:
http://www.ansys.com/customerportal
UnderOnline Support, chooseANSYS Electromagnetics CustomerSupport.
The ANSYS Electromagnetics technical support site provides access to fre-quently asked questions, application notes, presentations, and examplescripts.
Readme File: Before installation, you can read the readme file (readme.txt) in the AnsysEM
Getting Started 1-3
ANSYSElectromagnetics Suite 17.0 - © SAS IP, Inc. All rights reserved. - Contains proprietary and confidential
information of ANSYS, Inc. and its subsidiaries and affiliates.

ANSYS Electromagnetics Suite 17.0Windows Installation Guide
directory of the installation program. After installation, the readme file is avail-able in the Help directory.
Product Docu-mentation:
Online help files are accessible from theHelpmenu of each applica-tioninstalled, and they are located in the product subdirectories under the Helpdirectory. The online help system includes two formats: Mic-rosoft HTMLHelpand Portable Document Format (PDF).
Getting Started Guides and other documentationmay be available as PDFsin the product subdirectories under the Help directory.
Getting Started 1-4
ANSYSElectromagnetics Suite 17.0 - © SAS IP, Inc. All rights reserved. - Contains proprietary and confidential
information of ANSYS, Inc. and its subsidiaries and affiliates.

2 - Installing ANSYS ElectromagneticsSuite Software
To install ANSYS Electromagnetics Suite software on aWindows operating system:l Obtain a license file for the software you are installing. See "License File " on page 1-1 formore information.
l Install the ANSYS Electromagnetics Suite software.l Set up a license server if prompted to do so.
Obtaining a License FileANSYS Electromagnetics requires a license for all software. If you do not have a license file for theANSYS Electromagnetics software you are about to install, contact your ANSYS sales rep-resentative. See "License File " on page 1-1 for more informa-tion.
Installing the SoftwareTo install ANSYS Electromagnetics software:1. Log in asAdministrator, or log on to an account with administrator privileges.2. If you downloaded the ANSYS Electromagnetics product ("Additional Resources" on page
1-3 ), unzip the download, and run the autorun.exe file in the newly created directory. TheInstallation Shell appears.
3. Click Install Electromagnetics Suite.The initial screen appears.
4. ClickNext.The License Agreement screen appears.
5. Read the license agreement carefully. ClickYes if you accept the terms of the agreement.6. ClickNext.
TheChoose Destination Location screen appears.7. Under Destination Folder, do one of the following to accept the default path or specify
a new one:
ANSYS Electromagnetics Suite 17.0Windows Installation Guide
Installing ANSYSElectromagnetics Suite Software 2-1
ANSYSElectromagnetics Suite 17.0 - © SAS IP, Inc. All rights reserved. - Contains proprietary and confidential
information of ANSYS, Inc. and its subsidiaries and affiliates.

ANSYS Electromagnetics Suite 17.0Windows Installation Guide
l Accept the default installation directory listed underDestination Folder.l To select a different directory, clickBrowse. TheChoose Folder window appears.Select a directory, and clickOK. If you have other ANSYS Electromagnetics software,ANSYS recommends that you install new software in the same directory.
l To create a new directory, clickBrowse. TheChoose Folder window appears. Enterthe new name in thePath field, and clickOK.
8. ClickNext.Depending on the software and version being installed, youmay see one or both of the fol-lowing screens before theSelect Program Folder screen: the Choose Default Tem-porary Directory Location screen and/or theChoose Library Option screen.
9. If theDefault Temporary Directory Location screen appears, select a default locationfor all simulations (including local) to use as a temporary work space.l If desired, change the temporary folder assignment. You can edit the field directly or usethe Browse button to display file browser to let you navigate the folders on your machineand network.
l If desired, check the option to add read/write permissions for Everyone. If the installationwill be used for remote simulation bymultiple users, all usersmust have permissions onthe temporary folder.
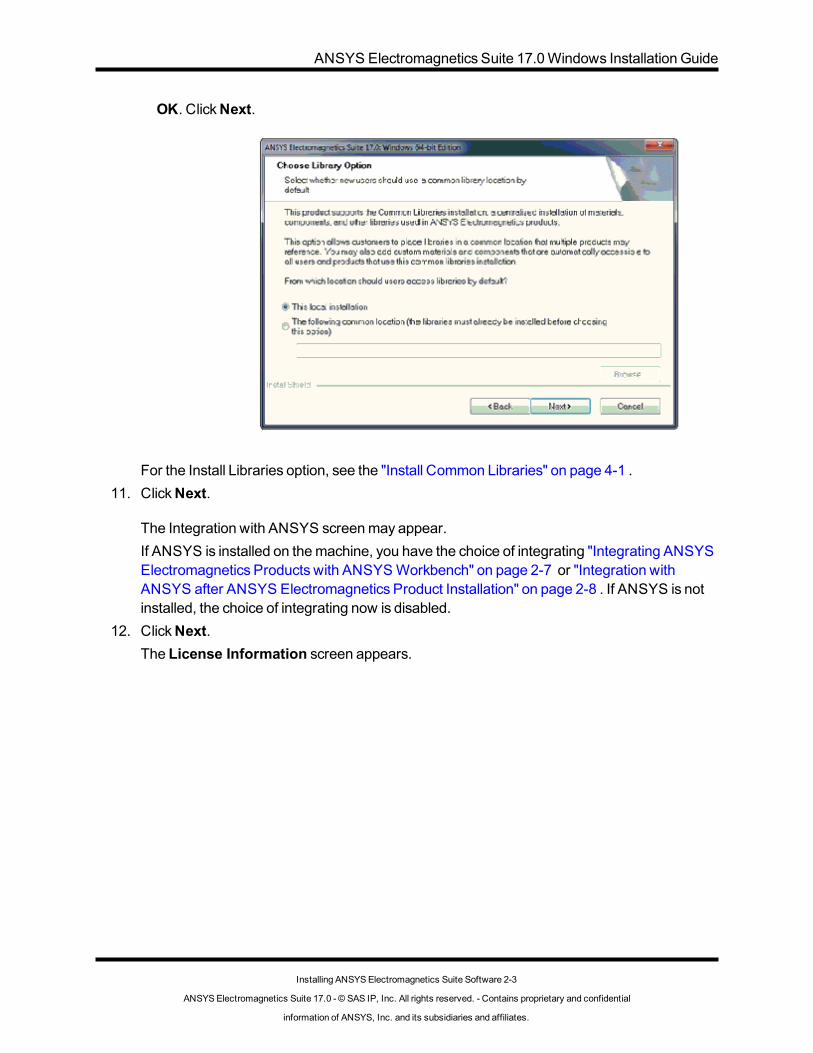
10. If theChoose Library Option screen appears, do one of the following to specify the loc-ation of ANSYS Electromagnetics libraries:Note ANSYS Electromagnetics libraries are large databases of electronic components,
developed by ANSYS and variousmanufacturers.
l ClickThis local installation to copy and install the default ANSYS Electro-magneticscomponent libraries, and then clickNext.
l ClickThe following common locationto use libraries that are already installed(locally or on the network). Click Browse, select the appropriate path, and click
Installing ANSYSElectromagnetics Suite Software 2-2
ANSYSElectromagnetics Suite 17.0 - © SAS IP, Inc. All rights reserved. - Contains proprietary and confidential
information of ANSYS, Inc. and its subsidiaries and affiliates.
ANSYS Electromagnetics Suite 17.0Windows Installation Guide
OK. ClickNext.
For the Install Libraries option, see the "Install Common Libraries" on page 4-1 .11. ClickNext.
The Integration with ANSYS screenmay appear.If ANSYS is installed on themachine, you have the choice of integrating "Integrating ANSYSElectromagnetics Products with ANSYSWorkbench" on page 2-7 or "Integration withANSYS after ANSYS Electromagnetics Product Installation" on page 2-8 . If ANSYS is notinstalled, the choice of integrating now is disabled.
12. ClickNext.The License Information screen appears.
Installing ANSYSElectromagnetics Suite Software 2-3
ANSYSElectromagnetics Suite 17.0 - © SAS IP, Inc. All rights reserved. - Contains proprietary and confidential
information of ANSYS, Inc. and its subsidiaries and affiliates.

ANSYS Electromagnetics Suite 17.0Windows Installation Guide
For additional information about the three license options, clickHelp me decide which ofthe following options to choose. This displays a browser page with additional explan-ations.
Note You can review the current license configuration by clickingView current license con-figuration.
Installing ANSYSElectromagnetics Suite Software 2-4
ANSYSElectromagnetics Suite 17.0 - © SAS IP, Inc. All rights reserved. - Contains proprietary and confidential
information of ANSYS, Inc. and its subsidiaries and affiliates.

ANSYS Electromagnetics Suite 17.0Windows Installation Guide
13. Select one of the following three license options:
14. On theSelect Program Folder screen, do one of the following to specify a name for the pro-gram folder:l Accept the default name displayed in theProgram Folder box.l Select an item from theExisting Folders list.
Installing ANSYSElectromagnetics Suite Software 2-5
ANSYSElectromagnetics Suite 17.0 - © SAS IP, Inc. All rights reserved. - Contains proprietary and confidential
information of ANSYS, Inc. and its subsidiaries and affiliates.

ANSYS Electromagnetics Suite 17.0Windows Installation Guide
l Type a new name for the folder in theProgram Folder box.Note The program folder, which appears on theWindowsStartmenu, is a grouping
of related software that includes executable files and other components. Thedefault programs folder isANSYS Electromagnetics (Start>All Pro-grams>ANSYS Electromagnetics).
15. ClickNext.TheReview settings before copying files screen appears.
16. In the Review settings before copying files screen, review the information dis-playedunderCurrent Settings, and then do one of the following:
l If the settings are correct, clickNext to start copying files.l If the settings are incorrect, clickBack asmany times as necessary, and change yourselections. Verify each screen before clickingNext to go to the next screen.When allinformation is correct, return to theReview settings before copying files screen, andclickNext.
TheSetup Status screen appears, displaying a progress bar, and installation begins. You canclickCancel at any time to exit the installation.Note If you receive amessage about read-only files, you typically want to overwrite themwith
the newer versions.
17. Once the files have all been copied, one of the followingmessagesmay appear:l If you identified as the license server the samemachine where you installed the ANSYSElectromagnetics software, then amessage appears that informs you that youmust installthe ANSYS LicenseManager on thismachine. ClickOK.
l If you identified as the license server amachine other than where you installed theANSYS Electromagnetics software, then amessage appears that identifies that machineas the license server and informs you that youmust install the ANSYS LicenseManageron that machine. ClickOK.
18. When the installation is complete, the InstallShieldWizard Complete window appears.You will see one of two check box options:
l If RSM is not installed, you will see a check box to launch the RSM installa-tion and, once theinstallation is complete, register this ANSYS Electromag-netics product with RSM. If youselect this option and clickFinish, the product installation ends and the RSM installation isautomatically started.
l If RSM is installed, you will see a check box to register this ANSYS Electro-magneticsproduct with RSM.See chapter 3 for more details on RSM.
19. ClickFinish.The initial setup Installation Shell reappears.
Installing ANSYSElectromagnetics Suite Software 2-6
ANSYSElectromagnetics Suite 17.0 - © SAS IP, Inc. All rights reserved. - Contains proprietary and confidential
information of ANSYS, Inc. and its subsidiaries and affiliates.

ANSYS Electromagnetics Suite 17.0Windows Installation Guide
Integrating ANSYS Electromagnetics Products withANSYS WorkbenchYou can integrate ANSYS Electromagnetics products with ANSYSWorkbench in one of twoways:
l "Integration with ANSYSWorkbench during ANSYS Electromagnetics Product Install-ation" below, or
l "Integration with ANSYS after ANSYS Electromagnetics Product Installation" on the nextpage
Integration with ANSYS Workbench during ANSYS ElectromagneticsProduct InstallationYou can choose to integrate ANSYS Electromagnetics products with ANSYSWorkbench duringinstallation as follows:1. If you have not already installed ANSYS, do so before proceeding. Refer to the Installation
Guide for ANSYS Electromagnetics Suite.2. Proceed through the installation dialogs.3. When the Integration with ANSYS dialog displays, select theYes radio button to have the
installer automatically integrate the ANSYS Electromagnetics prod-uct with ANSYS.
Note If you choose not to integrate the product with ANSYS during installation, you can per-form this step "Integration with ANSYS after ANSYS Electromagnetics Product Install-ation" on the next page
4. Complete the product installation and exit the installer.
Installing ANSYSElectromagnetics Suite Software 2-7
ANSYSElectromagnetics Suite 17.0 - © SAS IP, Inc. All rights reserved. - Contains proprietary and confidential
information of ANSYS, Inc. and its subsidiaries and affiliates.

ANSYS Electromagnetics Suite 17.0Windows Installation Guide
Integration with ANSYS after ANSYS Electromagnetics Product Install-ationIf you want to integrate ANSYS Electromagnetics Suite with ANSYS after installation, do the fol-lowing:1. From the Start menu, selectAll Programs>ANSYS Electromagnetics>ANSYS Elec-
tromagnetics Suite 17.0 >Modify Integration with ANSYS.
2. In the Integration with ANSYS dialog box, ensure that theYes radio button is selected,
Then clickOK to complete the integration process. ThenOK the information dialogue.You can confirm that ANSYS is “aware” of the ANSYS Electromagnetics integrated applic-ations via the ANSYSWorkbenchOptions dialog, which shows the paths to the integratedANSYS Electromagnetics applications.
Installing ANSYSElectromagnetics Suite Software 2-8
ANSYSElectromagnetics Suite 17.0 - © SAS IP, Inc. All rights reserved. - Contains proprietary and confidential
information of ANSYS, Inc. and its subsidiaries and affiliates.

ANSYS Electromagnetics Suite 17.0Windows Installation Guide
Installing ANSYSElectromagnetics Suite Software 2-9
ANSYSElectromagnetics Suite 17.0 - © SAS IP, Inc. All rights reserved. - Contains proprietary and confidential
information of ANSYS, Inc. and its subsidiaries and affiliates.

PDF layout 2-10
ANSYSElectromagnetics Suite 17.0 - © SAS IP, Inc. All rights reserved. - Contains proprietary and confidential
information of ANSYS, Inc. and its subsidiaries and affiliates.
ANSYS Electromagnetics Suite 17.0Windows Installation Guide

3 - High Performance Computing
ANSYS Electromagnetics products have a variety of ways to usemultiple threads, multiple coresor multiple hosts to improve productivity. These additional computational resourcesmay be used tosolve larger problems, to solve a given problem faster, or to improve the quality of a solution (usingmore stringent convergence criteria, for example) in the same amount of time. This sectiondescribes the configuration and requirements for using additional resources by ANSYS Elec-tromagnetics products.
Tomake effective use of the resources allocated to the analysis, the job settingsmust match the jobrequirements. In addition, the cluster configuration and the resourcesmust be allocated to the job ina way that the products are able tomake effective use of the resources.
Options for Distributed AnalysisThere are several options for configuring ANSYS Electromagnetics products to take advantage ofadditional computational resources. The simplest approach is to use the Remote SimulationMan-ager (RSM) for ANSYS Electromagnetics products. RSMmay be installed, configured, and startedon one or more hosts. It runs as aWindowsService. An analysismay be distributed to any of thehosts where the Remote SimulationManager is running. RSM is bundled with ANSYS Elec-tromagnetics products.
There are a number of job schedulers available from third parties, such as IBMPlatform LSF. A jobscheduler may also be called a distributed resourcemanagement system, a cluster manager, abatch system or a distributed resourcemanager. These systems provide queuing of jobs, load bal-ancing, assigning resources to jobs, andmany other management andmonitoring features.ANSYS Electromagnetics products integrate with several of themost widely used job schedulers.The user is able to submit jobs to the scheduler. When the job runs, the product uses the resourcesallocated to the job to accomplish the analysis.
Usersmay be able to use job schedulers which are not included in the list of supported job sched-ulers via “custom scheduler integration.” The end user, working with ANSYS Electromagneticsproducts support engineers, will provide an IronPython script or code library to act as an interfacebetween the scheduler and the ANSYS Electromagnetics products.
The RSM for ANSYS Electromagnetics productsmay be used for running an analysis on a remotehost or for running an analysis distributed tomultiple hosts. However, the user is required toman-age the jobs and resources used by these jobs; no ability to queue jobs until needed resources areavailable is provided. In general, a job scheduler ismore appropriate if there are a number of hostsshared between a number of users, because a scheduler is better able tomanage the jobs and theresources. It can queue a job and delay the start the job until appropriate resources become avail-able. Custom scheduler integration is needed to allow jobs to be run on a cluster that is not man-aged by one of the supported job schedulers.
ANSYS Electromagnetics Suite 17.0Windows Installation Guide
High Performance Computing 3-1
ANSYSElectromagnetics Suite 17.0 - © SAS IP, Inc. All rights reserved. - Contains proprietary and confidential
information of ANSYS, Inc. and its subsidiaries and affiliates.

ANSYS Electromagnetics Suite 17.0Windows Installation Guide
Remote Simulation Manager (RSM)TheRemote SimulationManager (RSM) for ANSYS Electromagnetics productsmay be used forrunning an analysis on a remote host or for running an analysis distributed tomultiple hosts. Whenusing RSM, the users are required tomanage the jobs and resources used by these jobs. No loadbalancing or queueing of jobs is provided. The Remote SimulationManager is not used if the ana-lysis is run as a job on one of the supported job schedulers, such as LSF or WindowsHPC. See"Supported Job Schedulers" on page 3-6 for a list of these jobs schedulers. RSM is also not used ifthe analysis is run as a job using custom scheduler integration with a scheduler that is not sup-ported by default. See "CustomScheduler Integration" on page 3-7 for more information.
If the the Remote SimulationManager is running on a host, by default, jobs started on remote hostsmay distribute jobs to the local host. A user may disable this access or re-enable this access usingtheOptions dialog. The Tools>Options>General Optionsmenu item pops up theOptions dialog:
High Performance Computing 3-2
ANSYSElectromagnetics Suite 17.0 - © SAS IP, Inc. All rights reserved. - Contains proprietary and confidential
information of ANSYS, Inc. and its subsidiaries and affiliates.

ANSYS Electromagnetics Suite 17.0Windows Installation Guide
The Disable access by remote machines check box, in theRSM Service Options group box,on theGeneral>Remote Analysis page controls access. If this check box is not checked, thedefault setting, then remote hosts can distribute jobs to the local host. If this check box is checked,then remote hosts cannot distribute jobs to the local host.
When do you need RSM?
RSM is needed only to run an analysis on a remote host or an analysis distributed tomultiple hosts.RSM is also required if some of the solvers are running on a hosts that run under a different OSthan theOS host that is running ANSYS Electronics Desktop. If RSM is required, then the RSMdaemon or servicemust be configured and running on all remote hosts for the analysis.
Please note that RSM isnot needed:
l To run an analysis only on the local host.l To run an analysis using integration with a supported job scheduler or using custom sched-uler integration.
You should not install RSMon hosts that aremanaged by a scheduler.
High Performance Computing 3-3
ANSYSElectromagnetics Suite 17.0 - © SAS IP, Inc. All rights reserved. - Contains proprietary and confidential
information of ANSYS, Inc. and its subsidiaries and affiliates.

ANSYS Electromagnetics Suite 17.0Windows Installation Guide
Installing RSMTo install ANSYS Electromagnetics RSM software:1. If you checked to install the Remote SimulationManager during the software installation, the
ANSYS Electromagnetics Remote SimulationManager installer appears. You can alsoinstall the Remote SimulationManager as an installation option on the installation CD.The following screen appears.
2. To install the ANSYS Electromagnetics Remote SimulationManager, clickNext.The License Agreement screen appears.
3. Read the license agreement carefully. ClickYes if you accept the terms of the agreement.TheChoose Destination Location screen appears.
4. Under Destination Folder, do one of the following to accept the default path or specifya new one:l Accept the default installation directory listed underDestination Folder.
High Performance Computing 3-4
ANSYSElectromagnetics Suite 17.0 - © SAS IP, Inc. All rights reserved. - Contains proprietary and confidential
information of ANSYS, Inc. and its subsidiaries and affiliates.

ANSYS Electromagnetics Suite 17.0Windows Installation Guide
l To select a different directory, clickBrowse. TheChoose Folder window appears.Select a directory, and clickOK. If you have other ANSYS Electromagnetics software,ANSYS recommends that you install new software in the same directory.
l To create a new directory, clickBrowse. TheChoose Folder window appears. Enterthe new name in thePath field, and clickOK.
5. ClickNext.The Remote SimulationManager Service Configuration window appears.
6. Choose to run the ANSYS Electromagnetics Communication service as theSys-tem Useror asA specific user (whomust have administrative privileges).If you selectA specific user, the fields for User name, Password, andMachine or domainname are enabled.
Note The user selected will run remote and distributed analyseswhen no user is specified inthe product interface.
7. On theSelect Program Folder screen, do one of the following to specify a name for the pro-gram folder:l Accept the default name displayed in theProgram Folders box.l Select an item from theExisting Folders list.l Type a new name for the folder in theProgram Folders box.Note The program folder, which appears on theWindowsStartmenu, is a grouping
of related software that includes executable files and other components. Thedefault programs folder is (Start>All Programs>ANSYSElectromagnetics).
8. ClickNext.TheReview settings before copying files screen appears.
9. In the Review settings before copying files screen, review the information dis-playedunderCurrent Settings, and then do one of the following:l If the settings are correct, clickNext to start copying files.l If the settings are incorrect, clickBack asmany times as necessary, and change yourselections. Verify each screen before clickingNext to go to the next screen.When allinformation is correct, return to theReview settings before copying files screen, andclickNext.
TheSetup Status screen appears, displaying a progress bar, and installation begins. Youcan clickCancel at any time to exit the installation.
Note If you receive amessage about read-only files, you typically want to overwrite themwiththe newer versions.
At the end of the installation, RSM is automatically started as a service on thismachine.The InstallShieldWizard complete window appears. If you want to view the README file(recommended before using the software), check the box.
High Performance Computing 3-5
ANSYSElectromagnetics Suite 17.0 - © SAS IP, Inc. All rights reserved. - Contains proprietary and confidential
information of ANSYS, Inc. and its subsidiaries and affiliates.

ANSYS Electromagnetics Suite 17.0Windows Installation Guide
10. ClickFinish to close the install window.If you use RSM, it must be installed on all remotemachines. In addition, the product enginesmust be registered on RSM.l If this installation was automatically launched from a product installation, then the regis-tration will occur automatically.
l To register the engines at any time onWindows, choose Start>All Pro-grams>ANSYSElectromagnetics>product>Register with RSM. You can also runRegister-EnginesWithRSM.exe, located in the product subdirec-tory (for example, C:\ProgramFiles\AnsysEM\AnsysEM17.0\Win64\Regis-terEnginesWithRSM.exe). In each case, yousee a dialog confirming the registration.OK the dialog.
Registering ANSYS Electromagnetics Product Engines for use withRSMYoumust make each installation of RSMaware of each ANSYS Electromagnetics product, sothat remote simulation requests are properly routed to the product. For network installations, youneed only to register each ANSYS Electromagnetics prod-uct once, regardless of the number ofmachines. Otherwise, you need to register each ANSYS Electromagnetics product on eachmachine running RSM.
l To register an ANSYS Electromagnetics product with RSM, either:ClickStart>All Programs>ANSYS Electromagnetics>ANSYS Electromag-neticsSuite 17.0>Register with RSM.Or runRegisterEngineswithRSM.exe, located in the product installation direc-tory (forexample, c:\ProgramFiles\AnsysEM\AnsysEM17.0\Win64\Regis-ter-EnginesWithRSM.exe).
l To unregister an ANSYS Electromagnetics product fromRSM, either:ClickStart>All Programs>ANSYS Electromagnetics>ANSYS Electromag-neticsSuite 17.0>Unregister with RSM.Or runUnregisterEngineswithRSM.exe, located in the product installation directory (forexample, c:\ProgramFiles\AnsysEM\Ansy-sEM17.0\Win64\Un-registerEnginesWithRSM.exe).
Supported Job Schedulers
The supportedWindows job schedulers of ANSYS Electromagnetics Suite 17.0 are listed in the fol-lowing table.
Job Scheduler (DRM) Latest Tested VersionWindowsHPC WindowsHPC Server 2012 R2
High Performance Computing 3-6
ANSYSElectromagnetics Suite 17.0 - © SAS IP, Inc. All rights reserved. - Contains proprietary and confidential
information of ANSYS, Inc. and its subsidiaries and affiliates.

ANSYS Electromagnetics Suite 17.0Windows Installation Guide
The versions earlier than the latest tested version indicated in the tablemay also work fine andmight have been tested in previous versions of the product. Newer versionsmay also work if back-ward compatibility ismaintained by the scheduler.
Custom Scheduler Integration
For the above job schedulers in a standard configuration, ANSYS Electromagnetics productsprovide an out-of-the-box integrated solution. For integration with other schedulers or non-stand-ard scheduler configurations, user (or scheduler vendor) needs to provide a component called "cus-tom scheduler proxy." Using this small component, AnsysEMmainly identifies the compute nodesallocated by a scheduler to the AnsysEM job, and launches solver processes on those nodes.
A custom scheduler proxy is usually an IronPython script file that has a class that implements a spe-cified interface. Functionally, themethods of this classmediate the interactions between AnsysEMprocesses and the scheduler. Physically, such a proxy is a small text file, and does not require to becompiled/linked. This is often the preferred approach, as it is easier to install and test. The details ofthis interface and itsmethods are described elsewhere. Installing a custom scheduler proxy usuallymeans just adding a .py file under schedulers subdirectory of the AnsysEM installation directory. Byproviding a custom scheduler proxywritten in IronPython, you can even override the default sched-uler proxy for a supported scheduler.
Note: IronPython is an implementation of the Python programming language targeting the .NETruntime. You do not need to install IronPython, as AnsysEMalready comeswith IronPython.AnsysEM supports it on bothWindows and Linux. For more information, see the "Introduction toIronPython" section.
Alternately, a custom scheduler proxy can be a dynamically linked library (onMicrosoft Windows)that implements a set of functions. This library is loaded by the AnsysEMat runtime, and if it is run-ning as part of a scheduler job, the AnsysEM interacts with the library to get information from thescheduler, and to start additional processes on specified hosts. Each such library implements a setof extern "C" functions needed tomediate the interactions between AnsysEMand the scheduler.The details of these functions are described elsewhere.
Limitations
Implementing your own custom scheduler proxy does not allow use of the jobmanagement GUI. Italso does not provide tight-integration of scheduler for MPI-based jobs.
Running HPC Test Jobs on a ClusterThis section describes how to submit and run a small number of test jobs to verify that the productinstallation, the cluster configuration, and theMPI installation and configuration are satisfactory forrunning ANSYS Electromagnetics analysis jobs. These tests are not comprehensive, but suc-cessful completion of all of the jobs indicates that the basic requirements for running ANSYS Elec-
High Performance Computing 3-7
ANSYSElectromagnetics Suite 17.0 - © SAS IP, Inc. All rights reserved. - Contains proprietary and confidential
information of ANSYS, Inc. and its subsidiaries and affiliates.

ANSYS Electromagnetics Suite 17.0Windows Installation Guide
tromagnetics jobs have beenmet. Before running these tests, the following steps should be com-pleted:
l The ANSYS Electromagnetics product or products should be installedl The cluster should be configured for running ANSYS Electromagnetics analysis jobs, asdescribed in "Scheduler Specific Configuration and Testing"on page 3-16
l MPI should be installed and configured as described in "Message Passing Interface (MPI)Installation" on page 6-1
Each of the test jobs should run to completion in a few minutes or less. They should be run in theorder specified, proceeding to the next test only if any problems found in the preceding test havebeen addressed. Three different test jobs are described.
l Non-distributed jobl Non-MPI job distributed tomultiple hostsl MPI job distributed tomultiple hosts
Non-distributed job
This is a simple job that uses one core on one host. This test uses the Tee.aedt example project,which is located in the “Examples/HFSS/RFMicrowave” subdirectory of the product installation dir-ectory. The files Tee.PDF and Tee.aedt are needed for this test. This test uses Setup1, but it doesnot use the frequency sweep, Sweep1, so the frequency sweepmust be disabled.
Use the following steps to copy the project files and disable the frequency sweep, if needed.
1. Copy the files Tee.aedt and Tee.PDF from the Examples/HFSS/RFMicrowave sub-directory of the product installation directory to another directory.
2. Run the product (ansysedt.exe).3. Open the copy of the project.4. In the Project Manager window, expand the tree item TeeModel (DrivenModel)>Ana-
lysis>Setup1>Sweep1. If frequency sweep Sweep1 is enabled, right-click on TeeModel(DrivenModel>Analysis>Setup1> Sweep1, and select the itemDisable Sweep in thepopupmenu to disable the frequency sweep.
5. Save and close the project.
Successful completion of this job indicates that the following requirements have beenmet:
l The job submission host is correctly configured for submitting jobs to the cluster.l The job user account is authorized to run jobs on the cluster.l The product installation is accessible from the cluster host allocated to the job.l The project directory is accessible from the cluster host allocated to the job.l Communication between different job processes on the cluster host allocated to the job isnot blocked.
High Performance Computing 3-8
ANSYSElectromagnetics Suite 17.0 - © SAS IP, Inc. All rights reserved. - Contains proprietary and confidential
information of ANSYS, Inc. and its subsidiaries and affiliates.

ANSYS Electromagnetics Suite 17.0Windows Installation Guide
Non-MPI job distributed to multiple hosts
This job usesmultiple cores distributed tomultiple hosts. It does not useMPI. This job will start onone host, but portions of the analysis will be distributed to the other hosts allocated to the job. Thistest also uses the Tee.aedt example project, which is located in the Examples/HFSS/RFMicrowave subdirectory of the product installation directory. The files Tee.PDF and Tee.aedt areneeded for this test, the same as the previous test. This test uses Setup1, and it uses the frequencysweep, Sweep1, so the frequency sweepmust be enabled.
Use the following steps to copy the project files and enable the frequency sweep, if needed.
1. Run the product (ansysedt.exe).2. Open the copy of the project.3. In the Project Manager window, expand the tree item TeeModel (DrivenModel)>Ana-
lysis>Setup1>Sweep1. If frequency sweep Sweep1 is disabled, right click on TeeModel(DrivenModel)>Analysis>Setup1>Sweep1, and select the itemEnable Sweep in thepopupmenu to enable the frequency sweep.
4. Save and close the project.
Successful completion of this job indicates that the following additional requirements have beenmet:
l A job process on one cluster host allocated to the job is able to use the cluster to start addi-tional job processes on other cluster hosts allocated to the job.
l Communications between job processes running on different cluster hosts allocated to thejob are not blocked.
MPI job distributed to multiple hosts
This job usesMPI processes distributed tomultiple hosts. This job will start on one host, but por-tions of the analysis will be distributed toMPI ranks running on the first execution host and ranksrunning on other hosts allocated to the job. This test uses the differential_stripline.aedt example pro-ject, which is located in the Examples/HFSS/Transmission Lines subdirectory of the product install-ation directory. The files differential_stripline.pdf and differential_stripline.aedt are needed for thistest. This test uses Setup1, but it does not use the frequency sweep, DC_10GHz, so the frequencysweepmust be disabled.
Use the following steps to copy the project files and disable the frequency sweep, if needed.
1. Copy the files differential_stripline.aedt and differential_stripline.pdf from the“Examples/HFSS/Transmission Lines” subdirectory of the product installation directory toanother directory.
2. Run the product (ansysedt.exe).3. Open the copy of the project. In the Project Manager window, expand the tree item dif-
ferential_stripline -> Differential Stripline (Driven Terminal)>Analysis>GHz>DC_10GHz. Iffrequency sweep DC_10GHz is enabled, right-click on differential_stripline> Differential
High Performance Computing 3-9
ANSYSElectromagnetics Suite 17.0 - © SAS IP, Inc. All rights reserved. - Contains proprietary and confidential
information of ANSYS, Inc. and its subsidiaries and affiliates.

ANSYS Electromagnetics Suite 17.0Windows Installation Guide
Stripline (Driven Terminal)>Analysis>GHz>DC_10GHz, and select the itemDisableSweep in the popupmenu to disable the frequency sweep.
4. Save and close the project.
Successful completion of this job indicates that the following additional requirements have beenmet:
l If needed, MPI is installed and configured on the cluster hosts.l If needed, user passwords are registered with MPI on the cluster hosts.l If needed, theMPI prerequisites are installed on the cluster hosts.
Submitting and Running the Tests
This section includes general instructions for submitting and running the jobs. For additional noteson running any of the test jobs on a specific cluster, see the information for the specific scheduler in"Scheduler Specific Configuration and Testing" on page 3-16
The test jobsmay be submitted to a cluster using the Ansys Electromagnetics job submission GUI.To use this GUI, start the product, ansysedt.exe, on a host which is configured as a submissionhost for the cluster. The product should be started in an environment configured for submitting jobsto the cluster.
Before submitting the first job, the scheduler must be selected. Usemenu item Tools>Job Man-agement>Select Scheduler to pop up theSelect Scheduler dialog.
For aWindowsHPC cluster, select theUse this computer radio button, and then selectWin-dows HPC in theChoose scheduler drop-down list. Enter the name of the head node in theHead node edit control. The “...” buttonmay be used to access a dialog to browse computersaccessible via a network.
For other clusters, select theUse this computer radio button, and then select the scheduler typein theChoose scheduler drop-down list. Select lsf for IBMPlatform LSF.
Pressing theRefresh button causes the connection to the cluster to be verified, and basic clusterinformation to be displayed in theScheduler info text control. When finished, clickOK. The selec-ted scheduler (and head node, if applicable) will be used for subsequent jobs submission using theSubmit JobGUI. To change the scheduler or head node, pop up theSelect Scheduler dialogagain, and select a different scheduler or head node.
To submit a job, usemenu item Tools>Job Management>Select Scheduler to pop up theSub-mit Job To: dialog. The controls applicable to options that are used less frequently are only shownif theShow advanced options check box is checked. Three tabs are shown on this dialog:
l Analysis Specification: Basic analysis parameters, including the product pathname, theproject pathname, and the setup or setups to analyze. Several additional optionsmay be
High Performance Computing 3-10
ANSYSElectromagnetics Suite 17.0 - © SAS IP, Inc. All rights reserved. - Contains proprietary and confidential
information of ANSYS, Inc. and its subsidiaries and affiliates.

ANSYS Electromagnetics Suite 17.0Windows Installation Guide
specified using this tab.l Compute Resources: The user selects the resources to be allocated to the job and optionsfor job distribution. Scheduler specific resourcesmay be specified using the “Resource selec-tion parameters.”
l Scheduler Options: Options for the job to be submitted to the scheduler, such as the jobname and job priority.
Use thePreview Submission button to display information about the job to be submitted to thecluster. For WindowsHPC, this pops up a dialog showing the parameters of the job to be sub-mitted, and the parameters of the first execution task, including the full command line of this task;for distributed jobs, additional taskswill be started automatically, as needed, to complete the job.For other clusters, the dialog shows the job submission command and the contents of the job scriptfor the job. If a problem is detected with the selected job parameters, amessage box containing anerror messagemay be shown, instead of the job submission parameters.
Use theSubmit Job button to submit the job to the selected cluster. If there is an error submittingthe job, then an error message will be shown. If the job is submitted successfully, then a dialog boxshowing the job ID is displayed to the user. If theBegin monitoring this job now check box ischecked when this dialog is dismissed, then theMonitor Job dialog pops up tomonitor the job.TheMonitor Job dialogmay be dismissed at any time, and the job will continue to run. To resumemonitoring the same job, select menu item Tools> Job Management>Monitor Jobs to accesstheMonitor Job dialog. Selecting a project file using theRecent Jobs drop-down list or the filebrowser popped up by the “...” button will resumemonitoring of themost recent job submitted forthe selected project. Monitoring will not be possible from theMonitor Job dialog if there is no net-work connection between the submission host and the cluster execution host where the Desktopprocess runs, or if this connection is blocked.
"Submitting and running a non-distributed job " below
"Submitting and running a non-MPI job distributed tomultiple hosts" on the next page
"Submitting and running anMPI job distributed tomultiple hosts" on page 3-14
Submitting and running a non-distributed job
1. Copy the files Tee.aedt and Tee.PDF from the Examples/HFSS/RFMicrowave sub-directory of the product installation directory to a directory which is accessible from thecluster hosts using the same path. This directory, the project directory, must be readable andwriteable by the user running the job. Disable the frequency sweep as described above.The scheduler (and head node, if applicable) should be set as described above before sub-mitting the job to the cluster.
2. Select menu item Tools>Job Management>Select Scheduler to activate theSubmitJob To: dialog.
3. In theAnalysis Specification tab, ensure that theProduct path edit control contains apathname of the product that is valid for the cluster execution nodes.
High Performance Computing 3-11
ANSYSElectromagnetics Suite 17.0 - © SAS IP, Inc. All rights reserved. - Contains proprietary and confidential
information of ANSYS, Inc. and its subsidiaries and affiliates.

ANSYS Electromagnetics Suite 17.0Windows Installation Guide
a. Specify the path to the project file in theProject edit control.b. Specify the setup “TeeModel:Nominal:Setup1” in theAnalysis Setups group box.
4. Switch to theCompute Resources tab, andmake sure that theUse automatic settingscheck box is not checked.
a. For theMethod, selectNumber of Tasks and Cores in the drop-down list.b. Set the Total number of tasks to 1.c. Set theCores per distributed task to 1.d. Ensure that the Limit number of tasks per node to: check box is not checked. The
other options on all tabsmay be set to any values.5. Press thePreview Submission button. If no errors are found, then thePreview Submit
Job Results dialog should display information on how the job will be submitted to thecluster. If an error is displayed instead of thePreview Submit Job Results dialog, thenaddress the error before continuing. This dialog should indicate that only one host is neededfor the job. If this is not the case, then review the job resources specified on theComputeResources tab, and retry. If the job and task parameters are correct, then close thePre-view Submit Job Results dialog and continue.
6. Submit the job using theSubmit Job button. If an error occurs on job submission, addressthe error before submitting the job again. If the cluster isWindowsHPC, youmay be promp-ted for a password if it is not cached. If this occurs, enter the password and continue. If pos-sible, monitor the job until it finishes.
If the job fails to complete successfully, check the following items:
l The user submitting the jobmust be authorized to run jobs on the cluster.l The pathname of the product must be accessible on the cluster execution node(s) where thejob runs, and the job user must have permission to run the product executables.
l The pathname of the project must be accessible on the cluster execution node(s) where thejob runs. The job user must have permission to read from and write to the directory con-taining the project file, and theremust be adequate disk space for the job results.
l The temp directory used by the jobmust exist and it must have adequate disk space for thejob temporary files.
l Check for errors or warnings in theMonitor Job dialog, and address these issues.l Check the cluster for errors or warnings related to the job and address these issues. The jobID is displayed in a dialog when the job is successfully submitted. The job ID of the last jobrun on the specified project is also shown in theMonitor Job dialog.
Submitting and running a non-MPI job distributed to multiple hosts
The cluster must have at least two hosts with the same number of cores per host. Let N be the smal-lest number of cores per host, such that the cluster contains at least two hosts with N cores perhost. The job will be submitted to run on two hosts with N cores per host, requesting a total of 2 * Ncores. For many clusters, selecting N = 4may be a good choice.
High Performance Computing 3-12
ANSYSElectromagnetics Suite 17.0 - © SAS IP, Inc. All rights reserved. - Contains proprietary and confidential
information of ANSYS, Inc. and its subsidiaries and affiliates.

ANSYS Electromagnetics Suite 17.0Windows Installation Guide
1. Copy the files Tee.aedt and Tee.PDF from the “Examples/HFSS/RFMicrowave” sub-directory of the product installation directory to a directory which is accessible from thecluster hosts using the same path. This directory, the project directory, must be readable andwriteable by the user running the job. Enable the frequency sweep as described above.The scheduler (and head node, if applicable) should be set as described above before sub-mitting the job to the cluster.
2. Select menu item Tools>Job Management>Select Scheduler to activate theSubmitJob To: dialog.
3. In theAnalysis Specification tab, ensure that theProduct path edit control contains apathname of the product that is valid for the cluster execution nodes.
a. Specify the path to the project file in theProject edit control.b. Specify the setup “TeeModel:Nominal:Setup1” in theAnalysis Setups group box.
4. Switch to theCompute Resources tab, andmake sure that theUse automatic settingscheck box is not checked.
a. For theMethod, selectNumber of Tasks and Cores in the drop-down list.b. Set the Total number of tasks to 2 * N.c. Set theCores per distributed task to 1.d. Ensure that the Limit number of tasks per node to: check box is not checked. The
other options on all tabsmay be set to any values.e. In the Job distribution group box, press theModify button to access the JobDis-
tribution dialog.f. In theEnable Distribution Types section, uncheck theUse defaults check box,
and check only the Frequencies check box.g. In theDistribution levels section, select theSingle level only radio button.h. ClickOK to close the Job Distribution dialog.
5. For the schedulers which support setting theminimumandmaximum cores per node for ajob (WindowsHPC and LSF), set both of these values to the value N, determined earlier, asfollows:
a. Click on the “...” button to activate theCompute Resource Selection Parametersdialog.
b. For theMinCoresPerNode parameter, check theSpecify Parameter check box, andset the value to N.
c. For theMaxCoresPerNode parameter, check theSpecify Parameter check box,and set the value to N.
d. ClickOK to close theCompute Resource Selection Parameters dialog.The other options on all tabsmay be set to any values.
6. Press thePreview Submission button. If no errors are found, then thePreview SubmitJob Results dialog should display information on how the job will be submitted to thecluster. If an error is displayed instead of thePreview Submit Job Results dialog, then
High Performance Computing 3-13
ANSYSElectromagnetics Suite 17.0 - © SAS IP, Inc. All rights reserved. - Contains proprietary and confidential
information of ANSYS, Inc. and its subsidiaries and affiliates.

ANSYS Electromagnetics Suite 17.0Windows Installation Guide
address the error before continuing. This dialog should indicate that a total of 2 * N cores arerequired for the job, and that N coreswill be needed on each host allocated to the job. If thisis not the case, then review the job resources specified on theCompute Resources tab,and retry. If the job and task parameters are correct, then close thePreview Submit JobResults dialog and continue.
7. Submit the job using theSubmit Job button. If an error occurs on job submission, addressthe error before submitting the job again. If the cluster isWindowsHPC, youmay be promp-ted for a password if it is not cached. If this occurs, enter the password and continue. If pos-sible, monitor the job until it finishes.
If the job fails to complete successfully, check the following items, in addition to the itemsmentionedfor the first test:
l TheDesktop processwill use the cluster to launch processes on the other hosts allocated tothe job. Verify that the cluster configuration allows a job to launch processes on the otherhosts allocated to the job.
l Job processes on different hosts allocated to the job need to communicate. Verify that com-munication between these job processes is not blocked.
Submitting and running an MPI job distributed to multiple hosts
Determine whichMPI Vendor will be used for MPI jobs, Intel MPI or IBMPlatformMPI. This testshould use the sameMPI Vendor that will be used by cluster users. If noMPI Vendor is specified bythe user, then the default MPI Vendor (PlatformComputing) will be used. Intel MPI is denoted bythe string “Intel.” IBMPlatformMPI is denoted by the string “PlatformComputing.” If bothMPI Ven-dorsmay be needed by cluster users, then this test should be run twice, once with eachMPIVendor specified. Consult "Message Passing Interface (MPI) Installation" on page 6-1 to determ-ine if theMPI provided by the selectedMPI Vendor needs to be installed and to determine how itshould be configured.
The cluster must have at least two hosts with the same number of cores per host. Let N be the smal-lest number of cores per host, such that the cluster contains at least two hosts with N cores perhost. The job will be submitted to run on two hosts with N cores per host, requesting a total of 2 * Ncores.
1. Copy the files differential_stripline.aedt and differential_stripline.pdf from theExamples/HFSS/Transmission Lines subdirectory of the product installation directory to adirectory which is accessible from the cluster hosts using the same path. This directory, theproject directory, must be readable and writeable by the user running the job. Disable the fre-quency sweep as described above.The scheduler (and head node, if applicable) should be set as described above before sub-mitting the job to the cluster.
2. Select menu item Tools>Job Management>Select Scheduler to activate theSubmitJob To: dialog.
High Performance Computing 3-14
ANSYSElectromagnetics Suite 17.0 - © SAS IP, Inc. All rights reserved. - Contains proprietary and confidential
information of ANSYS, Inc. and its subsidiaries and affiliates.

ANSYS Electromagnetics Suite 17.0Windows Installation Guide
3. In theAnalysis Specification tab, ensure that the Product path: edit control contains apathname of the product that is valid for the cluster execution nodes.
a. Specify the path to the project file in theProject: edit control.b. Specify the setup Differential Stripline:Nominal:3GHz in theAnalysis Setups group
box.c. In theAnalysis options group box, set theHFSS/MPIVendor batchoption to the
desiredMPI Vendor, “Intel” or “PlatformComputing.” If this batchoption is present, butset to a different value, then you can use theEdit button to change the value; edit thevalue in the Edit Batchoption dialog and press the Update button to register thenew value before closing the dialog with theDone button. If it is not set, then use theAdd button to add it; in theAdd Batchoption dialog, select the registry key“HFSS/MPIVendor” in the grid, and then edit the text in theValue control, if needed,and pressAdd to register the new value, before closing the dialog with theDone but-ton.
4. Switch to theCompute Resources tab, andmake sure that theUse automatic settingscheck box is not checked.
a. For theMethod, selectNumber of Tasks and Cores in the drop-down list.b. Set the Total number of tasks to 2 * N.c. Set theCores per distributed task to 1.d. Ensure that the Limit number of tasks per node to: check box is not checked.e. In the Job distribution group box, press theModify button to access the JobDis-
tribution dialog.f. In theEnable Distribution Types section, uncheck theUse defaults check box,
and check only theDirect Solver Memory check box.g. In theDistribution levels section, select theSingle level only radio button.h. ClickOK to close the Job Distribution dialog.
5. For the schedulers which support setting theminimumandmaximum cores per node for ajob (WindowsHPC and LSF), set both of these values to the value N, determined earlier, asfollows:
a. Click on the “...” button to activate theCompute Resource Selection Parametersdialog.
b. For theMinCoresPerNode parameter, check theSpecify Parameter check box, andset the value to N.
c. For theMaxCoresPerNode parameter, check theSpecify Parameter check box,and set the value to N.
d. ClickOK to close the Compute Resource Selection Parameters dialog.The other options on all tabsmay be set to any values.
6. Press thePreview Submission button. If no errors are found, then thePreview SubmitJob Results dialog should display information on how the job will be submitted to thecluster. If an error is displayed instead of thePreview Submit Job Results dialog, then
High Performance Computing 3-15
ANSYSElectromagnetics Suite 17.0 - © SAS IP, Inc. All rights reserved. - Contains proprietary and confidential
information of ANSYS, Inc. and its subsidiaries and affiliates.

ANSYS Electromagnetics Suite 17.0Windows Installation Guide
address the error before continuing. This dialog should indicate that a total of 2 * N cores arerequired for the job, and that N coreswill be needed on each host allocated to the job. If thisis not the case, then review the job resources specified on theCompute Resources tab,and retry. If the job and task parameters are correct, then close thePreview Submit JobResults dialog and continue.
7. Submit the job using theSubmit Job button. If an error occurs on job submission, addressthe error before submitting the job again. If the cluster isWindowsHPC, youmay be promp-ted for a password if it is not cached. If this occurs, enter the password and continue. If pos-sible, monitor the job until it finishes.
If the job fails to complete successfully, in addition to the itemsmentioned for the first and secondtests, MPI configuration issuesmay cause job failures. Check the followingMPI configurationissues:
l Verify that the correct MPI Vendor (“Intel” or “PlatformComputing”) is specified using abatchoption setting in theSubmit Job To: dialog. The controls for specifying batchoptionsare located in the Analysis Options group box on theAnalysis Specification tab of theSubmit Job To: dialog.
l Verify that the specifiedMPI Vendor is installed (if needed) and configured correctly for theuser submitting the job, as described in "Message Passing Interface (MPI) Installation" onpage 6-1 Pay close attention to the registration of user passwords because the lack of acached password when one is required, or a cached password that is incorrect or out of date(even if no cached password is required) may cause authentication errors. Note that pass-words are cached separately on each cluster host, so a jobmay have authentication errorson some hosts but not on other hosts.
Scheduler Specific Configuration and TestingThe sections below describe configuration requirements for each supported scheduler. Methodsfor running tests to verify the configuration are included.
"WindowsHPC" below
"IBMPlatform LSF" on page 3-19
Windows HPCCluster Configuration Guidelines
TheWindowsHPC cluster affinity setting should be set to “Non-Exclusive jobs” or “No jobs.” Set-ting theWindowsHPC cluster affinity to “All jobs” may prevent the job from using all of theresources allocated to the job, for the reasons outlined below.
High Performance Computing 3-16
ANSYSElectromagnetics Suite 17.0 - © SAS IP, Inc. All rights reserved. - Contains proprietary and confidential
information of ANSYS, Inc. and its subsidiaries and affiliates.

ANSYS Electromagnetics Suite 17.0Windows Installation Guide
Each ANSYS Electromagnetics analysis job is started as a single process on a single host. If thejob needs to distribute a portion of the analysis to a different host, a single core task is started on theremote host to start the analysis processes on that host. Only one core is allocated for the task usedto start these processes, even if multiple process are started by the task or multiple cores areneeded by any of the processes started by the task. If theWindowsHPC cluster affinity setting isset to “All jobs,” then the remote processeswould be limited to using a single core on the remotehost, even if the job was allocatedmultiple cores on the remote host.
Running Test Jobs
When attempting to submit a job to the cluster, if there is a problem connecting to the head node,check the following items:
l The head node name is correctl There is a network connection between the job submission node and the head nodel No firewall blocks communication between the job submission node and the head nodel The 64 bit WindowsHPC 2008 R2Client Utilities are installed on the job submission nodel The user making the connection is an authorizedWindowsHPC cluster user
If the job cannot bemonitored from the ANSYS ElectromagneticsMonitor Job dialog becausethere is no network connection between the submission node and the cluster execution node (orthe connection is blocked), then the HPC JobManager installed with theWindowsHPC Client Util-ities can be used tomonitor the job.
If errors occur with any of the test jobs, then information on the failure can be found by viewing thejob in the HPC JobManager. Check for messages in the Job Progresswindow. For any failedtasks, check the Results, Details, and Allocated Nodes tabs for more information on possible prob-lems.
Non-distributed job
If the job fails to complete successfully, check the following items:
l The user submitting the jobmust be authorized to run jobs on the cluster.l The pathname of the product must be accessible by the user running the job from the clusterexecution node(s) where the job runs.
l The pathname of the project must be accessible by the user running the job from the clusterexecution node(s) where the job runs. The directory containing the project file must be writ-able by the user running the job from the cluster execution node(s) where the job runs, andtheremust be adequate disk space for the job results.
l The temp directory specified by batchoptions or using the installation default setting on thecluster execution node(s) where the job runsmust have adequate disk space for the job tem-porary files.
l Check for errors or warnings in theMonitor Job dialog, and address these issues.
High Performance Computing 3-17
ANSYSElectromagnetics Suite 17.0 - © SAS IP, Inc. All rights reserved. - Contains proprietary and confidential
information of ANSYS, Inc. and its subsidiaries and affiliates.

ANSYS Electromagnetics Suite 17.0Windows Installation Guide
l Also check the Job using theWindows HPC Job Manager. Check for error and warningmessages associated with the job. Also check for failed tasks, and check the task inform-ation for any failed tasks.
Non-MPI job distributed tomultiple hosts
This job will be submitted to run on two hosts with N cores per host, requesting a total of 2 * Ncores, where N is the smallest number of cores per host, such that the cluster contains at least twohosts with N cores per host.
If the job fails to complete successfully, check the following items, in addition to the itemsmentionedfor the first test:
l In addition to the task used to start the job (the Desktop task), an additional task is startedeach of the other job hosts to start processes on these hosts. For this task, there should beone such task (a Remote Engine Task). Verify that the Remote Engine Task is able to startand communicate with the Desktop task.
MPI job distributed tomultiple hosts
This job will be submitted to run on two hosts with N cores per host, requesting a total of 2 * Ncores, where N is the smallest number of cores per host, such that the cluster contains at least twohosts with N cores per host.
The default MPI Vendor is IBMPlatformMPI. If theMPI Vendor is “PlatformComputing” (IBMPlat-formMPI), then installation of IBMPlatformMPI on the cluster hosts is not required, and regis-tration of user passwords on the cluster hosts is not required.We recommend verifying that userpasswords are not registered with IBMPlatformMPI on the cluster hosts, because an incorrect orout of date password registered with IBMPlatformMPI can cause authentication errors in thiscase. If theMPI Vendor is “Intel,” then installation of Intel MPI on all cluster nodes is required asdescribed in the "Install Intel MPI" on page 6-1
If the job fails to complete successfully, in addition to the itemsmentioned for the first and secondtests, MPI configuration issuesmay cause job failures. Check the followingMPI configurationissues:
l Verify that the correct MPI Vendor (“Intel” or “PlatformComputing”) is specified via a batch-option setting when submitting the job.
l Verify that the specifiedMPI Vendor is installed and configured correctly for the user sub-mitting the job, as described in "Message Passing Interface (MPI) Installation" on page 6-1 .Note that for both IBMPlatformMPI and for Intel MPI, MPI password registration is doneseparately for each cluster host. If authentication errors occur for some cluster hosts but notfor other cluster hosts, then the errorsmay be due to an incorrect password or no passwordregistered on some hosts.
High Performance Computing 3-18
ANSYSElectromagnetics Suite 17.0 - © SAS IP, Inc. All rights reserved. - Contains proprietary and confidential
information of ANSYS, Inc. and its subsidiaries and affiliates.
ANSYS Electromagnetics Suite 17.0Windows Installation Guide
IBM Platform LSFCluster Configuration Guidelines
To allow users to submit exclusive jobs, the usersmust have access to queueswhich are con-figured with the EXCLUSIVE property set to Y. Appropriate queues should be configured with theEXCLUSIVE property set if users need to submit exclusive jobs.
Using the ANSYS Electromagnetics job submission GUI, a user may submit jobswhere the userspecifies tasks automatically and specifies the “Number of Cores and (Optional) RAM.” However,the RAMper coremay only be specified if the LSF cluster is configured with parameterRESOURCE_RESERVE_PER_SLOT set. This LSF cluster configuration parameter should beset to allow user to specify the RAMper core for the job.
Running Test Jobs
If there is a problem connecting to the scheduler when the job submission node is the local node(where theGUI is running) and the lsf scheduler is specified, check the following items:
l The cluster is up and running normally.l The local node is configured as a job submission node for the cluster.l The user running theGUI has permission to submit jobs to the cluster.l The environment was configured for submission of jobs to the cluster before starting theproduct, ansysedt.
Non distributed job
l If the job fails to complete successfully, check the following items:l The user submitting the jobmust be authorized to run jobs on the cluster.l The pathname of the product must be accessible by the user running the job from the clusterexecution node(s) where the job runs.
l The pathname of the project must be accessible by the user running the job from the clusterexecution node(s) where the job runs. The directory containing the project file must be writ-able by the user running the job from the cluster execution node(s) where the job runs, andtheremust be adequate disk space for the job results.
l The temp directory specified by batchoptions or using the installation default setting on thecluster execution node(s) where the job runsmust have adequate disk space for the job tem-porary files.
l Check for errors or warnings in theMonitor Job dialog, and address these issues.
Non-MPI job distributed tomultiple hosts
This job is submitted to run on two hosts with N cores per host, requesting a total of 2 * N cores,where N is the smallest number of cores per host, such that the cluster contains at least two hostswith N cores per host.
High Performance Computing 3-19
ANSYSElectromagnetics Suite 17.0 - © SAS IP, Inc. All rights reserved. - Contains proprietary and confidential
information of ANSYS, Inc. and its subsidiaries and affiliates.

ANSYS Electromagnetics Suite 17.0Windows Installation Guide
For this test, the product, ansysedt, runs on one of the hosts, and the LSF blaunch command isused to start an ansoftrsm process on the other host. The ansoftrsm process is used to start anyadditional processes needed by the job on the other host. In some cases, multiple ansoftrsm pro-cesses are started on the other host, but only one such process should be running on a given hostat any time.
If the job fails to complete successfully, check the following items, in addition to the itemsmentionedfor the first test:
l Verify that the LSF blaunch command is able to start the ansoftrsm process on the otherhost.
MPI job distributed tomultiple hosts
This job is submitted to run on two hosts with N cores per host, requesting a total of 2 * N cores,where N is the smallest number of cores per host, such that the cluster contains at least two hostswith N cores per host.
The default MPI Vendor is IBMPlatformMPI. If theMPI Vendor is “PlatformComputing” (IBMPlat-formMPI), then installation of Intel MPI on all cluster nodes is required as described in "Install IBMPlatformMPI" on page 6-3 If theMPI Vendor is “Intel,” then installation of Intel MPI on all clusternodes is required as described in"Install Intel MPI" on page 6-1 If the job fails to complete suc-cessfully, in addition to the itemsmentioned for the first and second tests, MPI configuration issuesmay cause job failures. Check the followingMPI configuration issues:
l Verify that the correct MPI Vendor (“Intel” or “PlatformComputing”) is specified via a batch-option setting when submitting the job; otherwise the default, “PlatformComputing,” is usedfor the job.
l Verify that the specifiedMPI Vendor is installed and configured correctly for the user sub-mitting the job, as described in "Message Passing Interface (MPI) Installation" on page 6-1Note that for both IBMPlatformMPI and for Intel MPI, MPI password registration is doneseparately for each cluster host. If authentication errors occur for some cluster hosts but notfor other cluster hosts, then the errorsmay be due to an incorrect password or no passwordregistered on some hosts.
High Performance Computing 3-20
ANSYSElectromagnetics Suite 17.0 - © SAS IP, Inc. All rights reserved. - Contains proprietary and confidential
information of ANSYS, Inc. and its subsidiaries and affiliates.

4 - Install Common LibrariesThe Installation CD includes an Install Common Libraries option which installs a superset of mater-ials, components, and other libraries. This option allows customers to place ANSYS Elec-tromagnetics libraries in a common location, somultiple users andmultiple ANSYSElectromagnetics productsmay share the same libraries. You can also add custommaterials andcomponents that will be automatically accessible to all users and products that use this common lib-rary location.
Procedure for Installing LibrariesTo install ANSYS Electromagnetics software:1. Log in asAdministrator, or log on to an account with administrator privileges.2. If you have received a CD for the ANSYS Electromagnetics product you wish to install, insert
it into the CD-ROMdrive. The Installation Shell should appear automatically. If it does notappear, run the autorun.exe file located in the top-level directory of the CD-ROMdrive.If you downloaded the ANSYS Electromagnetics product ("Additional Resources" on page1-3 ), unzip the download, and run the autorun.exe file in the newly created directory. TheInstallation Shell appears.
3. Click Install Common Libraries.The Install Wizard for the ANSYS Electromagnetics Common Libraries appears. (The initialoptions differ depending on whether you have previously installed libraries or are doing a firstor clean install: if you have a version installed, you have the option tomodify, repair, orremove features.)
4. ClickNext.
ANSYS Electromagnetics Suite 17.0Windows Installation Guide
Install Common Libraries 4-1
ANSYSElectromagnetics Suite 17.0 - © SAS IP, Inc. All rights reserved. - Contains proprietary and confidential
information of ANSYS, Inc. and its subsidiaries and affiliates.

ANSYS Electromagnetics Suite 17.0Windows Installation Guide
The License Agreement screen appears.5. Read the license agreement carefully. ClickYes if you accept the terms of the agreement.
TheCustomer Information screen appears.6. Enter your information in theUser Name and Company Name boxes.7. ClickNext.
TheChoose Destination Location screen appears.8. Under Destination Folder, do one of the following to accept the default path or specify
a new one:l Accept the default installation directory listed underDestination Folder.l To select a different directory, clickBrowse. TheChoose Folder window appears.Select a directory, and clickOK. If you have other ANSYS Electromagnetics software werecommend that you install new software in the same directory.
l To create a new directory, clickBrowse. TheChoose Folder window appears. Enterthe new name in thePath field, and clickOK.
9. ClickNext.The Review Settings Before Copying Files screen appears. If you want to change anything,clickBack.
10. To go ahead, clickNext.11. TheSetup Status dialog shows the progress of the install. When the install has completed,
the Finish dialog displays.12. ClickFinish to close the dialog.
Install Common Libraries 4-2
ANSYSElectromagnetics Suite 17.0 - © SAS IP, Inc. All rights reserved. - Contains proprietary and confidential
information of ANSYS, Inc. and its subsidiaries and affiliates.

5 - Updating Software and LicensesAfter installation, youmay need to reinstall the software, update a license, or add a software com-ponent, such as a library. If you have already installed the software, the next time you run theSetup program, the installation starts in Maintenance mode.
Using Maintenance ModeThe following options are available inMaintenance mode:
l Modify: Allows you tomodify the existing installation. Use this option to select new softwarecomponents or to select a new license file.
l Repair: Upgrades the existing software with new features and defect patches and refreshesfiles.
l Remove: Removes all installed software components.l Update/Remove (This displays only if the version you are installing is newer than what isinstalled.)
To start the software inMaintenance mode:1. Use theWindowsControl Panel to access the Programs and Featureswindow.2. From the Programs and Features program list, click the desired ANSYS Electro-magnetics
product program folder.3. Right-click <ANSYS Electromagnetics Product> and selectChange.
A Setupwindow appears for the desired ANSYS Electromagnetics software.
ANSYS Electromagnetics Suite 17.0Windows Installation Guide
Updating Software and Licenses 5-1
ANSYSElectromagnetics Suite 17.0 - © SAS IP, Inc. All rights reserved. - Contains proprietary and confidential
information of ANSYS, Inc. and its subsidiaries and affiliates.

ANSYS Electromagnetics Suite 17.0Windows Installation Guide
4. Select one of the following:l Modify: Change the program features installed by the previous setup. You can alsochoose this option to specify new license files or a new server.
l Repair: Reinstall all program features installed by the previous setup.l Remove:Remove the ANSYS Electromagnetics product previously installed.
5. ClickNext, and follow the instructions that appear.
Updating a Software LicenseTheremay be timeswhen you need to update a software license. Thismay occur for a number ofreasons, such as:
l When you change servers. You need to1. Install ANSYS LicenseManager on the new server machine, and add the new license
file.2. Run each ANSYS Electromagnetics software installation inMaintenance mode, and
specify the names of the new servers.l When you receive an updated purchased license file. You only need to update the licensefile using the ANSYS LicenseManager.
If you are changing the name of the license server used by the software, you need tomodify the cli-ent installation:
Updating Software and Licenses 5-2
ANSYSElectromagnetics Suite 17.0 - © SAS IP, Inc. All rights reserved. - Contains proprietary and confidential
information of ANSYS, Inc. and its subsidiaries and affiliates.

ANSYS Electromagnetics Suite 17.0Windows Installation Guide
1. ClickStart>All Programs>ANSYS Electromagnetics.2. Click the desired ANSYS product program folder, and then click <ANSYS Elec-
tromagneticsProduct> Maintenance.TheMaintenance Mode screen appears for the desired ANSYS Electro-magnetics soft-ware.
3. ClickModify.4. ClickNext in each window.5. On the License Information screen, select the new license file.
Note Select I have a new license file to change the license file (if you received a newone fromANSYS Electromagnetics, either evaluation or purchased).
Select I want to specify a license server if you need to change the name ofthemachine where the ANSYS LicenseManager is installed.
See "Installing the Software" on page 2-1 for more details on available licenseoptions.
Updating Software and Licenses 5-3
ANSYSElectromagnetics Suite 17.0 - © SAS IP, Inc. All rights reserved. - Contains proprietary and confidential
information of ANSYS, Inc. and its subsidiaries and affiliates.

PDF layout 5-4
ANSYSElectromagnetics Suite 17.0 - © SAS IP, Inc. All rights reserved. - Contains proprietary and confidential
information of ANSYS, Inc. and its subsidiaries and affiliates.
ANSYS Electromagnetics Suite 17.0Windows Installation Guide

6 - Message Passing Interface (MPI)Installation
The two supportedMessage Passing Interface (MPI) options in ANSYS Electromag-netics Suiteare IBMPlatformComputing and Intel. MPI is required when you solve usingmultiple nodes. It isnot required to solve using a single node.This chapter provides information about theWindows installations of MPI:
WindowsTo obtain an ethernet address as a valid license hostid when runningMicrosoft Win-dows:1. If you are using a laptop, disconnect the laptop from the docking station if docked.2. Go to the command prompt.3. Type ipconfig /all, and pressEnter.
A listing of network interface cards is shown.4. For a valid network interface card, look for thePhysical Address line. The ether-net address
for that device is the value of the physical address, without dashes.Note Other types of adapters, including Point-to-Point Tunneling Protocol (PPTP)
adapters and theMicrosoft Loopback Adapter, may be listed here. These are notvalid for license hostids.
Install Intel MPI1. After you click Install Intel MPI, you see the following dialog.
2. Specify the installation directory and clickExtract.
ANSYS Electromagnetics Suite 17.0Windows Installation Guide
Message Passing Interface (MPI) Installation 6-1
ANSYSElectromagnetics Suite 17.0 - © SAS IP, Inc. All rights reserved. - Contains proprietary and confidential
information of ANSYS, Inc. and its subsidiaries and affiliates.

ANSYS Electromagnetics Suite 17.0Windows Installation Guide
3. You then see the installation wizard for Intel(R) Library Runtime Environment.
4. ClickNext and follow the prompts to accept the license terms and Install the soft-ware as dir-ected.Intel MPI typically requires passwords to be registered on the simulation host machine,which is typically the first machine in the distributedmachine list. Password registrationmayalso be required on other machines to allow access to network resources, such as shareddrives. Go to All Programs > Intel® Software Development Products > Intel MPI LibraryRuntime Environment > Build envi-ronment for Intel® 64 > wmpiregister and enter youraccount and password information.
Note You can work around the password registration for caseswhere accessing networkresources is not needed by performing the Active Directory setup (see http://soft-ware.intel.com/sites/products/documentation/hpc/ics/impi/41/win/Reference_Manu-al/Active_Directory_Setup.htm) and setting the environment variable I_MPI_MTHOD to"delegate".
Message Passing Interface (MPI) Installation 6-2
ANSYSElectromagnetics Suite 17.0 - © SAS IP, Inc. All rights reserved. - Contains proprietary and confidential
information of ANSYS, Inc. and its subsidiaries and affiliates.

ANSYS Electromagnetics Suite 17.0Windows Installation Guide
5. Define the temp directory on all machines such that the designated user is allowed full con-trol.
6. Disable theWindows firewall, or configure it as specified in the Firewall Config-uration topicin the ANSYS Electromagnetics product online help.
7. Select whichMPI to use in theMPI Vendor box on theOptions tab under Tools > Options> HPC and Analysis Options.
Install IBM Platform MPI
For IBMPlatformMPI jobs submitted to aWindowsHPC cluster, an installation of IBMPlatformMPI is not required because IBMPlatformMPI is provided in the ANSYS Electromagnetics Suiteinstallation. When using IBMPlatformMPI for analyses not running on aWindowsHPC cluster,IBMPlatformMPI must be installed as described below.
If a distributed analysis uses IBMPlatformMPI but it is not running as aWindowsHPC Job, thenIBMPlatformMPI must be installed locally on each of the analysis hosts in ServiceMode.
1. After choosing Install IBMPlatformMPI, you see an IBMPlatform-MPI dialog.
2. ClickNext.After a few moments, theSoftware License Agreement screen opens.
Message Passing Interface (MPI) Installation 6-3
ANSYSElectromagnetics Suite 17.0 - © SAS IP, Inc. All rights reserved. - Contains proprietary and confidential
information of ANSYS, Inc. and its subsidiaries and affiliates.

ANSYS Electromagnetics Suite 17.0Windows Installation Guide
3. Click I accept the terms in the license agreement.The License screen closes and theChoose Install Set screen opens.
4. SelectService Mode.5. ClickNext to continue.
TheService Listening Port screen displays.
Message Passing Interface (MPI) Installation 6-4
ANSYSElectromagnetics Suite 17.0 - © SAS IP, Inc. All rights reserved. - Contains proprietary and confidential
information of ANSYS, Inc. and its subsidiaries and affiliates.

ANSYS Electromagnetics Suite 17.0Windows Installation Guide
6. ClickNext.
TheChoose Install Folder screen displays.
Message Passing Interface (MPI) Installation 6-5
ANSYSElectromagnetics Suite 17.0 - © SAS IP, Inc. All rights reserved. - Contains proprietary and confidential
information of ANSYS, Inc. and its subsidiaries and affiliates.

ANSYS Electromagnetics Suite 17.0Windows Installation Guide
Select the Destination location for the install. You can specify a location.
Message Passing Interface (MPI) Installation 6-6
ANSYSElectromagnetics Suite 17.0 - © SAS IP, Inc. All rights reserved. - Contains proprietary and confidential
information of ANSYS, Inc. and its subsidiaries and affiliates.

ANSYS Electromagnetics Suite 17.0Windows Installation Guide
7. ClickNext to go to theChoose Shortcut Folder screen.
8. Make your selections and clickNext.ThePre-Installation Summary for Service Mode screen displays.
Message Passing Interface (MPI) Installation 6-7
ANSYSElectromagnetics Suite 17.0 - © SAS IP, Inc. All rights reserved. - Contains proprietary and confidential
information of ANSYS, Inc. and its subsidiaries and affiliates.

ANSYS Electromagnetics Suite 17.0Windows Installation Guide
9. Review the settings and click Install.The Install Screen displays and is replaced by the Install Complete screen.
Message Passing Interface (MPI) Installation 6-8
ANSYSElectromagnetics Suite 17.0 - © SAS IP, Inc. All rights reserved. - Contains proprietary and confidential
information of ANSYS, Inc. and its subsidiaries and affiliates.
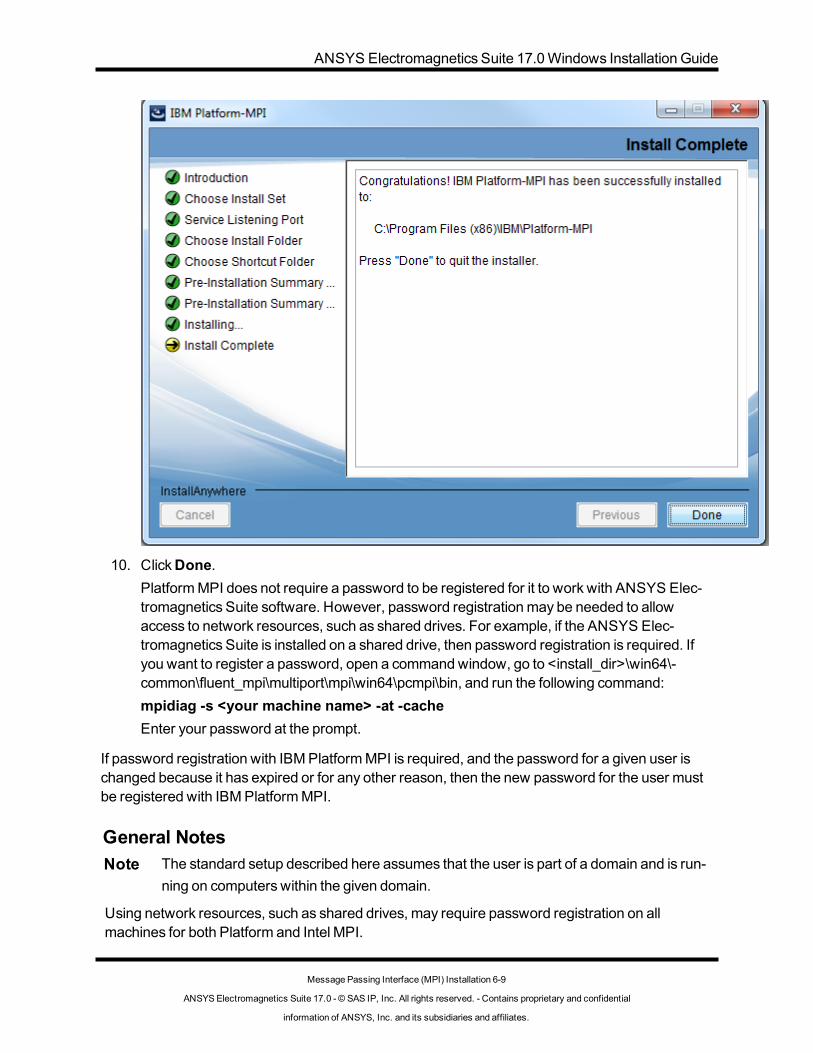
ANSYS Electromagnetics Suite 17.0Windows Installation Guide
10. ClickDone.PlatformMPI does not require a password to be registered for it to work with ANSYS Elec-tromagnetics Suite software. However, password registrationmay be needed to allowaccess to network resources, such as shared drives. For example, if the ANSYS Elec-tromagnetics Suite is installed on a shared drive, then password registration is required. Ifyou want to register a password, open a commandwindow, go to <install_dir>\win64\-common\fluent_mpi\multiport\mpi\win64\pcmpi\bin, and run the following command:mpidiag -s <your machine name> -at -cacheEnter your password at the prompt.
If password registration with IBMPlatformMPI is required, and the password for a given user ischanged because it has expired or for any other reason, then the new password for the user mustbe registered with IBMPlatformMPI.
General NotesNote The standard setup described here assumes that the user is part of a domain and is run-
ning on computers within the given domain.
Using network resources, such as shared drives, may require password registration on allmachines for both Platform and Intel MPI.
Message Passing Interface (MPI) Installation 6-9
ANSYSElectromagnetics Suite 17.0 - © SAS IP, Inc. All rights reserved. - Contains proprietary and confidential
information of ANSYS, Inc. and its subsidiaries and affiliates.

ANSYS Electromagnetics Suite 17.0Windows Installation Guide
It is easiest if share permissions are set to Full Control for the Everyone group for the temp dir-ectories.The following provides information about specific scenarios:
Scenario 1The user is administrator or standard user on the local machine and needs to run on one or moreremote computer as an admin or a standard user. In addition, the user always puts the localmachine first in the distributedmachine list so that the local machine is the simulation host.This is the standard situation and does not require further specifications. MPI should be installedon all machines, and the solver options andMPI configuration on the local machine will be used.
Scenario 2The user is administrator or standard user on the local machine and is not defined as a user on theremotemachines. In addition, the user always puts the local machine first in the distributedmachine list so that the local machine is the host.This situation is similar to Scenario 1, but theMPI jobswill run as a user that does not exist on theremotemachines. ANSYS strongly recommends setting the temp directories to Full Control forthe Everyone group to avoid issueswith per-missions.
Scenario 3The user is administrator or standard user on the local machine, but needs to run only on remotemachines. In this scenario the remotemachine that is first in the distributedmachine list will be thehost machine for the simulation.RSMmust be installed and registered on the host machine. There are two RSM settings that canaffect the simulation.
l The first setting is under RSMproperties, which can be set toSystem User orA specificuser. This setting is chosen at installation and can be changed through the Services panelor by going toRemote Simulation Manager > Remote Simulation Manager Main-tenance >Modify.
l The second setting is in the Desktop in Tools > Options > General Options, on theRemote Analysis Options tab. Here you can chose either Service User or SpecifiedUser. Here is additional information about these settings:
RSM Prop-erties
RemoteSimulationOptions
Simulationruns onremote
machine as
Notes
System ServiceUser
Local Systemuser
Local System user will not have ANSYS Elec-tromagnetics Suite user preferences andmay nothave necessary privileges or access to resources.
Message Passing Interface (MPI) Installation 6-10
ANSYSElectromagnetics Suite 17.0 - © SAS IP, Inc. All rights reserved. - Contains proprietary and confidential
information of ANSYS, Inc. and its subsidiaries and affiliates.

ANSYS Electromagnetics Suite 17.0Windows Installation Guide
RSM Prop-erties
RemoteSimulationOptions
Simulationruns onremote
machine as
Notes
System SpecifiedUser =user_A
user_A Runs as user_A
SpecificUser =user_A
ServiceUser
user_A Runs as user_A
SpecificUser =user_A
SpecifiedUser =user_B
May fail due toprivileges
Not recommended
The preferred setup for this situation is to assign a Specific or Specified user, but not both.
Windows HPC Scheduler
If you are using theWindowsHPC Scheduler, you have the option to install the ANSYS Elec-tromagnetics Suite at the same location on each node individually. The simulation can then be runfrom one of the compute nodes or from the head node using theWindowsHPC Scheduler GUIthat is selected in Tools>Job Management>Select Scheduler before using Tools>Job Man-agement>Submit Job. TheMPI setup is the same as described previously. If using IBMPlatformMPI, no installation of IBMPlatform of MPI is needed, and no password registration is required. Forthis case, we recommend clearing any previously registered passwords. If a registered passwordexpires or is changed for any other reason, thenMPI failuresmay occur due to the incorrect pass-word. To clear a previously registered password, open a commandwindow, go to <install_dir>\win64\common\fluent_mpi\multiport\mpi\win64\pcmpi\bin, and run the following command:
mpidiag -s <your machine name> -at -clearcache
The following commandmay be used to checkwhether a password is cached for the current user:
mpidiag -s <your machine name> -at -iscached
For general information on using theWindowsScheduler, see the Integration with Microsoft Win-dowsHPC Scheduler topic in the ANSYS Electromagnetics Suite online help.Note The LSF scheduler is not supported onWindows networks for ANSYS Elec-
tromagnetics Suite simulations that requireMPI (for example, DDM).
Message Passing Interface (MPI) Installation 6-11
ANSYSElectromagnetics Suite 17.0 - © SAS IP, Inc. All rights reserved. - Contains proprietary and confidential
information of ANSYS, Inc. and its subsidiaries and affiliates.

ANSYS Electromagnetics Suite 17.0Windows Installation Guide
Network InstallationIf you want to use a network installation with theWindowsHPC Scheduler, follow these steps:1. Install ANSYS Electromagnetics Suite on the head node.2. Share the AnsysEMdirectory in the head node installation (setting Full Control for Every-
one).3. Install Intel MPI on all nodes. Register your password with MPI on all nodes. PerformActive
Directory Setup on all nodes. To avoid password registration on all nodes, see the note in"Install Intel MPI" on page 6-1 .See http://software.intel.com/sites/products/documentation/hpc/ics/impi/41/win/Reference_Manual/Active_Directory_Setup.htmOrInstallation of IBMPlatformMPI is not required because IBMPlatformMPI is provided in theANSYS Electromagnetics Suite installation. Password registration is not required for Win-dowsHPC jobs. It is recommended that you read the information on using PlatformMPI withWindowsHPC for MPI Based Solves in the online help before submitting a job.
4. Install the followingMicrosoft Visual C++ Redistributables on all nodes:
l Microsoft Visual C++ 2008 (x86 and x64)
l Microsoft Visual C++ 2010 (x86 and x64)
l Microsoft Visual C++ 2012 (x64 only)
l Microsoft Visual C++ 2013 (x86 and x64)
The necessary installers are provided in the installation folder in the Prerequisites directory.5. Bring up ANSYS Electronics Desktop on each node using the network installa-tion to verify
the installation was done properly.6. Place the pjt in a shared folder (where Everyone has Full Control).7. Launch ANSYS Electronics Desktop on the head node. Set the head node from the ANSYS
Electronics Desktop using Tools > Job Management > Select Scheduler.8. Open theWindows Scheduler GUI from the ANSYS Electronics Desktop to submit the job
(see Tools > Job Management > Submit Job). Information is available in the Integrationwith Microsoft WindowsHPC Scheduler topic in the ANSYS Electronics Desktop onlinehelp.
9. Be sure to use the UNC pathname for the product and project (see the Integration withMicrosoft WindowsHPC Scheduler topic in the online help for more details).
10. Name the job and set other options as required for your setup.We recommend setting theversion of MPI (PlatformComputing or Intel) in the Batchoptions by adding the following, forexample:'HFSS/MPIVendor'=Intel'HFSS-IE/MPIVendor'=Intel
Message Passing Interface (MPI) Installation 6-12
ANSYSElectromagnetics Suite 17.0 - © SAS IP, Inc. All rights reserved. - Contains proprietary and confidential
information of ANSYS, Inc. and its subsidiaries and affiliates.

ANSYS Electromagnetics Suite 17.0Windows Installation Guide
'Q3D Extractor/MPIVendor'=IntelorHFSS/MPIVendor'=Platform Computing'HFSS-IE/MPIVendor'=Platform Computing'Q3D Extractor/MPIVendor'=Platform Computing
After the job is submitted, you canmonitor the job using theHPC Job Man-ager.
Testing has shown that when usingWindowsServer 2012 with a Network installation, the headnode should not be one of the computer nodes.
Troubleshooting Sectionl I am getting an error message that mentions AnsoftRSMService. Is there a prob-lem with my installation?[error] Unable to locate or start COMengine on 'your_machine_name_here' : Unable toreach AnsoftRSMService. Check if the service is running and if the firewall allows communication…Do not immediately assume there is a problemwith RSM, especially if your_ma-chine_name_here is your local machine. Themessage is stating that it cannot start the Comengine. This can be the result of a misspelledmachine name or an issue with the firewall.Check these first.If the host machine is a remotemachine (your_machine_name_here is a remote computer),theremight be an issue with the RSM service on the remote com-puter. Check the RSMinstallation and registration on that machine.
l Is there an easy way to test the computers in my Distributed Machine Con-fig-urations?1. SelectHPC and Analysis Options.2. ClickEdit, and select one or moremachine names in the list on theMachines for Dis-
tributed Analysis dialog.3. Click the Test Machines button. A set of tests will be run from the current machine to
the selectedmachines that includes pinging the computer and checking the RSMavail-ability.
l When I attempt to simulate, I get the following error message:[error] The attempted launch of solvers via MPI failed while connecting to communicationpipes. The probable cause is failure to install the vendor MPI on one or moremachines orpassword authentication failure for MPI during the launch attempt.Followed byUnable to create child process: mpirun.Possible causes for themessages are:l MPI is not installed on one or moremachines.l Thewrong version of MPI is installed on one or moremachines.
Message Passing Interface (MPI) Installation 6-13
ANSYSElectromagnetics Suite 17.0 - © SAS IP, Inc. All rights reserved. - Contains proprietary and confidential
information of ANSYS, Inc. and its subsidiaries and affiliates.

ANSYS Electromagnetics Suite 17.0Windows Installation Guide
l The password registration is incorrect on one or moremachines.l ANSYS Electromagnetics Suite is not installed in the same location on all machines.l The user is not a registered user on the remotemachines for a workgroup network.l There is an issue with the firewall.
l When I attempt to simulate, I get the following error message:[error] Distributingmatrix solutions for domains, processmpirun error: Simulation directorycreation failed for one or moreMPI solvers. Check access privileges and disk space for thefollowing:…Thismessagemeans you do not have the correct privilege for the temp directory on one ormore of the remotemachines. In many cases the software uses the installation temp dir-ectory that is defined during the installation on the givenmachine. It is recommended thatthis directory be set for Everyone to have full Read/Write privileges on all machines.
l My setup was working last week, but today I am getting a password authen-ticationfailure error.This error may occur if anything changed in your network configuration. Themost commoncause is your login password was changed as part of a periodic update for network security.If the passwordswere registered for MPI, they need to be updated on all machines everytime the login passwords are changed.
Message Passing Interface (MPI) Installation 6-14
ANSYSElectromagnetics Suite 17.0 - © SAS IP, Inc. All rights reserved. - Contains proprietary and confidential
information of ANSYS, Inc. and its subsidiaries and affiliates.

A - Silent InstallationWhen you use the ANSYS Electromagnetics silent installation feature, the software is installed onyour computer with no windows appearing during the installation pro-cess. InstallShield sup-presses all dialog boxes, including error messages and informa-tional message boxes.To install ANSYS Electromagnetics software using a silent installation:
l Obtain a license file for the software you are installing.l Obtain and install a hardware key if necessary.l On a representativemachine, install the ANSYS Electromagnetics software once fromthe command prompt, as described in this chapter.
Running the Silent InstallationTo install ANSYS Electromagnetics software using a silent installation, you need to record aresponse file, and then use that file to install the software on other computers.To record a response file, youmust install the software one time on onemachine:1. Open aWindows command prompt.2. Browse to the directory where setup.exe (full download) or the self-extracting executable
(patch) is located.3. Type the following, and press Enter:
l Full download:setup.exe -r -f1<.iss response file>
l Self-extracting p atch:<path to patch .exe> -a -r-f1<path to iss response file>
4. Follow the normal prompts for installation. Once complete, the iss response file will containinformation that can be used to install the same product on other Windowsmachines.
To install the software on other computers runningWindows, perform the following steps on eachmachine:1. Open aWindows command prompt.2. Browse to the directory where setup.exe (full download) or the self-extracting executable
(patch) is located.3. Type the following, and press Enter:
l Full download:setup.exe -s -f1<.iss response file>-f2<path to log file>
l Self-extracting patch:
ANSYS Electromagnetics Suite 17.0Windows Installation Guide
Silent Installation A-1
ANSYSElectromagnetics Suite 17.0 - © SAS IP, Inc. All rights reserved. - Contains proprietary and confidential
information of ANSYS, Inc. and its subsidiaries and affiliates.

ANSYS Electromagnetics Suite 17.0Windows Installation Guide
<path to patch .exe> -a -s-f1<path to iss response file>-f2<path to log file>
In silent mode, no confirmation windows of any kind are displayed. In thismode, InstallShieldsuppresses all dialog boxes, including error messages and informa-tional message boxes.
4. To verify that the silent setup succeeded, open the setup.log file, and look at the ResultCodevalue in the [ResponseResult] section. If the value is zero, the instal-lation was successful.If a failure occurs in silent mode, Setup aborts just as if you clicked the Abort button in a wiz-ard dialog box during a normal installation. In this case, an error is written to the log file.
Note The installation typically fails for one of the following two reasons:
l An invalid path was specified on the command line.l There were differences in the dialog box sequences between the recordedresponse file and the current silent installation - for example, an additional mes-sage appearing during the playback due to differences in the two computer sys-tems.
Silent Codes
ResultCode
Description
0 Success.
-1 General error.
-2 Invalid mode.
-3 Required data not found in the Setup.iss file.
-4 Not enoughmemory available.
-5 File does not exist.
-6 Cannot write to the response file.
-7 Unable to write to the log file.
-8 Invalid path to the InstallShield Silent response file.
-9 Not a valid list type (string or number).
-10 Data type is invalid.
-11 Unknown error during setup.
-12 Dialog boxes are out of order.
-51 Cannot create the specified folder.
Silent Installation A-2
ANSYSElectromagnetics Suite 17.0 - © SAS IP, Inc. All rights reserved. - Contains proprietary and confidential
information of ANSYS, Inc. and its subsidiaries and affiliates.

ANSYS Electromagnetics Suite 17.0Windows Installation Guide
-52 Cannot access the specified file or folder.
-53 Invalid option selected.
Silent Installation A-3
ANSYSElectromagnetics Suite 17.0 - © SAS IP, Inc. All rights reserved. - Contains proprietary and confidential
information of ANSYS, Inc. and its subsidiaries and affiliates.

PDF layout A-4
ANSYSElectromagnetics Suite 17.0 - © SAS IP, Inc. All rights reserved. - Contains proprietary and confidential
information of ANSYS, Inc. and its subsidiaries and affiliates.
ANSYS Electromagnetics Suite 17.0Windows Installation Guide

B - License hostidSoftware licenses for eachmodule of ANSYS Electromagnetics products you pur-chased are con-tained in one or more license files provided by ANSYS. Each license file requires one or morelicense hostids, which are physical devices that contain a unique identification. License hostids arealways required for the license server, and theymay also be required for eachmachine runningANSYS software.Each supported operating system supports certain hostids:
Operating Sys-tem
Permitted hostids
Windows l The ethernet address of a network interface card (MACaddress).
l Flexera FLEXid USB port hardware key.l Disk serial number.
To obtain the disk serial number, open a command prompt.
Type vol <drive letter>:, for example vol C:
Linux l The ethernet address of a network interface card (MACaddress).
l Flexera FLEXid USB port hardware key.
This utility will provide the disk id by default:http://www.ansys.com/Support/Licensing/Capture+License+Server+Information
Network Interface CardA network interface card is a physical device used to connect to a network (also known as an eth-ernet card). Each network interface card includes a unique ID that can be used as a license hostid.You can obtain an ethernet address to use as a valid license hostid. Themethod for doing so dif-fers depending on whether you are runningWindows or Red Hat Enter-prise Linux.
WindowsTo obtain an ethernet address as a valid license hostid when runningMicrosoft Win-dows:1. If you are using a laptop, disconnect the laptop from the docking station if docked.2. Go to the command prompt.3. Type ipconfig /all, and pressEnter.
A listing of network interface cards is shown.
ANSYS Electromagnetics Suite 17.0Windows Installation Guide
License hostid B-1
ANSYSElectromagnetics Suite 17.0 - © SAS IP, Inc. All rights reserved. - Contains proprietary and confidential
information of ANSYS, Inc. and its subsidiaries and affiliates.

ANSYS Electromagnetics Suite 17.0Windows Installation Guide
4. For a valid network interface card, look for thePhysical Address line. The ether-netaddress for that device is the value of the physical address, without dashes.Note Other types of adapters, including Point-to-Point Tunneling Protocol (PPTP)
adapters and theMicrosoft Loopback Adapter, may be listed here. These are notvalid for license hostids.
LinuxTo obtain an ethernet address as a valid license hostid when running RedHat Enter-prise Linux:1. If you are using a laptop, disconnect the laptop from the docking station if docked.2. Start a terminal session.3. Type ip addr (normally located in the /sbin directory) to see a listing of all active network
devices.4. Deviceswith an ethernet address show a Link encap value of Ethernet. The eth-ernet
address for each device is the value in theHWaddr field, without colons.
Hardware KeyA Flexera FLEXid hardware keymay be provided to you by ANSYS Electromagnetics as yourphysical device. The license hostid of a hardware key is affixed to the hardware key itself. Thehostid is a 17- to 21-character value that begins with FLEXID=.
Installing a Hardware Key on a USB PortOnly a single device can be installed on each USB port.
License hostid B-2
ANSYSElectromagnetics Suite 17.0 - © SAS IP, Inc. All rights reserved. - Contains proprietary and confidential
information of ANSYS, Inc. and its subsidiaries and affiliates.

ANSYS Electromagnetics Suite 17.0Windows Installation Guide
License hostid B-3
ANSYSElectromagnetics Suite 17.0 - © SAS IP, Inc. All rights reserved. - Contains proprietary and confidential
information of ANSYS, Inc. and its subsidiaries and affiliates.