advanced powerpoint susan dutton eric postman summer staff development
TRANSCRIPT

Advanced PowerPointAdvanced PowerPoint
Susan DuttonSusan Dutton
Eric PostmanEric Postman
Summer Staff DevelopmentSummer Staff Development
Really Bad PowerPointReally Bad PowerPoint
Some pointers about what makes a good Some pointers about what makes a good or bad presentation…….or bad presentation…….
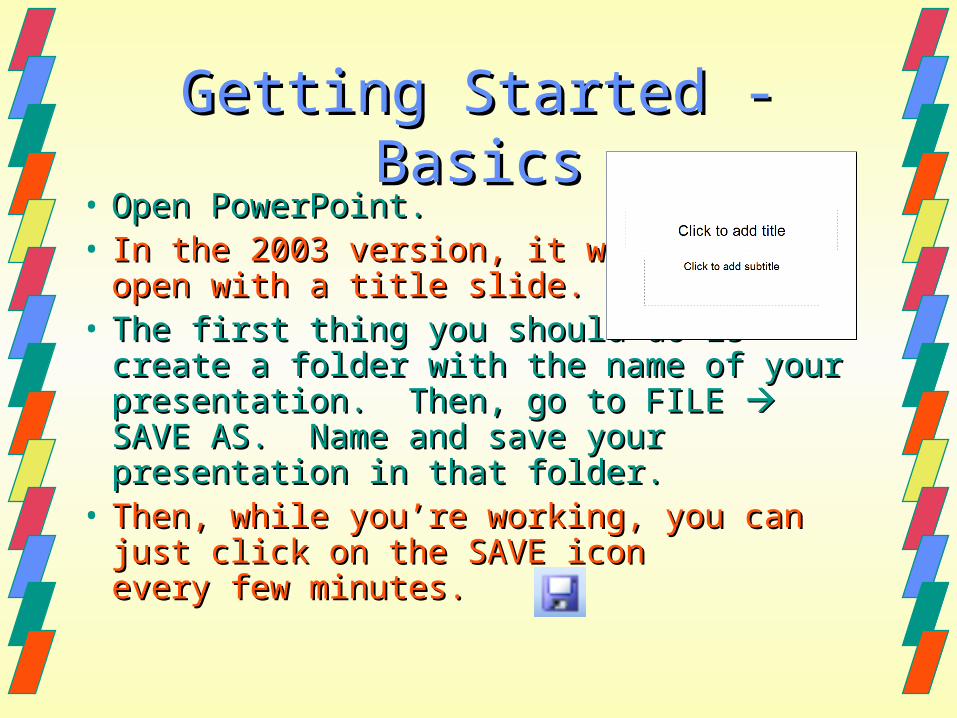
Getting Started - BasicsGetting Started - Basics• Open PowerPoint.Open PowerPoint.• In the 2003 version, it will In the 2003 version, it will
open with a title slide.open with a title slide.• The first thing you should do is create a The first thing you should do is create a
folder with the name of your presentation. folder with the name of your presentation. Then, go to FILE Then, go to FILE SAVE AS. Name and SAVE AS. Name and save your presentation in that folder.save your presentation in that folder.
• Then, while you’re working, you can just click Then, while you’re working, you can just click on the SAVE icon every few minutes.on the SAVE icon every few minutes.

Getting Started - BasicsGetting Started - Basics• Next, you should format your slide show Next, you should format your slide show
(although this can be done later).(although this can be done later).• You can go to FORMAT You can go to FORMAT SLIDE SLIDE
DESIGN and choose a design template DESIGN and choose a design template from among those in the task pane.from among those in the task pane.
• Or you can format your slides yourself. Or you can format your slides yourself. – Go to FORMAT Go to FORMAT BACKGROUND. BACKGROUND.– Choose a color or fill effect. Choose a color or fill effect. – Click on APPLY to apply the format to just Click on APPLY to apply the format to just
that slide, or click APPLY TO ALL SLIDES.that slide, or click APPLY TO ALL SLIDES.

Getting Started - BasicsGetting Started - Basics• If you want to create your own slide design, If you want to create your own slide design,
go to VIEW go to VIEW MASTER MASTER SLIDE MASTER. SLIDE MASTER.
• Make changes, and add graphics. When you Make changes, and add graphics. When you are done, click on CLOSE SLIDE MASTER.are done, click on CLOSE SLIDE MASTER.
• You can save your slide design as a template You can save your slide design as a template so you can use it again. so you can use it again. – Go to FILE Go to FILE SAVE AS. SAVE AS.
– Change SAVE AS TYPE from PRESENTATION to Change SAVE AS TYPE from PRESENTATION to DESIGN TEMPLATE. DESIGN TEMPLATE.
– Name it and SAVE.Name it and SAVE.

Getting Started - BasicsGetting Started - Basics• Type your title on the title slide.Type your title on the title slide.• Add a subtitle, your name, and any Add a subtitle, your name, and any
graphics you want.graphics you want.• Click on Click on , or go to , or go to
INSERT INSERT NEW SLIDE. NEW SLIDE.• Choose a text layout from Choose a text layout from
among those in the among those in the task pane.task pane.

Getting Started - BasicsGetting Started - Basics• Continue creating your slide show by inserting Continue creating your slide show by inserting
new slides, choosing text layouts, and adding new slides, choosing text layouts, and adding graphics.graphics.
• Sometimes it helps to have grid lines to help Sometimes it helps to have grid lines to help you place items on your slide. you place items on your slide. – Go to VIEW Go to VIEW GRID AND GUIDES. GRID AND GUIDES. – Check DISPLAY GRID ON SCREEN and/or Check DISPLAY GRID ON SCREEN and/or
DISPLAY DRAWING GUIDES ON SCREEN.DISPLAY DRAWING GUIDES ON SCREEN.
• You can turn on (and off) the ruler guide at the You can turn on (and off) the ruler guide at the top of the slide. Go to VIEW top of the slide. Go to VIEW check RULER. check RULER.


Getting Started - BasicsGetting Started - Basics• Typically, you are in NORMAL VIEW. If you Typically, you are in NORMAL VIEW. If you
want to see multiple slides at one time and want to see multiple slides at one time and easily change the order of slides, go to easily change the order of slides, go to VIEW VIEW SLIDE SORTER. SLIDE SORTER.
• If you want to write notes about each slide If you want to write notes about each slide go to VIEW go to VIEW NOTES PAGE. These notes NOTES PAGE. These notes will not be visible when you view your slide will not be visible when you view your slide show.show.
• To return to viewing one slide at a time, go To return to viewing one slide at a time, go to VIEW to VIEW NORMAL. NORMAL.

Things You May or May Not Things You May or May Not KnowKnow
• Drawing ToolbarDrawing Toolbar•Draw
•Select Objects
•AutoShapes
•Line
•Arrow
•Rectangle
•Oval
•Text Box
•Insert WordArt
•Insert Diagram or Organizational Chart
•Insert Clip Art
•Insert Picture
•Fill Color
•Line Color
•Line Style
•Dash Style
•Arrow Style
•Shadow Style
•3-D Style

• WordArtWordArt
•Insert WordArt
•Edit Text
•WordArt Gallery
•Format WordArt
•WordArt Shape
•WordArt Same Letter Heights
•WordArt Vertical Text
•WordArt Alignment
•WordArt Character Spacing
Things You May or May Not Things You May or May Not KnowKnow

Things You May or May Not Things You May or May Not KnowKnow
• Picture ToolbarPicture Toolbar
Reset picture
Set transparen
t color
Format object
Compress pictures
Line style
Crop
More brightnes
s
Less brightnes
s
More contrast
Less contrast
Color
Insert picture
Rotate left 90
Rotate right 90
Recolor picture

Things You May or May Not Things You May or May Not KnowKnow
• TextText– Format in placeholder (Go to FORMAT Format in placeholder (Go to FORMAT ))
• FontFont• Bullets and NumberingBullets and Numbering• AlignmentAlignment• Line SpacingLine Spacing• Change CaseChange Case• Replace FontsReplace Fonts
– TextboxesTextboxes• To create, go to INSERT To create, go to INSERT TEXT BOX, or click on . TEXT BOX, or click on .• To format, go to FORMAT To format, go to FORMAT TEXT BOX, TEXT BOX,
– or click on text box border or click on text box border right click right click FORMAT TEXT FORMAT TEXT BOX.BOX.

• GraphicsGraphics– Consider the size of any graphic file you Consider the size of any graphic file you
use. It will have an effect on the size of the use. It will have an effect on the size of the whole file. Large files can’t be e-mailed whole file. Large files can’t be e-mailed and won’t fit on a floppy disk.and won’t fit on a floppy disk.
– This is especially true when you use This is especially true when you use photos. Files > 200 k are probably too big.photos. Files > 200 k are probably too big.
– Try to keep your slide show < 3MB.Try to keep your slide show < 3MB.
Things You May or May Not KnowThings You May or May Not Know

• GraphicsGraphics– Insert pictures (from computer)Insert pictures (from computer)
• Go to INSERT Go to INSERT PICTURE PICTURE FROM FILE FROM FILE • Or, click Or, click on the drawing toolbar. on the drawing toolbar.
– Insert clip artInsert clip art• Go to INSERT Go to INSERT PICTURE PICTURE CLIP ART CLIP ART• Or, click Or, click on the drawing toolbar. on the drawing toolbar.
– Copy pictures (from other sources)Copy pictures (from other sources)• Select (i.e. click on) picture.Select (i.e. click on) picture.• Go to EDIT Go to EDIT COPY (or CTRL + C, COPY (or CTRL + C,
or right click or right click COPY). COPY).• Go back to your slide show. Go to EDIT Go back to your slide show. Go to EDIT PASTE (or PASTE (or
CTRL + V, or right click CTRL + V, or right click PASTE). PASTE).
Things You May or May Not KnowThings You May or May Not Know

Things You May or May Not Things You May or May Not KnowKnow
• Inserting:Inserting:– new slidesnew slides
• Go to INSERT Go to INSERT NEW SLIDE. NEW SLIDE. or click on or click on . .
– duplicate slidesduplicate slides• Go to INSERT Go to INSERT DUPLICATE SLIDE. DUPLICATE SLIDE.
– Go to VIEW Go to VIEW TOOLBARS TOOLBARS CUSTOMIZE. CUSTOMIZE.– In CUSTOMIZE window, select INSERT on left. In CUSTOMIZE window, select INSERT on left.
Scroll down on right to find DUPLICATE SLIDE.Scroll down on right to find DUPLICATE SLIDE.– Drag DUPLICATE SLIDE to one of your toolbars.Drag DUPLICATE SLIDE to one of your toolbars.

Things You May or May Not Things You May or May Not KnowKnow
• Inserting:Inserting:– Slides from files (other slide shows)Slides from files (other slide shows)
• Go to INSERT Go to INSERT SLIDES FROM FILES. SLIDES FROM FILES.• Browse to find the slide show that contains the Browse to find the slide show that contains the
slide(s) you want to insert.slide(s) you want to insert.• Select slide(s) and INSERT or INSERT ALL.Select slide(s) and INSERT or INSERT ALL.• CLOSE.CLOSE.
– SymbolsSymbols• Go to INSERT Go to INSERT SYMBOL. SYMBOL.• Select symbol. Click INSERT Select symbol. Click INSERT ((é ¼ ¢)é ¼ ¢)..• Click CLOSE.Click CLOSE.

Photo AlbumPhoto Album
Great way to add lots of Great way to add lots of pictures all at once!pictures all at once!

Several options for how your pictures will look. All will have the same formatting.
You can change the order of the pictures and make other revisions.

GHS JV BaseballGHS JV Baseball
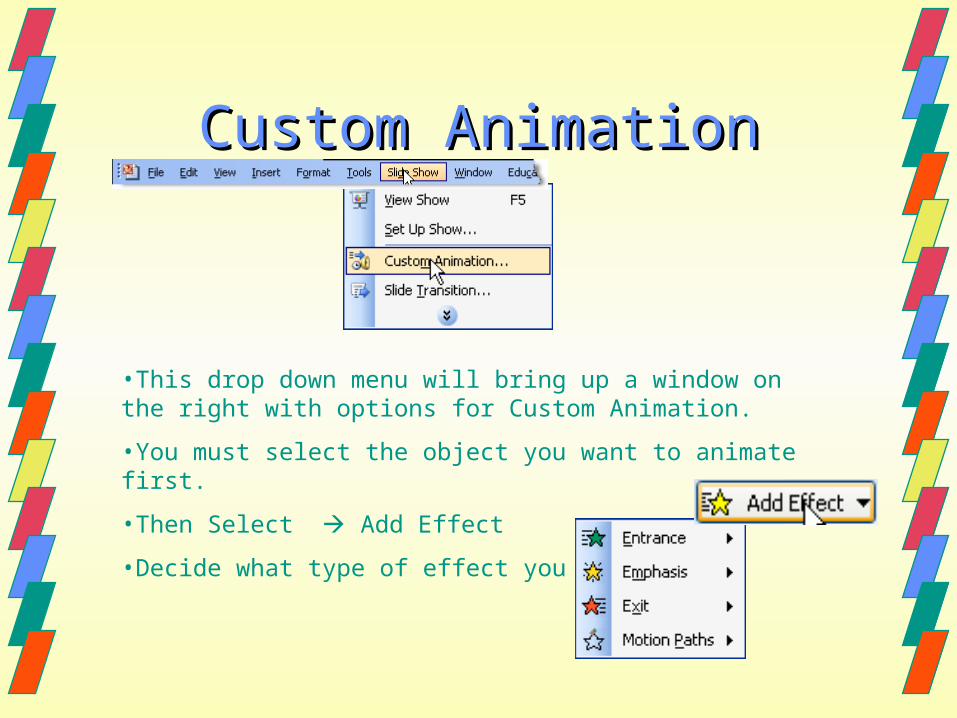
Custom AnimationCustom Animation
•This drop down menu will bring up a window on the right with options for Custom Animation.
•You must select the object you want to animate first.
•Then Select Add Effect
•Decide what type of effect you want
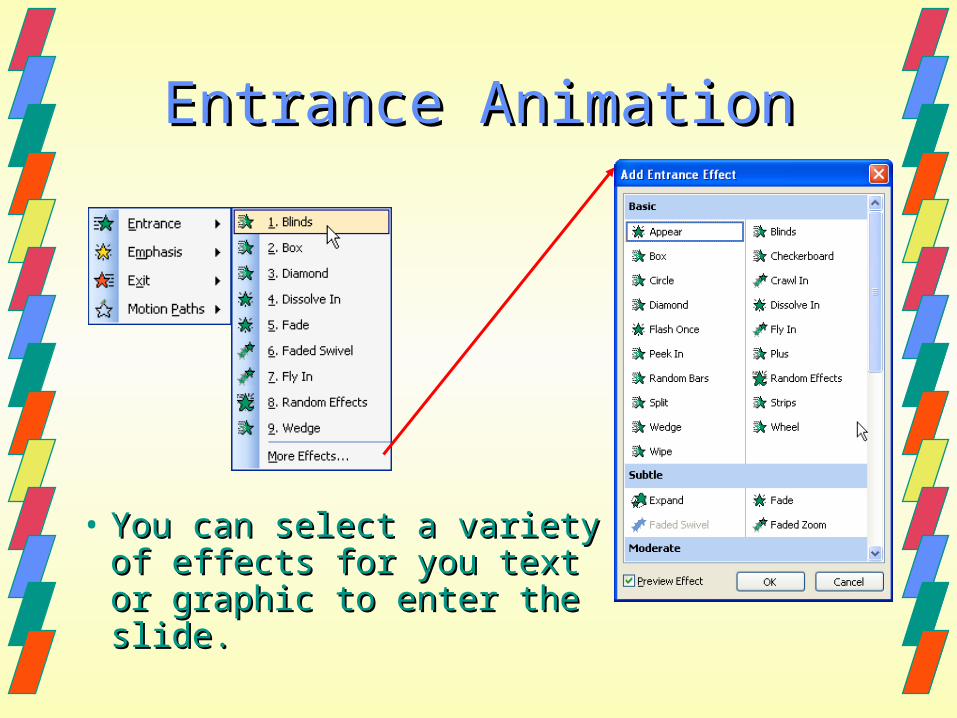
Entrance AnimationEntrance Animation
• You can select a variety You can select a variety of effects for you text or of effects for you text or graphic to enter the slide.graphic to enter the slide.

Emphasis AnimationEmphasis Animation
• To bring special attention To bring special attention to text or an object in to text or an object in your presentation use your presentation use emphasis.emphasis.

Exit AnimationExit Animation
• Exit animation Exit animation has many of the has many of the same effects.same effects.

Motion Path AnimationMotion Path Animation
Fun ways to add a special effect !Fun ways to add a special effect !

Using Action ButtonsUsing Action Buttons
Think of these buttons as hyperlinks to other slides or documents, sounds, or movies.
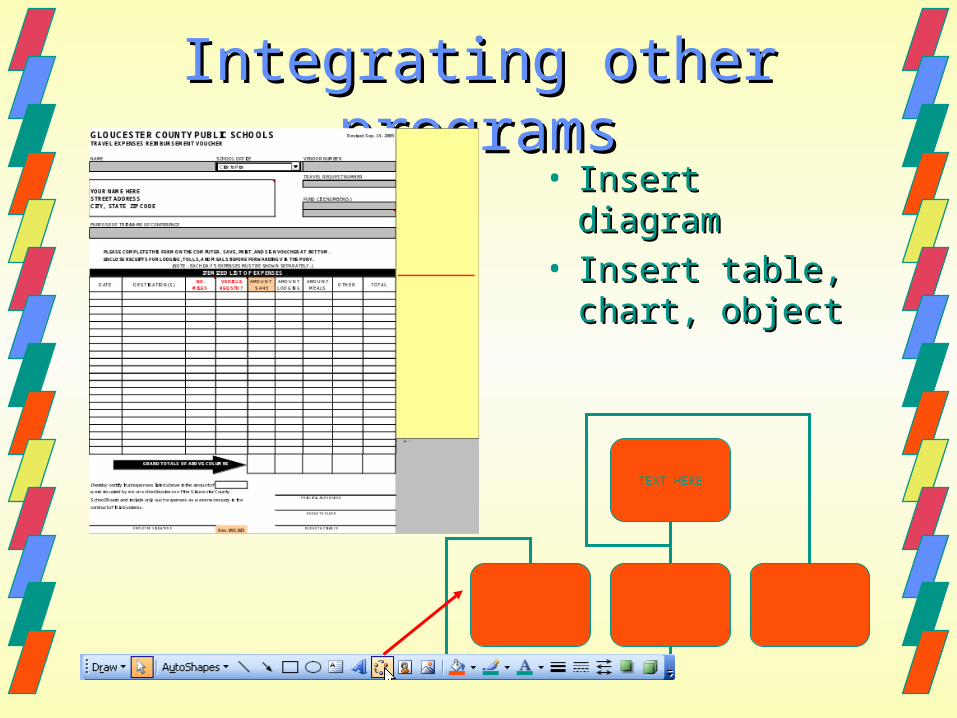
Integrating other Integrating other programsprograms
• Insert diagramInsert diagram• Insert table, Insert table,
chart, objectchart, object
TEXT HERE
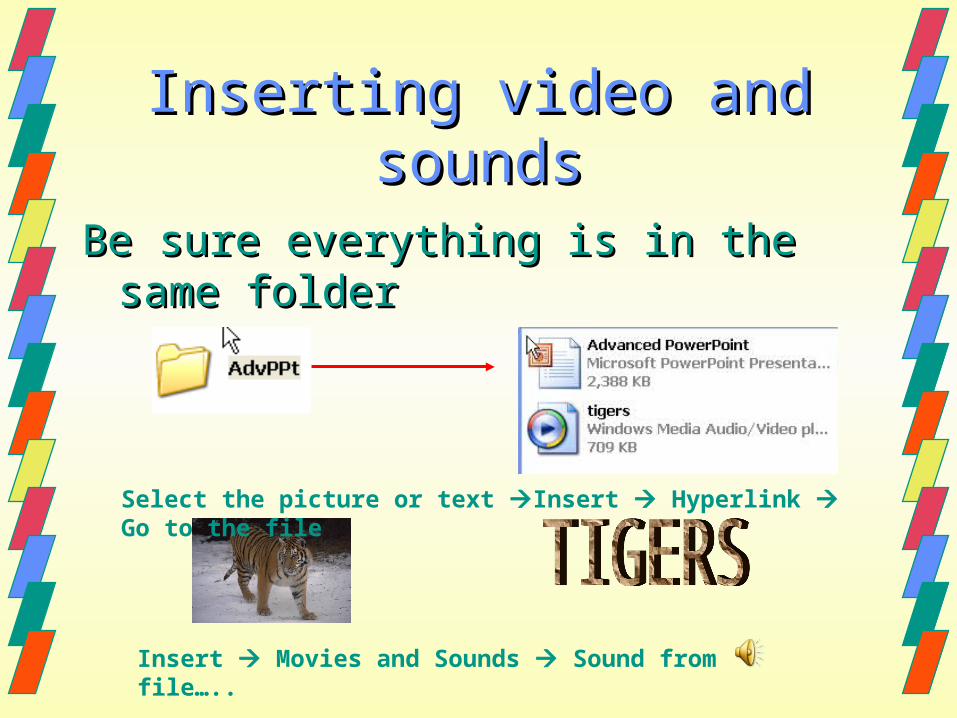
Inserting video and soundsInserting video and sounds
Be sure everything is in the same folderBe sure everything is in the same folder
Select the picture or text Insert Hyperlink Go to the file
Insert Movies and Sounds Sound from file…..

Insert Movies and Sounds From File (within same folder)
Select whether you want it to start automatically or on mouse click.

HyperlinksHyperlinks
• To outside sourceTo outside sourceLet’s visit the Let’s visit the MicrosoftMicrosoft page page
• To another slideTo another slide– Within Within thisthis presentation presentation– In another PowerPoint presentationIn another PowerPoint presentation
• Or just place the link right in the PPtOr just place the link right in the PPt http://gets.gc.k12.va.ushttp://gets.gc.k12.va.us

ViewingViewing
• Set up showSet up show– Go to SLIDE SHOW Go to SLIDE SHOW SET UP SHOW. SET UP SHOW.– Choose among the options given.Choose among the options given.
• View slide show from beginning View slide show from beginning – Go to SLIDE SHOW Go to SLIDE SHOW VIEW SHOW, VIEW SHOW,– Or click F5 key.Or click F5 key.
• View slide show from current slideView slide show from current slide– Click on this iconClick on this icon . .
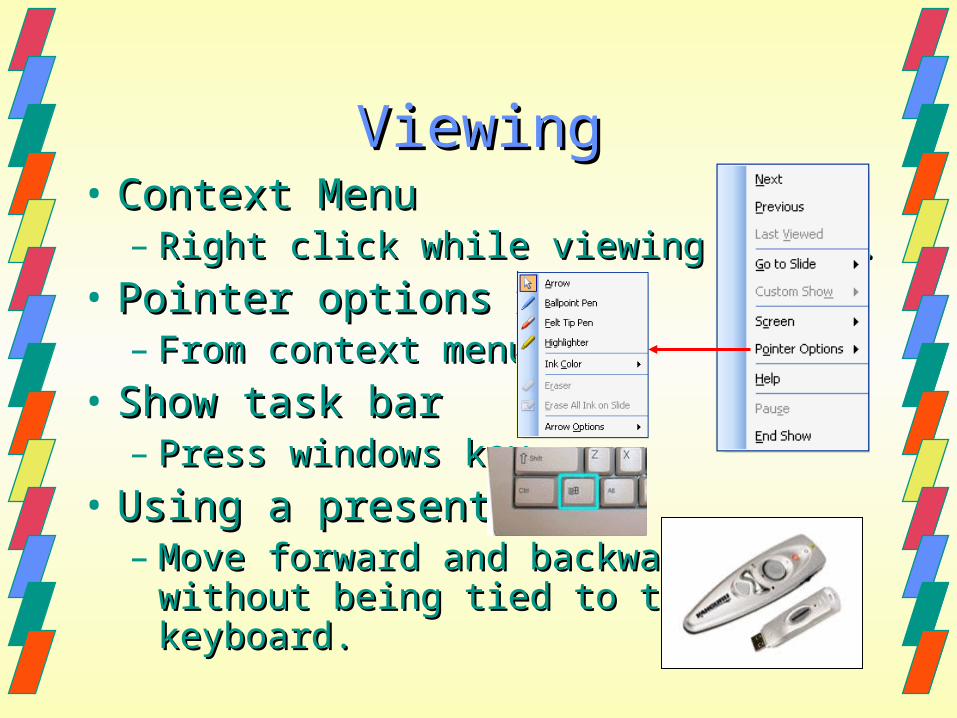
ViewingViewing• Context MenuContext Menu
– Right click while viewing a show.Right click while viewing a show.
• Pointer optionsPointer options– From context menuFrom context menu
• Show task barShow task bar– Press windows key.Press windows key.
• Using a presenterUsing a presenter– Move forward and backward Move forward and backward
without being tied to the without being tied to the keyboard.keyboard.

Finishing upFinishing up
• Printing optionsPrinting options– Go to FILE Go to FILE PRINT PREVIEW PRINT PREVIEW– Choose options from toolbarChoose options from toolbar
– Click PRINT.Click PRINT.
Finishing upFinishing up
• Save OptionsSave Options– Creating a web pageCreating a web page
• Go to FILE Go to FILE SAVE AS WEB PAGE. SAVE AS WEB PAGE.• Change SAVE AS TYPE from SINGLE FILE Change SAVE AS TYPE from SINGLE FILE
WEB PAGE to WEB PAGE,WEB PAGE to WEB PAGE,• Or, got to FILE Or, got to FILE SAVE AS and change SAVE SAVE AS and change SAVE
AS TYPE from SINGLE FILE WEB PAGE to AS TYPE from SINGLE FILE WEB PAGE to WEB PAGE.WEB PAGE.

Finishing upFinishing up
• Save optionsSave options– PowerPoint ShowPowerPoint Show
• For users who may not have PowerPoint on For users who may not have PowerPoint on their computer.their computer.
• Go to FILE Go to FILE SAVE AS. SAVE AS.• Change SAVE AS TYPE from PRESENTATION Change SAVE AS TYPE from PRESENTATION
to POWERPOINT SHOW.to POWERPOINT SHOW.
Finishing upFinishing up
• Save optionsSave options– Package for CDPackage for CD
• Go to FILE Go to FILE PACKAGE FOR CD. PACKAGE FOR CD.• The current slide show will automatically be The current slide show will automatically be
added to CD. Click on ADD button to add added to CD. Click on ADD button to add additional slide shows.additional slide shows.
• Click ADD.Click ADD.• Click on OPTIONS button. Choose options. Click on OPTIONS button. Choose options.
Click OK.Click OK.• Select COPY TO FOLDER or COPY TO CD.Select COPY TO FOLDER or COPY TO CD.
Finishing upFinishing up
• E-mailing the Slide ShowE-mailing the Slide Show– Go to FILE Go to FILE SEND TO SEND TO MAIL MAIL
RECIPIENT (AS ATTACHMENT).RECIPIENT (AS ATTACHMENT).– Complete the e-mail message.Complete the e-mail message.– SEND.SEND.

Other OptionsOther Options
• Games such as JeopardyGames such as Jeopardy
• Photo StoryPhoto Story
• ProducerProducer