adobe audition tutorial - a day a · pdf fileediting with adobe audition tips tricks penn...
TRANSCRIPT

CC 2014 BASICS Tutorial
“The word processor is a better tool than a quill pen because you can do so
much more with it, but on the other hand, what you have to say and how you
say it is the ultimate determination.
~ Walter Murch
v. 1.0
Adobe Audition
College of Communications

Editing With Adobe Audition
Penn StateCollege of Communications updated August 2014
2
TO P I C PAG E
Preparing your project 3
Set up Adobe Audition 5
Importing Media 6
Multitrack 8
Tools 9
Adjusting Volume 13
Exporting 15
Waveforms 18
Fixing Audio 19
Resources 25
Ta b l e o f C o n t e n t s

Editing With Adobe Audition
Tips & Tricks
Penn StateCollege of Communications created June 2015
3
Adobe Audition is a powerful audio editor.
You can edit audio for standalone audio projects. You can also use Audition in con-junction with Adobe Premiere to fix or improve the audio in your Premiere video projects.
This tutorial is designed as a get-started tutorial NOT a complete Everything You Always Wanted To Know About Audition And Were Afraid To Ask tutorial.IT is specifically written for Adobe Audition CC 2014 (We are now running CC 2015, there may be slight differences, but the programs are substantially the same)
GET READYPreparing yourself and Audition
Before you open the program it is extremely important to get organized. Mul-timedia projects get very complicated.. There are many files and folders and it is very easy to ‘lose’ stuff.
Get Organized. Stay Organized.you will thank me later.
*Create a Project Folder for every, er, project.*
This folder will hold everything associated with your project. Here is a sample system - the exact naming convention is less important than being consistent and logical:
•There are two kinds of
people. Those with messy sock drawers and those who
organize their socks. Multimedia requires you to organize your socks or pay
the price later.•

Editing With Adobe Audition
Tips & Tricks
Penn StateCollege of Communications created June 2015
4
FOLDER NAME: It should include your name and a one-word description of your story. I use the year at the front to make it easy to find and sort
A simple audio project may only have a your original audio files and the Audition .sesx project file.
You MUST have the original audio files to work on a project. Do NOT work off your SD card or recorder. FIRST copy the files into your project folder. Then put away your SD card or recorder.
DO THIS And your project will exist in a single place. You can copy it to another drive, give it to another person to edit.DON’T DO THIS and files will get lost. Projects won’t work, your hard drive will fill up and you will go crazy.
Project WorkflowThis is for creating an audio project. For fixing audio from Premiere go page xx
1. Create project folder and subfolder for ALL your assets.2. Copy your audio and other assets into your project folder (eject and put away your SD card, recorder, etc.)3. Launch Adobe Audition and set up your project. Save the Multitrack project file to the same folder you just created. 4. Import audio into Premiere5. Edit your assignment.6. Add any effects, make any audio fixes7 Export your audio - use mp3 if going straight to the web. Use .wav if you’ll be editing it further in Premiere for example.
TIP•
Audition has two ‘modes’ Waveform and Multitrack.
ONLY MULTITRACK projects can be saved.
•
TIP•
For students working in Lubert at Innovation Park:
Store your project folder on the SAN
For all other students:We strongly recommend using
a fast external hard-drive with Firewire 800, USB 3.0 or Thunderbolt connectivity
•

Editing With Adobe Audition
Tips & Tricks
Penn StateCollege of Communications created June 2015
5
PREPARING AUDITION
Open Adobe Audition
Note the Waveform/Multitrack tabs at the top left. This screenshot shows the Multitrack option which allows you to edit multiple tracks in a project.
Any imported audio is shown in the Files window top left.
The Media Browser, lower left, allows you to look at your harddrive(s) for other audio.
Important TABS next to Media BrowserEffects – allow you at add various effects and filters to clips and tracksMarker – keeps track of markers that you apply to a trackProperties – gives you information about a track including it’s location. You can also apply colors to different clips and tracks to stay organized.
TIP•
REMEMBER only Multitrack proj-ects can be saved and re-edited later. Work in Multitrack. Use waveform to look at individual
tracks, if necessary.•
•IMPORTANT!
Changes made in the Waveform mode are permanent. Editing done in Multitrack mode are
non-destructive and can be un-done at a later point.

Editing With Adobe Audition
Tips & Tricks
Penn StateCollege of Communications created June 2015
6
TIP•
Basic TerminologyFrequency equals the pitch. The higher the frequency, measured in hertz(Hz) or
kilohertz,(kHz) the higher the tone.
Amplitude, usually measured in decibels (dB), equals loud-ness. (There is actually a loud-ness scale that is also used by some). Higher decibels equals
louder sound
Sample Rate is how many times per second the digital file has captured the sound. The same way that in video we capture a series of still
images that when played back create motion. Audio sample rates are measured in hertz
or kilohertz. A typical rate for video applications is 48kHz
(48,000 hertz)
Because Video cameras typi-cally record audio at 48kHz, we use that setting when recording audio as well.
•
Importing Files
Note: Just as with Premiere, you are not actually importing files into the program. You need the original files at all times. Audition (like Premiere) simply remembers where the file is and points to it.
There are multiple ways to import your audio into Audition.
1. File>Import>File 2. Click the Import Files button at top left. 3. Keyboard shortcut - command I4. Double click or right click in blank space in File Pane to bring up import windowThese will all place the audio file(s) in the Files folder at top left.5. Click the Open File button (command O)This will import the audio AND open it in the Waveform editor

Editing With Adobe Audition
Tips & Tricks
Penn StateCollege of Communications created June 2015
7
TIP•
Basic Terminology (cont)
Bit Depth determines the dynamic range of the audio.
High bit depth allows a wider range of sound from quietest to loudest. 8 bit depth is low, allows only 48dB, which is not
enough for most sounds.16 bit, allows for 96dB and so on. Record at higher bit depths
to allow you to capture a wider range of volume.
File Format is the file type you record and save. Mp3 files are quite small, but that compres-sion severely degrades audio quality. NEVER record in mp3.
Record in .wav or .aiff.Export as mp3 for the web. Export as .wav or .aiff if you
plan to re-edit that file in Pre-miere for example.
•
Importing Files
A final way to import is to use the Media Browser
You can search your harddrive(s) and then browse files and even listen to them BEFORE you import them.
A great trick is to use the ‘autoplay’ button at the bottom of the browser. (circled in red).
Click this and then each time you click on a file it will start to play. You can quickly go through a list of audio files until you find the one you want.
The more shortcuts you use while editing, the less time you’ll spend on the computer - a good thing.

Editing With Adobe Audition
Tips & Tricks
Penn StateCollege of Communications created June 2015
8
•Multitrack sessions are the only way to save a project. You cannot save your work in the Waveform mode.
For basic audio editing - cut-ting, copying, pasting, of audio tracks, you’ll work primarily in the Multitrack mode.
•
Multitrack Sessions
Multitrack sessions are where you will edit multiple tracks of audio.
Create a Multitrack SessionAs with most functions in Audition, there are multiple ways to do create a session. File>New>Multitrack Session (command+N)or click on the Multitrack tab
Name your session. Use the settings above. MAKE SURE TO SAVE YOUR SESSION IN THE PROJECT FOLDER FOR THATASSIGNMENT.

Editing With Adobe Audition
Tips & Tricks
Penn StateCollege of Communications created June 2015
9
•Oddly, if a clip is not placed
on a track, it won’t, by default, be saved in the project’s File
Pane.
This means, that if you quit Audition, and return later to work on a project, the file
won’t be there.
To change this silly behavior go to preferences:
Audition> Preferences> Mul-titrack and click the box:‘Reference all open audio
and video files when saving session’
zv
Import your audio into the Files pane.
If you drag multiple clips onto the Multitrack Session you’ll get this dialogue window:
Select whichever option you prefer.
You’re now ready to begin editing.
TOOLS
Audition is a very powerful audio editor. We will focus on basic editing skills.
The tool bar is located at the top of the screen
Rollover a tool to learn the quick key for faster editing.
We will primarily use the first two tools.The Move Tool lets you move clips along the timeline and drag them onto a different track. It also lets you shorten or lengthen (trim) a clip by clicking on a edge and drag-ging. The Razor Tool lets you cut a track by clicking where you want to cut.
Editing With Adobe Audition
Tips & Tricks
Penn StateCollege of Communications created June 2015
10
•Oddly the keyboard shortcut
for The Razor Tool is ‘R’ in Audtion but ‘B’ in Premiere.
•
•If you have multiple tracks
and you want to cut between all of them, hold down the
Shift Key when selecting the Razor Tool.
•
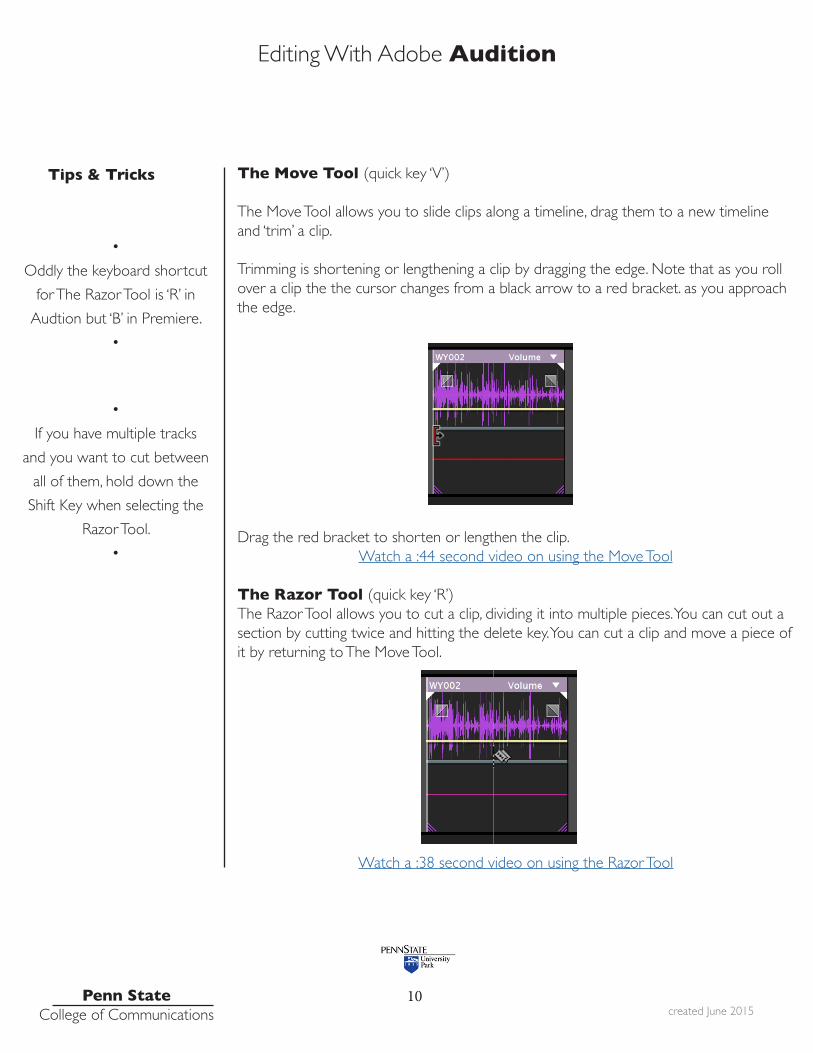
The Move Tool (quick key ‘V’)
The Move Tool allows you to slide clips along a timeline, drag them to a new timeline and ‘trim’ a clip.
Trimming is shortening or lengthening a clip by dragging the edge. Note that as you roll over a clip the the cursor changes from a black arrow to a red bracket. as you approach the edge.
Drag the red bracket to shorten or lengthen the clip.Watch a :44 second video on using the Move Tool
The Razor Tool (quick key ‘R’)The Razor Tool allows you to cut a clip, dividing it into multiple pieces. You can cut out a section by cutting twice and hitting the delete key. You can cut a clip and move a piece of it by returning to The Move Tool.
Watch a :38 second video on using the Razor Tool

Editing With Adobe Audition
Tips & Tricks
Penn StateCollege of Communications created June 2015
11
•Turn off the Toggle Global ClipStretching Tool.
When on, it allows you to change the duration of a clip, slowing down or speeding it up. Not something you’ll use very often.
•
The Time Selection Tool (quick key ‘T’)
The Time Selection Tool allows you to move the playhead (also called the scrubber) by clicking inside a clip. The playhead will move to where you click. If you are in the Move Tool and want to move the playhead you need to click above the clip.
Watch a 1:09 video on using the Time Selection Tool
The Snapping Tool ( quick key ‘S’)
When the snapping tool is on, and you move a clip it will ‘snap’ next to the closest clip. This make aligning clips very easy. If you want more precise control over where a clip goes, turn snapping off.

Editing With Adobe Audition
Tips & Tricks
Penn StateCollege of Communications created June 2015
12
•The last zoom tool on the right, Zoom Selected Track, will enlarge the track you’re working on to fill the screen. Useful for getting a very close look at a clip.
•
Zooming
You WILL want to zoom in and out of your timeline. Zooming in allows you a closeup look at the waveform for precise cuts. You need to be able to see the waveform to cut between words for example.
There are multiple ways of zooming in:Above the tracks, click on the zooming bar and drag the edge
ORBelow the Tracks are a series of Zooming Tools:
The first set of + and - buttons change the height of the track. The second set zooms in on the track.
Watch a 1:42 video on zooming tools

Editing With Adobe Audition
Tips & Tricks
Penn StateCollege of Communications created June 2015
13
••
Adjust Volume
There are multiple ways to adjust the volume (or amplitude) in Audition.
You can change the level of the entire project, of a specific track or of a clip within a track.
All tracks in a Multitrack Session are eventually output through the Master Track. So if you change the Master Track, those changes are applied everywhere.
The Master Track is at the bottom.You can enter a volume or click and drag the blue box to raise orlower the volume for the entireproject.
Apply volume changes to individual tracks in the same way.
Adjust the volume of an individual clip by dragging the volume level up or down. You can also change the volume in the Properties Panel.
Watch a 1:50 video on controlling volume

Editing With Adobe Audition
Tips & Tricks
Penn StateCollege of Communications created June 2015
14
•
•
Adjusting Volume
Beyond simply making clips louder or softer, you’ll want to learn how to fade audio, or create and ‘envelope’ that allows you modify the audio throughout a clip or track.
For example, you might have a natural sound in the background which is quieter than the interview, but during a break in the interview you want that sound to rise and then fade back again.
To fade in or out on a clip, Click anddrag on the small grey box in the topleft or right of the clip.
Cross fade two clips by overlappingthem on a track. This ONLY works ifyour preferences are set to ‘Automaticallycrossfade overlapping clips:Audition>Preferences>Multitrack Clip>select ‘automatically crossfade overlappingclips.
The Envelope tool allows you to raiseand lower the volume over time in a clipto, for example, create a rising and loweringof music or a natural sound.
Click on the volume to create keyframes.Then click and drag those to raise and lower the volume of a clip or track.
Watch a 3:56 Video on creating fades and using the Envelope tool

Editing With Adobe Audition
Tips & Tricks
Penn StateCollege of Communications created June 2015
15
•
Editing
At this point you have the basic skills to edit audio.
1. Set up your project2. Import your audio3. Move, trim, cut and edit your video into a compelling story4. Adjust the levels, create fades as necessary.
Audition is a powerful program that can do a LOT more than this of course. Lynda.Com or other online tutorials can help you if you can’t figure something out.
Or of course, ask me.
When you’ve finished editing, you will want to export your project into a usable format.
The file created by Audition, that ends in .sesx will NOT be useful to anyone else.
You MUST export your project. This will create a file that someone can open who doesn’t have your original material. The choice of export formats depends on the final use of your audio.
IF your audio will be posted online, MP3 is probably the best choice. It is a universal format, and files are compressed to be smaller for the web.
IF you plan to use your audio for some other project, adding it to video project in Premiere for example, use an uncompressed format for better quality such as .wav or .aif.
Exporting
BEFORE you export, make sure there is nothing extra on your timeline - no clips hiding at the end or on a track somewhere.

Editing With Adobe Audition
Tips & Tricks
Penn StateCollege of Communications created June 2015
16
•
•
To export:
File>Export>Multitrack Mixdown>Entire Session...
Then select the file type AND location. REMEMBER to name your file with your name and the name of the assignment.

Editing With Adobe Audition
Tips & Tricks
Penn StateCollege of Communications created June 2015
17
File Name: Your Name (first and last) and an assignment name NO SPACESLocation: Save it in your project folder for that assignmentFormat: MP3 for the web, Wave for editing in other softwareWe generally record at 48000 Hz. This is ideal for video projects. Format Settings: Leave at the default
Click OK
LISTEN TO YOUR PROJECT AFTER IT EXPORTS BEFORE YOU TURN IT IN

Editing With Adobe Audition
Tips & Tricks
Penn StateCollege of Communications created June 2015
18
WaveForm
Remember that everything to this point was in Audition’s Multitrack mode
Multitrack allows you to save projects with multiple audio files. It is also non-de-structive. So changes can be undone at a later date.
Waveform is for working on a single audio file. Changes are permanent and can’t be undone at a later date.
So why use Waveform at all you may ask???
Audition has powerful tools for fixing imperfect audio and those changes are done in Waveform mode.
IF you are working on a project in Multitrack and want to ‘fix’ an audio clip - double click to bring it into Waveform mode.

Editing With Adobe Audition
Tips & Tricks
Penn StateCollege of Communications created June 2015
19
FIXING MISTAKES
Let’s be clear. Garbage in, Garbage out. If your original audio is badly done, you might be able to improve it in Audition, but you’ll never make it great.
The only way to get good audio is to record good audio.
IF you’re reading this part, you’re probably trying to fix a mistake. If at all possible just go back and record the audio again.
BUT, if you’re desperate, you may be able to improve your audio. REMEMBER that chang-es made in the WaveForm mode are NOT undoable later.
WaveForm can be used for many things. This tutorial will focus on just a couple of fea-tures.
Two kinds of problems you can try and fix in Audition.
1. Background noise. This can be the hum of a fan or fluorescent light, wind noise, the hiss of the recorder itself or a noisy location. Constant sounds, like a hum or hiss can sometimes be improved. Variable sounds like a crowd are usually impossible to improve.
2. Pops and clicks. Hard distracting sounds can sometimes be removed - the tapping of fingernails, the clank if someone drops something.
Spectral Frequency Display
The waveform view doesn’t do a good job of showing you what frequencies are causing problems. Audition allows you to look at the Frequency display as well.
In WaveForm view, click and drag from the bottom of the screen to reveal the Spectral Frequency Display alongside the WaveForm.
•Record ‘room tone’ when out in the field. That means record-ing 30-60 seconds of any space you’re in to get the baseline ‘silence’ of the room.
When you do an interview, ask the subject to sit quietly for 30 seconds and just record. You can use that ‘silence’ as a baseline to fix problems later.
•

Editing With Adobe Audition
Tips & Tricks
Penn StateCollege of Communications created June 2015
20
You can see the standard Waveform in green on top and the Spectral Display below.
Editing out a distinct soundsuch as a bell or ringing, requires selecting that piece of audio and then simply deleting it.
For example, here is audio with a bell going off in the background.
Notice the distinct horizontal bands. Thebell rang three times. If we select those,and delete them, we remove the sound.
Use the tools at the top of Audition to select the offending sounds.

Editing With Adobe Audition
Tips & Tricks
Penn StateCollege of Communications created June 2015
21
Use whichever tool fits the shape of the sound. In this case, the Marquee Selection Tool will allow us to draw a box around the offending sounds.
Highlight the sound, then simply hit the delete key.
Watch a 3:10 video on removing an unwanted sound in the WaveForm editor
Noise Reduction
What if you have a noise in the background like a hum or hiss? You can’t erase the whole thing without destroying the overall sound.
Editing With Adobe Audition
Tips & Tricks
Penn StateCollege of Communications created June 2015
22
There are multiple ways to try and reduce unwanted background noise. I’ll show you two. No method will be perfect. You can’t remove a sound without effecting the overall quality of the audio.
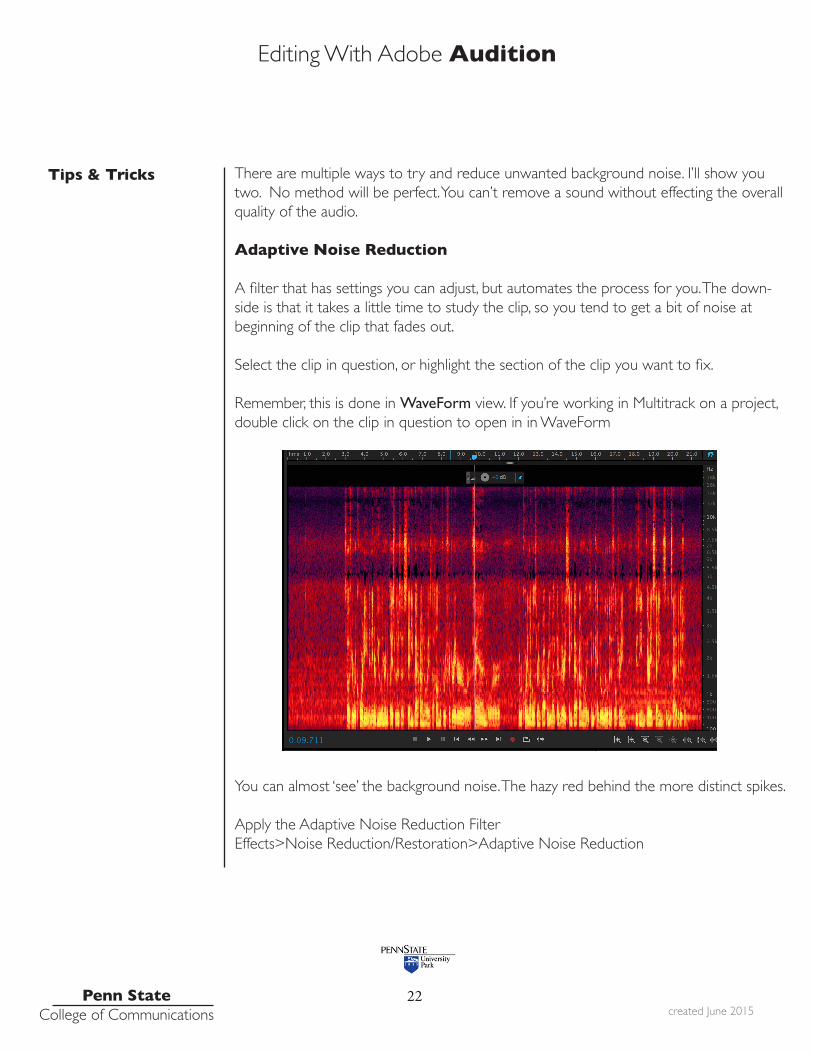
Adaptive Noise Reduction
A filter that has settings you can adjust, but automates the process for you. The down-side is that it takes a little time to study the clip, so you tend to get a bit of noise at beginning of the clip that fades out.
Select the clip in question, or highlight the section of the clip you want to fix.
Remember, this is done in WaveForm view. If you’re working in Multitrack on a project, double click on the clip in question to open in in WaveForm
You can almost ‘see’ the background noise. The hazy red behind the more distinct spikes.
Apply the Adaptive Noise Reduction FilterEffects>Noise Reduction/Restoration>Adaptive Noise Reduction

Editing With Adobe Audition
Tips & Tricks
Penn StateCollege of Communications created June 2015
23
To Start use the preset Default Settings
Experiment if you don’t like the results. Use the ‘High Quality Mode to improve your results.Watch a 3:09 video demonstrating the Adaptive Noise Reduction effect

Editing With Adobe Audition
Tips & Tricks
Penn StateCollege of Communications created June 2015
24
Noise Reduction (Process)This method requires that you have a sample of your noise. REMEMBER to capture some of the silence of the room. That ‘room tone’ can be the baseline you use to for noise reduction. It can also be used in your editing to add in a natural sounding pause or break.
Capture a Noise PrintAssuming you have some of the silence of the room, highlight it, and the capture that.Effects>Noise Reduction/Restoration>Capture Noise Print.
Audition will store this sample and use it.
Next, select Noise Reduction (Process)

Editing With Adobe Audition
Tips & Tricks
Penn StateCollege of Communications created June 2015
25
You can see there are a host of settings to adjust. Test the default settings by clicking the Preview/Play button in the lower left.
If you over correct, or if the background noise is too close in frequency to the voice of your subject, they tend to sound like robots - a very mechanical and artificial sound.
It’s unlikely you’ll be able to remove all the unwanted sound. But play with the settings and the preview button until it sounds as good as possible.
REMEMBER, when you save this change in the WaveForm mode you can’t go back later and undo it.
Watch a 3:51 video demonstration of the noise reduction method.
There are additional noise reduction tools in Audition.
The Spot Healing Brush can sometimes remove a cough or other hard noise for example.
These tools should get you started, but always remember you’ll save yourself time and have a better result if you simply record good audio.
RESOURCESWant help?Ask. – Don’t worry about asking me questions. That’s why I’m hereGoogle – Can’t figure something out? Try to search for your questionAdobe Help – Go to the source and search their websiteLynda.com – Online tutorials on a bazillion topics and FREE for Penn State