37 maintenance burned-on residue 1 while the · pdf fileholder while using a scraper on the...
TRANSCRIPT

37MAINTENANCEEN
GLISH
MAINTENANCECleaning the Glass-Ceramic Cooktop
CAUTION • Do not use scrub pads or abrasive cleaning pads. They may damage your cooktop surface.
• For your safety, wear an oven mitt or pot holder while using a scraper on the hot cooking surface.
Use ceramic cooktop cleaner on the glass cooktop. Other creams may not be as effective or may scratch, damage or stain the cooktop surface.
To maintain and protect the surface of the glass cooktop, follow these steps:
1 Before using the cooktop for the first time, clean it with a ceramic cooktop cleaner. This helps protect the top and makes cleanup easier.
2 Use ceramic cooktop cleaner daily to help keep the cooktop looking new.
3 Shake the cleaning cream well. Apply a few drops of cleaner directly to the cooktop.
4 Use a paper towel to clean the entire cooktop surface.
5 Rinse with clear water and use a dry cloth or paper towel to remove all cleaning residue.
NOTEDo not heat the cooktop until it has been cleaned thoroughly.
IMPORTANTIf any sugar or food containing sugar (preserves, ketchup, tomato sauce, jellies, fudge, candy, syrups, chocolate) spills, or plastic or foil melts on the cooktop, remove the molten material IMMEDIATELY with a metal razor scraper (it will not damage the decorated cooking surface) while the cooking surface is still hot to avoid the risk of damage to the glass-ceramic surface. For your safety, please use an oven mitt or pot holder while scraping the hot cooking surface.
Burned-On Residue1 While the cooktop is still hot, remove any burnt
on deposits or spilled food from the glass-ceramic cooking surface with a suitable metal razor scraper. (Similar to scraping paint off of a windowpane, it will not damage the decorated cooking surface.) Hold the scraper at an approximate 30° angle to the cooktop.
NOTE • Do not use a dull or nicked blade.
• To prevent burns, wear an oven mitt or pot holder while using the metal scraper.
2 When the cooking surface has cooled down, apply a few dabs (about the size of a dime) of an approved cleaner in each burner area and work the cleaning cream over the cooktop surface with a damp paper towel.
NOTEApproved cleaners • Weiman Cooktop Cleaning Cream (www.weiman.com)
• Cerama Bryte (www.ceramabryte.com)
• Golden Ventures Cerama Bryte
• Easy-Off 3 in 1 Glass Top Cleaner Spray (www.easyoff.us)
3 Rinse with clean water and wipe the cooktop surface with a clean, dry paper towel.
38 MAINTENANCE
Metal Marks and Scratches1 Be careful not to slide pots and pans across
the cooktop. Doing so will leave metal markings on the cooktop surface. To help remove these marks, use a ceramic cooktop cleaner with a cleaning pad for ceramic cooktops.
2 If pots with a thin overlay of aluminum or copper are allowed to boil dry, the overlay may leave black discoloration on the cooktop. This should be removed immediately before heating again or the discoloration may be permanent.
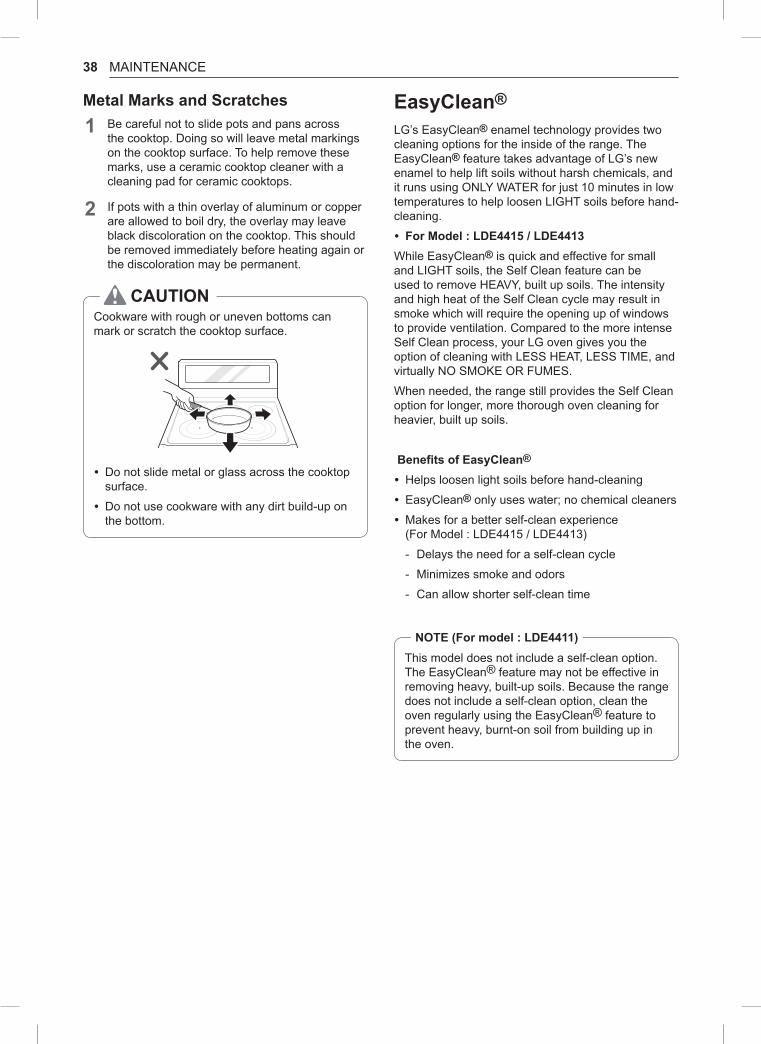
CAUTIONCookware with rough or uneven bottoms can mark or scratch the cooktop surface.
• Do not slide metal or glass across the cooktop surface.
• Do not use cookware with any dirt build-up on the bottom.
EasyClean®
LG’s EasyClean® enamel technology provides two cleaning options for the inside of the range. The EasyClean® feature takes advantage of LG’s new enamel to help lift soils without harsh chemicals, and it runs using ONLY WATER for just 10 minutes in low temperatures to help loosen LIGHT soils before hand-cleaning.
• For Model : LDE4415 / LDE4413While EasyClean® is quick and effective for small and LIGHT soils, the Self Clean feature can be used to remove HEAVY, built up soils. The intensity and high heat of the Self Clean cycle may result in smoke which will require the opening up of windows to provide ventilation. Compared to the more intense Self Clean process, your LG oven gives you the option of cleaning with LESS HEAT, LESS TIME, and virtually NO SMOKE OR FUMES.
When needed, the range still provides the Self Clean option for longer, more thorough oven cleaning for heavier, built up soils.
Benefits of EasyClean®
• Helps loosen light soils before hand-cleaning
• EasyClean® only uses water; no chemical cleaners
• Makes for a better self-clean experience (For Model : LDE4415 / LDE4413)
- Delays the need for a self-clean cycle
- Minimizes smoke and odors
- Can allow shorter self-clean time
NOTE (For model : LDE4411)This model does not include a self-clean option. The EasyClean® feature may not be effective in removing heavy, built-up soils. Because the range does not include a self-clean option, clean the oven regularly using the EasyClean® feature to prevent heavy, burnt-on soil from building up in the oven.

39MAINTENANCEEN
GLISH
When to Use EasyClean®
Suggested Cleaning Method Example of Oven Soiling Soil Pattern Types of
SoilsCommon Food Items
That Can Soil Your Oven
EasyClean®
Small drops or spots
Cheese or other
ingredientsPizza
Light splatter Fat/grease
Steaks, broiled
Fish, broiled
Meat roasted at low temperatures
Self Clean* (For Model : LDE4415 / LDE4413)
Medium to heavy splatter Fat/grease Meat roasted at high
temperatures
Drops or spots
Filling or sugar based
soilsPies
Cream or tomato sauce
Casseroles
* The Self Clean cycle can be used for soil that has been built up over time.
Cleaning Tips • Allow the oven to cool to room temperature before using the EasyClean® cycle. If your oven cavity is above 150 °F (65 °C), Hot will appear in the display, and the EasyClean® cycle will not be activated until the oven cavity cools down.
• A plastic spatula can be used as a scraper to scrape off any chunks or debris before and during oven cleaning.
• Using the rough side of a non-scratch scouring pad may help to take off burnt-on stains better than a soft sponge or towel.
• Certain non-scratch scrubbing sponges, such as those made of melamine foam, available at your local stores, can also help improve cleaning.
• The range should be level to ensure that the bottom surface of the oven cavity is entirely covered by water at the beginning of the EasyClean® cycle.
• For best results, use distilled or filtered water. Tap water may leave mineral deposits on the oven bottom.
• Soil baked on through several cooking cycles will be more difficult to remove with the EasyClean® cycle.
• Do not open the oven door during the EasyClean® cycle. Water will not get hot enough if the door is opened during the cycle.
• For hard to reach areas such as the back surface of the lower oven, it is better to use the Self Clean cycle. (For Model : LDE4415 / LDE4413)
EasyClean® Instruction Guide1 Remove oven racks and accessories from the
oven.
2 Scrape off and remove any burnt-on debris with a plastic scraper.
Suggested plastic scrapers:
• Hard plastic spatula
• Plastic pan scraper
• Plastic paint scraper
• Old credit card
3 Fill a spray bottle with 1¼ cups (10 oz or 300 ml) of water and use the spray bottle to thoroughly spray the inside surfaces of the oven.
4 Use at least ¼ cup (2 oz or 60 ml) of the water to completely saturate the soil on both the walls and in the corners of the oven.

40 MAINTENANCE
5 Spray or pour the remaining 1 cup (8 oz or 250 ml) of water onto the bottom center of the oven cavity. The indentation on the oven bottom should be fully covered to submerge all soils. Add water if necessary.
NOTEUse the "mist" setting on the spray bottle for better coverage. The entire 1¼ cup (10 oz or 300 ml) of water should be used for each oven cavity cleaned. Do not spray water directly on the door. Doing so will result in water dripping to the floor.
6 Close the oven door. Touch EasyClean®. Touch Start.
CAUTION • Some surfaces may be hot after the EasyClean® cycle. Wear rubber gloves while cleaning to prevent burns.
• During the EasyClean® cycle, the oven becomes hot enough to cause burns. Wait until the cycle is over before wiping the inside surface of the oven. Failure to do so may result in burns.
• Avoid leaning or resting on the oven door glass while cleaning the oven cavity.
7 A tone will sound at the end of the 10 minute cycle. Touch Clear/Off to clear the display and end the tone.
8 After the cleaning cycle and during hand-cleaning, enough water should remain on the oven bottom to completely submerge all soils. Add water if necessary. Place a towel on the floor in front of the oven to capture any water that may spill out during hand-cleaning. If you are cleaning the upper oven on a double oven range, it is also best to cover the holes in the top of the lower oven door with a towel to capture any water that may drip into the door during hand cleaning.
9 Clean the oven cavity immediately after the EasyClean® cycle by scrubbing with a wet, non-scratch scouring sponge or pad. (The scouring side will not scratch the finish.) Some water may spill into the bottom vents while cleaning, but it will be captured in a pan under the oven cavity and will not hurt the burner.
NOTEDo not use any steel scouring pads, abrasive pads or cleaners as these materials can permanently damage the oven surface.
10 Once the oven cavity is cleaned, wipe any excess water with a clean dry towel. Replace racks and any other accessories.
11 If some light soils remain, repeat the above steps, making sure to thoroughly soak the soiled areas.
• For Model : LDE4415 / LDE4413
If stubborn soils remain after multiple EasyClean® cycles, run the Self Clean cycle. Be sure that the oven cavity is empty of oven racks and other accessories, and that the oven cavity surface is dry before running the Self Clean cycle. Consult the Self Clean section of your owner’s manual for further details.
NOTE
• If you forget to saturate the inside of the oven with water before starting EasyClean®, touch Clear/Off to end the cycle. Wait for the range to cool to room temperature and then spray or pour water into the oven and start another EasyClean® cycle.
• The cavity gasket may be wet when the EasyClean® cycle finishes. This is normal. Do not clean the gasket.
• If mineral deposits remain on the oven bottom after cleaning, use a cloth or sponge soaked in vinegar to remove them.
• It is normal for the fan to operate during the EasyClean® cycle.

41MAINTENANCEEN
GLISH
Using the Scraper (For Model : LDE4411)The retractable razor scraper included with the range can be used to help remove stubborn soil from inside the oven.
1 To use the scraper, depress the button and slide it forward to extend the blade.
2 Scrape the surface of the oven, sliding the blade parallel to the surface. Do not gouge at the oven surface with the tips of the blade.
3 When finished, carefully clean the blade with a cloth, keeping fingers away from the sharp edges of the blade. Depress the button and slide it backward to store the blade.
Replacing the Scraper Blade (For Model : LDE4411)If the scraper blade becomes dull or damaged, remove and replace it.
CAUTIONKeep fingers away from sharp edges of blade.
1 To remove the blade, depress the scraper's button and slide it forward to extend the blade.
2 Hold the scraper as shown, with one end of the blade resting on the edge of a table or other flat surface.
3 Carefully push down on the scraper handle to slide the blade free from the handle.
4 To insert a new blade, align the back of the blade with the groove in the scraper handle. With the end of the blade against a flat surface, carefully push the handle down to slide the blade into position.
Self Clean (For Model : LDE4415 / LDE4413)The Self Clean cycle uses extremely hot temperatures to clean the oven cavity. While running the Self Clean cycle, you may notice smoking or an odor. This is normal; especially if the oven is heavily soiled.
During Self Clean, the kitchen should be well ventilated to minimize the odors from cleaning.
Before Starting Self Clean • Remove the oven racks, broiler pan, broiler grid, all cookware, aluminum foil or any other material from the oven.
• The kitchen should be well ventilated to minimize the odors from cleaning.
• Wipe any heavy spillovers on the bottom of the oven.
• Make sure that the oven light bulb cover is in place and the oven light is off.
• The oven light cannot be turned on during a Self Clean cycle. The oven light cannot be turned on until the oven temperature has cooled below 500 ˚F (260 ˚C) after a Self Clean cycle is complete.
CAUTION • Do not leave small children unattended near the appliance. During the Self Clean cycle, the outside of the range can become very hot to the touch.
• If you have pet birds, move them to another well-ventilated room. The health of some birds is extremely sensitive to the fumes given off during the Self Clean cycle of any range.
• Do not line the oven walls, racks, bottom or any other part of the range with aluminum foil or any other material. Doing so will destroy heat distribution, produce poor baking results and cause permanent damage to the oven interior (aluminum foil will melt to the interior surface of the oven).
• Do not force the door open. This can damage the automatic door locking system. Use care when opening the oven door after the Self Clean cycle. Stand to the side of the oven when opening the door to allow hot air or steam to escape. The oven may still be VERY HOT.
42 MAINTENANCE
During the Self Clean cycle, the cooktop elements and warming drawer cannot be used.
NOTE • Remove oven racks and accessories before starting the Self Clean cycle.
• If oven racks are left in the oven cavity during the Self Clean cycle, they will discolor and become difficult to slide in and out.
• Clean the frame of the oven and door with hot soapy water. Rinse well.
• Do not clean the gasket. The fiberglass material of the oven door gasket cannot withstand abrasion. It is essential for the gasket to remain intact. If you notice it becoming worn or frayed, replace it.
• Wipe up any heavy spillovers on the oven bottom.
• Make sure that the oven light bulb cover is in place and the oven light is off.
• It is normal for the fan to operate during the Self Clean cycle.
• The Burner On indicator light turns on when the knob is turned even if the cooktop element does not operate.
Setting Self CleanThe Self Clean function has cycle times of 3, 4, or 5 hours.
Self Clean Soil Guide
Soil Level Cycle Setting
Lightly Soiled Oven Cavity 3-Hour Self Clean
Moderately Soiled Oven Cavity 4-Hour Self Clean
Heavily Soiled Oven Cavity 5-Hour Self Clean
1 Remove all racks and accessories from the oven.
2 Touch Self Clean. The oven defaults to the recommended four-hour self clean for a moderately soiled oven. Touch twice for a five-hour self clean or three times for a three-hour self clean.
3 Touch Start.
4 Once the self-clean cycle is set, the oven door locks automatically and the lock icon displays. You will not be able to open the oven door until the oven has cooled. The lock releases automatically when the oven has cooled.
CAUTIONDo not force the oven door open when the lock icon is displayed. The oven door remains locked until the oven temperature has cooled. Forcing the door open will damage the door.
Setting Self Clean with a Delayed Start1 Remove all racks and accessories from the
oven.
2 Touch Self Clean. The oven defaults to the recommended four-hour self clean for a moderately soiled oven. Touch twice for a five-hour self clean or three times for a three-hour self clean.
3 Touch Start Time.
4 Use the number keys to enter the time of day you would like the Self Clean to start.
5 Touch Start.
NOTEIt may become necessary to cancel or interrupt a Self Clean cycle due to excessive smoke or fire in the oven. To cancel the Self Clean function, touch Clear/Off.
During Self Clean • The Self Clean cycle uses extremely hot temperatures to clean the oven cavity. While running the Self Clean cycle, you may notice smoking or an odor. This is normal, especially if the oven is heavily soiled.
• As the oven heats, you may hear sounds of metal parts expanding and contracting. This is normal and will not damage the oven.
• Do not force the oven door open when the lock is displayed. The oven door remains locked until the oven temperature has cooled. Forcing the door open will damage the door.
43MAINTENANCEEN
GLISH
After the Self Clean Cycle • The oven door remains locked until the oven temperature has cooled.
• You may notice some white ash in the oven. Wipe it off with a damp cloth or a soap-filled steel wool pad after the oven cools. If the oven is not clean after one self-clean cycle, repeat the cycle.
• If oven racks were left in the oven and do not slide smoothly after a self-clean cycle, wipe racks and rack supports with a small amount of vegetable oil to make them glide more easily.
• Fine lines may appear in the porcelain because it went through heating and cooling. This is normal and will not affect performance.
NOTE • The Self Clean cycle cannot be started if the Lockout feature is active.
• Once the Self Clean cycle is set, the oven door locks automatically. You will not be able to open the oven door until the oven is cooled. The lock releases automatically.
• Once the door has been locked, the lock indicator light stops flashing and remains on. Allow about 15 seconds for the oven door lock to activate.
• If the clock is set for a 12-hour display (default) the Delayed Self Clean can never be set to start more than 12 hours in advance.
• After the oven is turned off, the convection fan keeps operating until the oven has cooled down.
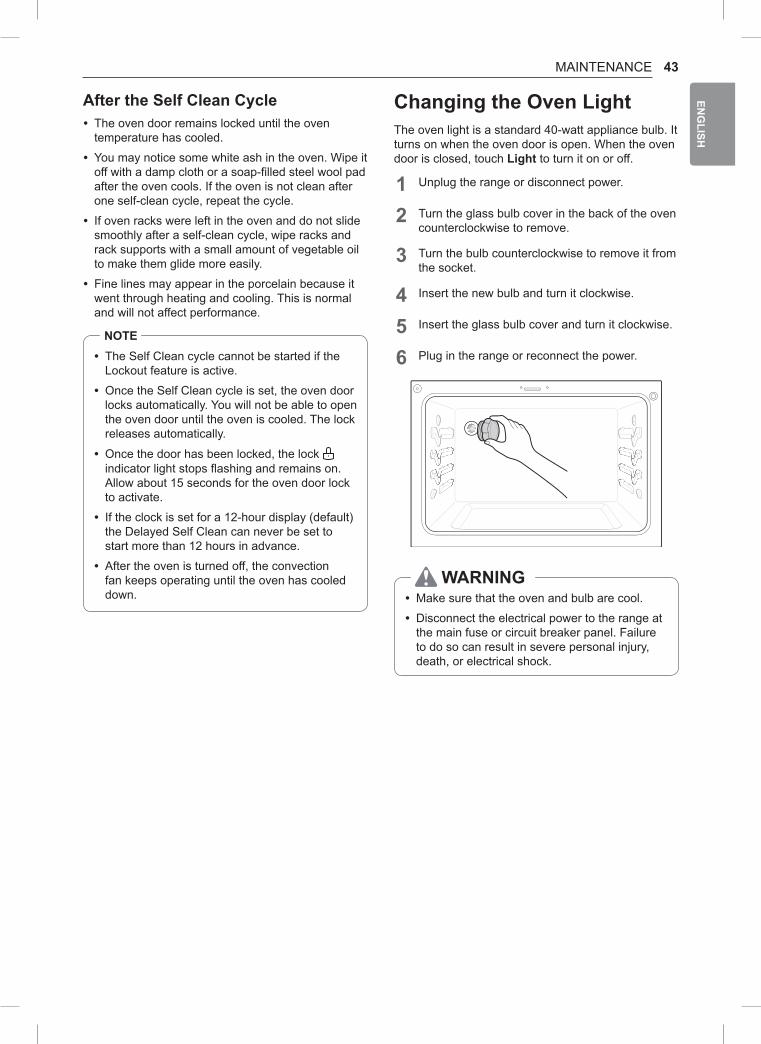
Changing the Oven LightThe oven light is a standard 40-watt appliance bulb. It turns on when the oven door is open. When the oven door is closed, touch Light to turn it on or off.
1 Unplug the range or disconnect power.
2 Turn the glass bulb cover in the back of the oven counterclockwise to remove.
3 Turn the bulb counterclockwise to remove it from the socket.
4 Insert the new bulb and turn it clockwise.
5 Insert the glass bulb cover and turn it clockwise.
6 Plug in the range or reconnect the power.
WARNING • Make sure that the oven and bulb are cool.
• Disconnect the electrical power to the range at the main fuse or circuit breaker panel. Failure to do so can result in severe personal injury, death, or electrical shock.

44 MAINTENANCE
Cleaning the ExteriorFront Manifold Panel and KnobsIt is best to clean the manifold panel after each use of the range. For cleaning, use a damp cloth and mild soapy water or a 50/50 solution of vinegar and water. For rinsing, use clean water and polish dry with a soft cloth.
CAUTION • Do not use abrasive cleansers, strong liquid cleaners, plastic scouring pads or oven cleaners on the manifold panel. Doing so will damage the finish.
• Do not try to bend the knobs by pulling them up or down, and do not hang a towel or other objects on them. This can damage the shaft.
• The control knobs may be removed for easy cleaning.
• To clean the knobs, make sure that they are in the Off position and pull them straight off the stems.
• To replace the knobs, make sure the knob has the Off position centered at the top, and slide the knob directly onto the stem.
NOTETo prevent scratching, do not use abrasive cleaners on any of these materials.
Painted and Decorative TrimFor general cleaning, use a cloth with hot soapy water. For more difficult soils and built-up grease, apply a liquid detergent directly onto the soil. Leave it on for 30 to 60 minutes. Rinse with a damp cloth and dry. Do not use abrasive cleaners.
Stainless Steel SurfacesTo avoid scratches, do not use steel wool pads.
1 Place a small amount of stainless steel appliance cleaner or polish on a damp cloth or paper towel.
2 Clean a small area, rubbing with the grain of the stainless steel if applicable.
3 Dry and buff with a clean, dry paper towel or soft cloth.
4 Repeat as necessary.
NOTE • Do not use a steel wool pad. it will scratch the surface.
• To clean the stainless steel surface, use warm sudsy water or a stainless steel cleaner or polish.
• Always wipe in the direction of the metal surface finish.
• To purchase stainless steel appliance cleaner or polish, or to locate a dealer near you, call our toll-free customer service number: 1-800-243-0000 (USA), 1-888-542-2623(CANADA) or visit our website at: www.lg.com
Oven Door • Use soapy water to thoroughly clean the oven door. Rinse well. Do not immerse the door in water.
• You may use a glass cleaner on the outside glass of the oven door. Do not spray water or glass cleaner on the door vents.
• Do not use oven cleaners, cleaning powders, or harsh abrasive cleaning materials on the outside of the oven door.
• Do not clean the oven door gasket. The oven door gasket is made of a woven material that is essential for a good seal. Care should be taken not to rub, damage, or remove this gasket.
CAUTIONDo not use harsh cleaners or harsh abrasive cleaning materials on the outside of the oven door. Doing so can cause damage.
Don’t hand clean oven door gasket
Do hand clean door

45MAINTENANCEEN
GLISH
Broiler Pan and Grid
• Do not store a soiled broiler pan or grid anywhere in the range.
• Do not clean the broiler pan or grid in a self-cleaning mode. (For Model : LDE4415 / LDE4413)
• Remove the grid from the pan. Carefully pour out the grease from the pan into a proper container.
• Wash and rinse the broiler pan and grid in hot water with a soap-filled or plastic scouring pad.
• If food has burned on, sprinkle the grid with cleaner while hot and cover with wet paper towels or a dishcloth. Soaking the pan will remove burned-on foods.
• Both the broiler pan and grid may be cleaned with a commercial oven cleaner or in the dishwasher.
Oven RacksRemove the oven racks before operating the self clean cycle. (For Model : LDE4415 / LDE4413)
1 Food spilled into the tracks could cause the racks to become stuck. Clean racks with a mild, abrasive cleaner.
2 Rinse with clean water and dry.
NOTEFor Model : LDE4415 / LDE4413If the racks are cleaned using the self clean cycle (not recommended), the color will turn slightly blue and the finish will become dull. After the self clean cycle is complete, and the oven has cooled, rub the sides of the racks with wax paper or a cloth containing a small amount of vegetable oil. This will make the racks glide more easily into the rack tracks.
Removing and Replacing the Lift-Off Oven Doors
CAUTION • Be careful when removing and lifting the door.
• Do not lift the door by the handle. The door is very heavy.
Upper OvenRemoving the Door
1 Fully open the door.
2 Lift up and rotate the hinge locks toward the hinge until they stop.
3 Close the door to 30 degrees (you will feel the door stop). The hinge locks will contact the oven frame.
about 30°
4 On both sides of the door, touch down on the release buttons on each hinge.
Push

46 MAINTENANCE
5 Lift the door up until it is clear of the hinges.
about 30°
Replacing the Door
1 Be sure both hinges are in a 30 degree position.
2 Slide the door back onto the hinges until you hear a solid click and the release buttons have engaged.
3 Fully open the door.
4 Push the hinge locks down onto the door frame.
5 Close the oven door.
Lower OvenRemoving the Door
1 Fully open the door.
2 Unlock the hinge locks, rotating them as far toward the open door frame as they will go.
Slot
Lock
Unlock
Hinge lock
3 Firmly grasp both sides of the door at the top.
4 Close the door to the removal position (approximately five degrees) which is halfway between the broil stop position and fully closed. If the position is correct, the hinge arms will move freely.
about 5°
5 Lift door up and out until the hinge arms are clear of the slots.

47MAINTENANCEEN
GLISH
Replacing the Door
1 Firmly grasp both sides of the door at the top.
2 With the door at the same angle as the removal position, seat the indentation of the hinge arms into the bottom edge of the hinge slots. The notch in the hinge arms must be fully seated into the bottom edge of the slots.
Hinge arm
Indentation
Bottom edge of slot
3 Open the door fully. If the door will not open fully, the indentation is not seated correctly in the bottom edge of the slots.
4 Lock the hinge locks, rotating them back toward the slots in the oven frame until they lock.
Hinge arm
Hinge lock
5 Close the oven door.
Door Care InstructionsMost oven doors contain glass that can break.
CAUTION • Do not close the oven door until all the oven racks are fully in place.
• Do not hit the glass with pots, pans, or any other object.
• Scratching, hitting, jarring, or stressing the glass may weaken its structure causing an increased risk of breakage at a later time.