20-gallon parts washer owner’s manual ... parts washer owner’s manual warning: read carefully...
TRANSCRIPT
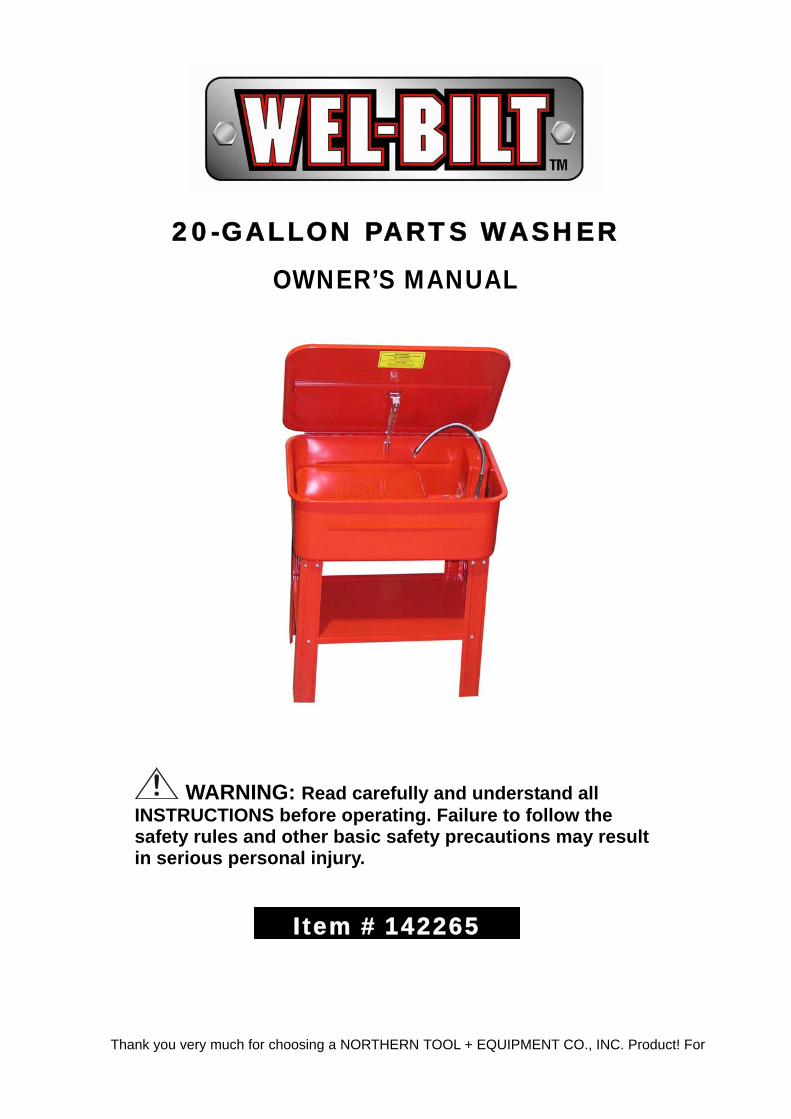
20-GALLON PARTS WASHER
OWNER’S MANUAL
WARNING: Read carefully and understand all INSTRUCTIONS before operating. Failure to follow the safety rules and other basic safety precautions may result in serious personal injury.
Item # 142265
Thank you very much for choosing a NORTHERN TOOL + EQUIPMENT CO., INC. Product! For

future reference, please complete the owner’s record below: Model: _______________ Purchase Date: _______________ Save the receipt, warranty and these instructions. It is important that you read the entire manual to become familiar with this product before you begin using it. This machine is designed for certain applications only. Northern Tool + Equipment cannot be responsible for issues arising from modification. We strongly recommend this machine is not modified and/or used for any application other than that for which it was designed. If you have any questions relative to a particular application, DO NOT use the machine until you have first contacted Northern Tool + Equipment to determine if it can or should be performed on the product. For technical questions please call 1-800-222-5381.
INTENDED USE This 20-Gallon Parts Washer is suitable for the rapid cleaning of small mechanical parts, motor parts, etc.
TECHNICAL SPECIFICATIONS & PACKING LIST Item Description
Maximum Pump Output 4 GPM (15L/min) Tank Capacity 20 Gallons(76 L) Solvent Capacity 12 Gallons(46 L)
GENERAL SAFETY RULES
WARNING: Read and understand all instructions. Failure to follow all instructions listed below may result in electric shock, fire and/or serious injury.
WARNING: The warnings, cautions, and instructions discussed in this instruction manual cannot cover all possible conditions or situations that could occur. It must be understood by the operator that common sense and caution are factors which cannot be built into this product, but must be supplied by the operator.
SAVE THESE INSTRUCTIONS
WHEN INSTALLING YOUR PARTS WASHER
1. Assemble the Parts Washer according to the instructions below. 2. Place it on firm, flat and level surface in a well-ventilated area, away from any open flames.
Page of 7 2

3. Fill with a non-flammable water-based degreaser or cleaning agent ONLY to just below the level of the parts shelf (approximately 12 gallons).
4. Follow the degreaser manufacturer’s instructions carefully.
WARNING: Do not fill the Parts Washer with flammable solvents such as kerosene or gasoline.
WHEN USING YOUR PARTS WASHER
1. Wear protective clothing, gloves and goggles. 2. Clean off any accidental skin exposure to the degreaser immediately. Follow the
manufacturer's instructions carefully. Seek medical attention if necessary. 3. Keep the work area tidy and mop up any accidental spills.
WARNING: Chlorinated solvents such as Methyl Chloride can chemically react with aluminum and may explode. Many tools and equipment parts contain aluminum. WHEN NOT IN USE 1. Switch off the pump and close the lid. 2. Disconnect the Parts Washer from the electrical supply before carrying out any maintenance
or cleaning.
WARNING: The pump of your Parts Washer may be damaged if you use solvents other than those listed above such as methyl ethyl ketone (MEK), perchloroethylene or trichloroethylene.
ELECTRICAL SAFETY
WARNING: Always check to ensure the power supply corresponds to the voltage on the rating plate. • Do not abuse the cord. Never carry a portable tool by its power cord, or yank the tool or
extension cord from the receptacle. Keep power cords and extension cords away from heat, oil, sharp edges or moving parts. Replace damaged cords immediately. Damaged cords may cause a fire and increase the risk of electric shock.
• Grounded tools must be plugged in to an outlet properly installed and grounded in accordance with all codes and ordinances. Never remove the grounding prong or modify the plug in any way. Do not use adapter plugs. Check with a qualified electrician if you are in doubt as to whether the outlet is properly grounded.
• Double insulated tools are equipped with a polarized plug (one blade is wider than the other). This plug will only fit in a polarized outlet one way. If the plug does not fit fully in the outlet, reverse the plug. If it still doesn’t fit, contact a qualified electrician to install a polarized outlet. Do not modify or alter the plug in any way.
• Avoid body contact with grounded surfaces such as pipes, radiators, ranges and refrigerators. There is an increased risk of electric shock if your body is grounded.
• When operating a power tool outside, use an outdoor extension cord marked “W-A” or “W.”
Page of 7 3

Page of 7 4
These cords are rated for outdoor use and reduce the risk of electric shock. • Extension Cord Use:
A. Replace damaged or worn cords immediately. B. Check the nameplate rating of your tool. Using an improper size or gauge of extension
cord may cause unsafe or inefficient operation of your tool. Be sure the extension cord is rated to allow sufficient current flow to the motor. For the proper wire gauge for your tool, see the chart.
CHART FOR MINIMUM WIRE SIZE OF EXTENSION CORD:
Nameplate AMPS CORD LENGTH 25’ 50’ 100’ 150’
0-6 18 AWG 16 AWG 16 AWG 14 AWG 6-10 18 AWG 16 AWG 14 AWG 12 AWG
10-12 16 AWG 16 AWG 14 AWG 12 AWG 12-16 14 AWG 12 AWG (NOT RECOMMENDED)
If in doubt, use larger cord.
Be sure to check the voltage requirements of the tool along with the incoming power source.
• Do not expose power tools to rain or wet conditions. Water entering a power tool will increase the risk of electric shock.
• Do not let your fingers touch the terminals of the plug when inserting or removing it from the outlet.
• Ground fault circuit interrupters. If the work area is not equipped with a permanently installed Ground Fault Circuit Interrupter outlet (GFCI), use a plug-in GFCI between the power tool or extension cord and the power receptacle.
ASSEMBLY
1. Remove the Parts Washer from the carton and inspect it for any visual damage. 2. Remove the parts inside the machine. 3. Place some clean cardboard on the floor and lay the machine on its lid (make sure you hold
cover closed). 4. Mount the legs on brackets with the M6X12 screws and the M6 nuts.
NOTE: DO NOT TIGHTEN. 5. Place the lower shelf between the legs with the flat surface up and attach the legs with the
M6X23 screws and the M6 nuts. 6. With the legs pressed tight against the lower shelf, tighten all the screws to the lower shelf. 7. Tighten all the screws from Step 4. 8. Stand the machine up, being careful to hold the lid closed. 9. Put the work shelf and basket into the machine. 10. Remove all Styrofoam packing from the pump and mount the pump assembly on to the slot
on the side of the machine. Push down firmly on the pump so that it seats itself on to the side wall of the tub. Place the filter screen in position.
11. Thread the flexible nozzle on to the elbow attachment on the pump housing and firmly screw it in to place.
12. Plug the machine into a standard 120 Volt 60Hz grounded outlet and fill it with the proper amount of fluid.
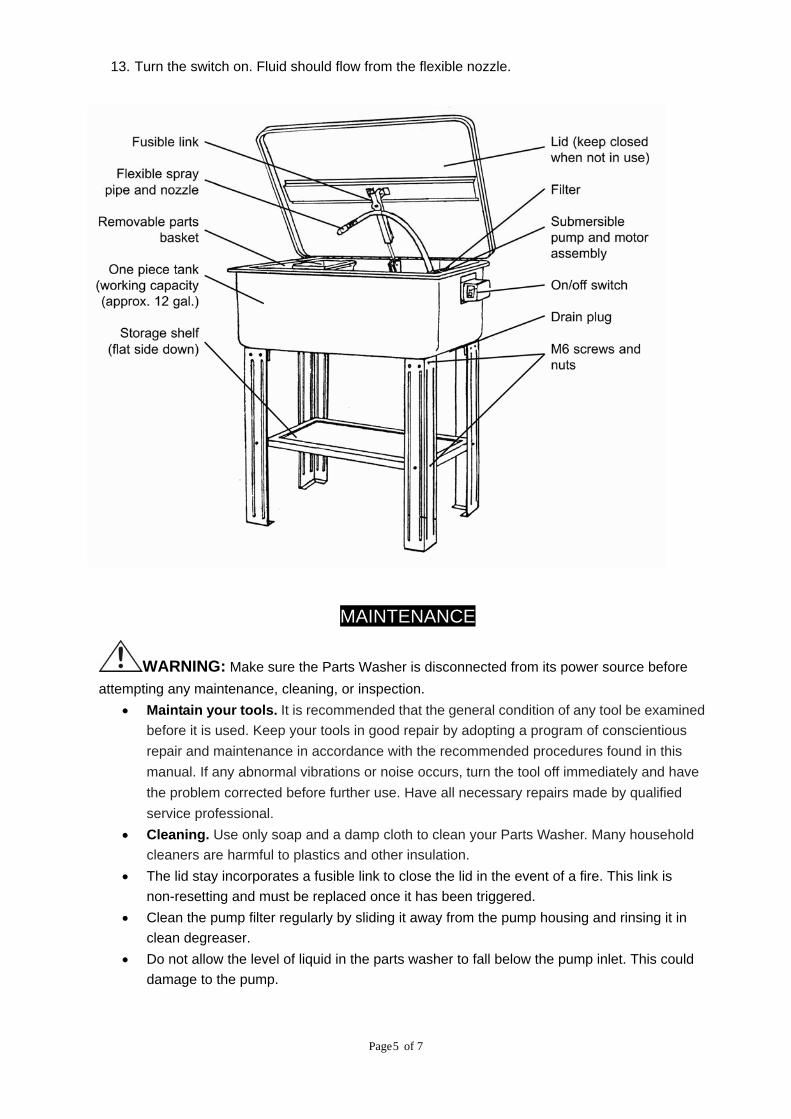
13. Turn the switch on. Fluid should flow from the flexible nozzle.
MAINTENANCE
WARNING: Make sure the Parts Washer is disconnected from its power source before attempting any maintenance, cleaning, or inspection.
• Maintain your tools. It is recommended that the general condition of any tool be examined before it is used. Keep your tools in good repair by adopting a program of conscientious repair and maintenance in accordance with the recommended procedures found in this manual. If any abnormal vibrations or noise occurs, turn the tool off immediately and have the problem corrected before further use. Have all necessary repairs made by qualified service professional.
• Cleaning. Use only soap and a damp cloth to clean your Parts Washer. Many household cleaners are harmful to plastics and other insulation.
• The lid stay incorporates a fusible link to close the lid in the event of a fire. This link is non-resetting and must be replaced once it has been triggered.
• Clean the pump filter regularly by sliding it away from the pump housing and rinsing it in clean degreaser.
• Do not allow the level of liquid in the parts washer to fall below the pump inlet. This could damage to the pump.
Page of 7 5

DIAGRAM & PARTS LIST
Part# Description Qty. Part# Description Qty.
01 Body 1 26 Elbow 1 04 Cover 1 27 Flexible Nozzle 1
06 Safety Lever 1 28 Pump 1
09 Safety Plate 1 29 Wire Holder 2 10 Pin 4 30 Hose 1
11 Spring Pin 4 31 Hose Clamp 2
12 Washer 2 32 Screw 1 13 O-ring 1 33 Switch Box 1
16 Spring Washer 1 34 Switch 1
17 Nut 1 35 Screw 2 18 Washer 1 36 Power Cord 1
19 Plug 1 37 Bolt 1
20 Shelf 1 39 Pump Housing Cover 1 21 Leg 4 40 Screen 1
22 Bolt 24 41 Cover Screen 1
23 Spring Washer 24 42 Work Shelf 1
Page of 7 6
24 Nut 24 44 Basket 1
25 Pump Housing 1 45 Screw 2
For replacement parts and technical questions, please call 1-800-222-5381.
WARRANTY One-Year Limited Warranty
WARNING Some dust created by power sanding, sawing, grinding, drilling, and other construction activities contains chemicals known to the State of California to cause cancer, birth defects or other reproductive harm. Some examples of these chemicals are: • lead from lead-based paints, • crystalline silica from bricks and cement and other masonry products, and • arsenic and chromium from chemically-treated lumber. Your risk from these exposures varies, depending on how often you do this type of work. To reduce your exposure to these chemicals: work in a well ventilated area, and work with approved safety equipment, such as those dust masks that are specially designed to filter out microscopic particles.
Distributed by
Northern Tool + Equipment Co., Inc. 2800 Southcross Drive West
P.O. Box 1499 Burnsville, MN 55337-0499 Made in China
Page of 7 7