streetrod gas pressure washer owner’s...
TRANSCRIPT
vers.04
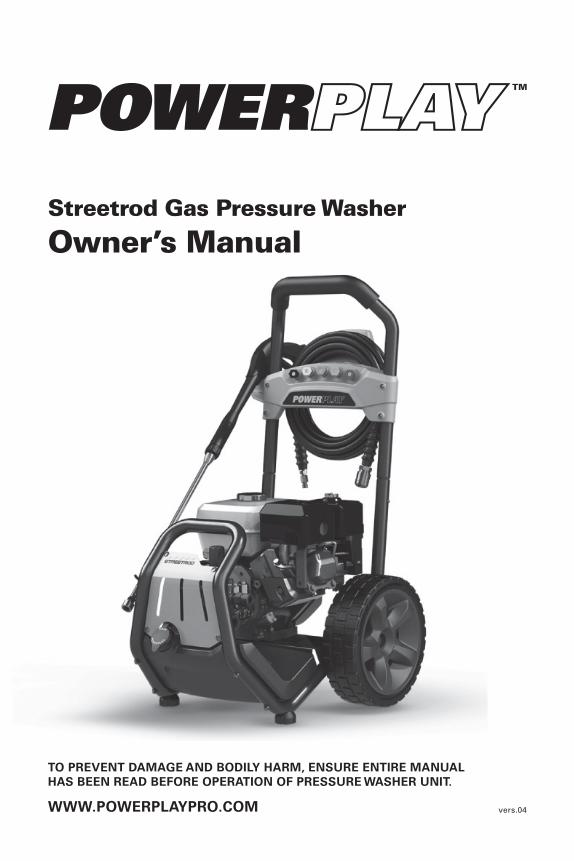
Streetrod Gas Pressure Washer
Owner’s Manual
WWW.POWERPLAYPRO.COM
TO PREVENT DAMAGE AND BODILY HARM, ENSURE ENTIRE MANUAL HAS BEEN READ BEFORE OPERATION OF PRESSURE WASHER UNIT.

Questions?
If you have questions or if there are missing parts, please call: 1-855-770-PLAY (7529) Or email: [email protected]

TABLE OF CONTENTS
Warning 1
Safety 2-3
Assembly and Pre-start Procedures 4 Assembly and Pre-Start Checklist Initial Start-up Procedures
Spray Tips - Spray Tip Applications 5
Soap Detergent Injector 6 Detergent Operations Using the Pressure Washer to Clean
Maintenance Guideline 7Recommended Engine OilEngine Oil ReplacementInspecting and Replacing the Spark Plug
Storage 8Damage PreventionLonger-term Storage
Limited Warranty 9-10 POWERPLAY™ Corporation Limited Warranty
Gas-powered Washer Components 11 Component Chart
Parts Guide 12-13 Troubleshooting 14 Troubleshooting Guide Product Information 15
MonTreAL offICeSales & Marketing117 Gun AvenuePointe-Claire, QCH9R 3X3
ToronTo offICeDistribution Centre6226 Danville Rd.Mississauga, ONL5T 2H7
CornWALL PLAnTManufacturing Facility805 Education Rd.Cornwall, ONK6H 6C7

WARNINGFailure to read and follow the Owner’s Manual and all operating
instructions can result in death, bodily injury, and/or property damage.
Warning
Running engines give off carbon monoxide an odourless, colourless, poison gas. Breathing carbon monoxide can cause headache, fatigue, dizziness, vomiting, confusion, seizures, nausea, fainting or death.
• Operate this product ONLY outdoors.• Keep exhaust gas from entering a confined area through windows, doors, ventilation intakes
or other openings.• DO NOT operate this product inside any building or enclosure, even if windows
and doors are open.• Use a respirator or mask whenever there is a chance that vapours may be inhaled.• Read all instructions with mask so you are certain the mask will provide the necessary
protection against inhaling harmful vapours.
Warning
Risk of eye injury. Spray can splash back or propel objects. Always wear indirect vented (chemical Splash) safety goggles, marked to comply with ANSI Z87.1 when using or in vicinity of this equipment. NEVER substitute safety glasses or dry-condition goggles for indirect vented safety goggles.
Warning
Lifting hazard. Single person lift could cause injury. Use assistance when moving or lifting. Use team lift.
Warning
This product contains lead and lead compounds, known to the State of California to cause birth defects or other reproductive harm. Wash your hands after handling this product.
We reserve the right to improve our products and make changes in specifications, designs and standard equipment without notice and without incurring obligations.

SAFETY
A pressure washer is a power tool that sprays water at high pressure to clean large, sturdy surfaces such as buildings, farm equipment and roads. Pressure washers may be used more often during a natural disaster clean -up; the risk of injury may be higher at that time. When using a pressure washer, always follow the safety instructions included in the Owner’s Manual.
risks
• The strong spray from a pressure washer can cause serious wounds that might first appear minor. Wounds that appear minor can cause a person to delay treatment, increasing risk for infection, disability or amputation.
• The fast, strong spray can throw objects that strike and injure others who are close by.• Using small, gasoline- powered engines can cause carbon monoxide poisoning.
Users should not use any equipment powered by gasoline engines inside buildings, homes or other partially enclosed spaces unless the gasoline engine can be placed outdoors and away from air intakes.
Precautions
• Never use a gasoline-powered washer in an enclosed space. • Never point a pressure washer at yourself or others. • Never attempt to push or move objects with spray from the washer.• Wear rubber-soled shoes with toe protection that provide insulation and protection when
using the pressure washer. • Never allow children to operate a pressure washer. Keep children at a safe distance
when an adult is using a pressure washer.• Never spray near power source.• Do not touch hot parts and avoid hot exhaust gases (hot parts can exceed 65.5 °C (150 °F)
and cause burns).
first aid
If someone is injured, contact a physician to determine the necessary type of treatment.
• Immediately clean all open wounds and cuts with soap and clean water.• Except for minor scratches, some cuts may need treatment to
prevent tetanus.
2 - English

recommended Types of eye Protection
• Always wear eye protection.• Before selecting appropriate eye protection for users at a job site,
assess the conditions and hazards and follow these recommendations:• At the very least, wear safety glasses with side protection. • Wear goggles when more protection is needed. • Consider using hybrid eye safety products with the comfort of glasses, the enclosure of
goggles, and better breathability.• Add a face shield over glasses or goggles for even greater protection.• Make sure that any helpers, other workers and bystanders are protected from direct pressure
strike or loose particles.• In the case of injury, please seek medical treatment as soon as possible.
recommended foot and Hand Protection
• Safety-toe, non-slip sole rubber boots are recommended for protection. • If you are applying solvents use appropriate hand protection. Make sure you immediately
remove any clothing saturated in solvents and wash skin thoroughly with soap and water. • Watch out for burns from hot water and back blasts from water or dirt particles.• Do not direct a high velocity stream of water on yourself or others
Do not Attempt to fuel the Tank While the engine is running
• Gasoline and gasoline vapours can ignite by coming into contact with hot components such as the muffler, engine, exhaust gases or from an electrical spark.
• Turn engine off and allow it to cool before adding fuel to the tank. Equip area of operation with a fire extinguisher certified to handle gasoline or fuel fires.
Storage
• Store the pressure washer in a well-ventilated area with the fuel tank empty when possible. Fuel should never be stored or placed near the pressure washer.
Prevent Pump Damage
• Do not run the pressure washer engine for more than 5 minutes without pressing the wand trigger or damage to the pump may result.
• Never let the machine run unless connected to the water supply and the water supply is on. Never run caustic fluids or acid through this machine.
SAFETY

ASSEMBLY AND START-up pROCEDuRES
Assembly and Pre-start
1. Remove the pressure washer from the shipping package and appropriately dispose of the shipping container.
2. Inspect machine for any shipping damage and report to point of purchase retailer immediately.
3. Install handle bar into the chassis, verify that the locking pins are secured.4. Install the hose holder onto the handle bar using the hardware supplied in the box.
The hose holder faces the front of the Pressure Washer.5. Remove the spray tips from the plastic bag and install in the hose holder.6. Locate the engine oil fill plug and fill the engine with oil. All units are shipped without engine
oil. Oil is provided in the box for initial start-up. This is not to be saved for the first oil change. Please refer to the Engine Owner’s Manual for assistance on type and quantity of oil required.
7. Install the wand to the gun. Push the wand into the gun and tighten by threading the black swivel connecter onto the female end of the wand.
8. Assemble the high-pressure hose at the pump. Your pressure washer may have a quick connect fitting or screw-on type fitting, depending on the model pump.
9. Select the pressure tip based on the your job requirement and connect to the wand.
WARNING! This pressure washer has been shipped from the factory without oil. Please refer to the Engine Owner’s Manual for correct checking, fill and specifications for engine oils.
Initial Start-up
1. Put on the recommended safety equipment.2. Place your pressure washer outside and fill with fuel and engine oil. Remember to use
fuel stabilizer if you do not plan on using your fuel completely within the next 30 days. It is recommended by POWERPLAY™ to use fuel stabilizer in every tank of fuel used.
3. Verify that the position of the exhaust will not cause any safety hazards and allow for enough space to pull the recoil avoiding risk of injury.
4. Attach the garden hose connection to the pump inlet. Ensure your hose is laid out properly to prevent any accidents, such as tripping. Turn on the water supply. Squeeze the trigger of the gun in order to prevent cavitation by purging any air, until you achieve a steady flow of water. Without a steady flow of water prior to starting the engine pump damage may occur which will not be covered under the manufacturer’s warranty.
5. Review your Engine Owner’s Manual to familiarize yourself with the engine controls.6. Set the engine stop switch to “run /on” or adjust the throttle to the position outlined
in the Engine Owner’s Manual.7. Set the choke as required. Cold conditions will most likely require full choke. Restarts or warm
conditions will only require 1/2 choke or no choke. (Certain engines come with automatic choke.)8. Pull the recoil gently until you feel compression, then pull the recoil in one brisk motion to start.9. Allow the engine to warm up and adjust the choke accordingly until it is not required to keep
the engine running anymore. If your engine will not run properly with the choke completely off, it may be low on fuel or it may need servicing. Please contact your nearest POWERPLAY™ service dealer immediately to prevent damage to the engine.
10. Point the gun at the object you intend to clean. Pull the trigger and wash the area you require. If the engine stops, go back to and repeat steps 5 through 9 and allow the unit to warm uplonger. Newer engines take a little longer to warm up due to emission control devices and break-in periods.

SpRAY TIpS
Your POWERPLAY™ pressure washer has multiple attachments. Pressure washers operate on pressure (PSI) and volume of water (GPM) that is supplied to the soiled area that requires cleaning. Depending on the job, you can select from different quick-change tips. Pressure tips range from 0°, 15°, 25°, 40° and low-pressure/high-volume soap. Each tip is intended for a different application. Please see the following for recommended uses to achieve the best performance for your pressure washer: • Low-pressure/high-volume soap tip (black) - used with the soap tank for injection of soap or
cleaner for pre-cleaning, wax application or high volume waterflow, where higher than garden hose pressure (55psi) is required, but will not damage delicate objects such as freshly painted or delicate surfaces.
• For delicate rinse (higher volume and lower pressure) the white 40° tip is recommended. This tip will be a good choice for the gentle cleaning of cars/trucks, boats, RVs, patio furniture, lawn equipment, etc.
• For general rinsing and washing, (medium volume and medium pressure) the 15° or 25° yellow or green tips are recommended. This is ideal for most all-purpose cleaning jobs, such as home siding, brick patios, wood decks, driveways, sidewalks, etc.
• For maximum cleaning, (maximum pressure, reduced flow) the 0° red tip is recommended. This is ideal for stubborn substances such as tar, wax, gum, grease, or reaching second-story surfaces, paint removal and oil stains. Please use caution when using this high-pressure tip. To test the high force of the 0° tip, it is recommended to start washing at a distance and gradually focus in on the object you intend to clean, reducing the possibility of causing damage.
Spray tip combinations may vary by model.
ANGLE COLOUR PRESSURE USAGE0° RED MAXIMUM HEAVY DUTY
15° YELLOW HIGH ROUGH SURFACE
25° GREEN MEDIUM VINYL AND WOOD
40° WHITE DELICATE VEHICLE
SOAP BLACK LOW WITH DETERGENT
Please note: Unit will only draw soap with black low pressure nozzle.

DETERGENT INJECTOR
Using water only can complete some cleaning jobs, but for most job requirements, a detergent is recommended in order to penetrate and remove the dirt more effectively. When using a pressure washer approved detergent, make sure the surface is dry. Wetting the surface first is not recommended. It will dilute the detergent and will reduce the cleaning effectiveness.Avoid hot surfaces or direct sunlight. This will minimize the chances of the detergent damaging the painted surface.
DO NOT let the detergent dry out or it may damage the painted surface. Allow the detergent to remain on the surface for a short time before rinsing with clean water under high pressure.
• This pressure washer is intended for use with qualified branded pressure detergents only.• Do not use powdered soaps, which can clog the injection system.• Follow the detergent manufacturer’s directions.• The siphon tubes come pre-assembled in the soap tank cap from POWERPLAY™.• Soap tanks will hold your liquid soap and work automatically with the low pressure
black spray tip.• When using a detergent, the wand must be fitted with the black tip detergent nozzle.• If the throttle lever is not in the fast position, the injection of the detergent may be decreased or
stopped completely. In this case move, the throttle lever to full / wide open position, to increase engine speed and pressure.
• When finished using the detergent, replace the low pressure black spray tip with a high-pressure tip, (white, green, red, or yellow).
Suggested Duty Cycle
A Duty Cycle is the time the pressure washer is in an active state.
Suggested Duty Cycle;50 seconds on (trigger pulled, under pressure)20 seconds off (trigger released, pump unloaded)
6 - English

MAINTENANCE GuIDELINE
Maintenance Items Each Use 25 hrs or Monthly 50 hrs 100 hrs 200 hrs Yearly
Check pump oil level H,B,P, RCheck pump oil quality (for discolouration or contamination)
H,B,P, R
Check for pump oil leaks - inspect oil seals, drain, plug, oil plug, sight glass
H,B,P, R
Check for water leaks under manifold, into crankcase
H,B,P, R
Plumbing H,B,P, RClean engine and check nuts and bolts H,B,P, R
Check and refill engine oil H,B,P, R
Change engine oil (initial change after 5 hours of use)
H,B,P, R
Change engine oil P, R H,B,R RClean spark plug R H, R B, RReplace spark plug H,B,RReplace air filter element H,B, R
Change pump oil(non-sealed pump model only)
** INITIAL
CHANGE**
Change pump seals **
Legend: H: HonDA B: Briggs & Stratton r: rATo **: Pump maintenance (all pumps) P: PoWerPLAY
* See Engine Owner’s Manual for recommended maintenance
Please note: Change oil every 25 hours if under heavy load.

STORAGE
Damage Prevention
If your pressure washer is subjected to freezing temperatures, damage could occur. This type of damage is not covered under warranty. To avoid possible damage, a small amount of antifreeze can be used. Place the unit on its side with the water inlet facing upwards. Pour 1/4 cup of antifreeze into the water inlet. Disconnect spark plug wire. Pull recoil starter several times to circulate the antifreeze in the pump system. Reconnect spark plug wire. It is also important to make sure the wand and all hoses are disconnected and drained of all water or they may burst. When taking the pressure washer out of storage, run water through the system until it runs clear.Long-term Storage
If you plan on storing your pressure washer for an extended period of time, the following steps should be followed.
• Add fuel stabilizer to the fuel tank to minimize the formation of fuel gum deposits during storage.
• Run the engine at least 5 minutes after adding stabilizer to allow it to enter the entire fuel system.
• Drain the engine oil from the engine as described in “Engine Oil Replacement” in the Owner’s Manual and immediately replace it to prevent a no oil start-up when the machine is used next.
• Pour approximately 5 mL (1 teaspoon) of engine oil through the spark plug hole and pull the recoil starter slowly until you feel increased pressure, which indicates that the piston is on its compression stroke and leave it in this position. This closes both the intake and exhaust valves to prevent the inside of the cylinder from rusting.
• Cover the pressure washer and store it in a clean, well-ventilated and dry place.
NOTE: If a fuel stabilizer is not used, all gasoline must be drained from the tank and carburetor to prevent gum deposits from forming on these parts and causing possible malfunction of the engine.
8 - English

POWERPLAY™ Corporation warrants that each product sold is free of defects in material and workmanship under normal use and service. Transportation charges on product submitted under this warranty must be assumed by the purchaser. This limited warranty becomes effective from the date of purchase. Please find below, a list of products with their corresponding warranties.
Time Periods:
PRODUCT CATEGORY CONSUMER WARRANTY COMMERCIAL WARRANTY ENGINE
POWERPLAY™ HOTROD™ 2-YEAR 3-MONTH
(90 DAYS) AS PER ENGINE MFG
POWERPLAY™ STREETROD™ 2-YEAR 3-MONTH
(90 DAYS) AS PER ENGINE MFG
POWERPLAY™ STREETFIGHTER™ 2-YEAR 3-MONTH
(90 DAYS) AS PER ENGINE MFG
POWERPLAY™ TERREX™ 2-YEAR 3-MONTH
(90 DAYS) AS PER ENGINE MFG
WArrAnTY QUALIfICATIon:
Prior to obtaining service on your pressure washer, you must, at your own expense, bring your POWERPLAY™ pressure washer and proof of purchase to any dealer in North America, during regular business hours, who is authorized to sell and/or service that particular product. To locate a dealer near you, please visit www.powerplaypro.com and select Contact Us for more information.
Each engine in your POWERPLAY™ pressure washer comes with a limited warranty from the engine manufacturer. If your pressure washer needs warranty work on the engine, please visit one of the POWERPLAY™ authorized repair centres. The repair centre will obtain replacement parts from the engine manufacturer. Lead times and parts availability depend on the engine manufacturer. POWERPLAY™ assumes no responsibility for late engine component deliveries.
Pump maintenance should be scheduled according to the POWERPLAY™ Owner’s Manual.
If you have a malfunction, please visit any one of the POWERPLAY™ authorized repair centres, along with your bill of sale.
Pump, chassis and accessories such as the gun, wand, hose and spray tips will not be covered under warranty if treated with abuse or negligence.
Please see below for a complete listing of exclusions:
POWERPLAY™ reserves the right to exclude the following from this limited warranty:
I. Any damage or deterioration resulting from the following:
• NeglectoftheperiodicmaintenanceasspecifiedintheproductOwner’sManual
• Improperrepairormaintenance
• OperatingmethodsotherthanthoseindicatedintheproductOwner’sManual
• Theuseofnon-genuineOEMpartsandaccessoriesotherthanthoseapprovedby POWERPLAY™ (other than recommended lubricants and fluids)
pOWERpLAY™ LIMITED WARRANTY

pOWERpLAY™ LIMITED WARRANTY
• Exposureoftheproducttosootandsmoke,chemicalagents,seawater,seabreeze, salt or other environmental phenomena.
• Fuelcontaminationordeterioration,neglect,unauthorizedalteration,misuse, incorporation or use of unsuitable attachments or parts.
• Normalwearandtear(normalfadingofpaintedsurfacesorothernatural deterioration).
2. Repairs required because of prolonged storage including damage caused by old or contaminated fuel in the fuel tank, fuel lines or carburetor, sticky valves or corrosion and rust of engine parts.
3. Please see the engine manufacturers limited warranty for engine warranted items and exclusions.
4. Instances when normal use has exhausted the life of a component.
The limited warranty set out above is further qualified by the restrictions on usage and related matters as set out in the Owner’s Manual. Any violation of the terms outlined in the Owner’s Manual shall render this limited warranty null and void and have no further effect.
POWERPLAY™ Corporation makes no further warranties or representations, express or implied, except those contained herein. No representative dealer is authorized to assume any other liability regarding the pressure washer.
The duration of the implied limited warranty granted under any provincial law, including warranties of merchantability and fitness for particular purposes are limited in duration to the express duration provided herein.
POWERPLAY™ Corporation reserves the right to inspect the claimed defective part or parts to determine if the defect or malfunction is covered by this limited warranty. Within 60 days after receipt of the product, POWERPLAY ™ will repair or replace the defective product free-of-charge (excluding delivery costs for transport of the pressure washer or replacement parts) if the warranty is deemed applicable.
POWERPLAY™ shall, in no event, be liable for direct, indirect, special or consequential damages. Should your pressure washer fail to operate under the terms of this limited warranty, please contact the POWERPLAY™ Corporation.
MonTreAL offICeSales & Marketing117 Gun AvenuePointe-Claire, QCH9R 3X3
ToronTo offICeDistribution Centre6226 Danville Rd.Mississauga, ONL5T 2H7
CornWALL PLAnTManufacturing Facility805 Education Rd.Cornwall, ONK6H 6C7
10 - English

GAS-pOWERED WASHER COMpONENTS
Refer to Engine Owner’s Manual for Engine Components
ITEM 21HANDLE TUBE SUBASSEMBLY
ITEM 20SOAP TANK SUBASSEMBLY
21
22
24
23
2
25
11
3
9
5
14
16
12
19
18
10
136
7
4
26
17
15
8
1
20
19
30
27
28
26
29
32
31
33
32
34
35
Gun Holder
Hose Storage
Spray Storage
Detergent Tank Rubber Vibration
Absorber
Engine

12 - English
pARTS GuIDE FOR STREETROD™

**You can buy sub-assemblies 20 and 21, or buy the parts separately.
Parts can be changed without notice.
pARTS GuIDE FOR STREETROD™

14 - English
PROBLEM CAUSE CORRECTION
Engine will not start or stops while operating
1. Low-oil shutdown (if equipped) 2. Engine switch not in “ON” position 3. Pressure built up in the hose
1. Fill engine with oil 2. Turn switch “ON” 3. Squeeze trigger while starting
Engine is overloaded 1. Nozzle partially blocked 2. Excessive pressure
1. Clean nozzle 2. Adjust unleader cartridge if adjustable
Pressure increases when gun is closed
1. Bypass valve is blocked 1. Clean the bypass valve
Engine is running but pump won’t build maximum pressure or has irregular pressure
1. Water supply faucet closed 2. Unit has been stored in freezing temperatures 3. Inadequate water supply 4. Water inlet screen clogged 5. Kink in garden hose 6. Wand tip worn or damaged 7. Air in pump 8. Engine speed not set to maximum position 9. Suction or discharge valves clogged or worn out 10. Bypass valve not operating effectively
1. Open water supply faucet 2. Thaw out unit completely including hose, gun and wand 3. Provide a minimum of 4 GPM at 20 PSI 4. Clean screen 5. Straighten garden hose 6. Replace wand 7. Let it run with gun open with wand removed until steady stream of water is released (engine off) 8. Set throttle to maximum position 9. Clean the suction or discharge valves 10. Clean the bypass valve
No intake of chemicals 1. Injection tube not securely inserted into unit 2. Tube cracked, split or crimped 3. Wrong nozzle (must use black soap nozzle) 4. Injection tube strainer clogged 5. Nozzle blocked 6. Dried chemicals injector 7. No chemicals in detergent tank
1. Push firmly into injector fitting 2. Replace tube 3. Switch to low-pressure black nozzle 4. Clean strainer 5. Clean nozzle 6. Dissolve by running warm water 7. Add chemicals
Trigger will not move 1. Gun safety lock engaged 1. Release safety lock
Water in crankcase 1. High humidity 2. Worn seals
1. Change oil more frequently 2. Change the oil seals
Noisy operation 1. Worn bearings 2. Air mixed with water
1. Change the bearing 2. Check inlet lines for restrictions and/or proper sizing
Rough/pulsating operating with pressure drop
1. Inlet restriction 2. Air mixed with water
1. Check system for stoppages, air leaks, correctly sized inlet, plumbing to pump 2. Check inlet lines for restrictions and/or proper sizing
High crankcase temperatures
1. Wrong grade of oil 2. Improper amount of oil in engine 3. Oil has lost all lubricity and cooling ability
1. Use 10w30 non detergent oil as per engine manufacturer’s recommendation 2. Adjust oil level to proper amount 3. Change engine oil as per maintenance schedule
TROuBLESHOOTING GuIDE

pRODuCT INFORMATION
Thank you for purchasing from the POWERPLAY™ Corporation. You have selected the POWERPLAY™ series Pressure Washer. We ask that you fill out the following information to ensure warranty support. Being the owner of a POWERPLAY™ Product you have access to our nationwide dealer network for service, support and to purchase available items for purchase, such as accessories and detergents.
Models: H/B/P/R*
Information can be found on the label on the motor plate mount.
Chassis Model Number:
Chassis Revision Number:
Chassis Serial Number:
Engine Make:
Engine Model:
Engine Serial Number:
Date of Purchase:
Point of Purchase:
City:
Province:
Store:
Contact Number:
The Owner’s Manual will assist you in the start-up of your new pressure washer. Please find enclosed the POWERPLAY™ operation and maintenance instructions, service information, troubleshooting, warranty and contact information.For further support please feel free to contact the POWERPLAY™ Corporation or our nationwide service network found at www.powerplaypro.com.
Legend -*H = HONDA B = BRIGGS & STRATTON P = POWERPLAYR = RATO