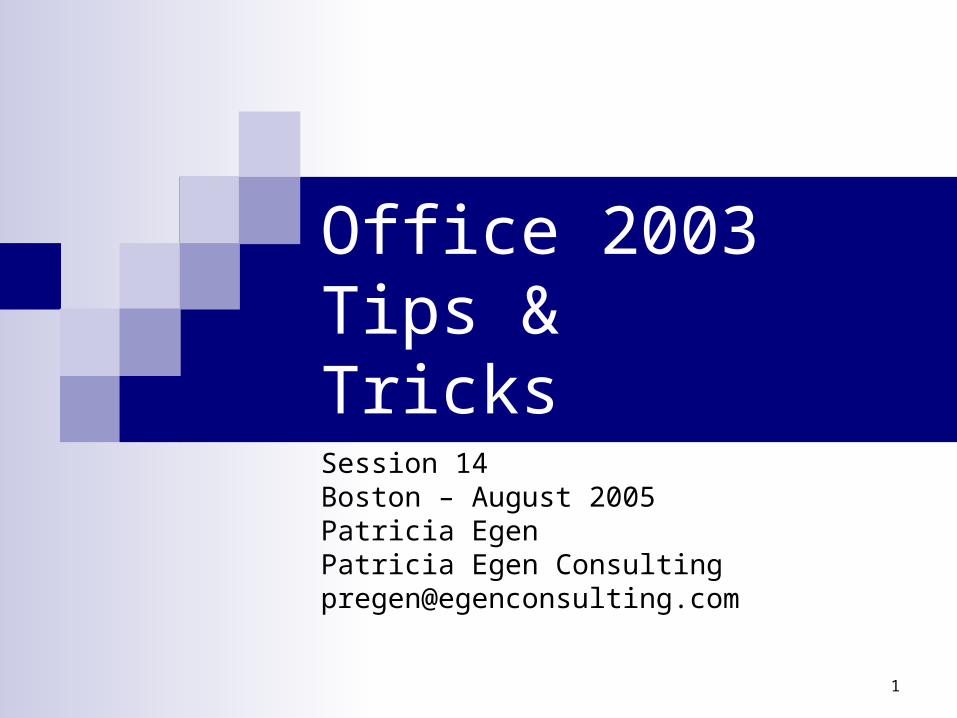
1 office 2003 tips & tricks session 14 boston – august 2005 patricia egen patricia egen...
Post on 22-Dec-2015
216 views
TRANSCRIPT
1
Office 2003 Tips & Tricks
Session 14Boston – August 2005Patricia EgenPatricia Egen [email protected]
2
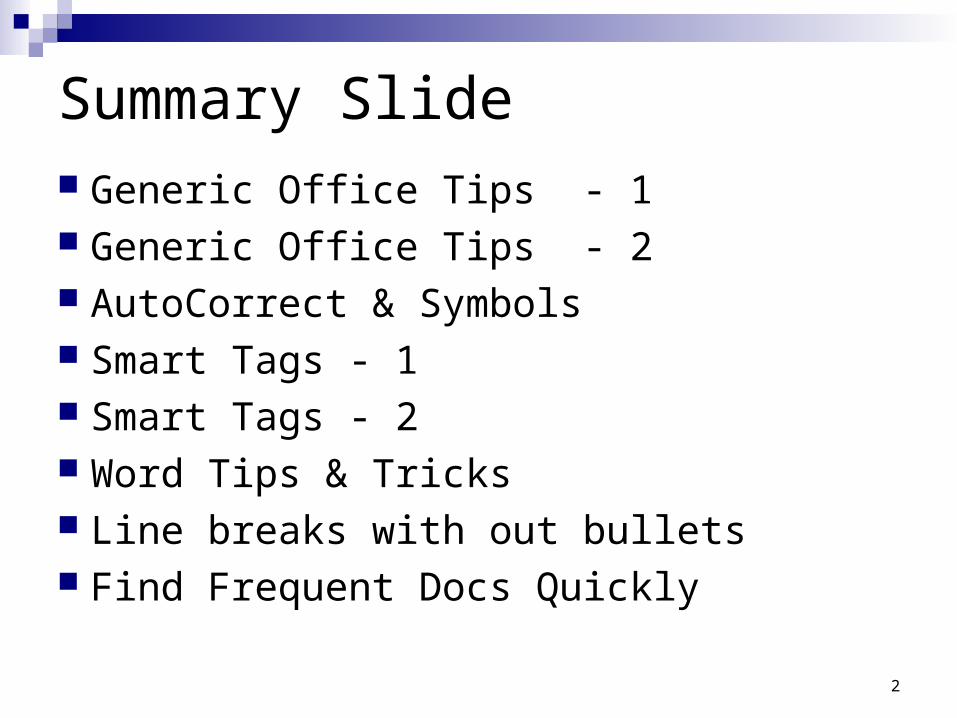
Summary Slide Generic Office Tips - 1 Generic Office Tips - 2 AutoCorrect & Symbols Smart Tags - 1 Smart Tags - 2 Word Tips & Tricks Line breaks with out bullets Find Frequent Docs Quickly
3
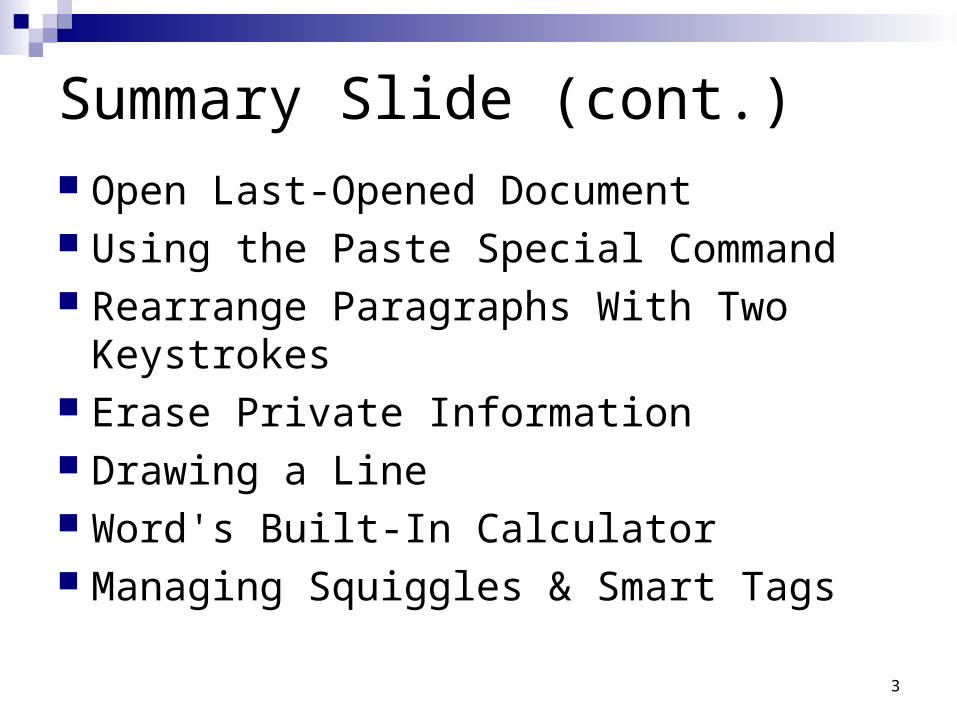
Summary Slide (cont.) Open Last-Opened Document Using the Paste Special Command Rearrange Paragraphs With Two
Keystrokes Erase Private Information Drawing a Line Word's Built-In Calculator Managing Squiggles & Smart Tags
4
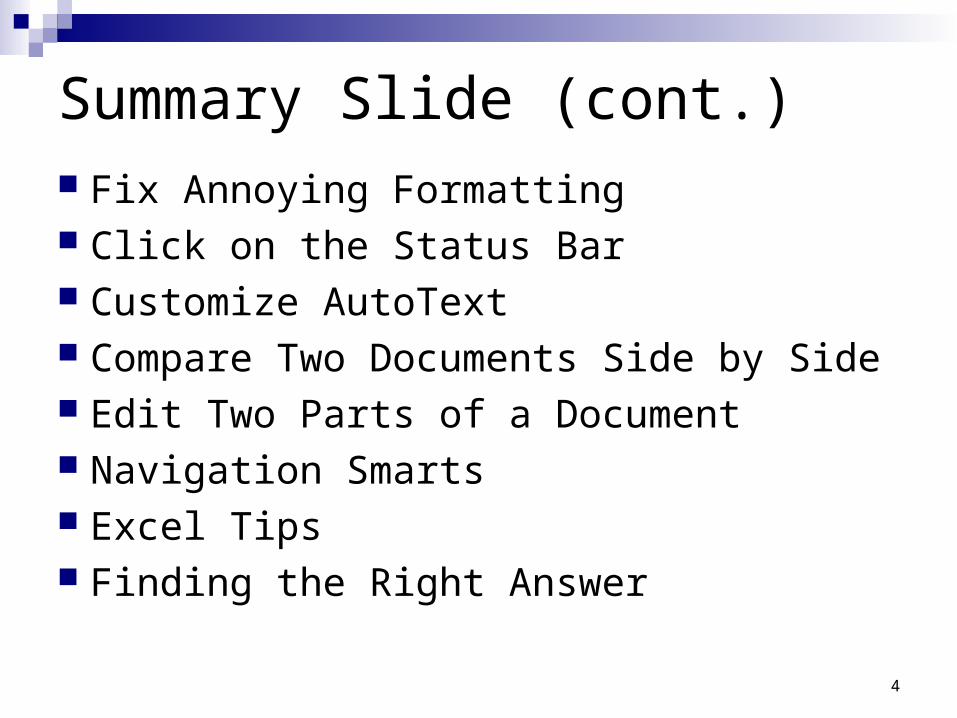
Summary Slide (cont.) Fix Annoying Formatting Click on the Status Bar Customize AutoText Compare Two Documents Side by Side Edit Two Parts of a Document Navigation Smarts Excel Tips Finding the Right Answer
5
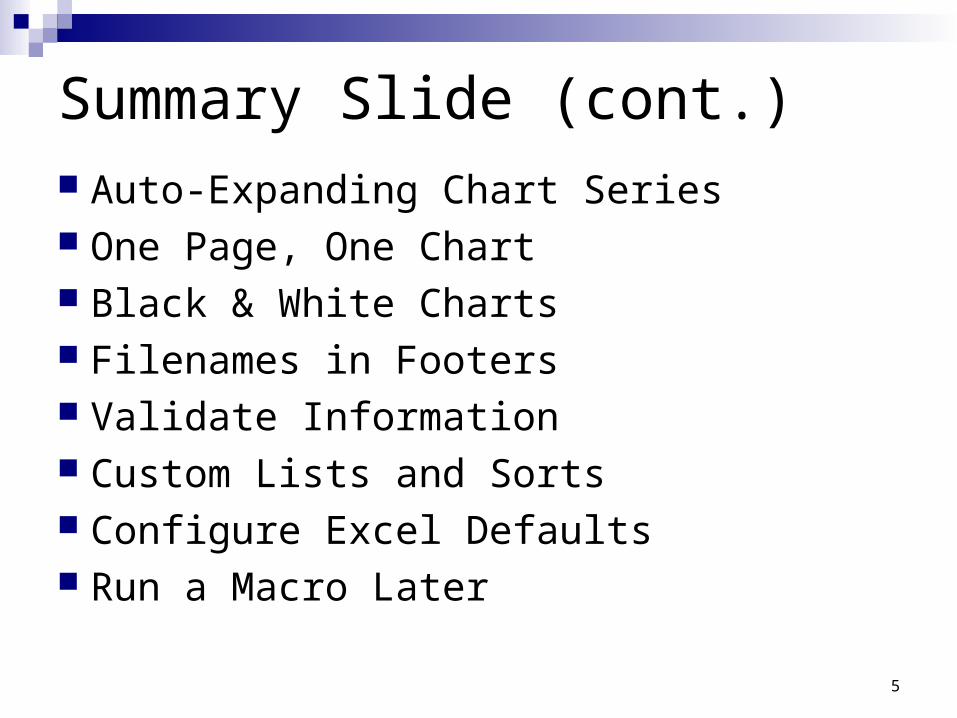
Summary Slide (cont.) Auto-Expanding Chart Series One Page, One Chart Black & White Charts Filenames in Footers Validate Information Custom Lists and Sorts Configure Excel Defaults Run a Macro Later
6
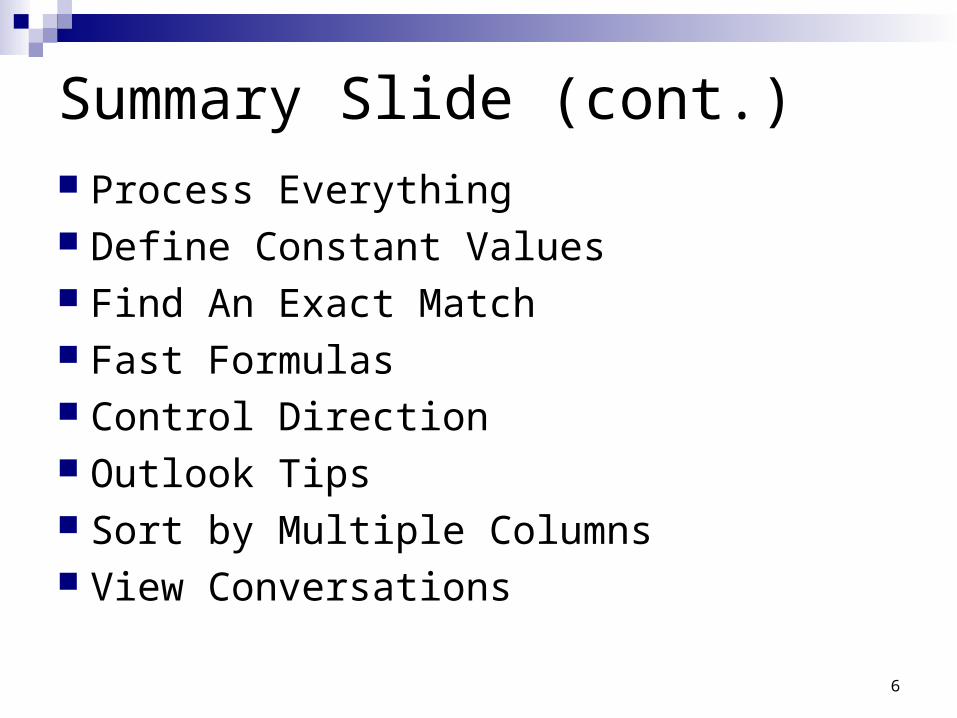
Summary Slide (cont.) Process Everything Define Constant Values Find An Exact Match Fast Formulas Control Direction Outlook Tips Sort by Multiple Columns View Conversations
7
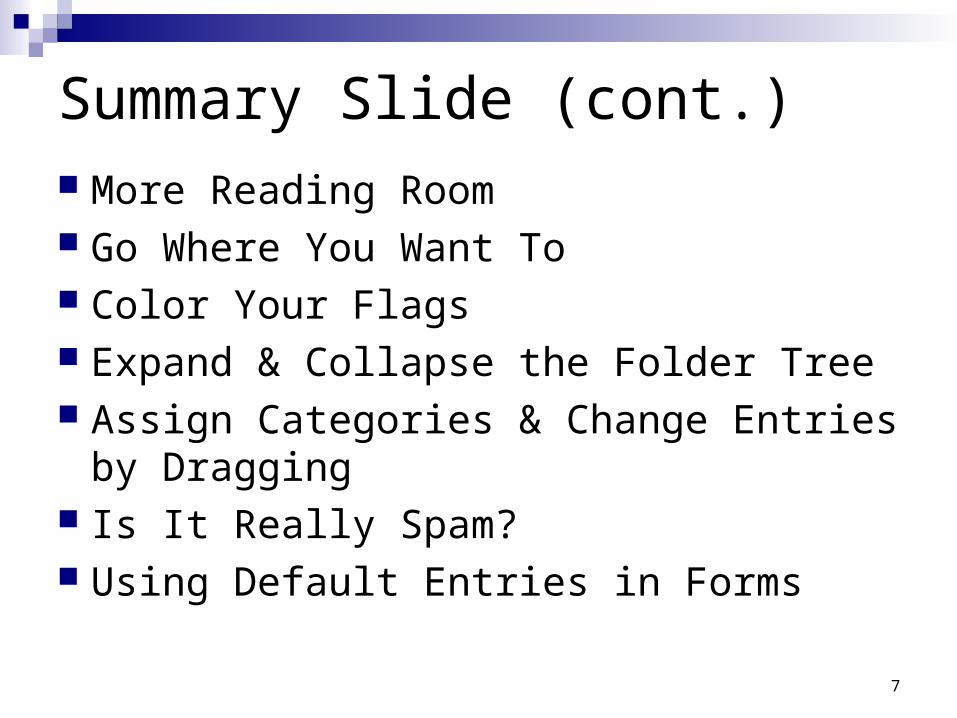
Summary Slide (cont.) More Reading Room Go Where You Want To Color Your Flags Expand & Collapse the Folder Tree Assign Categories & Change Entries by
Dragging Is It Really Spam? Using Default Entries in Forms
8
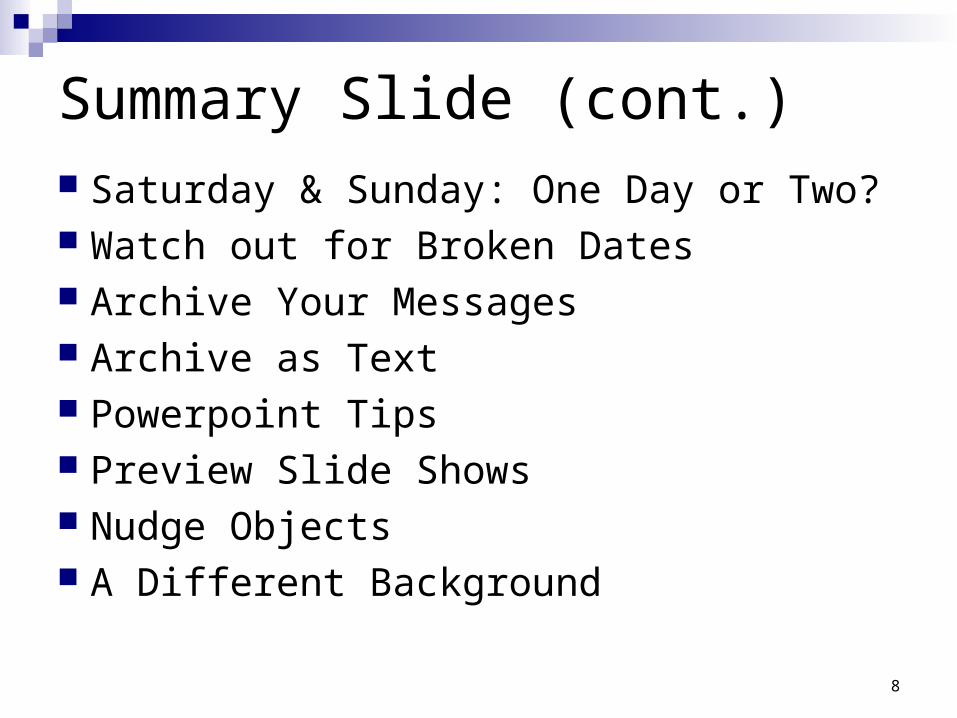
Summary Slide (cont.) Saturday & Sunday: One Day or Two? Watch out for Broken Dates Archive Your Messages Archive as Text Powerpoint Tips Preview Slide Shows Nudge Objects A Different Background
9
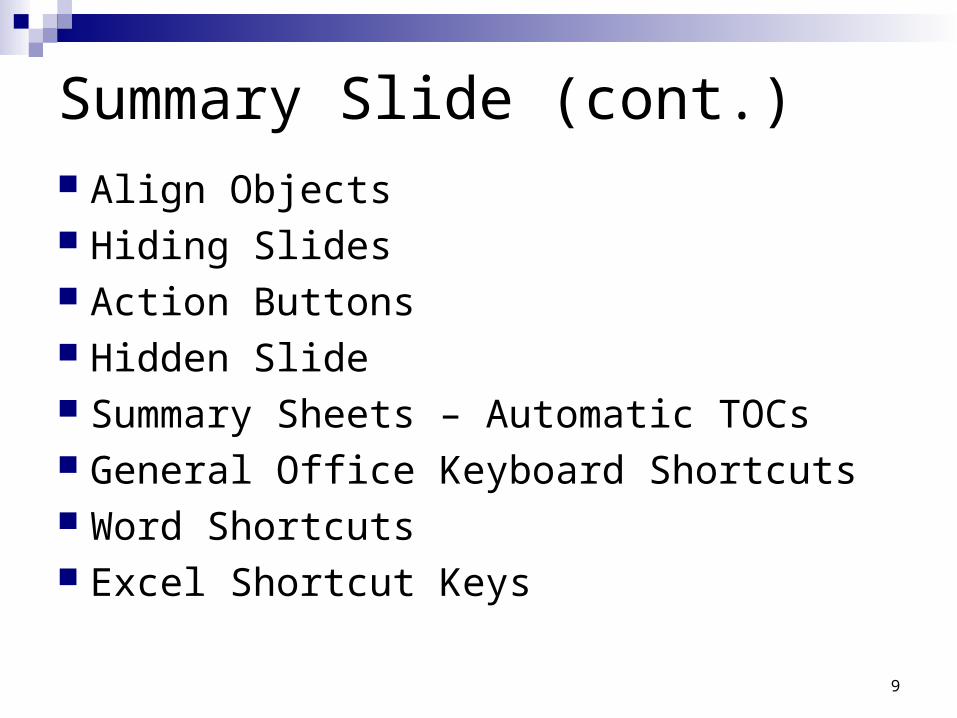
Summary Slide (cont.) Align Objects Hiding Slides Action Buttons Hidden Slide Summary Sheets – Automatic TOCs General Office Keyboard Shortcuts Word Shortcuts Excel Shortcut Keys

10
Summary Slide (cont.) Outlook Shortcut Keys Powerpoint Shortcut Keys
11
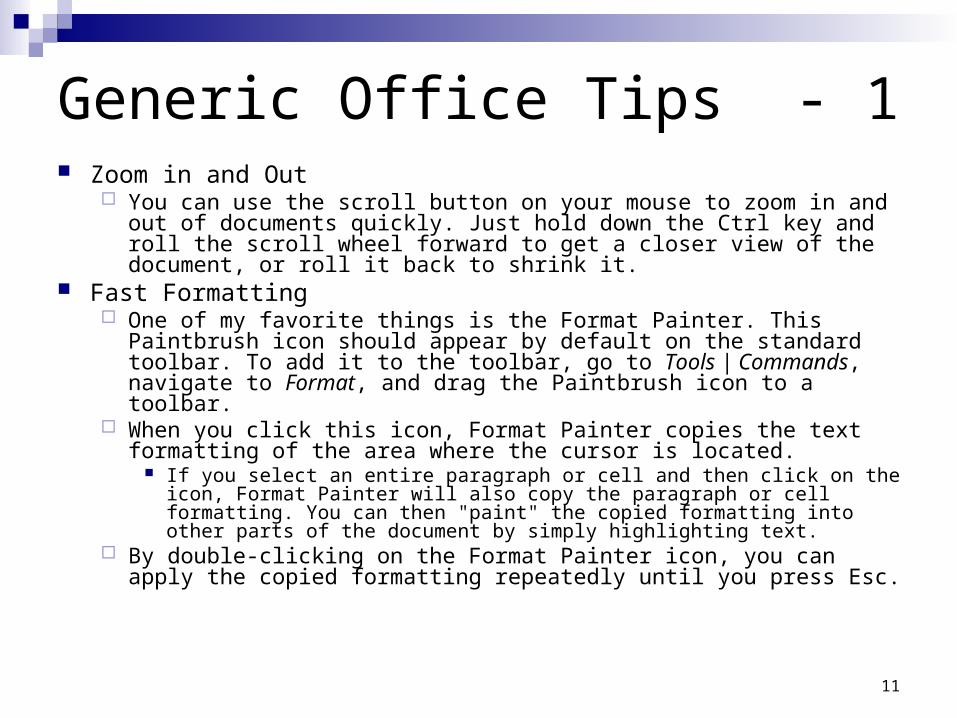
Generic Office Tips - 1 Zoom in and Out
You can use the scroll button on your mouse to zoom in and out of documents quickly. Just hold down the Ctrl key and roll the scroll wheel forward to get a closer view of the document, or roll it back to shrink it.
Fast Formatting One of my favorite things is the Format Painter. This Paintbrush icon
should appear by default on the standard toolbar. To add it to the toolbar, go to Tools | Commands, navigate to Format, and drag the Paintbrush icon to a toolbar.
When you click this icon, Format Painter copies the text formatting of the area where the cursor is located.
If you select an entire paragraph or cell and then click on the icon, Format Painter will also copy the paragraph or cell formatting. You can then "paint" the copied formatting into other parts of the document by simply highlighting text.
By double-clicking on the Format Painter icon, you can apply the copied formatting repeatedly until you press Esc.
12
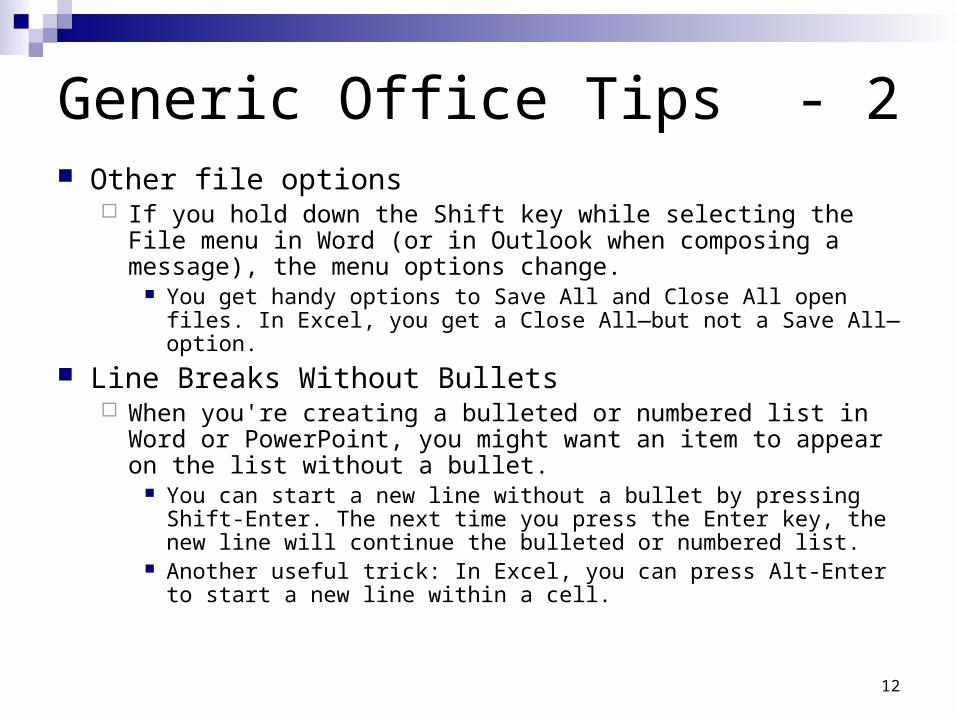
Generic Office Tips - 2 Other file options
If you hold down the Shift key while selecting the File menu in Word (or in Outlook when composing a message), the menu options change.
You get handy options to Save All and Close All open files. In Excel, you get a Close All—but not a Save All—option.
Line Breaks Without Bullets When you're creating a bulleted or numbered list in Word or
PowerPoint, you might want an item to appear on the list without a bullet.
You can start a new line without a bullet by pressing Shift-Enter. The next time you press the Enter key, the new line will continue the bulleted or numbered list.
Another useful trick: In Excel, you can press Alt-Enter to start a new line within a cell.
13
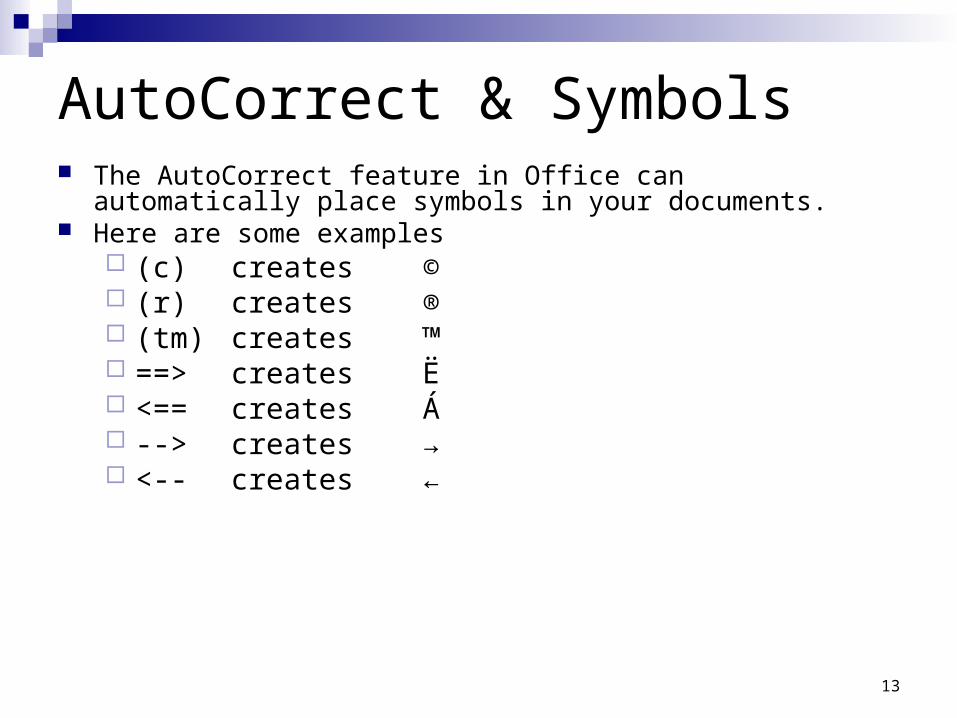
AutoCorrect & Symbols The AutoCorrect feature in Office can automatically place symbols
in your documents. Here are some examples
(c) creates © (r) creates ® (tm) creates ™ ==> creates Ë <== creates Á --> creates → <-- creates ←
14
Smart Tags - 1 Smart Tags, introduced in Microsoft Office XP, are small XML-based icons
that dynamically appear above or below data when an action is possible. Some Smart Tags are specific to an application, like Stock Symbol Smart Tags
in Excel, or to a specific type of data, like a name or address in Word or Outlook. The most universal is the Paste Options Smart Tag, which appears whenever
data is pasted into any Office application. To enable Smart Tags, select AutoCorrect Options in the Tools menu in any
Office application and click on the Smart Tags tab. Make sure the Label text with smart tags box is checked. You will find numerous recognizers such as address, financial symbol, person
name, and others, as well as a choice to remove Smart Tags altogether. NOTE - these choices will affect all Office applications where Smart Tags are an
option. Paste options
After pasting data in any Office application, clicking on the Smart Tag (which looks like a clipboard) will open up a menu with numerous formatting choices, including Match Destination Formatting (which will format the data being pasted in the same way as the rest of the document) and Keep Source Formatting (which will keep the text being pasted in the same format it had in the source document).
15
Smart Tags - 2 Address Smart Tags
Certain Smart Tags can perform handy actions. For example, if you type the name of one of your Outlook contacts into a Word
document, a Smart Tag will provide options to send e-mail, open the contact information (if it exists), insert the person's address, or schedule a meeting. Smart Tags associated with an address include options to add the address to your contact list and to display either a map or driving directions (which automatically brings you to http://mappoint.msn.com).
Excel error-checking Error-checking Smart Tags in Excel appear when a cell entry violates a set of
rules for a function or formula. The choices offered help users spot possible errors in calculations and enable
them to correct the errors or change the error-checking options. Stock symbol
The Stock Symbol Smart Tag in Excel recognizes stock symbols and lets users get information from MSN MoneyCentral.
Other Smart Tags There is an API for developers to build custom Smart Tags. Others are available on the Web. Find the ones currently available by clicking on
More Smart Tags in the Smart Tags dialog box.
16
Word Tips & Tricks

17
Line breaks without bullets Ever need a blank line between bullets?
Fix this by pressing Shift-Enter. The next time you press the Enter key, the
new line will continue the bulleted or numbered list.
Another useful trick: In Excel, you can press Alt-Enter to start a new line within a cell.

18
Find Frequent Docs Quickly Keep frequently used documents readily
available on Word's menu bar so you don't have to use the File menu and search through files and folders to find them. Do this by adding a Work menu to Word's menu
bar. Go to View | Toolbars | Customize, choose the
Commands tab, and select Built-in Menus from the list of categories.
Choose Work from the list of commands and drag it to where you want it on the top-line menu.
From your new menu, choose Add to work menu to attach a filename to the menu.
To remove a filename, press Ctrl-Alt-Minus and click on the item you want to remove.
19
Open Last-Opened Document You can create an icon on your desktop that will launch
Word and automatically open the document you last opened. Find Winword.exe in Windows Explorer (for Office 2003, this is
typically in C:\Program Files\Microsoft Office\OFFICE11) or find it with the Search item on the Start menu
Then right-click on the file icon and drag it to your desktop, and then select Create Shortcuts Here.
Right-click on the new shortcut icon, choose Properties, and go to the Shortcut tab.
In the Target field, after the existing file path, add a space and then /mFile1.
You can also assign a shortcut key if you want to launch the file with a keystroke combination.
When you're done, click on Apply. In the General tab, give the shortcut a descriptive name and click on OK.
20
Using the Paste Special Command
When you copy text from the Web or another document into a Word file, Word will reproduce the typeface, color, and font size displayed in the original page. If you want the pasted text to match the
formatting in the destination document, use Edit | Paste Special, and choose Unformatted Text.
21
Rearrange Paragraphs With Two Keystrokes Do you need to swap the second and third
paragraphs in the document you're working on? Don't waste time dragging text around within
your document using the mouse. Just click on the paragraph you'd like to move, hold
down Shift-Alt, and move the paragraph up or down using the arrow keys.
Each press of the arrow key causes the selected paragraph to jump over one adjacent paragraph.

22
Erase Private Information Word documents contain hidden information that can provide clues
to your identity and the identity of people to whom you e-mailed a file using Outlook.
Word 97 retains logs of the last ten people who revised your document, often with easily extractable e-mail addresses.
Unrevised versions of your text may also be hidden in your files. Microsoft has posted a Remove Hidden Data tool on its Web site,
but this is cumbersome to use and doesn't remove all identity information.
Before making a Word file public, you can thoroughly clean it by opening it in WordPad (located in Start | All Programs | Accessories) and saving the file in Rich Text Format. (Word can save to RTF but doesn't discard all the hidden information.)
After you've saved the file, you can change its file extension from .rtf to .doc.
23
Drawing a Line You can create a line across the page of
your Word or Outlook document with just a few keystrokes.
Type three consecutive hyphens and press Enter to get a normal line.
Type three underscores and Enter, and you'll get a bold line.
And if you type three equal signs and press Enter, you'll get a double line.
24
Word's Built-In Calculator Did you know you there’s a calculator in Word?
Go to View | Toolbars | Customize and choose the Commands tab.
In the list of categories, go to Tools, select Tools Calculate in the list of commands, and drag it to a toolbar or drop-down menu.
After you drop the command on the toolbar or menu, immediately right-click on the command, choose Change Button Image from the pop-up menu, and choose the calculator icon.
You can use the same pop-up menu to specify whether to display text, an icon, or both in the toolbar.
Now, type a simple calculation (try 2 + 2) in a Word document, highlight it, and click on the new icon or menu item.
To replace the calculation with the result, just press Ctrl-V. Before you press Ctrl-V, note that the result appears in the status line at the bottom of the window.
25
Managing Squiggles & Smart Tags Some of the features that are supposed to help you can just be
downright annoying. Take those squiggly red and green underlines Word puts under
words and sentences. Meant to point out spelling and grammatical errors, these are often
wrong or inappropriate (and really bug me!). To turn off the squiggly lines, choose Options from the Tools menu,
select the Spelling & Grammar tab, then uncheck Check spelling as you type and Check grammar as you type.
Similarly, the Smart Tags that appear under dates, telephone numbers, pasted text, and so on can be distracting.
You can choose AutoCorrect Options from the Tools menu, then select the Smart Tags tab to turn off individual features or all Smart Tag displays.
26
Fix Annoying Formatting Ever try to fix formatting that refuses to change? You can start with a clean
slate by removing all formatting from the selection—select the block of text and press Ctrl-Shift-N.
Alternatively, you can use Word's Reveal Formatting task pane to modify the formatting. In Word 2003, just hit Shift-F1; in Word 2002, select Reveal Formatting from the
Format menu. When you click on an underlined link, an options dialog will display settings
that you can modify. By checking the Distinguish style source option, you can view whether formatting
was applied directly or via a style. You can also see which styles are applied to multiple paragraphs. Choose
either Normal or Outline under the View menu. Then select Options from the Tools menu, go to the View tab, and enter a
value of 0.5 inches or more next to the field labeled Style area width. A panel at the left edge of the window will display the styles associated with
each paragraph.
27
Click on the Status Bar Unless you've turned the status bar off in Tools | Options
(under the View tab), it will appear at the foot of Word windows. This displays information such as the current page and line. You can double-click on the Page and Ln indicators to bring up
the Go To menu. Other status menu items are toggles:
Double-click on REC to access macro recording, TRK to start tracking changes, EXT to extend the selection, or OVR to switch the typing mode from insert to overwrite.
You can also right-click on some of these to bring up options menus.
28
Customize AutoText Ever notice that Word completes certain
phrases, such as "Best Wishes," before you've finished typing. Annoying, isn’t it.
You can customize this list so that Word completes only the phrases you define. Select AutoCorrect Options from the Tools
menu, then go to the AutoText tab. Delete any items you don't want to keep, then
add names and phrases that you type often, such as your name, company, or address.
29
Compare Two Documents Side by Side
New to 2003 you can compare documents side by side. Open two documents. Then, from the Window menu of one of them, select the
Compare Side By Side command. If you have only two documents open, the command will
automatically choose to compare them. If you have three or more documents open, you'll have to select
which document to compare with the current file. A floating toolbar with two buttons will open. If the button on the left is selected, Word will scroll both
documents at the same time. Press the button on the right side of the toolbar to return to
where the cursor was located when you started comparing.
30
Edit Two Parts of a Document Here’s a cool trick to edit two parts of a
document at the same time A wonderful but underused feature is Word's ability to
display two different parts of a document at the same time.
To do this, you either select the Split option from the Window menu to display a dividing line in the current window.
Or, drag down the tiny divider tool at the top of the right scroll bar.
Navigate to different parts of the document in each pane and use F6 to jump between them.
31
Navigation Smarts Many Word users know that the up-and-down
double arrows at the foot of the vertical scroll bar will page up and down through an open document.
I didn’t know, though, that the little dot icon between those arrows, called the Select Browse Object button, lets you change the function of the double-arrow buttons and of the Ctrl-PgUp and Ctrl-PgDn key combinations.
You can, for example, choose to browse by heading, so the buttons will automatically jump you up or down to the next heading.
Other choices let you browse by footnote, endnote, comment, graphic, or table.

32
Excel Tips
33
Finding the Right Answer When writing formulas, make sure the results will be
calculated as you intended. Excel adheres to the standard order of precedence for
calculations and calculates percentages, exponents, multiplication, and division in this order before calculating addition and subtraction.
For example, =7+5*3 results in an answer of 22, not 36. To force a calculation to be completed before other calculations, place it inside parentheses: =(7+5)*3 will result in 36.
If you're unsure how Excel is evaluating a formula, click on the cell and choose Tools | Formula Auditing | Evaluate Formula.
Click on Evaluate to watch as each part of the formula is successively calculated.
34
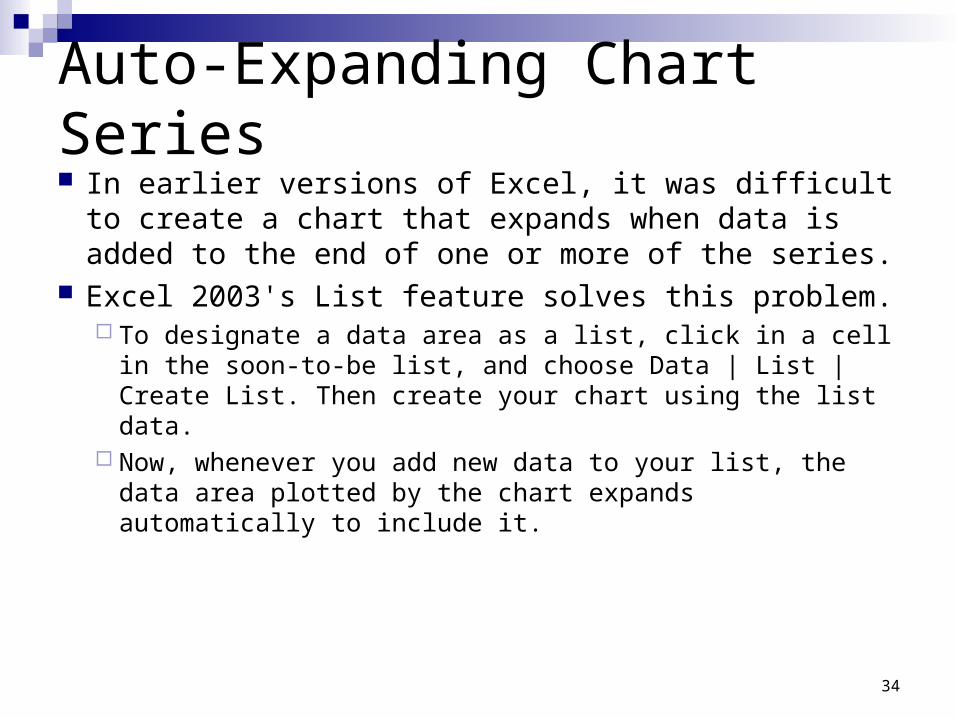
Auto-Expanding Chart Series In earlier versions of Excel, it was difficult to
create a chart that expands when data is added to the end of one or more of the series.
Excel 2003's List feature solves this problem. To designate a data area as a list, click in a cell in the
soon-to-be list, and choose Data | List | Create List. Then create your chart using the list data.
Now, whenever you add new data to your list, the data area plotted by the chart expands automatically to include it.
35
One Page, One Chart I often would like to embed a chart on a
worksheet near the data to which it relates.
However, sometimes you may want to print the chart on a page by itself.
To do this, select any part of the chart, choose File | Print, and the chart will print on a page by itself.

36
Black & White Charts Another handy feature when printing charts is
the Preview command. You can print images in black and white by
going to File | Print, clicking on the Preview button and then the Setup button, selecting the Chart tab, and then checking the Black and white box next to Print.
The preview will now be in gray scale, letting you determine if the contrast is sufficient to distinguish the bars, lines, columns, and so on from one another.

37
Filenames in Footers You can include the path to an Excel worksheet
in its header or footer. The path is automatically updated if the file's
location changes. Do this by selecting View | Header and Footer (or File
| Page Setup | Header/Footer) and clicking on the Custom Header or Custom Footer button.
The button with the folder icon adds the necessary code &[Path]&[File] to the selected area of the header or footer.
While you could select the path and filename from the list of preset headers/footers, a custom one lets you format the text and add an image, too.
38
Validate Information Excel's Data Validation feature lets you limit the data that
can be entered into a cell to what you specify as valid possibilities. For example, you can limit data to only whole numbers greater
than 1,000. The Error alert you choose to use with the Data Validation rule
has a significant bearing on whether or how easily invalid data can be entered. Only the Stop Style alert actually prevents invalid data being entered.
The other two options, Warning Style and Information Style, each warn that invalid data is about to be entered but allow the user to continue entering the data.
The Warning Style option requires the user to select Yes to make the invalid entry. The Information Style option is less stringent, with a warning dialog that will accept the invalid data by default.

39
Custom Lists and Sorts If you frequently enter the same data into a worksheet—
a list of employee names, for example—you can speed up the process by creating a custom list. Choose Tools | Options and select the Custom Lists tab. Type the list in the List entries pane, one entry per line, and click
on Add. You can also use the Import list from cells field to add a list that already appears in a workbook.
Once you've created the list, you can type any of the list entries (one employee's name, for example) in any cell and then drag the fill handle to fill the selected cells with the remainder of the list entries.
You can also use a list to sort data in a worksheet: Go to Data | Sort and select the column containing the list entries,
choose Options, and then choose your custom list from the First key sort order drop-down menu.

40
Configure Excel Defaults Excel uses two template files, Book.xlt and Sheet.xlt, to control
default settings for new workbooks and new worksheets that you add using the Insert | Worksheet command.
By modifying and saving these documents, you can customize default settings. Sheet.xlt should contain only one worksheet, and you use it to configure options appropriate to individual worksheets, such as gridline color.
Use Book.xlt to configure default options for entire workbooks, such as styles.
If you don't have either of these files (Excel works fine without them), you can easily create them.
Create a new workbook and then save it with the appropriate name in the XLStart folder.
For Office 2003, this is typically located in C:\Program Files\Microsoft Office\Office11\XLStart.
41
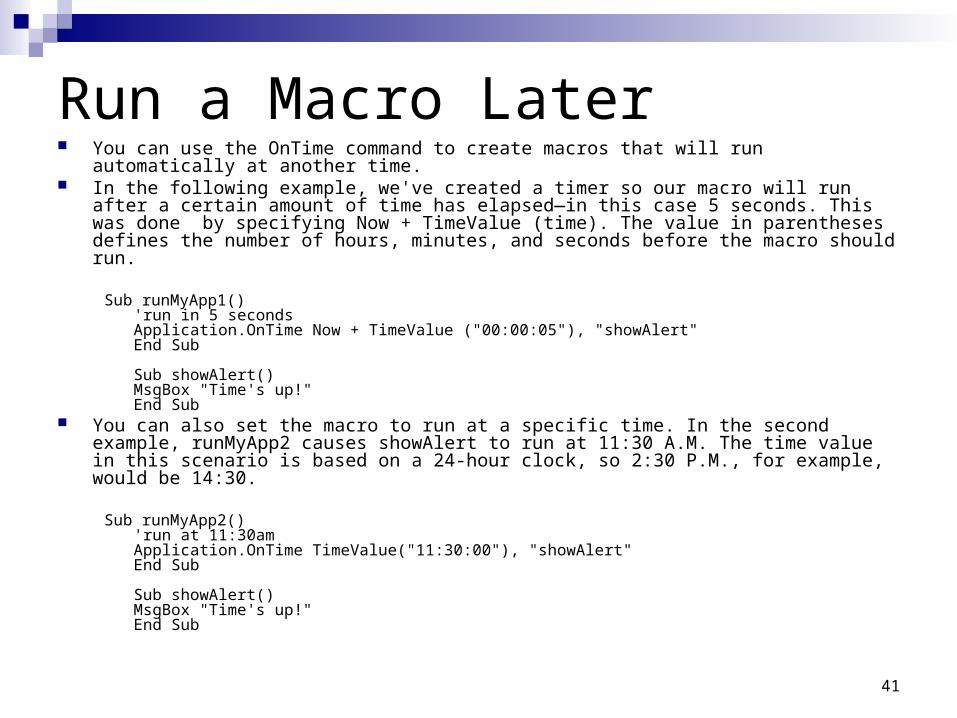
Run a Macro Later You can use the OnTime command to create macros that will run automatically at another time. In the following example, we've created a timer so our macro will run after a certain amount of
time has elapsed—in this case 5 seconds. This was done by specifying Now + TimeValue (time). The value in parentheses defines the number of hours, minutes, and seconds before the macro should run.
Sub runMyApp1()'run in 5 secondsApplication.OnTime Now + TimeValue ("00:00:05"), "showAlert"End Sub
Sub showAlert()MsgBox "Time's up!"End Sub
You can also set the macro to run at a specific time. In the second example, runMyApp2 causes showAlert to run at 11:30 A.M. The time value in this scenario is based on a 24-hour clock, so 2:30 P.M., for example, would be 14:30.
Sub runMyApp2()'run at 11:30amApplication.OnTime TimeValue("11:30:00"), "showAlert"End Sub
Sub showAlert()MsgBox "Time's up!"End Sub
42
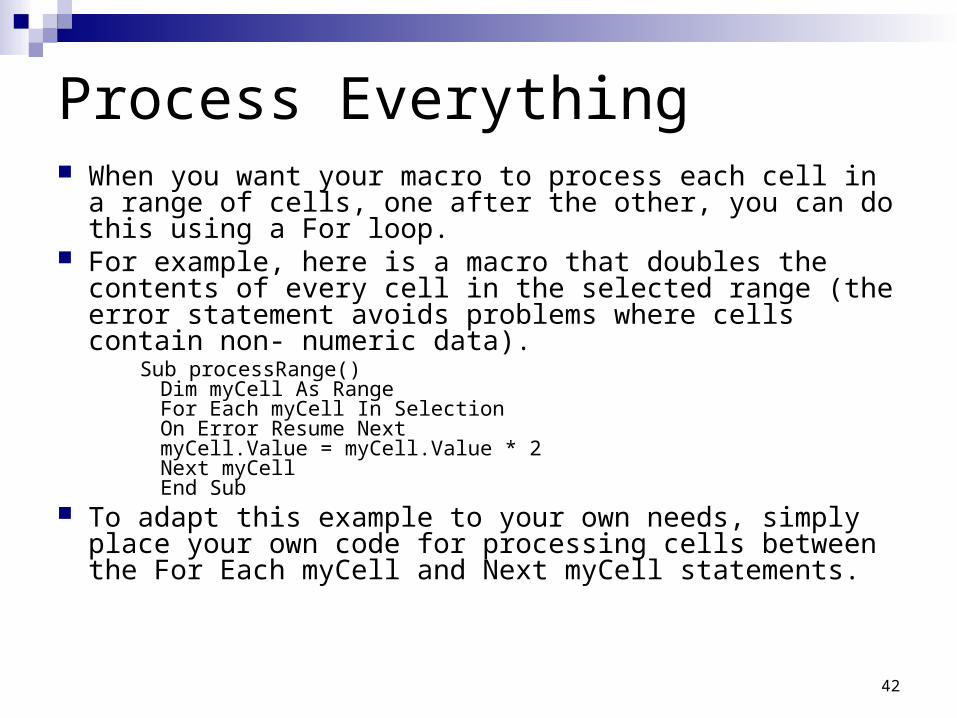
Process Everything When you want your macro to process each cell in a
range of cells, one after the other, you can do this using a For loop.
For example, here is a macro that doubles the contents of every cell in the selected range (the error statement avoids problems where cells contain non- numeric data).
Sub processRange()Dim myCell As RangeFor Each myCell In SelectionOn Error Resume NextmyCell.Value = myCell.Value * 2Next myCellEnd Sub
To adapt this example to your own needs, simply place your own code for processing cells between the For Each myCell and Next myCell statements.
43
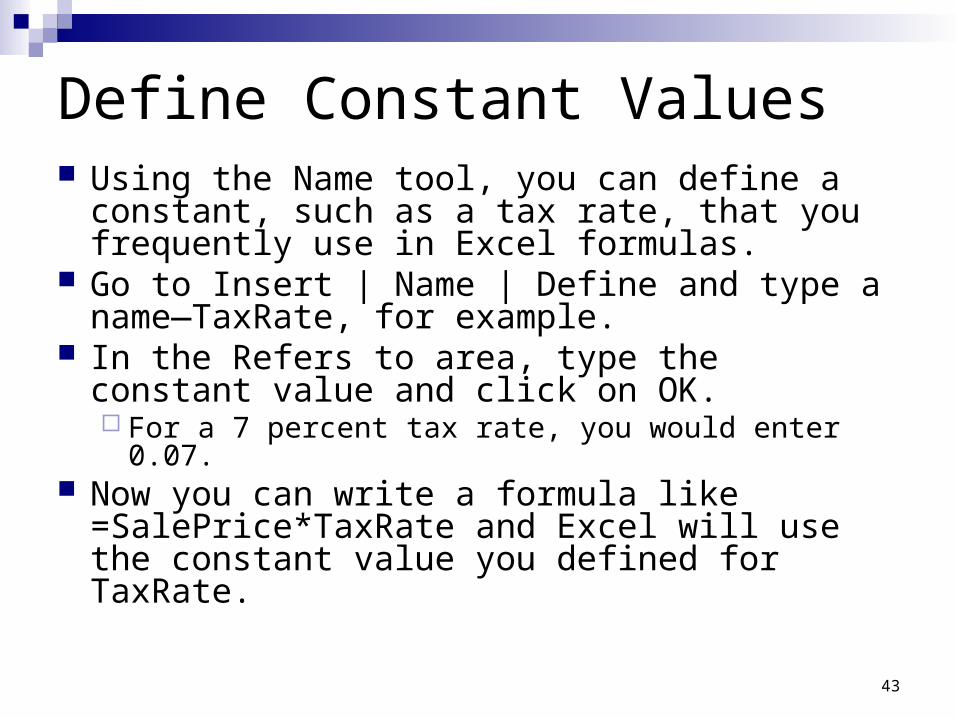
Define Constant Values Using the Name tool, you can define a constant,
such as a tax rate, that you frequently use in Excel formulas.
Go to Insert | Name | Define and type a name—TaxRate, for example.
In the Refers to area, type the constant value and click on OK. For a 7 percent tax rate, you would enter 0.07.
Now you can write a formula like =SalePrice*TaxRate and Excel will use the constant value you defined for TaxRate.

44
Find An Exact Match To search for an exact match for an item in a table and return data only if
the item is found, use a lookup formula with the FALSE argument. This argument will locate only exact matches, and it doesn't require the first
column of the table to be sorted. If your unsorted list is in the range A2:C5 and the value you need to look up
is in cell A8, =VLOOKUP(A8,A2: C5,2,FALSE) will return an exact match, even if it is in column B. If no match is found, an #N/A error will be displayed.
If all you need is the position of a matching item in the list, you can use the MATCH function. For example, =MATCH(A8,A2:A5,0) will return the item's position or an #N/A if a match is not found.
If you don't like the look of #N/A, you can use the IF function to create a friendlier message for when a match is not found:
=IF(ISNA(MATCH(A8,A2:A5,0)),"Not Found",MATCH(A8,A2: A5,0)) Similarly, if all you want to know is whether or not a match is found in the
list, you can use the following statement:=if(ISNA(MATCH(A8,A2:A5,0)),"Not Found", "Found")
45
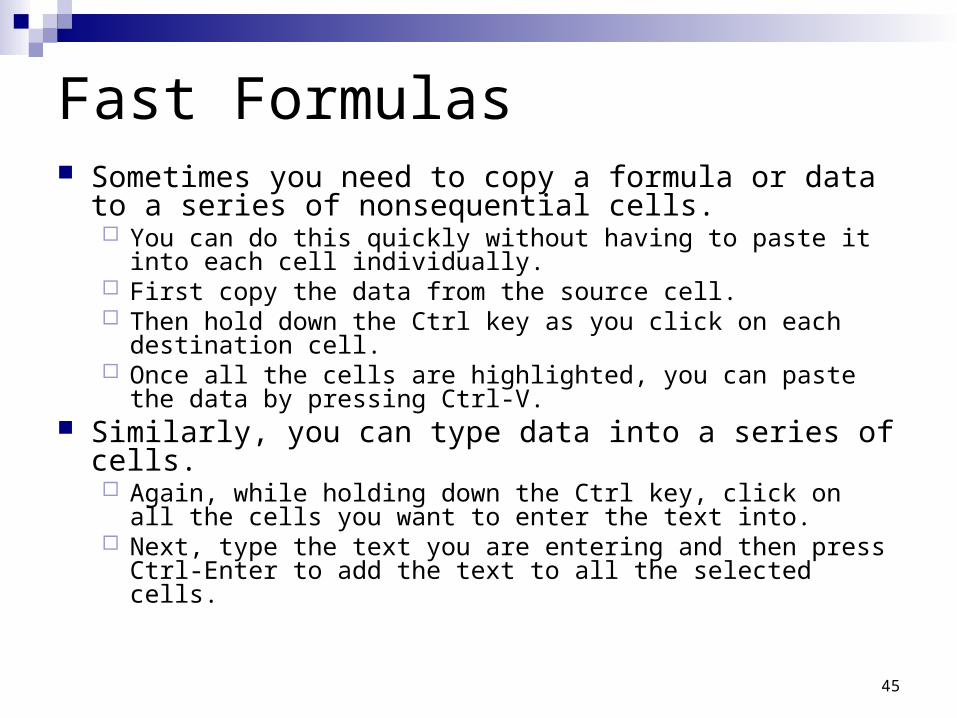
Fast Formulas Sometimes you need to copy a formula or data to a
series of nonsequential cells. You can do this quickly without having to paste it into each cell
individually. First copy the data from the source cell. Then hold down the Ctrl key as you click on each destination
cell. Once all the cells are highlighted, you can paste the data by
pressing Ctrl-V. Similarly, you can type data into a series of cells.
Again, while holding down the Ctrl key, click on all the cells you want to enter the text into.
Next, type the text you are entering and then press Ctrl-Enter to add the text to all the selected cells.

46
Control Direction Here's a simple yet very handy tip. By default, the cell pointer moves down when you press
Enter after entering data into a cell. But you can actually change the direction in which the
cell pointer will move when you press Enter. Go to Tools | Options and go to the Edit tab. Check the box next to Move selection after Enter if it isn't already
enabled, and choose the direction you want the pointer to move in from the drop-down menu.
When working in a document, you can make the pointer move in the opposite direction from the one you've chosen by holding down Shift while you press Enter.
47
Outlook Tips
48
Sort by Multiple Columns Sorting by a single column in Outlook is a simple matter
of clicking on the column head. Sorting by multiple columns, however, is not so obvious.
But it's actually quite easy. First, sort by the first criterion, such as From, by clicking on the
column head. Then hold the Shift key down as you click on a second heading,
such as Received. Your messages will be sorted primarily by sender, and all the
messages from each sender will be ordered chronologically. You can even add additional columns to sort by. Outlook will sort your messages by each additional criterion
within the earlier criteria to give you a multicolumn sort.
49
View Conversations Outlook 2003 lets you view messages by thread,
which is a convenient way to scan your in-box much faster. Just choose View | Arrange By | Conversation to see
your mail arranged this way. If you have the reading pane on the right, you can get
to this setting faster by clicking on Arranged by at the top of the message list.
You'll find that if each message contains the earlier messages, you can read just the latest message in the thread instead of working through each one, so you can easily clean out your in-box by deleting earlier notes and keeping only the latest one.
50
More Reading Room Outlook 2003 has a handy three-column format,
with the reading pane on the right, which makes it easier to read mail without opening each message.
But sometimes you need more room for reading. Alt-F1 toggles the navigation pane on and off,
giving the extra space to the reading pane. Try this once and you'll probably use it regularly.
51
Go Where You Want To The first time you save or add an attachment during any given
session, Outlook starts at the My Documents folder by default. If you rarely save files to or attach them from My Documents, this can
be annoying. One easy fix is to add shortcuts in the My Documents folder that take
you to the folders you use most often. That way, you can click on the shortcut rather than being forced to
navigate through multiple levels. To create a shortcut, open the My Documents folder. Choose File |
New | Shortcut, select Browse, and navigate to the folder you want the shortcut to take you to. Click on Next and enter a name for the shortcut. When naming the file, use an ampersand as the first character so that the
shortcut will appear at the top of your list. Now click on Finish. The next time you open Outlook and add or save an attachment, simply
click on the shortcut to go from My Documents to the folder you want.
52
Color Your Flags If you use each flag color in Outlook 2003 to mean something different but
sometimes forget which flag means what, here's a handy trick: Put the flags on a toolbar and give them custom names. Not only do the buttons tell you what each flag is for, but you can also use the
buttons to add flags to messages quickly. Start by choosing View | Toolbars | Customize. In the Customize dialog box,
choose Toolbars and then New. Enter "Flags" as the name, and click on OK. Drag the new toolbar onto Outlook's toolbar area. Next, choose the Commands
tab in the Customize dialog box. From the Categories list, choose Actions, and find the entries for Red Flag, Blue
Flag, and so on. Drag each flag command to the new toolbar. Also drag the Clear Flag command,
which lets you clear flags from messages. Right-click on each flag button, enter a name in the Name box, make sure the
Image and Text option is checked, and then close the Customize dialog box. Next time you want to flag an item, simply select the item and click on the
appropriate flag button in the toolbar.
53
Expand & Collapse the Folder Tree If you'd rather use keystrokes than the mouse
whenever possible, you can use the asterisk key on the numeric keypad to expand the currently selected folder in Outlook's folder tree.
Press the key again, and the next level of subfolders in all the newly opened folders will expand.
Each keystroke opens another level. The minus key on the numeric keypad will
collapse all the folders at once.
54
Assign Categories & Change Entries by Dragging You can assign categories as a way of making it easier
to group related items. For example, you can classify various contacts as
personal or business. If you want to assign categories to Outlook items that
already exist, you can do this with a simple drag-and-drop. Choose View | Arrange By | Categories.
Next, if the program is not already set to show groups, choose View | Arrange By | Show In Groups.
You can then assign a category to a record by dragging the record to the appropriate group.
You can also use this method to enter or modify other fields, such as company names.
55
Is It Really Spam? Outlook 2003 includes a decent spam filter, but like other
spam filters, it occasionally misidentifies legitimate e-mail as junk.
In cases where real mail comes in from unexpected sources, Outlook's whitelist feature won't help.
At the very least, be sure to give your junk mail a quick glance before you delete it, to make sure you're not losing messages from friends or business associates.
It's the sort of task you can handle on the train coming into work or while you're on hold on the phone.
Also make sure you have the latest version of the spam filter.
Microsoft has already posted an update, which you can get by clicking on Help | Check for Updates.
56
Using Default Entries in Forms All information in Outlook is stored in a database, so when you look at items like a
contact or appointment, it is using a form to retrieve info and provide fields for entering information.
Outlook lets you customize forms and create default entries for fields. Creating a default entry for a given field in a form is particularly useful for customized
forms. Suppose you have created a project form based on Outlook's Task Entry form, and you
have a field for the client associated with the project. If you have a primary client whose name is the one that most often shows up in this field,
you might like Outlook to enter the name automatically each time you create a project record.
To create a default entry, first confirm the name of the form that you want to modify. Right-click on the folder name in the folder list, choose Properties, and note the name of the form in the text box labeled When Posting To This Folder, Use....
Close the Properties window, go to the appropriate folder, and create a new blank record. Add the entry that you want as the default, and choose Tools | Forms | Publish Form. Navigate through the folders to find the old form, and publish the modified version in the same folder using the same name.
(You can use a new name, but then you'll also have to change the name of the form to use in the folder's Properties dialog box).
Then close the record you were working in, and open a new one. On the first attempt, you may get the message that Outlook can't open the form. Click on OK
and try to open a new form again. It should open with the default entry already added.

57
Saturday & Sunday: One Day or Two? The default month view for the Outlook Calendar
combines Saturday and Sunday into one column. You can, however, switch it to showing a separate
column for each. To find the command, right-click anywhere on the
calendar and choose Other Settings. Then remove the check from the option to Compress
Weekend Days. You can go back to having both in one column by
checking the box again. This setting also controls whether the calendar prints
with six columns or seven.
58
Watch out for Broken Dates If you choose the Details tab for an Outlook contact, you'll see Birthday and
Anniversary fields. Dates added here are automatically inserted into your calendar as recurring events.
(You don't have to know the year someone was born, just the day.) Unfortunately, this feature doesn't work properly in Outlook 2003. Try this quick test: Create a new contact named Debbie Smith with today's date as the birthday. Save the
record. Then change the name to Debbie Johnson (perhaps she got married), and then save the
record. Finally, change the birthday to three days later (as if you accidentally entered it incorrectly
the first time), and save the record. If you did this in Outlook 2002, you'd have one calendar entry, with the right date. You would also have a linked object in the Notes field of the contact, so you could remove
the event from the calendar by deleting the object. In Outlook 2003, however, you'll find a separate calendar entry for each time you
saved the record, and no linked objects in the Notes field. Instead, you have to find each entry in the calendar or go to the Activities tab and let
Outlook find them for you. Unfortunately, there is no way around this. If you don't clean out old versions of entries that
have been modified, they'll show up with the wrong names and dates year after year.
59
Archive Your Messages We all suffer from email bloat. As messages gather in your in-box, your
Outlook data file can grow to extremely large sizes. This eats up system resources and increases the time Outlook takes to
load. If you don't want to delete messages, consider archiving them. One way to archive is to use the File | Archive command, fill in the options in
the Archive dialog box, and choose OK. Another easy way is to create a second data file.
From the main Outlook window, select File | Open | Outlook Data File if you already have a file to archive to, or File | New | Outlook Data File if you need to create one.
If you're using Outlook 2003, you'll also see a dialog box asking you to choose whether to use the new Outlook format or the format used by Outlook 97 through 2002.) Once the second file is open, drag and drop the folders or files you want to
archive to the second file, and, finally, close the file. Yet another alternative is to use Outlook's auto-archive feature.
To set automatic archiving for any given folder, right-click on the folder, choose Properties and then the AutoArchive tab, and set the options to match your needs.
60
Archive as Text When you're ready to archive an old thread,
consider exporting it to a text file rather than sending it to an Outlook archive.
The text file will take up less space on your hard drive and can be easily opened in Word if you ever need to browse or search through it. To create the text file, select the messages to be
archived, then choose File | Save As. Make sure the file format is set to text only, navigate
to the appropriate folder, enter a name for the file, and choose Save.
You can then delete the messages from Outlook.
61
Powerpoint Tips

62
Preview Slide Shows For a quick preview of a slide show while you're editing a
presentation, hold down the Ctrl key while clicking on View Show in the Slide Show menu.
Instead of opening the presentation in full-screen mode it will appear, starting with the current slide, in a small window atop the slide being edited.
To edit the slide and see your changes in real time, resize the PowerPoint window so the preview slide is in view.
Any modifications you make will instantly appear in the preview window.

63
Nudge Objects Using the mouse to move an object a
minuscule distance can be very frustrating. Use your keyboard instead. Just select the object you want to nudge
(or move ever so slightly) and use the arrow keys to move it in the direction you want.
Each press of the key will move the object 1/12 inch.
64
A Different Background If you'd like a different look for one or more slides in a
slide show, you can omit the master background chosen for your presentation.
First navigate to the slide you'd like to change. Then click on Format | Slide Background, check the box that says Omit background graphics from master, and hit Apply.
To choose multiple slides at once, go to the View menu and click on Slide Sorter.
Then hold down the Ctrl key and click on the slides you'd like to modify.
You can then go to the Format menu and repeat the steps to omit the background, as above.
65
Align Objects You can automatically place or align objects
evenly with other objects in a slide without using a guide or grid.
Do the following: Select the objects by clicking on them while holding
down the Ctrl key. Click on the Draw button at the bottom left of the
screen, and choose Align or Distribute. Select one of the options in the pop-up menu, and the
objects will be aligned or distributed automatically.

66
Hiding Slides Sometimes you want to have a slide for reference but you
don’t want it in your show. What you can do is “hide the slide.”
To hide the reference slide, go to the Slide Show menu and choose Hide Slide. Make a note of the number of the hidden slide. At any point in your presentation, you can hop to that
slide by typing its number and pressing Enter. This trick works actually works for non-hidden slides as
well If you have multiple slides press the H key to go to
the next one. To return to the presentation, right-click on the slide
and select Last Viewed.
67
Action Buttons You can also create an action button on another slide
that will display the hidden slide. Choose a slide for the action button, click on Slide Show | Action
Settings, and select an icon to be placed on the slide. Once you've placed the action button, the Action Settings dialog
box will appear. You can choose to trigger the action by a mouse click or a mouse-over.
Then select Hyperlink to and choose Slide… from the drop-down list.
Choose the hidden slide from the list of slides in your presentation. During your presentation, simply click on the action button to display the hidden slide.
Use the steps noted above to create an action button on the hidden slide that will take you back to the slide you just clicked away from.
69
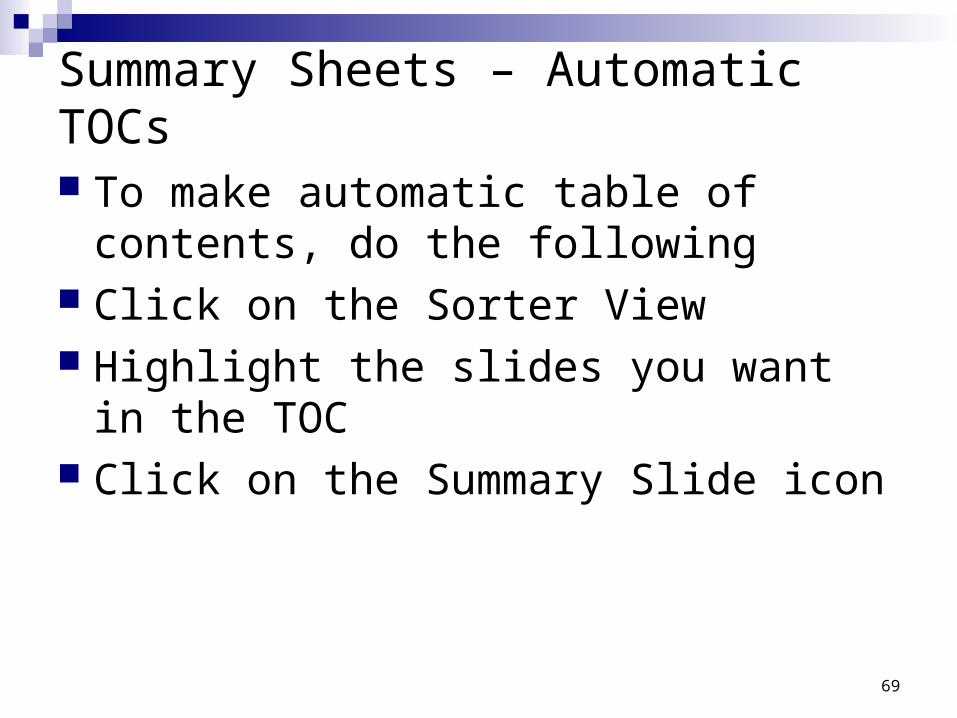
Summary Sheets – Automatic TOCs
To make automatic table of contents, do the following
Click on the Sorter View Highlight the slides you want in the TOC Click on the Summary Slide icon
70
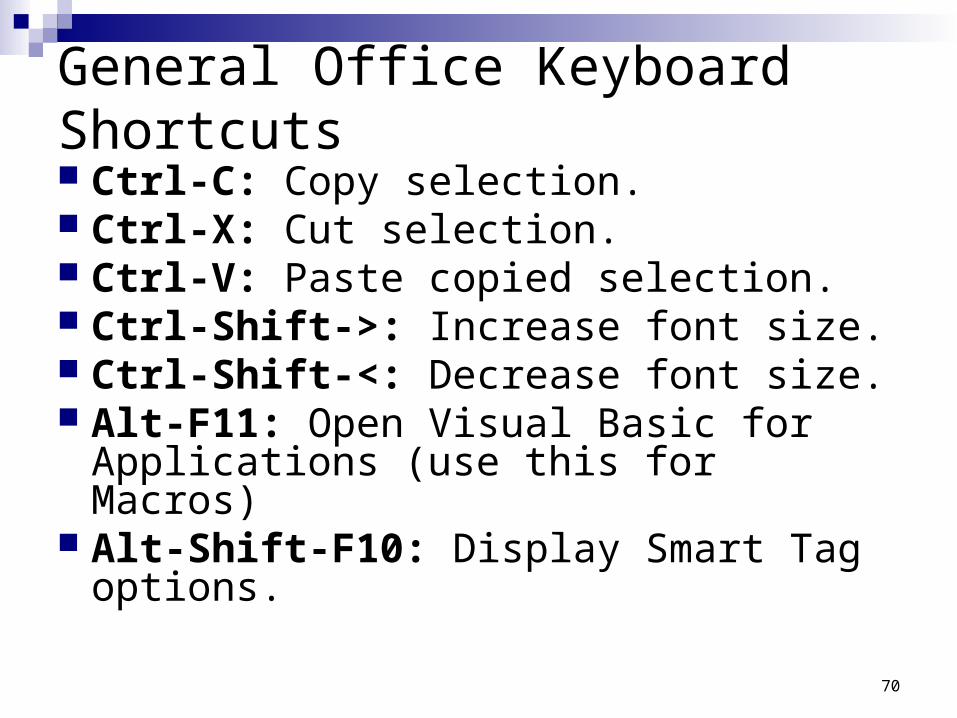
General Office Keyboard Shortcuts Ctrl-C: Copy selection. Ctrl-X: Cut selection. Ctrl-V: Paste copied selection. Ctrl-Shift->: Increase font size. Ctrl-Shift-<: Decrease font size. Alt-F11: Open Visual Basic for
Applications (use this for Macros) Alt-Shift-F10: Display Smart Tag options.
71
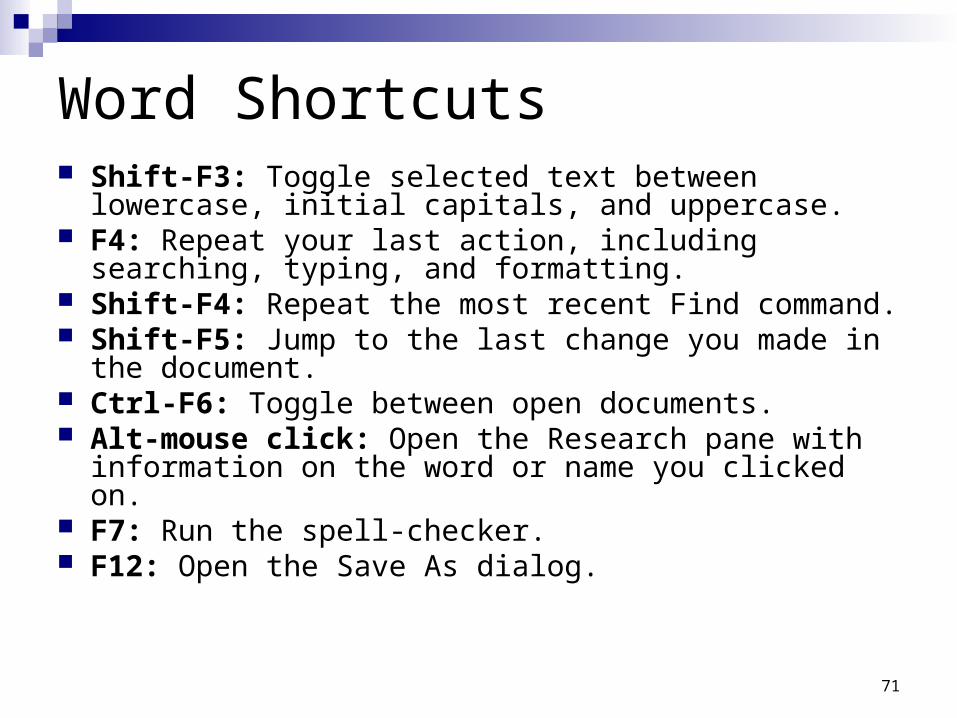
Word Shortcuts Shift-F3: Toggle selected text between lowercase, initial
capitals, and uppercase. F4: Repeat your last action, including searching, typing,
and formatting. Shift-F4: Repeat the most recent Find command. Shift-F5: Jump to the last change you made in the
document. Ctrl-F6: Toggle between open documents. Alt-mouse click: Open the Research pane with
information on the word or name you clicked on. F7: Run the spell-checker. F12: Open the Save As dialog.
72
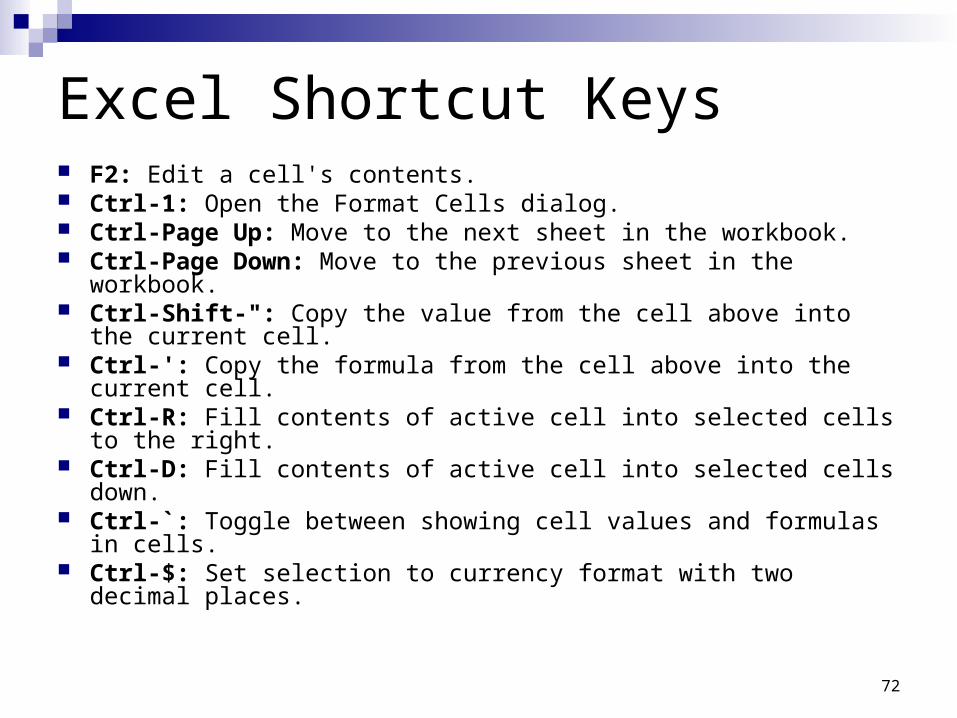
Excel Shortcut Keys F2: Edit a cell's contents. Ctrl-1: Open the Format Cells dialog. Ctrl-Page Up: Move to the next sheet in the workbook. Ctrl-Page Down: Move to the previous sheet in the workbook. Ctrl-Shift-": Copy the value from the cell above into the current cell. Ctrl-': Copy the formula from the cell above into the current cell. Ctrl-R: Fill contents of active cell into selected cells to the right. Ctrl-D: Fill contents of active cell into selected cells down. Ctrl-`: Toggle between showing cell values and formulas in cells. Ctrl-$: Set selection to currency format with two decimal places.
73
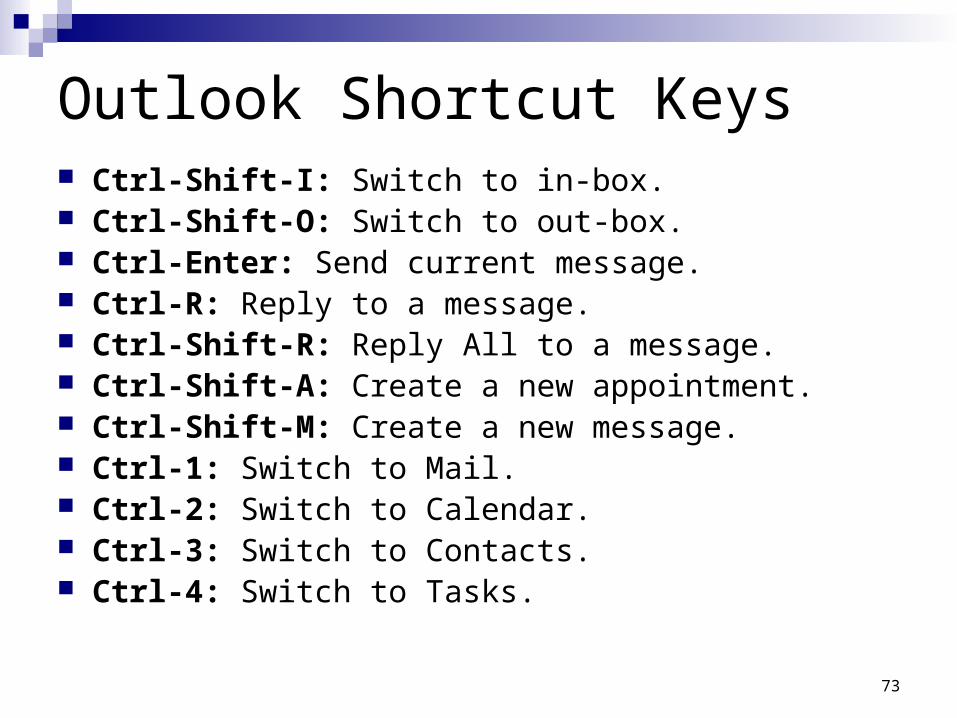
Outlook Shortcut Keys Ctrl-Shift-I: Switch to in-box. Ctrl-Shift-O: Switch to out-box. Ctrl-Enter: Send current message. Ctrl-R: Reply to a message. Ctrl-Shift-R: Reply All to a message. Ctrl-Shift-A: Create a new appointment. Ctrl-Shift-M: Create a new message. Ctrl-1: Switch to Mail. Ctrl-2: Switch to Calendar. Ctrl-3: Switch to Contacts. Ctrl-4: Switch to Tasks.
74
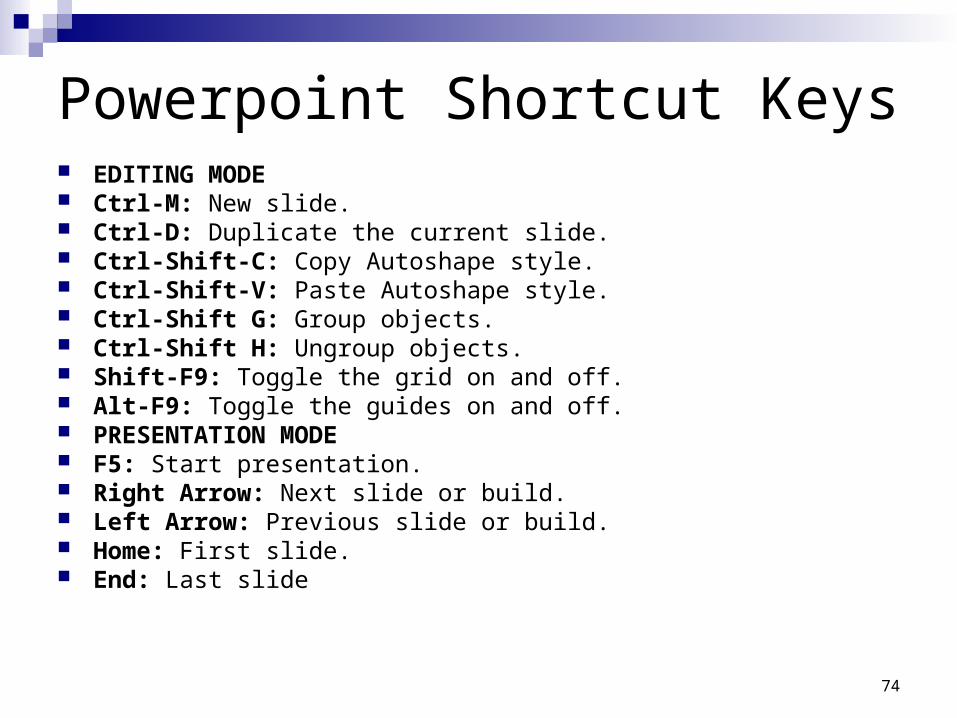
Powerpoint Shortcut Keys EDITING MODE Ctrl-M: New slide. Ctrl-D: Duplicate the current slide. Ctrl-Shift-C: Copy Autoshape style. Ctrl-Shift-V: Paste Autoshape style. Ctrl-Shift G: Group objects. Ctrl-Shift H: Ungroup objects. Shift-F9: Toggle the grid on and off. Alt-F9: Toggle the guides on and off. PRESENTATION MODE F5: Start presentation. Right Arrow: Next slide or build. Left Arrow: Previous slide or build. Home: First slide. End: Last slide
75
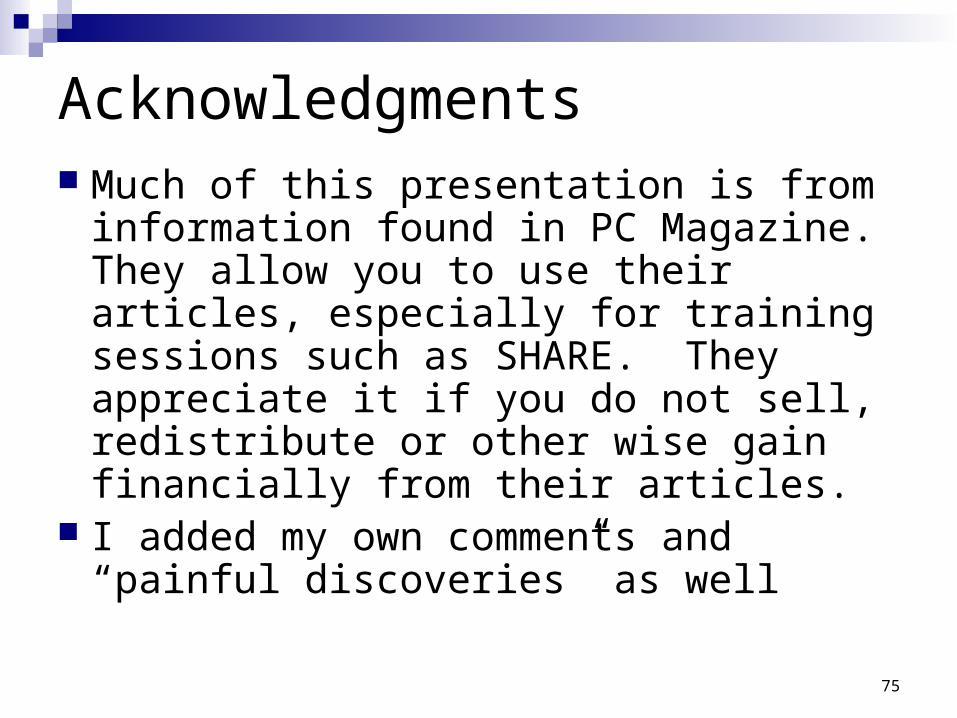
Acknowledgments Much of this presentation is from
information found in PC Magazine. They allow you to use their articles, especially for training sessions such as SHARE. They appreciate it if you do not sell, redistribute or other wise gain financially from their articles.
I added my own comments and “painful discoveries” as well