year 9 pewter casting scheme of learning focus: batch · pdf fileyear 9 pewter casting scheme...
TRANSCRIPT

Year 9 Pewter Casting Scheme of Learning Focus: Batch and One Off production using Cuttlefish and CAD/CAM
About the unit The aim of this unit is to develop awareness of small scale batch production and increase confidence in using ICT skills or handicraft skills to both design and manufacture a product. The theme is ‘Jewellery’ which captures the current trend of high fashion unique jewellery. The theme is Memphis Design style which is non-gender specific. This should not only increase interest when learning but improve their results and sense of pride in accomplishing a well finished piece. Students gain the knowledge; skills and understanding they need to carry out the DMA successfully through product evaluation activities and focused practical tasks. They:
Take initial inspiration from a Memphis mood board to generate creative, hand-drawn design ideas.
Individually and critically select a production process that is best suited to their design (cuttlefish or CNC milling) and are able to justify their choice.
Learn about the different production methods (predominantly batch and one-off) and understand that batch production ensures consistency as well as speed.
There are also opportunities for students to:
Use ICT both in researching and designing.
Generate their own success criteria.
Where the unit fits in This unit uses the disciplines of Product Design and Resistant Materials and is expected to take up to 8 lessons (1 hour 20 minutes each) The jewellery project gives the students the opportunity to address:
Aesthetics
Industrial Practices
Present DT Whilst including
focused practical tasks
an open design and make project
The opportunity to create a desirable product. Links with other subjects
ICT plays a large part in this project, both within the research stages, designing and manufacture.
Art can be seen in the creativity pupil’s use in generating ideas.
Mathematics will be needed to work out the material costing and the measurement of the design in relation to the mould material.

Prior learning It is helpful if students have:
Prior knowledge of the materials used in Resistant Materials.
Prior knowledge of how to use the equipment in the workshop.
Prior ICT skills both in using the internet and simple 2D line designs using CorelDraw or a similar package.
These skills should have been started in Year 7. Future learning Students could take the jewellery project into Resistant Materials to produce a hand crafted jewellery box made of beech or a similar material. Graphic Design skills could be alternatively used to design packaging and designing advertising for it. They could also take it into ICT and create a website for their product.
Language for learning Through the activities in this unit, students will be able to understand, use and spell correctly words relating to:
Designing- USP, Profit, Aesthetics, Personalisation, Marketing, Ranges,
Making – Pewter, Low Temperature Casting System, mould, pillar drill, acuracy,2D, 3D, Line bender, Consistency
Speaking and listening – through the activities students could:
Discuss – design ideas, each other's work
Listening – solutions to problems Reading – through the activities students could:
research Memphis Group for inspiration Writing – through the activities students could:
Label their designs using ACCESS FMM to demonstrate clear understanding of materials, consumers and design process.
Plan their work using a step by step process to enable them to know their next step and allow others to know how the final product was achieved.
Effectively Evaluate their own work Vocabulary and spelling – through the activities students could:
Learn how to write effective Evaluations
Develop accurate use of terminology.
Expectations at the end of this unit…
Most students will: Have carried out detailed research, created and used a simple plan of work, created colourful and neat design ideas fitting to the brief and finished making a jewellery product with some help using CAD/CAM or the cuttlefish process. They will evaluate this with suggestions of how it can be improved.
Some students will not have made so much progress and will: Have attempted to research, followed a simple plan, created some simple design ideas and make a jewellery product with extensive help. They will have evaluated this by describing what they liked about their products.
Some students will have progressed further and will: Have used additional and successful research, created and followed a clear plan of work, designed several well-presented ideas with annotation and finished making a jewellery product to a high standard, with little help, using CAD/CAM or the cuttlefish process. This will have been evaluated in detail looking at their success and suggested changes if mad again. They will have completed the extension tasks and successfully moved the design into another product, as well as briefly looking at costing.

Lesson 1
Context of lesson This lesson is the first of a 9 week project that will introduce students to the process of pewter casting. In this lesson students will develop their understanding of flowcharts and apply this understanding by producing a plan of making for the project.
Task
Teacher/student task Aims & objectives Outcomes Reference to NC/ Cross curricular links
Resources
1 Starter "Odd One Out" jewellery slide to be displayed to students as they enter the room - settle students and introduce project.
2 Activity 1 Students to watch teacher make cup of tea. Students to use whiteboards to write down the steps. Teacher to introduce flowchart (draw on whiteboard using students’ feedback) (15 mins)
Understand how to produce a flowchart plan.
Know how a plan of making can help you to make your final product
Whiteboards PowerPoint Equipment and ingredients for making tea
3 Teacher: Introduction to pewter casting Demonstration of pewter casting process using pre-prepared cuttlefish mould.
Learn about the process of casting from pewter using cuttlefish moulds and know how to prepare a cuttlefish mould.
Students to produce a plan of making which will demonstrate their understanding.
1.1d Exploring how products have been designed and made in the past, how they are currently designed and made, and how they may develop in the future.
Casting equipment and materials Carving tools Example moulds and cast pewter
4 Students to arrange the jumbled cards in order to accurately describe the pewter casting process. Teacher to review the activity and show completed flowchart Students to complete a plan of making for the pewter casting process using a flowchart.
Know how a plan of making can help you to make your final product
Students will organise the flowchart cards in order in their groups. Produce the Plan of Making related to this project using flowchart conventions.
Key processes 2e Plan and organise activities. 2a Communicate ideas in a range of ways, using appropriate strategies (Flowcharts)
PowerPoint Flowchart cards A3 Paper

5 Plenary What does the image show?
Use a plan of making to identify the steps of the pewter casting process
Be able to describe the process shown in the image and determine what shape this would be on a flowchart
PowerPoint Flowchart Symbol cards
Hmwk Mood board – Memphis design and jewellery ideas. Show KS3 Level descriptors so that students know what is expected of them.
Develop an understanding of Memphis Design and consider how this may inform your own design.
Students should produce mood boards which include a variety of images from a range of sources (not just the internet) Images should vary - e.g. furniture, jewellery
1.3a Making links between principles of good design, existing solutions and technological knowledge to develop innovative products and processes. 2d use their understanding of others’ designing to inform their own
PowerPoint
Assessment of Learning The success of the students’ plans of making will assess their understanding and ability to use flowcharts. Differentiation In Task 3 the cards will help students to arrange the stages of making before they draw out their flowchart. Students who finish will be asked to write down the benefits of using a plan of making on the back of the sheet.

Lesson 2
Context of lesson Students will build upon their knowledge of production planning gained through the flowchart production plan task they completed last lesson. In this lesson students will develop their understanding of production methods – Mass/Batch/One Off and put these various methods into practice in task 1.
Task
Teacher/student task Aims & objectives Outcomes Reference to NC/ Cross curricular links
Resources
1 Starter What am I? - Decision or Quality Check, Process or Start/ Finish – PowerPoint slide to be displayed on the whiteboard when students walk in. Students to use mini whiteboards to answer. (5 mins)
Develop your understanding of flowcharts.
Know the 4 common symbols used in flowcharts and what they are used for.
2 Task 1 – Production Challenge Students will follow a plan of making to produce card pendants – each table will be designated a production style of Mass/Batch/One Off (15 mins) (5 mins to introduce task/10 mins to complete)
Facilitated discussion about the success of task 1. Students to gather around the tables and students to explain to their peers how many pendants they produced, how successful their production plan was etc. (8 mins)
Understand how products may be batched and massed produced and produced as a one off. Explore production methods and their advantages and disadvantages.
Students to understand why the outcomes of each production method differed. It is expected that Mass will have produced the most pendants, Batch the second highest amount of pendants and One Off the least amount (although these may have pros such as unique design – not given templates). Know what the 3 methods of production are and how we decide which one to use. Be able to follow a flowchart accurately to produce the intended outcome. Students will have a better awareness of batch production and the awareness of how they would create their own ‘production line’ for their jewellery.
Creativity 1.3a Making links between principles of good design, existing solutions and technological knowledge to develop innovative products and processes. 1.3b Reinterpreting and applying learning in new design contexts and communicating ideas in new or unexpected ways. 1.3c Exploring and experimenting with ideas, materials, technologies and techniques. 4d work individually and
in teams, taking on
different roles and
responsibilities
Production Challenge Kit: 2 x Batch – laser cut templates, flowchart, coloured card, hole punch, string, Pritt stick and scissors 2 x Mass - same as above 2 x One Off – same as above, excluding laser cut templates
3 Teacher to go through Batch Production – Pros and Cons on PowerPoint (draw on students feedback from last activity) Students to complete production methods worksheet (5mins)
Production methods worksheet

4 Assessment Activity Students to use assessment booklets to peer assess homework (4 mins) Teacher to collect in all homework and booklets to be marked
Be able to accurately use level descriptors to give your work a level.
Know how to improve your mood board and be able to apply this to future design work.
Students to understand how their work is marked and peer assess a mood board.
Key processes 2h reflect critically when evaluating and modifying their ideas to improve products throughout their development and manufacture.
Assessment Booklets
5 Teacher to review student's ideas and knowledge about Memphis Group Design using the PowerPoint slides. Students to contribute through the use of Q&A (10 mins)
Be able to recognise Memphis Group designs based on their characteristic such as block colour and geometrical shapes.
Understand how the Memphis Group arose and what art movements inspired them.
Students to use their research and knowledge of Memphis design gained through completing their mood board to participate in Q&A. Students should understand the key features of the Memphis
Group such as their inspiration from such movements as Art Deco and Pop Art. Students should be able to recognise Memphis design.
1.3a Making links between principles of good design, existing solutions and technological knowledge to develop innovative products and processes.
6 Students to complete a plan of making flowchart from the previous lesson. (20 mins)
OR
Know how a plan of making can help you to make your final product
Understand how products may be batched produced through various stages of production.
Develop skills in managing tasks by identifying a step by step working method
Be able to explain the benefits of producing products along a production line.
Produce the Plan of Making related to this project using flowchart conventions.
Completed workstation resource sheet.
Key processes 2e Plan and organise activities. 2a Communicate ideas in a range of ways, using appropriate strategies (Flowcharts)
Workstation resource sheet.
Extension Activity Students to consult their flowchart to fill in workstation task sheet
7 Plenary What Am I? Activity – Batch/Mass/One off Students to be shown images of products (using PowerPoint) and
Be able to apply knowledge of the 3 production methods to real life products in order to identify how they were produced.
1.1d Exploring how products have been designed and made in the past, how they are currently designed and
PowerPoint Coloured A4 cards

they are to decide which of the production methods is used to manufacture it. 3 tables will be each allocated a production method (using the coloured A4 cards) and students are to go to the table they think has the correct answer. (8 mins)
made, and how they may develop in the future.
Hmwk Product analysis sheet to be completed. (Extra copies available on VLE) Show KS3 Level descriptors so that students know what is expected of them. (PowerPoint)
Investigate and analyse an existing product.
Consider how the design solution may inform the designing and making of your own pendent.
Understand the needs of users and the context in which products are used to inform designing and making.
Students will have a better realisation of what will make their design successful, both from an aesthetic point of view, and in manufacturing.
Critical evaluation 1.4a Analysing existing products and solutions to inform designing and making. 1.4b Evaluating the needs of users and the context in which products are used to inform designing and making.
Product analysis sheet Product analysis example (PowerPoint)
Assessment of learning Starter activity will assess the retention of knowledge from last lesson. Q&A following task 1 will be used to check the students understanding. Peer to peer teaching will occur in the feedback of task 1 as different groups will be able to share their views of the different production processes. Mood board homework will be peer assessed using the assessment booklets. Teacher to also collect homework in and fill in teacher comments. When setting homework KS3 Level descriptors will be displayed so that students know what is expected of them. Plenary will use AfL by determining how well the class has grasped the concept of the 3 production methods. Differentiation In task 1 place students who can lack enthusiasm or are slow to complete tasks in the “mass team”. Having to produce work for the group should motivate them, as should the competition element.

Lesson 3
Context of lesson
In previous lessons students have gained knowledge of flow chart and planning for production. Having developed their knowledge of processes this lesson aims for students to develop design ideas so that they may begin making their pendant next lesson. Students will consider existing products (making reference to their homework) in order to aid their design development.
Task
Teacher/student task Aims & objectives Outcomes Reference to NC/ Cross curricular links
Resources
1 Starter
Students to look at their homework and come up to the whiteboard (2 tables at a time). Students to write any considerations they will need to make when designing their pendent, e.g. “scale”, “weight”. The whiteboard may be divided into two halves of “dos” and “don'ts”. This will remain on the whiteboard for students to see when they are designing. Teacher to facilitate a discussion and pick out a few key points. (10 mins)
Be able to use research collected through product analysis to inform planning and manufacturing.
All Know what makes successful pewter pendants. Most Know how to consider the manufacturing process when designing in order to produce successful products. Some Produce design ideas that integrate the manufacturing process into their designs, for example incorporating the funnel for the sprue as a design feature.
Critical evaluation 1.4a Analysing existing products and solutions to inform designing and making. 1.4b Evaluating the needs of users and the context in which products are used to inform designing and making. 4a analyse products to learn how they function
Whiteboard Whiteboard markers Students’ homework
2 Task 1 – Design Ideas
Teacher to show exemplar work so that students know what is expected. Students are to use their mood boards, knowledge of Memphis Design and product analysis homework to create a design ideas page. This must be annotated using ACCESS FM. Teacher to show examples of using various media to produce quality work. Emphasis to be placed on the need to layer
Be able to use research to produce design ideas.
Understand how to use ACCESS FMM to annotate design ideas.
Be able to use various media to produce an eye-catching design ideas page.
All Will use various media to produce an eye-catching design ideas page. Most Will use ACCESS FMM words to annotate their ideas Some Will create exceptionally creative pages that layer lots of different materials and include sketches and annotation.
Key processes 2a generate, develop, model and communicate ideas in a range of ways, using appropriate strategies 2d use their understanding of others’ designing to inform their own
PowerPoint
Coloured paper
Tissue paper
Scissors
Pritt Stick
Pencils
A3 paper
Design ideas example work.
Access FMM Help sheet
Memphis prompt laminates

paper etc. to create an eye-catching page. (40 mins) Differentiation: For weaker students, they may produce designs using the shapes on the help sheet.
3 Assessment Activity
Half way through this activity teacher to hand out post it notes – stop class and instruct them using the PowerPoint how to write down “2 stars and a wish” to improve their work. (5 mins)
Know how to improve your design work using level descriptors and set targets to improve.
Students to understand how their work is marked and peer assess design work. Students to work towards their “wish” for the remainder of the lesson.
2h reflect critically when evaluating and modifying their ideas to improve products throughout their development and manufacture.
Production methods worksheet
4 Teacher demonstration – creating a mould for pewter casting using the milling machine (show design on PowerPoint and pre-milled mould).
(10 mins)
Learn about the process of casting from pewter using machine-milled moulds. Understand that the aesthetics of the final cast pendant are dependent upon the quality of the mould.
Students to become autonomous and discriminative users of processes and equipment. By considering both processes and their design ideas students to select the process that is best suited to their design.
3l know how to use materials and aesthetic qualities to design and make products of worth Assessment Booklets
5 Plenary
Using the post-it notes, students will select one of the above 3 points and write down their question or comment and then
Develop the ability to reflect on learning and question concepts you are unsure of.
Students should be given time to consider the lesson and think about what they have achieved. The students should understand how the lessons link together and form a continuation of learning.
Student Voice ILTS. PowerPoint Coloured A4 cards
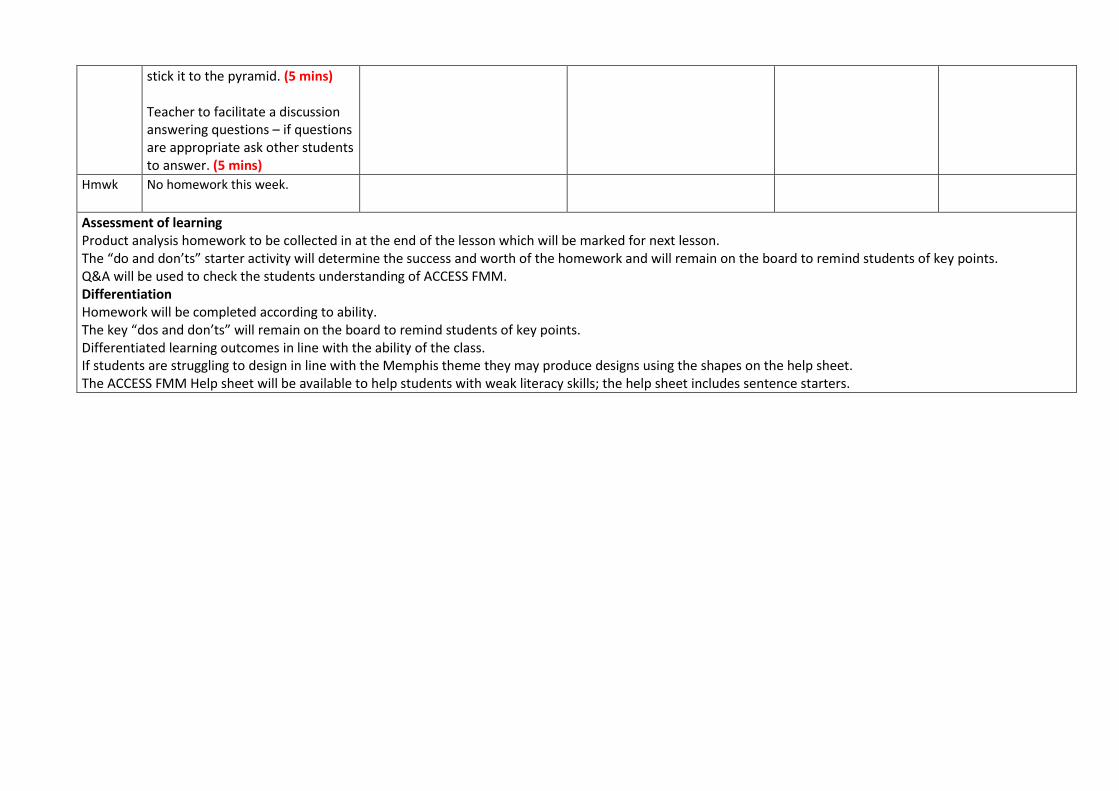
stick it to the pyramid. (5 mins) Teacher to facilitate a discussion answering questions – if questions are appropriate ask other students to answer. (5 mins)
Hmwk No homework this week.
Assessment of learning Product analysis homework to be collected in at the end of the lesson which will be marked for next lesson. The “do and don’ts” starter activity will determine the success and worth of the homework and will remain on the board to remind students of key points. Q&A will be used to check the students understanding of ACCESS FMM. Differentiation Homework will be completed according to ability. The key “dos and don’ts” will remain on the board to remind students of key points. Differentiated learning outcomes in line with the ability of the class. If students are struggling to design in line with the Memphis theme they may produce designs using the shapes on the help sheet. The ACCESS FMM Help sheet will be available to help students with weak literacy skills; the help sheet includes sentence starters.

Lesson 4
Context of lesson
In the previous lesson students developed design ideas based on their mood boards and existing products research. Students were using a range of media to produce eye-catching pages; they will continue these during the first part of the lesson. Students will then develop their final idea, considering the pewter casting process. Throughout the lesson students will become aware of the KS3 level descriptors and assess the level at which they are working.
Task
Teacher/student task Aims & objectives Outcomes Reference to NC/ Cross curricular links
Resources
1 Starter
All students to take out design work from last lesson. Teacher to display the 2 stars and a wish slide (PowerPoint) and give students a post-it note. Students to feedback their comments to the class. (10 mins)
Understand how to use the level descriptors to improve your work.
Students to write their 2 stars and a wish for their current design work on the post-it note and stick it onto their work. 1st star – self assessment 2nd star – peer assessment Wish – peer written target to improve work.
2 Task 1 - Venn Diagram Teacher to recap both the cuttlefish and the computer controlled milling machine process. Students to fill in the Venn diagram sheet to compare the processes and identify the pros and cons of each. (20 mins) Review activity – hands up to see how many students will use each process (5 mins)
Develop your skills of analysing production techniques, processes and equipment.
Understand why one process may be chosen over another based on the advantages and disadvantages you have highlighted
Students to compare both mould creation techniques by filling in the Venn diagram sheet to highlight both the advantages and disadvantages of both processes.
1.1b Applying knowledge of materials and production processes to design products and produce practical solutions that are relevant and fit for purpose. 2f evaluate which hand and machine tools, equipment and computer-aided design/manufacture (CAD/CAM) facilities are the most appropriate to use.
Venn diagram sheet
3 Recap brief to ensure students are still working within these guidelines (5 mins)
Work within the guidelines of a brief to produce a saleable quality product.
Students to consider their designs against the brief and adjust their designs if necessary so that they are more appropriate.
Production methods worksheet
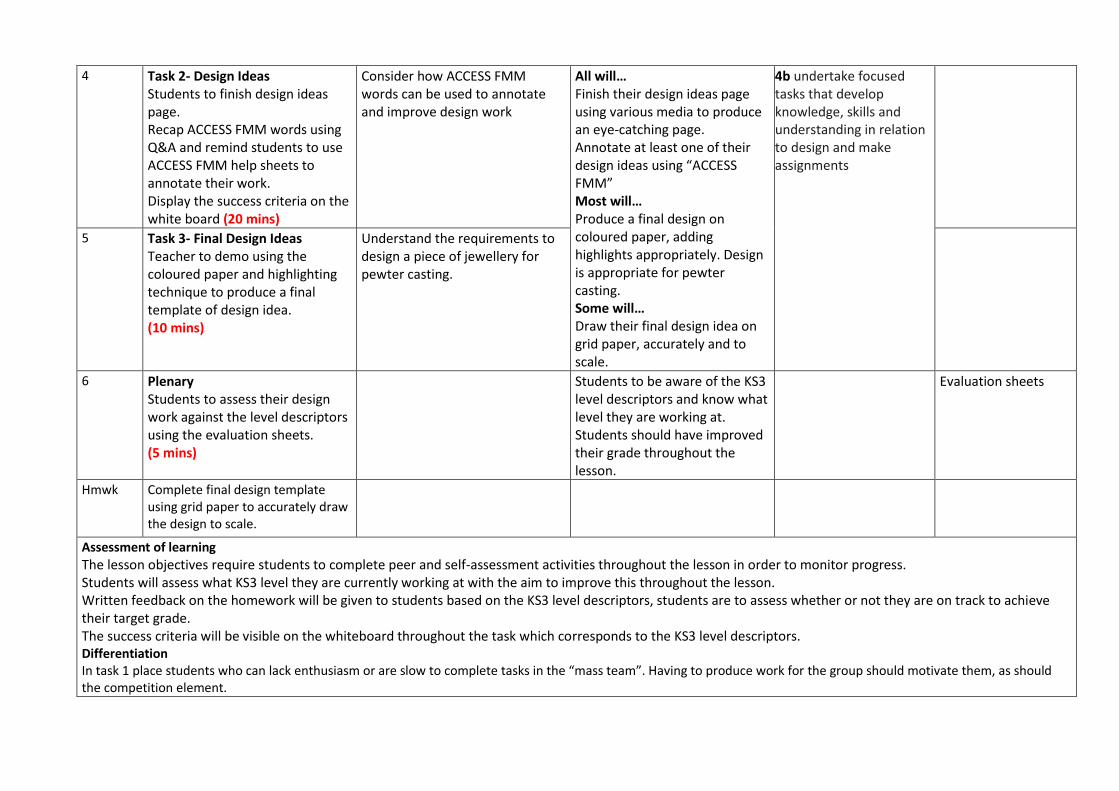
4 Task 2- Design Ideas Students to finish design ideas page. Recap ACCESS FMM words using Q&A and remind students to use ACCESS FMM help sheets to annotate their work. Display the success criteria on the white board (20 mins)
Consider how ACCESS FMM words can be used to annotate and improve design work
All will… Finish their design ideas page using various media to produce an eye-catching page. Annotate at least one of their design ideas using “ACCESS FMM” Most will… Produce a final design on coloured paper, adding highlights appropriately. Design is appropriate for pewter casting. Some will… Draw their final design idea on grid paper, accurately and to scale.
4b undertake focused tasks that develop knowledge, skills and understanding in relation to design and make assignments
5 Task 3- Final Design Ideas Teacher to demo using the coloured paper and highlighting technique to produce a final template of design idea. (10 mins)
Understand the requirements to design a piece of jewellery for pewter casting.
6 Plenary Students to assess their design work against the level descriptors using the evaluation sheets. (5 mins)
Students to be aware of the KS3 level descriptors and know what level they are working at. Students should have improved their grade throughout the lesson.
Evaluation sheets
Hmwk Complete final design template using grid paper to accurately draw the design to scale.
Assessment of learning
The lesson objectives require students to complete peer and self-assessment activities throughout the lesson in order to monitor progress. Students will assess what KS3 level they are currently working at with the aim to improve this throughout the lesson. Written feedback on the homework will be given to students based on the KS3 level descriptors, students are to assess whether or not they are on track to achieve their target grade. The success criteria will be visible on the whiteboard throughout the task which corresponds to the KS3 level descriptors. Differentiation In task 1 place students who can lack enthusiasm or are slow to complete tasks in the “mass team”. Having to produce work for the group should motivate them, as should the competition element.

Lesson 5
Context of lesson
Students will decide which of the mould creation techniques (cuttlefish or computer controlled milling machine) best suits their design. Students will then work on creating the mould. Cuttlefish students will begin preparing the cuttlefish mould using a variety of carving tools, milling machine students to use 2D Design on the laptops to draw their design on the pre-saved template (100x125mm).
Task
Teacher/student task Aims & objectives Outcomes Reference to NC/ Cross curricular links
Resources
1 Starter
All students to take out final design template from last lesson. Students to read their Venn diagram and decide which of the mould creation techniques best suits their design. Students to gather around the front desk and place their templates on the A3 sheets for either cuttlefish or milling. Teacher to facilitate class discussion – does class agree that correct process has been chosen? (10 mins)
Develop your skills of analysing production techniques, processes and equipment.
Understand why one process may be chosen over another based on the advantages and disadvantages you have highlighted
Students to compare both mould creation techniques by filling in the Venn diagram sheet to highlight both the advantages and disadvantages of both processes.
1.1b Applying knowledge of materials and production processes to design products and produce practical solutions that are relevant and fit for purpose. 2f evaluate which hand and machine tools, equipment and computer-aided design/manufacture (CAD/CAM) facilities are the most appropriate to use.
2 Task 1 - Missing word activity What is pewter? Teacher to target students to read aloud the bullet points with the missing words. (2 mins)
Missing word activity – what is pewter – target students to read aloud the bullet points with the missing words. (2 mins)
Students to compare both mould creation techniques by filling in the Venn diagram sheet to highlight both the advantages and disadvantages of both processes.
3 Teacher demonstration – 2D Design All students to watch demonstration as some students may change their mind about processes. Students will have used 2D Design in year 8 so should be familiar with basic
Students to understand how to produce their design using 2D Design.
1.4a Analysing existing products and solutions to inform designing and making. This includes sharing and negotiating success criteria that lead to successful practical solutions.
Production methods worksheet

tools. (8 mins) 3l know how to use materials and aesthetic qualities to design and make products of worth.
4 Teacher demonstration – Cuttlefish All students to watch demonstration as some students may change their mind about processes. Teacher to demonstrate using a selection of carving tools. (6 mins)
Learn about the process of casting from pewter using cuttlefish moulds. Understand that the aesthetics of the final cast pendant are dependent upon the quality of the mould and the properties of the material.
5 Student Task – Success Criteria – Following the recap of how to prepare their moulds students are to discuss in groups the success criteria for the moulds. Teacher to write these on the whiteboard for reference.(6 mins)
Understand what makes a suitable mould for pewter casting.
6 Student Task – Preparing the Mould All students to prepare the moulds – classroom to be split – 1 half preparing cuttlefish, other class drawing design on laptops. (2 x 15 mins)
Practise using a variety of carving tools to cut your cuttlefish mould accurately.
Explore the mould preparation processes for pewter casting.
Develop skills in accurately using 2D Design tools to create a drawing of suitable scale and proportion.
Produce an accurate mould that considers the pewter casting process.
1.1b Applying knowledge of materials and production processes to design products and produce practical solutions that are relevant and fit for purpose. 4b undertake focused tasks that develop knowledge, skills and understanding in relation to design and make assignments
7 Assessment Activity
Half way through this activity Know how to improve your mould using level descriptors and set
Students to understand how their work is marked and peer assess
2h reflect critically when evaluating and modifying
Production methods worksheet
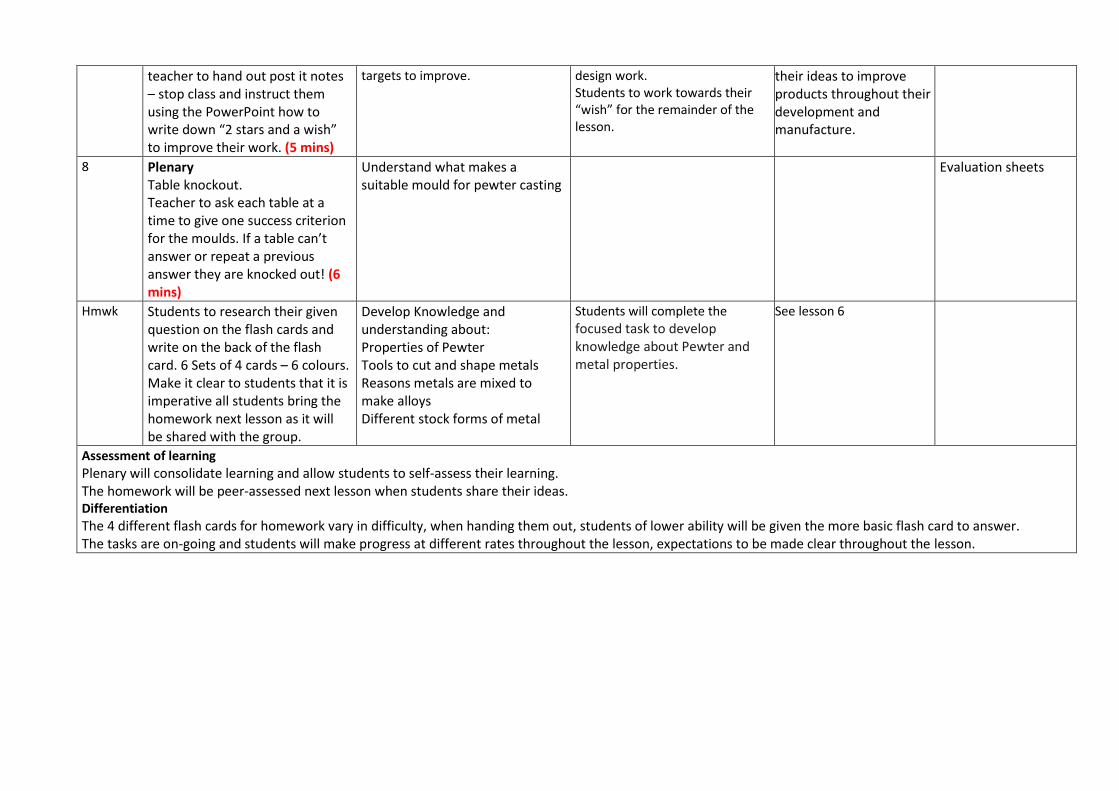
teacher to hand out post it notes – stop class and instruct them using the PowerPoint how to write down “2 stars and a wish” to improve their work. (5 mins)
targets to improve. design work. Students to work towards their “wish” for the remainder of the lesson.
their ideas to improve products throughout their development and manufacture.
8 Plenary Table knockout. Teacher to ask each table at a time to give one success criterion for the moulds. If a table can’t answer or repeat a previous answer they are knocked out! (6 mins)
Understand what makes a suitable mould for pewter casting
Evaluation sheets
Hmwk Students to research their given question on the flash cards and write on the back of the flash card. 6 Sets of 4 cards – 6 colours. Make it clear to students that it is imperative all students bring the homework next lesson as it will be shared with the group.
Develop Knowledge and understanding about: Properties of Pewter Tools to cut and shape metals Reasons metals are mixed to make alloys Different stock forms of metal
Students will complete the
focused task to develop knowledge about Pewter and metal properties.
See lesson 6
Assessment of learning
Plenary will consolidate learning and allow students to self-assess their learning. The homework will be peer-assessed next lesson when students share their ideas. Differentiation
The 4 different flash cards for homework vary in difficulty, when handing them out, students of lower ability will be given the more basic flash card to answer. The tasks are on-going and students will make progress at different rates throughout the lesson, expectations to be made clear throughout the lesson.
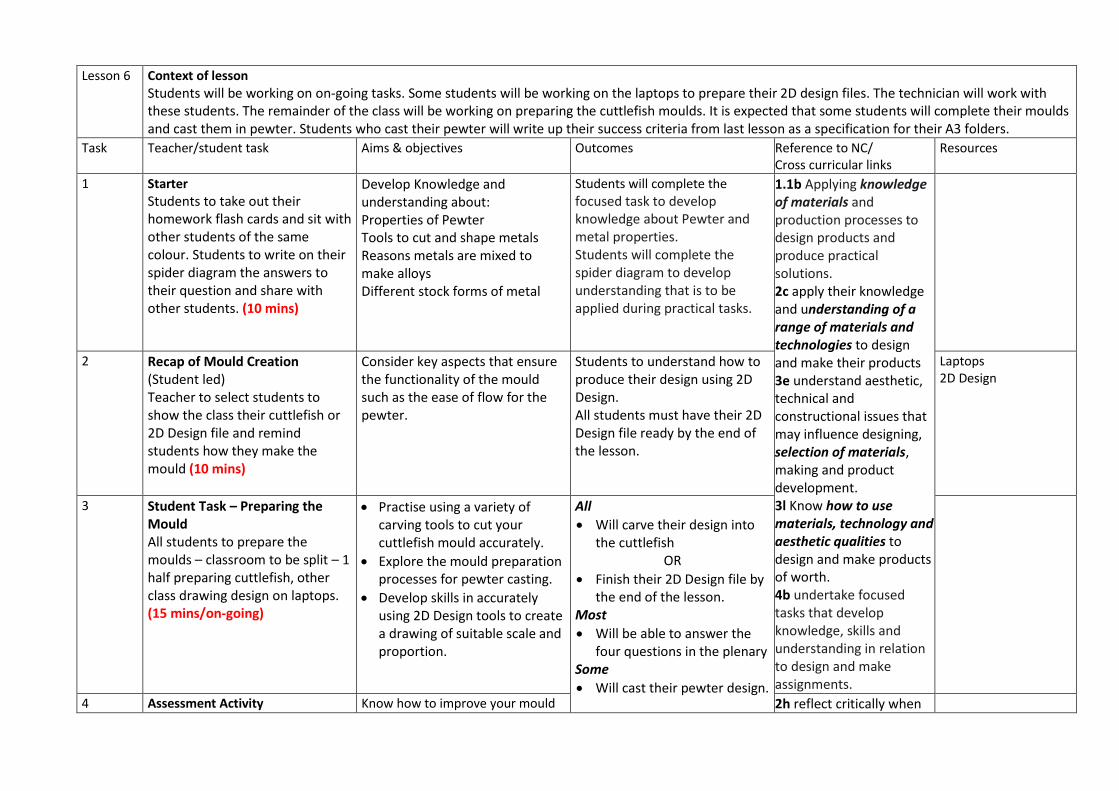
Lesson 6
Context of lesson
Students will be working on on-going tasks. Some students will be working on the laptops to prepare their 2D design files. The technician will work with these students. The remainder of the class will be working on preparing the cuttlefish moulds. It is expected that some students will complete their moulds and cast them in pewter. Students who cast their pewter will write up their success criteria from last lesson as a specification for their A3 folders.
Task
Teacher/student task Aims & objectives Outcomes Reference to NC/ Cross curricular links
Resources
1 Starter
Students to take out their homework flash cards and sit with other students of the same colour. Students to write on their spider diagram the answers to their question and share with other students. (10 mins)
Develop Knowledge and understanding about: Properties of Pewter Tools to cut and shape metals Reasons metals are mixed to make alloys Different stock forms of metal
Students will complete the
focused task to develop knowledge about Pewter and metal properties. Students will complete the spider diagram to develop understanding that is to be applied during practical tasks.
1.1b Applying knowledge of materials and production processes to design products and produce practical solutions. 2c apply their knowledge and understanding of a range of materials and technologies to design and make their products 3e understand aesthetic, technical and constructional issues that may influence designing, selection of materials, making and product development. 3l Know how to use materials, technology and aesthetic qualities to design and make products of worth. 4b undertake focused tasks that develop knowledge, skills and understanding in relation to design and make assignments.
2 Recap of Mould Creation (Student led) Teacher to select students to show the class their cuttlefish or 2D Design file and remind students how they make the mould (10 mins)
Consider key aspects that ensure the functionality of the mould such as the ease of flow for the pewter.
Students to understand how to produce their design using 2D Design. All students must have their 2D Design file ready by the end of the lesson.
Laptops 2D Design
3 Student Task – Preparing the Mould All students to prepare the moulds – classroom to be split – 1 half preparing cuttlefish, other class drawing design on laptops. (15 mins/on-going)
Practise using a variety of carving tools to cut your cuttlefish mould accurately.
Explore the mould preparation processes for pewter casting.
Develop skills in accurately using 2D Design tools to create a drawing of suitable scale and proportion.
All
Will carve their design into the cuttlefish
OR
Finish their 2D Design file by the end of the lesson.
Most
Will be able to answer the four questions in the plenary
Some
Will cast their pewter design.
4 Assessment Activity Know how to improve your mould 2h reflect critically when
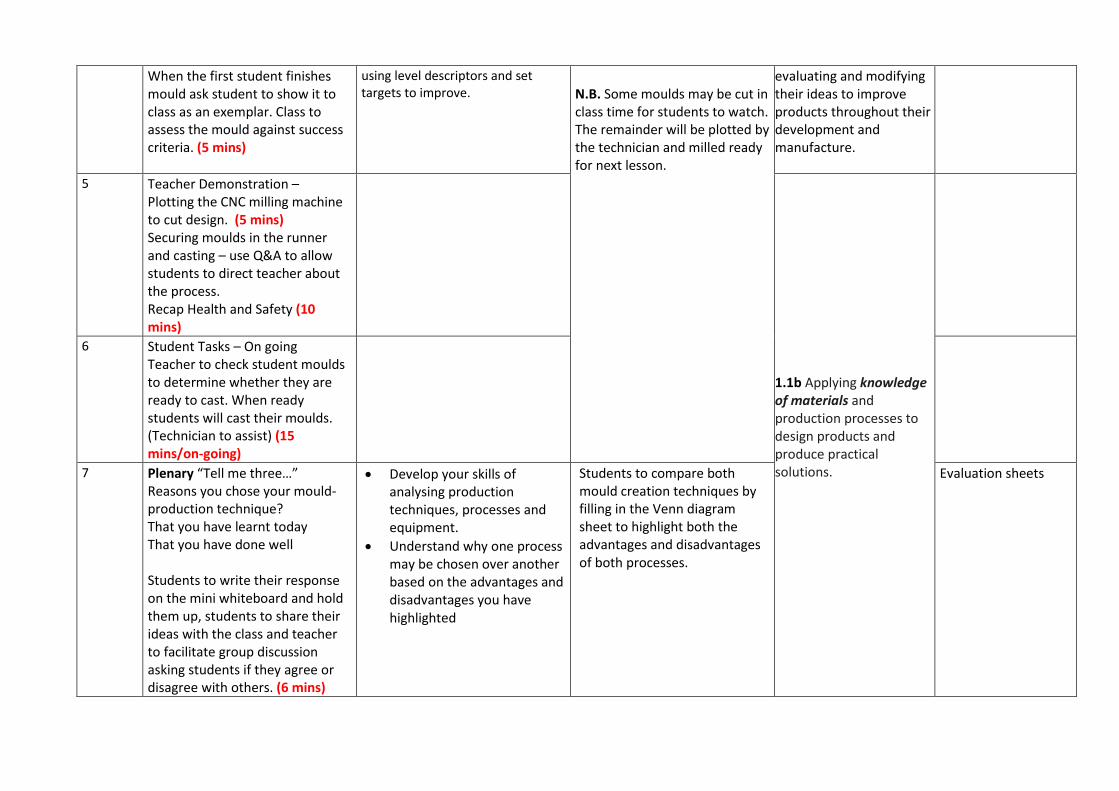
When the first student finishes mould ask student to show it to class as an exemplar. Class to assess the mould against success criteria. (5 mins)
using level descriptors and set targets to improve.
N.B. Some moulds may be cut in class time for students to watch. The remainder will be plotted by the technician and milled ready for next lesson.
evaluating and modifying their ideas to improve products throughout their development and manufacture.
5 Teacher Demonstration – Plotting the CNC milling machine to cut design. (5 mins) Securing moulds in the runner and casting – use Q&A to allow students to direct teacher about the process. Recap Health and Safety (10 mins)
1.1b Applying knowledge of materials and production processes to design products and produce practical solutions.
6 Student Tasks – On going Teacher to check student moulds to determine whether they are ready to cast. When ready students will cast their moulds. (Technician to assist) (15 mins/on-going)
7 Plenary “Tell me three…” Reasons you chose your mould-production technique? That you have learnt today That you have done well Students to write their response on the mini whiteboard and hold them up, students to share their ideas with the class and teacher to facilitate group discussion asking students if they agree or disagree with others. (6 mins)
Develop your skills of analysing production techniques, processes and equipment.
Understand why one process may be chosen over another based on the advantages and disadvantages you have highlighted
Students to compare both mould creation techniques by filling in the Venn diagram sheet to highlight both the advantages and disadvantages of both processes.
Evaluation sheets
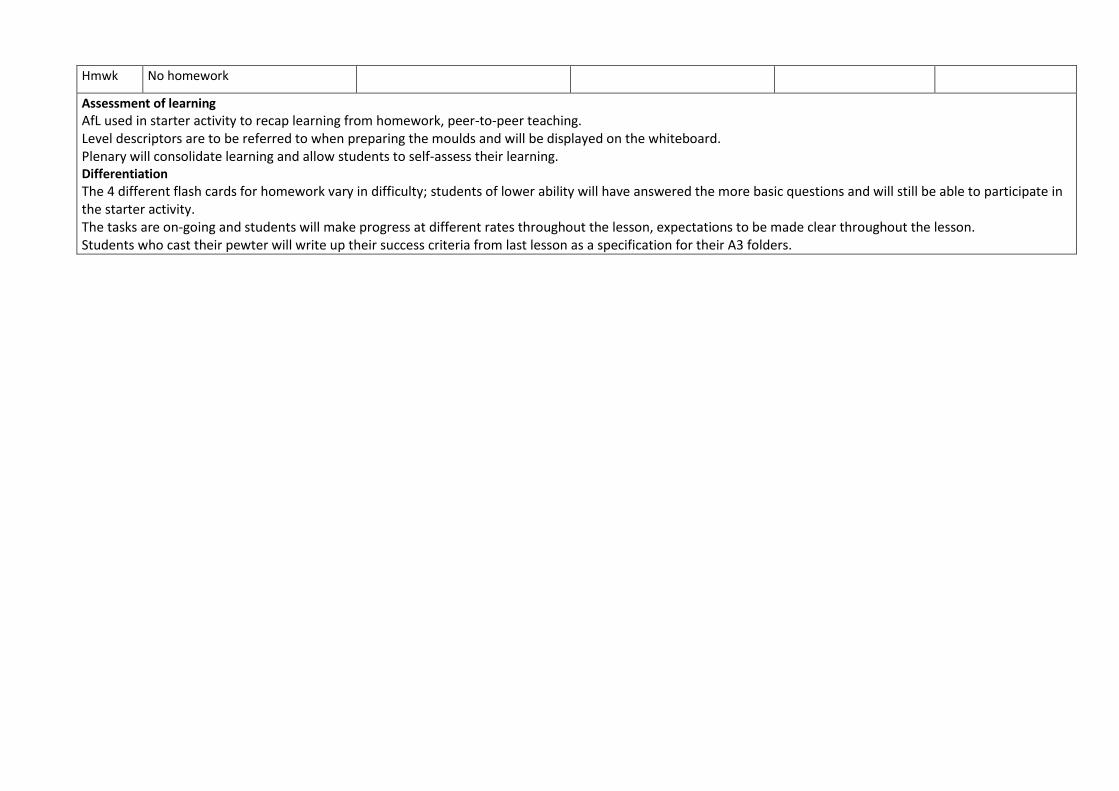
Hmwk No homework
Assessment of learning
AfL used in starter activity to recap learning from homework, peer-to-peer teaching. Level descriptors are to be referred to when preparing the moulds and will be displayed on the whiteboard. Plenary will consolidate learning and allow students to self-assess their learning. Differentiation
The 4 different flash cards for homework vary in difficulty; students of lower ability will have answered the more basic questions and will still be able to participate in the starter activity. The tasks are on-going and students will make progress at different rates throughout the lesson, expectations to be made clear throughout the lesson. Students who cast their pewter will write up their success criteria from last lesson as a specification for their A3 folders.
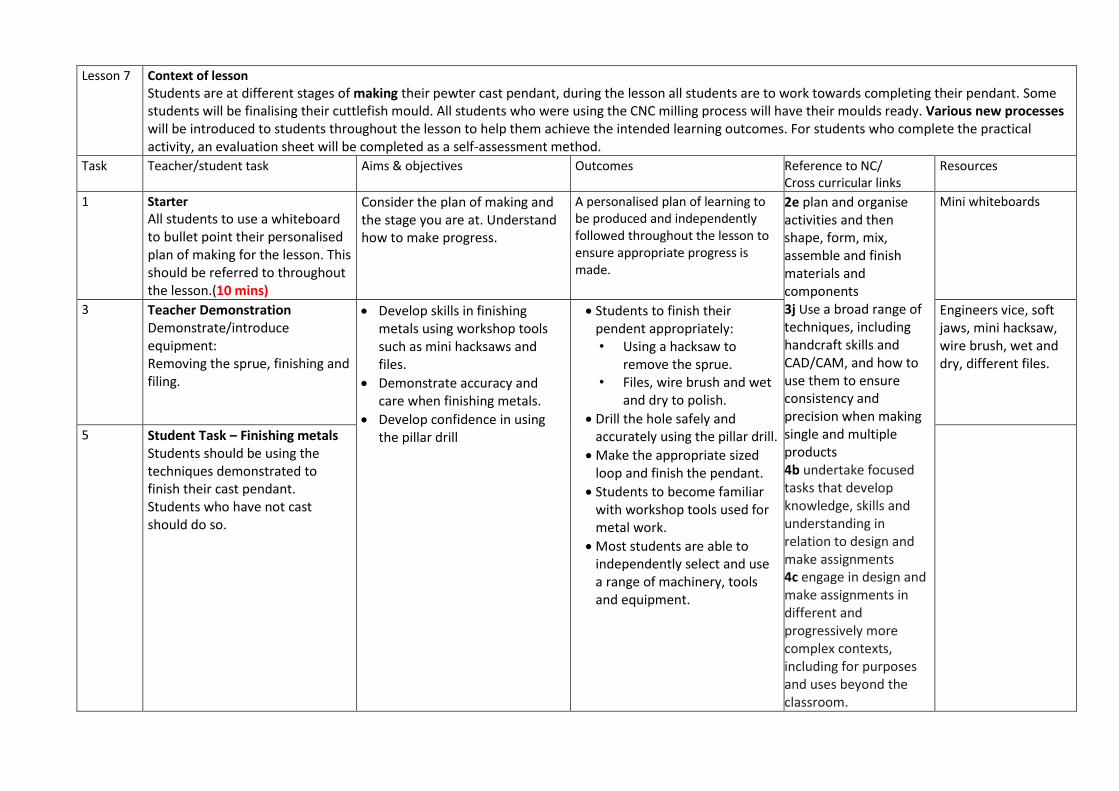
Lesson 7
Context of lesson
Students are at different stages of making their pewter cast pendant, during the lesson all students are to work towards completing their pendant. Some students will be finalising their cuttlefish mould. All students who were using the CNC milling process will have their moulds ready. Various new processes will be introduced to students throughout the lesson to help them achieve the intended learning outcomes. For students who complete the practical activity, an evaluation sheet will be completed as a self-assessment method.
Task
Teacher/student task Aims & objectives Outcomes Reference to NC/ Cross curricular links
Resources
1 Starter All students to use a whiteboard to bullet point their personalised plan of making for the lesson. This should be referred to throughout the lesson.(10 mins)
Consider the plan of making and the stage you are at. Understand how to make progress.
A personalised plan of learning to be produced and independently followed throughout the lesson to ensure appropriate progress is made.
2e plan and organise activities and then shape, form, mix, assemble and finish materials and components 3j Use a broad range of techniques, including handcraft skills and CAD/CAM, and how to use them to ensure consistency and precision when making single and multiple products 4b undertake focused tasks that develop knowledge, skills and understanding in relation to design and make assignments 4c engage in design and make assignments in different and progressively more complex contexts, including for purposes and uses beyond the classroom.
Mini whiteboards
3 Teacher Demonstration Demonstrate/introduce equipment: Removing the sprue, finishing and filing.
Develop skills in finishing metals using workshop tools such as mini hacksaws and files.
Demonstrate accuracy and care when finishing metals.
Develop confidence in using the pillar drill
Students to finish their pendent appropriately: • Using a hacksaw to
remove the sprue. • Files, wire brush and wet
and dry to polish.
Drill the hole safely and accurately using the pillar drill.
Make the appropriate sized loop and finish the pendant.
Students to become familiar with workshop tools used for metal work.
Most students are able to independently select and use a range of machinery, tools and equipment.
Engineers vice, soft jaws, mini hacksaw, wire brush, wet and dry, different files.
5 Student Task – Finishing metals Students should be using the techniques demonstrated to finish their cast pendant. Students who have not cast should do so.

Teacher Demonstration Gather students in an arc around the pillar drill ensuring all students can see. Safe and accurate use of the pillar drill
Pillar drill
Assessment Activity Students to peer assess each other’s pendants using the luggage tags Students to consider target and work towards improving their pendant
Peer assessment luggage tags
Students to complete the costing worksheet.
Understand the importance of pricing your product accurately.
Students to consider their product in the commercial context and use mathematical skills to calculate prices.
1.2b Exploring how products contribute to lifestyle and consumer choices.
6 Plenary Assessment Activity Allocate 3-4 tables for levels 4-7, place the level descriptor on each table. (6 mins)
Understand how to level your work using level descriptors
Students to know what their current level is and how to improve.
Evaluation sheets
Hmwk No homework
Assessment of learning
Level descriptors are to be referred to when completing development sheet. Pewter pendant success criteria to remain on the board. Plenary will consolidate learning and allow students to self-assess their learning. Differentiation
For students who complete the practical activity, an evaluation sheet will be completed as a self-assessment method.
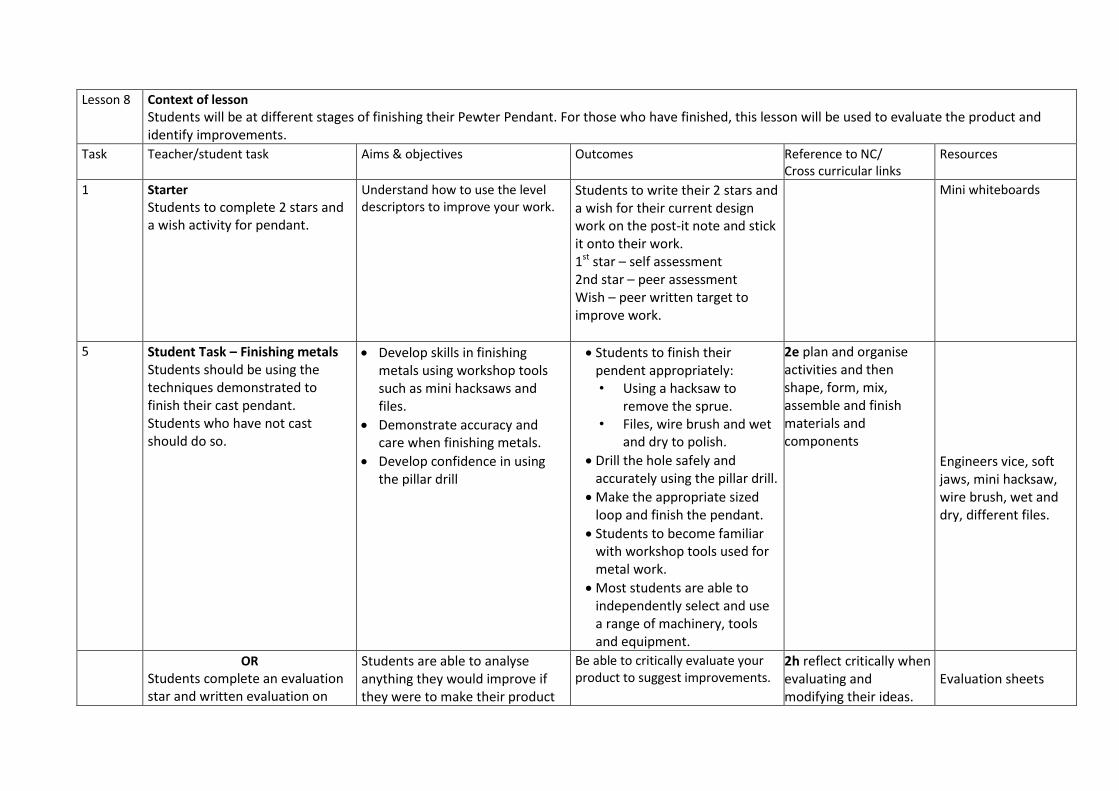
Lesson 8
Context of lesson
Students will be at different stages of finishing their Pewter Pendant. For those who have finished, this lesson will be used to evaluate the product and identify improvements.
Task
Teacher/student task Aims & objectives Outcomes Reference to NC/ Cross curricular links
Resources
1 Starter
Students to complete 2 stars and a wish activity for pendant.
Understand how to use the level descriptors to improve your work.
Students to write their 2 stars and a wish for their current design work on the post-it note and stick it onto their work. 1st star – self assessment 2nd star – peer assessment Wish – peer written target to improve work.
Mini whiteboards
5 Student Task – Finishing metals Students should be using the techniques demonstrated to finish their cast pendant. Students who have not cast should do so.
Develop skills in finishing metals using workshop tools such as mini hacksaws and files.
Demonstrate accuracy and care when finishing metals.
Develop confidence in using the pillar drill
Students to finish their pendent appropriately: • Using a hacksaw to
remove the sprue. • Files, wire brush and wet
and dry to polish.
Drill the hole safely and accurately using the pillar drill.
Make the appropriate sized loop and finish the pendant.
Students to become familiar with workshop tools used for metal work.
Most students are able to independently select and use a range of machinery, tools and equipment.
2e plan and organise activities and then shape, form, mix, assemble and finish materials and components Engineers vice, soft
jaws, mini hacksaw, wire brush, wet and dry, different files.
OR Students complete an evaluation star and written evaluation on
Students are able to analyse anything they would improve if they were to make their product
Be able to critically evaluate your product to suggest improvements.
2h reflect critically when evaluating and modifying their ideas.
Evaluation sheets
their product. again.
6 Plenary Key Word quiz (6 mins)
Develop accurate use of terminology to be able to knowledgeably discuss the project.
Students to develop their vocabulary of materials and processes.
Hmwk No homework
Assessment of learning
Level descriptors are to be referred to when completing development sheet. Pewter pendant success criteria to remain on the board. Plenary will consolidate learning and allow students to self-assess their learning. Differentiation
For students who complete the practical activity, an evaluation sheet will be completed as a self-assessment method.