wood connections 05f - heights libraries · pdf filewood connections over generations ......
TRANSCRIPT

for do-self repairs
WOOD CONNECTIONS
Over generations, the Japanese have elevated the joining of wood to an art. Apprentices often spend several years cleaning, setting, and sharpening their master's tools before they are allowed to make joints themselves. These traditional craftsmen make incredibly intricate, tight-fitting, and visually pleasing joints that permanently connect two or more pieces of wood –without glue, nails, or screws.
Luckily, it is possible to learn how to make strong wood joints without a five-year apprentice-
ship. In fact, most people have probably joined wood at one time or another without realizing the range of joints and fasteners available to them. To make the best connection, you need to understand the basic properties of wood and how to select from the hundreds of different types of joints available. The method you choose to use will depend on your skill level, what you want to accomplish with your joint, how much strength the joint will need to have, and how visually pleasing the connection should be. Each of these factors can take on more or less importance in different situations.
Whether or not you need to use a fastener will depend on which joint you select. About half of
all joints are designed to hold without fasteners. Regardless of whether or not you use a fastener, the use of some white glue (like Elmer'sTM) will greatly increase the strength of any joint. Take care to keep the wood clear of excess glue, as it can seal the pores of the wood and prevent stain from penetrating as deeply as in surrounding areas.
Choosing which joint to use in a given situation comes from experience. Until you have made
the various types of joints, you can't fully appreciate how long it may take to construct one, or how strong it will be. The attached chart illustrates some of the more basic joints. We have rated them in regard to their strength and the skill required to construct them. As you can see, some require little skill, while others demand more from you. Start with the easier ones and work your way up the levels, until you can make the type of joints you want.
Now, let's talk about the easiest way to connect wood – nails. These fastening devices have
played a major role in our development as a civilized race. The earliest nails were wooden plugs cut by hand. As you may guess, they were used very sparingly. (And, many alternative methods of joining wood were developed.)
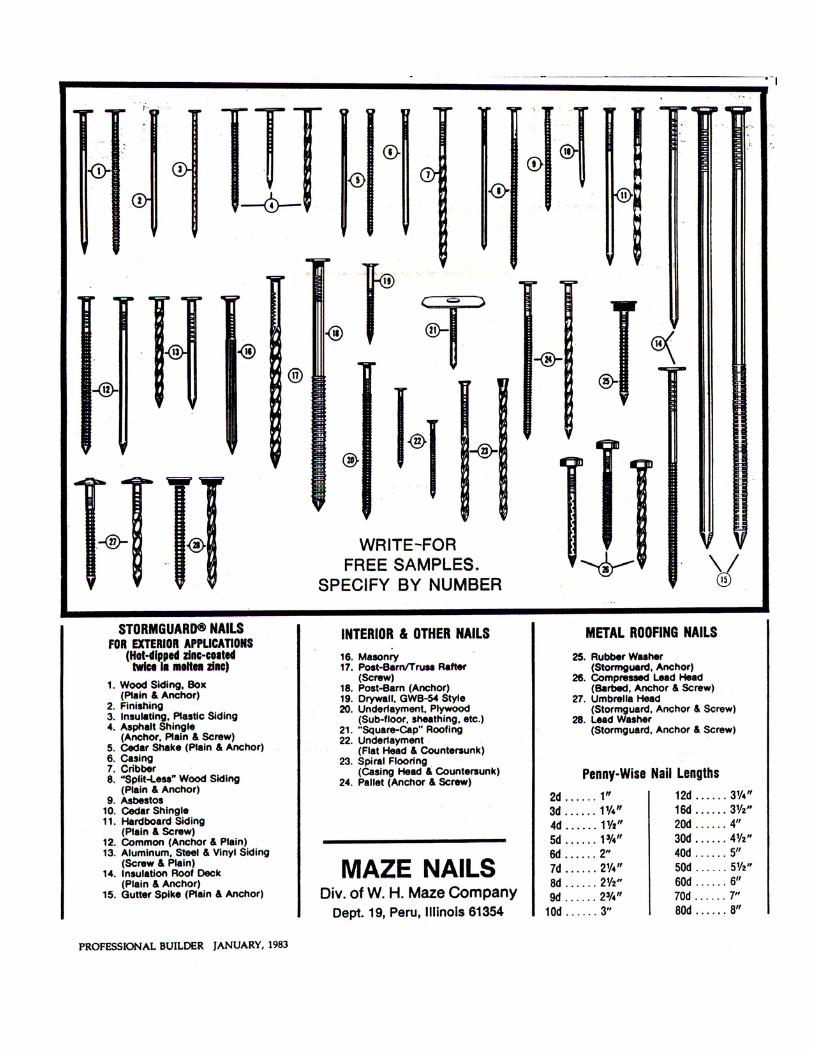
There are now literally hundreds of nail types, each designed to work best at a certain job.
Nail length varies, in most cases, from one inch to eighteen inches. The way nails are identified today refers back to how nails were purchased in centuries past. The length of the nail is indicated by a number followed by the letter “d” (from the roman coin “denarius”) or the word “penny” (indicating their price per hundred under the English system of weight.) The chart on the next page illustrates how the name of a nail indicates its size.
Another common fastener is the screw. The main advantage screws hold over nails is their
greatly increased strength and durability. Screws can also be removed more easily to disassemble the pieces of wood, if the need arises.
(continued)

With screws, also, you have a large number of choices. Screws are numbered according to
the diameter of the unthreaded shank beneath the screw head and the length. You can buy many different combinations of these two dimensions. Screws come in a range of head types designed for use with different styles of screwdrivers and made of different metals. These different types of heads have little to do with the strength of the screw; the head you select will usually depend on aesthetics more than anything else, although occasionally the screw's location or function will determine the type to be used.
A good rule of thumb for selecting the screw to use in connecting wood is that the screw
should be long enough to pass through the top board and 2/3 of the way into the bottom piece you are joining to it. The use of hand soap on its threads will make a screw easier to turn in the wood.
There is not room here to list all the different joints or fasteners available to you in your home
repairs. If you have questions about what joint or fastener might work best for your specific project, feel free to call us at Project Repair, and we'll be happy to discuss your options with you. However, experience and practice will be your best teachers in the long run.
(continued)
©2011, Home Repair Resource Center, 2520 Noble Rd., Cleveland Hts., OH 44121 (phone: 216-381-9560)