wine chiller / vinera instruction manual manual de instrucciones
TRANSCRIPT

WINE CHILLER / VINERA INSTRUCTION MANUAL
MANUAL DE INSTRUCCIONES Model Numbers / No. de Modelos: WC681BG / WCR682SS
(Picture May Vary)
BEFORE USE, PLEASE READ AND FOLLOW ALL SAFETY RULES AND OPERATING INSTRUCTIONS.
La sección en español empieza en la página 20.
Avanti Products has a policy of continuous improvement on its products and reserves the right to change materials and specifications without notice.
Avanti Products, A Division of The Mackle Co., Inc. P.O. Box 520604 - Miami, Florida 33152
www.avantiproducts.com
2
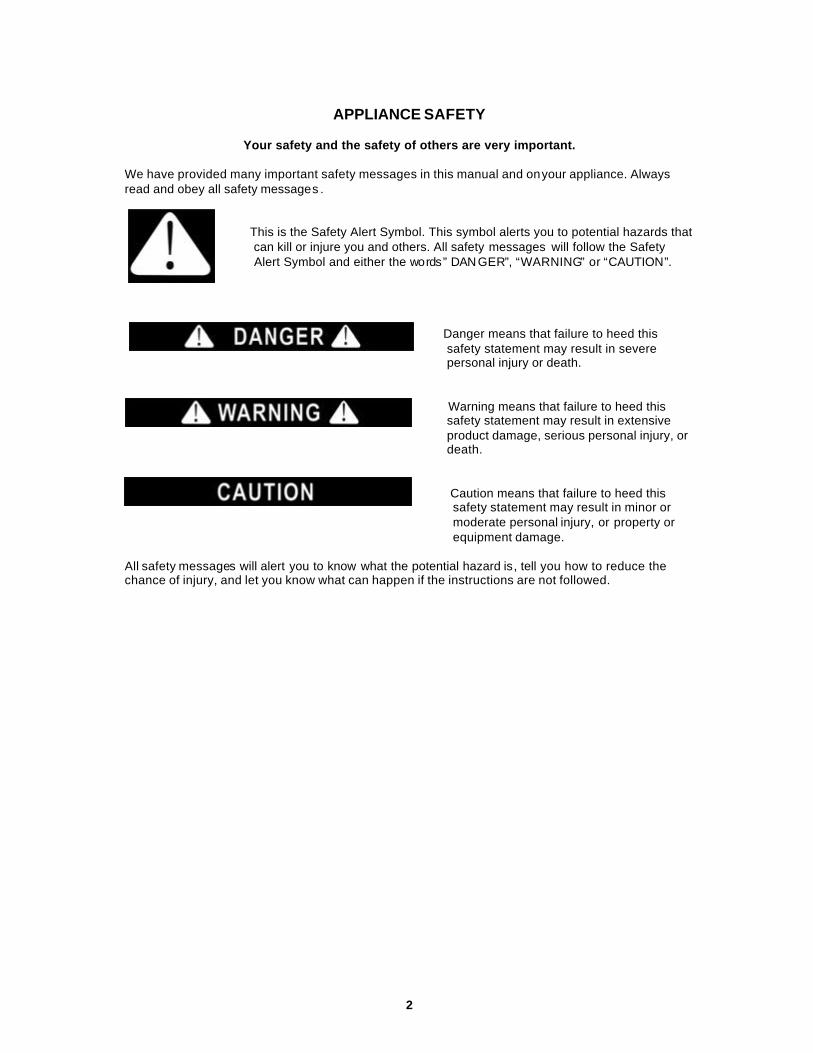
APPLIANCE SAFETY
Your safety and the safety of others are very important.
We have provided many important safety messages in this manual and on your appliance. Always read and obey all safety messages . This is the Safety Alert Symbol. This symbol alerts you to potential hazards that
can kill or injure you and others. All safety messages will follow the Safety Alert Symbol and either the words” DANGER”, “WARNING” or “CAUTION”.
Danger means that failure to heed this safety statement may result in severe personal injury or death.
Warning means that failure to heed this
safety statement may result in extensive product damage, serious personal injury, or death.
Caution means that failure to heed this
safety statement may result in minor or moderate personal injury, or property or equipment damage.
All safety messages will alert you to know what the potential hazard is, tell you how to reduce the chance of injury, and let you know what can happen if the instructions are not followed.

3
IMPORTANT SAFEGUIDES
Before the appliance is used, it must be properly positioned and installed as described in this manual , so read the manual carefully. To reduce the risk of fire, electrical shock or injury when using the appliance, follow basic precaution, including the following:
? Plug into a grounded 3 -prong outlet, do not remove grounding prong, do not use an adapter, and
do not use an extension cord. ? Replace all panels before operating. ? It is recommended that a separate circuit, serving only your appliance be provided. Use
receptacles that cannot be turned off by a switch o r pull chain. ? Never clean appliance parts with flammable fluids. These fumes can create a fire hazard or
explosion. And do not store or use gasoline or other flammable vapors and liquids in the vicinity of this or any other appliance. The fumes can create a fire hazard or explosion.
? Before proceeding with cleaning and maintenance operations, make sure the power line of the unit is disconnected.
? Do not connect or disconnect the electric plug when your hands are wet. ? Unplug the appliance or disconnect power before cleaning or servicing. Failure to do so can result
in electrical shock or death. ? Do not attempt to repair or replace any part of your appliance unless it is specifically
recommended in this manual . All other servicing should be referred to a qualified technician.
FOLLOW WARNING CALL OUTS BELOW ONLY WHEN APPLICABLE TO YOUR MODEL ? Use two or more people to move and install appliance. Failure to do so can result in back or other
injury. ? To ensure proper ventilation for your appliance, the front of the unit must be completely
unobstructed. Choose a well -ventilated area with temperatures above 60°F (16°C) and below 90°F (32°C). This unit must be installed in an area protected from the element, such as wind, rain, water spray or drips.
? The appliance should not be located next to ovens, grills or other sources of high heat. ? The appliance must be installed with all electrical, water and drain connections in accordance with
state and local codes. A standard electrical supply (115 V AC only, 60 Hz), properly grounded in accordance with the National Electrical Code and local codes and ordinances is required.
? Do not kink or pinch the power supply cord of appliance. ? The fuse (or circuit breaker) size should be 15 amperes. ? It is important for the appliance to be leveled in order to work properly. You may need to make
several adjustments to level it. ? All installation must be in accordance with local plumbing code requirements. ? Make certain that the pipes are not pinched or kinked or damaged during installations . ? Check for leaks after connection. ? Never allow children to operate, play with or crawl inside the appliance. ? If you use the drainage container , you must set the drain select switch to OFF or the water can
overflow from the drainage container ? Although the unit has been tested at the factory, due to long-term transit and storage, the first
batch of cubes must be discarded. ? Do not use solvent-based cleaning agents of abrasives on the interior. These cleaners may
damage or discolor the interior. ? Do not use this a pparatus for other than its intended purpose.

4
REGISTRATION INFORMATION
Thank you for purchasing this fine Avanti products. Please fill out this form and return it within 100
days of purchase and receive these important benefits to the following address: Avanti Products, A Division of The Mackle Co., Inc.
P.O. Box 520604 - Miami, Florida 33152 USA ? Protect your product:
We will keep the model number and date of purchase of your new Avanti Products product on file to help you refer to this information in the event of an insurance claim such as fire or theft.
? Promote better products:
We value your input. Your responses will help us develop products designed to best meet your future needs.
----------------------------------------------------------(detach here)----------------------------------------------------------
Avanti Registration Form __________________________________ _____________________________________ Name Model # Serial # __________________________________ ___________________________ __________ Address Date Purchased Store/Dealer Name __________________________________ ______________________________________ City State Zip Occupation __________________________________ As Your Primary Residence, Do You: Area Code Phone Number ?Own ?Rent Did You Purchase An Additional Warranty: Your Age: ?Extended ?Food Loss ?None ?under 18 ?18-25 ?26-30 Reason For Choosing This Avanti Product: ?31-35 ?36-50 ?over 50 Please indicate the most important factors Marital Status: that influenced your decision to purchase ?Married ?Single this product. Is This Product Used In The: ?Price ?Home ?Business ?Product Features How Did You Learn About This Product: ?Avanti Products Reputation ?Advertising ?Product Quality ?In Store Demo ?Personal Demo ?Salesperson Recommendation ?Other_______________________________ ?Friend/Relative Recommendation Comments____________________________ ?Warranty _____________________________________ ?Other_______________________ _____________________________________

5

6
HELP US HELP YOU...
Read this guide carefully. It is intended to help you operate and maintain your new Wine Chiller properly. Keep it handy to answer your questions. If you don't understand som ething or you need more assistance, please call:
Avanti Customer Service 800-220-5570
Keep proof of original purchase date (such as your sales slip) with this guide to establish the warranty period.
Write down the model and serial numbers. You'll find them on a plate located on the rear outside wall of the Wine Chiller. Please write these numbers here: ____________________________________ Date of Purchase ____________________________________ Model Number ____________________________________ Serial Number Use these numbers in any correspondence or service calls concerning your Wine Chiller. If you received a damaged Wine Chiller, immediately contact the dealer (or builder) that sold you the Wine Chiller. Save time and money. Before you call for service, check the Troubleshooting Guide. It lists causes of minor operating problems that you can correct yourself.
IF YOU NEED SERVICE We're proud of our service and want you to be pleased. If for some reason you are not happy with the service you receive, here are some steps to follow for further assistance. FIRST, contact the people who serviced your Wine Chiller. Explain why you are not pleased. In most cases, this will solve the problem.
NEXT, if you are still not pleased, write all the details, including your telephone number, and send it to: Customer Service
Avanti Products 10880 NW 30 Street Miami, FL 33172 USA
CAUTION:
THIS WINE CHILLER IS NOT DESIGNED FOR THE STORAGE OF MEDICINE OR OTHER MEDICAL PRODUCTS.

7
PARTS & FEATURES
(Only for WC681BG)
1. DIGITAL CONTROL PANEL 2. TOP INSERT 3. GLASS DOOR 4. RECESSED HANDLE 5. LARGE WOODEN SHELVES (TOTAL 14) 6. SMALL WOODEN SHELVES (TOTAL 2) 7. LEVELING LEGS 8. SECURITY LOCK 9. BOTTOM GRILLE 10. CABINET

8
PARTS & FEATURES
(Only for WCR682SS)
1. DIGITAL CONTROL PANEL 2. TOP INSERT 3. STAINLESS STEEL DOOR 4. STAINLESS STEEL HANDLE 5. ROLL-OUT LARGE SHELVES (TOTAL 14) 6. ROLL-OUT SMALL SHELF (TOTAL 1) 7. BOTTOM WOODEN SHELF (TOTAL 1) 8. LEVELING LEGS 9. SECURITY LOCK 10. BOTTOM GRILLE 11. CABINET

9
TABLE OF CONTENTS
Appliance Safety 2
Important Safeguides 3
Registration Information ________________________________________________________ 4
Help Us Help You…_____________________________________________________________ 6
Parts And Features ___________________________________________________________7~8
Important Safety Instructions ___________________________________________________ 10
Installation Instructions ________________________________________________________ 10
Before Using Your Wine Chiller _________________________________________________ 10
Installation Of Your Wine Chiller ________________________________________________ 10
Electrical Connection __________________________________________________________ 11
Extension Cord 11
Reversing The Door Swing Of Your Appliance 11
Operating Your Wine Chiller ____________________________________________________ 11
ON/OFF Power 12
Setting The Temperature Control _______________________________________________ 12
Storage 12
Interior Light 12
Door Lock 13
Shelves 13
Care And Maintenance 15
Cleaning Your Wine Chiller _____________________________________________________ 15
Power Failure 15
Vacation Time_________________________________________________________________ 15
Moving Your Wine Chiller 15
Energy Saving Tips____________________________________________________________ 15
Troubleshooting Guide ________________________________________________________ 16
Service For Your Wine Chiller___________________________________________________ 17
Your Product Warranty_________________________________________________________ 18
Wiring Diagram _______________________________________________________________ 19
INSTRUCCIONES EN ESPAÑOL______________________________________________20~22

10
IMPORTANT SAFETY INSTRUCTIONS
?WARNING?
To reduce the risk of fire, electrical shock, or injury when using your appliance, follow these basic precautions:
? Read all instructions before using the Wine Chiller. ? DANGER or WARNING: Risk of child entrapment.
Child entrapment and suffocation are not problems of the past. Junked or abandoned appliances are still dangerous . . . even if they will “just sit in the garage a few days”.
? Before you throw away your old Wine Chiller: Take off the door. Leave the shelves in place so that children may not easily climb inside.
? Never allow children to operate, play with, or crawl inside the appliance. ? Never clean appliance parts with flammable fluids. The fumes can create a fire
hazard or explosion. ? Do not store or use gasoline or any other flammable vapors and liquids in the vicinity
of this or any other appliance. The fumes can create a fire hazard or explosion.
-Save these instructions-
INSTALLATION INSTRUCTIONS
? Before Using Your Wine Chiller ? Remove the exterior and interior packing. Read installer’s directions. ? Check to be sure you have all of the following parts:
? 14 Large Wooden Shelves for WC681BG ? 2 Small Wooden Shelves for WC681BG ? 14 Roll-out Large Shelves for WCR682SS ? 1 Roll-out Small Shelves for WCR682SS ? 1 Bottom Wooden Shelf for WCR682SS ? 2 Keys ? 1 Stainless Steel Handle Assembly for WCR682SS ? 1 Door Lower Hinge for Door Opening from the Right Side for WC681BG ? 1 Instruction Manual
? Before connecting the Wine Chiller to the power source, let it stand upright for approximately 2 hours. This will reduce the possibility of a malfunction in the cooling system from handling during transportation.
? Clean the interior surface with lukewarm water using a soft cloth. ? Install the handle on the left side of the door. (Only for WCR682SS)
? Installation of Your Wine Chiller
? This appliance is designed to be free standing installation only, and should not be recessed or built-in.
? Place your Wine Chiller on a floor that is strong enough to support it when it is fully loaded. To level your Wine Chiller, adjust the front leveling leg at the bottom of the Wine Chiller .
? Locate the Wine Chiller away from direct sunlight and sources of heat (stove, heater, radiator, etc.). Direct sunlight may affect the acrylic coating and heat sources may increase electrical consumption. Extreme cold ambient temperatures may also cause the unit not to perform properly.
? Avoid locating the unit in moist areas. ? Plug the Wine Chiller into an exclusive, properly installed -grounded wall outlet. Do not under
any circumstances cut or remove the third (ground) prong from the power cord. Any questions

11
concerning power and/or grounding should be directed toward a certified electrician or an authorized Avanti Products service center.
? Electrical Connection This appliance should be properly grounded for your safety. The power cord of this appliance is equipped with a three-prong plug which mates with standard three prong wall outlets to minimize the possibility of electrical shock. Do not under any circumstances cut or remove the third ground prong from the power cord supplied. For personal safety, this appliance must be properly grounded. This appliance requires a standard 115/120 Volt AC ~/60Hz electrical ground outlet with three-prong. Have the wall outlet and circuit checked by a qualified electrician to make sur e the outlet is properly grounded. When a standard 2-prong wall outlet is encountered, it is your responsibility and obligation to have it replaced with a properly grounded 3-prong wall outlet. The cord should be secured behind the appliance and not left exposed or dangling to prevent accidental injury. The appliance should always be plugged into its own individual electrical outlet which has a voltage rating that matches the rating label on the appliance. This provides the best performance and also prevent overloading house wiring circuits that could cause a fire hazard from overheated. Never unplug the appliance by pulling the power cord. Always grip the plug firmly and pull straight out from the receptacle. Repair or replace immediately all power cords that have become frayed or otherwise damaged. Do not use a cord that shows cracks or abrasion damage along its length or at either end. When moving the appliance, be careful not to damage the power cord. ? Extension Cord Because of potential safety haza rds under certain conditions, it is strongly recommended that you do not use an extension cord with this appliance. However, if you must use an extension cord it is absolutely necessary that it be a UL/CUL-Listed, 3-wire grounding type appliance extension cord having a grounding type plug and outlet and that the electrical rating of the cord be 115 volts and at least 10 amperes. ? Reversing the Door Swing of Your Appliance This appliance has the capability of the door opening from either the left or right side. The unit is delivered to you with the door opening from the left side. Should you desire to reverse the opening direction, please call service for reversal instructions.
OPERATING YOUR WINE CHILLER It is recommended you install the Wine Chiller in a place where the ambient temperature is between 72-78 degrees Fahrenheit. If the ambient temperature is above or below recommended temperatures, the performance of the unit may be affected. For example, placing your unit in extreme cold or hot conditions may cause interior temperatures to fluctuate. The range of 40-65 degrees Fahrenheit may not be reached.
?Warning? Improper use of the grounded plug can result in the risk of electrical shock. If the power cord is damaged, have it replaced by an authorized Avanti Products service center.

12
Recommended Temperatures for Chilling Wine . Red Wines 58-65? F Dry/White Wines 48-57? F Rose Wines 49-51? F Sparkling Wines 40-47? F
? ON/OFF Power To turn OFF the appliance, press the ON/OFF button. ? Setting the Temperature Control ? You can set the temperature as you desire by pushing the UP or DOWN button. When you push
the two buttons for the first time, the LED readout will show the original temperature set at previous time (the temperature preset at the factory is 54ºF) in the “display” window.
? The temperature that you desire to set will increase 1ºF or 1ºC if you push the UP button once, on the contrary the temperature will decrease 1ºF or 1ºC if you push the DOWN button once.
? When you store mostly red wines, the temperature which you control by pushing the above two buttons need to be set at between 58 to 65? F and the LED lamp under “RED” will be lit red.
? When you store mostly white wines, the temperature needs to be set at between 48 to 57? F and the LED lamp under “WHITE” will be lit green.
? When you store mostly sparkling wines, the temperature needs to be set at between 40 to 47? F and the LED lamp under “SPARKL” will be lit amber.
? You can select temperature display setting from Fahrenheit to Celsius degree by pushing the UP and DOWN button at the same time for 5 seconds. Fahrenheit and Celsius degrees indicator will appear in green color in the “SET” window.
? The temperature inside the unit will appear in red color in the “DISPLAY” window. NOTE: ? If the unit is unplugged, power lost, or turned off, you must wait 3 to 5 minutes before restarting
the unit. If you attempt to restart before this time delay, the Wine Chiller will not start. ? When you use the wine chiller for the first time or restart the wine chiller after having been shut off
for a long time, there could be a few degrees variance between the temperature you select and the one indicated on the LED readout. This is normal and it is due to the length of the activation time. Once the wine chiller is running for a few hours everything will be back to normal.
? Storage Many bottles may differ in size and dimensions. As such the actual number of bottles you may b e able to store may vary. NOTE: You can place 166 standard bottles in this wine chiller with 11 bottles on each large shelf and 6 bottles on each small shelf. ? Interior Light You can turn the interior light ON or OFF by pushing the button marked with the “bulb” symbol . The light will be turned off automatically if it remains ON for 10 minutes. You have to push the button
marked with the “bulb” symbol again and the light will turn back on.
WINE CHILLERR
FF
C C
DOWNUP DISPLAYSET ON/OFFSPARKL REDWHITE

13
? Door Lock Your unit is provided with a lock and key combination. The keys are located inside the plastic bag that contains the User’s Guide. Insert the key into the lock and turn it counterclockwise to unlock the door. To lock the door do the reverse operation making sure metal pin is engaged completely. Remove the key and place it in a secure place for safekeeping. ? Shelves Appliance WC681BG is equipped with the normal wooden shelves and appliance WCR682SS is equipped with a pull-out roller assembly (except for the bottom shelf). You can move the wooden shelves out and in smoothly. Normal Wooden Shelves ? To prevent damaging the door gasket, make sure to have the door all the way opened when
pulling the bottom shelf out of the rail compartment. ? For easy access to the storage content, you must pull the shelf approximately 1/3 out of the rail
compartment, however this unit was designed with a plastic post on each sides of the shelf track to prevent bottles from falling.
? When removing the wooden shelf out of the i nner rail, make sure to remove all items first. Then move the shelf to the position where the notch of wooden shelf is exactly under the plastic post and lift the wooden shelf. In order to replace the shelf, repeat steps described above in reverse.
Pull-out Roller Shelves (Only for WCR682SS) ? To prevent damaging the door gasket, make sure to have the door all the way opened when
pulling shelves out of the rail compartment. ? For easy access to the bottles, you must pull the shelves approximately 1/3 out of the rail
compartment.

14
? To remove the shelves out of the rail pull each shelf approximately 1/3 out. Use a long flat
screwdriver to press down the right plastic notch as shown in Figure A and at the same time lift the left plastic notch as shown in Figure B. Then proceed to pull out the shelf slowly. Contact our service department if assistance is needed.
Figure A
Figure B

15
CARE AND MAINTENANCE ? Cleaning Your Wine Chiller ? Turn off the power, unplug the appliance, and remove all items including shelves and rack. ? Wash the inside surfaces with a warm water and baking soda solution. The solution should be
about 2 tablespoons of baking soda to a quart of water. ? Wash the shelves with a mild detergent solution. ? Wring excess water out of the sponge or cloth when cleaning area of the controls, or any
electrical parts. ? Wash the outside cabinet with warm water and mild liquid detergent. Rinse well and wipe dry with
a clean soft cloth.
? Power Failure ? Most power failures are corrected within a few hours and should not affect the temperature of
your appliance if you minimize the number of times the door is opened. If the power is going to be off for a longer period of time, you need to take the proper steps to protect your contents.
? Vacation Time ? Short vacations: Leave the Wine Chiller operating during vacations of less than three weeks. ? Long vacations: If the appliance will not be used for several months, remove all items and turn
off the appliance. Clean and dry the interior thoroughly. To prevent odor and mold growth, leave the door open slightly: blocking it open if necessary.
? Moving Your Wine Chiller ? Remove all items. ? Securely tape down all loose items (shelves) inside your appliance. ? Turn the adjustable leg up to the base to avoid damage. ? Tape the door shut. ? Be sure the appliance stays secure in the upright position during transportation. Also protect
outside of appliance with a blanket, or similar item. ? Energy Saving Tips ? The Wine Chiller should be located in the coolest area of the room, away from heat producing
appliances, and out of the direct sunlight.

16
PROBLEMS WITH YOUR WINE CHILLER?
You can solve many common Wine Chiller problems easily, saving you the cost of a possible service call. Try the suggestions below to see if you can solve the problem before calling the servicer.
TROUBLESHOOTING GUIDE
PROBLEM POSSIBLE CAUSE
Wine Chiller does not operate. Not plugged in. The appliance is turned off. The circuit breaker tripped or a blown fuse.
Wine Chiller is not cold enough. Check the temperature control setting. External environment may require a higher setting. The door is opened too often. The door is not closed completely. The door gasket does not seal properly.
Turns on and off frequently. The room temperature is hotter than normal. A large amount of contents has been added to the wine chiller. The door is opened too often. The door is not closed completely. The temperature control is not set correctly. The door gasket does not seal properly.
The light does not work. Not plugged in. The circuit breaker tripped or a blown fuse. The light button is “OFF”.
Vibrations. Check to assure that the Wine Chiller is level. The Wine Chiller seems to make too much noise. The rattling noise may come from the flow of the
refrigerant, which is normal. As each cycle ends, you may hear gurgling sounds caused by the flow of refrigerant in your Wine Chiller. Contraction and expansion of the inside walls may cause popping and crackling noises. The Wine Chiller is not level.
The door will not close properly. The Wine Chiller is not level. The door was reversed and not properly installed. The gasket is dirty. The shelves are out of position.

17
SERVICE FOR YOUR WINE CHILLER
We are proud of our customer service organization and the network of professional service technicians that provide service on your Avanti appliances. With the purchase of your Avanti appliance, you can have the confidence that if you ever need additional information or assistance, the Avanti Products Customer Service team will be here for you. Just call us toll-free.
AVANTI PRODUCTS CUSTOMER SERVICES Product Information 800-323-5029
Whatever your questions are about our products, help is available.
Part Orders 800-220-5570
You may order parts and accessories that will be delivered directly to your home by personal check, money order, Master Card, or Visa.
In-Home Repair Service 800-220-5570
An Avanti Products authorized service center will provide expert repair servi ce, scheduled at a time that is convenient for you. Our trained servicers know your appliance inside and out.

18
YOUR Avanti Products WARRANTY Staple your sales receipt here. Proof of
original purchase date is needed to obtain service under warranty.
WHAT IS COVERED LIMITED ONE-YEAR
WARRANTY For one year from the date of purchase by the original owner, Avanti Products will, at its option, repair or replace any part of the unit, which proves to be defective in material or workmanship under normal use. During this period Avanti Products will provide all parts and labor necessary to correct such defects free of charge, so long as the unit has been installed and operated in accordance with the written instructions in this manual. In rental or commercial use, the warranty period is 90 days. All Avanti Appliances of 3.5 cubic feet capacity or less must be brought/sent to the appliance service shop for repair.
? Content losses of food or other, due to
spoilage. ? Incidental or consequential damages. ? Parts and labor costs for the following will
not be considered as warranty: ? Door springs, and/or frames. ? Inner door panels, door rails and/or door
supports. ? Light bulbs and/or plastic housing. ? Plastic cabinet liners. ? Punctured evaporator that voids the
warranty on the complete sealed system.
LIMITED SECOND THROUGH FIFTH YEAR WARRANTY For the second through the fifth year from date of original purchase, Avanti Products will provide a replacement compressor free of charge due to a failure. You are responsible for the service labor and freight charges. In rental or commercial use, the limited compressor warranty is one year and nine months. Cost to move the appliance to the servicers’ shop and back to the user's home, as may be required, are the user's responsibility.
? Repairs performed by unauthorized
servicers. ? Service calls that do not involve defects in
material or workmanship such as customer education, door reversal, or proper installation.
? Service calls that are related to external problems, such as abuse, misuse, inadequate electrical power, accidents, fire, floods, or acts of God.
? Replacement of house fuses or resetting circuit breakers.
? Failure of the product if it is used for other than its intended purpose.
? This warranty does not apply outside the Continental USA.
WHAT IS NOT COVERED

19
WIRING DIAGRAM

20
INSTRUCCIONES DE SEGURIDAD
ATENCION
INSTRUCCIONES PARA
LA CONEXION A TIERRA Este aparato electrodoméstico debe estar conectado a tierra. En caso de un cortocircuito eléctrico, la conexión a tierra reduce el riesgo de choque eléctrico proporcionando un cable a tierra con una enchufe de conexión a tierra. Este enchufe debe estar conectado en un tomacorriente instalado correctamente y conectado a tierra. ADVERTENCIA – El uso inadecuado del enchufe de conexión a tierra puede resultar en un riesgo de choque eléctrico. Consulte con un electricista o persona de reparaciones competente si no comprenden bien las instrucciones de conexión a tierra o si existe alguna duda sobre si el aparato esta conectado a tierra correctamente.
NO USE CABLES PARA EXTENDER EL CORDON ELECTRICO DE LA UNIDAD
Use un tomac orriente de pared exclusivo. No conecte su vinera a cables para extender el cordon eléctrico o junto a cualquier otro electrodoméstico en el mismo tomacorriente de pared.
ADVERTENCIA IMPORTANTE: Una vinera vacía es una atracción muy peligrosa para los niños. Saque todas las juntas, pestillos, tapas o puerta de todo electrodoméstico que no esté en uso, o tome alguna medida para asegurar que no presente peligro.
INSTRUCCIONES DE INSTALACION Saque los embalajes exteriores, limpie bien el exterior con un paño suave seco, y el interior con un paño húmedo y tibio. Evite colocar la vinera cerca de una fuente de calor, luz de sol directa, o lugar húmedo. Ubicación
1. Seleccione un lugar con su piso fuerte y nivelado. 2. Evite la luz directa del sol o calor. La luz directa del sol puede afectar la capa de acrílico.
Las fuentes de calor en su proximidad provocarán un consumo mayor de electricidad. OPERACION Para evitar vibraciones, el compartimiento interior debe estar bien nivelado. La temperatura variará dependiendo de la cantidad de botellas almacenadas y la frecuencia con que se abre la puerta. Cuando la vinera no se use por un período largo, desconecte el enchufe y deje la puerta entreabierta. Nota: Espere entre 3 a 5 minutos antes de volver a encender si el funcionamiento ha sido interrumpido.
Se recomienda que Ud coloque su vinera en un lugar donde la temperatura ambiental se mantenga entre 23-25 grados centígrados. Si la temperatura ambiental oscila afuera de esos l ímites, pueda afectar la temperatura de la unidad. Por ejemplo, si su unidad está situada en lugares donde hay temperaturas muy frías o calientes también puede afectar la temperatura de la unidad.

21
Temperaturas recomendadas para enfriar vinos: Vinos tintos: 58 - 65ºF (14 -18ºC) Vinos blanco/seco: 48 - 57ºF (9 -14ºC) Vinos rosé/Zinfandel: 49 - 51ºF (9 -11ºC) Vinos blanco/espumante: 40 - 47ºF (4 - 8ºC)
WINE CHILLERR
FF
C C
DOWNUP DISPLAYSET ON/OFFSPARKL REDWHITE
Operación ? El enfriador de vino viene programado de fábrica. Si en su mayoría Usted solamente guarda
vinos blancos, presione el botón designado “white” o blanco y la vinera mantendrá una temperatura entre 9º y 14º C (48ºF y 52ºF). La pantalla digital se alumbra en color verde.
? Al presionar el botón marcado “red” o rojo, la vinera mantendrá una temperatura entre 14° y 18º C (58ºF y 65ºF). La pantalla digital se alumbrara en color rojo. Presione el botón marcado “sparkl” o espumoso y la vinera mantendrá una temperatura entre 4º y 8º C (40ºF y 47ºF). El indicador (pantalla digital) se alumbrara en color amarillo.
? Al conectar su vinera por primera vez, puede haber una variante de varios grados entre la temperatura seleccionada y la indicada en la pantalla digital. Esto es normal y es debido al largo período de activación y desactivación. También hay una variante de 6º a 8º F (3º a 4ºC) entre los estantes superiores e inferiores de la vinera, de forma que si usted quiere combinar una mezcla de vinos rojos (tintos) y blancos, deberá colocar las botellas de vino blanco en el estante inferior y las de vino tinto en el estante superior. Si usted ha programado el enfriador de vino a 15º por ejemplo, podría aumentarlo oprimiendo el botón marcado UP sucesivamente o podría bajarlo oprimiendo el botón marcado DOWN.
? También puede cambiar de grados centígrados a Fahrenheit, oprimiendo los botones marcados UP y DOWN sucesivamente y aparecerán en la pantalla marcada “SET” en color verde.
? La temperatura dentro de la unidad aparecerá en la ventana marcada “display”. Luz interior La luz interior se controla manualmente y no funciona al abrir ni cerrar la puerta. Para prender o
apagar la luz, presione el boton marcado ( ) de la luz ubicado en el panel de control. Si la luz esta prendida, por mas de 10 minutos, se apagara automáticamente. Cerradura de la puerta Su unidad viene equipada con una combinación de cerradura y llave. Las llaves (2) están dentro de la bolsa plástica junto al manual de instrucciones. Introduzca la llave en la cerradura y gírela hacia la izquierda para abrir la puerta. Para cerrarla, gire la llave hacia la derecha. Quite la llave y colóquela en un lugar seguro para evitar que se pierda.
Descongelación
Su refrigerador para vinos ha sido diseñado con un sistema de descongelación de “ciclo automático”.
Las superficies refrigeradas del compartimiento para vinos se descongela automáticamente, durante el ciclo “apagado” del control de enfriamiento (termostato). El agua descongelada del compartimiento es eliminada automáticamente, encauzándola hacia una bandeja de goteo ubicada cera del compresor. La transferencia de calor del compresor hacia la bandeja de goteo evapora el agua. ADVERTENCIA
Asegúrese de tener la puerta abierta completamente se Ud desea remover los estantes de madera o moverlos hacia adelante para extraer una botella.
22
NOTA: Para remover los estantes de madera corredizos, mueva cada uno de ellos aproximadamente una tercera parte fuera de los raíles. Presione el lado plástico derecho usando un destornillador plano (siga la flecha) como se muestra en el dibujo “A” de la página 13 y a la misma vez haga lo mismo con el plástico del lado izquierdo como se muestra en el dibujo “B” de la página 13. Saque el estante corredizo suavemente.
CUIDADO Y MANTENIMIENTO
Limpieza
Para limpiar el interior, use un paño suave con una solución de una cucharada de bicarbonato de sodio por cada cuarto de agua, o una solución de espuma de jabón suave, o un detergente suave. Para lavar las rejillas, sáquelas deslizándolas con cuidado, y use una solución de detergente suave; luego séquelas con un paño suave. Limpie el exterior con un paño húmedo suave y un poco de detergente suave o productos de limpieza para electrodomésticos. Período de vacaciones Para períodos cortos de vacaciones, deje los controles en la posición normal. Durante ausencias más largas;
(a) saque todas las botellas, (b) desconecte la vinera del tomacorriente, (c) limpie bien el refrigerador para vinos, (d) deje la puerta abierta para evitar la formación de condensación, moho u olores.
Corte de corriente La mayoría de los cortes de corriente se corrigen en una o dos horas y no afectarán las temperaturas de su vinera. Sin embargo, Ud. deberá reducir la cantidad de veces que abra la puerta cuando la corriente esté apagada. Si Ud. se muda Saque y asegure todos los artículos de su unidad . Para evitar que los tornillos nivelantes se averíen, gírelos completamente hacia la base. Algunas reglas importantes para el uso correcto de la vinera. ? Las bebidas se deben guardar en botellas cerradas. ? No sobrecargue el compartimiento interior. ? No abra la puerta a menos que sea necesario. ? Si la vinera se guardara sin uso por períodos largos, se sugiere que, luego de una limpieza
cuidadosa, se deje la puerta entreabierta para permitir que el aire circule dentro de la unidad y evitar una posible formación de condensación, moho u olores.
? Nunca cubra los estantes del compartimiento para vinos con papel de aluminio o cualquier otro material para cubrir estantes que puedan obstruir la circulación del aire.
PRINTED IN CHINA