widetire frame fab
TRANSCRIPT

7/27/2019 Widetire Frame Fab
http://slidepdf.com/reader/full/widetire-frame-fab 1/10
10/16/13 widetire
www.chopperhandbook.com/widetire.htm 1/10
Wide Tire Frame Fabrication
Before we get into the technicalities of the typical wide-tire frame it is important to understand that bikes built around wide rear tires havedistinctly different handling characteristics than cycles using more conventional rubber. Some people say that wide-tired choppers handlepoorly and this is a true statement up to a point but I prefer to say that a well-designed fat tire bike handles ‘differently’. Notice that I said
‘well designed’.
Despite what we see in the popular chopper rags fat-tired choppers represent a very small minority of all the chopped bikes on the roadtoday. If you attend many shows, rallies, swap meets and other events you’ll no doubt notice that for every wide-tired bike there will be atleast fifty ‘conventional’ bikes and this 50 to 1 ratio is substantiated by the feedback we’ve been getting from our clients and site visitors.In fact the vast majority of our customers and friends are building bikes that use 200mm or under rear tires by about a 100 to 1 ratio. Atthe last really big bike event I attended I only saw five wide-tired bikes parked in the streets along with around three thousand or so other rides but the show floor was full of fat tire scooter displays.
It all comes down to ‘appearance’ over ‘practicality’. Good looks and good handling don’t always follow the same path but somewherealong the line you can reach a good compromise if you pay attention to details and don’t get swayed by the latest fads or trends in showbikes.
In my opinion, and it is only my opinion, the maximum size rear tire that can be used on a chopper designed for ‘serious’ all-purpose
road-work falls somewhere between a 180 to a 230mm with a 200 or course being the ideal candidate. An experienced rider won’tnotice much difference in the handling characteristics of a 200 compared to a 150 and depending upon the overall chassis design a bikeequipped with such a tire can handle the twisty roads, traffic congestion and tight urban parking lot topography as well as most stockersor road racers. If the rider however is willing to modify their own behavior and to make some compromises in their riding style then theymay be happier with a wider tire if they are going after some kind of ‘look’ that they simply aren’t willing to give up.
You can’t dismiss the pursuit of appearance entirely. I have personally owned some bikes that handled miserably but they looked reallygood so I just adjusted my riding habits to suit the ride in question but I would not have ridden any of these bikes cross country as Ipersonally prefer a very responsive cycle, that I ride, and not a cycle that rides me, if you know what I mean.
For those who don’t understand what I’m talking about I’ve included an excerpt from a rode test article in one of the Chopper magazineswhere the writer is talking about the handling characteristics of a pretty popular 250-tired softail bike:
“The fat rear tire causes a slight constant pull to the left due to the engine and transmission offset but nothing that changing your
riding position can’t overcome. The overall handling of the bike is fine but there is a limit to the lean angles and sometimes the bikefeels a little unstable with sudden lurches in corners. On many occasions I found myself scraping the lower frame rails and on left-
handers grinding the primary cover or kickstand. The six over forks combined with the wide rear tire make it a little inconvenient to
maneuver in tight traffic and winding roads caused us to slow significantly. A better suspension system would help tremendously as
the frame bottoms out even over slight road irregularities due to the increased weight of the tire and swing-arm. This bike is probably
best suited for straightaway highway cruising”.
7/27/2019 Widetire Frame Fab
http://slidepdf.com/reader/full/widetire-frame-fab 2/10
10/16/13 widetire
www.chopperhandbook.com/widetire.htm 2/10
n ano er ar ce, s me wr en or a roa es o a a r g rame e r er wro e:
“The process of getting familiarized was a combination of fighting it and becoming its best friend. At first I had to muscle it intosubmission just to keep it on the road. The bike is a little cumbersome and clumsy at low speeds. It takes concentrated steering effort andnot just normal body-english to get it into sweeping turns but once into the corner the bike remains on its line relatively well”.
I’ve been around a long time and in my opinion these articles were using ‘sales-speak’ for “This bike is piece of crap and should be usedfor ‘show’ purposes only”. The writers were basically telling us laymen how to enjoy eating a tough steak when they should have beentelling us how to find a good steak to begin with but when you have to answer to your advertisers you have to compromise your ethics justa little bit.
Most of the folks I know who have built fat-tired rides have enjoyed them for what they are and that’s a show piece or bar-hopper but Idon’t know anybody who’d build another one which says a lot about their usefulness. It’s great to have one in the garage to show peoplebut it’s a whole lot better if you also have a serious ‘rider’ parked next to it.
Fat tired bikes require the builder to do far more design planning than more conventional cycles as there are simply more variablesinvolved. First and foremost is the selection of the tire itself as there can be considerable variation in the actual tire dimensions from onemanufacturer to the next. Then comes the selection of the wheel, which also has some bearing on how wide the mounted tire will be at thewidest point in the sidewall. Once the wheel and tire have been selected it’s up to the builder to decide whether they want to go with achain or belt final drive and what size chain or belt to use. Most ‘experts’ won’t endorse the use of belts with wide rubber but the vastmajority of folks still insist on running a belt anyway. The selection of the drive system has a tremendous impact on the design width of therear wishbones and lower rails and the minimum to maximum clearance can vary by as much as one inch on the drive side rails.
Once you decide on the drive system you’ll have to find out if you can buy an offset kit that will accommodate the components you’veselected up to this point or whether you’ll have to have something custom made. In the mix you’ll also have to consider whether or not youwant to opt for a right side drive transmission so you won’t have to offset the motor and tranny.
If you find that you can buy all of the components you’ll need you must also be prepared to either look into a hotter power plant of be willingto ride in the rear of the pack since the average fatty weighs anywhere between a fifty and a hundred pounds more than a conventionalbike.
Before you start building a wide tired bike you must be prepared for some of these compromises you may have to make and you mustalso be prepared for the additional expenses such bikes demand and these expenses are considerable compared to a moreconventional chopper. If you’re willing to make such concessions and you have the money we’ll not waste any more time and get right intoit in the next section.
Wide Tire Frame Buildup
Part I – The Design
The frame for this particular project will be designed for a 250mm rear tire using XLO final chain drive. We’ll get into the difference of chains versus belts elsewhere. Like the Old School chopper frame it is stretched four up and two out in front with two inches of stretchrearward in the lower rails and wishbones. All tubing is 1.25x.120 ERW and all bends use a 4.5” centerline radius. Ground clearance is3.75 inches. These design parameters result in a frame having a rakish profile if used with a higher ‘Sportster’ type tank yet low enoughto use a sculpted tank if desired for a more streamlined ground-hugger appearance. Rake is anticipated to be 38 degrees but we’ll waituntil later to make a final determination about that.
For the sake of descent handling we’ll be using a Baker right-side-drive transmission so we don’t have to offset the engine and tranny.Even though it is more expensive at least the rider won’t have to sit sidesaddle or let the right ass-cheek droop over the seat to keep therig balanced.
Major materials needed for the frame proper are thirty lineal feet of 1.25 x .120 ERW tubing and two feet of 1x2x.120 inch rectangular tube sections.
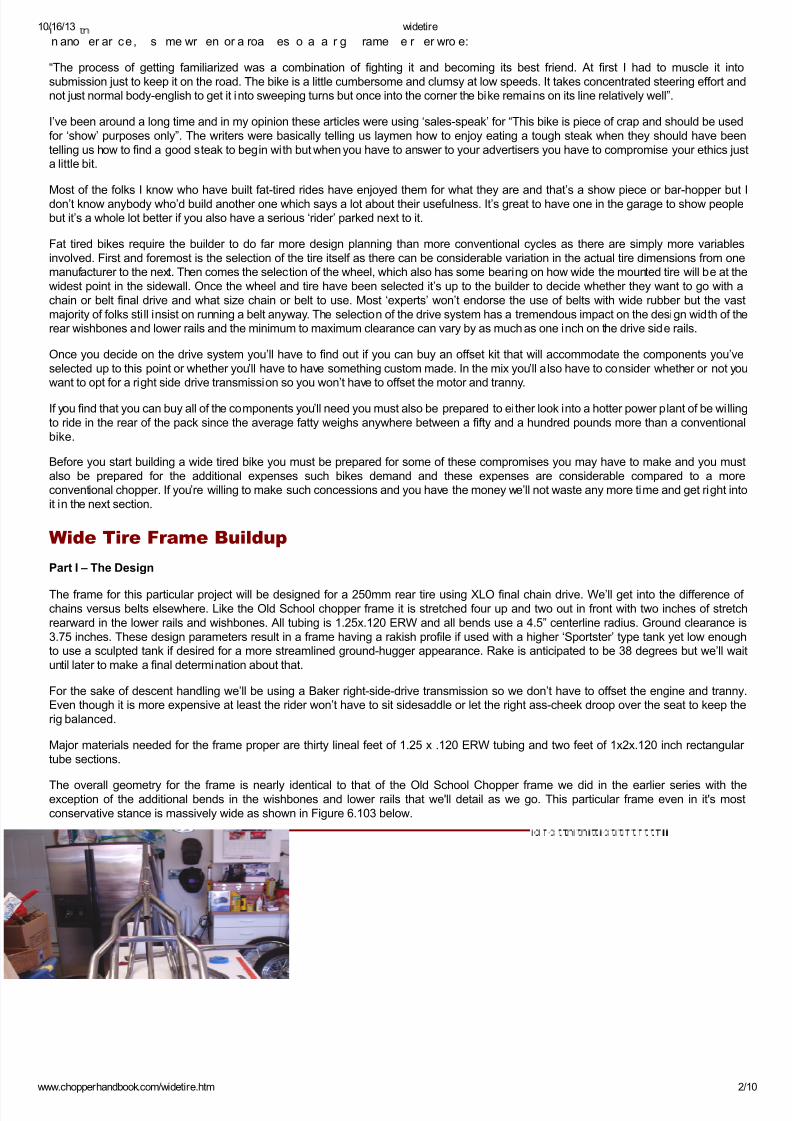
The overall geometry for the frame is nearly identical to that of the Old School Chopper frame we did in the earlier series with theexception of the additional bends in the wishbones and lower rails that we'll detail as we go. This particular frame even in it's mostconservative stance is massively wide as shown in Figure 6.103 below.

7/27/2019 Widetire Frame Fab
http://slidepdf.com/reader/full/widetire-frame-fab 3/10
10/16/13 widetire
www.chopperhandbook.com/widetire.htm 3/10
Figure 6.103
In this snapshot we've just taken the rear wishbones and backbone of a 250-frame section and laid it atop the Old School frame toprovide some indication of how much wider a 'wide-tire' frame actually is in comparison to a conventional chassis. The wishbones for a360 are over 4 inches wider than the ones shown here.
Figure 6.104 shows the major frame dimensions in profile view.
Figure 6.104
These dimensions can be used to build a wide tire frame that handles anything from a 180 to a 360 with the differences between anyparticular wheel/tire size being made in the outward bends, when viewed from above, of the rear wishbones and the rear section of thelower frame rails.
Before you undertake a wide tire project it is, in my opinion, essential that you have the wheel, tire, sprocket or pulley and fender for your particular project in the shop so you can make real measurements of the components you're going to use. This is the only way you'regoing to be able to make a 'tight' frame.
Most aftermarket mass-produced wide tire frames are built to 'maximum' dimensions that take into consideration the 'worse-case'scenario of a combination of components and this is why you sometimes see as much as two inches of 'air-space' between the framerails and the sides of the fender on some bikes. Our objective is to build a frame that fits the components perfectly to create a nice 'tight'fit between the rails and the other component parts.
Before we go much further it should be understood that building a nice wide tire frame is as much art as it is technicalities and no twobuilders will produce the same frame even if they're both using the same set of design dimensions. These are not the type of frames tomake your break-in to frame building on and I urge the first time fabricator to build a couple of conventional frames before trying to tacklea wide tire design. You must have a good bender for these frames and you must be very familiar with the characteristics andidiosyncrasies of your particular bending equipment before you tackle one of these monsters.
The dimensions for the rear wishbones are shown in Figure 6.105 below.

7/27/2019 Widetire Frame Fab
http://slidepdf.com/reader/full/widetire-frame-fab 4/10
10/16/13 widetire
www.chopperhandbook.com/widetire.htm 4/10
Figure 6.105
As we mentioned earlier this particular design is for 250mm rear tire running a 1.02" XLO chain so we're shooting for a clear dimensionof 13" between the insides of the rear frame rails so you could run a 230/240 with a 1-1/8" belt.
Depending upon the bender you're using you'll need two sections of 1.25 x.120" tubing between 36 and 38 inches long for each rail.
As you can tell from the diagram the inside width of the rails can be set by either changing the angles where the frame starts to flare outand/or lengthening or shortening the dimension of the tangent sections between the two rearmost bends that define the flare. The width of the rails forward of the fender mount cross member, which is 10.875" to the outside, is set for all practical purposes by the width of the oiltank you're going to use and can vary from as narrow as 10.5" to as much as 11.25". We've found 10.875 to be a good compromise for most tanks.
Remember that the actual width inside the rear rails is dependent upon the wheel/tire combo and drive system and braking setup youelect to use and can vary considerably from the dimensions we've used for this particular project.
It is also interesting to note that the shape and size of the rear fender you're planning on running has a lot to do with exactly where youwant to begin the bends for the rear flare outs. In this diagram we're showing a smooth rolled fender that follows the elliptical profile of thetire section. It barely clears the rails where they begin to narrow in. A flatter fender would require that the bends be started further towardsthe front.
Before you start bending these up it's a good idea to go around and carefully study, examine and measure up as many wide tire framesas you can. You'll find that there are tremendous variations in the approaches that the various manufactures and custom builders taketowards fabrication of these pieces. Sometimes a builder will use some large radius dies so that the entire wishbone looks like it's aseries of long very gentle compound curves. Other builders use small radius dies and shorten up on the small straight sections so it's
easier to fit a flatter fender but the frame will look more angular. On our design we took the middle road for a style that's about half waybetween streamlined and angular. There is no 'correct' way to build one of these frames and there are no 'standard' formulas or dimensions since they should ideally be custom built for specific components otherwise they'll look kind of bulky and out of proportion.
The wishbones are built exactly the same way as the wishbones for the Old School project bike. The only difference of course is that youhave four more bends to create the width necessary for the fat tire as seen below. Use the same process and you won’t have anyproblems building these.
Figure 6.106

7/27/2019 Widetire Frame Fab
http://slidepdf.com/reader/full/widetire-frame-fab 5/10
10/16/13 widetire
www.chopperhandbook.com/widetire.htm 5/10
Figure 6.107
Figure 6.108
Part 2 – The Right Side Down Tubes and Lower Rails
We’ve had a significant amount of email from prospective builders out there who are not only trying to build their first frame but alsolearning the ins and outs of their particular benders at the same time. Taking this into consideration we decided to add a little more detailin this section that hopefully shows some of the typical steps used in putting bends in a tube run. Keep in mind that each bender will bedifferent and the procedures shown here might not look the same on vertical type benders or other types but the concepts will remain thesame.
As I’ve mentioned elsewhere I find it easier to work from the top forward end of the lower rails where the down-tubes meet the headstockor backbone and work towards the rear. Other builders do just the opposite so it’s a matter of personal preference.
Figure 6.109 shows the first Down-tube bend in progress. This is exactly the same process and uses the same procedures anddimensions as making the so-called front ‘ramp’ bends in the down tubes on the Old School frame in the previous section.

7/27/2019 Widetire Frame Fab
http://slidepdf.com/reader/full/widetire-frame-fab 6/10
10/16/13 widetire
www.chopperhandbook.com/widetire.htm 6/10
Figure 6.109
Figure 6.110 shows the first Down-tube bend at completion.
Figure 6.110
Figure 6.111 shows the tube moved forward 4” per plan (3.5" for our bender) and set up for the second bend in the series.
Figure 6.111
Figure 6.112 shows the second bend at completion.

7/27/2019 Widetire Frame Fab
http://slidepdf.com/reader/full/widetire-frame-fab 7/10
10/16/13 widetire
www.chopperhandbook.com/widetire.htm 7/10
Figure 6.112
These two bends create what I call the 'ramp' in the down-tubes where they transition into the lower frame rails. Both of these bends lay in
the same plane as the normal centerline of the whole tube run. If we took it out of the bender and laid it on the shop floor at this point itwould lay perfectly flat.
You can repeat the process to make the ‘ramp’ bends in the left side down tube and lower rail.
What the snapshots don’t show clearly is that any one of these bends can be what some mistakenly call a ‘compound bend’ which usuallyaren’t used in race car or bikes frames to begin with. The term for a bend that changes direction from the normal x-y-z plane of the tubeslongitudinal axis probably should be called a ‘complex’ or ‘rolled’ bend and they occur any time the tube is ‘rotated’ in the bender tochange the direction of any particular bend in relation to the preceding one. This type of bend is impossible to see or i llustrate in a regular 2D shop drawing and this is where 3D graphics are much more helpful to the designer.
Rotating the tube in the bender is the way you control the ‘direction’ of the bends and this technique is hard to grasp until you startbending up some tubes and gets a little complicated since the direction of rotation changes from the left to the right side of the bike.
Moving on we slip the tube down to the point where we want the lower rails to begin widening near the location of the rear transmissionmount cross member. The entire tube run is rotated in the bender so that the direction of that outward turning bend is pointed in the
correction direction. Figure 6.113 shows the tube setup and ready to make that outward bend in the lower rail (this is the rail for the rightside of the frame). If you were bending the left side rail the down-tube would be pointing downward which is why you want the bender mounted at least 36" above the shop floor.
Figure 6.113
Figure 6.114 shows the outward bend being made.
Figure 6.114
The process can be repeated for the left side rail but remember that the down tube will be pointing downward at a slight 9 to 10 degree

7/27/2019 Widetire Frame Fab
http://slidepdf.com/reader/full/widetire-frame-fab 8/10
10/16/13 widetire
www.chopperhandbook.com/widetire.htm 8/10
.
Figure 6.115
When you're finished with the initial out-bends the lower rails should look somewhat like those in Figure 6.115. Notice that the tubes is still'flat' relative to the plane of the forward section of the lower rails at this point but they splay out as they extend rearward (near the yellowflashlight). You'll notice on some frames, Santee's come to mind, that this aft section of the rail is not flat and has already started to bebent very slightly in an upward direction.
We're now ready to move a li ttle further along and rotate the tube for a tricky bend that seems to be throwing some folks off track. This lastbend in the rail is one of those 'rolled' bends that are going in two directions at one time. In other words the tube is being bent upwardtowards the axle plate but at the same time it is also being bent back inwards towards the center of the frame so it lies in plane that isparallel with the main section of the lower rails. Even though it sounds complicated it is very simple and just involves rotating the tube inthe bender as shown in Figure 6.116.
Figure 6.116
After the bend is made the tube will sloped upward at an angle of 25 degrees, viewed from the side, and be bent back into a line running
parallel with the lower side rail all with a single bend as seen in the snapshot of Figure 6.117 that follows.
7/27/2019 Widetire Frame Fab
http://slidepdf.com/reader/full/widetire-frame-fab 9/10
10/16/13 widetire
www.chopperhandbook.com/widetire.htm 9/10
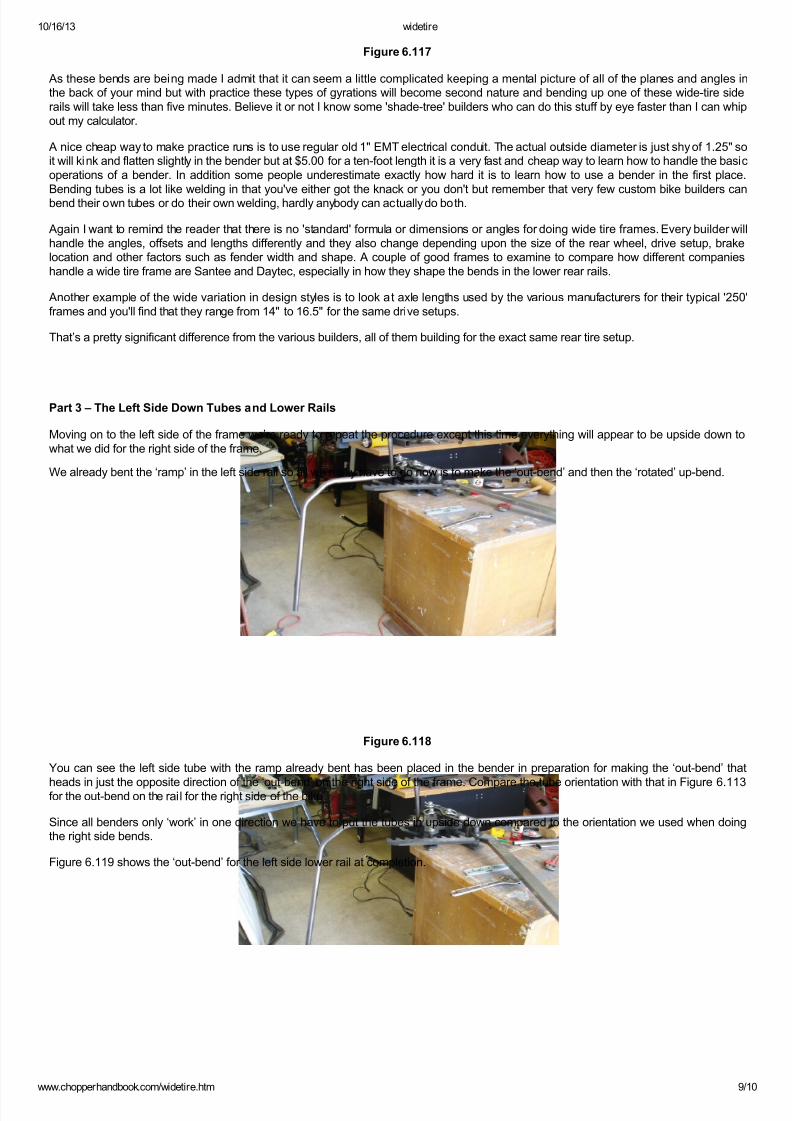
Figure 6.117
As these bends are being made I admit that it can seem a little complicated keeping a mental picture of all of the planes and angles inthe back of your mind but with practice these types of gyrations will become second nature and bending up one of these wide-tire siderails will take less than five minutes. Believe it or not I know some 'shade-tree' builders who can do this stuff by eye faster than I can whipout my calculator.
A nice cheap way to make practice runs is to use regular old 1" EMT electrical conduit. The actual outside diameter is just shy of 1.25" soit will kink and flatten slightly in the bender but at $5.00 for a ten-foot length it is a very fast and cheap way to learn how to handle the basicoperations of a bender. In addition some people underestimate exactly how hard it is to learn how to use a bender in the first place.Bending tubes is a lot like welding in that you've either got the knack or you don't but remember that very few custom bike builders canbend their own tubes or do their own welding, hardly anybody can actually do both.
Again I want to remind the reader that there is no 'standard' formula or dimensions or angles for doing wide tire frames. Every builder willhandle the angles, offsets and lengths differently and they also change depending upon the size of the rear wheel, drive setup, brakelocation and other factors such as fender width and shape. A couple of good frames to examine to compare how different companieshandle a wide tire frame are Santee and Daytec, especially in how they shape the bends in the lower rear rails.
Another example of the wide variation in design styles is to look at axle lengths used by the various manufacturers for their typical '250'frames and you'll find that they range from 14" to 16.5" for the same drive setups.
That’s a pretty significant difference from the various builders, all of them building for the exact same rear tire setup.
Part 3 – The Left Side Down Tubes and Lower Rails
Moving on to the left side of the frame we’re ready to repeat the procedure except this time everything will appear to be upside down towhat we did for the right side of the frame.
We already bent the ‘ramp’ in the left side rail so all we really have to do now is to make the ‘out-bend’ and then the ‘rotated’ up-bend.
Figure 6.118
You can see the left side tube with the ramp already bent has been placed in the bender in preparation for making the ‘out-bend’ that
heads in just the opposite direction of the ‘out-bend’ on the right side of the frame. Compare the tube orientation with that in Figure 6.113for the out-bend on the rail for the right side of the bike.
Since all benders only ‘work’ in one direction we have to put the tubes in upside down compared to the orientation we used when doingthe right side bends.
Figure 6.119 shows the ‘out-bend’ for the left side lower rail at completion.

7/27/2019 Widetire Frame Fab
http://slidepdf.com/reader/full/widetire-frame-fab 10/10
10/16/13 widetire
h h db k / id i h 10/10
Figure 6.119
Both rails are now finished and ready for fitting to the backbone.
Figure 6.120
As I’ve mentioned earlier there is no ‘one’ way to build a wide tire frame and no ‘right’ way to learn how to bend the tubes. The tube-bending section of the Handbook provides some good tips on learning how to do ‘rotated’ bends and the end results of a nicelycontoured set of wide rails are worth the effort of practicing.
In my opinion nothing looks more amateurish than the typical ‘hoop’ type frames some people are building just because they aren’t willingto truly master the art of bending.
| Main Page | Copyrights | Terms of Use | Warranty Disclaimer | Security and Privacy | Contact |
Copyright © 2003-11, All Rights Reserved