what makes my community special? thematic visual arts …...o use and experiment with different...
TRANSCRIPT
Rebecca Falls EDAE315 220127838
1 | P a g e
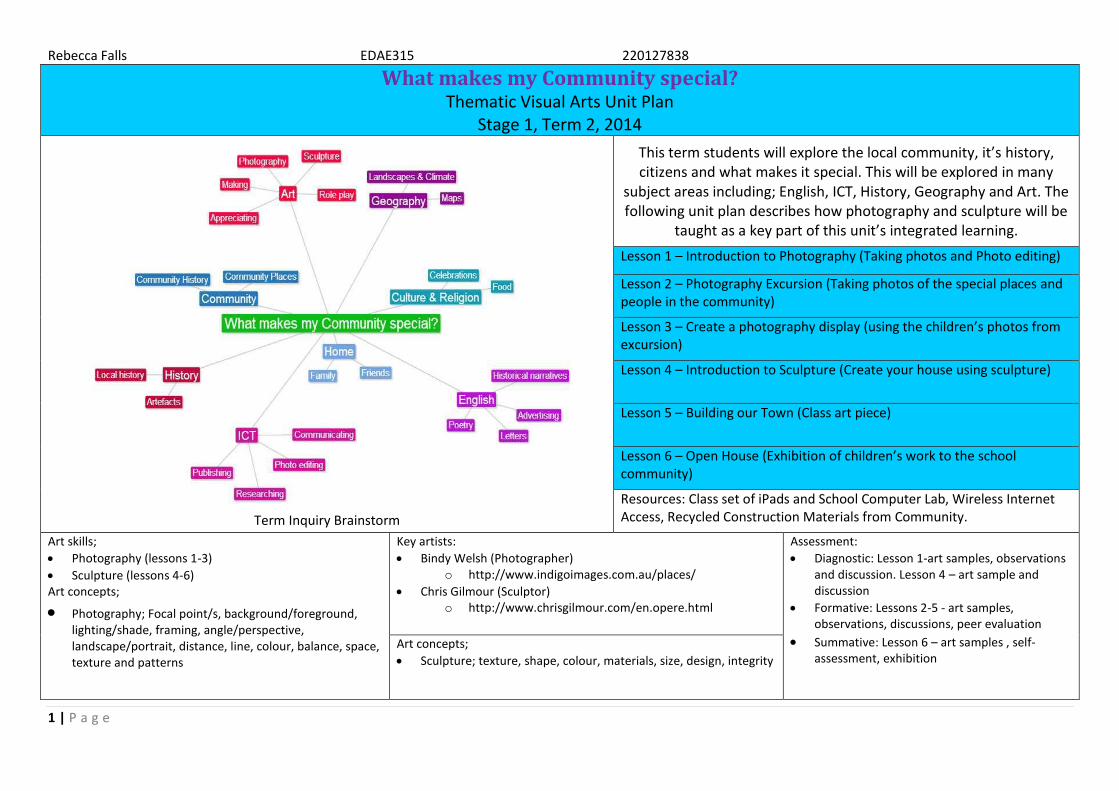
What makes my Community special? Thematic Visual Arts Unit Plan
Stage 1, Term 2, 2014
Term Inquiry Brainstorm
This term students will explore the local community, it’s history, citizens and what makes it special. This will be explored in many
subject areas including; English, ICT, History, Geography and Art. The following unit plan describes how photography and sculpture will be
taught as a key part of this unit’s integrated learning.
Lesson 1 – Introduction to Photography (Taking photos and Photo editing)
Lesson 2 – Photography Excursion (Taking photos of the special places and people in the community)
Lesson 3 – Create a photography display (using the children’s photos from excursion)
Lesson 4 – Introduction to Sculpture (Create your house using sculpture)
Lesson 5 – Building our Town (Class art piece)
Lesson 6 – Open House (Exhibition of children’s work to the school community)
Resources: Class set of iPads and School Computer Lab, Wireless Internet Access, Recycled Construction Materials from Community.
Art skills;
Photography (lessons 1-3)
Sculpture (lessons 4-6) Art concepts;
Photography; Focal point/s, background/foreground, lighting/shade, framing, angle/perspective, landscape/portrait, distance, line, colour, balance, space, texture and patterns
Key artists:
Bindy Welsh (Photographer) o http://www.indigoimages.com.au/places/
Chris Gilmour (Sculptor) o http://www.chrisgilmour.com/en.opere.html
Assessment:
Diagnostic: Lesson 1-art samples, observations and discussion. Lesson 4 – art sample and discussion
Formative: Lessons 2-5 - art samples, observations, discussions, peer evaluation
Summative: Lesson 6 – art samples , self-assessment, exhibition
Art concepts;
Sculpture; texture, shape, colour, materials, size, design, integrity
Rebecca Falls EDAE315 220127838
2 | P a g e
Lesson 1 - Introducing Photography
On Friday 9th May, I plan to implement an introductory lesson to photography with a class of grade 2 students. This will take place during the afternoon session, and will take approximately 60 minutes. I have planned this lesson based on the term 2 Art program in order to develop the students’ repertoire of art skills and delve further into the integrated unit on community. I aim to introduce photography as an art form students can use daily for a variety of tasks and can help us to reflect on our experiences. Students will develop their photography skills and knowledge through;
Participating in a class discussion
Identifying key art elements in a photo
Using iPads to take photos around the school
Consider art elements when taking photos
Using photo editing software to edit photos
Share and explain photographs and artistic choices to peers This is linked to the National Curriculum in:
The Arts – Media and Visual Arts o Explore ideas, characters and settings in the community through stories in images, sounds and text
(ACAMAM054) o Use media technologies to capture and edit images, sounds and text for a purpose (ACAMAM055) o Create and present media artworks that communicate ideas and stories to an audience
(ACAMAM056) o Respond to media artworks and consider where and why people make media artworks, starting with
media from Australia including media artworks of Aboriginal and Torres Strait Islander Peoples (ACAMAR057)
o Use and experiment with different materials, techniques, technologies and processes to make artworks (ACAVAM107)
The knowledge and skills that the students need to complete the lesson are;
Willingness to participate in discussion and creative task
Prior use of iPads/digital cameras The resources and preparation required are;
Class set of iPads/1 between 2
Photo editing and collage software downloaded onto iPads
IWB
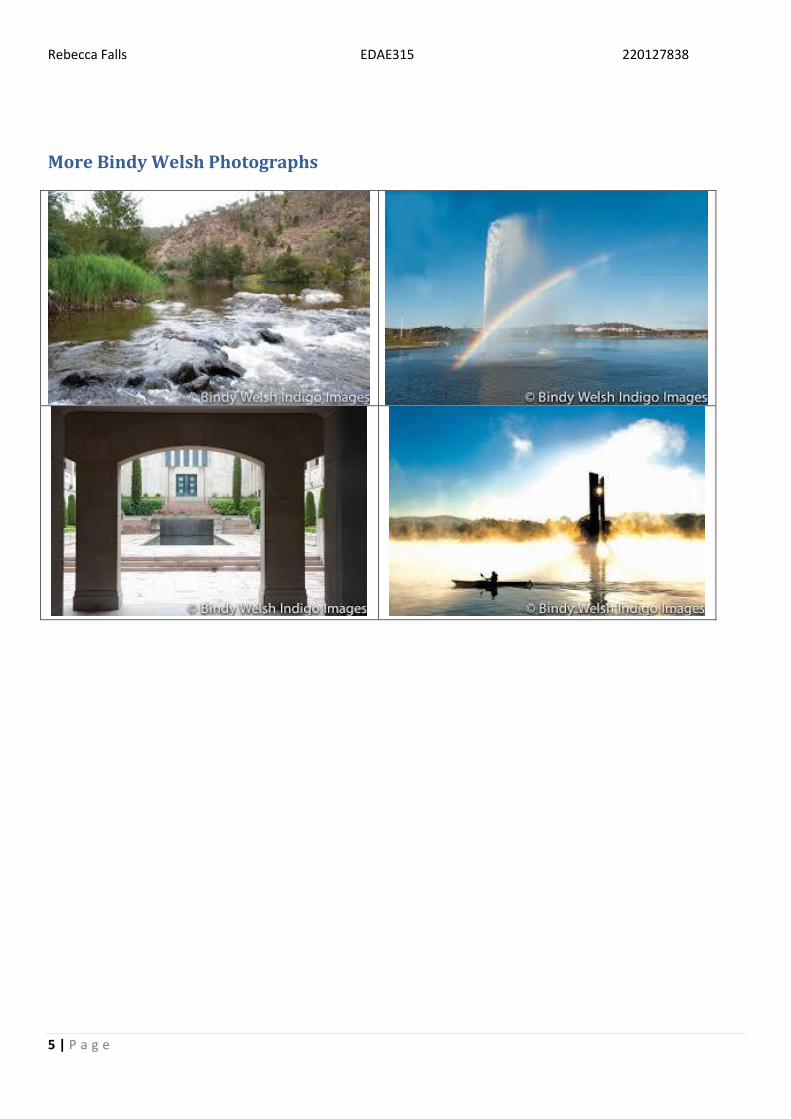
Bindy Welsh’s photographs of Canberra
Post-it squares and pencils The lesson will begin as the teacher gathers the students on the class mat after lunch. Once students are settled, the teacher will show them Bindy Welsh’s image of ‘Red trees on Lake Burley Griffin’ and ask them to silently absorb the image for a minute. The teacher will then ask the class, “What do you see?” and this will spark a class discussion into the elements of composition of the photograph. If not directed by the students, the teacher will address some of the elements including; Focal point/s, background/foreground, lighting/shade, framing, angle/perspective, landscape/portrait, distance, line, colour, balance, space, texture and patterns. This could be phrased as;
“Where do you look first?”
“What do you see in the background?”
“Where was the camera when this photo was taken?”
“Is this photo taken close up or from afar?” The teacher will also give the class a short description of the artist and briefly show them some of her other photographs.
Rebecca Falls EDAE315 220127838
3 | P a g e
After this discussion the teacher will then inform the class of their creative task for the afternoon. The students will be asked to jot down three of their favourite places/people in the school on a post-it. The teacher will then amalgamate the students’ responses to a short list of places around the school. Then as a class, the teacher will escort the students to their favourite places/people. Students will work in pairs with an iPad to take creative photos of these places. Students will use suggestion cards as prompts for taking better photos and the teacher will circulate amongst the students to give direction and suggestions as necessary. Students will need to decide on three final images that they will exhibit to their peers. This task will take approximately 20 minutes. Next students will be brought back to the classroom where the teacher will model how to edit images using the software of the iPads. This will include adjustments such as; crop, brightness, sharpen, lighting effects or filters, rotate or frames. Students will use play-based trial and error to edit their individual images using PicMonkey or similar technology. Students will be given 10-15 minutes for this task, where the teacher will give additional assistance as required. The lesson will end as students complete their photo collages and they will be asked to share and give feedback. In groups of four students will take turns to explain and describe their artworks, artistic choices and the significance of the photos and then others will give constructive feedback (which has been practiced in class). Students will then either print their artwork, email a copy to their student accounts and the teacher or upload it to the class blog/Pinterest board. Students will be assessed based on the indicators;
Participating in a class discussion
Identifying key elements of a photo
Using iPads to take photos around the school
Consider art elements when taking photos
Using photo editing software to edit photos
Share and explain photographs to peers Using the following methods;
Observation
Feedback from and to students
Artwork samples Evaluation:
Did students achieve the set outcomes? Why/not?
Were the teaching strategies used appropriate? Why/not?
What needs to be improved for next time?
What went really well?
From the learning achieved in this lesson, where will the learning focus continue to?

Rebecca Falls EDAE315 220127838
4 | P a g e
Red Trees on Lake Burley Griffin
Question to ask when taking a photo
Things to think about when taking Photographs
1. What angle are you going to take your photo
from?
2. What do you want to draw attention to?
3. What do you want to include or exclude in the photo?
4. Is there enough lighting?
5. Will the subject look better in landscape or portrait?
6. What story do you want this photo to tell?
Rebecca Falls EDAE315 220127838
5 | P a g e
More Bindy Welsh Photographs
Rebecca Falls EDAE315 220127838
6 | P a g e
Lesson 2 - Photographing our Community
On Friday 16th May, I plan to execute an excursion around the local community, where students will get the chance to photograph their favourite places and people in the community. On this excursion a class of grade 2 students, their teacher and parent volunteers will take a trip, approximately 3 hours long (with a lunch/play break). I have planned this excursion to further develop students’ authentic use of and skill in photography for the purposes of the integrated unit on community. Students will develop their photography skills through;
Using the iPad camera to take photographs of identified desired places or people
Considering artistic elements when taking photos
Identifying artistic elements in their photos
Using PicMonkey to edit photographs to their liking This is linked to the National Curriculum in:
The Arts – Media and Visual Arts o Explore ideas, characters and settings in the community through stories in images, sounds and text
(ACAMAM054) o Use media technologies to capture and edit images, sounds and text for a purpose (ACAMAM055) o Create and present media artworks that communicate ideas and stories to an audience
(ACAMAM056) o Respond to media artworks and consider where and why people make media artworks, starting with
media from Australia including media artworks of Aboriginal and Torres Strait Islander Peoples (ACAMAR057)
o Use and experiment with different materials, techniques, technologies and processes to make artworks (ACAVAM107)
The knowledge and skills that the students need to complete the lesson are;
Willingness and permission to participate in excursion
Participation in prior photography lesson
Basic digital camera/iPad camera use The resources and preparation required are;
School bus (caters for students, teacher and parent volunteers) booked and paid for
Class set of iPads
Tip sheets for taking photos (from lesson 1)
List of places/people to visit
Excursion requirements (class list, emergency contacts, mobile, first aid kit, risk assessment, etc.)
Consent forms for photographing community members The lesson will begin by the teacher welcoming the class at 9am and gathering them on the class mat with their lunches, drink bottles etc. ready to go. The teacher will then remind the students of the agenda for the excursion;
Leave school 9.30am
Destination 1 9.45am Destination 2 10.15am
Destination 3 10.45am Lunch/play Break 11.15am
Destination 4 12pm Back to School 12.30pm
Rebecca Falls EDAE315 220127838
7 | P a g e
The teacher will also review the artistic elements of photography and the aim of the excursion with the class to maximise the effectiveness and time efficiency of the excursion. The class will then leave for the excursion. At each destination, the students will work in pairs to collect their desired images, whilst following the strict instructions of the teacher and parent helpers. The adults will assist students in their photographing where needed and prompt for discussion or explanation, to ensure students are really thinking about the photos they are taking. If students are taking photos of people they need to use the written consent form before taking any photos (provided by the school).The teacher will need to constantly think of keeping the class together, student and adult safety and head counts. At the lunch break, the group will stop at the local park for lunch/recess and a short play on the playground. Adults may even conduct a group game or two. Once photographing at the final destination has finished the group will travel back to school. Once they get back to the classroom students will be given 30 minutes to edit their photographs and create a photo collage online. Due to time constraints, these will be shared at another time with the class, possibly in the school newsletter and posted to the class blog/Pinterest board. Students will be assessed based on the indicators;
Using the iPad camera to take photographs of identified desired places or people
Consider artistic elements when taking photos
Identify artistic elements in their photos
Using PicMonkey to edit these photographs to their liking Using the following methods;
Discussion
Feedback to students
Artwork samples Evaluation:
Did students achieve the set outcomes? Why/not?
Were the teaching strategies used appropriate? Why/not?
What needs to be improved for next time?
What went really well?
From the learning achieved in this lesson, where will the learning focus continue to?
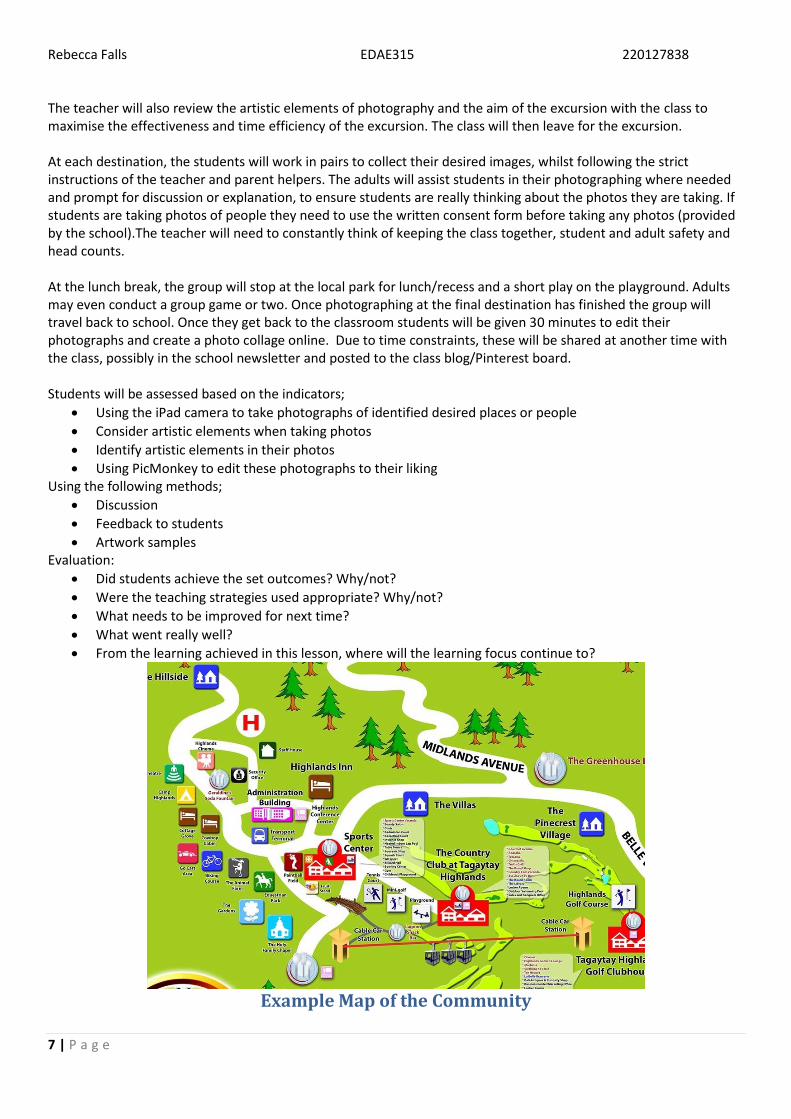
Example Map of the Community
Rebecca Falls EDAE315 220127838
8 | P a g e
Lesson 3 - Community Photography Display
On Friday 30th May, I plan to implement a collaborative art experience with a class of grade 2 students. This will take place during the afternoon session, and will take approximately 60 minutes. I have planned this lesson based on the term 2 Art program and the student’s line of inquiry into the local community. I aim to conclude the photography segment of the unit by using the skills and artworks developed to create a class photography display. Students will develop their photographic and exhibition skills through;
Selecting their best photographs from the excursion
Editing photographs using software
Producing and displaying finished photographic artworks
Personally explaining and justifying photographic artworks
Evaluating and giving feedback to others on their work This is linked to the National Curriculum in:
The Arts – Media Arts o Explore ideas, characters and settings in the community through stories in images, sounds and text
(ACAMAM054) o Use media technologies to capture and edit images, sounds and text for a purpose (ACAMAM055)
The Arts – Visual Arts o Create and display artworks to communicate ideas to an audience (ACAVAM108) o Use and experiment with different materials, techniques, technologies and processes to make
artworks (ACAVAM107)
English o Identify language that can be used for appreciating texts and the qualities of people and things
(ACELA1462)
Critical and creative thinking o Pose questions - pose questions to identify and clarify issues, and compare information in their
world o Organise and process information - organise information based on similar or relevant ideas from
several sources o Think about thinking (metacognition) - describe the thinking strategies used in given situations and
tasks o Evaluate procedures and outcomes - evaluate whether they have accomplished what they set out to
achieve Knowledge and skills that the students need to complete the lesson are;
Participation in excursion from prior lesson
Collection of photos from the excursion
Basic photography and photo editing skills The resources and preparation required are;
Class set of iPads
Photo editing and collage software downloaded onto iPads
Large spare wall available for photo display (in the school)
High Quality Photo Paper and Printer (A5/A4/A3) (with easy access)
Blue-tack
A variety of cardboard photo frames (A5/4/3 sizes)
Glue sticks and scissors The lesson will begin by the teacher gathering students on the class mat and reviewing the artworks and experiences of the excursion, and the sharing time of these photos. The teacher will then explain the task for the lesson, being
Rebecca Falls EDAE315 220127838
9 | P a g e
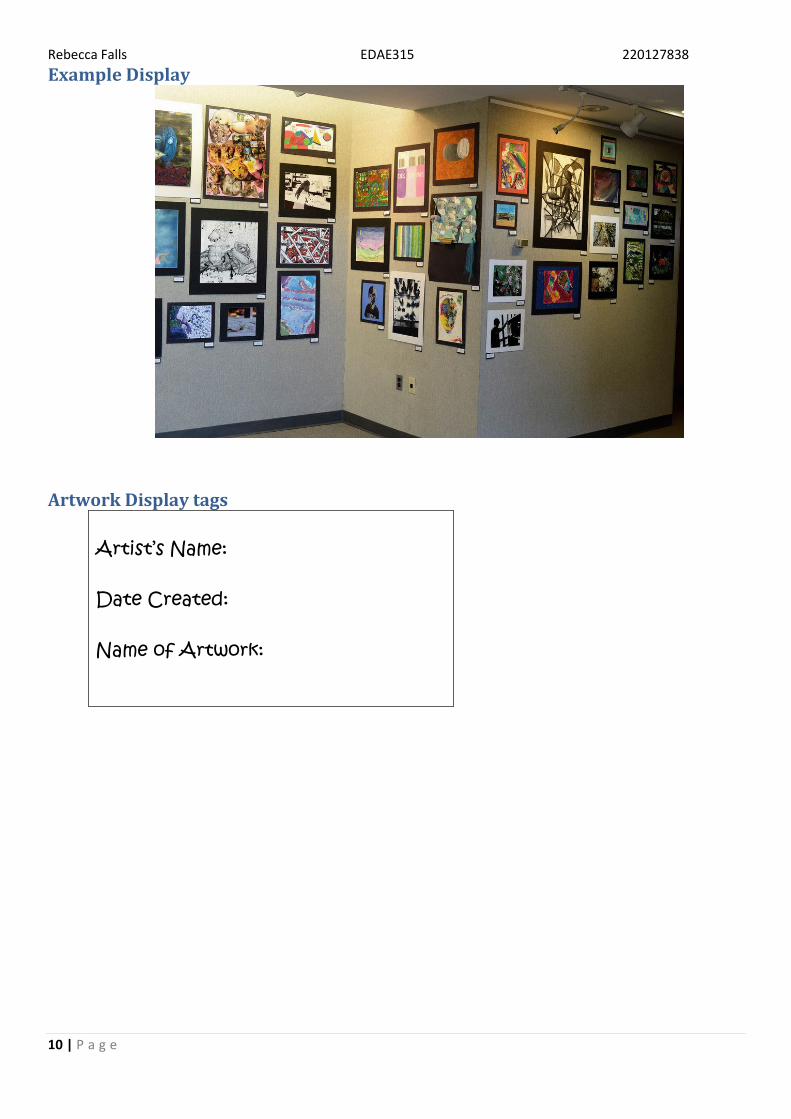
that they will create a class photography exhibition in the front foyer/other display space using their photos from the excursion. Students will need to print their collages to the desired size, frame their collages to their liking and as a class design and construct the photo exhibition. The teacher will then gain an understanding of where students are up to in the process of creating their collages (as some students may still be editing or creating collages). Students will then be sent in groups to work on what they are up to. The teacher will circulate the classroom and assist in printing or editing etc. Students will also need to create display tags for their collages (see attachments). Once all students have completed their framed collages, the class will move to the front foyer/display space. The students will then work together in arranging their artworks on the wall. Students will have a strong voice in this task, and the teacher will only assist in problem solving and technical issues. Once this is complete the class will take a few minutes to view the exhibition and admire the class’ work. The lesson will end with a feedback session where the teacher and students will give constructive feedback and comments to each other. The teacher will remind the students of the importance of giving positive feedback with key examples such as “I really like the way you..” “Next time maybe you could try..” “It was very interesting the way you ..”. The teacher will pair each student, handout a peer evaluation form and students will be given three minutes to complete the form and five minutes to share feedback. The teacher will then give an overall feedback comment to the class to congratulate them on their photographic skills and achievement and then the class will be sent home. Students will be assessed based on the indicators;
o Selecting the best photographs from the excursion o Editing photographs using software o Producing and displaying finished photographic artworks o Personally explaining and justifying photographic artworks o Evaluating and giving feedback to others on their work
Using the following methods;
Class Art Display
Peer assessments Evaluation:
Did students achieve the set outcomes? Why/not?
Were the teaching strategies used appropriate? Why/not?
What needs to be improved for next time?
What went really well?
From the learning achieved in this lesson, where will the learning focus continue to?
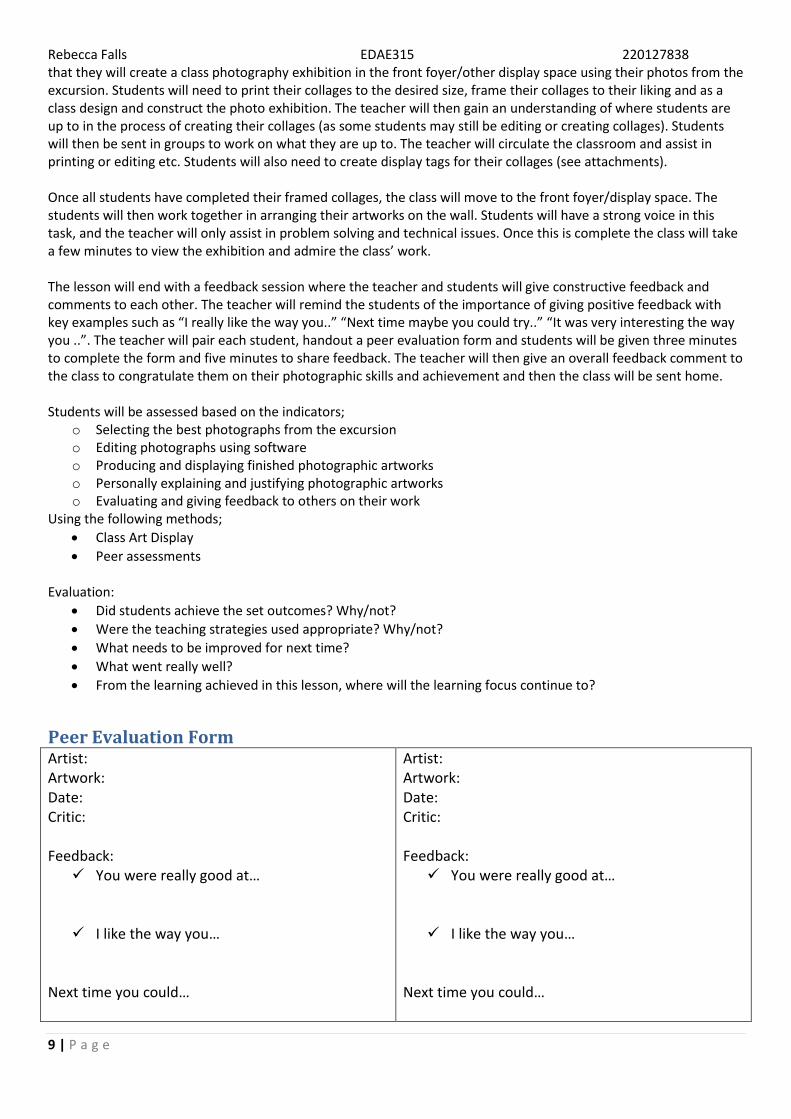
Peer Evaluation Form Artist: Artwork: Date: Critic: Feedback:
You were really good at…
I like the way you…
Next time you could…
Artist: Artwork: Date: Critic: Feedback:
You were really good at…
I like the way you…
Next time you could…
Rebecca Falls EDAE315 220127838
10 | P a g e
Example Display
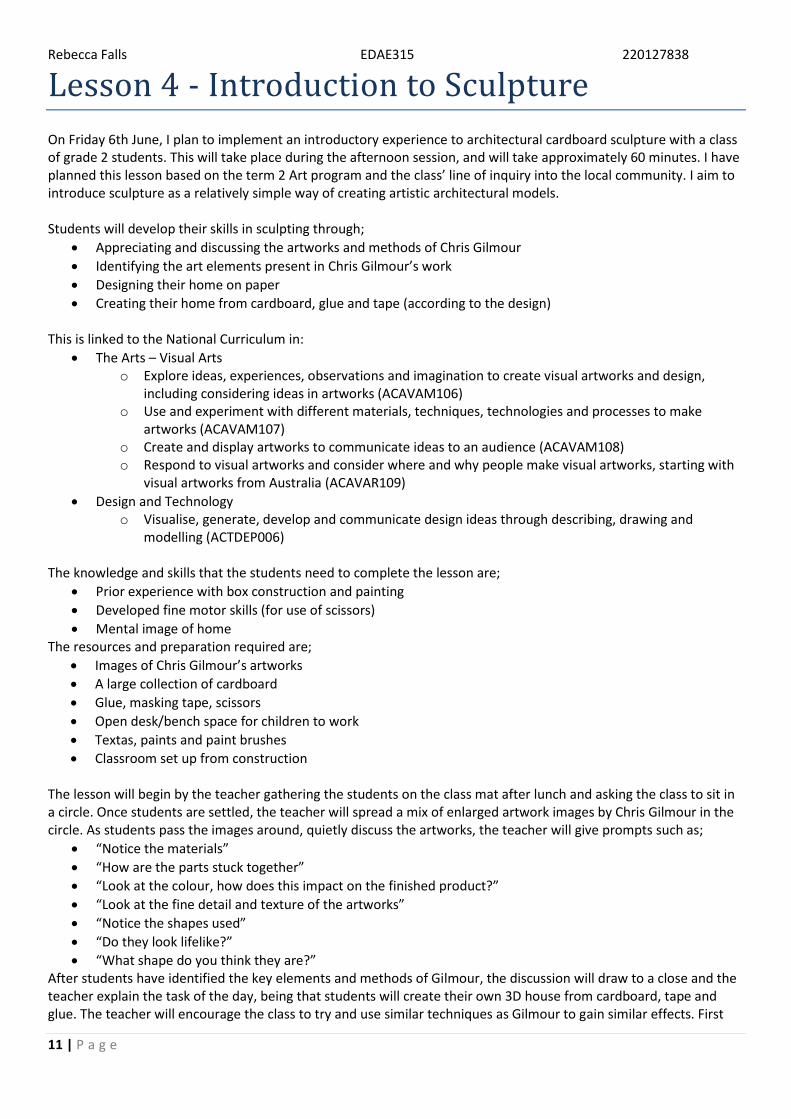
Artwork Display tags
Artist’s Name: Date Created: Name of Artwork:
Rebecca Falls EDAE315 220127838
11 | P a g e
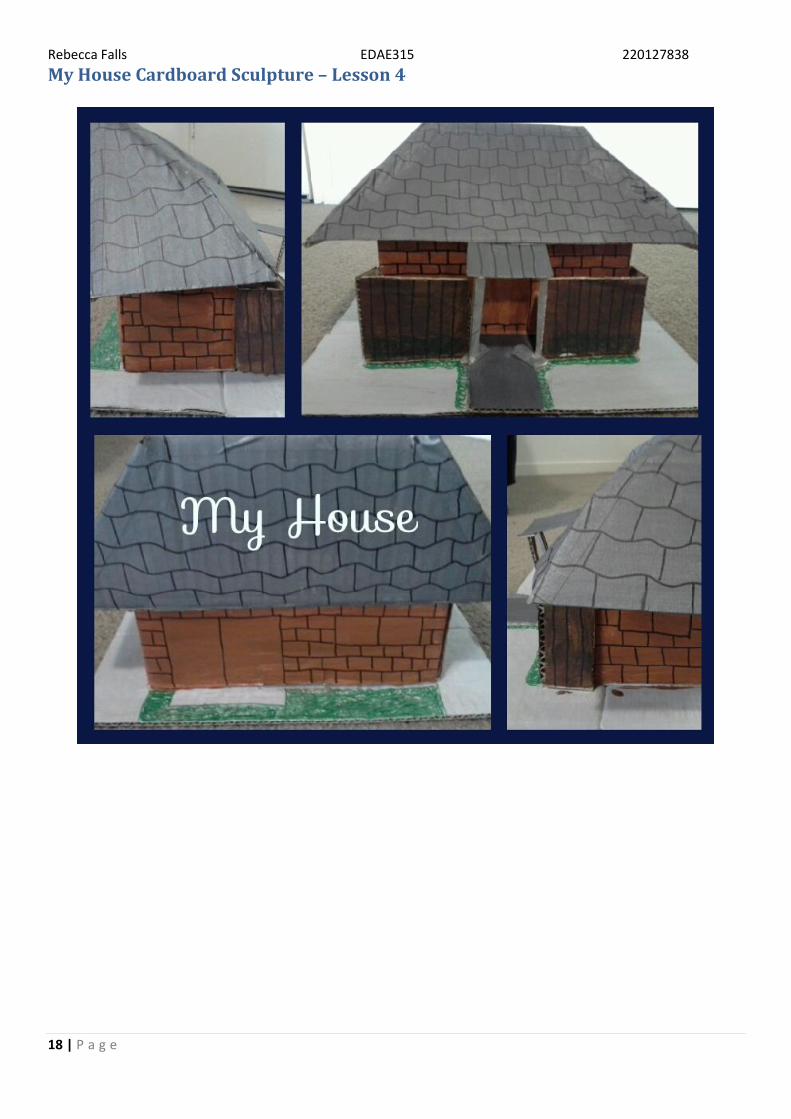
Lesson 4 - Introduction to Sculpture
On Friday 6th June, I plan to implement an introductory experience to architectural cardboard sculpture with a class of grade 2 students. This will take place during the afternoon session, and will take approximately 60 minutes. I have planned this lesson based on the term 2 Art program and the class’ line of inquiry into the local community. I aim to introduce sculpture as a relatively simple way of creating artistic architectural models. Students will develop their skills in sculpting through;
Appreciating and discussing the artworks and methods of Chris Gilmour
Identifying the art elements present in Chris Gilmour’s work
Designing their home on paper
Creating their home from cardboard, glue and tape (according to the design)
This is linked to the National Curriculum in:
The Arts – Visual Arts o Explore ideas, experiences, observations and imagination to create visual artworks and design,
including considering ideas in artworks (ACAVAM106) o Use and experiment with different materials, techniques, technologies and processes to make
artworks (ACAVAM107) o Create and display artworks to communicate ideas to an audience (ACAVAM108) o Respond to visual artworks and consider where and why people make visual artworks, starting with
visual artworks from Australia (ACAVAR109)
Design and Technology o Visualise, generate, develop and communicate design ideas through describing, drawing and
modelling (ACTDEP006) The knowledge and skills that the students need to complete the lesson are;
Prior experience with box construction and painting
Developed fine motor skills (for use of scissors)
Mental image of home The resources and preparation required are;
Images of Chris Gilmour’s artworks
A large collection of cardboard
Glue, masking tape, scissors
Open desk/bench space for children to work
Textas, paints and paint brushes
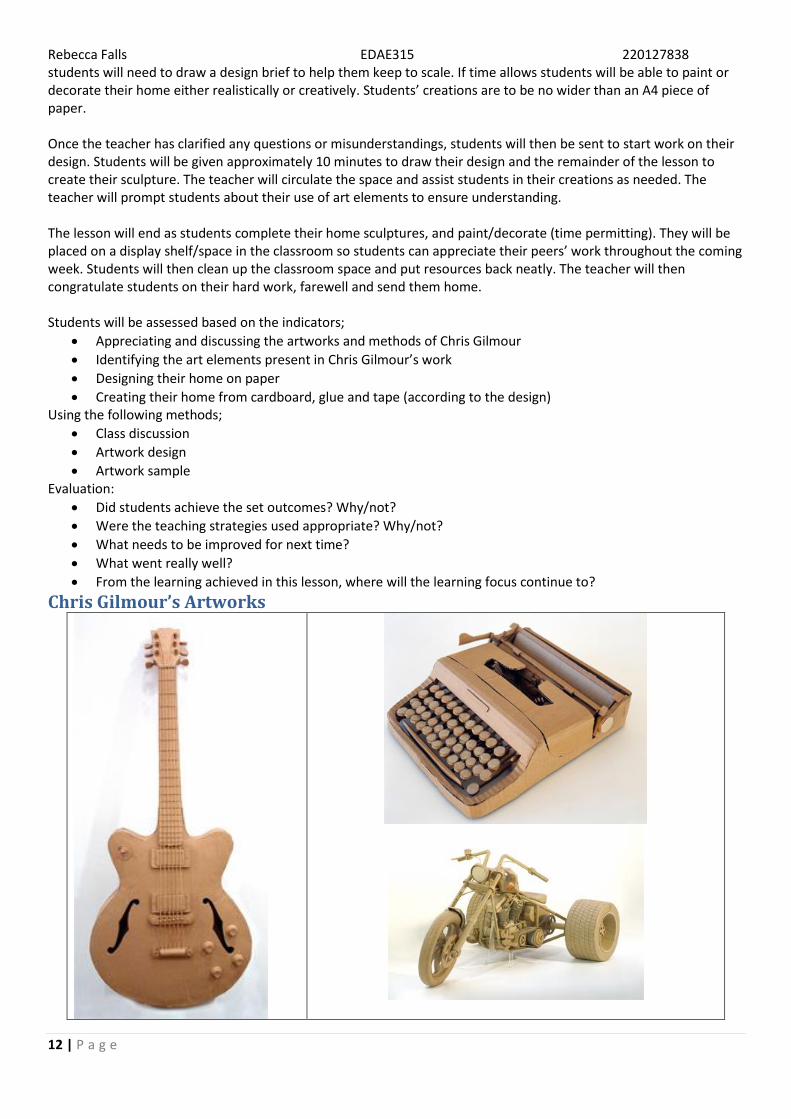
Classroom set up from construction The lesson will begin by the teacher gathering the students on the class mat after lunch and asking the class to sit in a circle. Once students are settled, the teacher will spread a mix of enlarged artwork images by Chris Gilmour in the circle. As students pass the images around, quietly discuss the artworks, the teacher will give prompts such as;
“Notice the materials”
“How are the parts stuck together”
“Look at the colour, how does this impact on the finished product?”
“Look at the fine detail and texture of the artworks”
“Notice the shapes used”
“Do they look lifelike?”
“What shape do you think they are?” After students have identified the key elements and methods of Gilmour, the discussion will draw to a close and the teacher explain the task of the day, being that students will create their own 3D house from cardboard, tape and glue. The teacher will encourage the class to try and use similar techniques as Gilmour to gain similar effects. First
Rebecca Falls EDAE315 220127838
12 | P a g e
students will need to draw a design brief to help them keep to scale. If time allows students will be able to paint or decorate their home either realistically or creatively. Students’ creations are to be no wider than an A4 piece of paper. Once the teacher has clarified any questions or misunderstandings, students will then be sent to start work on their design. Students will be given approximately 10 minutes to draw their design and the remainder of the lesson to create their sculpture. The teacher will circulate the space and assist students in their creations as needed. The teacher will prompt students about their use of art elements to ensure understanding. The lesson will end as students complete their home sculptures, and paint/decorate (time permitting). They will be placed on a display shelf/space in the classroom so students can appreciate their peers’ work throughout the coming week. Students will then clean up the classroom space and put resources back neatly. The teacher will then congratulate students on their hard work, farewell and send them home. Students will be assessed based on the indicators;
Appreciating and discussing the artworks and methods of Chris Gilmour
Identifying the art elements present in Chris Gilmour’s work
Designing their home on paper
Creating their home from cardboard, glue and tape (according to the design) Using the following methods;
Class discussion
Artwork design
Artwork sample Evaluation:
Did students achieve the set outcomes? Why/not?
Were the teaching strategies used appropriate? Why/not?
What needs to be improved for next time?
What went really well?
From the learning achieved in this lesson, where will the learning focus continue to?
Chris Gilmour’s Artworks
Rebecca Falls EDAE315 220127838
13 | P a g e
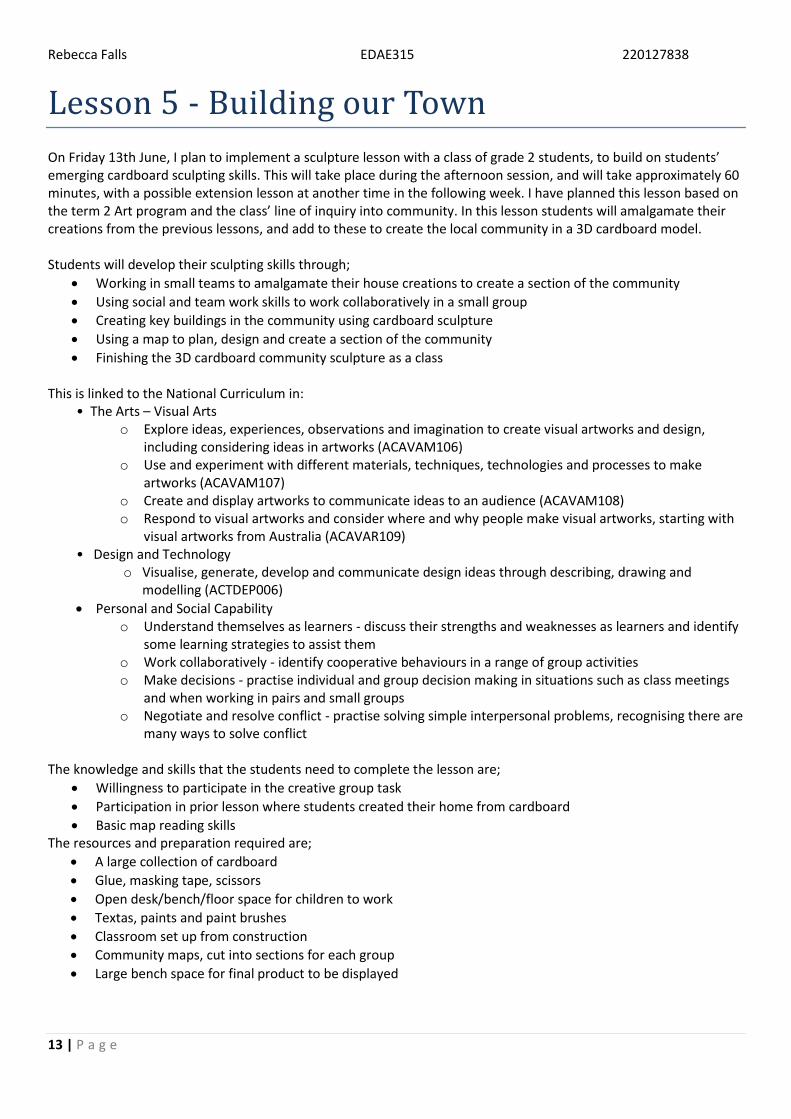
Lesson 5 - Building our Town
On Friday 13th June, I plan to implement a sculpture lesson with a class of grade 2 students, to build on students’ emerging cardboard sculpting skills. This will take place during the afternoon session, and will take approximately 60 minutes, with a possible extension lesson at another time in the following week. I have planned this lesson based on the term 2 Art program and the class’ line of inquiry into community. In this lesson students will amalgamate their creations from the previous lessons, and add to these to create the local community in a 3D cardboard model. Students will develop their sculpting skills through;
Working in small teams to amalgamate their house creations to create a section of the community
Using social and team work skills to work collaboratively in a small group
Creating key buildings in the community using cardboard sculpture
Using a map to plan, design and create a section of the community
Finishing the 3D cardboard community sculpture as a class This is linked to the National Curriculum in:
• The Arts – Visual Arts o Explore ideas, experiences, observations and imagination to create visual artworks and design,
including considering ideas in artworks (ACAVAM106) o Use and experiment with different materials, techniques, technologies and processes to make
artworks (ACAVAM107) o Create and display artworks to communicate ideas to an audience (ACAVAM108) o Respond to visual artworks and consider where and why people make visual artworks, starting with
visual artworks from Australia (ACAVAR109) • Design and Technology
o Visualise, generate, develop and communicate design ideas through describing, drawing and modelling (ACTDEP006)
Personal and Social Capability o Understand themselves as learners - discuss their strengths and weaknesses as learners and identify
some learning strategies to assist them o Work collaboratively - identify cooperative behaviours in a range of group activities o Make decisions - practise individual and group decision making in situations such as class meetings
and when working in pairs and small groups o Negotiate and resolve conflict - practise solving simple interpersonal problems, recognising there are
many ways to solve conflict The knowledge and skills that the students need to complete the lesson are;
Willingness to participate in the creative group task
Participation in prior lesson where students created their home from cardboard
Basic map reading skills The resources and preparation required are;
A large collection of cardboard
Glue, masking tape, scissors
Open desk/bench/floor space for children to work
Textas, paints and paint brushes
Classroom set up from construction
Community maps, cut into sections for each group
Large bench space for final product to be displayed
Rebecca Falls EDAE315 220127838
14 | P a g e
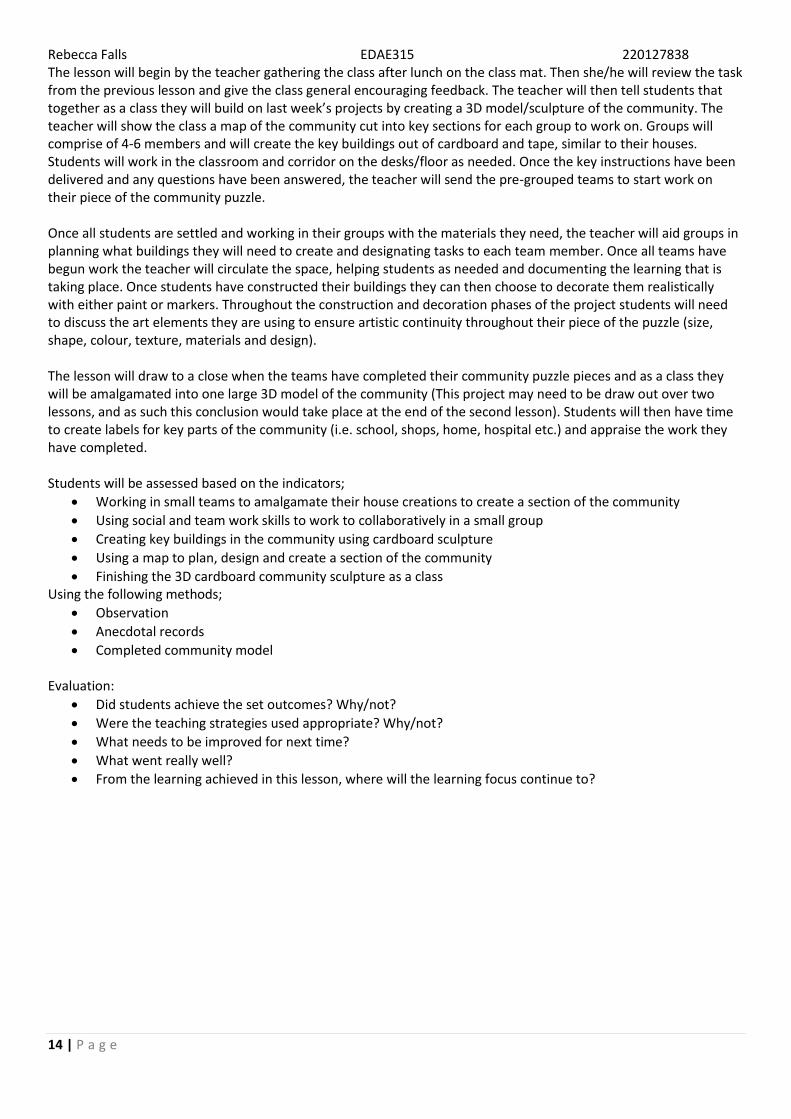
The lesson will begin by the teacher gathering the class after lunch on the class mat. Then she/he will review the task from the previous lesson and give the class general encouraging feedback. The teacher will then tell students that together as a class they will build on last week’s projects by creating a 3D model/sculpture of the community. The teacher will show the class a map of the community cut into key sections for each group to work on. Groups will comprise of 4-6 members and will create the key buildings out of cardboard and tape, similar to their houses. Students will work in the classroom and corridor on the desks/floor as needed. Once the key instructions have been delivered and any questions have been answered, the teacher will send the pre-grouped teams to start work on their piece of the community puzzle. Once all students are settled and working in their groups with the materials they need, the teacher will aid groups in planning what buildings they will need to create and designating tasks to each team member. Once all teams have begun work the teacher will circulate the space, helping students as needed and documenting the learning that is taking place. Once students have constructed their buildings they can then choose to decorate them realistically with either paint or markers. Throughout the construction and decoration phases of the project students will need to discuss the art elements they are using to ensure artistic continuity throughout their piece of the puzzle (size, shape, colour, texture, materials and design). The lesson will draw to a close when the teams have completed their community puzzle pieces and as a class they will be amalgamated into one large 3D model of the community (This project may need to be draw out over two lessons, and as such this conclusion would take place at the end of the second lesson). Students will then have time to create labels for key parts of the community (i.e. school, shops, home, hospital etc.) and appraise the work they have completed. Students will be assessed based on the indicators;
Working in small teams to amalgamate their house creations to create a section of the community
Using social and team work skills to work to collaboratively in a small group
Creating key buildings in the community using cardboard sculpture
Using a map to plan, design and create a section of the community
Finishing the 3D cardboard community sculpture as a class Using the following methods;
Observation
Anecdotal records
Completed community model Evaluation:
Did students achieve the set outcomes? Why/not?
Were the teaching strategies used appropriate? Why/not?
What needs to be improved for next time?
What went really well?
From the learning achieved in this lesson, where will the learning focus continue to?
Rebecca Falls EDAE315 220127838
15 | P a g e
Lesson 6 - Open House
On Friday 27th June, I plan to execute a community exhibition with a class of grade 2 students. This will take place during the afternoon session, and will take approximately 45 minutes. I have planned this lesson based on the term 2 Art program and the class’ line of inquiry into the local community. This exhibition will occur at the end of the unit of work. Members of the school, staff, families and community members will be invited to see the display of the class’ work surrounding their special community. Not only will this give students the opportunity to share their work across subject areas with many people, but it will also aid in developing presentation and social skills. Students will develop their presentation and social skills through;
Displaying multiple pieces of work that tie into the inquiry e.g. writing piece, artwork and history project
Presenting their work to the community
Reflecting on their learning throughout the unit This is linked to the National Curriculum in:
The Arts o Create and display artworks to communicate ideas to an audience (ACAVAM108)
Personal and Social Capability o Communicate effectively - discuss the use of verbal and nonverbal communication skills to respond
appropriately to adults and peers o Recognise personal qualities and achievements - identify and describe personal interests, skills and
achievements and explain how these contribute to family and school life o Develop reflective practice - reflect on what they have learnt about themselves from a range of
experiences at home and school
English o Understand that language varies when people take on different roles in social and classroom
interactions and how the use of key interpersonal language resources varies depending on context (ACELA1461)
o Use interaction skills including initiating topics, making positive statements and voicing disagreement in an appropriate manner, speaking clearly and varying tone, volume and pace appropriately (ACELY1789)
o Rehearse and deliver short presentations on familiar and new topics (ACELY1667) The knowledge and skills that the students need to complete the lesson are;
Participation in at least several key elements of the inquiry
Work to display and present
Prior experiences with self-assessment The resources and preparation required are;
Open indoor space (e.g. hall) with displays and adequate seating
Exhibition set up (tables, wall displays etc.)
A sequence of events/presentations
Information flyers for audience
Self-assessments printed for each student
Students have created; advertising for the exhibition, invitations, displays and banners The exhibition will begin by students setting up the final elements of the exhibition in the hall (prior preparation had been made earlier in the day). Students will need to ensure that their displays are neat and tidy and that they are ready to share their presentations with the audience. Then a few students will be placed at the front doors to welcome the community members to the exhibition and handing them an information flyer. Then the audience will be invited to look around the exhibition before the presentations begin. Students will need to be polite and welcoming to the community and circulate amongst the crowd, answering questions and participating in discussions.
Rebecca Falls EDAE315 220127838
16 | P a g e
Once the majority of the community members have arrived the teacher will formally welcome the audience and give a short introduction summarising the work the class has done surrounding their local community. Then the teacher will invite individual students and pairs to present their work (e.g. community model, photography collage, writing piece, history project) to the audience and critically reflect on the learning experience. This will be aided by the teacher if necessary and the audience will be invited to ask questions. The exhibition will end with the final student presentation and then the teacher will thank all of the students for all of their hard work and thank the community members for coming to the exhibition and making the community such a wonderful place to live. The community will then once again be given another chance to view the exhibition before the end of the school day. Over the weekend students will be asked to reflect on the learning they have done by completing a self-assessment/unit evaluation for the inquiry unit. This will assist in the assessment process and future planning. Students will be assessed based on the indicators;
Displaying multiple pieces of work that tie into the inquiry e.g. writing piece, artwork and history project
Presenting their work to the community
Reflecting on their learning throughout the unit Using the following methods;
Observation
Student presentations
Self-assessments
Work samples Evaluation:
Did students achieve the set outcomes? Why/not?
Were the teaching strategies used appropriate? Why/not?
What needs to be improved for next time?
What went really well?
Self-Assessment and Unit Evaluation Student Name: Date: Feedback:
I was really good at…
The learning task I enjoyed the best was…
I would have liked to have learned more about …
I learned how to/improved on …
Next time I need to improve on…
Student Name: Date: Feedback:
I was really good at…
The learning task I enjoyed the best was…
I would have liked to have learned more about …
I learned how to/improved on …
Next time I need to improve on…
Rebecca Falls EDAE315 220127838
17 | P a g e
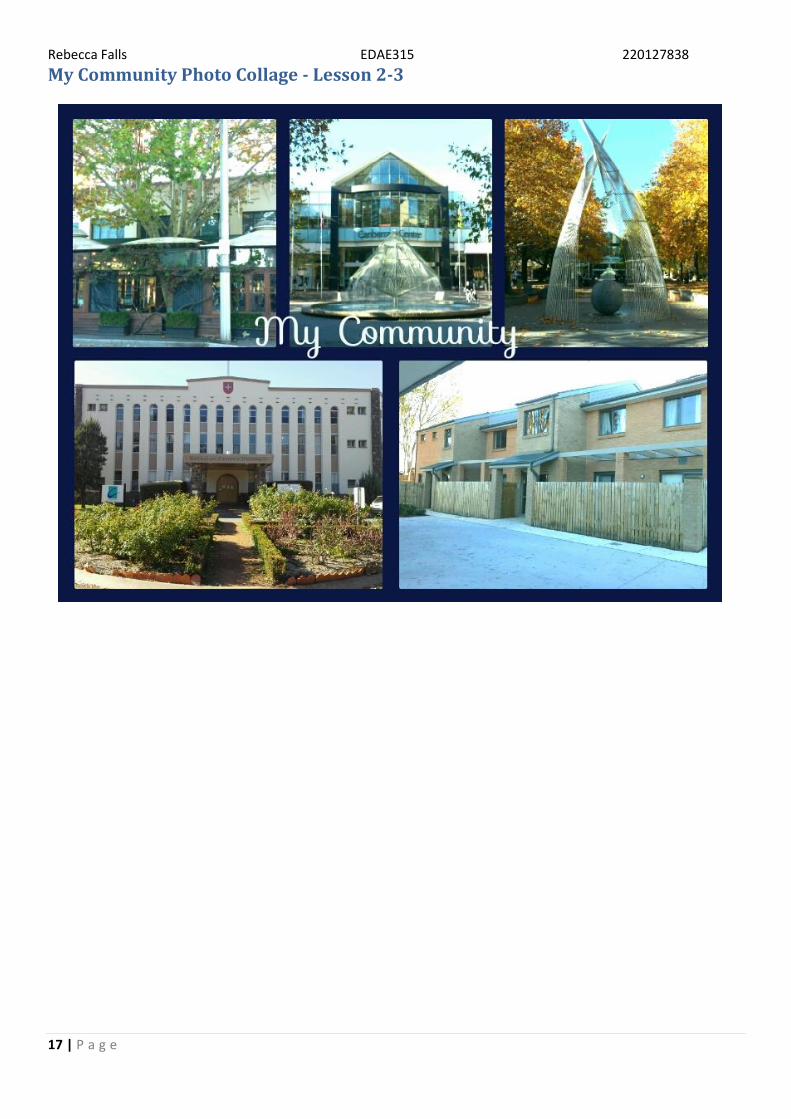
My Community Photo Collage - Lesson 2-3
Rebecca Falls EDAE315 220127838
18 | P a g e
My House Cardboard Sculpture – Lesson 4
Rebecca Falls EDAE315 220127838
19 | P a g e
References Australian Curriculum, Assessment and Reporting Authority. (2013). The Australian Curriculum: English (version 6.0).
Retrieved from: http://www.australiancurriculum.edu.au/
Australian Curriculum, Assessment and Reporting Authority. (2013). The Australian Curriculum: General Capabilities
(version 6.0). Retrieved from: http://www.australiancurriculum.edu.au/
Australian Curriculum, Assessment and Reporting Authority. (2013). The Australian Curriculum: Technologies.
Retrieved from: http://www.australiancurriculum.edu.au/
Australian Curriculum, Assessment and Reporting Authority. (2013). The Australian Curriculum: The Arts (Draft).
Retrieved from: http://www.australiancurriculum.edu.au/
Board of Studies. (2002). Creative Arts: Syllabus. Board of Studies: Sydney.
Briot, A. (2003). How to compose a photograph 2 [webpage]. Retrieved from http://www.luminous-
landscape.com/columns/composition-2.shtml
Digital Photography School. (2014). Tips and tutorials. Retrieved from http://digital-photography-school.com/tips
Gilmour, C. (2006). Guitar [photograph]. Retrieved from http://www.chrisgilmour.com/en.opere.html
Gilmour, C. (2005). Motorbike [photograph]. Retrieved from http://www.chrisgilmour.com/en.opere.html
Gilmour, C. (2002). Typewriter [photograph]. Retrieved from http://www.chrisgilmour.com/en.opere.html
Goldberg, M. R. (2000). Arts and learning: An integrated approach to teaching and learning in multicultural and
multilingual settings (2nd ed.). New York: Longman Incorporated.
Martz90. (2014). Camera icon [image]. Retrieved from http://www.iconarchive.com/show/circle-icons-by-
martz90/camera-icon.html
Mckinnell, A. (2014). 4 essential ingredients for great landscape photographs [blog post]. Retrieved from
http://digital-photography-school.com/4-essential-ingredients-for-great-landscape-photographs
Rebecca Falls EDAE315 220127838
20 | P a g e
PicMonkey. (2014). PicMonkey: Photo editing made of win [web application]. Retrieved from
http://www.picmonkey.com/
Russell-Bowie, D. (2009). MMADD about the arts; An introduction to primary arts education. (2nd ed.). NSW: Pearson
Education Australia.
Rye Country Dale School. (2013). Photographs from the fall art show [photograph]. Retrieved from
http://www.ryecountryday.org/page.cfm?p=1678&newsid=430
Tagaytay Highlands. (n.d.). Community map [image]. Retrieved from http://www.tagaytay-highlands.com/tagaytay-
highlands-complex.html
Twisted Sifter. (2014). 30 amazing sculptures made out of cardboard [blog post]. Retrieved from
http://twistedsifter.com/2012/04/sculptures-made-of-cardboard-chris-gilmour/
Welsh, B. (n.d.). Captain Cook Fountain [photograph]. Retrieved from http://www.indigoimages.com.au/places/
Welsh, B. (n.d.). Carillion sunrise [photograph].Retrieved from http://www.indigoimages.com.au/places/
Welsh, B. (n.d.). Parliament House courtyard [photograph]. Retrieved from
http://www.indigoimages.com.au/places/
Welsh, B. (n.d.). Red trees on Lake Burley Griffin [photograph]. Retrieved from
http://www.indigoimages.com.au/places/
Welsh, B. (n.d.). River [photograph]. Retrieved from http://www.indigoimages.com.au/places/