vmware integrated openstack user guide · vmware integrated openstack user guide vmware integrated...
TRANSCRIPT

VMware Integrated OpenStack UserGuide
VMware Integrated OpenStack 3.1
This document supports the version of each product listed andsupports all subsequent versions until the document isreplaced by a new edition. To check for more recent editions ofthis document, see http://www.vmware.com/support/pubs.
EN-001680-04

VMware Integrated OpenStack User Guide
2 VMware, Inc.
You can find the most up-to-date technical documentation on the VMware Web site at:
http://www.vmware.com/support/
The VMware Web site also provides the latest product updates.
If you have comments about this documentation, submit your feedback to:
Copyright © 2016 VMware, Inc. All rights reserved. Copyright and trademark information.
VMware, Inc.3401 Hillview Ave.Palo Alto, CA 94304www.vmware.com

Contents
About This Book 5
Updated Information 7
1 Log In to the VMware Integrated OpenStack Dashboard 9
2 Managing Images for the Image Service 11
Import Images Using the Horizon Dashboard 11Import Images in Supported Formats Using the CLI 12Modify Image Settings 13Delete an Existing Image 14
3 Configuring Access and Security for
Instances 15Working with Security Groups 15Working with Key Pairs 18Allocate a Floating IP to an Instance 19
4 Working with Networks 21
Create a Network 21Create a Router 22
5 Working with Instances in OpenStack 23
Start an OpenStack Instance from an Image 23Start an OpenStack Instance from a Snapshot 24Connect to an Instance by Using SSH 26Track Instance Use 26Create a Snapshot from an Instance 26Using Affinity and Anti-Affinity to Place OpenStack Instances 26
6 Working with Volumes 29
Create a Volume 29Modify Existing Volumes 30Delete Existing Volumes 30Attach a Volume to an Instance 31Detach a Volume 31Create a Snapshot from a Volume 31
7 Working with Orchestration and Stacks 33
Start a New Orchestration Stack 33Modify an Orchestration Stack 34
VMware, Inc. 3

Delete an Orchestration Stack 35
Index 37
VMware Integrated OpenStack User Guide
4 VMware, Inc.

About This Book
VMware Integrated OpenStack User Guide shows you how to perform VMware Integrated OpenStack cloudend-user tasks in VMware Integrated OpenStack, including how to create and manage instances, volumes,snapshots, images, and networks.
As a VMware Integrated OpenStack cloud end user, you can provision your own resources within the limitsthat administrators set.
Intended AudienceThis guide is for cloud users who want to create and manage resources with an OpenStack deployment thatis fully integrated with VMware® vSphere®. To do so successfully, verify that you are familiar with theOpenStack components and functions.
VMware Technical Publications GlossaryVMware Technical Publications provides a glossary of terms that might be unfamiliar to you. For definitionsof terms as they are used in VMware technical documentation, go to http://www.vmware.com/support/pubs.
VMware, Inc. 5

VMware Integrated OpenStack User Guide
6 VMware, Inc.

Updated Information
This VMware Integrated OpenStack User Guide is updated with each release of the product or when necessary.
This table provides the update history of the VMware Integrated OpenStack User Guide.
Revision Description
001680-04 n Updated for VMware Integrated OpenStack version 3.0.n Updated for the Mitaka release of OpenStack.
001680-03 Added procedures for configuring instance affinity and anti-affinity, plus minor revisions. See “UsingAffinity and Anti-Affinity to Place OpenStack Instances,” on page 26.
001680-02 Updated for VMware Integrated OpenStack version 2.0. Minor revisions and updated screenshots.
001680-01 n Removed outdated step from “Import Images in Supported Formats Using the CLI,” on page 12. It is nolonger necessary to obtain a token before uploading
n Minor revisions.
001680-00 Initial release.
VMware, Inc. 7

VMware Integrated OpenStack User Guide
8 VMware, Inc.

Log In to theVMware Integrated OpenStackDashboard 1
You access the user and administrative controls for your VMware Integrated OpenStack deploymentthrough the VMware Integrated OpenStack dashboard. The dashboard enables you to create and manageinstances, images, user accounts, and volumes, among other tasks.
To log in to the dashboard, you must obtain the host name or IP address for theVMware Integrated OpenStack dashboard from your OpenStack operator. This is the public virtual IPcreated when deploying up the VMware Integrated OpenStack in vSphere.
Prerequisites
n Verify that you have a user account that was set up by an administrative user.
n Verify that you have a browser with JavaScript and cookies enabled.
Procedure
1 In a browser window, navigate to the host name or IP address for the VMware Integrated OpenStackdashboard.
A certificate warning might appear the first time you access the URL. To bypass the warning, verify thecertificate or add an exception.
2 On the Log In page, enter the domain name, your user name and password.
3 Click Sign In.
You are now logged in. The Project tab appears, opened to the default Overview page.
VMware, Inc. 9

Figure 1‑1. VMware Integrated OpenStack Overview Page
VMware Integrated OpenStack User Guide
10 VMware, Inc.

Managing Images for the ImageService 2
In the OpenStack context, an image is a file that contains a virtual disk from which you can install anoperating system on a VM. You create an instance in your OpenStack cloud by using one of the imagesavailable. The VMware Integrated OpenStack Image Service component natively supports images that arepackaged in the ISO, OVA, and VMDK formats.
If you have existing images in vSphere that you want to use in OpenStack, you can export them in one of thesupported formats and upload them to the Image Service. If you obtain an image that is in an unsupportedformat, you can convert it as part of the import process. Unsupported formats are RAW, QCOW2, VDI, andVHD.
This chapter includes the following topics:
n “Import Images Using the Horizon Dashboard,” on page 11
n “Import Images in Supported Formats Using the CLI,” on page 12
n “Modify Image Settings,” on page 13
n “Delete an Existing Image,” on page 14
Import Images Using the Horizon DashboardYou can import images directly in the VMware Integrated OpenStack Horizon dashboard.
Prerequisites
n Verify that the image is packaged in the ISO, VMDK, OVA, RAW, QCOW2, VDI, or VHD format.
n If the source image format is RAW, QCOW2, VDI, or VHD, verify that the source image is hosted on aserver without credentials to allow plain HTTP requests.
Procedure
1 Log in to the VMware Integrated OpenStack dashboard.
2 Select the project from the drop-down menu in the title bar.
3 Select Project > Compute > Images.
4 On the Images page, click Create Image.
5 Configure the image.
Option Action
Name Enter a name for the new image.
Description (Optional) Enter a description for the new image.
VMware, Inc. 11

Option Action
Image Source Select the image source.If the source image format is RAW, QCOW2, VDI, or VHD, you must selectthe Image Location option.
Disk Format Select the disk format.
Disk Type Select the disk type.Images in the RAW, QCOW2, VDI, and VHD formats are automaticallyintrospected to capture their properties and converted to the VMDKformat during the import process.
Adapter Type Select the adapter type.
Architecture Accept the default.
OS Type Select the type of operating system.
Minimum Disk (GB) Specify the minimum disk size for the image in GB.
Minimum RAM (GB) Specify the minimum RAM for the image.
Public Select to make the image visible and available to all tenants.
Protected Select to prevent the image from being deleted.
6 Click Create Image.
The Images page now includes the newly added image.
The image is now ready for deployment in OpenStack instances.
Import Images in Supported Formats Using the CLIYou can make images available for use in instances by importing images to the Image Service datastore .
To import an image in a non-supported format such as RAW, QCOW2, VDI, or VHD, see the VMwareIntegrated OpenStack Administrator Guide.
Prerequisites
n Verify that you configured one or more Image Service datastores.
n Obtain the image, for example, ubuntuLTS-sparse.vmdk.
n Verify that the images are packaged in the ISO, VMDK, or OVA format.
Procedure
1 Log in to the OpenStack management cluster as a user with administrative privileges to upload theimage to the Image Service component.
2 Run the glance image-create command to obtain, define, and import the image.
glance --os-auth-token $token --os-image-url http://123.456.7.8:9292 \
image-create name="ubuntu-sparse" \
disk_format=vmdk \
container_format=bare \
--visibility="public" \
--property vmware_adaptertype="lsiLogicsas" \
--property vmware_disktype="sparse" \
--property vmware_ostype="ubuntu64Guest" < ubuntuLTS-sparse.vmdk
This example uses the following parameters and settings.
VMware Integrated OpenStack User Guide
12 VMware, Inc.

Parameter or Setting Description
--os-image-urlhttp://123.456.7.8:9292
The URL of the source image.
name="ubuntu-sparse" The name of the source image, in this case, ubuntu-sparse.
disk_format=vmdk The disk format of the source image. You can specify ISO, VMDK, orOVA.
container_format=bare The container format indicates if the image is in a format thatcontains metadata about the actual virtual machine. Because thecontainer format string is not currently used by Glance, it isrecommended to specify bare for this parameter.
--visibility="public" The privacy setting for the image in OpenStack. When set to public,the image is available to all users. When set to private, the image isavailable only to the current user.
--propertyvmware_adaptertype="lsiLogicsas"
During import, the VMDK disk is introspected to capture its adaptertype property.You also have the option of using the vmware_adaptertype tospecify adapter type.Note If you are using a disk with the paraVirtual or LSI Logic SASadapter type, it is recommend that you use this parameter. Forexample, vmware_adaptertype= lsiLogicsas orvmware_adaptertype= paraVirtual.
--property vmware_disktype="sparse" During import, the VMDK disk type is introspected to capture itsdisk type property.You also have the option of specifying disk type using thevmware_disktype property.
sparse This disktype property applies to monolithicsparse disks.
preallocated This disktype property applies to VMFS flatdisks, including thick, zeroedthick, oreagerzeroedthick. This is the default propertyif none is specified.
streamOptimized
This disktype property applies to MonolithicSparse disks, optimized for streaming. You canconvert disks dynamically to and from thisformat with minimal computational costs.
--propertyvmware_ostype="ubuntu64Guest"
The name of the image file after it is imported to the Image Service.In the example above, the resulting name will be ubuntuLTS-sparse.vmdk.
3 (Optional) In the Compute component, confirm that the image was successfully imported.
$ glance image-list
The command returns a list of all images that are available in the Image Service.
Modify Image SettingsAfter an image is loaded, you can modify the image settings, such as image name, description, and thepublic and protected settings.
Procedure
1 Log in to the VMware Integrated OpenStack dashboard.
2 Select the project from the drop-down menu in the title bar.
Chapter 2 Managing Images for the Image Service
VMware, Inc. 13

3 Select Project > Compute > Images.
4 Select the image to edit.
5 In the Actions column, click Edit Images.
6 Modify the settings as necessary.
7 Click Update Image.
The Images page redisplays with the changed information.
Delete an Existing ImageDeleting an image is permanent and cannot be reversed. You must have administrative permissions todelete an image.
Procedure
1 Log in to the VMware Integrated OpenStack dashboard.
2 Select the project from the drop-down menu in the title bar.
3 Select Project > Compute > Images.
4 Select one or more images to delete.
5 Click Delete Images.
6 Confirm the deletion at the prompt.
VMware Integrated OpenStack User Guide
14 VMware, Inc.
Configuring Access and Security forInstances 3
Before you start instances, configure access and security settings. For example, SSH access and ICMP accessare not enabled by default.
Security groups Enable users to ping and use SSH to connect to the instance. Security groupsare sets of IP filter rules that define networking access and are applied to allinstances in a project.
Key pairs SSH credentials that are injected into an instance when it starts. To use keypair injection, the image that the instance is based on must contain the cloud-init package. Each project must have at least one key pair. If you generated akey pair with an external tool, you can import it into OpenStack. You can usethe key pair for multiple instances that belong to a project.
Floating IPs When you create an instance in OpenStack, it is assigned a fixed IP addressin the network. This IP address is permanently associated with the instanceuntil the instance is terminated. You can also attach to an instance a floatingIP address whose association can be modified.
This chapter includes the following topics:
n “Working with Security Groups,” on page 15
n “Working with Key Pairs,” on page 18
n “Allocate a Floating IP to an Instance,” on page 19
Working with Security GroupsA security group is a set of IP filter rules that define networking access and that you can apply to allinstances in a project. Group rules are project-specific. Project members can edit the default rules for theirgroup and add new rule sets.
You can use security groups to apply IP rules by creating a new security group with the desired rules or bymodifying the rules set in the default security group.
Note A security group can apply either rules or a security policy, but not both.
About the Default Security GroupEach project in VMware Integrated OpenStack has a default security group that is applied to an instanceunless another security group is defined and specified. Unless it is modified, the default security groupdenies all incoming traffic to your instance and permits only outgoing traffic. A common example is to editthe default security group to permit SSH access and ICMP access, so that users can log in to and pinginstances.
VMware, Inc. 15

Create a Security GroupSecurity groups are sets of IP filter rules that define networking access and are applied to all instanceswithin a project. You can either modify the rules in the default security group or create a security group withcustom rules.
To modify an existing rule for a security group, see “Modify the Rules for an Existing Security Group,” onpage 16
Procedure
1 Log in to the VMware Integrated OpenStack dashboard.
2 Select the project from the drop-down menu in the title bar.
3 Select Project > Compute > Access & Security.
4 Click the Security Groups tab.
5 Click Create Security Group.
6 Enter a name and description for the new group, and click Create Security Group.
The new group appears in the list on the Security Group tab.
7 Configure the rules for the new group.
a Select the new security group and click Manage Rules.
b Click Add Rule.
c From the Rule drop-down menu, select the rule to add.
The subsequent fields might change depending on the rule you select.
d If applicable, specify Ingress or Egress from the Direction drop-down menu.
e After you complete the rule definition, click Add.
8 Configure additional rules if necessary.
9 Click the Access & Security tab to return to the main page.
Modify the Rules for an Existing Security GroupYou can modify a security group by adding and removing rules assigned to that group. Rules define whichtraffic is allowed to instances that are assigned to the security group.
Procedure
1 Log in to the VMware Integrated OpenStack dashboard.
2 Select the project from the drop-down menu in the title bar.
3 Select Project > Compute > Access & Security.
4 Click the Security Groups tab.
5 Select the security group to modify and click Manage Rules.
6 To remove a rule, select the rule and click Delete Rule.
VMware Integrated OpenStack User Guide
16 VMware, Inc.

7 To add a rule, click Add Rule and select the custom rule to add from the Rule drop-down menu.
Option Description
Custom TCP Rule Used to exchange data between systems and for end-user communication.
Custom UDP Rule Used to exchange data between systems, for example, at the applicationlevel.
Custom ICMP Rule Used by network devices, such as routers, to send error or monitoringmessages.
Other Protocol You can manually configure a rule if the rule protocol is not included inthe list.
a From the Remote drop-down list, select CIDR or Security Group.
b If applicable, select Ingress or Egress from the Direction drop-down menu.
For TCP and UDP rules, you can open either a single port or a range of ports. Depending on yourselection, different fields appear below the Open Port list.
c Select the kind of access to allow.
Option Description
CIDR (Classless Inter-DomainRouting)
Limits access only to IP addresses within the specified block.
Security Group Allows any instance in the specified security group to access any othergroup instance.You can choose between IPv4 or IPv6 in the Ether Type list.
8 Click Add.
The new rule appears on the Manage Security Group Rules page for the security group.
Enabling SSH and ICMP AccessYou can modify the default security group to enable SSH and ICMP access to instances. The rules in thedefault security group apply to all instances in the currently selected project.
Procedure
1 Log in to the VMware Integrated OpenStack dashboard.
2 Select the project from the drop-down menu in the title bar.
3 Select Project > Compute > Access & Security.
4 Click the Security Groups tab, select the default security group, and click Manage Rules.
5 Click Add Rule and configure the rules to allow SSH access.
Control Value
Rule SSH
Remote CIDR
CIDR 0.0.0.0/0 To accept requests from a particular range of IP addresses, specify the IP address block in the CIDR textbox.
Instances will now have SSH port 22 open for requests from any IP address.
6 Click Add.
Chapter 3 Configuring Access and Security for Instances
VMware, Inc. 17

7 From the Manage Security Group Rules page, click Add Rule and configure the rules to allow ICMPaccess.
Control Value
Rule All ICMP
Direction Ingress
Remote CIDR
CIDR 0.0.0.0/0
8 Click Add.
Instances will now accept all incoming ICMP packets.
Working with Key PairsKey pairs are SSH credentials that are injected into an instance when it starts.
To use key pair injection, the image that the instance is based on must contain the cloud-init package. Eachproject should have at least one key pair. If you generated a key pair with an external tool, you can import itinto OpenStack. You can use the key pair for multiple instances that belong to a project.
Add a Key PairKey pairs are SSH credentials that are injected into an instance when it starts. You can create or import keypairs.
You must provide at least one key pair for each project.
Procedure
1 Log in to the VMware Integrated OpenStack dashboard.
2 Select the project from the drop-down menu in the title bar.
3 Select Project > Compute > Access & Security.
4 Click the Key Pairs tab, which lists the key pairs available for the current project.
5 Click Create Key Pair.
6 Enter a name for the new key pair, and click Create Key Pair.
7 Download the new key pair at the prompt.
8 On the main Key Pairs tab, confirm that the new key pair is listed.
Import a Key PairKey pairs are SSH credentials that are injected into an instance when it starts. You can create or import keypairs.
You must provide at least one key pair for each project.
Procedure
1 Log in to the VMware Integrated OpenStack dashboard.
2 Select the project from the drop-down menu in the title bar.
3 Select Project > Compute > Access & Security.
4 Click the Key Pairs tab, which lists the key pairs available for the current project.
VMware Integrated OpenStack User Guide
18 VMware, Inc.

5 Click Import Key Pair.
6 Enter the name of the key pair. .
7 Copy the public key to the Public Key text box and click Import Key Pair.
8 Return to the main Key Pairs tab to confirm that the imported key pair is listed.
Allocate a Floating IP to an InstanceYou can attach a floating IP address to an instance in addition to the fixed IP address that is assigned when itis created. Unlike fixed IP addresses, you can modify floating IP address associations at any time, regardlessof the state of the instances involved.
Procedure
1 Log in to the VMware Integrated OpenStack dashboard.
2 Select the project from the drop-down menu in the title bar.
3 Select Project > Compute > Access & Security.
4 Click the Floating IPs tab, and click Allocate IP to Project.
5 Choose the pool from which to pick the IP address and click Allocate IP.
6 Click Associate in the Floating IPs list and configure the floating IP associations settings.
Option Description
IP Address Click the plus sign to add an IP address.
Ports to be associated Select a port from the list. The list shows all the instances with their fixedIP addresses.
7 Click Associate.
8 (Optional) To disassociate a floating IP address from an instance, click the Floating IPs tab, and clickDisassociate in the Actions column for the IP address. .
9 To release the floating IP address back into the pool of addresses, click More and select ReleaseFloating IP.
10 Click the Floating IPs tab and select the IP address.
11 Click Release Floating IPs.
Chapter 3 Configuring Access and Security for Instances
VMware, Inc. 19

VMware Integrated OpenStack User Guide
20 VMware, Inc.

Working with Networks 4The OpenStack Networking service provides a scalable system for managing the network connectivity in anOpenStack cloud deployment. It can react to changing network needs, for example, creating and assigningnew IP addresses. You can also configure logical routers to connect the different networks within yourVMware Integrated OpenStack deployment.
For more information about how to manage networks, see the VMware Integrated OpenStack AdministratorGuide.
This chapter includes the following topics:
n “Create a Network,” on page 21
n “Create a Router,” on page 22
Create a NetworkThe OpenStack Networking service component is a scalable system for managing network connectivitywithin your VMware Integrated OpenStack deployment. With the VMware Integrated OpenStackdashboard, you can quickly create logical networks.
Procedure
1 Log in to the VMware Integrated OpenStack dashboard.
2 Select the project from the drop-down menu in the title bar.
3 Select Project > Network > Networks.
The Networks page lists the networks that are currently configured.
4 Click Create Network.
5 On the Network tab, enter a name for the new network.
6 (Optional) Select Admin State to have the network forward packets.
7 Click Next.
8 Configure the subnet.
Option Action
Create Subnet Select to create a subnet. You do not have to specify a subnet when youcreate a network, but if you do not, attached instances receive an Errorstatus. To create a network without a subnet, deselect Create Subnet.
Subnet Name (Optional) Enter a name for the subnet.
Network Address If you create a subnet associated with the new network, specify the IPaddress for the subnet using the CIDR format, for example, 192.168.0.0/24.
VMware, Inc. 21

Option Action
IP Version Select IPv4 or IPv6 from the drop-down menu.
Gateway IP Enter the IP address for a specific gateway.
Disable Gateway (Optional) Select to disable a gateway IP address.
9 Click Next to access the settings on the Subnet Detail tab.
10 (Optional) if you selected the Create Subnet option on the previous tab, enter the subnet settings.
Option Description
Enable DHCP (Optional) Select this option to enable DHCP. Consult with your networkadministrator.
Allocation Pools Specify IP address pools for use by devices in the new network.
DNS Name Servers Specify DNS servers for the new network.
Host Routes Specify the IP address for the host routes.
11 Click Create.
When you start a new instance, this network will be available.
Create a RouterWith the VMware Integrated OpenStack dashboard, you can create logical routers. You use logical routers toconnect the networks in your OpenStack deployment.
Procedure
1 Log in to the VMware Integrated OpenStack dashboard.
2 Select the project from the drop-down menu in the title bar.
3 Select Project > Network > Routers.
The Routers page lists the routers that are currently configured.
4 Click Create Router.
5 Provide a name for the router and click Create Router.
The new router appears in the list on the Routers page. You can now complete the router configuration.
6 Click Set Gateway in the Actions column of the new router.
7 Select a network from the drop-down menu, and click Set Gateway.
The Router Name and Router ID text boxes are automatically populated.
8 Connect the router to a private network.
a Click the router name on the Routers page.
b Click Add Interface.
c Select a subnet from the drop-down menu.
d (Optional) Enter the router interface IP address for the selected subnet.
If you do not set this value, the first host IP address in the subnet is used by default.
e Click Add Interface.
You successfully created the router. You can view the new topology on the Network Topology page.
VMware Integrated OpenStack User Guide
22 VMware, Inc.

Working with Instances in OpenStack 5Instances are virtual machines that run in the cloud.
You can start an instance from the following sources:
n Images uploaded to the OpenStack Image Service. See Chapter 2, “Managing Images for the ImageService,” on page 11.
n An image that you copied to a persistent volume. The instance starts from the volume, which thecinder-volume API provides through iSCSI. See “Attach a Volume to an Instance,” on page 31.
This chapter includes the following topics:
n “Start an OpenStack Instance from an Image,” on page 23
n “Start an OpenStack Instance from a Snapshot,” on page 24
n “Connect to an Instance by Using SSH,” on page 26
n “Track Instance Use,” on page 26
n “Create a Snapshot from an Instance,” on page 26
n “Using Affinity and Anti-Affinity to Place OpenStack Instances,” on page 26
Start an OpenStack Instance from an ImageWhen you start an instance from an image, OpenStack creates a local copy of the image on the computenode where the instance starts. You can observe OpenStack instances in vSphere as VMs, but you mustmanage them in OpenStack.
Prerequisites
Verify that images, flavors, block storage, and networks are configured and available to start an instance.
Procedure
1 Log in to the VMware Integrated OpenStack dashboard.
2 Select the project from the drop-down menu in the title bar.
3 Select Project > Compute > Images.
The Images page lists the images available to the current user.
4 In the Actions column of the image, click Launch.
VMware, Inc. 23
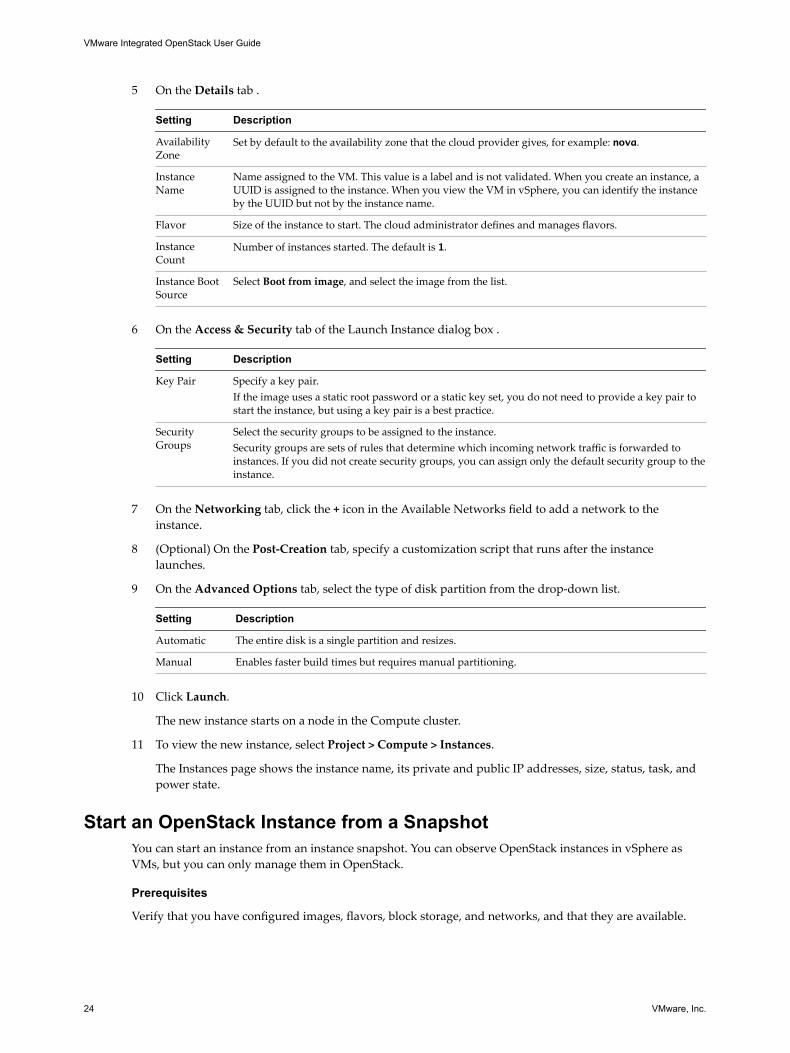
5 On the Details tab .
Setting Description
AvailabilityZone
Set by default to the availability zone that the cloud provider gives, for example: nova.
InstanceName
Name assigned to the VM. This value is a label and is not validated. When you create an instance, aUUID is assigned to the instance. When you view the VM in vSphere, you can identify the instanceby the UUID but not by the instance name.
Flavor Size of the instance to start. The cloud administrator defines and manages flavors.
InstanceCount
Number of instances started. The default is 1.
Instance BootSource
Select Boot from image, and select the image from the list.
6 On the Access & Security tab of the Launch Instance dialog box .
Setting Description
Key Pair Specify a key pair.If the image uses a static root password or a static key set, you do not need to provide a key pair tostart the instance, but using a key pair is a best practice.
SecurityGroups
Select the security groups to be assigned to the instance.Security groups are sets of rules that determine which incoming network traffic is forwarded toinstances. If you did not create security groups, you can assign only the default security group to theinstance.
7 On the Networking tab, click the + icon in the Available Networks field to add a network to theinstance.
8 (Optional) On the Post-Creation tab, specify a customization script that runs after the instancelaunches.
9 On the Advanced Options tab, select the type of disk partition from the drop-down list.
Setting Description
Automatic The entire disk is a single partition and resizes.
Manual Enables faster build times but requires manual partitioning.
10 Click Launch.
The new instance starts on a node in the Compute cluster.
11 To view the new instance, select Project > Compute > Instances.
The Instances page shows the instance name, its private and public IP addresses, size, status, task, andpower state.
Start an OpenStack Instance from a SnapshotYou can start an instance from an instance snapshot. You can observe OpenStack instances in vSphere asVMs, but you can only manage them in OpenStack.
Prerequisites
Verify that you have configured images, flavors, block storage, and networks, and that they are available.
VMware Integrated OpenStack User Guide
24 VMware, Inc.

Procedure
1 Log in to the VMware Integrated OpenStack dashboard.
2 Select the project from the drop-down menu in the title bar.
3 Select Project > Compute > Images.
The Images page lists the snapshots available to the current user.
4 In the Actions column of the snapshot, click Launch.
5 On the Details tab of the Launch Instance dialog box, configure the instance.
Setting Description
AvailabilityZone
By default, this value is set to the availability zone that the cloud provider provides, for example,nova.
InstanceName
Assign a name to the VM. This value is a label and is not validated. When you create an instance, aUUID is assigned to the instance. When you view the VM in vSphere, you can identify it by theUUID but not by the instance name.
Flavor Specify the size of the instance to start. The cloud administrator defines and manages flavors .
InstanceCount
To start multiple instances, enter a value greater than 1. The default is 1.
Instance BootSource
Select Boot from snapshot, and select the snapshot from the list.
6 On the Access & Security tab of the Launch Instance dialog box, configure access and securityparameters by specifying a key pair and security group.
Setting Description
Key Pair Specify a key pair.If the image uses a static root password or a static key set, you do not need to provide a key pair tolaunch the instance. A best practice is to use a key pair.
SecurityGroups
Select the security groups to assign to the instance.Security groups are sets of rules that determine which incoming network traffic is forwarded toinstances. If you did not create security groups, you can assign only the default security group to theinstance.
7 On the Networking tab of the Launch Instance dialog box, click the + icon in the Available Networksfield to add a network to the instance.
8 (Optional) On the Post-Creation tab, specify a customization script that runs after the instance starts.
9 In the Advanced Options tab, select the type of disk partition from the drop-down menu.
Setting Description
Automatic The entire disk is a single partition and automatically resizes.
Manual Enables faster build times but requires manual partitioning.
10 Click Launch.
The new instance starts on a node in the Compute cluster.
11 To view the new instance, select Project > Compute > Instances.
The Instances tab shows the instance name, its private and public IP addresses, size, status, task, andpower state.
Chapter 5 Working with Instances in OpenStack
VMware, Inc. 25

Connect to an Instance by Using SSHTo use SSH to connect to your instance, use the downloaded keypair file.
Procedure
1 Copy the IP address for your instance.
2 Use the ssh command to make a secure connection to the instance.
For example:
$ ssh -i MyKey.pem [email protected]
3 At the prompt, enter yes.
Track Instance UseYou can track use for instances in each project. You can view instance metrics such as number of vCPUs,disks, RAM, and uptime.
Procedure
1 Log in to the VMware Integrated OpenStack dashboard.
2 Select the project from the drop-down menu in the title bar.
3 Select Project > Compute > Overview.
The Overview page shows use and limit information. You can also limit the information to a specificperiod of time lists and download a summary in the CSV format.
Create a Snapshot from an InstanceWith snapshots, you can create new images from running instances.
You can create a snapshot of an instance directly from the Instances page.
Procedure
1 Log in to the VMware Integrated OpenStack dashboard.
2 Select the project from the drop-down menu in the title bar.
3 Select Project > Compute > Instances.
The Instances page lists the instances available to the current user.
4 In the Actions column, click Create Snapshot.
The snapshot appears on the Images page.
Using Affinity and Anti-Affinity to Place OpenStack InstancesThe Nova scheduler provides filters that you can use to ensure that OpenStack instances are automaticallyplaced on the same host (affinity) or separate hosts (anti-affinity).
You apply the affinity or anti-affinity filter as a policy to a server group. All instances that are members ofthe same group are subject to the same filters. When you create an OpenStack instance, you can specify theserver group to which the instance will belong and therefore what filter will be applied.
You can perform this configuration using either the OpenStack CLI or ServerGroup API. You cannotperform this configuration in the VMware Integrated OpenStack Horizon dashboard.
VMware Integrated OpenStack User Guide
26 VMware, Inc.

This approach to placing OpenStack instances is tenant-based. Affinity and anti-affinity determine therelationship among instances in the same server group, but they cannot determine the hosts on which theinstances are placed in vCenter. For an administrator-based approach that provides greater control, seeVMware Integrated OpenStack Administrator Guide.
Create Instances with an Affinity or Anti-Affinity Policy by Using the CLIYou can place instances using affinity or anti-affinity by creating a server group in OpenStack and applyingdesired filter as a group policy. All instances that are members of the server group will be subject to theaffinity or anti-affinity policy. You can perform this configuration using the CLI .
Prerequisites
n Verify with the cloud administrator that the intended filter configuration does not conflict with anyadministrative configuration, such as DRS rules that manage instance placement on hosts.
n Verify that you are running VMware Integrated OpenStack version 2.0.x or later.
n Verify that VMware Integrated OpenStack is running.
n Verify that you are using a Python nova-client version 2.17.0.6 or later as required for the ServerGroupAPI. Go to http://docs.openstack.org/user-guide/common/cli_install_openstack_command_line_clients.html.
Procedure
1 Using SSH, log in to the nova-client.
2 (Optional) Obtain the ID of the image you will use to create the instance.
You can use the nova image-list command to view the list of available images and their ID values.
3 (Optional) Obtain the ID of the flavor you will use to define the instance .
You can use the nova flavor-list command to view the list of flavor definitions and their ID values.
4 Create a new server group with the intended policy.
a Create a server group with the affinity policy:
nova server-group-create --policy affinity <GROUP_NAME>
b Create a server group with the anti-affinity policy:
nova server-group-create --policy anti-affinity <GROUP_NAME>
In both case, the CLI returns the auto-generated server group UUID, name, and policy.
5 Launch a new instance, using the --image, --flavor, and --hint flags to apply the server group affinitypolicy .
nova boot --image IMAGE_ID --flavor FLAVOR_ID --hint group=SERVER_GROUP_UUID INSTANCE_NAME
6 (Optional) Ask your cloud administrator to confirm that the new rule and the server group instancesappear and are running correctly in the VMware Integrated OpenStack deployment in vCenter.
The details appear in the Manage > Settings > VM/Host Rules page for the Compute cluster.
Chapter 5 Working with Instances in OpenStack
VMware, Inc. 27

Create Instances with an Affinity or Anti-Affinity Policy Using the APIYou can place instances using affinity or anti-affinity by creating a server group in OpenStack and applyingdesired filter as a group policy. All instances that are members of the server group will be subject to theaffinity or anti-affinity policy. You can perform this configuration using the ServerGroup API from thePython nova-client.
Prerequisites
n Verify with the cloud administrator that your anti-affinity filter configuration does not conflict with anyadministrative configuration, such as DRS rules that manage instance placement on hosts.
n Verify that you are running VMware Integrated OpenStack version 2.0.x or later.
n Verify that VMware Integrated OpenStack is running.
n Verify that you are using a Python nova-client version 2.17.0.6 or later, as required for the ServerGroupAPI. Go to http://docs.openstack.org/user-guide/common/cli_install_openstack_command_line_clients.html.
Procedure
1 Create a new server group with an anti-affinity policy.
POST /v2/TENANT_ID/os-server-groups
{
"server_group": {
"name": "SERVER_GROUP_NAME",
"policies": ["POLICY_TYPE"]
}
}
Option Description
TENANT_ID ID value for the OpenStack tenant.
SERVER_GROUP_NAME Specify the name for the server group.
POLICY_TYPE Specify either affinity or anti-affinity.
2 Launch a new instance, including the os:scheduler_hints argument with the server group ID in theGET /servers command.
... "os:scheduler_hints": {"group": "SERVER_GROUP_UUID"}
3 (Optional) Ask your cloud administrator to confirm that the new rule and the server group instancesare created and are running correctly in the VMware Integrated OpenStack deployment in vCenter.
The rule details appear in the Manage > Settings > VM/Host Rules page for the Compute cluster.
VMware Integrated OpenStack User Guide
28 VMware, Inc.

Working with Volumes 6Volumes are block storage devices that you attach to instances to enable persistent storage.
You can attach a volume to a running instance or detach a volume and attach it to another instance at anytime. You can also create a snapshot from or delete a volume.
Only administrative users can create volume types.
This chapter includes the following topics:
n “Create a Volume,” on page 29
n “Modify Existing Volumes,” on page 30
n “Delete Existing Volumes,” on page 30
n “Attach a Volume to an Instance,” on page 31
n “Detach a Volume,” on page 31
n “Create a Snapshot from a Volume,” on page 31
Create a VolumeVolumes are block storage devices that you attach to instances to enable persistent storage.
Prerequisites
Upload an image for the volume. See Chapter 2, “Managing Images for the Image Service,” on page 11.
Procedure
1 Log in to the VMware Integrated OpenStack dashboard.
2 Select the project from the drop-down menu in the title bar.
3 Select Project > Compute > Volumes.
The Volume & Snapshots page lists the volumes currently configured that are available to the currentuser.
4 Click Create Volume.
5 Create the volume.
Option Description
Volume Name Enter a name for the new volume.
Description (Optional) Enter a description for the new volume.
VMware, Inc. 29

Option Description
Type Leave blank.
Size Enter the size of the volume.
6 Specify the volume source.
Option Description
No source, empty volume Creates an empty volume. An empty volume does not contain a file systemor a partition table.
Snapshot Creates a volume from a snapshot. If you choose this option, the Usesnapshot as a source field appears. Select the snapshot from the list. Theoptions to use a snapshot or a volume as the source for a volume appearonly if snapshots or volumes exist.
Image Select this option to create a volume from an image. If you choose thisoption, the Use image as a source field appears. Select the image from thelist.
Availability Zone Select the Availability Zone from the list. By default, this value is set to theavailability zone specified by the cloud provider, for example, us-west orapac-south. The default can also be nova.
Volume Creates a volume from an existing volume. If you choose this option, theUse volume as a source field appears. You can select the volume from thelist. The options to use a snapshot or a volume as the source for a volumeappear only if snapshots or volumes exist.
7 Click Create Volume at the bottom of the page.
The Volume & Snapshots page appears again, showing the new volume in the table.
Modify Existing VolumesYou can modify the name and description for an existing volume. When you delete an instance, the attachedvolumes and their data are not destroyed.
Procedure
1 Go to the Volumes page and locate the volume to modify.
2 In the Actions column, click Edit Volume.
3 Modify the settings and click Edit Volume.
Delete Existing VolumesWhen you delete an instance, the attached volumes and their data are not destroyed
Procedure
1 Go to the Volumes page and select the volume to delete.
2 Select the volumes to delete.
3 Click Delete Volumes.
4 When prompted, confirm the deletion.
The deleted volume no longer appears on the Volumes page.
VMware Integrated OpenStack User Guide
30 VMware, Inc.

Attach a Volume to an InstanceAfter you create one or more volumes, you can attach them to instances. You can attach a volume to oneinstance at a time.
Procedure
1 Log in to the VMware Integrated OpenStack dashboard.
2 Select the project from the drop-down menu in the title bar.
3 Select Project > Compute > Volumes.
The Volume & Snapshots page lists the volumes currently available to the current user.
4 Select the volume to add to an instance and select More > Edit Attachments in the Actions column.
5 From the Attach to Instance drop-down menu, select the instance to which you want to attach thevolume.
6 Click Attach Volume.
The new volume appears in the list of available volumes.
Detach a VolumeYou can detach a volume from one instance and attach it to another.
Procedure
1 Log in to the VMware Integrated OpenStack dashboard.
2 Select the project from the drop-down menu in the title bar.
3 Select Project > Compute > Volumes.
The Volume & Snapshots page lists the volumes currently available to the current user.
4 Select the volume to detach and click Edit Attachments.
5 Click Detach Volume.
6 Confirm the action at the prompt.
The volume is now available and can be attached to a different instance.
Create a Snapshot from a VolumeWith snapshots, you can create new images from running instances.
Prerequisites
Detach the volume from the instance before you take the snapshot. Creating a snapshot from an attachedvolume can result in a corrupted snapshot.
Procedure
1 Log in to the VMware Integrated OpenStack dashboard.
2 Select the project from the drop-down menu in the title bar.
3 Select Project > Compute > Volumes.
The Volume & Snapshots page lists the volumes currently configured that are available to the currentuser.
Chapter 6 Working with Volumes
VMware, Inc. 31

4 Select the volume to add to an instance and select More > Create Snapshot in the Actions column.
5 Enter a snapshot name and optional description.
6 Click Create Volume Snapshot.
The Volume & Snapshots page appears again, showing the new snapshot in the table on the VolumeSnapshots tab.
VMware Integrated OpenStack User Guide
32 VMware, Inc.

Working with Orchestration andStacks 7
You can use the OpenStack Orchestration service to orchestrate multiple composite cloud applications. Itsupports the native OpenStack Heat Orchestration Template (HOT) format through a REST API, and theAmazon Web Services (AWS) CloudFormation template format through a Query API that is compatiblewith CloudFormation.
You use templates to create stacks. A stack configures the automated creation of most OpenStack resourcetypes, including instances, floating IP addresses, volumes, security groups, and users.
With orchestration templates, application developers can define the parameters for automating thedeployment of infrastructure, services, and applications. Templates are static files that you can use directlyfor creating a stack.
You can also create a stack that combines a template with an environment file. An environment file suppliesa unique set of values to the parameters defined by the template. By using environment files with templates,you can create many unique stacks from a single template.
For information about how to create template and environment files, see the OpenStack documentation athttp://docs.openstack.org/developer/heat/template_guide/index.html.
This chapter includes the following topics:
n “Start a New Orchestration Stack,” on page 33
n “Modify an Orchestration Stack,” on page 34
n “Delete an Orchestration Stack,” on page 35
Start a New Orchestration StackWith orchestration stacks, you can launch and manage multiple composite cloud applications. You start anew stack by specifying the template and environment files, and defining other operational settings,including user credentials, database access settings, and the Linux distribution.
Prerequisites
Verify that the template and environment file for the stack are created and available. For information aboutcreating template and environment files, see the OpenStack documentation athttp://docs.openstack.org/developer/heat/template_guide/index.html.
Procedure
1 Log in to the VMware Integrated OpenStack dashboard.
2 Select the project from the drop-down menu in the title bar.
VMware, Inc. 33

3 Select Project > Compute > Orchestration > Stacks.
The Stacks page lists the stacks available to the current user.
4 Click Launch Stack.
5 Select the template for the new stack.
Option Description
Template Source Select the template source: URL, File, or Direct Input.
Template URL or File or Data Dynamically changes depending on what you select for Template Source.Enter the URL, browse to the file location, or paste the template text.
Environment Source Select the environment source: URL, File, or Direct Input.
Environment URL or File or Data Dynamically changes depending on what you select for EnvironmentSource. Enter the URL, browse to the file location, or paste the templatetext.
6 Click Next.
7 Configure the new stack.
Option Description
Stack Name Name to identify the stack.
Creation Timeout (minutes) Number of minutes before the launch of the stack times out.
Rollback On Failure Select this check box to roll back changes if the stack fails to launch.
Password for user "demo" Password for the default user after the stack is created.
DBUsername Name of the database user.
Linux Distribution Linux distribution that is used in the stack.
DB Root Password Root password for the database.
Key Name Key pair for logging into the stack.
DB Name Name of the database.
DB Password Password for the database.
Instance Type Flavor for the instance.
8 Click Launch to create the stack.
9 (Optional) Verify that the new stack appears on the Stacks page.
10 (Optional) Click the stack to view the stack details.
Detail Description
Topology Visual topology of the stack.
Overview Parameters and details of the stack.
Resources Resources that the stack uses.
Events Events related to the stack.
Modify an Orchestration StackYou can modify a stack by updating the template file, environment file, or stack parameters.
Procedure
1 Log in to the VMware Integrated OpenStack dashboard.
2 Select the project from the drop-down menu in the title bar.
VMware Integrated OpenStack User Guide
34 VMware, Inc.

3 Select Project > Compute > Orchestration > Stacks.
The Stacks page lists the stacks available to the current user.
4 Select the stack to update.
5 Click Change Stack Template.
6 (Optional) In the Select Template dialog box, modify the template or environment file selection.
7 Click Next.
8 (Optional) In the Update Stack Parameters dialog box, modify the parameter values.
9 Click Update.
10 (Optional) On the Stacks page, verify that the changes to the stack configuration are applied.
Delete an Orchestration StackWhen you delete a stack, you also delete the resources that that stack generates.
Procedure
1 Log in to the VMware Integrated OpenStack dashboard.
2 Select the project from the drop-down menu in the title bar.
3 Select Project > Compute > Orchestration > Stacks.
The Stacks page lists the stacks available to the current user.
4 Select the stack to delete and click Delete Stack.
5 Confirm the action at the prompt.
6 (Optional) Verify that the deleted stack no longer appears on the Stacks page.
Chapter 7 Working with Orchestration and Stacks
VMware, Inc. 35

VMware Integrated OpenStack User Guide
36 VMware, Inc.

Index
Aaccess, configuring security 15affinity rules, instance placement 26–28allocating 19anti-affinity rules, instance placement 26–28audience 5
Ddashboard, logging in 9
Ffloating IP 19
Iimages
deleting 14managing 11modifying settings 13uploading with CLI 12uploading with dashboard 11
instancesconnecting via SSH 26launching from image 23placing with anti-affinity rules 26–28placing with affinity rules 26–28tracking use 26working with 23
Kkey pairs
about 18adding 18importing 18
Llaunching from a snapshot 24
Nnetworks
creating 21routers 21working with 21
Oorchestration
deleting a stack 35modifying a stack 34
stacks 33starting a stack 33
Rrouters
creating 22working with 21
Ssecurity
configuring 15overview 15
security groupsabout 15CIDR or Security Group 16creating 16ICMP access 17modifying 16SSH access 17
snapshotscreate from a volume 31create from an instance 26
stacksdeleting 35modifying 34orchestration 33starting 33
Uupdated information 7
Vvolumes
adding 29attaching to instances 31deleting 30detaching from an instance 31editing 29modifying 30overview 29
VMware, Inc. 37

VMware Integrated OpenStack User Guide
38 VMware, Inc.