virtual program - cycle-ology - a virtual exploration of...
TRANSCRIPT

The Canada Science and Technology Museum presents
Cycle-ology
A Virtual Exploration of the Bicycle
Section 1: About This Guide

Page 2 of 7
Introduction Cycle-ology is a virtual program that invites students in Grades 4 through 6 to take part in exciting and engaging activities, discussions, and experiments that help them discover the world of bicycles. Through their virtual explorations, your students will learn the important historical and scientific significance of one of the greatest inventions ever created — the bicycle!
Background It was in 1967 that the Canada Science and Technology Museum began collecting bicycles. Over the past 40 years, the collection has expanded to include a variety of cycles as well as accessories, literature and bicycle paraphernalia. By collecting, researching and preserving these wonderful artifacts, we are able to learn more about the impact that this technology has had on society. Through many of the virtual explorations listed in this program, students will explore the Museum’s impressive cycle collection and discover examples of innovative bicycle technology from the early 1800s to today.
What this Exploration Guide can do for you This Exploration Guide lets you and your students discover the historical, scientific and social principles behind the bicycle by using your school’s Internet connections. Our activities and worksheets will enrich your exploration of the Canada Science and Technology Museum’s web pages as well as other great sites. Blank worksheets and detailed examples can be freely reproduced to use in your classroom. Our activities are modular and can be completed independently.
In addition to learning about history and science and technology, the Exploration Guide’s activities reinforce other skills such as mathematics, creativity, reading and writing. You will also find suggestions for classroom discussions, class projects and students’ special projects.
Teachers may request an answer package for more detailed Activity Sheets by e-mailing [email protected]. Please allow at least a week for us to reply.

Page 3 of 7
Navigating through the Exploration Guide Currently, there are four sections to the Exploration Guide. Each section can be downloaded as a separate Adobe PDF file, allowing you to select the sections you want to use. Alternatively, you can download the entire Guide as a single Adobe PDF file. The content is identical in either case.
Section Topic
1 Introduction (This Module)
2 Pedalling Through History
3 Cycling Science
4 Cycles in Society
Throughout the Exploration Guide, distinctive icons indicate features in the text. These help you find your way through the Exploration Guide quickly and efficiently.
Classroom activity
Discussion or essay topic
Deeper study
Site to visit

Page 4 of 7
Curriculum Links The Guide is cross-curricular, introducing elements from various curriculum divisions: Mathematics, Social Studies, Geography, Language Arts, and Science and Technology.
Links to the Pan-Canadian Common Framework
Learning Outcomes Grades 4 to 6 Science, Technology, Society and the Environment
107, 108
Skills 204; 205; 206; 207
Knowledge 300-13; 301-13; 301-14; 302-11; 303-30
Attitudes 410; 419
Ontario Science Curriculum Grades 4 to 6 • Structures and Mechanisms
Grade 5 • Energy and Control
Grades 5 to 6 • Matter and Materials
Ontario Mathematics Curriculum Grades 4 to 6 • Number Sense and Numeration
• Measurement
• Data Management and Probabilities
Ontario Social Studies Curriculum Grade 4, 6: Canada and World Connections
• Canada’s Link to the World
Ontario Arts Curriculum Grades 4 to 6 • Visual Arts
• Drama
Ontario Language Arts Curriculum Grades 4 to 6 • Reading, Writing, Oral Communication,
Media Literacy
Ontario Health and Physical Activity Curriculum Grade 4 • Healthy Living

Page 5 of 7
Quebec Curriculum 13-0003-07T
Mathematics, Science and Technology To propose explanations for or solutions to scientific or technological problems
To explore the world of science and technology
To communicate in the languages used in science and technology
Geography, History and Citizenship Education To interpret change in a society and its territory
English Language Arts To read and listen to literary, popular and information-based texts
To write self-expressive, narrative and information-based texts
To use language to communicate and learn
Physical Education and Health To adopt a healthy active lifestyle
Arts Education To invent short scenes (Drama)
To produce media works in the visual arts (Visual Arts)
Cross-Curricular Competencies
To use creativity
To use information and communications technologies (ICT)
To cooperate with others
To communicate appropriately

Page 6 of 7
Resource Information Babaian, Sharon. The Most Benevolent Machine: A Historical Assessment of Cycles in Canada, Ottawa ON, Canada Science and Technology Museum, 1998 (may be ordered from the Museum)
Beeley, Serena. A History of Bicycles, London, Studio Editions, 1992
Erlbach, Arlene. How It’s Made: Bicycles, Minneapolis MN, Lerner Publications Company, 1994
Humber, William. Freewheeling The Story of Bicycling in Canada, Erin ON, The Boston Mills Press, 1986
Lord, Trevor. Amazing Bikes, Toronto ON, Dorling Kindersley Limited, 1992
Ollerenshaw, Chris. Gears, Milwaukee WI, Gareth Stevens Publishing, 1994
Otfinoski, Steve. Pedaling Along, New York NY, 1997
Perry, David B. Bike Cult: The Ultimate Guide to Human-Powered Vehicles, New York NY, Four Walls Eight Windows, 1995
Pollard, Michael. From Cycle to Spaceship: The Story of Transportation, New York NY, Facts On File Publications, 1987
Transportation, Alexandria VA, Time Life Inc., 1992
Useful Web Sites Notice Regarding Internet Sites
These Internet links are provided as a convenience only. We have taken care to suggest websites that are stable and are appropriate for education but we cannot guarantee the content of any sites not under the direct control of Canada Science and Technology Museum. These sites provide information for the activities presented in this Virtual Guide but performing subject searches will show up many more, also one of the objectives of this guide.
Since the Internet has a very dynamic nature, web addresses can change without warning.
Canada Science and Technology Museum Cycles web pages http://www.sciencetech.technomuses.ca/english/collection/cycles.cfm Canada Science and Technology Museum Curator’s Choice web pages http://www.sciencetech.technomuses.ca/english/collection/bikes.cfm Canada Science and Technology Museum Simple Machines web page http://www.sciencetech.technomuses.ca/english/schoolzone/Info_Simple_Machines2.cfm

Page 7 of 7
Canada Science and Technology Museum Energy web page http://www.sciencetech.technomuses.ca/english/schoolzone/ Info_Energy.cfm#transportation
Exploratorium website http://www.exploratorium.edu/cycling/ How Stuff Works website http://www.howstuffworks.com/bicycle.htm
Society of Women Engineers website http://www.swe.org/iac/lp/cycling_03.html Transport Canada – Sustainable transportation web pages http://www.tc.gc.ca/environment/menu.htm#sustainable
World Bicycle Relief website http://www.worldbicyclerelief.org/impact/index.php
International Bicycle Fund website http://www.ibike.org/economics/work-bike.htm
Public Health Agency of Canada – Canada Physical Activity Guide for Youth website http://www.phac-aspc.gc.ca/pau-uap/paguide/child_youth/youth/index.html Trans Canada Trail website http://www.tctrail.ca/thetrail.php
Lance Armstrong website http://www.lancearmstrong.com/ Official website of the Olympic Movement http://www.olympic.org/uk/index_uk.asp

The Canada Science and Technology Museum presents
Cycle-ology:
A Virtual Exploration of the Bicycle
Section 2: Pedalling Through History

Page 2 of 14
Introduction The following activities and lessons look at the development of the bicycle from its creation in the 19th century to the present. Students will discover how mechanics and inventors modified the bicycle throughout history in order to improve the vehicle’s performance. They will learn how the bicycle became so popular in Canada and how its development had an important influence on society.
Teachers may request an answer package for more detailed Activity Sheets by e-mailing [email protected]. Please allow at least a week for us to reply.

Page 3 of 14
Activity 2.1: Discover the Museum’s Collection Suitable for Grades 4 – 6
Purpose: Students will discover the Museum’s rich cycle collection and trace the principal changes in bicycle design.
The Canada Science and Technology Museum has been collecting, conserving, preserving, restoring and researching cycles for the past 40 years. The Museum’s collection is enriched by many fascinating artifacts ranging from the earliest hobby-horses to bicycles developed in the late 1980s.
Collecting Cycles Encourage students to explore the Museum’s website to discover their rich cycle collection.
http://www.sciencetech.technomuses.ca/english/collection/cycles.cfm Using the website as their resource, have students identify the images of historical bicycles found on Activity Sheet 2.1 and ask the students to number the cycles in the order they were invented.
Following the activity, ask the students to list the principle differences between the cycles. Encourage students to analyze the design of the cycles, what looks different between the different cycles? (Have students pay close attention to the bicycle frames, the size of the wheels, the number of wheels, and the presence of pedals, gears and brakes.) List their observations on the board.
This discussion will serve as an introduction to this module as the differences observed by the students will be explored and explained in a variety of activities throughout the Exploration Guide.
Oral Presentation The following activity will allow each student to familiarize themselves with a historical cycle. Invite students to prepare an oral presentation describing a cycle from the Museum’s collection. Students can browse the Museum’s website to find the answers to the following questions:
• What year was the cycle invented?
• Who invented the cycle?
• In which country did it originate?
• What was the shape of its frame?
• What materials were used in its fabrication?
• What are its strong and weak points?

Page 4 of 14
• Who would have ridden it and for what purpose?
• How was the cycle ridden?
• Why did this cycle loose its popularity?
In addition, students can draw their selected cycle on a large poster board and demonstrate to their classmates where the pedals, gears and other parts are located. Students can take turn presenting their cycle to the class.
Display the students’ posters in the classroom.
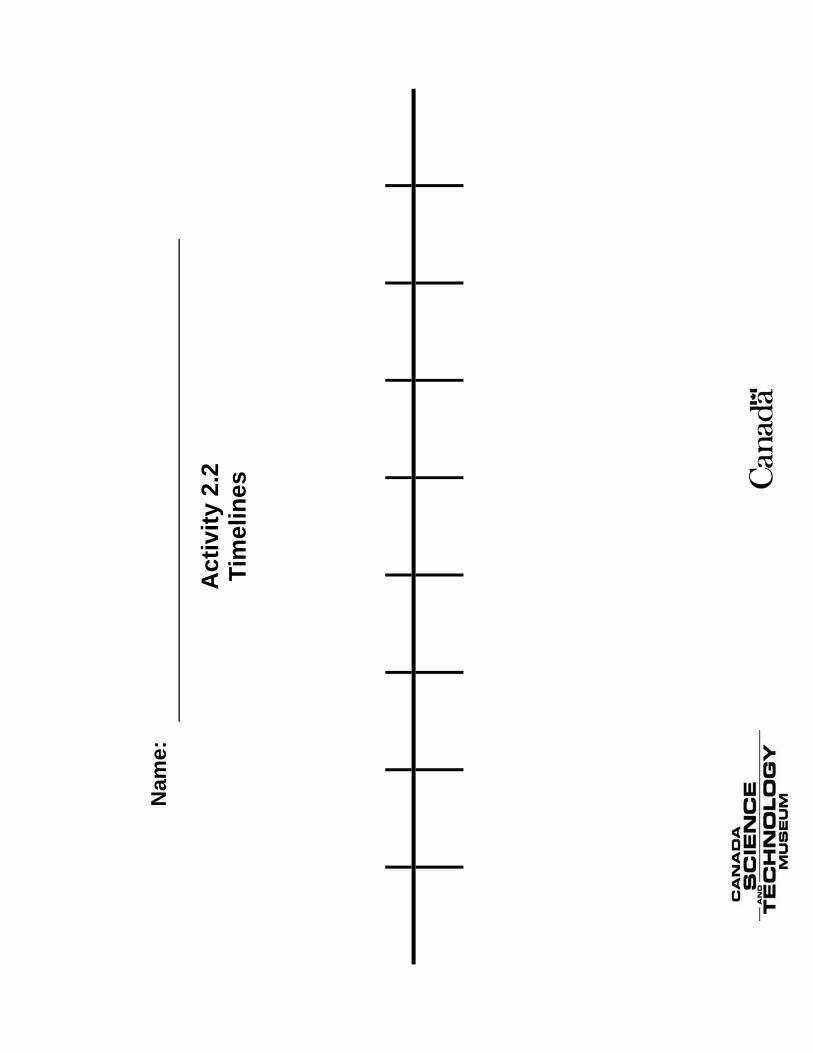
Activity 2.2: Timelines Suitable for Grades 4 – 6
Purpose: Students will create timelines in order to study the progression of the bicycle.
Timelines are valuable tools for determining relationships between events in history. Many different types of timelines can be constructed using the blank timeline provided in Activity Sheet 2.2. Students can customize their very own timeline and determine the time intervals as needed. They can print multiple timeline sheets and attach them end-to-end to form a long, detailed timeline. Additional blank pages can be attached to the bottom of the timeline form to provide space to record more events.
Resources for building timelines: A great source for Canadian-themed timeline data is the Time Machine game at the Canada Science and Technology Museum website’s Kid’s Zone web page at: http://www.sciencetech.technomuses.ca/english/schoolzone/timeline/timeline_en.cfm Excellent timelines are also available at the HyperHistory Online Project website at: http://www.hyperhistory.com/online_n2/History_n2/a.html. These timelines can be useful both as examples and as reference resources.
Suggested Timelines: Here are a few possibilities of timelines to get your students started.
• Technological Improvements: Invite students to create a timeline that demonstrate the principal technological modifications that have been made to the bicycle by inventors and mechanics to improve the vehicle’s speed and efficiency. Have them include the following events: inventors and makers add gears to the bicycle, introduce pneumatic tires, add pedals, etc.

Page 5 of 14
• The Canadian Bicycle Story: Instruct students to list the principal Canadian events associated with the history of bicycles. Students should indicate the following events: the introduction of the cycle in Canada, the beginning and end of the Canadian bicycle boom, the creation of the first Canadian bicycle clubs, the interest for cycles is revived in Canada, Canadian makers develop the mountain bike, etc.
• Transportation Timeline: Have students choose several modes of transportation and mark the date of their invention on the timeline. Have them include the invention of the bicycle, the automobile, the train, the motorcycle, the ship and the airplane.
• Competitive Cycling Achievements: Have students list important sporting achievements related to the bicycle. Have them include the first recorded Velocipede race, the creation of the Tour de France, the introduction of competitive cycling in the Olympics and important world records.
To complete this lesson, have students compare their timeline with the one developed by the Exploratorium on the theme of bicycles at: http://www.exploratorium.edu/cycling/timeline.html
Activity 2.3: Improving the Bicycle over Time Suitable for Grades 4 – 6
Purpose: Students will identify the principal changes in the design of the bicycle made by inventors and makers in order to improve the bicycle.
Class Discussion Discuss the following questions with the class:
• Why do you ride your bicycle?
• What are the principal criteria you look at when selecting a bicycle?
List their answers on the board. (Possible answers: security, comfort, efficiency, speed, style, colour, weight, specific brand and cost) Have students rank the criteria listed on the blackboard from the most important to the least important when choosing a bicycle.
Invite a few students to share their top three answers with the class and have them describe why each factor is important to them.
Ask students which criteria were the most important to inventors and makers developing the first bicycles. Would these factors be the same as the ones you have listed? Many factors have influenced the evolution of the bicycle but three criteria have been the most
Page 6 of 14
prevalent. Have students guess which three factors have contributed the principal modifications of bicycles throughout time.
Historically, the changes made to the bicycle have focussed around improving the safety, comfort and speed of the bike. Ask students why they think inventors and makers concentrated primarily on these elements when improving the bicycle.
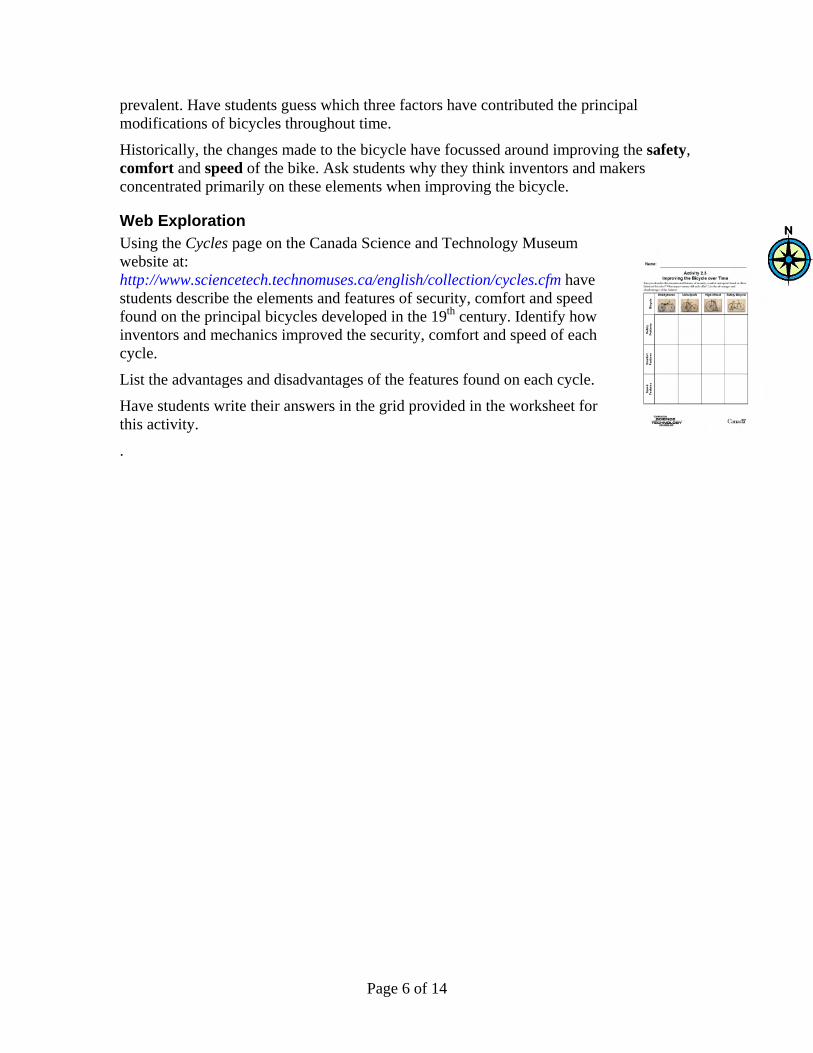
Web Exploration Using the Cycles page on the Canada Science and Technology Museum website at: http://www.sciencetech.technomuses.ca/english/collection/cycles.cfm have students describe the elements and features of security, comfort and speed found on the principal bicycles developed in the 19th century. Identify how inventors and mechanics improved the security, comfort and speed of each cycle.
List the advantages and disadvantages of the features found on each cycle.
Have students write their answers in the grid provided in the worksheet for this activity.
.

Page 7 of 14
Activity 2.4: Cycle Inventors, Mechanics and Makers Suitable for Grades 4 – 6
Purpose: Students will discover the stories of the people behind the creation of the bicycle — the inventors, mechanics and makers who contributed to its evolution.
The bicycle was not developed overnight; it took many inventors, mechanics and makers almost a century to come up with the modern bicycle. Since the early 19th century, these people have experimented with various devices and their creations have all contributed to the development of the bicycle that we know of today. To learn more about the fascinating individuals who have played an important role in the technological advancement of the bicycle, invite students to prepare a biography sheet of one or more contributors. Using the internet, encyclopaedias and your school’s resources, have students complete the biography sheets provided in Activity Sheet 2.4. Ask students to choose from the inventors, mechanics or makers from the list bellow:
• Baron von Drais
• Denis Johnson
• Pierre Michaux
• James Starley
Suggested website for the student’s bibliography and photo research: Canada Science and Technology Museum web pages http://www.sciencetech.technomuses.ca/english/collection/cycles.cfm http://www.sciencetech.technomuses.ca/english/collection/bikes.cfm

Page 8 of 14
Activity 2.5: The Canadian Bicycle Boom
Purpose: Students will characterize the Canadian bicycle boom and identify its principal causes.
The Safety bicycle was so popular in Canada it created a period in history called the “bicycle boom.” This term was used to describe a very rapid growth of manufacturing and sales of the device. The Safety was an appealing, efficient, affordable product and combined with effective promotion, the craze for this bicycle took off.
Web Exploration Suitable for Grades 4 – 6 Invite students to visit the Canada Science and Technology Museum’s web page describing the Canadian bicycle boom: http://www.sciencetech.technomuses.ca/english/collection/cycles14.cfm
Have them find the answers to the following questions:
• When was the Canadian bicycle boom? (1895-1900)
• Why were bicycles so popular during this time? (The bicycle became safer, more efficient, affordable and comfortable to ride.)
• Why did the Canadian bicycle boom end? (Too many makers were fabricating bicycles, price competition was fierce, and the automobile was gaining popularity.)
Using Activity Sheet 2.5, students will paint a portrait of Canada during the Canadian bicycle boom. They will describe Canadian society and identify the principal means of transportation and communication used during this period.
Additional Activity: Bicycle Boom Advertisement Suitable for Grades 5 – 6 To encourage Canadians to purchase the new, improved Safety bicycle, many manufacturers in the late 19th century and early 20th century used catalogues and even colourful posters for advertisements.
In small teams, have students design their own catalogue cover or poster to advertise bicycles during this same time period. Students should include: a Canadian manufacturer’s name and city (students should refer to the Museum’s website to locate this information), an image of the cycle and any other relevant information they wish to incorporate.
Encourage students to explore the web for information on this time period. Have students research the design of the cycles during the era, the fashion people wore and the look and style of the catalogues and posters at the end of the 19th century (colours, font style, illustration style, etc.)

Page 9 of 14
These websites present examples of historic Canadian and American bicycle catalogues and posters: Canada Science and Technology Museum web pages: http://www.sciencetech.technomuses.ca/english/collection/cycles16.cfm http://www.sciencetech.technomuses.ca/english/collection/cycles21.cfm Selwood Cycle — Vintage Bicycle Poster Gallery http://www.sellwoodcycle.com/gallery/view_album.php?set_albumName= posters&page=1
Page 10 of 14
Activity 2.6: Bicycles Contribute to Social Change Suitable for Grades 4 – 6
Purpose: Students will describe the social impacts of the development of the bicycle.
The previous activities demonstrated how people changed the bicycle over many years, but the opposite is also true, the bicycle changed people too.
Background Information for the Teacher
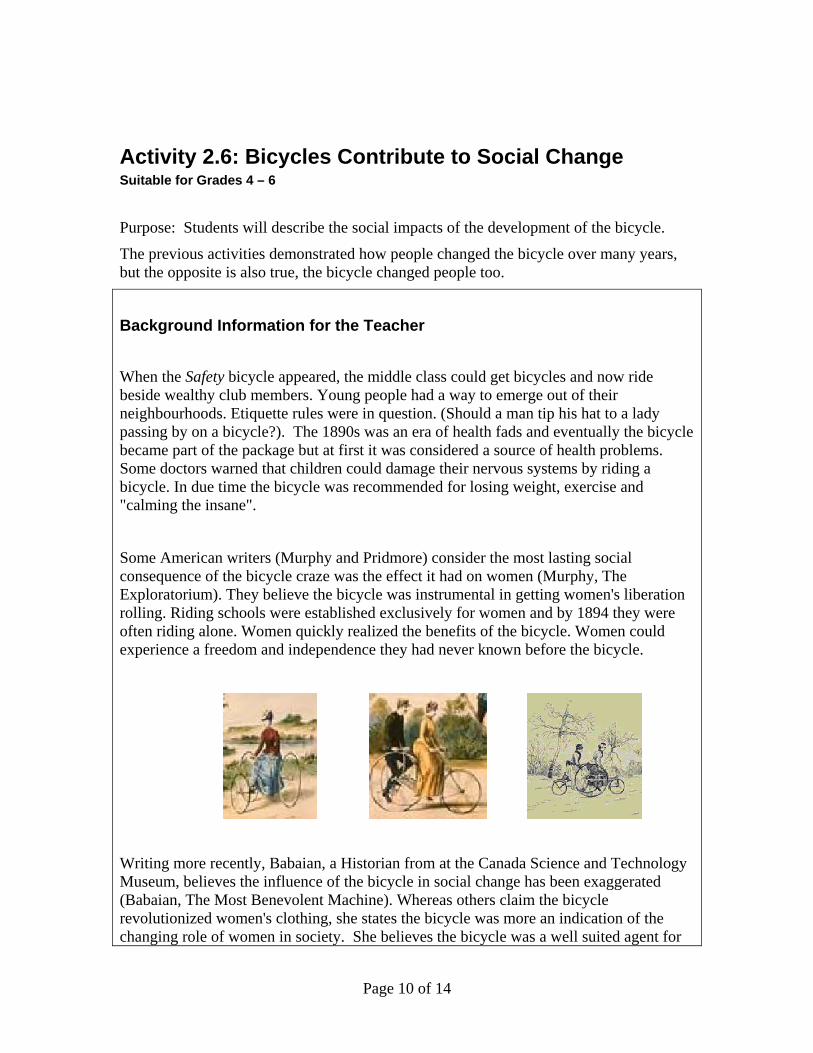
When the Safety bicycle appeared, the middle class could get bicycles and now ride beside wealthy club members. Young people had a way to emerge out of their neighbourhoods. Etiquette rules were in question. (Should a man tip his hat to a lady passing by on a bicycle?). The 1890s was an era of health fads and eventually the bicycle became part of the package but at first it was considered a source of health problems. Some doctors warned that children could damage their nervous systems by riding a bicycle. In due time the bicycle was recommended for losing weight, exercise and "calming the insane".
Some American writers (Murphy and Pridmore) consider the most lasting social consequence of the bicycle craze was the effect it had on women (Murphy, The Exploratorium). They believe the bicycle was instrumental in getting women's liberation rolling. Riding schools were established exclusively for women and by 1894 they were often riding alone. Women quickly realized the benefits of the bicycle. Women could experience a freedom and independence they had never known before the bicycle.
Writing more recently, Babaian, a Historian from at the Canada Science and Technology Museum, believes the influence of the bicycle in social change has been exaggerated (Babaian, The Most Benevolent Machine). Whereas others claim the bicycle revolutionized women's clothing, she states the bicycle was more an indication of the changing role of women in society. She believes the bicycle was a well suited agent for

Page 11 of 14
expressing already emerging changes. The changes in women's clothing to accommodate the bicycle were reflecting the new woman of the 1890s. For instance, some women were discarding corsets altogether and launching themselves into a new styled life. Dressing to ride the bicycle was a natural argument to advance their cause. For easier riding, skirts were shortened (from floor to ankle). Trousers eventually became acceptable as "rational dress".
Activity: Who Said This?
The following quotes were made by three people living back in the late 1900s: a woman cyclist, a doctor giving medical advice to a cyclist and a bicycle manufacturer. Read out the three quotes and have the class guess who is speaking.
“It never talks back, it responds quickly to the slightest touch, it never growls when its meals are
not ready, it does not swear or smoke.” *
A woman cyclist
“You should stop riding the bicycle. You have developed a bicycle hump.”*
A doctor giving medical advice to a
cyclist
“Doctors are saying the rough ride Velocipede is causing "nerve death". I will make a cane seat that is more comfortable and will attract people to buy
my bicycle.”*
A bicycle manufacturer
*Source: (Pridmore, The American Bicycle).
The Bicycle and Women’s Fashion It is difficult to imagine a lady in the late 1900s riding a bicycle in all the clothes she typically wore. Undergarments consisted of a corset, special cycling knickers made of wool and a long full petticoat (an undergarment worn underneath a skirt or dress). On top of this she wore a high-necked blouse, long skirt and a narrow waisted jacket. Her large hat was held on with half a dozen long hatpins.

Page 12 of 14
Discuss the challenges women in the late 1900s may have encountered by wearing layers of constricting clothing when riding a bicycle. Ask students the following questions:
• What type of clothing do you wear when your ride your bicycle? What type of clothing do you not wear?
• Why did women wear layers of constricting clothing to practice this activity?
• Imagine riding your bicycle dressed in the fashions women wore in the late 19th century. How comfortable would you be? How difficult would it be to ride a bicycle? How long could your bicycle trip last?
To ride her bicycle a woman needed to wear more practical clothing and as time moved on the corsets and petticoats disappeared and were replaced by bloomers (a baggy trouser tightened at the knee) and button-down boots. Invite students to compare the women’s fashion by visiting the following website: http://womenshistory.about.com/library/weekly/aa050900a.htm
• Take a look at the illustration of the two women riding their bicycles. What are the principal differences between the women’s clothing?
• How did the change in fashion make cycling easier for women?
• How do you think women of the time felt about this change?

Page 13 of 14
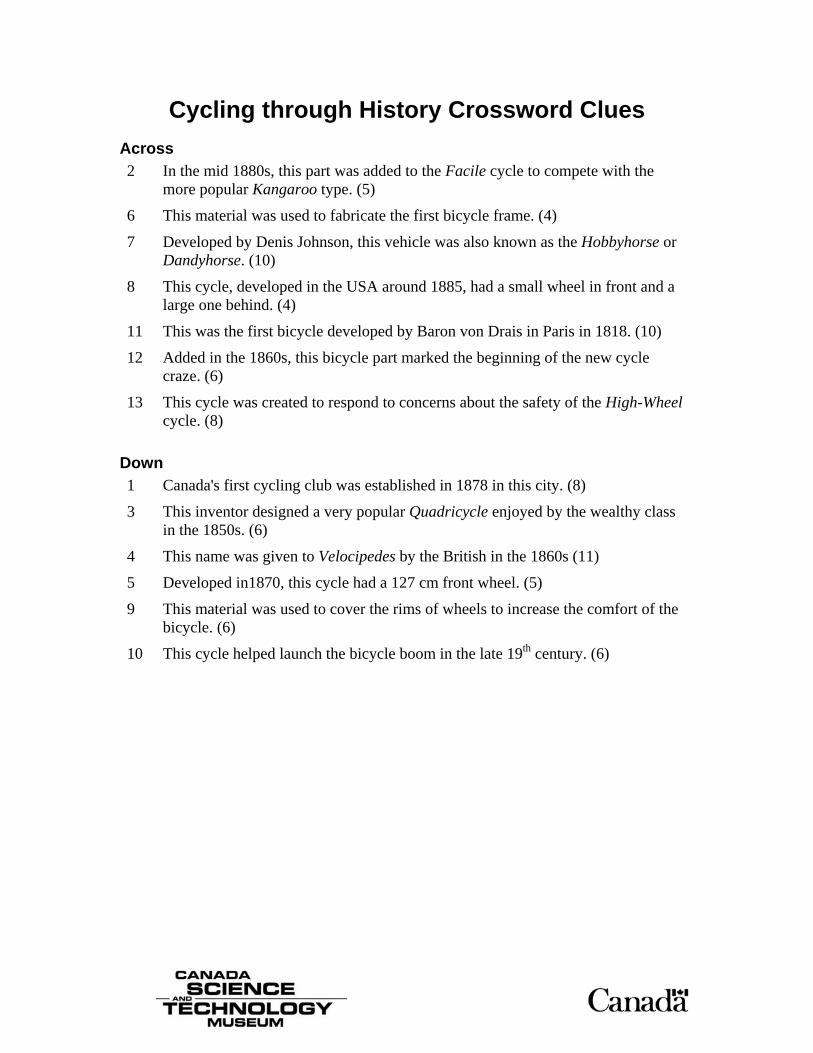
Activity 2.7: Cycling through History Crossword Suitable for Grades 4 – 6 Purpose: Students will use their web searching skills in order to complete this word search and learn various facts about the history of cycles.
Have students explore the Canada Science and Technology Museum’s web page on the history of cycles to complete this word search.
The clues are included in the activity sheet package to allow for copying and distribution of the sheets to your students. For your own reference, the clues and solutions are also included here.
Across 2 In the mid 1880s, this part was added to the Facile cycle to
compete with the more popular Kangaroo type. (5) gears
6 This material was used to make the first bicycle frame. (4) wood
7 Developed by Denis Johnson, this vehicle was also known as the Hobbyhorse or Dandyhorse. (10) Velocipede
8 This cycle, developed in the USA around 1885, had a small wheel in front and a large one behind. (4) Star
11 This was the first bicycle developed by Baron von Drais in Paris in 1818. (10) Draisienne
12 Added in the 1860s, this bicycle part marked the beginning of a new cycle craze. (6) pedals
13 This cycle was created to respond to concerns about the safety of the High-Wheel cycle. (8) tricycle
Down 1 Canada's first cycling club was established in 1878 in this city.
(8) Montreal
3 This inventor designed a very popular Quadricycle enjoyed by the wealthy class in the 1850s. (6) Sawyer
4 This name was given to Velocipedes by the British in the 1860s (11) boneshakers
5 Developed in1870, this cycle had a 127 cm front wheel. (5) Ariel
9 This material was used to cover the rims of wheels to increase the comfort of the bicycle. (6) rubber

Page 14 of 14
10 This cycle helped launch the bicycle boom in the late 19th century. (6) Safety
Activity 2.8: What’s in a Name? Suitable for Grades 4 – 6
Purpose: Students will explore the various name variations given to the bicycle throughout time and identify their origin.
Throughout time, inventors and mechanics have transformed the bicycle and with each variation the invention has collected different names: the Draisienne, the Dandyhorse, the Boneshaker, the Velocipede, the High-Wheeler, the Safety, the Tricycle and even the Human Powered Vehicle. The name Bicycle, which first appeared in 1869, has remained in common use.
Web Exploration To explore these name variations, have students explore the Canada Science and Technology Museum’s web pages on the history of cycles: http://www.sciencetech.technomuses.ca/english/collection/bikes.cfm and http://www.sciencetech.technomuses.ca/english/collection/cycles.cfm.
Have students identify the root or the inspiration behind the names of this invention by completing Activity Sheet 2.8a.
Getting to the Root of the Word Of all these names, the Velocipede and the Bicycle have been the most popular in identifying this invention as they relate to the function and character of the machine.
Using the school’s library resources as well as the internet, have students find the roots of these words. What do the words Velocipede and Bicycle signify? Have students complete Activity Sheet 2.8b.
Naming Inventions The name you give an invention is very important as it will be the reference the public will use to identify your device. Have students research ways in which inventions are named by exploring NASA’s website: http://scifiles.larc.nasa.gov/text/kids/Research_Rack/tools/naming_inventions.html. Using the various methods researched on the web; invite students to propose alternate names to the bicycle. If you lived in the 19th century and had just invented a human propelled vehicle what would you have named it?

Name:
Activity 2.1 Collecting Cycles
Can you identify these cycles from the Canada Science and Technology Museum’s collection and place them in the order that they were invented?
Use this website as a reference: http://www.sciencetech.technomuses.ca/english/collection/cycles.cfm
#__ _____________________ #__ ___________________ #__ __________________
#__ _____________________ #__ ___________________ #__ __________________
#__ _____________________ #__ ___________________ #__ __________________
Nam
e:
Act
ivity
2.2
Ti
mel
ines

Name:
Activity 2.3 Improving the Bicycle over Time
Can you describe the elements and features of security, comfort and speed found on these historical bicycles? What improvements did each offer? List the advantages and disadvantages of the features.
Bic
ycle
Hobbyhorse
Velocipede
High-Wheel
Safety Bicycle
Safe
ty
Feat
ures
Com
fort
Fe
atur
es
Spee
d Fe
atur
es

Name:
Activity 2.4 Cycle Inventors, Mechanics and Makers
Known to have invented the following cycle(s):
Cycle Photo
Other known inventions:
Biography:
Name: _______________________________________
Lived: From_______________ to ______________
Country of origin: _______________________________________

Name:
Activity 2.5 The Canadian Bicycle Boom
Can you paint a portrait of Canada during the bicycle boom? Years of the bicycle boom
Canadian Prime Ministers in office during these years:
Provinces and territories in the Canadian Confederation by the
end of the bicycle boom:
Canadian population:
Canadian historical context:
Means of transportation: .
Means of communication:
Principal leisure and entertainment activities:

Name:
Activity 2.7 Cycling through History Crossword
Cycling through History Crossword Clues Across 2 In the mid 1880s, this part was added to the Facile cycle to compete with the
more popular Kangaroo type. (5)
6 This material was used to fabricate the first bicycle frame. (4)
7 Developed by Denis Johnson, this vehicle was also known as the Hobbyhorse or Dandyhorse. (10)
8 This cycle, developed in the USA around 1885, had a small wheel in front and a large one behind. (4)
11 This was the first bicycle developed by Baron von Drais in Paris in 1818. (10)
12 Added in the 1860s, this bicycle part marked the beginning of the new cycle craze. (6)
13 This cycle was created to respond to concerns about the safety of the High-Wheel cycle. (8)
Down 1 Canada's first cycling club was established in 1878 in this city. (8)
3 This inventor designed a very popular Quadricycle enjoyed by the wealthy class in the 1850s. (6)
4 This name was given to Velocipedes by the British in the 1860s (11)
5 Developed in1870, this cycle had a 127 cm front wheel. (5)
9 This material was used to cover the rims of wheels to increase the comfort of the bicycle. (6)
10 This cycle helped launch the bicycle boom in the late 19th century. (6)

Name:
Activity 2.8a What’s in a Name?
Can you identify the root or inspiration behind the various names given to these cycles throughout time?
Name Root or inspiration behind the name Draisienne
Hobbyhorse
Dandyhorse
Boneshaker
Velocipede
High-Wheel
Safety Bicycle
Tricycle
Human Powered Vehicle

Name:
Activity 2.8b Getting to the Root of the Word
Find the root of the following words.
BICYCLE VELOCIPEDE Bi = ____________
Veloci= ____________
Cycle = ____________
Pede= ____________ Can you find other words that have similar roots? Bi Cycle Veloci Pede (or Ped)

The Canada Science and Technology Museum presents
Cycle-ology:
A Virtual Exploration of the Bicycle
Section 3: Cycling Science

Introduction This module investigates the scientific principles behind the bicycle. Through these activities, students will explore the various parts and systems of this human powered vehicle and gain a better understanding of the scientific concepts behind this amazing invention.
Teachers may request an answer package for more detailed Activity Sheets by e-mailing [email protected]. Please allow at least a week for us to reply.

Activity 3.1: Bike Anatomy Suitable for Grades 4 – 6
Purpose: Students will identify basic bicycle parts, their utility and how they contribute to the proper function of the bicycle.
Individual Activity Using the school library and internet resources, have your students identify the parts of a bicycle, using Activity Sheet 3.1a
Then, using Activity Sheet 3.1b, have students pair each bicycle part to their appropriate function.
These websites provide excellent resources for this activity:
How Stuff Works http://science.howstuffworks.com/bicycle1.htm
The Bicycle Doctor http://www.bicycledoctor.co.uk/parts.html Think Quest – Bicycling http://library.thinkquest.org/11569/html_home/html_rbiking/parts.html
Group Activity Once students have identified the principal bicycle parts and their functions, divide the classroom into smaller groups. Taking into consideration the function of each bicycle part, teams must now rank the bicycle parts from the most important part of the bicycle to the least important. Students will debate over which parts are the most important and come to a consensus. After 15 minutes, have a speaker from each group read their list out loud to the class and justify the reasons for their ranking. While students share their answers, the teacher is invited to play devil’s advocate.
Class Discussion After completing these activities, discuss the following questions with your class:
• Can you name a part of the bicycle that is not important?
• Can each part of the bicycle work independently?
• Is one bicycle part more important than another?
• How do bicycles work? Why are they so effective?
Through this class debate, students will realize that no specific part of the bicycle is more important than another. They all contribute in the proper function of the machine. The frame holds the handlebars, seat, and the wheels; the handlebars help the bicycle turn, the wheels enables the bicycle to move forward, etc. The individual components of a bicycle cannot work independently and, if you remove a part, the bicycle cannot work efficiently. Only accessories are independent, for example the bell, basket, etc.
In fact, the bicycle is a complex machine — a point we’ll examine in Activity 3.2.
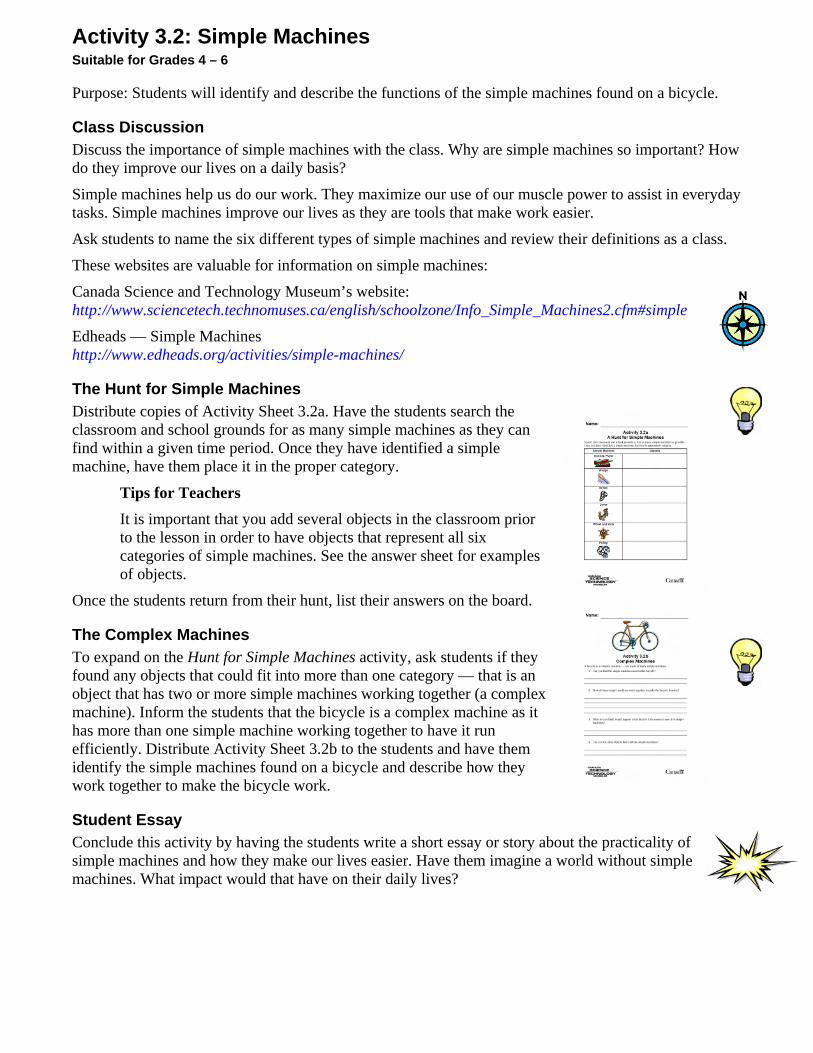
Activity 3.2: Simple Machines Suitable for Grades 4 – 6
Purpose: Students will identify and describe the functions of the simple machines found on a bicycle.
Class Discussion Discuss the importance of simple machines with the class. Why are simple machines so important? How do they improve our lives on a daily basis?
Simple machines help us do our work. They maximize our use of our muscle power to assist in everyday tasks. Simple machines improve our lives as they are tools that make work easier.
Ask students to name the six different types of simple machines and review their definitions as a class.
These websites are valuable for information on simple machines:
Canada Science and Technology Museum’s website: http://www.sciencetech.technomuses.ca/english/schoolzone/Info_Simple_Machines2.cfm#simple Edheads — Simple Machines http://www.edheads.org/activities/simple-machines/
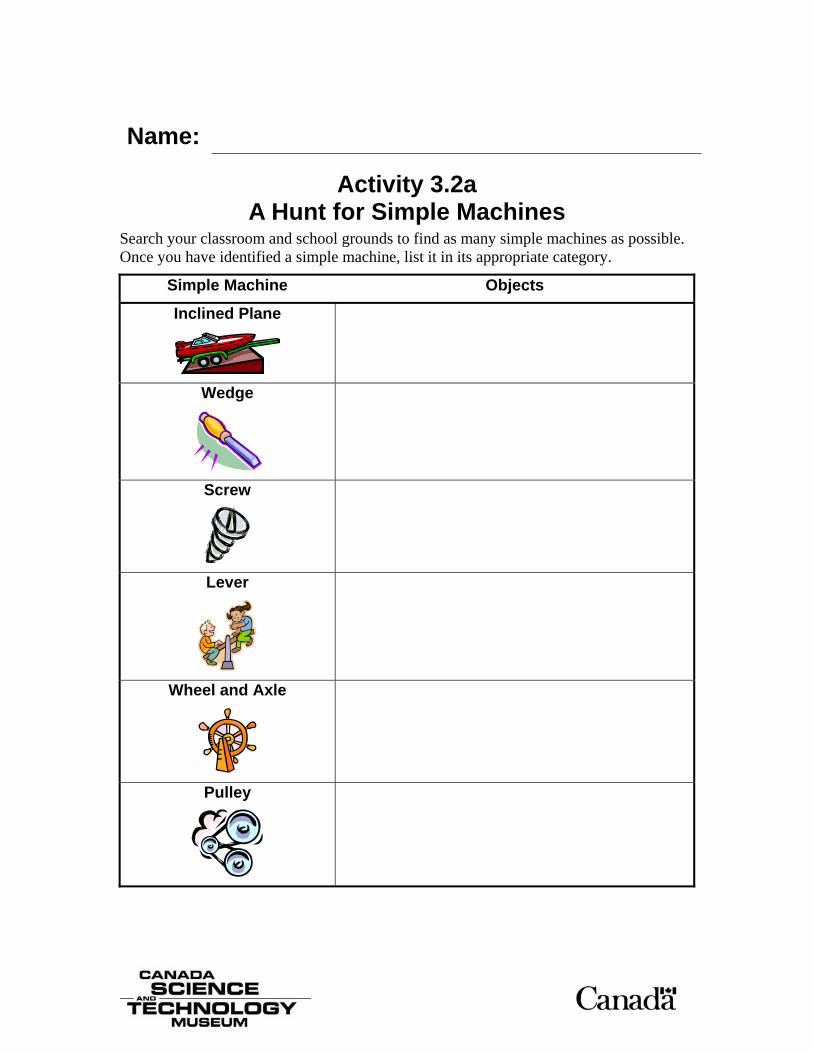
The Hunt for Simple Machines Distribute copies of Activity Sheet 3.2a. Have the students search the classroom and school grounds for as many simple machines as they can find within a given time period. Once they have identified a simple machine, have them place it in the proper category.
Tips for Teachers It is important that you add several objects in the classroom prior to the lesson in order to have objects that represent all six categories of simple machines. See the answer sheet for examples of objects.
Once the students return from their hunt, list their answers on the board.
The Complex Machines To expand on the Hunt for Simple Machines activity, ask students if they found any objects that could fit into more than one category — that is an object that has two or more simple machines working together (a complex machine). Inform the students that the bicycle is a complex machine as it has more than one simple machine working together to have it run efficiently. Distribute Activity Sheet 3.2b to the students and have them identify the simple machines found on a bicycle and describe how they work together to make the bicycle work.
Student Essay Conclude this activity by having the students write a short essay or story about the practicality of simple machines and how they make our lives easier. Have them imagine a world without simple machines. What impact would that have on their daily lives?

Activity 3.3: Gearing Up!
Purpose: Students will learn the purpose of gears and determine gear ratio advantage.
Class Discussion Suitable for Grades 4 – 6 Discuss the importance of bicycle gears with the class. You will find information on these websites:
Canada Science and Technology Museum http://www.sciencetech.technomuses.ca/english/schoolzone/Info_Simple_Machines2.cfm#gear. Exploratorium – Science of Cycling http://www.exploratorium.edu/cycling/gears1.html How Stuff Works – Bicycle Gears http://www.howstuffworks.com/bicycle3.htm
Ask the class the following questions:
• What purpose do gears serve on a bicycle? What are the benefits of gears?
• What would happen to a bicycle if its gears were removed?
• Other than the bicycle, where else are gears found?
What Are Gear Ratios? Suitable for Grades 5 – 6 Explain to the class that gear ratios are calculated by dividing the number of teeth on the front sprocket by the number of teeth on the rear sprocket. This ratio determines how many revolutions the back wheel will make for every complete turn of the front chain wheel. Gear ratios also help in calculating the distances travelled by multiplying the gear ratio by the circumference of the bicycle wheel.
For instance, if the front sprocket of the bicycle has 50 teeth and the back sprocket has 25 teeth, its gear ratio is 2:1 (i.e. for every front chain wheel revolution, the back wheel will turn twice). If the wheel’s circumference is 1.5 metres, the distance travelled would be 3 metres per pedal revolution. (1.5 X 2= 3)
Have students visit the following websites to learn more about gear ratios:
The Exploratorium
http://www.exploratorium.edu/cycling/gears1.html How Stuff Works
http://www.howstuffworks.com/bicycle4.htm
Demonstration of Gear Ratios Suitable for Grades 5 – 6 The best way to explain gear ratios is by demonstrating this using a bicycle. Turn a bicycle upside down in order for the students to see the chain gear. Set the bicycle to its largest gear ratio. Invite the students to count the number of teeth on the front and back sprockets. Using this information to calculate the gear ratio, ask the class how many revolutions the back wheel will make for every complete turn of the front sprocket. To verify the answer, use masking tape or chalk to make a reference mark of the wheel and turn the pedals. Have the class count the number of revolutions made by the back wheel. Was the class correct? Did they have the appropriate gear ratio?
To calculate the distance of travel for each pedal revolution, remind the class of the mathematical calculation (gear ratio multiplied by the circumference of the wheel). Using chalk or masking tape,

identify the distance travelled by the bicycle at the beginning and end of one pedal revolution. It should match the students’ answer.
Gear Ratio Exercises Suitable for Grades 5 – 6 To close the lesson, have students solve the gear ratio problems found in Activity Sheet 3.3.

Activity 3.4: The Wheel Story Purpose: Students will recognize that the wheel and axle has been incorporated in the design of many structures throughout history in order to make work easier.
The Wheel Invention Timeline Suitable for Grades 4 – 6 The wheel is one of the world’s greatest mechanical devices. The earliest wheel documented dates back to about 3500 BC. With time inventors incorporated the wheel and axle in the fabrication of simple machines and simplified the lives of many people as it made work much easier. Using the school’s library resources and the internet, have students investigate the history of the wheel and axle and its many functions. What early and modern inventions have incorporated the wheel and axle into their structure? Who used these inventions and why?
Invite the class to create a large wheel invention timeline. Using brown craft paper posted to the wall of a hallway, have students decide on the year increments in order to draw a timeline. Using magazines, catalogues, newspapers and personal drawings, have students locate images of inventions that have incorporated the wheel and axle in its design. Have students place the image of the inventions they have found on the timeline under the year it was first introduced.
Student Essay Suitable for Grades 6 + Complete the lesson by having students write an essay on how a historical group of people used a wheeled device to help them work.

Activity 3.5: Archimedes and the Number π Suitable for grades 5-6
Adapted from Jeux de vélos with the permission of the Société pour la promotion de la science et de la technologie.
Purpose: Students will discover the number pi and learn that the diameter of a wheel has an influence on a cyclist’s performance.
Ask students if they cycled with their parents when they were young. Perhaps they noticed that, even though the adults were pedalling slowly, the children had to work a lot harder just to keep up. Here’s why: the adults were riding on large wheels, while the children were riding on small wheels.
To understand why wheel size makes a difference, we need to look at the number π (pi), discovered by Archimedes in ancient Greece. This number expresses the ratio of the circumference of a circle to the diameter of the circle: in other words, the distance a wheel travels in one turn, divided by the wheel’s diameter.
Ask students to write down the value of π. The number π is, to an accuracy of 64 decimal places: 3.1415926535897932384626433832795028841971693993751058209749445923
Since the π is a constant, the larger the diameter of a bicycle wheel, the greater the distance the wheel travels in one turn of the pedals. In fact, the 1880s High-Wheel bicycle could attain considerable speed because it had a very large front wheel and a small rear wheel. Since the front wheel diameter could be as large as 2.5 metres, one turn of the pedals went a long way!
Experiment: Following in Archimedes’ Footsteps Materials: For each team:
• One or more bicycles • A piece of chalk • A measuring tape
Preparation Divide the class into small teams. Procedure
1. Measure the diameter of a wheel of the bicycle.
2. Make a chalk mark on the sidewall of the tire and another chalk mark on the ground. Be sure the two marks are lined up together.
Did You Know?
π was the first discovered member of a class known as irrational numbers. These are numbers that can’t be represented by a ratio of two integers. The decimal part of π never ends; it can be calculated to as many decimal places as desired. The digits do not repeat or form any recognizable pattern. π has been calculated to literally billions of decimal places.
For most purposes, an accuracy of 6 or 7 decimal places is more than adequate: 3.1415926

3. Push the bicycle forward until the wheel has completed exactly one turn, and then make a second chalk mark on the ground.
4. Measure the distance between the first and second chalk marks and record the result.
5. Repeat Steps 3 and 4 at least three times to minimize any error. Extra Challenges
• Repeat the experiment using a bicycle with wheels of a smaller diameter. Write down these new results.
• Repeat the experiment while making measurements as accurately as possible. Use the distance between the marks and the wheel diameter to calculate π to as many decimal places as possible. Which team will obtain the longest series of correct figures for the number pi (π)?
Experiment: Tied Strings Materials: Materials required:
• A two-litre plastic bottle
• String
• Sticky tape
• Two light weights
• A measuring tape Preparation:
Note: Complete the preparation before your class arrives.
1. Tie a string around the body of the bottle and another around the neck of the bottle. Use sticky tape to make sure the strings adhere to the bottle.
2. By holding the bottle horizontally and rotating it, roll the strings around the bottle several times.
3. Still holding the bottle horizontally, cut both strings evenly at the bottom. Attach a small weight to each string. Unroll the strings to their full length.
Procedure 1. Hold the bottle horizontally with the weighted strings dangling. Explain that you are going to
rotate the bottle, wrapping the strings around it.
2. Ask the students which string will win the race and be wound up first.
3. Rotate the bottle to wind up the strings. Which string won the race? Discussion Many people might think that the shorter string would win. But no! The two strings will be “tied” — they will be wound up at the same time, every time.
Why are the strings “tied?”
It’s πι’s fault! Whatever the radius (“r”) of a circle, the circumference is always equal to 2πr. So, each turn of the bottle winds up each of the strings one turn (one turn being equal to the circumference of the bottle, wherever the string is tied). And, because the number of turns is the same for each string, they both finish being wound up at the same time.

Activity 3.6: Bicycle Frames Suitable for Grades 3 – 6
Purpose: Students will discover that the diamond (or triangular) shape is the most effective in making bicycle frames and that its design is so successful it hasn’t changed for more than a century.
Web Exploration A bicycle frame is an important part of a bike as it supports and distributes the cyclist’s weight and holds together all its various components
Have students visit this Exploratorium website: http://www.exploratorium.edu/cycling/frames4.html to learn more about the bicycle frame and have them answer the following questions:
• What are the functions of the frame? (Holds all the bicycle parts together, positions and supports the rider, makes pedalling efficient due to light weight, gives strength but is light in weight)
• What geometric shape is commonly used to design the bicycle frame? (The diamond shape which is divided by two back to back triangles)
• Why is this shape so effective for a bicycle frame? (The triangle shape is very strong and can support the weight of the frame and the cyclist)
Have students locate and draw other examples of objects that rely on this shape for strength and stability. You may find these objects simply by observing your surroundings or by surfing the internet for ideas.
Have students visit the Canada Science and Technology Museum’s website on structures to learn more: http://www.sciencetech.technomuses.ca/english/schoolzone/Info_Structures.cfm#bridge3
The History of Bicycle Frames Invite students to explore the Canada Science and Technology Museum’s web pages on the history of bicycles: http://www.sciencetech.technomuses.ca/english/collection/cycles.cfm.
Have students illustrate the various frames of these historical bicycles and encourage them to compare and examine the different shapes and designs. Ask students to identify the cycle which incorporated the triangle or diamond shape for the first time. How did bicycle makers arrive at this shape? How has this shape influenced the design of the modern bicycle?

Activity 3.7: Bicycle Materials
Purpose: Students will determine which materials are the most suitable for the fabrication of bicycle frames.
Materials used in the Past Suitable for Grades 4 – 6 Throughout history, inventors, makers and mechanics have used various materials to fabricate their bicycles. Have students explore the Canada Science and Technology Museum’s web pages at: http://www.sciencetech.technomuses.ca/english/collection/cycles.cfm and list the different materials used in the construction of the wheels and frames of these bicycles. For each material listed, have students write the advantages and disadvantages of the material. Students can record their answers on Activity Sheet 3.7a.
Selecting Materials Suitable for Grades 4 – 6 The addition of materials such as steel tube frames and pneumatic tires revolutionized the bicycle in the late 19th century by increasing its speed, stability and comfort substantially. The bicycle improved furthermore well into the 20th century as inventors and makers began fabricating bicycle frames using new materials.
Invite students to consult the Exploratorium website on frames and materials at: http://www.exploratorium.edu/cycling/frames1.html and the Bike Frames website at: http://www.bikeframes.co.uk/ Using the school’s library resources as well as the internet, have students answer the following questions:
• Name the principal materials used in the fabrication of bicycle frames today.
• Why are these materials popular with bicycle makers?
Yield Strength, Ultimate Strength, and Elasticity Suitable for Grades 5 – 6 Test students knowledge of materials by completing the science experiment “Yield Strength, Ultimate Strength, and Elasticity Activity” found on the Exploratorium’s website at: http://www.exploratorium.edu/cycling/frames3.html Prior to the activity, gather the objects required to complete the experiment. Divide the class into groups and have them list their observations on the Activity Sheet 3.7b.

Activity 3.8: Aerodynamics of Cycling Suitable for Grades 6 – 7
Purpose: Students will learn about aerodynamic forces that affect cyclists’ performance.
Class Discussion Ask the class what happens when they ride their bicycle against the wind. Why does this problem occur?
This problem is due to drag. Drag is the resistance that a cyclist encounters when he or she is moving through air. This resistance occurs because the human’s shape is not designed to slice through the air. Ask the class to name a shape that cuts through air; such a shape is known as an aerodynamic shape. (Examples: domes, ovals, cones, spheres)
Drag or wind resistance is an important issue to cyclists who wish to increase their speed and conserve their energy. Unfortunately, wind resistance increases as you cycle faster. To demonstrate that wind resistance increases with speed, ask the class if they have ever placed their hand outside a window of a moving car. What happens to your hand when the vehicle increases its speed?
These websites have extra information on cycling and aerodynamics:
Exploratorium — Science of Cycling http://www.exploratorium.edu/cycling/aerodynamics1.html. Society of Women Engineers — Aerodynamics of Cycling http://www.swe.org/iac/lp/cycling_03.html
Drag Demonstration To demonstrate the effects of drag on the cyclist invite the students to try this outdoor experiment. Have students descend a hill on their bicycles. They must push off and let the bicycle go down the hill without using their pedals. For the first part of the experiment the participant should sit up straight. Have another student record the time that it took for his classmate to cycle from the top of the hill to the bottom. Repeat the experiment using a more aerodynamic posture, that is the student crouches his or her back into a rounded position. Was there a time difference? Why?
Aerodynamic Improvements
To decrease drag bicycle makers, as well as cyclists, have adapted not only the design of the bicycle but also the riding position of the cyclist.
Have students describe the aerodynamic improvements in the sport of cycling that has contributed to improving the cyclist’s performance by reducing drag and wind resistance. Include aerodynamic modifications in the design of wheels, frames, riding techniques, body position and clothing and equipment. Have students list their answers in Activity Sheet 3.8.
Student Essay Ask students to list other sports where aerodynamics may affect an athlete’s performance. Have each student write an essay on a specific sport that has modified its equipment and design in order to reduce wind resistance.

Drafting Has anyone ever watched the Tour de France or other cycling races on television or in person? Have you ever noticed that cyclists ride close behind each other in a pack? Why do cyclists do this?
When cyclists pull up close behind each other they are drafting. The advantage of drafting is to conserve energy as the rider in front of you is doing the work of pushing the air in front of them, while the others behind him are riding the draft and conserving their energy. This is why cyclists racing in teams take turns at being the leader, each member is taking turns at preserving their energy.
Ask students to name other sports, where athletes use drafting in order to conserve energy. (Examples: speed skating, car racing)

Activity 3.9: Forms of Energy found in Transportation Suitable for Grades 4 – 6
Purpose: Students will recognize the forms and sources of energy used by various modes of transportation.
Web Exploration Different modes of transportation use different forms of energy. From food to fossil fuels, there are many sources of energy that allow you to travel from point A to point B.
Have students explore the Canada Science and Technology Museum’s web pages on the theme of energy at: http://www.sciencetech.technomuses.ca/english/schoolzone/Info_Energy.cfm#transportation. Using this site, invite students to complete Activity Sheet 3.9 and identify the form and source of energy used in various modes of transportation.

Activity 3.10: Energy Transformations Suitable for Grades 5 – 7
Adapted from Jeux de vélos with the permission of the Société pour la promotion de la science et de la technologie.
Purpose: Students will identify a series of energy transformations explaining that bicycles work on solar energy.
When you’re cycling, you make a large number of energy transformations. You can’t see energy, but you can see its effects — for example, when things move. You can’t create or destroy energy, but you can convert it from one form to another.
When you want to set an inanimate object in motion, you have to push or pull it; when you want your bicycle to move forward, you have to push the pedals. That takes energy.
The energy that moves your bicycle forward comes from the work done by the muscles of your body. Those muscles obtain energy from the food you have eaten. If you ask yourself where the energy comes from, at each step farther back along the energy chain, you end up with a long series of energy transformations. Eventually, all energy transformations lead back to the sun. So it’s not hard to figure out that bicycles actually work on solar energy!
The Energy Chain Have the students cut out the boxes from Activity Sheet 3.10. Have them place the energy transformations in the correct order to demonstrate how bicycles actually work on solar energy.
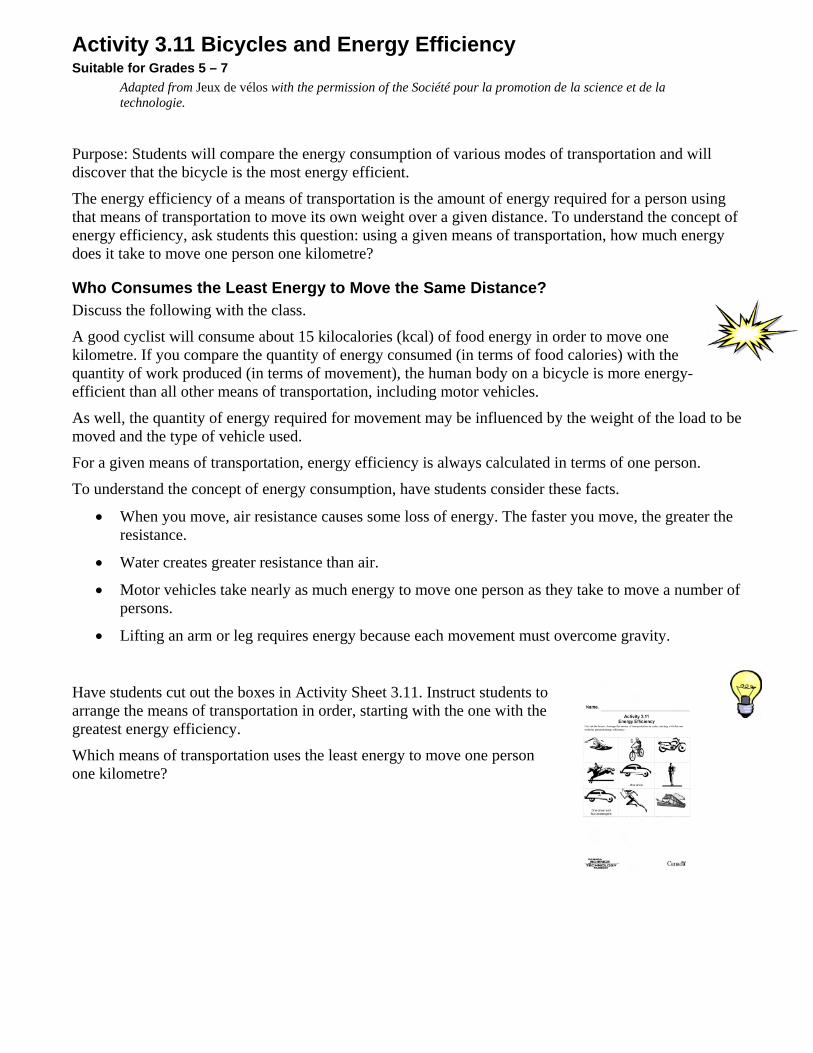
Activity 3.11 Bicycles and Energy Efficiency Suitable for Grades 5 – 7
Adapted from Jeux de vélos with the permission of the Société pour la promotion de la science et de la technologie.
Purpose: Students will compare the energy consumption of various modes of transportation and will discover that the bicycle is the most energy efficient.
The energy efficiency of a means of transportation is the amount of energy required for a person using that means of transportation to move its own weight over a given distance. To understand the concept of energy efficiency, ask students this question: using a given means of transportation, how much energy does it take to move one person one kilometre?
Who Consumes the Least Energy to Move the Same Distance? Discuss the following with the class.
A good cyclist will consume about 15 kilocalories (kcal) of food energy in order to move one kilometre. If you compare the quantity of energy consumed (in terms of food calories) with the quantity of work produced (in terms of movement), the human body on a bicycle is more energy-efficient than all other means of transportation, including motor vehicles.
As well, the quantity of energy required for movement may be influenced by the weight of the load to be moved and the type of vehicle used.
For a given means of transportation, energy efficiency is always calculated in terms of one person.
To understand the concept of energy consumption, have students consider these facts.
• When you move, air resistance causes some loss of energy. The faster you move, the greater the resistance.
• Water creates greater resistance than air.
• Motor vehicles take nearly as much energy to move one person as they take to move a number of persons.
• Lifting an arm or leg requires energy because each movement must overcome gravity.
Have students cut out the boxes in Activity Sheet 3.11. Instruct students to arrange the means of transportation in order, starting with the one with the greatest energy efficiency.
Which means of transportation uses the least energy to move one person one kilometre?

Activity 3.12 Speed Record Suitable for Grades 4 – 6
Adapted from Jeux de vélos with the permission of the Société pour la promotion de la science et de la technologie.
Purpose: Students will learn that the bicycle is the fastest mode of transportation working on human power.
Did you know that cycling is the fastest of all human-powered means of transportation?
Discuss the following questions with the class.
• Why is cycling so fast?
• What makes bicycles such a speedy way to get around?
Wheels are what make bicycles so fast. Wheels allow humans to move faster, over longer distances, and with less fatigue. By using bicycles, humans can attain speeds three or four times greater than by walking or running.
Who is the Fastest? Ask the students to cut out the boxes in Activity Sheet 3.12 and have them associate each sport to its corresponding speed record.
Note: If you want to complete this activity more than once, you can glue the two sets of boxes to a piece of cardboard before cutting out the boxes. Then arrange the corresponding “sport” and “speed” boxes side-by-side.
Bar Graph Have students create a bar graph comparing the energy efficiency of various means of transportation.
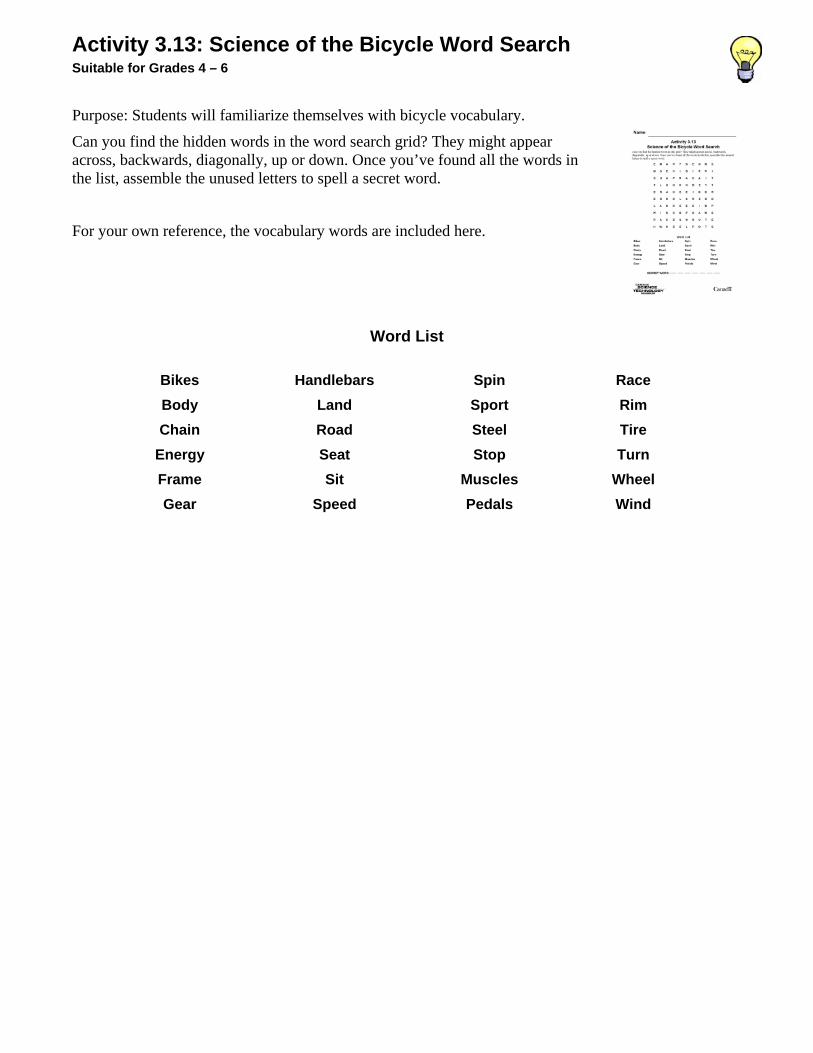
Activity 3.13: Science of the Bicycle Word Search Suitable for Grades 4 – 6
Purpose: Students will familiarize themselves with bicycle vocabulary.
Can you find the hidden words in the word search grid? They might appear across, backwards, diagonally, up or down. Once you’ve found all the words in the list, assemble the unused letters to spell a secret word.
For your own reference, the vocabulary words are included here.
Word List
Bikes Handlebars Spin Race Body Land Sport Rim Chain Road Steel Tire
Energy Seat Stop Turn Frame Sit Muscles Wheel Gear Speed Pedals Wind

Activity 3.14: Gyroscopic Inertia Suitable for Grades 4 – 6
Purpose: To discover and experience the concept of gyroscopic inertia that contributes to keeping the rider upright on his or her bicycle.
To begin this activity, ask students the following questions.
Have you ever tried to sit down on a bicycle without it moving? Was it difficult to balance? Why is it far easier to maintain your balance on a moving bicycle than on a motionless bicycle? What’s the difference? (The wheels are spinning)
To explore this concept have students complete the following experiment.
Experiment: Spinning Records Divide the class into groups and hand each team an LP record, which can easily be purchased in second hand stores or flea markets, one meter of string and a pencil. Explain the procedure as outlined below.
FIRST PART
• Invite the groups to tie one end of the piece of string to the centre of the pencil. • Have the students pull the other end of the string through the hole of the record. • Have students hold the record by the string and swing it back and forth like a pendulum. • Ask the teams to write down their observations. What happens to the record? Does it tilt or stay
level when you swing it? (it should tilt or wobble)
SECOND PART
• For the second part of the experiment, tell the students to hold the record level and spin it as fast as possible.
• Using the string, have them swing the record back and forth. • Ask the teams to write down their observations. What happens to the record? Does it tilt or stay
level when it is spinning and swung? (the record stays level)
The LP record stays level as it spins because the spinning motion resists any force that tries to make it tilt. “Gyroscopic inertia is the property of a rotating object to resist any force which would change its axis of rotation. Once the record is set spinning at an angle perpendicular to the string, it will resist any forces (such as gravity) that try to change that angle.” (Source:http://www.spartechsoftware.com/reeko/Experiments/ExpRecordSpin.htm)
This action happens on a bicycle —you have to be moving to keep it upright. The spinning wheel resists the tilting that happens when the bicycle begins to slow down and then fall over. The faster you go on a bike, the greater the resistance to tipping. The shape of the wheel plus the speed at which it travels are keys to balancing upright. To learn more about gyroscopes and gyroscopic inertia, visit the Canada Science and Technology Museum’s website: http://www.sciencetech.technomuses.ca/english/schoolzone/Info_Science.cfm#5

Activity 3.15: Bicycle Graphs Suitable for Grades 4 – 5
Purpose: Students will use their math skills to create graphs and solve problems.
Graph Making Have students create charts surrounding the theme of the bicycle. Provide each student a class list and have them survey their classmates to find the answers to their questions.
Examples of survey questions:
• What colour is your bicycle?
• Do you ride your bike to school?
• How many cycles have you ever owned? (Have students specify the number of tricycles and bicycles they have owned)
• What is the distance you would need to travel by bike to ride to school? (Have students consult Map Quest or Google Maps to obtain this answer by entering their school and home addresses)
Have students incorporate the results of their survey into a graph. Use the class results to create math problems that students will solve. For instance, students can calculate:
• the percentage of the class who own a red bicycle
• the percentage of girls who ride a bicycle to school
• the sum of the cycles ever owned by the students in the class
• the sum of wheels of the cycles ever owned by the students in the class
• the mean, mode and median of the distance travelled by the students to ride their bicycles to school

Name:
Activity 3.1a Bike Anatomy
Can you identify the following parts of this bicycle?
Frame Gears Chain
Tires Wheel Handlebars
Pedals Brakes Seat
1
2
3
4
5
6
7
8
9

Name:
Activity 3.1b Bike Anatomy
What am I? Draw lines to link each bicycle part to its function.
Frame Allows the rider to propel the bicycle by transferring power to the wheel.
Pedals Increases the comfort of the bicycle ride by absorbing ground shocks.
Tires Allows the bicycle to roll over the ground and move the cyclist from point A to point B.
Wheel Makes pedalling easier, allows the cyclist to go faster and makes it easier to ride up-hill.
Handlebars
Connects the pedals to the rear wheel. It allows the power applied to the pedals to be transferred to the rear wheel, moving the bicycle forward.
Gears Ensures the comfort of the cyclist and acts as one of the body’s principal contact point to the bicycle.
Brakes Holds all the parts together and positions and supports the rider.
Chain Allows the rider to steer the bicycle.
Seat Allows the rider to slow down and stop.
Name:
Activity 3.2a A Hunt for Simple Machines
Search your classroom and school grounds to find as many simple machines as possible. Once you have identified a simple machine, list it in its appropriate category.
Simple Machine Objects
Inclined Plane
Wedge
Screw
Lever
Wheel and Axle
Pulley
Name:
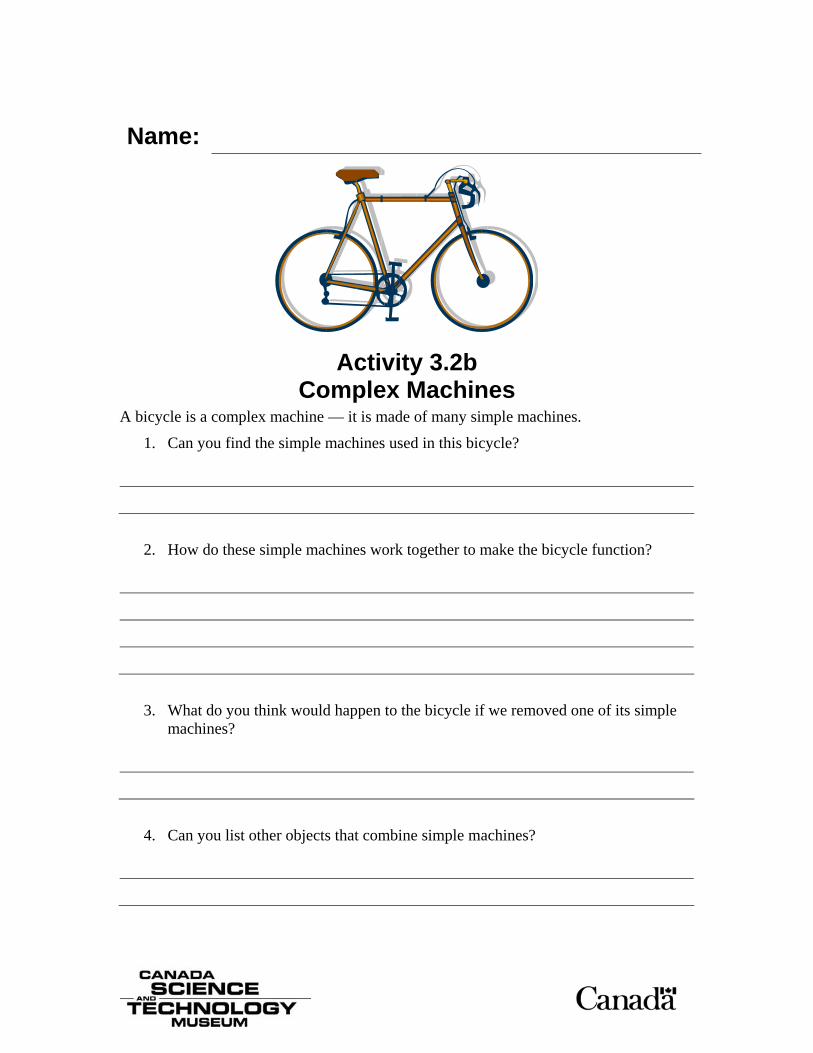
Activity 3.2b Complex Machines
A bicycle is a complex machine — it is made of many simple machines.
1. Can you find the simple machines used in this bicycle?
2. How do these simple machines work together to make the bicycle function?
3. What do you think would happen to the bicycle if we removed one of its simple machines?
4. Can you list other objects that combine simple machines?

Name:
Activity 3.3 Gear Ratios
Can you solve these gear ratio problems?
1 • If the front sprocket of your bicycle has 60 teeth and the back sprocket
has 20 teeth, how many revolutions will the back sprocket make for every complete revolution of the front sprocket? __________
• If the circumference of your bicycle wheels is 1.5 metres, how far would you travel in one complete revolution of the pedals? __________
• If you are pedalling at a consistent speed of 40 revolutions a minute on flat land, what distance will you have travelled if you cycle 10 minutes? ___________
2 • If the front sprocket of your bicycle has 45 teeth and the back sprocket
has 15 teeth, how many revolutions will the back sprocket make for every complete revolution of the front sprocket? __________
• If the circumference of your bicycle wheels is 180 centimetres, how far would you travel in one complete revolution of the pedals? __________
• If you are racing at a consistent speed of on 70 revolutions a minute on flat land, how many kilometres will you have travelled in 20 minutes? ___________
3 • If the front sprocket of your bicycle has 44 teeth and the back sprocket
has 11 teeth, how many revolutions will the back sprocket make for every complete turn of the front sprocket? __________
• If the radius of your bicycle wheels is 250 millimetres, how far would you travel in one complete turn of the pedals? __________
• If you changed gears so that the back sprocket now had 22 teeth, how far would you travel in one complete turn of the pedals? _________

Name:
Activity 3.7a Bicycle Materials
Identify the materials used to make the following historical bicycles. Indicate the advantages and disadvantages of the materials used in its fabrication.
Bic
ycle
Hobbyhorse
Velocipede
High-Wheel
Safety Bicycle
Year
Intr
oduc
ed
Mat
eria
ls U
sed
Adv
anta
ges
Dis
adva
ntag
es

Name:
Activity 3.7b Yield Strength, Ultimate Strength and Elasticity
Visit the Exploratorium’s website at: http://www.exploratorium.edu/cycling/frames3.html and complete the Yield Strength, Ultimate Strength and Elasticity experiment. Write your team’s observations in the grid below.
Material Elasticity Yield Strength Ultimate Strength
plastic comb
rubber band
ball point pen
pencil
paper clip
Which of these materials is the most appropriate for the fabrication of a bicycle frame? Use specific reasons and details to support your answer.
_______________________________________________________________________
_______________________________________________________________________
_______________________________________________________________________

Name:
Activity 3.8 Aerodynamic Improvements
Can you describe the aerodynamic improvements in the sport of cycling that have contributed to improving the cyclist’s performance by reducing drag and wind resistance? Include aerodynamic modifications in the design of wheels, frames, riding techniques, body position and clothing and equipment.
Features Aerodynamic Improvements
Wheels
Frames
Riding Techniques
Body Position
Clothing and Equipment
Name:
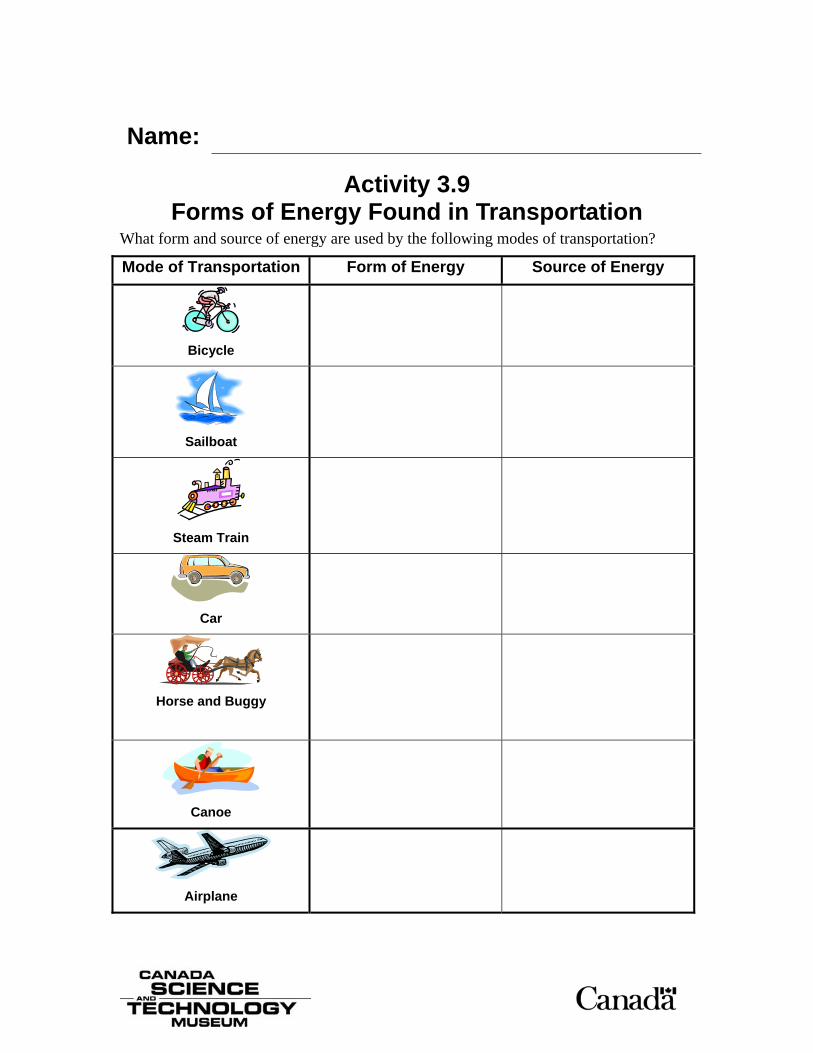
Activity 3.9 Forms of Energy Found in Transportation
What form and source of energy are used by the following modes of transportation?
Mode of Transportation Form of Energy Source of Energy
Bicycle
Sailboat
Steam Train
Car
Horse and Buggy
Canoe
Airplane

Name:
Activity 3.10 The Energy Chain
Cut out the boxes. Place the energy transfers in the correct order to explain how bicycles actually work on solar energy.
A B C D
E F G H

Name:
Activity 3.11 Energy Efficiency
Which means of transportation uses the least energy to move one person one kilometre?
Cut out the boxes and arrange the means of transportation in order, starting with the one with the greatest energy efficiency.
A car with one driver
A car with one driver and four passengers
Name:
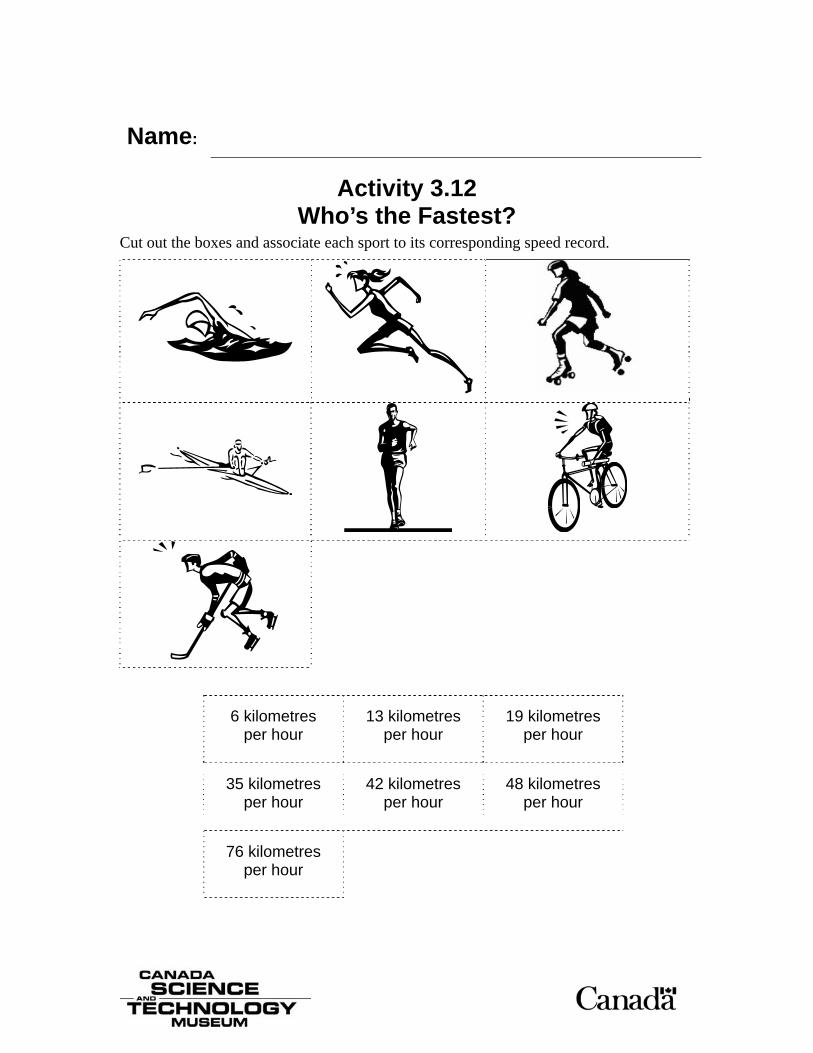
Activity 3.12 Who’s the Fastest?
Cut out the boxes and associate each sport to its corresponding speed record.
6 kilometres per hour
13 kilometres per hour
19 kilometres per hour
35 kilometres per hour
42 kilometres per hour
48 kilometres per hour
76 kilometres per hour

Name:
Activity 3.13 Science of the Bicycle Word Search
Can you find the hidden words in this grid? They might appear across, backwards, diagonally, up or down. Once you’ve found all the words in the list, assemble the unused letters to spell a secret word.
E M A R F N E N M S
M S E K I B I R R I
S U A P R A C A I T
T L S O H H B E Y T
E R A C E E I G D R
E D N D L S R E O O
L A N D E E E I B P
W I N D N P S A M S
R A C E S N R U T E
H W H E E L P O T S
Word List
Bikes Handlebars Spin Race Body Land Sport Rim Chain Road Steel Tire Energy Seat Stop Turn Frame Sit Muscles Wheel Gear Speed Pedals Wind
SECRET WORD: —— —— —— —— —— —— ——

The Canada Science and Technology Museum presents
Cycle-ology:
A Virtual Exploration of the Bicycle
Section 4: Cycles in Society

Page 2 of 12
Introduction The following activities will encourage students to think about the effects that the bicycle has on our society. Students will explore the many benefits of the bicycle and identify its main uses and impacts on people’s lives.
Teachers may request an answer package for more detailed Activity Sheets by e-mailing [email protected]. Please allow at least a week for us to reply.

Page 3 of 12
Activity 4.1: The Bicycle as a Means of Transportation Suitable for Grades 4 – 6
Purpose: Students will compare the advantages and disadvantages of the principal modes of transportation.
The bicycle is an important mode of transportation. In fact, it was the first personal mechanical mode of transportation. Prior to the bicycle; humans were dependent of their own feet or other animals. This invention had an important social impact as it allowed for a more efficient and quicker way of travelling.
Which Mode of Transportation is Best? Have students name the principal non-mechanical and mechanical means of transportation that exist today: ship, train, car, bus, truck, cable car, subway, snowmobile, canoe, airplane, bicycle and their own two feet.
Ask the students which means of transportation they regularly use?
Using Activity Sheet 4.1, ask students to list the advantages and disadvantages of the principal modes of transportation they use on a regular basis.
The Bicycle Commuter Interview Have students interview a member of their family or community who cycles to work on a regular basis. Have students write down their questions before the interview.
Some examples of questions:
• Describe your daily commute to work on a bicycle.
• How long does it take for you to get to work? How long would it take if you used a car?
• Why do you cycle to work?
• Did your commute by bicycle influence your current job or living location?
• What are the advantages/disadvantages of cycling to work every day?
• What is the most rewarding thing about cycling to work?
• What would you say to someone to encourage them to cycle to work?
Have students complete written reports and allow time for class discussion about the results of the interviews.
Ask the class if the people interviewed have influenced their choice of using their bicycles as a regular means of transportation.

Page 4 of 12
Activity 4.2: A City with No Cars! Story Writing Suitable for Grades 4 – 6 Have students write a short story about a city that bans cars and replaces them with bicycles. Include the following:
• What are the principal changes that this city could encounter? Would the city be planned differently?
• How would this new law affect the environment? How would this new law affect the citizens of the city? What would be the advantages and disadvantages for the citizens?
• Have students draw a picture of the city and its citizens.
Alternate Activity: Student Essay Suitable for Grades 6 – 7 Have students write an essay on the following topic:
It has recently been announced that your city has planned to ban all automobiles and replace them with bicycles. Do you support or oppose this plan? Why? Use specific reasons and details to support your answer.
This activity can also be conducted as a class debate. Separate the class into two groups and assign each group a position (for or against the new law). Offer each group enough time to list their arguments and hold a structured debate including opening and closing statements.
Page 5 of 12
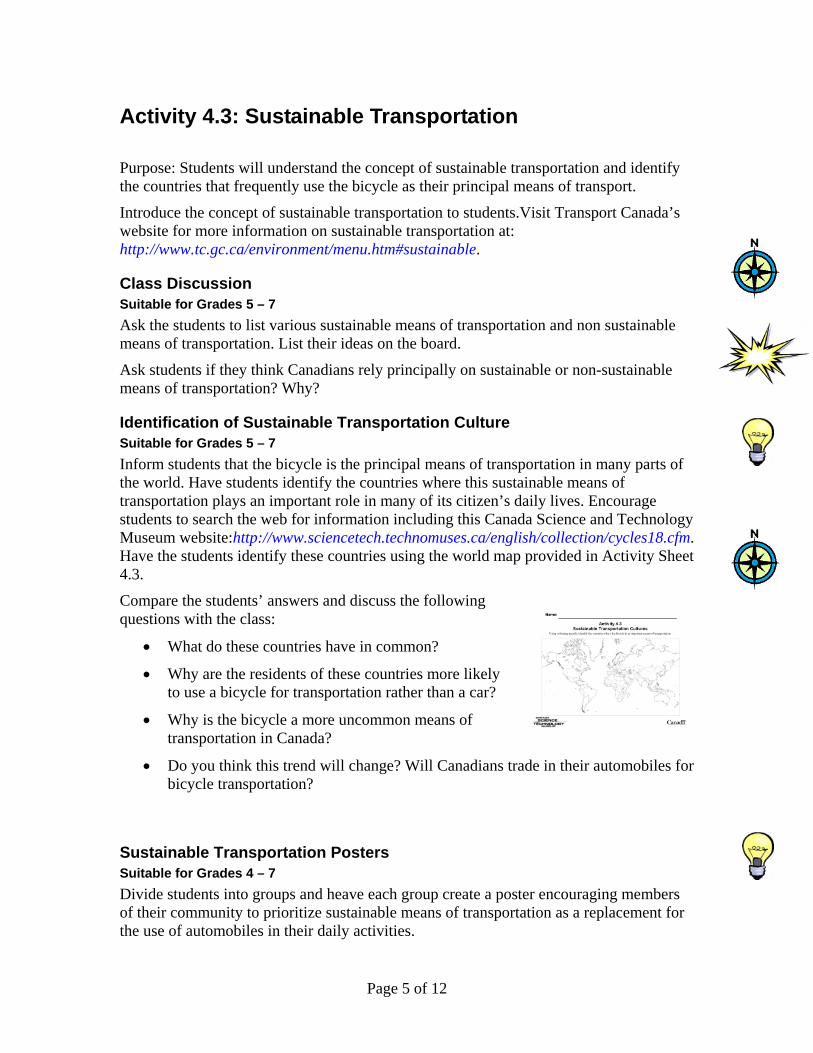
Activity 4.3: Sustainable Transportation
Purpose: Students will understand the concept of sustainable transportation and identify the countries that frequently use the bicycle as their principal means of transport.
Introduce the concept of sustainable transportation to students.Visit Transport Canada’s website for more information on sustainable transportation at: http://www.tc.gc.ca/environment/menu.htm#sustainable.
Class Discussion Suitable for Grades 5 – 7 Ask the students to list various sustainable means of transportation and non sustainable means of transportation. List their ideas on the board.
Ask students if they think Canadians rely principally on sustainable or non-sustainable means of transportation? Why?
Identification of Sustainable Transportation Culture Suitable for Grades 5 – 7 Inform students that the bicycle is the principal means of transportation in many parts of the world. Have students identify the countries where this sustainable means of transportation plays an important role in many of its citizen’s daily lives. Encourage students to search the web for information including this Canada Science and Technology Museum website:http://www.sciencetech.technomuses.ca/english/collection/cycles18.cfm. Have the students identify these countries using the world map provided in Activity Sheet 4.3.
Compare the students’ answers and discuss the following questions with the class:
• What do these countries have in common?
• Why are the residents of these countries more likely to use a bicycle for transportation rather than a car?
• Why is the bicycle a more uncommon means of transportation in Canada?
• Do you think this trend will change? Will Canadians trade in their automobiles for bicycle transportation?
Sustainable Transportation Posters Suitable for Grades 4 – 7 Divide students into groups and heave each group create a poster encouraging members of their community to prioritize sustainable means of transportation as a replacement for the use of automobiles in their daily activities.
Page 6 of 12
Obtain the approval of your city or town to display students’ posters in various public locations (e.g. City Hall, municipal libraries, community centers, recreation centers, arenas etc.)
Page 7 of 12
Activity 4.4: Bicycles in Developing Countries Suitable for Grades 4 – 6
Purpose: Students will discover the many uses of the bicycle in developing countries and recognize the importance of this device to these communities.
Class Discussion Start this activity by asking the students why they use their bicycles. Do they use their bicycles to get to school or to ride to a friend’s house; do they use them for recreation or for physical fitness? How important is the bicycle in their every day life? Could they live without their bicycles? If someone took away their bicycles what impact would that have on their life?
Ask the students if they think people from developing countries use their bicycles for the same reasons as we do here in Canada. What would a bicycle symbolize for a person living in a developing country?
In developing countries, bicycles represent an important means of transportation. It allows teachers to get to schools which are too far to walk to. It allows patients to travel quickly to medical services to obtain treatment and enables people to carry large quantities of merchandise to sell in markets permitting them to earn money.
Web Exploration Invite students to view photographs and video clips on the World Bicycle Relief website to learn more about the impacts of the bicycle on developing countries at: http://www.worldbicyclerelief.org/ Students can also explore the Massive Change in Action page on the Virtual Museum Canada’s website which tells the story of a Canadian who used ingenuity to design a bicycle ambulance in order to transport patients from African villages and farms to clinics and hospitals. http://www.massivechangeinaction.virtualmuseum.ca/stories/ambulance/index.html
Story Writing Have students write a story about a person living in a developing country who receives his first bicycle. What purpose does his bicycle serve? How does the bicycle change his life and his family’s life?

Page 8 of 12
Activity 4.5: Bicycles in the Workplace Suitable for Grades 4 – 6
Purpose: Students will discover that the bicycle is used in different workplaces for its economy and efficiency.
Most of us use our bicycles for exercise, recreation and enjoyment but did you know that the bicycle has other practical uses? Did you know that many people from around the world use their bicycles in their workplaces? Many policemen, messengers and vendors use their bicycles at work as it helps them accomplish the tasks they need to do. They have found that the bicycle is a practical tool that goes beyond recreation.
Web Exploration Have students list some occupations that use the bicycle by completing Activity Sheet 4.5. Before students begin the activity, have them explore the Bicycles in the Workplace website at: http://www.ibike.org/economics/work-bike.htm for ideas and suggestions.

Page 9 of 12
Activity 4.6: Cycling and Physical Activity Suitable for Grades 4 – 6 Purpose: Students will be challenged to use their bicycle on a daily basis and adopt a healthier lifestyle.
Regular physical activity is essential to good health. Unfortunately, many young Canadians aren’t getting enough exercise. In response to this crisis, Health Canada has developed the Canada Physical Activity Guide to encourage youth to increase their levels of physical activity. Have students explore the guide on the web at: http://www.phac-aspc.gc.ca/pau-uap/paguide/child_youth/youth/index.html Ask the students if they meet the levels of physical activity recommended by the Guide.
Class Discussion Hold a discussion with the class as to why so many young Canadians do not exercise on a regular basis.
List the reasons on the board.
Physical Activity Brochure Divide the class into groups and have each team create an educational brochure that will encourage youth to participate in physical activity. The objective of this brochure is not only to motivate youth but also to inform them of the benefits of a healthy lifestyle. Have students incorporate the following elements in their brochure:
• The importance and benefits of physical activity
• Suggestions on how to motivate young people into getting more exercise
• A listing of suggested physical activities
Have students share their ideas and suggestions by presenting their brochure to the rest of the class
Cycling Across Canada Challenge To motivate your students into pursuing regular physical activity, propose the challenge of collectively cycling or walking across the country or part of it by following the Trans Canada trail.
Explain the challenge to your students. Every day, they will individually keep track of the kilometres that they have travelled by bicycle or by foot. Encourage students to use their bicycle not only for recreational use but also as a means of transportation — cycle to school or to a friend’s house. Many websites exist to calculate distances, Google Maps or Map Quest allows you to calculate kilometres by entering a departure and arrival address. For instance the student may enter his home address and the school’s address to calculate the distance that he/she has cycled. Every day, each student will record his or her progress using
Page 10 of 12
Activity Sheet 4.6. Students weekly kilometres will be tallied with the group’s results. Once the class’ weekly progress has been calculated enter their number of kilometres in the Trans Canada Trail virtual walk across Canada site at: http://maps.tctrail.ca/ This site will record the distances achieved by the class and track their progress along the trail.
Using a large map of Canada, track the class’ progress on a weekly basis. This map and tracking system will act as a motivational tool for students. When the students have successfully travelled the full length of the Trans Canada Trail, reward the class with an outing to visit the part of the trail nearest to the school. You may also want to organize a healthy potluck picnic amongst the students to enjoy near the trail.
Extended study: the Virtual Tourist As the class tracks their progress on the trail, have the students discover the cities and towns that they cross. Make a virtual visit of the locations on the trail by consulting the various municipalities’ website. For each location visited, students can describe the population, the land, principal industries, principal languages spoken and main tourist attractions.
Tips for the teacher To achieve the goal faster, you may want to propose this challenge to other classes of similar grades in the school. Classes can combine their kilometres completing the Trans Canada Trail challenge much faster.

Page 11 of 12
Activity 4.7: Bicycle Safety Suitable for Grades 4 – 6
Purpose: Students will describe the basic rules and procedures associated with bicycle safety.
Web Exploration Have students visit the Young Cyclist’s Guide on the web which describes the rules that one must follow to ensure their personal safety and the safety of others when cycling. http://www.mto.gov.on.ca/english/safety/cycling/youngcyclist.htm
Following their exploration of this website, have students complete the following activities.
Safety Poster Divide the class into groups and have the students create a poster promoting bicycle safety. Posters should include: a catchy slogan, illustrations or photographs and bright attractive colours.
Have each team create a poster on one specific theme on bicycle safety, for example: helmet safety, road signs, road rules, hand signals and bicycle maintenance.
Have each team present their poster to the class before putting them up in the classroom or in the school’s hallways.
Bicycle Behaviour Theatre Divide the classroom into small groups. Have each team list responsible and irresponsible actions that a cyclist may do as he or she rides their bike. Invite each team to perform skits illustrating a responsible and irresponsible action and have the rest of the class guess to what action they correspond.
This activity can also be done in an improvisational style. Have students pick good and bad cycling behaviours from a hat and invite them to perform their improvised skit in front of the classroom. For added challenge, inform the students that they must act out the opposite behaviour from what they were handed. For example, if a student were given a “responsible cyclist behaviour”, the student must perform its corresponding irresponsible action.
Spotting the Hazards Activity reproduced with the permission of Citizens for Safe Cycling
Have students use Activity Sheet 4.7 to list the potential hazards that cyclists can encounter. Once each hazard has been located, have students write down how each hazard can be avoided. Review the answers with the class.

Page 12 of 12
Activity 4.8: The Lance Armstrong Story Suitable for Grades 4 – 6
Purpose: Students will be captivated and inspired by Lance Armstrong’s story of perseverance and determination.
Web Exploration Competitive cycling has become a very popular sport over the past decades. There is one cyclist in particular that has been a great ambassador for the sport and has popularized competitive cycling with his success and record holdings. His name is Lance Armstrong and he is a wonderful example of someone who never gave up.
Invite students to read the biography of Lance Armstrong on his official website at: http://www.lancearmstrong.com/.
• Why was Lance Armstrong forced to stop cycling in 1996?
• How did Lance Armstrong react to this?
• What accomplishments did Lance Armstrong realize following his illness?
• Now that Lance Armstrong has retired from cycling, what new challenges has he taken on?
• Why is Lance Armstrong’s story an example of tenacity?
Student Essay Have students write an essay about the importance of achieving their goals through determination and tenacity. Have them include a personal story where they achieved their goals through their persistence and hard work.
Athletic Inspirations Research other athletes and their incredible stories of determination by exploring the Olympic Movement’s website at: http://www.olympic.org/uk/index_uk.asp
Have students write their biographies and present their athletes’ story to the rest of the class in an oral presentation.

Name:
Activity 4.1 Which Mode of Transportation is Best?
Can you list the advantages and disadvantages of the following modes of transportation?
Advantages
Bicycle
Disadvantages
Advantages
Car Disadvantages
Advantages
Bus
Disadvantages
Advantages
Walking
Disadvantages

Nam
e:
Act
ivity
4.3
Su
stai
nabl
e Tr
ansp
orta
tion
Cul
ture
s
Usi
ng c
olou
ring
penc
ils id
entif
y th
e co
untri
es w
here
the
bicy
cle
is a
n im
porta
nt m
eans
of t
rans
porta
tion.
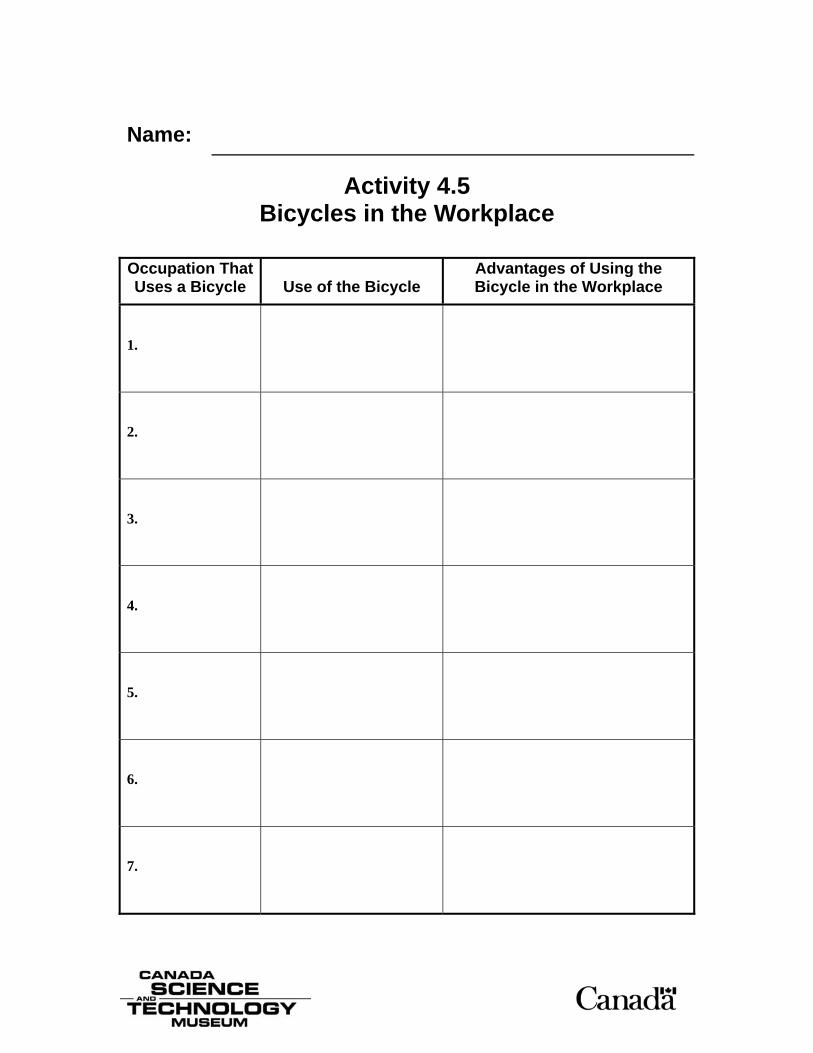
Name:
Activity 4.5 Bicycles in the Workplace
Occupation That Uses a Bicycle Use of the Bicycle
Advantages of Using the Bicycle in the Workplace
1.
2.
3.
4.
5.
6.
7.

Name:
Activity 4.6 Cycling Across Canada Challenge
Week of:
Day Kilometres Ridden
Monday ________ km
Tuesday ________ km
Wednesday ________ km
Thursday ________ km
Friday ________ km
Saturday ________ km
Sunday ________ km
Total for the Week ________ km

Name:
Activity 4.7 Find the Hazards
There are twelve (12) hazards facing the cyclist at the bottom of this picture. Identify each one and think of the best way to avoid the danger.
Courtesy of Citizens for Safe Cycling