· web viewschmottlach, n., mcmanama, j. (2002). physical education activity handbook 10th...
TRANSCRIPT
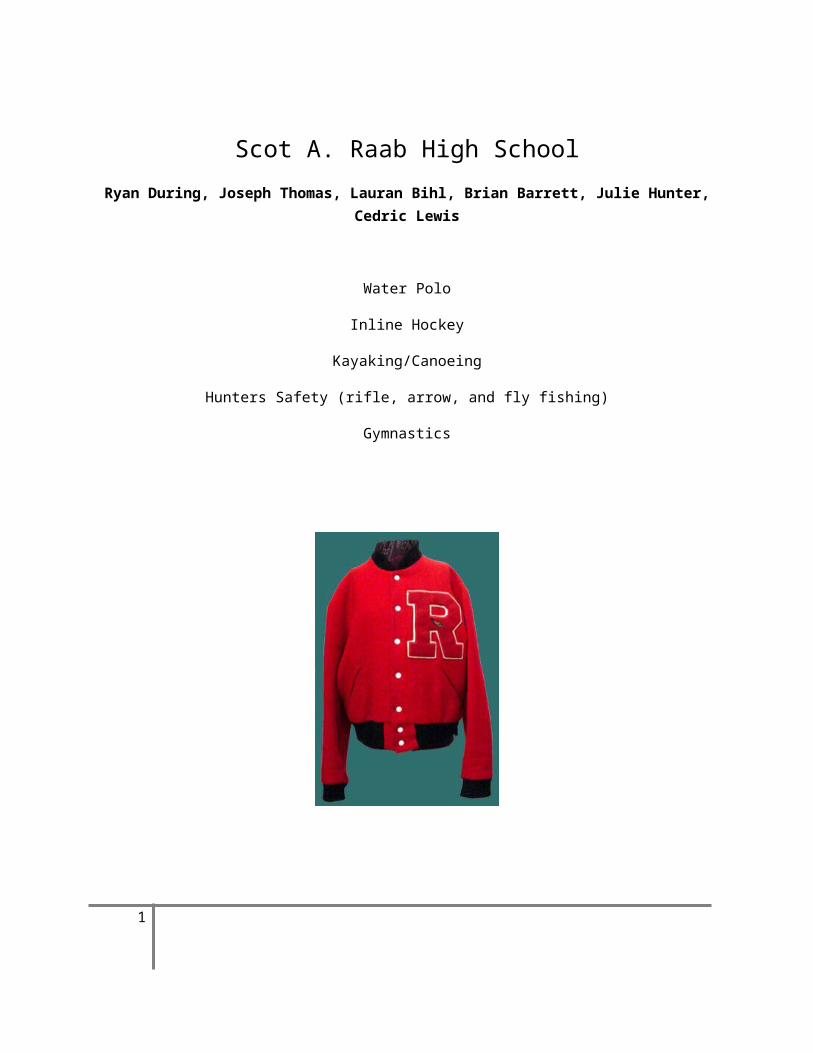
Scot A. Raab High SchoolRyan During, Joseph Thomas, Lauran Bihl, Brian Barrett, Julie Hunter, Cedric Lewis
Water Polo
Inline Hockey
Kayaking/Canoeing
Hunters Safety (rifle, arrow, and fly fishing)
Gymnastics
1

Table of Contents
Introduction of Teachers
Ryan During
Joseph Thomas
Brian Barrett
Lauran Bihl
Julie Hunter
Cedric Lewis
Goals and Objectives
Learning Styles Found Among Students
Equipment List
State Standards
Introductory Activity
2

Introduction of Teachers:
Ryan During:
Biography
I graduated from Irwin County High School class of 2005. I played football for 4 years and was a
member of the Beta Club and yearbook staff in 2005. I graduated from Valdosta State University in 2008
with a bachelor’s degree in Health and Physical Education. While attending Valdosta State I was a
member of the Health and Physical Education Club.
Philosophy
My Physical Education philosophy is quite simple. I want to become an innovative teacher that
helps in bettering my students. I want to improve my children’s mental, social, physical and emotional
state. I want to be my student’s role model as to how to live a healthy life. I want to promote health and
wellness and assist in helping students achieve health and wellness. I am going to challenge my students
to go the extra mile and push themselves to the limit, while learning all they can. I want my students to
fill better about themselves and realize all the potential that they have.
Once I get into my teaching I want my classroom to be a safe and positive environment. I want
to provide my students with the skills and knowledge to live a healthy life. In my class I am going to
teach my students lifetime activities that they can participate and do the rest of their lives. I want my
students to treat their fellow students with respect and dignity no matter what type of body they have. I
want all of my students to motivate each other and be enthusiastic about Physical Education. Overall I
want my classroom to be fun, enjoyable, and exciting, while making sure that my students know that I
3

hold them to high expectations and that they realize the importance of lifetime wellness and fitness. I
also want my classroom to be competitive but also make sure that my students play fair and show good
sportsmanship.
Overall I want to improve my student’s self-esteem, self-respect, and body image through
different teaching styles. I will emphasis the importance of long term goals but also the importance of
short term goals. Every time a student reaches one of his of her goals I will reward them with prizes. I
will talk about how each student should respect each other and encourage each other to actively
participate and to improve their physical fitness. Most of all I want each and every student in my class
to improve themselves both mentally and physically by the time they leave me class. By the time they
leave my class I want every student to be excited about physical fitness and want to exercise.
4

Joseph Thomas:
Biography
I graduated Valdosta State University with a Bachelor’s degree in Health and Physical Education.
While in school, I was a member of the Baptist Collegiate Ministries and Health and PE Majors club. I
participated in Flag Football and Softball intramural sports. I graduated from Central High School in
Macon, GA. I was a member of the Youth Alive program and FCA.
Philosophy
When it comes to the philosophies of education, I can not say that I completely agree with just
one of them. But I find this to be a good thing. In my opinion, if you adhere to just one philosophy, then
you can not offer your students the broad range of education that they should have. But by using the
methods of a variety of philosophies, I believe that you can offer a higher quality education in the
physical part of their life.
In the Idealism philosophy, I agree with the idea that a person needs to believe that they can do
something before they do it. It has been proven that a person is stronger when they are thinking
positive thoughts then they are when thinking negative ones. I also agree that a teacher should work on
developing the whole person and teach students the need to know why movement or skills are
important. But I do not believe that while doing this, physical activity should be put to a secondary
status. That is what has happened to most of America, they have made physical activity something less
important that it should be and have become severely overweight.
5

As for the Realism philosophy, I can see myself, as a physical educator, administering tests to my
students to measure their strength and flexibility. I also think that the teacher and coach should show
students the correct way to execute a skill rather than just expecting them to pick it up without ever
seeing how to do it. The part that turns me off from this belief is the idea that everything can be based
on scientific truth. I don’t know if this is because I was raised as a Christian and my religion has taught
and shown me that science can be proven wrong, or if it’s my belief that science doesn’t prove
everything.
Just like a pragmatist, I believe that the experiences each person has is different than anyone
else’s. And for each student to become a better member of society, they need to have experience
solving problems that they are going to face in real life. I think students should experience a variety of
activities and games. I love playing teams sports and being with other people. I like to sit back, listen to
what other people are saying, and just “people watch” sometime. If I had to choose what philosophy I
agreed with the most, it would have to be Pragmatism.
I’m not a very big fan of the Naturalist philosophy. While I do agree that students need
education to meet their needs, I don’t think that every where you go you learn something. But to me,
this philosophy seems to agree with the idea that physical activity helps with learning. I could see Dr.
Langford being a big believer of this philosophy since he is always mentioning how being active helps a
student grow brain cells.
As for Existentialism, I agree that students need to learn self-responsibility and what the
consequences of their choices are going to be. If not, then you have someone who doesn’t realize what
is going to happen to them and will just live life without caring about anything. It seems that the
profession that this would fit best would be a personal trainer.
6

As I said earlier, I believe that the best physical education teacher is one who incorporates a
variety of philosophies and their methods in to their curriculum. I hope to be one of these teachers one
day. With a bit of all philosophies, I feel that I could give my students an education that would keep
them active and living a healthy lifestyle throughout their lives.
7

Lauran Bihl:
Biography
I graduated from Valdosta State University with an undergraduate degree in Kinesiology and
Physical Education. While enrolled there, I was involved in the LeaderQuest Program for 4 years, was an
Orientation Leader, secretary for the Health and Physical Education Club, was nominated for Who’s Who
among American College Students, and played for the women’s club soccer team.
Philosophy
In America, childhood obesity rates are higher than ever before. This is a huge concern because
current research shows there are many health issues associated with pediatric obesity such as Type 2
Diabetes, symptoms of depression, and cardiovascular disease. Our nation’s children are essentially
eating themselves, along with their sedentary lifestyle, into premature death and as a physical educator;
I am going to teach with the intention of helping our youth reach their full potential to live long, healthy,
and happy lives.
As a physical educator, most importantly I want to emphasize the value of making physical
education fun, enjoyable, and exciting. Maximum participation is especially imperative. No child needs
to feel like they are not adequate enough to be included. The majority of students who are sitting out or
not dressing out are the individuals that require physical education the most and it is my responsibility
to make them realize their potential.
Physical education should not be survival of the fittest; it should be a safe haven where
everyone can feel comfortable about challenging themselves without the fear of persecution from
8

others. Self esteem respect of others, and good sportsmanship is critical especially during adolescence
when physical and emotional growth is rapid. I will give multiple opportunities to asses their fitness
levels because I believe learning occurs through trial and error because sometimes you need to fault in
order to succeed in the end. Moreover, I will provide activities that will strengthen skills they have
already developed and offer interventions to work on student weaknesses.
Lastly, I want to create well-rounded students. Not only will they be working towards fitness
goals while they are in my class, but I will provide them with the understanding of how to develop a
strong, healthy body, and aid in the use of athletic skills to not only benefit them now but also later in
life. Lifetime activity is the solution. I want to be remembered by my students by the simple fact that I
provided them with the necessary skills and tools to be productive and healthy adults all while making
physical education an enjoyable experience.
9

Brian Barrett:
Biography
My name is Brian Barrett. I’m from Fort Valley, GA and graduated from Peach County High
School as an Honor Graduate in 2005. I thoroughly enjoy playing any kind of sports, hiking/camping, and
several other outdoor activities. I strive to be as good as a tennis player as my dad. He’s one of my
sports/outdoors related models I look up to. I was very active in the Boy Scouts and an Eagle Scout,
which I am very proud of. Also, I am very active in church related activities. I graduated from Valdosta
State with a B.A. in Health and Physical Education in 2009.
Philosophy
I believe that my philosophy is split between an idealistic and pragmatic view. I believe that the
importance of being the teacher is to be a role model and example for the students to look up to. I also
believe that an objective, while teaching, should to develop both the mind and body (physically).
However, there are a few things that I do not fully agree with certain things of idealism. I would be open
to changes and different ideas, and I would not want to have lectures all the time. I would challenge the
students in different physical aspects while during class. I personally would not want to sit and listen to
lectures in a physical education class all the time. I think that would turn off students to physical
education and bore them to death.
For the pragmatic view, I think that students should always be interacting and socializing with
others. I think this builds great character and motor development for students. I think it is good for
students to pace themselves in certain activities like weight training. The student personally knows how
much they are capable of, but I think the teacher should assist when starting the activities. When a
10

student is able to accomplish a goal that they personally set, it gives them motivation in their mind to go
and possibly strive toward other physical activities.
While in class I will want to teach the students various ways of being physically and mentally
active. I will modify different lessons so the students will not just learn a sport, but other school criteria.
After the students are partaking in the lesson, I will try to back away and will be able to assess their
capabilities and assist them when needed. I primarily want to teach all the students respect and to have
a good self-esteem. I think it is vital for anyone to have a successful lifestyle for years to come. I was
taught these things primarily at home, but I think it should be taught in every single class. It should be
especially taught in physical education where students are constantly interacting with others.
I will try my best to have every class fun and every single student participating in certain ways.
This will be challenging while teaching a health class, but in a physical education class it will be possible.
I think physical education is very important, because students are socializing in many ways with their
fellow classmates. I will try to have lessons that will build trust between each student while in a positive
environment. I will not allow negative talk between others during any time in any class. During lessons I
will try to be as enthusiastic and motivating as possible to make the activity fun for each student.
11

Julie Hunter:
Biography
I graduated from Valdosta State University with a Bachelor of Science degree in Health and
Physical Education. While I attended VSU, I was involved with the Catholic Student Center, participated
in intramural sports, and a member of the Health and Physical Education club.
Philosophy
I believe every child has the ability to learn and to implement learning the teacher must use
different teaching styles. Physical education is more than rolling a ball out and saying “play”, it should
teach students how to live a healthy and active lifestyle for the rest of their lives. Being active can lead
to improved student success in and out of the classroom and at the same time students should be
having fun. Physical education can help to create a well rounded student.
Physical education is like any other subject taught in school; you have to have a basis to start
from so you can build upon it. Students need to learn locomotors steps and motor skills. In order for a
child to like fitness for life, they need to be taught early on in school that fitness is fun and rewarding.
To keep students interested, I will have different activities to do everyday so they are excited about
coming to class. Also when students are performing various activities, they are learning how to be good
at more than one thing. My goal as an educator is to turn students on to physical education and not
make it their worst nightmare because they are not as highly skilled as others.
Current research has shown that students perform better on tests when they participate in
physical activity and they should get at least one hour of physical activity daily. When a student engages
in physical activity for periods of time, they are gaining self-respect and self-esteem because their body
12

looks good and they feel better and are happier. My job is to provide students with knowledge about
the negative effects of not taking care of your body and promote high expectations.
The overall objective in physical education is for students to have fun and appreciate fitness for
life. While they participate in physical education class, they are learning about fair play and
sportsmanship. Being a role model and motivator will help my students to achieve success in everything
they do causing them to be a well rounded person.
13
Cedric Lewis:
Biography
My name is Cedric Bryan Lewis I graduated from Valdosta State University with a Bachelor’s
degree in Health and Physical Education. While attending Valdosta state University I volunteered my
time at a lot of different community events and programs such as the Boys and Girls Club, the Valdosta
Recreation Center, and I also helped with Special Olympics as well. I was also a member of Life Changing
Word ministries during my college experience and this helped me through a lot of rough times. While
being a full time student I also worked over thirty hours a week in order to help pay my way through
college this helped me prepare myself for my life after college. My experiences at Valdosta State
University were great learning experiences and they helped build me into the person I am today.
Philosophy
As a Physical Education teacher, you should have a set of goals that you strive to obtain. My
goals include: having an exciting and fun classroom, teaching my students about their overall health
status, and encouraging my students to lead a physically active, fit lifestyle. Being a physical educator, I
feel that it is our responsibility, as Americans; to help today’s society overcome the obesity epidemic.
Current research shows the number one health risk among adolescent and small children is obesity and
diseases related to being obese. I plan to offset this by being a motivator to my students and
emphasizing the importance of being healthy and living a healthy, well-rounded lifestyle. I would also
like to be in a position where I would be able to use new technology to help develop new, innovative
ideas with which to help monitor my students target heart rate. This would ensure that the proper
amount of physical activity is maintained throughout my physical education class session. In becoming
14

an innovative teacher, one should use several different teaching methods or styles. I would use
command style teaching whenever I am lecturing about statistics, diseases, or maintaining high self-
esteem. However, because this would soon become very repetitive, I would also use demonstrative style
which would seem more exciting and fun for my pupils because I would actually be doing the activity or
exercise with them. By staying active with my students and by making sure my students are having fun
while learning about physical health and wee-being, I am ensuring myself that all of my before
mentioned goals will be achieved.
15

Goals and Objectives:
To broaden the physical, social, and emotional aspects of each student throughout the course of
the class
To enhance and build each students techniques in the variety of locomotor, non-locomotor, and
manipulative skills.
To utilize several teaching styles in order to develop lifetime skills the students will use in their
adulthood.
Teach all lessons to assimilate every student (no matter what their ability level) in the planned
activities.
The obtain the knowledge and skills that encompasses a healthy physical lifestyle
To acquire proficiency in maintaining a strong mentality throughout life
16

Learning Styles:
Visual learners- These students learn best by seeing what they are learning. For example, they
like to see demonstrations, diagrams, posters, slides, etc. They like to sit in the front of the classroom
because they want to see the teacher and want to avoid anything that might be a distraction.
Auditory learners- These students learn best by listening to others talk and by reading aloud and
discussing things. They listen to the voice, pitch, and speed of the teacher and usually do not understand
what they have read until they do read it aloud.
Kinesthetic/Tactile learners- These students learn best by doing and touching. They want to be
moving and not have to sit still for very long. Once a topic has been presented, students want to learn by
using their hands instead of looking at diagrams and trying to figure out how to fix a problem.
Aural learners- These students are good at listening to the sound and rhythm of music. They are
the better students in music class and usually participate in band. They also tend to be good at
identifying sounds of different instruments.
Logical learners- These students are best at reasoning through problems and issues. They like
having lists to follow and are good with rules.
Interpersonal learners-These students like to work in groups and love to interact with others.
They prefer to solve problems in groups rather than as individuals.
17

Intrapersonal learners-These students prefer to work alone and solve problems and issues by
themselves. They like to figure things out on their own instead of having input from others.
Teaching Styles:
Water Polo
The teaching styles that will be used in water polo will be command and problem solving.
Command style will only be used when teaching students the rules of the game. After learning the rules,
the problem solving method will be instated in to the lesson plan by having the students find their ways
to get the ball down the pool and score a goal. The problem solving style is better than the guided
discovery style because there are incorrect ways to participate in this activity and will result in loss of
possession of the ball.
Inline Hockey
For inline hockey, guided discovery will be the first method being used for teaching. The reason
for this is so the students can find out what is the best way for them to get up on skates and maneuver
around the floor. Once they have grasped skating and can complete the different maneuvers the
teacher wants them to learn, reciprocal style will be implemented into the lesson. Students will work
with partners in skating and give feedback to one another on how they are doing. Once all students
have gained a decent ability to skate, the will be taught the rest of inline hockey by the problem solving
method. They will have a goal that they want to achieve, but there will be certain ways of achieving that
goal that is wrong.
Kayaking/Canoeing
18

Canoeing and kayaking will be taught with a mixture of the command and guided discovery
styles. In the beginning, lessons will be taught with the command style while students are learning how
to wear their life jackets, get in the boats, and what to do if they or another student falls out. After
learning all of the safety tips, students will use the guided discovery method to paddle the boats and
move to their destination.
Hunter’s Safety
This part of the PE class will be primarily taught through command style due to the danger
present in this sport. Students will be shown how they are supposed to hold the weapons, wear the
equipment, and use decoys.
Gymnastics
Gymnastics will be taught with the command and practice style. After learning how to do the
stunts, the students will have days where the come and practice doing the stunts on the mats. Instead
of telling them what to do on these days, the teacher will go around and answer any questions and help
anyone who is having problems with the stunts.
19

Equipment:
Water Polo:
Pool, Water polo balls (35), Caps (35), Shot clock (2), Weight Belts (20), Goals (2), Water Polo Shooting Bar (2), Resistance Triangle (10), Pass It Partner (17), Mikasa Nylon Duffel Bag (2), Men’s and Women’s Water Polo Suits (20 men[5s,8m,7l], 20 women [6s, 8 m, 6 l])
Inline Hockey Equipment:
RBK Pump 8k Inline Hockey Skates (35 pairs, mens sizes 4, 5, 6, 7, 8, 9, 10, 11, 12, 13), Hyper Formula G Flex Wheels , Composite Hockey Sticks (35), Equipment Wheel Bag, Full Face Protectors (35), Hockey Gloves(35), Shoulder Pads(35), Elbow Pads(30), Shin Guards(35), Helmets (35), Inline Bearings, Equipment bags (5), Inline Hockey Field
Kayaking/Canoeing:
Kayaks (35), Life Jackets (35), Paddles (35), Helmets (35), Eyewear (35), Water Proof Storage, Spray Skirts, Lake or River, Canoes (35), Back Rests (35), Thigh Straps(35), Sit on Top Trolley, Paddles(70), Bungee Paddle Leash (35), Itchnetucknee River
Hunters Safety:
(15) Targets,(35) Bows, (120) Arrows, (35) Safety Manual, (35) Rifles, (30) Rifle Scopes, (100 boxes) Rifle Ammo, Hearing Protection and Glasses for 30 students, (35) Two Way Radios,(50)Decoys, (2) Large Gun Safes, Men’s and Women’s Hunting Clothing for 35 students, Hunting Range
Gymnastics:
(4) 6x12 Mats, (2) Balance Beams, (2) Mini Bar, (3) Crash Mat, (1)Trampoline, (2)Mini Bar Rings, (1)Parallel Bars, (1)Pommel Horse, (1)Handspring Machine, 2-step, 3-step, (35)Scooters, Parachutes, Tumble Track, (2)Uneven Parallel Bar, (2) Vault, (35)Grips, Landing Mats, (1) Resi Pit, (2) Eight Coil Springboards, (1) Infinity Floor Balance Bean, Foam Balance Beam, Floor Training Mat, Gymnastics Chalk, (4) Mailboxes, Gymnasium
20

State Standards:
Grades 9-12 Personal Fitness
Physical Fitness: QCC’s 1-6
Grades 9-12 Sports and Lifetime Activities
Individual and Dual and Lifetime Activities: QCC’s1-5
Team Sports: QCC’s 6-11
Outdoor Activities: QCC’s 12-14
21

Introductory Activities:
Agility Drills (#1-15)
1. Seat Roll – Students are on all fours with head up.
2. Arkansas Flip – Same position as the seat roll. Flip over to either the left or right, without
seat touching the floor.(half flip)
3. Quarter Eagle – Head up, arms flexed in front of the body, knees bent, feet straight
ahead and shoulder width apart.
4. Wave Drill – Students will shuffle left, right, backwards, or forward on signal.
5. Log Roll – Three people will lay flat on the floor to begin with. The middle person rolls to
either the left or right while the other partners roll on that side up and over the top of
the middle person.
6. Square Drill – Students form a square, they then shuffle around the square to the left or
right.
7. Lateral Shuffle – Two cones are placed 5 yards apart. Student is assigned to stand in the
middle and shuffle back and forth between the cones touching the cone each time.
Students will try and touch the cone as many times as possible in 15 seconds.
8. Rooster Hop Drill – Students hop 10 yards on one leg. 1- Left hand touching the right
toe, which is on the ground. 2- Right hand touching the left toe on the ground. 3- Right
hand touching the right toe on the ground. 4- Left hand touching the left toe on the
ground.
22

9. Weave Drill – Students shuffle in and out of a series of obstacles, such as cones,
dummies or boards.
10. Running Weave Drill – Student will run through the weave of obstacles with a fast pace
stride.
11. Leaping Lena with a Forward Roll – Students leap forward as far as possible and begin
moving their feet. Two more leaps are repeated and then a forward roll is performed.
12. Burpee-Flip Drill – Students begin in the standing position with bent knees and hands on
the floor. Legs kick back into an all four position, Half flip right to a crab position, half flip
right to an all four position.
13. All-Fours Circle – Students begin on their stomachs with head close together and legs
extended outward. One person starts by placing the hands in the center and moving
around the circle over the other students without touching anyone.
14. Coffee Grinder Square – Right arm extended on the ground, while the feet walk 360
degrees around the arm.
15. Flash Drill – Hands up: students jump up and return to feet, Hands down: students touch
the floor and return to feet, Hands right: students shuffle right, Hands left: students
shuffle left, Hands make a circle: student do a forward roll and get up chopping their
feet.
16. Number Challenges – Students are challenged to move and perform and exercise or drill
as many times is the number that is called.
17. Four Corners – Four cones will set up a square. As the student passes each square they
have to perform the locomotor skill until they reach the next square.
23

18. Gauntlet Run – Students are lined up on a football field or an area of equal size.
Challenges are placed every ten yards.
19. Rubber Band – On signal the students move away from the teacher using different
locomotor skills. On the second signal, students sprint back to the teacher and form a
tight circle around the teacher.
20. Rope Jumping – First signal the students begin the jump rope, second signal they drop
the rope and perform a stretching exercise, third signal students drop the rope and run
in place.
21. Ball Activities – Each student has a ball and dribbles it throughout the area while
moving. On signal, the students stop and move the ball behind the back, around each
leg, and over the head.
22. Beanbag Touch and Go – Beanbags are spread all over the gym floor. On go the students
have to run and touch the beanbag with whatever body part the teacher calls out.
23. Vanishing Beanbag – Students move around the area doing different locomotor skills.
On the signal the students run to a single beanbag and kneel on it. Each time a beanbag
is taken away.
24. Hoops and Plyometrics –Each student has a hula hoop and rolls in alongside or carries
the hoop while jogging. On the signal the hoops are dropped, and students are
challenged to move in and out of as many hoops as possible during the time given.
25. Musical Hoops – Hoops are placed over the gym floor. When the music starts the
students move around the area. When the music stops, students should find a hoop to
sit in. Each time the music stops a hoop is taken away.
24

26. Animal Walk – Cones are placed 10 to 20 yards apart. On the signal students perform
either an animal walk or a locomotor movement to the end of the 20 yards.
27. Marking – On first signal the one of the partners begin to chase one another. On the
freeze signal both partners much freeze, if the “it” partner can reach out and touch the
other partner he/she is awarded a point.
28. Marking with Addition or Multiplication – Students perform a paper, rock, scissors game
and then display a number from one to five. Students quickly add or multiply the
number. Whoever calls out the correct sum or product becomes the fleer while the
other is the chaser.
29. Pacman – Students walk on any line of the gym floor. Five students are picked to be “it”.
The “it” must move along the lines and try and tag people.
30. Pentabridge Hustle – On signal the first student in the group of five moves under the
other four bridging students and runs ahead and forms a bridge. The next person in line
completes the same task until the bridge has moved across the finish line.
31. Over, Under, and Around #1 – Challenge is for the partner to move over, go under and
run around the partner a certain number of times.
32. New Leader – Students will get into small groups. A leader is picked, whatever
locomotor movements the student picks the others in the group must also perform it.
33. Balance Tag – Students will attempt to tag people while staying balanced on one foot.
34. Push-Up Tag – Students will assume the push-up position to avoid being tagged.
35. Blob Tag – Two people begin the game as being “it”. When they tag someone that
person must join hands with them and try and tag people.
25

36. Addition Tag – If tagged, the partners trade places or stay in the middle to make it more
difficult for others to cross the gym floor.
37. Frozen Tag – When tagged, the person must freeze in a designated position. To resume
play, a classmate must “high five” the frozen person.
38. Spider Tag – Students stand back to back with a partner with elbows locked. If tagged
the partners become it.
39. Triangle-Plus-One Tag – Three students hold hands to form a triangle. One person in the
triangle is the leader. The fourth person outside the triangle tries to tag the leader. The
triangle moves around to avoid getting the leader tagged.
40. Fugitive Tag – One person is the fugitive and is given a head start. The partner is a police
officer trying to tag the fugitive.
41. Fastest Tag – All students are “it” When students are tagged, they can kneel and then
tag other from that position.
42. Triangle-and-Two Tag – Same applies to this game as triangle-and-two tag except this
game two people are “it”.
43. Clothespin Tag – Students place two or three clothespin on the back of their shirts.
When the game starts students try and get as many clothespins as possible and place
them on the front of their shirt.
44. Head-And-Tails Tag – Teacher flips a large coin with the picture of a head and tail of a
donkey. Half the students are heads and the other half is tails.
45. Help-Me Tag – Four or five taggers in a large area. Three or four students hold a rubber
chicken as a safe area. Three students can be touching a chicken at one time. The
chicken must be passed on before 30 seconds of the holder becomes a tagger.
26

46. Hospital Tag – Four or five taggers have some type of soft ball or equipment for tagging.
If tagged twice, the student is able to get back into the tag game.
47. True or False Partner Tag – Teacher calls out a true or false question, and the line that
has the correct answer chases the other group and tags them before they can reach the
safe zone. If tagged before he or she reaches the safe zone they move to the other side.
48. Follow The Leader – Students are grouped in pairs. On signal, the leader performs all
types of movements to elude his or her partner.
49. Hoops On The Ground – Students run around the room space. When the teacher calls a
number, students must get that number of students inside one hoop in 5 seconds or
less.
50. Mirror Drill In Place- One person is the leader and makes a quick movement with the
legs, hands, head, or body. The other partner will try and be a mirror and perform the
exact movement.
51. Formation Rhythmic Running – Students move in a circle to music and try and run
rhythmically to the music.
52. Loose Caboose – Students are hooked together in groups of two or three. Teacher then
picks several students to move without partners. The students without partners simply
come up behind one of the groups and tag the end person and yells loose caboose. That
person then becomes “it”.
53. Flag Grab – Students try to grab the flags of other students while avoiding getting theirs
pulled.
27

54. Running High Fives – Use music intervals of 15 seconds on and 15 seconds off. When the
music starts the students do different locomotor movements around the run space.
When the music goes off the students stop and give high fives to each other.
55. Standing High Fives – Students get a partner of about the same height. Students start
with a jump and right-hand high five, and then use the left hand, and then both hands.
Next, students add a quarter turn and the various high fives.
56. Quick Hands with Beanbags – Students sit facing a partner with legs crossed or
extended. One beanbag is placed on the floor equally between the two partners. The
teacher then yells out right or left and the students try to quickly grab the beanbag with
the appropriate hand that was called by the teacher.
57. Builders/Destroyers – 30 cones are placed in the scatter formation with half the cones
tipped over. Half of the class is trying to knock the cones over while the other half are
trying to set them up.
58. Hoops Circle Pass – Class is divided into three or four groups that form a circle while
holding hands. From there the groups must pass a hula hoop from the end to the
beginning without breaking the lock of their hands.
59. Quick Lineup – Class is divided into four equal groups. Each group decided on a team
name and lines up in a single file line, facing one assigned side of the teacher. All
students close their eyes and the teacher moves to a new position and rotates his or her
body position. On the teachers signal, students run to the new position and line up in
the same order, facing the same side of the teacher and yells out their team name as
they finish.
28

Water Polo
Table of Contents
History
Values, Interests, and Objectives
Safety
Skills and Drills
Scope and Sequence
Modifications and Considerations
Test Styles
Glossary
References
29
History
Water Polo was invented in Britain in the 1860’s. It originated being played in lakes with 11
players on each side in rafts. It became an Olympic event in 1900, being dominated by Great Britain and
Belgium in the early years. The most incredible Olympic feat was Hungry winning a medal every year
from 1928-1980.
Water Polo has become the fastest growing water sport in the world. Many believe this to be
the effects of the growing number of swimming pools, being able to train under an expert coach, and an
increase of competent swimmers around the world. According to the U.S. Olympic Development
Committee, of all 30 sports held in the Olympics, water polo is the third fastest growing sport in the
United States.
For many years, the United States did not adhere to the same water polo rules as FINA, the
international organization. But recently, the U.S. has modified its rules so that it is almost identical to
those of FINA. This was done so that the U.S. teams would be able to compete at a higher level in
international competitions.
Originally, the United States played what they called “softball” water polo. It was played with an
inflatable ball that the players could take up under the water. This had most of the action taking place
up under the water. It made it hard for the referee to make calls and for fans to see what was going on.
Several underwater injuries occurred and few people attended matches. The game was bought back
above the surface by a group of California high school swimming coaches in the 1940s and 1950s that
spread across the state. During the 1960’s, the above water style spread across the United States.
30
Until the 1984 Olympic Games, the only medals the U.S. had won in water polo were three
bronze. But in 1984 and 1988, the U.S. was able to win the silver, losing to Yugoslavia both times in very
close games. Finally in 1991, the U.S. won the gold, finally defeating Yugoslavia. It was the first gold
medal won in international competition for the U.S. since 1904 when it won the FINA World Cup
Tournament in Spain.
In June 1991, the U.S. women’s team won the bronze medal in the FINA world cup. Women’s
Water Polo was not an Olympic event until the 2000 games. The women’s U.S. team came away with a
silver medal losing to the Australian team. (Mood, Musker, Rinker; 2007)
Values, Interests, and Objectives
During the summer, most people love spending time in water such as the pool. Water Polo
offers students something fun and active to add to the time they spend already enjoying the pool. It is a
fun, fast-paced game that is also a great aerobic workout. Water Polo is also a sport that can be played
year around. During the summer, students can play it in any pool they choose. During the winter, they
can go to an indoor pool and still participate in the sport.
Psychomotor objectives for students will be learning how to shoot, pass, and perform different
drills while playing Water Polo. Also, students will work on different swim strokes they can use during
games. Cognitive ones will be being able to find the player that had a better chance of making a shot or
31

not giving the ball away to the other team. They will also be able to come up with strategies that make
their teams function better together.
Safety
The main safety point is making sure that all students can swim well enough to keep them
afloat. If you have students that are having trouble performing the swim strokes or making it across the
pool, then give them flotation devices that will help keep them above the water. You should also make
sure that all students have at least some ability to hold their breaths for a few seconds in case they go
up under water for any reason during the game. Also make students wear goggles to protect their eyes,
a swimming cap to keep hair from getting pulled, and ear and mouth guards. Students also need to
keep their fingernails short to keep the scratching of other player to a minimum. Since they are in a
pool, students will probably not think that they are using as much fluids as they were if they were
outside a pool. Make sure that all students get water to drink before they enter the pool and when they
get out of it. Also make sure that everyone is warmed up and stretched before beginning the rigorous
part of the class.
Skills and Drills
32

Swimming Skills
Students need to be able to perform some basic swimming strokes. This is vital for the players to get
across the pool towards the other team’s goal to score.
1. Freestyle- Swimming stroke done with arms and legs extended, legs performing a flutter kick
alternating up and down, and arms moving alternately following the six components: entry,
catch, pull, push, finish, and recovery. The only difference is that students need to make sure
that they swim with their head up so that they can see what is going on in the playing area.
2. Breaststroke- Legs are pulled up to your chest, pointed outwards, kicked out and pulled back
together. Arms are streamlined forward with the palms facing out, pulled back with the palms
facing slightly downwards until they pass the shoulder, and then are snapped back to the
original position.
3. Eggbeater Kick- legs are kicked similarly to the breaststroke but in an alternate pattern rather
than together.
4. Sidestroke Kick- Performed with the player on their side using just one arm and leg on opposite
sides to gain momentum before usually moving to the freestyle stroke.
5. Backstroke- performed facing upwards with the legs doing the flutter kick with toes barely
touching the surface and knees never touching the top of the water. Arms move in opposition,
bent slightly and thumbs hitting the water first each time.
Defensive Skills and Drills
1. Half-pool One-on-one – As soon as their opponents have possession of the ball, all members of
the team move back to their side of the pool and then pick up a player to cover once they have
33

reached their side. It shuts down opponents chances at a fast break and keeps all members of
their team away from the goal area.
2. Zone Defense- Rather than having each player defend one member of the other team, each
person is assigned an area of their side to protect. This type of defense is usually only used
when a team is a player down.
3. Guarding- when a player on defense makes contact with a player on offense. Only permitted
when the offensive player has possession of the ball.
Offensive Skills and Drills
1. Dribbling- Controlling the ball between the arms with your head raised while performing the
freestyle stroke. Arms are held a bit higher than normal in the recovery stage to keep the ball
from the other team.
2. Passing- While it may seem this skill is a relatively easy, it can actually be rather difficult. Player
must make sure they are out of reach of other players so they aren’t hit or in danger of the pass
being intercepted. Its also hard to see your teammates when only their head is sticking out of
the water.
3. Fast Break- Occurs when team takes possession of the ball and everyone sprints towards the
opponent’s goal. Usually requires team to be in top shape. If shot doesn’t score, team runs a
risk of not being able to get back on defense in time to stop the other time.
4. Motion Offense- Is used to make the other team draw a foul and set up a 6-on-5 situation. Two
players make a fast break to the other team’s side and are usually fouled, drawing a ejection of
the defensive player, and giving them an easier opportunity to score.
Shooting Skills
34

1. Power Shot- A shot when the shooter is not hurried and has plenty of time to rear back and
throw as hard as they can in a vertical position at the goal.
2. Bounce or skip shot- Is made in the same position as the power shot, but instead of throwing it
straight at the goal, the shooter throws it right in front of the goal so it bounces up over the goal
keeper’s head and goes into the goal.
3. Lob Shot- This shot is made from anywhere facing the goal. It is thrown high so that it goes in
the rear or corner of the goal softly over the goalkeeper’s arm.
4. Pop Shot- Players usually make this shot when they are swimming away from an opponent and
don’t have time to get into a good shooting position. The player holds the ball with their
underwater hand a few inches above the water and hits it with an open hand as it comes
forward for the recovery part of the swimming stroke.
Passing Drills
1. Circle Drill- Players stand in a circle and practice passing it with both hands. If you have enough
students to make two circles, the drill can be modified into a competition.
2. Three-player Passing Drill- Players stand in a variety of patterns practicing passing the ball with
both hands and in all directions.
3. Triangle Passing Drill- Players make a triangle and pass the ball in one direction the entire time.
35
Scope and Sequence
Day 1
Wall Kicks
Backstroke
Freestyle
Rules
Safety Instructions
Backstroke Relay
Day 2
Shallow Water Bobs
Dribbling
Rules
Dribbling Relay
Safety Instructions
Review Rules
36

Day 3
Back Float
Passing
Circle Passing Competition
Day 4
Deep Water Bobs
Shooting
Shooting Competition
Quiz on Rules and Safety
Day 5
Shooting Drills
Offensive Skills
Use offensive skills to move ball across pool
37

Day 6
Passing and Shooting Drills
Defensive Skills
Swimming Relay/Skills Test
Day 7
Deep and Shallow water bobs
Goaltending
Practice Game
Day 8
Tread Water, Bobs, Swimming Strokes
Skills Test
Written Exam
Day 9
38

Practice Game
Day 10
Practice Game
Modifications and Considerations
1. While in official games there is a penalty for hanging on the wall. But official games also have
well conditioned athletes. Therefore, you might not include this rule so that you can make sure
that unconditioned students don’t drown.
2. Before moving all skills to the deep water, have students try them in the shallow end. That way
students have a better hold of them before moving to an area where they can’t touch.
3. For students that have orthopedic impairments, modifications will be made to the lesson for
them so that they can still practice skills possible for them. If they are bound to a wheelchair,
they will be in an area away from the pool, but close enough for the teacher to have contact
with and keep in constant sight, but where they can work with others on the skills being taught
that day. One example modification may be practicing their pass for basketball in the same
manner as those practicing for water polo.
4. Make sure students have a buddy and do a buddy check often. This makes it easier for the
teacher to make sure that everyone is okay in the water.
5. Instructor should get certified and have a life guard on duty at all times.
39

Test Styles
1. For the skills and safety test, the students will complete a fill in the blank test. It will have them
list all of the safety and game rules.
2. For the swimming strokes test, students will list the proper mechanics for each stroke.
3. On the skills Test, students will be assessed by a class mate on their ability of different skills.
Sample Task Sheet
1. Able to pass with both hands Yes No
2. Able to make Power Shot Yes No
3. Able to make Lob Shot Yes No
4. Able to make Bounce Shot Yes No
5. Able to make Pop Shot Yes No
6. Able to run Fast Breaks Yes No
7. Able to run Zone Defense Yes No
8. Able to block goals Yes No
Glossary
Backing- net that encloses goal
40
Caps- Head covering. Each team has a different color and each player must wear one.
Ejection- Penalty for a personal foul resulting in swimming to the ejection area and
remain out of game for 20 seconds.
Ejection area- The space on the corner of pool across from scorer’s table where they
wait while being ejected until signaled back into the game.
Face-off- Used when the referee cannot determined who should put the ball back in
play. One player from each team stands facing each other and has the ball dropped by
the referee between them.
Free Throw- Throw taken after any action where the team is directly given the ball. Free
throw is taken at point of infraction and player has 3 seconds to get rid of the ball. It
may not be taken directly at the goal.
Goal Throw- A free throw taken by goaltender after offensive team made the ball go out
of bounds on goal side.
Guarding- When a defensive player makes contact with offensive player of other team.
Occurs when offensive player has control of the ball.
Illegal Player- Player who has committed a third personal foul or been ejected from the
entire game.
Impeding- When a player hinders or slows the progress of opponent by swimming on
opponent or swims under opponent without having the ball.
Penalty Throw- Throw taken by any member of team that was offended from penalty.
The shot is one-handed and made over the shoulder.
Technical Fouls- Fouls committed that are not personal like stalling, striking ball with
closed fist, and being within 2 yards of opponent’s goal line.
41

References
Mood, Dale; Musker, Frank; Rink, Judith; Sports and Recreational Activities McGraw-Hill Companies, Inc.
2007
Darst, Paul W.; Pangrazi, Robert P.; Dynamic Physical Education for Secondary School Students Pearson
Education, Inc. 2006
42
Table of Content
History
Values, Interest, Objectives, and Reason for Choosing
Safety
Skills and Drills
Modifications and Considerations
Culminating Activity
Test
Glossary
References
43

History
In-line hockey is basically an extreme version of roller hockey and ice hockey combined. In-line
was deprived from a basic backyard or recreation game that almost overnight exploded in popularity. In
the 1980s in-line skates were invented and shortly thereafter in-line hockey came about. The mid 1990s
is when in-line hockey took over the world its popularity exceeding ice hockey for the first time. The
first World In-line hockey championships took place in 2005(Summers, 2007). In 1996, in-line
hockey experienced and explosion of popularity. An overall increase of 47% of participates involved in
In-line hockey in 1995.
.
44

Values, Interest, Objectives, and Reason for Choosing
Values
Students will enjoy the game and will be turned on to a fitness activity. In-line hockey is a high intensity activity with constant motion which will improve the student’s cardiovascular levels as well as the students will be working in a team environment to achieve a common goal. This will help with social skills for all students
Interest
The sport of In-line hockey will bring a new and exciting feel to the gymnasium, it will hopefully spark and interest for the students to a not so usual sport for all students
Objectives
Students will be able to shoot, pass, and dribble the puck with control and accuracy.
Reasons for Choosing
In-line hockey will help students with balance, coordination, teamwork, skating, agility and overall fitness.
45

Safety
Do not touch anyone unless instructed to do so.
Don’t do anything to harm you.
Don’t do anything to harm someone else.
Most hockey injuries occur because of being hit with the ball/puck or a stick. The best way to insure safety is using basic safety rules of hockey
No bodychecking of any kind.
No sticks above your waist.
All safety equipment most be worn properly and at all times
No fighting or horseplay will be tolerated.
46

Skills and Drills
Scope and Sequence
Day 1:
Back to BackSafetyStance
Day 2:
Team CountdownPassingReceiving Passes
Day 3:
Bean Bag Touch and goDribbling
Day 4:
Loose CabooseShooting (goal scoring)
Day 5:
Flag ChaseDefendingGoalie
Day 6:
Red Light2 on 2 Games3 on 3 Games
Day 7:
47

Animal WalkScrimmage Games
Day 8:
FreezeRound Robin Tournament
Day 9:
Field Trip
Day 10:
Field Trip
(Mood, Musker, and Rink, 2007)
Skills
Sticking
Position- hands should be positioned in a normal hockey grip
Dribbling-using the stick to move the ball/puck around the ring
Puck handing
Students will need to be able to handle or control the puck/ball without being out of control, and also keeping an eye out for defenders and open teammates.
Receiving a Pass
Students will demonstrate soft hands and puck handling ability by receiving the pass from a teammate and gaining control of the puck without losing control.
Passing
Students will be able to use the stick to propel the puck/ball to another teammate so that the team can score.
Shooting
48

This skill is used in order to get the puck/ball past the goalie in order to score points. Students will learn about accuracy and velocity in order to score affectively.
Shot blocking
Students will take a normal ice hockey stance (goalie and/or defender) and learn the proper technique to block a shot or pass.
Drills
2 on 2 games
Is a scrimmage type activity simulating a real game, but with less action because of fewer players. This lets the students get a feel for the game without the full speed of the game.
3 on 3 games
Is a scrimmage type activity simulating a real game, but with less action because of fewer players. This lets the students get a feel for the game without the full speed of the game.
Weaving
This a drill used to improve puck handling and obstacle course will be set up for the students to maneuver through: changing direction while maintaining control of the puck will be key.
Target
The students will use target zones setup to improve passing and shooting accuracy.
49

Modifications and Considerations
All students will already know how to skate and must be fluent at all moves necessary for competition and or activities on the skates.
In our class we will start with the less difficult actions/tasks and gradually move our way to more and more difficult activities till we will be in a full game.
As always there will be some students who we are more gifted than others as well as some students you will need special attention or care. For these cases different assignments or activities/tasks will be issued.
50

Culminating Activity
I would take the students on a field trip to a professional In-line hockey game. We would take a short plane ride to New York City, NY, to see the Northeast & Atlantic Minor League All-Star Game on March 16, 2008. This event will give the students a chance to put everything we have learned together and see the game in full speed on a professional level.
The students will also participate in a round robin tournament for the last day of actual activity.
51
Tests
Sample Task Sheet, Pre-Post Test Card, and Test Styles
Task
How many cones did the student knock over going through the dribbling section?
0 1 2 3 4 Total
Number of
points
How many passes did not hit within the designated area?
How many slap shots did not hit within the designated area?
How many wrist shots did not hit within the designated area?
How many passes were not intercepted?
1. Able to move through cone station without hitting 3 or more cones. Yes no
2. Able to hit 3 out of 5 target zones. Yes no
3. Able to catch and control 3 out of 5 passes. Yes no
4. Will display proper athletic stance before shooting or passing. Yes no
52

Test Styles
Multiple choice
Physical skills Test
Assessment of teamwork (during tournament)
53

Glossary
Center- is a transitional player who plays between the left and right wings
Clearing the puck- sending the puck to the opposite side of the rink away from ones goal
Wings (forward) - The offensive scorers for the team the main objective is to score goals against the opposing defenseman
Defenseman- there two defenseman per team they usually are positioned at the corner or the net, there basic job is to defend their goal is offensive attacks
Goalie- the goalie is the last line of defense his job is to basically stop the puck from entering the net
Save- a shot or attempted shot stopped by the goalie
Assist- the player or players who touched the puck before the goal allowing their teammate to score
Power Play- A play or shot on a goal while the other team is down a player or two because of penalty
Face Off- referee drops the puck in between two players to decide who is on offense players battle for control
Wrist shot- a shot with the flat blade of the stick using only a quick wrist snap
Penalty box- penalized players serve time for misconduct
Goal- getting the puck past the goalie and goal line
Slap shot- a shot with that occurs after a full backswing with the flat part of the stick
54

References
Summers, D. (2007). The Sports Book. New York: DK publishing.
Mood, D, Musker, F, & Rink, J (2007). Sports and Recreational Activities. New York: McGraw Hill Companies, Inc..
55
Kayaking and Canoeing
Table of Contents
History
Values, Interest, Objectives, why selected
Safety
Skills and Drills
Scope and Sequence
Modifications and Considerations
Sample Task Sheet/ Pre-Post Test Score card/ Test sStyles
Glossary
References
56

History
The canoe and kayak can be traced to Indian tribes and Eskimos of North America. The first
“kayak,” were used by Eskimos in Alaska and Greenland. Kayaks were small, built for one person, and
double-paddles were used to navigate the kayak. Canoes were open boats that were built to carry more
people and single-blade paddles were used. Canoes and kayaks became a primary source of
transportation. From the 1880s to the 1940s both canoeing and kayaking became recreational and
competitive activities. Canoeing and kayaking have gained a great deal of popularity in North America
and Europe. Many camps such as the YMCA, private, and military have used the canoe when going on
fishing and hunting trips. The first canoes were made of wood covered with canvas and later replaced by
aluminum. Today, canoes and kayaks are made out of fiberglass, acrylonitrile butadiene styrene, and
Kevlar. Canoeing was first introduced in the Olympic games of 1936 in Berlin and has since continued as
an official sport of the Summer Games and Europeans continue to dominate both canoeing and kayaking
in the Olympics
57

Values, Interest, Objectives
Most outdoor recreation and sports develop muscles of the lower limbs. However, canoeing and
kayaking develop muscles of the back, abdomen, shoulders, and arms. These are excellent aerobic
activities because they can last from a half hour to half day to several days. Most of the time canoeing
and kayaking begins as recreational activities and then gradually become competitive. Canoeing and
kayaking can be done solo or with a partner and offers companionship among groups. People can paddle
in creeks, rivers, lakes, or the sea and as one becomes more skilled, it is possible to take pictures, fish,
hunt, or bird watch while paddling. Flat-water racing and downriver racing are examples of competitive
canoeing and kayaking.
(Mood, Musker, and Rink, 2007)
58

Safety
Paddlers should wear lifejackets at all times. Lifejackets should not be used as padding, seating,
or kneeled on.
Communicate with everyone that you are canoeing or kayaking with.
Stay with your group.
Respect other’s property.
All boats that are propelled by oars or paddles have the right-of-way over motorboats.
When two boats cross, the boat to the right has the right of way.
Know all the universally known river signals to communicate to others.
(Mood, Musker, and Rink, 2007)
59

Skills and Drills
Launching and Docking- Students may practice getting into the canoe by entering end-first, with the canoe perpendicular to the shore, or from the side, with the side parallel to the shore or dock. The best way to enter a kayak is to place the kayak parallel and next to shore. Place the paddle across the kayak with one of the blades lying flat on shore for support. With the hand nearest the kayak, grip the junction of the kayak paddle and the cockpit to keep boat steady. Place the leg nearest the kayak just to the front of the seat and follow it with the other leg and pull yourself into the seat. To get out of a canoe reverse the process and remember step into the center, grasp both gunwales, and keep your weight low. When exiting a kayak again, reverse the order.
Universal River Signals-These are signals used to communicate with other people who are in the water.
Forward stroke-In canoeing, in the catch position, the body is rotated with the bottom arm reaching as far forward as possible. The top arm is across the midline of the body to allow the paddle to be vertical in the water and the torso remains upright. In kayaking, significant torso rotation and a push-and-pull action with the upper body is used. The top of the paddle shaft is stabilized by a static push while the torso and lower arm pull on the shaft to move the kayak forward.
Back stroke-The catch position is just behind the hip nearest the blade, and the power phase ends when the upper hand is near the shoulder. The back face of the paddle blade is used.
J stroke-Is a canoeing stroke only and is used to keep canoe on track. The initial part of the stroke resembles a forward stroke and a vertical paddle shaft and torso rotation is the keys to success. There is no immediate recovery and the top hand with the paddle shaft in a vertical position rotates the thumb downward to present the power face of the paddle to a vertical position facing away from the canoe, this gets the canoe back on track.
Draw stroke-Is used to move a boat laterally or turn a boat. The basic draw stroke is performed at a right angle to the paddler’s side. The paddle is then inserted into the water and the boat is pulled to the blade. The stroke ends with the blade parallel to and near the boat.
60

Cross draw-Requires the paddler to lift the paddle across the boat to the offside and the body and arms are twisted to the offside. Recovery is made above the water. It may be used dynamically or from a static position.
Pry stroke-Is not a kayak stroke. It is used to move the canoe in the opposite direction of the draw and it moves the paddler’s offside and can be used to turn or move the boat laterally.
Sweep stroke-These are wide-sweeping arcs of the paddle. Solo sweeps are made with a 180 degree arc and are called one-half sweeps. Tandem sweeps cover 90 degrees and are called one-fourth sweeps.
Duffek-It is a turning stroke and its purpose is to make a 180 degree turn to enter or exit currents or eddies or to turn behind a solid object.
High brace-Used to right a vessel and prevent capsizing. It is a variation of the draw stroke.
Low brace-Used to lean the boat into turns and to correct an impending capsizing.
Eskimo roll-It is an advance maneuver used mainly in turbulent whitewater conditions. It should be taught in calm water first.
Spins-Are used when moving around a bend in a river or positioning around another object.
Moving sideways-Is helpful when pulling up beside another boat or the shore or to avoid an object. Drawing to the right or left will move the boat sideways in the direction of the onside.
Moving in a straight line-Is most often the intent of paddling and going forward is the most powerful and sufficient stroke.
Capistrano flip-Can be done by ducking under the capsized canoe and coming up in the air pocket and in unison, the paddlers use a scissors kick and a forceful lifting action to the side to push the craft above the water and roll it upright.
Shake-out-Is done while the boat is upright. One paddler pushes down on an end of the canoe while also pushing forward. The end must then be lifted before the water flows back in.
Forward stroke: For 20 strokes drive the stroke side shoulder back and the other shoulder forward.
J stroke: Students will perform the J stroke for 25 strokes.
Pry stroke: Students will dynamically perform the pry stroke for a distance of 50 feet and back without a partner.
Spins: Students will practice spinning around a bend and another boat.
Rescue: Students will be divided into groups and will practice as group saving a craft.
61
(Mood, Musker, and Rink, 2007)
Scope and Sequence
Day 1
Beanbag Touch and Go
Launching
Docking
Day 2
Animal Walk
Universal river signals
Forward stroke
Back stroke
Day 3
New leader
J stroke
Draw stroke
Cross draw
Day 4
Push-up tag
62

Pry stroke
Sweep stroke
Dufflek
Day 5
Follow the Leader
High brace stroke
Low brace stroke
Eskimo roll
Day 6
Loose Caboose
Spins
Moving sideways
Moving in a straight line
Day 7
Running High Fives
Spins
High brace
Principles of rescue
Day 8
Quick Lineup
Principles of rescue
Capistrano flip
Shake-out
Day 9
63

Flag Grab
Capistrano flip
Shake-out
Group rescue
Day 10
Fastest Tag
Pry stroke
Spin
Moving sideways
Principles of rescue
64
Modifications and Considerations
Initial instruction can occur on land so the teacher can walk around and correct technique.
Try to use visual aids as much as possible to help clarify points about technique and parts of the canoe or kayak.
Allow students to refine for good technique and stroke mechanics.
Teach students to gain experience paddling on one side and then gradually ask them to change to the other side.
Move from simple maneuvers to more complex maneuvers.
Start off teaching in a controlled environment and then move to a more natural setting.
Learn all strokes and maneuvers on flat water before moving to moving water.
Practice safety and rescue procedures
Instructors should be certified.
65

Sample Task Sheet
Task 0 1 2 3 4 Number
Performed
Correctly
Back Stroke- The catch position is just behind the hip nearest the blade, and the power phase ends when the upper hand is near the shoulder. The back face of the paddle blade is used.
Draw Stroke- The basic draw stroke is performed at a right angle to the paddler’s side. With the arms making a C shape and the paddle in a vertical position extended out and away from the boat, the paddle is inserted fully into the water. The boat is then pulled to the blade. Most of the force is provided by the lower, arm as it pulls into the hip. The hip simultaneously is thrust forward toward the paddle blade. The stroke ends with the blade parallel to and near the boat.
High Brace- This is used to prevent the vessel from capsizing. The power face of the blade is used on the water. The blade is angled more and this allows for part of the force to be applied in a downward direction, giving the paddler time to regain balance and reposition the center of gravity inside the boat by thrusting the near hips toward the
66

paddle and moving the boat back within one’s base.
Spins- These are used when moving around a bend in a river or positioning around another object. A forward one-half sweep will turn the bow to the offside of the stroke. A reverse one-half sweep will move the bow to the onside of the stroke. If both people draw, the canoe will turn to the onside.
Pre-Post Test Score Card:
Students will launch into the canoe or kayak successfully 5 out of 7 times.1.2.3.4.5.6.7.
Students will dock successfully 4 out of 5 times.1.2.3.4.5.
Students will perform the forward stroke with the torso upright 3 out of 5 times.1.2.3.4.5.
67

Students will perform the pry stroke by moving the canoe in the opposite direction of the draw 7 out of 10 times.
1.2.3.4.5.6.7.8.9.10.
Students will spin around another boat successfully 3 out of 5 times.1.2.3.4.5.
Test Styles:
Multiple Choice
Essay
True/False
Fill in the blank
68

Glossary
Astern- Behind the canoe, kayak, or other craft
Back paddle- Paddling backward to slow or check forward motion
Bail- To remove water from the craft
Blade- The broad, flat section of the paddle
Bow- The area in the forward end of a watercraft
Bracing stroke- Paddle stroke providing stability against the capsizing force of a lateral current
Capsize- To overturn
Closed boat- Boats having the deck as an integral part of the craft
Control hand- The upper hand on a canoe paddle
Cross draw- A stroke used to move the canoe to the paddler’s normal offside
Draw stroke- A paddle stroke designed to move the craft to the onside of the paddler or toward the power face of the blade
69

Duffek stroke- A high bracing stroke used to enter or leave an eddy as an eddy turn
Eddy- Place where the current either stops or moves upstream below obstructions and on the inside of bends
Forward stroke- The standard propulsion stroke used in paddling a canoe directly ahead
Hull- The frame, or body, of a craft.
J stroke- Stroke used by tandem stern or solo paddler to correct the swing of the craft to the offside when only a forward stroke is used
Low brace- Brace stroke in which the entire paddle is nearly flat on the surface of the water
Offside- Side of the canoe on which the paddler is not usually paddling
Port- The left side of a craft when facing toward the bow
Pry- A type of stroke that uses the craft as a fulcrum to move the boat away from the blade
Stern- The rear section of a watercraft
Sweep stroke- A wide, shallow stroke used for turning or pivoting the canoe
Track- Paddling in a straight line
70

References
Mood, D., Musker, F., & Rink, J. (2007). Sports and Recreational Activities 14th edition. New York: McGraw-Hill.
Schmottlach, N., McManama, J. (2002). Physical Education Activity Handbook 10th edition. Benjamin Cummings
71
Hunter Safety (Archery, Fly Fishing, and Rifle)
Table of Contents
History
Value, Interests, Objectives, Why Selected
Safety
Skills, Drills
Scope and Sequence
Modifications and Considerations
Sample Task Sheet/Pre-Post Test Score Card/Test Styles
Glossary
References
72

History
Archery (Bow and Arrow)
The use of a bow and arrow can be dated back to being one of the oldest mechanical weapons
used by our early ancestors in the world, and is still used to this day for hunting. Hundreds of years ago,
the bow and arrow was used by many cultures for hunting and even for times of war. Ever since
gunpowder and firearms were invented, the use of a bow and arrow has decreased to just sport
competition and hunting. (Mood, Musker, & Rink, 2007)
The very first recorded archery competition was created by the Ancient Scorton Arrow Society in
England in 1673, and the tournament created is still in existence to this day. The first archery club in the
United States was organized in 1828 called the United Bowmen of Philadelphia. However, the first
tournament was held in Chicago in 1879. Archery was brought into the Olympics as a competitive sport,
in 1908, but was dropped after the 1920 Games. The Federeation Internationale de Tir I’Arc (FITA) in
1931 had a great influence though in archery. After the popularity rose with archery with FITA it was
brought back into the Olympics as a competitive sport in the 1974 Games. (Mood, Musker, & Rink,
2007)
In 1971, the college Division of the National Archery Association (NAA) was founded in order to
coordinate and promote collegiate archery throughout the United States. A national tournament is
73
hosted and rotated every year throughout the U.S. For the 1996 Olympic Games, a new shooting format
was instilled in the competition to increase public awareness and gain television viewer support. (Mood,
Musker, & Rink, 2007)
Guns
Shotgun shooting is a very popular weapon of choice used for hunting and competitive sport.
The modern sport of shotgun shooting (both trap and skeet) derives from the custom of shooting birds,
in particular pigeons and pheasants, for sport. Skeet shooting was invented in 1915 as a recreational
sport. Live pigeons were used at first, but they were eventually replaced with clay targets. Trap
shooting has been part of the Olympics since 1950, whereas skeet shooting appeared at the Games for
the first time in 1968. The word “skeet” is derived from an old Scandinavian word which means
“shooting.” The term was adopted by the sport in 1926. (Summers, 2007)
The rifle is another popular weapon of choice for hunting wild game and also for the competitive
sport. During the 19th century, rifles were evolving from just being used in hunting to target practice and
eventually a sport since many people could purchase food without having to hunt. Union veterans
Colonel William C. Church and General George Wingate formed the National Rifle Association since they
were dismayed by the lack of marksmanship by their troops. Only bullets made of lead of similar soft
material are permitted in competition shooting. Tracer, armor piercing, and incendiary ammunition is
prohibited. Women were first allowed to compete in Olympic shooting in 1968. Mexico, Peru, and
Poland each entered one female contestant during those Olympics. (Summers, 2007)
Fly Fishing
Today’s methods of fly fishing are believed to have started in the countries of Scotland and
England during the 15th century. However, fly fishing has been noted from the Roman’s in the 2nd
74

century. Fly fishing clubs began to organize in the 19th century in England. Two different types of fly
fishing were used in different parts of England. In the southern part, the locals used a method called
dry-fly fishing. This method was used in the clearer and slower rivers. The locals in the northern part of
England used the wet-fly fishing method. This technique uses a weighted lure and is used faster flowing
streams.
Fly fishing became very popular around 1920 in the streams of the northeastern part of the
United States. Also, fly fishing became popular during the spring in Wisconsin later on. The popularity
of fly fishing was spread through being publicized in books and in movies with popular actors.
Value, Interests, Objectives, Why Selected
This day in our time, many households own firearms, people go fishing or use a bow and arrow.
It is vital for everyone with possession arrows, rifles, and fishing rods to know how to properly use them
in order to decrease the chances of someone getting injured during the use of them. All of the students
who go through this course will be able to share their knowledge with their peers and possibly teach
their parents a few key safety procedures. Hunter safety is becoming more public and the need for the
students to know how to properly use the equipment will help society to be a little safer.
Safety
All equipment will be checked after each day of use
Students should NOT be goofing off and horsing around the equipment
All ranges being used should be properly marked and roped off from public thoroughfare
Students are to not touch or use any equipment until specified by the teacher or supervisor
75

Students should follow each command when preparing to fire a rifle or bow and arrow
Skills and Drills
Archery Use
1. Nocking the Arrow – The bow should be held horizontally in the left or right hand, and the nock
of the arrow should be placed on the nocking point of the string. The odd-colored feather
should face away from the bow. Use the index finger of the left hand to steady the arrow on the
arrow rest.
2. Extending and Draw – The string is on the first joint of three fingers of the right or left hand. The
index finger above the arrow, and the next two fingers are below the arrow. Rotate the bow to
a vertical position with the left arm parallel to the ground. Extend the left or right arm and draw
the string toward the body with the right or left hand. Keep the right or left elbow parallel to
the ground. Be sure the fingers of the bow hand are loose and relaxed
3. Anchoring and Holding – the string should touch the nose, lips, and chin, while the index finger
touches under the center of the chin. The anchor point should be the same for every shot.
4. Aiming – Beginners should use point-of-aim technique, which involves finding a spot somewhere
on a vertical line drawn above, through, and below the middle of the target. To locate the point,
align the eye and the arrow with an object on the vertical line through the center of the target.
5. Releasing and Experiencing Afterhold – As the arrow is released, the back muscles remain tight
while the string fingers relax. The relaxed drawing hand moves backward slightly along the
neck. The bow arm and head remain steady until the arrow hits the target
6. Retrieving Arrows – arrow should be removed from target by placing the arrow between the
index and middle finger of the left hand. The right hand should be placed palm down on the
76
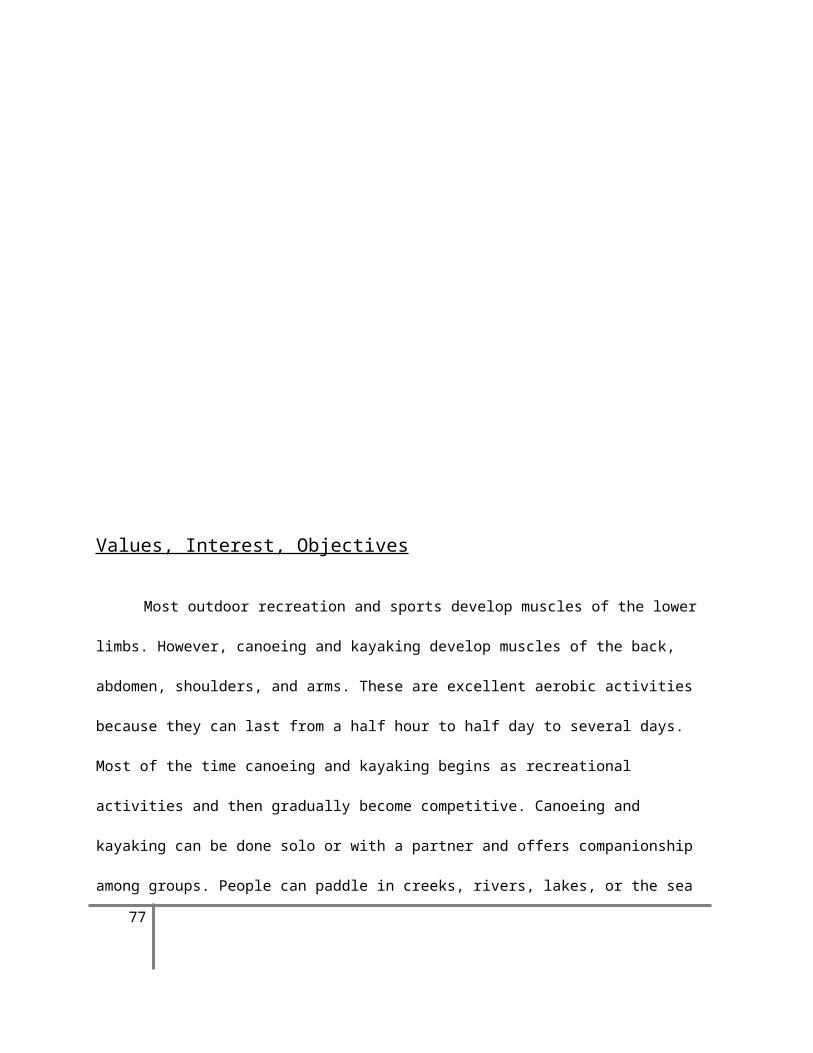
surface of the target. The arrow is removed by gently twisting and pulling at the same angle at
which the arrow entered.
7. Relays – each team has one target, and each person has one arrow. The first person in line
shoots and then goes to the end of the line. All team members shoot one arrow, and then the
team score is tallied. The team with the highest score is the winner.
8. Turkey Shoot – each team draws a turkey about the size of a target on a piece of paper. The
turkey is placed on the target. Each team tries to hit the turkey as many times as possible.
9. Tic-Tac-Toe or Bingo – Balloons or a target with squares are placed on the regular target – three
rows of three for tic-tac-toe, or five rows of five for bingo. The object is to hit three or five in a
row vertically, horizontally, or diagonally. The game can be for individuals or for teams.
10. Target Work-Up – start with four or five students on a target. Shoot an end of four arrows and
tally the score. The highest scorer moves up one target, and the lowest scorer moves down a
target. This can be an individual or partner activity.
11. Tape Shooting – place two pieces of masking tape across the target, one vertically and one
horizontally. The object is to hit either piece of tape. This can be an individual or partner event.
(Mood, Musker, & Rink, 2007)
Gun Use
1. Breathing Practice – done while holding the riddle in the firing position. Inhale fully, release
about half of the breath and hold before firing the gun. Try to relax and keep calm through the
firing procedure.
2. Trigger Squeeze – jerking of the trigger while firing the gun will cause the path of the bullet to be
inaccurate. Pull the trigger slow and steady while using the proper breathing procedures.
77
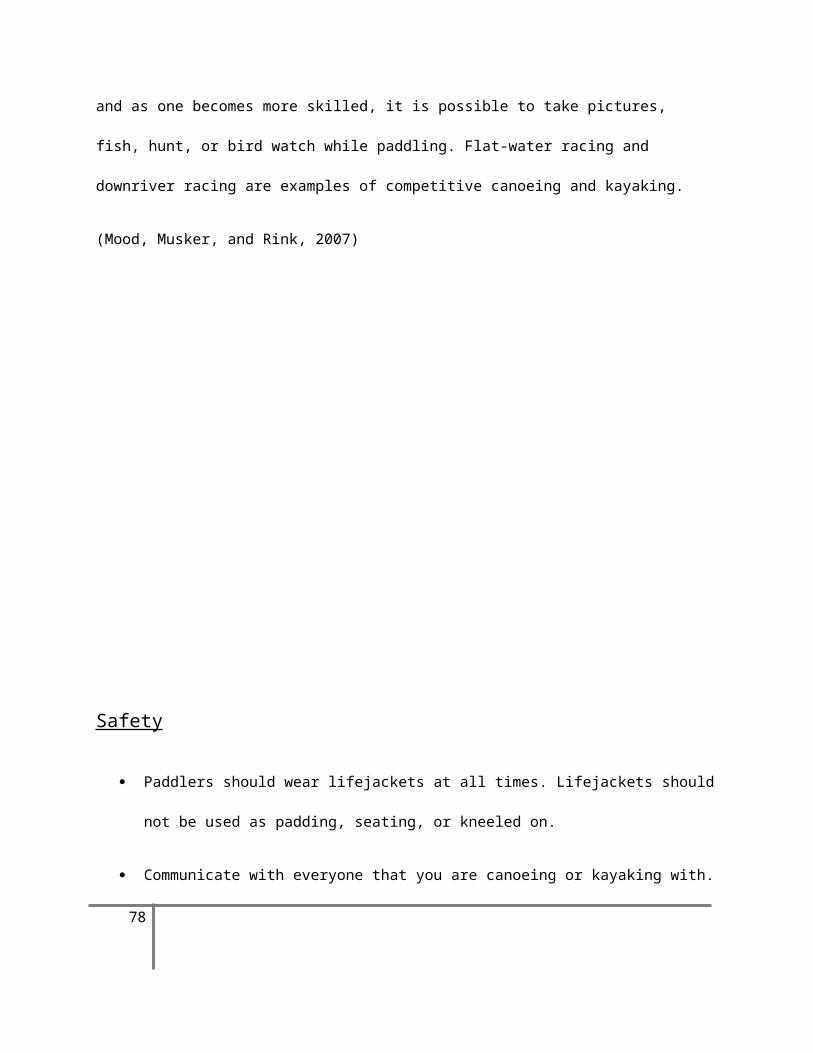
3. Storage – Students will be shown how to properly store each gun and how to handle when in a
case.
4. Prone Stance – the steadiest position to keep the gun from wavering and it is the easiest to hold
the gun.
5. Standing Stance – the most basic of the stances and quickest to use. Since the person is not able
to rest the gun on anything to keep it steady, one should keep the barrel moving slowly and
steady. The shotgun should be used mainly while at this stance.
6. Sitting Stances – in this position both arms are supported by the legs. This is the second easiest
position.
7. Kneeling Stance – only one arm is braced in this position. With the one arm bracing the gun, it
makes the gun easier to aim. However, being in this position may become uncomfortable over
time.
8. Pointing/Aiming of the Gun at Targets – one’s eye must be in line with the barrel and the sight
on the end. The stock of the gun should fit snugly between the shoulder and collar bone. While
aiming at moving targets, one should keep the barrel of the gun at the moving target even after
firing the shot. If the person ceases moving the barrel at the target, the bullet will go in a
straight line. When not shooting, the gun should ALWAYS be pointed away from others and the
safety be turned on. If using a scope, one should NOT put their eye directly on the end of the
scope. Instead, they should keep their sighting eye a few inches back due to the kick from the
gun when shot.
9. Loading of the Gun – students will be taught how to load each gun being used specifically. Also,
discussion on why to use the correct ammo in the correct gun. The using of the safety should be
taught at the same time
78

10. Target Practice – students will first begin by aiming at a target down-range of 25 yards. It
depends one’s aiming ability if the target should be moved back, and causes a greater difficulty
in hitting specific locations on the target. The 22 rifle should be used during this activity.
11. Skeet Shooting – this is performed with a 12 or 16 gauge shotgun. It depends on one’s ability to
control the gun and body size. Smaller students may want to shoot with the 16 gauge due to a
less kick.
12. Around the World – drill done with using the 22 rifle on a range. Each team should be equal
based on skill number of people. Every member gets 1 shot. The target may vary of the
distance according to difficulty level. The object is to hit every single point level on the target
sheet. After all have taken one shot, one of the members from each team will check to see if
they had scored correctly. If not, then the process is performed again. First team to score
correctly will win. (Today's Hunter, 2006)
Fly Fishing Use
1. Holding the Rod – Student should not poke rods at each other or anything for any reason. One
should place index finger of dominate hand on top if front of reel. The thumb should be on top
of rod, but behind the reel. The second, ring, and pinkie fingers should grip around and on the
bottom of the rod. The other hand should be used to feed the fishing line out of the reel. The
rod should be point out and away from the holder.
2. Storage – students are to be taught how to properly take care of a fly fishing rod when it’s not in
use. Also, they should be taught not to run will in possession of a rod or lure. The lure’s should
be taken off and placed in a specified location such as a tackle box.
3. Casting – When casting with a fly fishing reel, it’s not a normal open or closed faced fishing pole.
The Reel on a fly fishing reel and rod is fed by the users hand and the whipping action of the rod.
79

The user may bring the rod back to front either in a motion over the shoulder or out to the side.
Casting with a fly fishing rod and reel is usually the hardest part to the entire sport. One must
be aware of their surroundings and not swing the rod when near others or objects.
4. Hit the Cone – this can be done while on dry ground by placing a small object such as a cone,
ball, or even a leaf about fifteen yards away. The students will use the object as a spot to
attempt to land their lure near or on. While performing this task, the end of the fishing line
should be just a weight for safety reasons.
Scope and Sequence
Day 1:Nocking the Arrow Extending and Draw Anchoring and Holding
Day 2: AimingReleasing and Experiencing AfterholdRetrieving ArrowsRelays
Day 3: Turkey ShootTic-Tac-Toe or BingoTarget WorkupTape Shooting
Day 4:Breathing Practice Storage Trigger Squeeze
Day 5:Prone Stance Standing Stance Kneeling Stance Sitting Stances
Day 6:Breathing PracticePointing/Aiming of the Gun at TargetsLoading the Gun
Day 7:
80

Target PracticeAround the World
Day 8:Pointing/Aiming of the Gun at TargetsSkeet ShootingStorage
Day 9:Holding the RodStorageCasting
Day 10:CastingHit the Cone
Modifications and considerations
Students can use broom sticks or wooden guns to implement and practice proper ways to hold a
gun.
Assign guns, ammo, bows, and arrows in which each student will use the extent of the course
Give students the entire idea of each skill before breaking it down into different parts
Help students analyze their errors in form based on the clustering of their shots after enough
practice results in consistent errors. (Mood, Musker, & Rink, 2007)
Sample Task Sheet/Pre-Post Test Score Card/Teaching Styles
Archery (Bow and Arrow) Criteria Task Sheet
Reciprocal Style
Name:___________________ Period:_____________ Date:_________
Role of Observer:
1. Observe the performance using criteria sheet to analyze the performance.2. Offer feedback to the doer.3. Record the results after each component.4. At completion of the task, switch roles.
81

Sample Verbal Behavior Excellent job on using the correct grip while holding the bow. Very well done on nocking the arrow on the string with correct finger placement
Task/Criteria Nocking the Arrow
Bow held horizontally with left hand Nock of the arrow be placed on the nocking point on the string Odd-colored feather should face away from the bow Use index figner of left hand to steady the arrow on the arrow rest
Task/Criteria Acceptable Not Acceptable
1. _____ _____
2. _____ _____
3. _____ _____
4. _____ _____
Extending and Draw
String is on the first joint of three fingers of right hand
Index finger is above arrow and next two fingers are below the arrow
Rotate bow to vertical position with left arm parallel to ground
Extend left arm and draw the string toward body with right hand
82

Task/Criteria Acceptable Not Acceptable
1. _____ _____
2. _____ _____
3. _____ _____
4. _____ _____
Anchoring and Holding
Bow is to be held in correct vertical position as if ready to fire
String should touch the nose, lips, and chin
Index finger holding the nock of the string should touch under the center of the chin
83

Task/Criteria Acceptable Not Acceptable
1. _____ _____
2. _____ _____
3. _____ _____
Pre-Post Test Score Card
Students will nock, extend and draw, and anchor a bow and arrow correctly 4 out of 5 times.
1.2.3.4.5.
Students will demonstrate the correct way to aim, correct releasing or arrow, and correct ways to
retrieve arrows 4 out of 5 times.
1.2.3.4.5.
Students will perform the proper breathing patterns, correct way of holding a gun, and the standing
position 4 out of 5 times.
1.2.3.4.5.
Students will demonstrate the correct way to point and aim the gun, and correct ways of loading the
guns 4 out of 5 times.
1.2.3.4.5.
84

Students will demonstrate the correct ways of holding the rod, and how to store them safely 2 out of 3
times.
1.2.3.
Students will cast the fly fishing rod and reel with proper form 4 out of 5 times.
1.2.3.4.5.
Testing Styles
Skills Tests
o Multiple Choice
o True/False
o Fill in the Blank
Reciprocal Task Sheets
Glossary
Archery
Arm guard- protective cover for the lower part of the bow.
Back- the side of the bow away from the body and facing the target.
Belly- the inside of the bow; the side facing the string.
85

Bow sight- a device attached to the bow used for aiming.
Crest- marks identifying the arrows.
Face- front of the target.
Fletch- to place feathers on arrow.
Head- the pile tip of the arrow.
Hen feathers- two similar colored feathers on the arrow.
Index feather- the feather of an arrow set as the right angle to the nock.
Loose- the release of the bowstring after the draw.
Nock- the grove at the end of the arrow.
Nocking point- the point on the string at which the arrow is placed.
Petticoat- target facing the outside rings.
Quiver- a device to hold the arrows.
Tackle – archery equipment.(Mood, Musker, & Rink, 2007)
Gun
Butt- the part of the stock that you hold against your shoulder when shooting.
Stock- handle of the firearm
Safety- device that blocks the trigger or hammer to prevent from firing.
Bolt handle- used to open a bolt action.
Bolt- metal block that seals a cartridge into the chamber on some actions.
Chamber- base of the barrel used to hold the cartridge or shotshells ready for shooting.
Sight- device used for aiming.
Trigger guard- piece that surrounds the trigger to protect it from being squeezed or bumped.
Trigger- small lever that is pulled to fire the gun.
86
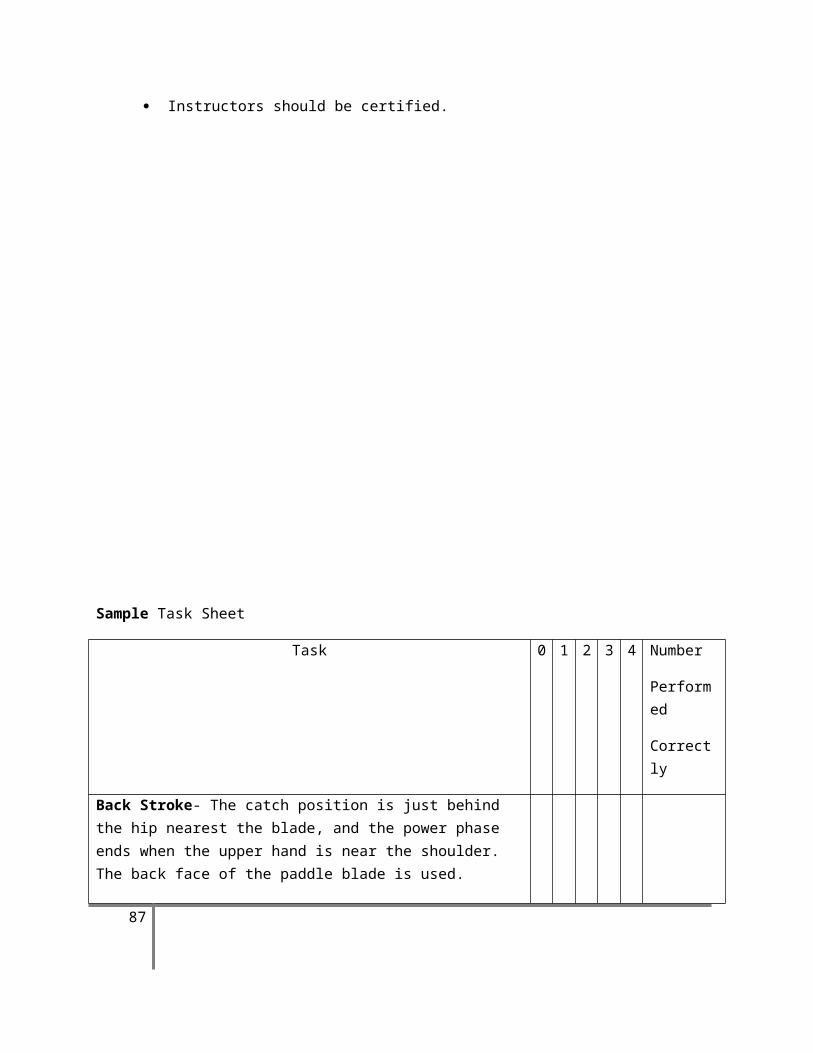
Barrel- metal tube through which the bullet travels.
Muzzle- end of the barrel through which the projectile exist. (Today's Hunter, 2006)
Fishing
Rod- device that the reel and line goes through.
Reel -Part of rod that the line comes out of.
Hook- device used to catch fish
Lure- type of insect of bug, either artificial or live used to catch fish.
Weights- part of line that allows the lure to sink.
Spinner bait- lure that spins under the water.
Top water lure- lure that runs across the water.
Ball bearings- part of reel that allows it to move with ease and not making noise.
References
Mood, D, Musker, F, & Rink, J (2007). Sports and Recreational Activities 14th Edition. New York: McGraw
Hill Companies, Inc..
Summers, D. (2007). The Sports Book. New York: Dorling Kindersley.
Today's Hunter. (2006). A Guide to Hunting Responsibly and Safely . U.S.A.: Kalkomey Enterprises, Inc.
87

Gymnastics
Table of Contents
History
Values, Interests, Objectives, and Why Selected
Safety
Scope and Sequence
Modifications/Considerations
Culminating Activity
Sample Task Sheet/Pre-Post Test Score Card/Test Styles
Glossary
References
88

History
In ancient Greece, gymnastics was considered a men’s only sport. Women were not even
allowed inside the stadium. This might be because the word gymnastics comes from the Greek word
gymnos which means “naked”. Still, before the Olympic Games were founded, gymnastics was being
practiced on the island of Crete. Athletes performed gymnastics solely to train for other sports, mainly
wrestling and athletics. Later, it was also used for military training (Goodbody, 1982).
At the beginning of the Renaissance, keeping fit was not of importance. During the Renaissance,
writers slowly were realizing that there were many health benefits so they started stressing the need for
exercise. A man named Johann Freidrich GutsMuths added climbing, balancing, marching and more
military drills to gymnastics. His aim was to engage as many young people as possible in this sport
(Goodbody, 1982).
Gymnastics got its big debut in the 1986 Olympics. The events incorporated horizontal bar,
parallel bars, vault, rings, and pommel horse. But the U.S. women did not get to compete until the 1936
Olympics in Berlin. In the 1954 Olympics, the points system had been established along with many of the
events we see today.
89

Value, Interests, Objectives, Why Selected
During the gymnastics portion of class I want students to understand the historical aspects of
tumbling and gymnastics. They need to recognize the magnitude of safety and spotting and be able to
state the basic rules and meet structure for gymnastics. Furthermore they will be able to understand
the fundamental skills of parallel, floor, uneven bars, and the balance beam and be able to demonstrate
basic tumbling skills.
The reason gymnastics was selected is because it is a different way to achieve and maintain
fitness through muscular strength, flexibility, and endurance and for students to become aware of their
bodies (Mood, Musker, and Rink, 2007)
90

Safety
All equipment needs to be inspected on a regular basic to make sure there are no dangers.
Mats need to be placed around all apparatus, making sure the edges do not overlap anywhere.
Activities are performed in a progression from easiest to hardest to prevent injury.
Spotting is necessary for all tumbling and apparatus work.
When using bars, chalk or grips should be used on hands to prevent slipping and blisters.
Warming up is essential in order to prevent injury.
Horsing around is prohibited.
(Mood, Musker, and Rink, 2007)
91

Skills and Drills
Vault:
1. Squat Vault- Employ a two foot takeoff. As the palms of the hands touch the horse shove down. Draw knees to the upper body. The whole body should move over the top of the horse and during the landing, extend arms for balance.
2. Side Vault- Also called a flank vault. Uses the two foot takeoff again and instead of both feet coming to the chest, they extend to the side with toes pointed.
3. Straddle Vault- Use a two foot takeoff, the body should pass over the top of the horse with the legs straddling it. Knees should stay flexed during landing. (Mood, Musker, and Rink, 2007)
Parallel Bars:
1. Run and Jump to Cross Support- Run and jump onto bars while keeping arms straight.
2. Hand Traveling- Traveling down the bars moving hand over hand. Keep toes pointed.
3. Bicycle Riding- Hand traveling while moving legs alternately in a bicycle motion.
4. Intermediate Swing- Keeping toes pointed, swinging back and forth.
5. Intermediate Swing with a Hop- Just like the intermediate swing, but when reaching the highest point, hop. (Mood, Musker, and Rink, 2007)
Floor Exercises:
1. Toe Rise- Standing on floor, rise up on toes and extend hands to the sides with palms down.
2. Split- Start with one leg in front of the other and slide down the floor.
3. One Leg Balance- Start in standing position. Lift one leg off the ground in front of you at a 15 degree angle, if that is too easy, then try 30, 45, and 90 degree angle.
4. Arabesque- Start in a standing position and lift one leg off the ground behind you. Make your back as straight as possible. Holding arms out to the sides can help with balance.
5. Side Scale- Start in a standing position and lift one leg off the ground to the side of your body at angle. Hold arms out to the sides of your body will help with balance.
6. Tripod- Bending down on your knees, place hands shoulder width apart on the mat. Place head on the mat so that your head and hands make a triangular shape. Raise hips up and place knees on your elbows while balancing on your head.
92

7. Head Stand- A head stand can be started out of a tripod. After you get done balancing knees on your elbows, lift legs all the way in the air, keeping them straight and pointing your toes. T his may require a spotter to grab your ankles as you lift them into the air so you don’t lose balance.
8. Back Bridge- Lie down on the mat with your knees bent. Put hands palms down at your ears so your elbows are pointing towards the ceiling. Push up off the ground with arms and arch back to come to a bridge position. Lift head off the ground once the back is completely arched.
9. Back Bridge Walk Over- The back bridge walk over starts just the same as the back-bridge. Get into the back-bridge, lift the leg you are going start with off the ground and push off with the supporting leg. Straighten legs as you go into a handstand position then your leading leg should come down first followed by the other. (Mood, Musker, and Rink, 2007)
Tumbling:
1. Spinal Rock- Lay on back with knees to chest. Arch back. Rock back and forth slowly.
2. Forward Roll Over Shoulder- Squat down on the mat. Hands need to be shoulder width apart, palms down. Lean head to one side, tuck chin to their chest, and lower their head to the floor. Arch back and roll over head back to starting position.
3. Backward Roll Over Shoulder- This is performed the same way as a forward roll over shoulder except your back is to the mat, and your hands are head height, palms up waiting to catch yourself as you come over.
4. Forward Roll- Squat down on the mat. Hands need to be shoulder width apart, palms down. Keep head straight this time and tuck your chin to your chest. Lower head to the floor and arch back. Roll over head and land back to a crouching position.
5. Backward Roll- Squat down with back towards mat. Hands need to be head height with palms up. Tuck chin to chest and arch back. Hands need to be ready to catch yourself as you come over. Roll over head and land back to a crouched position.
6. Forward Roll Pike Position- The forward roll pike position starts just the same as the forward roll. Squat down on the mat. Hands need to be shoulder width apart, palms down. Keep head straight this time and tuck your chin to your chest. Lower head to the floor and arch back. Instead of staying in a crouched position at the end of the roll, you will keep your legs straight in front of you and land in a sitting position.
7. Backward Extension Roll- The backward extension roll starts just the same as the forward roll. Squat down with back towards mat. Hands need to be head height with palms up. Tuck chin to chest and arch back. Hands need to be ready to catch yourself as you come over. As your feet get over head, push up with your arms and try to come to a hand stand position.
8. Cartwheel Standing- Reach forward with your right arm, kicking your left leg up as you go. The left hand should follow, and as it touches the ground, your right leg should be off of the ground.
93

Your left leg will reach the ground first, followed by the right, which you will place in back, finishing in a lunge, just as you started.
9. Round Off- A round off starts the same way as a cartwheel, but instead of your legs coming down right after the other, they come down together. You should land with your feet together instead of in a lunge position.
10. Cartwheel Dive/Jogging- A cartwheel dive starts off just like a cartwheel except instead of starting at a standing position you start jogging. Your right arm should go down first kicking over with your left leg. The left hand should follow, and as it touches the ground, your right leg should be off of the ground. Your left leg will reach the ground first, followed by the right, which you will place in back, finishing in a lunge, just as you started.
11. One handed Cartwheel- Your right arm should go down, then kick over quickly with your left leg. The left hand should be crossed across the chest. Your left leg will reach the ground first, followed by the right, which you will place in back, finishing in a lunge, just as you started
12. Ariel- At aerial is like a cartwheel but with no hands. Start at a bit of a jog to build momentum, jump with arms up and face towards the ground. Twist to the opposite direction that you started. You should land with legs slightly bent for balance.
13. Kip From Floor- Lie flat on your back. Bring your knees up to your chin while arching your back. Place your hands palms down next your ears. When you rock back on your shoulder blades, push with your hands as hard as you can while kicking up hard. (Mood, Musker, and Rink, 2007)
94
Scope and Sequence
Day 1: Squat VaultSide VaultStraddle Vault
Day2:Run and Jump to Cross SupportHand TravelingBicycle Riding
Day3:Intermediate SwingIntermediate Swing with a HopToe Rise
Day 4:SplitOne Leg BalanceArabesque
Day 5:Side ScaleTripodHead Stand
Day 6:Back BridgeBack Bridge Walk OverSpinal Rock
Day 7:Forward Roll Over ShoulderBackward Roll Over ShoulderForward Roll
Day 8:Backward RollForward Roll Pike PositionBackward Extension Roll
Day 9:CartwheelRound-offJogging Cartwheel
95
Day 10:One-handed cartwheelArielKip from Floor(Mood, Musker, and Rink, 2007)
96

Modifications
Most of the activities involving gymnastics and tumbling require a lot of core and upper body strength. Some students will not be able to perform everything unless upper body strength is worked on in the unit before.
Tumbling skills need to be learned first because they are the basis for apparatus work
Apparatus work needs to be taught piece by piece with all the students in a group first. Once the skill has been taught and safety rules have been gone over, apparatus work can be done in stations.
Checklists are helpful because they show the skill being performed from simple to more complex. Students will take more time working on form instead of just trying to quickly move through the skill. (Mood, Musker, and Rink, 2007)
97

Sample Task Sheet/Pre-Post Test Score Card/Test Styles
Tumbling Criteria Sheet
Reciprocal Style
Name: ___________________ Period:_______ Date:________________
Observer:
1. Observe the performance using criteria sheet to analyze the performance.2. Offer feedback to the doer.3. Record the results after each component.4. At completion of the task, switch roles.
Sample verbal behavior:
o You did an excellent job remembering all the steps of the partner stunt.o Terrific job!o Excellent job remembering not to bump heads on Wring the Dishrag.
Task/Criteria
Spinal Rock
o Lay on Backo Knees to chesto Keep spine curvedo Rock back and forth
98

Task/Criteria Acceptable Not Acceptable
1. _____ _____
2. _____ _____
3. _____ _____
4. _____ _____
Forward Roll Over Shoulder
o Squat down on mat, hands shoulder width aparto Lean head to side and tuck chin to chesto Lower head to floor and roll over
Task/Criteria Acceptable Not Acceptable
5. ____ _____
6. ____ _____
7. ____ _____
Backward Roll Over Shoulder
o Back is to the mato Elbows bend, hands palm upo Lean head to the side and arch backo Roll over head
99

Task/Criteria Acceptable Not Acceptable
8. ____ _____
9. ____ _____
10. ____ _____
11. ____ _____
Pre-Post Test Score Card:
Student will perform squat vault correctly 4 out of 5 times1.2.3.4.5.
Student will carry out side vault 4 out of 5 times1.2.3.4.5.
Student will execute run and jump to cross support 4 out of 5 times1.2.3.4.5.
Student will perform a split on the floor 4 out of 5 times1.2.3.4.5.
Student will execute a headstand 2 out of 3 times1.2.3.
100

Test Styles: Multiple Choice
Reciprocal Task Sheets
Skill Tests
101

Glossary
Aerial- a stunt where a gymnast does a cartwheel in the air without hands
All-Around- all events in gymnastics
Apparatus- Any of the equipment used in gymnastics
Arch-A position that an individual’s back is in when it’s curved
Back Flip- A skill that consists of taking off on two feet, revolves feet over head, and lands
Beam- A women’s apparatus used for balancing skills
Cartwheel- A stunt in which the gymnast moves sideways (like in the motion of a wheel) alternately placing hands over feet.
Composition- The configuration of a gymnastics routine
Deduction- Points that are taken off of a score in gymnastics for errors during the routine
Dismount- To leave an apparatus at the end of a routine
Flexibility- The range of motion a person can move without feeling discomfort
Layout- Arms fully extended, body stretched out
Pike Position-Body bent at the waist, keeping toes pointed and legs straight
Routine- A combination of skills performed at a time on an apparatus
Sequence- Two or more skills performed at a time.
To “Stick” a Landing- To land stably with exact skill
Scale- To raise one leg while balancing on another
Uneven Bars- Bars made out of fiberglass, a women’s apparatus
Zero- The score you get in an even if you do not compete.
102

References
Goodbody, J (1982). The Illustrated History of Gymnastics. London, England: Hutchinson Publishing Group.
Mood, D, Musker, F, & Rink, J (2007). Sprots and Recreational Activities. New York: McGraw Hill Companies, Inc..
103