vidacode nucleotide puzzle pieces used to model events ... · genotyping, restriction enzymes,...
TRANSCRIPT

Tested Studies for Laboratory Teaching Proceedings of the Association for Biology Laboratory Education Volume 39, Article 15, 2018
© 2018 by Valerie Schawaroch, Mary G. Egan, and Elizabeth Torres 1
VidaCode TM Nucleotide Puzzle Pieces Used to Model Events during Polymerase Chain Reaction (PCR) and Sanger Sequencing of DNA
Valerie Schawaroch 1, Mary G. Egan 1, and Elizabeth Torres 2
1 Baruch College, Department of Natural Sciences Box A-0506, One Bernard Baruch Wy, New York NY 10010 U.S.A. 2 Department of Biological Sciences, California State University Los Angeles, 5151 State University Dr, Los Angeles CA 90032 U.S.A. ([email protected]; [email protected]; [email protected])
Learning is enhanced when more than one sensory modality is used. Here we present VidaCodeTM 3-D puzzle pieces that represent DNA nucleotides and dideoxy nucleotides, and exercises that use visual and kinesthetic senses to teach Polymerase Chain Reaction and Sanger sequencing for high school or college biology students. Each nucleotide puzzle piece has a unique shape and color. Initially, students self-guide assembly of puzzle pieces to discover features of DNA structure. Student groups then build primers and a double-stranded DNA molecule and use them to model the events that occur in the first three cycles of PCR and in Sanger sequencing. For sequencing, groups of students collaborate and class results are pooled to complete the model. Detailed instructions are provided and include embedded questions for assessment. VidaCodeTM also can be used to improve understanding of DNA replication, additional sequencing technologies, genotyping, restriction enzymes, primer design, and DNA cloning.
Keywords: Visual learning, kinesthetic learning, DNA, puzzle, PCR, Sanger sequencing, VidaCode TM
Link to Supplemental Materials: http://www.ableweb.org/volumes/vol-39/Schawaroch/supplement.htm
Introduction
Seemingly simple tools can have a profound effect on student learning. For example, we (and many other educators) have found that pipe cleaner models of chromosomes greatly improve student understanding of the processes of mitosis and meiosis. Students seem to gain a clearer understanding and retain information for longer time periods when they are actively engaged in the learning process. Using multiple sensory modalities and engaging the mind through exploration and discovery empowers students in the learning process. Learning is further enhanced when students share the experience with their peers. The 21st century is the age of genomics and it is important that students gain a clear understanding of DNA and biotechnology applications. We are introducing VidaCode™, a 3-dimensional self-guided puzzle, to improve understanding of DNA structure and
biotechnology applications through active engagement and exploration.
Rather than using traditional approaches of teaching DNA structure and synthesis with animations or diagrams, student groups are given the VidaCode™ puzzle pieces to discover DNA structure. Each puzzle piece has a unique color and shape, representing each of the four nucleotide bases. As they assemble the puzzle, students discover the details of structure such as the difference between purines and pyrimidines, directionality, base pairing rules, and covalent and hydrogen bonding. Each piece has directionality represented by the arrow shapes of the pieces: the apex of each “arrow” represents the 3’ end of the nucleotide, and the 5’ end of each nucleotide is indented and fits onto the “arrow”. They discover complementarity and base pairing rules when they build double strands that interlock with each other; only specific combinations of VidaCode™ puzzle pieces will interlock to form a double strand. Students can distinguish triple versus double hydrogen bonding in the double strand by

Major Workshop: VidaCode TM Puzzle
2 Tested Studies for Laboratory Teaching
the number and shapes of the indentations and projections linking complementary bases. The parts of the puzzle representing hydrogen bonds in a double helix are more easily pulled apart than the parts of that represent the covalent bonds in the sugar-phosphate backbone of a single strand.
After students become familiar with the puzzle pieces and DNA structure, they use them to model PCR (Mullis and Faloona, 1987) and Sanger sequencing (Sanger et al., 1977). They build short DNA primers and simulate denaturation of the double strands, annealing of primers to template, and elongation of the strand. For Sanger sequencing, they use transluscent dideoxy nucleotide puzzle pieces that are missing the notch on the 3’ end to simulate cycle sequencing. Once one of the ddNTPs is randomly incorporated into the growing strand, no further
nucleotides can be added, modeling the chain termination that occurs in Sanger sequencing. Groups pool the information from their sequenced fragments with the class in order to generate a full-length DNA sequence.
The VidaCode™ puzzle is still in the development phase, with prototype sets being used by the authors in their introductory biology courses. We have improved the puzzle pieces since the first beta-testing at the ABLE workshop and continue to work on the design and manufacturing to improve accessibility, reduce the cost of the puzzle, and construct the puzzle from recycled materials. The VidaCode™ puzzle is a seemingly simple tool, but is a promising new approach for teaching DNA structure and biotechnology applications.
Schawaroch, Egan, and Torres
Proceedings of the Association for Biology Laboratory Education, Volume 39, 2018 3
Student Outline
Objectives • Identify aspects of DNA structure including chemical components and directionality• Identify the nucleotides in a DNA strand that is complementary to a specific template.• Use primers and nucleotides to complete a simulation of the first three rounds of PCR.• Explain what happens during the three steps of a PCR cycle• Explain the difference in chemical structure of deoxy- and dideoxynucleotides (dNTPs and ddNTPs).• Use primers and mixtures of dNTPs and ddNTPs to simulate Sanger sequencing reactions• Explain how Sanger sequencing can be used to visualize and determine the bases in a DNA strand
Introduction Biotechnology applications are being developed at a much faster rate than they were for the first few decades after the
structure of DNA was described in the 1950’s (Crick and Watson, 1953). Prior to the development of the Polymerase Chain Reaction (PCR; Mullis and Faloona, 1987), researchers had to clone fragments of DNA into bacteria to make enough copies to perform Sanger sequencing reactions (Sanger et al., 1977) and determine the sequence of bases in a part of the genome. Sanger sequencing was the most popular method of sequencing for decades. In the earlier years, people used radioactivity to label nucleotides for detection but that was eventually replaced by fluorescent labeling that was safer and more sensitive. These advances in technology led to the determination of sequences of whole genomes, the use of DNA markers in forensics, and the wide use of DNA sequences for reconstructing the tree of life and relationships among species and populations. Many of the very recently developed DNA technologies are fluorescent based and require DNA synthesis at some stage in the procedure. In this exercise, you will use VidaCode™ puzzle pieces to learn details of nucleotide structure, and how nucleotides bind to each other in single stranded and double stranded DNA. The exercise is designed as a discovery exercise, with your instructor guiding you through the exploration. After you are experienced with the puzzle pieces and understand how they represent the chemical structure of DNA, you will simulate three cycles of PCR and model Sanger DNA sequencing. Throughout the exercise, you will learn by assembling the puzzle and answering the questions that are embedded in the worksheet.
Methods and Data Collection PART I: Familiarization with the Puzzle Pieces and How They Symbolize the DNA Nucleotide Bases A. Look carefully at each puzzle piece. Pick two pieces of each color. Connect the pieces so that they interlock like shapes in a jigsaw puzzle. Share the way that you connected your puzzle pieces with the other groups and the instructor.
B. Complete Figure 1. Discuss with your classmates. Label each nucleotide (Hint: A is green). Identify and/or describe the aspects of the puzzle pieces that represent:
a. sugar-phosphate backboneb. covalent bondsc. hydrogen bondsd. the 5’ end of the strande. the 3’ end of the strandf. purinesg. pyrimidines

Major Workshop: VidaCode TM Puzzle
4 Tested Studies for Laboratory Teaching
Figure 1. Shapes of the four VidaCodeTM deoxynucleotide puzzle pieces.
C. Once a double helix is assembled. Try to slide the puzzle pieces apart to see if one aspect easily separates. Use the terminology in Part 1B to complete the following sentences: The side representing the _______________ bonds slides apart. The side representing the _______________ bonds does not slide apart.
PART II: Application of Puzzle Pieces to Simulate the Polymerase Chain Reaction (PCR) Setting Up Double Stranded DNA Template and Primers for PCR
A. Using the puzzle pieces, make a single DNA template strand with the sequence in Figure 2. This is oriented from 5’ to 3’
Figure 2. Sequence of DNA template strand.
B. Make a single strand complementary to the DNA template strand with puzzle pieces and fill in the boxes in Figure 3 showing the sequence you created. Reading left to right this strand is oriented 3’ to 5’.
Figure 3. Sequence of strand that is complementary to DNA template strand.
C. Make two small DNA strands to simulate primers: 1. One 5’ to 3’ direction with the sequence CATTAPlace a piece of masking tape labeled “right primer” on the flat side that does not interlock with other puzzle pieces. 2. One 5’ to 3’ direction with the sequence TCACGPlace a piece of masking tape labeled “left primer” on the flat side that does not interlock with other puzzle pieces. 3. Repeat C1 – C2 until you have created a total of six primers, three of each kind.
Schawaroch, Egan, and Torres
Proceedings of the Association for Biology Laboratory Education, Volume 39, 2018 5
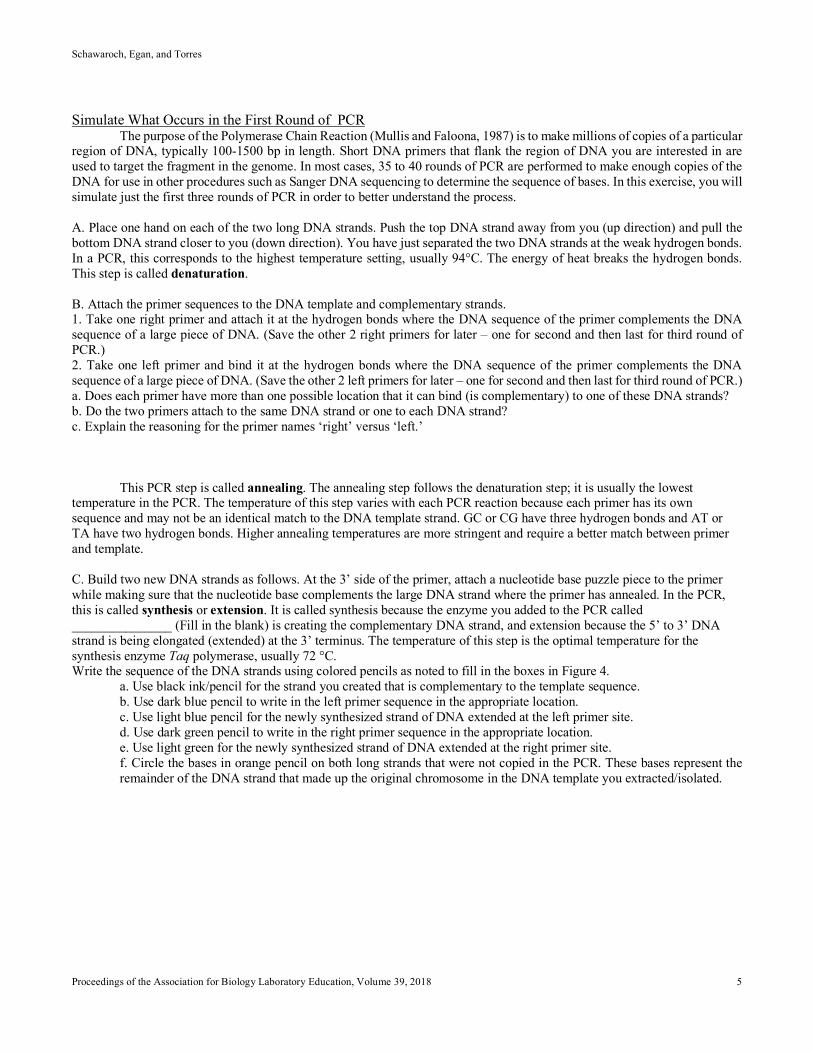
Simulate What Occurs in the First Round of PCR The purpose of the Polymerase Chain Reaction (Mullis and Faloona, 1987) is to make millions of copies of a particular
region of DNA, typically 100-1500 bp in length. Short DNA primers that flank the region of DNA you are interested in are used to target the fragment in the genome. In most cases, 35 to 40 rounds of PCR are performed to make enough copies of the DNA for use in other procedures such as Sanger DNA sequencing to determine the sequence of bases. In this exercise, you will simulate just the first three rounds of PCR in order to better understand the process.
A. Place one hand on each of the two long DNA strands. Push the top DNA strand away from you (up direction) and pull the bottom DNA strand closer to you (down direction). You have just separated the two DNA strands at the weak hydrogen bonds. In a PCR, this corresponds to the highest temperature setting, usually 94°C. The energy of heat breaks the hydrogen bonds. This step is called denaturation.
B. Attach the primer sequences to the DNA template and complementary strands. 1. Take one right primer and attach it at the hydrogen bonds where the DNA sequence of the primer complements the DNAsequence of a large piece of DNA. (Save the other 2 right primers for later – one for second and then last for third round of PCR.) 2. Take one left primer and bind it at the hydrogen bonds where the DNA sequence of the primer complements the DNAsequence of a large piece of DNA. (Save the other 2 left primers for later – one for second and then last for third round of PCR.) a. Does each primer have more than one possible location that it can bind (is complementary) to one of these DNA strands?b. Do the two primers attach to the same DNA strand or one to each DNA strand?c. Explain the reasoning for the primer names ‘right’ versus ‘left.’
This PCR step is called annealing. The annealing step follows the denaturation step; it is usually the lowest temperature in the PCR. The temperature of this step varies with each PCR reaction because each primer has its own sequence and may not be an identical match to the DNA template strand. GC or CG have three hydrogen bonds and AT or TA have two hydrogen bonds. Higher annealing temperatures are more stringent and require a better match between primer and template.
C. Build two new DNA strands as follows. At the 3’ side of the primer, attach a nucleotide base puzzle piece to the primer while making sure that the nucleotide base complements the large DNA strand where the primer has annealed. In the PCR, this is called synthesis or extension. It is called synthesis because the enzyme you added to the PCR called _______________ (Fill in the blank) is creating the complementary DNA strand, and extension because the 5’ to 3’ DNA strand is being elongated (extended) at the 3’ terminus. The temperature of this step is the optimal temperature for the synthesis enzyme Taq polymerase, usually 72 °C. Write the sequence of the DNA strands using colored pencils as noted to fill in the boxes in Figure 4.
a. Use black ink/pencil for the strand you created that is complementary to the template sequence.b. Use dark blue pencil to write in the left primer sequence in the appropriate location.c. Use light blue pencil for the newly synthesized strand of DNA extended at the left primer site.d. Use dark green pencil to write in the right primer sequence in the appropriate location.e. Use light green for the newly synthesized strand of DNA extended at the right primer site.f. Circle the bases in orange pencil on both long strands that were not copied in the PCR. These bases represent theremainder of the DNA strand that made up the original chromosome in the DNA template you extracted/isolated.

Major Workshop: VidaCode TM Puzzle
6 Tested Studies for Laboratory Teaching
Figure 4. Results of the first round of PCR.
Simulate What Occurs in the Second Round of a PCR Now you have two long strands of DNA. Each strand is made up of original template/complementary DNA with
newly synthesized DNA created in the first round of the PCR reaction.
A. Step 1: Denature (PCR reaction at 94 °C) by separating the puzzle piece DNA strands from one another at their weak ___________ bonds. (fill in the blank)
For the following steps to make it easier to work with and visualize, we will only work with the newly created DNA strands (corresponding to one created using the left primer, i.e., dark blue - light blue strand and the other created by the right primer the dark green – light green strand). The original template DNA and its complementary strand you may disassemble into the individual nucleotide bases and place them in your box to use again.
B. Step 2: PCR annealing step. This temperature varies based upon ____________________ (fill in the blank). Take one left primer and one right primer and place it along the large DNA strands where it complements the nucleotide bases of the DNA strand.
C. Step 3: The PCR synthesis/extension step. This occurs at _______ °C, which is optimal for the ________ polymerase enzyme. Synthesize two new DNA strands as you did above starting at the 3’ end of each primer and complementing the DNA nucleotide bases.
D. Fill in the boxes in Figure 5 to record what you have just done with the puzzle pieces. Keep the primer colors as they were above. Therefore, the dark blue primer sequence 5’ to 3’ is CATTA and the dark green primer sequence 5’ to 3’ is TCACG. However, this time use pink pencil for the newly generated strand extended from the dark blue primer, and use purple pencil for the newly generated strand extended from the dark green primer. Circle the bases in the blue strand (dark and light) that were not copied by the PCR reaction with orange pencil. Circle the bases in the green strand (dark and light) that were not copied by this PCR reaction with orange pencil. These bases represent the remainder of the DNA strand that made up the original chromosome in the DNA you extracted.
Figure 5. Results of the second round of PCR.

Schawaroch, Egan, and Torres
Proceedings of the Association for Biology Laboratory Education, Volume 39, 2018 7
Simulate What Occurs in the Third Round of a PCR Now you have two long strands of DNA. Each strand represents a double helix of DNA. One of the double helix DNA
strands was created in the first round of the PCR (the dark blue-light blue strand above). Bound to it is the complement created in the second round of the PCR (the dark green - purple strand). The other double helix is also composed of first round and second round PCR strands (dark green - light green bound to dark blue-pink strand).
A. Separate the puzzle DNA strands that you have just completed at the end of the second round of the PCR reaction. This is “Step 1”: called ________________. This occurs when the PCR reaction temperature is ___ °C. In the space below, describe what is happening to the DNA strands.
For the following steps, to make it easier to work with and visualize, we will only work with the most recently created DNA strands (the dark blue-pink strand and the dark green-purple strand created in the second round of the PCR reaction). For the “discarded” DNA strands keep the primers to be used again and disassemble the individual nucleotide bases and place in your box to use again.
B. Using the puzzle pieces, appropriately position each of the two primers. This is “Step 2”: called ________________. Describe what is happening to the DNA strands. How might increasing or decreasing the temperature affect the primer specificity?
C. Using the puzzle pieces, elongate the strands as you have done previously. This is “Step 3”: called __________________________. The temperature is _______ °C.
Describe what is happening to the DNA strands.
D. Fill in the boxes in Figure 6 to draw what you have just done with the puzzle pieces. Keep the dark – blue pink strand and the dark green – purple strand. Use black pencil for the nucleotide bases for both the newly synthesized complementary DNA strands and their respective primers.
Figure 6. Results of the third round of PCR.

Major Workshop: VidaCode TM Puzzle
8 Tested Studies for Laboratory Teaching
PART III. Sanger DNA Sequencing Comparison of dNTP and ddNTP Puzzle Piece Shapes
Trace one DNA nucleotide base and one dideoxy DNA nucleotide base of the same color (one opaque and the other translucent) in the space below. Place the images side-by-side flat edge up (5’ to 3’ position).
1. Draw an arrow pointing to the feature that is different between the two shapes.2. What does this feature represent?3. Compare all the DNA nucleotide bases with their corresponding dideoxy DNA nucleotide bases. Do they all vary in thesame feature as in part ‘a’ above? Yes or No. (Circle one). 4. How does this change alter the ability to interconnect puzzle pieces?
Simulation of Sanger Sequencing Reactions Sanger sequencing (Sanger et al., 1977) uses similar technology to PCR but differs in two ways: 1) Instead of copying
both strands of the double helix, only a single strand is copied at a time. This is accomplished by adding only a single primer to the reaction (Note: In general, paired reactions would be set up to independently sequence both strands but this simulation will only sequence one strand); and 2) In addition to the regular nucleotides, a percentage of each nucleotide is replaced by dideoxy (chain terminating) nucleotides. By randomly incorporating dideoxy nucleotides (ddNTPs) and thereby terminating the growth of the chain a population of sequences of varying lengths will be generated. These would then be separated by electrophoresis and the sequence of the strand recorded. In practice, these ddNTPs are fluorescently labeled which allows them to be detected by a laser during subsequent electrophoresis.
In this simulation, each group of students will simulate cycle sequencing and record the results of three amplifications to generate a pool of sequences. Groups of students will pool their results with the rest of the class and the class will organize these single stranded fragments by length, in the order that they would appear in an acrylamide gel in order to determine the sequence of the DNA strand.
A. Build a template strand for sequencing with the sequence and orientation in Figure 7:
Figure 7. Sequence of DNA template strand for Sanger sequencing reactions.
You may notice that this strand is one of the strands that you made during the PCR simulation.
B. Make three copies of the “left” primer for sequencing with the following sequence: 5’ TCACG 3’
C. Prepare a mixture of nucleotides for sequencing as follows: Set up four zipper bags labeled A, G, C and T (each containing all the remaining deoxynucleotides of that color). Add 10 translucent ddNTPs of the corresponding color to each bag of dNTPs [You should have 4 bags, one for each color]. You can distinguish ddNTPs from dNTPs by observing differences in color and shape. As you discovered earlier, puzzle piece ddNTPs are translucently colored versions of the corresponding dNTPs and lack the indentation (representing the hydroxyl group of the deoxyribose 3’ carbon) required for incoming nucleotides to covalently bond.
D. Simulate the cycle sequencing reaction as follows: 1. Cycle 1: Perform the three steps (denaturation, annealing, and extension) you learned for PCR reactions using the templateand primer you built in parts A and B of this section and the bags of mixed dNTPs/ddNTPs you just made. To obtain nucleotides for this extension step, mix the contents of the appropriately lettered bag, reach in to it and randomly remove one puzzle piece at a time to incorporate into your growing strand.

Schawaroch, Egan, and Torres
Proceedings of the Association for Biology Laboratory Education, Volume 39, 2018 9
What happens when you incorporate a ddNTP rather than a dNTP into your strand? Are you able to extend your copy to the end of the template strand during each cycle? If not, explain why not.
2. Set aside and save your copied DNA strand (you may use masking tape to keep the puzzle pieces from separating).3. Cycles 2 and 3: repeat the denaturation, annealing, and extension steps two more times for a total of three cycles, savingyour DNA strands each time. If time allows, your instructor may ask you to complete more cycles. 4. If you were performing a sequencing reaction in the laboratory, at this stage you would have a tube that contains millions ofpieces of DNA of all different lengths. In order to determine the sequence of bases, additional steps are needed. First, the fragments would need to be sorted by size (often by gel electrophoresis) and the color of the bases detected by a laser. 5. Before proceeding further, review information about gel electrophoresis and answer the following questions. Check youranswers with the lab instructor. Your instructor may show you this brief video from the Cold Spring Harbor Dolan DNA Learning Center (https://www.dnalc.org/view/15921-Gel-electrophoresis.html) to help you recall some information about gel electrophoresis.
a. When a current is applied to a gel, DNA fragments migrate towards the ___________ electrode.b. This is because DNA has a net _____________ charge.c. The _____________ sized DNA fragment will travel furthest from the well.
6. Now that you understand how DNA fragments migrate through a gel placed under an electric current. Arrange the classfragments in the order that they would have migrated in the acrylamide gel. 7. Now you are ready to determine the sequence of bases in the fragment you sequenced. Remember, in real world applicationsyou would only know the primer sequences. The goal is to determine the sequence of bases between the two primers. Based on the class results, write the sequence of bases in 5’ to 3’ direction and underline the primer sequence.
Cited References
Crick F, Watson JD. 1953. Molecular structure of nucleic acids: a structure for deoxyribonucleic acid. Nature. 171:737-738.
Mullis KB, Faloona FA. 1987. Specific synthesis of DNA in vitro via a polymerase-catalyzed chain reaction. Methods Enzymol. 155:335-350.
Sanger F, Nicklen S, Coulson AR. 1977. DNA sequencing with chain-terminating inhibitors. Proc Natl Acad Sci. 74:5463–5467.

Major Workshop: VidaCode TM Puzzle
10 Tested Studies for Laboratory Teaching
Materials
A set of puzzle pieces (inquire with first author for ordering information) is required for group of 4-5 students.
There Are 8 Different Puzzle Pieces: 1. Deoxynucleotide A made with green opaque plastic2. Dideoxynucleotide A* made with translucent greenplastic 3. Deoxynucleotide T made with opaque red plastic4. Dideoxynucleotide T* made with translucent red plastic5. Deoxynucleotide C made with opaque blue plastic6. Dideoxynucleotide C* made with translucent blueplastic 7. Deoxynucleotide G made with opaque yellow plastic8. Dideoxynucleotide G* made with translucent yellowplastic
Part I: Familiarization with Puzzle Pieces Students should work in groups of 4.
Part II: Simulation of PCR Students should work in groups of 4. Each group will need:
• Masking tape for labeling primers.• Colored pencils – dark blue, light blue, dark
green, light green, orange, pink, purple• Pen and pencil• 76 pieces of deoxynucleotide A• 77 pieces of deoxynucleotide T• 44 pieces of deoxynucleotide C• 45 pieces of deoxynucleotide G
Part III: Simulation of Sanger Sequencing Students should work in groups of 4-5 students. Each group will need:
• 4 Zipper bags for mixing dNTPs with ddNTPs• Masking tape for labeling primers• 76 pieces of deoxynucleotide A• 10 pieces of dideoxynucleotide A*• 77 pieces of deoxynucleotide T• 10 pieces of dideoxynucleotide T*• 44 pieces of deoxynucleotide C• 10 pieces of dideoxynucleotide C*• 45 pieces of deoxynucleotide G• 10 pieces of dideoxynucleotide G*
Notes for the Instructor
Familiarization with the Puzzle Pieces For this activity students are provided with
unlabeled puzzle pieces to allow them to discover the structure of DNA and rules of nucleotide base pairing. Have students work in groups of four. Because the puzzle
pieces are self-guiding, students can assemble the shapes without instruction. Usually, single linear strands are assembled before the double helix. Allow approximately 5 minutes for students to observe the puzzle pieces and answer the questions on their student worksheet.
If students need guidance to assemble the strands, tell them to orient all of the pieces with the flat edge along the bottom side and ask if they see how pieces might fit into one another. If students need guidance to see base pairing and the double helix (especially if students assembled all the puzzle pieces in a linear strand), point out that that edge opposite of the flat side has features that can interlock with other pieces. Ask the students to create a double strand.
After students complete this section of the worksheet, have students discuss in groups what the colors and shapes on each nucleotide represent. Encourage students to convert the color and shape information into the formal names for: 1) the parts of the nucleotide, 2) rules of complementary base pairing, 3) distinctions between purines and pyrimidines, 4) growing strand directionality, and 5) the relative strengths of the covalent and hydrogen bonds which permits DNA copying. Give a brief writing pause for each student to synthesize this information in his/her notes. Have group members share this information and lead a discussion with the class before moving on to the simulations of the polymerase chain reaction (PCR; Mullis and Faloona, 1987) and Sanger sequencing (Sanger et al., 1977).
Description of Puzzle Pieces Each piece has directionality represented by the
arrow shapes of the pieces. The apex of each “arrow” represents the 3’ end of the nucleotide (Figure 8). The 5’ end of each nucleotide is indented and fits onto the arrow. Thus, new nucleotides are added to the 3’ end of the growing strand. The entire shape with the exception of the nitrogenous base that does the hydrogen bonding represents the sugar-phosphate backbone (students should have labeled this “a” in the student handout). Covalent bonds (“b” in student handout) occur within the arrow aspects. Specifically, the indentation in the 3’side represents the 3’carbon hydroxyl group on the deoxyribose sugar covalently bonding with the extension on the 5’side that represents the phosphate group on the 5’carbon of the deoxyribose sugar of the next DNA nucleotide base. Hydrogen bonds (“c”): two for the A-T and T-A base pairing and three for the G-C and C-G base pairing. The 5’ end of the strand (“d”) is the edge that accepts the “arrow.” The 3’ end (“e”) of the strand is the edge with the “arrow.” Purines (“f”) are the A and G nucleotide bases. These accept the extensions of the T and C respectively. Pyrimidines (“g”) are the T and C nucleotide bases. These have the extensions that are accepted by the A and G nucleotide bases respectively.

Schawaroch, Egan, and Torres
Proceedings of the Association for Biology Laboratory Education, Volume 39, 2018 11
Figure 8. Labeled diagram of VidaCodeTM nucleotide puzzle pieces showing how students should have labeled the parts.
5’ to 3’ Strand Directionality
The overall appearance of the arrows gives the 5’ to 3’ directionality of each strand and when two strands of the double helix are connected the two strands are antiparallel (run in opposite directions, Figure 9). The 3’ end of the nucleotide contains an indentation, which accepts the extension of the 5’ end of the nucleotide. This aspect represents the 3’ carbon on the deoxyribose sugar covalently bonding with phosphate group that is connected to the 5’ carbon of the deoxyribose sugar. Puzzle pieces assembled into single strands cannot be pulled apart just as the carbon bonds are not broken during DNA replication in vivo and in vitro (e.g., PCR). The kit also has dideoxy DNA nucleotides that can be used to simulate chain termination of Sanger sequencing. The dideoxy DNA nucleotides lack the indentation (representing the 3’carbon) required for incoming nucleotides to covalently bond.
Figure 9. Photograph of student model of double-stranded DNA made while working through the student handout. The image shows complementary base pairing and directionality of each strand. It also shows the amount of desk space each group of students would need for this VidaCodeTM PCR exercise.
Complementary Base Pairing
Each of the pieces is distinct and can only fit together with its exact match (complementary base pair). For example, one of each pair has an indented surface and
the other has surface projections. In fitting them together, students will notice that some (A and T) fit together with two interdigitations (Figures 8 and 9). These represent the two hydrogen bonds that occur between Adenine and Thymine. Guanine and Cytosine fit together with three interdigitations. In addition, purines (A and G) may be distinguished from pyrimidines (T and C) in that the purines have indented surfaces representing the hydrogen bonds while pyrimidines use projections to represent for the hydrogen bonds. Within the puzzle the DNA strands can easily be slid apart at the ‘hydrogen bonds’ just as it occurs during DNA replication in vivo and in vitro. The flat edge of each piece represents the phosphate backbone. The colors used are the same as the colors for fluorescently labeled DNA sequencing red for T, green for A, blue for C, and yellow for G. Simulation of the Polymerase Chain Reaction (PCR)
In the preceding part of the exercise, students will have explored the shapes and fits of the pieces in order to discover the structure and function of nucleotides. Because this is designed as a discovery rather than a memorization exercise, nucleotide puzzle pieces are intentionally unlabeled as to their identity. However, once students have discovered the identities of each nucleotide in the initial part of the lab exercise they may find it a useful memory aid to label the puzzle pieces using a dry erase whiteboard marker. We recommend using a dry erase whiteboard marker rather than a permanent marker.
Using a whiteboard marker ensures that at the end of the lab students can easily wipe off the labels with a paper towel. We do not recommend the use of permanent markers for labeling because the solvents that would be required to remove permanent marker labels would likely damage the surface of the puzzle pieces. Students may choose to label one of each nucleotide and place them on the desk for a convenient reference. Alternatively, students may choose to label each nucleotide in each strand that they build. We recommend the former as a more efficient procedure.
In this part of the exercise, student groups will follow the instructions to build a template strand of DNA and its complementary strand. They will also need to build a “right” and “left” primer. We have designed these primers in such a way that due to their sequence and 5’ to 3’ directionality, each primer will be complementary to only one location on one strand. Allow sufficient time for students to find the location where each primer will bind. If they need assistance, suggest they try rotating the primer and seeing if it matches the other strand.
During this time instructors may wish to prompt students to think about and discuss the importance of primer sequence length and sequence specificity. For example, we have made short primers (5 bases long) for demonstration purposes. They are sufficiently long for the

Major Workshop: VidaCode TM Puzzle
12 Tested Studies for Laboratory Teaching
demonstration because they will only bind in one place. However, they would not be long enough for in vitro PCR. Primers for in vitro studies are generally 20-22 base pairs long and the 3’ end has a ‘G’ or ‘C.’ Students can be encouraged to discover why this is by asking them what they think would happen if the primers were only 2 bases long. They will likely find that the primers would bind to multiple locations along a strand. They can then be asked to think about what impact this would have if they were trying to amplify a particular gene. Alternatively, students could be asked to think about applications in which short primers might be useful. This could lead to a discussion of Random Amplification of Polymorphic DNA (RAPD; Williams et al., 1990).
For the remainder of this section of the lab exercise students should follow the instructions in the handout and simulate three rounds of PCR, answering the embedded questions as they proceed. In their simulation of early rounds of PCR students will note that there were longer fragments of copied strands made but that as PCR rounds progress, the length of the amplified fragment will be the length of the DNA that is flanked by the primers. Sanger DNA Sequencing
Sanger sequencing uses similar technology to PCR but differs in two ways: 1) Instead of copying both strands of the double helix, only a single strand is copied at a time. This is accomplished by adding only a single primer to the reaction (Note: In general, paired reactions would be set up to independently sequence both strands but this simulation will only sequence one strand); and 2) In addition to the regular nucleotides, a percentage of each nucleotide is replaced by dideoxy (chain terminating) nucleotides. By randomly incorporating dideoxy nucleotides (ddNTPs) and thereby terminating the growth of the chain a population of sequences of varying lengths will be generated. These would then be separated by electrophoresis and the sequence of the strand recorded. In practice, these ddNTPs are fluorescently labeled which allows them to be detected by a laser during subsequent acrylamide gel electrophoresis.
In the first part of the sequencing exercise, students will discover the structural differences of ddNTPs by observing and sketching both types. Dideoxy nucleotides lack the 3’carbon hydroxyl group and when incorporated into a growing strand, subsequent nucleotides are unable to be added to the strand and the chain reaction terminates. Our dideoxy nucleotide puzzle pieces lack an indentation (representing the site of the covalent bond at the 3’carbon) required for incoming nucleotides to covalently bond (Figure 10 is an example of what a student sketch may look like along with images of a representative nucleotide and dideoxy nucleotide). When these dideoxy puzzle pieces are added to a growing strand, no further bases can be added and the chain terminates. Students will
also observe that the ddNTPs are translucent versions of the corresponding color nucleotides.
Figure 10. Comparison of puzzle piece nucleotides and dideoxy nucleotides. The upper panel shows the expected results of the student activity sketching nucleotides. The arrows point to the location of the indentation (representing the site of the covalent bond at the 3’carbon) required for incoming nucleotides to covalently bond. Dideoxy nucleotide puzzle pieces lack the indentation. The lower panel shows representative VidaCodeTM puzzle pieces.
In the sequencing simulation, each group of students will simulate cycle sequencing and record the results of three amplifications to generate a pool of sequences. Groups of students will pool their results with the rest of the class and the class will organize these single stranded fragments by length, in the order that they would appear in an acrylamide gel in order to determine the sequence of the DNA strand. Students should follow the instructions to build a single stand of DNA to use as a template for sequencing. They should also build three copies of the sequencing primer; one for each round of sequencing they will be performing. Students will also need to prepare mixtures of nucleotides and ddNTPs for sequencing in four zipper bags labeled A, G, C and T. Students are instructed to add 10 translucent ddNTPs of the corresponding color to each bag of dNTPs. This proportion of ddNTPs was chosen to give a suitable distribution of fragments for demonstration purposes and to minimize the time required build fragments. This proportion could be varied. Instructors could also extend this activity by asking students to hypothesize about how the proportion of ddNTPs would influence the range of DNA fragment sizes that result. Students could also design experiments to test their hypotheses (a low frequency of ddNTPs would favor longer fragments). In practice, this proportion of dNTPs to ddNTPs is optimized to obtain a pool of sequences that has fragments of all lengths and reagents purchased for

Schawaroch, Egan, and Torres
Proceedings of the Association for Biology Laboratory Education, Volume 39, 2018 13
sequencing will have already been optimized for these results.
Students should save each piece of their sequenced DNA and we suggest they use a piece of masking tape along the phosphate backbone edge of each strand to make it easier to move the strands around the desk. After each group completes the simulation of three rounds of the sequencing reaction, students should group the fragments from the entire class. At the completion of the sequencing reaction in vitro, a single tube would contain multiple DNA fragments of all sizes. In order to determine the sequence, the DNA fragments would undergo gel electrophoresis in order to separate fragments by size. This would be a good point to review the principles of electrophoresis (or show a video on the topic) and point out that gel electrophoresis for sequencing is able to separate fragments of DNA that differ in size by only a single base. This greater resolving power is due to the chemistry of the gel matrix (acrylamide versus agarose), length and thickness of the gel (longer and thinner for sequencing). Have students arrange the sequenced strands of the entire class in the order in which they would migrate through an acrylamide gel. This simulates electrophoresis and having students call out the ddNTP at the end of each sequenced strand they are simulating how the laser detects the fluorescently labeled ddNTPs in an automated sequencer. Figure 11 shows a diagram of how students should arrange the DNA fragments. The sequence would be read starting from the bottom. In observing results students may find they have missing size fragments and are therefore unable to identify the nucleotide at that position in the DNA strand. Suggest to students that they place an N in that position of their sequence (IUPAC code for any base) and use this as an opportunity for students to observe their results and suggest ways that they could optimize the reaction in order to obtain complete and full-length sequence. Development and Availability of VidaCodeTM
Currently, several sets of VidaCode™ have been made and are being tested in the classroom. The original idea was to use a tool and dye machine and produce pieces out of heavy card stock, but those would not hold up in classroom use. The Maker Hub (3-D printer) seemed to be a promising solution for producing more durable pieces. The Maker Hub technology was good for the first production of prototypes, however, large scale production
Figure 11. Diagram of how students should arrange sequenced DNA fragments in order to read the sequence.
of hundreds to thousands of pieces required laser cutting the pieces. The prototype of the laser cut version was demonstrated at the ABLE conference. We found with the first prototype, that the laser cut pieces fit too tightly and had to make modifications for a much better fit. Many avenues are being explored to further test and expand educational and applications for VidaCode™. Enhancements to future production are such features such as design of a discovery kit with the pieces and educational exercises, production of the pieces and kit with recycled materials, addition of texture to accommodate students with color blindness or visual impairments, and other improvements based on student and educator feedback. We plan to license VidaCodeTM for larger scale production and distribution. The first author may be contacted for information and updates on puzzle availability. Links to Videos of Interest
The instructor may want to show these videos during lab or assign for homework post exercise to reinforce information:

Major Workshop: VidaCode TM Puzzle
14 Tested Studies for Laboratory Teaching
Brief Cold Spring Harbor Lab (CSHL) video on gel electrophoresis: https://www.dnalc.org/view/15921-Gel-electrophoresis.html Brief CSHL video on the original method of Sanger sequencing: https://www.dnalc.org/view/15479-Sanger-method-of-DNA-sequencing-3D-animation-with-narration.html Brief CSHL video on cycle sequencing using fluorescently labeled dideoxynucleotides: https://www.dnalc.org/view/15923-Cycle-sequencing.html
Cited References
Mullis KB, Faloona FA. 1987. Specific synthesis of DNA in vitro via a polymerase-catalyzed chain reaction. Methods Enzymol. 155:335-350.
Sanger F, Nicklen S, Coulson AR. 1977. DNA sequencing
with chain-terminating inhibitors. Proc Natl Acad Sci. 74:5463–5467.
Williams JGK, Kubelik AR, Livak KJ, Rafalski JA, Tingey
SV. 1990. DNA polymorphisms amplified by arbitrary primers are useful as genetic markers. Nucleic Acids Research. 18(22):6531-6535.
Acknowledgments
We would like to thank ABLE and its board
members for accepting the project for a major workshop and the opportunity to share this educational idea and lesson. V. Schawaroch would like to recognize Kathy Nolan, ABLE publicity committee for suggesting ABLE as
a venue for this project. She thanks Mohamed Hassan of the Lawrence N. Field Center for Entrepreneurship Maker Hub and Christina Toscano of Baruch College for assistance with 3-D files for printers and laser cutter. V. Schawaroch’s registration was supported by ABLE 2017 conference. Her travel was supported through a Weissman School of Arts and Sciences, Baruch College Travel Award. Production of VidaCodeTM puzzle pieces for testing was supported through Weissman School of Arts and Sciences Dean Romero’s I.D.E.A. award. E. Torres was supported by the California State University Program for Education and Research in Biotechnology (CSUPERB) Faculty Travel Grant. Funds for a prototype puzzle set for use at Cal State LA were provided by the Department of Biological Sciences. We are especially grateful to all the members of ABLE and most especially the individuals who attended the workshop and whose reviews greatly improved this manuscript.
About the Authors
Valerie Schawaroch is a faculty member since 2003 in the Natural Sciences Department at Baruch College, a senior college within the City University of New York. She primarily teaches genetics which contains both a lecture and wet-laboratory component at the second-year level.
Mary Egan is an adjunct faculty member at Baruch College and Fordham University. She teaches introductory biology (majors and non-majors) as well as Evolution, Ecology and Molecular Ecology.
Elizabeth Torres has been a professor at California State University Los Angeles since 1998, where she teaches large courses in majors introductory biology, professional writing in the life sciences, marine invertebrate zoology, and evolution.

Schawaroch, Egan, and Torres
Proceedings of the Association for Biology Laboratory Education, Volume 39, 2018 15
Mission, Review Process & Disclaimer The Association for Biology Laboratory Education (ABLE) was founded in 1979 to promote information exchange among
university and college educators actively concerned with teaching biology in a laboratory setting. The focus of ABLE is to improve the undergraduate biology laboratory experience by promoting the development and dissemination of interesting, innovative, and reliable laboratory exercises. For more information about ABLE, please visit http://www.ableweb.org/.
Papers published in Tested Studies for Laboratory Teaching: Peer-Reviewed Proceedings of the Conference of the Association for Biology Laboratory Education are evaluated and selected by a committee prior to presentation at the conference, peer-reviewed by participants at the conference, and edited by members of the ABLE Editorial Board. Citing This Article Schawaroch V, Egan MG, Torres E. 2018. VidaCode TM Nucleotide Puzzle Pieces© Used to Model Events During Polymerase Chain Reaction (PCR) and Sanger Sequencing of DNA. Article 15 In: McMahon K, editor. Tested studies for laboratory teaching. Volume 39. Proceedings of the 39th Conference of the Association for Biology Laboratory Education (ABLE). http://www.ableweb.org/volumes/vol-39/?art=15 Compilation © 2018 by the Association for Biology Laboratory Education, ISBN 1-890444-17-0. All rights reserved. No part of this publication may be reproduced, stored in a retrieval system, or transmitted, in any form or by any means, electronic, mechanical, photocopying, recording, or otherwise, without the prior written permission of the copyright owner. ABLE strongly encourages individuals to use the exercises in this proceedings volume in their teaching program. If this exercise is used solely at one’s own institution with no intent for profit, it is excluded from the preceding copyright restriction, unless otherwise noted on the copyright notice of the individual chapter in this volume. Proper credit to this publication must be included in your laboratory outline for each use; a sample citation is given above.