verity count quick reference manual - sos.state.co.us · verity count quick reference manual...
TRANSCRIPT
Verity Count Quick Reference Manual
Document ID 6620-004-A04
Draft 2/13/15
Welcome to Verity Count. This document is intended to be used in tandem with the Verity Count Technical Reference Manual, document ID number 6600-004-A04, and with the Verity Count component logged into and open.
This manual walks through common procedures within the Count interface. These procedures may require specific user roles to access and complete actions. If you have questions regarding the required user access or in-depth screen shots of features, refer to the Verity Count Technical Reference Manual.
Through this manual, you will learn how to do the following:
• Getting Started with Count, starting on page 3
• Reading the Election Dashboard, starting on page 13
• Review and Resolve Write-Ins, starting on page 15
• Reporting Options, starting on page 17
• Importing and Exporting Data, starting on page 31
• Appendices
• Election Management, starting on page 33
• User Management, starting on page 41
• Desktop, starting on page 43
• Verity Networked Workstation Troubleshooting, starting on page 50
This quick reference manual is supplementary, only, and is in no way intended to replace Verity training materials or user manuals.

Hart InterCivic is committed to consistently providing high quality products and services for its customers through adherence to its established Quality Management System, complying with customer, statutory and regulatory requirements, and a commitment to continual improvement.Hart InterCivic is also committed to the integrity and the security of the information used in both the product development process and by the products themselves. Management will establish and maintain an information security management system to ensure that contractual requirements are met, employees are trained in information security, and risks to information security are managed.
This DOCUMENT and the SOFTWARE, HARDWARE, and FIRMWARE to which it pertains contain confidential and proprietary information belonging exclusively to Hart InterCivic, Inc. No part of this publication may be modified, reproduced, stored in a retrieval system, or transmitted in any form, distributed by any electronic or mechanical means, photocopied, recorded, or otherwise reproduced or distributed without prior written permission of Hart InterCivic, Inc. Any person receiving this manual has a duty to take reasonable precautions preventing unauthorized disclosure of the contents.
Verity is a registered trademark of Hart InterCivic, Inc.
Verity Scan, Verity Touch, Verity Touch Writer, Verity Controller, Verity Print, Verity Access, Verity Key, Verity vDrive, Verity Layout, Verity Build, Verity Central, Verity Relay, and Verity Count are trademarks of Hart InterCivic, Inc.
Hart InterCivic disclaims any proprietary interest in the marks and names of others.
© 2014, Hart InterCivic, Inc.
Document number 6620-004-A04.
All rights reserved.
Hart InterCivic, Inc.P.O. Box 80649 Austin, Texas 78708 Telephone: (866) ASK-HART /(866) 275-4278URL: www.hartintercivic.com

Getting Started with Count
Draft 2/13/15
Getting Started with Count
As you work in Verity applications, keep in mind that this document is intended to be used with the corresponding Technical Reference Manual, which contains more information about how your Verity application works. In the event that you receive an error, warning, or failure message, follow the instructions in the message window. Also reference the relevant section in the corresponding Technical Reference Manual.
Proper Server-Client Start-Up and Shut-Down
Ensure that you follow proper start-up and shut-down procedures:
1. Press the power button to power up the server first.
2. When the Log In screen displays, verify that the Ethernet switch indi-cates that the server is connected to a port on the switch.
3. Once you have confirmed that, then press the power button on the first client workstation.
4. Verify that the switch indicates that the client is connected to a port on the Ethernet switch.
5. Power up client workstations one at a time.
6. If the Log In screen does not display on a client workstation, contact the Hart Customer Support Center.
A Word About Removable Media Devices
Working with external media devices requires a solid connection. When using vDrives, you should ensure that they are properly inserted and firmly seated. While using any Verity application, if you receive an error message stating that there is a problem with the vDrive, you should remove the vDrive, wait a moment, and then reinsert it. If, after a few attempts the vDrive still triggers an error message, contact the Hart Customer Support Center for a replacement vDrive.
Note: Only Hart approved, formatted, and distributed devices should be used.
Verity Count Quick Reference Manual | 3

Getting Started with Count
Draft 2/13/15
Logging In
When Verity starts, the Verity Voting login window displays.
1. Type a valid User Name and Password.
2. Click OK.
You are allowed to be logged into only one workstation at a time. If you log into one workstation and, still logged in, you then log into a second workstation, you will be immediately logged out of the first workstation.
4 | Verity Count Quick Reference Manual
Getting Started with Count
Draft 2/13/15
Password Changes
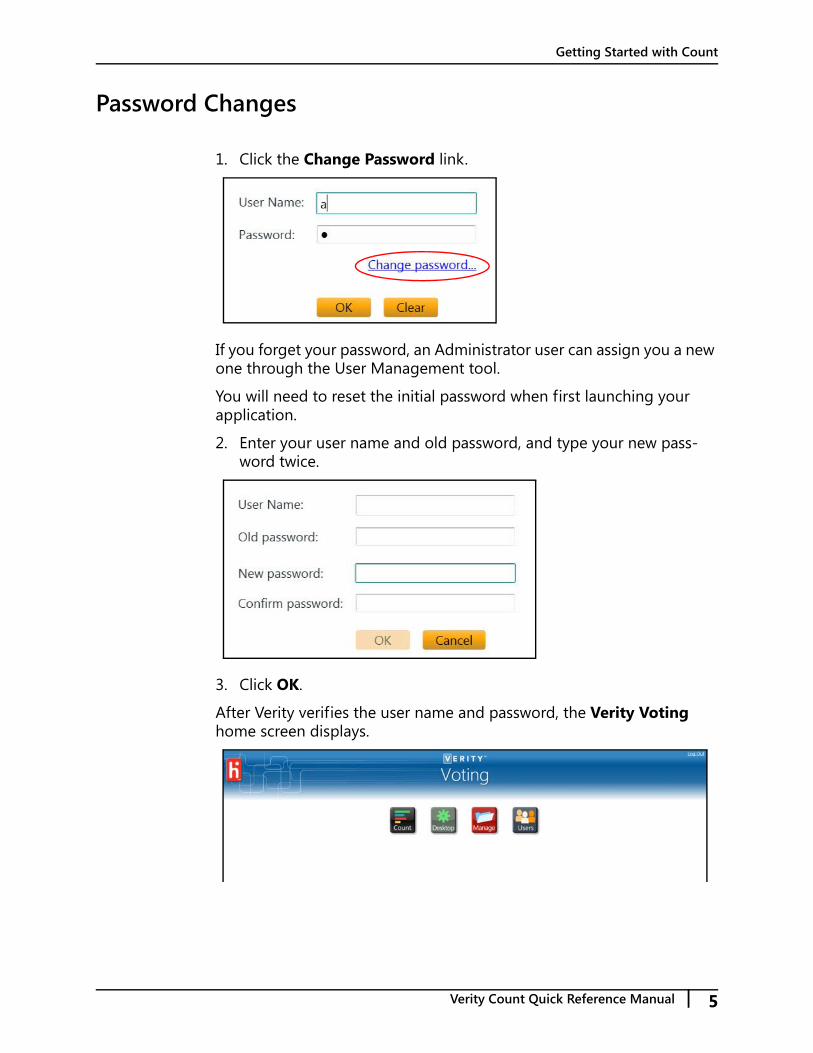
1. Click the Change Password link.
If you forget your password, an Administrator user can assign you a new one through the User Management tool.
You will need to reset the initial password when first launching your application.
2. Enter your user name and old password, and type your new pass-word twice.
3. Click OK.
After Verity verifies the user name and password, the Verity Voting home screen displays.
Verity Count Quick Reference Manual | 5

Getting Started with Count
Draft 2/13/15
Note: Those logging into client workstations or those with-out election manager authorization will not see the Manage tile.
For Build-Count combined installations, users will see both the Build tile and the Count tile.
Note: For networked installations of two or more worksta-tions, all workstations must have the Build-Count application duo installed.
Starting Count
An election must be imported through the Election Management application before you can use the Count application.
1. Click the Count tile.
6 | Verity Count Quick Reference Manual

Getting Started with Count
Draft 2/13/15
The Select Election screen displays.
Preferences Tab
1. Click the Preferences tab. The Election Preferences screen displays.
2. Set your preferred default values on each of the three tabs.
3. Click Save.
Working with Tasks
1. Click the Elections button at the top of the screen.
2. The Elections tab on the left side of the screen is automatically selected. The Select Election list displays.
3. Double-click an election. The Tasks list for the selected election dis-plays.
Verity Count Quick Reference Manual | 7
Getting Started with Count
Draft 2/13/15
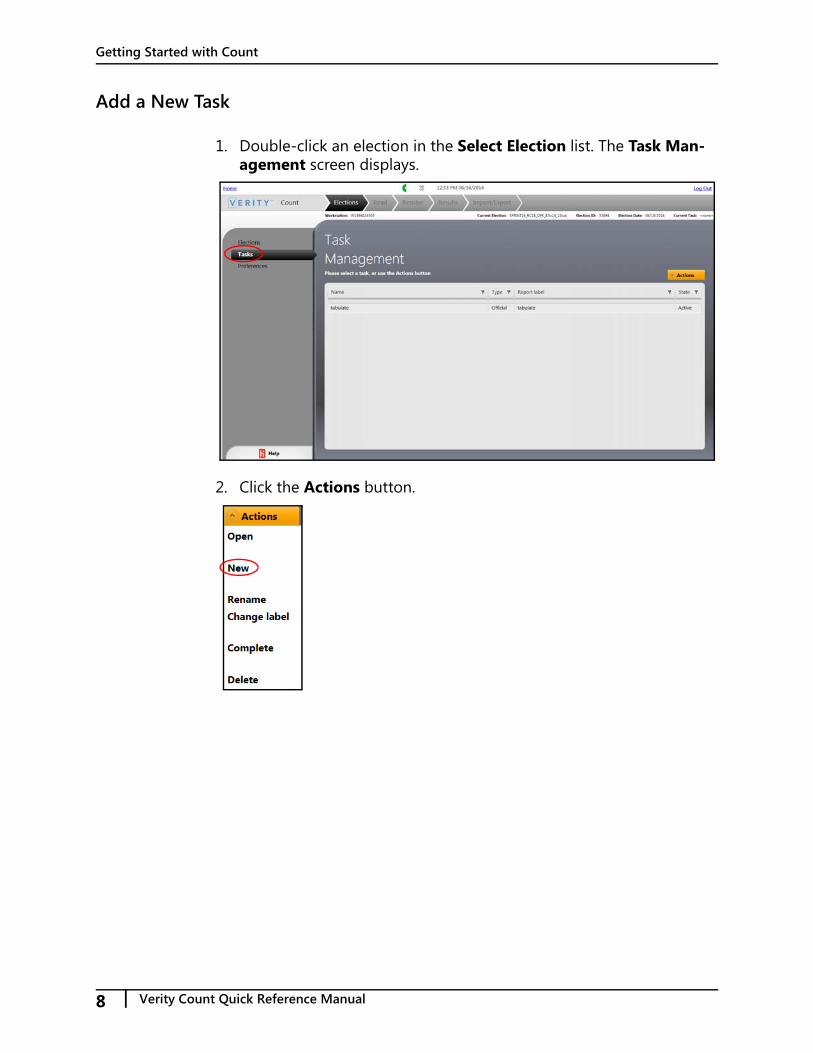
Add a New Task
1. Double-click an election in the Select Election list. The Task Man-agement screen displays.
2. Click the Actions button.
8 | Verity Count Quick Reference Manual

Getting Started with Count
Draft 2/13/15
3. Click New. The New Election Task window opens.
4. Type the Task Name.
5. Select the Task Type from the drop-down list.
6. Type the Report Label.
7. Specify the date and time (for the first task of an election).
8. Select a voting type from the Voting Types for Precincts/Polling Places Reporting drop-down list (for the first task of an election).
Note: The Date and Time of Tabulation and the Voting Types for Precincts/Polling Places Reporting options can be selected only for the first task created for an election.
9. Click OK. Click Cancel to close the window without adding the task. The task displays in the Task Management list.
Verity Count Quick Reference Manual | 9

Getting Started with Count
Draft 2/13/15
Rename a Task
1. Click a task to select it.
2. Click the Actions drop-down list. The Actions list is displayed.
3. Select Rename from the Actions drop-down list. The Rename Task dialog window displays.
4. Rename the task by typing over the old name.
5. Click OK to save the new name and close the window. Click Cancel to close the window without saving changes.
10 | Verity Count Quick Reference Manual

Getting Started with Count
Draft 2/13/15
Change a Task Label
1. Select Change label from the Actions drop-down list.
2. The Change Report Label dialog window displays. Change the report label by typing over the old label.
3. Click OK to save the new label and close the window.
Complete
1. Select Complete from the Actions drop-down list. The Really Com-plete Task dialog window displays.
2. Click Yes to mark the task Complete. Click No to close the window without marking the task Complete.
Note: Once the task is marked Complete, no vDrives can be read for the task.
Verity Count Quick Reference Manual | 11

Getting Started with Count
Draft 2/13/15
Delete a Task
1. Select the Delete option from the Actions drop-down list. The Delete dialog window displays.
2. Click Yes to delete the task and close the dialog window.
Opening an Election
1. Click the Elections button at the top of the screen and the Elections tab on the left side of the screen.
2. Double-click an election from the Select Election list and then dou-ble-click a task from the Task Management list. The Election Dash-board displays.
12 | Verity Count Quick Reference Manual

Reading the Election Dashboard
Draft 2/13/15
Reading the Election Dashboard
Operators and Administrators use the Election Dashboard.
1. Double-click a task to open it. The Election Dashboard displays.
2. Click a Detail button to view more information about a given status bar.
3. Click the Tabulate toggle to switch the auto-tabulation function on and off.
Note: When reading vDrives, if a vDrive is not properly inserted or successfully read, the vDrive Id may read 0. In that case, the user must remove and reinsert the vDrive so that it reads properly.
Reading vDrives without Tabulating
1. Print a Zero report prior to tabulation when prompted.
2. Ensure the Tabulate toggle is in the OFF position.
3. Insert Verity Key.
4. Insert a vDrive to read the contents into Count.
5. Type your user name and password when prompted. This is required for reading the first vDrive only.
The vDrive is read automatically, and the data is stored until you are ready to tabulate.
Verity Count Quick Reference Manual | 13
Reading the Election Dashboard
Draft 2/13/15
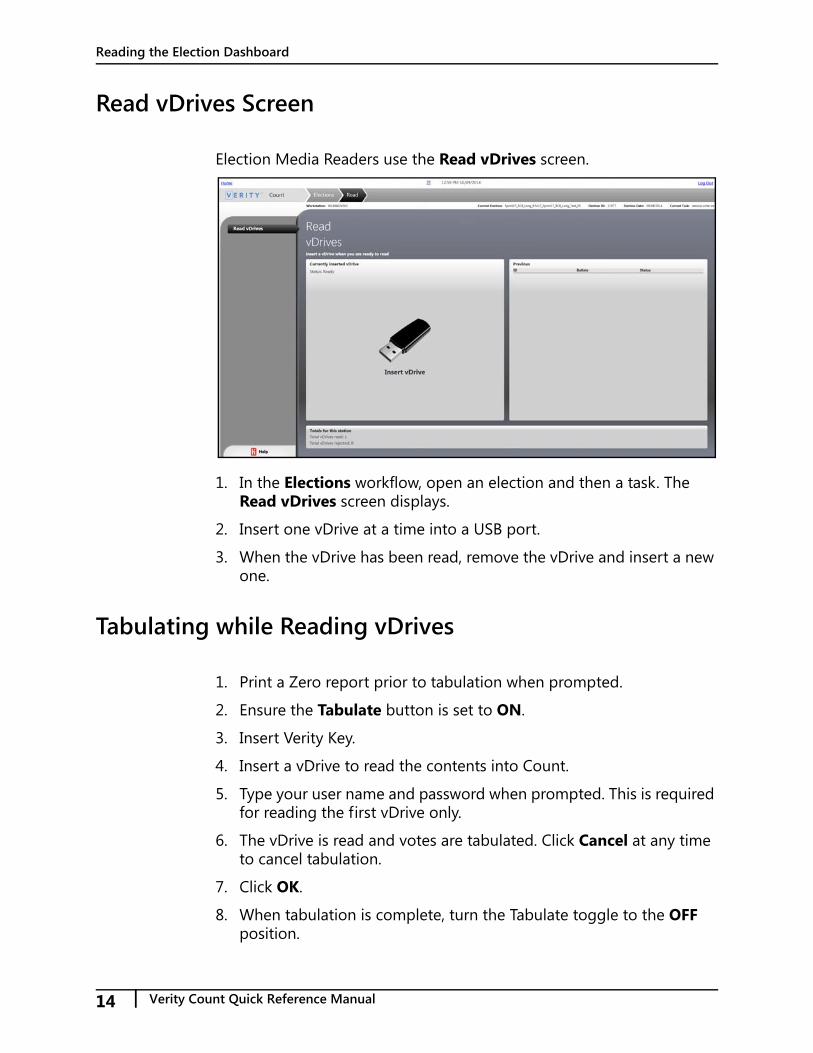
Read vDrives Screen
Election Media Readers use the Read vDrives screen.
1. In the Elections workflow, open an election and then a task. The Read vDrives screen displays.
2. Insert one vDrive at a time into a USB port.
3. When the vDrive has been read, remove the vDrive and insert a new one.
Tabulating while Reading vDrives
1. Print a Zero report prior to tabulation when prompted.
2. Ensure the Tabulate button is set to ON.
3. Insert Verity Key.
4. Insert a vDrive to read the contents into Count.
5. Type your user name and password when prompted. This is required for reading the first vDrive only.
6. The vDrive is read and votes are tabulated. Click Cancel at any time to cancel tabulation.
7. Click OK.
8. When tabulation is complete, turn the Tabulate toggle to the OFF position.
14 | Verity Count Quick Reference Manual
Review and Resolve Write-Ins
Draft 2/13/15
Review and Resolve Write-Ins
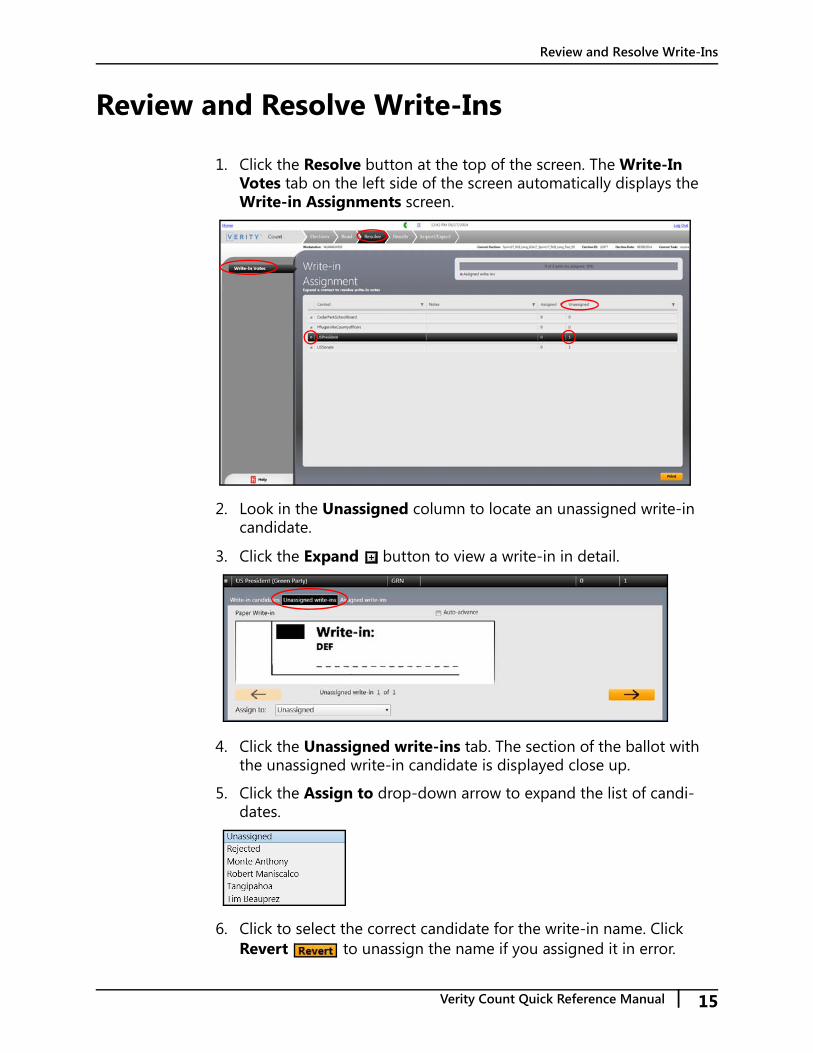
1. Click the Resolve button at the top of the screen. The Write-In Votes tab on the left side of the screen automatically displays the Write-in Assignments screen.
2. Look in the Unassigned column to locate an unassigned write-in candidate.
3. Click the Expand button to view a write-in in detail.
4. Click the Unassigned write-ins tab. The section of the ballot with the unassigned write-in candidate is displayed close up.
5. Click the Assign to drop-down arrow to expand the list of candi-dates.
6. Click to select the correct candidate for the write-in name. Click Revert to unassign the name if you assigned it in error.
Verity Count Quick Reference Manual | 15
Review and Resolve Write-Ins
Draft 2/13/15
7. The contest moves from the Unassigned write-ins tab to the Assigned write-ins tab. Alternatively, click Reject to reject the write-in.
8. Click Save.
9. Click the Auto-advance checkbox to automatically display the next write-in issue. Otherwise, click one of the scroll arrows to move forward or backward through the list.
Adding a Write-in Candidate
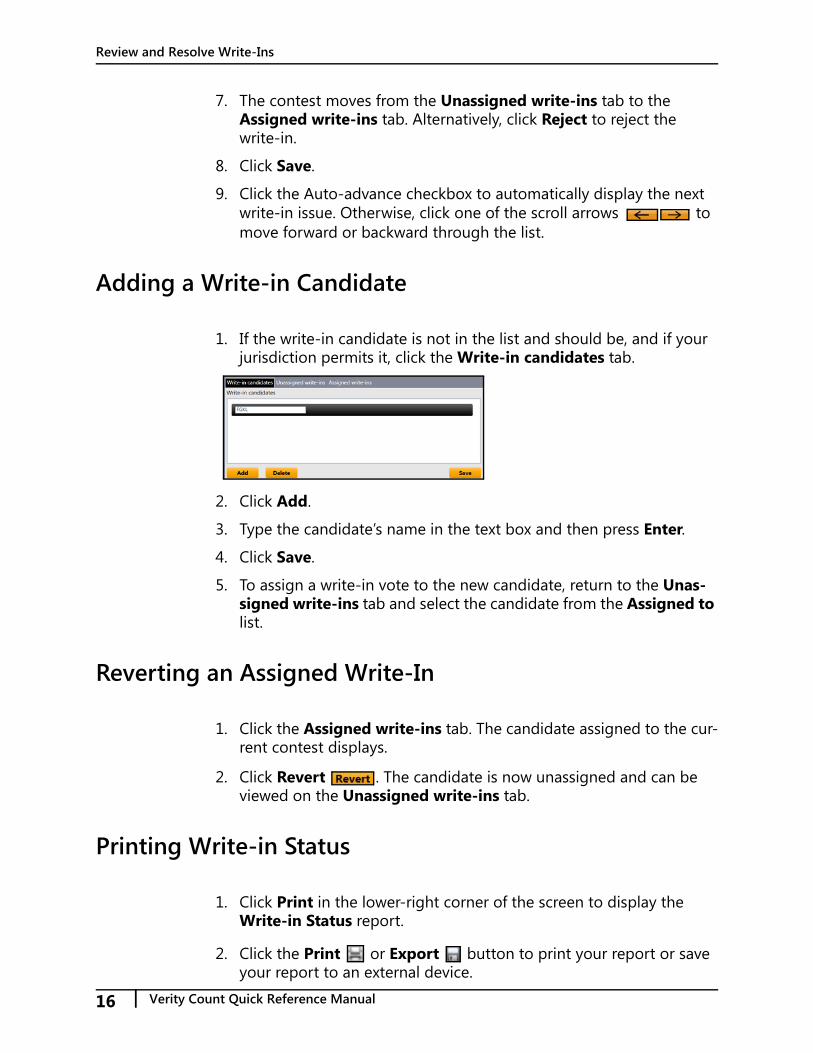
1. If the write-in candidate is not in the list and should be, and if your jurisdiction permits it, click the Write-in candidates tab.
2. Click Add.
3. Type the candidate’s name in the text box and then press Enter.
4. Click Save.
5. To assign a write-in vote to the new candidate, return to the Unas-signed write-ins tab and select the candidate from the Assigned to list.
Reverting an Assigned Write-In
1. Click the Assigned write-ins tab. The candidate assigned to the cur-rent contest displays.
2. Click Revert . The candidate is now unassigned and can be viewed on the Unassigned write-ins tab.
Printing Write-in Status
1. Click Print in the lower-right corner of the screen to display the Write-in Status report.
2. Click the Print or Export button to print your report or save your report to an external device.
16 | Verity Count Quick Reference Manual
Reporting Options
Draft 2/13/15
Reporting Options
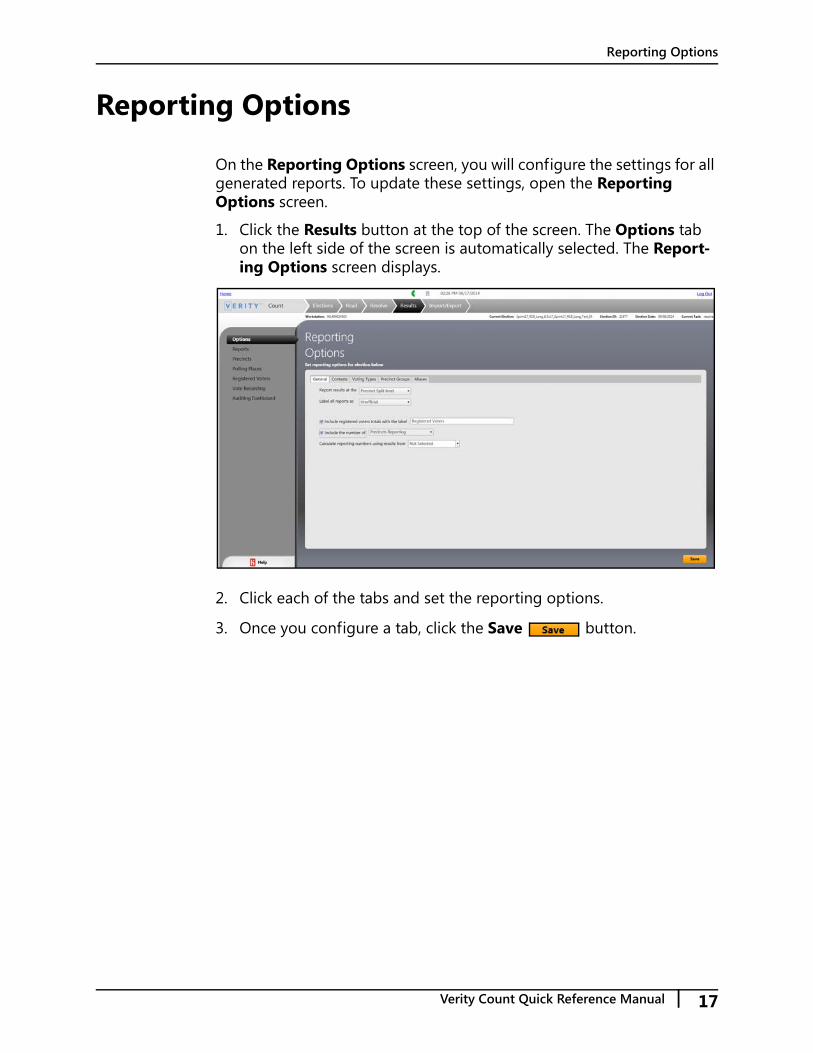
On the Reporting Options screen, you will configure the settings for all generated reports. To update these settings, open the Reporting Options screen.
1. Click the Results button at the top of the screen. The Options tab on the left side of the screen is automatically selected. The Report-ing Options screen displays.
2. Click each of the tabs and set the reporting options.
3. Once you configure a tab, click the Save button.
Verity Count Quick Reference Manual | 17
Reporting Options
Draft 2/13/15
Reports
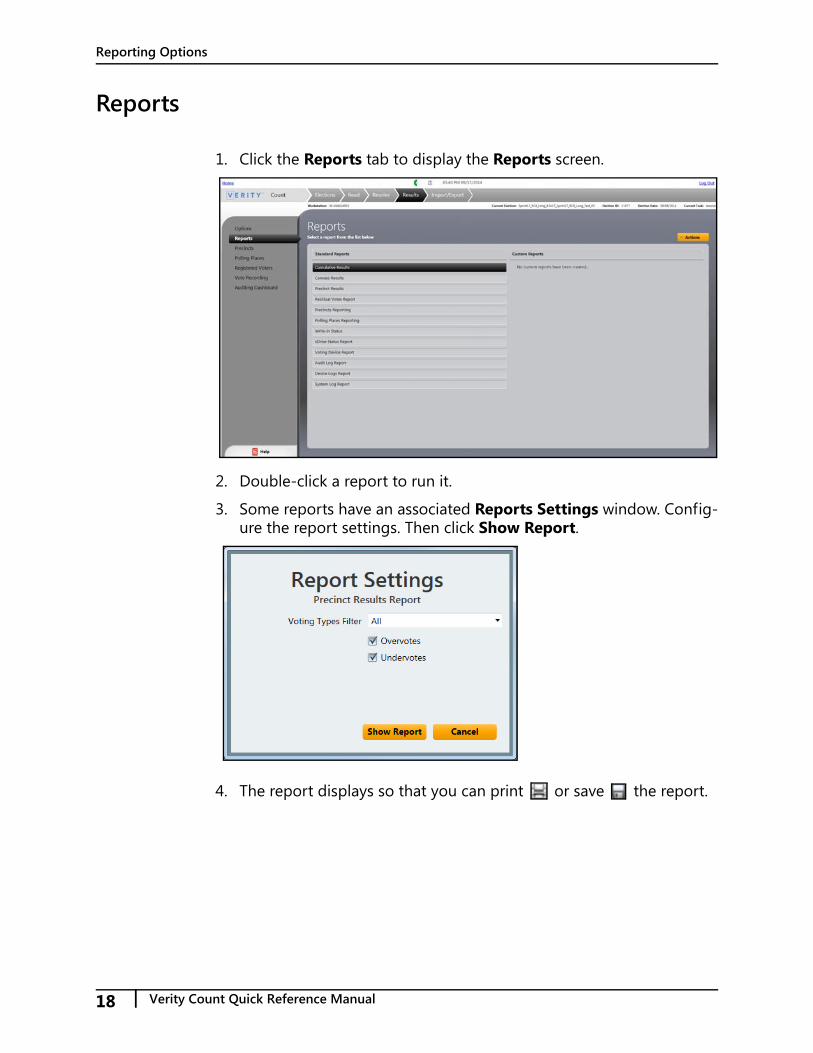
1. Click the Reports tab to display the Reports screen.
2. Double-click a report to run it.
3. Some reports have an associated Reports Settings window. Config-ure the report settings. Then click Show Report.
4. The report displays so that you can print or save the report.
18 | Verity Count Quick Reference Manual

Reporting Options
Draft 2/13/15
Create Custom Reports
1. On the Report screen, click a report.
2. Click the Actions button.
3. Select Create custom report from the drop-down list. The Verity Dialog window displays.
4. Select the options you want applied to your custom report.
5. Click Continue or Back through the wizard until complete.
6. On the last screen, click Finish . Then click Close . The report is displayed in the Custom Reports list on the Reports screen.
Verity Count Quick Reference Manual | 19
Reporting Options
Draft 2/13/15
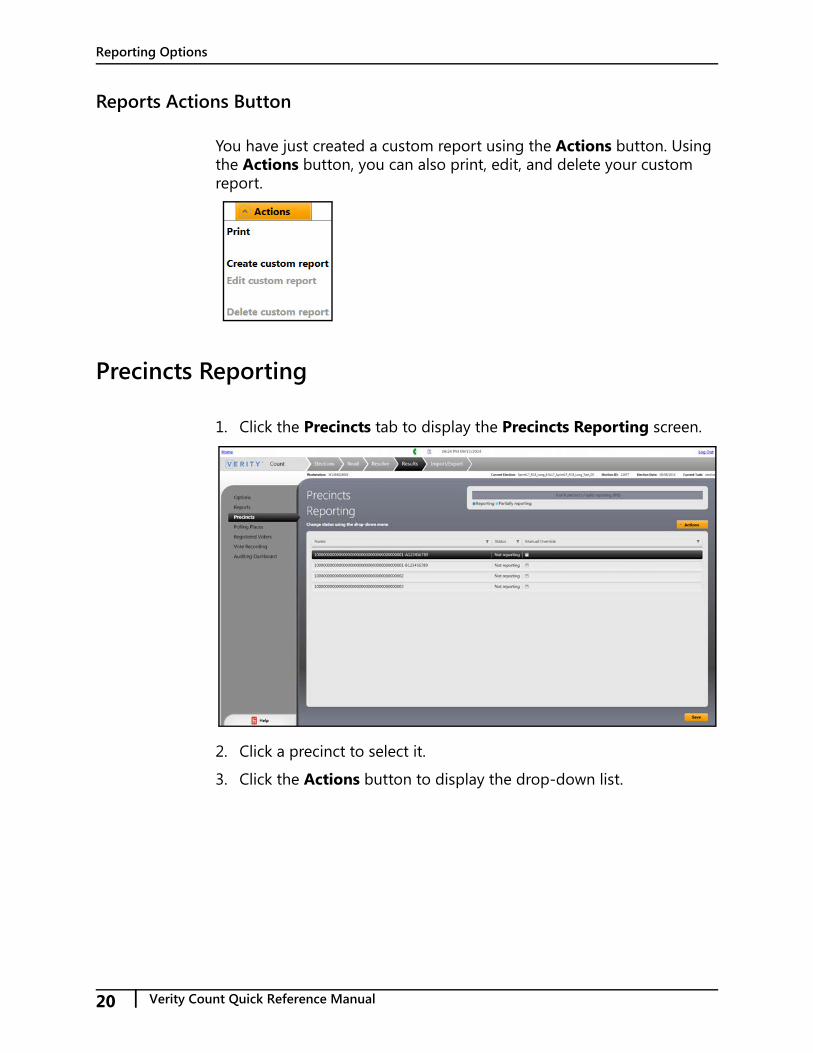
Reports Actions Button
You have just created a custom report using the Actions button. Using the Actions button, you can also print, edit, and delete your custom report.
Precincts Reporting
1. Click the Precincts tab to display the Precincts Reporting screen.
2. Click a precinct to select it.
3. Click the Actions button to display the drop-down list.
20 | Verity Count Quick Reference Manual
Reporting Options
Draft 2/13/15
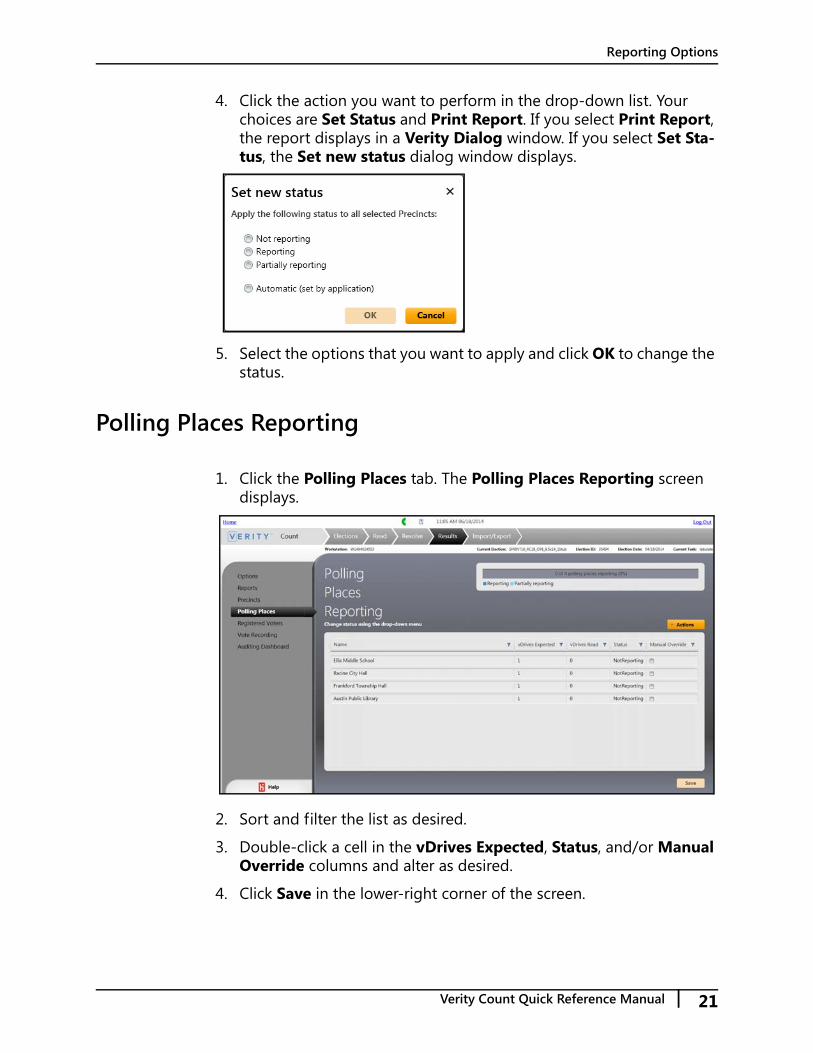
4. Click the action you want to perform in the drop-down list. Your choices are Set Status and Print Report. If you select Print Report, the report displays in a Verity Dialog window. If you select Set Sta-tus, the Set new status dialog window displays.
5. Select the options that you want to apply and click OK to change the status.
Polling Places Reporting
1. Click the Polling Places tab. The Polling Places Reporting screen displays.
2. Sort and filter the list as desired.
3. Double-click a cell in the vDrives Expected, Status, and/or Manual Override columns and alter as desired.
4. Click Save in the lower-right corner of the screen.
Verity Count Quick Reference Manual | 21
Reporting Options
Draft 2/13/15
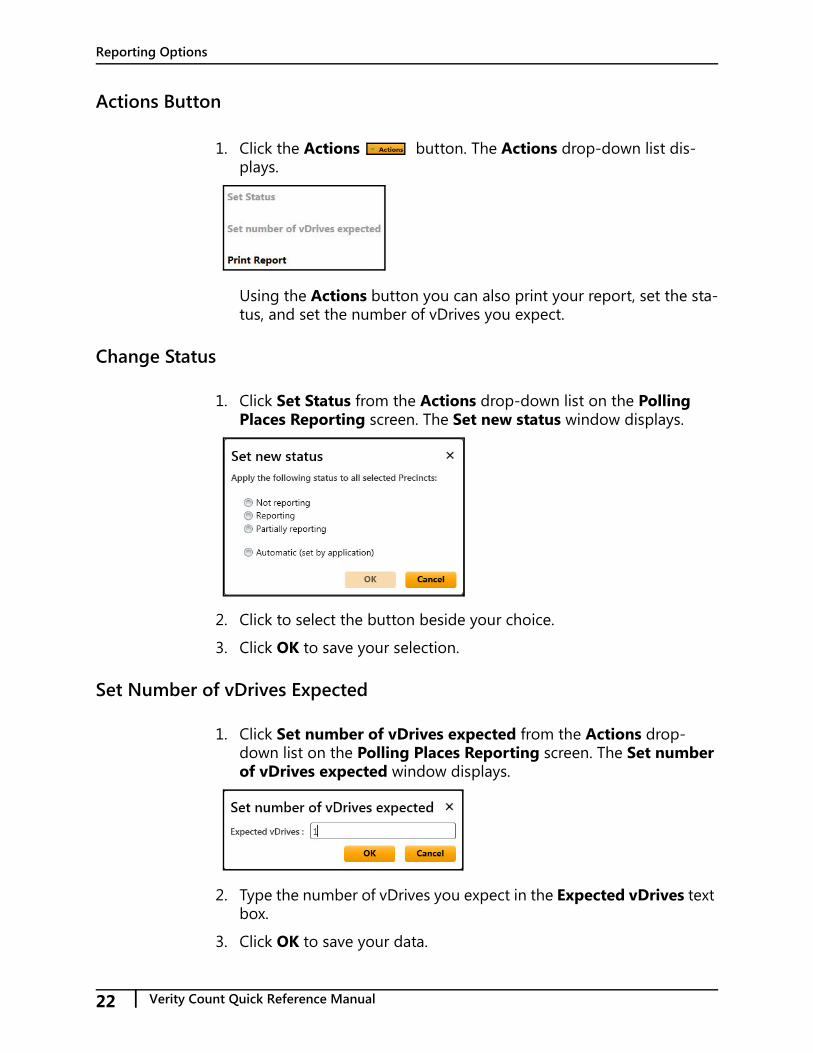
Actions Button
1. Click the Actions button. The Actions drop-down list dis-plays.
Using the Actions button you can also print your report, set the sta-tus, and set the number of vDrives you expect.
Change Status
1. Click Set Status from the Actions drop-down list on the Polling Places Reporting screen. The Set new status window displays.
2. Click to select the button beside your choice.
3. Click OK to save your selection.
Set Number of vDrives Expected
1. Click Set number of vDrives expected from the Actions drop-down list on the Polling Places Reporting screen. The Set number of vDrives expected window displays.
2. Type the number of vDrives you expect in the Expected vDrives text box.
3. Click OK to save your data.
22 | Verity Count Quick Reference Manual

Reporting Options
Draft 2/13/15
Registered Voters
1. Click the Registered Voters tab. The Registered Voters screen dis-plays.
2. Sort and filter the list as desired.
3. Double-click a cell in the Registered Voters columns and alter as desired.
4. Click Save in the lower-right corner of the screen.
Verity Count Quick Reference Manual | 23

Reporting Options
Draft 2/13/15
Manually Record Votes
It is important that you follow these recommended procedures. First sort the ballots that contain voted write-ins into a separate pile. Record the ballots that do not contain voted write-ins. When finished, the session should be closed. A new session should be started to manually record each ballot that contains voted write-ins in its own Manual Vote Recording session.
1. Click the Vote Recording tab. The Manually Record Votes screen displays.
2. Click the heading of any of the columns to sort or filter.
3. Click to select a column and then click the Start New Record button.
24 | Verity Count Quick Reference Manual

Reporting Options
Draft 2/13/15
Start a New Record
1. Click the Start New Record button on the Manually Record Votes screen. Step 1 displays.
2. Select a Precinct, Voting Type, and Adjustment Type.
3. Type or use the arrows to select the Number of ballots.
4. Type a reason for making the adjustment.
5. Click Continue. The Administrator authorization required window displays.
6. Type an administrator user name and password.
Verity Count Quick Reference Manual | 25

Reporting Options
Draft 2/13/15
7. Click OK to continue. Step 2 displays.
8. Type the correct number(s) in the votes box beside each choice. Be sure that the number of votes remaining is correct and not a nega-tive number.
9. Click Next. The next contest displays.
10. Repeat steps 8 and 9 until all of the contests on the ballot are com-plete.
11. Click the Finish button. The Vote Recording Complete win-dow displays.
12. Click Close.
Delete Manually Recorded Votes
1. Select a row in the list of Manually Record Votes.
2. Click the Delete button on the bottom-right corner of the screen. The Delete confirmation window displays.
3. Click Yes to delete the row.
26 | Verity Count Quick Reference Manual

Reporting Options
Draft 2/13/15
Auditing Votes
1. Click the Auditing Dashboard tab. The Auditing Dashboard screen displays.
Add a Filter
1. Click Select a filter type. A column of filter types displays.
2. Click one of the filter types to expand it.
Verity Count Quick Reference Manual | 27

Reporting Options
Draft 2/13/15
3. Click to select a filter. The Select filter contents pane displays your options.
4. Click the checkbox(es) beside your choices.
5. Click Add filter. The filter is added to the Currently applied filters pane.
6. To remove the filter, click the Delete button beside the currently applied filter.
7. Configure report settings in the lower-right corner of the screen.
28 | Verity Count Quick Reference Manual
Reporting Options
Draft 2/13/15
Export CVRs
1. Click the Export CVRs button at the lower-right corner of the screen. The File Browser Dialog window displays.
2. Select the removable media device to which you want to export your data and click OK.
Note: External mass storage devices used to archive or export data from Verity should be formatted as NTFS.
Print a Report
1. Click the Print report button at the lower right-corner of the screen. The CVR Report displays on the screen. You can print or export the report as needed.
Verity Count Quick Reference Manual | 29

Reporting Options
Draft 2/13/15
30 | Verity Count Quick Reference Manual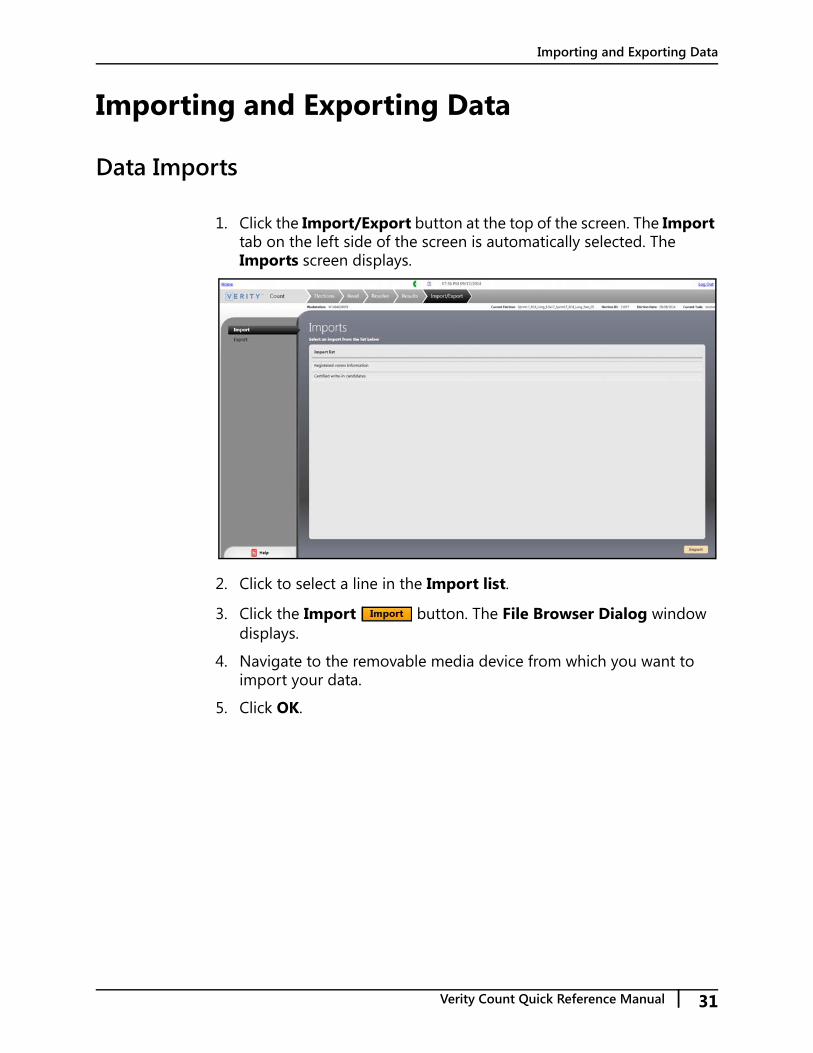
Importing and Exporting Data
Draft 2/13/15
Importing and Exporting Data
Data Imports
1. Click the Import/Export button at the top of the screen. The Import tab on the left side of the screen is automatically selected. The Imports screen displays.
2. Click to select a line in the Import list.
3. Click the Import button. The File Browser Dialog window displays.
4. Navigate to the removable media device from which you want to import your data.
5. Click OK.
Verity Count Quick Reference Manual | 31
Importing and Exporting Data
Draft 2/13/15
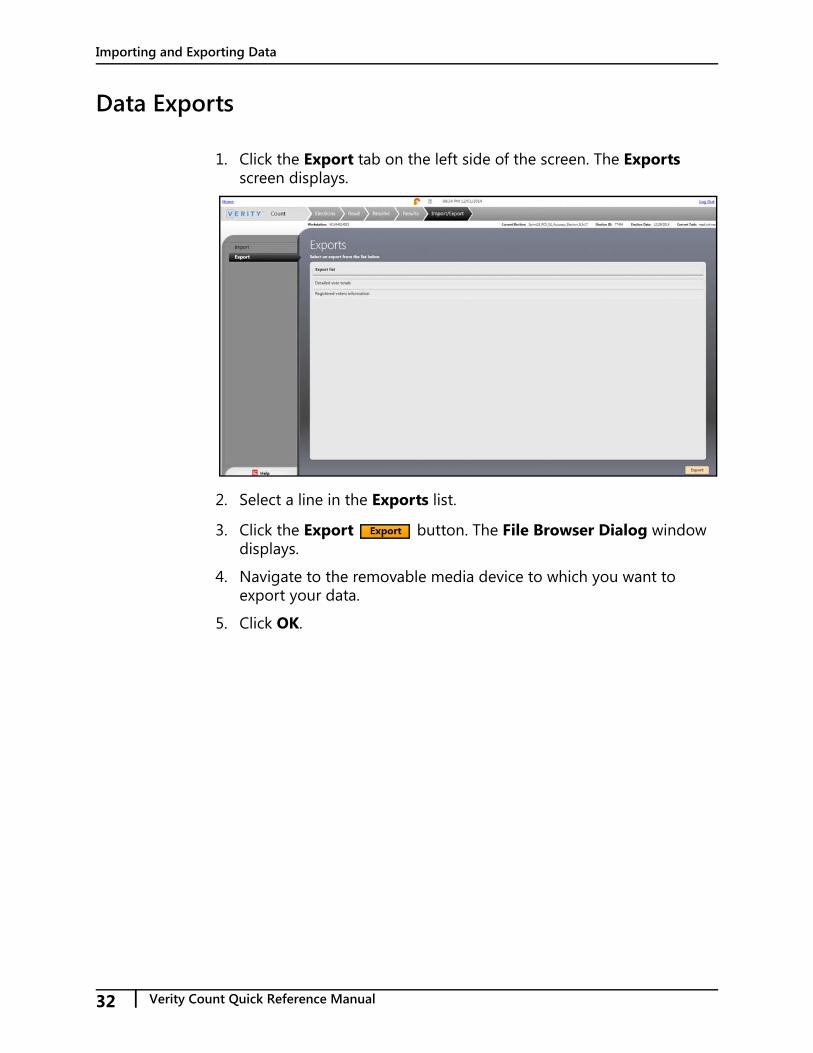
Data Exports
1. Click the Export tab on the left side of the screen. The Exports screen displays.
2. Select a line in the Exports list.
3. Click the Export button. The File Browser Dialog window displays.
4. Navigate to the removable media device to which you want to export your data.
5. Click OK.
32 | Verity Count Quick Reference Manual

Appendices
Draft 2/13/15
Appendices
The remainder of this manual is dedicated to the following appendices:
• Election Management (this page)• User Management, starting on page 39• Desktop, starting on page 41• Verity Networked Workstation Troubleshooting, starting on page 50
The appendices are relevant to Build, Central, and Count.
Election Management
In order to work with Verity Voting, you must first import your election(s).
Note: The Election Manager tile will not display on a net-worked client workstation.
Administrators can rename, delete, archive, restore, import, and export signed elections.
1. Click the Manage tile on the Verity Voting home screen.
Verity Count Quick Reference Manual | 33

Election Management
Draft 2/13/15
Actions Button
1. Click the Actions button to display the list of Actions. The options that display depend on the application you are using.
Election Management Screen
1. Click the Manage tile to open Election Management and display the Election Management screen.
34 | Verity Count Quick Reference Manual
Election Management
Draft 2/13/15
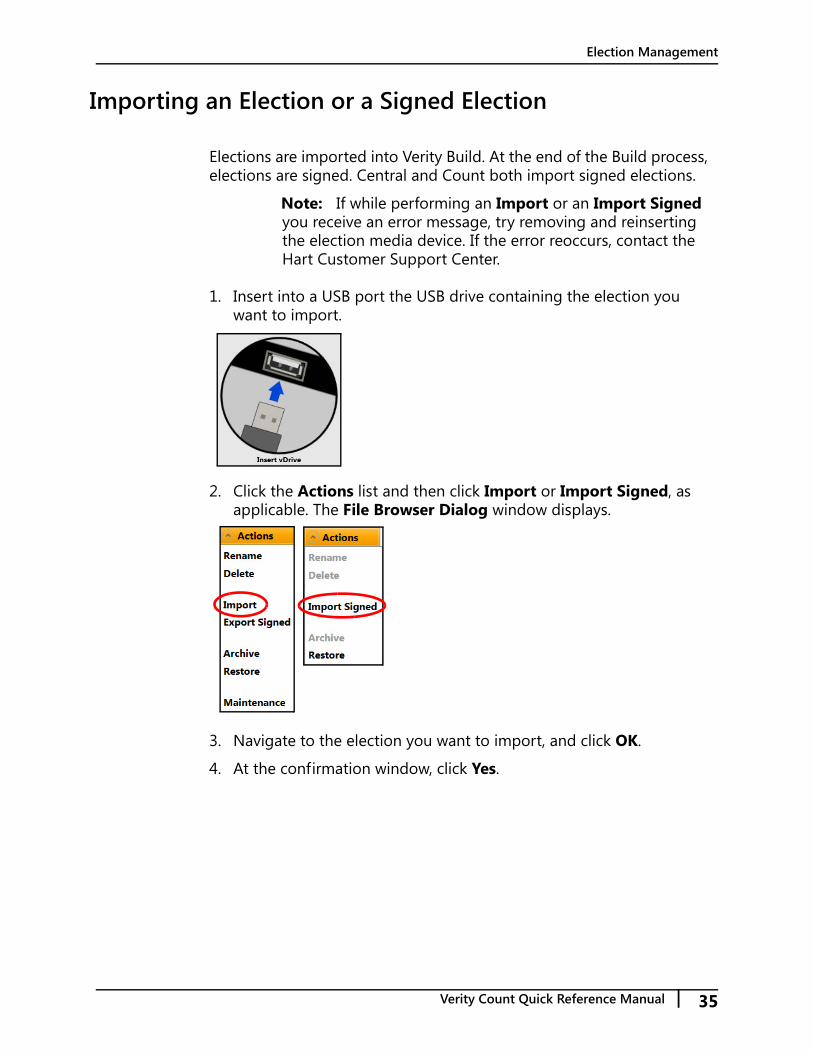
Importing an Election or a Signed Election
Elections are imported into Verity Build. At the end of the Build process, elections are signed. Central and Count both import signed elections.
Note: If while performing an Import or an Import Signed you receive an error message, try removing and reinserting the election media device. If the error reoccurs, contact the Hart Customer Support Center.
1. Insert into a USB port the USB drive containing the election you want to import.
2. Click the Actions list and then click Import or Import Signed, as applicable. The File Browser Dialog window displays.
3. Navigate to the election you want to import, and click OK.
4. At the confirmation window, click Yes.
Verity Count Quick Reference Manual | 35

Election Management
Draft 2/13/15
Renaming an Election
1. Select an election, click the Actions button, and then select Rename from the drop down list.
2. The Rename Election dialog window opens. Type a new election name.
3. Click Save to save the election. Click Cancel to close the window without saving changes.
Maintaining an Election
1. Ensure that all users are logged out of Verity before running the Maintenance program.
Note: If a user is not logged out of Verity, the Maintenance program will not complete its tasks.
2. Select an election, click the Actions button, and then select Mainte-nance from the drop down list.
Verity runs a database optimization program to ensure that applica-tions run quickly and efficiently.
36 | Verity Count Quick Reference Manual
Election Management
Draft 2/13/15
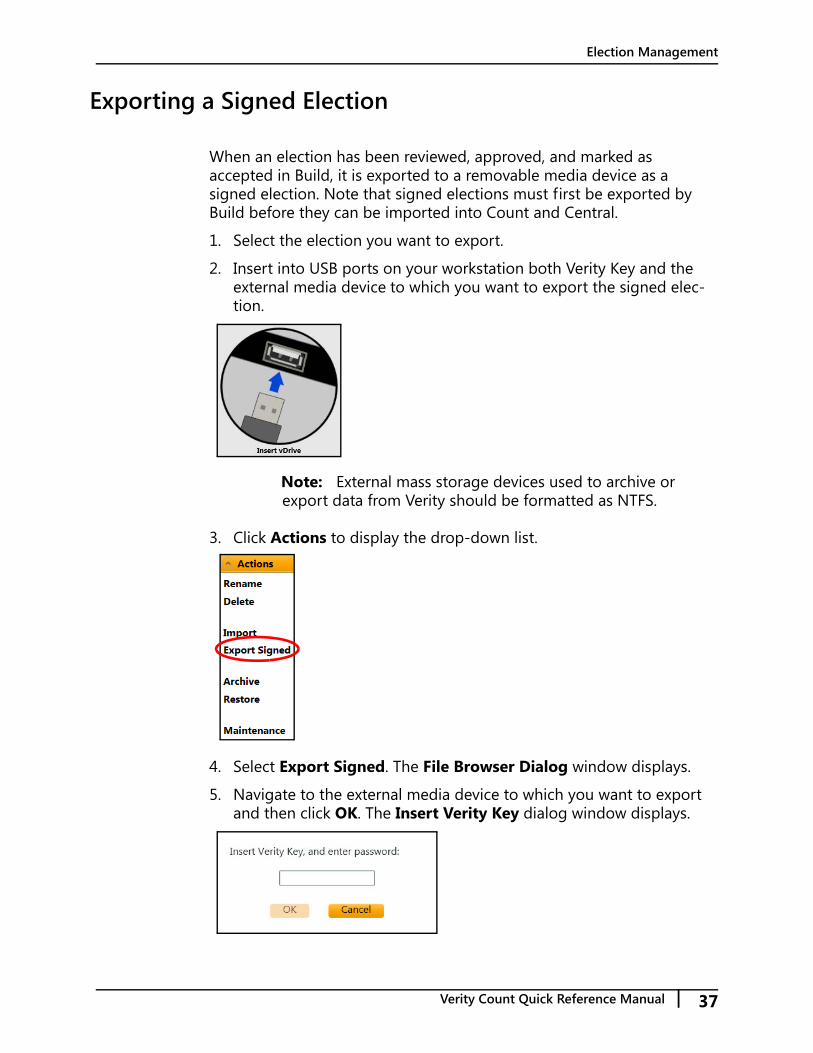
Exporting a Signed Election
When an election has been reviewed, approved, and marked as accepted in Build, it is exported to a removable media device as a signed election. Note that signed elections must first be exported by Build before they can be imported into Count and Central.
1. Select the election you want to export.
2. Insert into USB ports on your workstation both Verity Key and the external media device to which you want to export the signed elec-tion.
Note: External mass storage devices used to archive or export data from Verity should be formatted as NTFS.
3. Click Actions to display the drop-down list.
4. Select Export Signed. The File Browser Dialog window displays.
5. Navigate to the external media device to which you want to export and then click OK. The Insert Verity Key dialog window displays.
Verity Count Quick Reference Manual | 37

Election Management
Draft 2/13/15
6. Type your password and click OK.
7. Click Cancel to close the window without exporting.
Archiving Elections
When an election definition is archived, all of the information for the election is saved to an external .zip file.
1. Select an election from the elections list and then click the Actions button to display the Actions drop-down list.
2. Select Archive. The File Browser Dialog window displays.
3. Navigate to the removable media device to which you want to archive the file.
4. Click OK to archive the election definition.
38 | Verity Count Quick Reference Manual

Election Management
Draft 2/13/15
Restoring Elections
Restoring an election loads it from an archived copy. To use an archived election, the election must be restored.
1. Select Actions to display the Actions drop-down list.
2. Click Restore to display the File Browser Dialog window.
3. Navigate to the election .vArchive file that you want to restore. Click OK to restore the file.
Deleting Elections
When an election is deleted, it is removed permanently from the entire Verity Voting system. Hart recommends performing an archive of the election data prior to removal.
1. Select an election, click the Actions button, and then select Delete from the drop-down list.
2. The Delete Election dialog window displays. Click Yes to delete the election. Click No to close the window without deleting the election.
Verity Count Quick Reference Manual | 39

Election Management
Draft 2/13/15
Closing Election Management
1. Click the Home link or click the Log Out link. Clicking Log Out logs you out of the application entirely and displays the Ver-
ity log in screen. Clicking the Home link displays the Verity Voting launcher.
40 | Verity Count Quick Reference Manual

User Management
Draft 2/13/15
User Management
1. Click the Users tile on the Verity launcher screen.
The User Management application opens and displays the User Manager screen.
Adding or Altering User Accounts
1. Click the Add button at the bottom of the screen to add a row to the Manage Users list.
2. Double-click each column for the added user row and then enter the User Name, Password, and Account Locked status.
3. Click the Expand button for the selected user. The role assigned to that user for each application displays.
4. Click in the Role space beside the Application name.
5. Click the down arrow , and scroll through the drop-down list to select a user role.
6. Click Save.
Verity Count Quick Reference Manual | 41

User Management
Draft 2/13/15
Deleting a User
You can delete user accounts that are no longer needed.
Note: If an account may be used again, but only at specific times, you can lock the account instead.
1. Click to select a user account.
2. Click Delete. The Delete window displays.
3. Click Yes to permanently delete the user account.
Configuring Rules
1. Click an empty check box to activate a rule, or click a checked box to disable the option.
2. To select or change a numeric value, click in the text field.
3. Type a number or click the up or down arrows until the desired number appears in the text box.
4. Click Save.
Closing User Management
1. Click the Home link or click the Log Out link. Clicking Log Out logs the user out of the application and launcher entirely,
and returns the user to the Verity Voting log in screen. Clicking the Home link returns the user to the Verity Voting application launcher screen, from which the user can choose to work with an application, Desktop, Election Management, or User Management.
42 | Verity Count Quick Reference Manual

Desktop
Draft 2/13/15
Desktop
1. Click the Desktop icon on the Verity Voting home screen.
The Desktop screen displays.
Verity Count Quick Reference Manual | 43

Desktop
Draft 2/13/15
Set the Time and Date
1. Click the displayed time, and then type over the displayed time. Use the hh:mm time configuration. Variations are not accepted. Desig-nate AM or PM.
2. Change the date by typing a new date over the old date using the format mm/dd/yy or mm/dd/yyyy (both with slashes). Click to select the date.
Note: Supported dates are 1/1/2009 to 12/31/2037.
3. Alternatively, can change the time and date by clicking the clock or calendar drop-down icon to display the time or calendar.
4. Click to make a selection in the drop-down list. The new time or date is displayed.
5. Most regions adapt their clocks to Daylight Savings Time. Clicking to check or clear the Daylight Savings check box, as applicable.
6. Click Set to save your changes.
44 | Verity Count Quick Reference Manual

Desktop
Draft 2/13/15
Export File Hashes
If you are an administrator, you can export files to a removable drive in order to verify that the software installed is identical to the certified software.
To generate the file manifest, perform the following steps:
1. Contact Hart Customer Service and Care.
2. Insert a USB portable drive into one of the workstation’s USB ports.
3. Log into the Verity application launcher.
4. Launch the Desktop application.
5. In the Export file hashes to removable drive dialog box, users select the Export button. Clicking the Export button dis-plays the File Browser Dialog window. Clicking Cancel in the File Browser Dialog window closes the window without exporting.
6. Select a location and click the OK button.
7. Allow the system to write the manifest file to the USB drive.
8. Remove the USB drive from the workstation.
9. Retrieve Verity file manifests from the NSRL reference files from the NSRL Voting website http://www.nsrl.nist.gov/vote.html
10. Using Notepad, Excel, or WinMerge, manually compare the Verity Manifest file provided by the NSRL to the manifest file stored on the USB drive.
The comparison should indicate that the file names, file versions, and file checksums are identical.
Verity Count Quick Reference Manual | 45

Desktop
Draft 2/13/15
Close Desktop
1. Click the Home link or click the Log Out link. Clicking Log Out logs you out of the application and launcher entirely and dis-
plays the Verity Voting log in screen. Clicking the Home link displays the Verity Voting home screen.
46 | Verity Count Quick Reference Manual

Desktop
Draft 2/13/15
Access the Operating System
1. If you need to access the operating system, contact the Hart Cus-tomer Support Center to acquire a code.
2. Click the text box, type the access code, and click the Access the OS button.
3. The Verity application closes and displays the windows desktop.
You must shut down and restart the workstation to use Verity once again:
1. Select the Shutdown option from Windows.
2. Once the workstation is shutdown, press the power button on the workstation to start the workstation and launch Verity.
Note: For networked configurations, see the Restarting the Workstation, starting on page 49 section for proper network shutdown procedures.
Verity Count Quick Reference Manual | 47

Desktop
Draft 2/13/15
48 | Verity Count Quick Reference Manual
Troubleshooting
Draft 2/13/15
Troubleshooting
Restarting the Workstation
One of the most commonly used and successful fixes for many computer issues is restarting the system. As the first step in your troubleshooting, try powering down and then powering up your system. Ensure that you follow proper start-up and shut-down procedures.
Shutting Down:
1. Close all active tasks on all workstations sharing a network.
2. On each workstation return to the Home screen.
3. Shut down each Verity client.
4. After all clients are shut down one at a time, shut down the Verity server.
Starting Up:
1. Confirm that the Verity server is shut down.
2. Press the power button to power up the server first.
3. When the Log In screen displays, verify that the Ethernet switch indicates that the server is connected to a port on the switch.
4. Once you have confirmed that, then press the power button on the first client workstation.
5. Verify that the switch indicates that the client is connected to a port on the Ethernet switch.
6. Repeat steps 3 and 4 to power up all client workstations one at a time.
7. If the Log In screen does not display on a client workstation, contact the Hart Customer Support Center.
8. Log in to each workstation with unique user credentials.
Verity Count Quick Reference Manual | 49

Troubleshooting
Draft 2/13/15
Verity Networked Workstation Troubleshooting
If you suspect that your workstation is having hardware issues, call the Hart Customer Support Center.
When network communications between Verity server and client workstations become degraded or non-functional, walk through the following checklist to recover your network connections.
1. Ensure that all network cables are plugged into the workstations’ Ethernet ports and the Ethernet switches.
2. Ensure that the Ethernet switch indicates that each port that has a workstation connected to it indicates the physical connection to the workstation by lighting the port’s Link LED.
If all connections are good, restart the workstations by following the steps in Restarting the Workstation, starting on page 49.
Note: Only Hart personnel can upgrade software on the Verity workstations; call the Hart Customer Support Center, 866.275.4278.
Critical System Errors
Verity applications monitor the server in order to determine that the server is available and correctly configured. The monitor checks for the following functionality:
• Ability to write to the system logs and audit logs• Ability to connect to the SQL database on the server• Ability to see the server hard disk
In the event of a problem while the system is idle, the monitor notifies you as soon as the problem is identified.
In the event of a sudden interruption while the system is in use, you are likely to see error messages that indicate the following:
• The current action has failed or been interrupted• The user has been logged out
Note: Due to the interruption of an ongoing task, these messages may not indicate the real problem. However, these messages will be followed shortly by the monitor message explaining the underlying issue.
50 | Verity Count Quick Reference Manual

Troubleshooting
Draft 2/13/15
User is Logged In
If the monitor identifies a problem while a user is logged in, it displays an error window.
This window serves two purposes:
• This window indicates the issue(s) that the monitor identified and actions that you should take to troubleshoot the problem. It also indicates whether the error requires the workstation to be restarted or if the system is trying to recover automatically. Errors display next to one of the following icons.
• This window prevents you from taking further action within the Verity system. Problems must be resolved before you continue working with Verity. Attempting to run the system without a correctly operating server could create further, significant issues.
Icon Meaning
The system is attempting to recover from an error condition.If recovery is successful, the window will disappear and you can
continue using the system normally.
The system is unable to recover from an error condition. The system must be restarted.
Verity Count Quick Reference Manual | 51

Troubleshooting
Draft 2/13/15
No User is Logged In
If the monitor identifies a problem while no user is logged into the workstation, the Access Operating System screen displays and you cannot log in.
When a Problem is Identified
Initial troubleshooting steps are displayed in the error message window.
Note: Recovering from many typical problems (even prob-lems that affect only a single station) requires the entire sys-tem (clients and server) to be restarted.
52 | Verity Count Quick Reference Manual

Troubleshooting
Draft 2/13/15
If you need to restart a station that has a monitoring error, use the Log Out button in the error message window to cancel any existing tasks and navigate to the Verity Voting launcher screen. From the launcher, click the Shutdown button to shut down the workstation.
Note: The logout button may not be available if there is a problem with the server database. In this situation (and only this situation) you can restart this workstation using the power button on the PC.
If you need to restart a workstation, always restart the workstation using the procedures defined in Restarting the Workstation, starting on page 49. In brief, the steps are as follows:
1. Problem is identified that requires one or more stations to be restarted.
2. Shut down all of the client workstations.
3. Shut down the server workstation.
4. Turn on the server workstation and wait for the Verity Voting login screen.
5. Turn on the client workstations.
Sample Error Messages
Following are examples of operation-impacting system errors that are reported from system monitoring functions. Follow the directions provided in the message. If the issue persists, call the Hart Customer Service Center. If Hart Customer Service advises system shutdown and restart, refer to Restarting the Workstation, starting on page 45 for instructions on how to restart your system properly.
Verity Count Quick Reference Manual | 53

Troubleshooting
Draft 2/13/15
54 | Verity Count Quick Reference Manual
