valuable tips & tricks managing suse with yast and …€¦ · valuable tips & tricks...
TRANSCRIPT

Valuable Tips & Tricks Managing SUSE® With YaST and AutoYaST
Thomas GöttlicherSoftware Engineer
Cameron SeaderSystems Engineer
2
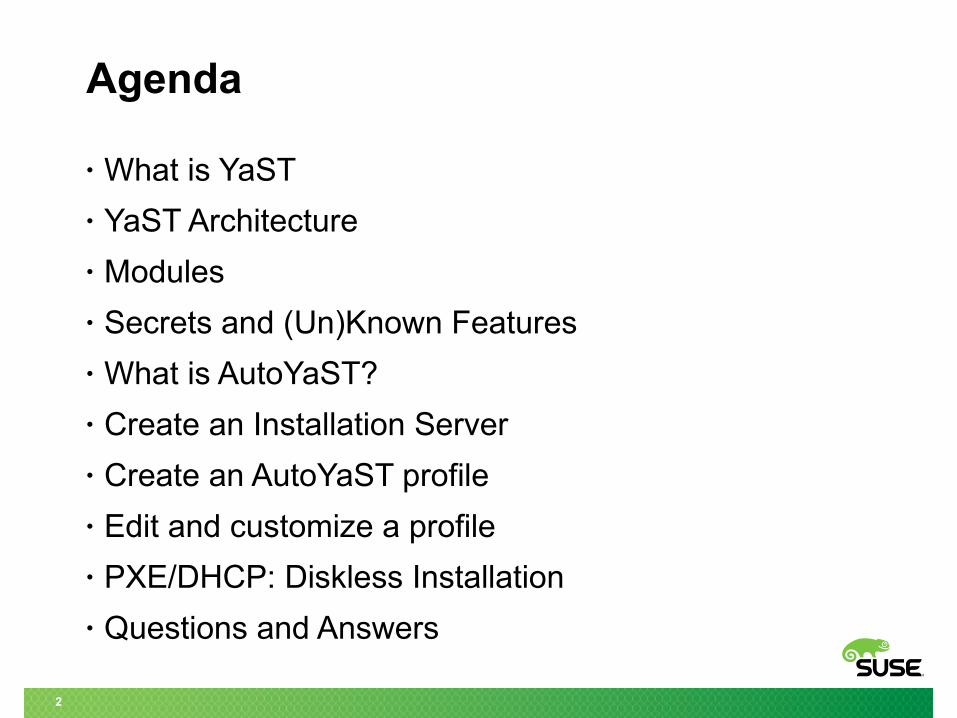
Agenda
• What is YaST
• YaST Architecture
• Modules
• Secrets and (Un)Known Features
• What is AutoYaST?
• Create an Installation Server
• Create an AutoYaST profile
• Edit and customize a profile
• PXE/DHCP: Diskless Installation
• Questions and Answers
3
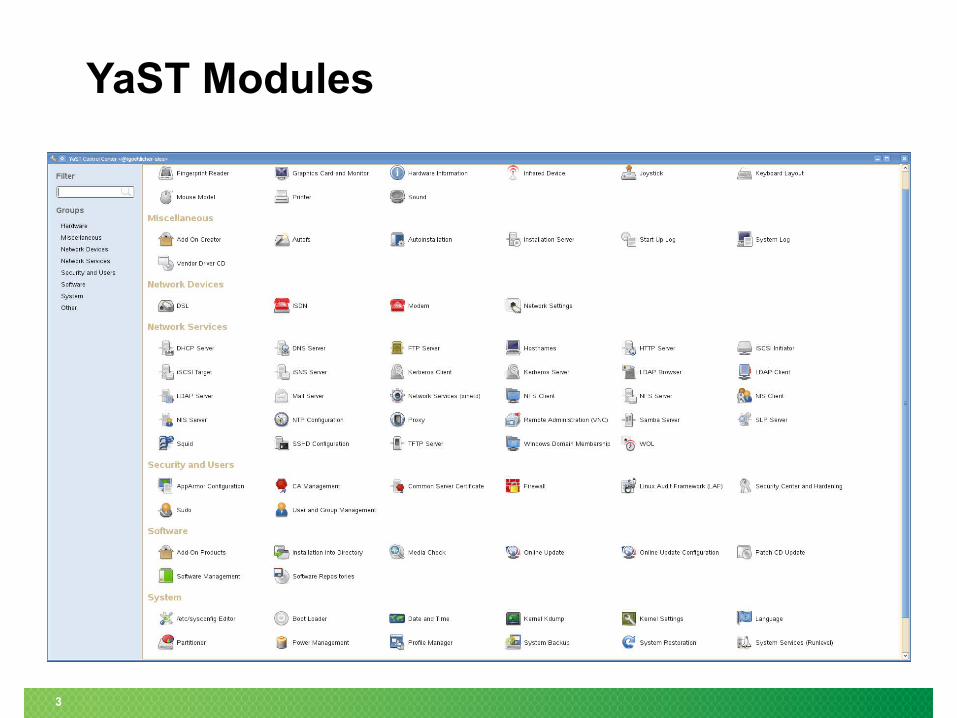
YaST Modules
4
What is YaST?
• “Yet another Setup Tool”
• Since 1996
• Installs and configures your SUSE® Linux Enterprise system
• Graphical and text user interfaces
• Modules for almost every aspect

5
ncurses
YaST Architecture
Target System
YaST ModuleUser Interface
SystemConfiguration
Repository
Installation Source

YaST Modules

7
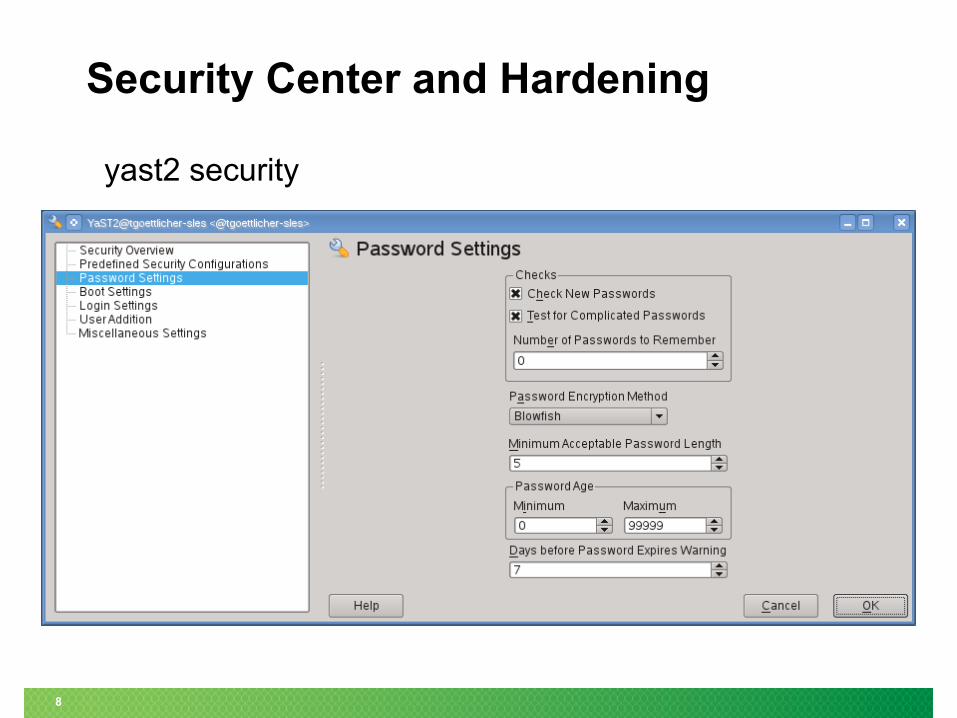
Security Center and Hardening
yast2 security
8
Security Center and Hardening
yast2 security
9
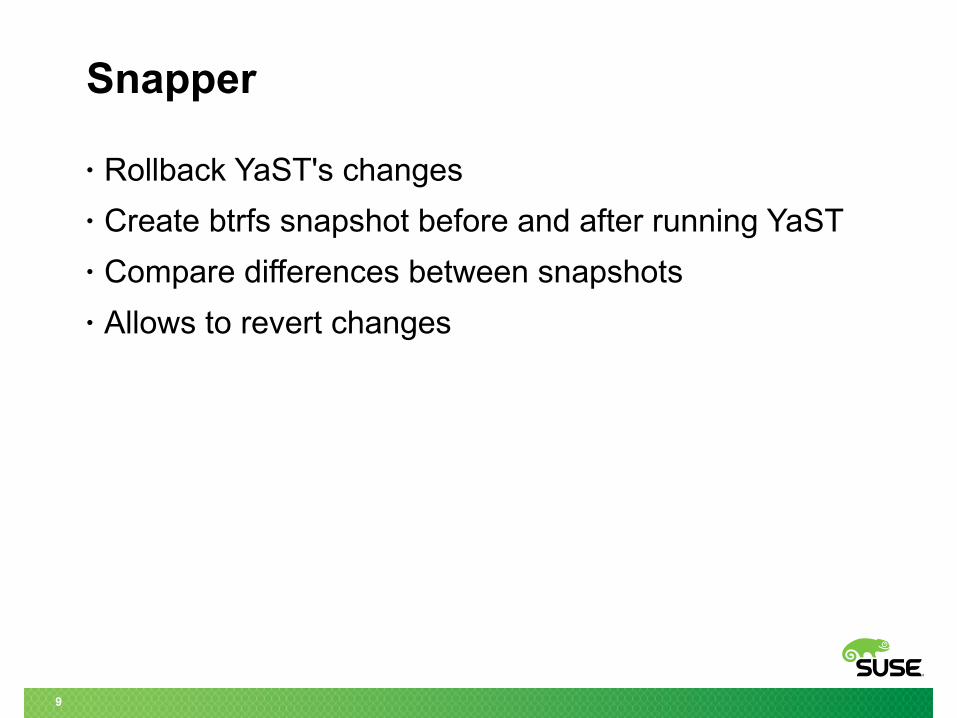
Snapper
• Rollback YaST's changes
• Create btrfs snapshot before and after running YaST
• Compare differences between snapshots
• Allows to revert changes

10
Snapper (cont'd)
Secrets and (Un)Known Features

12
Debugging
• Turn on debugging messages:
Y2DEBUG=1 yast2 network
• Read YaST log file:
tail -f /var/log/YaST2/y2log

Feature: Hotkeys

14
Hotkeys
• Crtl + Shift + Alt + X Run xterm
• Shift + F7 Debug level
• Print Screenshot
• Shift + F8 Save logs
• Ctrl + Shift + Alt + M Start/stop macro recorder
• Ctrl + Shift + Alt + P Play macro
• Ctrl + Shift + Alt + S Style sheet editor

Feature: Themes
16
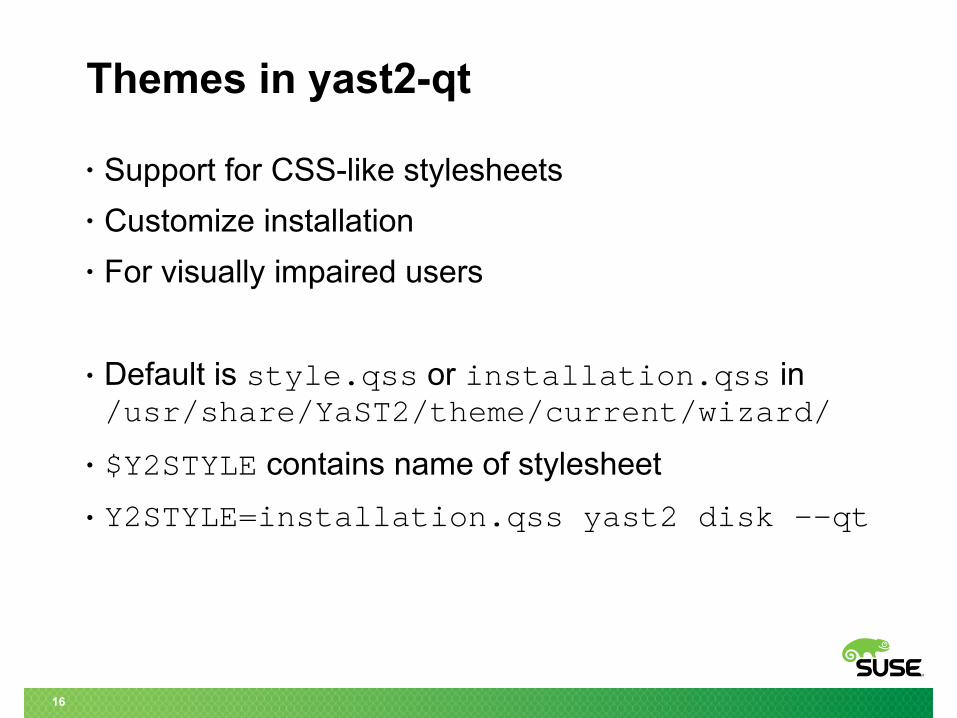
Themes in yast2-qt
• Support for CSS-like stylesheets
• Customize installation
• For visually impaired users
• Default is style.qss or installation.qss in /usr/share/YaST2/theme/current/wizard/
• $Y2STYLE contains name of stylesheet
• Y2STYLE=installation.qss yast2 disk --qt

17
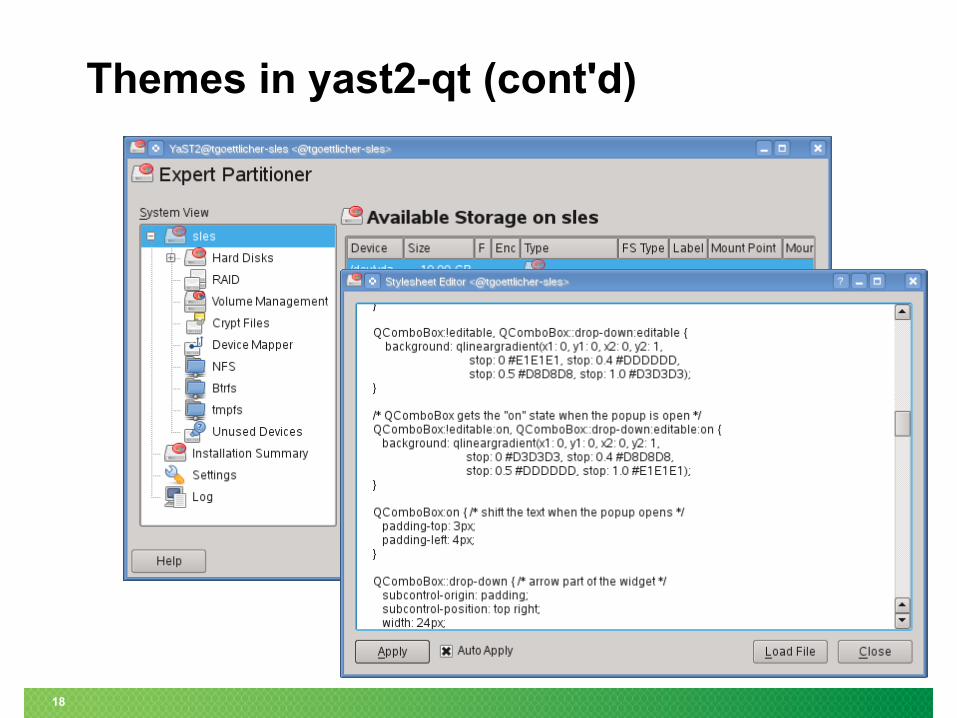
Themes in yast2-qt (cont'd)
18
Themes in yast2-qt (cont'd)

19
Themes in yast2-qt (cont'd)
20
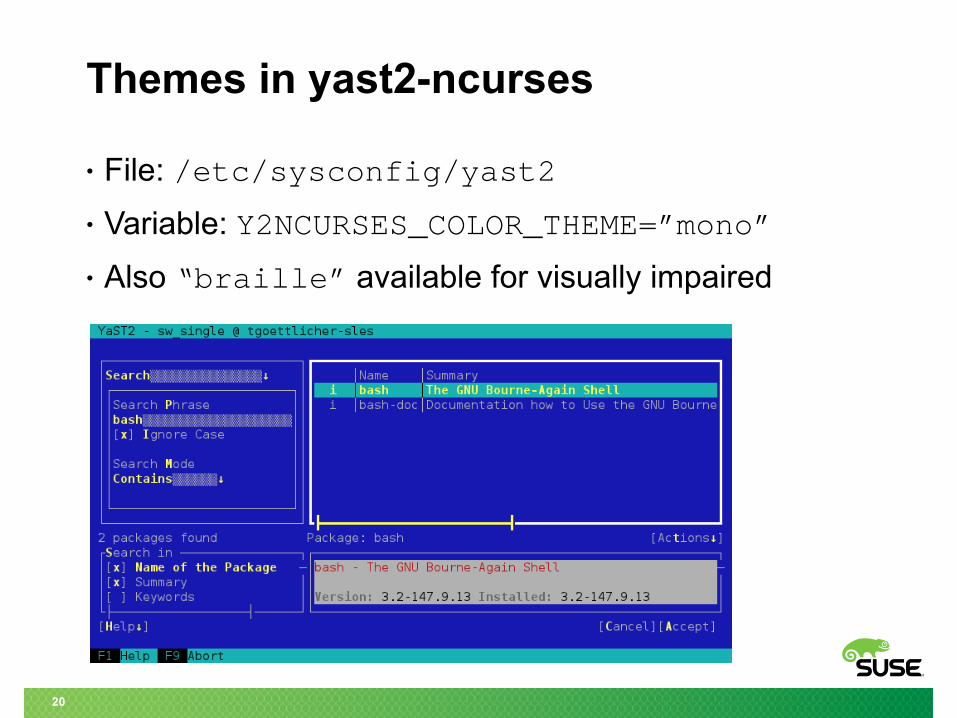
Themes in yast2-ncurses
• File: /etc/sysconfig/yast2
• Variable: Y2NCURSES_COLOR_THEME=”mono”
• Also “braille” available for visually impaired

21
Themes in yast2-ncurses (cont'd)
• File: /etc/sysconfig/yast2
• Variable: Y2NCURSES_COLOR_THEME=”mono”
• Also “braille” available for visually impaired

Feature: Driver Update
23
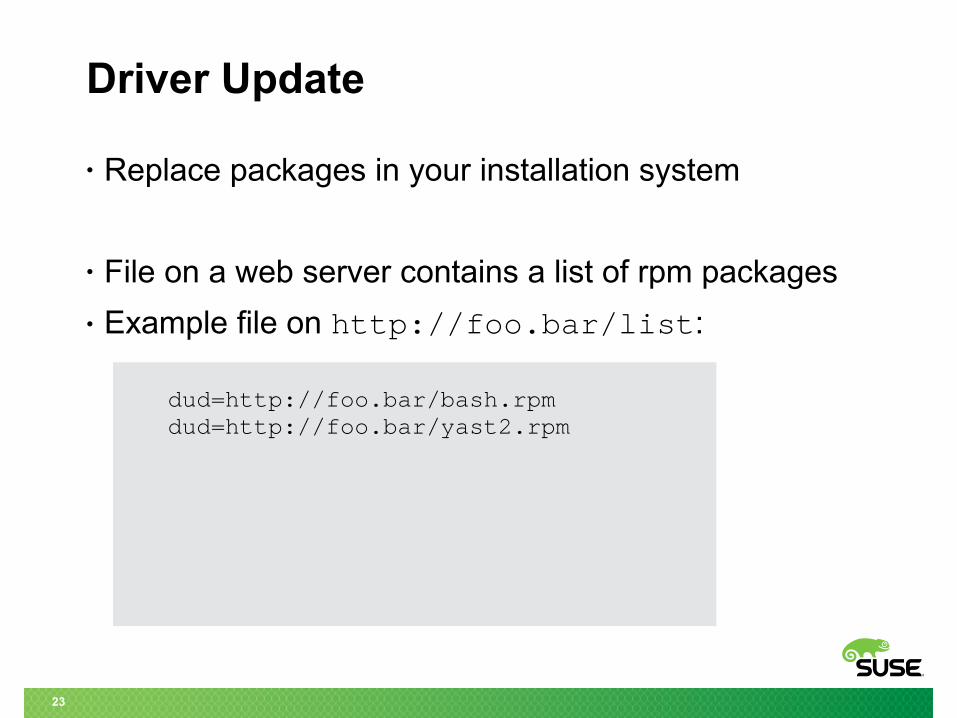
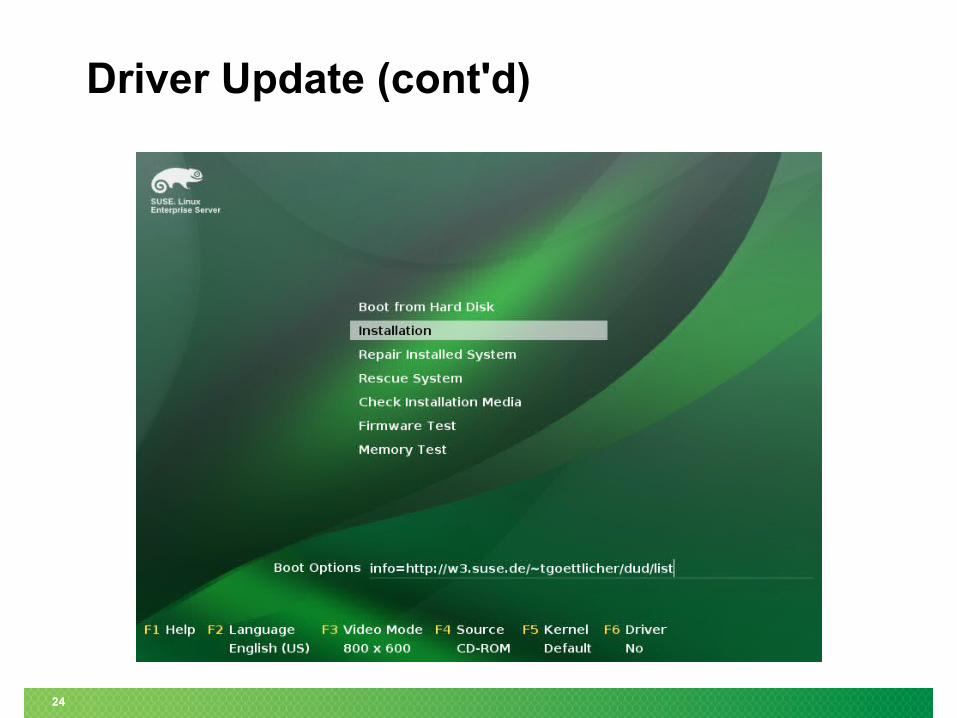
Driver Update
• Replace packages in your installation system
• File on a web server contains a list of rpm packages
• Example file on http://foo.bar/list:
dud=http://foo.bar/bash.rpm dud=http://foo.bar/yast2.rpm
24
Driver Update (cont'd)

25
Driver Update (cont'd)

Feature: Boot Loader Speaker
27
Boot Loader Speaker
• Press F9 at the boot screen
• Reads menu entries to you
• If you do not have a monitor
• For visually impaired users
Feature: Remote Installation
29
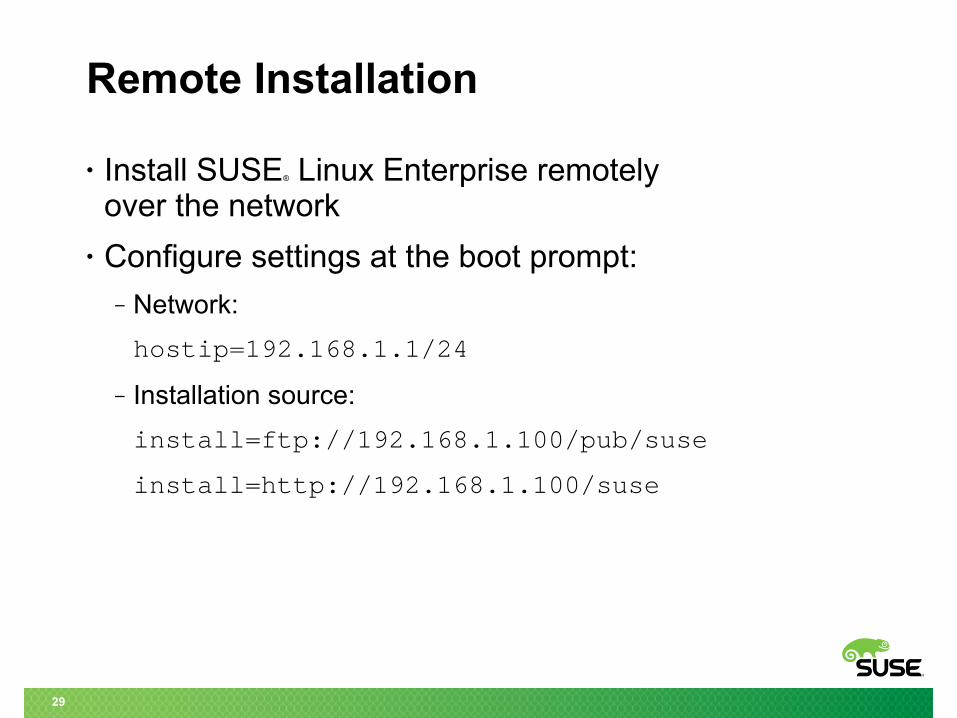
Remote Installation
• Install SUSE® Linux Enterprise remotely over the network
• Configure settings at the boot prompt:‒ Network:
hostip=192.168.1.1/24
‒ Installation source:
install=ftp://192.168.1.100/pub/suse
install=http://192.168.1.100/suse

30
Remote Installation (cont'd)
• Installation via:
‒ VNC (Virtual Network Computing)
vnc=1
vncpassword=susecon2013
‒ SSH (Secure Shell)
ssh=1
sshpassword=susecon2013

31
Remote Installation (cont'd)
•

32
Remote Installation (cont'd)
• Connect to host via vncviewer 10.10.2.15 :1

Feature: Macro Recorder
34
Macro Recorder
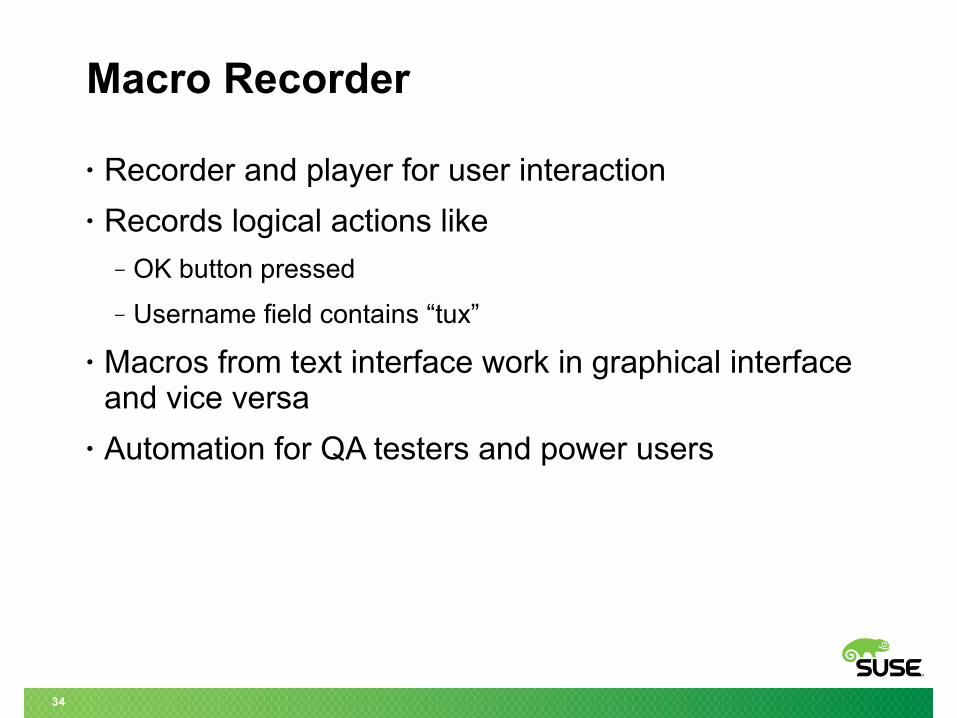
• Recorder and player for user interaction
• Records logical actions like ‒ OK button pressed
‒ Username field contains “tux”
• Macros from text interface work in graphical interface and vice versa
• Automation for QA testers and power users
35
Macro Recorder (cont'd)
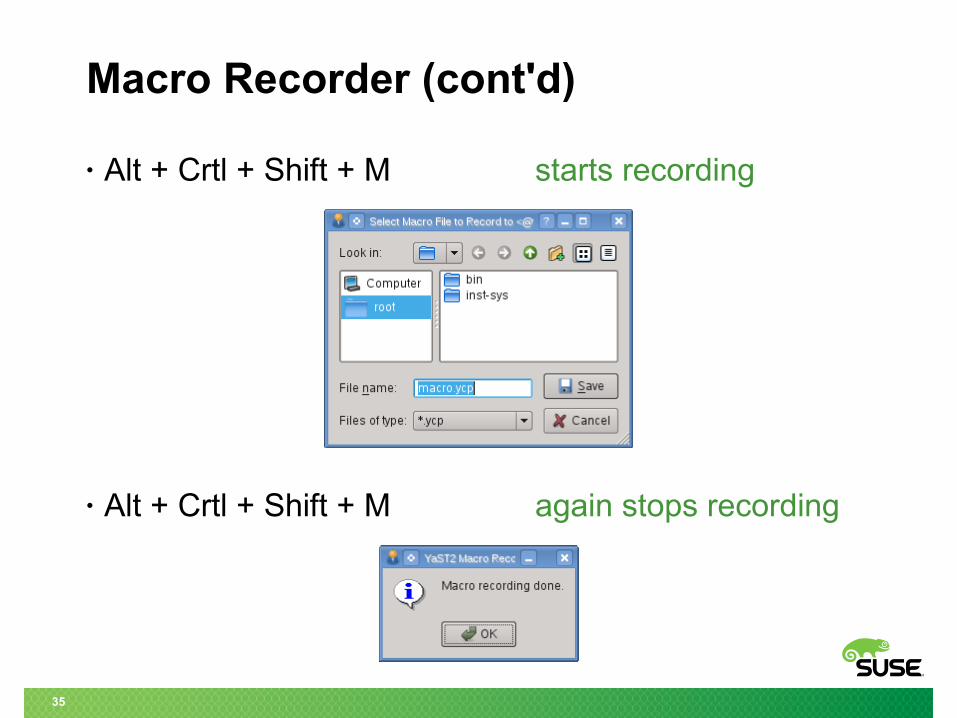
• Alt + Crtl + Shift + M starts recording
• Alt + Crtl + Shift + M again stops recording

36
Macro Recorder (cont'd)
• Play a recorded macro:
Alt + Ctrl + Shift + P
• Run macros from the command line:
/usr/lib/YaST2/bin/y2base modulename qt --macro macro.ycp
• Macros are not a substitution for AutoYaST
What is AutoYaST?

38
AutoYaST
• AutoYaST is the SUSE® Linux Enterprise automated installation method that leverages standard installation processes with predefined rules and responses to create reproduceable OS builds
• Caution: Can reduce the time to provision a new SUSE Linux Enterprise machine to less than 10 minutes

39
When to Use AutoYaST
• Linux is your primary OS or you need deployment on demand
• Dealing with a wide range of machines
• Constantly changing hardware or a wide variety of hardware
• Constantly changing software requirements
• Only installing a few machines at a time
• Staff has varying Linux expertise

40
When to Use Imaging
• Need to support multiple operating systems
• Have a large number of identical systems to support
• Limited applications to support or you are using an application deployment system (I.e., thin images and SUSE® Studio)
• Limited number of hardware platforms
• Few images are needed

41
SUSE® Manager
• Best of both worlds with support for AutoYaST, multi-cast and integrated support for SUSE Studio images.

Create an Installation Server
43
Installation ServerServer Specs
• Disk Space‒ 5GB plus enough disk space to hold the Linux distributions
you will use
• Processor/RAM‒ Any modern system with 512MB of RAM or greater
• Apache installed‒ Can use FTP, NFS, HTTP or Samba for installation.
‒ HTTP is easiest to use and URLs can be manipulated via apache. Windows and other OSs can be used if you already have an existing web server

44
Best Practices
• When setting up, turn off your firewall
• YaST : Security and Users : Firewall
• Can be re-enabled after configuration and setup‒ Be mindful of these ports: HTTP 80, TFTP 69, DHCPD 547

45
Installation ServerYaST:Miscellaneous:Installation Server
YaST installs and configures Apache and copies the source media to the system

46
Verify the Installation Source
You can browse to the installation source to verify that it is visible on the network. Make sure to include the trailing slash (“/”)

47
Start an Installation
Use SUSE® Linux Enterprise 11 DVD1
Boot Options: install=http://<server>/<source_path>
48
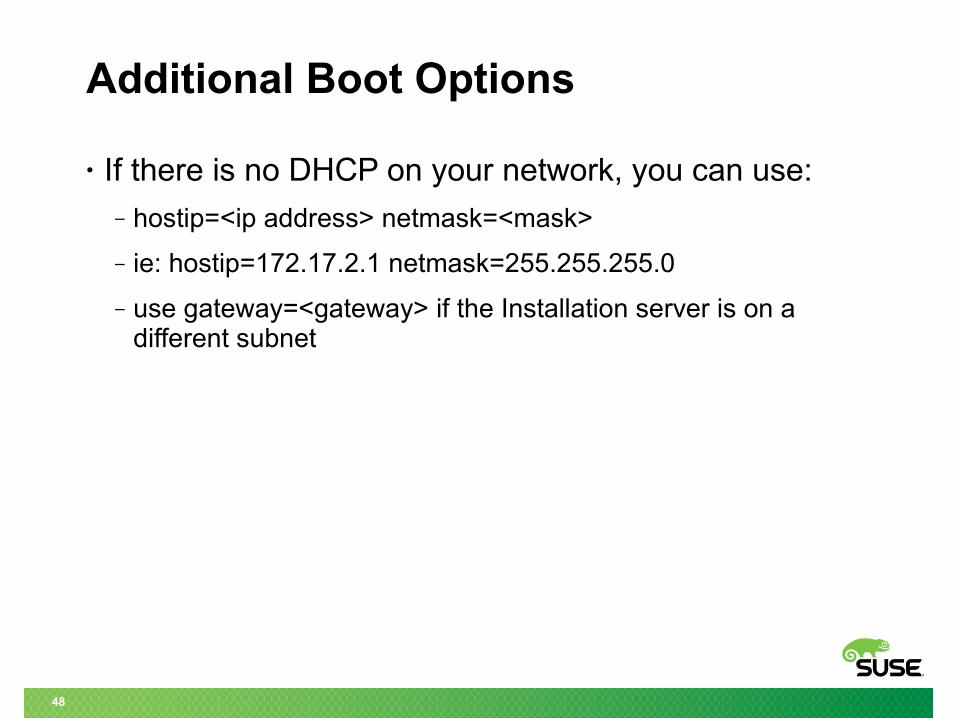
Additional Boot Options
• If there is no DHCP on your network, you can use:‒ hostip=<ip address> netmask=<mask>
‒ ie: hostip=172.17.2.1 netmask=255.255.255.0
‒ use gateway=<gateway> if the Installation server is on a different subnet

Network Setup and Install Demo:

Create an AutoYaST Profile
51
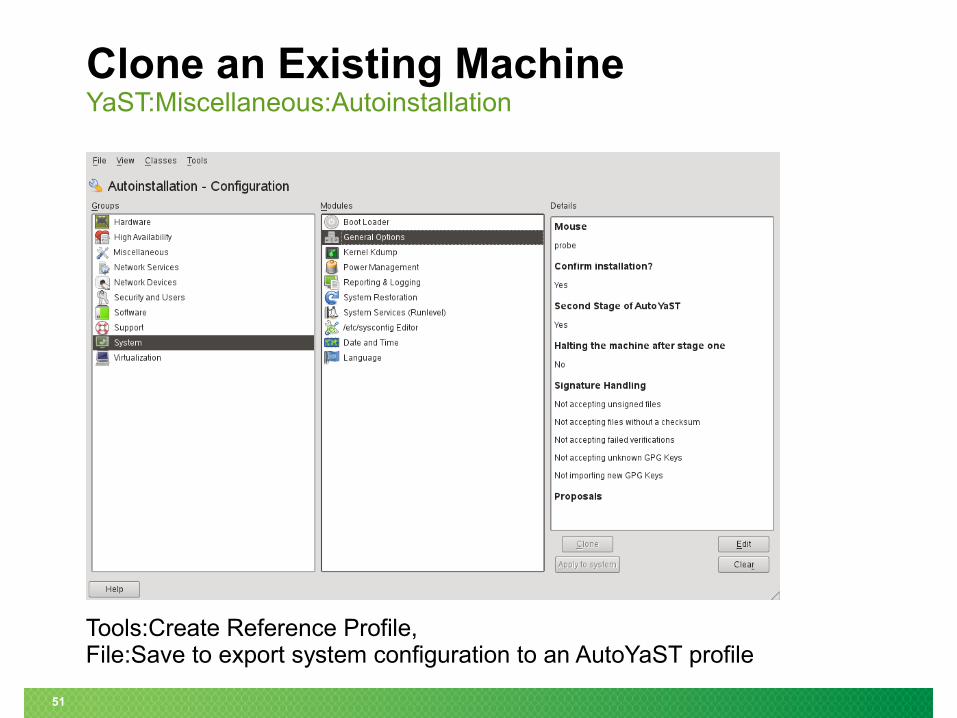
Clone an Existing MachineYaST:Miscellaneous:Autoinstallation
Tools:Create Reference Profile, File:Save to export system configuration to an AutoYaST profile
52
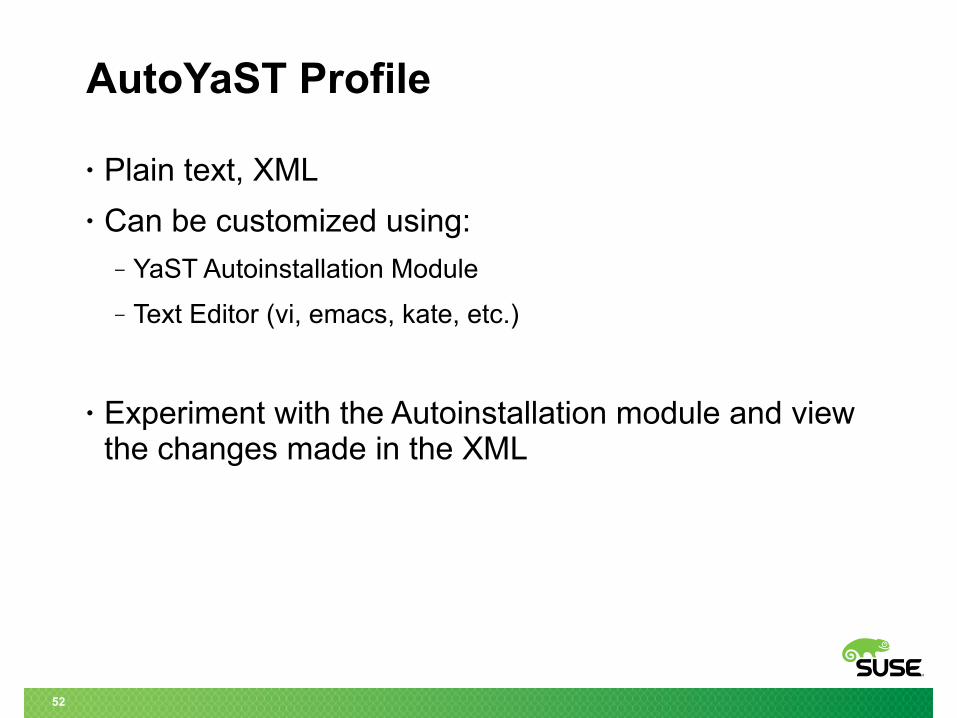
AutoYaST Profile
• Plain text, XML
• Can be customized using:‒ YaST Autoinstallation Module
‒ Text Editor (vi, emacs, kate, etc.)
• Experiment with the Autoinstallation module and view the changes made in the XML

53
AutoYaST ProfileThings I like to edit
• <Software>‒ Just use patterns, individual packages typically not needed
• <Interface>‒ Remove <name> (and <netmask> if dhcp) tags
‒ Change <device>eth-id-<MAC></device> to <device>eth0</device>, <device>eth1</device>, etc.
‒ Recommend to define all interfaces if system has more than one NIC
• <Partition>‒ Chang <size> to fixed size for swap and other partitions
(ie 2GB) and “auto” to span the remainder of the disk
• Scan XML and remove machine specific syntax
AutoYaST Profile Demo:

55
Sample AutoYaST profileSimplest possible profile for SUSE Linux Enterprise Server 11
<?xml version="1.0"?>
<!DOCTYPE profile SYSTEM "/usr/share/autoinstall/dtd/profile.dtd">
<profile xmlns="http://www.suse.com/1.0/yast2ns" xmlns:config="http://www.suse.com/1.0/configns">
<partitioning config:type="list">
<drive>
<use>all</use>
</drive>
</partitioning>
<users config:type="list">
<user>
<encrypted config:type="boolean">false</encrypted>
<user_password>myrootpassword</user_password>
<username>root</username>
</user>
</users>
</profile>

56
Start an Installation
Use SLE 11 DVD1
Boot Options:
install=http://<server>/<source_path>
autoyast=http://<server>/<path_to_profile>

Automated Installation Demo:
Diskless Installation

59
Preboot Execution Environment (PXE)
Part of the firmware of most modern network cards,
PXE leverages DHCP (Dynamic Host Configuration
Protocol) to find an available PXE server to download
a network bootstrap program (NBP) to the computer's
RAM using TFTP (Trivial File Transfer Protocol).
Once in RAM, the NBP can execute and download
installation or other software, removing the need for
installation media.
60
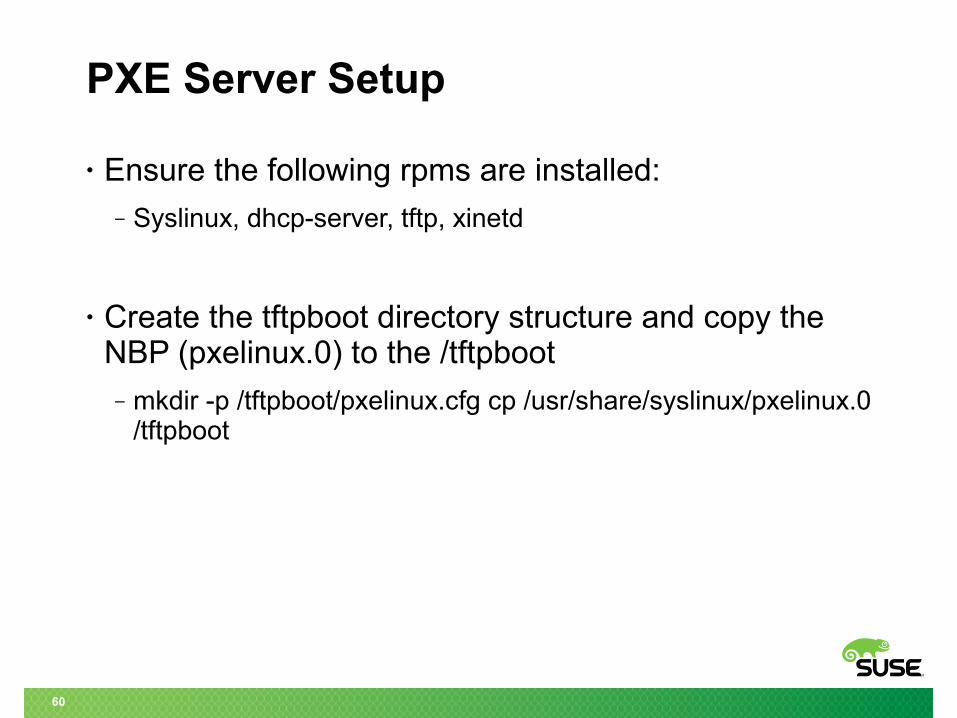
PXE Server Setup
• Ensure the following rpms are installed:‒ Syslinux, dhcp-server, tftp, xinetd
• Create the tftpboot directory structure and copy the NBP (pxelinux.0) to the /tftpboot
‒ mkdir -p /tftpboot/pxelinux.cfg cp /usr/share/syslinux/pxelinux.0 /tftpboot

61
PXE Server Setup (continued)
• Copy the Linux kernel and initrd (initial ramdisk) from the source media (or installation directory):
‒ From the source directory...‒ cp boot/x86_64/loader/linux /tftpboot/sle11sp2_64bit_linux
‒ cp boot/x86_64/loader/initrd /tftpboot/sle11sp2_64bit_initrd
• If you're hosting multiple architecture sources (i386, x86-64, etc), you'll need to have unique names for each copied linux and initrd file
62
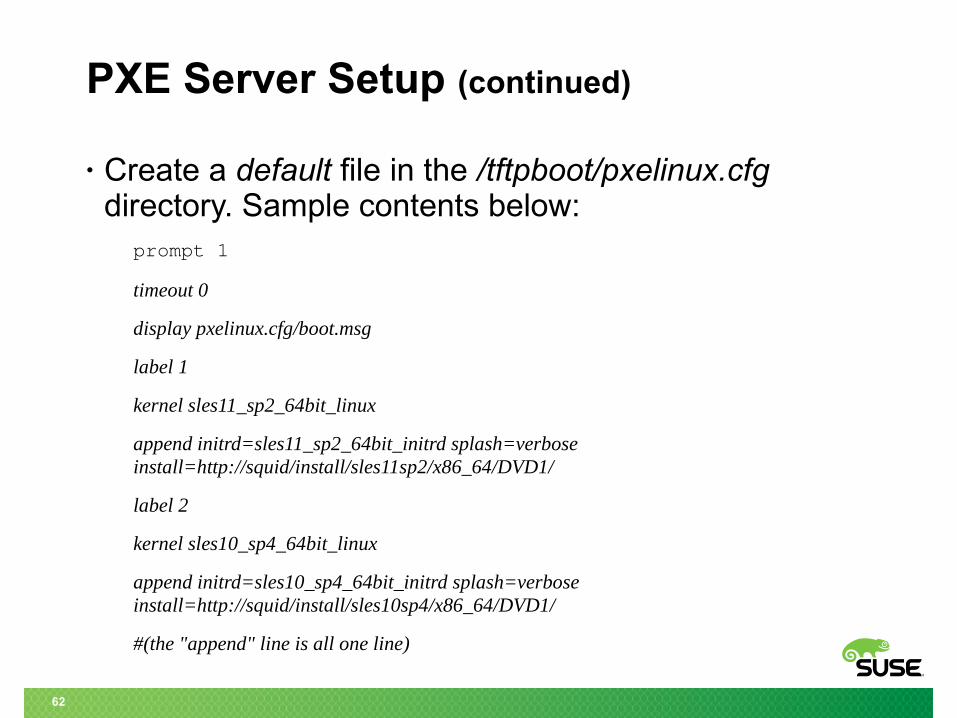
PXE Server Setup (continued)
• Create a default file in the /tftpboot/pxelinux.cfg directory. Sample contents below:
prompt 1
timeout 0
display pxelinux.cfg/boot.msg
label 1
kernel sles11_sp2_64bit_linux
append initrd=sles11_sp2_64bit_initrd splash=verbose install=http://squid/install/sles11sp2/x86_64/DVD1/
label 2
kernel sles10_sp4_64bit_linux
append initrd=sles10_sp4_64bit_initrd splash=verbose install=http://squid/install/sles10sp4/x86_64/DVD1/
#(the "append" line is all one line)

63
PXE Server Setup (continued)
• Create a boot.msg file in the /tftpboot/pxelinux.cfg directory. Sample contents below:|--------------------------------|
| |
| PXE Boot Menu List |
| |
| 1. SLES 11 SP2 (64-bit) |
| 2. SLES 10 SP4 (64-bit) + auto |
|--------------------------------|
• Do not use any tabs in the boot.msg file (spaces only)

64
Configure TFTPYaST:Network Services:TFTP Server
Select Enable and choose /tftpboot as the Boot Image Directory
65
DHCP Server Setup
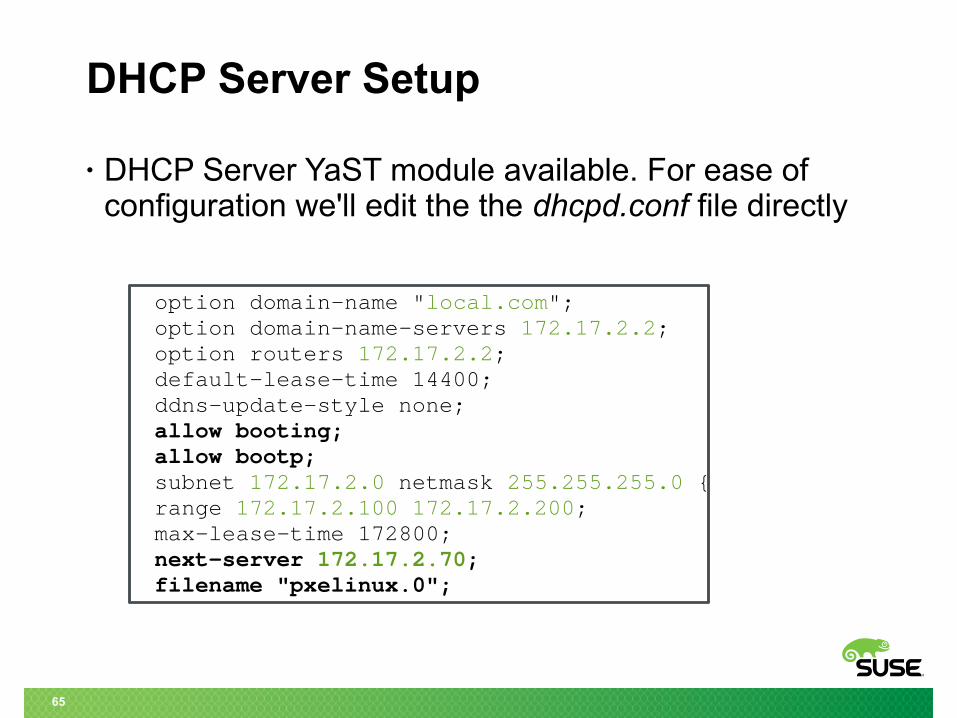
• DHCP Server YaST module available. For ease of configuration we'll edit the the dhcpd.conf file directly
option domain-name "local.com"; option domain-name-servers 172.17.2.2; option routers 172.17.2.2; default-lease-time 14400; ddns-update-style none; allow booting; allow bootp; subnet 172.17.2.0 netmask 255.255.255.0 { range 172.17.2.100 172.17.2.200; max-lease-time 172800; next-server 172.17.2.70; filename "pxelinux.0";
66
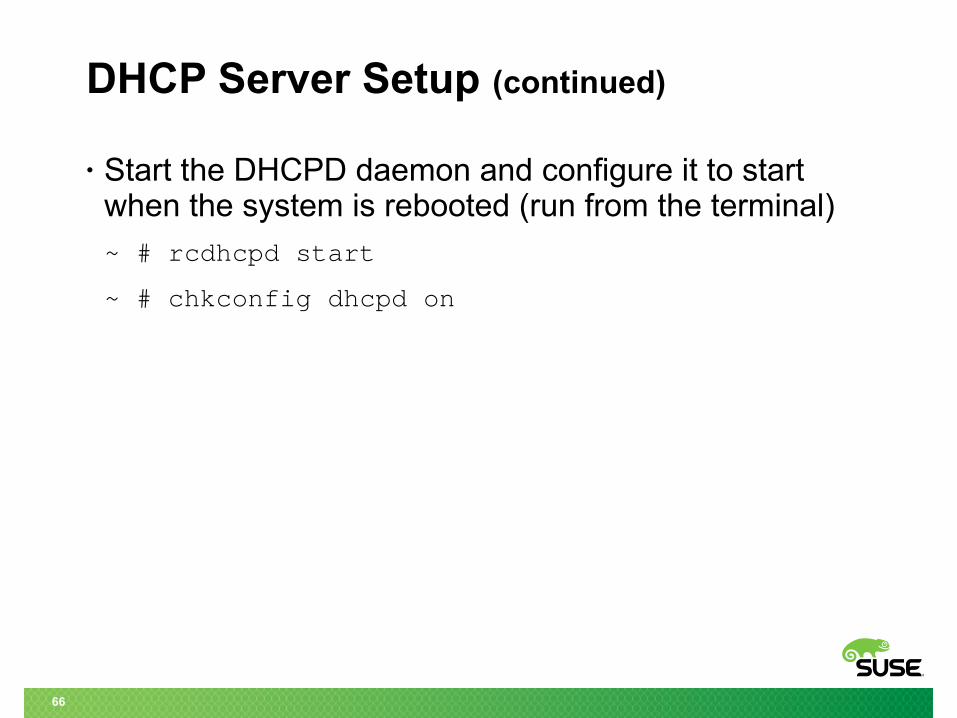
DHCP Server Setup (continued)
• Start the DHCPD daemon and configure it to start when the system is rebooted (run from the terminal)
~ # rcdhcpd start
~ # chkconfig dhcpd on

67
Start a Diskless Installation
Select Network Boot from the BIOS

68
Additional Resources
• Setup Guide for Auto-installation Environment:
http://www.novell.com/coolsolutions/feature/19280.html
• The most up-to-date AutoYaST documentation:
http://www.suse.de/~ug/
• Mailing list for AutoYaST, subscribe here:
http://en.opensuse.org/Communicate
Thank you.
69
Questions?
Corporate HeadquartersMaxfeldstrasse 590409 NurembergGermany
+49 911 740 53 0 (Worldwide)www.suse.com
Join us on:www.opensuse.org
70

Unpublished Work of SUSE. All Rights Reserved.This work is an unpublished work and contains confidential, proprietary and trade secret information of SUSE. Access to this work is restricted to SUSE employees who have a need to know to perform tasks within the scope of their assignments. No part of this work may be practiced, performed, copied, distributed, revised, modified, translated, abridged, condensed, expanded, collected, or adapted without the prior written consent of SUSE. Any use or exploitation of this work without authorization could subject the perpetrator to criminal and civil liability.
General DisclaimerThis document is not to be construed as a promise by any participating company to develop, deliver, or market a product. It is not a commitment to deliver any material, code, or functionality, and should not be relied upon in making purchasing decisions. SUSE makes no representations or warranties with respect to the contents of this document, and specifically disclaims any express or implied warranties of merchantability or fitness for any particular purpose. The development, release, and timing of features or functionality described for SUSE products remains at the sole discretion of SUSE. Further, SUSE reserves the right to revise this document and to make changes to its content, at any time, without obligation to notify any person or entity of such revisions or changes. All SUSE marks referenced in this presentation are trademarks or registered trademarks of Novell, Inc. in the United States and other countries. All third-party trademarks are the property of their respective owners.