user manual - amazon web...
TRANSCRIPT
User ManualFor Mini GPS Tracker A9

Scan the QR code below to the user manual in different languages,
DE IT FR ES
RU
Chapter 1 Product views
1.1 Product Introduction
Mini GPS Tracker is a new generation of personal GPS tracking gadget for kids/elderly/pets /personalasset. It is compact, accurate, discreet and reliable. With GSM and GPRS network connectivity, the GPSTracker works almost anywhere in the world. With mobile app and live tracking function, user can checkthe position of the tracker anywhere anytime. With the SOS panic button and two-way voice functions,you can have voice conversation with kids/elderly whenever they need your help. It is as small as a setof car keys and can be easily placed inside pocket/handbag/suitcase/backpack/etc. You will enjoy apeace of mind with knowing exactly where your loved ones or valuable assets are.
1.2 Product interface

1. Micro USB portMicro USB port is designed for charging.2. Power/SOS buttonPower on/off the GPS tracker;Initiate a SOS emergency call after the tracker is powered on and the emergency number are setup,(Press the power button for 5 seconds, the tracker will dial a emergency call)
3. Indicator lightIndicator light will indicate the different status of the GPS tracker, below are the details,
Device Status Light status
Charging Light on when charging; lights off after fully charged;
Starting Up Light on with voice hint, then flashes for 6 times
Normal work Light off
GSM card fault Light flashing
Emergency CallLight flashes once then lit on after pressing SOS button for 3 seconds, thenlight off after dial the call.
No power Light off
Indicator light
Power/SOS
Speaker
Micro USB slot
MicrophoneBack cover screwSIM card slot

RemoteShutdown
Light flashes for 6 times then shutdown with voice hint
Low power Lights off after two drops
Can’t beconnected server
Light flashing
1.3 Box contents
1.4 How to charge the device?
Connect one end of the charging cable to a USB port of laptop(or 5V power adapter) and the other endto GPS tracker to begin charging. Full charge usually takes 1 or 2 hours.
1.5 Warnings
1. Please check device model and accessories after received the package, if product is found cracked,deformed, or has other anomalies, please stop using it immediately and contact the seller ormanufacturer.2. Check GSM signal after turned on, please refer to indicator lights status for details. If the indicatorlight is flashing, it means the SIM card may not be installed well or the PIN code is not disabled. ThenPlease install the SIM card into the a cellphone to disable the PIN code, then put the SIM card back intothe tracker.3. The device could not be turned off manually after it is online. If you need to turn it off, please sendshutdown command via APP. User can press power button to turn it off manually only when the deviceis offline. Please change the SIM card only when the device is off, otherwise SIM card may be burned.4. This device depends on the GPS network, GSM (GPRS) network system, GIS (geographic information)system, computer system and etc. This product must work with good network flow, due to networkfailure or other forces causes any losses and service disruption, we will not undertake any responsibility.5. Keep the product away from water, fire, high temperature or other extreme environment.
Item list Accessories Quantity(piece)
1 GPS tracker 1
2 Quick User Guide 1
3 USB cable 1
4 Tweezers 1
6. Don’t disassemble or modify the product, to avoid damage to the product.7. If the product is damaged as a result of breach of the warnings above, we will not bear any legalresponsibility.
Chapter 2 Before Using
Step 1. Install the SIM card
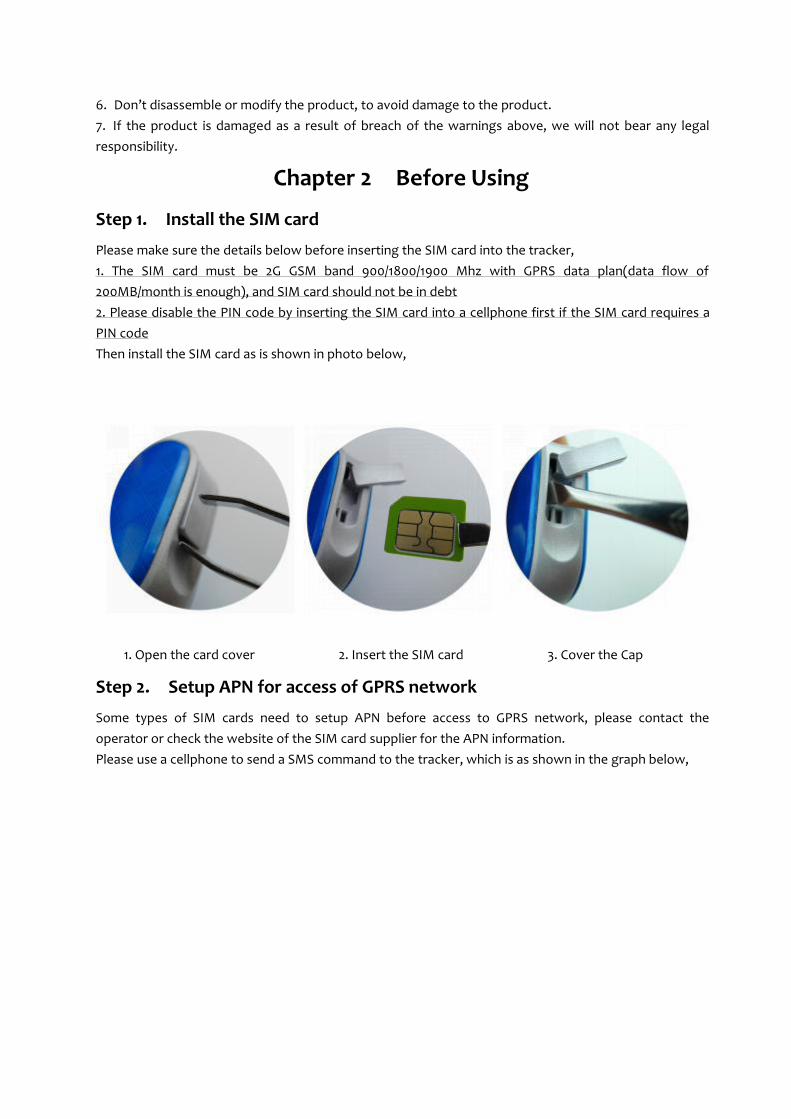
Please make sure the details below before inserting the SIM card into the tracker,1. The SIM card must be 2G GSM band 900/1800/1900 Mhz with GPRS data plan(data flow of200MB/month is enough), and SIM card should not be in debt2. Please disable the PIN code by inserting the SIM card into a cellphone first if the SIM card requires aPIN codeThen install the SIM card as is shown in photo below,
1. Open the card cover 2. Insert the SIM card 3. Cover the Cap
Step 2. Setup APN for access of GPRS network
Some types of SIM cards need to setup APN before access to GPRS network, please contact theoperator or check the website of the SIM card supplier for the APN information.Please use a cellphone to send a SMS command to the tracker, which is as shown in the graph below,
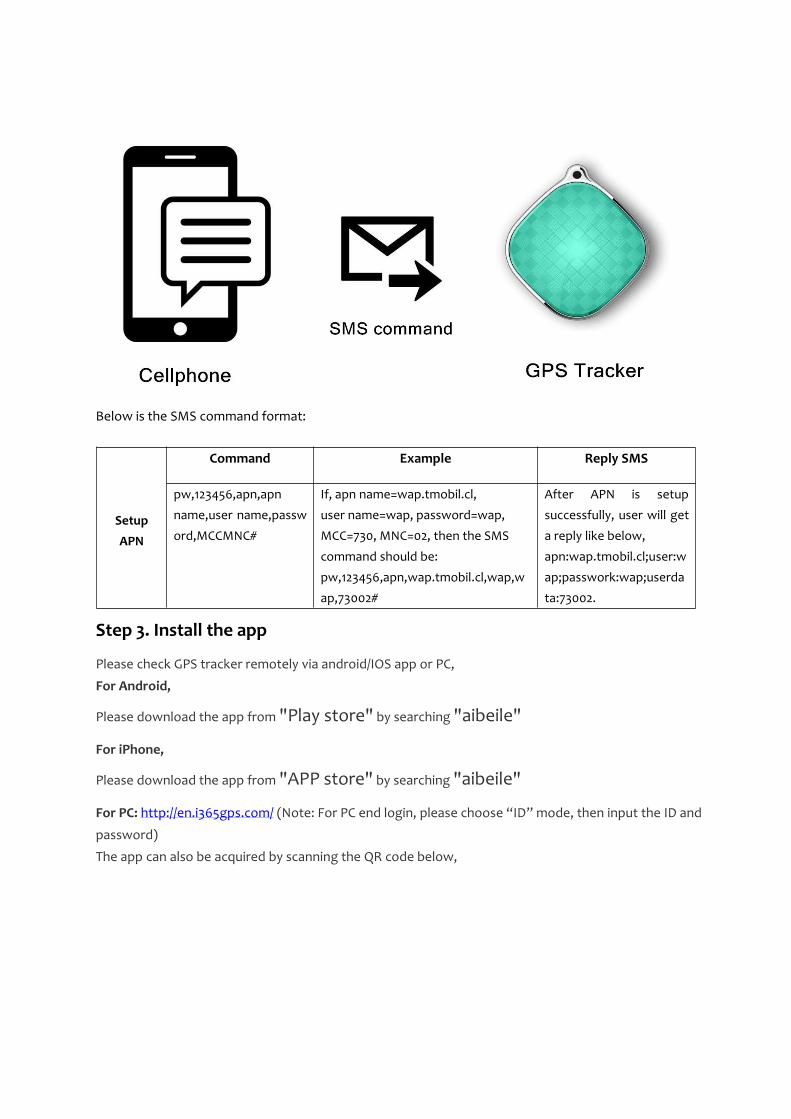
Below is the SMS command format:
Setup
APN
Command Example Reply SMS
pw,123456,apn,apn
name,user name,passw
ord,MCCMNC#
If, apn name=wap.tmobil.cl,
user name=wap, password=wap,
MCC=730, MNC=02, then the SMS
command should be:
pw,123456,apn,wap.tmobil.cl,wap,w
ap,73002#
After APN is setup
successfully, user will get
a reply like below,
apn:wap.tmobil.cl;user:w
ap;passwork:wap;userda
ta:73002.
Step 3. Install the app
Please check GPS tracker remotely via android/IOS app or PC,
For Android,
Please download the app from "Play store" by searching "aibeile"
For iPhone,
Please download the app from "APP store" by searching "aibeile"
For PC: http://en.i365gps.com/ (Note: For PC end login, please choose “ID” mode, then input the ID and
password)
The app can also be acquired by scanning the QR code below,

Step 4. Login the app
Click the icon “aibeile” on smartphone and choose “login by ID” mode, then login the ID and thepassword of the device.Note: The default password is 123456, and the ID can be found on the silver label on the package.

Chapter 3 Start to use
3.1 Live tracking
Live tracking can not only track the position of the device, but also can track the position of smartphone, user can click “+” and “-” to zoom in and zoom out the map.
3.2 Footprint
Nearly three months’ historical route could be found in Footprint.
3.3 Geo-fence

Click on the upper right corner “+”under the main menu for setup Geofence. Then the device will lock
device’s present position as center automatically, then adjust the radius distance by “+” “-” on map
(default radius is 100 meters, recommended radius is 500 meters) .Save the settings by clicking“Save”.
The device will send message when the device is out of the range.
3.4 Messages
All received messages of can be found in “Message”, such as emergency call, offline alarm, low poweralarm, Geofence alarm and etc.
Chapter 4 Settings

4.1 Setup working mode
The device can setup GPS data uploading interval in working mode settings, which it is related to thebattery standby time.1. Tracking every 1 minute: Fast positioning mode and standby time is 24 hours.2. Tracking every 10 minutes: Standard positioning and standby time is 72 hours.3. Tracking every 1 hour: Power saving mode and standby time is over 96 hours.
4.2 Setup admin number
Click “admin number” and input the admin phone number. The device will send the alarm informationto this phone number. The alarm information includes lower power alarm, Geo-fence alarm,SOS callalarm and other alarm.
4.3 Setup emergency number
The emergency number should be the number for emergency calls. Two emergency numbers can be setat most. The device circularly dials a call to the emergency numbers after press the SOS button for 5seconds. It will call the second number if the first number is not connected, then cycle continually.
4.4 Setup whitelist
Only the phone number in the whitelist can call and be connected with the device.
4.5 Setup voice monitoring number
The voice monitoring phone number can call the device and then listen in to check the voicebackground of the device.
4.6 No disturbing
The user can also setup the time range, then user will not be disturbed by the tracker.
4.7 Setup language and timezone
The user must setup the languages for alarm notice and the timezone at the same time. Only digitnumber can be input in timezone, and language means the language of the alarm notice, it supportEnglish and Chinese.Note: The APP can automatically synchronize the time of user’s cellphone with the tracker after thedevice is online.
4.8 Other settings
1. About deviceIt includes display nickname, device phone number and etc.2. Remote shutdownPlease remote shutdown in device setting option.3. Change passwordUser can change the password of the device for safety reason.
Chapter 5 Troubles and Shootings

Troubles Shootings
The indicator light is flashingand device is not enabled
Please check:
1. SIM card is not installed correctly, please install the SIM again.3. PIN code is not disable, please install the SIM card into the a cellphoneto disable the PIN code, then put the SIM card back into the tracker.3. APN is not setup, please setup APN
The indicator light is flashingand device is offline
Please check if:
1. SIM card may have no signal2. GPRS is canceled or not enabled3. The SIM card is in debts
Positioning is not accurate The device support two modes of positioning,GPS is mainly for outdoor positioning, the accuracy is around 10 meters,base station positioning is mainly for indoor positioning, the accuracy isaround 100-1000 meters.
Lost the ID of the tracker Send the SMS command below to the tracker,pw,123456,ts#Then you can get a reply with the ID and IMEI of the tracker.
Chapter 6 SMS command list
Command items Command format( SMSformat)
Example(manuallysend following SMSfrom mobile phone toGPS locator )
After you send SMS,there will be feedback( SMS returns from GPSlocator to your mobilephone)
Setup admin number pw,123456,center,xxxxxxxxxxx#
pw,123456,center,13640927062#
Central number:
13640927062. setupsuccess!
Setup APN pw,123456,apn,apnname,user name,password,MCCMNC#
pw,123456,apn,wap.tmobil.cl,wap,wap,73002#
APN:wap.tmobil.cl;user:wap;passwork:wap;userdata:73002.
Setup the upload timeinterval
pw,123456,upload,x# pw,123456,upload,300#
Upload timeinterval:300S;setup
success!; upload:
300s;ok!
Inquiry the URL for mappw,123456,url#
pw,123456,url#[GPS]http://maps.google.com.hk/maps?q=N22.568657,E113.8663225

[BASE]http://maps.google.com.hk/maps?q=N22.568657,E113.8663225
Inquiry parameters pw,123456,ts# pw,123456,ts# ver:G19C_BASE_V1.0_2014.05.19_09.38.29;ID:7893267577;imei:000078932675770;ip:121.37.43.203;port:8711;
Reset the device pw,123456,reset# pw,123456,reset# The device will resetRestore factory settings pw,123456,factory# pw,123456,factory# The device will resetSetup IP and port pw,123456,ip,x.x.x.x,y# pw,123456,ip,112.95.16
4.119,7755#IP and port setupsuccess!
Setup language andtime zone
pw,123456,lz,x,y# pw,123456,lz,0,8# lz,x,y# x=0&1 stands for
language,1 for Chinese,
0 for English,y for time
zone