user guide - precision os
TRANSCRIPT
User Guide

CONTENTS(click to follow)
Oculus App SetupConnect to WifiGuardian SetupCasting (broadcast VR on your TV or Phone)
User\HCP LoginMaintenance
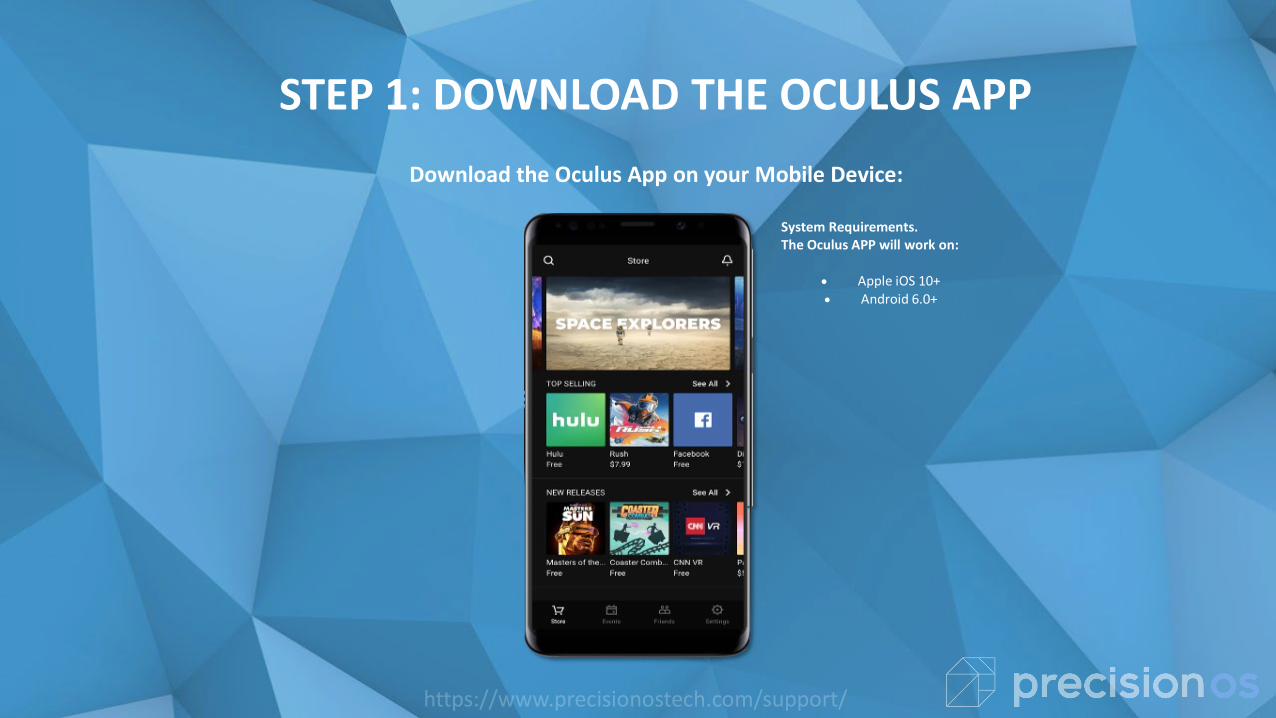
STEP 1: DOWNLOAD THE OCULUS APPDownload the Oculus App on your Mobile Device:
System Requirements. The Oculus APP will work on:
• Apple iOS 10+• Android 6.0+
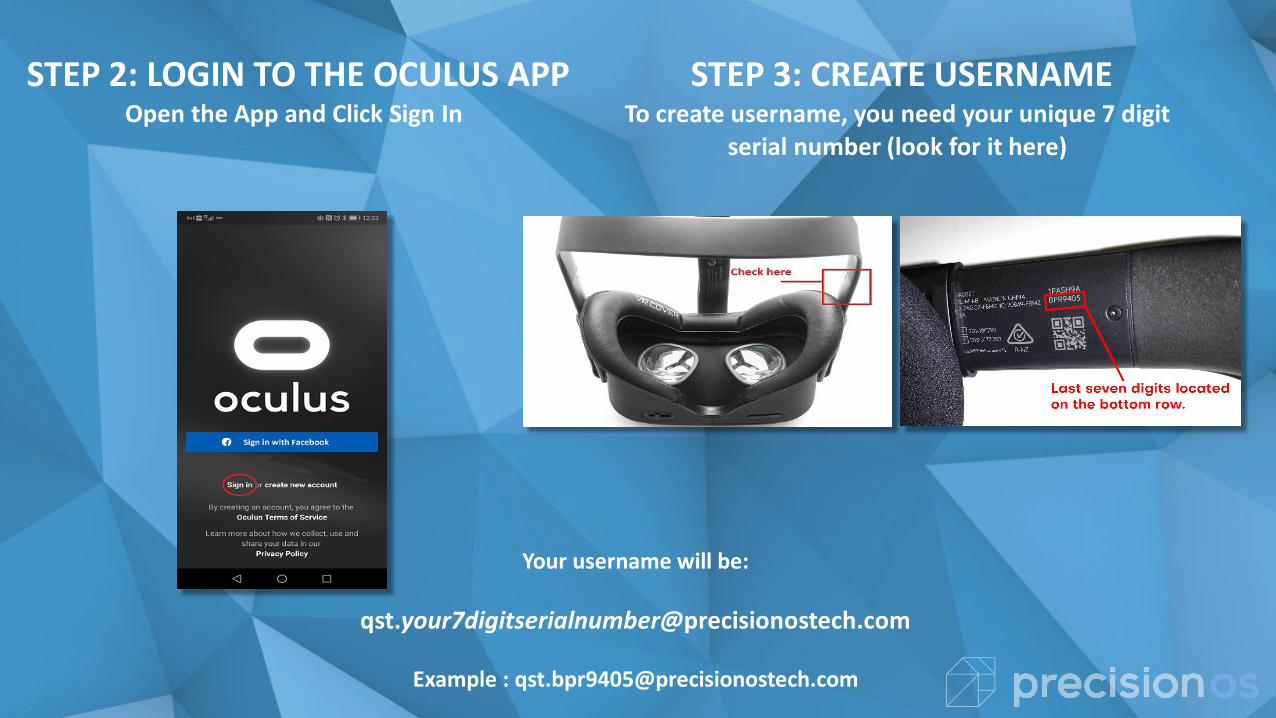
STEP 2: LOGIN TO THE OCULUS APPOpen the App and Click Sign In
STEP 3: CREATE USERNAMETo create username, you need your unique 7 digit
serial number (look for it here)
Your username will be:
Example : [email protected]

STEP 4: ENTER PASSWORD
Your password is : Precision@!
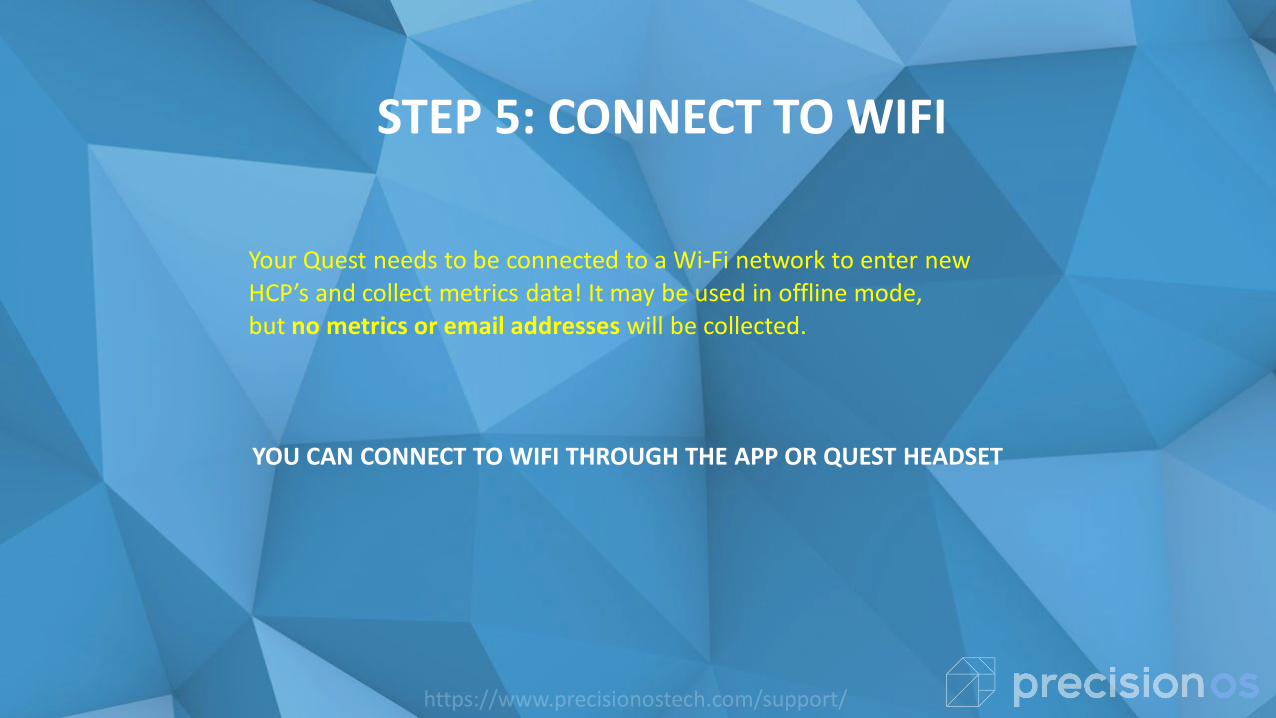
YOU CAN CONNECT TO WIFI THROUGH THE APP OR QUEST HEADSET
STEP 5: CONNECT TO WIFI
Your Quest needs to be connected to a Wi-Fi network to enter new HCP’s and collect metrics data! It may be used in offline mode, but no metrics or email addresses will be collected.

CLICK YOUR HEADSET CLICK DESIRED WIFI (enter relevant credentials)
OPEN APP AND CLICK SETTINGS
STEP 5A: CONNECT TO WIFI IN THE APP
OR

STEP 5B: CONNECT TO WIFI IN THE QUEST HEADSETA. PUT THE HEADSET ON C. PRESS OCULUS BUTTON
(RIGHT CONTROLLER)
D. SELECT SETTINGS E. SELECT WIFI AND CHOOSE YOUR NETWORK
B. PLACE CONTROLLER IN HAND

PLEASE SKIP THE NEXT 2 SLIDES IF CONTROLLERS ALREADY PAIRED TO YOUR OCULUS QUEST HEADSET
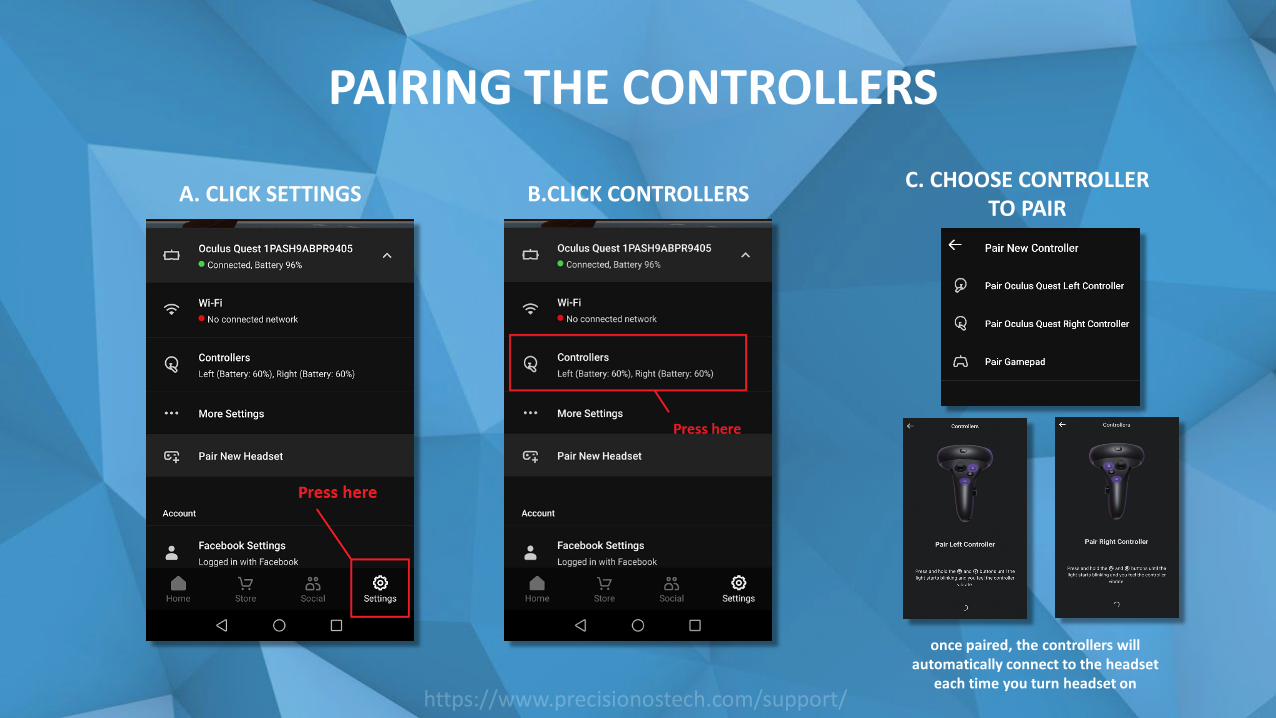
PAIRING THE CONTROLLERS
A. CLICK SETTINGS B.CLICK CONTROLLERS C. CHOOSE CONTROLLER TO PAIR
once paired, the controllers will automatically connect to the headset
each time you turn headset on

UN-PAIRING THE CONTROLLERS
A. CLICK SETTINGS B. CLICK YOUR PAIRED HEADSET
D. CHOOSE CONTROLLER YOU WANT
TO UNPAIR
C. CLICK CONTROLLERS

CONTROLLER FUNCTION(OCULUS BUTTON)
PRESS AND HOLD: resets the virtual world
PRESS AND LET GO: go back to Oculus Home
Press any button to wake controller after you turn headset on

STEP 6: SETTING UP THE GUARDIAN(THE BOUNDARY IN VR APPEARS WHEN YOU GET TO CLOSE TO EDGE OF PLAY AREA)
A. PRESS AND LET GO OCULUS BUTTON (RIGHT
CONTROLLER)
B. SELECT ROOMSCALE OR STATIONARY
ROOMSCALE – BOUNDARY WHICH CAN BE DRAWN USING CONTROLLERS (RECOMMENDED)
STATIONARY – BOUNDARY WHICH IS AUTOMATICALLY SET FOR YOU
VIDEO: Setting up play area

STEP 7: CASTING ( PROJECTING) FROM HEADSET TO PHONE[Headset and Phone must be on SAME WIFI Network]
A. PUT THE HEADSET ON B. CLICK SHARING FROM TOOLBAR
C. SELECT CAST FROM SHARING MENU
D. CLICK DEVICE TO CAST TO AND CLICK START
E. On phone, open Oculus APP and select START
CASTING
VIDEO: Tutorial on how to cast

Rebooting the Oculus Quest:If you're having trouble with your Oculus Quest for any reason, you can try rebooting it to resolve the issue. To reboot your Quest:
1.With your headset on, hold the power button on the top of your headset down until you're prompted with a shut-down screen.
2.Select Restart from within the headset to reboot your Oculus Quest.
REBOOTING THE OCULUS QUEST

If you have used this software before (i.e. conference, meeting, convention etc.) please use the same email you used to login at the event and use the PIN ‘1111’ to login.
If you are a brand-new user, you will need to create a new account prior to entering the OR. In order to make a new account, you will need to provide the following information:
A valid e-mail account.
A Personal Identification Number (PIN)
User Classification
1. When you turn on the headset, the Launcher will open.
2. After the tutorial, you will be brought to the LOGIN page.
3. Select SIGN UP at the bottom of the login panel.
LOGIN AND NEW USER:

The user can now select the module of choice and have their usernames and data recorded.Please remember to RESET the user\HCP after use. You must reset to capture the next user's info within the same session.
5. Enter your email address and choose a PIN then hit SUBMIT.
4. Select a user type and input your institution/company name then hit NEXT.
LOGIN AND NEW USER:
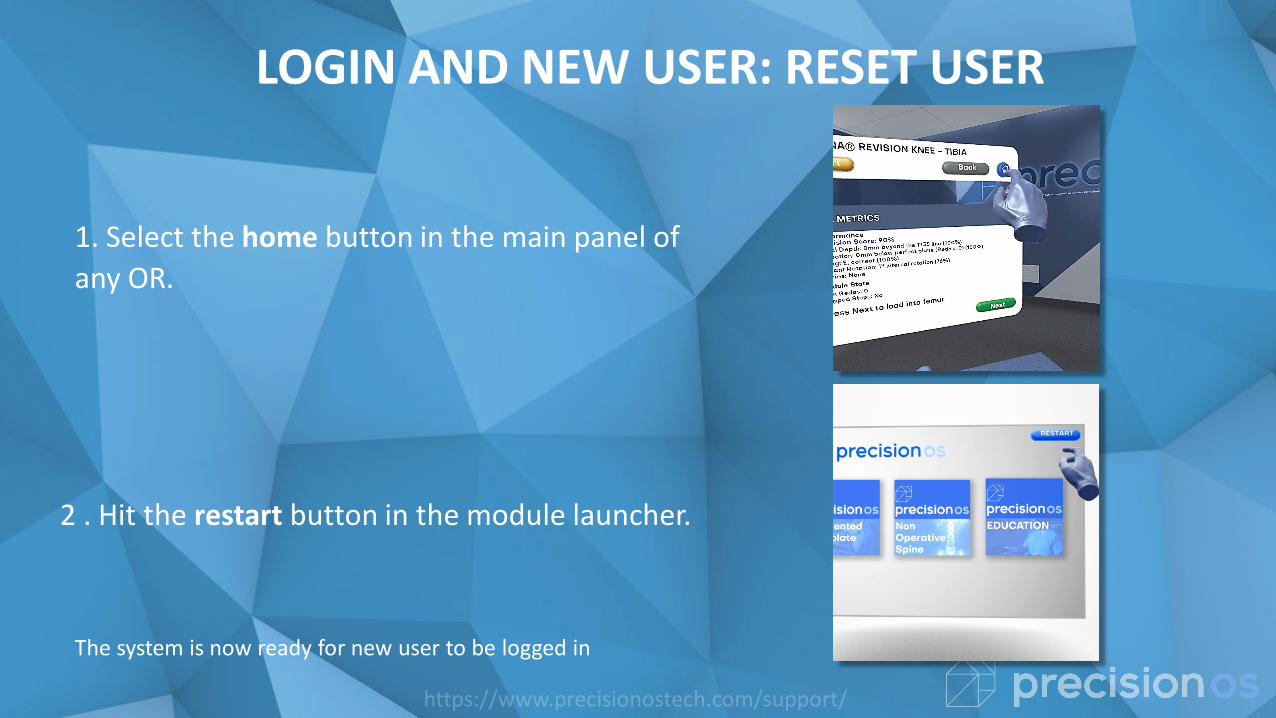
The system is now ready for new user to be logged in
2 . Hit the restart button in the module launcher.
1. Select the home button in the main panel of any OR.
LOGIN AND NEW USER: RESET USER

CLEANING THE OCULUS QUEST:
To clean your Oculus Quest headset:•Use a dry cloth to clean the outside of your headset.•Use non-abrasive, anti-bacterial wipes to clean the straps and the facial interface foam. Don’t use alcohol or an abrasive cleaning solution.
To clean your Quest headset lenses:•Use a dry optical lens micro-fiber cloth to clean your headset lenses. Don’t use liquid or chemical cleansers.•Starting from the center of the lens, gently wipe the lens in a circular motion moving outwards.
To clean your Quest controller:•Use a dry cloth or non-abrasive anti-bacterial wipes to clean your controllers. Don’t use alcohol or an abrasive cleaning solution.
VIDEO: Tutorial on maintenance

It’s important to take care of your Oculus Quest and secure it in a safe place. Keep in mind your limited warranty doesn’t cover normal wear and tear or physical damages. To keep your Oculus Quest safe, follow these tips:
Avoiding sunlight:To avoid damaging your lenses and display, keep your Quest away from direct sunlight. Your headset can be permanently damaged from less than a minute of exposure to direct sunlight. To avoid damaging your lenses and display, keep your Quest away from anywhere that it might get exposed to the sun.
To keep your Oculus Quest safe from sun exposure, follow these tips:• Don't store or leave your Quest anywhere where it can be exposed to sunlight. The lenses inside your
headset can be permanently damaged from less than a minute of exposure to direct sunlight even if it's indoors.
• Do not use your Quest outdoors.• If you need to transport your Quest, do so in a bag or case that keeps it safe and protected from direct
sunlight.
QUEST CARE AND MAINTENANCE: