upgrading to d-show 2 - digidesign support...
TRANSCRIPT

Upgrading to D-Show™ 2.0For D-Show Systems
Digidesign2001 Junipero Serra Boulevard
Daly City, CA 94014-3886 USA
tel: 650·731·6300
fax: 650·731·6399
Technical Support
Digidesign (USA)
tel: 650·731·6100
fax: 650·731·6384
Product Information (USA)
tel: 650·731·6102
tel: 800·333·2137
International Offices
Visit the Digidesign Web site
for contact information
Web Site
www.digidesign.com
PN 9321-55033-00 REV A 03/06

Copyright
© 2006 Avid Technology, Inc. All rights reserved. This guide may not be duplicated in part or in whole without the prior written consent of Avid Technology, Inc.
Avid, Digidesign, D-Show, and Pro Tools are trademarks or registered trademarks of Avid Technology, Inc. in the U.S. and/or other countries. All other trademarks contained herein are the property of their respective owners.
Product features, specifications, system requirements, and availability are subject to change without notice.
PN 9321-55033-00 REV A 03/06

Contents
Chapter 1. New Features in D-Show 2.0 . . . . . . . . . . . . . . . . . . . . . . . . . . . . . . . . . . . . . . . . . . . . . . . . . . . . . . . . . . . . 1
New Features . . . . . . . . . . . . . . . . . . . . . . . . . . . . . . . . . . . . . . . . . . . . . . . . . . . . . . . . . . . . . . . . . . . . . . . . . . . . . . . . 1
Main and Sidecar Split Banking . . . . . . . . . . . . . . . . . . . . . . . . . . . . . . . . . . . . . . . . . . . . . . . . . . . . . . . . . . . . . . . . . . . 2
Copying and Pasting Channel Settings. . . . . . . . . . . . . . . . . . . . . . . . . . . . . . . . . . . . . . . . . . . . . . . . . . . . . . . . . . . . . . . 2
Linking and Unlinking Adjacent Matrix and PQ Inputs . . . . . . . . . . . . . . . . . . . . . . . . . . . . . . . . . . . . . . . . . . . . . . . . . . . . 4
Warning when Stealing Inputs or Outputs in the Patchbay. . . . . . . . . . . . . . . . . . . . . . . . . . . . . . . . . . . . . . . . . . . . . . . . . 4
Patchbay Click and Drag . . . . . . . . . . . . . . . . . . . . . . . . . . . . . . . . . . . . . . . . . . . . . . . . . . . . . . . . . . . . . . . . . . . . . . . . 5
Assignable Monitor Output . . . . . . . . . . . . . . . . . . . . . . . . . . . . . . . . . . . . . . . . . . . . . . . . . . . . . . . . . . . . . . . . . . . . . . . 5
Solo Controls On-Screen. . . . . . . . . . . . . . . . . . . . . . . . . . . . . . . . . . . . . . . . . . . . . . . . . . . . . . . . . . . . . . . . . . . . . . . . . 6
Plug-Ins . . . . . . . . . . . . . . . . . . . . . . . . . . . . . . . . . . . . . . . . . . . . . . . . . . . . . . . . . . . . . . . . . . . . . . . . . . . . . . . . . . . . 6
Filing Page and Footswitch. . . . . . . . . . . . . . . . . . . . . . . . . . . . . . . . . . . . . . . . . . . . . . . . . . . . . . . . . . . . . . . . . . . . . . . 8
New D-Show Hardware Options. . . . . . . . . . . . . . . . . . . . . . . . . . . . . . . . . . . . . . . . . . . . . . . . . . . . . . . . . . . . . . . . . . . . 8
Chapter 2. Snapshots . . . . . . . . . . . . . . . . . . . . . . . . . . . . . . . . . . . . . . . . . . . . . . . . . . . . . . . . . . . . . . . . . . . . . . . . . . . . . 9
Introduction . . . . . . . . . . . . . . . . . . . . . . . . . . . . . . . . . . . . . . . . . . . . . . . . . . . . . . . . . . . . . . . . . . . . . . . . . . . . . . . . 10
Snapshots Page . . . . . . . . . . . . . . . . . . . . . . . . . . . . . . . . . . . . . . . . . . . . . . . . . . . . . . . . . . . . . . . . . . . . . . . . . . . . . 10
Snapshot Controls on the D-Show Control Surface . . . . . . . . . . . . . . . . . . . . . . . . . . . . . . . . . . . . . . . . . . . . . . . . . . . . . 12
Snapshots List . . . . . . . . . . . . . . . . . . . . . . . . . . . . . . . . . . . . . . . . . . . . . . . . . . . . . . . . . . . . . . . . . . . . . . . . . . . . . . 13
Creating Snapshots . . . . . . . . . . . . . . . . . . . . . . . . . . . . . . . . . . . . . . . . . . . . . . . . . . . . . . . . . . . . . . . . . . . . . . . . . . . 14
Recalling Snapshots . . . . . . . . . . . . . . . . . . . . . . . . . . . . . . . . . . . . . . . . . . . . . . . . . . . . . . . . . . . . . . . . . . . . . . . . . . 15
Recall Safe and Channel Automation Safe. . . . . . . . . . . . . . . . . . . . . . . . . . . . . . . . . . . . . . . . . . . . . . . . . . . . . . . . . . . 16
Managing Snapshots . . . . . . . . . . . . . . . . . . . . . . . . . . . . . . . . . . . . . . . . . . . . . . . . . . . . . . . . . . . . . . . . . . . . . . . . . . 20
Making Changes to Snapshots . . . . . . . . . . . . . . . . . . . . . . . . . . . . . . . . . . . . . . . . . . . . . . . . . . . . . . . . . . . . . . . . . . . 21
Preview Mode . . . . . . . . . . . . . . . . . . . . . . . . . . . . . . . . . . . . . . . . . . . . . . . . . . . . . . . . . . . . . . . . . . . . . . . . . . . . . . . 23
Undoing Snapshot Commands . . . . . . . . . . . . . . . . . . . . . . . . . . . . . . . . . . . . . . . . . . . . . . . . . . . . . . . . . . . . . . . . . . . 26
Disabling Snapshots . . . . . . . . . . . . . . . . . . . . . . . . . . . . . . . . . . . . . . . . . . . . . . . . . . . . . . . . . . . . . . . . . . . . . . . . . . 26
Adding MIDI Messages to Snapshots. . . . . . . . . . . . . . . . . . . . . . . . . . . . . . . . . . . . . . . . . . . . . . . . . . . . . . . . . . . . . . . 26
Adding Plug-In Data to Snapshots . . . . . . . . . . . . . . . . . . . . . . . . . . . . . . . . . . . . . . . . . . . . . . . . . . . . . . . . . . . . . . . . . 28
Snapshot Options . . . . . . . . . . . . . . . . . . . . . . . . . . . . . . . . . . . . . . . . . . . . . . . . . . . . . . . . . . . . . . . . . . . . . . . . . . . . 29
Snapshot Data Types and Parameters. . . . . . . . . . . . . . . . . . . . . . . . . . . . . . . . . . . . . . . . . . . . . . . . . . . . . . . . . . . . . . 30
Chapter 3. Installing D-Show 2.0 . . . . . . . . . . . . . . . . . . . . . . . . . . . . . . . . . . . . . . . . . . . . . . . . . . . . . . . . . . . . . . . . . . 31
Show File Compatibility . . . . . . . . . . . . . . . . . . . . . . . . . . . . . . . . . . . . . . . . . . . . . . . . . . . . . . . . . . . . . . . . . . . . . . . . 31
Converting Show Files to 2.x Format . . . . . . . . . . . . . . . . . . . . . . . . . . . . . . . . . . . . . . . . . . . . . . . . . . . . . . . . . . . . . . . 31
Installing D-Show 2.0 Software . . . . . . . . . . . . . . . . . . . . . . . . . . . . . . . . . . . . . . . . . . . . . . . . . . . . . . . . . . . . . . . . . . . 32
Contents iii

Upgrading to D-Show 2.0iv

Chapter 1: New Features in D-Show 2.0
This chapter provides an overview of new features in D-Show™ 2.0 software.
New Features
Routing and Hardware Features
Chapter 1 describes the following enhancements and addi-tions to general D-Show functionality including banking, sig-nal routing and plug-ins:
Channels, Encoders, and Banking
• Main and Sidecar split banking and encoder control
• Copying and pasting channel settings
Input and Output Routing
• Linking or unlinking adjacent inputs to Matrix and PQ
• Warning dialog when stealing input or output assign-ments in Patchbay
• Shortcut to locate Output assignments
• Patchbay click and drag functionality
• Monitor bus assignable in Patchbay
• Solo controls now available in Options > Busses
Plug-Ins
• Pinning a plug-in on-screen
• Improvements to plug-in management
• Ability to route channel Direct Outs and Monitor bus to plug-ins
Filing Page and Footswitch
• Filing page shows the name of the last loaded Show
• Footswitch option to Recall snapshots
New D-Show Hardware Options
• Digital Stage Input (DSI) and Digital Stage Output (DSO) Options for Stage Racks
Snapshot Features
Chapter 2 describes the following new and changed Snap-shot-related features provided in D-Show 2.0.
General Enhancements to Snapshots
• Non-contiguous selection of Snapshots
• Enhancements to Scope (Snapshots store all parameters)
• Improved Handling of VCA Membership in Snapshots
• Channel Delay added to Scope choices
Crossfade Enhancements
• Maximum crossfade time increased to 99.9 seconds
• Crossfades on non-scoped channels continue through subsequent Recalls
• Modified crossfade curve
Recall Safe
• Global filtering of snapshot recall
• Safe by-parameter across any or all channels
• Scope Sets
Preview Mode
• Taking the console offline to edit and preview
Making Changes to Snapshots
• Using Propagate mode
• Using Edit mode to apply Absolute or Relative changes
Upgrading to D-Show 2.0
Chapter 3 provides instructions for upgrading a system to D-Show 2.0.
Chapter 1: New Features in D-Show 2.0 1
Main and Sidecar Split BankingWith D-Show 2.0, it is now possible to link or unlink fader banking and encoder assignment across Main and Sidecar units.
◆ Unlinking Main and Sidecar banking lets you leave key channels available on one section of the control surface, while maintaining the ability to access other channels as needed within another section of the control surface.
◆ Unlinking encoder assignment lets you assign encoder functions locally, per Main or Sidecar unit.
Faders and encoders can be linked or unlinked as separate functions, giving you four possible configurations:
• Faders linked, encoders linked (the default setting)
• Faders unlinked, encoders linked
• Faders linked, encoders unlinked
• Faders unlinked, encoders unlinked
If more than one Sidecar is connected, each Sidecar functions independently (locally) when unlinked.
Link status can be changed at any time (in both Config and Show modes) and settings are stored in the Show file.
To link or unlink fader banks from the control surface:
■ Press and hold for two seconds any fader bank button on the Main unit or any Sidecar. All four Bank buttons and the Source button flash when link/unlink occurs. When linking, bank selection follows the unit the linking was initiated from.
To link or unlink encoders from the control surface:
■ Press and hold for two seconds any encoder assignment but-ton on the Main unit or any Sidecar. All encoder assign but-tons (except Flip) flash when you link or unlink.
In previous versions of D-Show, Main and Sidecar banking as well as encoder assignment functioned globally across all units.
The Multi-Select, Default, Fine and Make Stereo switches remain linked between Main and Sidecar units regardless of Fader Bank or Encoder link status.
The Aux Follows AFL switch toggles only the Main unit en-coder assignments when units are unlinked (Sidecar en-coder assignments are unaffected).
The encoder Flip switch does not support control surface linking/unlinking. Use any other encoder assignment switch.
Upgrading to D-Show 2.02
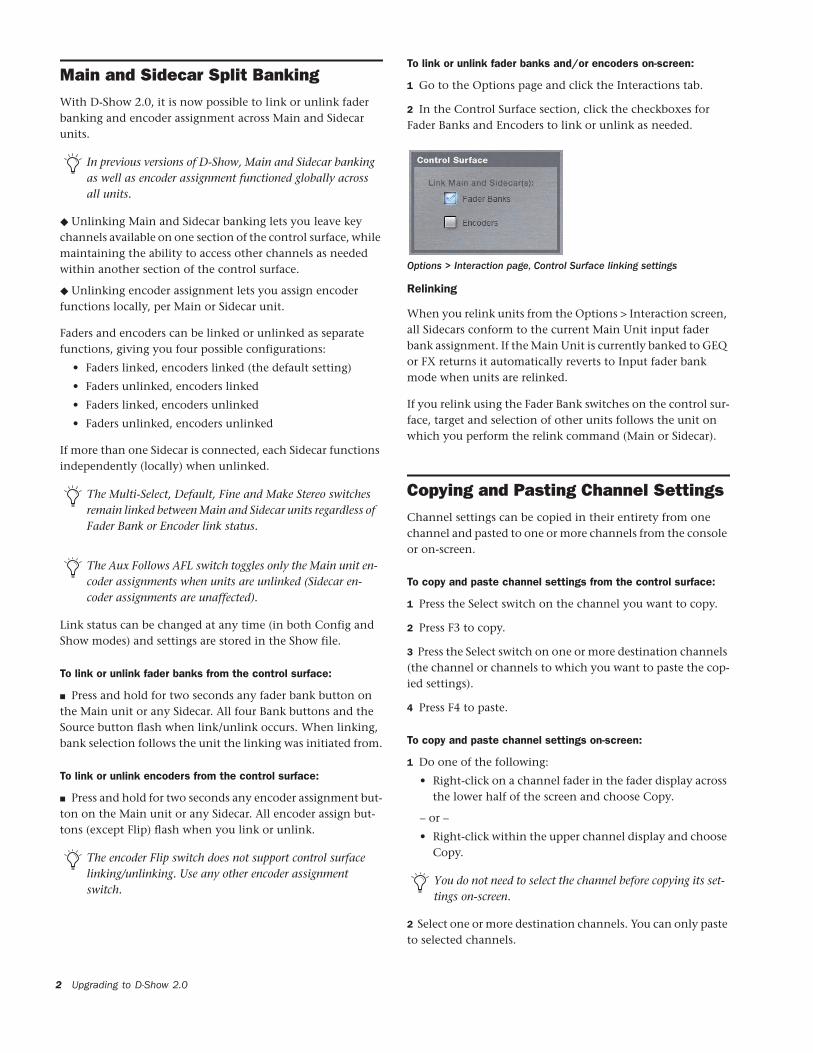
To link or unlink fader banks and/or encoders on-screen:
1 Go to the Options page and click the Interactions tab.
2 In the Control Surface section, click the checkboxes for Fader Banks and Encoders to link or unlink as needed.
Relinking
When you relink units from the Options > Interaction screen, all Sidecars conform to the current Main Unit input fader bank assignment. If the Main Unit is currently banked to GEQ or FX returns it automatically reverts to Input fader bank mode when units are relinked.
If you relink using the Fader Bank switches on the control sur-face, target and selection of other units follows the unit on which you perform the relink command (Main or Sidecar).
Copying and Pasting Channel SettingsChannel settings can be copied in their entirety from one channel and pasted to one or more channels from the console or on-screen.
To copy and paste channel settings from the control surface:
1 Press the Select switch on the channel you want to copy.
2 Press F3 to copy.
3 Press the Select switch on one or more destination channels (the channel or channels to which you want to paste the cop-ied settings).
4 Press F4 to paste.
To copy and paste channel settings on-screen:
1 Do one of the following:
• Right-click on a channel fader in the fader display across the lower half of the screen and choose Copy.
– or –
• Right-click within the upper channel display and choose Copy.
2 Select one or more destination channels. You can only paste to selected channels.
Options > Interaction page, Control Surface linking settings
You do not need to select the channel before copying its set-tings on-screen.

3 Right-click on the lower fader strip on-screen, or on any non-control area of the destination channel, and choose Paste to Selected Strip(s).
Parameters and Channel Types
Input channels can only be copied or pasted to other Input channels. Output channels can only be copied or pasted to other channels of the same type (such as Aux, Group, PQ, Ma-trix). When pasting channel settings:
• Settings common to the source and destination channel are always pasted.
• Copied settings with no corresponding parameter in the destination channel are ignored.
• Settings in the destination channel with no correspond-ing parameters are left unchanged.
Copying Settings Between Mono and Stereo Channels
You can copy a mono channel and paste its settings to one or more stereo channels. Mono settings are applied equally to the left and right channels of the stereo destination. The ste-reo destination channel retains its current balance and width settings.
You can also copy a stereo channel and paste its settings to one or more mono channels. The left channel settings of the stereo source are applied to the mono channel(s). The mono destination channel retains its current pan setting.
Pasting channel settings
Settings Excluded from Copy and Paste
Input Channels
The following Input channel parameters are not copied or pasted (the current settings of the destination channels are re-tained):
• Patchbay assignments, including Direct Outs
• Channel Name
• Hardware and software insert (plug-ins) assignments and in/out state.
Output Channels
The following Output channel parameters are not copied or pasted (the current settings of the destination channels are re-tained):
• Patchbay assignments, including Direct Outs
• Channel Name
• Hardware and software insert (plug-in) assignments and in/out status
• GEQ settings
• Output membership (the assignment of channels to an Aux, Group VCA, Matrix or PQ).
To copy GEQ settings, use the copy/paste GEQ shortcut or use GEQ Presets. Use the Replace with Mix (members) From command to replace output membership for an Aux, Group, VCA, Matrix or PQ.
Replacing VCA membership in the Outputs page
For additional improvements to VCA functionality in snap-shots, see Chapter 2, “Snapshots.”
Chapter 1: New Features in D-Show 2.0 3

Linking and Unlinking Adjacent Matrix and PQ InputsAdjacent inputs to Matrix and PQ mixers can be linked or un-linked on a per input pair basis. Link status can be specified on a per PQ or Matrix basis (for example, inputs 1 and 2 can be linked for PQ 1, but unlinked for PQ 2). This gives you the ability to control inputs as either a stereo-linked pair or as in-dependent mono inputs.
◆ When linked, level and source on/off controls are linked.
◆ When unlinked, discrete level and on/off controls affect each individual channel.
Stereo inputs (such as stereo groups, Mains LR, and ste-reo-linked auxes) are linked by default. Adjacent inputs can be linked or unlinked at any time, in Config or Show mode.
To link or unlink inputs to Matrix or PQ mixers:
1 Go to the Outputs page, and click to display the Matrix or PQ mixer.
2 Click the checkboxes below any adjacent inputs to link or unlink them. A checkmark in the checkbox indicates a linked input source; an empty checkbox indicates unlinked sources.
Relinking and Offsets
When inputs are relinked, their level and on/off state will change as follows:
Level Each channel maintains any offset between the two channels. This offset is not maintained if both linked controls are adjusted beyond their maximum or minimum.
On/Off Each channel maintains its discrete on/off state at the time the sources are relinked. For example, if one channel is on and the other is off the stereo input will maintain these set-tings after relinking, thus providing a stereo source with one
Link controls in the PQ page
Click to link or unlink
Selected PQ
PQ mixer
output
Upgrading to D-Show 2.04
channel on, and the other off. Toggling one channel from Off to On results in both channels switching On; toggling one of the linked channels from On to Off results in both channels switching Off.
Warning when Stealing Inputs or Outputs in the PatchbayThe Patchbay indicates hardware outputs that are already in use by dimming the column number for that physical output. In addition, a dialog is shown if the patch will steal a hardware input or output that is already in use, asking you to confirm or cancel the reassignment.
To confirm a reassignment, do one of the following:
■ Click Assign when prompted to confirm the reassignment.
– or –
■ Click again on the same patch point.
To cancel a reassignment, do one of the following:
■ Click Cancel to cancel the reassignment and leave the patchpoint unchanged.
– or –
■ Click any other point in the grid (the Patchbay grid remains active, even when the Confirm Assignment dialog is open on-screen).
Warning when reassigning an output that is already in use
To suppress the reassignment warning dialog, hold Default (on the control surface) or Alt (on the computer keyboard) while clicking in the patch grid to change the assignment.

Shortcut for Locating Output Assignments
Before reassigning in the Patchbay, you may want to dou-ble-check the existing assignment to the desired hardware output. This can be done quickly from within the Patchbay, as follows:
To identify the bus or channels currently assigned to a hardware output:
■ Click on any dimmed (already assigned) column number at the top of the Patchbay. The Outputs tab containing the as-signment is automatically revealed.
Patchbay Click and DragYou can quickly select a range of crosspoints in the Patchbay grid in one operation with a left-click and drag of the cursor. You can click and drag horizontally, vertically, and at 45 de-gree angles in any direction to populate the rows or columns through which you drag.
To use click and drag in the Patchbay grid:
1 Left-click on the crosspoint defining the start of the range.
2 Continue to hold the left-click button, then drag horizon-tally (to populate a row), vertically (to populate a column), or horizontally and vertically (a 45 degree angle).
3 Release the left-click button when the destination cross-point is reached. All crosspoints along the path are filled in.
The destination crosspoint sets the targeted channel. If the new assignments steal any previous assignments, a warning dialog will ask you to confirm or cancel the reassignment.
Click column numbers to “go to” the current assignment
You cannot undo changes to the Patchbay grid.
To suppress the reassignment warning dialog, hold Default (on the control surface) or Alt (on the computer keyboard) while clicking in the patch grid.
The Recall Safe screen also supports click and drag within its Channels and Parameters grid. See Chapter 2, “Snap-shots.”
Click
Assignable Monitor OutputThe Monitor bus can be routed to hardware outputs and to bus-fed plug-ins.
Hardware Outputs For routing to hardware outputs, the Moni-tor (Solo) bus outputs are available in the Mains tab of the Patchbay Outputs page. Monitor bus outputs are assignable to any number of physical outputs on the Stage Rack or FOH Rack in addition to the dedicated Monitor outputs on the FOH Rack. Use this capability to route monitor outputs to multiple cue stations (in-ear mix and wedge mix), or to an outboard analyzer.
Bus-Fed Plug-Ins For routing to bus-fed plug-ins, the Monitor bus appears as a choice in the plug-in routing selector. This lets you route the Monitor bus to a bus-fed stereo plug-in such as an onboard analyzer. Plug-ins cannot be inserted on the Monitor bus.
Routing the Monitor Bus to Additional Outputs
To route the Monitor bus to additional outputs:
1 Go to the Outputs page and click the Mains tab.
2 Click in the grid to assign the Monitor output to the desired destination.
These feeds are in addition to the existing, dedicated Mon-itor outputs on the FOH Rack, and are taken post-Monitor Speakers control and post-Monitor bus Delay.
Plug-ins can also be fed from channel Direct Outs. See “Routing Channel Direct Outs to Plug-Ins” on page 7.
Solo In Place, when engaged, is simultaneously routed to the Mains and Monitor busses.
Chapter 1: New Features in D-Show 2.0 5
Routing the Monitor Bus to Plug-Ins
To route Monitor output to a bus-fed plug-in:
1 Go to the Plug-Ins screen.
2 Make sure the desired stereo plug-in is installed and as-signed to a rack slot.
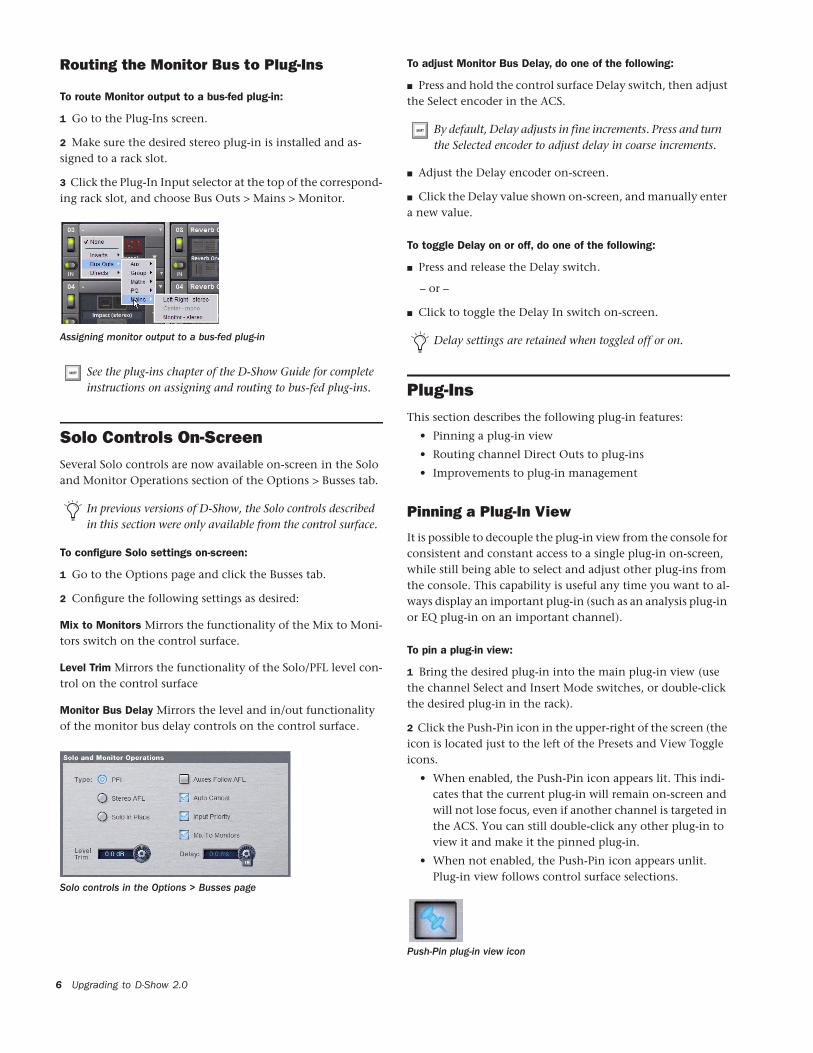
3 Click the Plug-In Input selector at the top of the correspond-ing rack slot, and choose Bus Outs > Mains > Monitor.
Solo Controls On-ScreenSeveral Solo controls are now available on-screen in the Solo and Monitor Operations section of the Options > Busses tab.
To configure Solo settings on-screen:
1 Go to the Options page and click the Busses tab.
2 Configure the following settings as desired:
Mix to Monitors Mirrors the functionality of the Mix to Moni-tors switch on the control surface.
Level Trim Mirrors the functionality of the Solo/PFL level con-trol on the control surface
Monitor Bus Delay Mirrors the level and in/out functionality of the monitor bus delay controls on the control surface.
Assigning monitor output to a bus-fed plug-in
See the plug-ins chapter of the D-Show Guide for complete instructions on assigning and routing to bus-fed plug-ins.
In previous versions of D-Show, the Solo controls described in this section were only available from the control surface.
Solo controls in the Options > Busses page
Upgrading to D-Show 2.06
To adjust Monitor Bus Delay, do one of the following:
■ Press and hold the control surface Delay switch, then adjust the Select encoder in the ACS.
■ Adjust the Delay encoder on-screen.
■ Click the Delay value shown on-screen, and manually enter a new value.
To toggle Delay on or off, do one of the following:
■ Press and release the Delay switch.
– or –
■ Click to toggle the Delay In switch on-screen.
Plug-InsThis section describes the following plug-in features:
• Pinning a plug-in view
• Routing channel Direct Outs to plug-ins
• Improvements to plug-in management
Pinning a Plug-In View
It is possible to decouple the plug-in view from the console for consistent and constant access to a single plug-in on-screen, while still being able to select and adjust other plug-ins from the console. This capability is useful any time you want to al-ways display an important plug-in (such as an analysis plug-in or EQ plug-in on an important channel).
To pin a plug-in view:
1 Bring the desired plug-in into the main plug-in view (use the channel Select and Insert Mode switches, or double-click the desired plug-in in the rack).
2 Click the Push-Pin icon in the upper-right of the screen (the icon is located just to the left of the Presets and View Toggle icons.
• When enabled, the Push-Pin icon appears lit. This indi-cates that the current plug-in will remain on-screen and will not lose focus, even if another channel is targeted in the ACS. You can still double-click any other plug-in to view it and make it the pinned plug-in.
• When not enabled, the Push-Pin icon appears unlit. Plug-in view follows control surface selections.
By default, Delay adjusts in fine increments. Press and turn the Selected encoder to adjust delay in coarse increments.
Delay settings are retained when toggled off or on.
Push-Pin plug-in view icon

Routing Channel Direct Outs to Plug-Ins
You can route the Input channel Direct Outs to plug-ins. This lets you directly feed plug-ins from individual channels to pre-serve Aux busses for other uses, with control over send level using the channel Direct Out level control.
When a channel Direct Out is routed to a plug-in, it follows the one global pickoff setting for that specific Direct Out (as set in the Patchbay), and is applied in addition to any other as-signment made for that Direct Out. This makes it possible to use a channel’s Direct Out to route that channel to both a Pro Tools recording option and to a plug-in.
Improvements to Plug-In Management
Plug-in management has been improved to allow more flexi-bility for installing, uninstalling, and deleting plug-ins.
In version 2.0, uninstalling a plug-in removes the plug-in from the racks, but the installer remains in the Previous In-stalls cache and the installed plug-ins list, making it easier to reinstall the plug-in at a later time without requiring the in-staller CD or other media. In order to completely remove and delete a plug-in and its installer, you must explicitly Delete the plug-in, as described in the following sections.
To uninstall a plug-in from the system but leave its installer available:
1 Put D-Show in Config mode.
2 Go to the Options page and click the Plug-Ins tab.
If you do use a Direct Out to feed both a hardware output such as a Pro Tools recording option as well as a plug-in, be aware that any adjustments to that Direct Out affect both the output signal and the signal fed to the plug-in.
Routing a channel Direct Out to a plug-in in the Plug-Ins page
Installing, uninstalling, and deleting plug-ins is not sup-ported using the Standalone software.
3 Right-click the specific plug-in name from the right-hand list and choose the Uninstall option for the selected plug-in.
To reinstall a removed plug-in:
1 Put D-Show in Config mode.
2 Go to the Options page and click the Plug-Ins tab.
3 Select Previous Installs from the left-hand list.
4 Select the plug-in and choose Install. If the desired plug-in is not listed, it must be re-installed from the original CD-ROM or other media.
Deleting Uninstalled Plug-Ins
Once a plug-in is uninstalled, its installer can be deleted from the system. (Plug-ins which are currently installed cannot be deleted).
To completely remove a plug-in and its installer:
1 Put D-Show in Config mode.
2 Go to the Options page and click the Plug-Ins tab.
3 Select Previous Installs from the left-hand list.
4 Right-click the plug-in name and choose the Delete option for the selected plug-ins. The plug-in is removed from the sys-tem, and the stored plug-in installer is removed from the Pre-vious Installs list.
Managing plug-in installations
Chapter 1: New Features in D-Show 2.0 7

Filing Page and Footswitch
Last Show Loaded Confirmation Display
The name of the last loaded Show file is always displayed in the lower right area of the Load and Save tabs of the Filing page.
Snapshot Recall via Footswitch
D-Show Footswitch 1 and Footswitch 2 can be assigned to any of the following snapshot recall functions:
• Recall Next
• Recall Previous
• Recall Selected (new in D-Show 2.0)
To assign a function to a footswitch:
1 Go to the Options page and click the Interaction tab.
2 In the Foot Switch Functions area at the lower left of the screen, click the pop-up menu for Switch 1 or Switch 2 and choose an available function.
Last Show loaded display
Last Loaded Show
Upgrading to D-Show 2.08
New D-Show Hardware Options
DSI and DSO Stage Rack Options
The DSI and DSO hardware options let you expand Stage Racks with AES/EBU and ADAT optical digital I/O.
For complete information, see the Expansion Options Guide.

Chapter 2: Snapshots
This chapter describes all D-Show snapshot features and re-places the Snapshots chapter of the D-Show Guide. New and enhanced snapshot features described in this chapter include the following:
General Enhancements to Snapshots
• Snapshots now store all parameters instead of just the scoped data (see “Snapshot Scope Controls” on page 11)
• Snapshot list supports non-contiguous selection (see “Se-lecting Snapshots” on page 14)
• Improved handling of VCA membership in snapshots (see “Snapshot Data Types and Parameters” on page 30)
Crossfade Enhancements
• Increased maximum crossfade time to 99.9 seconds (see “Crossfade Time” on page 29)
• Improved crossfading of unscoped channels through subsequent recalls
• Modified crossfade curve
Recall Safe
• New global filtering of automation parameters and chan-nels on recall (see “Recall Safe” on page 16)
• Scope Sets (see “Using Scope Sets” on page 19)
Preview Mode
• New offline mode to edit and preview snapshots (see “Preview Mode” on page 23)
Making Changes to Snapshots
• New Edit mode to update snapshots in absolute or rela-tive fashion (see “Using Edit Mode” on page 21)
• Modified Propagate mode to speed up applying changes (see “Using Propagate Mode” on page 22)
Chapter 2: Snapshots 9
IntroductionThe D-Show Snapshots feature lets you flexibly store and recall a wide range of console mixing parameters. Snapshots are com-monly used to store the mixer setup and levels for individual scenes, songs or sound cues in a performance. Snapshots store in-formation about channels and mix parameters, and you can use a variety of methods to edit, preview, and manage snapshot data.
Snapshots are contained and stored as part of a Show. A single Show file can contain up to 999 snapshots. Snapshots are con-trolled from the on-screen Snapshots page, or from the dedicated Snapshot controls of the ACS section. Once stored, snapshots can also be recalled with a footswitch.
The selection of data types and channels to be recalled is referred to as the scope of a snapshot. The scope of data to be recalled is also stored within each snapshot, and is set using the Data Type Scope buttons and the Channel Scope controls in the Snap-shots page. In addition, the Recall Safe page provides global control of automation safe status for individual parameters on spe-cific channels.
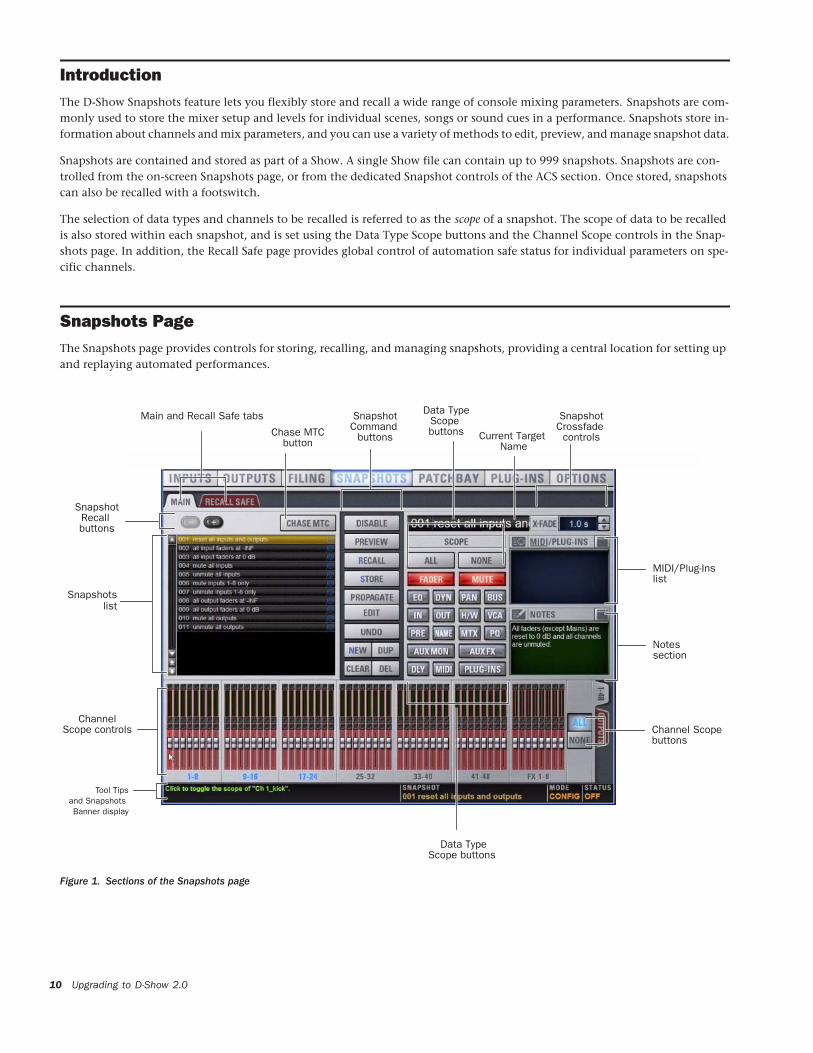
Snapshots PageThe Snapshots page provides controls for storing, recalling, and managing snapshots, providing a central location for setting up and replaying automated performances.
Upgrading to D-Show 2.010
Figure 1. Sections of the Snapshots page
Snapshotslist
SnapshotCommand
buttons
MIDI/Plug-Inslist
Notessection
ChannelScope controls
Data TypeScope buttons
SnapshotRecall buttons
Chase MTCbutton
SnapshotCrossfade
controls
Channel Scopebuttons
Data TypeScope buttons
Tool Tipsand Snapshots Banner display
Main and Recall Safe tabs
Current Target Name

To display the Snapshots page, do one of the following:
■ Click the Snapshots tab on-screen.
– or –
■ Press the Snapshots View Mode switch in the ACS.
Main and Recall Safe
The Snapshots screen provides the Main and Recall Safe tabs.
Main Provides the primary snapshot controls described in the following sections.
Recall Safe Provides a matrix of channel parameters which can be globally safed from Recall for all snapshots.
Snapshots List
Snapshots can be targeted, renamed, recalled, previewed, ed-ited, reordered, duplicated, searched and deleted from the Snapshots list.
Snapshot Command Buttons
Disable Temporarily disables all snapshot functions.
Preview An “offline” mode in which the console continues to process audio using its settings at the time Preview is invoked, letting you recall, edit and manage snapshots without affect-ing the current mix.
Recall Recalls the targeted snapshot, updating the console to reflect the status of all scoped data types and channels in the snapshot (subject to the current Recall Safe settings).
Store Stores the current state of the console in the targeted snapshot for all data types and channels, overwriting any ex-isting data in the snapshot.
Propagate Enables Propagate mode. Lets you apply isolated changes to one or more snapshots at once (such as updating a channel EQ across all snapshots).
Edit Enables Edit mode. Lets you adjust parameters freely and apply those changes to one or more snapshots. Changes can be applied in Absolute or Relative fashion.
Undo Returns the console to its state before the last snapshot command.
New Creates a new snapshot that captures the current state of all data types and channels.
Repeatedly pressing the Snapshots View Mode button tog-gles through all tabs.
In previous versions of D-Show, snapshots only stored the channels and parameters that were scoped. Snapshots now “store all.” The Scope buttons now function as recall filters (in addition to the new Recall Safe feature).
Duplicate Creates a copy of the selected snapshots.
Clear Clears the contents of the targeted snapshot, but retains the MTC information for the snapshots.
Delete Deletes the targeted snapshots.
Snapshot Scope Controls
The Snapshot Data Type buttons and Channels work to-gether, acting as a filter for which data types are recalled for which channels on the console. The buttons and channels in-dicate which data will be recalled for the currently targeted snapshot.
Scope States
Scoped Red display indicates that the data type or channel is currently scoped and will be affected by snapshot recall.
Not Scoped Gray display indicates that the data type or chan-nel is not currently scoped and will not be affected by snap-shot recall.
Data Type Scope Buttons
The Snapshot Data Type buttons display scope status for the corresponding types of controls on the console. See Table 3 on page 30 for a complete list.
In previous versions of D-Show, snapshots only stored data for scoped data types. Now, snapshots store all console data (except plug-ins), and VCA and channel Delay are now available as discrete data types.
Loading Show files containing snapshots created in previ-ous versions of D-Show requires that the Show file be con-verted. For details, see “Converting Show Files to 2.x For-mat” on page 31.
Data Type Scope buttons showing different scope states
Data typecurrentlyscoped
Data typenot currentlyscoped
MIDI and
(red)
(gray)
Plug-Ins
Notes
Chapter 2: Snapshots 11

Channel Scope Controls
Channels may be included or excluded from snapshots. The Snapshot Channel Faders display the scope status of each channel on the console. They also let you preview any changes in fader position or mute state that will result by re-calling the targeted snapshot.
Channel Fader Position
When you target a snapshot with scoped channels that have different fader positions from the current fader positions, the target fader positions are shown in bright red.
Channel Mute State
When you target a snapshot with scoped channels that have different mute states from the current mute states, the target mute buttons are outlined in yellow.
Snapshot channel fader display showing different scope states
Snapshot channel fader display showing target fader positions
Snapshot channel fader display showing target mute states
Channels currently scoped
Channels notcurrently scoped
(red) (gray)
Upgrading to D-Show 2.012
Data Type Scope Action Buttons
All Turns on the scope for all data types at once. This is equiv-alent to clicking all of the Data Type buttons so they are red.
None Turns off the scope for all data types at once. This is equivalent to clicking all of the Data Type buttons so they are gray.
Channel Scope Action Buttons
All Turns on the scope for all channels displayed on the cur-rent tab (such as 1–48, 49–96). Double-clicking the All button turns on the scope for all channels on the system.
None Clicking the None button turns off the scope for all channels on the current tab (such as 1–48, 49–96). Dou-ble-clicking the None button turns off the scope for all chan-nels on the system.
Snapshot Controls on the D-Show Control SurfaceSnapshot controls appear in three locations on the control surface: the Options & Snapshots section in the ACS, the Snapshot Master Controls, and the Snapshot Output Safes. These controls provide direct access to a few basic snapshot commands and allow manual control of snapshot recall.
Options & Snapshots Section
You can target (select), store, and recall snapshots from the Snapshots controls in this section.
The Snapshot controls in the Options and Snapshots section perform the following functions:
Store Stores the current state of all console parameters in the targeted snapshot. This switch mirrors the Store button in the Snapshots page.
Recall Recalls the targeted snapshot. This switch mirrors the Recall button in the Snapshots page.
Snapshot controls in the ACS Section
KICKKICK
Store
Previous
Recall
Next
Select

Select Encoder and Displays Turning the Select encoder scrolls through and selects the targeted snapshot in the Snapshots list. The displays show the number and name of the currently targeted snapshot. A period is appended to the snapshot name in this display if the snapshot has been edited since it was last recalled.
Previous Instantly recalls the previous snapshot in the Snap-shots list. This switch mirrors the Recall Previous button in the Snapshots page.
Next Instantly recalls the next snapshot in the Snapshots list. This switch mirrors the Recall Next button in the Snapshots page.
Snapshot Master Controls
The following controls are available on the console in the Snapshot Master Controls section:
Safe Selected Lets you put any combination of Input chan-nels and Output channels in automation safe mode. This switch works independently of the Safe switches on Input channels.
Safe All Toggles all Input channels and Output channels on D-Show in and out of automation safe mode. This switch works independently of the Safe switches on Input channels.
Chase MTC Enables automated recall of snapshots when the MTC Read or MTC Generate options are enabled. This switch mirrors the Chase MTC button in the Snapshots page.
Disable Temporarily disables all snapshot functions. The Dis-able switch lights to indicate that the Disable function is ac-tive. This switch mirrors the Disable button in the Snapshots page.
The Previous and Next switches combine target and recall actions in one step, causing the next or previous snapshot to be instantly active. These switches cannot be used to pre-view snapshots before recalling them.
Snapshot Master Control switches
Snapshot Output Safes
Output Safe controls the automation safe status of all 8 output channels of a given type; individual output channels cannot be safed with these switches. Use Safe Selected to safe individ-ual outputs. Each switch lights to indicate that the corre-sponding output type is automation safe. Output Types in-clude:
• Auxes (1–8 and 9–16)
• Personal Qs
• Matrixes
• Groups
• VCAs
• Mains
• MIDI
The MIDI Safe switch mirrors the function of the MIDI Snap-shot Output Safe option. See “Safing MIDI Message Output” on page 27.
Snapshots List
Snapshot Entries
Each entry in the Snapshots List has a number (001–999) and name. If either the MIDI Read or Generate feature is enabled, each snapshot will also have a time code value, trigger indica-tor, or send indicator.
Recall Buttons
The Recall Previous (–) and Recall Next (+) buttons at the top of the Snapshots List cause the previous or next snapshot to be targeted and recalled in one step.
Chase MTC
Enables or suspends automated recall of snapshots when ei-ther the MTC Read or MTC Generate options is enabled.
Snapshot Output Safe switches
Chapter 2: Snapshots 13
Navigating the Snapshots List
Snapshots are highlighted in color in the Snapshots list to in-dicate the following:
Green Indicates the last recalled snapshot
Red Indicates the currently targeted snapshot
Yellow Indicates that the snapshot is both the last recalled and currently targeted snapshot
Blue Indicates that the snapshot is part of a multiple snapshot selection but not the last recalled or currently targeted snap-shot. Recalled and Targeted snapshots can also be part of a multiple selection in the list. In this case, the sequence num-ber is blue while the rest of the name is red, green or yellow.
Snapshot Keyboard Shortcuts
When the Snapshots page is displayed, you can perform the following Snapshot functions with these keyboard shortcuts:
Selecting Snapshots
You can select single snapshots or multiple snapshots in order to target, recall, duplicate, edit, or delete them in the snap-shots list.
To select multiple contiguous snapshots:
■ Shift-click the snapshot names in the Snapshots list.
Snapshot Function Keyboard Shortcut
Target Next/Previous Snapshot Up/Down Arrow keys
Target First Snapshot in List Home key
Target Last Snapshot in List End key
Target Snapshot at Top of Page Page Up
Target Snapshot at Bottom of Page Page Down
Select Multiple Contiguous Snapshots Shift-click snapshots
Select Multiple Non-Contiguous Snap-shots/Deselect any Snapshot
Ctrl-click snapshots
Select All Snapshots Ctrl+A
Create New Snapshot Ctrl+N
Recall Targeted Snapshot Ctrl+R
Store Targeted Snapshot Ctrl+S
Undo Ctrl+U
Add or update MIDI/Plug-in data to snapshot
Right-click MIDI/Plug-ins entry
Upgrading to D-Show 2.014
To clear a selection of multiple contiguous snapshots, do one of the following:
■ Click any snapshot name in the Snapshots list.
– or –
■ Turn the Select knob in the ACS section.
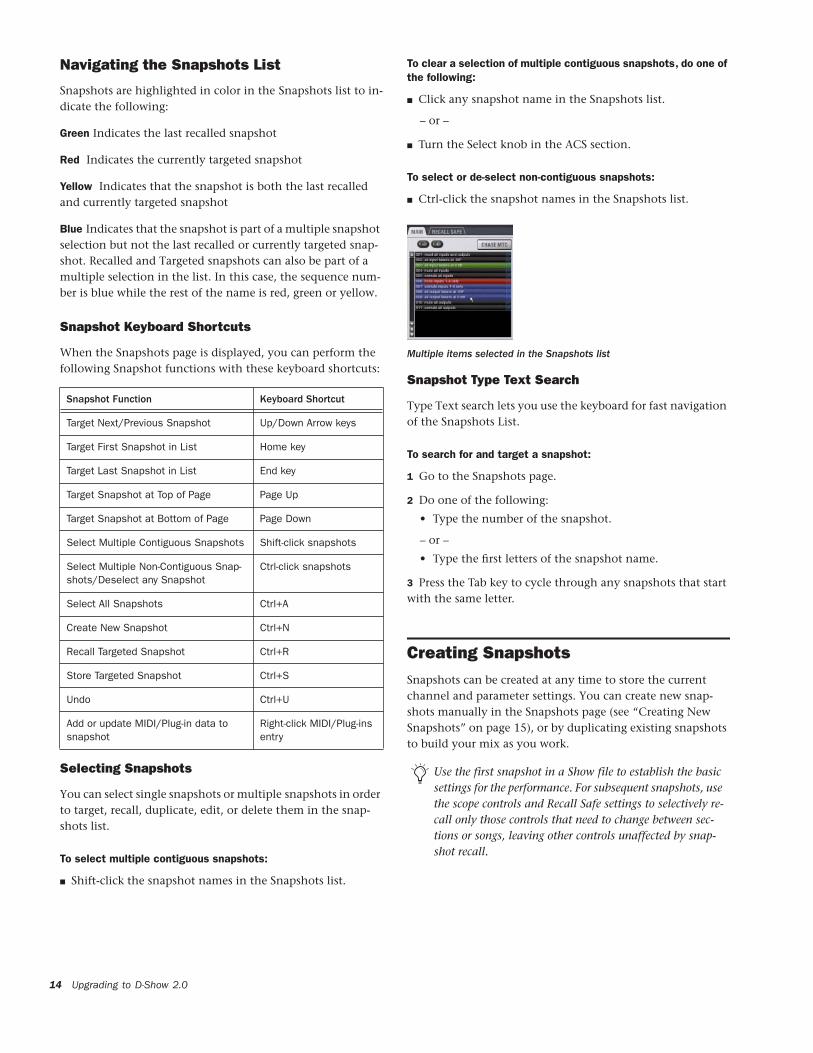
To select or de-select non-contiguous snapshots:
■ Ctrl-click the snapshot names in the Snapshots list.
Snapshot Type Text Search
Type Text search lets you use the keyboard for fast navigation of the Snapshots List.
To search for and target a snapshot:
1 Go to the Snapshots page.
2 Do one of the following:
• Type the number of the snapshot.
– or –
• Type the first letters of the snapshot name.
3 Press the Tab key to cycle through any snapshots that start with the same letter.
Creating SnapshotsSnapshots can be created at any time to store the current channel and parameter settings. You can create new snap-shots manually in the Snapshots page (see “Creating New Snapshots” on page 15), or by duplicating existing snapshots to build your mix as you work.
Multiple items selected in the Snapshots list
Use the first snapshot in a Show file to establish the basic settings for the performance. For subsequent snapshots, use the scope controls and Recall Safe settings to selectively re-call only those controls that need to change between sec-tions or songs, leaving other controls unaffected by snap-shot recall.

Creating New Snapshots
When you create a snapshot, it captures the current state of all console settings.
To create a new snapshot:
1 Set all parameters on the console whose state you want to store in the snapshot.
2 Click New. The new snapshot appears in the Snapshots List.
3 For each channel you want affected when the snapshot is later recalled, click the channel so that it is scoped (displayed in red).
4 For each parameter of the scoped channels you want af-fected when the snapshot is later recalled, click the corre-sponding Data Type button so that it is scoped (displayed in red).
Adding channels to the scope of a snapshot
To quickly select (or de-select) banks of channels, click their blue labels below the Channel Faders in the Snapshots page.
Adding data types to the scope of a snapshot
When you create a new snapshot it automatically inherits the channel and data type scope of the currently targeted snapshot.
The New command can be undone.
Click to select-/de-select bank
Naming Snapshots
New snapshots are automatically numbered and appear as “<Untitled>” in the Snapshots list. Snapshots can be renamed at any time. You can undo snapshot naming operations.
To name a snapshot:
1 Do one of the following:
• Double-click the snapshot name in the Snapshots list or the current target name display.
– or –
• Right-click the snapshot name and choose Rename.
2 Type a name for the snapshot.
3 Press Enter on the keyboard or click another snapshot name.
Adding Notes to Snapshots
You can add notes to snapshots at any time. You do not need to store the snapshot to save the notes in the snapshot.
To add or edit comments for a snapshot:
1 Double-click the Notes header or click the list icon to ex-pand the Notes field.
2 Double-click in the Notes field and enter text.
Recalling Snapshots
Targeting Snapshots
Targeting a snapshot lets you preview which data types and channels will be affected by that snapshot before recalling it. When a snapshot is targeted, the on-screen Data Type buttons and Channel Faders update to show the data types and chan-nels enabled for recall by the snapshot.
To target a snapshot, do one of the following:
■ Click the snapshot name in the Snapshot list.
■ Type the number or name of the snapshot on the keyboard.
■ Press the Home/End, Page Up/Page Down, and Up/Down Arrow keys to navigate the Snapshot list.
■ Turn the Select knob in the ACS to scroll through the Snap-shot list. Snapshot numbers and names appear in the displays above the Select knob.
The current target snapshot is highlighted in red in the Snap-shots list.
Preview mode lets you take the console offline to recall and edit snapshots in their entirety without affecting the current mix. See “Preview Mode” on page 23.
Chapter 2: Snapshots 15
Recalling Snapshots
You can do the following when recalling snapshots:
• Target and instantly recall successive snapshots (next or previous)
• Target first, then recall one or more snapshots
• Select multiple snapshots and recall them all sequentially
• Target snapshots, change Data Type or Channel Scope settings, then recall.
Recalling Successive Snapshots Instantly
You can instantly recall successive snapshots in the Snapshots list. This command references the previously recalled snap-shot, not the last targeted snapshot.
To instantly recall successive snapshots, do one of the following:
■ Click the Recall Previous (–) or Recall Next (+) button at the top of the Snapshots list.
– or –
■ Press the Previous or Next switch in the ACS section.
Targeting Before Recalling Snapshots
To target and then recall a snapshot:
1 Target the snapshot you want to recall by clicking the snap-shot name in the Snapshot list, or turning the Select knob in the ACS.
2 (Optional) Set the scope of the snapshot by doing the fol-lowing:
• For each channel you want to recall in the snapshot, click the channel so that it is scoped (displayed in red).
• For each parameter of the scoped channels you want to recall in the snapshot, click the corresponding Data Type button so that it is scoped (displayed in red).
• Configure the Recall Safe page to further filter snapshot data on recall. (See “Recall Safe and Channel Automation Safe” on page 16.)
3 Click the Recall button on-screen, or press the Recall switch in the ACS.
Undoing snapshot recall commands might cause audio to be interrupted. Use Undo with caution in performance.
The Snapshot Recall buttons combine target and recallactions in one step, causing the previous or next snapshot to be instantly active. These buttons cannot be used to preview snapshots before recalling them.
Snapshot Recall can also be triggered by a D-Show foot-switch, as configured in the Options > Interaction page.
Upgrading to D-Show 2.016
Selecting and Recalling Multiple Snapshots
You can select and recall multiple snapshots to load them all in sequence, and in one step. This is useful to quickly reset the console to a sub-cue or other specific point within a longer scene or cue and “pick up from there.”
To recall multiple snapshots:
1 Select multiple snapshots in the list (Shift-click to select multiple adjacent (contiguous) snapshots; Ctrl-click to select non-contiguous items or to deselect a single item.
2 Press the Recall switch, or click the Recall button on-screen.
Recall Safe and Channel Automation SafeThe Recall Safe tab in the Snapshots page provides global au-tomation safe settings of nearly every section of the console.
You can also place individual channels in automation safe from the console or on-screen. For more information, see “Automation Safing Channels” on page 19.
Recall Safe
Recall Safe lets you select which parameters on which chan-nels you want to be ‘safed’ from snapshots, and which you want recalled.
Recall Safe is global to all snapshots, can be turned on or off quickly, and provides preset capabilities in the form of Scope Sets. Scope Sets can be loaded and saved just like D-Show Pre-sets for built-in EQ, Dynamics, and plug-in settings. Current Recall Safe settings are stored with the Show file.
Recall Safe Tab
The Recall Safe tab opens the Recall Safe page on-screen. The Recall Safe tab is displayed in red when Recall Safe is on and in effect, and in gray when Recall Safe is off or when nothing is safed.
If multiple snapshots are selected, toggling Data Type or Channel Scope buttons affects all selected snapshots. This provides a quick way of removing a channel or data type (such as EQ) from some or all snapshots. This action can be undone using the UNDO button.
Indication of active Recall Safe from the main Snapshots page

Recall Safe Displays and Controls
On
The master On button toggles the entire Recall Safe feature on or off globally. When lit (blue), Recall Safe is active. When dark, Recall Safe is suspended.
Snapshot List, Recall and Store
The Snapshot List and its Recall and Store functions remain visible and available from the Recall Safe page at all times.
Channel Tabs
The Inputs and Outputs tabs at the top of the parameter ma-trix selects the channel type whose safe status you want to view or edit. Along the left side of the parameter matrix are channel Type selector tabs, which will change depending on whether you are viewing Input or Output tabs.
Global Safe for MIDI Output and Plug-Ins
These checkboxes let you globally suspend MIDI output and/or plug-in changes (if any) from being sent when snap-shots are recalled. They are considered separate from the pa-rameter matrix and do not follow the Recall Safe on/off status.
Scope Sets
Scope Sets are presets for the Recall Safe page that can be stored and loaded, just like plug-in, EQ and Dynamics presets. Scope sets can be used as a template when creating new shows, or used to change Recall Safe settings during a perfor-
Displays and controls in the Recall Safe page
Shift-click channel type tabs to view more than one type at once in the scrollable parameter matrix.
Recall Safe tab Scope SetsGlobal safe for MIDI
Snapshot List, Parameter matrix
Channeltabs
Master on/off
and plug-ins
Recall, and StoreChannel
tabsType
mance. Like other D-Show presets and settings files, Scope Sets can be transferred from the Filing page, making it easy to maintain and transfer Recall Safe configurations. For more in-formation, see “Using Scope Sets” on page 19.
Parameter Matrix
The parameter matrix is a scrollable grid in which you can safe parameters and channels. You can undo and redo parameter matrix operations.
Parameters are represented in the columns of the parameter matrix; channels are listed along the left side in rows.
Clicking in the grid enables safe status for that parameter on that channel. Parameter and Channel grid icons provide shortcuts to “safe all” parameters in a single-click, and to safe entire channels. Clicking these icons lets you quickly toggle recall safe status for entire columns and rows. You can also use the grid master icon (located in the upper left most corner of the matrix) to toggle the entire grid.
Parameter matrix for Recall Safe
Display states for grid icons in Recall Safe
Parameters
Channels
Channel grid icons Parameter grid icons
Channel Safe
None Some AllGrid master icon
Chapter 2: Snapshots 17

The display state of the Parameter and Channel grid icons in-dicate safe status for that column or row as follows:
None A dark Parameter or Channel grid icon indicates that no items in that column or row are safe enabled.
Some A dark triangle inside a lit blue circle indicates that at least one item in that column or row is safe enabled.
All A lit (white) triangle indicates that all items in that column or row are safe enabled.
Channel Safe Controls
The CHANNEL SAFE column mirrors the SAFE switch on the console and on-screen. Controls in the CHANNEL SAFE col-umn are not part of the parameter matrix; they function in ad-dition to the parameter matrix and act as a global “all channel” setting or override. As a result, you do not need to enable any CHANNEL SAFE settings to use the Recall Safe parameter ma-trix.
Using Recall Safe
To access the Recall Safe page:
1 Do one of the following:
• Go to the Snapshots page and click the Recall Safe tab.
– or –
• Double-press the Snapshot View switch until the Recall Safe tab is displayed.
2 Click a channel type tab to display the desired channels.
To safe individual parameters on specific channels:
■ Click in the grid at the intersection of the appropriate pa-rameter (column) and channel (row). A blue dot appears, in-dicating a parameter is safed.
To safe multiple parameters or channels at a time:
■ Click and drag in a column, across a row, or at an angle.
For more information, see “Automation Safing Channels” on page 19.
Enabling recall safe for channel 1 fader
Click
Upgrading to D-Show 2.018
To safe individual parameters or channels using the computer keyboard:
1 Place the cursor above the grid, above a parameter or chan-nel name, or above any Channel Safe button. To be sure the cursor is above a valid area, you should be able to see at least one parameter name or channel name highlight.
2 Use the Arrow keys of the computer keyboard to move the cursor right, left, up, or down to other grid points. (You can-not navigate to parameter or channel grid icons, or to the Channel Safe column.)
3 Press Enter to enable or disable safe status for the currently focused grid point. Continue navigating to and toggling safe status of other parameters and channels.
To safe a parameter across all currently displayed channel types:
■ Click the Parameter grid icon at the top of the appropriate column until the triangle is white.
To safe all parameters for a particular channel:
■ Click the Channel grid icon in the ALL column for that channel (row).
To toggle the status of a parameter column or channel row:
■ Click the appropriate Parameter or Channel grid icon re-peatedly until it displays the desired status. For more informa-tion, see “Parameter Matrix” on page 17.
To safe all parameters across all channels and clear any current settings:
■ Click the triangular icon at the top of the ALL column.
Channel Safe
To automation safe an individual channel and retain all recall safe settings for that channel:
■ Click in the CHANNEL SAFE column for the desired chan-nels.
To automation safe all parameters across all channels and retain all current recall safe settings:
■ Click the CHANNEL SAFE master icon at the top of the Channel Safe column.
You can undo or redo the last action taken in the parameter matrix.
A channel (row) Channel Safe button does not need to be lit in order to Recall Safe individual parameters for that chan-nel.
The Channel Safe column mirrors the channel automation Safe controls. For more information, see “Automation Saf-ing Channels” on page 19.

MIDI
To enable Recall Safe for MIDI Snapshot output:
■ Click the MIDI Snapshot Output Safe button, located above the parameter matrix.
Plug-Ins
To enable Recall Safe for plug-ins:
■ Click the Plug-In Snapshot Safe button, located above the parameter matrix.
Using Scope Sets
The configuration of the Recall Safe page can be stored as a Scope Set settings file. Scope Sets can be previewed, recalled and transferred just like D-Show plug-in, EQ and Dynamics settings.
To store the current Recall Safe settings as a Scope Set:
1 Configure the Recall Safe page as desired.
2 Click the Scope Sets icon (the folder icon located above and to the right of the parameter matrix).
3 Click New.
To preview and recall a saved Scope Set:
1 From the Recall Safe page, click the Scope Set icon to display the Scope Set window.
2 If necessary, click the appropriate Scope Sets folder by click-ing and selecting it from the Folder selector.
3 Do one of the following:
• To preview an existing Scope Set, click its name in the Scope Sets window.
• To load the currently selected Scope Set, press Enter or click the Close box (X) in the Scope Sets window title bar.
• To cancel without changing Recall Safe settings, click Cancel.
For more information, see “Adding MIDI Messages to Snap-shots” on page 26.
For more information, see “Adding Plug-In Data to Snap-shots” on page 28.
Automation Safing Channels
You can suspend the effect of snapshots on individual chan-nels using any of the following Automation Safe controls:
Input Channel Safes Temporarily suspend the effect of snap-shots on individual Input Channels and FX Returns from the control surface.
Output Safes Temporarily suspend the effect of snapshots on the following categories of outputs, from the Snapshot Out-put Safe section of the control surface: Aux 1–8, Aux 9–16, Personal Qs, Matrixes, Groups, VCAs, Mains, and MIDI.
Safe All Temporarily suspends the effect of snapshots on all channels. Safe All lets you continue to recall, store and man-age snapshots while the channels are safed. This switch is lo-cated in the Snapshot Master Controls section.
Safe Selected Temporarily suspends the effect of snapshots on selected channels. This is a latching mode that lets you se-lect multiple Input and Output channels. This switch is lo-cated in the Snapshot Master Controls section.
Scope Sets window
See the Shows and File Management chapter for instruc-tions on creating custom folders and transferring D-Show data.
Scope SetsFolder selector
Chapter 2: Snapshots 19
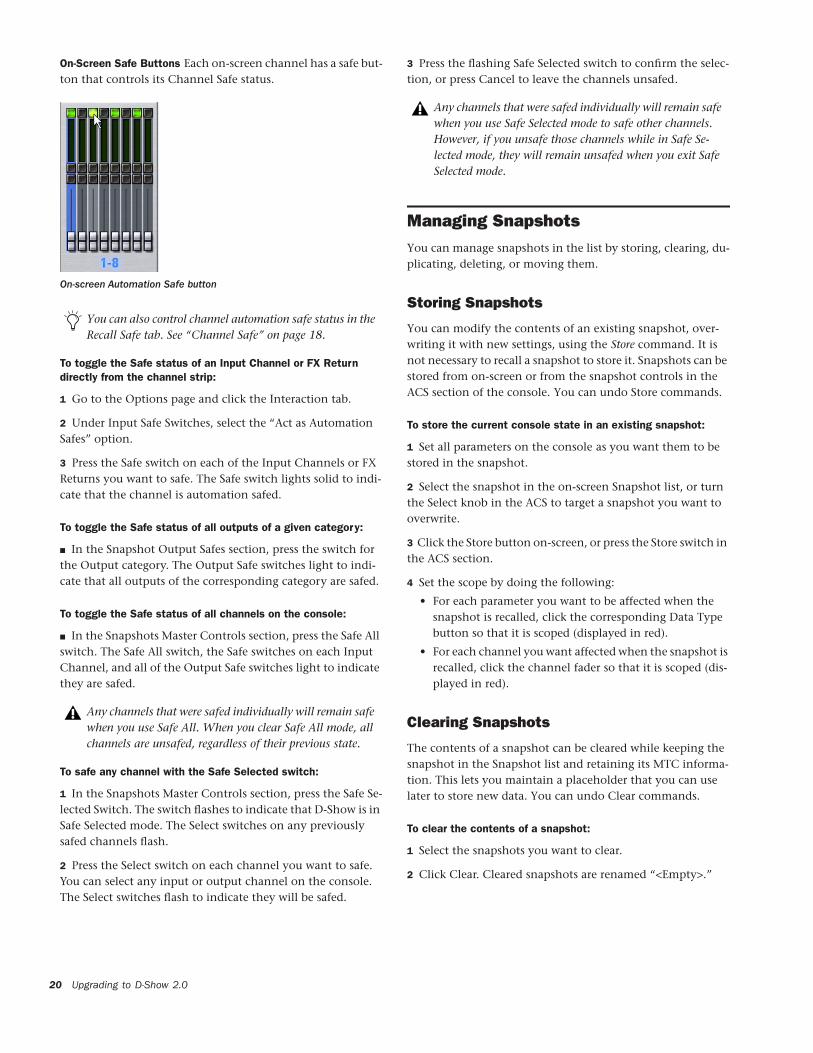
On-Screen Safe Buttons Each on-screen channel has a safe but-ton that controls its Channel Safe status.
To toggle the Safe status of an Input Channel or FX Return directly from the channel strip:
1 Go to the Options page and click the Interaction tab.
2 Under Input Safe Switches, select the “Act as Automation Safes” option.
3 Press the Safe switch on each of the Input Channels or FX Returns you want to safe. The Safe switch lights solid to indi-cate that the channel is automation safed.
To toggle the Safe status of all outputs of a given category:
■ In the Snapshot Output Safes section, press the switch for the Output category. The Output Safe switches light to indi-cate that all outputs of the corresponding category are safed.
To toggle the Safe status of all channels on the console:
■ In the Snapshots Master Controls section, press the Safe All switch. The Safe All switch, the Safe switches on each Input Channel, and all of the Output Safe switches light to indicate they are safed.
To safe any channel with the Safe Selected switch:
1 In the Snapshots Master Controls section, press the Safe Se-lected Switch. The switch flashes to indicate that D-Show is in Safe Selected mode. The Select switches on any previously safed channels flash.
2 Press the Select switch on each channel you want to safe. You can select any input or output channel on the console. The Select switches flash to indicate they will be safed.
On-screen Automation Safe button
You can also control channel automation safe status in the Recall Safe tab. See “Channel Safe” on page 18.
Any channels that were safed individually will remain safe when you use Safe All. When you clear Safe All mode, all channels are unsafed, regardless of their previous state.
Upgrading to D-Show 2.020
3 Press the flashing Safe Selected switch to confirm the selec-tion, or press Cancel to leave the channels unsafed.
Managing SnapshotsYou can manage snapshots in the list by storing, clearing, du-plicating, deleting, or moving them.
Storing Snapshots
You can modify the contents of an existing snapshot, over-writing it with new settings, using the Store command. It is not necessary to recall a snapshot to store it. Snapshots can be stored from on-screen or from the snapshot controls in the ACS section of the console. You can undo Store commands.
To store the current console state in an existing snapshot:
1 Set all parameters on the console as you want them to be stored in the snapshot.
2 Select the snapshot in the on-screen Snapshot list, or turn the Select knob in the ACS to target a snapshot you want to overwrite.
3 Click the Store button on-screen, or press the Store switch in the ACS section.
4 Set the scope by doing the following:
• For each parameter you want to be affected when the snapshot is recalled, click the corresponding Data Type button so that it is scoped (displayed in red).
• For each channel you want affected when the snapshot is recalled, click the channel fader so that it is scoped (dis-played in red).
Clearing Snapshots
The contents of a snapshot can be cleared while keeping the snapshot in the Snapshot list and retaining its MTC informa-tion. This lets you maintain a placeholder that you can use later to store new data. You can undo Clear commands.
To clear the contents of a snapshot:
1 Select the snapshots you want to clear.
2 Click Clear. Cleared snapshots are renamed “<Empty>.”
Any channels that were safed individually will remain safe when you use Safe Selected mode to safe other channels. However, if you unsafe those channels while in Safe Se-lected mode, they will remain unsafed when you exit Safe Selected mode.

Duplicating Snapshots
Snapshots can be duplicated from the Snapshots list. You can undo Duplicate commands.
To duplicate snapshots:
1 Select the snapshots you want to duplicate.
2 Do one of the following:
• Click “Dup” (Duplicate).
– or –
• Right-click the snapshot name and choose Duplicate.
A copy of each selected snapshot is placed after the selection, with a plus sign (+) appended to the original snapshot name.
If multiple snapshots are selected in the list, the new (dupli-cate) items are added below their original source snapshots.
Deleting Snapshots
Snapshots can be deleted from the Snapshots list. You can undo Delete commands.
To delete snapshots:
1 Select the snapshots you want to delete.
2 Do one of the following:
• Click “Del” (Delete).
– or –
• Right-click the snapshot name and choose Delete.
The snapshots are removed from the Snapshots list, and suc-ceeding snapshots are renumbered.
Moving Snapshots
Existing snapshots can be rearranged in the Snapshots list. When you move one or more snapshots, they are automati-cally renumbered in the list, but MTC values are left un-changed. You can undo a snapshot move.
To move a snapshot, do one of the following:
■ Drag the currently selected snapshots to a new location in the Snapshots list.
– or –
■ Double-click the snapshot number in the Snapshots list or the banner display, type a new number, and press Enter on the keyboard.
Making Changes to SnapshotsThere may be situations where you need to change specific pa-rameters in existing snapshots while leaving other parameters unchanged.
For example, if a guitarist changes instruments in the middle of a tour it might be necessary to change levels and EQ on the guitar channel in all the snapshots in a show. D-Show pro-vides the following modes to accommodate these types of sit-uations:
Edit Mode Lets you capture individual control changes while you mix, and apply those changes to one or more pre-existing snapshots as absolute or relative changes. For example, you could enter Edit mode the first time a guitarist uses a new gui-tar in rehearsal or performance. When you are satisfied with your settings you can apply them (in absolute or relative fash-ion) to update other snapshots. See “Using Edit Mode” on page 21.
Propagate Mode Lets you update data in pre-existing snap-shots after you've already made changes and decided you want to keep them. While Edit mode requires you to know ahead of time that you will be updating snapshots, Propagate mode lets you update other snapshots with current settings af-ter making adjustments to your mix. For example, after the third consecutive night of reaching to increase gain on the DI channel for a new guitar you could use Propagate mode to quickly take the gain increase you just made and apply it to other snapshots. See “Using Propagate Mode” on page 22.
Using Edit Mode
Edit mode is a powerful way to update specific parameters across multiple snapshots without overwriting any settings you want to preserve. By entering Edit mode before making adjustments, you can edit a single control or any number of controls, and your changes are tracked from the point Edit mode was entered.
The ability to edit a single control in Edit mode provides more selectivity than Propagate mode.
Chapter 2: Snapshots 21

Absolute and Relative Edits
Changes can be applied to one or more selected snapshots as absolute or relative values. Any parameter can be edited in ab-solute fashion; all dB parameters can be edited in relative fash-ion.
Examples of Absolute and Relative Edits
Absolute Changing a fader level from 0 dB to –3 dB and apply-ing that change results in that fader being set identically to –3 dB in all selected snapshots.
Relative Changing a fader level from 0 to –3 dB and applying that change results in that fader being reduced by that amount in all selected snapshots, or 3 dB relative to the value previously stored in the snapshot(s). For example, a channel previously at –6 dB would be changed to –9 dB.
Making Relative Changes with Mixed Data Types
If a combination of dB and non-dB parameters (such as gain and EQ frequency) are edited and applied in relative fashion, the dB parameters are adjusted as relative (delta) changes and the non-dB are applied as absolute changes.
To update specific parameters in existing snapshots using Edit mode:
1 Navigate to the main Snapshots page.
2 Click the Edit button to enter Edit mode. The Edit button changes into two smaller flashing buttons: Abs, and Rel. D-Show begins tracking all changes while you make them.
3 Adjust any combination of snapshottable parameters on the console or on-screen.
4 Select the snapshot(s) to which you want to apply your ed-its.
5 Click either of the flashing buttons Abs (for Absolute) or Rel (for Relative). You can cancel Edit mode by pressing the Can-cel button on the control surface, clicking the Cancel button on-screen, or by pressing the ESC key on your computer key-board.
Edit mode
Upgrading to D-Show 2.022
The selected snapshots are updated according to your changes and your choice of Absolute or Relative edit.
Using Propagate Mode
You can use the Propagate command to capture changes and apply them to existing snapshots. Propagate mode is most useful when you realize during the course of mixing that you want to capture your current settings to use in other snap-shots. You can undo Propagate commands.
To update specific parameters in existing snapshots:
1 Make sure the channel is set as needed.
2 Click Propagate. The current data and channel scope is cleared.
3 Set the scope to reflect only those parameters you want to update by doing the following:
• For each parameter you want to update, click the corre-sponding Data Type button so that it is scoped (displayed in red).
– and –
• For each channel you want to update, click the channel so that it is scoped (displayed in red).
4 Select the snapshot or range of snapshots you want to up-date in the Snapshots list.
5 Click Propagate. The scoped parameters are updated in the selected snapshots.
Propagating an EQ change for a channel

Preview ModePreview mode lets you recall, store and edit snapshots without affecting the current mix.
When enabled, Preview mode takes the console offline from the live audio mix so you can “work ahead” during a re-hearsal, performance or event to preview upcoming snapshots and edit them as needed. Any control that can be stored and recalled by snapshots is available while in Preview mode, and you can also modify the Snapshot List. Once you are done pre-viewing or editing snapshots, you can store your changes to update the existing snapshots with your changes.
Using Preview Mode
The basic workflow for using Preview mode is as follows:
1 Make sure your active mix is set as desired, and make sure the rehearsal, event or performance has an upcoming oppor-tunity for you to go offline.
2 Enter Preview mode by pressing F1 on the console, or by clicking the on-screen Preview button in the main Snapshots page. The word “PREVIEW” flashes in red across the screen for confirmation; on the console, the F1 (Preview) switch flashes, as do all input and output channel strip displays.
3 Do any of the following:
Edit the Snapshots List Reorder snapshots in the list, if de-sired, by clicking and dragging them. Changes to the order of items in the Snapshots list may affect the current active mix if the affected snapshots rely on MIDI or MTC triggering. (For more information, see “Changing the Snapshot List in Pre-view Mode” on page 24.)
Create a New Snapshot Adjust settings as desired and create a new snapshot by clicking New.
Preview mode
Recall and Edit an Existing Snapshot Recall a snapshot to pre-view its settings and make any adjustments necessary, being sure to re-store the snapshot before exiting Preview mode. Storing a snapshot in Preview mode does not affect previously stored MIDI or Plug-in data (if any).
Edit Channel and Scope Settings Edit any channel settings, pa-rameters, or scope associated with the snapshot being pre-viewed. The Snapshots page displays the current snapshot name in italics to indicate that at least one parameter has been changed, and the Channel Faders show you the previous level for each channel in bright red. Scope Data Type buttons and Channel Scope functionality remain live and active at all times (in other words, changes made to these controls while in Preview mode will remain once Preview mode is exited).
Add and Edit MIDI or Plug-In Data To add MIDI or plug-in data associated with the snapshot, click the Add button in the MIDI or Plug-Ins snapshot list. With plug-ins this adds the current online plug-in settings to the snapshot. If you need to update pre-existing MIDI or plug-in data associated with a snapshot, right-click the corresponding entry in the MIDI/Plug-ins view of the Snapshots page and choose the Up-date option (this option will include the plug-in rack position, and the name of the associated snapshot). For more informa-tion, see “Plug-Ins and MIDI in Preview Mode” on page 25.
4 To undo any of your changes made while in Preview mode, click the Undo button on-screen. (For more information about Undo in Preview mode, see “Making Changes to Snap-shots” on page 21.)
5 To update the currently previewed snapshot but remain in Preview mode, press or click Store.
6 Continue previewing and editing settings as needed (all snapshot functions are available in preview mode).
7 When you are finished and need to exit Preview mode, press F1 (or click the on-screen Preview button).
Updating snapshot plug-in data
Exiting Preview mode without storing will discard the changes made while in Preview mode (Preview mode is cleared each time you exit). You must explicitly store changes to update the associated snapshots.
Chapter 2: Snapshots 23

Undo and Preview Mode
In Preview mode, you can Undo changes to settings and to the Snapshots list without affecting the online mix.
Changing Console Settings in Preview Mode
D-Show tracks any changes to console settings or to the Snap-shot List while in Preview mode, but only Snapshot List ac-tions create an Undo point. Choosing Undo will undo the last action you took while in Preview mode, up to a maximum of 100 levels of Undo. Any changes to console settings made af-ter the last Preview action are also undone (the Snapshot screen is returned to its exact state prior to the action that cre-ated the Undo point).
Changing the Snapshot List in Preview Mode
Changes made to the Snapshot List are automatically tracked and available for Undo, regardless of whether Preview mode is enabled or not. This includes any Recall of snapshots triggered by incoming MIDI or MTC while in Preview mode.
For example, if a MIDI Snapshot Recall occurs while you are in Preview mode, the online mix will be updated with that snap-shot. Pressing Undo immediately after that Recall will undo that Snapshot recall and revert the online mix to its state prior to the Undo.
Consider turning off the Chase MTC option while in Preview mode to disable all MIDI recall of snapshots. In addition, you can always use the D-Show History feature to recover from any unexpected results.
Changing MIDI or Plug-In Data in Preview Mode
Changes made to MIDI and Plug-In data cannot be undone. For more information, see “Adding MIDI Messages to Snap-shots” on page 26 and “Adding Plug-In Data to Snapshots” on page 28.
Multiple levels of Undo are available.
Take advantage of D-Show Tool Tips in the banner display to confirm what action the Undo button will revert. See “Undoing Snapshot Commands” on page 26.
Upgrading to D-Show 2.024
Available and Unavailable Functions in Preview Mode
In order to maintain essential mix indicators and controls while in Preview mode, not all functions are taken offline.
The following sections detail what is and what is not available during Preview mode.
Always Active
Certain D-Show essential mix functions remain live and ac-tive at all times, regardless of whether Preview mode is en-abled. The following vital mix functions continue to affect or be affected by the console and software:
• Metering (including input, output and dynamics meters, clip and bank clip indicators)
• AFL/PFL
• Dynamics Key Listen
• Monitoring level, Headphone level and Monitoring bus Delay
• Talkback, Osc and 2-Track
• Mute Groups (recall only)
• Recall Safe
• PQ system (remains active, but changes from a PQ Con-troller are not reflected)
• MIDI snapshot Recall, Chase MTC and Disable
• Snapshot List and Recall Safe (deleting, adding, or editing snapshots are/will be reflected online and affect the mix)
• History (auto-save)
Recall Safe in Preview Mode
The Recall Safe settings are global, and are applied to filter snapshot data regardless of the current operating mode. For details on Recall Safe and other D-Show automation safe fea-tures, see “Recall Safe and Channel Automation Safe” on page 16.
Available and Editable in Preview Mode
Almost all system functions, such as selecting channels and banking faders, are available in Preview mode.
Only those controls that can be stored and recalled via snapshots are available for offline previewing and editing. In addition, some snapshot-capable controls have special requirements when using Preview mode (such as MIDI and plug-in data). See “Plug-Ins and MIDI in Preview Mode” on page 25.

Not Available in Preview Mode
The only controls not available while in Preview mode are those controls which are not able to be stored or recalled via snapshots. In addition, Config mode options are unavailable in Preview mode.
Unavailable functions include the following:
• Make Stereo, or Split to Mono
• Move channels
• Input channel Gain Guess
• Input channel and FX Return Input Direct switch
• Input channel Dyn Pre EQ switch
• Insert mode (plug-ins cannot be edited)
• Digital input source selection (ADAT)
• Enabling or disabling sample rate conversion
Config Mode
Config mode is not available while in Preview mode. Pressing the Config switch (or double-clicking the Config/Show mode icon on-screen) displays a dialog box in which you can choose to “Exit Preview” (return to online mix, in Config mode), or “OK” (remain in Preview mode).
The system automatically switches to Show mode if Config mode is active at the time Preview mode is entered.
Plug-Ins and MIDI in Preview Mode
Plug-ins in Preview mode operate in a similar way as when us-ing the standalone software.
Plug-Ins in Preview Mode
Recalling a snapshot that contains plug-in data affects the of-fline (Preview) routing and bypass state of the plug-in only; the online plug-in parameter settings are not recalled, and the online mix is not affected.
The following plug-in functions are available offline in Pre-view mode:
• Plug-in routing can be changed
• Plug-in rack view can be changed
• Plug-ins can be added to a snapshot to capture its current online parameter settings and (Preview mode) routing
These functions are neither available for offline access in Preview mode, nor do they remain active (online) while in Preview mode. To adjust any of the above settings, you must exit Preview mode.
The following plug-in functions are not available while in Pre-view mode:
• Plug-ins cannot be added to or removed from rack slots
• Plug-in presets cannot be recalled or saved
• Plug-in parameters cannot be changed (you cannot open plug-in windows while in Preview mode)
• Plug-ins cannot be installed
You must explicitly add or update plug-in (or MIDI) data to update snapshots, whether or not Preview mode is enabled. You can do this from the main Snapshot page, or from the plug-in racks. For more information, see “Adding Plug-In Data to Snapshots” on page 28
MIDI in Preview Mode
Incoming MIDI or MTC continues to trigger snapshot recall while in Preview mode. However, MIDI messages stored to snapshots are not sent out when a snapshot is recalled in Pre-view mode. For more information, see “Adding MIDI Mes-sages to Snapshots” on page 26.
Updating plug-in data in an associated snapshot from the plug-in view
Chapter 2: Snapshots 25
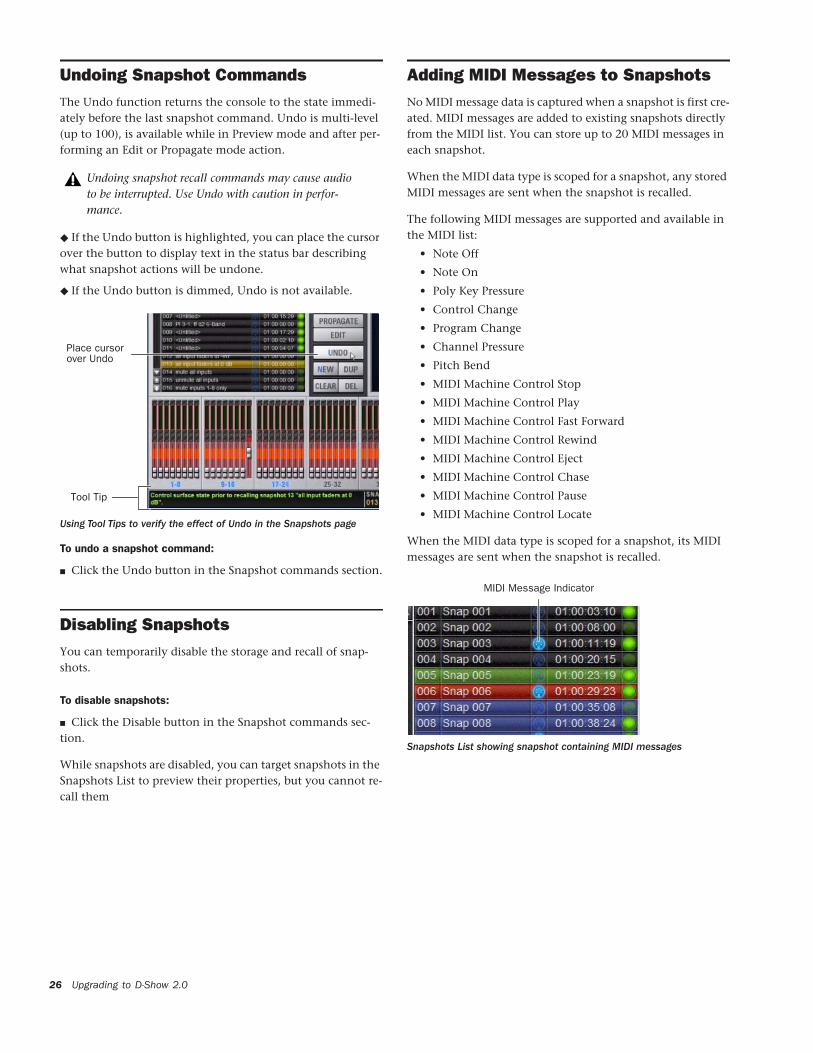
Undoing Snapshot CommandsThe Undo function returns the console to the state immedi-ately before the last snapshot command. Undo is multi-level (up to 100), is available while in Preview mode and after per-forming an Edit or Propagate mode action.
◆ If the Undo button is highlighted, you can place the cursor over the button to display text in the status bar describing what snapshot actions will be undone.
◆ If the Undo button is dimmed, Undo is not available.
To undo a snapshot command:
■ Click the Undo button in the Snapshot commands section.
Disabling SnapshotsYou can temporarily disable the storage and recall of snap-shots.
To disable snapshots:
■ Click the Disable button in the Snapshot commands sec-tion.
While snapshots are disabled, you can target snapshots in the Snapshots List to preview their properties, but you cannot re-call them
Undoing snapshot recall commands may cause audio to be interrupted. Use Undo with caution in perfor-mance.
Using Tool Tips to verify the effect of Undo in the Snapshots page
Place cursorover Undo
Tool Tip
Upgrading to D-Show 2.026
Adding MIDI Messages to SnapshotsNo MIDI message data is captured when a snapshot is first cre-ated. MIDI messages are added to existing snapshots directly from the MIDI list. You can store up to 20 MIDI messages in each snapshot.
When the MIDI data type is scoped for a snapshot, any stored MIDI messages are sent when the snapshot is recalled.
The following MIDI messages are supported and available in the MIDI list:
• Note Off
• Note On
• Poly Key Pressure
• Control Change
• Program Change
• Channel Pressure
• Pitch Bend
• MIDI Machine Control Stop
• MIDI Machine Control Play
• MIDI Machine Control Fast Forward
• MIDI Machine Control Rewind
• MIDI Machine Control Eject
• MIDI Machine Control Chase
• MIDI Machine Control Pause
• MIDI Machine Control Locate
When the MIDI data type is scoped for a snapshot, its MIDI messages are sent when the snapshot is recalled.
Snapshots List showing snapshot containing MIDI messages
MIDI Message Indicator

To add a MIDI message to a snapshot:
1 Target the snapshot you want to modify.
2 Double-click the word “MIDI” in the MIDI/Plug-Ins list header to expand the MIDI list.
3 Click Add and choose a message from the pop-up menu.
A MIDI plug icon appears in the Snapshots List for each snap-shot that contains MIDI messages.
To record incoming MIDI data to a snapshot.
1 Click REC.
2 Send a supported MIDI command.
3 Click REC again when done.
To edit a MIDI message in the MIDI list:
1 Double-click the message text to display the pop-up menu bar for the message.
2 Choose the message name and send channel or device ID from the pop-up menus.
3 Enter the message values in the text fields or drag up or down across the text field to change the values.
4 Click in the MIDI list area to dismiss the pop-up menu bar.
To remove a MIDI message from a snapshot:
■ Right-click the MIDI message in the MIDI list and choose Delete.
Adding a message to the Snapshot MIDI list
Editing a MIDI message in the snapshot MIDI list
Viewing MIDI Messages in Hexadecimal Format
You can toggle the view of MIDI messages in the MIDI list be-tween hexadecimal and decimal formats.
To toggle the view format of the MIDI list:
■ Click the “Hex” button in the MIDI/Plug-Ins list header.
Safing MIDI Message Output
You can temporarily disable output of embedded MIDI mes-sages so that they are not sent when a snapshot is recalled, even when the MIDI data type is scoped.
To safe MIDI message output on-screen:
1 Go to the Snapshots page and click the Recall Safe tab.
2 Click the MIDI global output safe button above the param-eter matrix.
MIDI output can also be safed globally from the control sur-face (see “Snapshot Output Safes” on page 13). This button mirrors the on-screen button on the Recall Safe page.
MIDI output is automatically suspended in Preview mode.
In previous versions of D-Show, this control was located in the Options > Snapshots page.
Chapter 2: Snapshots 27

Adding Plug-In Data to SnapshotsNo Plug-In data is captured when a snapshot is first created. Plug-In data is added to existing snapshots from the Plug-Ins list or from the Plug-In rack.
When the Plug-In data type is scoped for a snapshot, plug-in routing, in/out state, and settings are recalled with the snap-shot. (Adding or changing plug-in side-chain routing is not supported in snapshots.)
To add plug-in data to a snapshot from the MIDI/Plug-Ins list:
1 Target the snapshot you want to modify.
2 Double-click “Plug-Ins” in the MIDI/Plug-Ins list header to expand the Plug-In list.
3 Do one of the following to add one or more plug-ins to the list:
• To add settings for a single plug-in, click Add and choose the plug-in from the pop-up menu.
– or –
• To add settings for all plug-ins currently in the Plug-In rack, click Add and choose All Plug-Ins from the pop-up menu.
To remove plug-in data from a snapshot from the MIDI/Plug-Ins list:
■ Right-click the data item in the Plug-Ins list and choose De-lete.
Expanded Plug-In list
Adding a plug-in to the snapshot Plug-In list
Upgrading to D-Show 2.028
To add plug-in data to a snapshot from the Plug-In rack:
1 In the Snapshots window, target the snapshot you want to modify.
2 Go to the Plug-Ins page to display the Plug-In rack.
3 Click the Snapshot pop-up menu (indicated by an “S”) and do one of the following:
• To add a new snapshot to the Snapshots List with the plug-in data, choose “Create New Snapshot Containing This Plug-In.”
• To add the plug-in data in the currently targeted snap-shot, choose “Add This Plug-In To Target Snapshot.”
• To update existing data for the plug-in in the currently targeted snapshot, choose “Update This Plug-In in Target Snapshot”
To remove plug-in data from a snapshot from the Plug-In rack:
1 In the Snapshots window, target the snapshot you want to modify.
2 Go to the Plug-Ins page to display the Plug-In rack.
3 Click the Snapshot pop-up menu in the rack slot for the plug-in you want to remove and choose “Remove Plug-In From Target Snapshot.”
Snapshot pop-up menu in Plug-In Rack
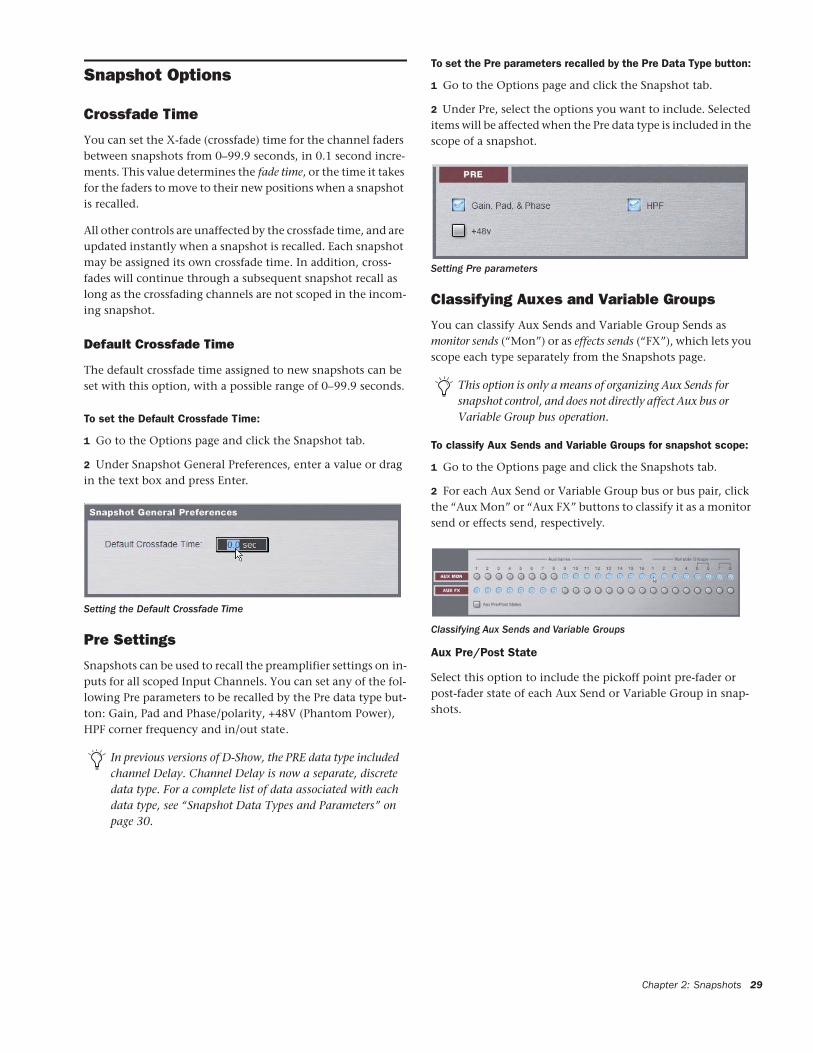
Snapshot Options
Crossfade Time
You can set the X-fade (crossfade) time for the channel faders between snapshots from 0–99.9 seconds, in 0.1 second incre-ments. This value determines the fade time, or the time it takes for the faders to move to their new positions when a snapshot is recalled.
All other controls are unaffected by the crossfade time, and are updated instantly when a snapshot is recalled. Each snapshot may be assigned its own crossfade time. In addition, cross-fades will continue through a subsequent snapshot recall as long as the crossfading channels are not scoped in the incom-ing snapshot.
Default Crossfade Time
The default crossfade time assigned to new snapshots can be set with this option, with a possible range of 0–99.9 seconds.
To set the Default Crossfade Time:
1 Go to the Options page and click the Snapshot tab.
2 Under Snapshot General Preferences, enter a value or drag in the text box and press Enter.
Pre Settings
Snapshots can be used to recall the preamplifier settings on in-puts for all scoped Input Channels. You can set any of the fol-lowing Pre parameters to be recalled by the Pre data type but-ton: Gain, Pad and Phase/polarity, +48V (Phantom Power), HPF corner frequency and in/out state.
Setting the Default Crossfade Time
In previous versions of D-Show, the PRE data type included channel Delay. Channel Delay is now a separate, discrete data type. For a complete list of data associated with each data type, see “Snapshot Data Types and Parameters” on page 30.
To set the Pre parameters recalled by the Pre Data Type button:
1 Go to the Options page and click the Snapshot tab.
2 Under Pre, select the options you want to include. Selected items will be affected when the Pre data type is included in the scope of a snapshot.
Classifying Auxes and Variable Groups
You can classify Aux Sends and Variable Group Sends as monitor sends (“Mon”) or as effects sends (“FX”), which lets you scope each type separately from the Snapshots page.
To classify Aux Sends and Variable Groups for snapshot scope:
1 Go to the Options page and click the Snapshots tab.
2 For each Aux Send or Variable Group bus or bus pair, click the “Aux Mon” or “Aux FX” buttons to classify it as a monitor send or effects send, respectively.
Aux Pre/Post State
Select this option to include the pickoff point pre-fader or post-fader state of each Aux Send or Variable Group in snap-shots.
Setting Pre parameters
This option is only a means of organizing Aux Sends for snapshot control, and does not directly affect Aux bus or Variable Group bus operation.
Classifying Aux Sends and Variable Groups
Chapter 2: Snapshots 29

Snapshot Data Types and Parameters
Table 3. Snapshot data types and parameters included in each data type
Upgrading to D-Show 2.030
Snapshot Data Type Included Parameters (for Each Scoped Channel Strip)
Fader Main volume level
Mute Mute state
EQ EQ type selection (analog/digital); EQ in-circuit state; 4 bands (2 bands on FX Returns) of gain, freq, Q, bell/shelf selection (digital only), band on/off
Dyn Compressor/Limiter in-circuit state; threshold, ratio, attack, release, knee, makeup gainExpander/Gate in-circuit state; threshold, ratio, attack, release, hold time, range, side-chain input
Pan Channel pan or balance/widthPQ strip balancePan or balance/width for each Group bus returning back to L–R
Bus Group bus assignments, group bus mono/stereo-linked state (if mono groups) or dual-mono/true stereo state (if stereo groups), L–R bus assignment and C/M bus assignments for input strips and groups
In Input routing for Input Channels and FX Returns
Out Main out assignments; direct out assignments, level, in-circuit state, & tap-off point (excluding VCAs)
H/W Hardware insert routing and in-circuit state (excluding VCAs)
VCA VCA membership
Pre Gain, pad, phase, phantom power, HPF corner frequency & in-circuit state
Name Name for each strip
MTX Level & enable for all 12 Matrix sources plus the user send input (including tap-off point if input is a strip)
PQ Level, enable, & pan for all 12 PQ sources plus the user send input (including tap-off point if input is a strip), limiter threshold & in-circuit state
Aux Mon On/off, pre/post selection, level, and pan/balance for each Aux/Var Group bus classified as a Monitor Aux
Aux FX On/off, pre/post selection, level, and pan/balance for each Aux/Var Group bus classified as an FX Aux
Dly Channel delay time & in-circuit
MIDI All MIDI messages that were added to the associated MIDI list for that snapshot.
Plug-Ins Rack slot settings, in-circuit state, and I/O routing for each plug-in added to plug-ins list for that snapshot
In previous versions of D-Show, VCA membership was stored as part of the (member) channel data. In version 2.0, VCA membership is stored and associated with the VCA strip.
In previous versions of D-Show, channel Delay settings were stored as part of channel Pre data. In version 2.0, channel Delay has been added as a discrete data type in the Scope controls (Dly).
For more information, see “Converting Show Files to 2.x Format” on page 31.
Chapter 3: Installing D-Show 2.0
Show File CompatibilityD-Show 2.0 uses a new version of the Show file format to sup-port the new features.
Opening 1.x Show Files on D-Show 2.0
D-Show 2.0 loads and automatically converts Show files cre-ated with D-Show 1.x. It does not automatically convert the Show file saved on disk. This saved version 1.x Show file can still be opened on a D-Show 1.x system, if needed.
To update a Show file created with D-Show 1.x, you need to save the Show file as a new file, or overwrite the existing Show file.
To load a D-Show 1.x Show file in D-Show 2.0:
1 Transfer the Show file to the system if necessary.
2 Go to the Filing page and click the Load tab.
3 In the Show Folders column, click the name of the Show Folder containing the show file you want to load.
4 In the Shows column, click the name of the Show file you want to load. The Show file version appears in the Info win-dow.
5 Click the Load button.
D-Show loads and converts the file, creating a 2.x version, without affecting the saved 1.x Show file.
During the conversion, D-Show checks whether any saved data will have to be modified for 2.x format. For example, loading a 1.x Show file into 2.0 requires that any VCA and De-lay data saved in the 1.x version be converted to match the data structure of snapshots in 2.x; If D-Show detects that any snapshots in the 1.x Show file contain VCA or Delay data, a message is posted on-screen alerting you to the change, and recommending that you check the appropriate parameters in your snapshots.
Version 2.x Files are Not Compatible with D-Show 1.x
D-Show 2.0 format Show files cannot be opened on D-Show 1.x systems.
D-Show 2.0 format Show files cannot be opened on D-Show systems using a lower version of the D-Show soft-ware.
Converting Show Files to 2.x FormatShow files created with previous versions of D-Show will be converted to 2.x format when loaded into a system running version 2.0 or later. This conversion is necessary due to the following changes to D-Show snapshot functionality:
• Snapshots now “store all” parameters (previously, snap-shots only stored that data that was explicitly scoped for storage).
• Channel Delay is now stored separately, and has a dedi-cated Data Type Scope button in the Snapshots main page (previously, channel Delay was stored as part of the larger Pre data type).
• VCA membership is now stored as part of the VCA chan-nel itself (previously, VCA membership was stored with the channels assigned to each VCA).
D-Show will post a message whenever a Show file is loaded that might be affected by this conversion.
No data is lost during this conversion, but the scope of some snapshots may be changed. If this occurs, consider using the Recall Safe tab to restore normal behavior. For example, when VCA membership is converted the affected VCA strips are au-tomatically added to the scope if they weren't already. If VCA Faders are scoped, the VCA fader would now be recalled with the snapshot, when previously it wouldn't. In this case, you can enable Recall Safe for the VCA fader to restore the original behavior.
It is recommended that you double-check each snapshot by recalling it, ensure that the console is in the desired state, and then re-store each snapshot before adding channels or data types to a snapshots scope. Ideally, this should be done prior to a performance or event.
Chapter 3: Installing D-Show 2.0 31

Installing D-Show 2.0 SoftwareYou can install D-Show 2.0 software by two methods:
Update Upgrades the D-Show software and leaves User Set-tings, Shows and Presets intact.
Restore Completely erases the D-Show system drive and places a new install of D-Show software on the drive.
Backing Up Current Settings
Whether you are performing an update or a full system re-store, you should back up any Console Settings, Show files or Presets on your system before installing D-Show 2.0. software.
To back up the current D-Show settings:
1 Go to the Filing page and click the Transfer tab.
2 Connect a portable storage device (such as a USB key disk) to D-Show. The device appears above the right column of the Transfer page.
3 Do one of the following to select the type of data to transfer:
• To transfer all data, click the Console icon.
• To transfer Console Settings, click the Settings icon.
• To transfer Show Folders, click the Show Folders icon.
• To transfer individual Shows, click the Shows icon.
• To transfer Preset Folders, click the Preset Folders icon.
• To transfer Presets for individual items, click the Built-In icon or the Plug-In icon and choose a processor or plug-in from the pop-up menu.
4 In the left column, select the items you want to transfer from D-Show to the portable storage device.
Plug-ins must be re-installed after performing a system Re-store. For more information, see “Plug-Ins” on page 6.
The USB ports on the FOH Rack are the faster USB 2.0 type. Use these to reduce the time needed for large transfers.
Show files selected for transfer from D-Show to USB key disk
Upgrading to D-Show 2.032
5 Click the Transfer button.
Large transfers may take time. Transfer status is shown by a progress bar. A transfer may be cancelled by clicking Cancel.
6 Remove the portable storage device from D-Show.
Installing D-Show 2.0 software
To install D-Show 2.0 software:
1 Make sure outputs, speakers, and power amps are off or muted.
2 Insert the D-Show 2.0 System Restore CD into the D-Show CD-ROM drive on the FOH Rack.
3 Press the two Reset switches on the front of the FOH Rack si-multaneously to restart the system, then press and hold F10 on the keyboard until Restore CD text screen appears.
4 Use the Up and Down Arrow keys to select the CD drive and press Enter. This launches using the software on the inserted System Restore CD.
5 Do one of the following to update or restore D-Show soft-ware:
• To update D-Show software while keeping any Show files and Preset files on the system, press U. Follow the on-screen instructions to begin installation. The installer begins replacing D-Show software on the CPU of the FOH Rack.
– or –
• To fully restore the system (completely removing all files on the system), press R. (Or press P to return to the pre-vious screen.) A warning dialog appears on-screen asking you to confirm. Press Shift+R (uppercase R) to begin, then follow on-screen instructions to complete the system re-store operation.
When finished updating or restoring, the system restarts.
Updating Firmware
During an update or system restore, D-Show checks for new firmware. If newer firmware is found on the System Restore CD, it is installed while D-Show starts up.
Cancelled transfers may result in partial folder contents, which will have to be deleted manually.
Some models of USB keyboards require repeated pressing of F10 (holding it down in between pressings) to register.
When you perform an Update from 1.x to 2.0, a backup of the current 1.x Console Settings file is automatically saved in the Preserved Shows folder, accessible from the History tab.

Reinstalling Plug-Ins
The System Restore CD installs D-Show system software only. DigiRack Plug-ins and any additional plug-ins from Digide-sign or its Development Partners must be re-installed sepa-rately.
After an Update You can use the Previous Installs feature to re-install any plug-in with a compatible D-Show installer stored on the user drive partition. Any plug-ins without compatible D-Show installers that were manually installed must be man-ually re-installed. See “Improvements to Plug-In Manage-ment” on page 7.
After a Full System Restore All plug-ins must be installed from their original CD-ROM.
To reinstall plug-ins:
1 Put D-Show into Config mode.
2 If installing from a CD-ROM, insert the installer disc into the CD-ROM drive in the D-Show FOH Rack.
3 Go to the Options page and click the Plug-Ins tab.
4 Choose any of the following options in the Device Selector pop-up menu:
• Choose Previous Installs to access any plug-in installers stored on the user drive partition.
• Choose an external storage device to access plug-in in-stallers on any inserted USB media.
• Choose CD-ROM to access a D-Show compatible plug-in installer loaded in the FOH Rack CD-ROM drive.
5 Select a plug-in from the Plug-Ins to Install list on the left by doing any of the following:
• Click to select a single installer.
• Shift-click to select multiple contiguous installers.
• Control-click to select or deselect installers one at a time.
Click Install to install the selected plug-ins. Once installed, the plug-in appears in the Installed Plug-Ins list on the right.
Installing Plug-Ins Manually
If a plug-in does not appear in the Plug-Ins to Install list, it may not have a fully compatible D-Show installer and must be manually installed.
To install a plug-in manually:
1 Make sure all sound systems are shut down or muted.
2 Insert the plug-in installer disc into the CD-ROM drive on the FOH Rack.
3 Go to the Options page and click the System Config tab.
4 Hold the Control key and click Shutdown Console on-screen. Follow on-screen directions to exit to the Desktop.
5 Copy the plug-in installer to the partition named User Data.
6 Launch the plug-in installer application and follow any on-screen directions. If prompted, do not restart the system from a plug-in installer. (Doing so will not harm the system, but will take longer, especially if you have multiple plug-ins to install manually.)
7 Quit the installer application and eject the installer disc.
8 Click the Return to D-Show shortcut on the desktop to re-launch D-Show.
9 Go to the Options page and click the Plug-Ins tab. Verify that the manually installed plug-in appears in the Console list of available plug-ins.
A plug-in without a D-Show installer may still be com-patible with D-Show. Consult the plug-in manufacturer for compatibility information.
Chapter 3: Installing D-Show 2.0 33

DIGIDESIGN2001 Junipero Serra Boulevard
Daly City, CA 94014-3886 USA
Tel: 650.731.6300
Fax: 650.731.6399
TECHNICAL SUPPORT (USA)Tel: 650.731.6100
Fax: 650.731.6384
PRODUCT INFORMATION (USA)Tel: 650.731.6102
Fax: 800.333.2137
INTERNATIONAL OFFICESVisit our Digidesign Web sitefor contact information
www.digidesign.com