tutorial laser cut
TRANSCRIPT

LASERCUTTING 2LASERCUTTING 2TUTORIALTUTORIAL

The thickness of the material has a high influence on design aspect. Before designing the pieces, the thickness should be decided.
On our laser it's better to not go beyond 8 mm (plexi) or 10 mm (plywood).You can probably reach even more, but the cut will be very difficult and not clean.To create a thicker layer it's possible to glue several thinner layers together.
THICKNESS AND JOINTS

When the laser is out of focus, the spot is larger and more visible.You can decide to keep the laser out of focus to have some darker engrave
FOCUSED OR
OUT OF FOCUS
1- Laser beam2- Cutting gas3- Focusing lens4- Cutting head / nozzle5- Work-piece6- Blow-out molten mass

HOW TO PREPARE A FILE
Any vector present in the file will be processed by the machine.The thickness of the cut is irrelevand, as is the colour of the line, on our lasercut software. Even rastered images can be used.

For the machine, all the vectors are paths that the laser will follow. How it will work while moving depends on the settings of the software of the machine.
THE VECTORS

COLOUR SUBDIVISION
To make it easier to assign the pens for cutting, you need to group all the vectors which should be worked in the same way in one single layer and colour.

Once in the machine you assign parameters to obtain the various effects. Note that even fills and dotted lines are assigned by using simple lines. If you want a particular dotted line (for example dots with various lenghts) it has to be drawn in CAD.
ASSIGNING THE PARAMETERS

If I want to be sure of the resistance of the join I can insert parts that guarantee the interference. With 0,25mm per side I have an almost irreversible joint, with 0,1 mm very soft.
DRAWING THE JOINTS
(WOOD)
http://blog.ponoko.com/2008/11/03/how-to-create-better-nodes/
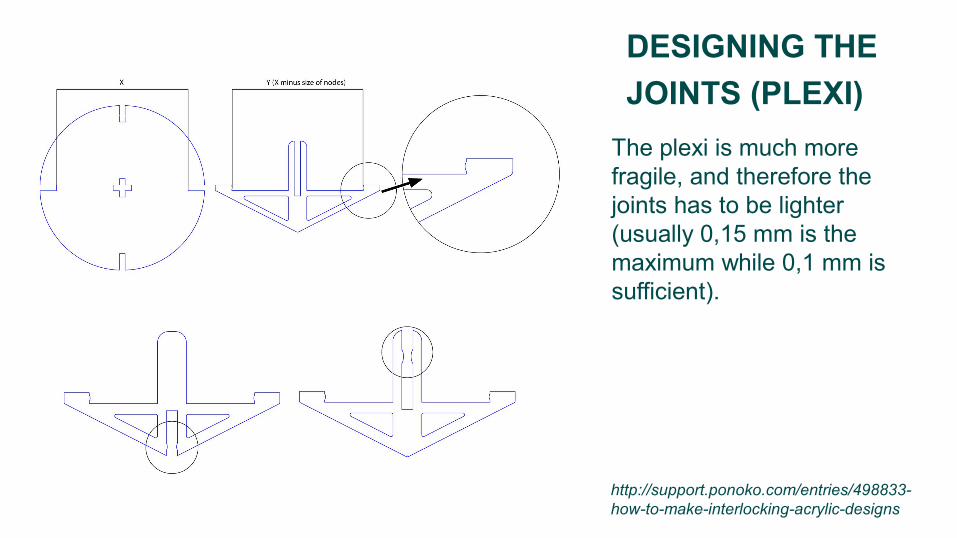
The plexi is much more fragile, and therefore the joints has to be lighter (usually 0,15 mm is the maximum while 0,1 mm is sufficient).
DESIGNING THE
JOINTS (PLEXI)
http://support.ponoko.com/entries/498833-how-to-make-interlocking-acrylic-designs

To reduce the risks caused by the fragility, usually you can cut a round corner.
DESIGNING THE
JOINTS (PLEXI)
http://support.ponoko.com/entries/498833-how-to-make-interlocking-acrylic-designs

The only inputs are vectors or rasters. Blocks, instances, texts, etc. have to be exploded into vectors before proceding.
TEXTS, BLOCKS, ETC.

To reduce the time and obtain a cleaner result you can incide the single line characters.
SINGLE LINE FONTS

FILE OPTIMIZATION
Reducing the curved lines and placing the pieces one next to the other you can reduce the time by a significant ammount.
http://support.ponoko.com/entries/20621872-a-guide-to-laser-cut-line-optimisation

To optimize time and quality it's better to avoid double lines. They could be a mistake from copying and pasting, or from placing two pieces attached to each other.
THE DOUBLE LINES
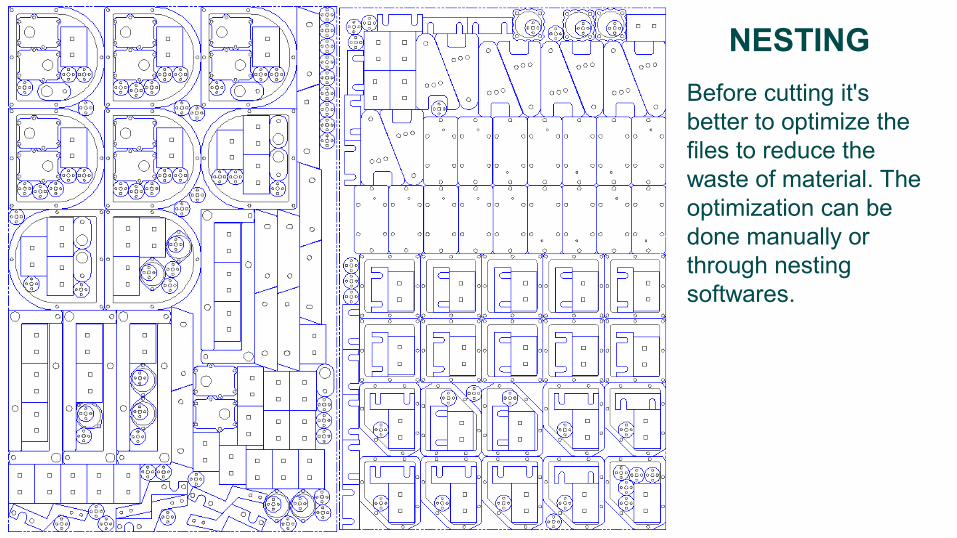
Before cutting it's better to optimize the files to reduce the waste of material. The optimization can be done manually or through nesting softwares.
NESTING

When exporting the files even the hidden or blocked vectors are usually saved. To be sure, export only the selection or cancel all that which you don't want to cut.
EXPORTING

CHECK:- that the drawing is in mm- texts, blocks, hatches etc. exploded in vectors- no hidden objects- no double lines
EXPORT IN:- dxf 2004 “natural” (in Rhino)- it is possible to export several pages in the same file, if distanced - the file can be exported even as a pdf, but it's a less stable process
BEFORE EXPORTING

LASERCUTTING 3LASERCUTTING 3TRICKSTRICKS
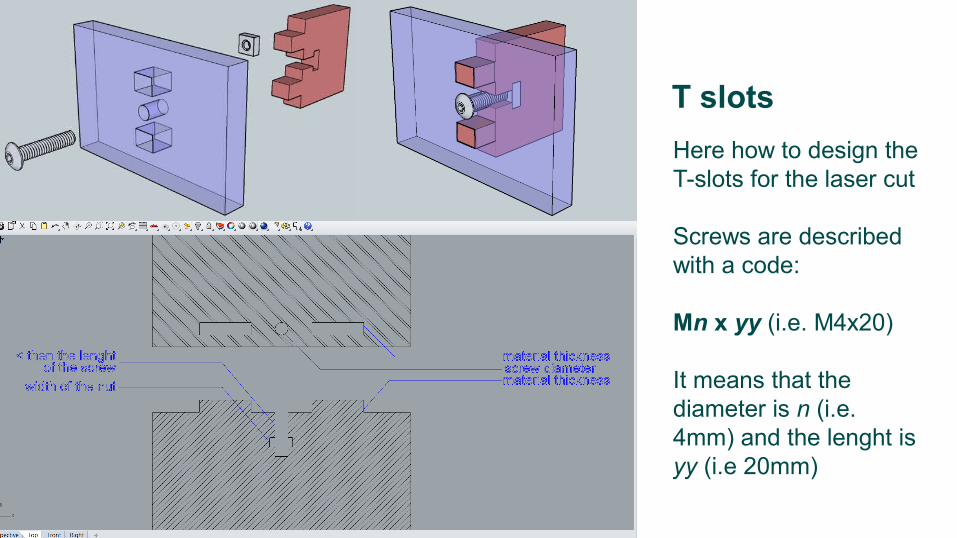
Here how to design the T-slots for the laser cut
Screws are described with a code:
Mn x yy (i.e. M4x20)
It means that the diameter is n (i.e. 4mm) and the lenght is yy (i.e 20mm)
T slots

Cutting the material with a specific pattern it's possible to increase a lot the flexibility of the piece. Increasing the flexibility mans also to reduce the resistance.
FOLDABLE
PATTERN

The behave and the effience of this pattern is strictly related to the material, so it's better to make some tests. Too thick materials are very hard to bend (max thickness suggested 8mm).
THE BASIC
PATTERN
http://www.deferredprocrastination.co.uk/blog/2012/minimum-bend-radius/

It's possible to modify the original patter to increase the resistance, flexibility or other properties
ALTERNATIVE
PATTERNS
http://www.instructables.com/id/Curved-laser-bent-wood/

Defocusing the laser, the material it's warmed up, but not melted. When it is warm enough, it bends, due to its weight or because of a mold
LASER ORIGAMI
http://www.wired.com/2013/02/laser-origami/