the waste wise schools program learning to be waste · pdf fileplastic bottle flowers 27 ......
TRANSCRIPT
�
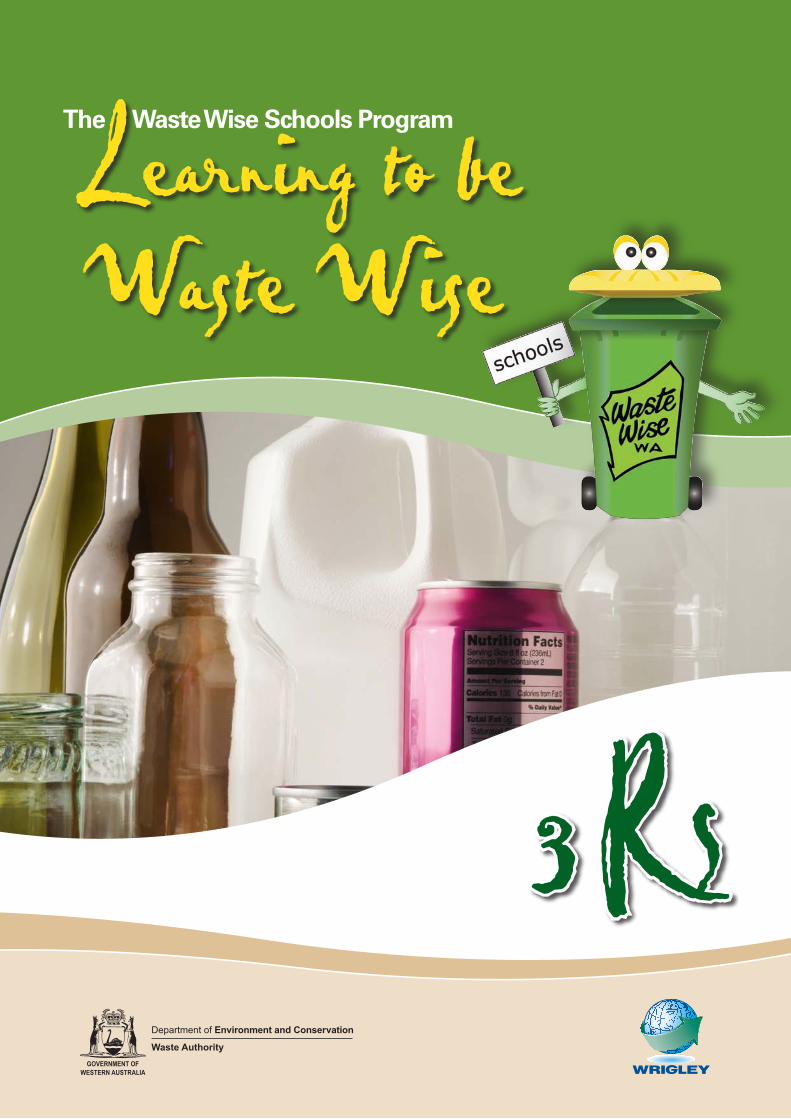
Learning to be Waste Wise
The Waste Wise Schools Program
3 RsDepartment of Environment and Conservation
Waste AuthorityGOVERNMENT OF
WESTERN AUSTRALIA
AcknowledgmentsWritten by
Wendy AspdenVanessa DowMeg GreenhillPatrick HamillEmma PointonJennifer Weston
Illustrations by Rod Waller
Designed by Su-Anne Lee, Spice Creative
Edited by Tania Hudson, Words Communications Consultancy
This guide was developed by the Waste Wise Schools Program which is managed by the Department of Environment and Conservation and funded by the Western Australian Landfill Levy through the Waste Authority and Wrigleys Corporation.
For more information about the program please contact:
The Waste Wise Schools ProgramDepartment of Environment and ConservationLocked Bag 104Bentley Delivery Centre, WA 6983
Phone: (08) 6467 5011Fax: (08) 6467 5532Email: [email protected]: www.wastewise.wa.gov.au

ContentsLearning to be Waste Wise activity guide �
Curriculum links 2
Introduction 4
Waste relay �0
What’s in the lunch box? �2
Sultana/M&M experiment �4
One potato, two potato, three potato, more! �6
Reuse those glass jars: Glass painting �8
Mosaics 20
Chip packet crafts 22
Waste wise instruments 25
Plastic bottle flowers 27
Newspaper bags 29
Waste wise scarecrow 3�
Recycled paper – making your own 33
Newspaper pots 35
Paper beads 37
Tetra pack milk carton wallets 39
Recycling sort 4�
�
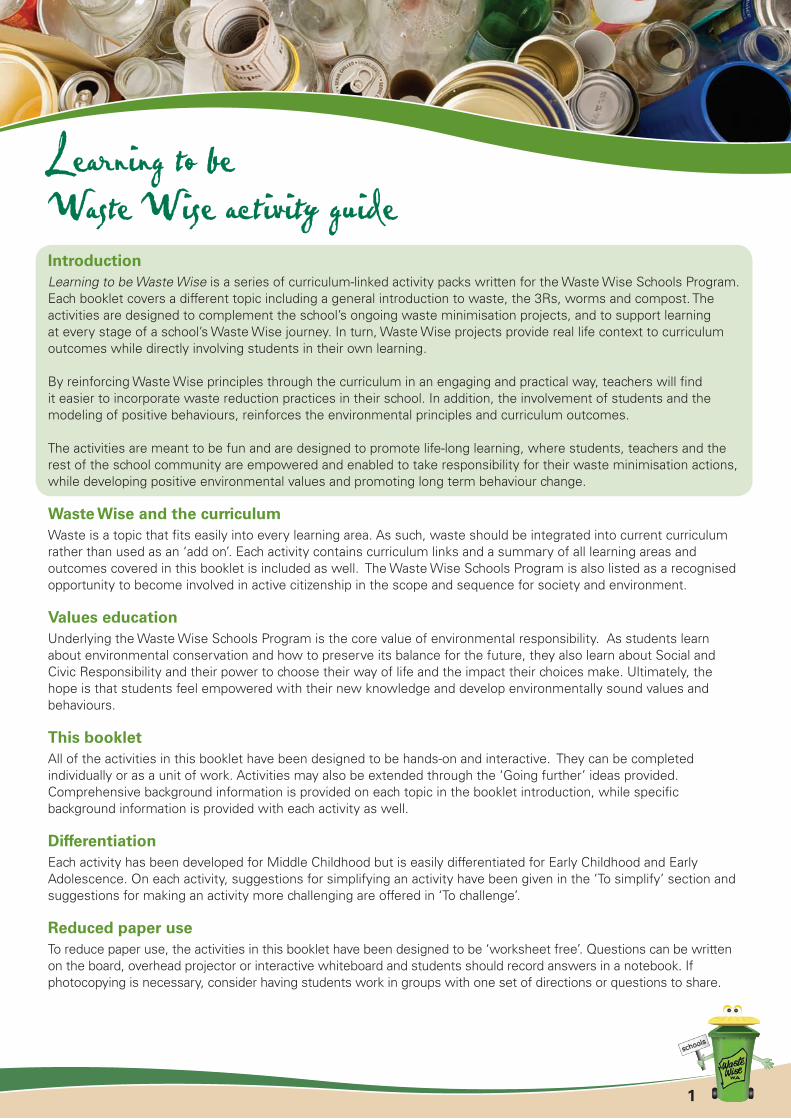
Learning to be Waste Wise activity guideIntroductionLearning to be Waste Wise is a series of curriculum-linked activity packs written for the Waste Wise Schools Program. Each booklet covers a different topic including a general introduction to waste, the 3Rs, worms and compost. The activities are designed to complement the school’s ongoing waste minimisation projects, and to support learning at every stage of a school’s Waste Wise journey. In turn, Waste Wise projects provide real life context to curriculum outcomes while directly involving students in their own learning.
By reinforcing Waste Wise principles through the curriculum in an engaging and practical way, teachers will find it easier to incorporate waste reduction practices in their school. In addition, the involvement of students and the modeling of positive behaviours, reinforces the environmental principles and curriculum outcomes.
The activities are meant to be fun and are designed to promote life-long learning, where students, teachers and the rest of the school community are empowered and enabled to take responsibility for their waste minimisation actions, while developing positive environmental values and promoting long term behaviour change.
Waste Wise and the curriculumWaste is a topic that fits easily into every learning area. As such, waste should be integrated into current curriculum rather than used as an ‘add on’. Each activity contains curriculum links and a summary of all learning areas and outcomes covered in this booklet is included as well. The Waste Wise Schools Program is also listed as a recognised opportunity to become involved in active citizenship in the scope and sequence for society and environment.
Values educationUnderlying the Waste Wise Schools Program is the core value of environmental responsibility. As students learn about environmental conservation and how to preserve its balance for the future, they also learn about Social and Civic Responsibility and their power to choose their way of life and the impact their choices make. Ultimately, the hope is that students feel empowered with their new knowledge and develop environmentally sound values and behaviours.
This bookletAll of the activities in this booklet have been designed to be hands-on and interactive. They can be completed individually or as a unit of work. Activities may also be extended through the ‘Going further’ ideas provided. Comprehensive background information is provided on each topic in the booklet introduction, while specific background information is provided with each activity as well.
DifferentiationEach activity has been developed for Middle Childhood but is easily differentiated for Early Childhood and Early Adolescence. On each activity, suggestions for simplifying an activity have been given in the ‘To simplify’ section and suggestions for making an activity more challenging are offered in ‘To challenge’.
Reduced paper useTo reduce paper use, the activities in this booklet have been designed to be ‘worksheet free’. Questions can be written on the board, overhead projector or interactive whiteboard and students should record answers in a notebook. If photocopying is necessary, consider having students work in groups with one set of directions or questions to share.
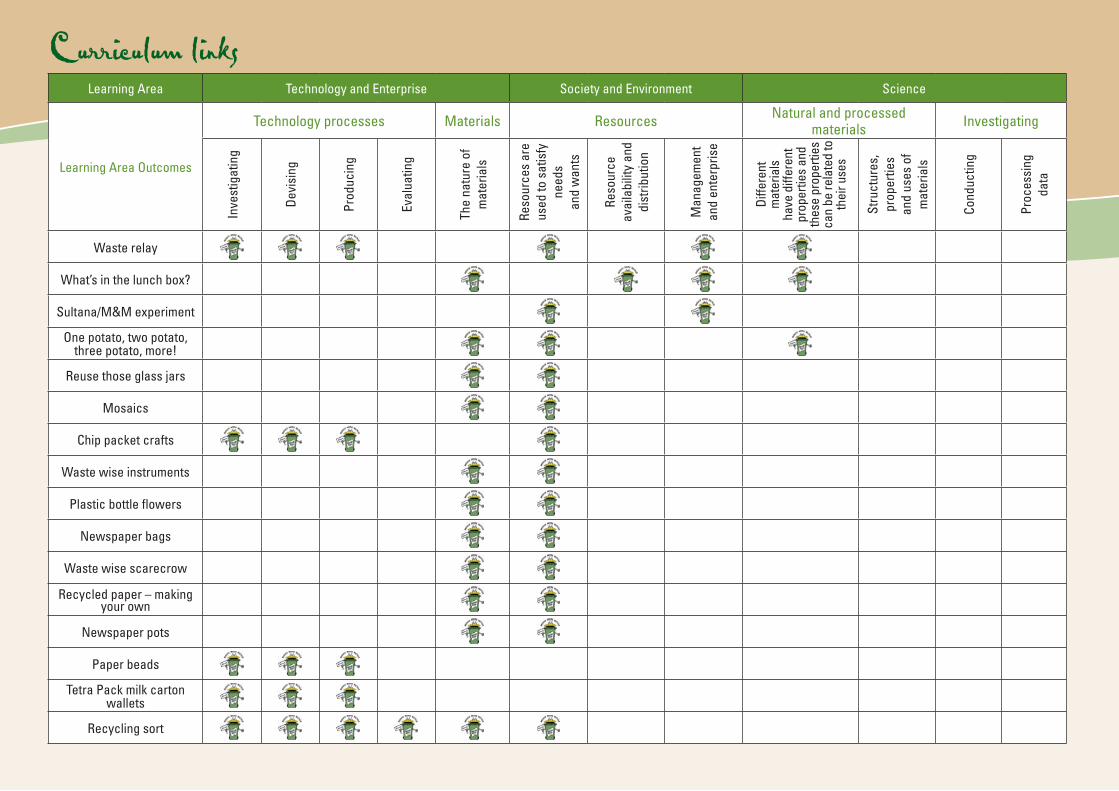
Curriculum linksLearning Area Technology and Enterprise Society and Environment Science
Learning Area Outcomes
Technology processes Materials Resources Natural and processed materials Investigating
Inve
stig
atin
g
Dev
isin
g
Prod
ucin
g
Eval
uatin
g
The
natu
re o
f m
ater
ials
Reso
urce
s ar
e us
ed to
sat
isfy
ne
eds
and
wan
ts
Reso
urce
av
aila
bilit
y an
d di
strib
utio
n
Man
agem
ent
and
ente
rpris
e
Diffe
rent
m
ater
ials
ha
ve d
iffer
ent
prop
ertie
s an
d th
ese
prop
ertie
s ca
n be
rela
ted
to
thei
r use
s
Stru
ctur
es,
prop
ertie
s an
d us
es o
f m
ater
ials
Cond
uctin
g
Proc
essi
ng
data
Waste relay
What’s in the lunch box?
Sultana/M&M experiment
One potato, two potato, three potato, more!
Reuse those glass jars
Mosaics
Chip packet crafts
Waste wise instruments
Plastic bottle flowers
Newspaper bags
Waste wise scarecrow
Recycled paper – making your own
Newspaper pots
Paper beads
Tetra Pack milk carton wallets
Recycling sort
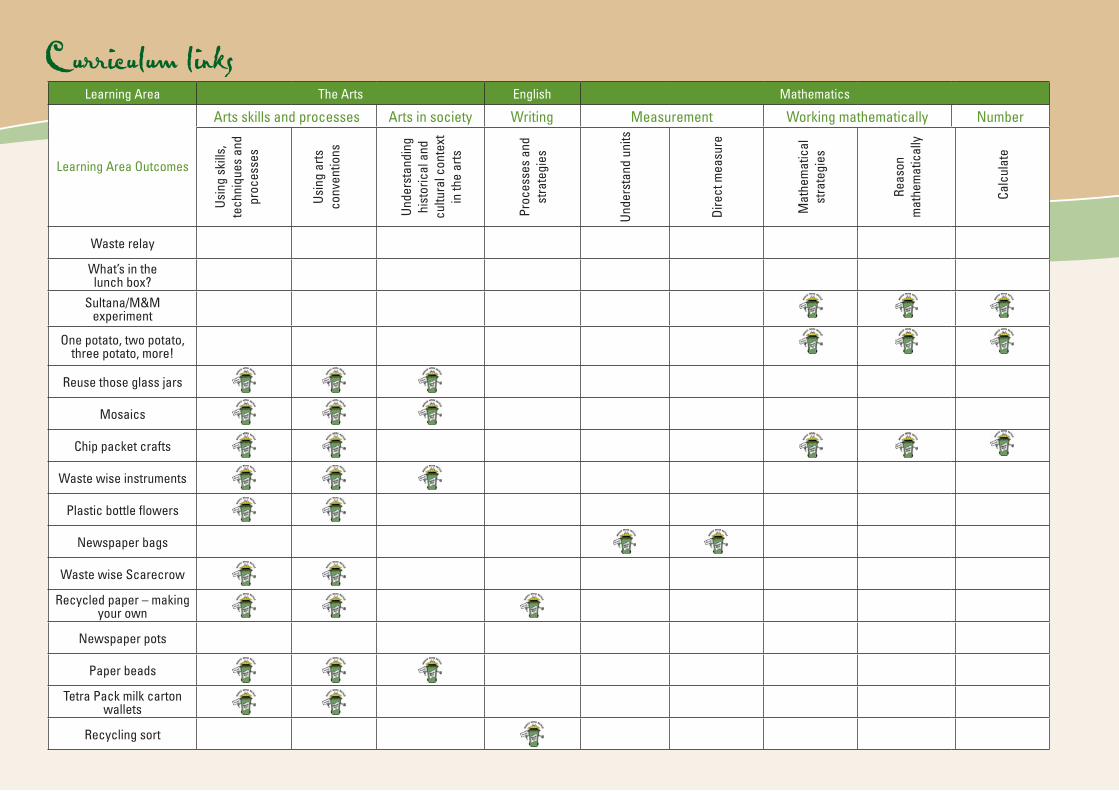
Curriculum linksLearning Area The Arts English Mathematics
Learning Area Outcomes
Arts skills and processes Arts in society Writing Measurement Working mathematically Number
Usi
ng s
kills
, te
chni
ques
and
pr
oces
ses
Usi
ng a
rts
conv
entio
ns
Und
erst
andi
ng
hist
oric
al a
nd
cultu
ral c
onte
xt
in th
e ar
ts
Proc
esse
s an
d st
rate
gies
Und
erst
and
units
Dire
ct m
easu
re
Mat
hem
atic
al
stra
tegi
es
Reas
on
mat
hem
atic
ally
Calc
ulat
e
Waste relay
What’s in the lunch box?
Sultana/M&M experiment
One potato, two potato, three potato, more!
Reuse those glass jars
Mosaics
Chip packet crafts
Waste wise instruments
Plastic bottle flowers
Newspaper bags
Waste wise Scarecrow
Recycled paper – making your own
Newspaper pots
Paper beads
Tetra Pack milk carton wallets
Recycling sort
4
IntroductionWaste is a part of our everyday lives. Some waste production is natural and unavoidable, however, with increasing consumption habits and population we need to be smarter and more efficient with our waste management.
The 3R philosophy is an effective way to address waste issues and to manage our resources in a more sustainable way. A large amount of excessive waste could be avoided if it was reduced at each stage of a material’s life cycle. Reducing consumption in turn reduces the demand for materials.
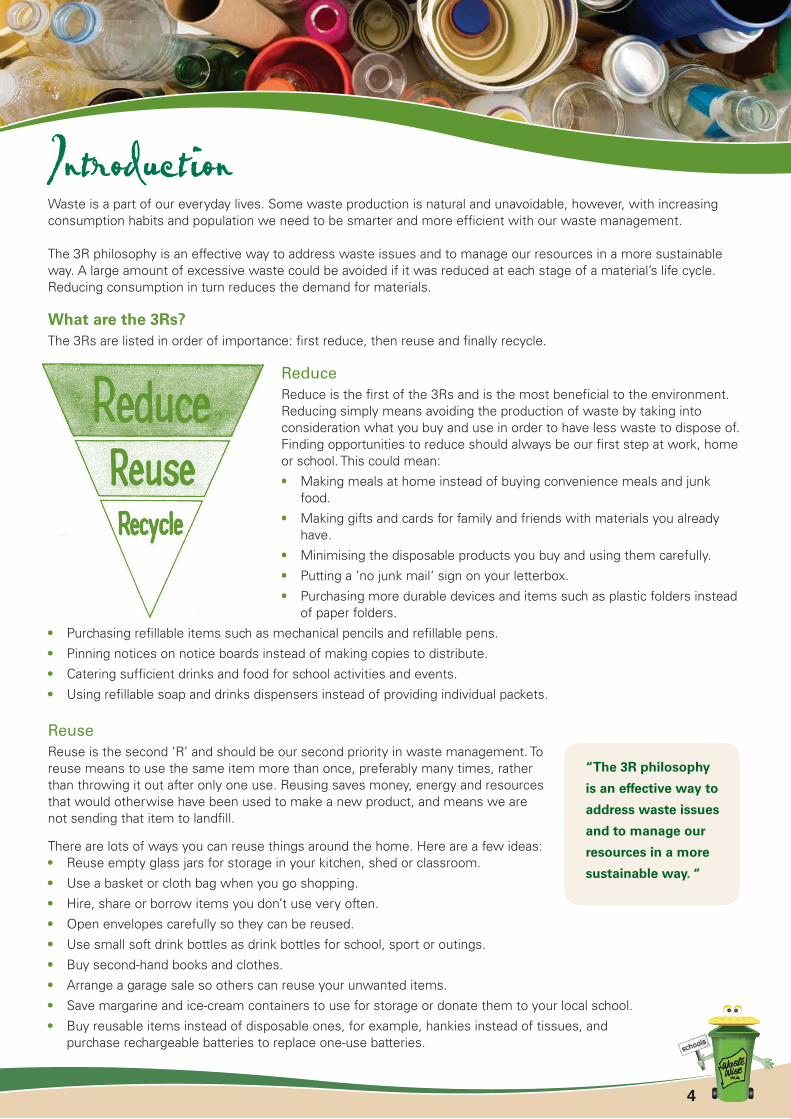
What are the 3Rs?The 3Rs are listed in order of importance: first reduce, then reuse and finally recycle.
ReduceReduce is the first of the 3Rs and is the most beneficial to the environment. Reducing simply means avoiding the production of waste by taking into consideration what you buy and use in order to have less waste to dispose of. Finding opportunities to reduce should always be our first step at work, home or school. This could mean:
• Making meals at home instead of buying convenience meals and junk food.
• Making gifts and cards for family and friends with materials you already have.
• Minimising the disposable products you buy and using them carefully.
• Putting a ’no junk mail‘ sign on your letterbox.
• Purchasing more durable devices and items such as plastic folders instead of paper folders.
• Purchasing refillable items such as mechanical pencils and refillable pens.
• Pinning notices on notice boards instead of making copies to distribute.
• Catering sufficient drinks and food for school activities and events.
• Using refillable soap and drinks dispensers instead of providing individual packets.
ReuseReuse is the second ‘R’ and should be our second priority in waste management. To reuse means to use the same item more than once, preferably many times, rather than throwing it out after only one use. Reusing saves money, energy and resources that would otherwise have been used to make a new product, and means we are not sending that item to landfill.
There are lots of ways you can reuse things around the home. Here are a few ideas:• Reuse empty glass jars for storage in your kitchen, shed or classroom.
• Use a basket or cloth bag when you go shopping.
• Hire, share or borrow items you don’t use very often.
• Open envelopes carefully so they can be reused.
• Use small soft drink bottles as drink bottles for school, sport or outings.
• Buy second-hand books and clothes.
• Arrange a garage sale so others can reuse your unwanted items.
• Save margarine and ice-cream containers to use for storage or donate them to your local school.
• Buy reusable items instead of disposable ones, for example, hankies instead of tissues, and purchase rechargeable batteries to replace one-use batteries.
“The 3R philosophy
is an effective way to
address waste issues
and to manage our
resources in a more
sustainable way. “

5
Schools are a great place to reuse lots of items that can be brought in from home. Many schools are now creating reuse sheds to collect, organise and store items for easy access by all teachers across the school for different projects. If this cannot be achieved at your school, your classroom is a great place to start.
However, there will be occasions when it is best to recycle rather than reuse. For example, recyclable bottles and containers made from plastic and glass should be recycled if the alternative is that they join the waste stream as discarded art projects.
RecycleRecycle is the third ‘R’ and should be considered after we have decided we can’t reduce or avoid the item and we can’t reuse it. Recycling means to break down a waste product and remake it into either the same product or something different. For example, aluminium cans are able to be recycled back into cans or into engine blocks for new cars. Recycling saves landfill space, stops new resources from being used and also saves energy. You can even recycle fruit, vegetable and garden waste by worm farming and composting.
Sorting recyclables at the material recovery facilityMany local councils have a material recovery facility (MRF). This is a centre often located near a landfill where all the local area’s rubbish and recycling is collected and sorted. Different councils collect different recycling materials depending on public demand and market forces. Sometimes materials are collected and stored until there is a market to make recycling viable.
At the MRF the recycling materials are placed on a conveyor belt and sorted manually by facility workers and/or by machines. For example, in some MRFs a magnet is used to remove the steel and an Eddy Current is used to eject aluminium from the rest of the rubbish. Plastic is usually sorted manually by colour and type, as is glass. Once the material is separated, it is usually baled together for easy transportation (WSN, 2005 and SMRC, 2009.) Many materials in Western Australia are transported to the eastern states where companies recycle them into new products.
Waste and consumption background Our municipal waste is generally made up of food scraps, garden waste, paper and cardboard, plastics 1-7, liquid paperboard (milk cartons etc.), glass, aluminium and steel. If we are able to compost and worm farm the food scraps and garden waste, then we are generally left with waste from the packaging in which our food and everyday products are wrapped. While recycling is a great option, it is dealing with the waste problem at the end of the waste chain, rather than at the source. Recycling is also not always possible due to market forces, limited facilities and contamination. In addition, there is a lot of embedded waste in the packaging lifecycle that is not immediately evident from the final product. Thus the ‘Reduce’ and ‘Reuse’ aspects of the 3Rs are applicable.
Waste from packagingPackaging performs a valuable function in our global economy. The functions of packaging include product protection, transportation, convenience, hygiene, spoilage protection information and branding. Despite the benefits, packaging waste in many parts of the industrialised world makes up about one third of total waste. Recycling has generally been seen as one of the main solutions to dealing with this waste. However, improvements can be made along every step of the packaging chain (Imhoff, 2005).
The main packaging materials used in Australia today are plastics, paper or cardboard, aluminium, steel and glass. The consumption of packaging in Australia was estimated at 4.23 million tonnes in 2005.
6
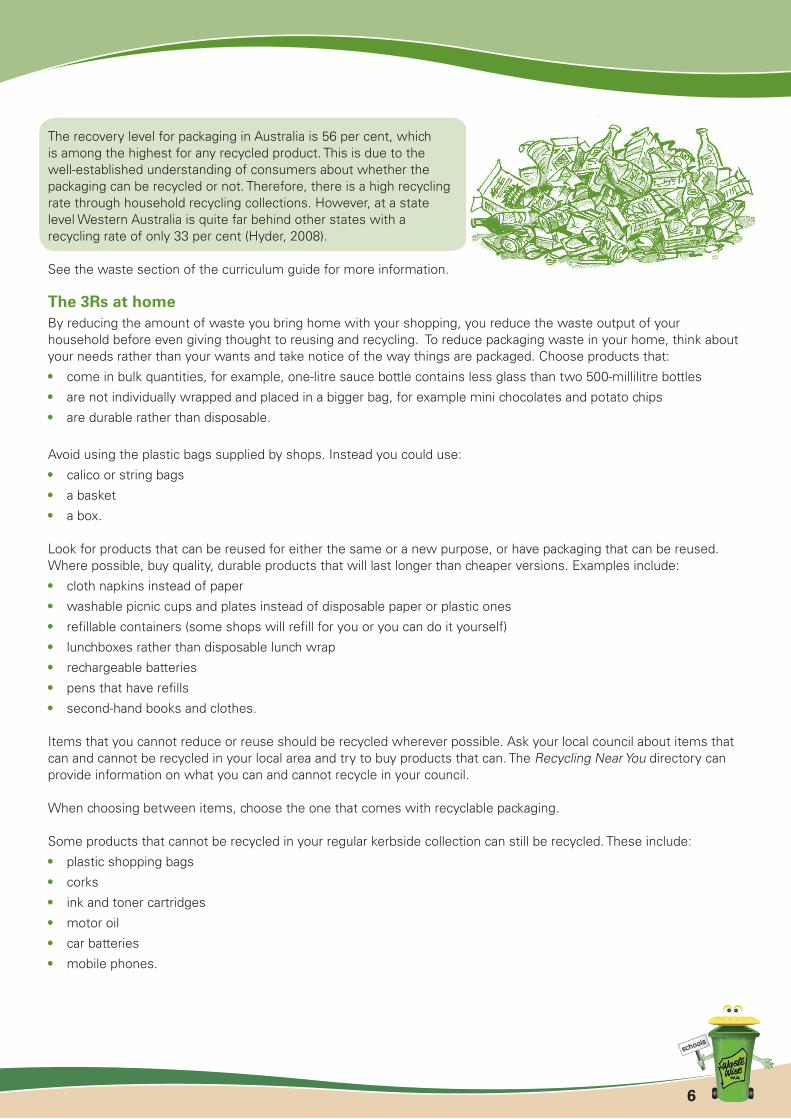
The recovery level for packaging in Australia is 56 per cent, which is among the highest for any recycled product. This is due to the well-established understanding of consumers about whether the packaging can be recycled or not. Therefore, there is a high recycling rate through household recycling collections. However, at a state level Western Australia is quite far behind other states with a recycling rate of only 33 per cent (Hyder, 2008).
See the waste section of the curriculum guide for more information.
The 3Rs at homeBy reducing the amount of waste you bring home with your shopping, you reduce the waste output of your household before even giving thought to reusing and recycling. To reduce packaging waste in your home, think about your needs rather than your wants and take notice of the way things are packaged. Choose products that:
• come in bulk quantities, for example, one-litre sauce bottle contains less glass than two 500-millilitre bottles
• are not individually wrapped and placed in a bigger bag, for example mini chocolates and potato chips
• are durable rather than disposable.
Avoid using the plastic bags supplied by shops. Instead you could use:
• calico or string bags
• a basket
• a box.
Look for products that can be reused for either the same or a new purpose, or have packaging that can be reused. Where possible, buy quality, durable products that will last longer than cheaper versions. Examples include:
• cloth napkins instead of paper
• washable picnic cups and plates instead of disposable paper or plastic ones
• refillable containers (some shops will refill for you or you can do it yourself)
• lunchboxes rather than disposable lunch wrap
• rechargeable batteries
• pens that have refills
• second-hand books and clothes. Items that you cannot reduce or reuse should be recycled wherever possible. Ask your local council about items that can and cannot be recycled in your local area and try to buy products that can. The Recycling Near You directory can provide information on what you can and cannot recycle in your council.
When choosing between items, choose the one that comes with recyclable packaging.
Some products that cannot be recycled in your regular kerbside collection can still be recycled. These include:
• plastic shopping bags
• corks
• ink and toner cartridges
• motor oil
• car batteries
• mobile phones.
7
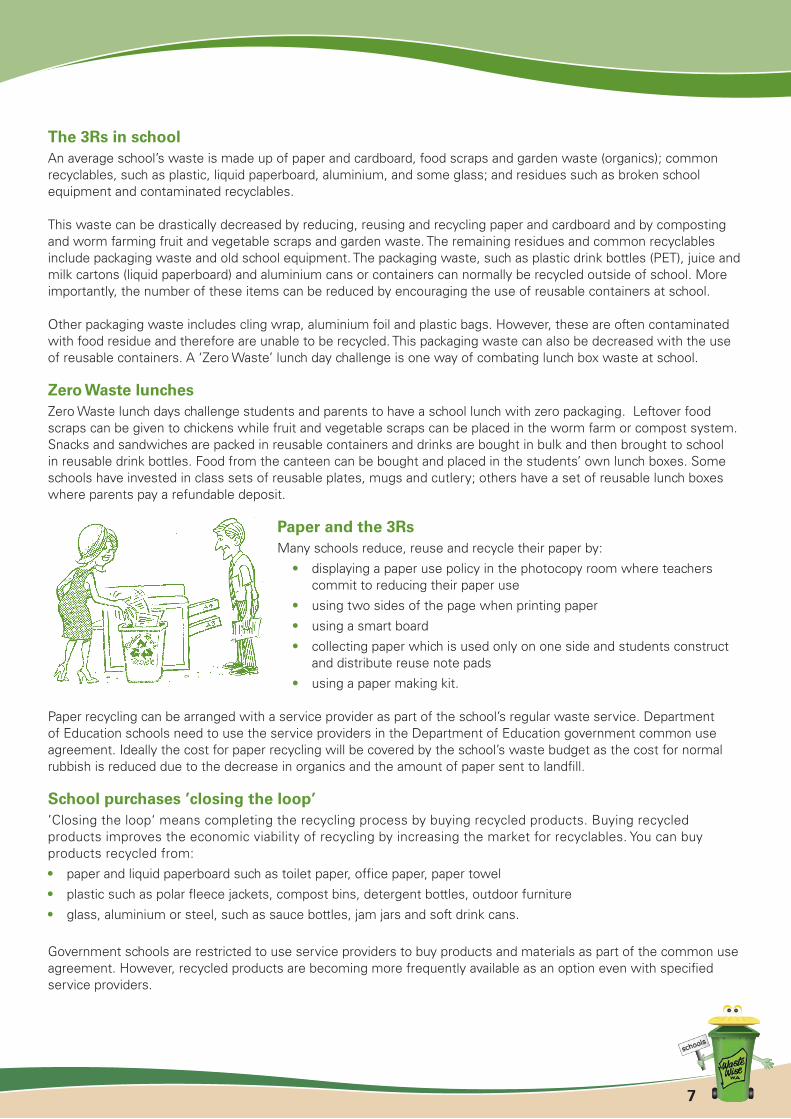
The 3Rs in schoolAn average school’s waste is made up of paper and cardboard, food scraps and garden waste (organics); common recyclables, such as plastic, liquid paperboard, aluminium, and some glass; and residues such as broken school equipment and contaminated recyclables.
This waste can be drastically decreased by reducing, reusing and recycling paper and cardboard and by composting and worm farming fruit and vegetable scraps and garden waste. The remaining residues and common recyclables include packaging waste and old school equipment. The packaging waste, such as plastic drink bottles (PET), juice and milk cartons (liquid paperboard) and aluminium cans or containers can normally be recycled outside of school. More importantly, the number of these items can be reduced by encouraging the use of reusable containers at school.
Other packaging waste includes cling wrap, aluminium foil and plastic bags. However, these are often contaminated with food residue and therefore are unable to be recycled. This packaging waste can also be decreased with the use of reusable containers. A ‘Zero Waste’ lunch day challenge is one way of combating lunch box waste at school.
Zero Waste lunchesZero Waste lunch days challenge students and parents to have a school lunch with zero packaging. Leftover food scraps can be given to chickens while fruit and vegetable scraps can be placed in the worm farm or compost system. Snacks and sandwiches are packed in reusable containers and drinks are bought in bulk and then brought to school in reusable drink bottles. Food from the canteen can be bought and placed in the students’ own lunch boxes. Some schools have invested in class sets of reusable plates, mugs and cutlery; others have a set of reusable lunch boxes where parents pay a refundable deposit.
Paper and the 3RsMany schools reduce, reuse and recycle their paper by:
• displaying a paper use policy in the photocopy room where teachers commit to reducing their paper use
• using two sides of the page when printing paper
• using a smart board
• collecting paper which is used only on one side and students construct and distribute reuse note pads
• using a paper making kit.
Paper recycling can be arranged with a service provider as part of the school’s regular waste service. Department of Education schools need to use the service providers in the Department of Education government common use agreement. Ideally the cost for paper recycling will be covered by the school’s waste budget as the cost for normal rubbish is reduced due to the decrease in organics and the amount of paper sent to landfill.
School purchases ’closing the loop’’Closing the loop‘ means completing the recycling process by buying recycled products. Buying recycled products improves the economic viability of recycling by increasing the market for recyclables. You can buy products recycled from:
• paper and liquid paperboard such as toilet paper, office paper, paper towel
• plastic such as polar fleece jackets, compost bins, detergent bottles, outdoor furniture
• glass, aluminium or steel, such as sauce bottles, jam jars and soft drink cans.
Government schools are restricted to use service providers to buy products and materials as part of the common use agreement. However, recycled products are becoming more frequently available as an option even with specified service providers.

8
Key words: Common use agreement (CUA): A whole-of-government standing offer that is awarded to a single or panel of suppliers to provide goods or services commonly used by government agencies. (See the government contract directory for education)
Consumption: The using up of goods and services.
Contamination: When something has been made impure or dirty.
Closing the loop: To complete the recycling process by buying recycled products.
Disposable: Capable of being disposed of.
Eddy current: A method of separating aluminium cans from other materials. A magnetic field is used to generate an ‘eddy current’ in the aluminium. This current generates a secondary magnetic field in the aluminium that causes it to be pushed away from the other materials.
Landfill: An area where wastes are placed in the ground, compacted and covered.
Material Recovery Facility (MRF): A facility where recyclable items are separated into different streams.
Municipal waste: Waste that comes from a district (municipality) which has its own local government. (Macquarie University, 2001)
Market forces: The economic forces operating in the market place.
Reduce: To bring down to a smaller extent or amount.
Recycle: To treat waste, empty bottles, old tins etc. so that new products can be manufactured from them.
Reuse: To use the same item more than once, preferably many times, rather than throwing it out after only one use.
Service provider: A company that provides a service, in this case a waste removal company.
Sources:Danial Imhoff, 2005, Paper or Plastic, Searching for Solutions to an over packaged world, Sierra Club Books.
Government Contract Directory: Education and Training Edition, September 2009, Government of Western Australia, Department of Treasury and Finance
Mosaic Matters, [online] viewed 12 January 2009 URL www.mosaicmatters.co.au
Macquarie University 2001, Macquarie School Dictionary, John Wiley & Sons Australia, Ltd.
Macquarie University 2003, Macquarie Concise Dictionary, Macquarie Library Pty Ltd, Australia.
WSN Environmental solutions, 2006, Landfills, what you need to know, responsible management of our landfill sites, NSW, viewed 31 August 2009, www.wsn.com.au/dir138/wsn.nsf/AttachmentsByTitle/Landfill_Easy_Guide/$FILE/Easy+Guide+to+Landfills.pdf
9
WSN Environmental solutions, MRF the why, what and how, NSW, viewed 7 October 2009 www.wasteservice.nsw.gov.au/dir138/wsn.nsf/AttachmentsByTitle/easy_guide_to_MRF/$FILE/MRF+brochure.pdf
Waste and Recycling in Australia, Final report, Hyder, 3 November 2008, Report no:1.
Southern Metropolitan Regional Council, 2009, Materials Recovery Facility, viewed 4 September 2009 www.smrc.com.au/go/what-we-do/regional-resource-recovery-centre-rrrc-/materials-recovery-facility-mrf
WSN Environmental solutions, 2005, MRF the what, why and how, NSW, viewed 4 September 2009 www.wasteservice.nsw.gov.au/dir138/wsn.nsf/AttachmentsByTitle/easy_guide_to_MRF/$FILE/MRF+brochure.pdf
Other resources:Department of Education ‘Schools buying Kit’, found on the Department of Education website.
YouTube, Jack Johnson: Reduce, reuse, recycle – 3R song www.youtube.com/watch?v=uSM2riAEX4U&NR=1
YouTube, Mitchel Musso - The Three R’s official HQ music video www.youtube.com/watch?v=V2DfTCfYACE
Planet Ark, Recycling near you www.recyclingnearyou.com.au/
Ollie saves the planet, Australia, website for kids on the 4Rs www.olliesworld.com/planet/
For more information go to www.wastewise.wa.gov.au
�0
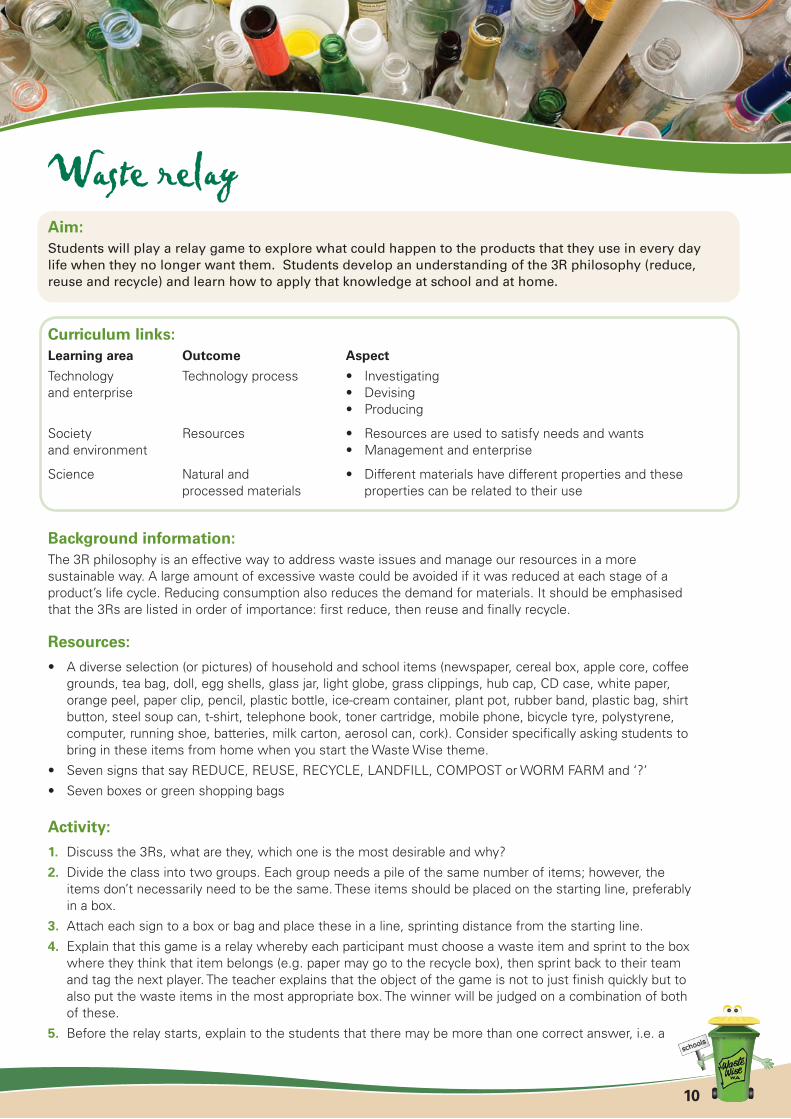
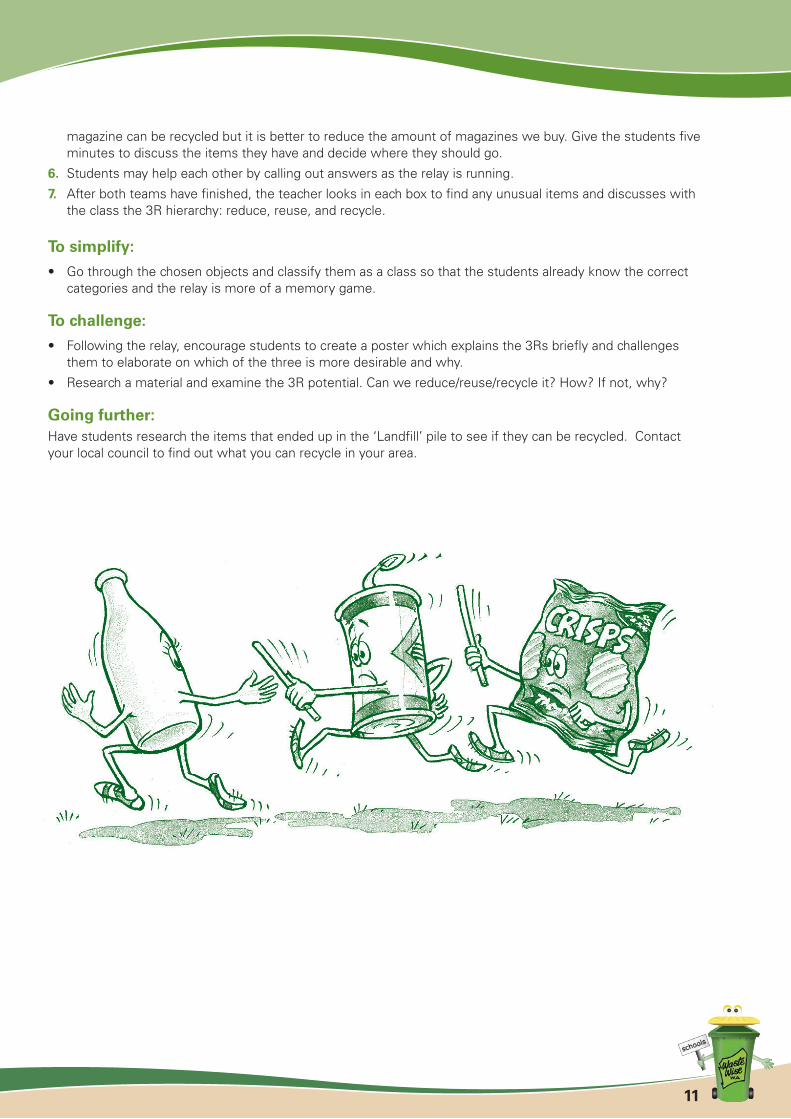
Waste relayAim:Students will play a relay game to explore what could happen to the products that they use in every day life when they no longer want them. Students develop an understanding of the 3R philosophy (reduce, reuse and recycle) and learn how to apply that knowledge at school and at home.
Curriculum links:Learning area Outcome Aspect
Technology Technology process • Investigating and enterprise • Devising • Producing
Society Resources • Resources are used to satisfy needs and wantsand environment • Management and enterprise
Science Natural and • Different materials have different properties and these processed materials properties can be related to their use
Background information:The 3R philosophy is an effective way to address waste issues and manage our resources in a more sustainable way. A large amount of excessive waste could be avoided if it was reduced at each stage of a product’s life cycle. Reducing consumption also reduces the demand for materials. It should be emphasised that the 3Rs are listed in order of importance: first reduce, then reuse and finally recycle.
Resources:
• A diverse selection (or pictures) of household and school items (newspaper, cereal box, apple core, coffee grounds, tea bag, doll, egg shells, glass jar, light globe, grass clippings, hub cap, CD case, white paper, orange peel, paper clip, pencil, plastic bottle, ice-cream container, plant pot, rubber band, plastic bag, shirt button, steel soup can, t-shirt, telephone book, toner cartridge, mobile phone, bicycle tyre, polystyrene, computer, running shoe, batteries, milk carton, aerosol can, cork). Consider specifically asking students to bring in these items from home when you start the Waste Wise theme.
• Seven signs that say REDUCE, REUSE, RECYCLE, LANDFILL, COMPOST or WORM FARM and ‘?’
• Seven boxes or green shopping bags
Activity:
�. Discuss the 3Rs, what are they, which one is the most desirable and why?
2. Divide the class into two groups. Each group needs a pile of the same number of items; however, the items don’t necessarily need to be the same. These items should be placed on the starting line, preferably in a box.
3. Attach each sign to a box or bag and place these in a line, sprinting distance from the starting line.
4. Explain that this game is a relay whereby each participant must choose a waste item and sprint to the box where they think that item belongs (e.g. paper may go to the recycle box), then sprint back to their team and tag the next player. The teacher explains that the object of the game is not to just finish quickly but to also put the waste items in the most appropriate box. The winner will be judged on a combination of both of these.
5. Before the relay starts, explain to the students that there may be more than one correct answer, i.e. a
��
magazine can be recycled but it is better to reduce the amount of magazines we buy. Give the students five minutes to discuss the items they have and decide where they should go.
6. Students may help each other by calling out answers as the relay is running.
7. After both teams have finished, the teacher looks in each box to find any unusual items and discusses with the class the 3R hierarchy: reduce, reuse, and recycle.
To simplify:
• Go through the chosen objects and classify them as a class so that the students already know the correct categories and the relay is more of a memory game.
To challenge:
• Following the relay, encourage students to create a poster which explains the 3Rs briefly and challenges them to elaborate on which of the three is more desirable and why.
• Research a material and examine the 3R potential. Can we reduce/reuse/recycle it? How? If not, why?
Going further:Have students research the items that ended up in the ‘Landfill’ pile to see if they can be recycled. Contact your local council to find out what you can recycle in your area.
�2
What’s in the lunch box? Aim:Students will understand the purpose of packaging, that it is made of different materials and can be disposed of in different ways or simply avoided. This activity aims to prompt students to think of holding a zero waste lunch themselves.
Curriculum links:Learning area Outcome Aspect
Society and Resources • Resources are used to satisfy needs and wantsenvironment • Management and enterprise
Science Natural and • Different materials have different properties and Processed Materials these properties can be related to their uses
Technology Materials • The nature of materials and enterprise • The selection and use of materials
Background information:An average school’s waste is made up of paper and cardboard, food scraps and garden waste (organics) as well as common recyclables such as plastic, liquid paper board, aluminium and some glass. Residues such as broken school equipment and contaminated recyclables are also thrown out.
This lesson is designed to raise awareness among students about the large number of disposable products that can be found in a school lunch box. The 3R philosophy is that if one reduces the use of packaging in school lunches, reuses lunch containers and recycles food scraps, the waste from a lunch can be negligible.
Resources:
• Drink in a plastic bottle; sandwich in tin foil, cling wrap or snap lock bag, pre-packaged cheese and biscuit, packet of chips, cereal bar, and banana (or other highly packaged lunch foods) in a lunch box
• Poster, paper and pens
Activity:
�. Show students a closed lunch box containing a typical school lunch. Brainstorm with students as to what they think is inside.
2. Build up the drama by revealing items from the lunch box, one by one.
3. Discuss each item and its packaging. Pose questions:
• Why do we use wrapping or packaging?
• What is the packaging made of?
• Can the packaging be avoided, reused or recycled?
4. Make a list of packaging used and what alternatives exist. The list may contain natural (fruit skin), plastic wrap, plastic snap lock bags, foil, plastic chip packets, cardboard, aluminium cans and plastic bottles. Working in groups, students consider why each different material has been used to create packaging.
�3
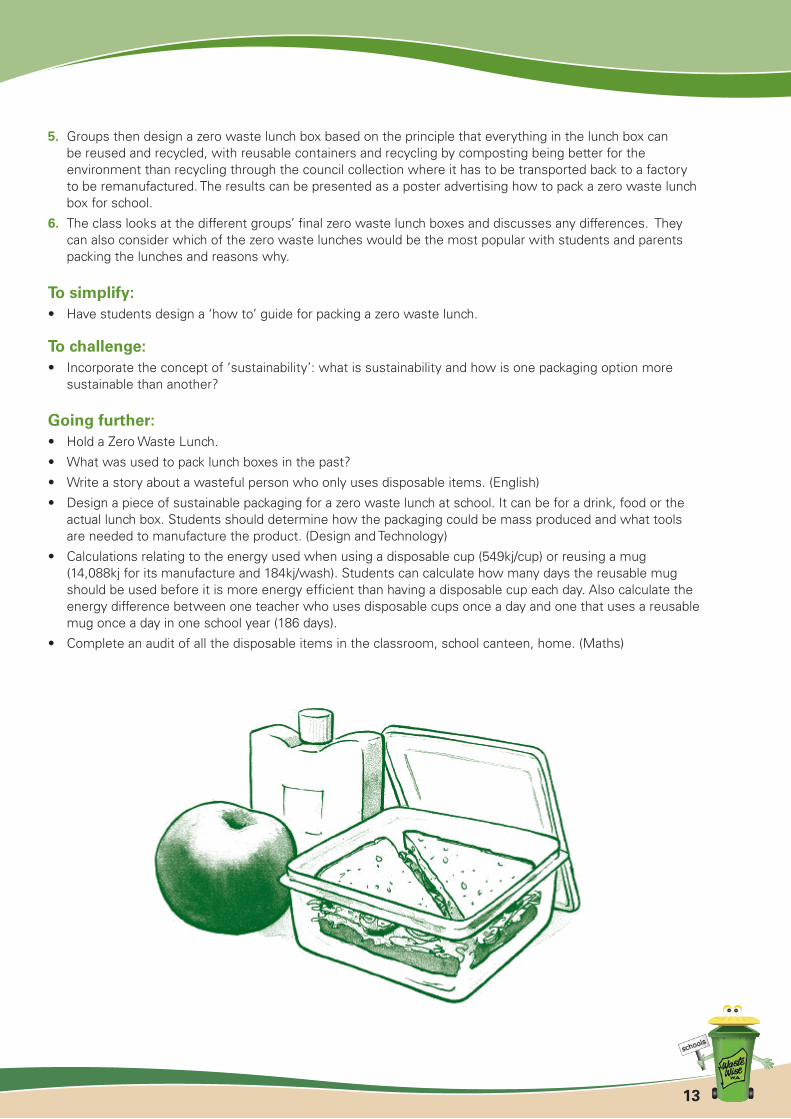
5. Groups then design a zero waste lunch box based on the principle that everything in the lunch box can be reused and recycled, with reusable containers and recycling by composting being better for the environment than recycling through the council collection where it has to be transported back to a factory to be remanufactured. The results can be presented as a poster advertising how to pack a zero waste lunch box for school.
6. The class looks at the different groups’ final zero waste lunch boxes and discusses any differences. They can also consider which of the zero waste lunches would be the most popular with students and parents packing the lunches and reasons why.
To simplify:• Have students design a ‘how to’ guide for packing a zero waste lunch.
To challenge:• Incorporate the concept of ‘sustainability’: what is sustainability and how is one packaging option more
sustainable than another?
Going further:• Hold a Zero Waste Lunch.
• What was used to pack lunch boxes in the past?
• Write a story about a wasteful person who only uses disposable items. (English)
• Design a piece of sustainable packaging for a zero waste lunch at school. It can be for a drink, food or the actual lunch box. Students should determine how the packaging could be mass produced and what tools are needed to manufacture the product. (Design and Technology)
• Calculations relating to the energy used when using a disposable cup (549kj/cup) or reusing a mug (14,088kj for its manufacture and 184kj/wash). Students can calculate how many days the reusable mug should be used before it is more energy efficient than having a disposable cup each day. Also calculate the energy difference between one teacher who uses disposable cups once a day and one that uses a reusable mug once a day in one school year (186 days).
• Complete an audit of all the disposable items in the classroom, school canteen, home. (Maths)
�4
Sultana/M&M experiment Aim:Students learn about the differences in packaging and the related pros and cons. They also determine the benefits of buying in bulk.
Curriculum links:Learning area Outcome Aspect
Mathematics Working mathematically • Mathematical strategies • Reason mathematically Number • Calculate
Society Resources • Management and enterprise and environment • Resources are used to satisfy needs and wants
Background information:There are many benefits to packaging. However, packaging waste in many parts of the industrialised world makes up about one third of total waste. Recycling has generally been seen as the solution to dealing with this waste. Improvements can, however, be made along every step of the packaging chain (Imhof, 2005).
Packaging waste, especially chip and confectionary wrappers, constitute a large proportion of a school’s waste. Exploring the different ways products are packaged and possible alternatives to them can stimulate students to think about consumer choices made in their home and perhaps lead to the family choosing options with less packaging.
Resources:
What you need:
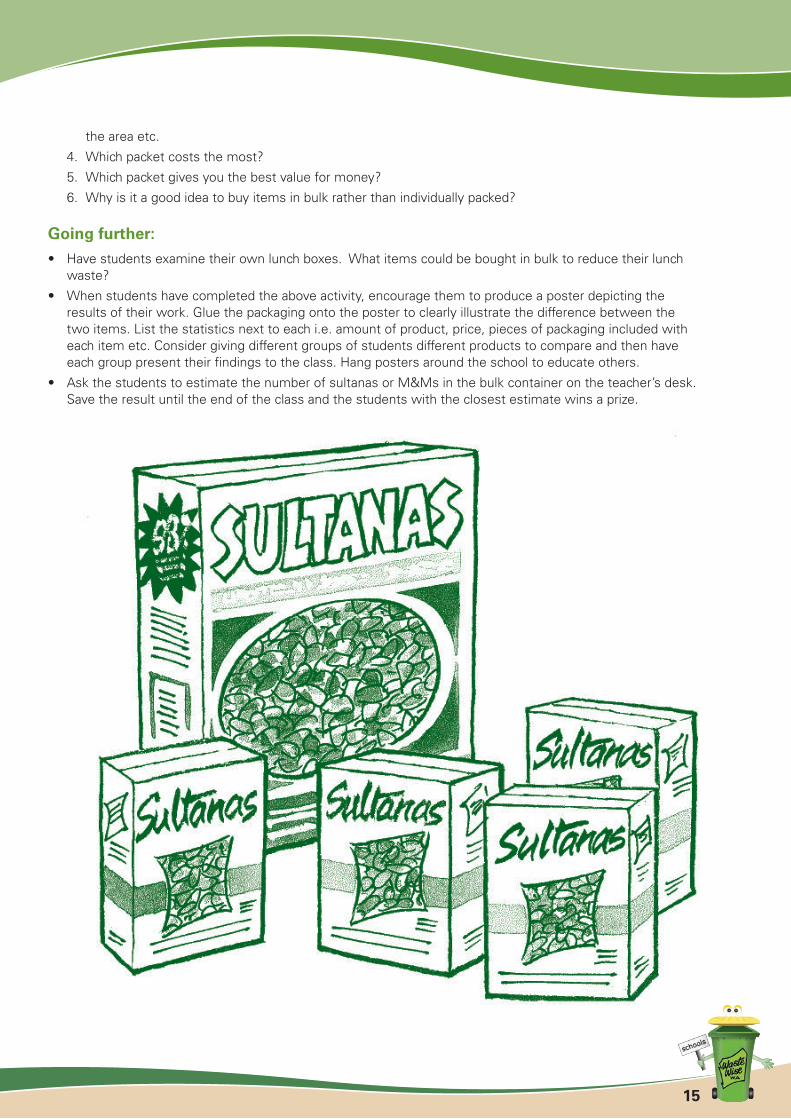
• One 250g packet of M&Ms or one large box of sultanas (for the teacher to use as a demonstration)
• One 210g packet of individually wrapped M&M multi pack or multi pack of mini sultana boxes. Enough for one pack per pair of students
Activity:
�. The teacher sets up the demonstration bulk pack of sultanas or M&Ms. Volunteer students write the volume and size, in terms of amount of packaging, of the bulk packet on the board.
2. In pairs, the students are given a mini pack of sultanas or M&Ms.
The students answer the following questions, comparing the packet of individually packed mini sultana/M&M packets to the teacher’s demonstration of the bulk container:
1. Which packet looks the biggest?
2. Which packet contains the most chocolates or sultanas?
3. Which packet contains the most packaging waste? Students can determine how they would work this out. For example they could weigh packaging or could cut the sides of the pack and flatten it to work out
�5
the area etc.
4. Which packet costs the most?
5. Which packet gives you the best value for money?
6. Why is it a good idea to buy items in bulk rather than individually packed?
Going further:
• Have students examine their own lunch boxes. What items could be bought in bulk to reduce their lunch waste?
• When students have completed the above activity, encourage them to produce a poster depicting the results of their work. Glue the packaging onto the poster to clearly illustrate the difference between the two items. List the statistics next to each i.e. amount of product, price, pieces of packaging included with each item etc. Consider giving different groups of students different products to compare and then have each group present their findings to the class. Hang posters around the school to educate others.
• Ask the students to estimate the number of sultanas or M&Ms in the bulk container on the teacher’s desk. Save the result until the end of the class and the students with the closest estimate wins a prize.
�6
One potato, two potato, three potato, more! Aim:Students learn about the advantages and disadvantages of packaging when they examine different potato products and compare the amount of packaging, the price, and waste produced.
Curriculum links:Learning area Outcome Aspect
Mathematics Working • Mathematical strategies mathematically • Reason mathematically Number • Calculate
Technology Materials • The nature of materialsand enterprise • The selection and use of materials
Society Resources • Resources are used to satisfy needs and wantsand environment
Science Natural and • Different materials have different properties and processed materials these properties can be related to their uses
Background information:Packaging performs a valuable function in our global economy. The functions of packaging include product protection, transportation, convenience, hygiene, spoilage protection information and branding. Despite the benefits, packaging waste in many parts of the industrialised world makes up about one third of total waste. Recycling has generally been seen as the solution to dealing with this waste. However, improvements can be made along every step of the packaging chain (Imhoff, 2005).
The students are able to discover for themselves the waste produced from packaging, with emphasis being placed on the ‘Reduce’ aspect of the 3R philosophy. Reducing packaging can save resources and there are many food products that can be bought with less packaging.
Resources:
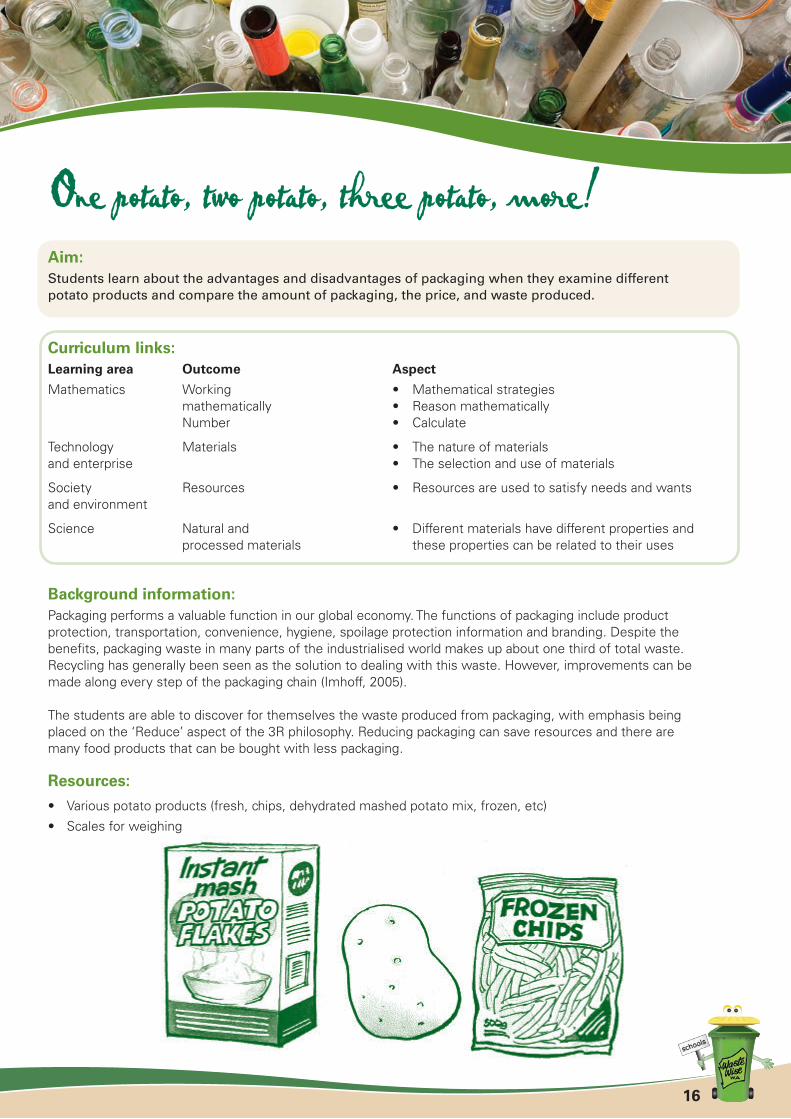
• Various potato products (fresh, chips, dehydrated mashed potato mix, frozen, etc)
• Scales for weighing
�7
Activity:
Place a different potato product at stations around the room next to a label which has the price of that product. As groups of students rotate to each station, they will examine the different forms of potato, its packaging and cost.
In their notebooks, students will record:
• the name of the product
• the size (processed mass in grams)
• the cost of the entire product
• the price per kilogram
• a description of the type of packaging
• a description of the waste produced after the product is used
• how the waste will be disposed of – recycled, landfill etc.
When students have completed examining the potatoes, discuss the following with the class:
• Which potato product was the least expensive?
• Which potato product had the least packaging?
• Which potato product produced the least waste?
• What effect does processing and packaging have on the cost of the product and the amount of waste produced?
• Which items have packaging that can be recycled? Which don’t?
• Can any of the products not be packaged in recyclable materials?
• Why do you think certain items are packaged in a wasteful way? Why would people buy these items?
• How can you minimise waste when you shop?
To simplify:
Do the activity as a whole class, discuss the different forms potatoes come in, the packaging and the cost. Write the ideas on the board and discuss. In pairs students discuss the questions above, and present their ideas.
To challenge:
Link this activity with a discussion about nutrition.
• Which potato product was the healthiest?
• Is there a connection between packaging and nutrition?
• Look at the contents of lunch boxes and compare nutritional value with the amount of packaging and waste.
Going further:• Design a new and less wasteful package for one of the potato products. How will you reduce the amount
of waste produced? What materials will you use?
• Grow potatoes in your school garden and make baked potatoes, homemade chips or potato soup (a slow cooker in the classroom is a great way to prepare soup and the smells will make everyone hungry!). How much waste was produced and how much money did it cost to prepare this meal?
Product Mass (g) Cost Price per kg Description of packaging
Waste produced
Method of disposal
�8
Reuse those glass jars: Glass painting Aim:Students learn about the reuse philosophy and the alternative uses for perceived rubbish. They will reuse an old glass jar or bottle by decorating it and therefore creating a useful object to display in their homes.
Curriculum links:Learning area Outcome Aspect
The Arts Arts skills and processes • Using skills, techniques and processes Arts in society • Using arts conventions • Understanding historical and cultural context in the arts
Technology Materials • The nature of materialsand enterprise • The selection and use of materials
Society Resources • Resources are used to satisfy needs and wantsand environment
Background information:Reuse is the second ‘R’ of the 3R philosophy and should be our second priority in waste management. Reusing simply means to use the same item more than once, preferably many times, rather than throwing it out after only one use. Reusing saves money, energy and resources that would otherwise have been used to make a new product. It also means that we are not sending that item to landfill. Many schools are now creating reuse sheds to collect, organise and store items for easy access by all teachers across the school for different projects. If this cannot be achieved at your school, your classroom is a great place to start!
In this activity, students are given the opportunity to turn old glass jars and bottles into beautiful vases, pencil holders, or storage containers for coins or homemade goodies. The possibilities are endless!
Resources:
• Clean used jars
• Paint suitable for glass (eg. gallery glass)
• Whiteboard pens
• A design to put on the jar
• Scissors
• Sticky tape
�9
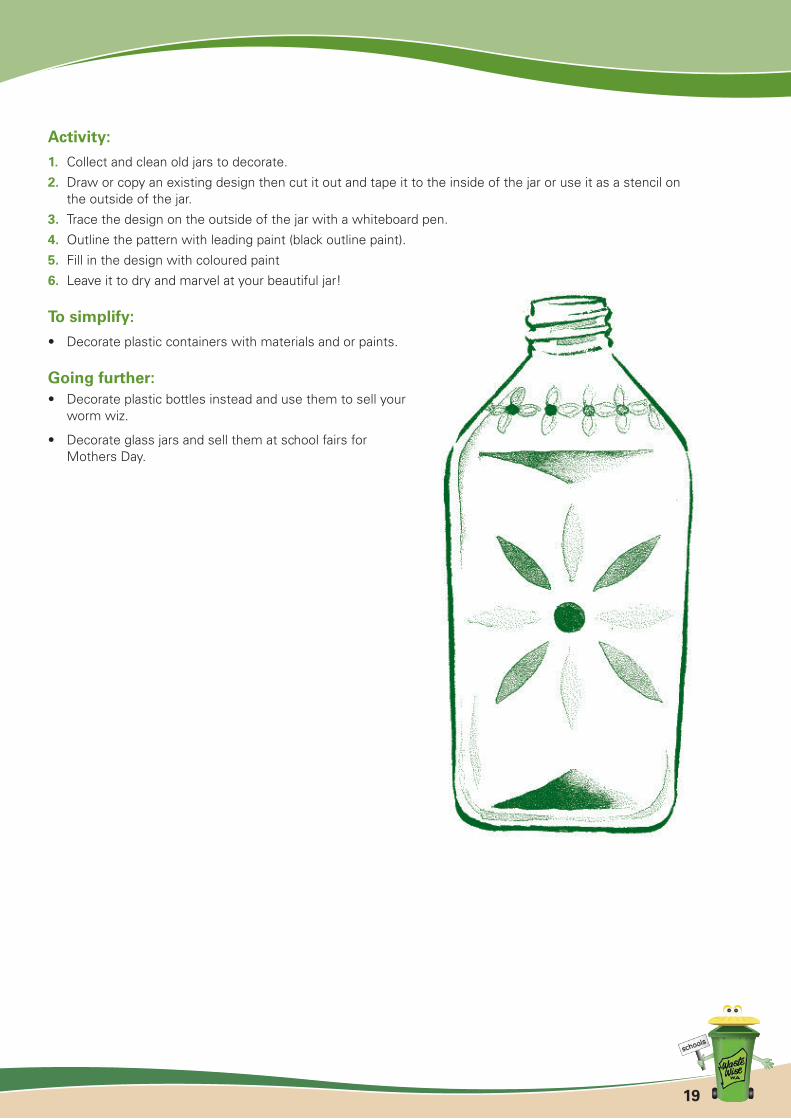
Activity:
�. Collect and clean old jars to decorate.
2. Draw or copy an existing design then cut it out and tape it to the inside of the jar or use it as a stencil on the outside of the jar.
3. Trace the design on the outside of the jar with a whiteboard pen.
4. Outline the pattern with leading paint (black outline paint).
5. Fill in the design with coloured paint
6. Leave it to dry and marvel at your beautiful jar!
To simplify:
• Decorate plastic containers with materials and or paints.
Going further:• Decorate plastic bottles instead and use them to sell your
worm wiz.
• Decorate glass jars and sell them at school fairs for Mothers Day.
20
MosaicsAim:Students learn how to reuse old crockery, ceramics and tiles when they use the broken pieces to make a mosaic pattern on a plant pot.
Curriculum links:Learning area Outcome Aspect
The Arts Arts skills and processes • Using skills, techniques and processes Arts in society • Using arts conventions • Understanding historical and cultural context in the arts
Technology Materials • The nature of materialsand enterprise • The selection and use of materials
Society Resources • Resources are used to satisfy needs and wantsand environment
Background information:Mosaics are designs or pictures made from pieces of broken pottery, tiles, stones or glass and set in a fixative such as grout, glue or cement. The art of creating mosaics is ancient, and it was first invented by the Greeks.
This is a creative way to reuse old crockery, tiles and glass to cover any smooth surface in an artistic way that is ideal for sculptures, gifts or class displays. In this activity great gifts are made from old pottery plant pots and discarded tiles.
The 3R theme for this activity is ‘Reuse’, reusing old materials for similar functions, or making something completely different.
Resources:
• Old coloured tiles
• Old crockery
• Old pottery plant pots
• Protective clothing and gloves
• Grout
• Mosaic adhesive/glue
• Rubber spatula
• Grout sealant (optional)
2�
Activity:
Preparation:
�. Wash and dry the old pottery plant pots, one per student. Make sure the rim is clean, smooth and dry.
2. Break the old tiles into small pieces.
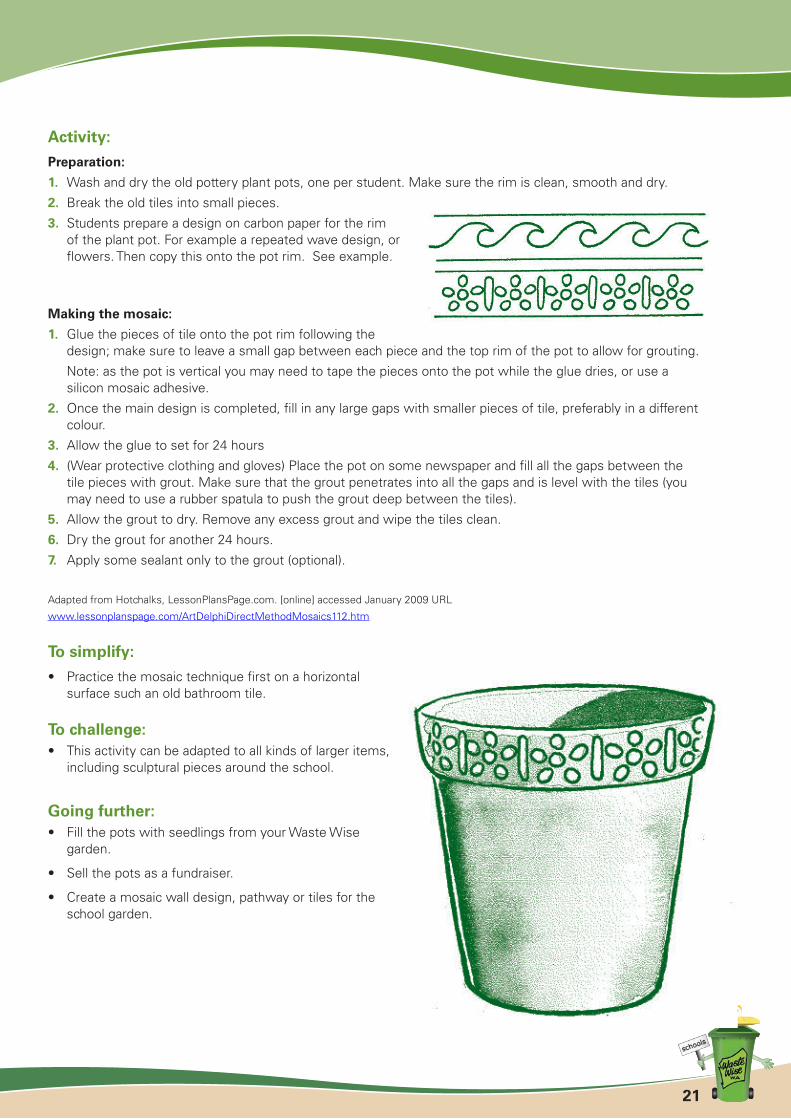
3. Students prepare a design on carbon paper for the rim of the plant pot. For example a repeated wave design, or flowers. Then copy this onto the pot rim. See example.
Making the mosaic:
�. Glue the pieces of tile onto the pot rim following the design; make sure to leave a small gap between each piece and the top rim of the pot to allow for grouting.
Note: as the pot is vertical you may need to tape the pieces onto the pot while the glue dries, or use a silicon mosaic adhesive.
2. Once the main design is completed, fill in any large gaps with smaller pieces of tile, preferably in a different colour.
3. Allow the glue to set for 24 hours
4. (Wear protective clothing and gloves) Place the pot on some newspaper and fill all the gaps between the tile pieces with grout. Make sure that the grout penetrates into all the gaps and is level with the tiles (you may need to use a rubber spatula to push the grout deep between the tiles).
5. Allow the grout to dry. Remove any excess grout and wipe the tiles clean.
6. Dry the grout for another 24 hours.
7. Apply some sealant only to the grout (optional).
Adapted from Hotchalks, LessonPlansPage.com. [online] accessed January 2009 URL
www.lessonplanspage.com/ArtDelphiDirectMethodMosaics112.htm
To simplify:
• Practice the mosaic technique first on a horizontal surface such an old bathroom tile.
To challenge:• This activity can be adapted to all kinds of larger items,
including sculptural pieces around the school.
Going further:• Fill the pots with seedlings from your Waste Wise
garden.
• Sell the pots as a fundraiser.
• Create a mosaic wall design, pathway or tiles for the school garden.
22
Chip packet craftsAim:Students work mathematically and recognise patterns when they learn how to reuse chip packets by making a variety of crafts.
Curriculum links:Learning area Outcome Aspect
The Arts Arts skills and processes • Using skills, techniques and processes • Using arts conventions
Technology Technology process • Investigatingand enterprise • Devising • Producing
Mathematics Working mathematically • Mathematical strategies • Reason mathematically Number • Calculate
Society Resources • Resources are used to satisfy needs and wantsand environment
Background information:To reuse an object is to turn a waste material into a useful object. In this case, students can reuse chip packaging to make a woven bracelet, belt or, as a challenge, something more complicated.
Chip packets are one of the main rubbish types found in a school waste audit! Why not reuse them to make something functional?
For middle to upper primary make a trendy pencil case, wallet, bag or picture frame using the basic instructions as a guide; for lower primary make a belt or bracelet.
Working with patterns, students can practice their mathematical skills by calculating how many chip packet pieces they will need to create the bracelet or belt size they require.
Resources:
• Plastic potato chip, noodle, chocolate and lolly wrappers and/or old magazines
• Scissors
Optional
• Old bank card or plastic milk bottle
• Strong, thick cotton or plastic/nylon cord
• Metal or wooden loops for the belt buckle, e.g. old curtain rings
• Zippers or velcro to seal the wallet or bag
23
Activity:
Part �: Prepare the materials
• Collect plastic potato chip, noodle, chocolate and lolly wrappers, clean if necessary.
• Calculate the number of rectangles needed for the length of chain you want. One large chip packet will make a chain about 22cm in length enough for one bracelet
• For a 1.5cm/0.5 inch sized square weave pattern cut the chip packets into rectangles 11.5cm x 5cm square. For a larger sized square weave pattern increase the dimensions accordingly.
• Magazine pages can be used to reinforce the chip packets for the belt.
• For a bag or wallet make a plastic needle for sewing two chains horizontally together from a piece of firm plastic such as an old bank card or plastic milk bottle. Punch a hole at one end for the thread. Thread with strong, thick cotton or plastic/nylon cord, check that the thread won’t cut the chip packets.
Adapted from ‘Wrapper Purses’ by Mylinda Agler [online] viewed 15 January 2010
URL www.candywrapperpurse.blogspot.com/
Part 2: Fold and weave a chain
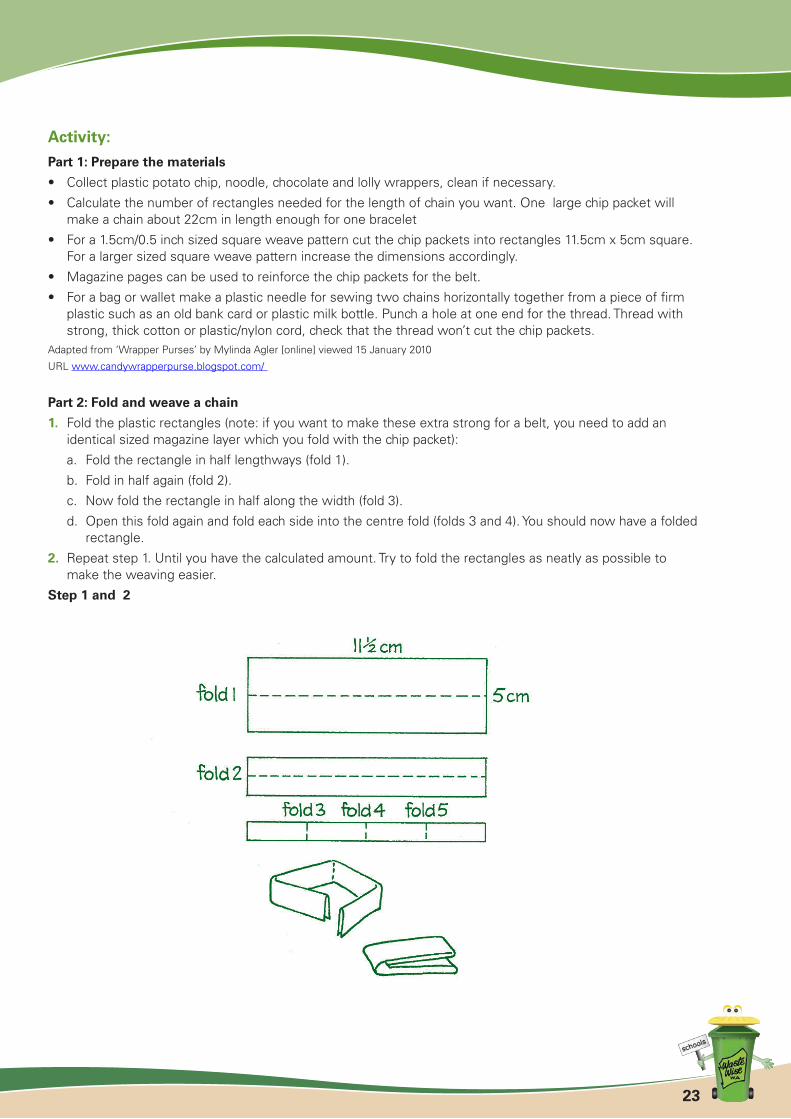
�. Fold the plastic rectangles (note: if you want to make these extra strong for a belt, you need to add an identical sized magazine layer which you fold with the chip packet):
a. Fold the rectangle in half lengthways (fold 1).
b. Fold in half again (fold 2).
c. Now fold the rectangle in half along the width (fold 3).
d. Open this fold again and fold each side into the centre fold (folds 3 and 4). You should now have a folded rectangle.
2. Repeat step 1. Until you have the calculated amount. Try to fold the rectangles as neatly as possible to make the weaving easier.
Step � and 2
24
Step 3
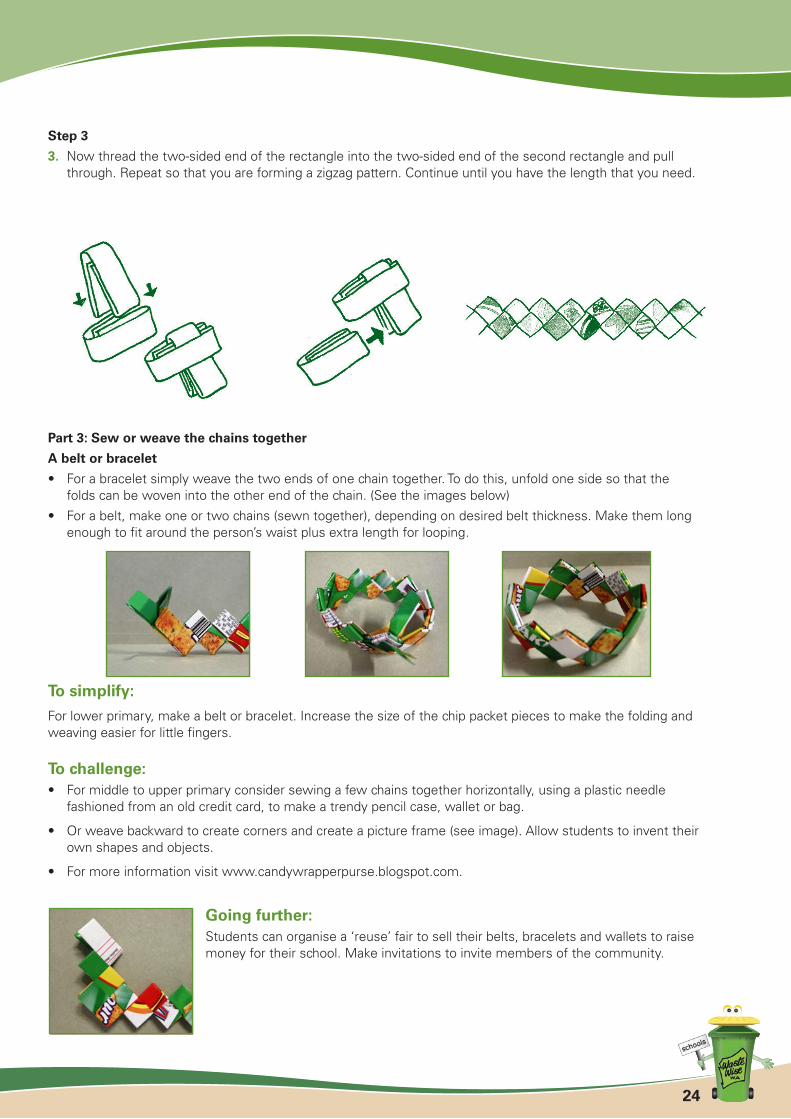
3. Now thread the two-sided end of the rectangle into the two-sided end of the second rectangle and pull through. Repeat so that you are forming a zigzag pattern. Continue until you have the length that you need.
Part 3: Sew or weave the chains together
A belt or bracelet
• For a bracelet simply weave the two ends of one chain together. To do this, unfold one side so that the folds can be woven into the other end of the chain. (See the images below)
• For a belt, make one or two chains (sewn together), depending on desired belt thickness. Make them long enough to fit around the person’s waist plus extra length for looping.
To simplify:
For lower primary, make a belt or bracelet. Increase the size of the chip packet pieces to make the folding and weaving easier for little fingers.
To challenge:• For middle to upper primary consider sewing a few chains together horizontally, using a plastic needle
fashioned from an old credit card, to make a trendy pencil case, wallet or bag.
• Or weave backward to create corners and create a picture frame (see image). Allow students to invent their own shapes and objects.
• For more information visit www.candywrapperpurse.blogspot.com.
Going further:Students can organise a ‘reuse’ fair to sell their belts, bracelets and wallets to raise money for their school. Make invitations to invite members of the community.
25
Waste wise instrumentsAim:Students will learn how to reuse tin and plastic containers in order to create a variety of musical instruments.
Curriculum links:Learning Area Outcome Aspect
The Arts Arts skills and processes • Using skills, techniques and processes (Music) • Using arts conventions • Understanding historical and cultural context in the arts
Technology Materials • The nature of materialsand enterprise • The selection and use of materials
Society Resources • Resources are used to satisfy needs and wantsand environment
Background information:Musical instruments have been created in many inventive ways by many different cultures. Some cultures make shakers by placing seeds or pebbles in gourds, shells or pieces of hollowed out wood.
A variety of containers can be used in the same way, such as plastic bottles, milk cartons, yoghurt and margarine containers, glass jars and tins. Students can even make their own designs from waste items found in the reuse bin. This is a good opportunity to embed the reuse aspect of the 3R philosophy.
Resources:
• Chocolate or coffee tins, ice-cream containers, steel cans, margarine or yoghurt containers
• Plastic bottles, milk cartons
• Gravel, gum nuts, metal bolts, screws, nuts, buttons or bottle, rice, pasta, grains or sand or salt, sugar, breadcrumbs or pencil shavings
• Two big aluminium pie plates and 20 bottle caps
Activity:
Make one instrument as a class or assign different instruments to each student to form a band.
�. Rattles and shakers
Musical instruments can be made easily from a variety of waste materials such as coffee tins, ice-cream containers etc. Place a handful of dry material to make the noise. Consider using gravel, gum nuts, metal bolts, screws, nuts, buttons or bottle caps or lids for harsh sounds.
26
Use rice, pasta, grains or sand for soft sounds or salt, sugar, breadcrumbs or pencil shavings for very soft sounds.
Try adding a handle to the shaker and decorate with paint, ribbons and glitter. To play the instrument, shake in time to the beat or strike against your hand or thigh.
2. Drums
Drums can be made from coffee tins, ice-cream containers, steel cans, margarine or yoghurt containers and chocolate drink tins. Decorate with paper and paint. Make drumsticks from wooden spoons, disposable cutlery, sticks, pencils etc.
3. Tambourine
Collect two big aluminium pie plates and 20 bottle caps. Use a hammer and nail to punch 10 holes evenly around the sides of both pie plates as well as punching holes through the 20 bottle caps. Use split pins to attach the bottle caps to the pie plates. Use two strips of cardboard to make a supportive cross to go inside the tambourine when you join the two pie plates together. Cut a slit halfway along each piece of card and slot together. Staple the two pie plates together with the cardboard cross inside. Decorate with ribbon and anything else you can find.
4. Bottle xylophone
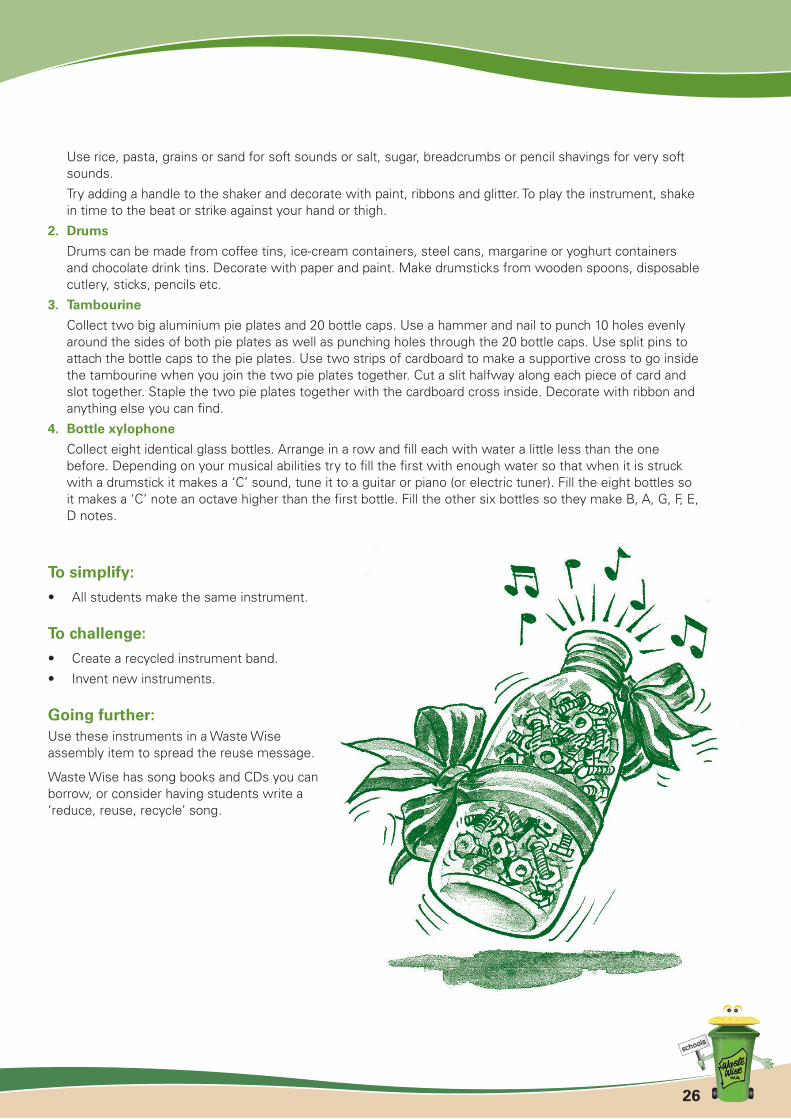
Collect eight identical glass bottles. Arrange in a row and fill each with water a little less than the one before. Depending on your musical abilities try to fill the first with enough water so that when it is struck with a drumstick it makes a ‘C’ sound, tune it to a guitar or piano (or electric tuner). Fill the eight bottles so it makes a ‘C’ note an octave higher than the first bottle. Fill the other six bottles so they make B, A, G, F, E, D notes.
To simplify:
• All students make the same instrument.
To challenge:
• Create a recycled instrument band.
• Invent new instruments.
Going further:Use these instruments in a Waste Wise assembly item to spread the reuse message.
Waste Wise has song books and CDs you can borrow, or consider having students write a ‘reduce, reuse, recycle’ song.
27
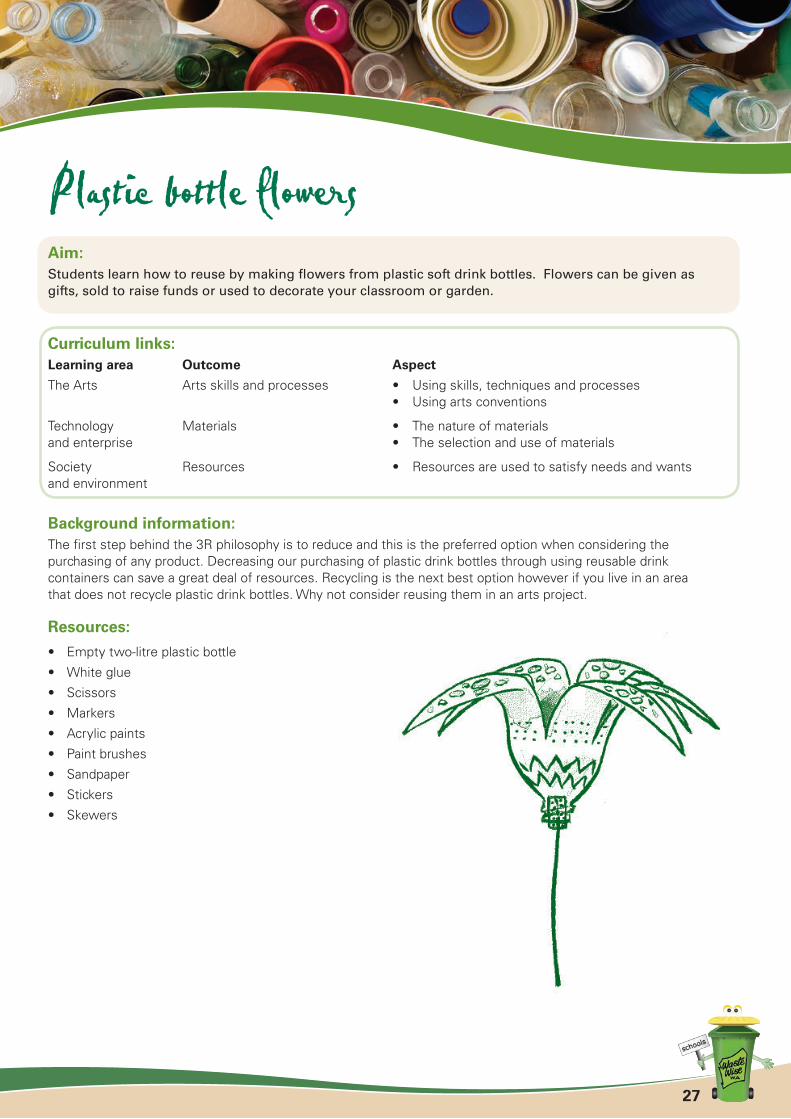
Plastic bottle flowersAim:Students learn how to reuse by making flowers from plastic soft drink bottles. Flowers can be given as gifts, sold to raise funds or used to decorate your classroom or garden.
Curriculum links:Learning area Outcome Aspect
The Arts Arts skills and processes • Using skills, techniques and processes • Using arts conventions
Technology Materials • The nature of materialsand enterprise • The selection and use of materials
Society Resources • Resources are used to satisfy needs and wantsand environment
Background information:The first step behind the 3R philosophy is to reduce and this is the preferred option when considering the purchasing of any product. Decreasing our purchasing of plastic drink bottles through using reusable drink containers can save a great deal of resources. Recycling is the next best option however if you live in an area that does not recycle plastic drink bottles. Why not consider reusing them in an arts project.
Resources:
• Empty two-litre plastic bottle
• White glue
• Scissors
• Markers
• Acrylic paints
• Paint brushes
• Sandpaper
• Stickers
• Skewers
28
Activity:
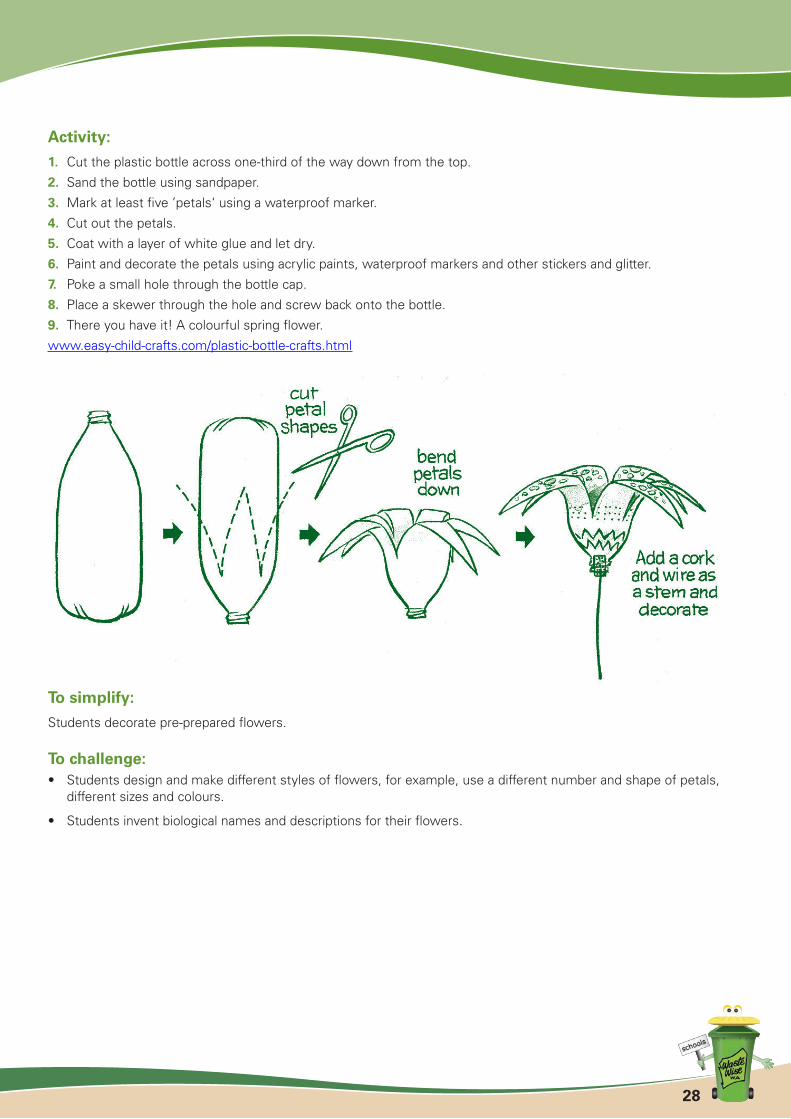
�. Cut the plastic bottle across one-third of the way down from the top.
2. Sand the bottle using sandpaper.
3. Mark at least five ’petals‘ using a waterproof marker.
4. Cut out the petals.
5. Coat with a layer of white glue and let dry.
6. Paint and decorate the petals using acrylic paints, waterproof markers and other stickers and glitter.
7. Poke a small hole through the bottle cap.
8. Place a skewer through the hole and screw back onto the bottle.
9. There you have it! A colourful spring flower.
www.easy-child-crafts.com/plastic-bottle-crafts.html
To simplify:
Students decorate pre-prepared flowers.
To challenge:• Students design and make different styles of flowers, for example, use a different number and shape of petals,
different sizes and colours.
• Students invent biological names and descriptions for their flowers.
29
Newspaper bagsAim:Students learn how to reuse when they make a durable and usable paper bag from a newspaper or magazine that would normally be thrown away or recycled.
Curriculum links:Learning area Outcome Aspect
Maths Measurement • Understand units • Direct measure
Technology Materials • The nature of materialsand enterprise • The selection and use of materials
Society Resources • Resources are used to satisfy needs and wantsand environment
Background information:To reuse means to use the same item more than once, preferably many times, rather than throwing it out after only one use. Reusing saves money, energy and resources that would otherwise have been used to make a new product, and means we are not sending that item to landfill.
Most students know how to recycle; however, reuse sometimes requires more creative effort. Here is another creative way to reuse newspaper to make great gift bags.
Resources:
• Newspaper, double weekly or weekend newspaper spread size
• Ruler
• Sticky tape
• Glue
• Stapler (optional)
• Shoe box, standard size
Activity:
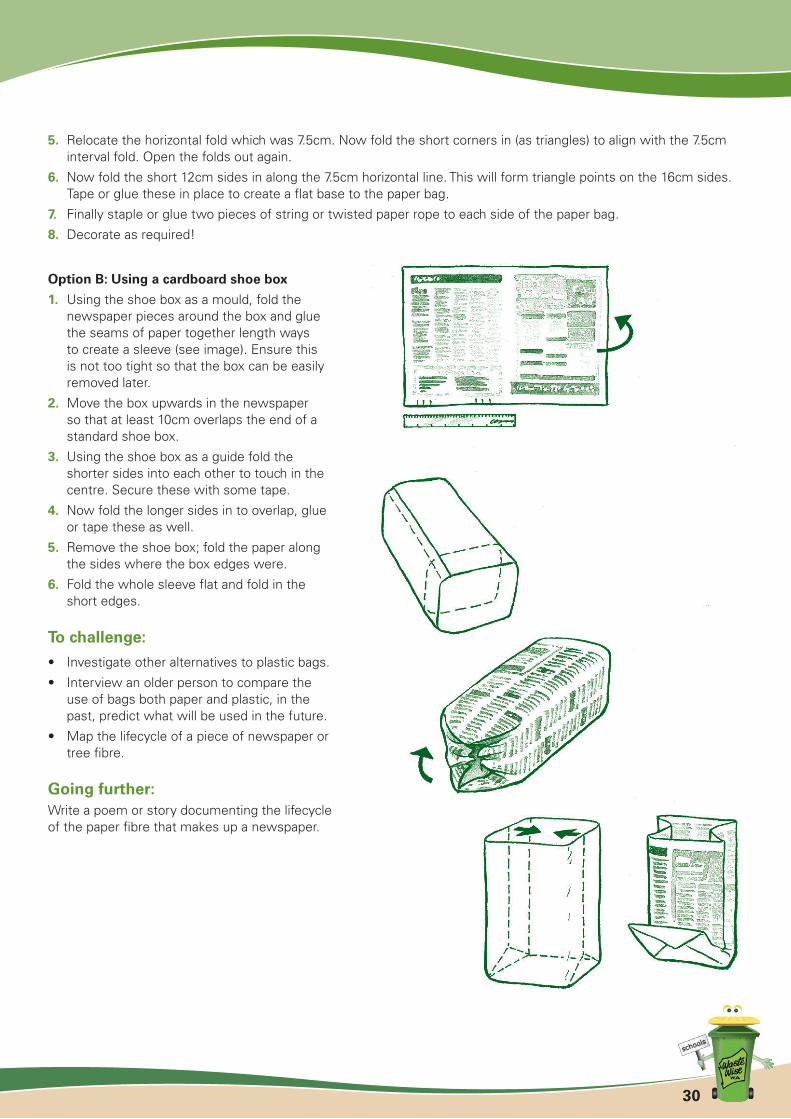
Choose some newspaper pieces, two to three double-page pieces. The layers are required to reinforce the bag.
Adapt the measuring skills to your level and desired bag size.
Option A: Using the ruler
�. Measure along the long edge of the newspaper and mark 2cm (this is for overlap when gluing), then 6cm, 6cm, 16cm, 6cm, 6cm and 16cm intervals. Fold the newspaper at each of these intervals.
2. Open out the newspaper again and measure 7.5cm along the short edges. Fold and unfold again.
3. Glue the 2cm interval section onto the opposite 16cm section so that the short edges of the newspaper are joined to form a rectangular shaped sleeve.
4. Fold the 6 + 6cm short sides inwards so that the sleeve flattens neatly.
30
5. Relocate the horizontal fold which was 7.5cm. Now fold the short corners in (as triangles) to align with the 7.5cm interval fold. Open the folds out again.
6. Now fold the short 12cm sides in along the 7.5cm horizontal line. This will form triangle points on the 16cm sides. Tape or glue these in place to create a flat base to the paper bag.
7. Finally staple or glue two pieces of string or twisted paper rope to each side of the paper bag.
8. Decorate as required!
Option B: Using a cardboard shoe box
�. Using the shoe box as a mould, fold the newspaper pieces around the box and glue the seams of paper together length ways to create a sleeve (see image). Ensure this is not too tight so that the box can be easily removed later.
2. Move the box upwards in the newspaper so that at least 10cm overlaps the end of a standard shoe box.
3. Using the shoe box as a guide fold the shorter sides into each other to touch in the centre. Secure these with some tape.
4. Now fold the longer sides in to overlap, glue or tape these as well.
5. Remove the shoe box; fold the paper along the sides where the box edges were.
6. Fold the whole sleeve flat and fold in the short edges.
To challenge:
• Investigate other alternatives to plastic bags.
• Interview an older person to compare the use of bags both paper and plastic, in the past, predict what will be used in the future.
• Map the lifecycle of a piece of newspaper or tree fibre.
Going further:Write a poem or story documenting the lifecycle of the paper fibre that makes up a newspaper.
3�
Waste wise scarecrowAim:Students learn how to reuse by making scarecrows for their Waste Wise school garden. This activity will also help students to develop a feeling of responsibility for the garden.
Curriculum links:Learning Area Outcome Aspect
The Arts Arts skills and processes • Using skills, techniques and processes • Using arts conventions
Technology Materials • The nature of materialsand enterprise • The selection and use of materials
Society Resources • Resources are used to satisfy needs and wantsand environment
Background information:It’s great to have birds in the garden, but sometimes they can be a real nuisance. Do you find that they peck at your strawberries and spoil them? Why not make a scarecrow for the strawberry patch and keep those pesky little feathered thieves away.
The first information about scarecrows was written in 1592. A scarecrow is defined as ’that which frightens or is intended to frighten without doing physical harm‘. They were used by farmers to frighten crows away from their crops. Reusing materials to make a scarecrow is another chance to develop the idea that there are many uses for a material, and our waste is actually a resource.
Schools are a great place to reuse a plethora of items that can be brought in from home. Many schools are now creating reuse sheds to collect, organise and store items for easy access by all teachers across the school for different projects. You will be able to reuse a variety of resources such stockings, old clothing, old sunglasses, mops and bags to use in making a scarecrow.
Source: Scarecrow land, A brief History of the Scarecrow, [online] viewed March 2009 URL www.scarecrowland.co.uk/history.html
Resources:
• Reuse material for scarecrow body and head, for example, old stockings and socks, plastic bags, second hand clothing.
• Reuse material for stuffing such as plastic bags, straw, old rags and paper.
• Second-hand clothes and accessories such as a skirt or pants, shirt, jacket, shoes, gloves, hat, sunglasses, old mops or plastic bags for hair.
• Wooden posts to attach finished scarecrows to.
• Glue, string, needles and thread, staples and wire.

32
Activity:
�. Students discuss why we use scarecrows.
2. Students discuss what scarecrows are usually made out of.
3. Explain to students they need to design a scarecrow made from all reuse materials that would otherwise be thrown away.
4. Students design and draw a scarecrow made of reuse items. The design should incorporate elements which make the scarecrow weatherproof and it should be made of materials which are easily found in homes and school.
5. In groups students should then create a plan as to how they will build the scarecrow.
6. Students collect reuse materials.
7. Students build the scarecrow.
To simplify:
Students take turns to help create and build one class scarecrow.
33
Recycled paper – making your ownAim:Students learn how to make their own paper and gain insight into how paper can be recycled.
Curriculum links:Learning area Outcome Aspect
The Arts Arts skills and processes • Using skills, techniques and processes • Using arts conventions
Technology Materials • The nature of materialsand enterprise • The selection and use of materials
Society Resources • Resources are used to satisfy needs and wantsand environment
Background information:The first use of paper dates back to 4,000 years ago when people in China created a type of cloth sheet to record their drawings and writings. Paper from plant fibres was then developed in China in 105 AD by Tsai Lun, an official at the Chinese Emperor’s court.Source: The history of paper, [online] viewed August 2009, www.silk-road.com/artl/papermaking.shtml
In the past, the technique for making handmade paper involved soaking cotton and/or linen rags in liquid until the fibres broke down into bits. A paper mould was dipped into the fibre suspension, lifted out and the excess water shaken off. The paper sheet was then partially dried before being removed from the mould. Source: Bergner, M, The history of American paper making, [online] viewed August 2009 www.suite101.com/article.cfm/book_arts/11620
Students will use a similar technique to make their own recycled paper from used paper.
Resources:
• Small pieces of scrap paper that have been soaked in a bucket of hot water (minimum 30 minutes or overnight)
• Flower petals
• Food dye
• Peppermint extract for scented paper
• Blender (to blend the paper)
• Paper making screen or firm wire mesh stretched within a frame
• Large shallow pan such as a roasting pan that is large enough to for the paper making screen to fit inside
• Tea towels or cloths
• Iron (for teacher to use)
34
Activity:
�. Introduce the concept of recycling – taking something old and turning it into something new.
2. Tear the scrap paper into tiny pieces and soak them in a bucket of hot water for about 30 minutes. Put a handful of the soaked paper into the blender and mix until mush. Or, if using a whisk, beat the mixture until it is a creamy pulp. Add a small amount of flower petals or dye for colour (you could also add some peppermint extract to give it a scent).
3. Pour the blended pulp into a measuring cup. Pour roughly 3cm of water into the pan. Put the screen into the pan and pour one cup of the paper pulp onto the screen.
4. Spread the pulp evenly in the water with your fingers. It should feel kind of mushy. Lift the screen and let the water drain.
5. Lie the pulp-covered screen face down on a cloth (tea towel). Using your hand, squeeze as much water out of the paper pulp as possible. Carefully lift the screen away, leaving the paper pulp on the cloth. Cover with another cloth and iron with a hot iron, or use a rolling pin to flatten and press out excess water. Let the pulp dry for at least 24 hours.
6. Once it is dry, flip the towel over and slowly peel it off the recycled paper.
7. Use the newly made paper to create greeting cards for your friends and family, or use it to make posters urging other members of your school community to recycle.
To simplify:
• See the lesson on paper plant pots. Use the paper mash to fill a mould such as a yoghurt container and allow it to dry. This makes a fairly strong paper container (non water proof) which can be decorated.
• Make larger boxes using the same idea by using reusable plastic lunch boxes as a mould. Make sure the layer of paper mash is thick enough for strength. Use non-toxic varnish to waterproof the boxes.
To challenge:• Create papier mâchè objects or sculptures.
• Learn about the process of paper recycling by using the website www.pneb.com.au. There is an animation to watch and details about how paper is recycled.
Going further:• Make recycled paper from three different types of paper: photocopier paper, notebook paper and newspaper.
Examine the three different types of paper and the qualities of each. Devise a way to test the different types of paper for strength, smoothness, ease of writing and appearance.
• Have students think of how they use paper in their lives. Students can list or write a story about the role of paper in their life using a booklet made from re-use paper.
• To reiterate the point of how a few pieces of paper can turn into a large amount, have students complete a paper log book over the next week to record the amount of paper they use. (The students can make their paper log book out of re-use scrap paper.) Use this information for a maths activity. Students can calculate how much paper they used over the week and extrapolate for the whole year, then research how many trees worth of paper they would be saving by reducing this paper use.

35
Newspaper potsAim:Students learn how to reuse and recycle newspaper in order to create paper pots. The pots are then used to raise seedlings for their Waste Wise gardens.
Curriculum links:Learning area Outcome Aspect
Technology Materials • The nature of materialsand enterprise • The selection and use of materials
Society Resources • Resources are used to satisfy needs and wantsand environment
Background information:To reuse means to use the same item more than once, preferably many times, rather than throwing it out after only one use. Reusing saves money, energy and resources that would otherwise have been used to make a new product. It also means that we are not sending that item to landfill. The act of reusing paper extends the life of a resource which would otherwise be wasted.
Resources:
• Black and white newspaper
• Glass jar or plastic bottle
• Small yoghurt tubs
Activity �: Short life span paper pots
�. Select some newspaper.
2. On a flat surface fold a full piece of newspaper in half lengthways twice so that you have a narrow piece of newspaper.
3. Place a glass jar on its side at one end of the newspaper. Make sure to leave about half of the width of the paper overlapping the opening of the jar. Roll the paper around the jar.
4. Push the overlapping newspaper into the jar opening.
5. Remove the jar from the newspaper.
6. Now firmly push the jar base into the newspaper cylinder to flatten the folded end and seal the paper pot.
7. Add soil and plant a seed in your paper pot. Make sure the pot is supported on its sides by other pots to prevent the sides from collapsing. Once the seedling has grown you will be able to plant the whole pot straight into the garden bed.
36
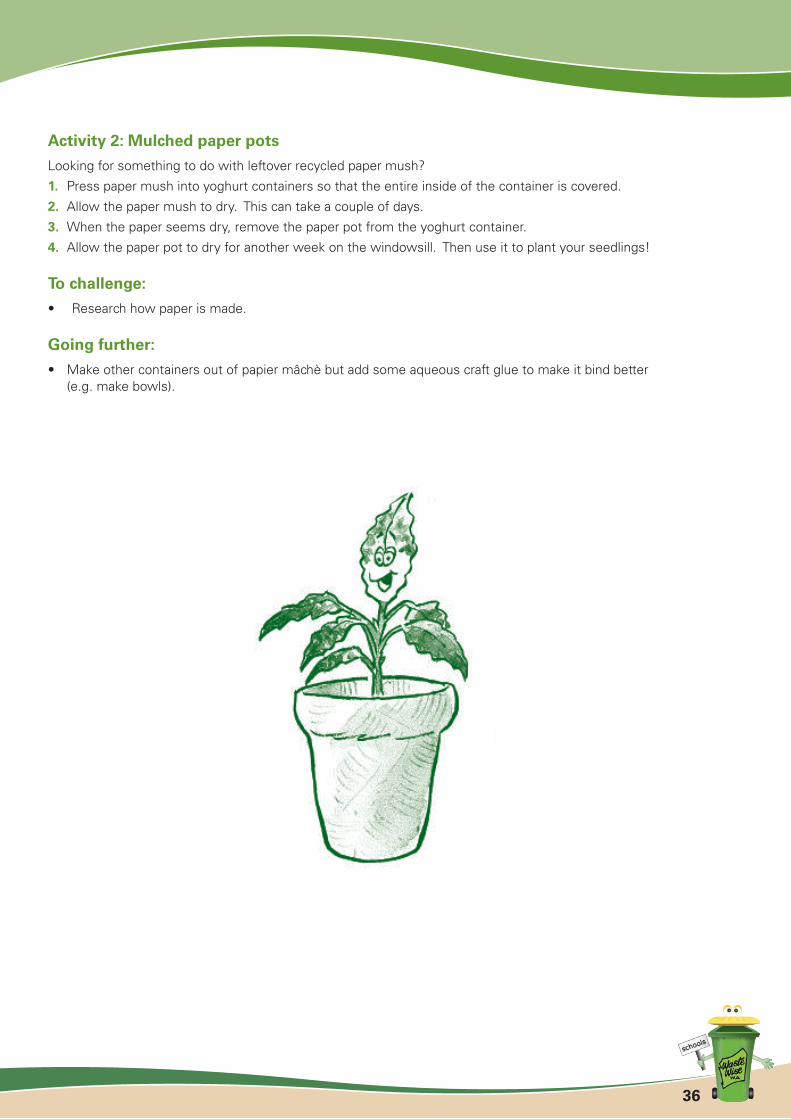
Activity 2: Mulched paper pots
Looking for something to do with leftover recycled paper mush?
�. Press paper mush into yoghurt containers so that the entire inside of the container is covered.
2. Allow the paper mush to dry. This can take a couple of days.
3. When the paper seems dry, remove the paper pot from the yoghurt container.
4. Allow the paper pot to dry for another week on the windowsill. Then use it to plant your seedlings!
To challenge:
• Research how paper is made.
Going further:
• Make other containers out of papier mâchè but add some aqueous craft glue to make it bind better (e.g. make bowls).
37
Paper beadsAim:Students learn how to make colorful beads from pieces of discarded paper such as wallpaper, wrapping paper or colourful magazines.
Curriculum links:Learning Area Outcome Aspect
The Arts Arts skills and processes • Using skills, techniques and processes • Using arts conventions Arts in society • Understanding historical and cultural context in the arts
Technology Technology process • Investigatingand enterprise • Devising • Producing
Background information:In Victorian times, women would make beads on their knitting needles from wall paper strips. They would string them together to make curtains to separate rooms.
This is a great way to reuse colourful scraps of paper. You can use leftover pieces of wallpaper, wrapping paper or coloured magazine pages. You can make these beads and string them together to make jewellery or create 3D art pieces. Source: Paper University Recycled Paper Beads [online] viewed January 2009 URL www.tappi.org/paperu/art_class/paperBeads.htm
Source: Paper University Recycled Paper Beads [online] viewed January 2009 URL www.tappi.org/paperu/art_class/paperBeads.htm
Resources:
• Scraps of wallpaper, magazine pictures, used wrapping paper, coloured paper, etc.
• Pencil, ruler, and scissors
• Glue stick
• Tetra pack drinking straws from lunch or old lollipop plastic sticks or tooth picks for 100 per cent biodegradability
38
Activity:
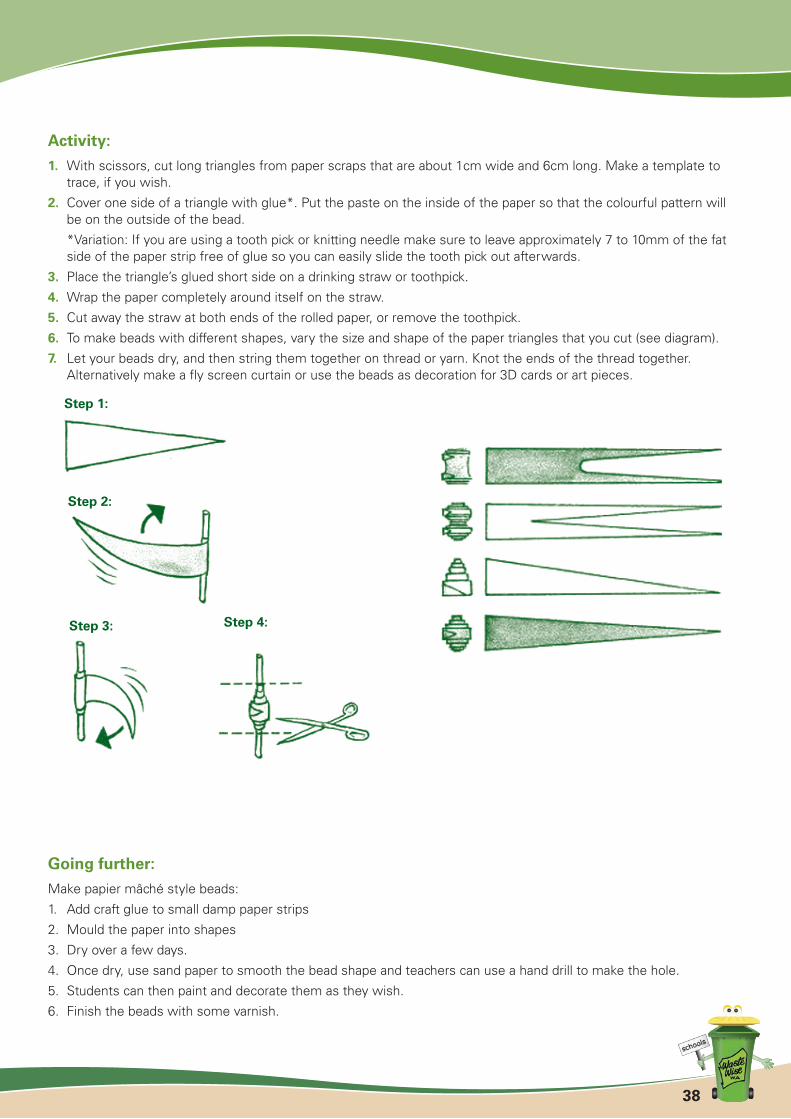
�. With scissors, cut long triangles from paper scraps that are about 1cm wide and 6cm long. Make a template to trace, if you wish.
2. Cover one side of a triangle with glue*. Put the paste on the inside of the paper so that the colourful pattern will be on the outside of the bead.
*Variation: If you are using a tooth pick or knitting needle make sure to leave approximately 7 to 10mm of the fat side of the paper strip free of glue so you can easily slide the tooth pick out afterwards.
3. Place the triangle’s glued short side on a drinking straw or toothpick.
4. Wrap the paper completely around itself on the straw.
5. Cut away the straw at both ends of the rolled paper, or remove the toothpick.
6. To make beads with different shapes, vary the size and shape of the paper triangles that you cut (see diagram).
7. Let your beads dry, and then string them together on thread or yarn. Knot the ends of the thread together. Alternatively make a fly screen curtain or use the beads as decoration for 3D cards or art pieces.
Going further:
Make papier mâché style beads:
1. Add craft glue to small damp paper strips
2. Mould the paper into shapes
3. Dry over a few days.
4. Once dry, use sand paper to smooth the bead shape and teachers can use a hand drill to make the hole.
5. Students can then paint and decorate them as they wish.
6. Finish the beads with some varnish.
Step �:
Step 2:
Step 3: Step 4:
39
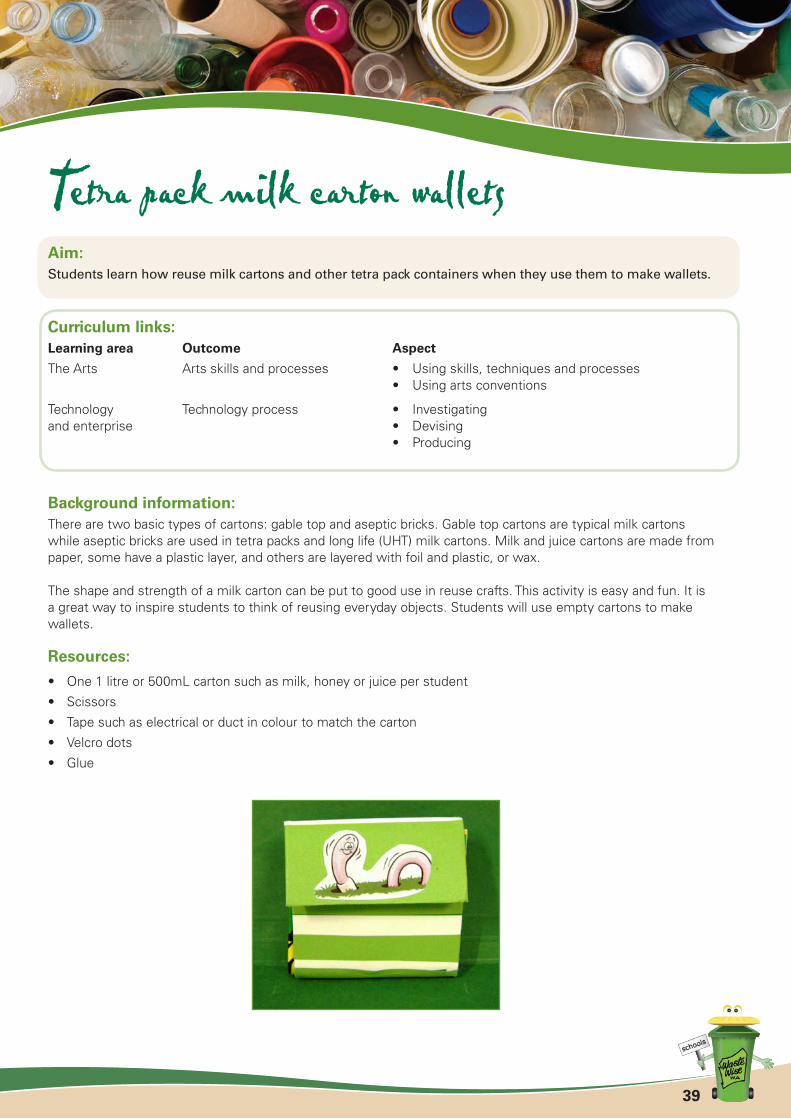
Tetra pack milk carton walletsAim:Students learn how reuse milk cartons and other tetra pack containers when they use them to make wallets.
Curriculum links:Learning area Outcome Aspect
The Arts Arts skills and processes • Using skills, techniques and processes • Using arts conventions
Technology Technology process • Investigatingand enterprise • Devising • Producing
Background information:There are two basic types of cartons: gable top and aseptic bricks. Gable top cartons are typical milk cartons while aseptic bricks are used in tetra packs and long life (UHT) milk cartons. Milk and juice cartons are made from paper, some have a plastic layer, and others are layered with foil and plastic, or wax.
The shape and strength of a milk carton can be put to good use in reuse crafts. This activity is easy and fun. It is a great way to inspire students to think of reusing everyday objects. Students will use empty cartons to make wallets.
Resources:
• One 1 litre or 500mL carton such as milk, honey or juice per student
• Scissors
• Tape such as electrical or duct in colour to match the carton
• Velcro dots
• Glue
40
Activity:
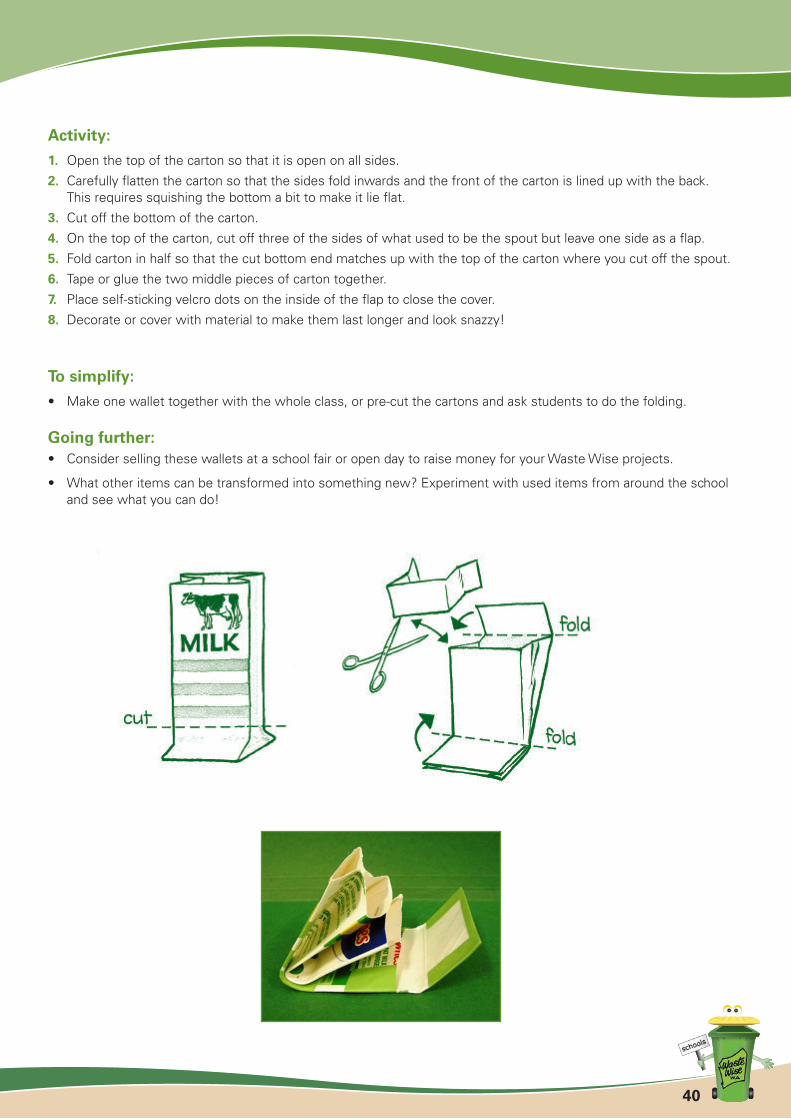
�. Open the top of the carton so that it is open on all sides.
2. Carefully flatten the carton so that the sides fold inwards and the front of the carton is lined up with the back. This requires squishing the bottom a bit to make it lie flat.
3. Cut off the bottom of the carton.
4. On the top of the carton, cut off three of the sides of what used to be the spout but leave one side as a flap.
5. Fold carton in half so that the cut bottom end matches up with the top of the carton where you cut off the spout.
6. Tape or glue the two middle pieces of carton together.
7. Place self-sticking velcro dots on the inside of the flap to close the cover.
8. Decorate or cover with material to make them last longer and look snazzy!
To simplify:
• Make one wallet together with the whole class, or pre-cut the cartons and ask students to do the folding.
Going further:• Consider selling these wallets at a school fair or open day to raise money for your Waste Wise projects.
• What other items can be transformed into something new? Experiment with used items from around the school and see what you can do!
4�
Recycling sort Aim:Students will use their creativity to design a machine to sort recycled materials.
Curriculum links:Learning area Outcome Aspect
Technology Materials • The nature of materialsand enterprise • The selection and use of materials Technology process • Investigating • Devising • Producing
English Writing • Processes and strategies
Society Resources • Resources are used to satisfy needs and wantsand environment
Background information:Many local councils have a material recovery facility (MRF), which is a centre often located near a landfill where all the local area’s rubbish and recycling is collected.
At the MRF, the recycling materials are placed on a conveyor belt and sorted manually by facility workers and/or by machines. For example, a magnet is used to remove the steel and an eddy current is used to eject aluminium from the rest of the rubbish. Plastic is usually sorted manually by colour and type, as is glass. Once the material is separated, it is usually baled together for easy transportation.
Students use information they already know or guess about the properties of some materials and use it to create an imaginary MRF or recycling machine. This lesson is suitable for upper primary.
Resources:
Enough for a set per student group or one class set
• Butcher/poster paper
• Plastic milk bottle
• Aluminium can
• Steel can (no sharp edges)
• Paper
• Cardboard
• Greenwaste (optional)
• Pictures of glass bottles (to avoid breakage), a few different colours to show differences
42
Activity:
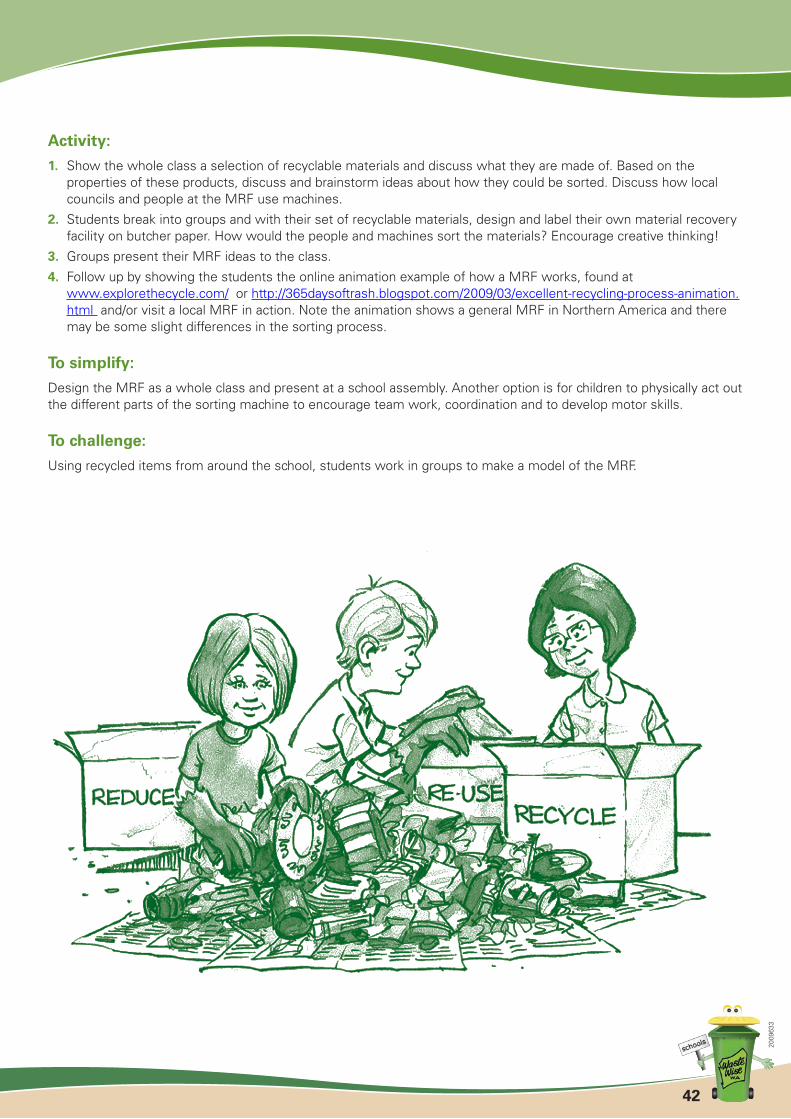
�. Show the whole class a selection of recyclable materials and discuss what they are made of. Based on the properties of these products, discuss and brainstorm ideas about how they could be sorted. Discuss how local councils and people at the MRF use machines.
2. Students break into groups and with their set of recyclable materials, design and label their own material recovery facility on butcher paper. How would the people and machines sort the materials? Encourage creative thinking!
3. Groups present their MRF ideas to the class.
4. Follow up by showing the students the online animation example of how a MRF works, found at www.explorethecycle.com/ or http://365daysoftrash.blogspot.com/2009/03/excellent-recycling-process-animation.html and/or visit a local MRF in action. Note the animation shows a general MRF in Northern America and there may be some slight differences in the sorting process.
To simplify:
Design the MRF as a whole class and present at a school assembly. Another option is for children to physically act out the different parts of the sorting machine to encourage team work, coordination and to develop motor skills.
To challenge:
Using recycled items from around the school, students work in groups to make a model of the MRF.
2009
633