the user manual for tf5800pvr - toppy.org.uk manual_rev.4.pdf · tf5800pvr user manual digital...
TRANSCRIPT

TOPFIELD
TF 5800 PVRUser Manual
Digital Terrestrial ReceiverPersonal Video Recorder

ii CONTENTS
Contents
Contents ii
1 Introduction and getting started 1
1.1 Unpacking . . . . . . . . . . . . . . . . . . . . . . . . . . . . . . 2
1.2 Remote control buttons and their functions . . . . . . . . . . . 3
1.3 Rear panel connections . . . . . . . . . . . . . . . . . . . . . . . 6
1.4 Connecting up your PVR . . . . . . . . . . . . . . . . . . . . . 8
1.4.1 Connecting the aerial to your PVR . . . . . . . . . . . . 9
1.4.2 Connecting the PVR to your TV using a SCART . . . . 9
1.4.3 Connecting the PVR to your TV using the RF output . 10
1.4.4 Connecting to your HiFi system . . . . . . . . . . . . . 10
1.5 Switching on for the first time . . . . . . . . . . . . . . . . . . . 10
1.5.1 Searching for TV and radio channels . . . . . . . . . . 11
1.5.2 Basic system settings . . . . . . . . . . . . . . . . . . . . 12
1.5.3 Time and date options . . . . . . . . . . . . . . . . . . . 12
1.5.4 AV output settings . . . . . . . . . . . . . . . . . . . . . 13
1.6 Pay TV . . . . . . . . . . . . . . . . . . . . . . . . . . . . . . . . 15
2 Watching TV 17

iii
2.1 Starting to watch television . . . . . . . . . . . . . . . . . . . . 18
2.1.1 Volume control . . . . . . . . . . . . . . . . . . . . . . . 19
2.1.2 Changing channels . . . . . . . . . . . . . . . . . . . . . 19
2.1.3 Radio channels . . . . . . . . . . . . . . . . . . . . . . . 20
2.2 Electronic Programme Guide . . . . . . . . . . . . . . . . . . . 21
2.3 Time Shift television . . . . . . . . . . . . . . . . . . . . . . . . 23
2.3.1 Rewinding TV . . . . . . . . . . . . . . . . . . . . . . . 23
2.3.2 Pausing TV . . . . . . . . . . . . . . . . . . . . . . . . . 25
3 Recording and playing TV programmes 26
3.1 How your PVR records . . . . . . . . . . . . . . . . . . . . . . . 26
3.2 Instant recording . . . . . . . . . . . . . . . . . . . . . . . . . . 28
3.3 Current event recording . . . . . . . . . . . . . . . . . . . . . . 30
3.4 Scheduled recordings . . . . . . . . . . . . . . . . . . . . . . . . 31
3.4.1 Scheduling a recording using the EPG . . . . . . . . . . 31
3.4.2 Altering the details . . . . . . . . . . . . . . . . . . . . . 33
3.4.3 Viewing your recording schedule . . . . . . . . . . . . 35
3.5 Things you should know about recording on your PVR . . . . 37
3.5.1 Dual recordings . . . . . . . . . . . . . . . . . . . . . . 37
3.5.2 Watching television while dual recording . . . . . . . . 38
3.5.3 When recordings start or stop . . . . . . . . . . . . . . 38
3.5.4 Leaving the PVR in standby . . . . . . . . . . . . . . . 39
3.5.5 Switching off while recording . . . . . . . . . . . . . . 39
3.5.6 How recordings are named . . . . . . . . . . . . . . . . 40
3.6 Playing back recordings . . . . . . . . . . . . . . . . . . . . . . 40
3.6.1 Playback features . . . . . . . . . . . . . . . . . . . . . . 42
3.6.2 Bookmarks and resume play . . . . . . . . . . . . . . . 42
3.6.3 After you’ve watched a recording . . . . . . . . . . . . 44

iv CONTENTS
4 Extra features 45
4.1 Make the most of digital TV . . . . . . . . . . . . . . . . . . . . 45
4.1.1 Subtitles . . . . . . . . . . . . . . . . . . . . . . . . . . . 46
4.1.2 Sound tracks . . . . . . . . . . . . . . . . . . . . . . . . 46
4.1.3 Picture in Picture . . . . . . . . . . . . . . . . . . . . . . 47
4.1.4 Digital teletext . . . . . . . . . . . . . . . . . . . . . . . 48
4.1.5 Sleep timer . . . . . . . . . . . . . . . . . . . . . . . . . 49
4.2 Organising channels . . . . . . . . . . . . . . . . . . . . . . . . 50
4.2.1 Favourite channels . . . . . . . . . . . . . . . . . . . . . 50
4.2.2 Setting up favourite channels . . . . . . . . . . . . . . . 51
4.2.3 Managing lists of favourites . . . . . . . . . . . . . . . 52
4.2.4 Watching TV using favourites . . . . . . . . . . . . . . 53
4.3 Organising recordings . . . . . . . . . . . . . . . . . . . . . . . 54
4.3.1 Renaming recordings . . . . . . . . . . . . . . . . . . . 54
4.3.2 Organising recordings . . . . . . . . . . . . . . . . . . . 55
4.3.3 Copying recordings . . . . . . . . . . . . . . . . . . . . 56
4.3.4 Editing recordings . . . . . . . . . . . . . . . . . . . . . 57
4.4 Additional playback and viewing features . . . . . . . . . . . 58
4.4.1 Playing back multiple recordings . . . . . . . . . . . . 58
4.4.2 Slow motion playback . . . . . . . . . . . . . . . . . . . 59
4.4.3 Repeat playback . . . . . . . . . . . . . . . . . . . . . . 59
4.4.4 Parental lock . . . . . . . . . . . . . . . . . . . . . . . . 60
4.4.5 Restricting access to recorded programmes . . . . . . . 61
4.4.6 Restricting access to TV channels . . . . . . . . . . . . 61
4.4.7 Organising the channel list . . . . . . . . . . . . . . . . 61
5 The PC Connection 63
5.1 Installing the software and drivers . . . . . . . . . . . . . . . . 64

v
5.2 Connecting the PVR to your PC . . . . . . . . . . . . . . . . . . 64
5.2.1 Using Altair . . . . . . . . . . . . . . . . . . . . . . . . . 65
5.2.2 How files are organised on your PVR . . . . . . . . . . 66
5.2.3 Transferring files . . . . . . . . . . . . . . . . . . . . . . 67
6 Advanced features 69
6.1 MP3 playback . . . . . . . . . . . . . . . . . . . . . . . . . . . . 69
6.2 Firmware updates . . . . . . . . . . . . . . . . . . . . . . . . . 70
6.2.1 Installing a firmware update via USB . . . . . . . . . . 71
6.2.2 Installing a firmware update via a serial connection . . 72
6.2.3 Installing a firmware update over the air . . . . . . . . 73
6.3 TAPs - Additional software for your PVR . . . . . . . . . . . . 74
6.3.1 Installing TAPs . . . . . . . . . . . . . . . . . . . . . . . 74
6.3.2 Starting TAPs . . . . . . . . . . . . . . . . . . . . . . . . 75
6.3.3 Starting TAPs automatically . . . . . . . . . . . . . . . 76
6.3.4 Troubleshooting TAPs . . . . . . . . . . . . . . . . . . . 76
7 Troubleshooting and How to 78
7.1 Troubleshooting . . . . . . . . . . . . . . . . . . . . . . . . . . . 78
7.1.1 Unexpected channel changes . . . . . . . . . . . . . . . 78
7.1.2 Failed recordings . . . . . . . . . . . . . . . . . . . . . . 79
7.1.3 PVR crashes . . . . . . . . . . . . . . . . . . . . . . . . . 79
7.1.4 Incorrect channel numbers and duplicate channels . . 80
7.1.5 Unable to view Pay TV channels . . . . . . . . . . . . . 81
7.2 How to . . . . . . . . . . . . . . . . . . . . . . . . . . . . . . . . 82
7.2.1 Adding a new channel . . . . . . . . . . . . . . . . . . . 82
7.2.2 Moving home . . . . . . . . . . . . . . . . . . . . . . . . 83
7.3 Contacting support . . . . . . . . . . . . . . . . . . . . . . . . . 83

vi CONTENTS
A Technical Information 84

1
Chapter 1
Introduction and getting
started
Congratulations on buying a Topfield TF 5800 Personal VideoRecorder (PVR). The TF 5800 allows you to view and recorddigital TV channels easily, via an ordinary television aerial.You can receive all the Freeview channels broadcast in yourarea, which includes a range of digital radio stations too. Inaddition, with a small subscription module, you can accesssome additional channels from pay TV broadcasters.
Your new PVR allows you to record two different programmessimultaneously, and even to play back existing recordings whileyou’re making new ones. With it’s large hard drive, there’splenty of space for all the shows you want to watch, and thebuilt in electronic programme guide (EPG) makes it easy tofind programmes and schedule automatic recordings.
As well as recording and playback of TV programmes, it hasplenty of other features. You can pause TV when the phonerings, for example, or rewind a sports match to watch some-one score a second time. Channels can be arranged into groupsof ‘favourites,’ and there are other useful features like picture

2 Introduction and getting started
in picture, interactive services and even a link to your homecomputer.
We’ll cover all of those issues in this manual, starting frombasic installation and setup, then looking at everyday use, andfinally giving you an idea of some of the advanced featuresthat you can make use of when you’re comfortable with howyour PVR works.
1.1 Unpacking
Before going any further, check that you have received the fol-lowing items with your PVR. If any are missing, please contactyour supplier.
• Remote control unit• Two AA batteries for the remote control• One aerial cable, to link the PVR to your TV aerial• One loop cable (a short aerial cable)• One SCART cable, to link the PVR to your television set• A copy of this user guide
Unpack the cables, and insert the batteries in the remote con-trol; make sure you insert them the correct way round, follow-ing the symbols on the inside of the battery compartment.
Before going any further, you should familiarise yourself withthe remote control and with the connectors on the rear of thePVR. Let’s look at the remote control first. Dont worry if someof the things we mention here seem a little unusual —all thefunctions and features will be explained later on.

1.2 Remote control buttons and their functions 3
1.2 Remote control buttons and their functions
1⃝ Power Use this button to switchthe PVR in and out of standbymode.
2⃝ Mute Press mute to temporarilyswitch off the sound; pressagain to switch it back on.
3⃝ TV/Radio Switch the PVR be-tween television and radiochannels.
4⃝ Satellite This button switches theoutput of the main SCARTsocket between the PVR’spicture and the device con-nected to the secondarySCART socket.
5⃝ Opt The Opt button gives ac-cess to additional features,such as subtitles, favourites,soundtracks and the sleeptimer.
6⃝ Numeric keys These are used toenter channel numbers andmenu options. The 0 keyalso cycles through picturesize options.
7⃝ Recall The Recall button switches between the currentchannel and the previously viewed one.
8⃝ Info Press iIto display more information about the cur-rent programme or a programme highlighted in the

4 Introduction and getting started
EPG.
9⃝ Guide The Guide button displays the Electronic ProgrammeGuide (EPG).
10⃝ Menu Use this button to access the PVR’s menus, or toreturn to the previous menu from a sub-menu.
11⃝ List Press List once to display a list of all the channelsstored for TV or Radio. Press it again when the listis displayed to select a group of Favourite channels.
12⃝ Exit Press Exit to leave the current screen.
13⃝ V+ / V− These buttons increase and decrease the volume.In some screens, they also work as right and leftmovement keys.
14⃝ P+ / P− The P+ and P− buttons move to the next orprevious channel in the channel list or the currentFavourites list. In some screens, they also work asup and down movement keys.
15⃝ OK/List The OK button is used to select items in menus,and in interactive services. When viewing live TV,it displays the channel list, and when viewing arecordings, it will display the list or recordings inthe archive.
16⃝ Up and down keys In system menus, the up and downkeys allows you to choose an item from the menu.They are also used to navigate through the elec-tronic programme guide, and in interactive services.
17⃝ Left and right keys In system menus, left and right keysallow you to change the options for a menu item.They are also used to navigate through the elec-tronic programme guide, and in interactive services.

1.2 Remote control buttons and their functions 5
18⃝ Rewind Press to reverse playback; press again to increasespeed, or hold down to move along the progressbar.
19⃝ Play Press to go to normal playback speed, or to displaythe progress bar for faster navigation when play-back has already started. From the Archive, pressto resume playback from the last position.
20⃝ Fast forward Press to start fast forward, and again to in-crease playback speed, or hold down to move alongthe progress bar.
21⃝ Stop Press to stop playback, to stop a recording, or tojump back to live TV from time shifted television.
22⃝ Record Press to start a recording.
23⃝ Pause Press to pause playback of a recorded programmeor live television.
24⃝ Slow motion This button starts slow motion playback. Sub-sequent presses change the speed of playback.
25⃝ PiP move Press this button once to start the Picture inPicture (PiP) function. Press again to change theposition of the Picture in Picture, and to turn it off.
26⃝ Archive This button displays the list of recorded programmesthat have been saved on your PVR’s hard disk.
27⃝ Text button The Text button is used to access or leave in-teractive services, such as BBCi and Teletext.
28⃝ PiP Swap This button swaps the Picture in Picture withthe main picture.
29⃝ White key When the PiP function is being used, this keydisplays a list so that you can choose which chan-nel is displayed in the smaller picture. When theProgress Bar is displayed, it allows you to select a

6 Introduction and getting started
section of a programme for repeat playback or edit-ing.
30⃝ Colour keys The coloured keys on the remote control areused by interactive services, such as BBCi or Tele-text —for example, you may see a message on screenasking you to ‘Press Red.’ The keys are also usedin some of the PVR menus, where you will usuallysee an on screen message telling you which key touse for which function.
1.3 Rear panel connections
The TF 5800 PVR has a wide range of connections on the backpanel, and it can look a little complicated at first. Dont worry —it’s much simpler than it looks, and not everyone needs to useall the connections. We’ll explain some of the most commonways of connecting the PVR after we’ve looked at the rearpanel.
2
1 3
4 137 9 10
11
14
5
6
8
12
ANT 1 IN
RF LOOP 1 OUT RF LOOP 2 OUT AUDIO
L
R
S-VIDEO VCR USB
RF IN
S/PDIF RS-232
VIDEO
TV
RF OUT
ANT 2 IN
1⃝ ANT 1 This is the input to one of the TV tuners in yourPVR (it has two, so that it can record two things atthe same time.) This socket should be connected toyour TV aerial.
2⃝ RF LOOP 1 OUT This is the output from the first tuner.Normally, you should use the supplied loop cable

1.3 Rear panel connections 7
to connect this to the ANT 2 connector.
3⃝ ANT 2 ANT 2 is the input to the second of the tuners inyour PVR.
4⃝ RF LOOP 2 OUT This is the output from the first tuner.
5⃝ Video output This yellow socket carries composite video.This format is used by some video projectors, andaudio visual amplifiers; most users will not need touse this socket.
6⃝ Audio outputs These two connectors provide left (white)and right (red) channel audio outputs, which canbe connected to a hi-fi system, if you wish.
7⃝ S-Video The S-Video output is another way of connect-ing some televisions, projectors or AV amplifiers toyour PVR. Again, most users will not need to usethis socket.
8⃝ TV SCART This is the main output socket from your PVR,carrying both audio and video connections usingthe large SCART connectors. You should normallyuse the supplied SCART cable to connect this to thecorresponding socket on your television set.
9⃝ VCR SCART This is a secondary SCART socket. It is in-tended to be used to allow other devices to recordthe material you are watching or playing on yourPVR, and can also pass their signal through to yourtelevision, so that even if you have only one SCARTconnector on your TV you can use, for example,both the PVR and a DVD player, selecting one orthe other via the Satellite button on the remote con-trol.
10⃝ RF IN The RF in connector allows you to feed a signalfrom a TV aerial into the PVR, where it will be com-

8 Introduction and getting started
bined, on the RF OUT socket, with a signal show-ing the PVR’s display.
11⃝ RF OUT This output provides the display from the PVRas an ordinary TV channel, so it can be selected ontelevisions that have no special AV inputs.
12⃝ S/PDIF optical connector If you have an audio visual sys-tem with a surround sound decoder or an amplifierthat has optical input, you can use this connector tolink it to your PVR. (Note that multi-channel digi-tal surround, such as Dolby Digital, is not currentlybroadcast on UK digital terrestrial TV channels).
13⃝ RS-232 Serial port The Serial port connector allows youto update the software on your PVR using a com-puter that does not have a USB connection.
14⃝ USB port By connecting to your computer using this USBport, you can upgrade the built-in software of thePVR, transfer recorded programmes to your com-puter, or transfer music files from the computer toplay back on the PVR.
1.4 Connecting up your PVR
As you can see, there is a wide range of connectors on the backof the PVR, and consequently you can set it up in a number ofdifferent ways. To some extent, the way that you choose willdepend on the other equipment that you have. We’ll cover themost basic cases here.
The first thing you need to work out is how you will connectyour PVR to your television.
Most modern television sets have one or more connectors forother equipment, often referred to as AV, EXT or SCART con-nectors. If your television does not have any inputs, and canonly receive signals through its aerial connection, you will

1.4 Connecting up your PVR 9
need to use the RF OUT connector on your PVR; we shall de-scribe how to do that shortly.
1.4.1 Connecting the aerial to your PVR
Whatever sort of connection you have between the PVR andthe TV, you need to connect the PVR to your television aerialso that it can receive digital TV channels.
Note that in some areas, you may need to upgrade your aerialto ensure that you receive digital television broadcasts —good reception of existing analogue signals is no guaranteeof good digital reception.
The first connection you should make is to connect a cablefrom your TV aerial to the ANT 1 connector on the back ofthe PVR.
However your PVR is connected to the TV, you must ensurethat there is a connection to both the ANT1 and ANT2 con-nectors on your PVR, so that both tuners work properly. Nor-mally, you do that by using the supplied loop cable to linkfrom RF LOOP1 OUT to ANT 2.
However, if you are in a weak signal area, or are using a signalamplifier with more than one output, you may achieve betterresults by connecting a cable from the aerial or amplifier di-rectly to the ANT2 connector, rather than using the loop cable.
1.4.2 Connecting the PVR to your TV using a SCART or AV cable
For best results with a standard television set, you should usethe supplied SCART cable, plugging one end into the TV SCARTsocket on the PVR, and the other end into a free SCART socketon your television.
If you have more than one SCART connector on your televi-sion, you should choose one with ‘RGB’ (Red, Green, Blue)support, since it can give a better picture. You may wish to

10 Introduction and getting started
experiment with different sockets on your TV, since some mayhave different facilities, such as automatic switching when thePVR is turned on, while others may not.
Some televisions have inputs via S-Video or Composite con-nectors, rather than SCART. If you have such a television, usean appropriate cable to link the socket on the PVR to the match-ing socket on your television.
1.4.3 Connecting the PVR to your TV using the RF output
If your television does not have an AV input, you will need touse the RF output from the PVR. In this case, you will needto connect a cable from the RF OUT socket (number 13 in thediagram) to the aerial connector on your television.
To ensure your television can also pick up existing analoguechannels as well, you will need to connect a cable from yourTV aerial or from the RF LOOP2 OUT connector on the backof the PVR to the RF IN connector (number 12 in the diagram).If you do not want to watch analogue TV channels any more,this link will not be needed.
After connecting the PVR’s RF OUT to your television, youwill need to tune one of the buttons on your television to chan-nel number 36 to see the output from the PVR.
1.4.4 Connecting to your HiFi system
If you wish to play the sound from the PVR through your HiFior audio visual system, you should connect either the S/PDIFdigital audio connector or the left and right audio connectorsto an input on your audio system.
1.5 Switching on for the first time
Now that you have your PVR connected, you should plug itin to a mains socket, and switch on at the wall. Ensure that

1.5 Switching on for the first time 11
your television set is turned on and that the correct input orchannel has been selected, so that you will be able to see thedisplay from the PVR.
Now, press the Standby button on the front of the PVR or onthe remote control. As the PVR starts, the front panel displaywill show first C4.56, followed by the word ‘run’. You willneed to perform some initial set up steps before you can startusing your TF 5800.
1.5.1 Searching for TV and radio channels
The first step in setting up your PVR is to search for the avail-able TV and radio channels.
If there are no channels stored, you will not be able to accessother menu options. If you ever use the Factory Setting op-tion in the menus to fully reset your PVR, you will have toperform this procedure again.
When you turn on the PVR, it may automatically display theService Search screen. If not, press the Menu button on theremote control, move to Installation with the arrow keys, thenpress OK.
On the next screen, move to Installation, and press OK again.Next select Service search and press OK.
On the next screen, move to Search Mode and ensure that theAuto option is selected —you can change options by using theleft and right arrows.
All the system menus work in this way; in future, we’ll simplyexplain which options to select; remember to move up anddown to highlight menu entries, left and right to change theoptions, and OK to select or confirm.
Next, move down to Start search, and then press OK. The PVRwill start to search for channels, and will display a list of TVand radio services as they are found.

12 Introduction and getting started
It may take several minutes for the search, and it is commonfor no channels to be found until quite late in the process.Be patient; when the scan is complete, you will see a mes-sage telling you how many TV and radio channels, or services,have been found. Press OK to save the list, and then pressMenu to move back to the main menu from the Installationscreen.
If you receive signals from more than one transmitter, or are ina poor reception area, you may miss some channels, or receiveduplicates of others when searching. You can find out how toresolve this problem in the Advanced Features section of themanual.
1.5.2 Basic system settings
As well as tuning your PVR in to the available channels, thereare also some other settings that you should check, to ensurethat you get the best performance from your new TF 5800.
Remember that you’ll also need to check these settings if youdecide to perform a full reset of your PVR at any time.
1.5.3 Time and date options
First, we’ll set the time options, which ensure that the PVRknows where it is, and displays the correct time for programmesin the Electronic Programme Guide. From the Main menu,choose System Setting, and then Time setting. You should seea screen like this one.

1.5 Switching on for the first time 13
First, select the top item in themenu, Mode, and ensure thatit is set to Auto; this will allowyour PVR to receive its timesignal from the television sta-tions, keeping it accurate all thetime. Next, move down to TimeOffset.
The left and right arrow keys change the offset in fifteen minutesteps; if you are not in the United Kingdom, you should usethis option to select the correct difference between your timeand GMT (or UTC as it is also known). Remember that thisdifference may change with the start or end of summer or day-light savings time.
If you are in the United Kingdom, you should ensure that theTime Offset is set to Auto; use the left key to decrease the timeoffset to 00:00, and then press left once more; the offset willnow say Auto, and your PVR will automatically change to andfrom British Summer Time.
Return to the previous menu, System Setting, and select A/VOutput Setting.
1.5.4 AV output settings
The AV output settings screen allows you to set the PVR op-tions to match your television set.

14 Introduction and getting started
Set the TV type to PAL for mostEuropean television sets. TheVideo Output option selects thetype of video signal that will besent via the TV SCART socket.You can choose between RGB,S-Video, YUV (also known ascomponent, and used with someflat-panel displays), and CVBS,also known as composite.
For most televisions, you will get the best picture by choosingthe RGB option. If, while you change this option, the pictureon your television disappears, or changes to black and white,simply use the arrow keys to select another option, until youcan see the display correctly. Some televisions may take a fewseconds to adjust to a new setting.
Use the VCR SCART setting to change how the signal from theVCR SCART connector is passed through to your television.When set to Standard, it will be automatic, and so will dependon the device you have connected to the VCR SCART; for ex-ample, a video recorder’s picture may display only when itis playing, while a DVD player may display all the time. Ifyou set this option to External A/V, then the picture from thedevice you have connected to the VCR SCART connector willonly appear on your television when you select it via the Satel-lite button on the remote control.
If you have a widescreen television, you should set the TVAspect Ratio option to 16:9; for a conventional television set,set it to 4:3.
The 16:9 Display format controls how widescreen programmeswill appear on a non-widescreen television. If you select LetterBox, then the picture will appear with black bars top and bot-tom; select Center Extract to see a picture that fills the wholescreen, with some of the side information lost.
1.6 Pay TV 15
You can cycle through the different display size options bypressing the 0 button on the remote control while watchinga programme; a message will appear in the top right of thescreen telling you which option has been selected, and the set-tings in this menu will also change.
The Sound mode allows you to select stereo, mono, left orright channels; you should normally leave this set to Stereo.
The RF Type should be set to PAL-I for UK television sets,and controls how the sound is sent when you are using theRF OUT connector on the back of the PVR to link to your tele-vision.
If you are using the RF OUT connector, you may also needto change the RF Channel option; it will initially be set to36, which is the same channel used by many video recordersfor their outputs; if you experience interference, you shouldchange this to a spare channel number.
If you do alter the RF Channel, you will also need to changethe appropriate tuning settings on any televisions connectedto the RF OUT connector.
When you have made the necessary changes, if any, to the set-tings in this menu, you’re ready to start using your PVR. Pressthe Exit key on the remote control to leave the menus, and turnto the next chapter, where we’ll explain the basic features andhow to use them.
1.6 Pay TV
Although most of the channels broadcast on digital televisionin the UK are free, including all BBC channels and all the exist-ing channels available on analogue television, there are a fewthat are only accessible via a subscription.
Your TF 5800 PVR is capable of receiving these additional chan-nels when it’s fitted with a subscription module. If you choose
16 Introduction and getting started
not to add a subscription module, you will still be able to seeall the free channels and listen to all the radio stations.
Your PVR will automatically detect all channels during thesetup procedure that we have described, including any payTV channels being broadcast, but you will need to install thesubscription module, called a CAM (Conditional Access Mod-ule) before you can view the pay channels.
To install a CAM, make sure your PVR is in standby mode,and pull down the flap at the right hand end of the front panel.
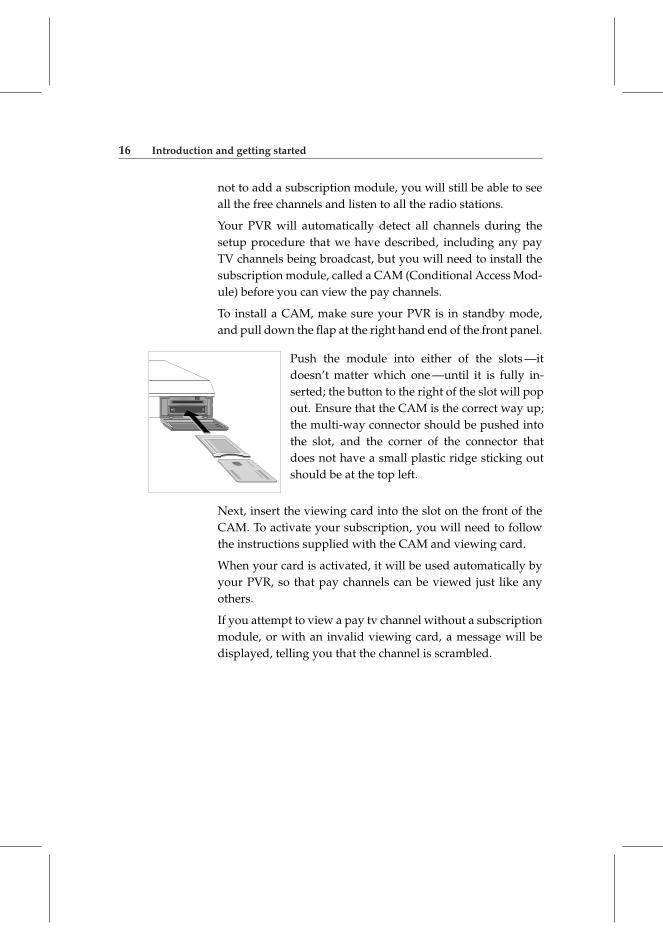
Push the module into either of the slots —itdoesn’t matter which one —until it is fully in-serted; the button to the right of the slot will popout. Ensure that the CAM is the correct way up;the multi-way connector should be pushed intothe slot, and the corner of the connector thatdoes not have a small plastic ridge sticking outshould be at the top left.
Next, insert the viewing card into the slot on the front of theCAM. To activate your subscription, you will need to followthe instructions supplied with the CAM and viewing card.
When your card is activated, it will be used automatically byyour PVR, so that pay channels can be viewed just like anyothers.
If you attempt to view a pay tv channel without a subscriptionmodule, or with an invalid viewing card, a message will bedisplayed, telling you that the channel is scrambled.

17
Chapter 2
Watching TV
Your PVR incorporates twin digital television tuners, allowingyou to pick up more channels than an older analogue televi-sion set, together with some radio stations that are also broad-cast on the digital TV service. In this chapter, we’ll explain thebasics of how you watch TV or listen to the radio with youPVR, and start to explore a few of the new features that it of-fers.
Why twin tuners?With an analogue television and a video recorder, there was atuner in each device, so you could watch one programme onyour TV and record another on your video. By having twintuners, the TF 5800 PVR allows you to do the same for digitaltelevision, unlike single tuner ‘digiboxes,’ where you can onlyrecord the channel that the box is displaying.
To start watching TV through your PVR, turn on your televi-sion set, and then press the Power button on the remote, or theStandby button on the front of the PVR.
Some televisions will automatically switch to the correct con-nector when the PVR is turned on; on others, you may need to

18 Watching TV
select the appropriate channel or input.
After a short pause, the word ‘run’ will appear on the frontpanel display of the PVR, shortly after that, you’ll see the tele-vision picture. The front panel will display the letter P, fol-lowed by the channel number.
2.1 Starting to watch television
Just after the picture appears, the information box will appearon screen; it looks a little like this:
This box appears briefly eachtime you change channel; as youcan see, at the left is the channelnumber, while the channel nameappears just to the right of it.Below that is the name of thecurrent programme, followed bya short description.
Further to the right, you’ll see a graph showing the signalstrength and quality, and below that is the current time, in-formation and a series of icons that indicate other informationabout the channel, such as whether or not subtitles are avail-able, or a $ symbol to indicate that a channel is a pay TV chan-nel.
You can see additional information about the current programmeby pressing the Info button [button picture] while the informa-tion box is on screen. Press Exit to hide it. Another press of theInfo button will display the box again.
You can also use the left and right keys on the remote controlto switch between the details of the current programme andthe next programme on the channel you’re viewing.

2.1 Starting to watch television 19
2.1.1 Volume control
Use the and controls on the remote to alter the volumeto a comfortable level. You may need to adjust the volumeon your television set too, so that the controls on the PVR’sremote give you a good range of control, without too muchnoise or distortion.
To temporarily switch off the sound, press the button onthe remote control. Press it again to restore the sound to theprevious level.
The PVR’s remote control changes the volume or mutes thesound sent through the TV SCART connector, the left and rightaudio connectors, and the RF OUT. Neither the volume nor themute buttons affect the signal sent to the VCR SCART connec-tor, or the S/PDIF optical connector.
2.1.2 Changing channels
The simplest way of changing channels is to press the appro-priate numbers on the remote control; if a channel numberhas more than one digit, don’t wait too long between each keypress.
For example, to switch to Five, press 5. To switch to ITV4,press 3 then 0.
You can also use the and buttons on the remote control;press either of these keys to move to the next or previous chan-nel in the list. They’re a good way of just flicking through thechannels to see what’s on —as each channel appears, the In-formation box will pop up, telling you the name of the currentprogramme.
If you’re not sure which channels you have, or you can’t re-member the correct numbers, press the List, or OK/List but-ton on the remote control, and you’ll see a display like this:

20 Watching TV
Here you can see all the TVchannels that your box has stored,with their channel number at theleft, and the name at the right.If any pay TV channels weredetected, they will be markedwith a $ symbol.
Use the up and down keys to move through the list, and pressOK to switch to the channel that you’ve highlighted.
2.1.3 Radio channels
As we’ve said, your PVR can also receive some radio channels.Don’t be surprised if you can’t see them in the channel list, orif you can’t change to them by typing in their number.
Radio and TV channels are kept separate, and to listen to aradio station, all you need to do is switch to Radio mode, bypressing the button on the remote control, and then selectthe radio channel you want to hear.
When the PVR is in radio mode, it works in just the same way,but the front panel will display a small letter R, followed bythe channel number of the radio station you’re listening to.
The only difference is that when you look at the channel list,or move through the channels with the P+ and P− keys, youwon’t see any television stations. Instead, you’ll just see theradio stations.
To switch back to watching television, just press the TV/Radiobutton again.

2.2 Electronic Programme Guide 21
2.2 Electronic Programme Guide
The Electronic Programme Guide, or EPG, is like a built-inversion of a TV listings magazine, allowing you to see whatprogrammes are on, for up to seven days ahead. You can seea short synopsis of each programme, and in the next chapterwe’ll explain how you can use the EPG to schedule recordingsof programmes that you want to watch.
To access the EPG, press the on the remote control. You’llsee a display like this, showing the current channel, with a listof the programmes following the current one.
The first time you access theEPG after switching your PVRon, it may take a few momentsfor the information to appear. Itmay also take a moment for theinformation to appear when youmove to a new channel.
Use the up and down keys to highlight different programmes;as you move down the list, you’ll see the short description ofthe highlighted programme change, in the bottom right quar-ter of the screen. If you can’t read the whole description, pressthe Blue button to see the next section of it, or use the Info keyto display the whole description in one go; another press ofthe same key will hide it.
The left and right arrow keys allow you to view the EPG fora different channel; when you use them, you’ll see that thepicture in the top right or the screen changes, so that it alwaysshows the channel for which you’re viewing the guide.
You’ll also see at the bottom of the screen that you can use the

22 Watching TV
Green and Yellow keys on the remote control to move back-wards and forwards by one day at a time, so you can easilysee what’s on tomorrow.
Finally, pressing the Red key on the remote will change theEPG from the current, single channel view, to a multi channelview, like this:
In this view of the EPG, you’llsee a time-line across the bottomof the screen, and a grid showingfour channels at a time, with theprogrammes for each channel.The green vertical line representsthe current time, so you can seehow close programmes are toending.
Use the left and right arrows to select programmes on the cur-rent channel; you’ll see their descriptions in the top left cornerof the screen, and just as with the single channel guide, youcan press the Info button to see more details, while green andyellow keys move by a day at a time.
If you’d like change the time span of the information, to in-clude more or fewer hours, use the Fast Forward and RewindKeys.
Use the up and down arrows to highlight a different channel;the picture at the top right of the screen will change. PressingGuide again, or Exit to close the EPG and watch the channelthat’s highlighted.
If you’ve moved a long way through the EPG to look at what’son in future, you can return quickly to the current time bypressing the Red button to switch to the other EPG view at thecurrent time, then again to switch back to your current view.
2.3 Time Shift television 23
2.3 Time Shift television
Because it has a hard disk inside, your PVR is able to con-stantly save the TV programme that you’re watching. Thatmeans that it can make TV more convenient than ever —youdon’t need to miss something crucial when the phone rings,or wonder what a character in a drama just mumbled, thanksto time shifting.
Time shifting just means that the most recent hour of the tele-vision channel you’re watching is saved on the PVR’s disk;each time you change to a new channel, it starts to save theprogramme you’re watching, so if you’ve been watching for20 minutes, all those twenty minutes will be on the disk. Ifyou’ve been watching for 85 minutes, then the most recenthour will be on the disk, and the first twenty five minuteswon’t be there any more.
What does all this mean to you?
2.3.1 Rewinding TV
Simple. When you’re watching live TV, and you want to seesomething again, just press the button on the remote con-trol, and the programme will start to play in reverse. To gofaster, press Rewind again.
When you reach the point where you want to start watching,perhaps to see a goal again, or to try and catch some importantdialogue, just press the button.
You’ll see a display at the top right hand corner of the screen,telling you how far behind live TV you are and, if you like, youcan use the key to move forwards again, until you catch upwith the live broadcast.
When you do that, you’ll see a message with the word ‘Live’at the top right corner of the screen.
24 Watching TV
If you change channel, the PVR will discard the informationon its disk, and start recording the new channel, so if you swapchannels during the ads, you won’t be able to rewind when goback to the previous channel. Since looking at other channelsin the EPG changes channel, it also clears the time shift infor-mation.
While the Rewind function is useful, the fastest speed is onlythree times normal. If you want to go back a long way, it’squicker to use the Progress bar instead.
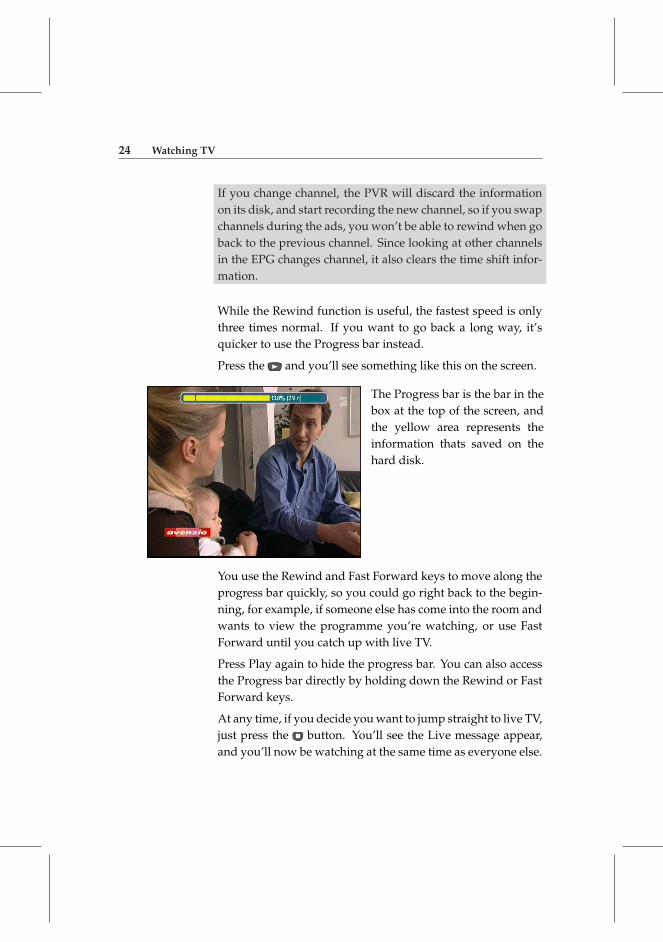
Press the and you’ll see something like this on the screen.
The Progress bar is the bar in thebox at the top of the screen, andthe yellow area represents theinformation thats saved on thehard disk.
You use the Rewind and Fast Forward keys to move along theprogress bar quickly, so you could go right back to the begin-ning, for example, if someone else has come into the room andwants to view the programme you’re watching, or use FastForward until you catch up with live TV.
Press Play again to hide the progress bar. You can also accessthe Progress bar directly by holding down the Rewind or FastForward keys.
At any time, if you decide you want to jump straight to live TV,just press the button. You’ll see the Live message appear,and you’ll now be watching at the same time as everyone else.
2.3 Time Shift television 25
2.3.2 Pausing TV
Rewinding is useful to see something again, but if you don’twant to miss something, press the button instead. You’llsee a pause symbol appear at the top right of the display, anda counter showing you how far behind live TV you are.
When you want to carry on watching, just press Pause again,or press Play, and you can carry on from where you left.
You’re now watching time-shifted TV, and you can use the fastforward and rewind buttons, just as we described above. Pressthe Stop button at any time, or use Fast Forward, to return tolive TV.
Why not press Pause when your favourite programme starts,then go and put the kettle on? When you’ve made your drink,press Play to start watching, and then Fast Forward throughthe ad breaks, until you’ve caught up with live TV again.
Note that time shifting is not possible if your box is watch-ing a third channel while recording two others at the sametime, since that would require a third recording to be made.
Now that you know how to watch TV, and use the PVR to timeshift live TV, turn to the next chapter, where we’ll explain howyou can schedule and play back recordings of programmes.

26 Recording and playing TV programmes
Chapter 3
Recording and playing TV
programmes
At the heart of your Topfield PVR is its ability to record andplay back television programmes using its hard disk. Youdon’t need to worry about finding a blank tape, or recordingover something important —and, unlike a VCR, the quality ofthe recordings is just the same as the original broadcast.
With a large hard drive, you can store many hours of record-ings —roughly 80 hours if your PVR has a 160Gb disk, or 125hours on one fitted with a 250Gb disk.
In this chapter, we’ll explain how you can set your PVR torecord programmes for you, how to play them back, and someof the other basic functions that will help you make the mostof your TF 5800.
3.1 How your PVR records
Before we start looking at the different ways you can record,we’ll explain each of them, so you can decide which is the bestoption to use.

3.1 How your PVR records 27
Instant recordings are just like pressing the record button ona video recorder; the PVR starts to record the programme thatyou’re watching, so if a programme is just about to start, youcould begin an instant recording, without having to worryabout setting the timer.
Current event recordings are similar to instant recordings, forthe channel that you’re viewing. But instead of just record-ing from when you start, they include some or all of the timeshift information, allowing you to save material that you’vealready seen. So, if you’ve been watching a programme anddecide that you’d like to see it again, a ‘current event’ record-ing will save the parts you’ve already watched, as well as therest of the programme.
Note that only material that’s in the time shift can be saved,so if you’ve just changed to a channel, you won’t be able tosave parts of the programme that were on before you changedchannel.
Scheduled recordings are recordings that are made by tellingyour PVR what channel you would like it to record, and atwhich time. The PVR will automatically turn on if it’s in standbymode, save the programme on the hard disk, and the switchoff again —just like setting a recording on a VCR.
So, as you can see, there are different ways of starting record-ings, depending on the circumstances, but don’t worry —they’reall quite easy to use, and we’ll explain each one in turn.
And, thanks to the Electronic Programme Guide, schedulingrecordings is much, much easier than with a video recorder.You can simply look through the EPG, and press a coupleof buttons to select programmes that you would like to haverecorded.
Thanks to its twin tuners, the TF 5800 can actually record twothings at the same time, so you don’t need to miss out on any-thing just because two programmes clash on a night whenyou’re out with friends. You can even watch a programme
28 Recording and playing TV programmes
you’ve recorded previously while it’s making two new record-ings, or watch a different TV channel. We’ll explain later howall of this is done —and some restrictions on what you can dowhen recordings are being made —but first, we’ll look at thebasics. You’ll be recording your favourite shows in no time atall.
3.2 Instant recording
An instant recording is just what you’d expect; simply pressthe button on the remote control, and the PVR will start torecord for two hours.
You’ll see a record icon appear in the top right hand corner ofthe screen for a few seconds, like this:
The recording will be automatically named, using thename of the current programme. If you don’t want torecord for two hours, you can simply stop the record-
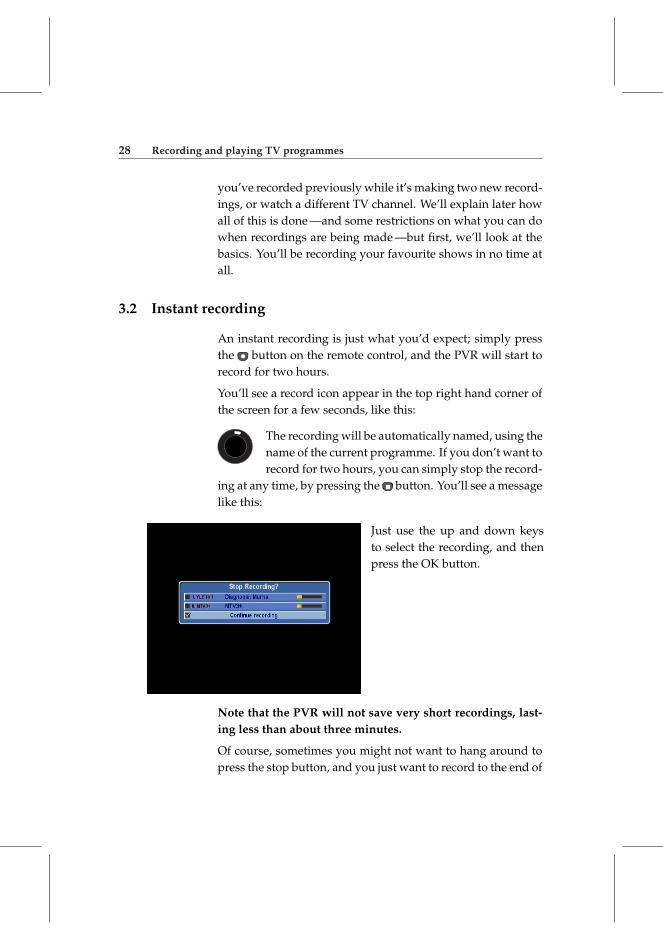
ing at any time, by pressing the button. You’ll see a messagelike this:
Just use the up and down keysto select the recording, and thenpress the OK button.
Note that the PVR will not save very short recordings, last-ing less than about three minutes.
Of course, sometimes you might not want to hang around topress the stop button, and you just want to record to the end of

3.2 Instant recording 29
the programme, or for the next fifteen minutes. No problem!
After starting the recording, just press the Record button again,and a menu will be displayed on the screen, like this:
Use the up and down keys onthe remote to select one of theoptions. With the first one, thelength, you can use the left andright keys to increase or decreasethe recording time.
Often though, it’s more convenient to say which programmeyou want recorded, and that’s what the next two options letyou do. The first tells the PVR to stop at the end of the currentprogramme, and the second tells it to stop after the followingprogramme, so if you know that your favourite show is on in afew minutes, you can start an instant record, and tell the PVRto stop at the end of your favourite show.
Remember that the recording will be automatically namedbased on the programme that’s being watched when you firstpress Record. So, if you’re watching the news, and realisethat you want to record the drama that’s on next, you can tellyour PVR to stop recording after the drama has ended, but therecording will have the name of the news programme.
Below the options for when to stop recording, you’ll also seeanother option, to pause the recording. You might want to usethis, for example, if there’s a news bulletin in the middle of afilm you’re recording. Just press the Record button, select thePause option and press OK. Then, when the news bulletin fin-

30 Recording and playing TV programmes
ishes and the film starts again, press Record and then chooseto continue recording.
3.3 Current event recording
Instant recordings are useful if you’ve not missed much of aprogramme, or you want to record the programme that’s onnext, but with a current event recording, you can also includethe bits of the programme that you’ve already watched, aslong as you haven’t changed channels at all.
They’re not quite as easy to start as an instant recording, butonce you’ve seen how, you’ll find it’s quite straightforward.
Instead of pressing the Record button, you record the cur-
rent event by pressing on the remote control to displaythe PVR’s main menu. Select Recording, and then you’ll see ascreen like this.
Move to Start Time and thenuse the left and right arrows onthe remote control to change thesetting to Current event. Now,move down to Record Start andpress the OK key. The PVR willautomatically work out howmuch of the programme is left torecord, and set the length of therecording for you.
You’ll see a message telling you that the recording has started,
and you can press to return to viewing.
There’s another way to record some of the current event too,with fewer button presses, but without the PVR working outwhen to stop the recording. Just use the Rewind key to moveback through time shift television, as we described in the pre-

3.4 Scheduled recordings 31
vious chapter. Then, when you reach the point where you’dlike the recording to start, press the Record button on the re-mote control, as if you were starting an instant record. Therecording will automatically include everything from yourcurrent position onwards. Press Stop to jump back to liveTV, and press Record to display the menu with options forthe recording’s duration, just like instant recording.
3.4 Scheduled recordings
Of course, a lot of the time you’ll be using your PVR to recordprogrammes because you won’t be in when they’re due to bebroadcast, so you need to schedule recordings. Your PVR willwork through the list, automatically recording at the appro-priate time, and even wake up from standby if necessary.
3.4.1 Scheduling a recording using the EPG
The easiest way to schedule a recording is using the ElectronicProgramme Guide —the PVR will automatically set the cor-rect time, channel and duration.
Before we go further, you need to know that there are twotypes of entry you can make in your PVR’s recording sched-ule.
The first is called ‘preselecting,’ which means that the PVRremembers that you want to watch the programme you’ve se-lected. It will switch to the appropriate channel at the righttime, so that you dont miss the programme, but it won’t actu-ally record.
The second type of entry in the schedule is a recording; thePVR will switch to the appropriate channel and record the pro-gramme on its hard disk for you to watch later.
You can schedule up to seventy different events, and eventscan overlap each other, so you can tell your PVR to record a

32 Recording and playing TV programmes
programme that starts on one channel, and then to change toanother channel fifteen minutes later to watch something else,for example.
You cannot have more than two things scheduled at the sametime, regardless of whether they are recordings or pre-selections,and you can’t pre-select two things at the same time —youcan only watch one TV programme after all! If you try toschedule too many overlapping events, the PVR will displaya message.
Now, let’s see how to create an entry in the schedule. It’s veryeasy. Press the button to display the EPG. You can sched-ule from both the single channel and the multi-channel views,so browse around the EPG until you see a programme thatyou want to record, and move to it with the arrow keys.
When you’ve highlighted the programme —the box contain-ing the name will turn yellow —just press the OK button, anda letter P will appear in the box, like in the picture here.
That’s all you have to do, if youwant to watch a programme. Ifyou’d like to record it instead,just press OK again, and the Pwill turn into a red R. As youbrowse through the EPG, you’llsee the P or R markers on theprogrammes you’ve alreadyscheduled.
If you decide that you’d like to remove the programme fromyour schedule, just move to it again and press OK. If the pro-gramme was pre-selected, the P will turn to an R; if it wasalready set to record, it will be deleted from the schedule —sotwo presses of OK will delete a pre-selection.

3.4 Scheduled recordings 33
You can also schedule a recording with one key press in theEPG by highlighting a programme and pressing the Recordbutton; the red R mark will appear.
3.4.2 Altering the details
As you can see, scheduling recordings couldn’t be easier. Butwhat if you’d like to record a programme each time it’s on?Then, you’ll need to create a timer that repeats automatically.
And what about programmes that start or end at the wrongtime? It’s frustrating to miss an important part of somethingbecause the news went on longer than normal.
Don’t worry —it’s very easy to alter the details of a recordingthat you’ve set from the EPG. You can do it at the same timeas you schedule the recording, or later, by finding the P or Rin the EPG.
Either way, all you have to do is press the Record button whenthe entry is highlighted in the EPG, and this screen will ap-pear.
The top three items can’t bechanged; for a pre-selection, theRecord type will say Off, whilefor a recording it will say On. Ifyou want to change between thetwo, press Record again to closethis screen, and then use theOK button to change betweenpre-selection and recording.
The first item you can change is labelled Mode, and is how of-ten the recording will be made. To start with, it will be set toOne time, Use the arrow keys to select other options, depend-ing on when the programme is repeated.

34 Recording and playing TV programmes
Use Weekly to record on the same day each week, for examplea programme that is on every Thursday.
Use Every Weekday to record at the same time, Monday toFriday.
Use Every Weekend to record at the same time on both Satur-day and Sunday.
Use Every Day to record at the same time, seven days a week.
Below, you can choose the date on which the first recordingwill take place; use the arrow keys to change the date.
Next, you can change the start time and the duration; you maywant to do this to ensure that you record the whole of a pro-gramme, even if it starts a few minutes early, or ends a fewminutes late.
The start time and duration are independent of each other, soif you have selected a one hour programme that is due to startat 19:00, and moved the start time to 18:57, remember that theduration will also need to be increased to 63 minute to finishat the original time, or longer if you want to allow for laterunning as well. If you change the start time so that it movesfrom one site of midnight to another, remember to change thedate too.
Underneath the running time, you’ll see the name that will beused to store the programme on the PVR’s hard disk. We’llexplain later in the manual how you can change it. For now,simply move down to the next line, and press OK to save yourchanges to the schedule.
You can abandon your changes to the schedule by pressing theRecord button while the editing screen is displayed.
If you have altered the details of a recording, for example bychanging the start and end time, or setting it to repeat, youwill see that the R symbol in the EPG is changed to Rt.

3.4 Scheduled recordings 35
3.4.3 Viewing your recording schedule
Once you’ve scheduled a number of recordings, you’ll prob-ably want to see which programmes you have added to yourschedule, or you may even want to remove an entry from yourlist, without having to look through the EPG to find them all.
To see the recording schedule, press the button to displaythe PVR’s main menu, and then select Recording. On therecording menu, choose the last option, Timer setting, andyou’ll see this:
As you can see, the list shows thedate, time and duration of therecordings that you’ve sched-uled, together with the channelnumber.
The symbol at the right shows whether a recording is for aTV or a radio station, and just to the left is an abbreviation forwhether or not a recording is repeated; it will show OT for onetime, WL for weekly, WD for weekdays and WE for weekends.
If a recording is scheduled to repeat, the time and date in thelist will be the next time the recording will take place.
To see more details of a recording, highlight it with the arrowkeys and then press OK. As you can see, this is the same screenas the one that appears when you edit the details of a record-ing from the EPG, and it works in just the same way.
If you’d like to delete a recording from the schedule, simplymove to it and press the Green button on the remote control

36 Recording and playing TV programmes
Press Exit to return to viewing from the recording schedule.
Scheduling a recording without using the EPG The programmeinformation that’s broadcast with digital TV signals usuallycovers a week’s worth of programmes, but sometimes thereare technical errors that mean it doesn’t go that far into thefuture, or perhaps you’ve heard about a programme that’s onnext month, and you want to schedule a recording while youremember.
It’s very easy to do —you can create a scheduled recordingwithout using the EPG. First, you need to access the recordingschedule in the way we’ve just described.
Then, press the Red button on the remote control to create anew entry. You’ll see a screen like this appear:
Make sure the Record option isOn, and then move down to thenext option and choose whetheryou want to record a TV or aradio channel.
On the next line, you can use the left and right arrows to movethrough the channels, or press OK to see the list, then move toone and press OK.
Next, select the mode —how often the recording will be made,for example daily, weekly, or just one time. On the next linedown, use the arrow keys to pick the date for the recording.
The start time will automatically be set to the time when youbegan creating the timer; you can either change it with thearrow keys, or just type in a time, using the 24 hour clock, for

3.5 Things you should know about recording on your PVR 37
example 1745 for quarter to six in the evening.
Below the start time, set the duration, and then simply movedown to the OK line, and press OK. The PVR will automat-ically give your recording the name of the programme that’sbeing broadcast when it starts.
If you’d like to choose your own name for a recording, youcan enter one using an on-screen keyboard, by changing theFilename option. We’ll explain more about advanced featuressuch as this later on in the manual.
3.5 Things you should know about recording on your PVR
As you can see, recording is very easy with your TF 5800. Butit’s a sophisticated piece of equipment, and there are somethings that may seem a little peculiar when you start to useit more. Here are some of the things you need to bear in mind.
3.5.1 Dual recordings
Since it has two tuners, your PVR can record two things at thesame time. You don’t need to do anything complicated —itworks out for you which tuner it needs to use. You can starta second recording simply by switching to another TV chan-nel and pressing the Record button, or you can schedule tworecordings for different programmes at the same time on dif-ferent channels.
When dual recording is in progress, you’ll see a second roundsymbol at the top right of the display, and if you press the Stopbutton to finish a recording, you’ll see a display like this:

38 Recording and playing TV programmes
All you have to do is select therecording that you do want tostop, and press OK.
3.5.2 Watching television while dual recording
While you’re recording two channels at the same time, you canwatch either of the channels you’re recording. In fact, some-times you can watch a completely different channel —that’sbecause of the way in which digital television is transmitted.
The simplest way to see which channels are available whenyou’re recording two things at the same time is to press the
button on the remote control.
You’ll see the channel list, but if you look closely, you maynotice that some of the channels have a grey background, in-stead of the usual blue; these are channels that you can’t selectto view during your dual recordings. You will be able to selectany of the other channels, either from the list, or by enteringtheir number.
3.5.3 When recordings start or stop
Sometimes, when recordings start or stop, the PVR may needyour attention; for example, if you’re watching a channel thatwon’t be available when a second recording starts.
When this happens, the PVR will display a message on thescreen. If you want your recording to take place, you need

3.5 Things you should know about recording on your PVR 39
to select Yes when this message appears (if you leave it onscreen, the PVR will select Yes for you after a short pause). Ifyou select No, or press Exit, then the recording will not takeplace, and you will carry on watching the current channel.
If you are watching a programme that is still being recorded,and have rewound so that you are not watching the live broad-cast, when the recording stops, the PVR will automaticallystop your playback too, returning you to live TV.
Additional software, called TAPs, can be loaded on to yourTF 5800 PVR, and can automatically return you to what youwere doing, if the PVR interrupts your viewing.
3.5.4 Leaving the PVR in standby
You do not need to leave your PVR running all the time tomake recordings. If you have scheduled recordings, the PVRwill automatically switch on.
It will return to standby automatically at the end of the record-ing, unless you have used any of the controls on the remotecontrol or the front panel during the recording. If you use thecontrols, the PVR assumes that you want to carry on watchingtelevision when the recording has finished.
Note that if your television turns on automatically when thePVR switches on, it may also be turned on when the PVRwakes up from standby for a scheduled recording.
3.5.5 Switching off while recording
If you attempt to switch the PVR off while a recording is inprogress, you will see a message displayed on screen, askingyou if you want to switch off and terminate recordings.
Choose No to continue recording. If you choose Yes, all yourrecordings will be stopped, and the PVR will return to standby.

40 Recording and playing TV programmes
You can instruct the PVR to return to standby after the cur-rent recordings have finished, using the Sleep timer. Pressthe key on the remote, and move to the bottom option,Sleep timer. Use the right arrow key to choose 10 minutes, andthen press OK. The PVR will count down the sleep timer untilthere is one minute left. If your recordings are still in progress,it will then wait until they have finished, before returning tostandby.
3.5.6 How recordings are named
If you record two or programmes with the same name, thePVR will automatically rename the second and subsequentrecordings, by adding a —and a number to the name. For ex-ample, if you already had a recording called Rome, the nextepisode to be saved would be called Rome-2, and the one af-ter than Rome-3. If you deleted the first one, then the nameRome would be used again. We’ll explain in the next chapterhow you can change programme names yourself.
3.6 Playing back recordings
Now you’ve made some recordings, let’s take a look at how toplay them back. It’s very easy. All you have to do to get startedis press the button on the remote control, and you’ll see thelist of recorded files, like this.

3.6 Playing back recordings 41
As you can see, the recordingshave the names of the programmesthey contain. Move up and downwith the arrow keys, and you’llsee that the bottom section of thescreen shows additional infor-mation, including the channel,date and time of the recording,and the start of the programme’sdescription.
You can see more of the description by press the Info buttonon the remote control.
You’ll also notice that, at the bottom left of the screen, there’sa message telling you how much of the space on your PVR’sdisk is free, and how much there is in total.
To start playing a programme, all you need to do is move toit with the up and down keys on the remote control, and thenpress the OK button. It will start playing from the beginning,and when it finishes, you’ll see a message on screen saying‘Playback stopped,’ before you are switched to live TV.
One of the most useful features you’ll notice is that you’ll seeprogrammes appear in the archive list as soon as they startrecording; when you highlight them, the bottom left sectionof the screen will show the progress of the recording. If youselect a programme that’s still recording, it will play just likeany other recording. That means that you can start to watchthe beginning while the end is still being recorded!
Your PVR also has the ability to play back MP3 files and tohave additional software installed on it —features we’ll lookat later on; files for each of those functions appear in turnwhen you use the Fast forward or Rewind buttons when inthe archive, so if you cannot see the list of programmes youexpected, press one of those keys until the list appears.

42 Recording and playing TV programmes
3.6.1 Playback features
While you’re playing back a recorded file, you can use thepause, rewind and fast forward features, just the same as whenyou’re watching time shifted TV, so pressing once plays atdouble speed, press again for four times normal speed, andagain for six times.
The button will go backwards at 1, 2 or 3 times normalspeed, and just like in time shift, if you hold down either Rewindor Fast forward, the Progress bar will appear, and you canmove quickly through the programme. You’ll notice that theProgress bar has a small red line, which represents your cur-rent position, and you’ll see it move as you hold down thekeys.
You can also use the Progress bar to skip quickly through ad-verts, if you have no bookmarks in a file. Press Play to displayit, and then press the Yellow button on the remote to skip for-ward thirty seconds for each press, then press Play again tohide the Progress bar.
During playback, the information box will display details ofthe programme you’re watching, so you can view the full de-scription of an episode, for example, by pressing the but-ton twice.
To stop play back of a programme, just press the Stop key;pressing the OK/List button will take you back to the archive,with the programme you are watching highlighted.
3.6.2 Bookmarks and resume play
Your PVR can keep track of which programmes you’ve watched,and how much of them, so that if you have to stop watching aprogramme for any reason, you can carry on from where youleft off.

3.6 Playing back recordings 43
To use this ‘resume playback’ feature, simply highlight a pro-gramme in the archive list, and then press the button onthe remote, instead of OK. Playback will start from the sameplace where you stopped viewing previously.
While resume play is useful when you want to carry on whereyou left off, sometimes you might want to mark favourite partsof a programme, like a great song in a concert. You can do thatby creating bookmarks, and you can have as many of them ina programme as you like.
To create a bookmark, you first need to display the Progressbar, which is done by pressing the button. Next, pressthe Green button on the remote control, and you’ll see a smallgreen dot appear just above the bar, like the picture below.
If you press the Green buttonwhen you’re at or close to theposition of a bookmark, it willbe removed, so if you realise youdidn’t want to set one, a secondpress will remove it.
To jump to a bookmark, display the Progress bar again, andpress the Yellow key. You’ll see the marker move to the nextbookmark, and playback will continue from that point. If thereare several bookmarks, just press Yellow until you reach thecorrect one.
If the PVR interrupts your playback, for example because itneeds your attention when a recording starts or ends, it willcreate a bookmark automatically at your current position, soyou can jump back to where you were easily.

44 Recording and playing TV programmes
3.6.3 After you’ve watched a recording
When you’ve watched a recording, you can keep it for as longas you like. If you decide that you don’t want to watch it,display the Archive screen, and then highlight the recordingand press the White key on the remote control. You’ll be askedif you want to delete the recording, and if you choose Yes andpress OK, it will be deleted, freeing up disk space.
It is not possible to recover a programme once you havedeleted it.
In the next section, we’ll explain how you can organise yourPVR’s hard disk, for example by storing all the episodes of aseries together.
Although the PVR does not restrict how long you can keep arecording, you should note that recordings made from pay TVchannels may only be playable for a short period, dependingon the restrictions set by the pay TV company. More informa-tion about pay TV can be found in the advanced section of thismanual.

45
Chapter 4
Extra features
Now you know how to watch TV, choose programmes to record,and play them back, let’s look at some of the other extra fea-tures that the PVR provides, and which you may find yourselfusing quite often. There are also some even more advancedfeatures, like connecting to your PC, which you won’t use asoften, and which we’ll leave until later.
In this chapter, we’ll look at some of the features that yourTF 5800 provides to help you get the best from digital tele-vision, and at ways in which you can start to organise yourchannels and recordings in ways that are more convenient toyou.
4.1 Make the most of digital TV
Digital television provides some extra features that you mightnot be used to on analogue broadcasts, and also new ways ofdoing some things you’re familiar with. We’re going to lookat some of the most useful of the extra features on your PVR.

46 Extra features
4.1.1 Subtitles
If you used subtitles on an analogue broadcast, you’re proba-bly used to accessing them through the teletext service. Withdigital TV, they’re separate, and you can turn them on and offeasily using the Opt button [Opt button picture] on the remotecontrol.
Press the Opt button, and a small menu box will appear onscreen. Choose Subtitle Track, and press OK. Now you’ll seeanother menu, showing the subtitles available. English lan-guage subtitles will be labelled DVB [eng] and Welsh onesDBV [wel]; just highlight the subtitles you want, and pressOK to turn subtitles on.
To turn subtitles off again, go to the same menu, and selectDisable.
Digital Teletext is not available when subtitles are turnedon.
If you have a hearing difficulty, and would like subtitles tobe displayed automatically each time you switch your PVRon, press the Menu key, choose System Setting, then LanguageSetting and set 1st Subtitle Language to English or Welsh.
4.1.2 Sound tracks
Digital television offers the option of having more than onesoundtrack. So, for example, a foreign language film could bebroadcast with both the original and the dubbed soundtrack,allowing viewers to choose which version to listen to.
You can switch between soundtracks by pressing the Opt keyon the remote control, then selecting Sound Track. You’ll seethe available soundtracks listed, such as ‘eng’ for English or‘wel’ for Welsh, together with an Auto option. If you chooseAuto, the PVR will automatically select the soundtrack thatmatches your language settings.

4.1 Make the most of digital TV 47
4.1.3 Picture in Picture
Since it has two tuners, your PVR can record two differentchannels at the same time, as we’ve already seen. It can alsoallow you to watch two different channels at the same time,too, using Picture in Picture (PiP).
To start PiP, just press the button on the remote control. Asmall picture will appear in the top right section of the screen.Each time you press PiP move again, it will move one positionclockwise around the screen,
Pressing PiP move when you have moved the small picture tothe top left section of the screen will hide the small picture.
At first, the picture will show a smaller version of the channelthat you’re watching; you can change the channel in the smallpicture by pressing the White button on the remote control.
Just select a channel from the listthat appears, and the small pic-ture will change to that channel.
If you change channels in the normal way, the small PiP willstay on the channel it was previously set to, and the main pic-ture will change; you’ll always hear the sound from the mainpicture, rather than the smaller one.
At any time, you can swap between the two pictures, makingthe main one smaller and the small one larger, by pressing the
button.
48 Extra features
If you are recording two programmes, the choice of channelsavailable for the Picture in Picture may be limited, just as youcan only view certain channels when recording two channelsat the same time.
4.1.4 Digital teletext
Digital teletext provides a more colourful, simpler to use ser-vice than traditional teletext. Instead of having to select pagesby typing in their numbers, you can choose items from on-screen lists, and pages can contain photographs or even tele-vision pictures.
Many channels call their digital teletext services ‘interactive,’since they can provide much more than just pages to read.They can tell your PVR to tune to a different channel, for ex-ample, where you may find coverage of a different sports match,or the latest news headlines.
On services like the BBC News interactive pages, you can evenchoose for which of two video clips you would like to hear thesoundtrack.
Most channels will display a message on screen if there areinteractive services available, often in the form of a small re-minder to ‘Press Red.’ When you see a message like this, youcan press the red button on your remote control.
Usually, you can return to watching TV by pressing the TEXTbutton, and on most channels the TEXT button will also startdigital teletext too, if it’s available.
While you’re using digital teletext, the number keys on yourremote control, the arrow keys, coloured keys and the OK but-ton are used to select items on screen or move to different partsof the teletext service.
Since each service, such as BBCi or Teletext uses its own de-sign, we can’t give a detailed guide here; just look for on-

4.1 Make the most of digital TV 49
screen instructions, and remember that pressing the TEXT but-ton will take you back to watching TV.
Using the P+ and P− buttons to change channel while in dig-ital teletext will also return you to normal television viewing.
Digital teletext pages may change channels to show you extrainformation, and when this happens, you’ll see the front paneldisplay of your PVR change to show the new channel number.
Sometimes, however, for example if you’re recording two chan-nels simultaneously, the PVR may not be able to access the in-formation that the digital teletext is trying to display, just asyou can’t always select the channel you want if you’re record-ing two things at the same time. When this happens, you’ll seea message telling you that the interactive service isn’t avail-able.
4.1.5 Sleep timer
Your Topfield PVR doesn’t use much electricity when it’s turnedon, but even so, you can help be kind to the planet by remem-bering to put it into standby mode when you’re not watchingTV.
The built in sleep timer makes sure your PVR will switch off,even if you’ve fallen asleep in front of the television.
Like the soundtrack and subtitle options, you can access thesleep timer by pressing the Opt key on the remote control. Thelast item on the menu is Sleep timer

50 Extra features
Select the sleep timer with theup and down arrows, and thenuse the left and right arrows toincrease or decrease the time pe-riod, then press OK. At the endof the time you choose, whichcan be between ten and 120 min-utes, the PVR will automaticallyreturn to standby.
When the sleep timer has been started, pressing the Opt keywill display the menu again, and the time remaining will beshown next to Sleep timer. You can cancel the timer by usingthe arrow keys to select disable, or change the time remaining.
4.2 Organising channels
One of the great things about digital TV is that there are lotsof channels, and lots of things to watch. But that can also bea little confusing —with so many channels, you may not wantto look through what’s on all of them, if you’re not interestedin news or quiz shows, for example.
4.2.1 Favourite channels
Favourite channels allows you to tell your PVR which chan-nels you’re interested in. When you call up the EPG, or usethe P+ and P− buttons to move through the channels, you’llsee only those that you’ve marked as favourites, so it’s quickerand easier to find the things that interest you.
You’ll still be able to watch any channel you like by entering itsnumber, or by using the List button to see the full channel list,but favourites make it much easier to flip through channelsand see just the ones you enjoy.

4.2 Organising channels 51
4.2.2 Setting up favourite channels
Before you can use the favourites facility, you need to organisechannels into groups of favourites. You can have up to thirtygroups of favourite channels, so you could have one list ofmusic channels, one of news channels and one of other chan-nels. Or each member of your family could have a list of theirown.
To start creating lists of favourite channels, press Menu andselect Organizing Favorites.
On this screen, the first columnshows the groups of favouritechannels. The second columnshows all the channels that arein the group you’ve selected,and the third column showsother channels. You’ll see thatsome types of channels, such asMovies and News have a groupalready created.
You can add more groups if you like, and you don’t have touse the ones that are already created —you can just leave themempty.
To see the list of radio channels, instead of TV channels, pressthelinefigRadioButton button on the remote control.
Let’s start simply, by adding News channels to the existinggroup. Use the up and down arrows to select News in thefirst column, then press the Red button on the remote to moveto the list of TV channels. Move through the list until youfind a news channel, for example BBC News 24, and press theOK button to add it to the favourites list. You can find otherchannels and add them too.
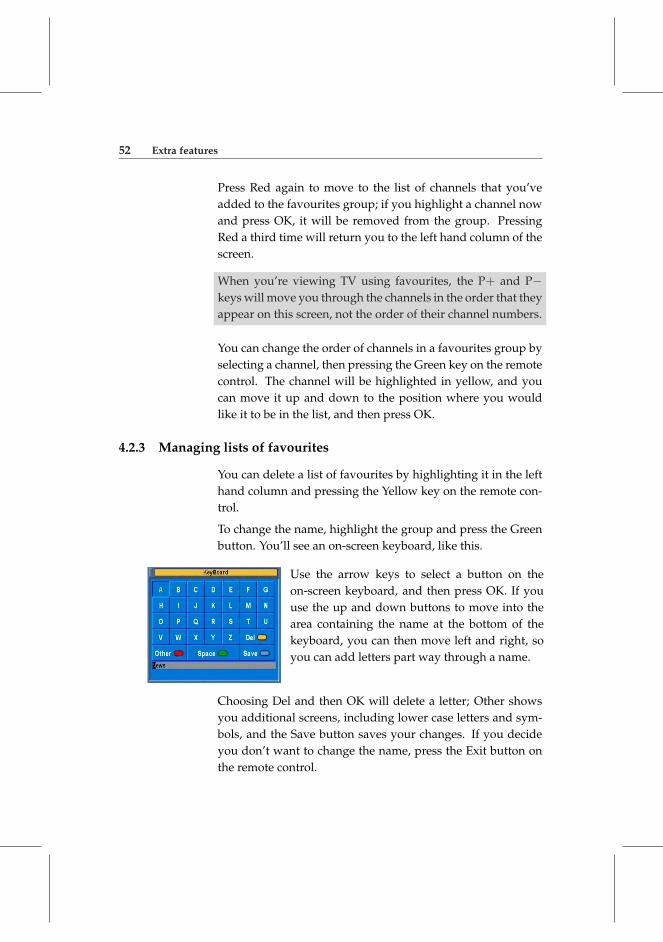
52 Extra features
Press Red again to move to the list of channels that you’veadded to the favourites group; if you highlight a channel nowand press OK, it will be removed from the group. PressingRed a third time will return you to the left hand column of thescreen.
When you’re viewing TV using favourites, the P+ and P−keys will move you through the channels in the order that theyappear on this screen, not the order of their channel numbers.
You can change the order of channels in a favourites group byselecting a channel, then pressing the Green key on the remotecontrol. The channel will be highlighted in yellow, and youcan move it up and down to the position where you wouldlike it to be in the list, and then press OK.
4.2.3 Managing lists of favourites
You can delete a list of favourites by highlighting it in the lefthand column and pressing the Yellow key on the remote con-trol.
To change the name, highlight the group and press the Greenbutton. You’ll see an on-screen keyboard, like this.
Use the arrow keys to select a button on theon-screen keyboard, and then press OK. If youuse the up and down buttons to move into thearea containing the name at the bottom of thekeyboard, you can then move left and right, soyou can add letters part way through a name.
Choosing Del and then OK will delete a letter; Other showsyou additional screens, including lower case letters and sym-bols, and the Save button saves your changes. If you decideyou don’t want to change the name, press the Exit button onthe remote control.

4.2 Organising channels 53
To create a new list of favourite channels with a name of yourchoice, select the bottom item in the left hand column, —NEW—and press OK. The on-screen keyboard will appear, and youcan choose a name for your group. Select Save when you’veentered the name, and then add channels to it, just as you didfor the existing groups.
After you’ve made changes on the Organising Favorites screen,remember to press the Menu button to return to the mainmenu, so that your changes will be saved.
4.2.4 Watching TV using favourites
To select a group of Favourites, press the Opt key on the re-mote control, then select Fav List, and press OK again. You’llsee two menus on screen, like this, showing favourite groupsthat have one or more channels in them:
Choose the group of favouritesthat you’d like to use, and pressOK, then select a channel fromthat group, and press OK again.You’ll see the name of the groupappear at the top right of thescreen.
The name will also appear briefly when you change channels,to remind you that you have a group of favourites selected.When you view the multi-channel EPG, you’ll see only thechannels that are in your currently selected group of favourites.
You can select a group of favourites without using the Optmenu by pressing List when the channel list is displayed, so

54 Extra features
pressing the List button on the remote twice is a quick way toaccess favourites.
4.3 Organising recordings
When you’ve recorded more than a handful of programmes,you’ll realise that it can take some time to find the things youwant to watch after pressing the Archive button on the remote,as you have to move up and down the list, through pages ofnames, to find the programme you’re looking for.
Fortunately, there are lots of ways that you can make it easierto find things, besides just deleting recordings using the Whitebutton on the remote.
Normally, the most recent recordings will appear at the bot-tom of the archive list, but you can also view the list by nameor size of the recording.
To do that, press the Blue button, and you’ll see this menuappear.
The Sorting option can be set toTime, Size and Alphabetic.
4.3.1 Renaming recordings
If you want to change the name of a recording —perhaps toadd a better description, for example —move to it in the archive

4.3 Organising recordings 55
list, then press the Blue button, and select Rename.
You’ll see an on-screen keyboard appear. It works just thesame way as we explained above, when we looked at Favourites.Just select Save when you’ve changed the name, or press Exiton the remote to abandon the changes.
4.3.2 Organising recordings
One of the best ways to organise your recordings is by sortingthem into folders, just like you organise the folders on yourcomputer’s hard disk. To create a new folder, press the Greenbutton on the remote control. The first new folder will becalled GROUP 01, and you can rename it to something moremeaningful using the Blue button, as we’ve just described.
To put a recording into a folder, move to it and then press theYellow button on the remote.
You’ll see a screen like this:
Just highlight the folder that youwant to put the programme in,and press the OK button.
You cannot move a programme into a folder if there is al-ready one with the same name in that folder. Rename one ofthe programmes first.
You can see the contents of a folder by selecting it in the listand pressing the OK button, and you can create folders withinone another.

56 Extra features
To move up from a folder, select the option labelled with twodots, at the top of the list. You’ll see it appear at the top of thelist of files in a folder, and if you’re in a folder and try to movea file, it will also appear as one of the destinations. To move afile from a folder back to the top level, select ‘..’ and press OK.
4.3.3 Copying recordings
Sometimes, you might want to make a copy of a recording, orjust of part of it —your favourite scene from a film, for exam-ple, or a song from a chart music show.
While you’re playing a recording, just press the Record button,and your PVR will automatically start making a copy, whichwill be named the same as the original programme, but with(COPY) in the title. The copy will stop automatically when theprogramme you’re watching comes to an end, or you can stopit sooner by pressing Stop on the remote control.
You can make a copy of a long recording more quickly by start-ing to play the original recording, then pressing until thespeed has increased to six times, then pressing the Record but-ton. The copy will be done at six times normal speed.
You can also use the copy function for programmes that havebeen recorded from pay TV channels, to create a copy that canbe played without your subscription card. By playing the pro-gramme and pressing Record to make a copy, the PVR willcreate a new recording that is not encrypted, and will have agreen $ symbol next to it in the archive list to indicate that,rather than the yellow $ that indicates a programme is en-crypted and will require a subscription card to play.
Note that copying and recording from PayTV channels maybe restricted by broadcasters, and the PVR should not beused to attempt to circumvent such restrictions.

4.3 Organising recordings 57
4.3.4 Editing recordings
As well as copying recordings, your PVR allows you to editrecordings that are stored on the hard disk. So, for example,if you set a recording to start a few minutes early, you couldremove the extra material at the start of it. Or if you just wantto keep a small part of a programme, you can cut it out andsave it, then delete the rest.
Because of the way that recordings are broadcast and savedon the PVR, the actual points at which edits are made mayvary by a few seconds from the position you select on screen;for perfect results, you may find it easier to edit recordings onyour computer.
To edit a recording, start playing the programme, and find thelocation where you would like to make the edit. Press the Playbutton to display the progress bar. While the progress bar ison screen, press the White button on the remote control, andthe red marker will start flashing between red and blue.
Now, use the left and right arrows to move either forwardsor backwards in the program. The part of the progress barbetween the point where you first pressed the White key andthe current position will turn purple.
When you have highlighted thesection of a program that youwish to either remove or save,press the Blue button, and thismessage will appear on screen.

58 Extra features
If you choose Save, then a newfile will be saved containing justthe section of the programmethat you highlighted, and theoriginal programme will be un-altered. This can be used, forexample, to extract just a part ofa programme.
If you choose Cut, the portion of the programme that you se-lected will be removed from the original recording, and willbe lost. You can use this to remove extra material at the end orbeginning of a recording; if you remove material in the mid-dle, you may see some interference around the position whereyou made the edit.
4.4 Additional playback and viewing features
Before we look at some of the more advanced functions thatcan be used in conjunction with a PC, here are some more use-ful features for playback and viewing.
4.4.1 Playing back multiple recordings
Your PVR can play back several recordings in a row, withoutintervention. You could use this to play back a series of shortcartoons for children, or to provide constant entertainment ata party.
To play back a selection of files they must all be in the samefolder in your archive. To select the files that you want to play,move to the first one and press the Red button. A number 1will appear to the right of the name. When you select the next,it will be numbered two, and so on.

4.4 Additional playback and viewing features 59
Press the OK button to start playback from the first file. At theend of that programme, the second one will be played, andthen others in the sequence.
You can also use multiple playback to copy files, by pressingthe Record button on the remote, instead of the OK button,after selecting the files with the Red key.
4.4.2 Slow motion playback
In addition to the fast playback we’ve already seen, you canwatch programmes in slow motion too, as slow as 1/8th of thenormal speed, whether you’re time-shifting live TV, or watch-ing a recording.
Press the button on the remote control to start playback athalf normal speed. Press it again for 1/4 and again for 1/8.Press the Play button to resume normal speed.
4.4.3 Repeat playback
As well playing back multiple recordings, you can tell yourPVR to play back the same recording, or even a section of it,repeatedly, until you tell it to stop. To play back the whole ofa recording, press the White key during playback. The repeatsymbol will be displayed in the information box.
When the end of the recording is reached, playback will re-sume from the beginning.
You can also select a section of a programme to play repeat-edly. During playback, press the button to display theprogress bar, and while it is on screen, press the White but-ton. Now move along the progress bar until you find the otherend of the section that you would like to repeat, which can bebefore or after the original point. Press the white key again.
Now, press Play to hide the progress bar, and press the Whitekey to select the repeat mode. When you see a symbol like
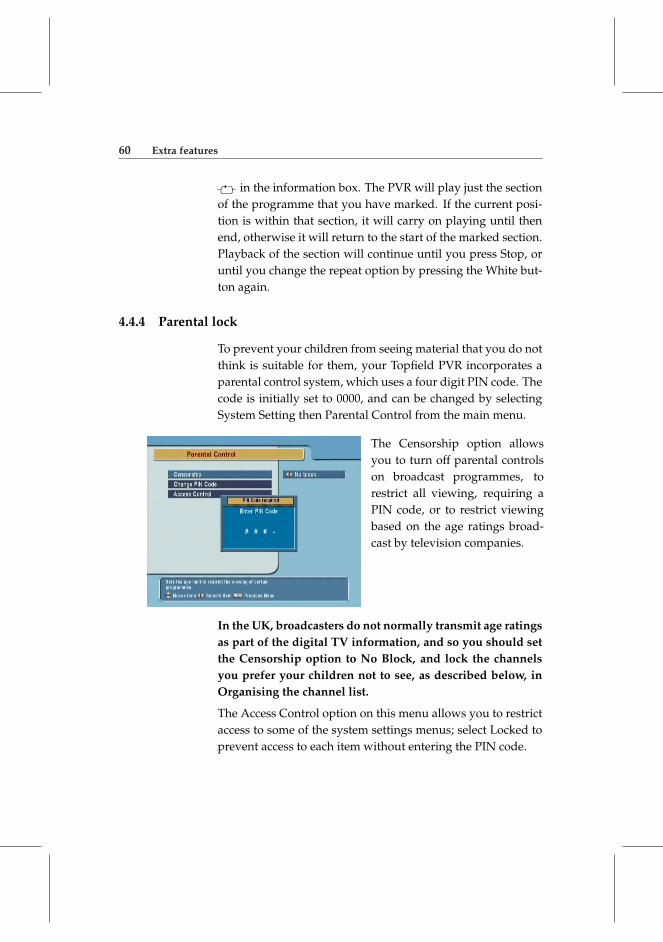
60 Extra features
in the information box. The PVR will play just the sectionof the programme that you have marked. If the current posi-tion is within that section, it will carry on playing until thenend, otherwise it will return to the start of the marked section.Playback of the section will continue until you press Stop, oruntil you change the repeat option by pressing the White but-ton again.
4.4.4 Parental lock
To prevent your children from seeing material that you do notthink is suitable for them, your Topfield PVR incorporates aparental control system, which uses a four digit PIN code. Thecode is initially set to 0000, and can be changed by selectingSystem Setting then Parental Control from the main menu.
The Censorship option allowsyou to turn off parental controlson broadcast programmes, torestrict all viewing, requiring aPIN code, or to restrict viewingbased on the age ratings broad-cast by television companies.
In the UK, broadcasters do not normally transmit age ratingsas part of the digital TV information, and so you should setthe Censorship option to No Block, and lock the channelsyou prefer your children not to see, as described below, inOrganising the channel list.
The Access Control option on this menu allows you to restrictaccess to some of the system settings menus; select Locked toprevent access to each item without entering the PIN code.

4.4 Additional playback and viewing features 61
4.4.5 Restricting access to recorded programmes
To ensure that a programme cannot be viewed without enter-ing the PIN code, highlight it in the archive list and press theBlue key, then choose Lock. A key icon will appear to the rightof the name.
4.4.6 Restricting access to TV channels
To prevent a particular channel from being viewed without aPIN code, press the List button to display the channel list, andhighlight the channel you want to restrict.
Press the Red button on the remote control to display the Op-tions menu for the channel.
If you Lock the channel fromthis menu, it will not be acces-sible without entering your PINcode.
4.4.7 Organising the channel list
As well as allowing you to lock or unlock channels, the op-tions menu allows you to organise the channel list, and to adda channel to one of your favourites groups, via the other op-tions on the menu.
You can delete a channel completely if you wish; it will not beavailable to select via channel numbers, or via the programmeguide, or favourites.

62 Extra features
You can also change the name of a channel by selecting re-name, or show the provider of the channels, which is usu-ally the name of the TV company responsible for broadcastingthem.
The channel list can be sorted by choosing the Sort option. TheDefault order will show the channels in numerical order; youcan also choose to sort in alphabetical order, or by provider.
The CAS ∼ FTA sort option shows pay TV channels first, thenfree channels, while FTA ∼ CAS is the opposite, and the FAV∼ NOFAV option lists channels in your current Favouritesgroup first.
The order of channels in the channel list does not affect theEPG, where they always appear in numerical order.

63
Chapter 5
The PC Connection
One of the most exciting features of your Topfield TF 5800 PVRis one of the ones you probably won’t notice in day to dayuse. It’s the USB connector on the rear panel. USB stands forUniversal Serial Bus, and it’s a standard connector found onjust about every modern home computer.
The USB connection on your PVR allows you to connect it toyour computer and transfer files between the computer andthe PVR. You can copy MP3 music files from the computer,and play them on the PVR, and you can transfer recorded pro-grammes from the PVR to your computer’s hard disk.
It’s even possible to use the USB connection to update the builtin software that controls your PVR and to add additional soft-ware to it, to change the way that it works.
We’ll explain how to play MP3s and transfer software betweenyour computer and PVR in the next chapter. In this one, we’llexplain how to set up the software on your computer andmove files to and from the PVR.
Your Topfield PVR needs special software installed on yourPC to connect to it, including a driver. You must install thissoftware before connecting the PVR to the PC.

64 The PC Connection
5.1 Installing the software and drivers
The software for your PVR is called Topfield Windows Appli-cations Setup, and can be downloaded from the UK Topfieldweb site at www.topfield.co.uk.
It will run on most recent versions of Windows that supportUSB connections, but for best results you should have a PCwith a USB 2.0 connection, which is much faster.
The setup program is distributed as a Zip file, which is a typeof archive that you will need to extract it from; you can do thisautomatically by double clicking on the downloaded file onmost Windows computers. After extracting the file from thearchive, double click on it to start the setup wizard.
Read the instructions carefully, then click next to TF5xxx se-ries, and then click Next. Now you can choose which Topfieldapplications you want to install, and which model you have.
From the droP−down menu at the top of this screen, you shouldchoose TF5xxxPVRt.
In the list of optional components below, this should automat-ically select the correct files for your PVR, which are the basefiles, the USB driver, Altair, which is used to transfer files toand from your PC, TFDN USB and TFD Down, both of whichcan be used to update the system software on the PVR.
Click the Next button to start installing the selected softwareon your computer. You’ll need to choose the folder whereyou’d like the software stored, and then click Install.
5.2 Connecting the PVR to your PC
After the software has been installed, click Finish. You’re nowready to connect your PVR to the computer for the first time.
You need a standard USB A to B cable to link your PVR toyour computer —that’s the same sort of cable commonly used

5.2 Connecting the PVR to your PC 65
to link computers to devices like printers.
Make sure that the PVR is turned off, and then connect theUSB cable to the rear panel, and plug the other end into thePC.
Press the standby button on the front panel of the PVR to startit, and after a brief pause, Windows will display the FoundNew Hardware wizard. Just click Next to work through theWizard until it has finished, and your PVR will be ready touse with the computer.
You do not need an aerial or TV connected to your PC whileit’s linked to the PC; all the information about the connectionwill be displayed on the PC’s monitor, rather than the PVR.
5.2.1 Using Altair
Altair is the main program that you’ll use on your computerto transfer files between it and your PVR, so we’ll take a quicklook at it here. In the next section, we’ll explain some of theother functions that you can use in conjunction with your com-puter, like playing back MP3 music files, or updating the soft-ware in your PVR.
Before using Altair, you may want to record a short pro-gramme of up to about fifteen minutes, so that you can prac-tise transferring files easily. Depending on the channel you’verecorded from, and the speed of your computer, it will takebetween a fifth and a third of the duration of a program totransfer it from the PVR using the USB connection.
Before starting Altair, ensure that the PVR has been connectedto your computer, and that you have installed the drivers, aswe described above. Start Altair from the Start menu, and youshould see a screen similar to this.

66 The PC Connection
The left hand panel shows files and folders that are on yourPVR, while the right hand one shows files and folders that areon your computer. If you don’t see anything on the left handside, Altair has not been able to connect to the PVR, and youshould check that it is turned on and that the software wasinstalled correctly.
Altair works a little like the old file transfer programmes peo-ple used to use; you can open a folder by double clicking on it,and move up a level by clicking on the top icon in the list. Atthe top of each panel, you’ll see buttons to move up a folder,and to change the view, so you can see icons, file details orjust names. The button marked with a red X deletes the filethat’s selected in that panel, and the blank folder allows youto create a new folder.
5.2.2 How files are organised on your PVR
In the left hand panel, you’ll see three folders called DataFiles,MP3 and ProgramFiles. You can’t change the names of thesefolders or create an additional ones at this level; each is usedto store the three different types of information that your PVRcan work with.
The DataFiles folder is where you’ll find all the recordings thathave been made on the PVR. If you open it, you’ll see a file for

5.2 Connecting the PVR to your PC 67
each recorded programme, with a name ending in .rec.
The MP3 folder is where you can store MP3 music files, whichyour PVR can play back.
The ProgramFiles folder is where you can store additional soft-ware for the PVR, which we’ll explain more about in the nextsection.
When you display the archive list on the PVR, using theArchive button on the remote control, you’ll see the contentsof one of these three folders, and you can view each of themin turn by using the or buttons on the remote control.
When you view files in the PVR’s archive list on your televi-sion screen, you won’t see all the same files that you can viewusing Altair; when you’re viewing DataFiles, you’ll only beshown recordings, without the .rec on the end of their name.Similarly, in the MP3 area, you’ll only be shown MP3 musicfiles that have names ending in .mp3, and in the ProgramFilesare, you’ll only be shown the add-on software that you can runon your PVR and not additional files, such as settings, that anysoftware may have created.
5.2.3 Transferring files
Double click on the DataFiles folder in the left hand panel toopen it, and you’ll see the files for all the programmes you’vestored on the PVR, along with any extra folders you created toorganise them.
At the top of the panel, you’ll see a message that says TurboOff to start with. Turbo mode is a way of speeding up thetransfer of files to and from the PVR; you can click the circle tothe left of the message to turn turbo mode on or off.
When turbo mode is turned on, and you have a USB2.0 con-nection on your computer, you can transfer programmes atspeeds of up to a fifth of their running time, so a fifteen minute
68 The PC Connection
programme could be transferred in about three minutes. Whenturbo mode is turned off, it will take approximately fifteenminutes to transfer a fifteen minute programme.
To transfer a recorded programme from your PVR to yourPC, click on it in the left hand panel, and then click the right-pointing arrow between the two panels. The file will be copiedto the folder on your computer that’s displayed in the righthand panel.
You can transfer files in the opposite direction in the same way,by highlighting them in the right hand panel, and selecting afolder on the PVR to copy them to, then clicking the left point-ing arrow. If you would like to copy several files in one go,you can click to select the first, then hold down the Ctrl keyon your keyboard while you click to add others to the selec-tion.
Turbo mode makes transferring files faster, but to allow that,the PVR stops responding to commands from the remotecontrol, and dedicates all its resources to the transfer. It isnot recommended that you use turbo mode if you want touse the PVR while transferring, or if any scheduled record-ings are due to start.
In the next section, we’ll look at some of the advanced fea-tures you can use on your PVR, including adding additionalsoftware and playing back MP3 files that you have transferredto its hard disk.

69
Chapter 6
Advanced features
Now you know how to use most of the basic features of yourPVR, we’ll look at a few of the extra features and useful thingsto know, such as how to play back MP3 music files, or updatethe PVR’s software.
6.1 MP3 playback
Your Topfield PVR can play back MP3 music files, just likemany portable music players. Before playing the files, youneed to transfer them to the MP3 folder on your PVR usingthe Altair program, as we described in the previous section.
There is no limit to the number of MP3 files you can store onyour PVR’s hard disk, but remember that the space is sharedwith recorded TV programmes, so the more MP3 files youstore, the less TV you will have space to record.
To view the list of MP3 files, press the button on the remotecontrol, and then use the Fast Forward or Rewind buttons toselect the MP3 Files list. You can organise the MP3 files into
70 Advanced features
folders in exactly the same way as you organise recorded tele-vision programmes.
To play a single MP3 file, just move to it with the arrow keys
on the remote control, and press the or button on theremote control. While MP3 files are being played, a graphicalimage will be displayed on your television screen.
Just like with TV programmes, you can select a series of musicfiles to play in sequence, by highlighting each one in turn andpressing the Red button on the remote control. A number willappear next to each one, and they will be played when youpress the Play or OK buttons on the remote.
If you organise your music files into folders, you can also tellthe PVR to play all the files in a particular folder, by highlight-ing it and then pressing the Play button; if you press OK, thecontents of the folder will be displayed, as usual.
Finally, you can choose to repeat the playback of one or moreMP3 files, by pressing the White key on the remote controlto choose between repeating a single track, repeating all thetracks in the selection, or just playing them once.
When you press the button, you’ll see a symbol appear in theinformation box like to indicate that the current track willbe repeated. Or like if all the tracks will be repeated.
6.2 Firmware updates
From time to time, Topfield makes new firmware —the soft-ware that controls your PVR —available.
Firmware releases provide new functions or updates to ex-isting functions that are built into your PVR. They are madeavailable for download on the Topfield web site, so that youcan update your PVR whenever you like, and are also broad-cast from time to time via the digital television system, as an‘over the air’ update.

6.2 Firmware updates 71
Before updating, you should find out which firmware versionyou have installed on your PVR; you may also be asked thisinformation if you ring the technical support line.
Press the Menu button on the remote control and select Infor-mation from the main menu. On the next screen, select IRDstatus to see which software is installed on your PVR. Thefirmware version is given by two pieces of information —theApplication Version and the Last Update.
When you check the Topfield web site for firmware updates,ensure that any updates you select are for the TF 5800PVR.Firmware updates for other models are not compatible withyour PVR, and you will not be able to install them.
6.2.1 Installing a firmware update via USB
To install a firmware update via USB, first download the ap-propriate update from the Topfield web site. Usually, the up-date will be in a zip file, which will contain both the updateitself, which has a file name ending in .tfd, and any additionalnotes regarding the update, which you should read beforeproceeding.
You will not be able to perform an update via USB unlessyou have installed the Topfield software and drivers on yourPC, as explained in the previous section.
You do not need to have a television connected to the PVRto perform an update; all the necessary information will bedisplayed on the front panel.
Ensure that the PVR is connected to your computer, and is instandby mode. Start the TFDN USB application, and click theFind button. Locate the .tfd file and click Open.
Now, click the Download button in the main window of theTFDN USB application; you should see a screen similar to this,with the message Wait Download displayed.

72 Advanced features
Now, press the Standby button on thefront of the PVR. The PVR will beginto start up and then you should see asequence of numbers displayed on thefront panel, beginning with the lettersdn; this process usually takes less thana minute.
After the firmware file has been transferred, another sequenceof numbers, beginning Ap, will be displayed, and at the endof this sequence, the message End will flash on the display.
You must not turn your PVR off until the End message hasbeen displayed or your PVR restarts itself, otherwise youmay damage it by interrupting the update process.
If there is an error transferring the firmware, you may see theletter E, followed by a number; if this happens, you shouldcheck that you selected the correct file for your PVR, and thatthe USB cable is correctly connected, before trying the firmwareupdate again.
The firmware update program will not work if Altair or anyother program that communicates with your PVR is runningon the computer at the same time.
6.2.2 Installing a firmware update via a serial connection
The TFD Down application that is installed as part of Top-field’s Windows applications allows you to update the firmwareon your PVR if you do not have a computer with a USB port.It works in the same manner as the USB version, but is slower,and you should use the USB update programme if possible.

6.2 Firmware updates 73
6.2.3 Installing a firmware update over the air
Updating your firmware via USB is quick, but it’s not alwaysconvenient to connect the PVR to your computer. From timeto time, Topfield broadcasts firmware updates via the digi-tal television system, and you can choose to download thesewhen they are broadcast.
You will not see an on-screen message when an update is be-ing broadcast, but Topfield’s web site at www.topfield.co.ukwill indicate if an update is available, and the dates on whichit will be broadcast. You can only download an update dur-ing that specific period, and not all firmware updates for yourPVR may be made available in this way.
To download and install an over the air update, turn your PVRon and press the Menu button on the remote control. SelectInstallation and then System Software Upgrade.
The PVR will display a screen like this, and if an update isfound, it will be listed, and you can select Yes to install it.
The update may take ten tofifteen minutes to download,and your PVR will then restartitself. The new firmware versionwill be shown in the systemmenus afterwards.
If there is no update available, you will see a message tellingyou that there is nothing available. You will also see the samemessage if the firmware you are using is the same version asthe one being broadcast.
74 Advanced features
6.3 TAPs - Additional software for your PVR
One of the most exciting things about the Topfield TF 5800,compared to other PVRs, is that it’s possible to add additionalsoftware to it, as well as simply updating the firmware.
The TF 5800 includes a facility to load and run small addi-tional programs, called TAPs —Topfield Applications. Thesecan provide additional features, change the way in which ex-isting features work, or change the look of menus and otherdisplays. Although some of them have many features, theystill rely on the PVR’s own software —just as you could add anew program to your computer to browse through your filesin a different way, but the original Windows Explorer wouldstill be available.
Most TAPs are written by independent authors; many are free,some have to be paid for, and some ask for donations if youlike them. There’s a wide range, including programs for view-ing photographs, searching for particular types of programmesto record, ways to create shortcut keys to menus you use a lot,and even extra games.
Since TAPs are created by independent authors, Topfield can-not be responsible for how well they behave, or for any prob-lems that a TAP may cause with operation of your PVR. Ifyou experience problems, you should disable any TAPs be-fore calling the technical support line, and remember thathelp with individual TAPs cannot be offered by Topfield.
6.3.1 Installing TAPs
TAPs can be copied to your PVR just like MP3 files, using Al-tair.
Most TAPs are small, and they are usually supplied in a zip filetogether with documentation and any other files that are re-quired. A TAP itself is a small file with a name ending in .tap.TAPs should always be copied into the ProgramFiles folder on

6.3 TAPs - Additional software for your PVR 75
your PVR.
Remember to check the documentation that accompanies eachTAP to see if there are any other files that need to be copied tothe PVR with it. Some TAPs, for example, require a configu-ration file or folder to be copied into the ProgramFiles folderwith them.
6.3.2 Starting TAPs
When TAPs have been copied to your PVR, you can view themby pressing the button on the remote control and using the
or buttons to select Program Files.
You’ll see a list of the TAPs that you have copied to the PVR, similar to the normal list of recorded programmes, and youcan create additional folders to organise them if you wish; thenames of TAPs may not match exactly the names of the filesyou copied from your PC, since the PVR displays the namesstored within the TAPs themselves, rather than just the namesof the .tap files.
Additional files, such as configuration information, that youtransferred will not be shown, only the TAPs themselves.
As you move up and down the list, you will see additional in-formation about TAPs in the bottom section of the archive list,which may include details about which buttons a TAP uses, orthe name of the author.
To start a TAP, simply highlight it on the screen and press the
button on the remote control.
Don’t be alarmed if nothing appears to happen when you starta TAP. Many of them simply wait for you to press a particularkey on the remote control before doing anything further. Sinceeach TAP behaves differently, you should always read the doc-umentation supplied with it to check which keys it uses.

76 Advanced features
6.3.3 Starting TAPs automatically
You may find that there are some TAPs that you particularlylike using, and you’d like to start them each time you turnyour PVR on. That’s very easy to do; after you’ve first runTAPs, you’ll see that an additional folder is created within theProgramFiles folder, called Auto Start.
Any TAPs that you place in this folder will be started automat-ically each time your PVR is turned on. You can move TAPsin just the same way as you organise recorded programmes;highlight the TAP that you would like to start automatically,and then press the Yellow button on the remote control tomove it.
You’ll see a list of folders appear on the screen, and you shouldselect Auto Start. If you decide that you no longer want a TAPto start automatically when the PVR is turned on, simply stopit —most TAPs provide an option to stop them running, justlike choosing Exit in a computer program —and then moveit from the Auto Start folder back to the main ProgramFilesfolder.
6.3.4 Troubleshooting TAPs
Although we can’t provide advice for individual TAPs, thereare some general tips that you may find useful if you havedifficulty with your PVR after installing them.
You can prevent TAPs that are in the Auto Start folder fromrunning when you turn your PVR on by holding down the 0button on the remote control. Hold the button down immedi-ately after turning the PVR on, and continue to hold it downuntil you see the screen ratio start to change. Then, press 0to return the screen to your preferred settings. Your PVR willnow be running without any TAPs loaded.
TAPs are able to tell whether or not the PVR is playing a record-

6.3 TAPs - Additional software for your PVR 77
ing, making a new recording, showing live TV or in the sys-tem menus. Not all TAPs are designed to work at all times,so check the documentation for a TAP if it doesn’t do whatyou expect —it may be designed only to work when the PVRis doing certain tasks.
The Exit key is often used by TAPs to provide access to a menuwhich may allow you to change options or stop the TAP, soyou should try it and see if it provides extra information.
Sometimes, you may find that two TAPs interfere with eachother, just as can happen on your computer. You should tryTAPs individually, rather than running several at a time, un-til you are sure which combinations provide the features thatyou like; if you experience problems, the authors of the TAPsinvolved are the people who can help you.
Although the Topfield TF 5800 can run many of the TAPs cre-ated for other similar models in the TF5000 range, some TAPsare designed for specific models, or to take advantage of fea-tures of the digital TV system in certain countries, and thereare a few differences between the remote control on the TF 5800and that on other models. Always check to ensure that a TAPis designed or suitable for use on the TF 5800.
You will not be able to damage your PVR by installing TAPs,but it is possible for a TAP to cause the PVR to restart itself, justas a badly written program can make your computer crash.When this happens, any recordings that are in progress willbe terminated and may be unplayable.
Remember that Topfield is not responsible for TAPs, andcannot offer any support on using them, beyond the infor-mation in this manual. If you experience problems withyour PVR, you should always try running it without TAPsbefore calling for technical support.

78 Troubleshooting and How to
Chapter 7
Troubleshooting and How to
In this section, you can find a summary of solutions to somecommon problems and some useful tips.
7.1 Troubleshooting
Although your Topfield PVR is a reliable piece of equipment,sometimes you may experience problems. To assist you, hereare some common solutions to problems.
7.1.1 Unexpected channel changes
From time to time, your PVR may interrupt playback or view-ing, and change to live TV, or display a message stating ”Checkyour reservation.”
If a Check your reservation message is displayed, you shouldanswer Yes, or just wait, to allow the recording to take place;the channel will change so that a recording can begin. If youchoose no, the recording will not happen.
Whenever playback of a recording is interrupted, the PVR placesa bookmark which you can jump back to.

7.1 Troubleshooting 79
Some third party TAPs can automatically return you to yourplayback or previous viewing, however these are not sup-ported by Topfield.
7.1.2 Failed recordings
The most common cause of failed recordings is a problem withthe signal from your TV aerial. You must make sure that youhave connected the system correctly, following the instruc-tions at the start of this manual.
If you see a message stating ”No signal at tuner 1” or ”Nosignal at tuner 2,” then it is likely that one of the tuners hasnot been connected, or the connection has come undone.
If all the connections are ok, you may have too low a signallevel for the PVR to work reliably, and you should consult anaerial specialist; it may be necessary to adjust your aerial towork correctly with digital television.
Another cause of recording problems is reception of the samechannel from several transmitters; this is dealt with below, un-der the heading Incorrect channel numbers
If your PVR fails to start up for scheduled recordings, you mayneed to reset the clock. To do this, unplug the PVR from theelectricity supply for approximately one minute, then plug itback in again. The time will be reset when the PVR starts upand receives a TV signal. Turning the PVR off with the remotecontrol or the button on the front panel is not sufficient.
7.1.3 PVR crashes
Your TF 5800 is a sophisticated computer, and like all comput-ers, it can crash from time to time, though it’s extremely rare.In most cases, when the PVR crashes, it is caused by add-onsoftware (TAPs) that has been loaded.
You can start the PVR without any TAPs running by hold-

80 Troubleshooting and How to
ing down the 0 button on the remote control while you startthe system, until the picture has appeared. You should thenopen the Archive list, and move to the ProgramFiles sectionby pressing Fast Forward or Rewind. Open the Auto Startfolder, and either delete the applications contained in it, ormove them to the main ProgramFiles folder, so that they donot run when the PVR is turned on.
Although interactive services are useful, they too are, essen-tially, computer programs that are delivered to your PVR viathe digital television signal, and it is possible, though extremelyrare, for them to cause problems. Should you suspect that thisis the case, you should try disabling interactive services viathe System Setting menu.
7.1.4 Incorrect channel numbers and duplicate channels
If you can receive a signal from more than one TV transmit-ter, your PVR may store duplicate versions of some channels.In some cases, duplicates will appear on numbers from 1000upwards, while other users may have two channels with thesame number.
If you have two channels with the same number, and one ofthem has a very weak signal, you should delete the one withthe weaker signal; press the OK/List button to display thechannel list, highlight the channel you want to remove, andpress Red to display a menu, from which you can select theDelete option.
You can view information about the strength and quality ofa signal by changing to a channel, then pressing Menu andselecting Installation, then Service Search. Details of the signalon the current channel will be displayed at the bottom right ofthe screen.
Users with many duplicate channels, or incorrectly numberedchannels, should perform a factory reset of their PVR, andthen tune in channels manually, instead of automatically.

7.1 Troubleshooting 81
To tune manually, you need to know which transmitter youraerial is pointing at, and the UHF channel numbers (which arealways in the range 21-69) that are used for digital television;there will normally be six numbers, though in some regionsthere may be fewer.
Press Menu, then from the main menu select Installation, Ser-vice Search. Set the search mode to Manual, and set the chan-nel number to the first of the group of UHF channel numbersappropriate to your local TV transmitter, then move to StartSearch and press OK.
The PVR will store all the digital television channels broad-cast on the channel you selected. Now, repeat the process foreach of the other UHF channel numbers, and your PVR shouldstore one copy of each channel, on the correct number.
7.1.5 Unable to view Pay TV channels
To view Pay TV channels, you must have a CAM inserted inone of the slots on the front of the PVR, with a valid subscrip-tion card in it.
If you are unable to view any channels at all, check that thecard has been inserted the correct way up; ensure that the con-tacts on it are clean.
You can view the status of the CAM —which is used to decodePay TV channels —by pressing Menu then selecting CommonInterface. If the CAM has been inserted correctly, it will beshown in one of the slots; if no CAMs show on the screen,check it is inserted fully.
If the CAM is shown on the screen, select it, and then pressOK on the remote control. On the next screen, the Smart cardinformation option will tell you the subscription date that isstored on your card. If there is no date, or the date has passed,then you will need to contact your PayTV service and askthem to send you an activation signal.

82 Troubleshooting and How to
Some recordings made from PayTV channels may not be playablewithout a subscription, or after some time has elapsed. Sec-tion 4, Extra features, Copying recordings contains informa-tion about how you may be able to avoid this problem.
7.2 How to
Although the rest of the manual has covered most of the com-mon day to day functions you’ll need, there are a few otherthings that it may be helpful to know to make the most of yourPVR in certain circumstances.
7.2.1 Adding a new channel
From time to time, new channels are added to the digital tele-vision service, and some existing ones removed. You can re-
move a channel simply by pressing the button to displaythe channel list, then moving to the channel with the arrowkeys, and pressing Red. Select delete from the options menuto delete the channel.
The quickest way to add a channel is to do a manual search forit; it helps to know which group of channels (or ‘multiplex’)it’s being added to, as this will help you find out the correctoptions for a manual search.
When you press the OK button on the remote control and thenmove up and down the channel list, you’ll see that the ‘UHFchannel’ for each TV station is shown at the bottom of the list;there will be around half a dozen of these numbers, and all thechannels on the same multiplex have the same one.
So, if you know that a new channel is being added to the samegroup as BBC Four, highlight BBC 4 in the list and make anote of the UHF channel number, then press Exit to hide thelist. Next, press Menu, select Installation then Service Search.
Set the search type to Manual, and choose the channel num-
7.3 Contacting support 83
ber you noted from the previous paragraph, then select StartSearch and press OK. You’ll see a list showing all the chan-nels on that multiplex, including the new one, which will beadded to your channel list for you. Existing channels will notbe affected.
If you don’t know which multiplex a new channel is beingadded to, you can simply scan each of the UHF channels usedby your current set of channels.
You can simply do an automatic search for channels, but thatcan take up to twenty minutes, and may find duplicate chan-nels if you can receive from more than one transmitter. Scan-ning a single UHF channel is much, much quicker.
7.2.2 Moving home
If you move home, and your new home receives digital TVfrom the same transmitter as your old one, you do not need toalter any settings on your Topfield PVR.
However, if you receive signals from a different transmitter,you will need to re-scan for channels, just as you would haveto tune in an analogue television again.
The simplest way is to perform a complete reset of your PVR,by choosing Menu, Installation and then Factory Setting, thendoing a service search.
When you choose Factory Setting, all your timers will becancelled, and your favourites lists erased. Programmes onthe hard drive will not be damaged or removed.
7.3 Contacting support
Telephone technical support for your Topfield TF 5800 PVR isavailable during working hours, on 01795 429 666.
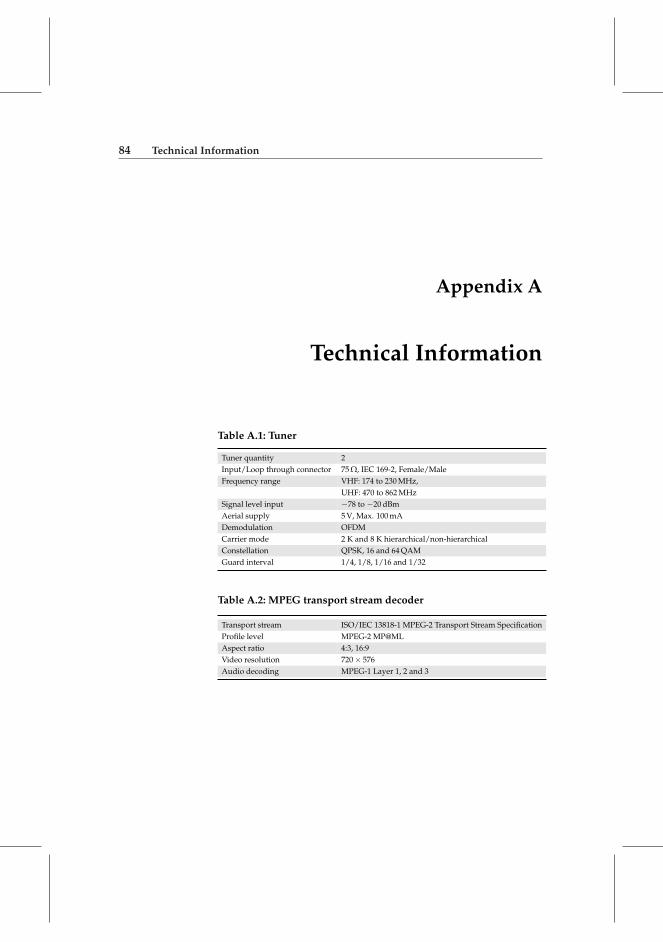
84 Technical Information
Appendix A
Technical Information
Table A.1: Tuner
Tuner quantity 2Input/Loop through connector 75 Ω, IEC 169-2, Female/MaleFrequency range VHF: 174 to 230 MHz,
UHF: 470 to 862 MHzSignal level input −78 to −20 dBmAerial supply 5 V, Max. 100 mADemodulation OFDMCarrier mode 2 K and 8 K hierarchical/non-hierarchicalConstellation QPSK, 16 and 64 QAMGuard interval 1/4, 1/8, 1/16 and 1/32
Table A.2: MPEG transport stream decoder
Transport stream ISO/IEC 13818-1 MPEG-2 Transport Stream SpecificationProfile level MPEG-2 MP@MLAspect ratio 4:3, 16:9Video resolution 720 × 576Audio decoding MPEG-1 Layer 1, 2 and 3

85
Table A.3: Connectors
TV SCART Video CVBS/S-Video/RGB/YUV outputAudio L/R output
VCR SCRT Video CVBS outputAudio L/R outputVideo CVBS/S-Video/RGB/YUV input for bypassAudio L/R input for bypass
S-Video Video S-Video outputRCA A/V Video CVBS output
Audio L/R outputS/PDIF Digital audio or Dolby AC-3 bitstream outputRS-232 9 pin D-sub type
Transfer rate : Max. 115.2 kbpsUSB 2.0 Device
Table A.4: RF-modulator
Connector 75 Ω, IEC 169-2, Female/MaleOutput channel PAL: 21 to 69
NTSC: 14 to 83TV standard PAL G/I/K, NTSC-M
Table A.5: Conditional access interface
PCMCIA 2 slotsDVB Common Interface Standard
Table A.6: Power supply
Input voltage 90 to 250 VAC, 50,/60 HzType Switching Mode Power SupplyPower consumption Running: Max. 55 W
Standby: 14 W
Table A.7: Physical specification
Size (W × H × D) 340 × 60 × 265 mmWeight 4.2 KgOperating temperature 0 to 45 °CStorage humidity 5 to 95 % RH

86
Warning

87

88
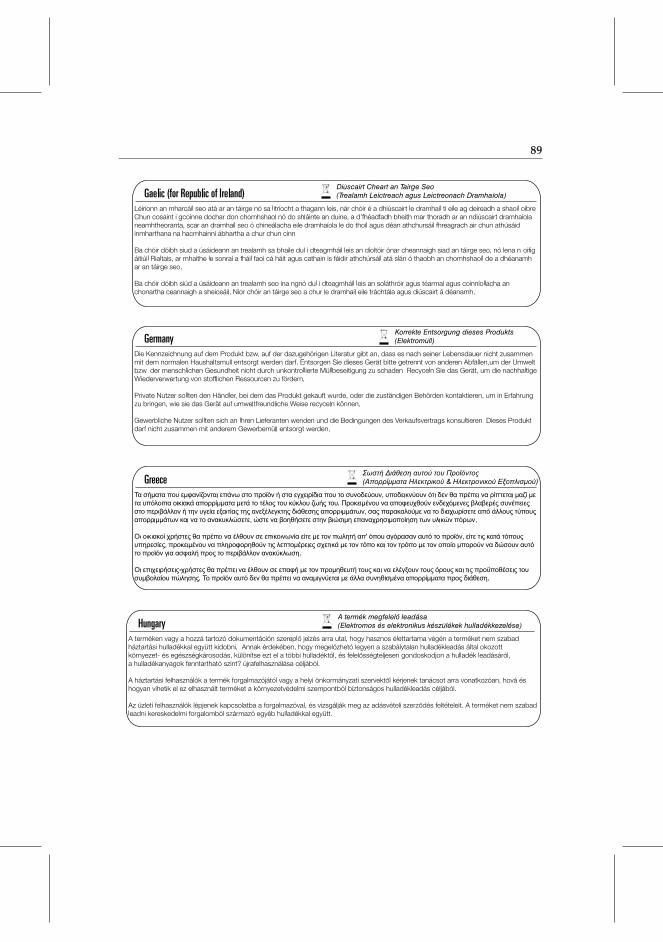
89

90

91

92

93

Topfield continues to improve the digital receiver which this manual explains. So some ex-planations and illustrations in this manual could be different from the real digital receiver.
Copyright © 2006, Topfield Co., Ltd. English versionhttp://www.i-topfield.com 110T-F7115-201-4 Rev. 4