the strength of digital - audiocontrol · owner’s enjoyment manual the strength of digital ™ 1...
TRANSCRIPT

DigitalThe Strength of
DQS
Owner’s Enjoyment Manual
Six ChannelDigital Equalizer
AudioControl®
22410 70th Avenue West • Mountlake Terrace, WA 98043 USAPhone 425-775-8461 • Fax 425-778-3166
www.audiocontrol.com
tm
Digital

Owner’s Enjoyment Manual
AudioControl®
This page was intentionally

Owner’s Enjoyment Manual
The Strength of Digital ™
Table of ContentsIntroduction . . . . . . . . . . . . . . . . . . . . . . . . . . . . . . . . . . . . . . . . . . . . . . . . . . . . . . . . . . . 1
Key Features and Highlights . . . . . . . . . . . . . . . . . . . . . . . . . . . . . . . . . . . . . . . . . . 2
Quick Installation Information . . . . . . . . . . . . . . . . . . . . . . . . . . . . . . . . . . . . . . 4
A Guided Tour of the DQS . . . . . . . . . . . . . . . . . . . . . . . . . . . . . . . . . . . . . . . . . . . . 6
Installation . . . . . . . . . . . . . . . . . . . . . . . . . . . . . . . . . . . . . . . . . . . . . . . . . . . . . . . . . . . . 8
Placement and Mounting . . . . . . . . . . . . . . . . . . . . . . . . . . . . . . . . . . . . . . . . . . 8
Power Wiring . . . . . . . . . . . . . . . . . . . . . . . . . . . . . . . . . . . . . . . . . . . . . . . . . . . . . . . 9
Audio Wiring and System Diagrams . . . . . . . . . . . . . . . . . . . . . . . . . . . . . 9-11
Level Matching . . . . . . . . . . . . . . . . . . . . . . . . . . . . . . . . . . . . . . . . . . . . . . . . . . . . 12
Navigating the DQS Menu Screens . . . . . . . . . . . . . . . . . . . . . . . . . . . . . . . . . . 13
Equalization Adjustment . . . . . . . . . . . . . . . . . . . . . . . . . . . . . . . . . . . . . . . . . . . . 18
Troubleshooting . . . . . . . . . . . . . . . . . . . . . . . . . . . . . . . . . . . . . . . . . . . . . . . . . . . . . 20
Warranty . . . . . . . . . . . . . . . . . . . . . . . . . . . . . . . . . . . . . . . . . . . . . . . . . . . . . . . . . . . . . 22
Specifications . . . . . . . . . . . . . . . . . . . . . . . . . . . . . . . . . . . . . . . . . . . . . . . . . . . . . . . . 23

Owner’s Enjoyment Manual
AudioControl®

Owner’s Enjoyment Manual
The Strength of Digital ™
1
IntroductionWelcome to the world of AudioControl digital
signal processing . A magical combination ofAudioControl’s lengthy experience in perfor-mance signal processing design combined withstate-of-the-art Digital Signal Processing (DSP)technology. You now have in your possession theDQS, an extremely powerful six channel, thirty-band, one-third-octave stereo graphic and para-metric digital equalizer. Whew, try saying thatfast a few times. Even better the DQS has a total of192 equalization controls making it an incredibleaddition to any multi-channel system...even cartheater! Whether you are a die-hard sound-offcompetitor or simply enjoy great music, you willdefinitely appreciate how the DQS makes yourperformance autosound system sound even better.
Now before you start salivating too much justthinking about the benefits of the DQS, take a fewminutes to sit back, have a latte’, decaffeinated ifnecessary, and read through this manual. It con-tains lots of useful facts and information… andbesides, we spent a lot of time writing it!
KEY FEATURES OF THE DQSHere are some of the cool features that areenclosed in this magical box:
• Six input and output channels• 30 bands of constant-Q equalization …
on each channel• Two, fully-adjustable parametric
equalizers per pair of channels• Eight non-volatile memories• 24 bit digital signal processing

Owner’s Enjoyment Manual
AudioControl®
2
FEATURES AND HIGHLIGHTSSix Channels Of Input and Output: The
DQS is AudioControl’s first digital car audioequalizer with six input and output channelsmaking it ideal for a multitude of applications.Whether you are designing around a source unitwith multiple outputs or you have a full blownsurround sound car theater system, the DQS is theprocessor for you.
Input and Output Level Controls: To helpaccurately level match your source units andamplifiers, the DQS has individual input andoutput level controls. This will help you maxi-mize the sound quality of your system and mini-mize any system noise. These controls will alsohelp your DQS work with factory installed sourceunits.
Constant-Q Equalization Controls: Carinteriors vary widely in size and acoustic make-up. Doors, kick-panels, and rear decks don’t makethe best location for speaker placement causingyour high performance speaker system to soundsomewhat lackluster. The DQS offers thirty preciseone-third octave equalization controls per chan-nel for a total of 180 filters!
Parametric Equalization Controls: Inaddition to offering thirty, one-third octavecontrols, the DQS also packs two, fully-adjustableparametric equalization controls for each pair ofchannels. With the DQS’s parametric controls youcan select a center frequency, dial in the idealbandwidth and apply the appropriate amount ofboost or cut. The precise filtering of the DQSallows you to select bandwidths as narrow as 1/12octave!
Non-volatile Memories: The DQS has theability to allow the user to set and store up toeight different system equalization settings inindividual memory locations.
24-bit Digital Signal Processing:AudioControl’s digital signal processors use aspecial 24-bit DSP (digital signal processor) thatwas specifically designed for equalization andother dynamics processing. Matching 24-bit A/D -D/A converters are also incorporated for maxi-mum sound quality.

Owner’s Enjoyment Manual
The Strength of Digital ™
3
Bulletproof Warranty: The most impor-tant feature of all. Every AudioControl product isselflessly designed and manufactured by theoccupants of our rainforest factory. We take everyeffort to ensure that you will have many years ofenjoyment out of your DQS. To ensure the perfor-mance of this new Digital product, we highlyrecommend that you allow your authorizedAudioControl dealer to perform the installation.Not only do they have all the right knowledgeand tools, but also in the unlikely chance yourDQS should stop working, we will back it with alimited five years parts and labor warranty.Should you choose to install it yourself we willstill give you a one-year parts and labor warranty.To activate your warranty, you need to FILL OUTAND SEND IN YOUR WARRANTY CARD!
We also recommend that you save your invoiceor sales slip as proof of installation and ownership.Not only is it necessary for warranty purposes, butshould your DQS “disappear” one day while yourcar is parked at your local latte’ stand, you willfind insurance companies very unforgivingwithout proof of purchase.
Owner’s Enjoyment Manual
AudioControl®
4
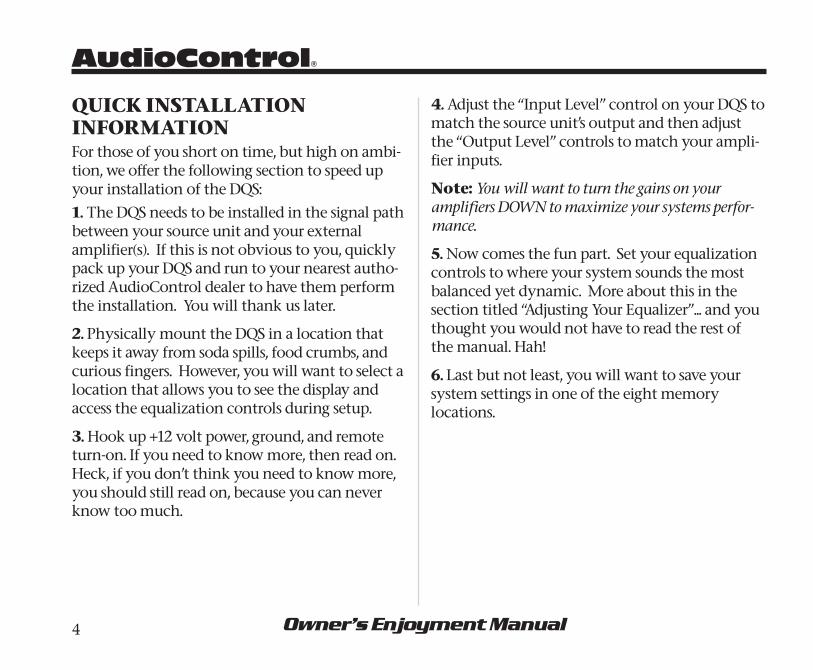
QUICK INSTALLATIONINFORMATIONFor those of you short on time, but high on ambi-tion, we offer the following section to speed upyour installation of the DQS:1. The DQS needs to be installed in the signal pathbetween your source unit and your externalamplifier(s). If this is not obvious to you, quicklypack up your DQS and run to your nearest autho-rized AudioControl dealer to have them performthe installation. You will thank us later.
2. Physically mount the DQS in a location thatkeeps it away from soda spills, food crumbs, andcurious fingers. However, you will want to select alocation that allows you to see the display andaccess the equalization controls during setup.
3. Hook up +12 volt power, ground, and remoteturn-on. If you need to know more, then read on.Heck, if you don’t think you need to know more,you should still read on, because you can neverknow too much.
4. Adjust the “Input Level” control on your DQS tomatch the source unit’s output and then adjustthe “Output Level” controls to match your ampli-fier inputs.
Note: You will want to turn the gains on youramplifiers DOWN to maximize your systems perfor-mance.
5. Now comes the fun part. Set your equalizationcontrols to where your system sounds the mostbalanced yet dynamic. More about this in thesection titled “Adjusting Your Equalizer”... and youthought you would not have to read the rest ofthe manual. Hah!
6. Last but not least, you will want to save yoursystem settings in one of the eight memorylocations.

Owner’s Enjoyment Manual
The Strength of Digital™
5
Figure 1: Basic DQS System

Owner’s Enjoyment Manual
AudioControl®
6
A GUIDED TOUR OF DQS1) Inputs: The DQS has six RCA inputs that
need to get their audio signals from the mainsource unit. If your source unit only has two orfour outputs, fear not, just use the front or rearinputs. See the system diagrams in this manualfor some cool system ideas.
2) Input Level: These knobs allow you tomaximize the signal level from your source unitthat goes into your DQS to achieve maximumsignal-to-noise ratio. Keep in mind that despitewhat the literature says, most aftermarket sourceunits produce a relatively low voltage signal whenit comes to playing music at normal levels.
3) Input Maximized Indicators: Thesenifty LEDs (Light Emitting Diode if you are curi-ous) indicate that you are supplying the DQS itsmaximum amount of signal voltage. If the LEDindicators never come on, don’t assume that it isnot working (since LEDs rarely break) but youmight consider adding a line driver to your system.
4) Output Level Controls: Although yourDQS has the ability to increase your signal voltage,your amplifiers may not necessarily accept thatmuch signal. These controls allow you to regulatethe proper amount of pre-amp signal from theDQS to the amplifiers.
5) Equalization Overload Indicator: Thisconvenient LED indicates when the DSP (digitalsignal processor) of your DQS is clipping or distort-ing. The usual cause of this is having the “InputLevel” turned up too high or you have to muchoverall boost on the various frequencies of yourequalizer.
6) Select: This button allows you to select oneof the various equalization, display, or memorymodes of your DQS.
7) Navigation Arrows: These multi-func-tion buttons perform a number of duties, depend-ing upon which mode your DQS is in. You can doanything from applying boost or cut to yourequalization filters to changing the display bright-ness. However, if you get the high score, youcannot enter your initials!
8) Output Voltage Indicators: Thesebrightly colored LEDs indicate the level of signalvoltage that is coming out of the various outputsof your DQS. Use these to assist in level matchingyour source unit with your amplifiers.
9) Outputs: These RCA connectors should beconnected to the next component(s) after theDQS, usually an amplifier. Do not connect anyspeakers directly to your DQS or to any homeappliances, like your toaster.

Owner’s Enjoyment Manual
The Strength of Digital™
7
Figure 2: Top view of DQS
·
¸ ¹
º
Ñ
DQS Digital EqualizerDQS Digital EqualizerDQS Digital EqualizerDQS Digital EqualizerDQS Digital EqualizerBy AudioControl(r)By AudioControl(r)By AudioControl(r)By AudioControl(r)By AudioControl(r)
Ï
Ð
Ò Ó
Owner’s Enjoyment Manual
AudioControl®
8
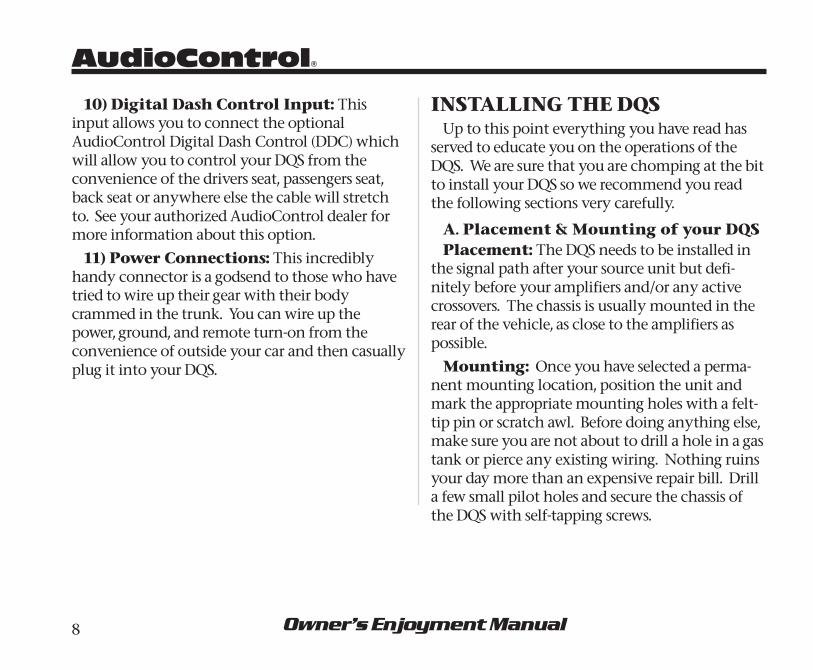
10) Digital Dash Control Input: Thisinput allows you to connect the optionalAudioControl Digital Dash Control (DDC) whichwill allow you to control your DQS from theconvenience of the drivers seat, passengers seat,back seat or anywhere else the cable will stretchto. See your authorized AudioControl dealer formore information about this option.
11) Power Connections: This incrediblyhandy connector is a godsend to those who havetried to wire up their gear with their bodycrammed in the trunk. You can wire up thepower, ground, and remote turn-on from theconvenience of outside your car and then casuallyplug it into your DQS.
INSTALLING THE DQSUp to this point everything you have read has
served to educate you on the operations of theDQS. We are sure that you are chomping at the bitto install your DQS so we recommend you readthe following sections very carefully.
A. Placement & Mounting of your DQSPlacement: The DQS needs to be installed in
the signal path after your source unit but defi-nitely before your amplifiers and/or any activecrossovers. The chassis is usually mounted in therear of the vehicle, as close to the amplifiers aspossible.
Mounting: Once you have selected a perma-nent mounting location, position the unit andmark the appropriate mounting holes with a felt-tip pin or scratch awl. Before doing anything else,make sure you are not about to drill a hole in a gastank or pierce any existing wiring. Nothing ruinsyour day more than an expensive repair bill. Drilla few small pilot holes and secure the chassis ofthe DQS with self-tapping screws.

Owner’s Enjoyment Manual
The Strength of Digital ™
9
B. DQS Power WiringWARNING: Failure to disconnect the negative
terminal of your battery prior to the installation ofyour DQS can result in a warm tingly feeling.
Remote Turn-On: Connect an 18 to 22 gaugewire from the head-unit’s remote turn-on to the“Remote” connector on the DQS .
Positive (+12V) Connection: Insert a 12 to18 gauge wire into the connector labeled “Power”on the nifty connector of your DQS. Connect itto a good constant source of 12 volts (we suggestthe battery), fused at 2 amps.
Ground Connection: Use the same gaugewire or larger as you did for the positive connectorand run it from the “Ground” connector on theDQS to the negative terminal of the battery, aground bus, or a verified ground location. Thefactory head unit ground is not, not, not a goodground! When the electrical connections arecomplete, you may now reconnect the negativeterminal to your battery.
C. DQS Audio WiringPlanning: As you may already have guessed,
there are numerous ways to configure the DQS inyour audio system. Spend a little quality timeplanning out your system and even sketching itout on paper. The following diagrams are just afew of the system options:
Owner’s Enjoyment Manual
AudioControl®
10
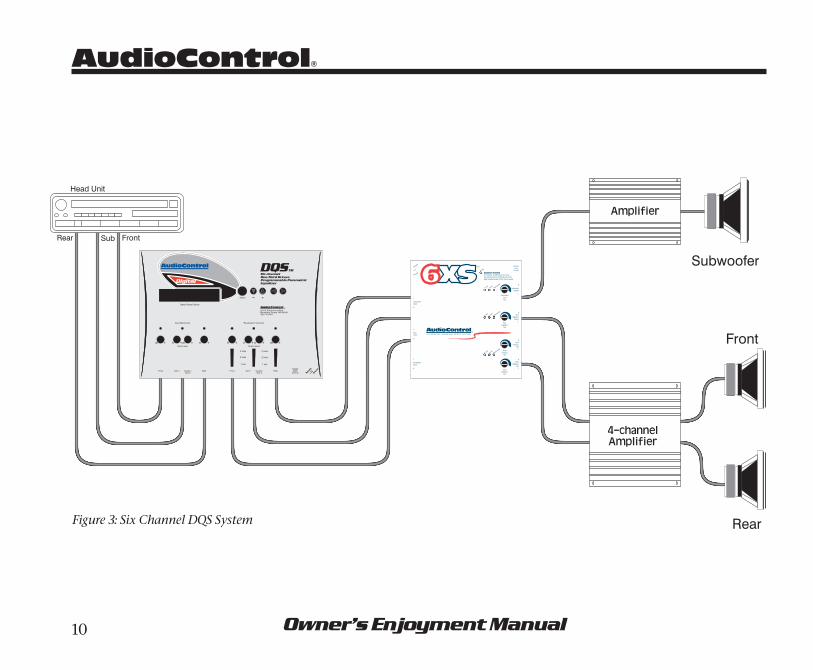
Figure 3: Six Channel DQS System

Owner’s Enjoyment Manual
The Strength of Digital™
11
Figure 4: DQS Car Theater System
Owner’s Enjoyment Manual
AudioControl®
12
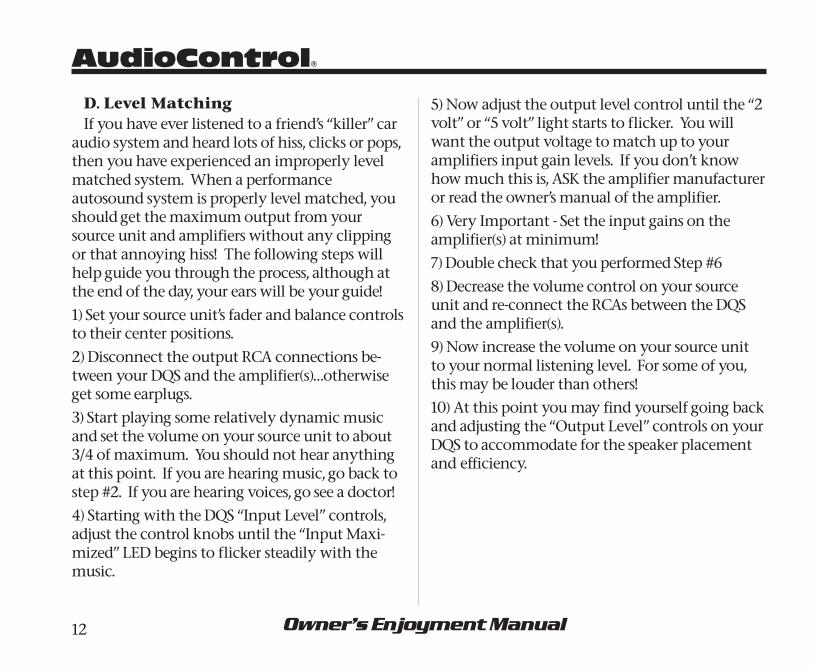
D. Level MatchingIf you have ever listened to a friend’s “killer” car
audio system and heard lots of hiss, clicks or pops,then you have experienced an improperly levelmatched system. When a performanceautosound system is properly level matched, youshould get the maximum output from yoursource unit and amplifiers without any clippingor that annoying hiss! The following steps willhelp guide you through the process, although atthe end of the day, your ears will be your guide!
1) Set your source unit’s fader and balance controlsto their center positions.
2) Disconnect the output RCA connections be-tween your DQS and the amplifier(s)…otherwiseget some earplugs.
3) Start playing some relatively dynamic musicand set the volume on your source unit to about3/4 of maximum. You should not hear anythingat this point. If you are hearing music, go back tostep #2. If you are hearing voices, go see a doctor!4) Starting with the DQS “Input Level” controls,adjust the control knobs until the “Input Maxi-mized” LED begins to flicker steadily with themusic.
5) Now adjust the output level control until the “2volt” or “5 volt” light starts to flicker. You willwant the output voltage to match up to youramplifiers input gain levels. If you don’t knowhow much this is, ASK the amplifier manufactureror read the owner’s manual of the amplifier.
6) Very Important - Set the input gains on theamplifier(s) at minimum!
7) Double check that you performed Step #6
8) Decrease the volume control on your sourceunit and re-connect the RCAs between the DQSand the amplifier(s).9) Now increase the volume on your source unitto your normal listening level. For some of you,this may be louder than others!10) At this point you may find yourself going backand adjusting the “Output Level” controls on yourDQS to accommodate for the speaker placementand efficiency.

Owner’s Enjoyment Manual
The Strength of Digital ™
13
DQS Menu ScreensOne of the major benefits of using Digital tech-
nology is the ability to use less knobs and buttonsand get more control. The DQS has six, 30-bandmono equalizers plus six 2-band parametricequalizers, that would normally require almost200 individual controls and occupy an area aslarge as your trunk. AudioControl’s digital tech-nology allows the DQS to offer a plethora offeatures in one compact chassis. In addition thereare only a few knobs so navigating through theDQS’s functions is quite simple.
When you first apply power to your DQS, it willgo through a few “wake-up” screens, includingsome subliminal advertising for AudioControl. Itwill then display a friendly blue screen (not thescary blue screen found on many computers). Fearnot, because the blue screen on the DQS is actu-ally a good thing.
Menu Tree: Once your DQS has settled on oneof these menu screens, you will want to spend afew minutes familiarizing yourself with thevarious modes. Although the DQS has one mainscreen , there are eleven sub menu screens thatallow you to access and program all of the variousfunctions of your DQS. Figure 5 shows you howthe Menu Tree of your DQS flows.

Owner’s Enjoyment Manual
AudioControl®
14
Figure 5: DQS Menu Tree

Owner’s Enjoyment Manual
The Strength of Digital ™
Figure 6: DQS main menu screen ÊÊÊÊÊ ËËËËË ÌÌÌÌÌ ÍÍÍÍÍ
15
Front EQ Freq = 1kHzFront EQ Freq = 1kHzFront EQ Freq = 1kHzFront EQ Freq = 1kHzFront EQ Freq = 1kHzL= +6dB L= +6dB L= +6dB L= +6dB L= +6dB >o<>o<>o<>o<>o< R =+4dB R =+4dB R =+4dB R =+4dB R =+4dB
MODE: Front EQ, Rear EQ, SubCtr EQ
Figure 7: Graphic EQ Screen
Your DQS has 30 built-in graphic equalizationfilters for each channel. These frequencies happento match those on the AudioControl SA-3055 realtime analyzer. In the Graphic EQ mode, you canselect any of the 30 frequencies, one at a time, andapply boost or cut. The menu screens for yourgraphic equalizers are labeled Front EQ, RearEQ, and SubCtr EQ respectfully. In addition youcan select whether you want the equalizationcontrols to affect the left and right channelsindividually or control both channels at the sametime.
Freq(uency): This corner of the screen indi-cates which frequency you are boosting or cut-ting. If you wish to select another frequency, tap
the left or right arrow buttonsuntil the cursor is flashing onthe number next to “Freq=”.Then use the “+” and “-” controlsto select the frequency to whichyou wish to apply boost or cut.
1) Digital Status Display - This cool bluescreen will tell you which mode your DQS is in.
2) Select - Every time you tap this button, youwill scroll through the various modes in yourDQS.
3) “+” and “-” Navigation Buttons:Depending upon where your cursor is flashing,these buttons will allow you to change the fre-quency, apply boost/cut and vary the bandwidthor “Q” of your equalization filters.
4) Left and Right Navigation Buttons:Within each mode there are several sub functions(i.e. Freq., Lvl, Width, etc.) that you can accessusing these buttons. By tapping on these buttonsand watching the flashing cursor, you can navi-
gate through eachfunction on the
screen.
Owner’s Enjoyment Manual
AudioControl®
16
Single or Dual Channel Equalization:After you have selected a frequency to equalize,you must decide whether you wish to equalize theleft channel, the right channel, or both channelssimultaneously. If you are a first time user, wesuggest you equalize both channels together atfirst and then individually. Use the arrow keys tomove the cursor to one of the following positions:
“L=” Equalizing on the left channel
“>o<“ Equalizing both channels simultaneously“R=” Equalizing on the right channel
When the cursor highlights this screen, you cannow apply boost or cut, using the + and - controls,to the frequency you selected in the previous step.
Once you have made your equalization settings,you will want to tap the Select button, go to theMemories screen, and save your settings in one ofthe eight memory locations. Keep in mind youhave the ability to equalize your Front, Rear, andSubwoofer/Center speakers individually.
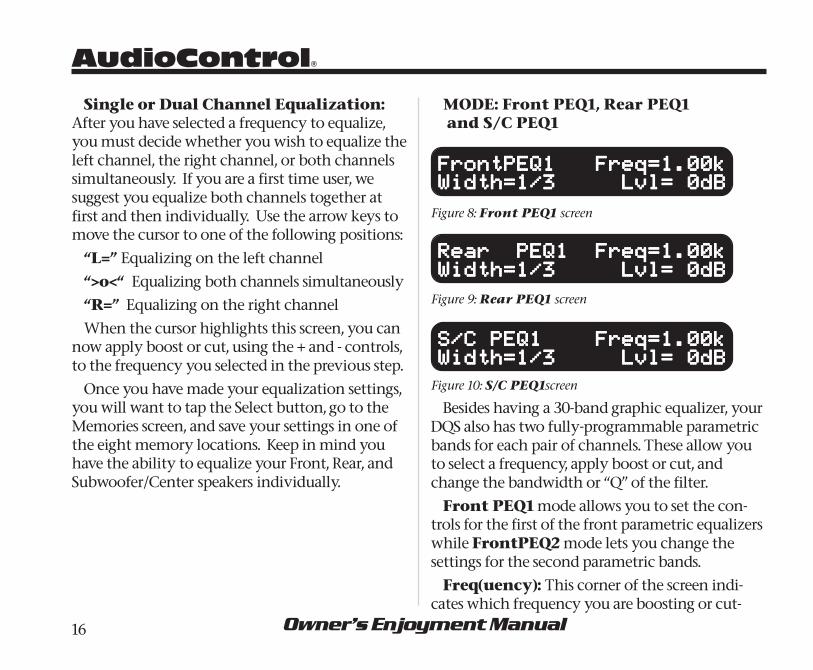
MODE: Front PEQ1, Rear PEQ1 and S/C PEQ1
FrontPEQ1 Freq=1.00kFrontPEQ1 Freq=1.00kFrontPEQ1 Freq=1.00kFrontPEQ1 Freq=1.00kFrontPEQ1 Freq=1.00kWidth=1/3 Lvl= 0dBWidth=1/3 Lvl= 0dBWidth=1/3 Lvl= 0dBWidth=1/3 Lvl= 0dBWidth=1/3 Lvl= 0dB
Rear PEQ1 Freq=1.00kRear PEQ1 Freq=1.00kRear PEQ1 Freq=1.00kRear PEQ1 Freq=1.00kRear PEQ1 Freq=1.00kWidth=1/3 Lvl= 0dBWidth=1/3 Lvl= 0dBWidth=1/3 Lvl= 0dBWidth=1/3 Lvl= 0dBWidth=1/3 Lvl= 0dB
S/C PEQ1 Freq=1.00kS/C PEQ1 Freq=1.00kS/C PEQ1 Freq=1.00kS/C PEQ1 Freq=1.00kS/C PEQ1 Freq=1.00kWidth=1/3 Lvl= 0dBWidth=1/3 Lvl= 0dBWidth=1/3 Lvl= 0dBWidth=1/3 Lvl= 0dBWidth=1/3 Lvl= 0dB
Figure 8: Front PEQ1 screen
Figure 9: Rear PEQ1 screen
Figure 10: S/C PEQ1screen
Besides having a 30-band graphic equalizer, yourDQS also has two fully-programmable parametricbands for each pair of channels. These allow youto select a frequency, apply boost or cut, andchange the bandwidth or “Q” of the filter.
Front PEQ1 mode allows you to set the con-trols for the first of the front parametric equalizerswhile FrontPEQ2 mode lets you change thesettings for the second parametric bands.
Freq(uency): This corner of the screen indi-cates which frequency you are boosting or cut-

Owner’s Enjoyment Manual
The Strength of Digital ™
17
ting. If you wish to select another frequency, tapthe left or right arrow buttons until the cursor isflashing on the number next to “Freq=”. Then usethe “+” and “-” controls to select the frequency towhich you wish to apply boost or cut.
Lvl: When the cursor highlights this part of thescreen, you can now apply boost or cut to bothchannels using the “+” and “-” controls. Pleasenote that you do not have individual channelcontrol using the parametric equalizers.
Width: This control lets you select how wideof an area each of the DQS’s parametric bandsaffects. You can choose a real narrow bandwidth,like 1/12 th of an octave or go as wide as three fulloctaves.
MODE : MemoriesThis screen allows you to save or recall settings
to or from one of the eight memory locations.Using the Left and Right arrows will cause thecursor to highlight one of the following func-tions:
Recall: When the cursor is flashing next tothis word, you have the ability to recall one of theeight memories. Push the “+” or “-” buttons toscroll through the memories and select a memoryto recall.
Figure 11: Memory screen
Save: Once you have made your equalizationsettings, you will want to save them in one of theeight memory locations. When the cursor isflashing next to the word “Save”, use the “+” or “-”buttons to select a memory location. Once youhave selected a memory location, tap either the“Left” or “Right” button and the cursor will moveto the bottom left of the screen between “N(-)”and “Y(+)”. Tap the (+) button to complete thesaving process or tap (-) to quit.
Please note that while you are RECALLING orSAVING a memory, the cursor will stop blinking.Once the processor has SAVED or RECALLEDall your settings, it will begin flashing again.
Memories Recall #1Memories Recall #1Memories Recall #1Memories Recall #1Memories Recall #1 Save #1 Save #1 Save #1 Save #1 Save #1

Owner’s Enjoyment Manual
AudioControl®
18
MODE: Display
Figure 12: Display brightness screen
In this mode, you have the ability to change thebrightness levels on the display of your DQS.Using the left and right navigation buttons youcan toggle back and forth between “Bright” and“Dim”. Once you have selected a brightness levelyou are comfortable with, tap the “Select” buttonand your last brightness setting will be retained.
ADJUSTING THE EQUALIZERWhen it comes to music, everyone’s taste is
different. Some people want pounding bass andcrisp, blood curdling highs. Others may prefer a“flat” response (whatever the heck that is). At theend of the day, most people just want their systemto sound balanced, “just like it did in the store” ortheir buddy’s car. The following equalizationguidelines should help you achieve your ownpersonal audio nirvana.
1) For optimum performance, get your hands on atest compact disc that contains pink noise and agood quality RTA (real-time analyzer); we happen
to know someone who makes a really good one.If you cannot locate an RTA, you probably wantto have your authorized AudioControl dealerperform the equalization adjustments, as they willlikely have an analyzer. You can certainly adjustyour DQS using your ears, however an RTA willgive you the best results.2) Begin playing pink noise through your systemand place the microphone for your analyzer on amicrophone stand in the driver’s seat. Take acareful look at the “curve” on your analyzer andhow one frequency combines with the next.
There is no one curve that will satisfy everyperson, as we all have different tastes. (How elsecan you explain Liberace, Brittany Spears or ricecakes?) The key is to use your DQS to help bal-ance your system from one frequency to the nextand give your speakers the sparkle, sizzle, detail orpunch that the acoustics of the car have compro-mised.
3) Start equalizing by removing any large bumps,peaks, or areas with too much energy at a particu-lar frequency. Next, boost the ranges that do nothave enough energy. We strongly recommendthat you cut or decrease energy before you boost.Try to keep any boosts to +6dB or less for bestperformance.
DisplayDisplayDisplayDisplayDisplayBright DimBright DimBright DimBright DimBright Dim

Owner’s Enjoyment Manual
The Strength of Digital ™
19
4) Although the plethora of controls on your DQScan be intimidating, fear not; they were designedto give enough control to maximize your system’sperformance but not enough to get you introuble. Here is an explanation of the key areasyou should focus on:
Sub-bass: 100 Hz and below - A car withoutbass is like a day without sunshine…unless youlive where we do because most of the days in thePacific Northwest do not have sunshine. Bass isone of the more critical areas and it is also one ofthe most difficult to properly reproduce. Mostpeople prefer their bass frequencies to be 6 to 9 dBlouder than the rest of their system, althoughthere are some crazy folks that prefer their basssubstantially louder. The key in this area is tohave enough speakers and power to produce theamount of bass youdesire. But don’t use thecontrols on the DQS totry and force yourspeakers to producesounds they can’t. Toomuch bass boost createsa condition called“speakerus explodus”,which is not pretty tohear or watch.
Midbass: 100 Hz to 300Hz - The phrase, “toomuch of a good thing”, can certainly apply to themidbass frequencies. This is the transition area ofthe audio spectrum that is an octave above yoursub-bass frequencies and several octaves belowyour midrange. Most autosound systems have toomuch mid-bass due to the fact that speakersmounted in the doors or kick panels cause reso-nances or peaks in the response curve. Thesepeaks in the mid-bass can actually mask or blocksounds in the all-important midrange area causingyour system to sound dull and lifeless.
Midrange: 300Hz to 3kHz - Musical instru-ments, vocals, mid-range percussion and manythings we associate with imaging and staginghappen in this area of the bandwidth. For thatreason you will want to keep this area as smooth
Figure 13: Sample RTA curve

Owner’s Enjoyment Manual
AudioControl®
20
and balanced as possible. Too much boosting canmake you feel like you are listening to your sys-tem in a tile bathroom. Not enough energy in themidrange sounds empty and dry.
Treble: 3KHz and Up - If midrange is thecake, then these high or upper frequencies are thefrosting. Many autosound systems start a gradualdecline in this area which is why speaker place-ment is very important. The DQS only gives you afew controls in this area because too much boost-ing can really make a speaker sound unnatural.
TROUBLESHOOTINGNo Power: If the blue display on your DQS will
not turn on, check to make sure that the powerwire and remote turn-on wires are connectedproperly or a fuse has not blown.
System Sounds Unbalanced: Check yourgraphic and parametric equalization settings tomake sure that one channel is not dramaticallydifferent than another.
Sounds Distorted: Should your system sounddistorted or your speakers are moving way toomuch, you should make sure you have your levelsmatched properly and that your amplifier gainsare set at minimum. If this checks out okay, youwill want to look at your EQ controls to insure
that your boost levels are not overly boosted.Still Sounds Distorted: Look at the frequen-
cies that you have selected for FrontPEQ1 andFrontPEQ 2 and see how much boost or cut youhave applied. Then look at those same frequen-cies on your Graphic EQ. If you have boost ap-plied to the same frequencies on both types ofequalizers, there is a strong chance you areoverdriving your speakers and amplifiers at thatfrequency.
Output Voltage LEDs Don’t Light Up: Ifyour system is playing music but none of theoutput LED’s are on, there is a good chance thatthe output voltage of your source unit is not thatstrong. Now before you call us and say, “The guyat the store said my radio has high-voltage out-put”, you might want to face the fact that there is“Engineering Voltage” and there is “MarketingVoltage”. Without picking on any particularsource unit, remember that you do get what youpay for.

Owner’s Enjoyment Manual
The Strength of Digital ™
21
UNDER THE COVER1) Input Grounding: For many systems you
can leave this jumper in the UNBALANCEDposition. In other systems, the source unit maylook for a ground through the RCA connection tothe amplifier and create a ground loop, which inturn can cause a whine (not the type that comesin a bottle) in your system. In that event, youshould set at least one of the three jumpers to theBALANCED position.
2) Ground Isolation Selector: Occasionallyalternator noise may appear in a system becausethe source unit and amplifier are using differentgrounding schemes. To help in this situation, wehave provided alternative grounding connections.Make sure your system is turned OFF before youmove these jumpers.
IF YOU LIKE THE DQS,YOU’LL LOVE…
The AudioControl Digital Dash Control (orDDC as it is called by its closest friends) is anoptional remote-mountable control for your DQS.The DDC can be installed almost anywhere inyour vehicle and then connected to your DQS viacable. This allows you to make all of your equal-ization settings from the convenience of yourfront seat as well the chassis of your DQS. Inaddition with the DDC, you can see “many col-ors” without any hallucinogenics by changingthe display colors and backlighting.
Shipped OptionsInputGrounding Unbalanced Balanced
GroundIsolation Isolated 200 ohms or Ground
Choice ofbeverage Micro-brew Latté
AudioControl DDC - Digital Dash Control

Owner’s Enjoyment Manual
AudioControl®
22
And now a word from the legal department.
THE WARRANTYPeople are scared of warranties. Lots of fine
print. Months of waiting around. Well, fear nomore, this warranty is designed to make you raveabout us to your friends. It’s a warranty that looksout for you and helps you resist the temptation tohave your friend, “...who’s good with electronics”,try to repair your AudioControl product. So goahead, read this warranty, and then take a fewdays to enjoy your DQS before sending in thewarranty card and comments.
“Conditional” doesn’t mean anything ominous.The Federal Trade Commission tells all manufac-turers to use the term to indicate that certainconditions have to be met before they’ll honorthe warranty. If you meet all of these conditions,we will warrant all materials and workmanshipon your DQS for one year from the date youbought it (five years if it is installed by an autho-rized United States AudioControl dealer). We willfix or replace it, at our option, during that time.
Here are the conditional conditions:1. You have to fill out the warranty card and send
it to us within 15 days after purchasing your DQS.
2. You must keep your sales receipt for proof ofpurchase showing when and from whom the unitwas bought. We’re not the only ones who requirethis, so it’s a good habit to get into with any majorpurchase.
3. Your DQS must have originally been pur-chased from an authorized AudioControl dealer.You do not have to be the original owner, but youdo need a copy of the original sales slip.
4. You cannot let anybody who isn’t (A) theAudioControl factory; (B) somebody authorizedin writing by AudioControl to service your DQS.If anyone other than (A) or (B) messes with yourDQS, that voids your warranty.
5. The warranty is also void if the serial numberis altered or removed, or if your DQS has been usedimproperly. Now that sounds like a big loophole,but here is all we mean by it.
Unwarranted abuse is (A) physical damage(don’t use the DQS for a jack stand); (B) improperconnections (120 volts into the power jack can frythe poor thing); (C) sadistic things. This is the bestmobile product we know how to build, but if youmount it to the front bumper of your car, some-thing will go wrong.

Owner’s Enjoyment Manual
The Strength of Digital ™
6. If an authorized United States AudioControldealer installs your DQS, the warranty is five years;otherwise the warranty is one year.
Assuming you conform to 1 through 6, and itreally isn’t all that hard to do, we get the option offixing your old unit or replacing it with a newone.
LEGALESE SECTION
This is the only warranty given by AudioCon-trol. This warranty gives you specific legal rightsthat vary from state to state. Promises of how wellthe DQS will perform are not implied by thiswarranty. Other than what we have covered inthis warranty, we have no obligation, express orimplied. Also, we will not be obligated for director indirect consequential damage to your systemcaused by hooking up the DQS.
Failure to send in a properly completed war-ranty card negates any service claims.
DQS SPECIFICATIONSAll specifications are measured at 14.4 VDC
(standard automotive voltage). As technologyadvances, AudioControl reserves the right tocontinuously change our specifications like ourweather.Maximum input level ................................................. 7.5 VrmsMaximum output level ............................................... 7.5 VrmsOutput gain ..................................................................... ±10dBFrequency response .............................................. 10Hz-22kHzTotal harmonic distortion ............................................... 0.01%Signal to Noise ratio ....................................................... 105dBBalanced input noise rejection ......................................... 60dBInput Impedance ....................................................... 20k OhmsOutput Impedance .................................................... 150 OhmsGraphic Equalization Controls ....... 30 bands, 25 Hz - 20 kHz
ISO 1/3 octave centersParametric Equalization Controls ..... 2 bands, 25 Hz - 20 kHz
ISO 1/12 octave Adjustable CentersParametric Equalization Bandwidth ............. 1/12 to 3 octavesEqualization boost/cut ................................................... ±12 dBPower supply ........................ High headroom PWM switchingPower draw ....................................................................600mARecommended fuse rating ............................................. 2 AmpSize ...................................................... 1.25" W x 9.9"D x 7"HWeight ........................................................................... 3.5 lbs.Country of origin ............................................................... USA
23

Owner’s Enjoyment Manual
AudioControl®
22410 70th Avenue WestMountlake Terrace, WA 98043 USA
Phone: 425-775-8461Fax: 425-778-3166
www.audiocontrol.com
®
©2004, AudioControl, a division of Electronic Engineeringand Manufacturing, Inc. All rights reserved. AudioControl,
Making Good Stereo Sound Better, DQS, DQX, DQT, DDCand DXS, are all trademarks of Electronic Engineering and
Manufacturing, Inc.
This manual was conceived, designed, and written on severalbleak, windy, and dreary rain-drenched days at our home inthe Pacific Northwest Rainforest outside of Seattle, Washing-ton. The lattés were hot and the wheat beers were cold like
our weather.