the secrets of - steve nichols of infotech communications · the secrets of better pr and ......
TRANSCRIPT
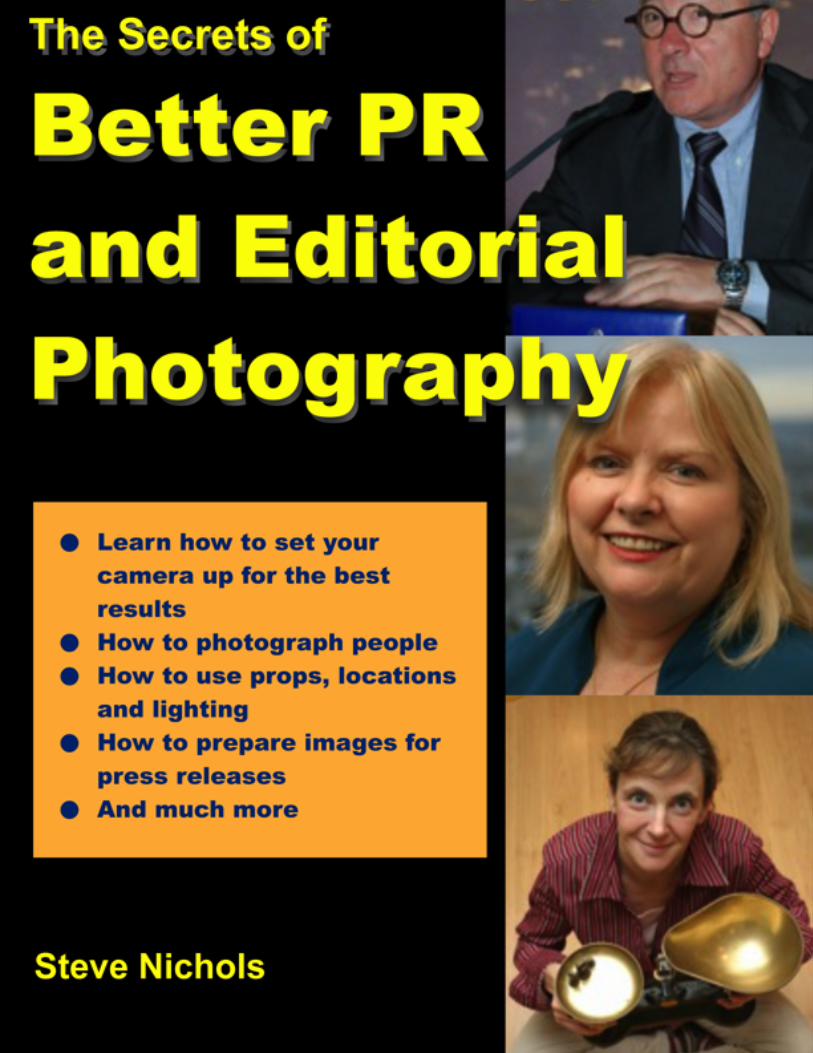

The Secrets of
Better PR and Editorial Photography
• Learn how to set your camera up for the best results
• How to photograph people
• How to use props, locations and lighting
• How to prepare images for press releases
• And much more
Terms and conditionsAll content contained within “Better PR and Editorial Photography” is copyright. © 2012 Steve Nichols, InfoTech Communications – www.infotechcomms.co.uk.
All rights reserved.
ISBN 978-1-4710-9500-9
Also available in printed form: - ISBN 978-1-4716-0781-3
All literary work contained within "Better PR and Editorial Photography" belongs to and is the sole property of Steve Nichols and is reprinted with permission.
Reproduction, copying, or any other form of use of the pieces contained within the book is STRICTLY FORBIDDEN without express permission from the author himself.
..........................................................................About the author 4
.................................................................................Introduction 4
..........................Why PR and Editorial Photography is different 6
...........................................................................Before setting off 6
............................................................Batteries - the charge of the light brigade 6
.............................................................................................I can see clearly now 8
...................................................................................Memories are made of this 9
.............................................................................................................Summary 10

...............................................Understanding digital image files 10
...............................................So let’s go and shoot some people! 6
..................................................................................Why first impressions count 7
...................................................................................Breaking down the barriers 7
................................................................................Taking images of individuals 8
...............................................................................................The formal portrait 8
................................................................................................Informal portraits 10
.............................................................................Handling two or more people 12
.......................................................................................Handling presentations 14
.........................................................................................................Using props 15
.............................................................................Make, not take, a photograph 15
................................................................................Case studies 17
..............................................................................................Work/Life balance 17
........................................................................................................Fighter Pilot 18
............................................................................................................Use props 19
..........................................................................................Use your imagination 20
........................................................................Use your backgrounds creatively 21
..........................................Layer people to fit them all in - and get some height 22
............................................................................................Take props with you 23
...........................Try informal portraits by getting people talking to each other 24
...........................................................................................Use attractive people 25
...................................................................Use props to help illustrate the story 26
..................................................................................Arrange people differently 27
.....................................................................Get your company logo in the shot 29
...............................................................................Managing press conferences 30
................................................................Use your own (or someone else’s) kids 31
......................................................................................Look for natural frames 32
......................................................................Balance daylight and bounce flash 33
...............................................................................................Try different ideas 34
...........................................................................Be creative and break the rules 36
.............................................................How to take great presentation pictures 37
.............................................................................................Know the story first 38
.............................Shooting and optimising images for intranet 40
............................................Preparing images for press releases 42
............................................Dictionary of Photographic Terms 43
About the authorSteve Nichols runs InfoTech Communications, which produces magazines, newsletters and electronic communications for businesses.
He also acts as a freelance photographer and his assignments have included traveling to Florida to cover a Space Shuttle launch, Seattle to cover the design of a new supersonic airliner and to Singapore and Dubai to photograph top airline executives.
He has also run in-house digital photography courses for a wide range of companies in the UK including Standard Life, Novartis, Astra Zeneca, Diageo, Halifax Building Society, Herts County Council, Aviva and others
IntroductionHi, and welcome to “Better PR and Editorial Photography”. This manual was written as the result of running more than 100 courses for people just like you - PR professionals and other communicators who have to take photographs as part of their jobs.
With the rise of digital cameras and the intranet, many of you have found that you now have to take your own pix.
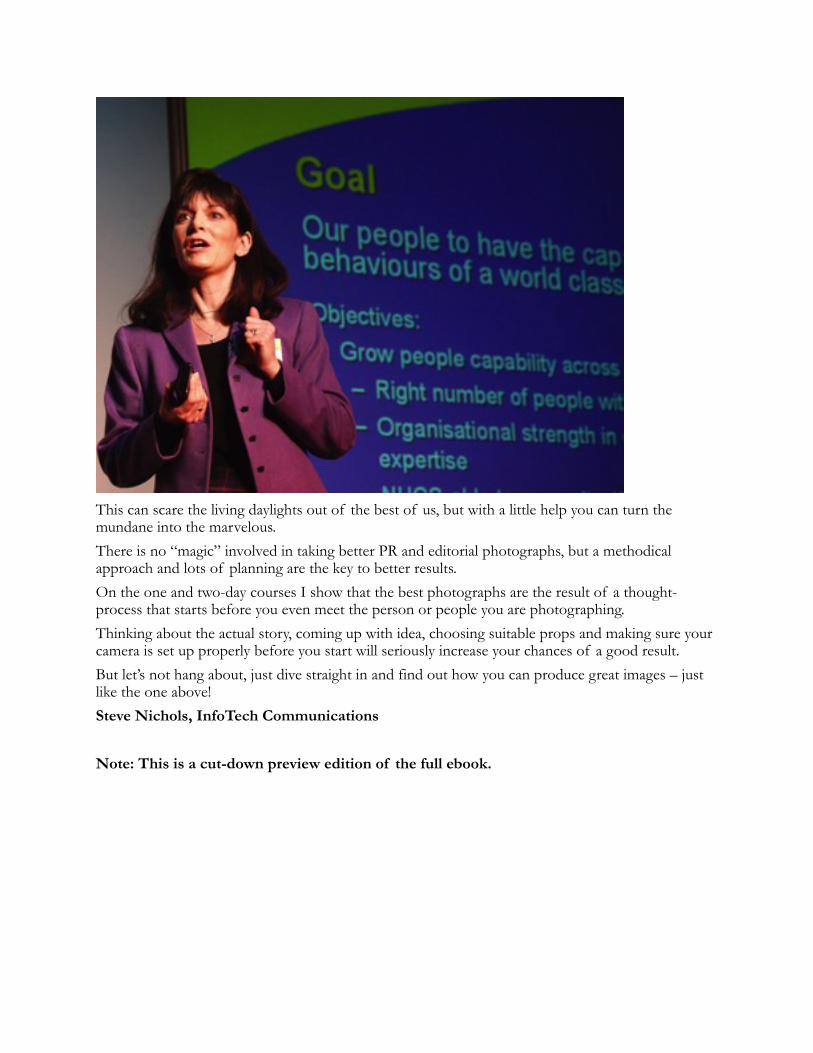
This can scare the living daylights out of the best of us, but with a little help you can turn the mundane into the marvelous.
There is no “magic” involved in taking better PR and editorial photographs, but a methodical approach and lots of planning are the key to better results.
On the one and two-day courses I show that the best photographs are the result of a thought-process that starts before you even meet the person or people you are photographing.
Thinking about the actual story, coming up with idea, choosing suitable props and making sure your camera is set up properly before you start will seriously increase your chances of a good result.
But let’s not hang about, just dive straight in and find out how you can produce great images – just like the one above!
Steve Nichols, InfoTech Communications
Note: This is a cut-down preview edition of the full ebook.

Why PR and Editorial Photography is different
Anyone can take photographs - can’t they? Isn’t it as simple as pointing and shooting? Well, no it isn’t, as a glance through any daily newspaper will show.
Most corporates need a good supply of strong imagery for their own in-house newspapers, magazines and corporate intranets. And if you want your local, national or trade media to use your images to support your press releases you are going to have to give them a little more than a simple snap.
What you will need is a compelling image that focuses the eye on the detail you want, with no extraneous rubbish. Oh, and its got to be sharp, well-exposed and of sufficient quality to be printed as a full-bleed A4 front cover too – phew!
No wonder most people call in a professional photographer.
But if you can master the basics of operating a digital camera you are well under way to producing printable results.
So here we go with the secrets.
Before setting offMake sure you have set up your camera properly, that you have charged the batteries, that the resolution is set correctly, the lens is clean and that you have enough storage space on the memory card.
On many of the courses I have run it is always apparent that a large percentage of the delegates have no idea how to set up their cameras.
That is, they don’t know how to set up the number of effective pixels or image size, how to delete images from an image card or how to switch their flash guns on and off.
Now I will be the first to admit that most camera handbooks are rubbish, but if you don’t understand your camera how are you going to get the best out of it?
The only way to get over this particular hurdle is to spend an afternoon or so going through the manual with the camera to find out what all the buttons do.
So let’s go and shoot some people!So far we have looked at what you should do with your camera before you even set off. It should be set up correctly, the memory cards should be clear, the batteries and spare(s) charged and the lens nice and clean.
Why? Because when you get to take the photographs you want to be able to concentrate on the job in hand. There is nothing more nerve racking than having to fiddle with a camera when you have a CEO standing in front of you waiting to be photographed.
He won’t be too impressed either as you fiddle with the camera trying to delete some images to make room for the new ones.
The overall impression is of someone who is completely incompetent! Sort all this out before you leave your own office and you will make the whole process a lot easier.
So what do you do when you arrive?
Why first impressions count
Whenever I have to go on a shoot I try to arrive a few minutes early. That way I can take a good look around the place and see if there are any locations that are suitable for photography. At the very least it allows me to get everything ready, calm down a little and think about the job in hand.
Calm down? Even after doing this job for many years I still get a little stressed on some jobs. This is natural and can be overcome by preparation, pre-planning and attention to detail.
You never really know what your subject is going to be like or how long they are going to make available for you.
I remember one shoot where I thought it was going to take about 20 minutes, but the CEO had booked out the whole day!
On the other hand I have another where I thought I had an hour and ended up with two minutes!
When you do meet your subject(s) greet them enthusiastically and with a big smile. Introduce yourself, say what you want to shoot and how they are going to be used. This is important as many people have no idea why they are being photographed, other than “my secretary arranged it”.
So outline why you are photographing the person and how they will be used.
I also say from the outset that I will need x number of minutes, usually no less than 20. That way, you are setting down from the outset what you expect of them. If they say they haven’t got that much time then either say you will have to come back or negotiate a little more.
Either way, you are in control now and you tell THEM what YOU want, not the other way around. The secret is to show ultimate confidence in what you are doing. So no apologies, no fiddling with the camera and definitely no comments like “I’m not very good at this” or “I really don’t understand this camera”.
Be prepared for your subject to say “I don’t like having my photograph taken”. In 25 years I would say that 90 per-cent of people say that and to be honest, I don’t like having my photograph taken either.
The secret is to make the subject as relaxed as possible - flatter them, be nice, talk to them.
When I first arrive to photograph someone I take a good long hard look. Is their hair a mess? Are their clothes sorted? Is their tie straight?
If it isn’t I usually say something like: “Do you want to spend a few minutes in the restroom making sure you are happy with your appearance? After all, these pix are going to be around for a long time and you want to look your best, don’t you?”
This is more subtle than “you look a mess”!
And trust me - if you photograph someone who looks a mess they will blame you, not themselves.
Breaking down the barriers
I have found that one of the best ways to relax someone is to talk to them about their work. Ask them a couple of open-ended questions like “How long have you been with the company?”, “What did you do before?”, “What do you do in this role?” and “What is the best part of the job?”
I’ll let you into a secret now. Nine times out of ten I don’t even listen to the answers! All I am doing is getting the subject to concentrate on themselves and give me the opportunity to get the camera out, look at suitable backdrops or locations and to thing about lighting.
Without a shadow of a doubt, one of the things I have noticed with novice photographers is that they clam up. They are so engrossed in what they are doing that they don’t talk to their subject.
Meanwhile, the subject is getting more and more uptight, doesn’t know what they are supposed to be doing or where to look, and generally feels very self-conscious.
If you can, find out a little about your subject before you start the shoot. Web sites often contain biog details of top people and over the years I have photographed people who have been a submarine captain, an ace fighter pilot and a dedicated ocean-going yachtsman in previous lives.
Just knowing this is enough to start up a conversation and it usually impresses the hell out of the sitter that you have made the effort.
In all, it can be an ice-breaker and help give you the shots you want.
Remember, people say they hate having their photographs taken. I think they mean, I hated having my photograph taken LAST TIME. Make sure you leave them with a better experience.
Taking images of individuals
Taking pictures of individual people is often the mainstay of general PR and editorial work. But there is a right way and a wrong way to do it.
What I am going to look at it is two methods of doing this – the first is how to take a classic portrait shot, suitable for use as a PR image.
The second is a way of taking more informal shots that can be used in editorial features and/or with press releases.
The formal portrait
Before you go on to try more elaborate or way-out methods of photographing people at least manage to try and perfect the classic portrait.
There are a number of hints and tips for this one, so let’s get going.
• Make sure your camera is vertical not horizontal
For the classic portrait shot you want your camera to be oriented vertically. This suits the image much better and avoids you having to crop off large amounts of wasteful image to the left and right of the subject’s head.
• Make sure that the subject is not up against a wall
I always believe that if the background adds something to an image keep it in. If it doesn’t then get rid of it. The problem with a lot of digital cameras nowadays, especially the smaller compact ones, is that they have tremendous depth of field. That is, a heck of a lot is in focus. If your subject is near to their background the chances are that it will be sharp too, which is very distracting. So keep them at least eight feet away from their background and DON’T use a brick wall either - it always looks like a mug shot from “Prisoner Cell Block H”!
• Shoot at their eye level
This is the best option – I usually put a chair in place for the sitter and then set my camera up on a tripod or hold it so that I am at their eye level. This gives the best perspective.
• Don’t use a wide-angle lens
Most compact digital cameras automatically default to their wide-angle settings when you first switch them on. This is the worst possible setting for a portrait. For a start you have to get way to close to the person you are photographing to fill the frame. Secondly, you then get terrible distortion – like looking into the back of a spoon. The solution is to go back until you are about six feet away from the person and then zoom in to fill the frame. This will give more flattering perspective and help to make the background more blurred. It will also help to get rid of distracting elements in the background.
• Get your sitter to sit at an angle of 45 degrees to you
If you shoot the person head on it will look like a police mug shot. Get them to sit at an angle of 45 degrees to you and then turn their heads to look square on to the camera. The result will be much better.
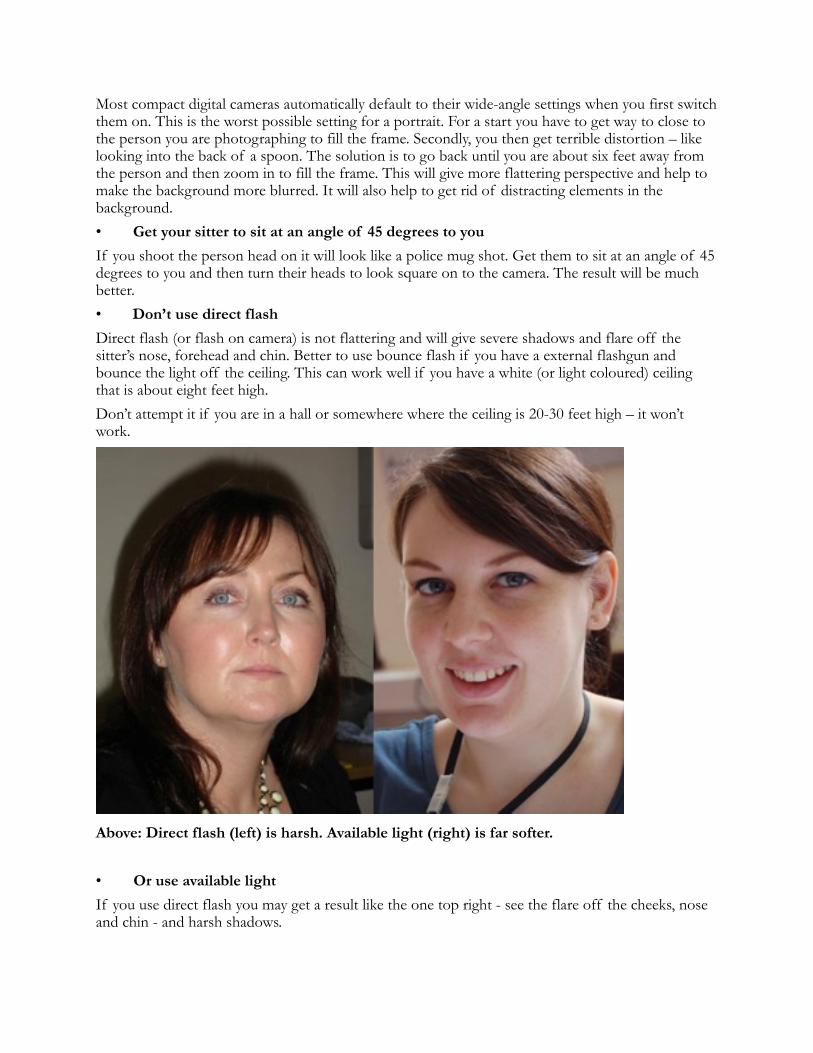
• Don’t use direct flash
Direct flash (or flash on camera) is not flattering and will give severe shadows and flare off the sitter’s nose, forehead and chin. Better to use bounce flash if you have a external flashgun and bounce the light off the ceiling. This can work well if you have a white (or light coloured) ceiling that is about eight feet high.
Don’t attempt it if you are in a hall or somewhere where the ceiling is 20-30 feet high – it won’t work.
Above: Direct flash (left) is harsh. Available light (right) is far softer.
• Or use available light
If you use direct flash you may get a result like the one top right - see the flare off the cheeks, nose and chin - and harsh shadows.

If you haven’t got an external flashgun turn your flash off by pressing the button with the small lightning symbol on your camera until you get the symbol that looks like a lightning with a line though it.
This means the flash will NEVER go off. Now mount the camera on a tripod and use the available light (if in a bright room) or use light coming through a window.
Don’t use direct sunlight as it is too harsh – light on a cloudy day or light from a north-facing window is best. Available light with a reflector will give a more natural look – see image right.
To avoid harsh shadows you can use a reflector to bounce some light back – see the image above.
You can buy commercial reflectors, like the ones from Lastolite, or you can make your own from a large piece of cardboard covered in aluminium foil.
The secret is to get it quite close to your subject’s face, but not so close that it appears in the shot. At a push you can use a large sheet of white paper or a white bin liner – try it, it works! Please note you MUST use a tripod – the shutter speed will be quite slow and you will probably get camera shake if you don’t.
• Make sure you “Fill the Frame”
Don’t place the sitter’s head in the middle of the frame. Make sure you use the whole frame and position their head towards the top.
• Look with your eye first
Take a look at your subject first. Are you happy with what you can see. Is their hair OK? Is their tie straight? If it isn’t sort it out before you take the picture.
So there you have it. The sure-fire way of taking a first class classic portrait shot.
Informal portraits
You can photograph people in their work environments to give more informal portraits. If you do this then landscape-shaped rather than portrait may work better.
Again, don’t use the wide-angle setting of your camera – zoom in a little bit first. You might also want to try not putting them in the middle of the frame. That way you can see a little more of the background, which gives the image a little more colour.
If your subject is not in the middle of the frame you are going to have to make sure that the camera focuses on the person and not the background. Here’s how you do it.
Your camera will usually focus on whatever is in the centre of the frame. To beat this we need to cheat. If you point your camera at something and half depress the shutter button you will probably notice that it beeps and/or a green light comes on.

Above: You can offset the subject if you want the background included. This was using bounce flash off the ceiling and the pre-focus method outlined in the book.
This confirms that it has focused. Now if you keep your finger half depressed on the button and move the camera you will see that it doesn’t refocus – as long as your finger remains in that position.
So now we can use this technique to our advantage.
So if your subject is not in the middle:
1. Point the camera at them and half depress the shutter release. The camera will now beep or a green focus light will come on.
2. Now, keeping your finger in that position recompose the shot so that the person is now over to one side.
3. Now depress the shutter button fully to take the picture.
You may have to practice this technique a little, but it does work. If you have a more complex digital SLR make sure that you have the focussing set up as “one-shot” and not “continuous” otherwise it will try and refocus each time.
So now let’s try a technique for informal portraits that you can use.
Get your subject to sit at their desk and place their elbows on the table. Now you can sit opposite and at an angle with them, but at the same height.
Use bounce flash if you can, or direct if that is all you’ve got. If it is bright you can also try available light (switch the flash off as outlined earlier) but USE A TRIPOD AND GET YOUR SUBJECT TO SIT STILL.

Now all you have to do is ask your subject to look at and talk to the far wall about their career or what they had for breakfast.
Above: Informal portraits: Get the subject to talk to the far corner about what they had for breakfast and count on their fingers how many pieces of toast they had!
You, meanwhile, can shoot away as they do this. Get them to use their hands too, making sure they are in shot. They can count on their fingers or wave them around in front of their face.
If you are not using flash get them to “freeze” what they are doing for a second while you shoot, otherwise they will be blurred.
If you have got this right you should end up with about 20 shots of them in action. Of these about four or five will be excellent and be very useful informal portraits.
Handling two or more people
These are probably the most difficult things to photograph.
Once you get more than four or five people together they tend to turn into monkeys and you will have your work cut out, so make sure you take control.

Above: Ta-da! A more informal way of treating group shots can often work well.
If you have two people the temptation is to just put them side by side and shoot them – don’t.
If you do this you end up with a lot of space between their heads and it is quite a boring shot. Why not overlap them so one is slightly behind the other? That gets rid of the head gap and gives you a tighter composition.
At this point I have to say that another one of the biggest mistakes that I have seen while running courses is that people don’t get close enough. Often they do a full length shot showing feet and everything.
Who cares about feet? What you want is people’s faces so make sure that you are close enough to fill the frame with their heads and perhaps shoulders. You might need to zoom in a bit to avoid distortion though.
If you have three people then look to layer them a little like skittles – smallest at the front. You can use the same technique with four people.
Beyond that you really need to arrange them on steps or get some height so that you can shoot downwards to get everyone in. Shooting a group out of an upstairs window is fairly easy and gives a better result than trying to do it on the flat.
If you want to attract their attention make sure you keep your eye to the camera and wave your free hand around and make sure they are looking at you.
Once you take the camera from your eye they will assume that you have finished and start to disperse.
If you want to focus their attention get them to say something that ends in an “eee” sound – like “smelly cheese!”. This will make it look like they are smiling and keep them looking at you.
Build them up a bit: “Come on …. on three …. 1-2-3 smelly cheese.”

“No, you can do better than that – let’s try again - 1-2-3 smelly cheese.”
This usually does the trick.
If you have an object to feature as well have them crowd around it, or have one holding it and lifting it towards the camera. This focuses the eye on the item and gives a different perspective, especially if you use a wide-angle setting.
Alternatively, line them up towards you and get them to do an aeroplane impression with their arms stretched out.
I used to work with a photographer who had techniques for all sorts of groups. If it was three then he would get them to do a “Three Musketeers - all for one, one for all” type pose using the golf clubs or whatever it was he was featuring as swords.
Or if he had five people he would get them all to do a high five together.
He even had people in a rugby scrum and shot from underneath to get their faces. The possibilities are endless.
This is a cut-down preview edition - see contents list for full version