the importance of shadows - … · chapter 4 > understanding shadows 45 the importance of...
TRANSCRIPT

Like what you see?Buy the book at
www.focalpress.com
Essential CG Lighting Techniques with 3ds Max, 3ed
Brooker ISBN 978-0-240-52117-6
CHAPTER 4 > UNDERSTANDING SHADOWS 45
The importance of shadows
Though they might be considered something that things get hidden or lost in, shadows are actually so vital in terms of
composition and the role they play in defining spatialrelationships, that the importance of shadows in a lightingscheme simply cannot be overstated. The human eye takes a cuefrom shadows not only in judging where a light source is located,but also what an object is made of, how far away it is and howit relates spatially to its surroundings. Shadows vary enormouslyin their many qualities of shape and form with the environment’sillumination. It is the ability to reproduce these characteristicsthat is one of the cornerstones of obtaining realistic renderings.
As well as being one of the biggest aesthetic considerations for alighting artist, in the world of CG, shadows are also one of themost important technical aspects to get to grips with. From theinitial choice of algorithm, shadow casting can be a computation-ally intensive business, so knowing the rules of how to best
‘Envy will merit as its shade pursue,But like a shadow proves the substance true.’
Alexander Pope
4
Image courtesy of:Denis Tolkishevskywww.to3d.ru
ESSENTIAL CG LIGHTING TECHNIQUES WITH 3DS MAX46
represent your lighting scheme’s shadows is vital, as is thenlearning how to break these rules and trick your way to creatingconvincing shadows in a fraction of the time. Though the abilityto hide things in shadows can actually prove very useful, bothfrom a storytelling and a quality control perspective, the visualrole that shadows play is more considerable than you might firstguess. They serve many purposes visually in terms ofcomposition, detail and tonal range.
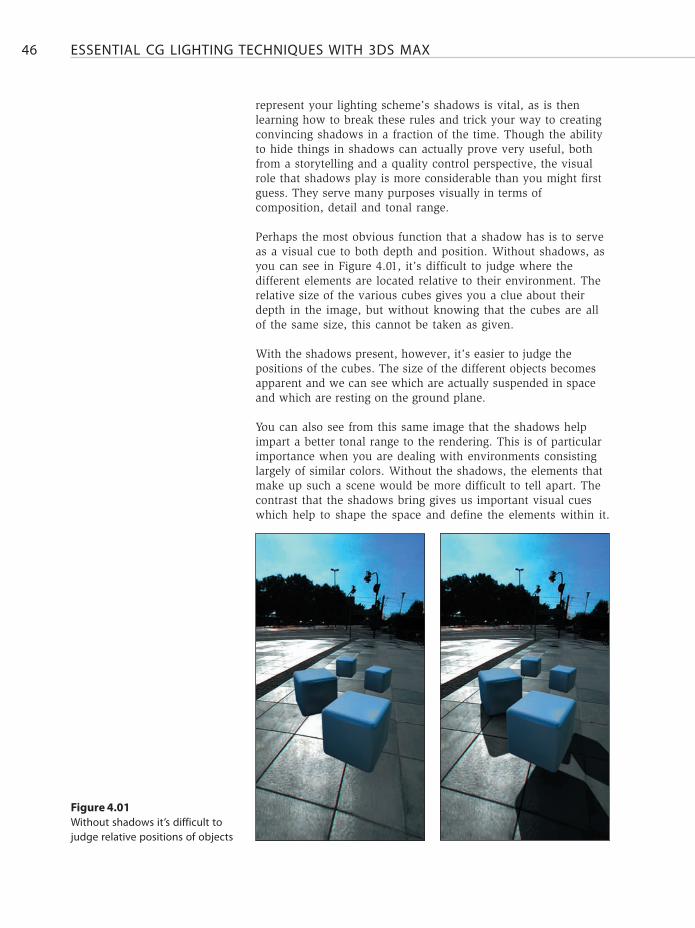
Perhaps the most obvious function that a shadow has is to serveas a visual cue to both depth and position. Without shadows, asyou can see in Figure 4.01, it’s difficult to judge where thedifferent elements are located relative to their environment. Therelative size of the various cubes gives you a clue about theirdepth in the image, but without knowing that the cubes are allof the same size, this cannot be taken as given.
With the shadows present, however, it’s easier to judge thepositions of the cubes. The size of the different objects becomesapparent and we can see which are actually suspended in spaceand which are resting on the ground plane.
You can also see from this same image that the shadows helpimpart a better tonal range to the rendering. This is of particularimportance when you are dealing with environments consistinglargely of similar colors. Without the shadows, the elements thatmake up such a scene would be more difficult to tell apart. Thecontrast that the shadows bring gives us important visual cueswhich help to shape the space and define the elements within it.
Figure 4.01Without shadows it’s difficult tojudge relative positions of objects
CHAPTER 4 > UNDERSTANDING SHADOWS 47
The way in which lighting can help show off the modeling workin a scene is of paramount importance. CG productions deal inthree-dimensional forms, and though this is invariably presentedas a series of flat rendered images, lighting has a pivotal role toplay in reinforcing a production’s 3D nature. For instance, lightingcan be purposefully placed to produce a shadow that reveals theoutline lying perpendicular to the camera, which as such wouldnot normally be apparent. Likewise, using a throw pattern such asone that would be produced by a horizontal or vertical blind canbe an unusual way of emphasizing a subject’s three-dimensionalform, which might otherwise have been less apparent.
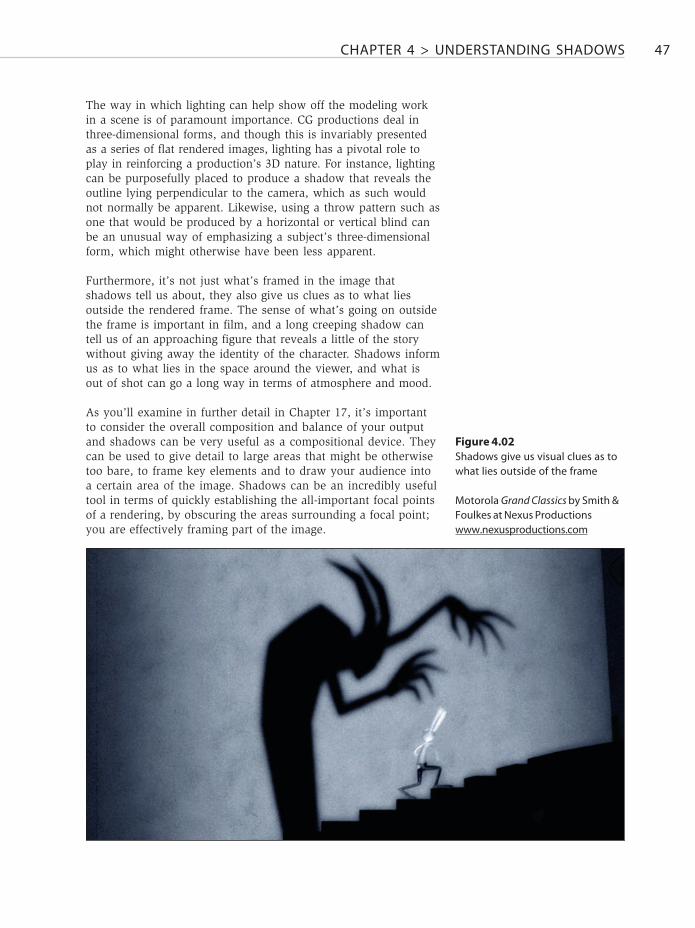
Furthermore, it’s not just what’s framed in the image thatshadows tell us about, they also give us clues as to what liesoutside the rendered frame. The sense of what’s going on outsidethe frame is important in film, and a long creeping shadow cantell us of an approaching figure that reveals a little of the storywithout giving away the identity of the character. Shadows informus as to what lies in the space around the viewer, and what isout of shot can go a long way in terms of atmosphere and mood.
As you’ll examine in further detail in Chapter 17, it’s importantto consider the overall composition and balance of your outputand shadows can be very useful as a compositional device. Theycan be used to give detail to large areas that might be otherwisetoo bare, to frame key elements and to draw your audience intoa certain area of the image. Shadows can be an incredibly usefultool in terms of quickly establishing the all-important focal pointsof a rendering, by obscuring the areas surrounding a focal point;you are effectively framing part of the image.
Motorola Grand Classics by Smith &Foulkes at Nexus Productionswww.nexusproductions.com
Figure 4.02Shadows give us visual clues as towhat lies outside of the frame
ESSENTIAL CG LIGHTING TECHNIQUES WITH 3DS MAX48
Additionally, shadows reassure us that objects are sharing thesame space. This might not seem a big consideration, but in CGscenes that don’t relate to normality are common and anythingyou can do to suspend your audience’s disbelief is helpful. Weall know that dinosaurs are extinct, but we are willing to accepttheir presence when immersed in a movie. However, if one camestomping towards the camera without a shadow tying it into itsenvironment the whole illusion would immediately be shattered.
Shadows help to bring such disparate elements together into avisually cohesive whole. If you want an audience to accept ascene which is somewhat implausible, the shadow can be a greattool in creating convincing interaction that assures the viewerthat what they are seeing is actually happening. Without thesubtle interplay of shadows, even the most photorealistic ofscenes becomes less credible, and the human eye is so used toseeing shadows that even for the most casual observer it does nottake much to stretch the illusion too far.
The technical side of shadows
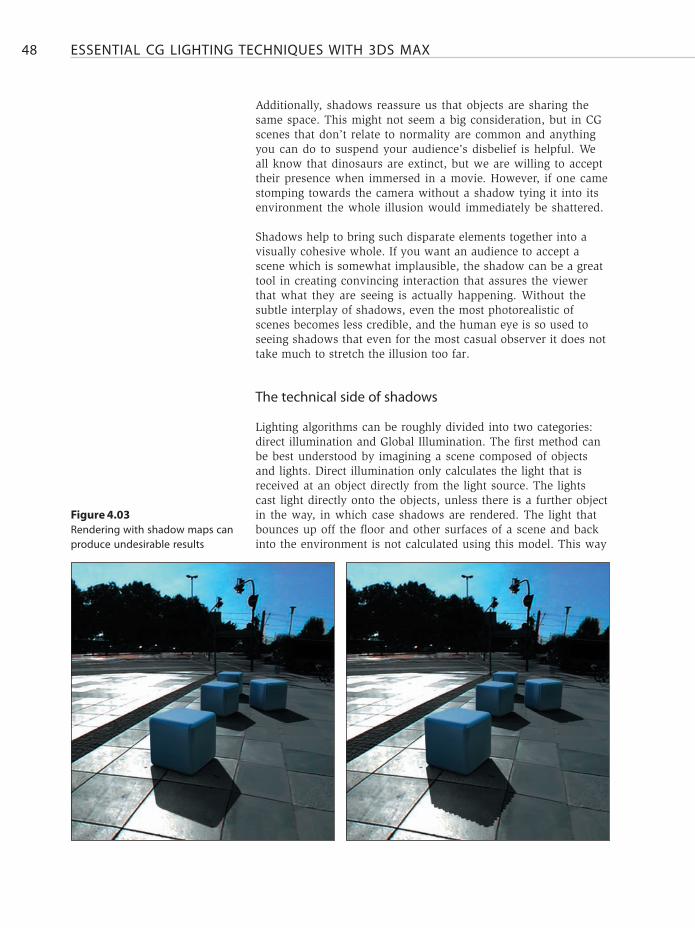
Lighting algorithms can be roughly divided into two categories:direct illumination and Global Illumination. The first method canbe best understood by imagining a scene composed of objectsand lights. Direct illumination only calculates the light that isreceived at an object directly from the light source. The lightscast light directly onto the objects, unless there is a further objectin the way, in which case shadows are rendered. The light thatbounces up off the floor and other surfaces of a scene and backinto the environment is not calculated using this model. This way
Figure 4.03Rendering with shadow maps canproduce undesirable results
CHAPTER 4 > UNDERSTANDING SHADOWS 49
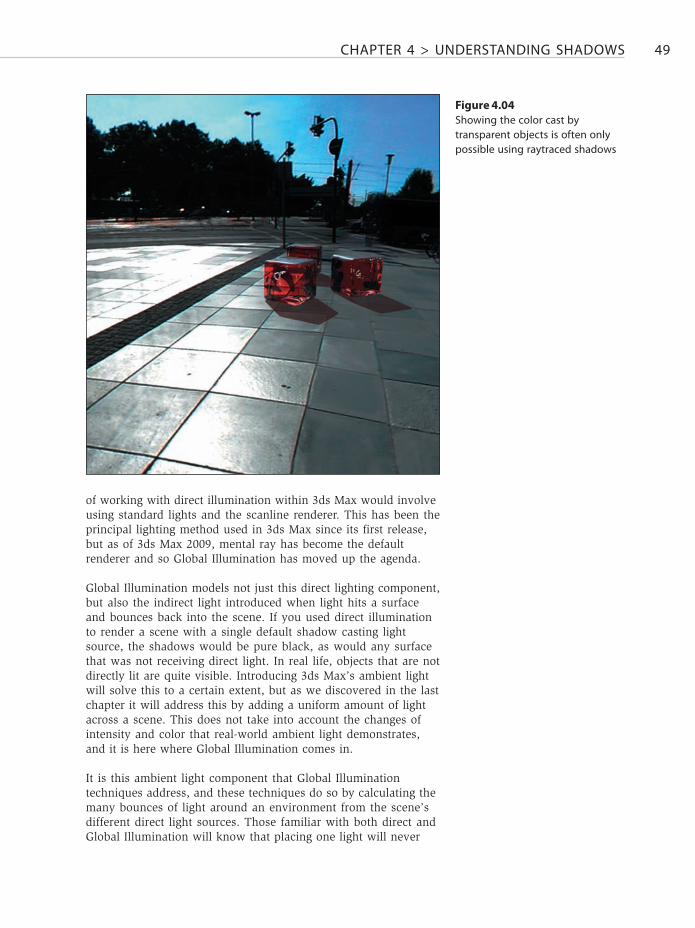
of working with direct illumination within 3ds Max would involveusing standard lights and the scanline renderer. This has been theprincipal lighting method used in 3ds Max since its first release,but as of 3ds Max 2009, mental ray has become the defaultrenderer and so Global Illumination has moved up the agenda.
Global Illumination models not just this direct lighting component,but also the indirect light introduced when light hits a surfaceand bounces back into the scene. If you used direct illuminationto render a scene with a single default shadow casting lightsource, the shadows would be pure black, as would any surfacethat was not receiving direct light. In real life, objects that are notdirectly lit are quite visible. Introducing 3ds Max’s ambient lightwill solve this to a certain extent, but as we discovered in the lastchapter it will address this by adding a uniform amount of lightacross a scene. This does not take into account the changes ofintensity and color that real-world ambient light demonstrates,and it is here where Global Illumination comes in.
It is this ambient light component that Global Illuminationtechniques address, and these techniques do so by calculating themany bounces of light around an environment from the scene’sdifferent direct light sources. Those familiar with both direct andGlobal Illumination will know that placing one light will never
Figure 4.04Showing the color cast bytransparent objects is often onlypossible using raytraced shadows

ESSENTIAL CG LIGHTING TECHNIQUES WITH 3DS MAX50
give you good results with the former method, yet with the latter,quite beautiful results can be attained with just a single light, aswe’ll discover when we get to these techniques.
In contrast, working with direct illumination involves theplacement of many lights to simulate this bounced ambient lightwithin a scene. Shadows also need to be simulated and in termsof tools there are two basic types of shadow that you have atyour disposal: shadow maps and raytraced shadows. Though youmight think that two algorithms is not a lot to work with forshadow generation, the amount of variation that can be producedbetween these two methods is wide, in terms of softness, form,quality, color, and most importantly, render times. The differencebetween one set-up and another might not be vast in terms of thevisual results, but the all-important factor of rendering speedmight be vastly different.
Broadly speaking, shadow maps work best with soft shadows,whilst raytraced shadows are good for sharp-edged and accurateshadows. In the world of Global Illumination, raytraced shadowsare more common, as they work best with materials that featuretransparency and opacity, which are particularly common indesign visualization. Light transmitted through, as well asbounced between surfaces featuring such materials isautomatically calculated using Global Illumination, whilst withdirect illumination, this has to be set up manually. Whilst GIsounds great, the calculation of the light bouncing around thescene’s environment is calculated using raytracing-based
Figure 4.05Shadow maps are morecontrollable in terms of theirsoftness
CHAPTER 4 > UNDERSTANDING SHADOWS 51
algorithms and as such it can be very processor intensive. We’ll gointo exactly how radiosity works in Chapter 7 and look at mentalray in Chapter 10, but for the moment we’ll just look at the twoalgorithms – shadow maps and raytraced shadows – in isolation.
Shadow-mapped shadows use a bitmap that the renderergenerates during a pre-rendering pass of the scene. This bitmap,called a shadow map (or depth map in some applications) is thenprojected from the direction of the light. ‘Depth mapping’ isperhaps the more accurate term, as the calculation involvesnumbers that represent the distances from the light to the scene’sshadow casting objects. With this information pre-calculated, therendering process does not cast light beyond distances specified inthis map, making it appear that shadows have been cast.
Raytraced shadows are generated by tracing the path of rayssampled from a light source. This process is called raytracing,and by following the rays in this manner the software is able tocalculate to a great degree of accuracy which objects are withinthe light’s zone of illumination and are casting shadows. It wasstated earlier that raytraced shadows are best suited to sharp-edged and accurate shadows. Though this is generally true,mental ray area lights use raytraced shadows, and can produceshadows whose softness varies in a beautifully realistic manner.
However, ignoring these special cases and concentrating on thetwo base algorithms for the moment, it’s clear the differencesbetween these two processes are considerable, and the choice ofshadow type can have a great effect on both rendering speedand output quality. This is particularly true if you are getting intothe render-intensive realm of soft raytraced shadows using area
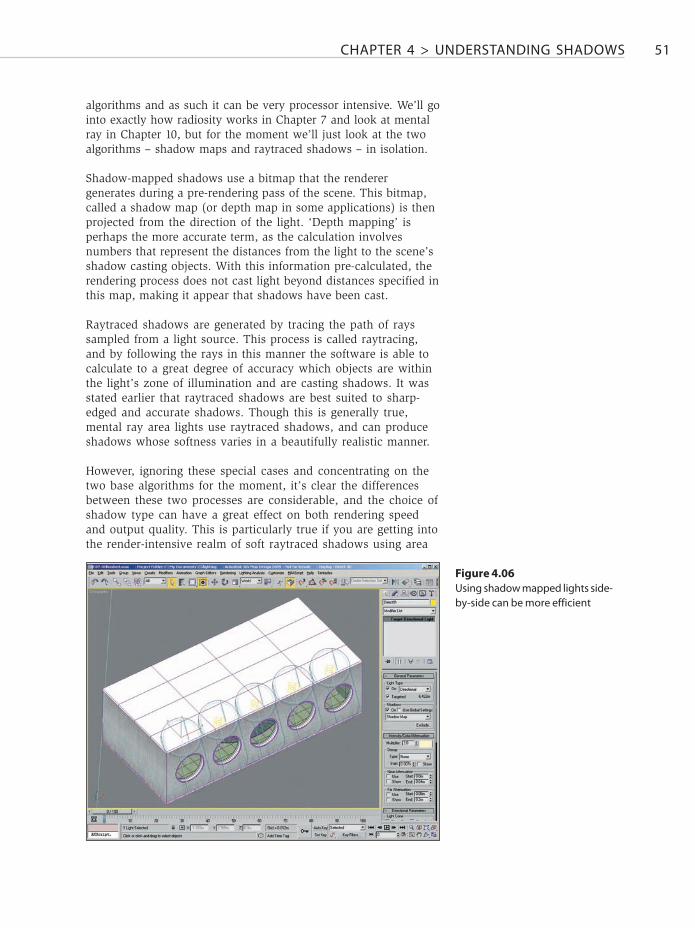
Figure 4.06Using shadow mapped lights side-by-side can be more efficient
ESSENTIAL CG LIGHTING TECHNIQUES WITH 3DS MAX52
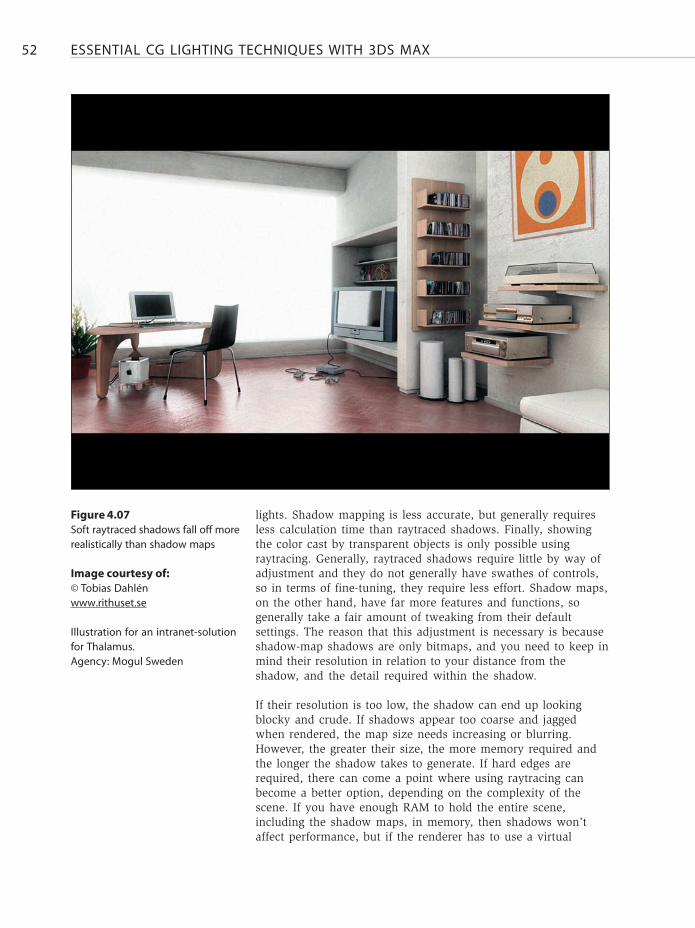
lights. Shadow mapping is less accurate, but generally requiresless calculation time than raytraced shadows. Finally, showingthe color cast by transparent objects is only possible usingraytracing. Generally, raytraced shadows require little by way ofadjustment and they do not generally have swathes of controls,so in terms of fine-tuning, they require less effort. Shadow maps,on the other hand, have far more features and functions, sogenerally take a fair amount of tweaking from their defaultsettings. The reason that this adjustment is necessary is becauseshadow-map shadows are only bitmaps, and you need to keep inmind their resolution in relation to your distance from theshadow, and the detail required within the shadow.
If their resolution is too low, the shadow can end up lookingblocky and crude. If shadows appear too coarse and jaggedwhen rendered, the map size needs increasing or blurring.However, the greater their size, the more memory required andthe longer the shadow takes to generate. If hard edges arerequired, there can come a point where using raytracing canbecome a better option, depending on the complexity of thescene. If you have enough RAM to hold the entire scene,including the shadow maps, in memory, then shadows won’taffect performance, but if the renderer has to use a virtual
Figure 4.07Soft raytraced shadows fall off morerealistically than shadow maps
Image courtesy of:© Tobias Dahlénwww.rithuset.se
Illustration for an intranet-solutionfor Thalamus.Agency: Mogul Sweden
CHAPTER 4 > UNDERSTANDING SHADOWS 53
memory swap file, rendering time can slow considerably. Theupside of shadow-mapped shadows is that they are much morecontrollable in terms of their softness, and thus it’s easier tocontrol the all-important trade-off between quality of output andrender time. One further point of note is that as an omni is theequivalent of six shadow-casting spotlights, the memoryrequirements of shadow-mapped omni lights jump up as a result,as obviously do the render times if your machine cannot hold thescene and its shadow maps in memory.
Sometimes, only raytraced shadows will do. If you wereattempting to render a scene with transparent objects, thismethod’s ability to handle transparency and the transmission oflight, can make it the simplest choice, if not the method with theshortest render time. In attempting to produce convincing resultswith this kind of scene using shadow mapping, you’d have toplace additional lights that did not include the transparentsurfaces in their shadow casting in an attempt to cheat thecorrect look. Nevertheless, a convincing cheat that works in halfthe time of the raytraced solution might be exactly what isneeded in a realistic production environment.
The key to controlling render times with shadow mappingdepends on several things, the first of which is the shadow’sresolution, which dictates the level of detail within the shadowcast. Raising this value makes for increased accuracy, but withthe usual penalty on memory requirements. Too low a resolutioncan result in blocky aliasing around the shadow’s edges and thelarger the light’s coverage, the greater the distance this map hasto be spread over, so again, the resolution might need to beincreased. By keeping any shadow-mapped lights restricted to astight an area as possible you are making certain that these shadowmaps are used efficiently. After tightening the light’s hotspot andfalloff values, reduce the shadow map size as much as is possible.When shadows are required across a significant space, it can bemuch more economical to use an array of lights with smallershadow maps rather than just one light with a huge shadow map.
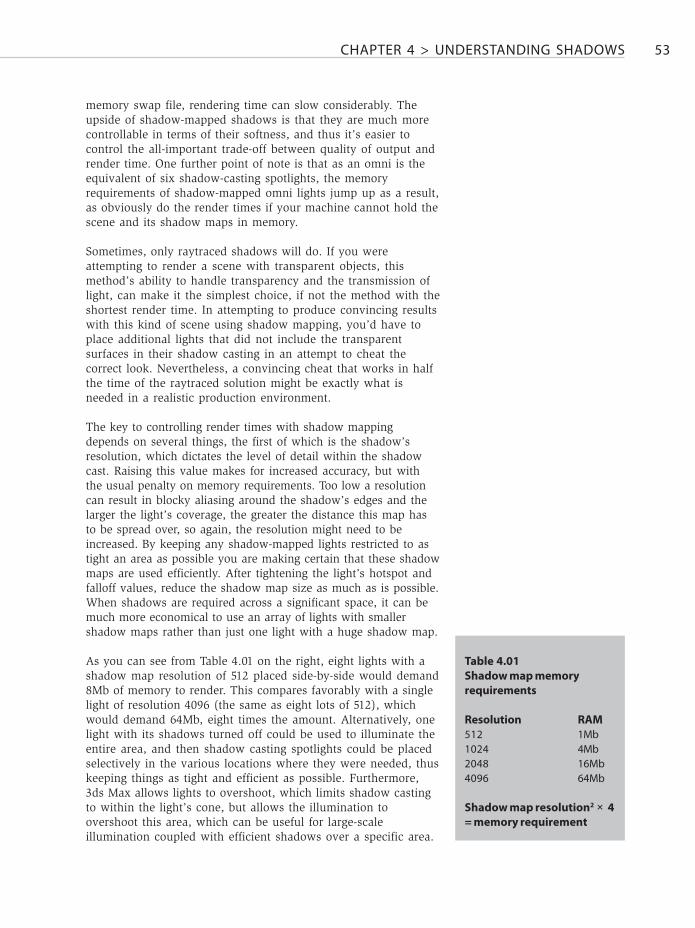
As you can see from Table 4.01 on the right, eight lights with ashadow map resolution of 512 placed side-by-side would demand8Mb of memory to render. This compares favorably with a singlelight of resolution 4096 (the same as eight lots of 512), whichwould demand 64Mb, eight times the amount. Alternatively, onelight with its shadows turned off could be used to illuminate theentire area, and then shadow casting spotlights could be placedselectively in the various locations where they were needed, thuskeeping things as tight and efficient as possible. Furthermore,3ds Max allows lights to overshoot, which limits shadow castingto within the light’s cone, but allows the illumination toovershoot this area, which can be useful for large-scaleillumination coupled with efficient shadows over a specific area.
Table 4.01Shadow map memoryrequirements
Resolution RAM512 1Mb1024 4Mb2048 16Mb4096 64Mb
Shadow map resolution2× 4= memory requirement
ESSENTIAL CG LIGHTING TECHNIQUES WITH 3DS MAX54
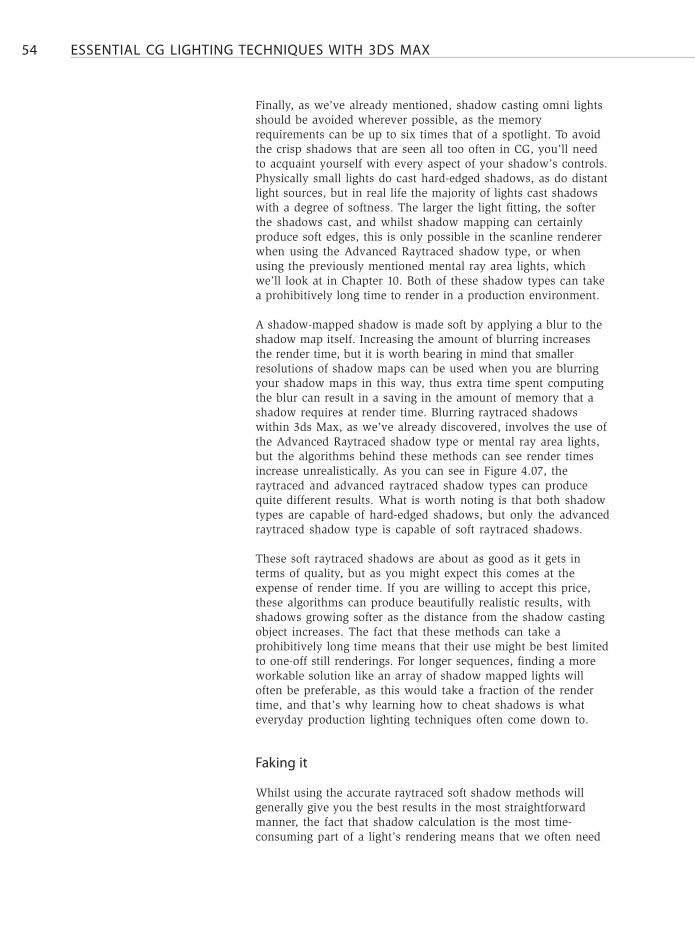
Finally, as we’ve already mentioned, shadow casting omni lightsshould be avoided wherever possible, as the memoryrequirements can be up to six times that of a spotlight. To avoidthe crisp shadows that are seen all too often in CG, you’ll needto acquaint yourself with every aspect of your shadow’s controls.Physically small lights do cast hard-edged shadows, as do distantlight sources, but in real life the majority of lights cast shadowswith a degree of softness. The larger the light fitting, the softerthe shadows cast, and whilst shadow mapping can certainlyproduce soft edges, this is only possible in the scanline rendererwhen using the Advanced Raytraced shadow type, or whenusing the previously mentioned mental ray area lights, whichwe’ll look at in Chapter 10. Both of these shadow types can takea prohibitively long time to render in a production environment.
A shadow-mapped shadow is made soft by applying a blur to theshadow map itself. Increasing the amount of blurring increasesthe render time, but it is worth bearing in mind that smallerresolutions of shadow maps can be used when you are blurringyour shadow maps in this way, thus extra time spent computingthe blur can result in a saving in the amount of memory that ashadow requires at render time. Blurring raytraced shadowswithin 3ds Max, as we’ve already discovered, involves the use ofthe Advanced Raytraced shadow type or mental ray area lights,but the algorithms behind these methods can see render timesincrease unrealistically. As you can see in Figure 4.07, theraytraced and advanced raytraced shadow types can producequite different results. What is worth noting is that both shadowtypes are capable of hard-edged shadows, but only the advancedraytraced shadow type is capable of soft raytraced shadows.
These soft raytraced shadows are about as good as it gets interms of quality, but as you might expect this comes at theexpense of render time. If you are willing to accept this price,these algorithms can produce beautifully realistic results, withshadows growing softer as the distance from the shadow castingobject increases. The fact that these methods can take aprohibitively long time means that their use might be best limitedto one-off still renderings. For longer sequences, finding a moreworkable solution like an array of shadow mapped lights willoften be preferable, as this would take a fraction of the rendertime, and that’s why learning how to cheat shadows is whateveryday production lighting techniques often come down to.
Faking it
Whilst using the accurate raytraced soft shadow methods willgenerally give you the best results in the most straightforwardmanner, the fact that shadow calculation is the most time-consuming part of a light’s rendering means that we often need
CHAPTER 4 > UNDERSTANDING SHADOWS 55
to fake our way to a quicker solution. There are several tricks andtechniques employed in CG to save on render times.The most basic of these techniques is to use lights with negativebrightness to add fake shadows into a scene. By adding such alight with its multiplier or intensity given a negative value, youcan selectively darken a region. As we’ve touched on before, thistechnique is most commonly employed to selectively and subtlydarken a scene in areas like the corners of rooms, but it can alsobe a useful way of cheating quick rendering soft shadows.
This technique involves targeting a spotlight at the base of theobject where the fake shadow is to appear. This light should beset to not cast shadows and the object that is to cast the shadowshould be excluded from the light’s illumination. Adjusting theMultiplier to a negative number will darken the area at theobject’s base rather than lighten it. Adjusting the hotspot andfalloff will control the falloff of this negative illumination, whichwill control how soft-edged this ‘shadow’ appears.
By constantly evaluating different methods of lighting yourscenes and minimizing the need for shadows you will certainlykeep render times down. Simply underlighting the areas whereyou want the shadows to fall might sound strange, but can beeffective and saves your software a whole lot of bother.
This practice is commonplace when it comes to designing simplelight fittings. Rather than simply use an omni light to representthe bulb and the lightshade to cast shadows on the ceiling andfloor, two spotlights can instead be used inside the shade – oneoriented upwards and one downwards – whose cones fit thecircular holes in the shade making it appear that the lightshade isactually casting shadows. A third light should also be introducedin the form of an omni which will illuminate the semi-transparentshade and mimic the light passing through it. By using threelights, none of which is set to cast shadows, in place of a singlesource that uses shadows, you not only speed up the render, butallow the lamp’s illumination to be more closely manipulated.
Shadows-only lights can be used to create shadows withoutadding any light to a scene, something that obviously is notpossible when lighting for film. However, if shadows are themost costly part of rendering light, why would you want tointroduce shadows-only lights? The value of these lights is foundin terms of cheating lighting angles to hide a modelingimperfection perhaps, or revealing something that wouldotherwise fall in shadow, or even as a stylistic or compositionaldevice. The use of shadows-only lights also gives you moreindividual control over the shadow’s color, saturation and so on,without having to alter the scene’s lighting. Furthermore, astouched on previously, these lights, when used selectively to castshadows in restricted areas, can provide a very controllable and
ESSENTIAL CG LIGHTING TECHNIQUES WITH 3DS MAX56
efficient solution in large illuminated areas of a scene that canfirst be lit with a light set not to cast shadows. If you do look in3ds Max’s help files for shadows-only lights, you won’t findanything. That’s because there is no such thing in 3ds Max(indeed, there is no such thing in most 3D applications) as ashadows-only light. However, this type of light is easy toconstruct; you first need to create the light that casts theshadows that you desire, and then make a clone of it. Shadowcasting should be turned off for this new clone and the multipliershould be set to the same amount as the first, but with anegative value. The result of these two lights is a shadows-onlylight, with the illumination of the first light counteracted by thenegative multiplier of the second. Alternatively, a single light canbe used with a Multiplier of 0, a white shadow color and anegative Density value. More about shadows only lights later.
When to fake
Though there are only two widely used algorithms for shadowgeneration, as this chapter has demonstrated, there are a hugenumber of ways of manipulating your lights to produce resultsthat don’t take an age to render. Knowing when to use a fakedsolution and when not to fake is something that comes withexperience, and your own reasoning will become your best tool.
Yes, computers are getting faster all the time so you might be ableto get away with using increasingly intensive algorithms, but a lotof the decisions will be based on a studio’s production schedules,and whether they allow for the extra time it takes to set up aconvincing lighting design using the methods outlined here.Indeed, more often than not you’ll be asked to produce resultsthat render as efficiently as possible in little time, due to otherproduction demands. In this situation, it is not viable to set up a
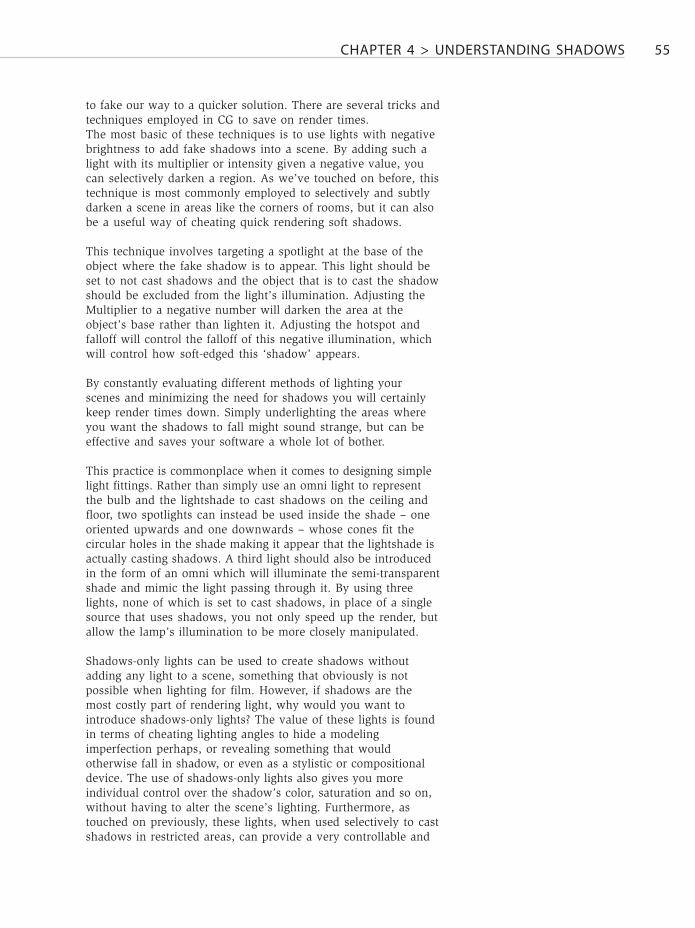
Figure 4.08By reducing the need for shadows,you can keep render times down
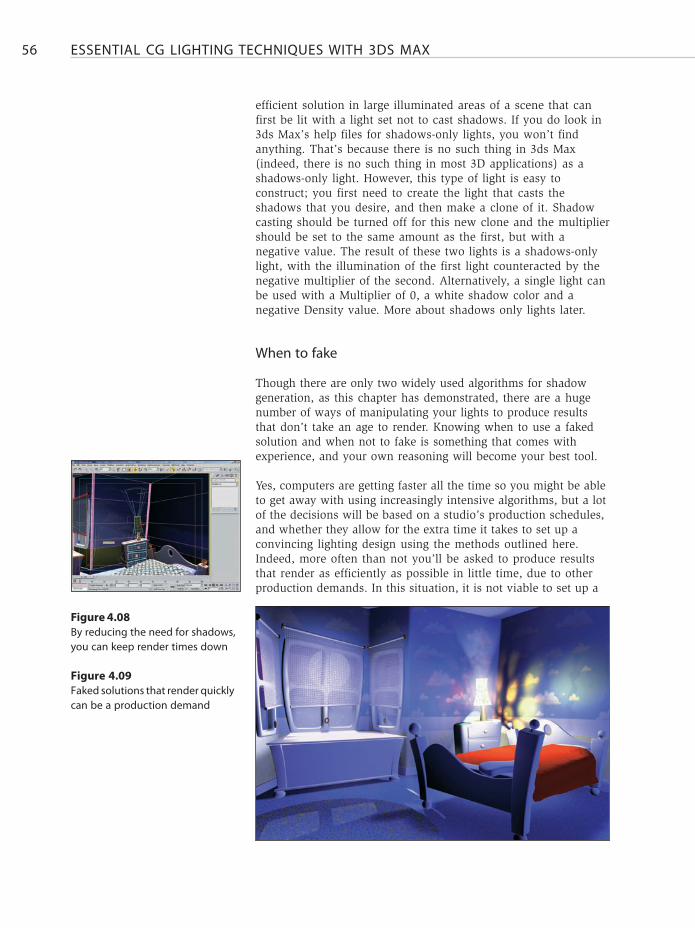
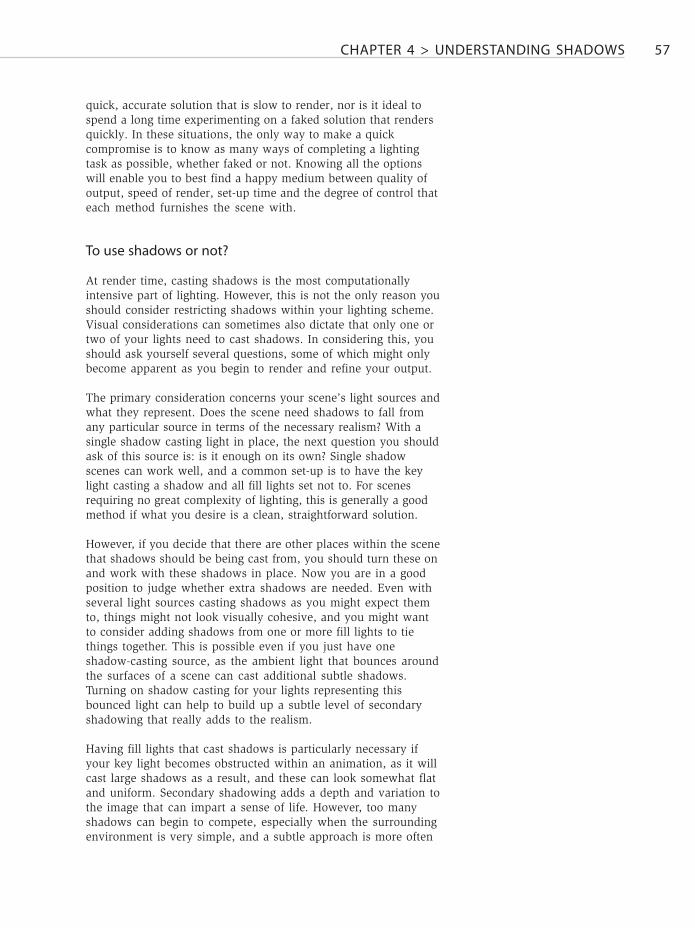
Figure 4.09Faked solutions that render quicklycan be a production demand
CHAPTER 4 > UNDERSTANDING SHADOWS 57
quick, accurate solution that is slow to render, nor is it ideal tospend a long time experimenting on a faked solution that rendersquickly. In these situations, the only way to make a quickcompromise is to know as many ways of completing a lightingtask as possible, whether faked or not. Knowing all the optionswill enable you to best find a happy medium between quality ofoutput, speed of render, set-up time and the degree of control thateach method furnishes the scene with.
To use shadows or not?
At render time, casting shadows is the most computationallyintensive part of lighting. However, this is not the only reason youshould consider restricting shadows within your lighting scheme.Visual considerations can sometimes also dictate that only one ortwo of your lights need to cast shadows. In considering this, youshould ask yourself several questions, some of which might onlybecome apparent as you begin to render and refine your output.
The primary consideration concerns your scene’s light sources andwhat they represent. Does the scene need shadows to fall fromany particular source in terms of the necessary realism? With asingle shadow casting light in place, the next question you shouldask of this source is: is it enough on its own? Single shadowscenes can work well, and a common set-up is to have the keylight casting a shadow and all fill lights set not to. For scenesrequiring no great complexity of lighting, this is generally a goodmethod if what you desire is a clean, straightforward solution.
However, if you decide that there are other places within the scenethat shadows should be being cast from, you should turn these onand work with these shadows in place. Now you are in a goodposition to judge whether extra shadows are needed. Even withseveral light sources casting shadows as you might expect themto, things might not look visually cohesive, and you might wantto consider adding shadows from one or more fill lights to tiethings together. This is possible even if you just have oneshadow-casting source, as the ambient light that bounces aroundthe surfaces of a scene can cast additional subtle shadows.Turning on shadow casting for your lights representing thisbounced light can help to build up a subtle level of secondaryshadowing that really adds to the realism.
Having fill lights that cast shadows is particularly necessary ifyour key light becomes obstructed within an animation, as it willcast large shadows as a result, and these can look somewhat flatand uniform. Secondary shadowing adds a depth and variation tothe image that can impart a sense of life. However, too manyshadows can begin to compete, especially when the surroundingenvironment is very simple, and a subtle approach is more often
ESSENTIAL CG LIGHTING TECHNIQUES WITH 3DS MAX58
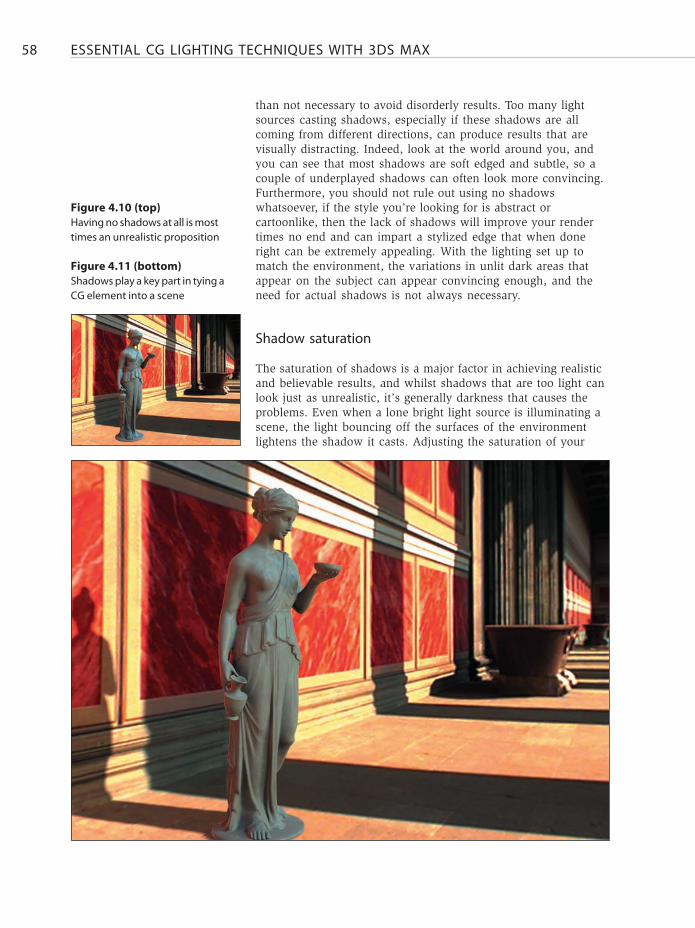
than not necessary to avoid disorderly results. Too many lightsources casting shadows, especially if these shadows are allcoming from different directions, can produce results that arevisually distracting. Indeed, look at the world around you, andyou can see that most shadows are soft edged and subtle, so acouple of underplayed shadows can often look more convincing.Furthermore, you should not rule out using no shadowswhatsoever, if the style you’re looking for is abstract orcartoonlike, then the lack of shadows will improve your rendertimes no end and can impart a stylized edge that when doneright can be extremely appealing. With the lighting set up tomatch the environment, the variations in unlit dark areas thatappear on the subject can appear convincing enough, and theneed for actual shadows is not always necessary.
Shadow saturation
The saturation of shadows is a major factor in achieving realisticand believable results, and whilst shadows that are too light canlook just as unrealistic, it’s generally darkness that causes theproblems. Even when a lone bright light source is illuminating ascene, the light bouncing off the surfaces of the environmentlightens the shadow it casts. Adjusting the saturation of your
Figure 4.10 (top)Having no shadows at all is mosttimes an unrealistic proposition
Figure 4.11 (bottom)Shadows play a key part in tying aCG element into a scene
CHAPTER 4 > UNDERSTANDING SHADOWS 59
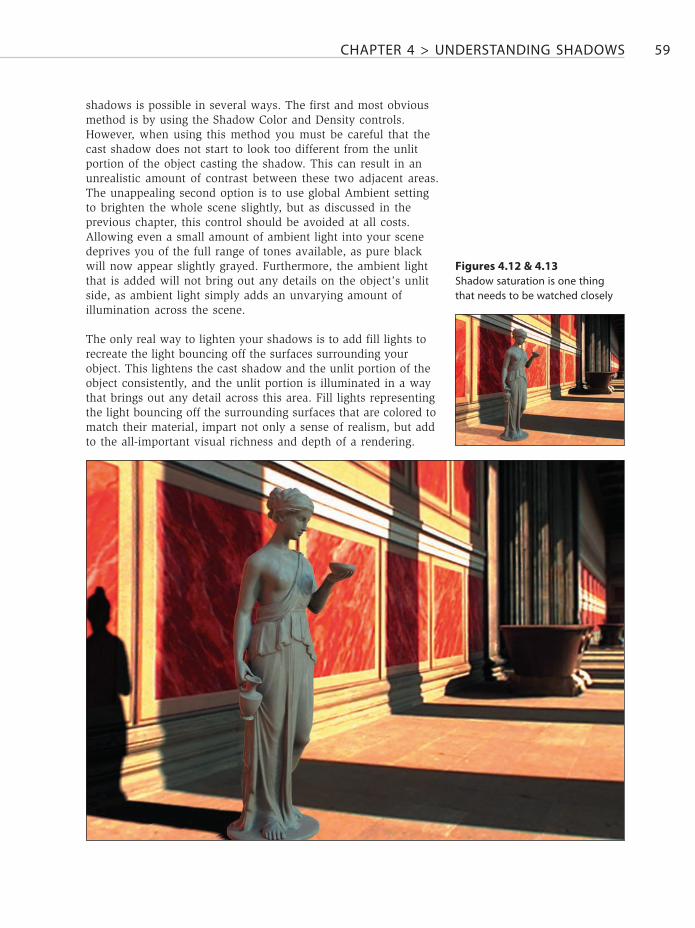
shadows is possible in several ways. The first and most obviousmethod is by using the Shadow Color and Density controls.However, when using this method you must be careful that thecast shadow does not start to look too different from the unlitportion of the object casting the shadow. This can result in anunrealistic amount of contrast between these two adjacent areas.The unappealing second option is to use global Ambient settingto brighten the whole scene slightly, but as discussed in theprevious chapter, this control should be avoided at all costs.Allowing even a small amount of ambient light into your scenedeprives you of the full range of tones available, as pure blackwill now appear slightly grayed. Furthermore, the ambient lightthat is added will not bring out any details on the object’s unlitside, as ambient light simply adds an unvarying amount ofillumination across the scene.
The only real way to lighten your shadows is to add fill lights torecreate the light bouncing off the surfaces surrounding yourobject. This lightens the cast shadow and the unlit portion of theobject consistently, and the unlit portion is illuminated in a waythat brings out any detail across this area. Fill lights representingthe light bouncing off the surrounding surfaces that are colored tomatch their material, impart not only a sense of realism, but addto the all-important visual richness and depth of a rendering.
Figures 4.12 & 4.13Shadow saturation is one thingthat needs to be watched closely

PART 2 > TECHNIQUES
Image courtesy of:Andre Cantarelwww.cantarel.de
part 2 >
techniques
