the answer book - sparklight/media/sharepoint/documents...quick menu, main menu or flip bar. from...
TRANSCRIPT

THE ANSWER BOOK
support.cableone.net
CABM-139762-AnswerBookUpdate_9-16_Cover_REV.indd 1 12/14/16 5:17 PM

WELCOME TO
PHONE INFO – VOICE MAILActivation Instructions1. From home phone – Dial *552. System will start a mini tutorial and offer
the following:• Change password
(Password must be 4 – 19 digits)• Record name• Record personal greeting
How to check messagesYou will hear what sounds like a fast busy signal to indicate that you have a new voice mail message waiting.To check messages from home1. Dial *55
To check messages away from home 1. Dial home number2. When Voice Mail greeting starts
playing, press * 3. Enter password and press #All methods of checking messages will lead to an identical Main Menu (As shown below)• Review new messages – press 1• Record new message – press 2• Review other messages – press 3 • Change personal options – press 4NOTES – Customers can reset password to default through
the Web Portal. See instructions on page 50.
– If you have Call Privacy set to “Anonymous,” *55 will not work without having to enter your mailbox number and password. You can temporarily disable Call Privacy on a per-call basis by dialing *82 before dialing *55 to access your voice mail.
CABLE TV INFO
TV 1 – LOCATION: __________________
INPUT: _______________________
TV 2 – LOCATION: __________________
INPUT: _______________________
TV 3 – LOCATION: __________________
INPUT: _______________________
TV 4 – LOCATION: __________________
INPUT: _______________________
HIGH-SPEED INTERNET INFO
INPUT 1: ____________________________ INPUT 2: ____________________________
TiVo INFO
TSN: ________________________________
YOUR ACCOUNT INFO
Username: _________________________ (You will create one during registration.)
Password: __________________________
Account number: ____________________
IMPORTANT INFORMATION TO SAVE
Your default password is the last four digits of your phone number.
support.cableone.net/alldigital
OR CALL
1-877-692-2253
OR CALL
1-877-692-2253
support.cableone.net
We’re happy that you’ve chosen us to entertain you and simplify your life. As a Cable ONE customer, you’ll find that we offer a wide array of services for everyone in your family. With Cable ONE, you can count on us for the latest in state-of-the-art technology and advanced home entertainment.
This Answer Book contains helpful information about how to use and enjoy our High-Speed Internet, Video and Phone service.
We believe that local service serves you best. So you can depend on friendly, courteous employees who are on call 24/7 with reliable, same-day service. And when you talk, we really listen. Whenever you have problems or concerns, we hear you loud and clear. Because we know there’s nothing more satisfying than being heard.
At Cable ONE, your complete satisfaction is very important to us. And we hope you’ll be with us for many years to come.
CABM-139762-AnswerBookUpdate_9-16_Cover_REV.indd 2 12/14/16 5:17 PM

CABLE TV..................................................CABLE TV..................................................CABLE TV 2
CABLE NETWORKS ............................................................2
RECEIVER INSTALLATION..................................................2
i-GUIDE...................................................................................4
QUICK REFERENCE GUIDE ..................................................4
DIGITAL VIDEO RECORDER (DVR) ................................. 8
CABLE TV FAQs ...................................................................9
TROUBLESHOOTING...........................................................10
HANDY TIPS FOR USING YOUR DIGITAL RECEIVER .....11
HD FAQs ...............................................................................13
TABLE OF CONTENTS

CABLE ONE ALL DIGITAL .......................14
CONNECTING YOUR ALL DIGITAL DEVICE ...................... 15
ACTIVATING THE ALL DIGITAL DEVICE ............................ 17
IR RECEIVER CONNECTION .............................................. 18
REMOTE CONTROL SETUP ............................................... 18
REMOTE CONTROL ............................................................ 19
GUIDE ....................................................................... 21
MAIN MENU ......................................................................... 22
FAVORITES/THEMES .......................................................... 23
PARENTAL CONTROLS....................................................... 23
CLOSED CAPTIONING ...................................................24
HOW TO UPDATE YOUR PIN-CODE .................................. 24
TROUBLESHOOTING .......................................................... 25
REMOTE CONTROL............................................................ 19
GUIDE ....................................................................... 21
MAIN MENU......................................................................... 22
FAVORITES/THEMES .......................................................... 23
PARENTAL CONTROLS....................................................... 23
CLOSED CAPTIONING ...................................................24
HOW TO UPDATE YOUR PIN-CODE.................................. 24
TROUBLESHOOTING.......................................................... 25
CABLE ONE ALL DIGITAL
CONNECTING YOUR ALL DIGITAL DEVICE
ACTIVATING THE ALL DIGITAL DEVICE
IR RECEIVER CONNECTION
REMOTE CONTROL SETUP

TiVoVoV ®........................................................ 27
FINDING AND RECORDING SHOWS.................................28
WATCHING SHOWS.............................................................29
GETTING RECOMMENDATIONS.........................................29
GETTING THE MOST FROM YOUR TiVoVoV ............................30
TiVo REMOTE CONTROL .................................................32
TiVo WHOLE HOME SOLUTION..........................................33
TiVo HELP.............................................................................33
TV EVERYWHERE ................................... 34

HIGH-SPEED INTERNET..........................35
GETTING THE MOST FROM YOUR INTERNET SERVICE... 35
SETTING UP YOUR HARDWARE ....................................... 38
CONNECTING TO YOUR WIRELESS MODEM ................. 39
COMPUTER NETWORK SETTINGS ................................... 39
INTERNET FAQs ................................................................. 41
TROUBLESHOOTING ......................................................... 42

CABLE ONE PHONE ...........................43
VOICE MAIL – PHONE AND WEB ACCESS................ 43
FEATURES – PHONE ACCESS .................................... 44
FEATURES – WEB ACCESS ........................................ 46
eMTA QUICK REFERENCE GUIDE .............................. 57
TROUBLESHOOTING ................................................... 58
QUICK REFERENCE GUIDE ........................................ 59
ADDITIONAL INFORMATION ..............61
BILL PAYMENT ............................................................. 61
BILL PAYMENT FAQs ................................................... 62
FCC INFORMATION ..................................................... 63
CABLE SERVICE GUARD ............................................ 64

2 I Cable ONE, CABLE
AVAILABLE ON STANDARD CABLE
Plus many more channels specific to your local Cable ONE location. Channels vary by system.
STANDARD CABLE CABLE NETWORKS
BACK
FRONT
Follow these directions and you should be able to install your SD or HD receiver — quickly and easily — in about 30 minutes.
How to connect your digital receiver to your TV:
1. At the back of the TV, disconnect the cable that runs from the wall outlet (cable should remain connected at the wall).
2. Connect that cable to the digital receiver where it says CABLE IN.
3. Connect the cable that came with your receiver to the matching output of the receiver.
4. Connect the other end of that cable to the matching input on the back of the TV.
5. Wait 20 minutes for the digital receiver to configure itself and load the program schedule. Newly installed equipment could take up to 45 minutes to complete this process.
6. Turn on the TV and set the TV to channel 3 or 4 or to the correct input (HDMI, Component, Video 1, etc.).
7. Enjoy channel surfing.
Customers with a CableCARD TV can get an authorized SD or HD CableCARD from Cable ONE to receive digital channels and premium channels.
RECEIVER INSTALLATION

Visit support.cableone.net for more help topics online. Cable ONE, CABLE I 3
TV
CABLEIN
R
V
INOUT
S-VIDEO
VIDEO AUDIOSERIAL DIGITAL AUDIO USB
ETHERENET
HDMI
eSATA
M-CARD DEVICE ONLY
DCH6416
L
Y
Pb
Pr
CABLE/ANTENNA IN
S-VIDEO
VIDEO 1
R
L
VIDEO 2
R
L
VIDEO 3
R
Pr
Pb
Y
L
VIDEO
AUDIO
RECEIVER TO TV – RCA CABLES
CABLE/ANTENNA IN
S-VIDEO
AV #1 AV #2
R
L
AV #3
R
Pr
Pb
Y
L
VIDEO
AUDIO
VIDEO
AUDIO
HDTV
CABLEIN
R
V
INOUT
S-VIDEO
AVSERIAL DIGITAL AUDIOUSB
ETHERENET
HDMI
eSATA
M-CARD DEVICE ONLY
DCH6416
L
Y
Pb
Pr
HDMI IN
RECEIVER TO HDTV – RCA AUDIO AND COMPONENT VIDEO CABLES
CABLEIN
R
V
INOUT
S-VIDEO
VIDEO AUDIOSERIAL DIGITAL AUDIO USB
ETHERENET
HDMI
eSATA
M-CARD DEVICE ONLY
DCH6416
L
Y
Pb
Pr
CABLE/ANTENNA IN
S-VIDEO
AV #1 AV #2
R
L
AV #3
R
Pr
Pb
Y
L
VIDEO
AUDIO
VIDEO
AUDIO
HDTV
HDMI IN
RECEIVER TO HDTV – HDMI CABLE
OUT OUT
AV #1AV #2 VIDEO 1
INOUTIN IN
MONITOR
Pr
Pb
YS-VIDEO
HDMI VIDEO
RIGHT
LEFT L
R
HOME THEATERRECEIVER
CABLEIN
R
V
INOUT
S-VIDEO
VIDEO AUDIOSERIAL DIGITAL AUDIO USB
ETHERENET
HDMI
eSATA
M-CARD DEVICE ONLY
DCH6416
L
Y
Pb
Pr
CABLE/ANTENNA IN
S-VIDEO
AV #1 AV #2
R
L
AV #3
R
Pr
Pb
Y
L
VIDEO
AUDIO
VIDEO
AUDIO
HDTV
HDMI IN
RECEIVER TO HOME THEATER RECEIVER TO HDTV – HDMI CABLES
CONNECTION DIAGRAMS
NOTE – If you own a Home Theater System, please refer to the manufacturer’s instructions.

4 I Cable ONE, CABLE
PPV
Press on your remote to highlight an
option, press OK and you’re on your way.
Press MENU twice for the Main Menu.
QUICK REFERENCE GUIDE
QUICK MENU: QUICK AND EASY
The Quick Menu offers shortcuts to key features of the i-Guide and digital cable. Press MENU one time and the Quick Menu appears over video, giving you access to Search, HDTV Programs, Sports, Movies and more.
REMOTE CONTROL FEATURES
Basic Navigation
• Yellow is always the highlight color. As you navigate listings using the remote, the highlight appears on screen to indicate the current selection.
• Press the buttons to move the highlight.
• Press OK to make a selection.
• Press EXIT to return to watching TV.
ALL ACCESS WITH MAIN MENU
Main Menu gives you easy access to all features. Simply press MENU twice, then select from the options available, including TV Listings By Time, viewing options by category, Parental Controls, My Favorite Channels, Local Weather and more.
i-GUIDE
Introducing the interactive programming guide from Rovi and Cable ONE. i-Guide is intuitive, intelligent and inspiring. It unlocks a world of greater choice, convenience and control so you can fully enjoy your digital entertainment experience.
With i-Guide you’ll enjoy:
• A convenient, time-saving Quick Menu
• A full 90 minutes of programming listings at a glance
• Virtual keyboard for easier and faster searches
• Increased speed
• Updated HDTV Menu
Try i-Guide. In no time, you’ll be able to Set Reminders, Favorites and Parental Controls and use our Mini Guide to find out what’s next, while you continue to watch your favorite shows. Plus, you’ll have access to great features like Digital Video Recording.
With i-Guide, the world is at your fingertips. That’s the Power of i.
i-Guide is not available on TiVo or All Digital Devices.

Visit support.cableone.net for more help topics online. Cable ONE, CABLE I 5
MINI GUIDE
The Mini Guide lets you watch television and view listings without having to leave your program. To access, press OK or INFO then use 3 and 4 to browse time and use 5 and 6 to browse channels.
FLIP BAR
When you change channels, the Flip Bar appears, providing a brief description. When you find the program you are interested in, press INFO for more program details, or press OK/SELECT to make the Flip Bar disappear.
WATCH IN HD
When tuning to a standard-definition (SD) channel, the Watch in HD option may appear on the left side of the Flip Bar to indicate the channel is also available in high definition (HD). Press OK/SELECT to tune directly to the associated channel.
ENHANCED SEARCHING
With i-Guide, you can sort and view program Listings By Time, Listings By Channel, or by categories such as Movies, Sports, Kids and more. Select a category from the Main Menu or Quick Menu to display listings.
TITLE SEARCH
Title Search allows you to find a specific program by entering a few letters of the program name. Select Title from the Search menu and use the 3 4 5 6 buttons to navigate the keyboard and spell out the program title. If the program is not airing in the next 14 days, it won’t appear in the results.
SAVING SEARCHES
Save your search by selecting Save Search. Select Saved Searches from the Search menu to access your list of saved searches or to restart or delete the search. Save up to 16 searches at one time.

6 I Cable ONE, CABLE
HD
If you have a high-definition television (HDTV) and an HD receiver, you can quickly access HD programming from the Quick Menu, Main Menu or Flip Bar. From the Quick Menu, select HD to view shows by time or channel.
GO AHEAD, PLAY FAVORITES
i-Guide’s Favorites feature lets you quickly access the channels you’ve designated as your Favorites. Just select My Favorite Channels from the Main Menu or ❤ from the Quick Menu.
Select Setup from the Main Menu or to set up Locks and PINs.
PARENTAL CONTROLS TO PROTECT YOUR FAMILY
Parental Controls let you restrict viewing and purchases of TV programming based on your preferences. Set a personalized 4-digit PIN and you can place locks on selected ratings, channels and titles. You can also hide adult titles from being displayed on screen.
QUICK REFERENCE GUIDE continued

Visit support.cableone.net for more help topics online. Cable ONE, CABLE I 7
DVR HISTORY
DVR History provides you with a list of recent DVR deletions or missed recordings. If a program did not record, DVR History will provide a reason why the program didn’t record or when a program was deleted.
DVR CLEANUP
From the Main Menu, Select DVR Menu then DVR Cleanup. A DVR Cleanup screen appears with a list of your recordings. To delete multiple recordings, simply highlight the corresponding boxes then arrow left to highlight Delete, press OK/SELECT and confirm your deletion.
MESSAGES
Messages may be sent occasionally by Cable ONE to announce new services or other important information. If you have a message, an envelope indicator appears in the upper left corner on guide screens and a red light appears on your digital receiver. From the Main Menu, select Messages, highlight the desired message and press OK/SELECT to read.
DVR FOLDERS
DVR Folders help keep your recorded series organized and help you quickly scroll through your recordings. DVR Folders automatically group like titles into folders. Highlight DVR Folders to open and scroll down to select a specific episode to watch. Press LAST to return to your recordings list.

8 I Cable ONE, CABLE
CONTROL LIVE TV
Any time you tune to a channel, the DVR starts a temporary recording. So you can PAUSE if the phone rings, REWIND a scene you missed or FAST FORWARD to skip what you don’t want to watch.
THREE WAYS TO RECORD
Press RECORD on your remote anytime while watching TV or navigating through the guide for easy, one-touch recording. Or, you can record interactively by program or manually schedule your recording.
MANY WAYS TO PLAY
Your DVR offers many playback controls.
Pause Press PAUSE to freeze; press PLAY to resume. (Pause for a maximum of 30 minutes on live TV. Press RECORD if you need to pause longer than 30 minutes.)
Rewind Press REWIND. Press it again up to 4 times to increase the rewind speed.
Fast Forward
Press FAST FORWARD. Press it again up to 4 times to increase the speed.
Slow Motion
Press PAUSE and then FAST FORWARD or PAUSE and then REWIND. To return to regular speed, press PLAY.
Instant Replay
Press PAGE 6 to replay the last 15 seconds. Press repeatedly to continue skipping back in 15-second intervals. There may also be an INSTANT REPLAY ( ) button on your remote.
Return to Live TV
To return to the live TV you have paused or rewound, press 6. Some remotes have a LIVE ( ) button.
Pause live television. Rewind and replay programs. Record your favorites all season long. With a DVR, you’re in control. Record up to 160 hours of HD programming and up to 700 hours of SD programming — all without rentals, tapes or returns.*
*DVR service not available in all areas. DVR recording capacities vary. Record up to 60 hours of HD or up to 400 hours of SD programming on the DCX 3501. Other DVRs have less recording time. Menu selections vary depending on the services your cable provider offers.
DIGITAL VIDEO RECORDER (DVR)

Visit support.cableone.net for more help topics online. Cable ONE, CABLE I 9
CABLE TV FAQsQ: DO I NEED A DIGITAL TV TO GET DIGITAL CABLE?A: Cable ONE provides the necessary equipment so that Digital Cable will work with any TV. We provide a state-of-the-art digital receiver or CableCARD that will deliver digital-quality picture and sound to your TV. Equipment may require an additional charge.
Q: DO I NEED A DIGITAL RECEIVER FOR EACH TV?A: If you want digital-quality picture and sound on your additional TVs plus a wider choice of channels, each TV will require its own digital receiver or CableCARD. Additional digital receivers or CableCARDs may require a low additional fee each and include all the programming you have selected on your primary TV.
Q: HOW DO I CONNECT A DIGITAL RECEIVER?A: It’s as easy as connecting a DVD player to your TV. Diagrams showing various ways of connecting your digital receiver are available online or see page 3. If you’re ordering cable from us for the first time, we’ll connect the digital receiver as part of our normal installation fee.
Q: IS DIGITAL CABLE HIGH DEFINITION?A: Digital Cable provides high-quality digital picture and sound to your current TV, equivalent to the quality of a DVD. To get the most out of your HDTV, an HD digital receiver or CableCARD is needed. Go online to learn more about our HD service or see page 13.
Q: WHY DOES THE GUIDE HAVE NO INFORMATION?A: If you have just rebooted your digital receiver, the guide will take up to 15 minutes to reload all programming information. Newly installed equipment could take up to 45 minutes to complete this process.
Q: WHY IS MY CABLE SERVICE BILLED IN ADVANCE?A: Since our service is not a “metered” service like electricity or gas, we bill for our services in advance.
Q: HOW DO I SET UP THE UNIVERSAL REMOTE TO CONTROL MY TV AND OTHER COMPONENTS?A: The instructions and setup codes to program the universal remote provided with your digital service can be downloaded at cableone.net/CS.
Q: HOW CAN I GET PARENTAL CONTROLS?A. All Cable ONE Digital customers have access to Parental Controls through the Interactive Guide.
Q: HOW DOES PARENTAL CONTROL WORK?A. By entering a code and clicking the lock button, the programming you choose is blocked with the Parental Control lock. See page 12 for detailed instructions.
Q: HOW DO I PROGRAM THE DIGITAL RECEIVER TO DISPLAY THE TIME?A: Select Setup from the Main Menu (press the MENU button twice), then select Cable Box Setup. The Front LED Display option lets you toggle between Current Time and Current Channel.
Q: WHY AM I UNABLE TO CHANGE CHANNELS WHEN ENTERING THE CHANNEL NUMBER?A: From the Setup menu, you can activate and customize certain i-Guide features. To change the channel entry mode (auto-tune) press the MENU button twice. Access the Setup menu, then the Guide Setup menu. Change the value for the Channel Entry Method to Auto-Tune using 3 and 4 on the remote. Once set, press EXIT to leave the setup screen.

10 I Cable ONE, CABLE
CABLE TROUBLESHOOTING“SOMETHING’S WRONG WITH MY TV!”When your picture looks funny, you may be able to easily fix the problem yourself. Just check the troubleshooting list below and follow the directions, or you can check support.cableone.net for easy-to-follow instructions. Or give us a call and we’ll be happy to assist you.
First, make sure your TV is set on the digital receiver output channel (channel 3 or 4) or set to the appropriate input (e.g. HDMI, composite or component video). If it is, and you’re still having a problem, see below.
When trouble occurs, here’s what to do. If you still can’t fix it, give us a call at 1-877-692-2253.
THERE’S NO POWER TO THE DIGITAL RECEIVERMake sure it’s plugged in. Don’t use an outlet connected to a wall switch.
QUICK REMOTE SETUP1. Turn device on.
2. Press device key (TV, CBL, DVD, etc.).
3. Press and hold SETUP (LED blinks twice).
4. Press 9-9-1 (LED blinks twice).
5. Press CH+ repeatedly until device turns off.
6. Press SETUP when device turns off.
7. Verify that the correct device key is in use (TV, CBL, DVD, etc.)
THE REMOTE CONTROL ISN’T RESPONDING• Check that the batteries are fresh and installed correctly.
• Point the remote at the digital receiver and make sure there are no obstructions between the remote control and the digital receiver.
• Press the keys on the remote one at a time.
• Be certain that channels can be changed from the front panel of digital receiver.
THE DIGITAL RECEIVER ISN’T RECEIVING A CABLE SIGNAL• Check the cable connections and tighten them if necessary.
• Make sure the cable connections are correct. (See diagrams on page 3 or check troubleshooting on our website.)
• See that your TV is working properly.
THE GUIDE HAS NO DATA Unplug the digital receiver from the power source and plug it in again. It could take 5 to 15 minutes until the guide can provide listings for the current hours and up to 60 minutes before it can provide listings for the next 36 hours.
THERE’S SNOW ON THE SCREEN• If there is a digital receiver, make sure the digital receiver is plugged
into a “live” electrical outlet.
• Make sure your television is set to either channel 3 or 4.
THERE’S NO PICTURE AND NO SOUND• Check that the TV is plugged into a “live” electrical outlet and is not
controlled by a wall switch.
• Push the red “RESET” button on the back of the TV, if you see one.
IT’S SHOWING THE WRONG CHANNELCheck the TV dial and the digital receiver for the channel setting.

Visit support.cableone.net for more help topics online. Cable ONE, CABLE I 11
THE PICTURE SHRANK• The program you’re watching may not be
in HD. Programs that are not broadcasted in HD on an HD channel will typically show black bars on both the left and right side of the screen. This allows the picture to be shown in standard format.
• The aspect ratio setting of your HDTV or Cable ONE HD receiver may be incorrect. Verify that the HD settings are set to optimal on both the HD receiver and your HDTV.
• To determine if it’s your Cable ONE receiver, please do the following:
– Power off the DVR (leaving the TV on).
– Press the MENU button on the remote.
– Changing the TV Type, YPbPr output, and 4:3 override settings will change HD settings.
THERE’S NO PICTURE• Check the channel setting on the digital
receiver and the TV.
• Check the cable listings to make sure the channel is broadcasting during the time slot.
• Check other channels to compare reception.
• The electric company may have cut back the power. Check to make sure you have power in other areas of your house.
• Make sure both the TV and the receiver (if any) are powered on.
• Make sure the TV is set to the proper input.
HANDY TIPS FOR USING YOUR DIGITAL RECEIVERGETTING STARTED• Be sure to always aim the remote toward the digital receiver and NOT the TV or
DVD/Blu-ray player. If the remote doesn’t seem to respond correctly, push the CBL button (top row, far right) and try again. One of the other buttons, AUDIO, VCR or TV, may have been the last one you pushed.
• Remember to program the new digital remote to your TV and DVD/Blu-ray player following the instructions with the remote. It is very simple and very important.
MENU – A VIEW OF ALL CHOICESThe menu is where you choose what you want to watch by time, by channel, by program name or by program categories. Use 3 4 5 6 to find your way around the menu. Press OK to display the highlighted selection. You can also restrict access to anything you don’t want the kids to watch by setting a Parental Code. Just press EXIT on your remote control to return to watching TV.
HOW TO USE THE FLIP BARThe Flip bar will appear every time you change channels to make it easy to know what you’re looking at. It displays the current channel number, program name, summary, rating and the start and end times.
Press 5 or 6 to change channels and the Flip bar will appear on screen. Press OK to make Flip disappear and reappear. Press INFO on your remote to get detailed information about the current program.
Flip lets you browse to other channels without losing sight of what you’re watching. Press 5 or 6 and the Browse bar will appear. Press 4 and you’ll see what’s coming up on that channel in half-hour increments. If you see something that you like, press OK for details on the program. Press EXIT to remove the Browse bar.
CHECK LISTINGS BY CHANNEL
Highlight the By Channel bar and press the OK button. Then use 5 or 6 to move up or down the list. To see what’s on other channels, use 3 or 4 to move to the next channel.
CHECK LISTINGS BY TIMEHighlight the By Time bar and press the OK button. Move up and down the list using 5 or 6. If you see something you like, highlight it and press the OK button. Or you can hit the INFO button to access information about the program.

12 I Cable ONE, CABLE
To see what’s on later, use 4 to move the time forward in half-hour increments. If you see something you want to watch later, highlight it, press the OK button and a reminder will be set.
HOW TO SELECT YOUR FAVORITE CHANNELSYou can use the My Favorite Channels feature to select your favorite channels and scan through them quickly using Browse or Flip.
To see a listing of all channels, flip to the Main Menu and highlight the My Favorite Channels bar and then press the OK button.
To select how the channels are displayed, highlight the By The Numbers bar or the By The Name bar.
Then use 5 or 6 to go to the channel you want to designate as a favorite, highlight it and press the FAVORITES button. The favorites you select will be blue.
To remove a channel from your favorites list, highlight it and then press the FAVORITES button. The channel will return to its original purple color. To Browse or Flip through your favorite channels, press the FAVORITES button before you begin.
HOW TO SET PARENTAL CONTROLSParental Control makes it easy to restrict programs you don’t feel are kid appropriate. You can set a lock to restrict viewing by rating, such as R or PG-13, or by program title. You can also completely lock certain channels.
Go to the Main Menu and highlight the Parental Controls bar and press OK.
Enter your 4-digit Parental Control code. If you have not set your code, you will be prompted to do so.
Use 5 or 6 to highlight either Channel or Rating and press the OK button.
Press 3 or 4 until the desired rating or channel appears, then press the LOCK button.
To lock a specific program or movie title, use 5 or 6 to locate and highlight a program and then press the LOCK button. You can
remove a lock by pressing the LOCK button again. To view a locked program, enter your 4-digit Parental Control code.
You can also temporarily remove all locks by going to the Main Menu, then select Parental Controls, then Master Locks. Select Yes, and you now have two choices:
• Bypass Locks allows you to maneuver around all the programs as though there were no Parental Locks selected. Then once the digital receiver is turned off, the locks go back on.
• Remove All Locks completely removes all the locks that were selected.
HOW TO SET REMINDERS
This makes it easy to keep track of programs you don’t want to miss. When you set a reminder for a program, a reminder screen will appear just before a program begins. If you’re tuned to another channel, you can switch to the program you want to watch.
To set a reminder from Flip or Browse or from the program listings in the Main Menu, highlight the program you want to set a reminder for and press OK. When the Set Reminder screen appears, highlight Yesand then press OK. A check mark will appear next to the program name indicating that a reminder has been set.
When a reminder appears, highlight the program name and press OK. If you don’t want to be tuned to the program, highlight Hide Reminder and press OK. Later you can press OK and the reminder will appear again.
Canceling a reminder is easy too. Just select the program; it will have a check mark next to it, indicating that it currently has a reminder set for it. When the Reminder Already Set screen appears, highlight Yes to cancel the reminder and then press OK.
LOCAL WEATHER AT YOUR FINGERTIPSTo get an update on your local weather, just select Weather from the Main Menu and you will see current local conditions as well as a three-day forecast at a glance.
HANDY TIPS FOR USING YOUR DIGITAL RECEIVER continued

Visit support.cableone.net for more help topics online. Cable ONE, CABLE I 13
Q: WHAT EQUIPMENT DO I NEED TO RECEIVE HD?
A: You will need an HDTV, available from retailers, and an HD digital receiver or CableCARD that will be available through Cable ONE. The HDTV needs to accept a 1080i signal via component connections. Or, you can use an HDMI cable for the connection to your HDTV.
Q: WILL MY OLD TV BE OBSOLETE?
A: No. However, it’s not possible to see the upgraded HD picture or hear the enhanced sound quality on a standard-definition TV. You’ll only want to upgrade to HD if you have an HDTV. HD programming from Cable ONE is available at no extra cost.
Q: DOES ALL TV PROGRAMMING COME IN HD?
A: Not all channels are available in HD. However, Cable ONE offers the most popular channels in high definition, providing you with thousands of hours of movies and sports every month.
Q: WHEN WILL YOU ADD MORE PROGRAMMING?
A: We are constantly in contact with local broadcasters, as well as cable programmers, in order to provide you with the most HD programming available. As networks are added, we’ll make announcements letting you know the networks that have been added to your HD lineup.
Q: HOW DO I HOOK UP MY HD RECEIVER?
A: Connecting the HD digital receiver is easy. Just refer to the instructions in your setup guide which explain how to connect the receiver to your TV and detail the various outputs on the receiver.
HD FAQs
TV 1 – LOCATION: _____________________ INPUT: ___________________
TV 2 – LOCATION: _____________________ INPUT: ___________________
TV 3 – LOCATION: _____________________ INPUT: ___________________
TV 4 – LOCATION: _____________________ INPUT: ___________________
OR CALL
1-877-692-2253
support.cableone.netsupport.cableone.net

Visit http://support.cableone.net for more help topics online.14 I Cable ONE, CABLE – ALL DIGITAL
CABLE ONE ALL DIGITAL
The world is going All Digital and so is Cable ONE. With the switch from analog to digital technology, Cable ONE will be able to add new channels, especially more HD channels, and provide even better picture quality. In All Digital systems, to receive cable TV service, all televisions will need a CableCARD, or a Motorola receiver, or DVR, or TiVo or a new All Digital Device.
Cable ONE’s All Digital Device, the ADD-Vantage, is small — just 5" x 1" x 4.5" — and can be mounted out of sight behind your television. Both Standard and High-Definition television signals are delivered through the All Digital Device. Customers with an HDTV will receive HD versions of the SD channels they subscribe to when Cable ONE offers that channel in HD. The All Digital Device also comes with an on-screen program guide.
DMT-200HDAll Digital Device

Cable ONE, CABLE – ALL DIGITAL I 15Visit support.cableone.net for more help topics online.
CHDMI
AUDIO
VIDEO
C
CONNECTING YOUR ALL DIGITAL DEVICEConnecting the All Digital Device is quick and easy.
• Some devices have an external Smart Card. If your device came with a Smart Card, insert the Smart Card into the slot in the back panel of the All Digital Device. If you are connecting multiple devices, only the Smart Card included with the All Digital Device will work with that device. If no Smart Card is included and there is no horizontal slot on the back of the device, skip this step.
• Find the coaxial cable coming from the wall to your television. Leave the coaxial cable connected to the wall but disconnect the end of the cable attached to your TV. Connect this end to the CABLE IN input on the back of the All Digital Device. Make sure the coaxial cable connections to your All Digital Device and the wall are finger tight.
• Connect the AC adapter to a power outlet.
• You’re now ready to connect the All Digital Device to your TV. There are three options for connecting the All Digital Device to your television. Choose A, B or C.
You can use the Mini-to-RCA connector included with the All Digital Device. Connect the single end to the AV OUT on the back of the All Digital Device and connect the yellow video and the red and white audio connectors to the inputs for video and audio on your TV.
If you have an HDTV, using an HDMI cable is the way to go. Connect one end of the cable to the HDMI input on your television and connect the other end to the HDMI OUT on the back of the All Digital Device.
Use a coaxial cable. Connect one end of the cable to TV OUT on the All Digital Device and connect the other end to CABLE IN on the back of your TV.
Connect your all digital device to your TV only. Do not connect to a VCR, DVD player or gaming console.
IMPORTANT NOTE:IMPORTANT NOTE:IMPORTANT NOTE:
NOTE: Only the Smart Card enclosed with this All Digital Device will work with this device. Follow the directions printed on the Smart Card.

Visit http://support.cableone.net for more help topics online.16 I Cable ONE, CABLE – ALL DIGITAL
• Next, insert the batteries into the remote control. Turn on your TV and adjust the input or source on your TV until the Livewire start-up screen appears on your TV.
• After 30 seconds to a minute, press MENU on the All Digital Device remote and select Cable ONE Connect from the Main Menu.
• If you will be connecting more than one All Digital Device, connect all of the All Digital Devices before moving to the activation step. Once all the All Digital Devices are connected, you’re ready to activate the Device(s) and begin watching cable TV.
DMT-200HD REMOTEInsert 2 AAA batteries into the back of the remote control.
CONNECTING YOUR ALL DIGITAL DEVICE continued

Cable ONE, CABLE – ALL DIGITAL I 17Visit support.cableone.net for more help topics online.
ACTIVATING THE ALL DIGITAL DEVICE
Activating the All Digital Device is quick and easy.
Go to help.cableone.net/alldigital or call 1-877-692-2253 and follow the instructions to authorize your All Digital Device(s). You will need your account number from your billing statement plus the device serial number and the Smart Card serial number from the installation screen to complete authorization. After you complete the activation steps, the All Digital Device(s) will be activated within 2 to 20 minutes. Once they have been activated, you’re ready to sit back and watch TV.
After connecting the All Digital Device(s), you’re ready to activate the Device(s). Initially you will see the screen above.
support.cableone.net/alldigital
OR CALL
1-877-692-2253
OR CALL
1-877-692-2253
support.cableone.netsupport.cableone.net
To watch a video on connecting/activating your All Digital Device, go to support.cableone.net.

Visit http://support.cableone.net for more help topics online.18 I Cable ONE, CABLE – ALL DIGITAL
NOTE: If you place the All Digital Device in direct line of sight with your remote control, you will not need to connect the IR Receiver cable.
Press and hold SETUP until the red LED blinks twice.
Enter 9-9-1.
Press CH+ repeatedly until the TV turns off.
To save the working code, press and hold SETUP until the LED blinks twice.
2
4 5
31
IR RECEIVER CONNECTION REMOTE CONTROL SETUP
If you choose to place the All Digital Device out of sight, you will need to connect the IR Receiver cable included with the All Digital Device.
Plug the IR Receiver cable into the IR IN on the right side of the All Digital Device. Place the IR Receiver lens in direct line of sight where your remote control is used.
1 Turn on your television.
2 Press and hold SETUP on the All Digital remote until the red LED blinks twice.
3 Enter 9-9-1.
4 Press CH+ repeatedly until the TV turns off.
5 To save the working code, press and hold SETUP until the LED blinks twice.

Cable ONE, CABLE – ALL DIGITAL I 19Visit support.cableone.net for more help topics online.
REMOTE CONTROL
Use the VOL +/- buttons on the remote control to raise and lower the volume.
Use the CH +/- buttons to change channels with the remote control.
Press the numeric buttons (0 – 9) on the remote control to tune directly to a specific channel.
If the All Digital Device does not tune immediately after entering channel numbers, press ENTER button on your remote control.
SETUP
CABLETV
GUIDE
ARROWS
HELP
FAVORITESMENU
VOLUME +/-
INPUT
INFO
DONE
LAST
SEL/OPT
PAGE +/-
CHANNEL +/-
MUTE
0 – 9
ENTER

Visit http://support.cableone.net for more help topics online.20 I Cable ONE, CABLE – ALL DIGITAL
CABLE Switches the All Digital Device’s power on or into stand-by mode.
TV Powers on or turns off the TV.
GUIDE Launches the Zap Browsers.
FAVORITES Rotates Favorite Lists between All Channels, currently selected Theme and any of the active Custom Favorite Lists.
VOLUME +/- Increases or decreases volume levels.
MUTE Mutes the audio.
PAGE +/- In channel lists, menu screens or program lists, scrolls one page up or down.
CHANNEL +/- Selects the previous and next available channels.
MENU Opens the Menu Features screen of the Menu System.
ARROWS Move to highlight items in respective direction.
SEL/OPT Confirms a selection. In the Zap Browser, displays the Option Menu (Audio/SAP).
EXIT Returns video to full screen from any Info or Menu System screen.
INFO Displays various information about the current program.
HELP Displays Help and Information for the current screen.
DONE Automatically selects Done or Cancel on screen. DONE saves any changes you have made to DONE saves any changes you have made to DONEthe current screen.
LAST Switches between the current and previous channel. In the Menu System, LAST returns to the LAST returns to the LASTprevious screen.
0 – 9 In the Zap Browser, enters channel numbers. In text windows, enters PIN-Code numbers and various characters.
INPUT Changes video input on the TV.
ENTER Confirms a selection.
REMOTE CONTROL continued

Cable ONE, CABLE – ALL DIGITAL I 21Visit support.cableone.net for more help topics online.
GUIDE
The All Digital Device provides a built-in now/next guide, allowing you to find your favorite shows quickly and easily.
One press of the INFO button brings up the channel you’re watching with the name of the program.
A second press of the INFO button brings up a summary of the program.
The GUIDE button on the remote provides a channel lineup.
Using ▲ and ▼ takes you from channel to channel.

Visit http://support.cableone.net for more help topics online.22 I Cable ONE, CABLE – ALL DIGITAL
MAIN MENU
Press MENU on your remote control to access the menu system.
Use ▲ and ▼ on your remote to navigate through the menu items.
Press SEL/OPT on your remote control to select a menu item or option.
Press DONE on your remote to automatically select Done on any screen that has the Done button.
Press HELP on your remote while in any menu screen to launch the Help and Information screen.
Press LAST on your remote to go to the previous menu screen.
Your selection will highlight in yellow.

Cable ONE, CABLE – ALL DIGITAL I 23Visit support.cableone.net for more help topics online.
FAVORITES/THEMES
• Select Favorites from the Main Menu.
• Select a Channel Theme.
• Select Channel Themes to set the channel lineup.
• Use ▲ and ▼ on your remote to choose a theme.
PARENTAL CONTROLS
Select Parental Controls from the Main Menu. Enter your 4-digit PIN-Code to access Parental Controls using the numbers on your remote.
Use Parental Controls to do the following:
• Toggle Parental Controls On or Off.
• Select Block Channels to make a channel require PIN-Code entry.
• Select Block Ratings to choose ratings to block.
• Select Done on screen to save your selections.
• Press SEL/OPT to toggle an on-screen button on or off.
• Press PAGE +/- if there is more than one Channel Themes page.
• Select Done when you have finished making your choices.
from the Main Menu. Code to access Parental
to choose ratings to block.
on screen to save your selections.
from the Main Menu. Code to access Parental
to choose ratings to block.
on screen to save your selections. Numbers will not display.
1 2 3 4* * * *
The first time you access Parental Controls, the default PIN-Code is 1234.
IMPORTANT NOTE:IMPORTANT NOTE:IMPORTANT NOTE:

Visit http://support.cableone.net for more help topics online.24 I Cable ONE, CABLE – ALL DIGITAL
CLOSED CAPTIONING
• Select PIN-Code from the System Settings Menu.
• Enter your 4-digit PIN-Code using the numbers on your remote and press SEL/OPT to continue.
• Enter your 4-digit PIN-Code using the numbers on your remote and press SEL/OPT to enter a new PIN-Code and select Enter on screen.
• Enter your new 4-digit PIN-Code a second time and select Enter on screen.
HOW TO UPDATE YOUR PIN-CODE
• Select Closed Captioning from the System Settings Menu.
• Use ▲ and ▼ to navigate through the menu options.
• Select On and press SEL/OPT to turn on Closed Captioning.
• Select Off and press SEL/OPT to turn off Closed Captioning.
• Select Font Style to choose size and style.
• Select Foreground Style to choose color and opacity.
• Select Background Style to choose color and opacity.
• Select Edge Style to choose color and style.
Numbers will not display.
1 2 3 4* * * *
The first time you access PIN-Code, the default PIN-Code is 1234.
IMPORTANT NOTE:IMPORTANT NOTE:IMPORTANT NOTE:

Cable ONE, CABLE – ALL DIGITAL I 25Visit support.cableone.net for more help topics online.
ALL DIGITAL CABLE TROUBLESHOOTING
PROBLEM POSSIBLE CAUSE SUGGESTIONS
LED light is red. All Digital Device is not turned on.
Press TV on the remote control to turn on the AllTV on the remote control to turn on the AllTV Digital Device.
Check batteries in the All Digital Device remote control.
No LED light appears on the front panel display of your All Digital Device.
Your box is not plugged in properly.
Make sure the power cord is plugged in correctly and the power outlet is working properly.
Green LED light displays on the front panel of the All Digital Device, but nothing is displayed on the TV.
The All Digital Device is not hooked up properly to your TV.
Make certain your connectors/cables are connected correctly.
If your All Digital Device is connected to your TV by coaxial cables, confirm that your TV is on channel 3 or 4, corresponding to the switch on the back of the All Digital Device.
If your system is connected by an HDMI or Mini-to-RCA cables, confirm that your TV is set to the proper input.
Verify that the TV is turned on.
The All Digital Device does not respond to your remote control.
1. The All Digital Device is powered off.
2. Something, such as furniture, is blocking the path between the remote control and the All Digital Device.
3. The batteries in the remote control need to be replaced.
Press TV on the remote control.TV on the remote control.TV
Make certain nothing is blocking line of sight to the All Digital Device or the IR extension.
Make certain the AAA batteries are inserted correctly, checking the + and - positions.
Replace the batteries on your remote control with two new AAA batteries, properly checking the + and - positions.
If the All Digital Device is in direct line of sight with your remote and the IR Receiver cable is also connected, disconnect the IR Receiver cable.
Visit http://support.cableone.net for more help topics online.26 I Cable ONE, CABLE – ALL DIGITAL
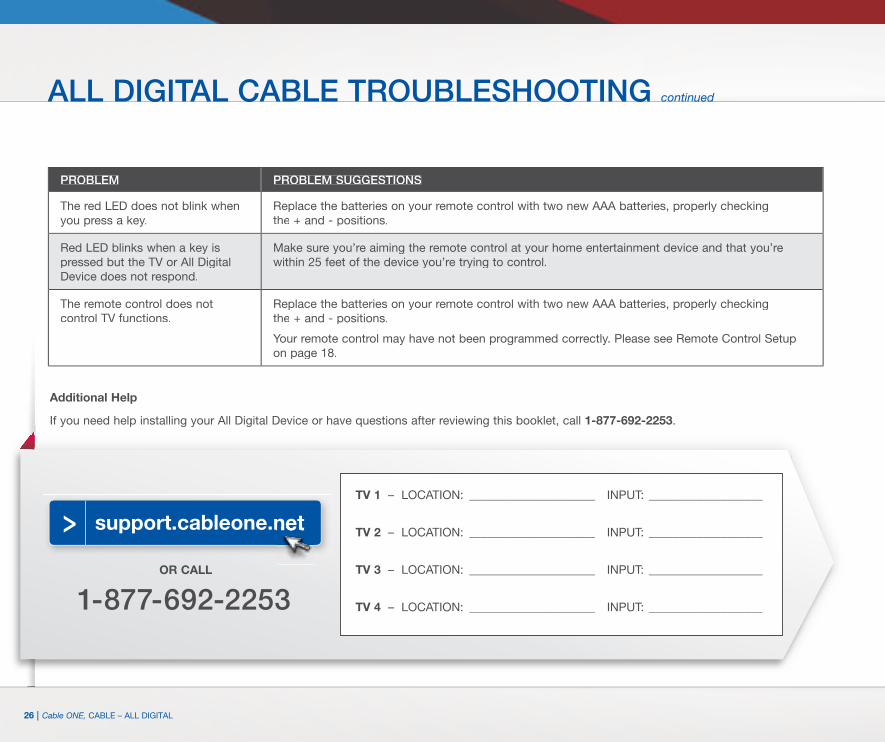
PROBLEM PROBLEM SUGGESTIONS
The red LED does not blink when you press a key.
Replace the batteries on your remote control with two new AAA batteries, properly checking the + and - positions.
Red LED blinks when a key is pressed but the TV or All Digital Device does not respond.
Make sure you’re aiming the remote control at your home entertainment device and that you’re within 25 feet of the device you’re trying to control.
The remote control does not control TV functions.
Replace the batteries on your remote control with two new AAA batteries, properly checking the + and - positions.
Your remote control may have not been programmed correctly. Please see Remote Control Setup on page 18.
Additional Help
If you need help installing your All Digital Device or have questions after reviewing this booklet, call 1-877-692-2253.
TV 1 – LOCATION: _____________________ INPUT: ___________________
TV 2 – LOCATION: _____________________ INPUT: ___________________
TV 3 – LOCATION: _____________________ INPUT: ___________________
TV 4 – LOCATION: _____________________ INPUT: ___________________
OR CALL
1-877-692-2253
support.cableone.netsupport.cableone.net
ALL DIGITAL CABLE TROUBLESHOOTING continued

Cable ONE, CABLE – TiVo I 27Visit support.cableone.net for more help topics online.
THE ULTIMATE TV EXPERIENCE – POWERED BY TiVo®
GET THE MOST OUT OF YOUR CABLE EXPERIENCE WITH CABLE ONE AND TiVo
It’s the best of TV and Internet together in a whole-home HD/DVR that lets you record four HD shows at once with up to 650 hours of recording time. You can even start watching in one room and finish in another. It also includes custom apps and an advanced guide that lets you easily browse current programming or quickly search for your favorite shows. So get the best of Cable and the Internet with Cable ONE — Powered by TiVo. It’s the ultimate way to watch TV.
Let’s get started.
The TiVo experience gives you total control of the TV programming you love, and much more! The TiVo digital video recorder (DVR) also connects to the Internet and gives you access to an entire universe of movies, TV shows, web videos and streaming music.
Press the TiVo button on your TiVo remote control to get to TiVo Central®, the starting point for all of the amazing features at your fingertips!
For more instructions on using your TiVo DVR, be sure to visit tivo.com/howto.
TiVo requires Cable ONE Standard Video and High-Speed Internet service of 5 Mbps or greater. Cable ONE Internet speeds of 15 Mbps or greater is suggested for the best experience.

Visit http://support.cableone.net for more help topics online.28 I Cable ONE, CABLE – TiVo
ONEPASS™ RECORDINGS: RECORD EVERY EPISODE OF A SHOW
Just select Get a OnePass from a show’s Information screen. You can even choose options like First run only.
SEARCH: FIND WHAT YOU LOVE TO WATCH
From the TiVo Central screen, select Find TV, Movies & Videos, then select Search. Enter a few letters of the show title or actor’s name, and the TiVo service searches across TV and broadband to find matches.
GUIDE: FIND OUT WHAT’S ON TV NOW OR LATER!
Press the GUIDE button on your TiVo remote to find what’s on right now and what’s coming up. Use the arrow keys to move around the guide. Press FORWARD and BACK to move right or left one page at a time. Press ADVANCE to move 24 hours ahead and REPLAY to move 24 hours back.
WISHLIST® SEARCHES: FIND SHOWS THAT MATCH YOUR AREAS OF INTEREST
Search by actor, director, keyword or category, and every time a show’s title or description matches your criteria, it’s recorded for you. From the TiVo Central screen, select Find TV, Movies & Videos, then select WishList saved searches.
COLLECTIONS: FIND SHOWS BASED ON GENRE OR CATEGORY
From the TiVo Central screen, select Find TV, Movies & Videos, then select Browse TV & Movies.
FINDING AND RECORDING SHOWS

Cable ONE, CABLE – TiVo I 29Visit support.cableone.net for more help topics online.
WATCHING SHOWSLIVE TV: RETURN TO LIVE TV AT ANY TIME
Press the LIVE TV button on your TiVo remote to watch live TV. Press LIVE TV again to switch tuners on your DVR.
MY SHOWS: ALL YOUR RECORDED DOWNLOADED PROGRAMS
My Shows is the first menu item on the TiVo Central screen. Here you’ll find all your recorded and downloaded shows and all your TiVo recommended shows (TiVo Suggestions).
HINT: You can get to the My Shows list by pressing the TiVo button
You can get to the My Shows
on your TiVo remote control twice.
PARENTAL CONTROLS: CONTROLLING ACCESS IS EASY
Restrict access to shows based on ratings or simply restrict certain channels. From the TiVo Central screen, select Settings & Messages > Settings > Parental Controls.
DISCOVERY BAR: GET PERSONALIZED RECOMMENDATIONS
The Discovery Bar is the bar of thumbnail images across the top of TiVo Central and many other screens. The Discovery Bar helps you find new shows based on what your TiVo DVR knows you already like! And it doesn’t contain only shows. You’ll also find thumbnails for actors, collections of related shows, and more. Press the UP arrow to move up to the Discovery Bar, then the LEFT and RIGHT arrows to move around. Press SELECT on an image that interests you to open an information screen about that item.
TIVO SUGGESTIONS: RECORD SHOWS THAT MATCH YOUR PREFERENCES
Based on the ratings you give to shows and movies, TiVo Suggestions automatically selects and records new content for you. It’s a great way to make new discoveries. Don’t worry, TiVo Suggestions won’t override your own recordings or steal valuable disk space. If you choose to auto-record TiVo Suggestions, you’ll find a list of recorded TiVo Suggestions in your My Shows list. TiVo Suggestions are marked with a Suggestions icon list. TiVo Suggestions are marked
.
GETTING RECOMMENDATIONS

Visit http://support.cableone.net for more help topics online.30 I Cable ONE, CABLE – TiVo
GETTING THE MOST FROM YOUR TiVoBRING ALL YOUR ENTERTAINMENT TOGETHER
The TiVo experience serves up the best entertainment from TV and the web — all in one place. Get movies from Netflix to web videos from YouTube™.
From the TiVo Central screen, choose Find TV, Movies & Videos, then choose the video provider you want.
For detailed instructions on how to find and enjoy shows and web videos*, go to support.tivo.com.
PLAY YOUR FAVORITE MUSIC ON THE BEST SPEAKERS IN THE HOUSE
Pandora lets you create custom Internet radio stations personalized just for you, playing only the music you love!
From the TiVo Central screen, choose Music & Photos (for TiVo with HD menus) or Music, Photos, & Showcases (for TiVo with SD menus), and select Pandora. Follow the on-screen instructions.
For detailed instructions on how to set up and operate Pandora, go to support.tivo.com.
*Some features and options may be not available in your service area.

Cable ONE, CABLE – TiVo I 31Visit support.cableone.net for more help topics online.
RECORD WHAT YOU WANT WHEN YOU WANT FROM WHERE YOU WANT
Take advantage of the Remote Scheduling feature to find shows and schedule recordings online using a computer, tablet or smartphone.
For detailed instructions, see support.tivo.com.
GET THE TiVo® APP FOR SMARTPHONES OR TABLETS FOR THE ULTIMATE REMOTE CONTROL
Download the TiVo app from the iTunes Store or Google Play.
NOTE: To use the app, you’ll need to make sure that the Network Remote Control setting is enabled on your box. From TiVo Central, select Settings & Messages > Settings > Remote, CableCARD, & Devices > Network Remote Control.

Visit http://support.cableone.net for more help topics online.32 I Cable ONE, CABLE – TiVo
Swap
The TiVo button takes you to TiVo Central®, the starting point for all your TiVo features and settings.
LIVE TV/SWAP takes you to live TV. If you’re watching live TV, use it to swap tuners.
Use the THUMBS UP and THUMBS DOWN buttons to rate shows for TiVo Suggestions. You can give up to three Thumbs Up (great!) or three Thumbs Down (terrible!). In TiVo with HD menus, you can also use the Thumbs Up button to mark any video provider, category or collection as a favorite.
Press RECORD to start recording the show you’re watching, or to set up a recording for a show selected in the program guide.
Use ZOOM to change aspect ratio of shows on your TV. Use SELECT to choose menu options or shows to record.
SLOW plays a show in slow motion.
ADVANCE moves forward in 30-second increments; press and hold to jump to the end of the show. While viewing a recorded show, press Advance to jump to the next tick mark when fast-forwarding or rewinding.
If programmed, TV PWR turns your TV or A/V receiver on/off. INFO shows the channel banner while watching live TV. Press it again to make it disappear.
REWIND rewinds a show. Press it up to three times for three speeds. When a show is paused, press Rewind to go back frame-by-frame.
PLAY starts playing a show from the My Shows list. When you are using pause, rewind, fast forward or slow, pressing Play will resume playing at normal speed.
If programmed, VOLUME controls the volume on your TV or A/V receiver. Use the ARROW buttons to navigate the TiVo menus and the
program guide.
REPLAY repeats the last 8 seconds of the show. Press and hold to jump to the beginning of a show.
ENTER/LAST returns you to the last channel tuned to in live TV. In the program guide, press Enter/Last to see Guide Options.
Use NUMBER buttons to enter channel numbers.
Use INPUT to select the input (such as TiVo DVR, DVD player, game system) your TV displays. GUIDE takes you to the program guide, where you can find
shows to watch or record. Press it again to clear the guide.
PAUSE freezes a show. Press it again to resume playing.
FAST FORWARD fast-forwards through a show. Press it up to three times for three speeds. When a show is paused, press Forward to advance frame-by-frame.
If programmed, MUTE turns the volume on your TV or stereo on or off.
Use the CHANNEL UP/DOWN buttons to change the channel and to page up or down while in the program guide or TiVo menus.
In TiVo with HD menus, the buttons sort and filter views. Look for the on-screen tips.
CLEAR removes the display of the channel banner or program guide, and deletes titles from the My Shows or To Do list.
TiVo REMOTE CONTROL

Cable ONE, CABLE – TiVo I 33Visit support.cableone.net for more help topics online.
TiVo WHOLE HOME SOLUTIONThe TiVo Whole Home Solution delivers TV plus web applications such as YouTube, Netflix, Pandora, Spotify, Picasa and Photobucket to just about anywhere in your home!
Share shows from your TiVo DVR to the TiVo Mini, a set-top box that enables you to stream shows from a centralized DVR to multiple TV locations.
Add a TiVo Stream to wirelessly deliver shows from your TiVo DVR to mobile devices such as iOS tablets and smartphones. The TiVo Stream enables streaming of shows simultaneously to multiple portable devices without interrupting what’s playing on the television.
Living Room
TiVo Digital Video Recorder
TiVo
TiVo Mini
Bedroom #1
TiVo
TiVo Mini
Bedroom #2
TiVo
TiVo Stream
In Home (any room)
TiVo
TiVo Mobile App
TiVo Tablet App
TiVo Browser
WiFi Router
TiVo HELP
© 2013 TiVo Inc. All rights reserved. TiVo, the TiVo logo, Season Pass, WishList, TiVo Central, the
Instant Replay logo, the Jump logo, the Thumbs Up logo and the Thumbs Down logo are registered
trademarks of TiVo Inc. or its subsidiaries worldwide. All other trademarks are the property of their
respective owners. U.S. Pat. Nos. D424,061; D424,577; D431,552; D433,403; D463,788.
GOT QUESTIONS? HERE’S HOW YOU CAN ALWAYS FIND ANSWERS:
• Find detailed instructions on how to use the many features of your TiVo DVR at tivo.com/howto.
• Use the Help screens on your TiVo DVR. Go to Settings & Messages > Help.
• Contact your cable provider for customer support.
Register your TiVo box at tivo.com.
Write your TSN number here so that you have it handy in the future.
TSN: – – –
IMPORTANT NOTE:IMPORTANT NOTE:IMPORTANT NOTE:

Visit http://support.cableone.net for more help topics online.34 I Cable ONE, TV EVERYWHERE
Getting started is easy.
• You’ll need your Cable ONE account user ID and password.
• Then go to home.cableone.net to set up your account.
• Click Sign In on the upper right side of the page.
• Use your Cable ONE user ID and password to log in.
• Go to Today in the upper left corner and pick Watch TV.
• Go to All Networks and choose a featured network. Enjoy live streaming by clicking the Watch Now banner, or go to Episodes for VOD.
To learn more about TV Everywhere, visit cableone.net. You’ll find available networks, plus the devices that you can use to access each network.
IT’S TV THAT’S EVERYWHERE YOU ARE
Get more value out of your cable TV service with TV Everywhere. Enjoy your favorite shows or catch up on past episodes from your computer, tablet or smartphone, anywhere. All you need is Standard Cable and an Internet connection.
Access over fifty cable networks with thousands of hours of programming, including HGTV, Food Network, A&E, History, AMC, FX, Discovery, ESPN, FS1, NFL Network, RedZone and more.
All Cable ONE customers with Standard Cable service, Internet and a direct billing relationship with Cable ONE can access TV Everywhere.
TV EVERYWHERE

Cable ONE, INTERNET I 35Visit support.cableone.net for more help topics online.
HOW TO GET HELP WITH YOUR SERVICE
In addition to the Answer Book, Cable ONE offers several ways to get support with your High-Speed Internet service.
• support.cableone.net offers support information and troubleshooting steps.
• 24-hour Customer Support via phone. Call 1-877-692-2253.
• Contact us via the web. Visit cableone.net and click on the Contact Us link.
YOUR EMAIL SERVICE
Cable ONE offers a full-featured email service. Your email address will end in @cableone.net.
There are two ways to access your email:
• Using a web browser, go to home.cableone.net.
• Using Outlook, Outlook Express or another mail program on your PC.
For information about email setup on your PC, visit support.cableone.net or contact us by calling 1-877-692-2253.
YOUR CABLE MODEM
Your cable modem is the link between your computer and the Internet. If you have Cable ONE Phone, your modem delivers your phone service too. Here are some things to know:
• Your modem should stay in the same location and stay plugged into an outlet (with a surge protector) that isn’t controlled by a light switch.
• Your modem does not have an on-off switch and is designed to stay plugged in all the time. However, “power cycling” your equipment can solve many connectivity issues and is explained on page 37 of this guide.
• If you have a wireless cable modem (one with Wi-Fi capability), it is important to secure your modem to prevent others from gaining access to your network. Visit support.cableone.net for instructions or contact us by calling 1-877-692-2253.
INTERNET GETTING THE MOST FROM YOUR INTERNET SERVICE
IMPORTANT NOTE:IMPORTANT NOTE:IMPORTANT NOTE:
High-Speed Internet
100100100100100100MbpsKeep this information handy:
• Cable ONE username ____________________________(you will create one during registration)
• Your Cable ONE account number __________________
• Password _______________________________________

Visit http://support.cableone.net for more help topics online.36 I Cable ONE, INTERNET
CREATING A CABLE ONE USERNAME
1. Open a browser and go to myaccount.cableone.net.
2. Click I don’t have a Cable ONE username.
3. Enter your Billing Account Number and Billing Zip Code in the required fields and click Register.
4. A message will populate that says “No username was found for this account. Please enter the phone number associated with your account.”
5. Enter the phone number tied to the account in the “Contact Phone” box and click Register.
6. You will be prompted to enter a requested username and select Next.
7. If your requested username is already in use, you will receive the following mesage: “The username you entered is already taken. Please enter a different one. We have provided a few names that are available.”
8. After you select a username that is not in use, click Next and you will be asked to enter the following information: password, re-enter password, select a password reset question (e.g. favorite author, favorite historical person, name of 1st grade teacher, name of 1st pet, street you grew up on, create a custom question) and answer the password reset question. Once those fields are entered, click Next.
9. Check the box that says “Create email address” (if you wish) and click Next.
10. Enter an alternate email address (not required) and click Next.
11. The final screen displays a review of the information entered. Click Create User if all information is correct.
12. The links on the left hand side throughout the process will take you back to any of the previous steps to edit information as necessary.
CABLE ONE IN-BROWSER NOTIFICATIONS
To better communicate with our Internet subscribers, Cable ONE provides a range of notifications that will automatically appear in your web browser. The notifications you would like to receive are customizable through your myaccount.cableone.net portal. To read additional information regarding in-browser notifications visit support.cableone.net and search for “in-browser notifications.”
GETTING THE MOST FROM YOUR INTERNET SERVICE continued
Cable ONE, INTERNET I 37Visit support.cableone.net for more help topics online.
ROUTERS
Many customers install a router to connect multiple computers to the Internet, add security or gain the benefits of a Wi-Fi connection in their home. We recommend you contact a Cable ONE authorized dealer for more information about routers and hubs. If you are using a wireless cable modem and a wireless router, Cable ONE recommends disabling one of the wireless devices.
If you own a wireless router, securing the wireless network will help prevent unauthorized access to your cable modem service. Unauthorized access may slow down your connection, cause additional usage against your data plan limits and create other risks. For assistance securing your wireless router, please contact the router manufacturer.
BANDWIDTH POLICIES AND ACCEPTABLE USE
We expect your Internet service will bring many hours of enjoyment to your home. In order to ensure a positive experience for all customers, Cable ONE manages bandwidth usage on its network and enforces policies. Here’s what you can do to help control your bandwidth usage:
• Disable any unattended programs that use up bandwidth. File-sharing programs are the most common culprit. File sharing programs allow others to grab music or movies from your computer. In addition to heavy bandwidth usage, file sharing of copyrighted material such as the latest movies violates certain laws and may subject your service to immediate suspension.
• Internet plans include data plans (the amount of bandwidth which can be used during a billing cycle). To monitor your monthly data plan, log in to your account at myaccount.cableone.net.
• Familiarize yourself with our acceptable use policies and bandwidth management practices. These may be found at cableone.net/Pages/internetaup.aspx or by searching “AUP” at cableone.net.
SUPPORT FOR YOUR PC, ETHERNET-ENABLED DVD PLAYER, TV, PRINTER AND GAME EQUIPMENT
Your Cable ONE Internet service is compatible with many devices in your home that use an Internet connection. You will find self-help guides at support.cableone.net or you may call us for additional information. We recommend you contact an authorized Cable ONE dealer for extended support on your home devices. Search “authorized dealer” from the cableone.net website.
HOW TO REBOOT YOUR EQUIPMENT: POWER CYCLE LIKE A PRO
Step 1 Turn off your computer and other devices if you have them.
Step 2 Cable Modem Power Off: Cable ONE Phone Customers: Do NOT unplug the power cable from the modem. Press the reset button on the back.
Cable ONE Customers Without Phone: Unplug the power from the cable modem. If applicable, do NOT use the Power/Standby button on top of the modem.
Step 3 Cable Modem Power On: Cable ONE Phone Customers: No action is required as the cable modem should not have been unplugged from the wall outlet.
Cable ONE Customers Without Phone: After the lights go out on the cable modem, count to 15 then plug the power back in.
Step 4 Wait until the “Cable” or “Online” light goes solid. Depending on the type of modem, there may not be a designated “Cable” light.
Step 5 Once the light is solid, power up your computers and other devices if you have them.

Visit http://support.cableone.net for more help topics online.38 I Cable ONE, INTERNET
Be sure to turn off your computer before you start. Please read the manual that came with your cable modem for descriptions of connectors and indicator lights.
1. Connect the coaxial TV cable from the wall jack to the cable connector on the cable modem.
2. Connect the cable modem to the computer by inserting one end of the 100Base-TX Ethernet cable to the cable modem and the other end to the Ethernet jack on the back of your computer.
3. Connect power to the cable modem. Note – Please allow approximately 30 minutes for your modem to come online for the first time. The “cable” or “online” light should be solid.
4. Once your cable modem is connected, wait for the power indicator and cable (online) indicator lights to stay on. If the cable modem will not come online, see “Problems with the cable line” in our Troubleshooting Guidelines on page 42.
5. Turn on your computer and allow it to boot up.
6. Watch for the “link” or “cable” light on the cable modem to indicate there is a connection between the cable modem and the computer. Note – Some cable modems may not have this “link” indicator light.
SETTING UP YOUR HARDWARE

Cable ONE, INTERNET I 39Visit support.cableone.net for more help topics online.
CONNECTING TO YOUR WIRELESS MODEM
WINDOWS 8 & WINDOWS 10
1. Turn on your computer, allow it to boot up, and log in to Windows. Note – Please allow approximately 30 minutes for your modem to come online for the first time.
2. From the Start screen, move your mouse cursor to the lower right corner of the screen to reveal the Charms Bar.
3. Click on the Settings icon.
4. Click on the Wireless reception bars. Note – You may see the word “Available” under the bars.
5. In the list of available wireless networks, click the SSID listed on your modem label.
6. Click Connect.
7. You will be asked for the network security key, which can be found on your model label.
• For SBG6580/DG860, enter the WPA-PSK key listed.
• For TG852G/TG862G, enter the Pre-Shared Key listed.
WINDOWS VISTA & WINDOWS 7
1. Turn on your computer and allow it to boot up. Note – Please allow approximately 30 minutes for your modem to come online for the first time.
2. Right-click the network icon ( or ) in the notification area to show your networks.
3. If a list of wireless networks opens, proceed to Step 4, otherwise select Network and Sharing Center, and select the following icon to Connect to a Network:
4. In the list of available wireless networks, click the SSID listed on your modem label. Note – If you are asked for a PIN, select “I want to enter the network key or passphrase instead.”
5. You will be asked for the network security key, which can be found on your model label.
• For SBG6580/DG860, enter the WPA-PSK key listed.
• For TG852G/TG862G, enter the Pre-Shared Key listed.
Note – If you are asked what type of network this is, select “Home” to connect automatically.
TG852G/TG862G modem label example
SBG6580 & DG860 modem label example
P/N: XXXXXX-XXX-00
SSID: MOTOROLA-12345
WPA-PSK:12345678901234567890
PASSCODE: 123456789012
CUSTOMER S-N: BCDFGHJKLMNP
S/N: PPPPMNYJJJSSSSSCAABBCCCC
HFC MAC ID: ABCDEF012345
GATEWAY MGNT MAC IDL ABCDEF012345
MODEM NO. 012345678ASSEMBLED IN CHINA
WINDOWS VISTA
• Click on Windows globe in lower left corner.
• Select Control Panel.
• In Control Panel, click on Network and Internet.
• Click on Network and Sharing Center.
• Click on Manage Network Connections in upper left.
• Double-click on the Local Area Connection.
• Click the Properties button at the bottom.
• Double-click Internet Protocol Version 4 (TCP/IPv4).
• Under the General tab of TCP/IP properties, choose Obtain an IP address automatically and Obtain DNS server address automatically.
• Click the Advanced button at the bottom.
• Under the IP Settings tab, the IP address should be set to DHCP Enabled.
• Under the DNS tab, entries should be left blank.
• Under the WINS tab, entries should be left blank.
COMPUTER NETWORK SETTINGS
You can obtain your wireless network information at myaccount.cableone.net.
IMPORTANT NOTE:IMPORTANT NOTE:IMPORTANT NOTE:

Visit http://support.cableone.net for more help topics online.40 I Cable ONE, INTERNET
WINDOWS 7
• Click on Windows globe in lower left corner.
• Select Control Panel.
• In Control Panel, click on Network and Internet.
• Click on Network and Sharing Center.
• Click on Change Adapter Settings in upper left.
• Double-click on the Local Area Connection.
• Click the Properties button at the bottom.
• Double-click Internet Protocol Version 4 (TCP/IPv4).
• Under the General tab of TCP/IP properties, choose Obtain an IP address automatically and Obtain DNS server address automatically.
• Click the Advanced button at the bottom.
• Under the IP Settings tab, the IP address should be set to DHCP Enabled.
• Under the DNS tab, entries should be left blank.
• Under the WINS tab, entries should be left blank.
COMPUTER NETWORK SETTINGS continued
WINDOWS 8
• From the Start Menu, click on the Desktop tile.
• Move your mouse cursor to the lower right corner of the screen to reveal the Charms Bar.
• Click on the Settings icon.
• Near the top of the Settings menu, click on Control Panel.
• Click on Network and Internet.
• Click on Network and Sharing Center.
• Click on Change Adapter Settings in the upper left.
• Double-click on the Ethernet or Wi-Fi option, depending on your type of connection.
• Click the Properties button at the bottom.
• Double-click Internet Protocol Version 4 (TCP/IPv4).
• Under the General tab of TCP/IP properties, choose Obtain an IP address automatically and Obtain DNS server address automatically.
• Click the Advanced button at the bottom.
• Under the IP Settings tab, the Use default gateway on remote network and Automatic metric boxes should be checked.
• Under the DNS tab, entries should be left blank.
• Under the WINS tab, entries should be left blank.
WINDOWS 10
• Click on the Start button then on Settings.
• Click on Network and Internet.
• Under Related Settings, click on Change Adapter Settings.
• Double-click on the Ethernet or Wi-Fi option, depending on your type of connection.
• Click the Properties button at the bottom.
• Double-click Internet Protocol Version 4 (TCP/IPv4).
• Under the General tab of TCP/IP properties, choose Obtain an IP address automatically and Obtain DNS server address automatically.
• Click the Advanced button at the bottom.
• Under the IP Settings tab, the Use default gateway on remote network and Automatic metric boxes should be checked.
• Under the DNS tab, entries should be left blank.
• Under the WINS tab, entries should be left blank.

Cable ONE, INTERNET I 41Visit support.cableone.net for more help topics online.
INTERNET FAQsQ. WHAT IS A CABLE MODEM? HOW DOES IT WORK?
A. A cable modem connects your computer to the Internet over your cable TV line. It is an external device having two connections, one to the cable wall outlet and the other to your computer. It is a special device designed especially for high-speed access to the Internet. A cable modem will not interfere with your TV signal. You can use both a TV and a cable modem at the same time.
Q. WHAT CABLE MODEM MODELS DOES CABLE ONE SUPPORT?
A. For a complete list of supported cable modems, go to support.cableone.net.
Q. DOES A CABLE MODEM CONNECT TO MY TV?
A. No. Cable modems connect to your computer.
Q. WHAT ARE THE BENEFITS OF HAVING A CABLE MODEM?
A. Cable modems bring the Internet to you faster than a dial-up connection and DSL connections. You will not tie up a telephone line while you are on the Internet. Also, the service is “always on”— that means you do not have to dial in to be connected. It is very convenient to stop by your computer and check your email throughout the day. A speedy cable modem means you will have more time to spend enjoying your content, rather than retrieving it.
Q. WHAT ABOUT SECURITY? IS A CABLE MODEM SAFE?
A. We have taken extra steps to ensure you have a secure connection on Cable ONE’s network. Your packets are securely routed directly to you through the security methods engineered by CableLabs® and Cable ONE. Does this mean you should not worry? No. Any computer connected to the Internet is at risk. Since a PC with a dedicated connection is “always on,” the risk is greater. This risk is not exclusive to cable. DSL and others have the same risk. At minimum, you should disable file sharing on Windows. If you have important information on your computer, you should talk with your local computer dealer about a “firewall.”
Q. WHAT DO I NEED TO BEGIN?
A. First, you will need to live at an address accessible to Cable ONE’s cable television lines. To check availability, call 1-877-692-2253.
• A computer meeting our minimum requirements: An Intel® Pentium®-class computer with 256 MB of RAM for Windows XP or 512MB of RAM for Windows Vista and Windows 7. A Macintosh configuration is also available. (For support questions on older systems, please call us at 1-877-692-2253.)
• A Cable ONE-certified cable modem. (Purchase one from a local dealer or lease one from your local Cable ONE office.) Purchased modems and other required equipment may vary in price. To view a list of Cable ONE-certified cable modems, visit support.cableone.net.
• A commonly available 10Base-T Network Interface Card installed.
• A cable television outlet near your computer.
Q. HOW DO I SIGN UP?
A. Begin our easy self-registration process. With your computer turned off, connect the cable modem to your PC’s Ethernet port and then to the cable outlet near your computer. Once completed, turn your computer on. Upon completion of startup, open your Internet browser and you will be directed to an easy online sign-up page. After just a few clicks and a restart, you will be set to go.
Q. WHY DO I NEED A CABLE ONE USERNAME AND PASSWORD IF MY INTERNET IS “ALWAYS ON?”
A. While the Cable ONE username and password is not needed to connect to the Internet, it is required if you would like to use your Cable ONE email address or access your Cable ONE account information online. The username you chose during registration will also be your Cable ONE email address. To create a username, visit myaccount.cableone.net/AccountRegister.aspx.Please make sure you document your username and password for future reference.

Visit http://support.cableone.net for more help topics online.42 I Cable ONE, INTERNET
Q. IF I HAVE TWO COMPUTERS, DO I NEED TWO CABLE MODEMS?
A. No. By design, you will use only one cable modem in your house. We will configure only one modem per residence or business. Through the use of an Ethernet switch you are able to connect up to three PCs to your Cable ONE Internet connection. For more than three PCs, a router is required. These devices can be purchased through any reputable computer dealer.
Q. DO I NEED TO BUY CABLE TELEVISION SERVICE?
A. No, a subscription to our cable television service is not required.
Q. DO I NEED SPECIAL SOFTWARE?
A. No, Cable ONE uses standard Internet and email settings. We recommend using Microsoft Internet Explorer and Outlook Express. Both of these products are freely available through your Windows Operating System.
Q. WHAT ABOUT A SMALL BUSINESS?
A. Your Cable ONE service is designed for residential use. If you have a small business, Cable ONE Business can help you run it smoothly with a mix of high-speed Internet, a small business phone system or cable TV that’s right for you and your industry. Call 1-855-762-7866 to talk to a Business Adviser.
Q. WHAT IS THE CABLE ONE ACCEPTABLE USE POLICY (AUP) FOR CABLE MODEM SERVICE?
A. You can view the Acceptable Use Policy for cable modem service online at cableone.net/Pages/internetaup.aspx.
Q. WHERE CAN I VIEW MY CABLE ONE ACCOUNT INFORMATION ONLINE?
A. Your account information is available at myaccount.cableone.net. Your Cable ONE username and password will be required.
INTERNET FAQs continued
PROBLEMS WITH THE CABLE LINE
It is best to have your cable line running directly from the wall to the cable modem without a splitter. If you need to split the cable line coming from the wall jack, use a high-quality splitter and cable. Too many splitters in the cable line will prevent the cable modem from coming online. If the online or cable indicator on your cable modem is off or blinking, remove any splitters and check all connections.
INTERNET TROUBLESHOOTING
OR CALL
1-877-692-2253
support.cableone.netsupport.cableone.net
INPUT 1: _____________________________________
INPUT 2: _____________________________________

Cable ONE, PHONE I 43Visit support.cableone.net for more help topics online.
VOICE MAIL – PHONE ACCESS
Activation Instructions
1. From home phone – Dial *55
2. System will start a mini tutorial and offer the following:
• Change password (Password must be 4 – 19 digits)
• Record name
• Record personal greeting
How to check messages
You will hear what sounds like a fast busy signal to indicate that you have a new voice mail message waiting.
To check messages from home phone
1. Dial *55
To check messages away from home phone
1. Dial home number
2. When the Voice Mail greeting starts playing, press *
3. Enter password and press #
NOTES
– Customers can reset password to default through the Web Portal. See instructions on page 50.
– If you have Call Privacy set to “Anonymous,” *55 will not work without having to enter your mailbox number and password. You can temporarily disable Call Privacy on a per-call basis by dialing *82 before dialing *55 to access your voice mail.
All methods of checking messages will lead to an identical Main Menu (as shown below)
Voice Mail Main Menu
• Review new messages – press 1
• Record new message – press 2
• Review other messages – press 3
• Change personal options – press 4
Review Messages Menu
• Save message – press 9
• Delete message – press 7
• Play message – press 2
• Previous message – press 4
• Play envelope – press 5
• Next message – press 6
• Call back caller – press 8
VOICE MAIL – WEB ACCESS
You can listen to or save your voice mail on the My Voice Mail tab at myphone.cableone.net.
All voice mails are listed. Those in bold black lettering have not been listened to. The icons in the yellow box are actions that can be taken for each voice mail:
• Speaker – Controls sound
• Disk – Will give the option of saving from the voice mail system to a computer
• X – Deletes voice mail
When you access your voice mail by phone, your default password is the last four digits of your phone number.
IMPORTANT NOTE:IMPORTANT NOTE:IMPORTANT NOTE:
PHONE VOICE MAIL – PHONE AND WEB ACCESS

Visit http://support.cableone.net for more help topics online.44 I Cable ONE, PHONE
FEATURES – PHONE ACCESSCALLER ID
Feature that displays incoming party’s name and/or number.
NOTE – Customers will need a Caller ID phone or a stand-alone Caller ID box.
CALLER ID BLOCKING PER CALL
Feature that allows you to block your name and number from being displayed to whomever you are calling.
Activation Instructions
1. Pick up phone — check for dial tone
2. Dial *67
3. Verify confirmation dial tone received
4. Dial telephone number as you normally would
NOTES
– This feature works on a per-call basis. Once the call is disconnected, you will need to repeat steps 1 – 4 for any additional calls.
– Some people do not accept anonymous calls, so using this feature may prevent you from reaching certain numbers.
ANONYMOUS CALL REJECTION
Feature that allows you to block any incoming calls where the caller has manually blocked their number.
Activation Instructions
1. Pick up phone — check for dial tone
2. Dial *77 to activate or *87 to deactivate
3. Announcement will state whether feature is active/inactive
NOTES
– This feature will remain on/off until the * code is entered to change the status. It is not on a per-call basis.
– Anonymous Call Rejection may not block calls that come through as Unknown, Out of Area or Private. It is designed to specifically block calls where the caller has dialed *67 to block their number.
– This feature can be activated and deactivated through the Web Portal. See instructions on page 48.
CALL FORWARDING
Allows user to forward home number to ring at another location.
Activation Instructions
1. Pick up phone — check for dial tone
2. Dial *72
3. Verify confirmation dial tone received
4. Dial number you would like calls forwarded to (including 1 for long distance numbers, etc.)
5. Verify confirmation dial tone received
6. Hang up
7. When someone dials your home number, it will ring once and then forward the call to the call forwarding number
NOTES
– To deactivate feature, follow steps 1 – 3 but use *73 instead.
– This feature can be activated and deactivated through the Web Portal. See instructions on page 47.
Services will be provided to you by Cable One, Inc. or its affiliate that is the voice service provider in your area. For purposes of this document, “affiliate” means any entity that controls, is controlled by, or is under common control with Cable One, Inc.

Cable ONE, PHONE I 45Visit support.cableone.net for more help topics online.
CALL WAITING
Allows you to be notified of an incoming call when you are on the phone. Feature is on by default.
Activation Instructions
1. When on a call, you will hear a special tone to indicate a second call is coming in
2. Press Flash to switch between the two calls
NOTES
– Feature can be removed from line for all calls via Web Portal. See instructions on page 48. Feature can also be turned off on a per-call basis by picking up the phone and dialing *70.
– In cases where phones do not have Flash buttons, the “Flash” effect can be created by quickly depressing and releasing the receiver switch hook.
AUTOMATIC RECALL
Allows user to dial back the phone number of the last call received.
Activation Instructions
1. Pick up phone — check for dial tone
2. Dial *69
3. The system will automatically call the last number that called. If you get a busy signal, you will have to try again later.
3-WAY CALLING
Allows user to add a third party to a call.
Activation Instructions
1. When on the call with the first caller, press Flash
2. You will receive a secondary dial tone
3. Dial the telephone number you want to call
4. When call is answered, press Flash again
5. This should conference in all callers
NOTE – In cases where phones do not have Flash buttons, the “Flash” effect can be created by quickly depressing and releasing the receiver switch hook.
SPEED DIAL
Allows user to assign individual destination telephone numbers to a numeric code (2 through 9) that can be dialed to save time. You can use Speed Dial from any phone connected to your Cable ONE account.
Activation Instructions
1. Pick up the phone and verify that you have a dial tone
2. Dial *74 to activate Speed Dial
3. Verify that the confirmation dial tone is received
4. Dial the Speed Dial numeric code followed by the destination number you are assigning to that code
5. Listen for a confirmation tone
6. Hang up
How to use Speed Dial
1. Pick up the phone and verify that you have a dial tone
2. Dial the Speed Dial numeric code followed by the # sign, and the assigned destination phone number will be dialed automatically

Visit http://support.cableone.net for more help topics online.46 I Cable ONE, PHONE
PHONE PORTAL ACCESS
1. Open your browser
2. Enter the following URL in your address bar: myphone.cableone.net
LOGIN
To access the Web Portal, a user must log in with a valid username:
1. Enter Username
2. Enter Password
3. Click Login
FEATURES – WEB ACCESS
MAIN MENU
A successful login will bring you to the MyPhone page, where you may manage your phone settings and view phone calls and phone bills.
• My Features: Allows you to view and modify your phone settings.
• My Calls: Allows you to view placed and received calls.
• My Bill: Allows you to view current and past statements.
• My Voice Mail: Allows you to listen to and delete voice mail.
• Intn’l Rate Lookup: Allows you to determine cost per minute for international calls.
visitvisitvisitmyaccount.cableone.net/AccountRegister.aspxmyaccount.cableone.net/AccountRegister.aspxmyaccount.cableone.net/AccountRegister.aspxTO CREATE A USERNAMETO CREATE A USERNAMETO CREATE A USERNAMETO CREATE A USERNAMETO CREATE A USERNAMETO CREATE A USERNAMETO CREATE A USERNAMETO CREATE A USERNAMETO CREATE A USERNAMETO CREATE A USERNAMETO CREATE A USERNAMETO CREATE A USERNAMETO CREATE A USERNAMETO CREATE A USERNAMETO CREATE A USERNAME,,,,,,,,,,,,,,,

Cable ONE, PHONE I 47Visit support.cableone.net for more help topics online.
MY FEATURES
There are 13 features available for user configuration under My Features:
1. Call Forwarding
2. Anonymous Call Rejection
3. Call Waiting
4. Toll Block
5. Call Privacy
6. Voice Mail Password Reset
7. Voice Mail Language Selection
8. Voice Mail Auto-Forward
9. Selective Call Rejection
10. Selective Call Acceptance
11. Selective Call Forwarding
12. Speed Dial
13. Number of Rings
Enable Call Forwarding
1. Select Enable Call Forwarding
2. Enter the phone number where you would like to forward your calls
3. Click Apply Changes
Disable Call Forwarding
1. Select Disable Call Forwarding
2. Click Apply Changes
The following confirmation will be displayed when changes have been successfully made:
1. CALL FORWARDING
When enabled, this feature forwards your calls to a different phone number. To enable/disable this
feature, click Edit under the Call Forwarding heading. This feature is set to “Disable Call Forwarding” by default.

Visit http://support.cableone.net for more help topics online.48 I Cable ONE, PHONE
3. CALL WAITING
This feature will notify you of incoming calls when you’re already on the phone. A special tone tells you a second call is coming.
NOTE – If you are using cable to access dial-up services, you may want to disable this feature because the dial-up connection may drop an incoming call.
To enable/disable this feature, click Edit under the Call Waiting heading. This feature is set to “Disable Call Waiting” by default.
2. ANONYMOUS CALL REJECTION
This feature blocks all anonymous callers and rejects calls if the incoming caller has their caller ID blocked.
Scenario
1. User A has his Caller ID blocked
2. User B has the Anonymous Call Rejection feature enabled
3. User A calls user B
4. User A hears a message similar to this: “The caller does not accept anonymous calls.”
To enable/disable this feature, click Edit under the Anonymous Call Rejection heading. This feature is set to “Disable Anonymous Call Rejection” by default.
Enable Anonymous Call Rejection
1. Select Enable Anonymous Call Rejection
2. Click Apply Changes
Disable Anonymous Call Rejection
1. Select Disable Anonymous Call Rejection
2. Click Apply Changes
The following confirmation will be displayed when changes have been successfully made:
FEATURES – WEB ACCESS continued

Cable ONE, PHONE I 49Visit support.cableone.net for more help topics online.
4. TOLL BLOCK
This feature will prevent you from making chargeable calls such as Extended Domestic, International and
Operator/Directory Assistance.
• This feature is set to “Disable Toll Block” by default
• If your phone package is Economy, Local Toll Calling is still available for $0.10/minute, and Long Distance Calling (Domestic 48) is still available for $0.10/minute
To enable/disable this feature, click Edit under the Toll Block heading.
Enable Toll Block
1. Select Enable Toll Block
2. Click Apply Changes
3. You can no longer place any International or Operator/Directory Assistance calls from your phone
Disable Toll Block
1. Select Disable Toll Block
2. Click Apply Changes
3. You can now place International and Operator/Directory Assistance calls from your phone
The following confirmation will be displayed when changes have been successfully made:
Enable Call Waiting
1. Select Enable Call Waiting
2. Click Apply Changes
Disable Call Waiting
1. Select Disable Call Waiting
2. Click Apply Changes
The following confirmation will be displayed when changes have been successfully made:

Visit http://support.cableone.net for more help topics online.50 I Cable ONE, PHONE
6. VOICE MAIL PASSWORD RESET
This feature resets your Voice Mail password to the default password – 123456.
To enable/disable this feature, click Edit under the Reset Password heading.
Click Reset Password under the Reset Password heading.
The following confirmation message will be displayed:
5. CALL PRIVACY
This feature allows you to block your name and number from appearing on the recipient’s Caller ID.
• When you make an anonymous call, “Anonymous” will be displayed on the recipient’s Caller ID.
• If the recipient has Anonymous Call Rejection enabled, your call won’t go through.
• If you want your call to go through, you can unblock your line for that call only and have your name and number shown by pressing *82 before placing the call.
NOTE – If the Call Privacy feature is enabled, your mailbox will not recognize your Caller ID. You will have to key in both your mailbox # and password when accessing voice mail.
To enable/disable this feature, click Edit under the Call Privacy heading. This feature is set to “Disable Call Privacy” by default.
Enable Call Privacy
1. Select Enable Call Privacy
2. Click Apply Changes
Disable Call Privacy
1. Select Disable Call Privacy
2. Click Apply Changes
The following confirmation will be displayed when changes have been successfully made:
FEATURES – WEB ACCESS continued

Cable ONE, PHONE I 51Visit support.cableone.net for more help topics online.
8. VOICE MAIL AUTO-FORWARD
This feature allows you to have copies of your voice mail sent instantly to the email address that you specify.
To access the configuration, click Edit under the Voice Mail Auto-Forward heading. This feature is set to “Disable Voice Mail Auto-Forward” by default.
Enable Voice Mail Auto-Forward
1. Select Enable Voice Mail Auto-Forward
2. If you want to keep a copy of your voice mail in the voice mail box so that you may still review your message using the telephone or on the My Voice Mail page, check the box next to “Keep copy of messages in voice mail box”
7. VOICE MAIL LANGUAGE SELECTION
This feature allows you to choose the language spoken by the voice mail system when you review your
voice mail and for callers leaving messages.
Select the language spoken by the Voice Mail system.
1. Click Edit under the Language Selection heading.
2. Select the language you want to hear spoken by the answering service for each of the following:
• User Prompt Language – for the language used when you review your voice mail
• Caller Prompt Language – for the language used when callers leave you voice mail
This is set to “English” for both options by default.
3. Click Apply Changes to confirm your selection and the following screen will be displayed:
NOTE – In the instance when a Cable ONE customer calls another Cable ONE customer, if the language selections do not agree, then the user language selection of the calling party will supersede the caller language selection of the receiving party.

Visit http://support.cableone.net for more help topics online.52 I Cable ONE, PHONE
Remove a rejected number from Selective Call Rejection
1. Highlight the box that contains the number
2. Delete the number
3. Click Apply Changes
Disable Selective Call Rejection
1. Select Disable Selective Call Rejection
2. Click Apply Changes
The following confirmation will be displayed when changes have been successfully made:
3. If you have enabled Voice Mail Auto-Forward, enter the email address that you want your voice mail sent to in the box under “If enabled, voice mail will be forwarded to this address.” NOTE – If you do not leave a copy in the voice mail box, keep in mind that the email copy is the only copy you will have of the voice mail left for you. At the same time, you will want to monitor the number of voice mails left in your voice mail box so that they do not exceed the maximum number of voice messages allowed, which is 15 messages at 3 minutes in length.
4. Click Apply Changes
Disable Voice Mail Auto-Forward
1. Select Disable Voice Mail Auto-Forward
2. Click Apply Changes
The following confirmation message will be displayed:
9. SELECTIVE CALL REJECTION
Allows users to select up to 8 numbers to reject calls from. If a call comes in from one of these numbers, the caller
will receive a busy signal. To enable/disable this feature, click Edit under the Selective Call Rejection heading. This feature is set to “Disable Selective Call Rejection” by default.
1. Select Enable Selective Call Rejection
2. Enter telephone number you wish to block in one of the 8 available boxes
3. Click Apply Changes
FEATURES – WEB ACCESS continued

Cable ONE, PHONE I 53Visit support.cableone.net for more help topics online.
11. SELECTIVE CALL FORWARDINGAllows user to enter up to 4 different phone numbers and then automatically forward calls from those
numbers to a different number, as specified. To enable/disable this feature, click Edit under the Selective Call Forwarding heading. This feature is set to “Disable Selective Call Forwarding” by default.
Enable Selective Call Forwarding
1. Select Enable Selective Call Forwarding
2. Enter the telephone number you wish to have forwarded in one of the 4 available boxes
3. Click Apply Changes
Enable Selective Call Acceptance
1. Select Enable Selective Call Acceptance
2. Enter telephone number you wish to accept in one of the 4 available boxes
3. Click Apply Changes
Remove an accepted number from Selective Call Acceptance
1. Highlight the box that contains the number
2. Delete the number
3. Click Apply Changes
Disable Selective Call Acceptance
1. Select Disable Selective Call Acceptance
2. Click Apply Changes
The following confirmation will be displayed when changes have been successfully made:
10. SELECTIVE CALL ACCEPTANCE
Selective Call Acceptance allows you to select up to 4 phone numbers to accept calls from. Any calls from
other telephone numbers will receive a busy signal. To enable/disable this feature, click Edit under the Selective Call Acceptance heading. This feature is set to “Disable Selective Call Acceptance” by default.

Visit http://support.cableone.net for more help topics online.54 I Cable ONE, PHONE
Remove a forwarded number from Selective Call Forwarding
1. Highlight the box that contains the number
2. Delete the number
3. Click Apply Changes
Disable Selective Call Forwarding
1. Select Disable Selective Call Forwarding
2. Click Apply Changes
The following confirmation will be displayed when changes have been successfully made:
FEATURES – WEB ACCESS continued
12. SPEED DIAL
Allows users to assign specific telephone numbers to a numeric code that they can
dial to save time. User can use Speed Dial from any phone connected to your Cable ONE account. This page shows you how to associate numbers with Speed Dial. You will need to use your phone handset to actually do so, by dialing *74 and entering the telephone number.
For assistance in setting up this feature, click Edit under the Speed Dial heading.
Enter a telephone number for Speed Dial in the Destination Phone Number box and click the keypad number below you wish to associate with the Speed Dial.
Instructions should appear below:

Cable ONE, PHONE I 55Visit support.cableone.net for more help topics online.
MY PHONE CALLS – ADVANCED SEARCH
Click the Advanced Search button to filter by Date, Time, Duration and Call Amount (or quantity).
MY PHONE CALLS
This screen displays the summary report of all the phone calls made. You can apply a filter prior to running the report based upon the following criteria:
• Phone Line
• Billing Cycle
• Show (Outgoing, Incoming and All calls)
• Advanced Search
13. NUMBER OF RINGS
This feature is new to My Phone. It will allow you to change the number of rings before calls forward to
voice mail. You can choose between 2 rings (12 seconds) and 10 rings (60 seconds).
Set number of rings
1. Click on the drop-down menu and choose a number of rings between 2 and 10.
2. Click Apply Changes
The following confirmation will be displayed when changes have been successfully made.

Visit http://support.cableone.net for more help topics online.56 I Cable ONE, PHONE
MY BILL
The My Bill screen allows you to view your Billing Information and Monthly Usage Summary. From the drop-down, select a Billing Cycle to view past and current billing summaries.
You can view your bill based on four Charge Types:
1. Extended Domestic Calls There is always a charge for this type of call. This most commonly includes Alaska, Hawaii, Puerto Rico and the U.S. Virgin Islands.
2. Local and Domestic Long Distance Calls The charge for this type of call is always “$0.00” unless you have the Economy package, then it is $0.10/minute for calls that are long distance or made outside of the calling area.
3. International Calls There is always a charge for this type of call.
4. Directory Assistance/Operator Services There is always a charge for this type of call.
MY VOICE MAIL
You can listen to or save your voice mail on the My Voice Mail tab.
All voice mails are listed. Those in bold black lettering have not been listened to. The icons in the yellow box are actions that can be taken for each voice mail:
• Speaker – Controls sound
• Disk – Will give the option of saving from the voice mail system to a computer
• X – Deletes voice mail
FEATURES – WEB ACCESS continued

Cable ONE, PHONE I 57Visit support.cableone.net for more help topics online.
eMTA QUICK REFERENCE GUIDE
NOTE – Wireless eMTA may not have an external antenna like older models. eMTA may look different if it isn’t wireless.
INTERNATIONAL RATE LOOKUP
Find out how much is charged for a call outside of the continental U.S.
Choose one of the following options:
• Enter the telephone number you are trying to call (including country code) and click Submit.
• Choose the country that you are looking for from the drop-down list and click Submit.
The amount that will be billed per minute for a call to that specific telephone number or country will be displayed.
LED DISPLAY - FRONT PANEL
Power: Indicates whether AC power is available to the unit
DS: Indicates downstream connectivity
US: Indicates upstream connectivity
Online: Indicates Internet data transmission status
Link: Indicates Ethernet connectivity between the Telephony modem and computer
Telephone 1: Indicates status of line 1
Telephone 2: Indicates status of line 2
Battery: Indicates status of battery in the Telephony modem
TM862G - REAR PANEL
Tel1/2: Connector for the first phone line (or both lines of a 2-line phone)
Tel 2: Connector for the second phone line
Ethernet connection:
For use with a computer or home network LAN connection
USB connector:
Not supported
Reset button: Resets the Telephony Modem as if you power cycled the unit. Use a pointed nonmetallic object to press this button
Cable: Connector for the coaxial cable
Power: Connector for the power cord

Visit http://support.cableone.net for more help topics online.58 I Cable ONE, PHONE
PHONE TROUBLESHOOTINGTHE MODEM IS PLUGGED IN, BUT THE POWER LIGHT IS OFF
• Check all power connections.
• If you plugged into a power strip, make sure the strip is switched on.
• Avoid using an outlet controlled by a wall switch if possible.
• Try a different power outlet if possible.
WHY DON’T I HAVE A DIAL TONE WHEN I PICK UP THE PHONE?
Is the Power LED lit?
1. If not, check to make sure the modem is plugged in and the outlet has power.
2. If the LED is lit, go to the next step.
Is the Online LED lit?
1. If not, check the coaxial cable connections at the modem and the wall. Ensure they are connected and tight.
2. If the ONLINE LED is lit, go to the next step.
Is the Telephone (Telephone 1 or Telephone 2) LED lit?
1. If not, phone service has not been provisioned on that line. Contact Cable ONE.
2. If it is blinking, there is a phone off the hook somewhere in the house. Find that phone and hang it up.
3. If it is lit, go to the next step.
Is the phone plugged directly into the modem?
1. Make sure the phone is plugged into the port on the back of the modem labeled TEL 1/2.
2. If so, try a different phone. Make sure the new phone is a working phone.
3. If a known good phone is used and you still don’t have a dial tone, try a different phone cable. If neither of these options work, call Cable ONE.
Is the modem plugged into a wall outlet?
If so, unplug the RJ-11 connector at the back of the Telephony port and plug in a known working phone. If you now have a dial tone, the problem is with the house wiring. Contact your local Cable ONE office or a qualified wiring technician to correct the house wiring.
DOES CABLE ONE PHONE SUPPORT COLLECT CALLS AND 900 NUMBER BLOCKING?
Collect calls are not supported and 900 numbers are automatically blocked by Cable ONE Phone service.
RJ-11 connector

Cable ONE, PHONE I 59Visit support.cableone.net for more help topics online.
FEATURE NAME * CODE SUMMARY
Anonymous Call Rejection
*77 Blocks all anonymous callers.
Deactivation *87 Allows anonymous callers.
Automatic Recall *69 Automatically calls back the last number that called. If the number is busy, you will need to try again later.
Cancel Call Waiting *70 Disables incoming Call Waiting calls for the duration of the current call. (This feature by default is OFF and must be activated on a per-call basis.)
Call Forwarding *72 Ability to forward all calls to another number.
Deactivation *73 Disable only turns off the feature, it does not remove the programmed number from the switch.
Caller ID Delivery Blocking
*67 Blocks outbound Caller ID on a per-call basis; receiving party sees “Anonymous” on Caller ID.
Caller ID Delivery *82 Delivers outbound Caller ID on a per-call basis.
Customer Originate Trace (COTR)
*57 Allows customer to capture calling party information when calling party's information has been blocked.
Selective Call Forwarding
*63 Allows customer to forward calls from a specific list of numbers to one designated number (max = 8 TNs).
Deactivation *83 *83 is used to activate/deactivate/manage the feature.
Speed Dialing *74 Allows customer to program up to 8 numbers in their speed calling list which can be reached by dialing a digit (2 - 9) then #.
Manage Speed Dialing *74 *74 is used to activate and manage the feature.
QUICK REFERENCE GUIDE

Visit http://support.cableone.net for more help topics online.60 I Cable ONE, PHONE
QUICK REFERENCE GUIDE continued
FEATURE NAME * CODE SUMMARY
Voice Mail *55 Allows access to voice mail when calling from the Cable ONE phone service.
Caller ID (inbound) n/a Allows user to receive calling party’s name and number on a Caller ID device.
Caller ID (outbound) n/a Delivers customer’s name and number to called party.
Spontaneous Call Waiting Identification
(aka “squid”)
n/a Displays Caller ID information from a call while engaged in another call.
3-Way Calling n/a Allows customer to set up a 3-way call.
OR CALL
1-877-692-2253
support.cableone.netsupport.cableone.net

Cable ONE, ADDITIONAL INFORMATION I 61Visit support.cableone.net for more help topics online.
ADDITIONAL INFORMATION BILL PAYMENTCABLE ONE EASY PAY – FREE AUTOMATIC BILL PAYMENTCable ONE Easy Pay is a FREE service that automatically pays the bill on the due date each month. Pay using any one of five different payment methods (bank checking or savings account, Visa, MasterCard or Discover).
ONLINE BILL PAYMENTWith online bill payment you can view your current balance and pay your monthly Cable ONE statement online with just a few easy keystrokes. Just take a few minutes to sign up and you’ll be on your way to a faster, easier way of paying your Cable ONE bill.
PAY BY PHONECable ONE offers a convenient automated method for paying your bill over the phone. It’s free of charge for all Cable ONE customers. Simply call your local Cable ONE office anytime to pay your bill with a Visa, MasterCard or checking account. Should you prefer assistance from one of our associates, an additional fee will apply.
THIRD PARTY PAYMENT LOCATIONS Payments can be made in cash at participating locations, such as Walmart and Western Union. A comprehensive list is available on the Cable ONE website. You must have your bill with you at the time of payment and your account cannot be past due. Fees apply.
UNDERSTANDING YOUR FIRST BILLIn the example below, the billing cycle runs from the 1st of the month to the end of the month. If you were to install your services on the 20th day of the month, you would have a 10-day prorate beginning the day after installation and ending the day prior to when the billing cycle begins again. Your bill would then reflect the 10-day prorate and the full first month of service.
1 2 3 4 5 6 7
8 9 10 11 12 13 14
15 16 17 18 19 20 21
22 23 24 25 26 27 28
29 30
Start of billing cycle
Service installed PRORATE
PRORATE
PRORATEEnd of billing cycle
You cannot make a payment at a third party location if your account is past due or disconnected.
IMPORTANT NOTE:IMPORTANT NOTE:IMPORTANT NOTE:

Visit http://support.cableone.net for more help topics online.62 I Cable ONE, ADDITIONAL INFORMATION
HOW TO READ YOUR STATEMENT
1. OUR CONTACT INFO Our phone number, address and website info, as well as hours of operation.
2. YOUR INFO & ACCOUNT NUMBER This info will include your account number, which should appear on all correspondence and payments you send to us.
3. ACCOUNT SUMMARY Will include some or all of the following information:
PREVIOUS BALANCE
PAYMENTS
ADJUSTMENTS
PARTIAL MONTH CHARGES The charges from the date of install, downgrade, upgrade or change to the billing cycle start date.
MONTHLY CHARGES
TAXES & FEES
INSTALLATION CHARGES
4. DUE DATE Payment of the total amount must be made by the due date that is specified on the billing statement.
5. BILLED FROM – BILLED TO The period covered in this billing statement.
6. SPECIAL INFORMATION
7. BALANCE DUE Your total outstanding balance.
8. SPECIAL MESSAGE AREA
BILL PAYMENT continued
Q: WHY IS MY CABLE SERVICE BILLED IN ADVANCE?A: Since our service is not a “metered” service like electricity or gas, we bill for our services in advance.
Q: WHY ARE THESE FEES AND TAXES ON MY BILL?A: These fees and/or taxes are assessed by city, state and federal governments. Fees can vary from community to community.
Q: WHY CAN’T I JUST PICK THE CHANNELS I WANT TO WATCH AND ONLY BE BILLED FOR THOSE?A: Most advertising-supported networks do not allow their service to be offered on an à la carte basis. Examples of channels that do allow their channels to be offered à la carte are HBO, Showtime, TMC and Cinemax.
Q: DO YOU OFFER PAPERLESS BILLING/BILLING VIA EMAIL ONLY?A: Yes. You can sign up at cableone.net/paperless.
BILL PAYMENT FAQs

Cable ONE, ADDITIONAL INFORMATION I 63Visit support.cableone.net for more help topics online.
FCC INFORMATIONThe cable that has been connected to your home carries cable TV signals. Here are a few tips to help keep it operating properly:
HANDS OFF – CALL FIRSTIn keeping with FCC regulations and to avoid affecting your picture, do not attempt to relocate or alter your cable equipment without first checking with our Customer Service Department. To avoid serious injury or liability, check local directory assistance for utility locations prior to any serious digging or excavation. They will assist you in locating buried cable, free of charge, so that damage may be avoided. If you damage our equipment while excavating, you will be held liable for damages and the cost of repairs. If you wish to have additional outlets — or if there is damage to cable equipment inside or outside your home — call our Customer Service Department.
DO NOT ATTEMPT TO MAKE REPAIRS YOURSELF.
USE CAUTIONYour channel converter operates on 110 volts, so take all the precautions you would for any small appliance. Keep away from liquids, pets and small children, and check to see that the cord is not worn or damaged.
ADDING ONPlease call us before adding any devices to the cable line serving your home. Attempts to add “extensions,” additional connections, stereo connections, etc. can result in serious interference problems for you and other cable customers in your immediate area.
SPORTS BLACKOUTSThe FCC requires that from time to time we “black out” distant signal importation of local team home games. This requirement results from contractual agreements between professional sports leagues and broadcasters. Even though we may be restricted from broadcasting these games, they may be listed in the newspaper or TV Guide. We regret any inconvenience these mandated “blackouts” may cause.
THEFT OF CABLE SERVICEIt is important for you, as our subscriber, to know that we work to protect our service (and yours) from unauthorized reception. It is a violation of the law to alter the cable system or converter to receive services which are not authorized. People who use illegal converter/descramblers are actually stealing cable service and this practice unfairly results in increased prices to our honest customers. We conduct routine audits of our system to help ensure compliance with the law and to protect our paying customers. We reserve the right to inspect, at our discretion, our converter for signs of tampering. Where violations are found, we will prosecute to the fullest extent of the law, including both civil and criminal action.
For more information, visit support.cableone.net, click on Contact Us.
Please call us before adding any devices to the cable line serving your home. Attempts to add “extensions,” additional connections, stereo connections, etc. can result in serious interference problems for you home. Attempts to add “extensions,” additional connections, stereo connections, etc. can result in serious interference problems for you
OR CALL
1-877-692-2253
support.cableone.netsupport.cableone.net

Visit http://support.cableone.net for more help topics online.64 I Cable ONE, ADDITIONAL INFORMATION
CABLE SERVICE GUARDRELIABLE INDOOR WIRE REPAIR COVERAGE
Local providers, like cable and telephone companies are responsible for maintaining the wiring and equipment outside your home. But did you know YOU own and are responsible for the wiring inside? With Cable Service Guard from Cable ONE, repairs on the TV, Internet and phone wiring inside your home will be covered too. Ask your Cable ONE representative for details or call 1-877-692-2253.
PROTECT YOURSELF FROM UNNECESSARY HASSLES
With Cable Service Guard, if anything goes wrong with your inside Phone, Cable or Internet wiring that carries Cable ONE service, we’re here to help. If we can’t resolve the issue over the phone, a skilled Cable ONE professional will come to your home, identify the problem and fix it fast.
AVOID EXTRA CHARGES AND UNEXPECTED COSTS
Unlike other providers, our Cable Service Guard covers inside wiring, with no extra hourly charges for covered repairs inside your home.
WIRE MAINTENANCE TERMS AND CONDITIONSPlan Definitions Cable ONE’s Cable Service Guard Plan (The Plan) is an optional monthly inside wiring maintenance plan. Your inside wiring consists of video (TV), voice (Phone) and data lines (Internet) which run from the main connection or Demarcation Point outside your home to an end device such as a television, computer or telephone. Also included in The Plan is all customer education issues relating to the use of Cable ONE equipment.Coverage Subject to the terms and conditions described below, The Plan covers repairs, not installation, of inside wiring and all customer education related to the use of Cable ONE equipment. Cable ONE will identify problems with and repair the inside wire in your home and make necessary repairs to cable lines actively used to deliver video, Internet or phone services. As long as you continue to subscribe to and be eligible for The Plan by paying the Cable Service Guard charge on your monthly bill you will not have to pay the then-current charge for such maintenance and repair.Terms and Conditions Only residential customers that directly subscribe to Cable ONE’s video, Internet or phone service are eligible to participate in The Plan. Cable Service Guard does not cover any wiring or cables that do not have Cable ONE services passing through them (e.g., disconnected coaxial or twisted pair cables). Additional exclusions include, but are not limited to: • Repairs to wiring not professionally installed by a certified installer or that has been modified in such a way that
it does not meet accepted industry standards or other applicable codes.• Rewiring after the building is destroyed by fire, flood, earthquake, other catastrophe, or acts of God.• New installations requiring new outlets or jacks.• Damage to the inside wire caused by intentional acts and/or resulting directly or indirectly from alterations to
the original installation.• Repair of electrical wiring carrying sufficient power to require a licensed electrician to repair.• Cable or wiring that runs between or among separate buildings or dwelling units, in a multi-tenant property.• Home security system wiring and associated equipment unless home security service is being provided by
Cable ONE.• Any customer-owned equipment, such as a TV, DVD player, surround sound, faxes, scanners, game systems,
computers, printers, external devices, telephones, etc.• Damage due to abuse or modifications by customer to the installation.• Any wiring from Cable ONE’s distribution to the in-unit point of termination or wall plate in a multiple dwelling
unit, such as an apartment, condominium or other group facility.
The Plan is optional and covers all inside cable wire-related service calls, pursuant to the Plan’s terms, for as long as the customer subscribes to the Plan. The Plan may be cancelled at any time; however, if the Plan is cancelled within 60 days of a service call, the customer will be charged the full service rate. The Plan does not cover initial installation or installation of primary or additional Internet or cable outlets or telephone jacks or the move or reconfiguration of existing Internet or cable outlets and telephone jacks. Additional fees may apply for work performed that is not covered by this Plan. The Plan is effective the day the customer orders the Plan. Charges for the Plan may change at any time with at least 30-day prior written notice. The Plan does not cover the repair of wire concealed within a wall. If the repair is not covered under The Plan, the customer may: 1) make the repair themselves, 2) hire an outside contractor, or 3) have Cable ONE perform the repair at its standard billing rate and in accordance to industry installation standards if that service is typically performed by Cable ONE. The Plan does not cover rewiring after a home is destroyed or damaged by fire, flood, earthquake, acts of nature, vandalism, gross negligence or willful damage. Cable ONE customers residing in multiple dwelling units, such as apartments, condominium or other group facility, please note that under the laws of some states or applicable agreements, landlords and not tenants, may be responsible for repair to and maintenance of some or all inside wiring. The customer must contact their landlord or building manager to determine responsibility. Except as expressly set forth herein, or where prohibited by applicable law, Cable ONE shall not be liable for any damages (including indirect, incidental, punitive or consequential damages of any kind) arising from services performed under this agreement. Cable ONE makes no warranties, expressed or implied, under this agreement and including any warranty of merchantability or fitness for a particular purpose. Charges for The Plan can change at any time with at least 30-day prior written notice. Changes to the Terms and Conditions can change at any time. Please visit support.cableone.net for the most recent version. Restrictions apply.

WELCOME TO
PHONE INFO – VOICE MAILActivation Instructions1. From home phone – Dial *552. System will start a mini tutorial and offer
the following:• Change password
(Password must be 4 – 19 digits)• Record name• Record personal greeting
How to check messagesYou will hear what sounds like a fast busy signal to indicate that you have a new voice mail message waiting.To check messages from home1. Dial *55
To check messages away from home 1. Dial home number2. When Voice Mail greeting starts
playing, press * 3. Enter password and press #All methods of checking messages will lead to an identical Main Menu (As shown below)• Review new messages – press 1• Record new message – press 2• Review other messages – press 3 • Change personal options – press 4NOTES – Customers can reset password to default through
the Web Portal. See instructions on page 50.
– If you have Call Privacy set to “Anonymous,” *55 will not work without having to enter your mailbox number and password. You can temporarily disable Call Privacy on a per-call basis by dialing *82 before dialing *55 to access your voice mail.
CABLE TV INFO
TV 1 – LOCATION: __________________
INPUT: _______________________
TV 2 – LOCATION: __________________
INPUT: _______________________
TV 3 – LOCATION: __________________
INPUT: _______________________
TV 4 – LOCATION: __________________
INPUT: _______________________
HIGH-SPEED INTERNET INFO
INPUT 1: ____________________________ INPUT 2: ____________________________
TiVo INFO
TSN: ________________________________
YOUR ACCOUNT INFO
Username: _________________________ (You will create one during registration.)
Password: __________________________
Account number: ____________________
IMPORTANT INFORMATION TO SAVE
Your default password is the last four digits of your phone number.
IMPORTANT NOTE:IMPORTANT NOTE:IMPORTANT NOTE:
support.cableone.net/alldigital
OR CALL
1-877-692-2253 1-877-692-2253
OR CALL
1-877-692-2253
support.cableone.netsupport.cableone.net
We’re happy that you’ve chosen us to entertain you and simplify your life. As a Cable ONE customer, you’ll find that we offer a wide array of services for everyone in your family. With Cable ONE, you can count on us for the latest in state-of-the-art technology and advanced home entertainment.
This Answer Book contains helpful information about how to use and enjoy our High-Speed Internet, Video and Phone service.
We believe that local service serves you best. So you can depend on friendly, courteous employees who are on call 24/7 with reliable, same-day service. And when you talk, we really listen. Whenever you have problems or concerns, we hear you loud and clear. Because we know there’s nothing more satisfying than being heard.
At Cable ONE, your complete satisfaction is very important to us. And we hope you’ll be with us for many years to come.
CABM-139762-AnswerBookUpdate_9-16_Cover_REV.indd 2 12/14/16 5:17 PM

THE ANSWER BOOK
support.cableone.net
CABM-139762-AnswerBookUpdate_9-16_Cover_REV.indd 1 12/14/16 5:17 PM