thank you for downloading echnology laboratory … you for downloading ... cpu central processing...
TRANSCRIPT

IT WS LAB MANUAL JKD
JAYA KRISHNA, M.Tech Assistant Professor
JKDIRECTORY JKMATERIALZ
Thank you for downloading
Information Technology Work Shop Laboratory Manual
I YEAR B.Tech (Common to All Branches)
By Jaya Krishna, M.Tech Assistant Professor
CSE Department

JKDYOLA IT WS LAB MANUAL
Jaya Krishna,
Page | 2
INDEX
S. NO. TITLE OF THE EXPERIMENT PG. NO.
1 03
2
2.1 Identify the Peripherals of a Computer 2.2 Assemble and Disassemble a PC 2.3 Windows XP Installation 2.4 Linux Installation 2.5 Hardware Troubleshooting 2.6 Software Troubleshooting
05
05 11 16 25 35 38
3
3.1 MS Word 3.2 MS Excel 3.3 MS PowerPoint 3.4 LATEX
41 44 47 50
4 4.1 Orientation & Connectivity Boot Camp 4.2 Web Browsers & Surfing the Web 4.3 Search Engine, Netiquette & Cyber Hygiene
55 58 62
Download Materials, previous papers Download, previous group papers

JKDYOLA IT WS LAB MANUAL
Jaya Krishna,
Page | 3
INTRODUCTION
The objective of IT Workshop is to impart basic computer usage and maintenance skills and to introduce you to a suite of productivity tools that will aid in your day to day activities.
IT workshop works in a learning-by-doing mode. It concentrates more on hands-on experience for the participants rather theoretical classes. It enables the participant to make the best use of Microsoft Office Suite in their day-to-day requirements and make use of it to improve the standards in the educational environment. The IT Workshop prepares the participant to have a hands-on experience in maintaining and troubleshooting a PC by themselves.
An electronic device that computes mathematical and logical operations and assembles, stores the information, process those information according to the user needs is called as Computer. (Simply a computer is made up of Hardware and Software).
Hardware comprises all of the physical parts of a computer, as distinguished from the data it contains or operates on. (E.g. CPU 2.4GHz Pentium-IV)
Software provides instructions for the hardware to accomplish tasks. (E.g. MS Windows XP).
Windows is a range of closed source proprietary commercial operating environments for personal computers and also servers. This range was first introduced by Microsoft in 1985 and eventually has come to dominate the world of personal computer market. All recent versions of Windows are full-fledged operating systems.
Linux is a computer operating system. It is among the most famous examples of free software and of open-source development. Initially, Linux was largely developed and used by individual enthusiasts.
Microsoft Office is a suite of productivity programs created by Microsoft and developed for Microsoft Windows and Apple Macintosh operating systems. In addition to the office applications, it includes associated servers and Web-based services.
Microsoft Office suite includes Word, Power Point, Excel, Publisher, and Outlook in most of its versions.
Internet & World Wide Web module introduces the different ways of hooking on to the internet from home and workplace and effectively usage of the internet. Usage of web browsers, email, newsgroups and discussion forums would be covered.

JKDYOLA IT WS LAB MANUAL
Jaya Krishna,
Page | 4
Sample System Configuration:
CPU Intel Dual Core processor (2.0GHz),
Mother Board Intel 945 Mercury mother board,
HDD 160 GB SATA Hard Disk Drive,
RAM 1 GB Dynet RAM (DDR2), LG CD/DVD –RW,
Optical Mouse,
17” LG LCD monitor, Multimedia keyboard, ATX cabinet, ALTEC Lansing speakers,
Laser Printer, UPS (500 Volt-Amperes)
CPU
Select the CPU from different families like INTEL, AMD. Also select the CPU based on
the usage keeping in mind like whether you are using your system for only playing games
or for daily work etc.
Select the Speed of the CPU which is normally measured in terms of GHz. E.g. 2GHz, 2.1
GHz, 2.2GHz, and so on
Mother Board
Select the mother board based on the CPU selected.
While you are selecting your mother board, you can also check for the graphic card (built-
in/ not).
HDD
Select the Hard Disk Drive based on the brand you like or the one which is popularly
moving in the market like Seagate, Transcend, LG, and so on.
Select the capacity of you HDD which is normally measured in terms of GB’s or TB’s. E.g.
500GB, 1TB.
RAM
Choose the most advanced RAM like DDR3 is in market (mostly moving one while this
manual is preparing)
It is measured in terms of GB’s but the capacity is either 2GB or 3GB, or 4GB or 6GB or
8GB but not in 3digit like 100GB.
Note: Handle the components of your system with care.

JKDYOLA IT WS LAB MANUAL
Jaya Krishna,
Page | 5
Experiment 1:- Identify the Peripherals of a Computer
Aim:
Identify the peripherals of a computer, components in a CPU and its functions. Draw the block diagram of CPU along with the configuration of each peripheral.
Procedure:
Hardware is physical appearance of the devices or tools, which we can touch & feel.
Computer Hardware consists of the Monitor, CPU, Keyboard, Mouse and all other Devices connected to the computer.
A typical computer consists of the following parts of Hardware:
CPU Central Processing Unit
Mother Board
RAM Random Access Memory
Bus
Power Supply
Video Display Controller
Storage Devices like CD, Floppy Disk, and Hard Disk etc…
MODEM (Modulator Demodulator)
Network Card
Input Devices (Keyboard, Mouse) Output Devices (Speaker, Printer) etc…
“Computer” is an electronic device used to perform arithmetic, logical, and complex operations.
“Computer” is also defined as, it is a machine which can accept the data, process those data and gives the output.
CPU:

JKDYOLA IT WS LAB MANUAL
Jaya Krishna,
Page | 6
Processor is the heart of any computer. The processor is fitted on to a Mother Board.
The Mother Board contains various components, which support the functioning of a PC.
Motherboard:
This holds the Processor, RAM, CMOS battery, North Bridge, South Bridge, PCI slots, AGP slot, etc…
RAM:
(Primary memory) used for program execution & short term data-storage, it is volatile in nature.
More RAM size can contributes a faster PC. (Types SRAM, DDR2 RAM, SDRAM etc..)
RAM Random Access Memory

JKDYOLA IT WS LAB MANUAL
Jaya Krishna,
Page | 7
BUS:
Used to transfer the data between the I/O devices, also called as IDE Cable.
Power Supply:
A case that holds a transformer, voltage control and fan. Also called as SMPS (Switch Mode Power Supply). Used to convert AC to DC.
Video Display Controller:
It produces the output for the computer display. It is connected to VGA ports.
Storage Devices:
CD Compact Disk used to store data, also read data from it.
Types of CD’s are CD-ROM (CD-Read Only Memory), CD-RW (CD- Read Write), and DVD (Digital Versatile Disks).
Capacity of CD is 700MB; Capacity of DVD is 4 GB.
Floppy Disk It is also used to store and retrieve the data. Unlike CD we can erase the data that was stored already in a floppy. But we can store a very less amount of data. Capacity: - 1.44MB

JKDYOLA IT WS LAB MANUAL
Jaya Krishna,
Page | 8
Hard Disk It is also used to store and retrieve the data (secondary memory). Compare to CD/DVD/Floppy we can store a large amount of data in terms of
Giga Bytes. We can not do any sort of operations in Hard disks.
Capacity: - 80GB/160GB/250GB/500GB/1TB
MODEM:
Used for dial-up connections. Also used to Modulate and Demoluate the signals.
Network Card:
For DSL/Cable internet, and/or connecting to other computers, Connected in PCI slots.
It is represented as shown in the figure as follows:

JKDYOLA IT WS LAB MANUAL
Jaya Krishna,
Page | 9
INPUT DEVICES
Keyboard:
It is an input device used to enter the data. This contains different Variants like keyboard with 108keys, keyboard with
116keys, and Multimedia Keyboard etc….
Mouse:
It is also an input device used to point the target (folder/file/image).

JKDYOLA IT WS LAB MANUAL
Jaya Krishna,
Page | 10
OUTPUT DEVICES
Printer:
It is an output device, which is used to create hardcopies. Laser printer, Inkjet printer, Dot-matrix Printer and etc… are types of printers.
Speaker:
It is also an output device used for listening music and sounds.
It is also used to listen the lectures.
SRAM Static Random Access Memory
DRAM Dynamic RAM
SDRAM Synchronous Dynamic RAM
DDRRAM Double Data Rate RAM
Result:
I have successfully completed identification of the peripherals of a Personal computer.

JKDYOLA IT WS LAB MANUAL
Jaya Krishna,
Page | 11
Experiment 2:- Assemble and Disassemble a PC
Aim:
Given a computer in working condition, disassemble and assemble it back to Working condition.
Procedure:
List of Computer Parts are: Cabinet, MotherBoard, Processor, Hard Disk, RAM, SMPS, Floppy Drive, DVD R/W Drive, AGP Card, and VGA Card etc…
Materials required:
Philips head Screwdriver (also known as Star Screwdriver)
Flat head Screwdriver
Forceps (for pulling out jumpers and screws)
Magnetized Screwdriver
Multi meter (Testing)
Disassemble:
Disassembling means removing part by part in a system or removing the parts separately.
Steps to Disassemble a PC:-
Remove the Power Supply from wall socket and remove all the connections.
Remove all the screws of the cabinet with a star headed screw driver and open the cabinet doors.
Remove the connections to the processor from SMPS.
Remove the SMPS
Remove the Heat Sink fan which is placed on the top of the processor.
Remove the Processor by raising the lift lever.
Remove the RAM from the RAM Slots.
Remove the AGP Cards if any.

JKDYOLA IT WS LAB MANUAL
Jaya Krishna,
Page | 12
Also Remove VGA Cards if any.
Remove the Network Cards if any.
Remove the Connections to the Hard Disk from motherboard.
Remove the Connections to the CD/DVD/Floppy Disk from motherboard.
Remove the Motherboard from the cabinet.
Assemble:
After buying all the computer components they must be put together. This process is called assembling.
Steps to Assemble a PC:-
1) Install the Motherboard to the cabinet using the star headed screw driver.
2) Install the Processor by raising the lift lever on the CPU Socket.
3) Install the Heat Sink fan.
4) Install the SMPS (Switch Mode Power Supply)
5) Give the connections to the processor from the SMPS.
6) Install the RAM in to the RAM Slots.
7) Install the VGA Cards. (VGA Video Graphic Adapter)
8) Install the AGP Cards. (AGP Accelerated Graphics Port)
9) Install the Network Cards.
10) Install the Hard Disk.
11) Install the CD/DVD/Floppy Disk to the motherboard.
12) Screw the doors of the cabinet using the star headed screw driver.
13) Finally give all the connections including the power supply from the wall socket.
Note: Be sure to handle all the components with great care. If a screw is dropped on the Motherboard; it can damage the delicate circuitry.

JKDYOLA IT WS LAB MANUAL
Jaya Krishna,
Page | 13
The Following diagram shows how to assemble:
Raising lift lever on the CPU
Socket Placing the mother board in the Cabinet
Placing the CPU in to the Socket Placing the Heat Sink
Plugging the Heat Sink fan in to the
mother board Inserting the RAM (Memory Chip) into the RAM Slots

JKDYOLA IT WS LAB MANUAL
Jaya Krishna,
Page | 14
There are two main kinds of motherboards and Cabinets available today with reference to Power Supply - AT and ATX.
AT Advanced Technology ATX Advanced Technology Extended
Final Connections in the cabinet:
Connect the wires coming out from behind the face of your computer case to your motherboard. They control the on, off, reset, hard disk activity, and power switch.
It is as shown in the figure as follows.
ATX Power Connector 20 pins ATX 12v Power Connector
Back Side of the Hard Disk
Fixing the Hard Disk

JKDYOLA IT WS LAB MANUAL
Jaya Krishna,
Page | 15
JUSB USB Connector (J means Jumper)
DVD Digital Versatile Disk
AGP Accelerated Graphics Port
PCI Peripheral Component Interconnect
SATA Serial Advanced Technology Attachment
VGA Visual/Video Graphics Adaptor/Array
USB Universal Serial Bus
SCSI Small Computer System Interconnect
IDE Integrated Drive Electronics
CMOS Complimentary Metal Oxide Semiconductor
Result:
I have successfully completed Disassembling and Assembling the PC back to the working Condition.

JKDYOLA IT WS LAB MANUAL
Jaya Krishna,
Page | 16
Experiment 3: - Windows XP Installation
Aim:
Perform the installation of Microsoft Windows XP on a Personal Computer.
Procedure:
Windows XP is one of the versions of Microsoft which was made publicly available on October 25th, 2001.
Two editions available are “Windows XP HOME Edition” and “Windows XP Professional”.
The word XP originate from the word “Experience”.
Steps to Install Windows XP:-
1) Insert the Windows XP CD-ROM and reboot the Computer. Now Press either “Del” or “function key” mentioned in the initial screen to move in to the Advance BIOS Features Window.
2) Change and save the Boot Device priority such that give the first boot priority to CD -ROM and give the second boot priority to Hard Disk Drive (HDD0).
3) Now the system will restart automatically and will boot from CD while booting from CD it will check for the system’s hardware configuration.
4) Now it will ask for “to setup windows XP” or “to repair Windows XP” or to quit from the setup (F3). This is as shown in the figure-1. (Shows the Setup window).

JKDYOLA IT WS LAB MANUAL
Jaya Krishna,
Page | 17
5) After pressing “Enter” key to setup the windows XP we have to accept the license agreement called as EULA (End User License Agreement). To accept the license agreement press F8.
BIOS Basic Input Output System

JKDYOLA IT WS LAB MANUAL
Jaya Krishna,
Page | 18
6) Next we are taken to a menu that allows us to partition the new hard drive.
7) Keys used throughout the XP installation is “F3”, “F8”, “D”, “C”, “R” and
“Enter” where
a. F3 is a function key to quit,
b. F8 is also a function key to agree the license,
c. D is a normal key used to delete the partition,
d. C is used to create the partition,
e. R is used to repair XP installation and Enter key is used to continue.

JKDYOLA IT WS LAB MANUAL
Jaya Krishna,
Page | 19
8) After creating the partitions now we have to choose the File System for the newly created partition before formatting.
9) The File System may be NTFS (New Technology File System) or FAT (File Allocation Table).

JKDYOLA IT WS LAB MANUAL
Jaya Krishna,
Page | 20
NTFS allows us to make larger partitions and is superior to FAT. There are two versions of FAT they are FAT16 and FAT32.
10) To select NTFS now press Enter key. Now formatting of the partition is started which shows the formatting progress status bar.
The format program will also ask if you want to do a quick format or a full format. Select full format (recommended by Windows).
11) After formatting is completed it will copy all the operating system files from the CD to hard drive.
12) Then the system will reboot and continue installation process.
13) After rebooting the system it will ask to enter the regional and language settings. FAT File Allocation Table
NTFS New Technology File System
BIOS Basic Input Output System

JKDYOLA IT WS LAB MANUAL
Jaya Krishna,
Page | 21
14) Next you will be asked to enter your name to personalize your software.
15) Next you will be asked to enter the product key, which is a 25 character key.

JKDYOLA IT WS LAB MANUAL
Jaya Krishna,
Page | 22
16) Next you will be asked to enter the name of the computer. This is useful on a network.
17) Next you will be asked to enter the date and time settings.

JKDYOLA IT WS LAB MANUAL
Jaya Krishna,
Page | 23
18) Now it will copy the remaining files to hard drive. You can see the progress of the install by the status bar at the left of the screen
19) Next it will be asked to activate the windows. This is possible if you have the internet connection else you can select the option as activate later.
20) Now system will reboot automatically and is asked to adjust your monitor settings. If it does, you’ll have only an “OK” box to select.
21) After adjusting your display settings, you’re asked to hit OK to confirm that you can read the display. If the display is unreadable, the settings should revert.
22) Next it will ask to add users to login in to the system. Here the username should not be same as the computer name.

JKDYOLA IT WS LAB MANUAL
Jaya Krishna,
Page | 24
23) Now click on next to complete the installation and click the finish button to restart the system.
24) Now to boot from the hard disk , at time of the reboot just change the boot device priority in the advanced BIOS feature window as the first boot device priority to hard disk and the second boot device priority to CD. It will now show the standard window login screen.
Result:
I have successfully completed the installation of Microsoft windows XP on a Personal Computer.

JKDYOLA IT WS LAB MANUAL
Jaya Krishna,
Page | 25
Experiment 4: - Linux Installation
Aim:
Perform the installation of the Linux operating system on a personal computer which should be windows installed. The system should be configured as the dual boot with both windows and Linux
Procedure:
YaST (Yet another Setup Tool) provides options that make installation simple and quick.
To perform the installation, follow the steps:
1) Insert the SUSE Linux Enterprise Server 10 Product CD/DVD and then reboot the system to start installation program.
2) Now it will display the Boot options window to select one option using the arrow keys. Now select the “Installation” option from Boot options window which will starts normal installation process where all modern hardware functions are enabled.

JKDYOLA IT WS LAB MANUAL
Jaya Krishna,
Page | 26
3) Next you will be asked for system language selection which is started by the YaST.
The left side display the overview of installation status. The right side displays the current installation step.
4) After selecting the language click on next to accept the license agreement. There you have to select the option “Yes, I agree to the License Agreement”.
5) After accepting the license agreement, in the Installation Mode dialog select either “New Installation” or “Update” (or) select “Repair Installation” or “Boot Installed System” from the Other Options dialog.

JKDYOLA IT WS LAB MANUAL
Jaya Krishna,
Page | 27
6) After selecting the New Installation option from the installation mode now set/change clock and time zone.
7) Next is to click on accept button to understand & change the installation settings.

JKDYOLA IT WS LAB MANUAL
Jaya Krishna,
Page | 28
Booting is one of the installation settings, Select this if you want to change any boot loader settings or use Lilo (Linux Loader) instead of GRUB (Grand Unified Boot loader) as boot loader.
A “Primary Partition” consists of a continuous range of cylinders (physical disk areas) assigned to a particular file system. If you use only primary partitions, you are limited to four partitions per hard disk.
This is why extended partitions are used. “Extended Partitions” are also continuous ranges of disk cylinders, but can be subdivided into “Logical partitions” which do not require entries in the main partition table.
A SLES 10 installation needs at least two partitions:
Swap partition: This partition is used by Linux to move unused data from the main memory to the hard dive, thus freeing main memory which then can be used by other processes.
Root partition: This is the partition that holds the top (/) of the file system hierarchy, called as root directory.
8) Next it will be asked to create the partition, select the type of partition from the Partitioning headline in the installation proposal.

JKDYOLA IT WS LAB MANUAL
Jaya Krishna,
Page | 29
Where we have three options Accept Proposal (accepts already existing partition scheme, Base Partition Setup on This Proposal (Starts the YaST Expert Pratitioner), and Create custom Partition Setup (used to create custom partition).
9) After selecting Create Custom partition setup option it will display a dialog of Hard disk containing two options. Select the option “Custom. Partition (for experts)”. And click on Next button.
10) Create new Partition by clicking the create button and choose “create a primary or logical partition”. And select the start and end cylinder and file system and mount point and click on OK.

JKDYOLA IT WS LAB MANUAL
Jaya Krishna,
Page | 30
11) Next you will be asked to select the software depending on the disk space available.
Preparing Hard Disk: Step1 Expert Pratitioner

JKDYOLA IT WS LAB MANUAL
Jaya Krishna,
Page | 31
12) Next we can start the installation process by clicking the accept button, which shows the dialog asking you to confirm the proposal.
13) Start the installation by selecting the option “Install”.
14) Set the host name of the system to “Linux-jkd”, root password (let the root password be jkd).

JKDYOLA IT WS LAB MANUAL
Jaya Krishna,
Page | 32
15) Next is to either skip configuration or use the following configuration. Let here we select “skip configuration”.

JKDYOLA IT WS LAB MANUAL
Jaya Krishna,
Page | 33
16) Next it will ask to test the internet connection. As we don’t have the internet connection we just skip this test. To skip this we select the option “No, Skip This Test”.
17) Next you will be asked to manage the users. Where we can add the local users. To add local users we have to give the full name of the user, user name, and password and confirm password and click on next button.
18) Next you will be asked to configure the hardware. The configuration proposal contains the Graphic card, printer, and sound option to configure.

JKDYOLA IT WS LAB MANUAL
Jaya Krishna,
Page | 34
19) Confirm your hardware settings by selecting next, and then select Finish.
20) The system starts the graphical login screen, where you can login with your previously created user account. SLES 10 is now installed on your system.
21) To Login enter the user name and password which is entered in step number 17.
Commands:
Result:
I have successfully completed Linux Installation on a personal computer.

JKDYOLA IT WS LAB MANUAL
Jaya Krishna,
Page | 35
Experiment 5: - Hardware Troubleshooting
Aim:
Identify the Hardware problems in the personal computer given to you and fix it to get the computer back to the working condition.
Procedure:
Troubleshooting is treated as a form of problem solving.
The term Hardware troubleshoots usually used, when the problem is suspected to be in hardware.
We have to follow the Five-Step process given below to solve the problem in
Hardware:
Step 1: Identify the list of symptoms for the problem.
Step 2: Create a hypothesis which can satisfy the symptoms.
Step 3: Isolate the problem as per the suggested hypothesis
Step 4: Implement the action plan by testing hypothesis and narrow down the possibilities.
Step 5: Test whether things have come to normal and observe.
Below is some list of Hardware Troubles:
1) Keyboard troubles
2) Floppy disk drive troubles
3) Processor troubles
4) Mouse troubles
5) Monitor troubles
6) RAM troubles
Keyboard Troubleshooting:
Keyboard is not working

JKDYOLA IT WS LAB MANUAL
Jaya Krishna,
Page | 36
1) Check whether the key board cable is inserted fully into the connector on the motherboard.
2) Clean the key board using a vacuum cleaner.
3) Check whether the cable is twisted or any damage.
4) Swap the old keyboard with a new keyboard, if it works then there is a problem with old key board.
Floppy Disk Drive Troubleshooting:
Floppy disk drive is not accessible:
1) Check whether the power connector is intact.
2) Check for the cable connected to the floppy drive is connected properly and is not loose.
3) Make sure that floppy disk controller is enabled in the BIOS setup.
Processor Troubleshooting:
System hangs sometime:
1) Check the power supply.
2) Check the processor Heat Sink fan is working or not.
3) Check whether there is any damage in L2 Cache of the processor
4) Check whether the processor is placed correctly or not.
5) Check whether the processor is placed in a balanced fashion.
Mouse Troubleshooting:
Mouse is not working properly:
1) Check whether the mouse is placed on a smooth surface or not.
2) Check whether the base of the mouse is covered with dust
3) Check whether the mouse is connected to the port for mouse connector or not.
4) Check the power supply.
5) Replace the mouse (old) with a new one.

JKDYOLA IT WS LAB MANUAL
Jaya Krishna,
Page | 37
Monitor Troubleshooting:
No beep and no display:
1) Check SMPS Power connection
2) Check if there are any misplaced connections.
3) Check on whether the silicon coating surface is covered with dust or any lubricants.
4) Check whether there is any damage capacitors
5) Check whether there is any damage in monitor cable connections.
A few tips to overcome the problems listed above is
1) Keep the environment (room where the PC is placed) clean.
2) Clean the peripherals periodically
3) Check the power connections from wall socket
4) Check the wires whether there is any damage
Result:
I have successfully completed identifying Hardware troubles and troubleshooting them.

JKDYOLA IT WS LAB MANUAL
Jaya Krishna,
Page | 38
Experiment 6: - Software Troubleshooting
Aim:
Identify the Software problems in the personal computer given to you and fix it to get the computer back to the working condition.
Procedure:
Troubleshooting is treated as a form of problem solving.
The term Software troubleshoots usually used, when the problem is suspected to be in Software/an Application.
We have to follow the Five-Step process given below to solve the problem in software:
Step 1: Identify the list of symptoms for the problem.
Step 2: Create a hypothesis which can satisfy the symptoms.
Step 3: Isolate the problem as per the suggested hypothesis
Step 4: Implement the action plan by testing hypothesis and narrow down the possibilities.
Step 5: Test whether things have come to normal and observe.
Below is some list of Software Troubles:
1) Microsoft DOS troubles
2) Microsoft Internet Explorer troubles
3) Basic software troubles
4) Windows XP troubles
Microsoft DOS Troubleshooting:
Error messages occurred during boot:
1) Ensure that your computer BIOS settings are correctly configured to the hardware that is installed in your computer.
2) Errors that are occurred during boot are commonly due to a misconfiguration with your autoexec.bat or config.sys

JKDYOLA IT WS LAB MANUAL
Jaya Krishna,
Page | 39
Computer running slowly:
1) Run Microsoft Scandisk (chkdsk command) and Defrag on the computer periodically.
2) Delete all the temporary files and any scandisk error files. To delete the temporary files type del *.tmp and del *.chk.
3) Ensure that your computer has the latest drivers for the hardware devices installed in your computer.
Microsoft Internet Explorer Troubleshooting:
To troubleshoot the problems related in internet explorer do the following:
1) Clear your Internet Explorer (IE) browser history. 2) Clear any “Unknown” or “Damaged” downloaded programs by clicking the
tools menu, internet options, click the settings button, click the view objects button and selecting each of the programs that are damaged or unknown and pressing the delete key.
3) Verify that your Security settings under Tools menu, internet options are set to medium at the most. Some web pages may not function properly if the security settings are set too high
4) Restore the advanced internet options by opening the Tools menu, internet options, clicking the Advanced tab, and clicking the Restore Defaults button.
5) Close the Internet Explorer and open it Explorer and try again.
Basic software Troubleshooting:
Unable to install the software program:
1) Verify the diskette or CD/DVD is readable by reading the files on the drive.
2) Verify your computer meets the minimum requirements of the software program. For example if your PC does not have enough disk space the program won’t install.
3) Make sure the program or utility is compatible with the version of the operating system you have on your PC.
4) Check whether the CD Key or Serial number is correct or not.
Windows XP Troubleshooting:
Computer running slowly:

JKDYOLA IT WS LAB MANUAL
Jaya Krishna,
Page | 40
1) Make sure that your computer has at least 500MB to 2GB of free hard disk drive space.
2) Run Microsoft Scandisk and Defragmentation on the computer.
3) Close any unnecessary programs that are running in background and/or disable the startup services.
4) Delete the temporary files from the temp folder in windows folder.
5) Make sure that Windows XP is up to date (requires internet connection).
6) Ensure that no errors or conflicts exist in the device manager.
7) Check your computer for viruses with any antivirus application.
8) Ensure that your computer has latest drivers for the hardware devices installed in your computer.
Result:
I have successfully completed identifying the software troubles and troubleshoot them.

JKDYOLA IT WS LAB MANUAL
Jaya Krishna,
Page | 41
OFFICE TOOLS & LaTeX
MS WORD
Experiment 7: - Project Certificate using MS Word
Aim:
Create a document of Project Certificate with the following features using Microsoft Word. The features to be covered are Formatting font in word, Drop cap, Applying text Effects, using character spacing, Borders and colors, Inserting Header and Footers, using Date and Time option.
Procedure:
1) Create a new document with the name “projectcertificate.doc”.
2) Insert the Header and Footer by clicking the insert menu, choose header & footer option.
3) Insert the Date and Time by clicking the insert menu, choose either header or footer from header & footer option & click on edit header or edit footer option respectively.
4) Type the desired text you want to be displayed in the document.
5) Format the font by clicking the home menu; choose font option where we can select “font style, font size, font name font color etc...”
6) Insert the Drop cap in word by clicking the insert menu, choose text option and click the drop cap option.
7) Apply the Text Effects by clicking the insert menu, choose text option and select the WordArt option, type the text and select it and apply the 3D effects, Fill effects, spacing etc…
8) Apply the Character Spacing by clicking the insert menu, choose the font option to open the Font dialog box, there, choose character spacing tab and follow the instructions.
9) Apply Border and shading by clicking the page layout menu, choose the page background option and click on the page borders option. Now we choose the page border tab and Shading tab.
10) Finally save the document.
JKDYOLA IT WS LAB MANUAL
Jaya Krishna,
Page | 42
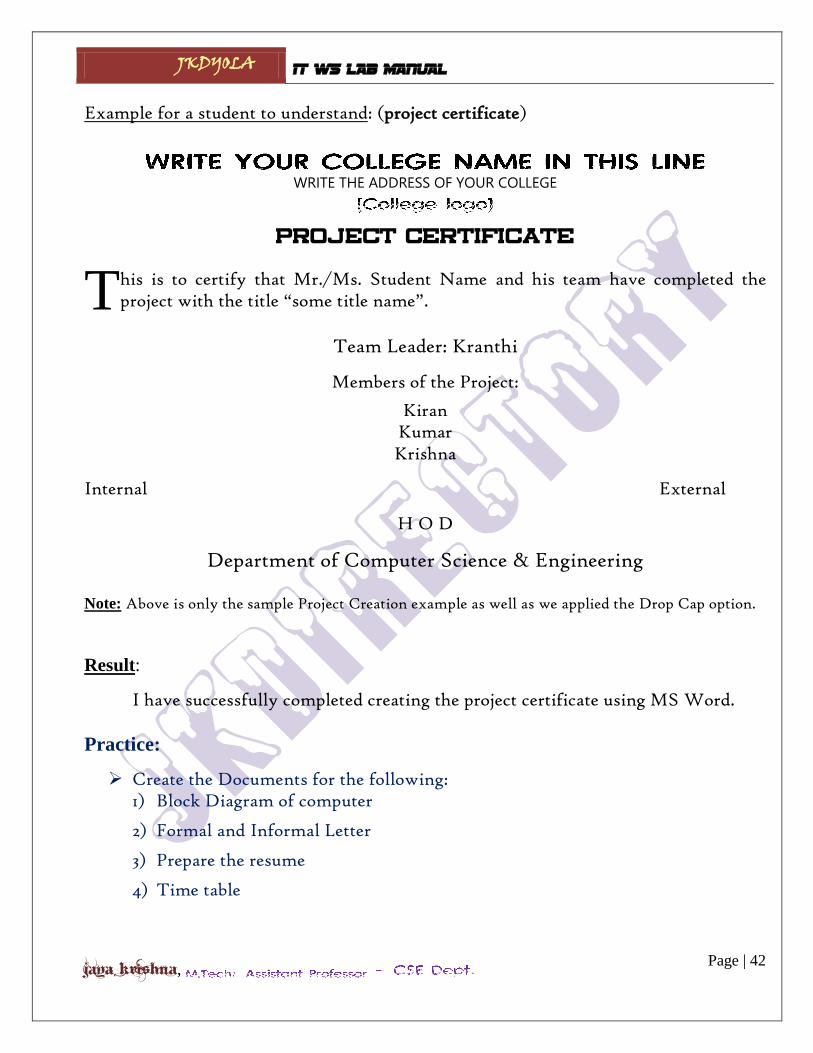
Example for a student to understand: (project certificate)
WRITE THE ADDRESS OF YOUR COLLEGE
PROJECT CERTIFICATE
his is to certify that Mr./Ms. Student Name and his team have completed the project with the title “some title name”.
Team Leader: Kranthi
Members of the Project:
Kiran Kumar Krishna
Internal External
H O D
Department of Computer Science & Engineering Note: Above is only the sample Project Creation example as well as we applied the Drop Cap option.
Result:
I have successfully completed creating the project certificate using MS Word.
Practice:
Create the Documents for the following: 1) Block Diagram of computer
2) Formal and Informal Letter
3) Prepare the resume
4) Time table
T

JKDYOLA IT WS LAB MANUAL
Jaya Krishna,
Page | 43
List of some useful shortcuts in MS Word:
Alt + Shift + T time field
Ctrl + S Save
Alt + Shift + D date field
Ctrl + L left justification of paragraph
Ctrl + J justify the paragraph
Ctrl + R right justification of paragraph
Ctrl + E center justification of paragraph
Alt + Shift + F7 dictionary
Ctrl + P print a document
Ctrl + X cut
Ctrl + F2 print preview
Ctrl + C copy
Ctrl + N create a document
Ctrl + V paste
Ctrl + O open a document
Ctrl + B bold
Ctrl + Z undo
Ctrl + Shift + + super script
Ctrl + + sub script
JKDYOLA IT WS LAB MANUAL
Jaya Krishna,
Page | 44
MS EXCEL
Experiment 8:- Student marks list
Aim: -
Develop a spread sheet to maintain the student marks list using MS Excel. The Features to be covered are Gridlines, Format cells, manual summation, auto summation, auto fill, Formatting Text.
Procedure:
1) Create a spread sheet with the name “studentmarks.xls”
2) Type the headings like S.No. , student name, subjects, total, rank etc… in appropriate cells. For example S.No. in the cell A1, student name in the cell B1 and so on.
3) Use auto fill function to fill the serial numbers and roll numbers of the student.
a. To use auto fill function we must have to type more than one serial number or roll number.
b. Auto fill function is applicable on numeric values.
4) Apply format cells, using this we can select the category of the cell, align the text in the cell, apply font styles, change the font name, size, apply the borders etc…
a. To apply format cells, in home menu select the option format from cells option.
5) Apply the auto sum function by selecting the formula menu; now choose auto sum option in function library.
6) To do manual summation type the function “=sum (number1,[number2], …)” in formula bar in the spread sheet. Example =sum(d2,e2,f2)
7) To sort the cells select those cells to be sorted and choose the data menu and select sorting type from sort & filter.
8) To draw charts like bar chart, pie chart, etc… choose the insert menu and select the type of chart from charts option.
9) To place the pictures in the spread sheet choose insert menu and select the picture option from illustrations option.
10) Finally save the spread sheet.

JKDYOLA IT WS LAB MANUAL
Jaya Krishna,
Page | 45
Example for the student to understand: (student marks list)
1 08381a0501 alif 90 90 99 279 2 2 08381a0502 anil 95 95 95 285 1
Result:
I have successfully completed maintaining the student marks list using MS Excel.
Practice:
Create the spread sheets for the following: 1) Company profile
2) Population profile
3) Attendance sheet
4) Cricket score card
List of some useful shortcuts in MS Excel:
Ctrl + Shift + & applies the outline border to the selected cell(s)
Ctrl + Shift + - removes the outline border to the selected cell(s)
Ctrl + Shift + @ applies the time format with hours & minutes & AM &
PM
Ctrl + Shift + : enters the current time into a cell
Ctrl + Shift + # applies the date format with day, month and year
Ctrl + Shift + ! Applies the number format with two decimal places,
Thousands separator and minus sign for negative values
Ctrl + Shift + + displays the insert dialog box to insert the cells
Ctrl + - displays the delete dialog box to delete the cells
Ctrl + 1 displays the format cells dialog box
Ctrl + 2 applies or removes bold formatting
Ctrl + 3 applies or removes italic formatting

JKDYOLA IT WS LAB MANUAL
Jaya Krishna,
Page | 46
Ctrl + 4 applies or removes underlining
Ctrl + 5 applies or removes strike through
Ctrl + K displays the insert hyper link dialog box
Ctrl + N creates a new, blank workbook
Ctrl + T displays the create table dialog box
Ctrl + W close the work book window
Shift + F11 insert a work sheet
Shift + F12 displays the save as dialog box
Shift + F3 display the insert function dialog box
Shift + F5 display the find and replace dialog box

JKDYOLA IT WS LAB MANUAL
Jaya Krishna,
Page | 47
MS PowerPoint
Experiment 9: - Block Diagram of Computer
Aim: Create a Power point presentation of block diagram of computer with some of
the following features like ppt orientation, slide layouts, inserting text, Word Art, formatting text, bullets and numbering, auto shapes, lines and arrows, Hyperlinks, Inserting – images, clip art, video, audio, objects, Tables & charts.
Procedure:
1) Create a presentation with the name “blockdiagram.ppt”
2) Select the Layout dropdown menu in slides tool in Home menu, where we can select different types of presentation themes.
3) Select the design menu and choose desired slide designs from themes tool.
4) To insert the text into the slide we can use either the textbox (in blank slide) or with a mouse click on “click to add title” textbox.
5) We can also insert text into the slide by using word art option (3D text).
6) To insert text using word art select insert menu and choose the option word art in text tool.
7) Choose the font tool in home menu to format the text (entire page).
8) To insert bullets and numbering choose the paragraph tool in home menu and select the desired one (either bullets or numbers).
9) Choose the insert menu and click on shapes drop down menu in illustrations tool or choose home menu and click on shapes drop down menu in drawing tool to insert auto shapes.
10) Choose the insert menu and click on shapes drop down menu in illustrations tool or choose home menu and click on shapes drop down menu in drawing tool to draw lines and arrows.
11) Select the text to which we need to apply hyperlink and choose the insert menu, now click on Hyperlink option in Links tool.
12) Using insert menu we can insert –
a. Images by clicking the picture dropdown menu in illustrations tool.
b. Clip art by clicking the clip art dropdown menu in illustrations tool.

JKDYOLA IT WS LAB MANUAL
Jaya Krishna,
Page | 48
c. Video by clicking the Movie dropdown menu in Media Clips tool.
d. Audio by clicking the Sound dropdown menu in Media Clips tool.
e. Objects by clicking the object dropdown menu in text tool.
f. Tables by clicking the table dropdown menu in tables tool.
g. Charts by clicking the chart dropdown menu in illustrations tool.
13) Finally save the PowerPoint presentation.
Example for the student to understand: (Block diagram of computer)
Result:
I have successfully completed the presentation of block diagram of computer using MS power point.
Practice:
Create power point presentation for the following:
1) College Profile

JKDYOLA IT WS LAB MANUAL
Jaya Krishna,
Page | 49
2) Water Jug Problem
3) Towers of Hanoi
4) Three men three ghost problem
5) Flow Chart symbols with example
List of some useful shortcuts in MS PowerPoint:
Ctrl + h replace
Ctrl + k hyperlink
Ctrl + m new slide
Ctrl + n new window
Shift + F5 slide show from current slide
F5 slide show from first slide irrespective of where the cursor is
Located

JKDYOLA IT WS LAB MANUAL
Jaya Krishna,
Page | 50
LaTeX
Experiment 10: - Project Certificate Using LaTeX
Aim: Create a document of Project Certificate with some of the features using LaTeX.
The features to be covered are Formatting font in LaTeX, inserting Header and Footers, page number styles, date option, title, and author.
LaTeX: -
In the late 1970’s Donald Knuth introduced TEX. In the 1980’s Leslie
Lamport decided TEX was too hard (other than Knuth) and introduced LaTeX.
TEX comes from Greek letter which is short for the word “technical” or “technique”. LaTeX is pronounced as “La-tek” or “Lay-tek”.
LaTeX is a typesetting program and is an extension of the original program TEX written by Donald Knuth.
Typesetting: -
To understand what is typesetting, let us have a look at different stages in the preparation of a document using a computer:
The text is entered in the computer.
The input text is formatted into lines, paragraph, & pages.
The output text is displayed on the computer screen.
The final output is printed.
In most word processors all the above operations are integrated in to single application package. But typesetting is a document using TEX, where we can type the text of a document and the necessary formatting commands in a text editor and then compile it. Finally the output can be viewed using a previewer.
Advantages:
1) It is easy to read and compile.
2) It is free to download.
3) It is portable (runs on UNIX, windows, Mac OS/2).

JKDYOLA IT WS LAB MANUAL
Jaya Krishna,
Page | 51
4) It is easy to write mathematical equations and formulas.
5) It is possible to create a “pdf” files.
Disadvantages:
1) Not widely used like any other MS office product.
2) Like MS office product it is not.
Procedure:
1) Type the code in a text editor like Latex Editor or notepad and save the file with an extension of “tex” for example “examplefilename.tex”
2) The first line should be “\documentclass{article} tells LaTeX that what
we want to produce is an article. If we want to write a book then we will write the above line as “\documentclass{book}”.
3) The whole document we want to typeset should be included between “\begin{document}” and “ \end{document}”.
4) Let us see the example below:
Example:
\documentclass{article}
\begin{document}
This is my \emph{first} document prepared in \LaTeX.
\end{document}
5) In our example the first three words are produced as typed. Then “\emph{first}”, becomes first in the output i.e. “\emph” is a command to display the text in emphasized format (italic letters). Again, the next three words come out without any change in the output. But the input \LaTeX comes out in the output as LATEX. Finally the output will be as given below:
6) To display the date we shall use the command “\date{date text}” after the command “\documentclass{article}”. For example the date command will be written as “\date{25/10/2009}”.

JKDYOLA IT WS LAB MANUAL
Jaya Krishna,
Page | 52
7) In LaTeX each page has “head” and “foot” by default which usually contains the information like current page number or current chapter or current section. This will be set by the command given as follows:
“\pagestyle{arguments}”
Where the arguments can be any one of the following styles
a) plain: The page head is empty and foot contains the page number centered. This is default for the article class if the above command is not set.
b) empty: Both the head and foot are empty. In particular no page numbers are printed.
c) headings: This is default for the book class. The foot is empty and the head contains the page number and the names of the chapter section or subsection, depending on the document class and its options as given below:
d) myheadings: Same as headings, except that the section information in the head is not predetermined. But to be given explicitly using the command “\markboth” or “\markright” as described below:
\markboth{left head{right head}
\markright{right head}
Where left head is the text to be appeared on the left hand page and the right head is the text to be appeared on the right hand page.
8) To apply the style for the page numbers we need to write the command \pagenumbering{style}. Here the style is :
a. arabic Indo-Arabic numerals
b. roman lower case roman numerals
c. Roman upper case Roman numerals
d. Alph upper case English letters
e. alph lower case English letters

JKDYOLA IT WS LAB MANUAL
Jaya Krishna,
Page | 53
The default value is arabic. This command resets the page counter. We can make the pages start with any number by the command \setcounter{page}{number}
9) To make the title for the page we have to use the command \title. For example “\text{document name}”.
10) To display the author on the page we have to use the command \author. For example “\author{name of author}”.
Note: After specifying the arguments for the commands \title, \author and \date we must issue the command \maketitle for this part to be typeset.
11) To format the fonts in LaTeX we have
1) “\begin{center} ... \end{center}” Typesets the text between them exactly at the center of the page. (center justification in MS office)
2) “\begin{flushright} ... \end{flushright}” Typesets text flush with the right margin. (Right Justification in MS office)
3) “\begin{flushleft} ... \end{flushleft}” places the enclosed text flush with the left margin. (Left Justification in MS office)
Type Size Font shape, series, family
Type style

JKDYOLA IT WS LAB MANUAL
Jaya Krishna,
Page | 54
Example for the student to understand:
Command Output
\textasciitilde ~
\& &
\# #
\$ $
\textbackslash \
\% %
\{ {
\textasciicircum ^
\} }
\\ Line break
\\[10pt] Line break with an increase in vertical space
12) Finally save the program and project and compile the program.
File formats encountered in Latex:
.tex - LaTeX input file.
.dvi - Device Independent File
Anything that begins with ‘%’ is a comment.
Result:
I have successfully completed the creation of a project certificate using LaTeX.

JKDYOLA IT WS LAB MANUAL
Jaya Krishna,
Page | 55
Internet & World Wide Web
Experiment 11:- Orientation and Connectivity Boot Camp
Aim:
Configure the TCP/IP settings in order to get connections to the LAN and access the internet.
Procedure:
To Configure TCP/IP Settings:
1. In the control panel double click the icon with the name “network connections” to open the Network Connections.
2. Click the connection you want to configure, and then, under Network Tasks, click Change settings of this connection.
3. Do one of the following:
a. If the connection is a local area connection, on the General tab, under “this connection uses the following items”, click “Internet Protocol (TCP/IP)”, and then click Properties.
b. If this is a dial-up, VPN, or incoming connection, click the Networking tab. In “this connection uses the following items”, click “Internet Protocol (TCP/IP)”, and then click Properties.
4. Do one of the following:
a. If you want the IP settings to be assigned automatically, click obtain the IP address automatically, and then click on OK.
b. If you want to specify an IP address or a DNS server address, do the following:
i. Choose the radio button use the following IP address, and in IP address, type the IP address.
ii. Choose the radio button use the following DNS server addresses, and in preferred DNS server and alternate DNS server type the address of primary and secondary DNS servers respectively.
5. To configure windows firewall settings and internet connection sharing, click on Advanced tab.
6. To make a local area connection:
a. If you have a network adapter installed, and have set up a home or small office network, you are connected to a Local Area Network (LAN).

JKDYOLA IT WS LAB MANUAL
Jaya Krishna,
Page | 56
b. You are also connected to a LAN if your Windows XP Professional computer is part of a corporate network. When you start your computer, your network adapter is detected and the local area connection automatically starts.
c. Unlike other types of connections, the local area connection is created automatically, and you do not have to click the local area connection in order to start it.
7. To make an Internet connection
a. Open Network Connections.
b. Under Network Tasks, click Create a new connection, then click Next.
c. Click Connect to the Internet, and then click Next.
d. Choose one of the following:
i. If you already have an account with an Internet service provider (ISP), click Set up my connection manually and then clicks Next.
ii. If you have a CD from an ISP, click Use the CD I got from an ISP and then click Next.
iii. If you do not have an Internet account, click Choose from a list of Internet service providers (ISPs) and then click Next.
8. From your choice above, click one of the following:
Set up my connection manually
a. If you are connecting to your ISP using a standard 28.8 Kbps, 56 Kbps, or ISDN modem, click Connect using a dial-up modem, click Next, and follow the instructions in the wizard.
b. If your DSL or cable modem ISP connection requires a user name and password, click Connect using a broadband connection that requires a user name and password, click Nesxt, and then follow the instructions in the wizard.
c. If your DSL or cable modem ISP connection is always on and does not require you to type a user name and password, click Connect using a broadband connection that is always on, click Next, and then click Finish.
Use the CD I got from an ISP
a. Click Next, and then click Finish. Insert the CD provided by your ISP and follow the instructions.
Choose from a list of Internet service providers (ISPs)
a. To create an Internet account using MSN Explorer, click Get online with MSN, and then click Finish. Follow the instructions in MSN Explorer.

JKDYOLA IT WS LAB MANUAL
Jaya Krishna,
Page | 57
b. To choose an ISP, click Select from a list of ISPs, click Finish, and then double-click Refer me to more Internet service providers. Follow the instructions in the wizard.
Result:
I have successfully completed configuring the TCP/IP settings.
Note: World Wide Web (WWW) was introduced by Tim Berner’s Lee. E-Mail was introduced by Retum Linson. Telnet is the service that lets the user login to remote computer, FTP is service, where one can use the internet to copy files from one computer to other.
FTP File Transfer Protocol
E-Mail Electronic Mail
ISP Internet Service Provider
MSN Microsoft Network
DSL Digital Subscriber Line
DNS Domain Name System
TCP/IP Transmission Control Protocol / Internet Protocol
WAN Wide Area Network
MAN Metropolitan Area Network
ISDN Integrated Services Digital Network
VPN Virtual Private Network

JKDYOLA IT WS LAB MANUAL
Jaya Krishna,
Page | 58
Experiment 12:- Web Browsers, surfing the web
Aim:
Customize the Web browser with LAN Proxy settings, pop up blocker settings, changing your Privacy settings and explain about web surfing.
Procedure:
The word internet is defined as a group of computers networked world wide.
The web is a tool used to retrieve information published on the internet. To navigate the web we use browser’s like Internet Explorer (IE), Mozilla Fire Fox, Opera, and Google Chrome etc…. which is a program used to view web documents.
Internet Addresses
1. Each computer on the internet has its own address
2. Each and every document on the world wide web has its own address
3. To find a web document, follow a link in a web address (URL). For example “http://www.yahoo.com/maindir/folder1/filename.html”
4. In the above example “www.yahoo.com” is the domain name, “maindir” is the directory indicating location of the document, “folder1” is the subdirectory where the actual document exists and “filename.html” is the actual document (file) to be searched.
5. May include text, sound, animation, images
6. We can customize the Web Browser using:
a. LAN Proxy Settings
A server that sits between a client application, such as a Web browser, and a real server is called as Proxy server.
Specifying Proxy Settings in Internet Explorer:
1. Go to Tools Internet Options in main menu of internet explorer.
2. Click on the Connections tab then click on LAN Settings button.
3. Specify the proxy server address and port in the Proxy server section
4. If you want to specify different proxies for different servers or you do not want to use proxy servers for some addresses, click on Advanced button where

JKDYOLA IT WS LAB MANUAL
Jaya Krishna,
Page | 59
1. You can provide different proxy address and ports for different servers
2. You can also enter addresses for which you do not want to use proxy servers
b. Pop-up blocker settings
A pop-up is a small web browser window that appears on top of the website you're viewing. Pop-up windows often open as soon as you visit a website and are usually created by advertisers.
Pop-up Blocker is a feature in IE that lets you limit or block most pop-ups. You can choose the level of blocking you prefer, from blocking all pop-up windows to allowing the pop-ups that you want to see.
When Pop-up Blocker is turned on, you will get an Information bar message saying "Pop-up blocked. To see this pop-up or additional options click here."
How to turn off or turn on the Pop-up blocker:
Pop-up Blocker is turned on in IE by default. To turn it off or to turn it on again if you've already turned it off, follow these steps:-
In Internet Explorer, click the Tools button, and then click Pop-up Blocker. Do one of the following:
a. To turn off Pop-up Blocker, click Turn off Pop-up Blocker.
b. To turn on Pop-up Blocker, click Turn on Pop-up Blocker (if it is turned off already).
c. Changing Privacy settings
Cookies are files that are stored on your computer by some websites. They are usually used to keep track of information about your username, password. IE privacy settings let you specify which cookies you want to allow to store in your computer.
To change your privacy settings follow the steps below:
1. Click the tools button and then internet options in the IE.
2. Click the privacy tab and move the slider to the level of privacy (Block all cookies/ High/ Medium High/ Medium/ Low/Accept all cookies etc…) you prefer.
3. If you move the slider to Block all cookies, then cookies from all the websites will be blocked also cookies that are already on your computer cannot be read by the websites.

JKDYOLA IT WS LAB MANUAL
Jaya Krishna,
Page | 60
4. If you move the slider to High, then
a. Cookies from all websites that do not have a compact policy (computer-readable privacy statement) will be blocked.
b. Cookies from all websites that use information that can be used to contact you without your explicit consent will be blocked.
Note: A first-party website is the website that you are currently viewing. A third-party website is a website other than the one you are currently viewing. For example, many sites use advertising from third-party websites and those third-party websites might use cookies.
5. If you move the slider to Medium High, then
a. Cookies from third-party websites that do not have a compact policy (computer-readable privacy statement) will be blocked.
b. Cookies from third-party websites that use information that can be used to contact you without your explicit consent will be blocked.
c. Cookies from first-party websites that use information that can be used to contact you without your implicit consent will be blocked.
6. If you move the slider to Medium, then
a. Cookies from third-party websites that do not have a compact policy (computer-readable privacy statement) will be blocked.
b. Cookies from third-party websites that use information that can be used to contact you without your implicit consent will be blocked.
c. Cookies from first-party websites that use information that can be used to contact you without your implicit consent will be deleted from your computer when you close IE.
7. If you move the slider to Low, then
a. Cookies from third-party websites that do not have a compact policy (computer-readable privacy statement) will be blocked.
b. Cookies from third-party websites that use information that can be used to contact you without your implicit consent will be deleted from your computer when you close IE.
8. If you move the slider to accept all cookies, then
a. All websites will be allowed to save cookies on your computer.
b. Cookies that are already on your computer can be read by the websites that created them.

JKDYOLA IT WS LAB MANUAL
Jaya Krishna,
Page | 61
Web Surfing means Jumping from one web page to another web page, just like TV channel surfing, where one clicks the channel buttons on the remote to go from one channel to another channel. But in Web Surfing we can click the hyperlinks to jump from one web page to another web page.
Hyperlink is the linkage between related information.
Hyper text is the foundation of the WWW enables the user to click on the link to obtain more information on a subsequent page on the same site or from a website anywhere in the world. Hyperlink is appeared like a text/image/an icon/graphical element.
Result:
I have successfully completed customization of web browser and explained the web surfing
IP address 192.168.20.500 two parts network identifier and host address
URL Uniform Resource Locator
HTTP Hyper Text Transfer Protocol
Some common Extensions used in internet are
1) .com (commercial websites) 2) .edu (educational websites)
3) .mil (military websites) 4) .gov (government websites)
5) .org (non profit organizations) 6) .biz (business websites)
7) .net (alternative to .com, for network service providers)

JKDYOLA IT WS LAB MANUAL
Jaya Krishna,
Page | 62
Experiment 13: Search Engine, Netiquette & Cyber Hygiene
Aim:
To know about what is a netiquette, search engine and how to use a search engine and also to know what are various threats in internet and how to configure the system so as to make it safe in internet.
Procedure:
Netiquette: Netiquette means network etiquette, the do's and don'ts of online communication. Netiquette is also defined as a set of rules talking about your online behavior and simple rules that one should follow.
To have a good netiquette here are three tips to keep in mind:
1. We can show emotions like etc… in while writing mails to others using the feature “emoticons”.
2. We can also use short hands and abbreviations while writing mails to others. For example: Short hands are LOL Laughing Out Loud, IMHO In My Humble Opinion BTW By The Way, NP No Problem.
3. Keep in mind that representing who you are while writing mails.
4. Never send anything that will reflects badly on you or anyone.
5. Don’t type the mails in all CAPS or in all small letters as it makes recipient more difficult to read.
6. Write clear, organized messages with subject line that gives enough information for the reader to file it and find it later.
Search engine:
Software that lets the user to specify the search terms. The search engine then finds the websites that contains those search terms. Overtime a search engine builds a database of searchable terms that can be matched to the websites.
Example: www.google.com, www.altavista.com, www.ask.com, www.askjeeves.com, etc…
To use search engine we need to follow some steps given as follows:

JKDYOLA IT WS LAB MANUAL
Jaya Krishna,
Page | 63
1. Type the domain name for example www.google.com in the address bar (called as URL) in the IE and press the return key.
2. Now we can see an empty text box where we can type the key words (search terms) which is as shown in the figure below:
1. Now type the keywords (search terms) in the text box without any mistake.
2. Now click on the button Google Search, by default radio button with the label “the web” is selected, which is appeared below the Google Search button.
3. It will provide the websites that contain the search terms through out the world.
4. But to get only the web sites from India then select the radio button “pages from India” which is below the radio button “I’m feeling lucky”.
5. While searching the web we can use + sign in the keywords.
Cyber hygiene:
It is defined as an electronic sanitation. Refers to securing a company’s systems and networks against attacks. Hygiene is common to talk about cleaning up a system or a PC after a virus attack.
Threat is defined as the expressed potential for the occurrence of harmful even such as an attack.
Text Box

JKDYOLA IT WS LAB MANUAL
Jaya Krishna,
Page | 64
Attack is defined as an action taken against target with the intention of doing harm.
Vulnerability is defined as the weakness that makes the target to be attacked.
There are various types of threats. Some of them are:
Virus:
A program written intentionally to alter the way your computer operates without your permission or without your knowledge. A virus attaches copies of itself to other files like documents, program files and is inactive until you run an infected program.
When activated virus may damage or delete files, cause erratic system behavior.
1. Macro Virus:
a. Macros are simple programs that can be written to automate the repetitive tasks in a document or make calculations in spreadsheets.
b. Macros are written in documents using MS Word, in spreadsheets using MS Excel.
2. Trojan horse:
a. These are the programs that appear to serve some useful purpose or provide entertainment, which encourages you to run, which can place virus on your computer or allow a hacker to gain access to your computer.
b. By clicking on a link Trojan horse may place the virus on your computer. But a Trojan horse is not a virus because it doesn’t replicate and spreads like a virus.
3. Worms:
a. These are programs that replicate and spread, often opening a backdoor to allow hackers to gain access to your system that they infect.
b. Worms can also spread by copying themselves from disk to disk or by e-mail.
4. Zombie:
a. A zombie is a dormant program that lies inactive in you computer, which can activated remotely i.e. zombie’s don’t normally damage the computer on which they reside but can damage other computer.
b. Zombies often arrived as email attachments and when the attachment is opened then they install themselves secretly and then wait to be activated.

JKDYOLA IT WS LAB MANUAL
Jaya Krishna,
Page | 65
5. Phishing:
a. A phishing attack is a one, when you sent an e-mail address that asks you to click on a link and re-enter your bank or credit card details.
b. Both email and the website it links appeared to be genuine but when you entered your bank or credit card details they are then used fraudulently.
6. Spyware:
a. It does not usually carry viruses but it can use your system resources and slow down your internet connection with the display of ads.
b. This will be installed with other applications usually without your knowledge, which records your behavior on the internet, display the targeted ads to you and can even download other malicious (hateful) software on to your computer.
To make the internet and your system safe, we must need to install antivirus software (example AVG, Norton, Node32, Avast etc...) on your system. Also we need to download and install the updates of operating system frequently.
Result:
I have successfully learned about search engine, netiquette, and cyber Hygiene and also about various threats.
Links (to Download Materials):
http://www.jkdirectory.yolasite.com/materials.php
http://www.jkdirectory.yolasite.com/material.php
http://jkdirectory.blogspot.com
http://jkmaterialz.weebly.com