terra mystica rules 04 - gezelschapsspel.info · in terra mystica each player governs one of 14...
TRANSCRIPT

The conference of the Council of Elders had been interrupted by a deafening turmoil.“The Witches! The Witches!” a young voice was shouting, and fists were knocking on the door of the as-sembly hall at which the ancestors of the Chaos Magicians had met. Fi-nally, the door had been opened, and a young female magician came rushing into the hall. “I’ve seen them!” she was shouting while gasping for breath. The stern looks of the elders made her pause.
“How dare you break in on our conference?” the vener-able spokeswoman of the Council of Elders sharply re-buked the disturber. “And if this is really important, then talk to us reasonably. What did you see?”
Shara Nindée, the young Chaos Magician, took a deep breath and made herself report everything that she saw, one thing at a time. “I’ve been to the south, on the edge of the forest. There’s Witches everywhere. They’re riding their stupid broom sticks above our heads, then landing in the southern forest. And their numbers are still growing! They’re about to settle here!”
This was an unpleasant message indeed. The Council of Elders had just decided to cut down the southern forest to redirect some lava streams there and transform that forestland into treeless wasteland – just how they liked it. The teams for this task had already been formed. And now it seemed the Witches had preempted that. Witches were a forest-dwelling people and as such, they had spread to a
number of for-ests. Even worse
– they used to plant trees where there
had been none to con-vert all land gradually
to forest. What a night-mare for the Chaos Magi-
cians who try hard to trans-form all land into wasteland.
Then Malkuzar, an old and wise Chaos Magician, spoke up. The reason they called him wise was that he had sur-vived five or more of his self-experiments. “There is noth-ing that can be done. It’s not necessarily bad for us to have neighbors, it’s good for trading. When building our own settlements, we can save a lot of gold by trading.”
Some of the elders nodded, others looked doubtful. “But our people are ready to go and commence the ground-work,” argued the spokeswoman. “Shall we just give up? We need more wasteland!”“Send Shara to the west, to the mountains,” Malkuzar suggested. “Usually, there are some underground lava streams in the mountains that we can open up. Mountains are much easier to convert to wasteland than forests, any-way. This is how we may preempt the Witches!”
The decision was taken. “As to you, Shara…” The young magician had to gulp when she met the serious look of the old Malkuzar. “As you’re so keen, I’ve got a mission for you. Immediately travel to the west, to the mountains. Check if things are still calm over there. Dwarves are usu-ally hanging around in mountains. That’s just what we needed.”

In Terra Mystica each player governs one of 14 factions trying to develop more successfully than their opponents. Terra Mystica is a magical world: its inhabitants are able to transform the terrain they are living in. Each faction is bound to a specific type of ter-rain: It can only build structures on its “Home terrain”. This is why each faction over the centuries needed to develop Terraformingcapability.
A faction either lives in the Plains, the Swamp, the Lakes, the Forest, the Forest, the Forest Mountains, the Wasteland, or the Wasteland, or the Wasteland Desertand each of them strives to transform the terrain according to its needs.
In the game, the players need to expand to build Dwellings. However, as they gain Power when another player builds Dwellings or up-grades Structures directly adjacent to them, each player has to face the challenge of finding the right balance between adjacency to other players and free space for expansion.
Existing Dwellings can be upgraded in multiple steps: to a Trading house at first, then to a Stronghold or Temple. One temple can be upgraded to a Sanctuary. Dwellings provide Workers. Upgrading a Structure increases your income in Coins, Power, or Priests.
A Dwelling may become a Sanctuary in three steps. Alternatively, one Trading house may become a Stronghold.
Besides geographic expansion and upgrading Structures, players can also develop four Cults: Earth, Water, Fire, and Air. Progress in these will be displayed on the Cult board. Developing them also provides an increase in Power and other rewards.
The Cult board
Cult of Fire
Cult of Water
Cult of Earth
Cult of Air
In the end, the player who developed their faction the best wins the game.
Town key (indicates that you need to found a Town first to advance to the last space of a Cult track)
Power gained when advancing on the Cult track
Order of the Cult of Air (enables you to ad-vance multiple steps on the track at once)
INTRODUCTION

65 natural-colored Workers 65 natural-colored Workers
40 small Coins (value 1)
25 medium Coins (value 2)25 medium Coins (value 2)
20 big Coins (value 5)20 big Coins (value 5)
65 purple Power tokens (occasionally simply called Power)
1 orange Starting player token
17 Action tokens (used for Power and (used for Power and (used for Power and 10 Town tiles 8 rectangular Scoring tiles Special actions)
1 Game end token
5 “100 Victory points” tokens
28 oval Favor tiles 9 Bonus cards (1+3+3 tiles per Cult) (depicted as scrolls)
5 “Actions” Overview tiles 5 “Actions” Overview tiles 5 “Actions” Overview tiles 5 “Actions” Overview tiles 5 “Actions” Overview tiles 5 “Actions” Overview tiles 5 “Actions” Overview tiles 5 “Actions” Overview tiles 5 “Actions” Overview tiles 5 “Actions” Overview tiles 5 “Actions” Overview tiles 5 “Actions” Overview tiles 5 “Actions” Overview tiles 5 “Actions” Overview tiles 5 “Actions” Overview tiles 5 “Actions” Overview tiles 5 “Actions” Overview tiles 5 “Actions” Overview tiles 5 “Actions” Overview tiles 5 “Actions” Overview tiles (one side English, the other German)
12 zip-lock bags
this rule book plus appendices in English this rule book plus appendices in English this rule book plus appendices in English this rule book plus appendices in English this rule book plus appendices in German
1 Game board with the map in its initial state 1 Cult board 7 Faction boards1 Cult board 7 Faction boards 7 Faction boards1 Cult board (with the four Cult tracks (each side displays a different faction) (with the four Cult tracks (each side displays a different faction) (with the four Cult tracks (each side displays a different faction) and Orders)
Note: As this game cannot be played with more than five players, it can never happen that all seven colors are used within the same session.
56 Terrain tiles per faction color (green, yellow, blue, brown, red, black, grey):(double-sided)
8 Dwellings
4 Trading houses
1 Stronghold
3 Temples
1 Sanctuary
7 Priests
7 Markers
3 Bridges
COMPONENTS

Put the Game board in the middle of the table and the Cult boardnext to it.
Assignment of factions
For your first game, we recommend you play Terra Mystica with predefined factions. Depending on the number of players, take the recommended factions and distribute them among the players:
2 players: Witches (green), and Nomads (yellow)3 players: Witches (green), Nomads (yellow),
and Alchemists (black)4 players: Witches (green), Nomads (yellow),
Halflings (brown), and Mermaids (blue)5 players: Witches (green), Nomads (yellow), Halflings (brown),
Mermaids (blue), and Giants (red)
Components in faction colors
Each Faction board has a Transformation cycle. It shows the seven types of terrain with the Home terrain of a given faction high-lighted by its larger size. (The color of your Home terrain matches your faction’s color.)
Take all the tokens in your faction’s color: Priests, Structures, Markers, and the Bridges.(Priests, Structures, and Bridges are limited by the token quantity.)
Put the 7 Priests and the 3 Bridges next to your Faction board.
Put the Structures on the corresponding spaces on your Faction board.
Priests and Bridges are put next to the Faction board Priests and Bridges are put next to the Faction board forming your “supply”.
This section consists of two parts. For your first play, please follow the instructions of the static introductory game. Add the changes for the variable main game in your second play at the earliest.
Red text in italics and parentheses highlights differences between the base rules and faction-specific ones. These differences are also depicted on each individual Faction board and are explained in detail on the last page of this rule book (see Appendix VI).
Faction setup
The setup for each faction is depicted on its Faction board.
Starting resourcesCollect your starting resources. They are depicted at the top right corner of your Faction board, under your faction’s name:
Workers Coins Priestsof your color
Take the depicted resources and place them on your Faction board. (On top of these starting resources, you will get your income for the first round. See page 8.)
The Witches get 3 Workers and 15 Coins during setup.
Distribute the 7 Markers of your color.
Place one Marker on the leftmost space of the Shipping track (value 0).(Only the Mermaids start with value 1. The Fakirs and Dwarves do not have Shipping and therefore do not need this Marker.)
Place one Marker on the bottom-most space of the Exchange track of your Faction board – this is the space where 3 Workers equal 1 Spade.(The Darklings do not need this Marker.)
Place another Marker on space 20of the Victory point track on the Game board.
Distribute the remaining 4 Markerson space 0 of each of the 4 Cult tracks on the Cult board.
SETUP
FIRST PLAY

Game and Cult board
For your first game, we recommend you play with the following setup. What follows is the setup for a 4-player game explained in detail. The setup for a different number of players follows afterwards.
Cult advancementsYour Faction board depicts some Cult symbols next to the starting resources. For each such symbol, move the corresponding Marker on the Cult board up one space.
The Nomads (yellow) start on space 1 in the Cults of Fire and Earth, the Halflings (brown) start on space 1 in the Cults of Air and Earth, the Witches (green) start on space 2 in the Cult of Air, and the Mermaids (blue) start on space 2 in the Cult of Water.
Bowls of PowerYour Faction board displays three Bowls of Power at its top left cor-three Bowls of Power at its top left cor- at its top left cor-three Bowls of Powerner. Distribute a total of . Distribute a total of ner 12 Power tokens (occasionally simply called Power) between Bowls I and II as indicated on your Faction board.
The Witches start with 7 Power in Bowl II
and
5 Power in Bowl I.
The Bonus cards are depicted as scrolls. Which ones you use depends on the number of players. The figure shows the cards used in a 4-player game.
There is a predefined order of Scoring tiles. Cover the right half of the uppermost Scoring tile with the Game end token . The covered part shall be ignored during the game.
Lay out the Favor tilesin a 3x4 pattern.
From left to right, take the Dwellings off your Faction boards and place them on the Game board as depicted.
Sort the Workers, Coins, and Town tilesand put them easily accessible next to the Game board. Turn the 10 Town tiles face-up.
Put one Put one Action token above each of the 6 Power action spaces on the Game board. Put the remaining Action to-kens next to the Game board.
The player who most recently has dug a planting bed in their garden takes the Starting player token and becomes the Starting player.
The map consists of The map consists of Terrain and and and and and River spaces .

The Bonus cards and setup for a 5-player game.
The Bonus cards and setup for a 2-player game. The Bonus cards and setup for a 3-player game.
Unlike the introductory game, randomly select which Bonus cards and Scoring tiles to use. Then, after these basic parameters are set, freely choose your factions. Also, freely place your first Dwellings.
(The positions of the first Dwellings are not preset.)
Note: Each faction (but one) has two special abilities: one from the beginning of the game on, the other one once its Stronghold has been built. These abilities are depicted on the Faction board and explained in detail on the last page of this rule book: Make sure all players know the special abilities of the participating factions before starting the game.
special ability gainedafter building the Stronghold
special ability from thebeginning of the game on
Bonus cards
Shuffle the 9 Bonus cards. The number of cards needed in the game depends on the number of players.
No. of players 2 3 4 5
No. of Bonus cards needed 5 6 7 8
Randomly draw the required number of Bonus cards and place them face-up next to one another. (Put the remaining cards back into the game box.)
Choosing a Faction board
The Starting player chooses a faction and takes its Faction board. In clockwise order, each other player takes one of the remaining Faction boards and chooses which side to use.
Note: Alternatively, randomly assign the factions. (Take one Dwelling of each color and randomly distribute them among the players.) Then choose one of the two factions: the front or back of the corresponding Faction board.
Once each player has decided on a faction, proceed with the fac-tion setup as explained for the introductory game. Also, distribute the components of your color as explained there. However, do not place your Dwellings on the Game board, yet (see „Placing the first Structures“, page 8).
2 3 4
5 6 7
2 3 4
5 6 7
2 3 4
5 6 7
2 3 4
5 6 7
Scoring tiles
Randomly draw 6 Scoring tiles and put them face-up on the Game board in random order. Each tile corresponds to a round. (Put the remaining two tiles back into the game box.)Cover the right half of the uppermost Scoring tile with the Game end token.
Reduced Scoring tile for round 6
Scoring tile for round 5
Scoring tile for round 4
Scoring tile for round 3
Scoring tile for round 2
Scoring tile for round 1
CHANGES IN THE MAIN GAME

Nomads are a horse people of the desert. They used to be living in tents and always on the move. Even to-day, they build their dwellings using plain and light materials. This way they can populate large areas re-ally quickly. Nomads only dwell in deserts, and their hordes of horsemen can cause a sand storm that may propagate to neighboring landscapes.propagate to neighboring landscapes.
There is a Scoring tilefor each of the six rounds. Each of them displayshow to get Victory points in a given round: by building Dwellings (Action #1, page 9), Trading houses, the Strong-hold, or the Sanctuary (Action #4, page 11). Additional Victory points may be awarded for transforming Terrain spaces (spade symbol) and founding Towns (key symbol).
You will be facing a dilemma: on the one hand, you might want to build the best Structures for your faction (one faction wants a quick Stronghold, another many Temples), on the other hand, you might want to concentrate on the Structures that score Victory points this round.
Three out of the nine Bonus cards award Victory points when you have completed all the actions you wish to take in the current Action phase (called passing):Then, Victory points are either awarded for• all of your Dwellings on the Game board, • all of your Trading houses on the Game
board, or • your Stronghold and Sanctuary on the
Game board.
Two Favor tiles award Victory points for Dwellings and Trading houses whenever you build them.
Another Favor tile awards Victory points for already built Trading houses when passing.
You get Victory points when founding Towns. (More details on page 14.)You also get additional rewards on top of that.
At the end of the game, the player with the most Victory points wins the game. The following figure displays the various ways to get Victory points in this game. (Victory points are depicted as brown squares containing a laurel wreath.)
While reading this rule book, you can come back to this page every now and then and get a better view of the context. This section has no relevance for understanding the rules. Any information found on this page is also explained elsewhere in this rule book.
You get Victory points when improving your Shipping (Action #2, page 11)
or
Terraforming skills (Action #3, page 11).This is why these actions are not only use-ful in the beginning of the game, but also towards its end.
Some factions have special abilities to gain additional Victory points. (For exam-ple, the Alchemists are particularly good at converting Coins to Victory points.)
At the end of the game, Victory points are awarded for the largest connected areas on the Game board (Area scoring). Improving your Shipping and Terraforming skills not only pro-vides Victory points directly, but is also helpful in creating a large connected area.
Area scoring Area scoring Area scoring Area scoring Area scoring
Cult scoringCult scoringCult
Also at the end of the game, Victory points are awarded for progress on the four Cult tracks (Cult scoring).
On the one hand, you want to have a lot of Dwellings to cre-ate a large connected area but on the other hand, the morevaluable Temples and the Sanctuary provide a lot of Priests. These are needed to score well in the Cult scoring (Action #5, page 13).
Close adjacency to other players enables you to trade Victory points for Power (see page 12). (This is why you start the game with 20 Victory points.)
GOAL OF THE GAME
Chaos Magicians appreciate the forces of destruction and feel the best when in dismal wastelands. They worship fire and are always looking for underground lava streams that they try to force to erupt and hit the surface to transform even more land into wasteland. Chaos Magicians also have a certain power over time – they are able to freeze time for other people so they can wreak havoc undisturbed.
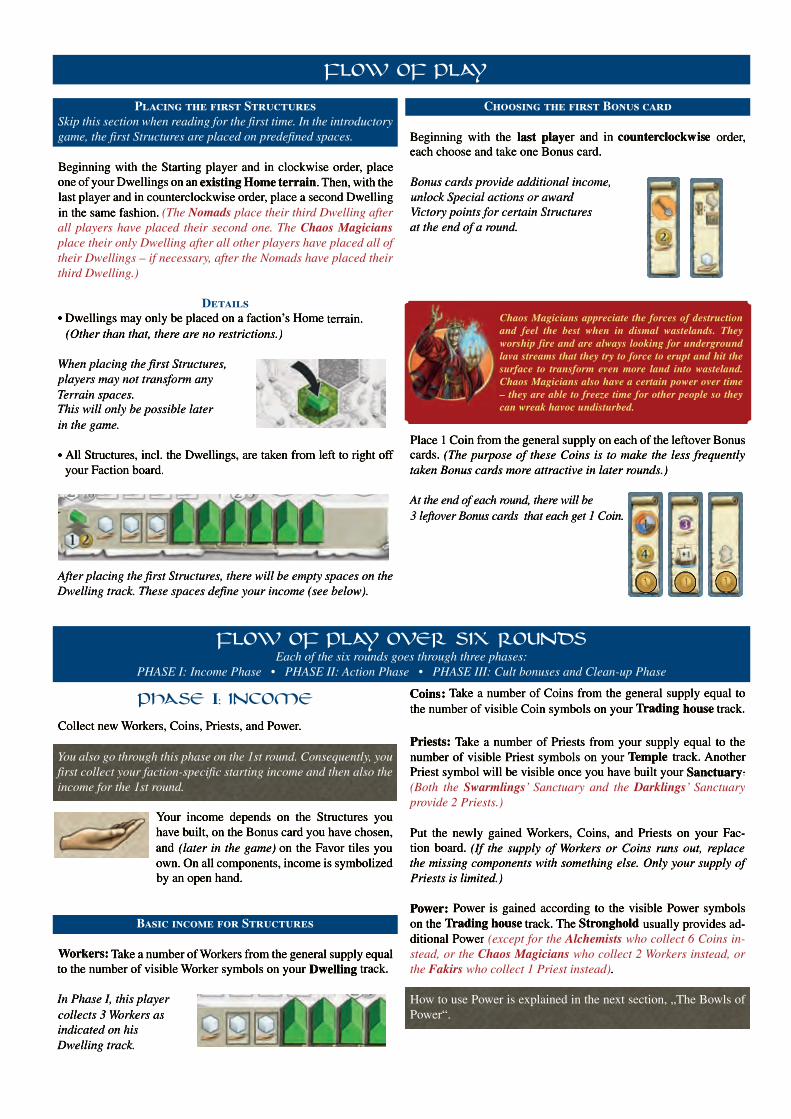
Placing the first Structures Skip this section when reading for the first time. In the introductory game, the first Structures are placed on predefined spaces.
Beginning with the Starting player and in clockwise order, place one of your Dwellings on an existing Home terrain. Then, with the last player and in counterclockwise order, place a second Dwelling in the same fashion. (The Nomads place their third Dwelling after all players have placed their second one. The Chaos Magicians place their only Dwelling after all other players have placed all of their Dwellings – if necessary, after the Nomads have placed their third Dwelling.)
Details• Dwellings may only be placed on a faction’s Home terrain.
(Other than that, there are no restrictions.)
When placing the first Structures, players may not transform any Terrain spaces. This will only be possible later in the game.
• All Structures, incl. the Dwellings, are taken from left to right offyour Faction board.
After placing the first Structures, there will be empty spaces on the Dwelling track. These spaces define your income (see below).
Choosing the first Bonus card
Beginning with the last player and in counterclockwise order, each choose and take one Bonus card.
Bonus cards provide additional income,unlock Special actions or award Victory points for certain Structures at the end of a round.
Place 1 Coin from the general supply on each of the leftover Bonus cards. (The purpose of these Coins is to make the less frequently taken Bonus cards more attractive in later rounds.)
At the end of each round, there will be 3 leftover Bonus cards that each get 1 Coin.
Each of the six rounds goes through three phases: PHASE I: Income Phase • PHASE II: Action Phase • PHASE III: Cult bonuses and Clean-up Phase
Collect new Workers, Coins, Priests, and Power.
You also go through this phase on the 1st round. Consequently, you first collect your faction-specific starting income and then also the income for the 1st round.
Your income depends on the Structures you have built, on the Bonus card you have chosen, and (later in the game) on the Favor tiles you own. On all components, income is symbolized by an open hand.
Basic income for Structures
Workers: Take a number of Workers from the general supply equal to the number of visible Worker symbols on your Dwelling track.
In Phase I, this player collects 3 Workers as indicated on his Dwelling track.
Coins: Take a number of Coins from the general supply equal to the number of visible Coin symbols on your Trading house track.
Priests: Take a number of Priests from your supply equal to the number of visible Priest symbols on your Temple track. Another Priest symbol will be visible once you have built your Sanctuary.
(Both the Swarmlings’ Sanctuary and the Darklings’ Sanctuary provide 2 Priests.)
Put the newly gained Workers, Coins, and Priests on your Fac-tion board. (If the supply of Workers or Coins runs out, replace the missing components with something else. Only your supply of Priests is limited.)
Power: Power is gained according to the visible Power symbols on the Trading house track. The Stronghold usually provides ad-ditional Power (except for the Alchemists who collect 6 Coins in-stead, or the Chaos Magicians who collect 2 Workers instead, or the Fakirs who collect 1 Priest instead).
How to use Power is explained in the next section, „The Bowls of Power“.
PHASE I: INCOME
FLOW OF PLAY OVER SIX ROUNDS
FLOW OF PLAY

Additional income for cards and tiles
Beside the income collected via your Faction board, add the in-come depicted on your Bonus card (see Appendix IV, page 19) and Favor tiles (see Appendix II, page 18).
If you got the depicted Favor tile and Bonus card, you would get the following: 1 Worker
6 Coins
1 Power
The Bowls of Power
Each player has 12 Power tokens that are distributed among three Bowls. Power actions (see Action #6, page 13) require Power in Bowl III (the one on the right).
In this scenario, you have 5 Power at your disposal. You may use all of the Power in Bowl III regardless of the number of Power tokens in Bowls I and II.
Whenever you gain Power in the game (as income, when an oppo-nent builds Structures, or by advancing on the Cult tracks), you do not get new Power tokens, but rather move the existing ones from Bowl to Bowl. Also, when spending Power on a Power action, you do not lose Power tokens, but move them around again.
Power tokens move (always in clockwise order) according to the following rules:
Gaining PowerWhen gaining Power, proceed in the following order.
1. If there are Power tokens in Bowl I, for each 1 Power you gain move one token from Bowl I to Bowl II.
2. Once Bowl I is empty, for each 1 Power you gain move one token from Bowl II to Bowl III.
3. Once all Power tokens are in Bowl III, you cannot gain further Power.
If you gain 3 Power in this scenario, move the 2 tokens from Bowl I to Bowl II first, then move 1 token from Bowl II to Bowl III as now Bowl I is empty.
Spending Power You can only spend Power tokens that are in Bowl III. You can only spend Power tokens that are in Bowl III. Move them to Bowl I when spending them.
After gaining 3 Power in the above scenario, you can now spend up to 6 Power for a Power action. More about these later.
During the Action phase, beginning with the Starting player and in clockwise order, each player takes exactly one Action. Continue to do so until no player wants to take any more Actions.There are eight possible Actions to choose from. Except for pass-ing, all Actions can be taken multiple times during the same Action phase (but only once per turn).
Overview of Actions This section explains the relations between the Actions.Action #1 is to build Dwellings on unoccupied terrain. Actions #2and #3 facilitate building. At the end of the game, there is a special scoring for the largest connected area.
Action #4 is to upgrade Structures. Many factions need to build their Stronghold as soon as possible. On the other hand, Temples and the Sanctuary are also very valuable as they provide Priests and Favor tiles, needed to score well during the Cult scoring at the end of the game.
Action #5 directly affects the Cult scoring and provides additional Power via Priests and Cults. Power can then be used for special Power actions (#6).
Action #7 explains the Special actions that you can unlock during the game.
Finally, Action #8 needs to be taken when you cannot or do not want to take any more Actions in the current Action phase.
1 Transform and Build
First, you may change the type of one Terrain space. Then, if you have changed its type to your Home terrain, you may immediately build a Dwelling on that space.
Building a DwellingIn order to build a Dwelling on a Terrain space, this space needs to be…
• of your color (i.e. it needs to be your Home terrain)• unoccupied• directly or indirectly adjacent to one of your • Structures (“Adjacency” is defined in the next
section).
Also, you need to pay its building costs. Each Dwelling costs 1 Worker and 2 Coins. (Exceptions: The Engineers build Dwellings for 1 Worker and 1 Coin, the Swarmlings for 2 Workers and 3 Coins.)
PHASE II: ACTIONS

Giants are beings of enormous size and physical strength. They can pull out trees or level out mountains with ease – as a matter of fact, they actually enjoy it. They are able to transform any landscape into waste-land in no time. Various Giants have already tried to transform land into something else, but it ended up be-ing wasteland anyway. Apparently, they simply have no knack for the finer things.
Transforming a Terrain space To ensure the first condition is met, you are allowed to transform one unoccu-pied Terrain space into your Home ter-rain immediately before building a Dwelling. Place a Terrain tile of your color on that space.
Transformation has its price: Each step between the source and destination terrain on the Transformation cycle of your Faction board costs 1 Spade. Thus, trans-forming adjacent types of terrain (on the Transformation cycle) into one another costs 1 Spade, with a maximum cost of up to 3 Spades if they are on opposite sides of the cycle as you can move in either direction on the cycle.(Exception: Giants always have to pay exactly 2 Spades to transform any type of terrain into their Home terrain.)
Spades can be acquired in a variety of ways.
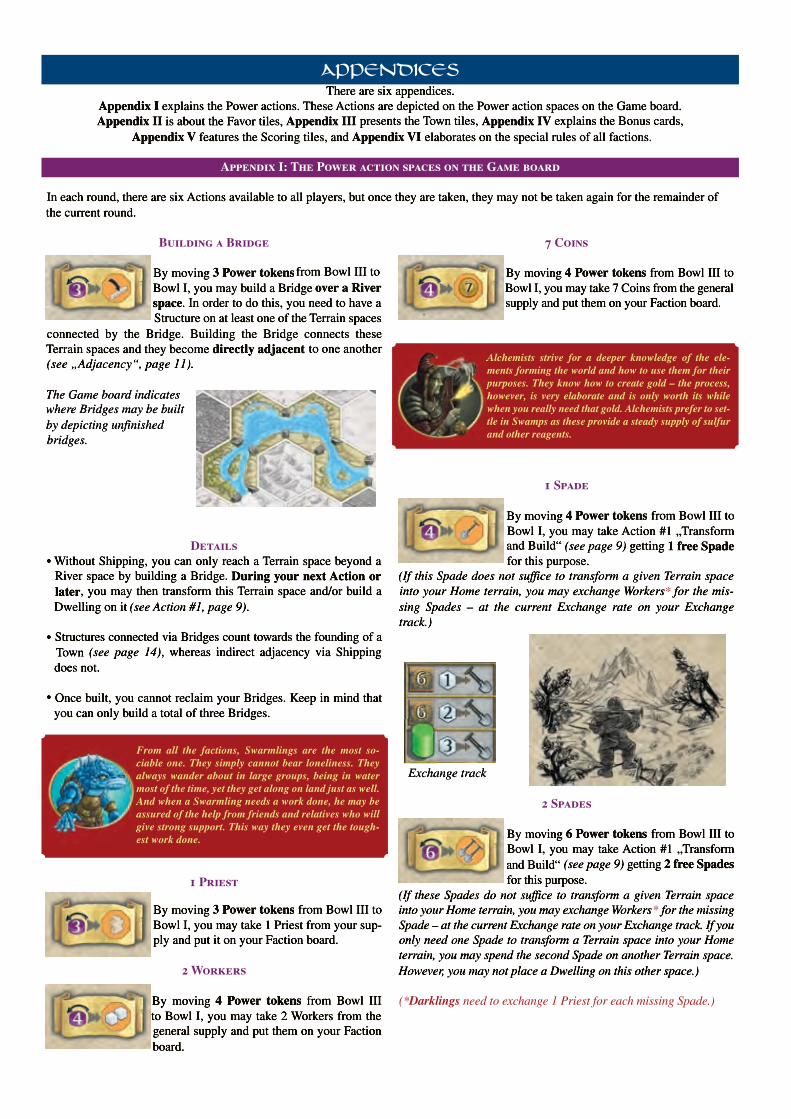
You may exchange Workers* for Spades. The Exchange track of your Faction board displays the Exchange rate: At the beginning of the game, this is usually 3 Workers for 1 Spade (see Action #3).
The Marker indicates that the Exchange rate is 3 Workers for 1 Spade.
1 or 2 Spades can be acquired via certain Power actions (see Action #6, page 13, or Appendix I, page 17).
One of the Bonus cards provides 1 Spade (see Action #7, page 14, or Appendix IV, page 19).
(Halflings and Giants gain additional Spades for immediate use after building their Stronghold.)
Spades may only be applied to a single Terrain space. However, there are two special cases:
• If the Spades gained via a Power action or Bonus card do not suf-fice to transform a Terrain space into your Home terrain, you mayexchange Workers* for the missing Spades (at the current Ex-change rate of your Exchange track).
(*The Darklings pay 1 Priest for each missing Spade instead.)
• When gaining 2 Spades, if you only need one of them to trans-form a Terrain space into your Home terrain, you may apply the second Spade on another Terrain space. However, you may not place a Dwelling on this second space.(The same is true when the Halflings build their Stronghold, im-mediately gaining 3 Spades, see last page.)
Details on building Dwellings• When building, take Structures (incl. Dwellings) from left to right
off your Faction board.
• If the current Scoring tile depicts a Dwelling, you get 2 Victory points for each Dwelling you build.
This Scoring tile awards 2 Victory points for building Dwellings.
Details on using Spades• You may not save Spades for future Actions. Spades need to be
used immediately.
• If the left side of the current Scoring tile depicts a Spade, you getVictory points for using Spades during the current Action phase.
This Scoring tile awards 2 Victory points for using Spades.
• After transforming a Terrain space, you do not need to build a Dwelling immediately. You can do this in another Action at a laterpoint in time.
• You do not need to transform a Terrain space into your Home terrain, you may stop at any other type of terrain (e.g. if you cannot afford more Spades). However, during their turns, your oppo-nents may claim that Terrain space for themselves. (Terrain spaces with Terrain tiles on them but no Structures are consideredunoccupied.)
• Even when transforming a Terrain space without building aDwelling, the transformed Terrain space needs to be directly or indirectly adjacent to one of your Structures (see page 11).
• You may not transform a Terrain space containing Structures.
• You may also get Spades via Cult bonuses (see Phase III of a round, page 15). As these Spades are gained outside the Actionphase, you may not build a Dwelling immediately afterwards, nordo you get to exchange Workers for more Spades. (You have to wait for the next Action phase to build a Dwelling.)

Auren are mysterious forest-dwelling people that are said to exist without a physical body. Unfortunately, one cannot prove this as you will never get to see them when wandering through the woods. When threatened or ex-pecting relatives to visit, they simply blend with the trees and become invisible.
AdjacencyDue to some other rules (see “Power via Structures” on page 12), it is important to distinguish between direct and indirect adjacency of Terrain spaces. (This distinction does not matter when building Dwellings, which is what this section is all about.)
Direct adjacency Terrain spaces and Structures are considered directly adjacent to one another if they share a hexagon edge. Additionally, Terrain spaces and Structures separated by a River but connected via a Bridge are also considered directly adjacent to one another (see Power action „Building a Bridge“, Appendix I on page 17).
These Terrain spaces are directly adjacent to one another. As soon as you build a Structure on the other Terrain space, both Structures will be considered directly adjacent as well.
Indirect adjacency Terrain spaces and Structures are considered indirectly adjacent to one another if they are (not directly adjacent to one another, but)separated by one or more River spaces and your Shipping value is high enough to cover the distance. (Shipping is another Action and will be explained in the next section.) (Terrain spaces and Structures that Dwarves can reach via Tun-neling and Fakirs via Carpet Flight are also considered indirectly adjacent to one another.)
In order to make these Structures indirectly adjacent to one another, you need a Shipping value of at least 2.
Note: When building Dwellings, your opponents get the chance to gain Power. This will be explained in Action #4 “Upgrading a Structure”. Before that, let us have a look at the following two Actions that facilitate building Dwellings for the remainder of the game: advancing on the Shipping track and lowering the Exchange rate for Spades.
2 Advancing on the Shipping track
Terrain spaces and Structures need to be indirectly adjacent to one another if you want to expand beyond River spaces. In order to transform Terrain spaces or build Structures beyond River spaces, as an Action, you may move the Marker on your Shipping track forward one space. Your Faction board displays the costs of this Action: 1 Priest and 4 Coins.As a reward for taking this Action, get a number of Victory points as indicated on the Shipping space you move to.
The Auren (green) get 3 Victory points for advancing on the Ship-ping track. From now on, the green Dwellings in the example above are considered indirectly adjacent to one another.
3 Lowering the Exchange rate for Spades
At the beginning of the game, Spades cost 3 Workers each (see Action #1). In order to reduce this cost down to 2 Workers or even down to 1 Worker, as an Action, you may move the Marker on your Exchange track up one space. Your Faction board displays the costs of this Action: 2 Workers, 5 Coins, and 1 Priest. (Exception: Halflings pay fewer Coins, and Darklings do not even have an Exchange track as they exchange Priests for Spades.)As a reward for taking this Action, you get 6 Victory points.
From now on, the Auren (green)only need to pay 2 Workers for each Spade.
4 Upgrading a Structure
Structures can be upgraded step by step. The costs for each upgrade are depicted on the Faction board to the left of a Structure.
Details• Always take newly placed Structures from left to right off your
Faction board. • When upgrading, you are replacing Structures by one another.
Take the Structure that you wish to upgrade off the Game board and return it to your Faction board. This reduces your income for the given type of Structure. (When returning Structures to your Faction board, always put them as far to the right as possible on their proper track.) Place the new Structure on the same space on the Game board where the just removed Structure has been.
When building a Trading house, return a Dwelling to your Faction board.
There are four possible upgrades (two of which can only be done once per game).
Dwelling Trading house
Upgrading a Dwelling to a Trading house costs 2 Workers and 6 Coins*. If there is at least one opponent’s Structure directly adjacent to that Dwelling, you only need to pay 3 Coins instead of 6. If the current Scoring tile depicts a Trading house, get 3 Victory points for this upgrade.
This Scoring tile awards 3 Victory points for building a Trading house.

Trading house Stronghold
Upgrading a Trading house to a Stronghold costs a number of Workers and Coins depending on the faction. After building its Stronghold, each faction gains a specific special ability (see Ap-pendix VI, page 20). If the current Scoring tile depicts a Strong-hold, get 5 Victory points for this upgrade.
Trading house Temple
Upgrading a Trading house to a Temple costs 2 Workers and 5 Coins*. As a reward, immediately choose and take one Favor tile** and put it face-up in front of you. (You may immediately take advantage of the newly gained Favor tile, or use it during the cur-rent Action phase, respectively.) You may not take a Favor tile that you already have. For further details on Favor tiles see Appendix II on page 18. (*Engineers pay less and Swarmlings pay more when upgrading to a Trading House or Temple.)
Temple Sanctuary
Upgrading a Temple to a Sanctuary costs a number of Workers and Coins depending on the faction. This is also awarded with a Favor tile**. If the current Scoring tile depicts a Sanctuary, get 5 Victory points for this upgrade.(**Chaos Magicians always get 2 Favor tiles instead of 1.)
Finally, more about the already mentioned rewards you get when an opponent builds a Structure.
Power via StructuresEach Structure has a Power value. The Power value of each Struc-ture is depicted to the right of its track on the Faction board:
The Stronghold and Sanctuary have a Power value of 3.
Trading houses and Temples have a Power value of 2.
Dwellings have a Power value of 1.
When building a Dwelling (Action #1) or upgrading a Structure (Action #4), you must inform the owners of Structures directly ad-jacent to your Structure that they may gain Power (see „The Bowls jacent to your Structure that they may gain Power (see „The Bowls (see „The Bowls jacent to your Structure that they may gain Powerof Power“, page 9): In order to determine the total number of Power an opponent may gain, add up the Power values of their Structures directly adjacent to your newly built Structure.
The Mermaid player (blue) needs to inform the Nomad player (yellow) that he may gain exactly 3 Powerdue to the newly built blue Dwell-ing: 1 Power for the yellow Dwell-ing plus 2 Power for the yellow Temple. The Nomad player does not gain Power for the yellow Trad-ing house as it is not directly adja-cent to the blue Dwelling.
Details• You do not gain Power for your own Structures. Power can only
be gained when an opponent builds Structures. • Beginning with the player to the left of the active player and in
clockwise order, each affected opponent needs to decide whether to actually gain the Power or not. (The next section explains why you might want to refuse to gain Power.)
The price of Power Unfortunately, Power gained via Structures is not free. To gain that Power, you need to lose a number of Victory points equal to one fewer than the number of Power gained.
Thus, gaining 1/2/3/4/… Power costs 0/1/2/3/… Victory points.
In the above example, the Nomad player may gain 3 Power. If he does, he will lose 2 Victory points.
Details• You may not end up with a negative score when losing Victory
points.
• You may not gain less Power in order to save Victory points. Either take it all or gain nothing. (Exceptions: If you have not enough Power tokens in Bowls I and II, gain as many Power as needed to move all of them to Bowl III and lose Victory points ac-cordingly. Also, you may gain less Power to avoid a negative score. In this case, only gain as many Power as needed to end up with 0 Victory points.)
• You only lose Victory points when gaining Power via Structures. You do not lose any Victory points when gaining Power otherwise.
Summary: How do I gain Power?You gain Power…
• when an opponent builds Structures (as explained above)
• as income from your Trading houses and Stronghold(and Temples if you are playing the Engineers)
• as income from two specificBonus cards
• as income from two specific Favor tiles
• as a one-time reward when founding a Town and taking the specific Town tile (see page 14 for details on found-ing a Town)
• as a one-time Cult bonus in Phase IIIif the specific Scoring tile is up for the current round (see page 15 for de-tails on the Cult bonus)
• when advancing on the Cult tracks (as explained below)(as explained below).
1x
1x

Initially, Engineers have been a mountain tribe liv-ing in inaccessible valleys and ravines. They have learned how to build bridges and mountain roads to keep their remote settlements connected. They enjoy dominating nature by means of technology. They ap-pear eccentric to the other factions when poring over their construction plans.pear eccentric to the other factions when poring over
6 Power actions
There are two types of Power actions: fully-fledged Actions and auxiliary Actions.
Power actions on the Game boardThe Power actions on the Game board (indicated by orange octa-gons) may only be taken once per round – first come, first served.
Whenever taking one of these Actions, move a number of Power tokens from Bowl III to Bowl I equal to its indicated cost. Then, put an Action token on its space on the Game board to indicate that this Action may not be taken any more this round.
Use Action tokens to cover taken Power actions. Power Actions on the Game board cost 3, 4, or 6 Power.
All the Power actions on the Game board are explained in detail in Appendix I on page 17.
Converions (anytime)Anytime during your turn, on top of your Action, you may do any number of Conversions. Therefore, you have the following options (also depicted in Bowl III on your Faction board):
• Spend 5 Power for 1 Priest.
• Spend 3 Power for 1 Worker.
• Spend 1 Power for 1 Coin.
• Convert a Priest to a Worker.
• Convert a Worker to a Coin.
This illustration reminds you of the available Conversions.
Details• A Conversion is not considered your Turn action.
• On your turn, you may do any number of Conversions before or after your Action.
Sacrificing Power If you do not have enough Power in Bowl III to take a specific Power or Conversion action, on top of your Action, you may move Power tokens from Bowl II to Bowl III and then immediately take the desired Action. However, for each Power token moved in this fashion, you need to remove 1 Power token from Bowl II from the game. From now on, you will irrevocably have to deal with fewer Power tokens in your cycle. (You may not sacrifice Power if you only have 1 Power token in Bowl II.)
These icons remind you of the ability to sacrifice Power.
Power via Cult tracksPower can also be gained on the Cult tracks of Earth, Water, Fire, and Air. You gain 1/2/2/3 Power when advanc-ing to the 3rd/5th/7th/10th space of a Cult track. You only gain this Power once when advancing to or passing by these spaces.
The Nomad player (yellow) gains 4 Power for advancing these 3 spaces in the Cult of Air.
Only one player on space 10Only one player may advance to space 10 of each Cult track. To do so, you also need to have founded a Town for each space 10 you want to advance to. See page 14 for details on founding a Town.
After founding two Towns, you may advance to space 10on two Cult tracks (unlessanother player beats you to it).
5 Send a Priest to the Order of a Cult
There are 4 spaces below each of the Cult tracks of Earth, Water, Fire, and Air that each can hold exactly 1 Priest.As an Action, you may place one of your Priests on one such space to ad-vance 3 or 2 spaces (as indicated on the space) on the corresponding Cult track.
Details• You may gain Power when advancing on a track (see „Power
via Cult tracks“ above). • There is no way of getting these Priests back. Keep in mind that
you only have a total of 7 Priests at your disposal.
If you do not want to lose a Priest, alternatively, return him to your supply (next to your Faction board) and only advance 1 space.

Cultists love rituals. Their entire life is based on strict rules. Even the simplest things are accompanied by se-cret symbols and invocations of the elements. For in-stance, when a Cultist wants to fill a bucket of water from a well, he first needs to appease the elements of earth and water which he is tearing apart, then he also needs to ensure the element of fire that he is not going to extinguish it with that water. This may seem overly elaborate, but the Cultists also greatly benefit from the power of the elements.
rules. Even the simplest things are accompanied by se-cret symbols and invocations of the elements. For in-stance, when a Cultist wants to fill a bucket of water from a well, he first needs to appease the elements of
needs to ensure the element of fire that he is not going to extinguish it with that water. This may seem overly
Witches live in the woods, but they also dominate the air. Riding their brooms, they fly from place to place. This is why a forest that has never seen a Witch before all of a sudden may become full of Witches. Witches are sociable, so they gladly join up in large Witch towns, where they keep trading love potions and portable curs-es with each other.
air. Riding their brooms, they fly from place to place.
all of a sudden may become full of Witches. Witches are sociable, so they gladly join up in large Witch towns,
7 Special actions
Each Special action may be taken only once per round. Special actions, like Power actions, are indicated by or-ange octagons and can be gained in a variety of ways. Some factions unlock a Special action when building their Stronghold. (These are explained in Appendix VI on page 20.)
After building their Stronghold, the Witches may build a free Dwelling once per round.
One Favor tile and one Bonus card provide a Special action to advance 1 space on a Cult track. Another Bonus card provides a free Spade for transforming a Terrain space.
Whenever taking one of these Special actions, you may advance 1 space on a Cult track of your choice.
Use Action tokens to cover taken Special actions.
8 Passing and new Starting player
On your turn, if you cannot or do not want to take any more Action, you have to pass and stop taking Actions for the remainder of this round.The first player to pass becomes the Starting player for the next round (and takes the Starting player token). When passing, immediately return your Bonus cardand take one of the three available ones. This may be a card another player has already returned this round. (Exception: Do not take any Bonus cards in the last round of the game – round 6.) If there were Coins on the newly taken Bonus card, put them on your Faction board (see „Coins on Bonus cards“, page 15).
You may get Victory points when returning certain Bonus cards.
When passing and returning the Bonus card depicted on the right, get 1 Victory point for each of your Dwellings on the Game board.
When passing and returning the Bonus card depicted on the left, get 2 Victory points for each of your Trading houses on the Game board.
When passing and returning the Bonus card depicted on the right, get 4 Victory points if you have already built your Strongholdand/or 4 Victory points if you have already built your Sanctuary.
Hint: Do not forget to get these Victory points. Always pay at-tention to the current Scoring tile: you may get Victory points for building certain Structures, for using Spades, or founding Towns.
Details• Freely choose which one of the three available Bonus cards
you want to take. (You may not immediately take the card thatyou have just returned.)
• You may wish to put the newly taken Bonus card face-down in front of you to indicate that you have already passed.
• There is no limitation for how many resources you may keep for the next round.
• You may take as many Actions as you wish, even if all other players have already passed. As long as there is at least one player left taking Actions, the current Action phase continues.
Founding a Town
During the course of the game, one or more Towns may be founded.Towns are founded automatically whenever these two conditions are met:
• There are at least 4 Structures of one color directly adjacent to one another (see Adjacency, page 11). Exception: Only 3 Structures are required if one of themis a Sanctuary.
• These Structures have a combined Power value of at least 7.
Reminder: Dwellings have a Power value of 1, Trading houses and Temples have a Power value of 2, the Stronghold and Sanctu-ary have a Power value of 3.
Indicate a founded Town by choosing and taking a Town tile (see Appendix V on page 19) and placing it under one of the Structures forming that Town.
Town tileTown tileT

Dwarves are always on a hunt for treasures and valu-able ores, thus engage in non-stop burrowing in soil. Their mines are usually located in the mountains, but in the heat of digging, they sometimes end up digging underneath a neighboring area. Even if this is inhab-ited, its inhabitants most often will only notice when the Dwarves all of a sudden appear on the other side of that area. Dwarves go through so much soil that they are able to form new mountains from the spoil, so that future generations of Dwarves may dig through these all over again.
Mermaids are lovely water creatures inhabiting the waters of Terra Mystica and traveling by its rivers. De-ceived by their charm, many a landsman has forgotten that the Mermaids preferably would like to transform Terra Mystica into a world of water. Mermaids are able to split their fishtail into two legs and traverse through land; however, they only do so when going to flood it with water, or when they need building materials for their floating cities.
Mermaids are lovely water creatures inhabiting the
ceived by their charm, many a landsman has forgotten that the Mermaids preferably would like to transform
to split their fishtail into two legs and traverse through
Fakirs have reduced their physical needs to a mini-mum and tremendously improved their spiritual forc-es. Their spirit rules over matter in such a way that they are able to levitate things like carpets. Carpets are very convenient flying devices when you know how to operate them. In contrast to brooms, they are capable of transporting load. Fakirs prefer to live in deserts as these comply with their meditative lifestyle due to the desert’s considerable lack of plants and animals.
Founding a Town has three benefits: • Immediately get a number of Victory points as indicated by the
chosen Town tile. Get additional Victory points if the current Scoring tile depicts a key.
This Scoring tile awards 5 Victory points for each newly founded Town.
• Immediately and only once, collect the rewards depicted on the chosen Town tile (either +1 space on each of the Cult tracks, 1 Priest, 2 Workers, 6 Coins, or 8 Power).
• Each Town provides a key. Each key allows you to advance to thelast space of one Cult track (space 10). (Without a key, you have to stop at space 9.)
Details• When founding a Town, all Structures directly adjacent to one
another form that Town (Bridges are key here), even if there are more than the required number of Structures.
• Indirect adjacency (especially via River spaces) has no rele-vance when founding a Town. (Exception: The Mermaids may ignore any one River space when founding a Town.)
• Building new Structures directly adjacent to an existing Town expands that Town rather than forming a new one.
• When a Structure is built combining two existing Towns to one larger Town, these Towns do not lose their individual rights or functions (despite the fact that you cannot tell anymore where their borders are).
• The total number of Towns for one game is limited to 10.
When all players have passed (see Action #8 on the left), the cur-rent Action phase is over. In rounds 1 to 5, the Action phase is fol-lowed by a Clean-up phase preparing the next round. (There is no Clean-up phase after the last round.)
Cult BonusesFirst, the Cult bonuses depicted on the current Scoring tile need to be awarded. Each player with enough progress in the depicted Cults gets the depicted reward, multiple times if need be.
In this case, if you were on space 6 in the Cult of Air, you would get 3 Workers, and if you were on space 8 in the Cult of Earth, you would get 2 Spades.
PHASE III: CULT BONUSES AND CLEAN-UP PHASE
Details on the Cult bonus „Spades“• The Cult bonuses are awarded in the play order of the next round.
(This is relevant for Spades.)• You may not acquire additional Spades when getting them as a
Cult bonus. (Neither may the Fakirs do a Carpet Flight, nor the Dwarves
do Tunneling when getting Spades as a Cult bonus. A Carpet Flight and Tunneling have costs that cannot be paid outside the Ac- tion phase. Also, if the Giants get only a single Spade as a Cult bonus, this Spade will be forfeit.)
• You may not save Spades for future turns. • You may apply these Spades on different adjacent Terrain
spaces.• You may not build a Dwelling in Phase III.
Return Action tokensIf there are any Action tokens on
• Power action spaces on the Game board,
• Special action spaces on Faction boards, or
• Favor tiles and Bonus cards,remove them from there.
Coins on Bonus cardsPut 1 Coin from the general supply on each of the three leftover Bonus cards. (If a card has not been taken by any player for two rounds, it will now have 2 Coins on it.)
Turn the Scoring tile face-downAs the last act of the current round, turn the current Scoring tile face-down so that only the Scoring tiles of the following rounds remain face-up.
You can tell by the Scoring tiles in which round you are – in this example: round 3.

Halflings are nice little guys, not overly strong, in-telligent, or apt in magic. So, hard work is their only way to achieve something in life. And with hard work, they achieve amazing things. Wherever a family of Halflings appears, the landscape will become flourish-ing farmland in a heartbeat – and this with only their own hands’ work.
The game ends after all players have passed in the Action phase of the last round. Afterwards, there is a final scoring. (As indicated by the Game end token, there are no Cult bonuses in the final round.)
Cult scoring
Score each of the four Cult tracks individually: • 8 Victory points for the playerhighest on a track.
• 4 Victory points for the player second highest on a track.
• 2 Victory points for the player third highest on a track.
These values are also depicted in the top left corner of the Game board. You can-not gain any Victory points when being still on space 0. In case of a tie, evenly divide the Victory points of the respective tiers among the tied players (round down if necessary).
Area scoring
Determine the number of your Structures directly or indirectly adjacent to one another (see Adjacency, page 11). With the proper Shipping value, scattered areas may be indirectly adjacent to one another (and, thus, considered connected)another (and, thus, considered connected) (and, thus, considered connected)another .
All of the eight depicted Structures are considered connected with a Shipping value of 1. You may skip a single River space at any number of locations on the Game board in order to connect Struc-tures. However, in order to skip two adjacent River spaces, a Ship-ping value of 2 is required.
(For Dwarves, Structures that can be reached via Tunneling are considered connected. For Fakirs, Structures that can be reached via Carpet Flight are also considered connected. Carpet Flight may span over 1 or 2 spaces. The costs for Tunneling and Carpet Flight need not to be paid at this point. However, Witches cannot connect spaces via Witches’ Ride, see last page.)
• The player with the highest number of connected Structures gets 18 Victory points.
• The player with the second highest number of connected Structures gets 12 Victory points.
• The player with the third highest number of connected Structures gets 6 Victory points.
These values are also depicted in the top left corner of the Game board. In case of a tie, evenly divide the Victory points of the respective tiers among the tied players (round down if necessary).
Example: One player has 20 connected Structures, the other three players have 19. The first player gets 18 Victory points. 12+6+0=18 Victory points need to be divided among the other three players. Thus, the other players each get 6 Victory points.
Resource scoring
Finally, get Victory points for left-over resources: get 1 Victory point per 3 Coins. (All other resources may be converted to Coins for this purpose, see „Conversions“ on page 13.) (The Alchemists get 1 Victory point per 2 Coins.)
The winner of the game
The player with the highest number of Victory points wins the game.In case of a tie, there is more than one winner.
Credits
Terra Mystica has been designed by Helge Ostertag. The rules have been adapted to the great variety of game plays in cooperation with co-designer Jens Drögemüller and Uwe Rosenberg. The variety of factions is due to Jens Drögemüller and Helge Ostertag.Dennis Lohausen is responsible for the illustrations and graphic design.The editing has been done by Frank Heeren, who is responsible for the graphic design and for the production, as well as Uwe Rosen-berg, the writer of this rule book.
Representing the many play-testers and supporters, we would like to thank Andreas Buhlmann, Bernadette Beckert, Carsten Stürmer, Christian Wojtko, Christine Heeren, Christof Tisch, Dirk Schmitz, Marcel Straub, Mario Weise, Nicole Strauch, Pan Pollack, Ralph Bruhn, and Stephan Rink.Many thanks to our proof-readers: Grzegorz Kobiela, Inga Blecher, Jesse Dean, Julian Steindorfer, Michael Wißner, Mario Weise, Mo-nika Harke, Rob Thompson, Rob Watson, and Sebastian Wehl-mann. Special thanks to Kay-Viktor Stegemann for the atmospheric ac-companying texts, and Grzegorz Kobiela for the English translati-on of this game.
For questions about this game, feel free to contact us at [email protected]
v1.0
Example:Two players have ad-vanced to space 9 in the Cult of Fire. 8+4=12 Victory points need to be divided be-tween them. Thus, they each get 6 Victory points.
END OF THE GAME AND FINAL SCORING
From all the factions, Swarmlings are the most so-ciable one. They simply cannot bear loneliness. They always wander about in large groups, being in water most of the time, yet they get along on land just as well. And when a Swarmling needs a work done, he may be assured of the help from friends and relatives who will give strong support. This way they even get the tough-est work done.
From all the factions, Swarmlings are the most so-ciable one. They simply cannot bear loneliness. They always wander about in large groups, being in water most of the time, yet they get along on land just as well. And when a Swarmling needs a work done, he may be assured of the help from friends and relatives who will give strong support. This way they even get the tough-
Alchemists strive for a deeper knowledge of the ele-ments forming the world and how to use them for their purposes. They know how to create gold – the process, however, is very elaborate and is only worth its while when you really need that gold. Alchemists prefer to set-tle in Swamps as these provide a steady supply of sulfur and other reagents.
Alchemists strive for a deeper knowledge of the ele-
purposes. They know how to create gold – the process,
There are six appendices. Appendix I explains the Power actions. These Actions are depicted on the Power action spaces on the Game board. Appendix II is about the Favor tiles, Appendix III presents the Town tiles, Appendix IV explains the Bonus cards,
Appendix V features the Scoring tiles, and Appendix VI elaborates on the special rules of all factions.
Appendix I: The Power action spaces on the Game board
In each round, there are six Actions available to all players, but once they are taken, they may not be taken again for the remainder of the current round.
Building a Bridge
By moving 3 Power tokens from Bowl III to Bowl I, you may build a Bridge over a River space. In order to do this, you need to have a Structure on at least one of the Terrain spaces
connected by the Bridge. Building the Bridge connects these Terrain spaces and they become directly adjacent to one another (see „Adjacency“, page 11).
The Game board indicates where Bridges may be built by depicting unfinished bridges.
Details• Without Shipping, you can only reach a Terrain space beyond a
River space by building a Bridge. During your next Action or later, you may then transform this Terrain space and/or build a Dwelling on it (see Action #1, page 9).
• Structures connected via Bridges count towards the founding of aTown (see page 14), whereas indirect adjacency via Shipping does not.
• Once built, you cannot reclaim your Bridges. Keep in mind that you can only build a total of three Bridges.
1 Priest
By moving 3 Power tokens from Bowl III to Bowl I, you may take 1 Priest from your sup-ply and put it on your Faction board.
2 Workers
By moving 4 Power tokens from Bowl III to Bowl I, you may take 2 Workers from the general supply and put them on your Faction board.
7 Coins
By moving 4 Power tokens from Bowl III to Bowl I, you may take 7 Coins from the general supply and put them on your Faction board.
1 Spade
By moving 4 Power tokens from Bowl III to Bowl I, you may take Action #1 „Transform and Build“ (see page 9) getting 1 free Spade for this purpose.
(If this Spade does not suffice to transform a given Terrain space into your Home terrain, you may exchange Workers* for the mis-sing Spades – at the current Exchange rate on your Exchange track.)
Exchange track
2 Spades
By moving 6 Power tokens from Bowl III to Bowl I, you may take Action #1 „Transform and Build“ (see page 9) getting 2 free Spades for this purpose.
(If these Spades do not suffice to transform a given Terrain space into your Home terrain, you may exchange Workers* for the missing Spade – at the current Exchange rate on your Exchange track. If you only need one Spade to transform a Terrain space into your Home terrain, you may spend the second Spade on another Terrain space. However, you may not place a Dwelling on this other space.)
(*Darklings need to exchange 1 Priest for each missing Spade.)
APPENDICES

Appendix II: The Favor tiles
After building a sacred Structure (Temple or Sanctuary), immediately choose and take one Favor tile. (Chaos Magicians always take two Favor tiles.) Put the Favor tile(s) face-up next to your Faction board. You may only have one tile of each type. There are 12 different types of Favor tiles.
• 4 of the Favor tiles, immediately and only once, increase your influence in a given Cult by 3. There is one each of any such tile.
• 8 of the Favor tiles immediately unlock a special ability. Additionally, immediately and only once, they increase your influence in a given Cult by 1 or 2. There are three each of any such tile.
(While advancing on the Cult tracks, you may pass by certain spaces and gain Power, see „Power via Cult tracks“ on page 13.)
Appendix III: The Scoring tiles
Each Scoring tile on the Game board represents one round. Their left side indicates how to get additional Victory points during the Action phase. Their right side displays the Cult bonuses awarded at the end of that round (in Phase III). These bonuses depend on your progress on the Cult tracks (and may be awarded multiple times for the same track). You do not need to spend the progress to get the bonus.
From now on, when founding a Town, your Structures only need to have a combined Power value of 6 instead of 7 (see “Founding a Town”, page 14).
From now on, as a Special action (once per Action phase), you may advance 1 space on a Cult track of your choice. Use an Action token to keep track of using this Special action (see Action #7 on page 14).
In Phase I “Income”, gain 4 additional Power.
In Phase I “Income”, collect 1 additional Worker and gain 1 additional Power.
Action phase: Get 2 additional Victory points when building a Dwelling.End of the round: Put 1 Priest from your sup-ply on your Faction board for every 4 spaces you have advanced in the Cult of Water.
Action phase: Get 2 additional Victory points when building a Dwelling.End of the round: Gain 4 Power for every 4 spaces you have advanced in the Cult of Fire (see page 9 for details on Power).
Action phase: Get 3 additional Victory points when building a Trading house.End of the round: Get 1 Spade for every 4 spaces you have advanced in the Cult of Air and apply them immediately (in the play order of the next round).
Action phase: Get 3 additional Victory points when building a Trading house.End of the round: Get 1 Spade for every 4 spacesyou have advanced in the Cult of Water and applythem immediately (in the play order of the next round).
In Phase I “Income”, collect 3 additional Coins.
When upgrading a Dwelling to a Trading house, immediately get 3 additional Victory points.
From now on, when passing (see Action #8, page 14), get 2/3/3/4 Victory points for 1/2/3/4 of your Trading houses on the Game board.
When building a Dwelling, immediately get 2 additional Victory points.
Action phase: Get 5 additional Victory points when building your Stronghold or Sanctuary.End of the round: Put 1 Worker from the general supply on your Faction board for every 2 spaces you have advanced in the Cult of Air.
Action phase: Get 5 additional Victory points when building your Stronghold or Sanctuary.End of the round: Put 1 Worker from the general supply on your Faction board for every 2 spaces you have advanced in the Cult of Fire.
Action phase: Get 2 additional Victory points for each Spade when using them.End of the round: Put 1 Coin from the general supply on your Faction board for every space you have advanced in the Cult of Earth.
Action phase: Get 5 additional Victory points when founding a Town.End of the round: Get 1 Spade for every 4 spacesyou have advanced in the Cult of Earth and applythem immediately (in the play order of the next round).

Darklings are said to be wicked and smarmy creatures that lure others into dangerous marshy hollows for fun, only to rob and then drown them. Only few have tried to verify these rumors. Darklings are fairly skilled in the elemental cults – that’s for sure. Their priests use their secret knowledge to bog even more land.
When taking this Town tile, get 6 Victory points and gain 8 Power (see page 9 for details on Power).
When taking this Town tile, get 5 Victory points and put 6 Coins from the general supply on your Faction board.
Appendix IV: The Bonus cards
There are nine different Bonus cards (depicted as scrolls). Their main purpose is to get additional income in Phase I. Bonus cards are only valid for a single round. They are returned at the end of each round (see Action #8 on page 14).
Appendix V: The Town tiles
There are two each of 5 different Town tiles. When founding a Town, choose and take one of the remaining Town tiles and with it mark a building in that Town. Each Town tile immediately provides a one-time bonus. (You may have multiple copies of the same Town tile.)
In Phase I “Income”, collect 6 additional Coins.
In Phase I “Income”, collect4 additional Coins. Also, in Phase II, you may take a Spe-cial action to advance 1 space on a Cult track of your choice for free. Use an Action token to keep track of using this Spe-cial action.
In Phase I “Income”, collect 2 additional Workers. Also, when returning this card after passing, get 4 Victory points if you have already built your Stronghold and/or 4 Victory points if you have already built your Sanctuary.
In Phase I “Income”, collect 1 additional Worker and gain 3 additional Power.
In Phase I “Income”, collect 2 additional Coins. Also, in Phase II as a Special action, you may take Action #1 getting 1 free Spade for this purpose. Use an Action token to keep track of using this Special action. (You may acquire additional Spades by paying Workers if this Spade does not suffice to transform into your Home terrain. Darklings pay 1 Priest per Spade.)
In Phase I “Income”, collect 1 additional Worker. Also, whenreturning this card after pass-ing, get 2 Victory points for each of your Trading houseson the Game board.
When taking this Town tile, get 9 Victory points and put 1 Priest from your supply on your Fac-tion board.
When taking this Town tile, get 8 Victory points and move 1 space forward on each of the 4 Cult tracks.
When taking this Town tile, get 7 Victory points and put 2 Workers from the general supply on your Faction board.
In Phase I “Income”,collect 1 additional Priest.
In Phase I “Income”, gain 3 additional Power. Also, in Phase II and for this round only, your Shipping value is increased by 1. If you got this Bonus card in round 6, this increase will not count for the final scoring. (Dwarves and Fakirs do not gain any ad-vantage from this card.)
In Phase I “Income”, collect2 additional Coins. Also, when returning this card after passing, get 1 Victory point for each of your Dwellingson the Game board.

AURENAbility: -Stronghold: After building the Stronghold, immediately and only once get 1 Favor tile. Also, take an Action token. As a Special action (once per Action phase), you may advance 2 spaces on a Cult track of your choice (or on space 10 if you have a key). Use the Action token to keep track of using this Special action.
WITCHESAbility: Get 5 additional Victory points when founding a Town.Festung: After building the Stronghold, take an Action token. As a Spe‘ al action (once per Action phase), you may build 1 Dwelling on an unoccu-pied Forest space. Neither pay 1 Worker, nor 2 Coins for this Dwelling. For this build only, ignore the adjacency rule. You may build on any free Forest space as long as it has been Forest at the beginning of this Action (Witches’ Ride). (Thus, you may not transform a Terrain space beforehand.) Use the Action token to keep track of using this Special action.
ALCHEMISTSAbility: You may trade 1 Victory point for 1 Coin, or 2 Coins for 1 Victory Point anytime and any number of times (Sorcerer’s Stone).Stronghold: After building the Stronghold, immediately and only once gain 12 Power. From now on, gain 2 Power for each Spade you get through-out the remainder of the game (regardless of the way you get the Spade).
DARKLINGSAbility: You need to pay Priests (instead of Workers) when transform-ing Terrain spaces. Pay 1 Priest and get 2 Victory points for each step of transformation.Stronghold: After building the Stronghold, you may immediately and only once trade up to 3 Workers for 1 Priest each (Ordination of Priests).
HALFLINGSAbility: Get 1 additional Victory point for each Spade you get through-out the game (regardless of the way you get the Spade).Stronghold: After building the Stronghold, immediately and only once get 3 Spades to apply on Terrain spaces following the general rules. You may build a Dwelling on exactly one of these spaces by paying its costs.
CULTISTSAbility: Whenever at least one of your opponents decides to take Power due to your building activity, advance 1 space on a Cult track of your choice. (You only get to advance 1 space in total regardless of the number of opponents taking Power. If all of your opponents refuse to take Power, do not advance on a Cult track.) Festung: After building the Stronghold, immediately and only once get 7 Victory points.
ENGINEERSENGINEERSAbility: As an Action, you may build a Bridge for 2 Workers. (You may take this Action any number of times during a round. You may still build Bridges via the respective Power action.)Stronghold: After building the Stronghold, each round when passing, get 3 Victory points for each Bridge connecting two of your Structures.
DWARVESDWARVESAbility: When taking the „Transform and Build“ action, you may skip one Terrain or River space by paying 2 more Workers (Tunneling). Get4 Victory points each time when Tunneling. You have no Shipping. In the final Area scoring, any Structures that can be reached via Tunneling are considered connected (regardless of the number of your leftover Workers).Stronghold: After building the Stronghold, only pay 1 more Worker instead of 2 when Tunneling.
Appendix VI: The Factions
This section provides further details on the 14 factions, their special abilities, and the rewards for building their Stronghold. The factions are sorted by Home terrain. Some factions gain an Action token after building their Stronghold. This token may already be used on the same round.
MERMAIDSAbility: You may skip one River space when founding a Town. (You decide if and when you want to use this ability. When founding a Town in this fashion, put the Town tile on the skipped River space. Of course, you may build Bridges as usual.)Stronghold: After building the Stronghold, immediately and only once move forward 1 space on the Shipping track. Neither pay 1 Worker, nor 4 Coins for this movement. (Take the rewards associated with the new level as indicated on your Faction board.)
SWARMLINGSAbility: Collect 3 Workers when founding a Town.Stronghold: After building the Stronghold, take an Action token. As a Special action (once per Action phase), you may upgrade a Dwelling to a Trading house. Neither pay Coins, nor Workers for this Trading house. Use the Action token to keep track of using this Special action.
CHAOS MAGICIANSAbility: You start the game with only one Dwelling. You may only place this Dwelling after all the other players have build all of theirs (if neces-sary, after the Nomads have placed their third one, see setup on page 5). You get 2 Favor tiles instead of 1 whenever you build a Temple or your Sanctuary.Stronghold: After building the Stronghold, take 1 Action token. As a Special action (once per Action phase), you may take a double-turn. (On this double-turn, take any 2 Actions one after another – passing is also considered an Action.) Use the Action token to keep track of using this Special action.
GIANTSAbility: You always pay exactly 2 Spades to transform a Terrain space into your Home terrain – even for Mountains and Desert. (A single Spade will be forfeit when gained in Phase III as a Cult bonus.)Stronghold: After building the Stronghold, take an Action token. As a Special action (once per Action phase), get 2 free Spades to transform a reachable Terrain space into your Home terrain. On this space, you may immediately build a Dwelling by paying its costs. Use the Action token to keep track of using this Special action.
FAKIRSFAKIRSAbility: When taking the „Transform and Build“ action, you may skip one Terrain or River space by paying 1 more Priest (Carpet Flight). Get 4 Victory points each time when doing a Carpet Flight. In the final Area scoring, any Structures that can be reached via Carpet Flight are consid-ered connected (regardless of the number of your leftover Priests).Stronghold: After building the Stronghold, you may now skip 2 Ter-rain, or 2 River spaces, or one each when doing a Carpet Flight. (This also affects the final Area scoring.)
NOMADSNOMADSAbility: You start the game with 3 instead of 2 Dwellings. Place the third one after all players have placed their second ones (but before the Chaos Magicians have placed their only Dwelling). Stronghold: After building the Stronghold, take an Action token. As a Special action (once per Action phase), you may transform a Terrain space directly adjacent to one of your Structures into your Home terrain (Sand-storm). On this space, you may immediately build a Dwelling by paying its costs. (This ability is not applicable past a River space or Bridge.) Use the Action token to keep track of using this Special action. (The Sandstorm is not considered a Spade.)