technical guide for furnishing & design
TRANSCRIPT

Technical guide for furnishing & design1620x324012+ | 20+
04.2021 - EN


1620x324012+ | 20+
04.2021
Technical guide for furnishing & design
- EN

Index
Introduction 4
1| Technical information 51.1 One surface, a multitude of technical features 6
Technical specifications - furniture industry 8
2| Packaging and packaging materials 13
3| Handling and storage 163.1 Moving A-Frames with a lift truck (forklift) 163.1.1 Loading/Unloading A-Frames on/from Lorries 173.1.2 Loading/Unloading A-Frames into/from Containers 183.2 Handling and Loading/Unloading Big A-Frames 193.3 Handling a single slab 213.4 Storing the Slabs 22
4|Quality Control on Laminam 12+ and Laminam 20+ 244.1 Dimensions 244.2 Thickness 254.3 Planarity 254.4 Shade 274.5 Surface Quality 274.6 Variations in graphics on materials 284.7 Labelling and marking 28
5| Guidelines for designing top surfaces and furnishing complements with Laminam 12+ and Laminam 20+ slabs 29
5.1 Minimum distances from the edges 295.2 Internal Angles 295.3 Designing holes for sinks and hobs 305.3.1 Overtop Installation 325.3.2 Flush Installation 325.3.3 Undertop Installations 335.3.4 Installation with 45° fitting 335.4 Creation of lowered areas in the countertop to place the sink 345.5 Creating a dripstone on Laminam countertops 355.6 Sinks Made in Laminam Ceramic 355.6.1 Making the sink bottom 365.6.2 Making a sink with a tilted integrated drip catcher 385.6.3 Making a sink without a base pan 395.6.4 Making a sink with a base pan 395.6.5 Undertop integration of Laminam sink 395.6.6 Integration of Laminam sink at 45° with the countertop 405.6.7 Ancoraggio e movimentazione dei lavabi integrati 405.7 Verifying the base units and supports for the countertop 415.7.1 Kitchen and bathroom countertops 415.8 Creating protruding parts and overhangs with Laminam 12+ and 20+ 425.9 Tables 435.10 Top joints and extensions 44

6| Laminam processing 466.1 Processing Laminam 12+ and Laminam 20+ slabs 466.1.1 Orientation of slabs during processing 476.1.2 End of processing 486.2 Disc cutting 486.2.1 Cutting Scheme 486.2.2 Indications 506.2.3 Parameters 526.3 Water-jet Processing 526.3.1 Cutting Scheme 536.3.2 Parameters 556.4 Numerical Control Processing 566.4.1 Positioning Suction Pads 576.4.2 Flush Top Processing 586.4.3 Flush Top Processing 596.4.5 Cutting Parameters 606.6 Manual Processing 616.7 Cleaning after processing 62
7| Edges 637.1 Straight Edges and Bevels 637.2 Other types of edges 647.3 Bordo a 45° e Scatolati 647.4 IN-SIDE Edge Finish 667.5 Fibre Abrasion 66
8| Bonding laminam on other materials 67
9| Treatments 68
10| Transport and installation of the finished countertop 6910.1 Packaging and transport 6910.2 Installation 7010.3 Cleaning after installation 71
11| Cleaning, use and maintenance 72
12| Safety information 74
13| Liability disclaimer 75
14| References 76
Certifications 90

Introduction
Every Laminam XL ceramic slab is meticulously manufactured using the most innovative technology available to the ceramic industry. This production line is carefully constructed to deliver precious millimeters of additional usable surface area, allowing savvy manufacturers to expand their design freedom. Available in the size 1620x3240 and thickness of 12,5 mm and 20,5 mm. Laminam surfaces are designed to be used as horizontal furniture surfaces such as table-tops, bathroom and kitchen countertops. Ceramic slabs constitute an alternative to materials like marble and stone, which have higher costs and ecological impacts.Due to their excellent technical performance levels, Laminam slabs are ideal for more delicate uses which require maximum levels of hygiene and resistance. The aesthetic qualities and large slab size provide authentic artistic benefits while guaranteeing continuity of the material throughout the room. Each slab is designed with natural and vibrant colors.
Technical guide for furnishing & design 1620x3240 12+ | 20+4

1|Technical information
Distinctive Values of Laminam 12+ e Laminam 20+Laminam 12+ and Laminam 20 + are slabs in porcelain stoneware in the respective thicknesses of 12,5 mm and 20,5 mm full-body in XL size 1620x3240 mm.Laminam 12+ consists of the basic slab reinforced structurally with a fiberglass mesh glued to the back with a specific adhesive. Its nominal thickness is 12,5 mm (0.49")Laminam 20+ consists of the basic slab reinforced structurally with a fiberglass mesh glued to the back with a specific adhesive. Its nominal thickness is 20,5 mm (0.80").
Use of Laminam 12+ e Laminam 20+
> Bathroom and interior design sector: surfaces for bathrooms and kitchens, tables, furnishing complements.> Construction sector: ventilated facades, raised floors and high traffic walkways, claddings> Shipbuilding sector: finishing material.
Technical specifications for Laminam 12+ e Laminam 20+
Porcelain stoneware obtained by wet-grinding clay, granite and metamorphic rock raw materials together with a feldspar component and ceramic pigments. Specially shaped in a compactor and sintered at 1200°C, with hybrid gas and electrical firing. Structurally reinforced with a fiberglass mesh bonded on the back.
Technical guide for furnishing & design 1620x3240 12+ | 20+ 5

1.1 One surface, a multitude of technical features*
Easy to clean and maintainLaminam is simple, fast and easy to clean. Laminam has no special maintenance requirements as time goes by; generally speaking, all you need to clean the surface is warm water and a neutral detergent.
Hygienic surface Laminam surfaces are ideal for application in places where maximux hygiene is needed.
Suitable for contact with foodstuffsLaboratory tests have proven that Laminam is totally compatible with foodstuffs.
Resistant to mould and fungiLaminam does not allow mould, bacteria or fungi to grow.
Impervious surfaceLaminam surface porosity is average 0,1%.
Resistant to freeze-thawLaminam is frost resistant and suitable for any weather condition, thanks to its low average water absorption (0,1%).
Dimensional stabilityLaminam is not subject to dimensional variations of any significance, as it has a low coefficient of thermal expansion.
Suitable for indoor and outdoor applicationsLaminam can be used both for interior and exterior décor. Weathering exposure does not damage or alter surfaces.
Resistant to heat and high temperaturesThe ceramic surface does not contain any organic materials and so its surface is not altered in case of direct contact with very hot items in the kitchen, like pots and pans, and high temperatures, without any alterations.
Resistant to staining**Laminam is not affected by prolonged contact with products commonly found in the kitchen that can cause staining, such as wine, coffee, olive oil or lemon juice, and its colour or shine will not be affected permanently.
Resistant to detergents and cleaning products*** Laminam resiste al contatto prolungato con i detergenti reperibili in commercio per la pulizia della casa, inclusi sgrassatori e anticalcare. Si pulisce con estrema facilità mantenendo inalterate le caratteristiche della superficie.
Resistant to chamicals, acids, alkalis and solvents*** Laminam is not affected by organic and inorganic solvents, chemical and disinfectants. The only chemical that can damage ceramics is hydrofluoric acid.
Technical guide for furnishing & design 1620x3240 12+ | 20+6

Resistant to thermal shock Laminam slabs are resistant to thermal shock in both indoor and outdoor environments.
Resistant to humidityThe ceramic surface of Laminam is not affected by long-term humidity exposure.
Resistant to UV rays, no alteration to colours Laminam surface is not affected by exposure to UV light and will preserve its original good looks throughout its lifetime.
Resistant to deflectionLaminam has a high modulus of rupture.
Resistant to scratches and abrasions****Laminam is resistant to scratching and deep abrasion. Its properties do not change even if it is subjected to intensive use and frequent cleaning.
Eco-friendly and recyclableLaminam is a product made of 100% natural materials. It does not release any elements into the environment and can be easily milled and recycled in other manufacturing processes.
* For the surface properties of the individual finishes, see technical data sheets at the end of the catalogue** On Lucidato surfaces, stubborn stains must be removed quickly*** On Lucidato surfaces, very aggressive detergents (such as bleach) must be removed quickly **** Laminam slabs with Lucidato finishes, are resistant to deep abrasion, but less resistant to superficial scratches. However, Lucidato surfaces still offer a similar or a better performance than other natural and artificial materials used to make horizontal furnishing surfaces.***** Valid for IN-SIDE technology
IN-SIDE plusThe IN-SIDE technology combines advanced technical performance in terms of resistance and durability of
Laminam surfaces with aesthetic qualities that further respond to the requirements of the furnishing and
architectural industries. Body and surface continuity even after cutting, drilling, edging *****
Technical guide for furnishing & design 1620x3240 12+ | 20+ 7

Technical specifications - furniture industry
* Value relative to the ceramic body onlyThe unique features of Laminam products do not allow for a perfect comparison with ceramic tiles. The test results are therefore only indicative and not binding.
physical and chemical properties norm-test method Laminam 12+ Laminam 12+ Lucidato
density EN 14617-1ASTM C97 2500 kg/m3 (average value) 2500 kg/m3 (average value)
water absorption EN 14617-1 average value ≤ 0,1% * average value ≤ 0,1% *
bending strength EN 14617-2 50 MPa (average value) 50 MPa (average value)
freeze and thaw resistance EN 14617-5 resistant resistant
dry heat resistance EN 12722EN 438-2 par.16 5 (no visible effect till 200°C) 5 (no visible effect till 200°C)
chemical resistance ISO 10545-13 from class A to B from class A to C
chemical resistance ASTM C650 resistant resistant (except potassium hydroxide)
cold liquid resistance EN 12720 5 no visible effect except ink (2) from class 5 to 2
cleaner product resistance PTP 53 CATAS 5 no visible effect from class 5 to 3
abrasion resistance EN 14617-4 28,0 mm 28,0 mm
hygiene properties Metodo CATAS
excellent (high degree of removal of bacterial cells >99% after cleaning with a biocide-free detergent)
excellent (high degree of removal of bacterial cells >99% after cleaning with a biocide-free detergent)
resistance to fungi ASTM G21 no fungal growth no fungal growth
lead and cadmium given off ISO 10545-15 0 mg/dm3 0 mg/dm3
overall migration UNI EN 1186 0 mg/dm^2 no significant migration 0 mg/dm^2 no significant migration
VOC emission UNI EN 16000-9 class A+ french class A+ french
shock resistance ISO 4211-4EN 14617-9
no damage to ball drop 400mm average value 3 J
no damage to ball drop 400mm average value 3 J
light resistance UNI EN 15187 5 no visible effect 5 no visible effect
thermal shock resistance EN 14617-6 resistant resistant
resistance to staining ASTM C1378 resistant resistant (except ink and methylene blue)
Technical guide for furnishing & design 1620x3240 12+ | 20+8

Technical specifications - furniture industry
* Value relative to the ceramic body onlyThe unique features of Laminam products do not allow for a perfect comparison with ceramic tiles. The test results are therefore only indicative and not binding.
physical and chemical properties norm-test method 1620x3240 Full Size
Laminam 12+1620x3240 Full Size Laminam 12+ Lucidato
Full Size: “length and width” nominal size:1620x3240mm size / (63.7”x 127.5”)
Laminamminimum size:≥ 1630x3250mm full size untrimmed
minimum size:≥ 1630x3250mm full size untrimmed
weight Laminam average value 30 kg/m² average value 30 kg/m²
surface quality / % pieces with no visible flaws ISO 10545-2 > 95% > 95%
water absorption ISO 10545-3 /ASTM C373 average value ≤ 0,1% * average value ≤ 0,1% *
breaking strength in N ISO 10545-4 > 4000 *(sample dimensions 400x800 mm)
> 4000 *(sample dimensions 400x800 mm)
modulus of rupture in N / mm² ISO 10545-4 average value 50 *(sample dimensions 400x800 mm)
average value 50 *(sample dimensions 400x800 mm)
resistance to deep abrasion ISO 10545-6 ≤ 175 mm3 ≤ 175 mm3
coefficient of linear thermal expansion / 10-6 /°C ISO 10545-8 6,6 average value * 6,6 average value *
resistance to thermal shock ISO 10545-9 resistant * resistant *
chemical resistance ISO 10545-13 class: from A to B class: from A to C
stain resistance ISO 10545-14 class: from 4 to 5 class: from 2 to 5
resistant to freeze-thaw ISO 10545-12 resistant * resistant *
fire reaction EN 13501 (rev. 2005) A2 - s1,d0 A2 - s1,d0
overall migration UNI EN 1186 0 mg/dm^2 no significant migration no significant migration
VOC emission UNI EN 16000-9 class A+ french class A+ french
shock resistance ISO 4211-4 no damage to ball drop 400mm no damage to ball drop 400mm
light resistance UNI EN 15187 5 no visible effect 5 no visible effect
thermal shock resistance EN 14617-6 resistant resistant
resistance to staining ASTM C1378 resistant resistant (except ink and methylene blue)
Technical guide for furnishing & design 1620x3240 12+ | 20+ 9

* Value relative to the ceramic body onlyThe unique features of Laminam products do not allow for a perfect comparison with ceramic tiles. The test results are therefore only indicative and not binding.vincolanti
Technical specifications - furniture industry
physical and chemical properties norm-test method Laminam 20+ Laminam 20+ Lucidato
density EN 14617-1ASTM C97 2500 kg/m3 (average value) 2500 kg/m3 (average value)
water absorption EN 14617-1 average value ≤ 0,1% * average value ≤ 0,1% *
bending strength EN 14617-2 50 MPa (average value) 50 MPa (average value)
freeze and thaw resistance EN 14617-5 resistant resistant
dry heat resistance EN 12722EN 438-2 par.16 5 (no visible effect till 200°C) 5 (no visible effect till 200°C)
chemical resistance ISO 10545-13 from class A to B from class A to C
chemical resistance ASTM C650 resistant resistant (except potassium hydroxide)
cold liquid resistance EN 12720 5 no visible effect except ink (2) from class 5 to 2
cleaner product resistance PTP 53 CATAS 5 no visible effect from class 5 to 3
abrasion resistance EN 14617-4 28,0 mm 28,0 mm
hygiene properties Metodo CATAS
excellent (high degree of removal of bacterial cells >99% after cleaning with a biocide-free detergent)
excellent (high degree of removal of bacterial cells >99% after cleaning with a biocide-free detergent)
resistance to fungi ASTM G21 no fungal growth no fungal growth
lead and cadmium given off ISO 10545-15 0 mg/dm3 0 mg/dm3
overall migration UNI EN 1186 0 mg/dm^2 no significant migration 0 mg/dm^2 no significant migration
VOC emission UNI EN 16000-9 class A+ french class A+ french
shock resistance ISO 4211-4EN 14617-9
no damage to ball drop 400mm average value 3 J
no damage to ball drop 400mm average value 3 J
light resistance UNI EN 15187 5 no visible effect 5 no visible effect
thermal shock resistance EN 14617-6 resiste / resistant resistant
resistance to staining ASTM C1378 resistant resistant (except ink and methylene blue)
Technical guide for furnishing & design 1620x3240 12+ | 20+10

* Value relative to the ceramic body onlyThe unique features of Laminam products do not allow for a perfect comparison with ceramic tiles. The test results are therefore only indicative and not binding.
Technical specifications - furniture industry
physical and chemical properties
norm-test method
1620x3240 Full Size Laminam 20+
1620x3240 Full Size Laminam 20+ Lucidato
Full Size: “length and width” nominal size:1620x3240mm size / (63.7”x 127.5”)
Laminamminimum size:≥ 1630x3250mm full size untrimmed
minimum size:≥ 1630x3250mm full size untrimmed
weight Laminam average value 50,4 kg/m² average value 50,4 kg/m²
surface quality / % pieces with no visible flaws ISO 10545-2 > 95% > 95%
water absorption ISO 10545-3 /ASTM C373 average value ≤ 0,1% * average value ≤ 0,1% *
breaking strength in N ISO 10545-4 > 10000 *(sample dimensions 400x800 mm)
> 10000 *(sample dimensions 400x800 mm)
modulus of rupture in N / mm² ISO 10545-4 average value 50 *(sample dimensions 400x800 mm)
average value 50 *(sample dimensions 400x800 mm)
resistance to deep abrasion ISO 10545-6 ≤ 175 mm3 ≤ 175 mm3
coefficient of linear thermal expansion / 10-6 /°C ISO 10545-8 6,6 average value * 6,6 average value *
resistance to thermal shock ISO 10545-9 resistant * resistant *
chemical resistance ISO 10545-13 class: from A to B class: from A to C
stain resistance ISO 10545-14 class: from 4 to 5 class: from 2 to 5
resistant to freeze-thaw ISO 10545-12 resistant * resistant *
fire reaction EN 13501 (rev. 2005) A2 - s1,d0 A2 - s1,d0
overall migration UNI EN 1186 0 mg/dm^2 no significant migration 0 mg/dm^2 no significant migration
VOC emission UNI EN 16000-9 class A+ french class A+ french
shock resistance ISO 4211-4EN 14617-9
no damage to ball drop 400mm average value 3 J
no damage to ball drop 400mm average value 3 J
light resistance UNI EN 15187 5 no visible effect 5 no visible effect
thermal shock resistance EN 14617-6 resistant resistant
resistance to staining ASTM C1378 resistant resistant (except ink and methylene blue)
Technical guide for furnishing & design 1620x3240 12+ | 20+ 11

Laminam12+ 1620x3240
KitchenLaminam Showroom FioranoIn-Side,Porfido Marrone Naturale
Technical guide for furnishing & design 1620x3240 12+ | 20+12

2|Packaging and packaging materials
Laminam 12+ and 20+ Full Size 1620X3240 slabs are packaged and positioned vertically on IPPC_FAO “A Frames” in galvanised metal.
760
3241
3280
1148 1148
573 573
4673
1780
B B
A
96
A A A
194 194
96
3241
760
A A
B
B
Technical guide for furnishing & design 1620x3240 12+ | 20+ 13

For transport in 20’ containers, Laminam 12+ and 20+ Full Size 1620X3240 slabs can be packaged on Big A frames, with dimensions and characteristics that are different from the regular A-frame, so that it can carry a greater number of slabs.
* Untrimmed end product.
Laminam slabs are packaged with a thin layer of wax placed between the slabs in order to protect the surfaces. Before processing the slab, we suggest removing the wax with a wooden spreader and denatured alcohol.
sizes /mm pcs per A-frame sqm per A-frame kg per A-frame mm total A-frame size /inch
Laminam 12 +Full Size* 1620x3240 mm63.7”x127.7”
20 105 3310 3280x760x1970h129.1”x29.9”x77.5h”
Laminam 20 +Full Size* 1620x3240 mm63.7”x127.7”
12 63 3335 3280x760x1975h129.1”x29.9”x77.7h”
sizes /mm pcs per Big-frame sqm per Big-frame kg per Big-frame mm total Big-frame size /inch
Laminam 12 +Full Size* 1620x3240 mm63.7”x127.7”
120 630 19011 3280x2220x1755h129.13”x87.4”x69.09h”
Laminam 20 +Full Size* 1620x3240 mm63.7”x127.7”
72 378 19351 3280x2220x1755h129.13”x87.4”x69.09h”
Technical guide for furnishing & design 1620x3240 12+ | 20+14

Below are examples of loading schemes for Laminam 12+ and Laminam 20+ slabs, which can vary depending on the type of vehicle, capacity and destination country. These indications must be verified against the current regulations in the destination country.
* Untrimmed end product.
A-FrameLaminam 12 +Full Size* 1620x3240 mm63.7”x127.7”
Container 20' Container 40' Lorry (13.60m)
A-frames for loading 3 8 8
Slabs for loading 60 180 180
Sqm for loading 315 945 945
Max total weight 9.840 26.230 26.230
A-FrameLaminam 20 +Full Size* 1620x3240 mm63.7”x127.7”
Container 20' Container 40' Lorry (13.60m)
A-frames for loading 3 8 8
Slabs for loading 36 108 108
Sqm for loading 189 567 567
Max total weight 10.005 26.685 26.685
Big A-FrameLaminam 12 +Full Size* 1620x3240 mm63.7”x127.7”
Container 20'
Big A-frames for loading 1
Slabs for loading 120
Sqm for loading 633
Max total weight 19.011
Big A-FrameLaminam 20 +Full Size* 1620x3240 mm63.7”x127.7”
Container 20'
Big A-frames for loading 1
Slabs for loading 72
Sqm for loading 378
Max total weight 19.351
Technical guide for furnishing & design 1620x3240 12+ | 20+ 15

BB
A
A
A
A
A-frame forked in grab point B, using long forks at least 2800 mm
A-Frame inforcato dal punto di presa A with a space in-between of at least 740mm
3|Handling and storage
Laminam 1620x3240mm slabs must be handled under safe conditions and in such a way as to preserve their original appearance and prevent accidental breakage. We recommend extreme care during handling phases to ensure that the area is clear and people are not walking through.
3.1 Moving A-Frames with a lift truck (forklift)
Before the handling phase, the A-frame must be loaded symmetrically to avoid problems of instability.The operator must verify that the slabs are secured to the A-frame with the specific hoops before beginning the handling process. It is important to be very careful when handling the material because the outer edges of slabs loaded onto the A-frames are not protected.
A-frames have two grab points for handling with the lift truck: “A” is the transversal grab point; center distance of at least 740mm. “B” is the longitudinal grab point.
Use a lift truck with a suitable maximum load capacity. Laminam slabs loaded on A-frames in the warehouse or at the manufacturer must be handled preferably using the “A” transversal grab point. This means loading the A-frame on the lift truck on the 3240mm side, using forks that are at least 1200 mm long and a lift truck with a capacity of at least 5000 Kg. If instead it is decided to use the “B” grab point, it will be necessary to use a lift truck with a capacity of 5000 Kg with forks extending at least 2800 mm in length. Make sure that the load is balanced and stable on the forks and that it does not sway. During the loading and unloading phases, from the lorry and the container, insert the forks under the A-frame with the help of the two grab points “A” and “B” as specified in the following paragraphs. When loading/unloading and in subsequent transport of even one single slab, secure the slab(s) to the A-frame with hoops/bands in cloth or plastic. Do not use metal chains to secure the slab. Before freeing the material from the hoops that secure it to the A-frame, make sure that the A-frame is positioned on a level surface to avoid any risk of the slabs falling.
Technical guide for furnishing & design 1620x3240 12+ | 20+16

3.1.1 Loading/Unloading A-Frames on/from Lorries
To load or unload slabs on a lorry with an openable bed, position the lift truck forks under the A-frame in the two “A” grab points with a center distance of at least 740 mm.
Use forks with a minimum length of 1200 mm to and place the A-frame in a central position on the lorry.
To safely transport slabs on lorries, fasten the A-frames to the lorry bed by securing them at the base of the wooden platform and also at the tallest point of the metal structure. Use suitable straps in polyester or similar materials to secure the A-frames. To load other rows of A-frames, make sure the distance between the slabs is at least 50 mm.
Before unloading, always check to see how the A-frames were blocked so that you can effectively remove those blocks.
When loading and unloading, the operator must pay attention to people in the surrounding areas and avoid instability of the load. For this reason, the load must always be kept low during transport and raised only when it is near enough to the lorry to be loaded.
Below is an example of loading an A-frame on a standard lorry 13.60 m in length.
pag 21
50 mm
A
A
A
A
A
A
A
A
A
A
A
A
Technical guide for furnishing & design 1620x3240 12+ | 20+ 17

3.1.2 Loading/Unloading A-Frames into/from Containers
Use a pallet mover or lift truck with 5000 kg capacity, with extensions of a minimum length of 2.80 m during the loading and unloading phases of the material if using a container. The operator handles the full A-frame, picking it up and lifting it from the two “B” grab points.
When loading, verify the correct stability of the material, and tie and fasten the A-frames together and to the cargo area. For safe transport in containers, fill the empty space between A-frames and rows of A-frames with airbags.
Before unloading, always check to see how the A-frames were blocked so that you can effectively remove those blocks. Outside the container, always handle the material by lifting the A-frames with the “A” grab points.
BB
B
BB
B
Technical guide for furnishing & design 1620x3240 12+ | 20+18

3.2 Handling and Loading/Unloading Big A-Frames
The Big A-frame is directly assembled inside 20’ containers by Laminam personnel. The central nucleus of the A-Frame is made up of three metal elements set at equal distances apart by tubular pieces. At the base of these elements, two wooden platforms marked FAO are prepared where the slabs will be placed.
To preserve the integrity of the slabs during transport, wooden elements called “stoppers” are positioned on the front and rear of the container to keep the slabs from moving in a longitudinal direction. To limit transversal movement of the slabs, four airbags are inflated on site, just before the container is closed, and set on the sides of the A-frame.
pag 23
Technical guide for furnishing & design 1620x3240 12+ | 20+ 19

The slabs are packaged and loaded in groups of ten for 12+ and of six for 20+. To load/unload these groups of slabs, it is necessary to use lifting equipment with straps similar to the photo below, mounted on a lift truck with a 7000 Kg capacity. Alternatively, a crane can be used with a lifting arm that is usually used for handling marble slabs.
These groups of slabs must be loaded symmetrically to keep the structure balanced and to place 20 for 12+ and 12 for 20+. Place a 2 cm sheet of polystyrene between the slabs to allow the straps to be inserted during the unloading phase.
To increase safety and stability of the container, the groups of slabs must be tied together with hoops. When unloading, we suggest using a similar tool and the same operative method to avoid unbalanced loads and accidental breakage.
Technical guide for furnishing & design 1620x3240 12+ | 20+20

3.3 Handling a single slab
When removing the Laminam Full Size 1620x3240 12+ and 20+ slabs from the A-frames, it is necessary to alternate sides for greater safety. Removing one slab from one side and the next slab from the other keeps the load symmetrical and more stable.
To move one single Laminam slab and position it on a rack or a machine that will process it, it is possible to use suction pad lifting equipment with several grab points supported by an overhead travelling crane or a jib crane, depending on the weight of the individual slab.
The single slab can also be moved with cloth straps coated in rubber. Never use chains or steel cable because these materials can damage the ceramics. In fact, chains and steel would scratch the surfaces of polished materials and could leave steel residue on natural materials which would then require careful cleaning. If handling with grippers, insert rubber grip covers to protect polished Laminam slabs.
Technical guide for furnishing & design 1620x3240 12+ | 20+ 21

3.4 Storing the Slabs
Laminam slabs can be stocked in warehouses on specific supports and metal structures like tripods or racks, suitably constructed and with protective structures in wood, rubber or plastic where the slabs will be positioned vertically. The A-frame used for packaging the Laminam slabs can also be used to store them. Safely store the material using dedicated wedges or belts to prevent sliding.
If stored outside, it is advisable to make sure that the stability of the A-frame is guaranteed in case of harsh weather. The slabs set vertically on the A-frames will bend slightly when they are set down. This is not a defect of the product and does not compromise processing in any way. This bending disappears when the slab is set on a horizontal surface.
Technical guide for furnishing & design 1620x3240 12+ | 20+22

Regardless of the storage method, we advise not setting other materials on top of Laminam slabs, especially on polished finishes (Lucidato). If it is necessary to place something on the slab, separate the materials with appropriate spacers.
When storing slabs with polished finishes, insert spacers (such as polystyrene sheets or wooden slats) between them if the wax coating cannot be guaranteed, or if the wax is not sufficient to prevent contact between the slabs during their handling at a later time
Wax spacers
Technical guide for furnishing & design 1620x3240 12+ | 20+ 23

4|Quality Control on Laminam 12+ and Laminam 20+
The Laminam 12+ and Laminam 20+ slabs are made of natural raw materials and carefully produced and selected in accordance with the high quality standards that Laminam S.p.A has set as objectives.The manufacturer (slab processer) must inspect the slab before beginning processing operations and after careful cleaning of the surface under inspection.
Any nonconformities that emerge must be reported before the slab is processed.Laminam S.p.A will not accept defect reports or claims after the slab has been processed and/or installed.
4.1 Dimensions
The term “Full Size” means that the slab has ended the production cycle without being trimmed. This is the size destined to be processed, because it gives manufacturers the opportunity to optimize their possible cutting schemes depending on the project.
The size with dimensions 1620x3240 mm can be obtained from each slab, which corresponds to the useable surface area and the billable quantity.
Technical guide for furnishing & design 1620x3240 12+ | 20+24

4.2 Thickness
Laminam 12+ Laminam 20+
Nominal thickness Laminam 12+ 12,5 mm Nominal thickness Laminam 20+ 20,5 mm
Tolerance +/- 0.5 mm Tolerance +/- 0.5 mm
4.3 Planarity
To verify planarity, position the single Laminam slab with the decorated face turned upwards on a reference surface, for example in metal, which is perfectly horizontal and stable.
Do not check planarity when the slab is in a vertical position because it will bend. The max 2mm tolerance refers to a full size slab and also to non-standard sizes which have been cut from a full size slab.
Laminam 12+Planarità
Laminam 20+Planarità
Side 1620 mm max 2 mm Side 1620 mm max 2 mm
Side 3240 mm max 2 mm Side 3240 mm max 2 mm
Technical guide for furnishing & design 1620x3240 12+ | 20+ 25

1620 1620
3240 3240
1620 1620
3240 3240
1620 1620
3240 3240
1620 1620
3240 3240
Convex planarity must be measured with an aluminum rod held parallel with one of the sides to verify. It is possible to assess the portion of the slab which presents a possible flexure by using a 2mm thickness gauge. If the thickness gauge does not pass underneath, there is no problem with planarity.
Concave planarity can be verified using a perfectly flat horizontal surface as a reference and a thickness gauge of 2mm representing the flexure tolerance of the slab. If the thickness gauge does not pass underneath, there is no problem with planarity.
Straight edge
Connection surface
Technical guide for furnishing & design 1620x3240 12+ | 20+26

4.4 Shade
Laminam 12+ and Laminam 20+ slabs are produced from natural raw materials and obtained through an industrial process. Even though they are not subjected to important aesthetic variations like natural stones, the type of raw material used to manufacture them ensures that there are minimal chromatic variations. The production process at Laminam S.p.A. involves an attentive selection phase to identify and mark the different shades, thus guaranteeing that the product always be within the company’s predetermined tolerance margins. These variations are to be considered a natural characteristic of Laminam slabs. Slabs with the same finish but different dimensions and thicknesses will always have a different shade, but this will always be in the company’s preset range. In building projects, we suggest not placing slabs of the same finish and different thicknesses, which have different shades, side by side on the same floor. A single package of slabs can contain several shades of the same finish, and this information will be marked on the label on each slab. Therefore, it is necessary to verify the uniformity in shade to build projects that require the use of several slabs. Each shade is not repeatable. If the finish is still in production, on request, Laminam S.p.A. can search the material available in the warehouse and supply the shade closest to the slabs purchased previously.
4.5 Surface Quality
Laminam slabs are obtained through the use of natural raw materials which have been fired at high temperatures (> 1200°C). These conditions can cause the formation of irregularities typical of natural products. Some of these characteristics can be considered as covered by the tolerance, but others will cause the slab to be declassed.
Laminam S.p.A classifies two distinct categories of Laminam 12+ and Laminam 20+ slabs, in terms of surface quality: Q1, first pick; Q2 second pick. In accordance with the ceramic regulations of the sector, the aesthetic conformity of the surface of Laminam materials must be verified by visual inspection by placing the slab in a horizontal position, with natural or artificial light aimed perpendicularly at the surface being observed (not backlighting) at a distance of not less than 1 m.
Q1– first choiceThis category includes Laminam slabs that comply with the following surface tolerances:
Irregularity* similar colour Radius: ≤ 3 mm
Irregularities* different colour Radius: 1 mm
Scratches (polished surfaces) Defects that are visible with natural light from a distance of 1 m on mechanically processed surfaces are nonconformities.
Q2 – second choice Anything that does not make the Q1 category except for cracks/broken angles greater than 20 cm. This material is declassed to 2nd pick (Q2).
*Irregularities are: dots, roughness, holes/hollows.
Technical guide for furnishing & design 1620x3240 12+ | 20+ 27

4.6 Variations in graphics on materials
Each series of Laminam products is made in one or more graphics. Slabs with the same graphics present minimal deviations of pattern symmetry, which mimic the characteristic variety present in natural materials.This feature could be more evident in the graphics that represent veining.
In the series that feature book match, at the same level of centering, the tolerance in the graphics between slabs ranges within 3cm, except for when the manufacturer obtains a better result by verifying the point of cutting and joining the slabs.
4.7 Labelling and marking
Every Laminam slab is identified with a label bearing important information about the product code, shade, size, production date and time, quality and finish.
The website URL www.laminam.com is also on the label, where technical information about the product is available. The label bears a 12-character serial number that uniquely identifies the slab produced. This information can be found within the label’s QRcode.
The following references are printed on one of the short sides of the slab to enable slab recognition during warehouse storage: item code, shade, choice, serial number (only for Q1) and item description.
Es.: F009913 815_B Q1 B12420886007 I NAT.ARDESIA NERO A SPACCO 1620X3240 XL Lam. 20+
Technical guide for furnishing & design 1620x3240 12+ | 20+28

5|Guidelines for designing top surfaces and furnishing complements with
Laminam 12+ and Laminam 20+ slabs
5.1 Minimum distances from the edges
Always design kitchen countertops with a minimum of 50mm from the external edge in the presence of holes and cutouts. The same minimum distance must be kept also with adjacent openings.
min 50 mm
min 30 mmmin 30 mm
min 50 mm
min 50 mm
5.2 Internal Angles
To create internal angles and openings, make a fitting in correspondence with the minimum radius equal to 5 mm, to distribute stresses, like which processing natural stone, marble and composite stone
R ≥ 5 mm
pag 36
The creation of internal 90° angles is not advisable. Like for all rigid materials such as marble, natural stone, composite quartz, and glass, it may be done under the responsibility of the operator on the basis of his/her own experience, with processes that the operator has tested and deems suitable. This processing increases the possibilities of crazing during the phases of handling, manufacturing, transport and installation of the surface and the subsequent settling of the different kitchen base units.
Technical guide for furnishing & design 1620x3240 12+ | 20+ 29

5.3 Designing holes for sinks and hobs
Processing Laminam 12+ and 20+ slabs to obtain holes for the placement of sinks or appliances must be done only after careful assessments of the processing measurements shown on the technical sheet of the product to install, depending on the installation method.
A minimum distance of at least 2 mm is required between the hob and the Laminam slab, to accommodate thermal expansion, unless a greater distance is envisaged by the appliance manufacturer. The gap must be filled with an appropriate sealant.
2 mm 2 mm
2 mm
Max 4mm x 12+Max 8mm x 20+
2 mm 2 mm
2 mm
Max 4mm x 12+Max 8mm x 20+
2 mm 2 mm
2 mm
Max 4mm x 12+Max 8mm x 20+
Stove installed on countertop
Silicone or gasket
Stove
Laminan
Stove flush with the countertop
Silicone or gasket
Silicone or gasket
Stove
Laminam
When applying silicone, protect the surface with adhesive tape
Technical guide for furnishing & design 1620x3240 12+ | 20+30

With regard to the project (such as in case of repeated grooves close together), assess the possible need for reinforcing the perimeter of the cutout by applying a Laminam slat with a suitable adhesive under the countertop.
If the base unit has sliding drawers, these supports must be suitably shaped to allow them to slide properly.
Regardless of the type of sink defined in the project, support bars or other equivalent systems must be fixed to the unit structure to hold the weight of the slab and the water that it can contain, so that it will not be dependent on the slab.
Technical guide for furnishing & design 1620x3240 12+ | 20+ 31

Laminam12+ and Laminam 20+ slabs can be processed to obtain different configurations for sinks and hobs.
5.3.1 Overtop Installation
This is a simpler, more traditional type of installation, which involves having a protruding edge a few millimeters wide overlapping the countertop.
1 mm
5.3.2 Flush Installation
The flush sink/hob is inserted into a hole that has a maximum depth of 3/4millimetres carved out of the Laminam 12+ slab and 6/8 millimeters on the Laminam 20+ slab. The depth of the hole varies depending on the thickness of the edge of the sink or hob to install in the countertop. This is a practical solution for cleaning, but it requires more care during assembly.
1 mm
Technical guide for furnishing & design 1620x3240 12+ | 20+32

5.3.3 Undertop Installations
Used for sinks, this solution makes it possible to have surface uniformity on the countertop because there is no edge. To increase the resistance of the Laminam 12+/20+ slab edge near the hole, make a bevel of at least 2mm. Consider that rounded bevels guarantee greater resistance to shock. This type allows the use of Laminam sinks made as per indications in the following paragraph.This solution facilitates cleaning and hygiene of the countertop, given the absence of protrusions that can trap dust and dirt.
1 mm
5.3.4 Installation with 45° fitting
The 45° integration of the countertop with the sink is possible when the sink is made of Laminam material, as indicated in the subsequent paragraph 5.6. It requires holes at 90°, and all indications listed in the paragraph 5.2 remain valid.
Technical guide for furnishing & design 1620x3240 12+ | 20+ 33

5.4 Creation of lowered areas in the countertop to place the sink
Some counters are designed so that the area around the sink is lower than the top surface.To avoid mounting slats horizontally to compensate for the two heights, we suggest limiting the lower depth to 8mm for 12mm slabs and 12mm for 20mm slabs.
122012
8
122012
8
This method allows the lowered part of the countertop to remain horizontal, and therefore the perimeter around the sink can contain the dispersion of liquid without spilling over onto the rest of the top.
122012
8
In this lowered portion, it is possible to mount any type of sink in all methods described above. To guarantee the correct installation of this type of top on all kitchen base units, it will probably be necessary to adapt the vertical profiles of bases in the lowered areas. If the countertop requires the presence of a frontal horizontal reinforcement, a suitable lightweight material (like Eulite) can be installed to restore a horizontal area to apply directly to the kitchen base units.
Laminam
Lightened material
Laminam
Lightened material
Technical guide for furnishing & design 1620x3240 12+ | 20+34

5.5 Creating a dripstone on Laminam countertops
Near the sink cutout, it is possible to make drip catcher channels with a suitable grade to make the water drain into the sink. These channels can be made with specific tools mounted on CNC machines or with specific disks on disk machines. The abraded parts lose the technical performance of the surface, and therefore must be treated with specific products as indicated in Chapter 9.
5.6 Sinks Made in Laminam Ceramic
A sink made in the same surface material as the countertop is a functional, practical aesthetic solution that harmoniously integrates the sink with the rest of the architecture and design of the kitchen where it is installed.There are several methods for building a sink in Laminam ceramic, which vary from manufacturer to manufacturer based on the specific experience. Since the material can be processed using the same technology required for natural stone, the architectural solutions are possibly infinite for creating surfaces on several levels, and therefore also sinks.
Below, a few of the more popular methods are described, requested for their high level of artisan craftsmanship. Manufacturers can guarantee these methods exclusively because they are an expression of each artisan’s own experience. This information provides a rough indication and is not binding.
Since the manufacturer must guarantee the sink and considering the particular nature of the processing and the high level of artisan craftsmanship necessary, we suggest making mock ups and subjecting them to the normal stresses of use to offer the client a tested solution. These items usually require care during packing, transport and installation, and attention to all attachment points that must guarantee stability over time.
Technical guide for furnishing & design 1620x3240 12+ | 20+ 35

5.6.1 Making the sink bottom
When making the sink, it is important that the bottom part guarantee that water can run off correctly and allow correct cleaning.
Sink bottoms can be made: By using more than one portion of slab specifically shaped and glued together to create the right slant towards the drain.
With a single removable piece of slab when mounting a readily serviceable drain that flows into a containment tank.
Technical guide for furnishing & design 1620x3240 12+ | 20+36

By abrading a portion of slab to form the base for setting the sink walls and the correct slope towards the designed drain point.
This process can be performed on IN-SIDE finishes, which are overall compatible with the surface finish, not including veins present in the thickness.
The slab thus processed will, anyhow, present differences in shade and graphics even after treatment, compared to the original slab, without this being considered a defect. For a uniform internal sink surface, repeat the process also on the vertical areas, if necessary.
For Laminam 20+, we suggest creating a min. 5 mm rounded connection between the perimeter portion forming the base of the walls and the rest of the bottom, to ensure easy cleaning.
R 5mm
20 mm
20 m
m12
mm
8 mm
12 mm
12 mm
R 5mm
20 mm
20 m
m12
mm
8 mm
12 mm
12 mm
From this edge to the drain point, the bottom slab will be abraded to give it the right slope. This processing is generally done with a technique that has already been used to shape natural stone, using tools and parameters that are suitable for stoneware.
The ceramic surface obtained in this manner must be treated with specific products to restore the characteristics of non-absorbency and stain resistance as indicated in Chapter 9. On these portions, Laminam does not guarantee the level of performance listed in the technical sheets.
Technical guide for furnishing & design 1620x3240 12+ | 20+ 37

5.6.2 Making a sink with a tilted integrated drip catcher
Both types of basins created in Laminam ceramic, in the two methods described below, can be integrated with an inclined portion of slab that functions as a drip catcher and is joined to the rest of the countertop.Inclining a portion of slab directly instead of abrading it to create a slope, or creating inclined channels (large grooves), will maintain the surface characteristics of the material intact.
Making these components, which could require cutting 90° angles, as already specified in paragraph 5.2, must be done exclusively by companies with extensive experience in these processes. It is necessary to pay particular attention to the kitchen countertop and base units to guarantee the correct installation of the sink and the consequent resistance level.
Technical guide for furnishing & design 1620x3240 12+ | 20+38

5.6.3 Making a sink without a base pan
It is possible to make a sink by gluing together pieces of suitably shaped Laminam 12+ and 20+ slabs. This method usually does not include a containment tank in another material, and therefore must directly guarantee watertightness and water drainage, through the correct bonding and slope of the component portions.
5.6.4 Making a sink with a base pan
Another advisable method for making a sink in Laminam ceramic consists in cladding a base pan that is anchored to the countertop and has the right slope to guarantee water drainage.Using a base pan guarantees further watertightness and functions as a support for the individual portions of shaped slab that form the sink.
This method makes it possible to make a sink with a readily serviceable drain, and therefore without having to be watertight. The base pan provides that function.
Pieces of Laminam 12 and 20 slabs of the same type used to make the countertop can be bonded to the base pan, but it is also possible to use slabs 5.6mm thick to reduce the weight of the sink.
In this case, the material will definitely be a different shade than the top and, given the reduced thickness, they guarantee less shock resistance.
The base pan can be made of different materials, built by the manufacturer or purchased on the market, such as for example, models in steel. The slab portions must be glued to the base pan with full spread of adhesive, without leaving empty parts, and using a glue that is suitable for the material.
5.6.5 Undertop integration of Laminam sink
In this type of installation, the sink basin is mounted under the top following the instructions given if paragraph 5.3.3, and therefore the edge of the top is visible in the sink. Even if the internal cladding of the basin is assembled at 90°, this solution allows tops to be made with radiused angles on the cutout, which guarantee greater resistance
Technical guide for furnishing & design 1620x3240 12+ | 20+ 39

5.6.6 Integration of Laminam sink at 45° with the countertop
This type of application involves the sides of the Laminam ceramic sink being joined at 45° angles with the kitchen countertop to ensure maximum continuity and the best aesthetic result.
This process requires cutting 90° angles, as specified in the previous paragraph 5.2, and must be undertaken only by specialized manufacturers that are able to guarantee the work, after having run all the tests deemed necessary.
The joint between the sink walls and the countertop should have a bevel of at least 2mm.
5.6.7 Ancoraggio e movimentazione dei lavabi integrati
Sinks made with these methods are sometimes supplied by the manufacturer preassembled with the countertops. Other times, they are assembled when the kitchen is installed. Since they are quite heavy, in addition to reinforcing the perimeter of the cutout in the countertop, it is important to pay close attention to the supports placed underneath the sink, as described in the paragraph 5.3, to prevent the weight of the sink from being supported completely by the countertop. The sink can be anchored to the countertop with mechanical fixings and/or epoxy adhesives.
Laminam
Laminam
Sink
Supporting slat
Glue GlueLaminam
Laminam
Sink
Bushing
Glue
Technical guide for furnishing & design 1620x3240 12+ | 20+40

5.7 Verifying the base units and supports for the countertop
5.7.1 Kitchen and bathroom countertops
Since the counter is the top surface of the furniture that forms the base of the kitchen or the bathroom, it is fundamental that the design process include checking to make sure that the supports are suitable and sufficient in number to guarantee adequate support and resistance over time.
Surfaces made of Laminam 12+ and 20+ slabs can be supported by transversal bases without other supports, up to a maximum center distance of 1200mm.
When the countertop has cutouts for inserting sinks or hobs, reinforcements must be inserted between the transversal bases to support the weight of that portion of the top, while preventing it from being supported only by the perimeter parts of the holes. Crazing could result from failure to provide adequate support. Generally speaking, in kitchens with doors that open and disappear, a “groove” or “recess” is inserted under the top, along the entire front of the kitchen. This feature normally guarantees perfect levelling between the kitchen base units, and a reinforcement where there are cutouts on the countertop.
The cutouts for a sink and hob inserted into an island unit must also be supported along the entire perimeter.
MAX 1200 mm
The manufacturer can mount reinforcements underneath a countertop which is designed to set on base units that are very far apart, or which requires greater resistance for reasons linked to dimensions, logistics, or other factors.
These reinforcements will normally be made from slats obtained from Laminam 12+ or 20+ slabs (ideal because they have the same expansion coefficient as the countertop), with steel bars or panels in plywood or rigid foam. All reinforcements must be installed with glue/silicone products with suitable horizontal elasticity to compensate for possible expansion between the two products.
Technical guide for furnishing & design 1620x3240 12+ | 20+ 41

5.8 Creating protruding parts and overhangs with Laminam 12+ and 20+
Laminam 12+ and 20+ slabs have been tested with a precise static load of 100 kg applied at a distance of 50 mm from the external edge of the protruding part without using substrates. When there is a protruding part, pay particular attention to anchor the countertops to the bases, whether mechanically or using an adhesive, in order to prevent the lever effect from causing countertop movements that might produce crazing especially near the holes.
Given below are the maximum values of protruding parts suggested for Laminam 12+/20+ with unit width 600-3240 mm.
Laminam 12+ O max 350 mm
Laminam 20+ O max 450 mm
The part of the countertop placed on a protruding part must guarantee a depth free of holes that are at least equal to the protruding part, with the sole exception of the circular hole for taps.
D4
O
O
S≥O
D2
D1
D3
W
W ≥ 600 mm
O = Protruding wall
S = Area with substrate
D1 ≥ 100 mm
D2 ≥ 100 mm
D3 ≥ 100 mm
D1+D2 ≥ O
W ≥ 600 mm
O = Protruding wall
S = Area with substrate
D1 ≥ 600 mm
D2 ≥ 600 mm
D3 ≥ 100 mm
D4 ≥ 100 mm
D1
D2
D3
O
S≥O
W
Technical guide for furnishing & design 1620x3240 12+ | 20+42
D3
O
D2
D1
W
S<O
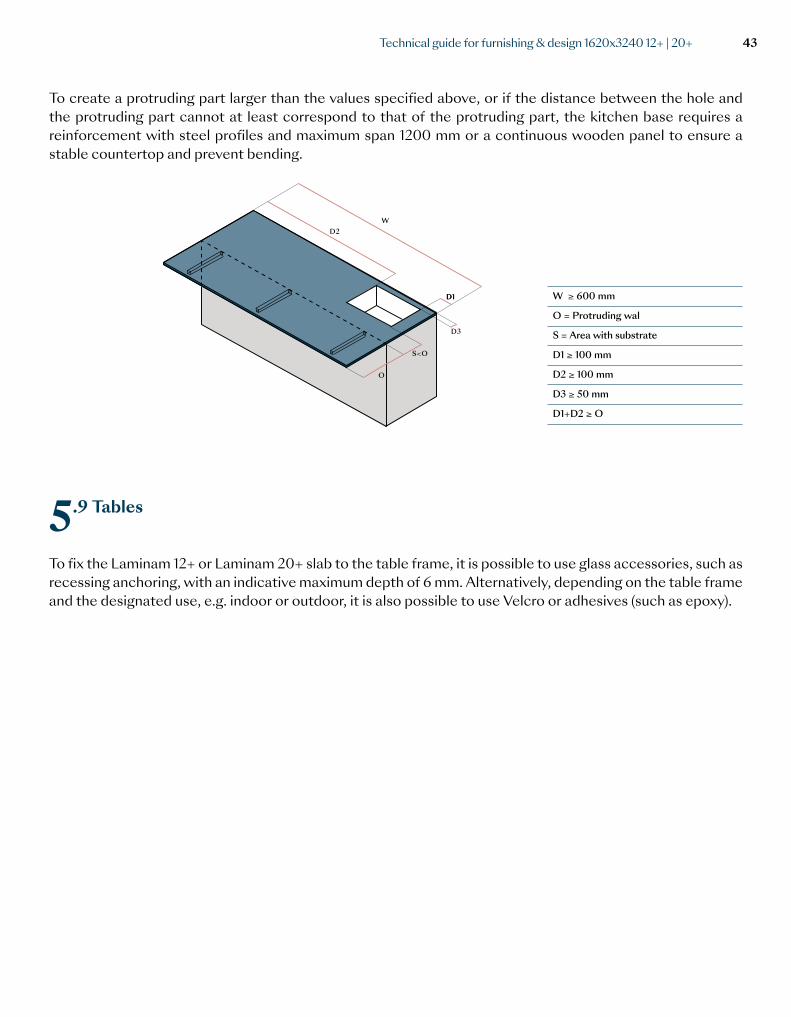
D1
To create a protruding part larger than the values specified above, or if the distance between the hole and the protruding part cannot at least correspond to that of the protruding part, the kitchen base requires a reinforcement with steel profiles and maximum span 1200 mm or a continuous wooden panel to ensure a stable countertop and prevent bending.
W ≥ 600 mm
O = Protruding wal
S = Area with substrate
D1 ≥ 100 mm
D2 ≥ 100 mm
D3 ≥ 50 mm
D1+D2 ≥ O
5.9 Tables
To fix the Laminam 12+ or Laminam 20+ slab to the table frame, it is possible to use glass accessories, such as recessing anchoring, with an indicative maximum depth of 6 mm. Alternatively, depending on the table frame and the designated use, e.g. indoor or outdoor, it is also possible to use Velcro or adhesives (such as epoxy).
Technical guide for furnishing & design 1620x3240 12+ | 20+ 43

✓
✓
The configuration of the diagonal cut is possible only if the kitchen base unit guarantees support for the point where the diagonal cuts meet.
This type of configuration is used when graphic continuity is required, especially for veined slabs, and it is made from a single portion of slab or two slabs with a “book match” finish.
✓45°
45° R 5mm
R 5mm
R ≥5mm
5.10 Top joints and extensions
In building projects, we suggest not to place slabs of the same finish and different thicknesses, which have different shades, side by side on the same floor.
For finishes that present non-uniform graphics and/or directions, verify the final effect of the parts by dry fitting the adjacent parts to verify final compatibility. Also verify that the pieces have uniform thickness and, if they do not, the lower part of the visible edge can be abraded to make them uniform.
When creating “L” shaped tabletops, it is advisable to fit the slabs using a straight pattern. When installing the top, fill the joint between the two slabs with silicone. If you are building a table with extensions, the leaves must be made from the same slab to provide continuity, so that the extensions have the same graphics and shade continuity.
This also allows you to create continuity between the tabletop and the extension leaves in case of small deviations that are still within tolerance limits.
Technical guide for furnishing & design 1620x3240 12+ | 20+44

✓45°
45° R 5mm
R 5mm
R ≥5mm
The design of “L” shaped surfaces made in a single piece is advisable only if the base units that will support the surfaces are perfectly plane, levelled and structurally solid and stable.
The pieces described above require very delicate handling. It is crucial to pay close attention during the handling, packaging and installation phases to avoid movements or twisting that could damage the surface and cause it to break.
The inside corner of single-piece L-shaped tops must have a minimum radius of 5 mm.
Technical guide for furnishing & design 1620x3240 12+ | 20+ 45

6| Laminam processing
6.1 Processing Laminam 12+ and Laminam 20+ slabs
Laminam can be processed with machines for materials like natural and composite stone, marble and glass.
Before beginning a cut, verify the maintenance status of the machine you are planning to use, in particular:
• The worktop must be solid, resistant, clean and free from defects.
• The worktop must be perfectly planar and level.
• No irregularities must be present on the worktop, and it must be free from debris from previous jobs.
• The tool must be suitable for processing porcelain stoneware and in good condition.
The operating parameters, in the ranges indicated in this guide, are suggested by machinery and tool producers and operators in the sector after tests on our materials. However, these parameters are purely an indication and must be verified by each user on the basis of the tools that they have available, their individual experience and the type of finish that they want to obtain.
Therefore, we advise each operator to do preliminary tests on samples before making cuts or starting processing operations, in order to properly test and program the machine and tools that they have available.If the cut finish turns out to be unsatisfactory, or the operation causes the slab to break, the reason could be a wrong feed rate, wrong pressure during the operation, or wrong tool rotation speed. Other causes could be imperfect planarity of the supporting surface, subjecting the slab to movements or vibrations during operations, or an incorrect choice of a cutting disk or tool..
Technical guide for furnishing & design 1620x3240 12+ | 20+46

6.1.1 Orientation of slabs during processing
It is advisable to plan processing operations for countertops with cutouts and openings to be positioned in the central part of the Laminam 12+ and Laminam 20+ slab.
✓ ✓ ✓
✓ ✓ ✓
Technical guide for furnishing & design 1620x3240 12+ | 20+ 47

6.1.2 End of processing
At the end of each processing operation and before the piece is dry, thoroughly clean the surface with clean water.
For Laminam Lucidato finishes, it is necessary to clean the slab with compressed air to remove all dust residue. Given the characteristics of this type of surface, avoid contact or dragging with metal objects.
After finishing the work on any type of machine, it is very important to pay particular attention to how the slab is handled, in particular if there are openings or internal holes and cutouts. Use suction pad lifting equipment only if it is equipped with a sufficient number of pads, so that the slab will not bend in any way.
As an alternative, handle the slab manually in a vertical position and be very careful to avoid torsion.
6.2 Disc cutting
To cut the slab, use diamond cutting discs suitable for processing porcelain stoneware, which are in good condition, on industry approved machinery.Both segmented and non-segmented blades can be used.The advancement of the slab in the cutting process must be in the same direction as the disk rotation.The cut takes place through the erosion of the width proportional to the width of the disk.
6.2.1 Cutting Scheme
Laminam “Full Size” slabs have untrimmed external edges. Start cutting by trimming the edges to make them square.
1620
mm
3240 mm
Cut 1
Cut
2
Technical guide for furnishing & design 1620x3240 12+ | 20+48

If you need to obtain a trimmed 1620x3240mm size from a “full size” 1620X3240mm slab, set the disk path to center this size at the center of the “full size” slab.
1620
mm
3240 mm
Here is an example of a cutting scheme that can be done with a disk cutting process.
If you want to protect the piece of slab not being used to make the table or countertop, move the part above 4th cut before you start it.
4th cut5° Holes
6° cuts for the hollow
3rd cut
2nd cut
1st cut
Technical guide for furnishing & design 1620x3240 12+ | 20+ 49

If you want to protect the piece of slab not being used to make the table or countertop, move the part above 4th cut before you start it. If you are making “L” shaped cuts or cutouts with a disk, first it is necessary to make a hole in correspondence of each corner and then make straight cuts. The last part of the cut near the hole can be done manually with a grinder.
When performing cuts 5 and 6, the disk must go past the intersection of cuts 7 and 4, respectively, for a length of at least the diameter of the disk. “L” shaped pieces must be handled very carefully to prevent torsion and twisting that would damage the slab.
6.2.2 Indications
• Smaller disk diameters require greater rotation speeds applied to the mandrel.
• Slower feed rates produce higher quality cuts. Excessive speed could require making a larger bevel to correct imperfections caused on the edge.
• Cutting speed at the entry and exit points must always be reduced by 50% compared to full speed, for a length of at least the diameter of the disk.
100%
50%
50%
X
X
X
4th cut
5th cut
3° Forature
8° cuts for the hollow
7th cut
2nd cut
6th cut
1st cut
Technical guide for furnishing & design 1620x3240 12+ | 20+50

• Given the hardness and strength of the material, it is necessary to turn the nozzles so that the water jet is pointed on the disk blade to guarantee cooling and in correspondence with the incision on the slab to remove debris from the cut.
• The disk must cut completely through the slab thickness and come out at least 1 mm on the other side.
• The process is successful if vibrations and movements of the slab are reduced to a minimum during the cutting processes. To limit these situations, we advise using a panel made of rubber or other suitable material that will not reduce the abrasive capacity of the disk.
• Set the machine correctly to obtain inclined cuts in the slab.
• To make a good quality inclined cut, we suggest reducing the disk diameter and using a disk with a reinforced core that can diminish bending of the disk and therefore reduce vibrations on the slab. As an alternative, apply a flange and counter flange to stabilize a disk that is too big.
Disk
CounterflangeFlange
Ø F
lang
e
Ø D
isk
12 ÷
15 m
m
Ø C
ount
erfla
nge
≥ 1mm
ThicknessLaminam
Technical guide for furnishing & design 1620x3240 12+ | 20+ 51

6.2.3 Parameters
The parameters indicated below were suggested by the main producers of cutting disks which have tested Laminam slabs, considering that the cut be made in a single stroke with a disk in good condition.To obtain these parameters, tests were run on products with white, medium and black bases.
If the manufacturer, under his/her own responsibility, wants to adopt faster speeds than those indicated, we suggest carrying out several preliminary tests while keeping in mind that materials with a white base are generally more sensitive to increased speeds.
Periodically, assess the maintenance levels of the disk and replace it when it no longer guarantees a good quality cut, with reference to the parameters indicated. To guarantee longer disk life and better cutting quality, we suggest reviving the blade with a block of concrete or quartz.
Disk Cutting Type of Cut Disk Diameter mm Rpm Feed rate
Mm / minInfeed/outfeed speed
Laminam 12 + Straight350400500
1800/19001600/18001300/1400
1000/14001000/14001000/1400
Reduce by 50%
Inclined350400500
1800/19001600/18001300/1400
500/800500/800500/800
Reduce by 50%
Laminam 20 + Straight350400500
1800/19001600/18001300/1400
800/1000800/1000800/1000
Reduce by 50%
Inclined350400500
1800/19001600/18001300/1400
400/500400/500400/500
Reduce by 50%
6.3 Water-jet Processing
Laminam slabs can be cut with water-jet machines. This method makes it possible to perform any type of cutting, shaping and drilling or making holes, with a high level of precision.
We advise making sure that the metal support grid is in good condition and planar, and that the piece is correctly blocked to prevent movements that could make it impossible to cut the slab.If the machine allows it, it is also possible to make 45° cuts. Adjust the processing parameters to obtain a straighter or rounder edge.Begin by cutting the larger cutouts and then do the smaller ones (for example, first cut the hole for the sink and then cut the hole for the tapware). We suggest starting and finishing the cut off the slab.
Technical guide for furnishing & design 1620x3240 12+ | 20+52

6.3.1 Cutting Scheme
Laminam “Full Size” slabs have untrimmed external edges. Start cutting by trimming the edges to make them square.
1620
mm
3240 mm
If you need to obtain a trimmed 1620x3240mm size from a “full size” 1620X3240mm slab, set the water-jet path to centre this size at the centre of the “full size” slab.
1620
mm
3240 mm
1st cut
2nd cut
Technical guide for furnishing & design 1620x3240 12+ | 20+ 53

Here is an example of a cutting scheme that can be done with a water-jet process.
Here is an example of an “L” shaped cut that can be done with a water-jet process.
4th cut
5th cut
3rd cut
2nd cut
1st cur
3rd cut
2nd cut
1st cut
4th cut
5th cut
Technical guide for furnishing & design 1620x3240 12+ | 20+54

≥ 5 mm ≥ 5 mm
≥ 5 mm ≥ 5 mm
IN
OUT
To make cutouts inside the slab, we advise starting the cut in a point that is inside the cutout area, and then gradually moving closer to the cut perimeter. Maintain the suggested minimum radius of 5 mm for internal corners.
6.3.2 Parameters
Water-jet Pressure (bar) Feed rateMm / min Cutting Abrasive Initial Drilling
Pressure Drilling Abrasive
Laminam 12 + 380/413,5 1000/1200 Mesh 80 (350/500 g/Min.) 40/80 Mesh 80
(100/150 g/min.)
Laminam 20 + 380/413,5 600/800 Mesh 80 (350/500 g/Min.) 40/80 Mesh 80
(100/150 g/min.)
Minimum recommended distance 50 mm
Technical guide for furnishing & design 1620x3240 12+ | 20+ 55

6.4 Numerical Control Processing
Laminam slabs can be cut with numerical control machines (CNC).
The most complex CNC machines offer the option of rotating and inclining the cutting head for many types of cuts.
Normally, CNC is used after shaping the top with a disk or water-jet cutter. This machine is used primarily to create cutouts for hobs and sinks, and to finish edges for flush tops, holes, edges and curved lines as well as wall scribing.
The tool must be diamond tipped and suitable for processing porcelain stoneware. The choice of tool depends on the specific process to complete. Do not make cuts or holes when the tool is oscillating.
During the work, it is important to use plenty of water aimed in the right direction, both inside and outside the tool. The tool must be at least 1 mm wider than the thickness of the slab.
✓
≥ 1mm
Technical guide for furnishing & design 1620x3240 12+ | 20+56

6.4.1 Positioning Suction Pads
Before beginning the process, check the correct hold of the suction pads on the back of the slab. If the hold is not satisfactory, use softer gaskets of the right thickness.
Correct positioning of the suction pads that hold the slab is a fundamental aspect of getting a good cut. For this reason, distribute the suction pads in a regular pattern to support the slab, including the part that must be removed. If you fail to do this, the part that is cut out could bend and cause crazing before the process is finished.
As an alternative to the suction pads, it is possible to use specific clamps: in this case, it is necessary to remember that the side with the clamp cannot be cut.
50 mm
50 mm
✓
Technical guide for furnishing & design 1620x3240 12+ | 20+ 57

6.4.2 Flush Top Processing
Perform the cuts as shown in the scheme below without entering the perimeter of the 90° hole, which would compromise the quality of the final process.
✓
IN
OUT
Technical guide for furnishing & design 1620x3240 12+ | 20+58

6.4.3 Flush Top Processing
We advise finishing the flush top before making the cutout.
It is possible to cut a maximum recess of 4 mm in a Laminam 12+ slab and 8 mm in a Laminam 20+ slab, of a suitable size and depth according to the instructions on the technical sheet of the sink or appliance to install.
Drilling
Incremental cutting
Cut
Technical guide for furnishing & design 1620x3240 12+ | 20+ 59

6.4.5 Cutting Parameters
CNC RPM Feed rate mm/min
Laminam 12+
Initial Hole 1800/3000 20/30
Cutting Tool 3500/5500 200/300
Flush Top 5000/8000 150/300
Bevel 5000/6000 1500/2500
Edge Polishing 3000/5000 1000/2500
Laminam 20+
Initial Hole 1800/3000 20/30
Cutting Tool 3500/5500 150/200
Flush Top 5000/8000 150/300
Bevel 5000/6000 1000/1500
Edge Polishing 3000/5000 1000/2500
Technical guide for furnishing & design 1620x3240 12+ | 20+60

6.6 Manual Processing
It is possible to use a manual cutting tool to perform cuts on Laminam 12+ and 20+ slabs.Through the use of accessories such as disks, diamond drill bits or abrasive pads with different grades, it is possible to obtain cuts, holes or finishes of edges or details of the countertop surfaces.It is important to position the slab being processed in a suitable position to avoid movements and vibrations.The area being processed should be bathed with water constantly or frequently, and the tool also, in order to guarantee correct cooling and the quality of the process.
✓
✓
Continuous countertop
Continuous countertop
Technical guide for furnishing & design 1620x3240 12+ | 20+ 61

6.7 Cleaning after processing
Cutting, drilling and similar operations generate dust residue due to abrasion of the material. This residue, along with the water required during the processing phases, tends to become solid on the surface when it dries.
It is, therefore, vital to ensure correct cleaning at the end of the processing phases because, if this is done wrongly or inaccurately, it could cause smears that are difficult to remove (particularly visible on dark colors).Clean off the processing residue from the surface of the slab with plenty of water, then dry with a paper towel and repeat the procedure until the surface is clean. Do not store any machine-processed material when wet.During assembly of the kitchen countertop, polyurethane or epoxy adhesives are used for panels, integrated sinks. etc.
Epoxy products are designed not to be removable to ensure good performance over time. For this reason, they can stick to surfaces without being absorbed, but this makes them difficult or impossible to remove. It is, therefore, vital to remove them quickly by using soft sponges or cloths and cleaning products recommended by the suppliers.
Do not contaminate the rest of the surface with the cloths/sponges used to remove these materials. Do not move the finished surface with gloves that have adhesive products on them.
If any epoxy/polyurethane material is observed after installation of the countertop, they must be treated with basic products and soft sponges, but since they will have been completely hardened at that point, it might not always be possible to remove them.
Technical guide for furnishing & design 1620x3240 12+ | 20+62

7|Edges
7.1 Straight Edges and Bevels
The straight edge is the finish that makes it possible to display the edge of the Laminam 12+ and Laminam 20+ slabs. It is normally done as a perimeter border for the surface of kitchen table tops and countertops, or as a finish for a hole when the basin is applied under the top.
At a later time, if requested, it is possible to polish the edge with a sequence of increasingly fine abrasive diamond wheels on CNC machines.
We suggest making a beveled edge of at least 2 mm to increase the strength of the edge in case of accidental impact. For beveling of curved lines, it is necessary to use a CNC machine with a grinding wheel on 5 axes.
The edge finish can be obtained through processes on automatic machines (such as side polishers, numerical control machines) or by hand, depending on the desired effect.
2 mm 2 mm
2 mm
Technical guide for furnishing & design 1620x3240 12+ | 20+ 63

7.2 Other types of edges
Other types of edges (such as bullnose and half bullnose) can be obtained with specific profiling grinders used on CNC machines.
Therefore, many different edge finishes can be obtained by using different grinders.The working speed must be tested in advance.
2 mm 2 mm
2 mm
7.3 Bordo a 45° e Scatolati
It is possible to process Laminam 12+ and Laminam 20+ slabs to obtain continuous joints for making panels of heights taller than the thickness of the product, basins and box structures.
This solution is also adopted when graphic continuity is desired on the front panel of the top.
After creating the portions to glue, we advise protecting the adjacent surfaces with plastic film or rubberized tape to prevent you from getting glue on the slab, because the adhesives will be hard to remove after they harden.
Clean the portions to glue and apply a homogeneous layer of glue to the entire surface. Make sure that the portions are kept in position until the glue dries completely, in compliance with the manufacturer's instructions.After the glue hardens completely, make a bevel of at least 2 mm.
Disponibile solo per gamma IN-SIDE
Technical guide for furnishing & design 1620x3240 12+ | 20+64

✓ ✓
Sequenza di passaggi con taglio a disco a 5 assi Sequenza di passaggi con idrogetto a 5 assi
We suggest reinforcing the joint by applying slats made from unused parts of the Laminam slabs, fixed with the same type of adhesive used to glue the 45° angle.
2° Taglio
2° Taglio
1° Taglio
1° Taglio
✓ ✓
5 mmPannello di supportoRinforzo
Spazio di dilatazione
Technical guide for furnishing & design 1620x3240 12+ | 20+ 65

We suggest using two-component adhesives, generally epoxy based or equivalent, which can be purchased freely. These adhesives can be pre-colored or transparent, and specific-colored additives can be added.
Below is a selection of products available on the market. Different companies have colored glue or adhesive products in their range which can be matched Laminam finishes. Please ask the producer directly for suitable products.
Adhesive for gluing Laminam 12+ and Laminam 20+ slabs
Correspondence between adhesive colours and Laminam finish and Adhesive Technical Sheet
AkemiColour Bond (internal use)Akepox 5010 (internal use)Coloured cartridges
www.akemi.de/en/
Tenax PowerbondOn demandwww.tenaxceramica.it
Integra AdhesivesIntegra XiColoured cartridgesIntegra Ultra (external use)
www.integra-adhesives.com
We recommend proper and immediate cleaning of all glue and adhesives used, in compliance with instructions from their producers. Removal after the glue has hardened could prove to be impossible and would cause halos to form on the slab over time.
7.4 IN-SIDE Edge Finish
To finish Laminam Fiammato products made with IN-SIDE technology, it is possible to recreate the surface structure on the edges of the slab.
This operation is usually done by using a sanding machine, commonly used for natural stone, with the right level of air pressure and quantity of sand.
We recommend protecting the horizontal surface of the slab so that it is not affected by the sanding process, which would compromise its finish and technical characteristics.The sanded edge obtained in this way must be treated as described below in chapter 9.
7.5 Fibre Abrasion
It is possible to remove the fiber reinforcement on the visible portion of the countertop edge either manually or using cutters to improve aesthetics. Since this material is fiberglass, applied with a polyurethane adhesive, it is necessary to carry out this operation under current national safety regulations.
Technical guide for furnishing & design 1620x3240 12+ | 20+66

8|Bonding laminam on other materials
Laminam slabs in the thicknesses 12 and 20 mm do not generally require reinforcement with other materials. There can be a need to bond the slabs mainly if there is a perimeter panel, in order to create a filler and a uniform horizontal surface.
We suggest using materials with expansion coefficients similar to Laminam slabs, such as polyurethane foam suitable to hold the fixings necessary for the countertop.These materials can be applied with epoxy-based, polyurethane or MS polymer adhesives, also in points and not full spread.
If it is necessary to bond the top to create a reinforcement, for example if it has a particular design, an absence of suitable supports on the kitchen base units or excessive protrusions, the support material must be glued with a full spread application and can also be constituted by tubular steel/aluminum.In this case, use extremely elastic adhesives and be careful to avoid reinforcements near cooking areas, which could cause excessive expansion.
The choice of gluing material, the glue to use and the frequency of application are all at the discretion and under the responsibility of the installer, and must be verified based on the conformity of the countertop, the materials used and the intended use of the countertop.
Technical guide for furnishing & design 1620x3240 12+ | 20+ 67

9|Treatments
The product abraded on the surface and in its thickness - for example, on the edge - does not offer the same characteristics as the slab.
For this reason, the surface which has been subjected to these processes must be treated with specific products to restore the characteristics of non-absorbency and stain resistance. On these portions, Laminam does not guarantee the level of performance listed in the technical sheets.
The manufacturer is responsible for applying the treatment with a suitable product, after having run the proper internal tests independently. When the countertop is delivered to the final client, the manufacturer agrees to inform the client about which treatments must be applied subsequently to maintain performance levels.
The use of these products could cause the slab shade to vary slightly.Laminam advises against abrading on light-colored finishes. For this purpose, the IN-SIDE finish guarantees overall product compatibility.
Please consult the Technical Sheets of the manufacturer for instructions about the correct application of the selected product.
Producer Protective product for edges and surface abrasions Website
Fila Solutions Stop Dirt www.filasolutions.com
Tenax Ager www.filasolutions.com
AkemiColour Bond (For interiors)Akepox 5010 colour cartridges (For interiors)
www.tenaxceramica.it
Technical guide for furnishing & design 1620x3240 12+ | 20+68

During handling, transport and installation of the finished countertop, remember to pay the utmost attention to possible twisting, torsion or impacts, in particular on the edges. Reviewing jobsite access with installers can assist in comfortable and efficient installation.
10.1 Packaging and transport
After finishing the processing, move the finished top into a vertical position and keep any holes towards the top. Never use the holes as lifting points, especially during transport, to prevent cracks or breakage.
We advise packing the countertop inside wooden crates or suitable frames and taking care that the edges and corners are protected with foam or polystyrene guards.
If the top has a preassembled basin, it must be encased in a wooden crate with a support that can sustain the weight of the sink, so that it does not cause the top to twist.
10|Transport and installation of the finished countertop
Technical guide for furnishing & design 1620x3240 12+ | 20+ 69

10.2 Installation
Verify that the kitchen base units are perfectly level and fastened together. This condition is necessary because the top must be supported continuously by the kitchen base units. Where the base units cannot guarantee perimeter support, it will be necessary to insert suitably dimensioned supports of adequate materials between the bases to support the weight of the top. This reinforcement must apply also if there are 45° joints between two portions of the top. After removing the packing, keep the countertop in a vertical position at all times when handling, and keep all holes towards upwards. To limit breaking during assembly, we suggest moving the top to the place where it is to be supported on the base units or vertical profiles while supporting the lower part with a wooden panel. Pay particular attention if the top has an integrated sink at the moment when it is placed in a horizontal position to be positioned on the kitchen base units. The weight of the sink basin must always be supported until the top is perfectly installed. Take care that the kitchen base units are fitted with their proper perimeter supports, as designed, and that sink basin supports are positioned immediately (see paragraph 5.3).
If the base unit has sliding drawers, these supports must be suitably shaped to allow them to slide properly. In cases of countertops with particular shapes or types of kitchens/ base units that do not guarantee adequate support, it is possible to position a surface generally in wood, or wood-based material, that guarantees constant uniform support for the countertop.
Keep the pieces together with a screw or tie.
✓
Technical guide for furnishing & design 1620x3240 12+ | 20+70

Silicone 2mm
Parete
Laminam
Protect the surface next to the silicone application with plastic film or rubberized tape. For tops made of more than one piece, place the portions carefully to prevent mistakes with visible edges. It is possible to facilitate this operation by inserting thicknesses which must be removed with the slabs positioned.Join the two portions together using silicone products or transparent or colored glues, and then cleaning up the residue immediately afterwards.
When mounting the sink, it is necessary to seal the edge with silicone, an adhesive gasket or another equivalent product to guarantee watertightness and avoid the accumulation of dirt. Based on the type of sink to install, use a fixing system that is envisaged or designed by the manufacturer which is consistent with the mechanical fixing and/or adhesive. Prepare two support bars or other equivalent systems to support sink basins, to be fastened to the furniture structure, so that the weight of the sink basins and the water that they contain is not supported exclusively by the top. Hobs must be installed in a centered position with respect to the prepared hole. Verify that the perimeter expansion space is maintained, as described in paragraph 5.3.
10.3 Cleaning after installation
Remove any silicone residue used for installation and sealing of appliances by using diluent products and soft sponges. Use acidic products and soft sponges to remove any cement-based residue left by back panel processing.
Then, before first using the countertop, sanitize it by initially cleaning with an alkaline cleaning agent for ca. 5-10 minutes. Proceed by wiping with a non-abrasive soft sponge, rinse with abundant water and dry the surface with a microfibre cloth. This operation contributes to remove any organic residue present on the surfaces following production, transformation and installation of the countertop.
We advise installing the surface at a distance from the wall of 2-3 mm and filling the gap with silicone, being careful to distribute it uniformly.
Technical guide for furnishing & design 1620x3240 12+ | 20+ 71

11|Cleaning, use and maintenance
The natural origin and production process make Laminam slabs almost entirely devoid of surface porosity; hence, they are easy to clean and suitable for use as kitchen countertops and table surfaces.
The same process ensures product hardness and compactness. During daily use, avoid any impact that might especially scratch the most delicate areas of the countertop, such as corners, edges, integrated sinks, etc.Do not use the countertop incorrectly. Avoid loading it with heavy weights, such as by climbing on it, as this might cause breakage particularly in processed areas, such as sinks and stoves, or in areas lightly supported by an underlying structure.
To clean Laminam surfaces, use a microfibre cloth or soft sponges and hot water; if necessary, use neutral detergents commonly sold to clean kitchen surfaces and appliances. When correctly maintained, the Laminam countertop will not require extraordinary cleaning.Please note that, generally, a quick intervention makes it easier to remove stains. If left to settle on surfaces for a long time, some residue might require the use of a specific cleaning product.
The choice of detergent will depend on the type of residue; for food stains, use alkaline detergents (products with high pH, such as ammonia or bleach); for inorganic stains, use acidic detergents (e.g., anti-scale); and for oily stains use degreasing products.After using detergents, rinse the countertop to avoid the formation of smears or patinas on the surface.
Stain Daily cleaningDetergent for stubborn residues
Wine Warm water and a neutral detergent Alkali*/Acid
Icecream, Coffee, Tea, Tomato, Balsamicvinegar, Lemon, Cocacola, Beer, Fruitjuice, Jam, Milk, Nicotine
Warm water and a neutral detergent Alkali*
Oil, Butter, Grease and oily substances, Wax Warm water and a neutral detergent Degreasing
Rust, Limescale, Metallic marks, Cement residue, Chalk
Warm water and a neutral detergent Acid
Nail varnish Warm water and a neutral detergent Solvent
*If bleach (alkaline cleaning agent) is used, dampen a soft cloth and rub the surface for a few seconds. Most of the residue will disappear 2-3 minutes after application. Alternatively, pour it directly onto the surface. Leave it to work for a maximum of 10 minutes on shiny surfaces, making sure that it does not dry. Repeat the procedure until it is completely clean, rinsing after each application.
Technical guide for furnishing & design 1620x3240 12+ | 20+72

Warnings
• Do not use fluorhydric acid or products containing it.
• Do not use abrasive sponges or metal wool.
• Always avoid cleaning agents containing abrasive particles on the Polished surfaces.
• To remove stubborn stains, when using mildly abrasive products that cannot, however, be used on Lucidato [polished] surfaces, ensure that the pressure applied does not have a polishing effect on the treated area.
• Do not use products that contain wax or polishes.
• When they are not promptly removed, staining agents might leave stains that are not entirely removable on the polished surface.
• Metal objects, such as cutlery, saucepans and knives, might cause surface scratches on polished surfaces. Use trivets and cutting boards when preparing food.
• Laminam surfaces, with the exception of the Lucidato [polished] ones, do not fear scratches caused by metal objects and cutlery. Having a lower degree of hardness, in case of rubbing, they might leave metal residue on the countertop. Such residue, which shall not be considered surface defects, might be hard to completely remove. They might be more evident on products with a black background.
• Avoid direct contact with the flame.
Technical guide for furnishing & design 1620x3240 12+ | 20+ 73

Handling, storage, installation and other phases that do not involve transforming or processing the slabs do not pose any risk of inhalation/breathing of respirable particles, fibres or dust.
When Laminam slabs are being transformed, crystalline silica and glass fibres are released into the air. To prevent occupational diseases, such as silicosis and lung diseases, the worker who carries out processes which can produce this type of dust must adopt preventive and protective safety measures in conformity with local safety and hygiene regulations to contain the risk.
These measures can be collective (for example, localized ventilation or extraction systems for capturing diffused dust) and individual (for example, FFP3 filtering face masks).
For more information, please refer to good practices and the Safety Information Sheet for Laminam slabs, which can be downloaded in the reserved area of the website Laminam.com.
12|Safety information
Technical guide for furnishing & design 1620x3240 12+ | 20+74

This guide contains information about all design, processing and installation phases of Laminam slabs to obtain kitchen countertops. Taking into account the high craftsmanship standards, please note that the information provides a rough indication and must be verified prior to implementation by the client or by the person appointed to implement the transformation.
In case of doubt or for clarifications, please visit the website www.laminam.com or contact Laminam SPA.
Technical Partners:
• Machines
1. INTERMAC – BIESSE SPA2. DENVER SPA3. PRUSSIANI ENGINEERING SPA
• Tools and disks
1. ADI SPA2. TYROLIT VINCENT SPA3. DIAMUT – BIESSE SPA4. TECNODIAMANT SRL5. MARMOELETTROMECCANICA SRL6. ITALDIAMANT SPA7. DIATEX
Consult our website www.laminam.com for the most recent versions of this document and of the Technical Sheets.
• Adhesives and finishing products
1. TENAX SPA2. INTEGRA ADHESIVE INC3. AKEMI GmbH
• Prodotti detergenti
1. FILA SOLUTION2. FABERCHIMICA3. BONASYSTEM
13|Liability disclaimer
Technical guide for furnishing & design 1620x3240 12+ | 20+ 75

14|References
Technical guide for furnishing & design 1620x3240 12+ | 20+76

Technical guide for furnishing & design 1620x3240 12+ | 20+ 77

Technical guide for furnishing & design 1620x3240 12+ | 20+78

Laminam12+1620x3240
IndoorCalce, Bianco
Technical guide for furnishing & design 1620x3240 12+ | 20+ 79

Technical guide for furnishing & design 1620x3240 12+ | 20+80

Laminam12+ 1620x3240
Private house byCameo Kitchens & Fine CabinetryI Naturali,Bianco Statuario Venato Soft Touch
Technical guide for furnishing & design 1620x3240 12+ | 20+ 81

Technical guide for furnishing & design 1620x3240 12+ | 20+82

Laminam 12+ 1620x3240mm
Euromobildesign: Roberto GobboANTIS / TELERO
In-Side, Pietra Piasentina Taupe
Technical guide for furnishing & design 1620x3240 12+ | 20+ 83

Laminam12+1620x3240mm
OutdoorCalce, Bianco
Technical guide for furnishing & design 1620x3240 12+ | 20+84
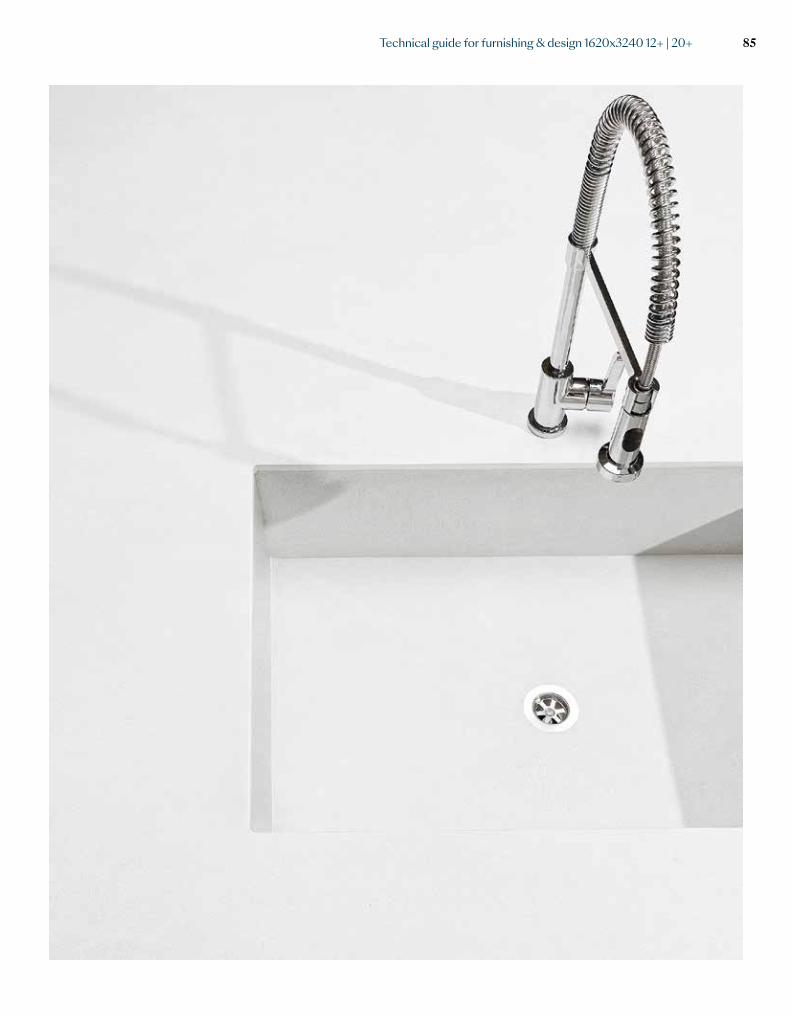
Technical guide for furnishing & design 1620x3240 12+ | 20+ 85

Laminam20+1620x3240mm
Kitchen | Milan/Italy
IN-SIDE, Pietra di Cardoso Nero NaturaleIN-SIDE, Pietra di Cardoso Nero Fiammato
Technical guide for furnishing & design 1620x3240 12+ | 20+86

Technical guide for furnishing & design 1620x3240 12+ | 20+ 87

LAMINAM S.P.A.VIA GHIAROLA NUOVA, 25841042, FIORANO MODENESEMODENA / ITALYTEL +39 0536 [email protected]
LaminamHeadquarters
ProductionPlants
LAMINAM S.P.A.VIA GHIAROLA NUOVA, 25841042, FIORANO MODENESEMODENA / ITALYTEL +39 0536 1844200
LAMINAM S.P.A.VIA PRIMO BRINDANI, 143043, BORGO VAL DI TAROPARMA / ITALYTEL +39 0525 97864
Showrooms LAMINAM S.P.A.VIA GHIAROLA NUOVA, 25841042, FIORANO MODENESEMODENA / ITALYTEL +39 0536 1844200
LAMINAM S.P.A.VIA VERDI, 520121, MILANO / ITALYTEL +39 02 89092496
LAMINAM SERVICE S.r.lVIA GHIAROLA NUOVA 258 41042, FIORANO MODENESE MODENA / ITALYT.+39 0536 1844200
Technical guide for furnishing & design 1620x3240 12+ | 20+88

[email protected] WeChat: Laminam_Official
Technical guide for furnishing & design 1620x3240 12+ | 20+ 89

Product certifications
UNI EN ISO 14021 Products containing at least 20% of pre-consumer re-cycled material in bulk (LEED 20) having an high solar reflectance index (SRI)
UNI EN ISO 14021 Products containing at least 30% of pre-consumer recycled materialin bulk (LEED 30) having an high solar reflectance index (SRI)
UNI EN ISO 14021 Products containing at least 40% of pre-consumer recycled material in bulk (LEED 40) having an high solar reflectance index (SRI)
CCC
China Compulsory Certificate mark
KASHERUT
Laminam slabs used for counterto are certificated Kosher Parve
NSF American Standard for food equipment “Ceramic Solid Surface For Food Zone”Valid for the products featured on the certificate available on the website:https://www.laminam.com
MED 96/98/EC e 2014/90/EU
Certification for use in the marine sector
MOCA Laminam slabs are suitable for contact with food, in accordance with the MOCA Legislation (Material and Objects in Contact with Food Legislation)
Certifications
Technical guide for furnishing & design 1620x3240 12+ | 20+90

System certifications
UNI EN ISO 9001: International Standard for Quality management systems
C-TPAT Customs-Trade Partnership Against Terrorism - USA
Certifications
Technical guide for furnishing & design 1620x3240 12+ | 20+ 91

Campionatura gratuita di
modico valore ai sensi del
DPR 633/72 e succ.modifiche art.2
Copyright 2021 Laminam S.p.A.


LAMINAM.COM
We are designers of our own spaces seeking uniqueness.