teampos2000-m windows 2000 pro device … · following installation of windows 2000 pro, video is...
TRANSCRIPT
1
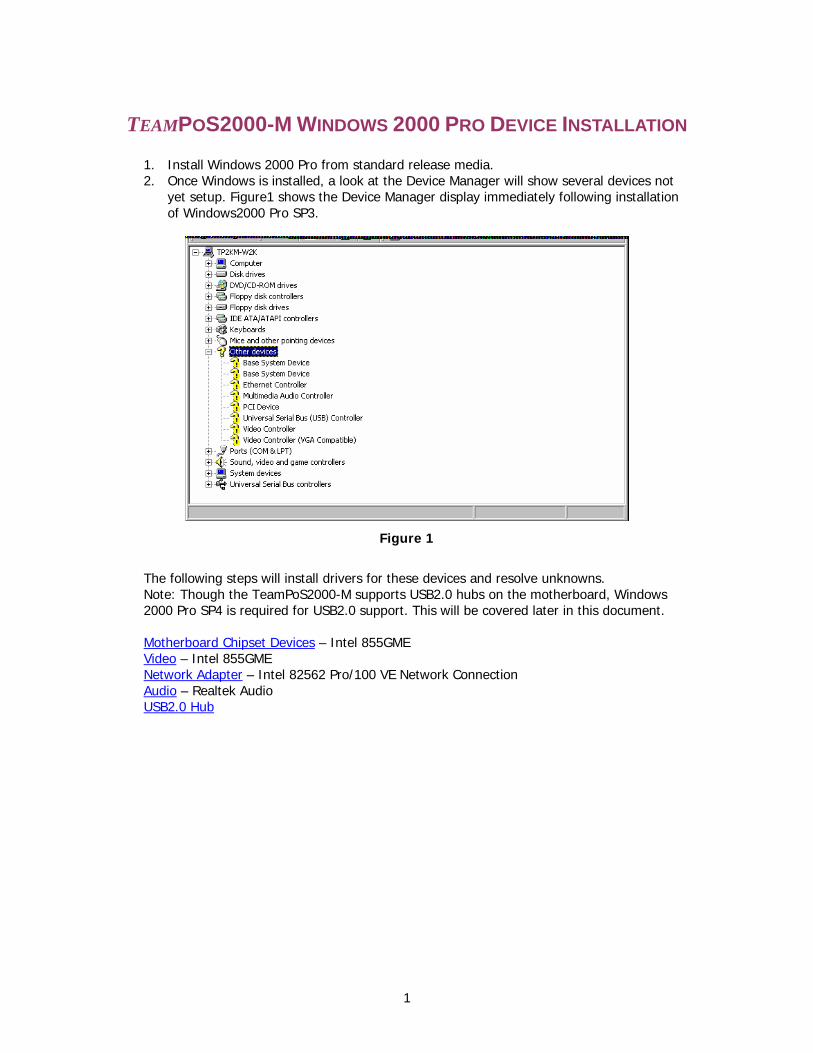
TEAMPOS2000-M WINDOWS 2000 PRO DEVICE INSTALLATION 1. Install Windows 2000 Pro from standard release media. 2. Once Windows is installed, a look at the Device Manager will show several devices not
yet setup. Figure1 shows the Device Manager display immediately following installation of Windows2000 Pro SP3.
Figure 1
The following steps will install drivers for these devices and resolve unknowns. Note: Though the TeamPoS2000-M supports USB2.0 hubs on the motherboard, Windows 2000 Pro SP4 is required for USB2.0 support. This will be covered later in this document. Motherboard Chipset Devices – Intel 855GME Video – Intel 855GME Network Adapter – Intel 82562 Pro/100 VE Network Connection Audio – Realtek Audio USB2.0 Hub
2
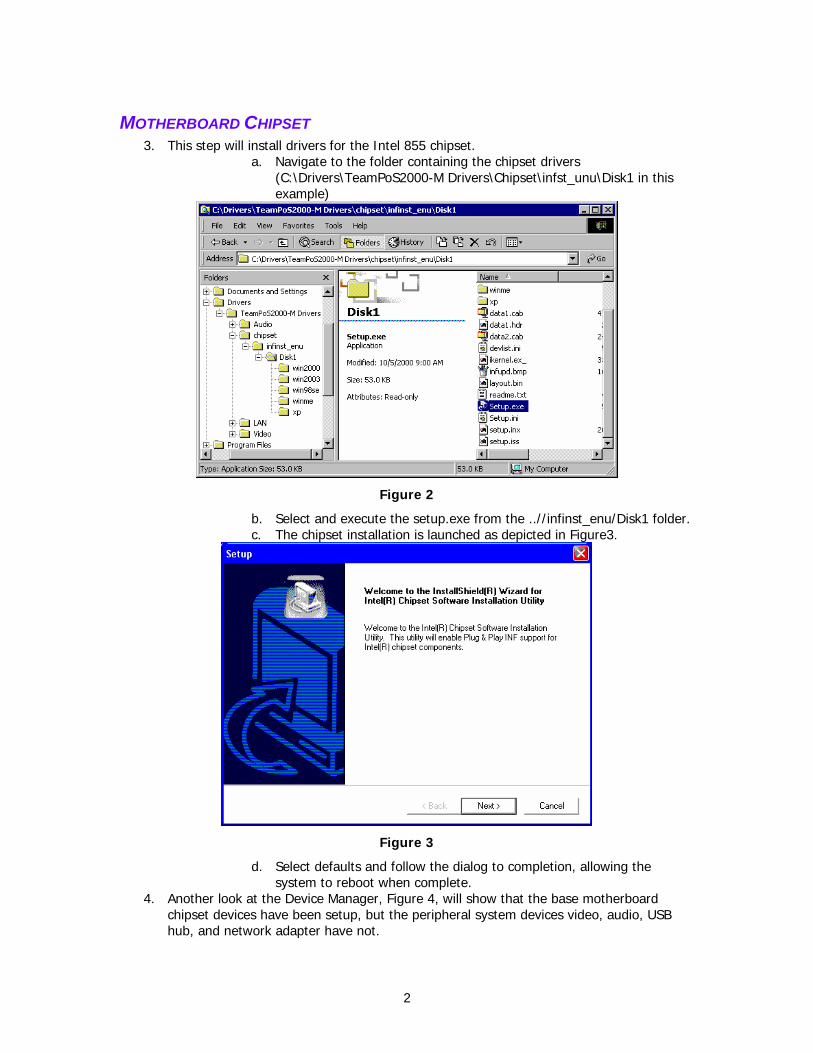
MOTHERBOARD CHIPSET 3. This step will install drivers for the Intel 855 chipset.
a. Navigate to the folder containing the chipset drivers (C:\Drivers\TeamPoS2000-M Drivers\Chipset\infst_unu\Disk1 in this example)
Figure 2
b. Select and execute the setup.exe from the ..//infinst_enu/Disk1 folder. c. The chipset installation is launched as depicted in Figure3.
Figure 3
d. Select defaults and follow the dialog to completion, allowing the system to reboot when complete.
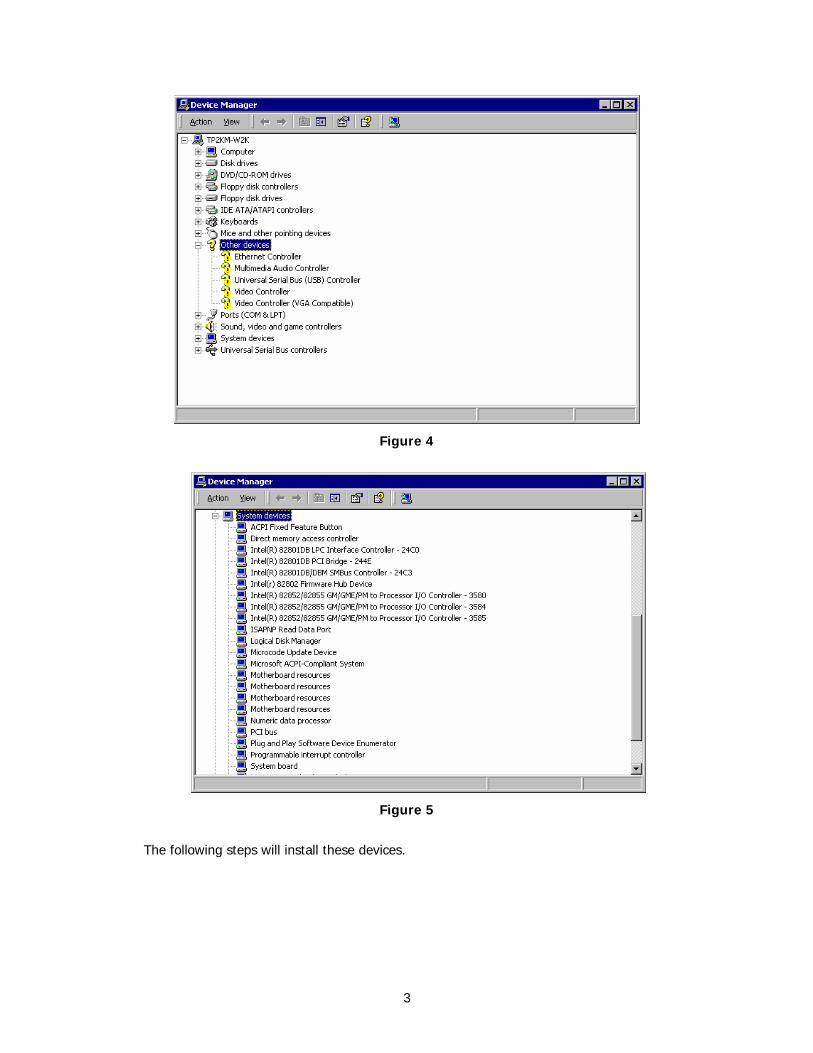
4. Another look at the Device Manager, Figure 4, will show that the base motherboard chipset devices have been setup, but the peripheral system devices video, audio, USB hub, and network adapter have not.
3
Figure 4
Figure 5
The following steps will install these devices.
4
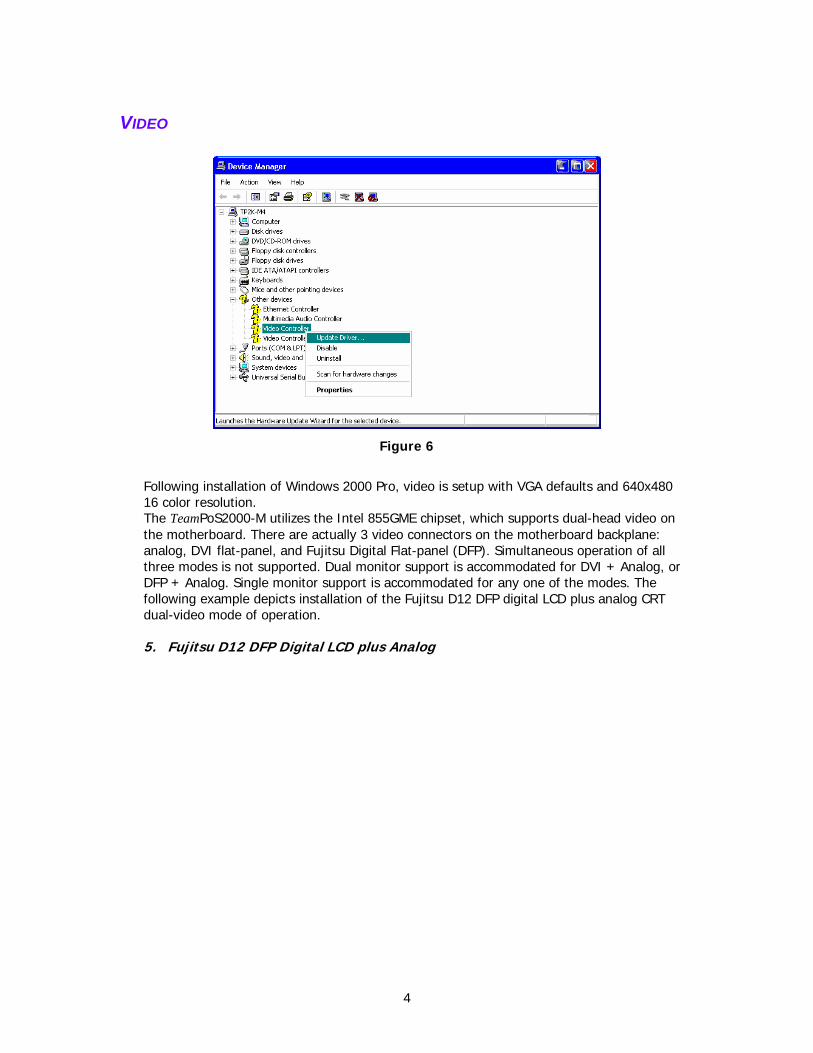
VIDEO
Figure 6
Following installation of Windows 2000 Pro, video is setup with VGA defaults and 640x480 16 color resolution. The TeamPoS2000-M utilizes the Intel 855GME chipset, which supports dual-head video on the motherboard. There are actually 3 video connectors on the motherboard backplane: analog, DVI flat-panel, and Fujitsu Digital Flat-panel (DFP). Simultaneous operation of all three modes is not supported. Dual monitor support is accommodated for DVI + Analog, or DFP + Analog. Single monitor support is accommodated for any one of the modes. The following example depicts installation of the Fujitsu D12 DFP digital LCD plus analog CRT dual-video mode of operation. 5. Fujitsu D12 DFP Digital LCD plus Analog
5
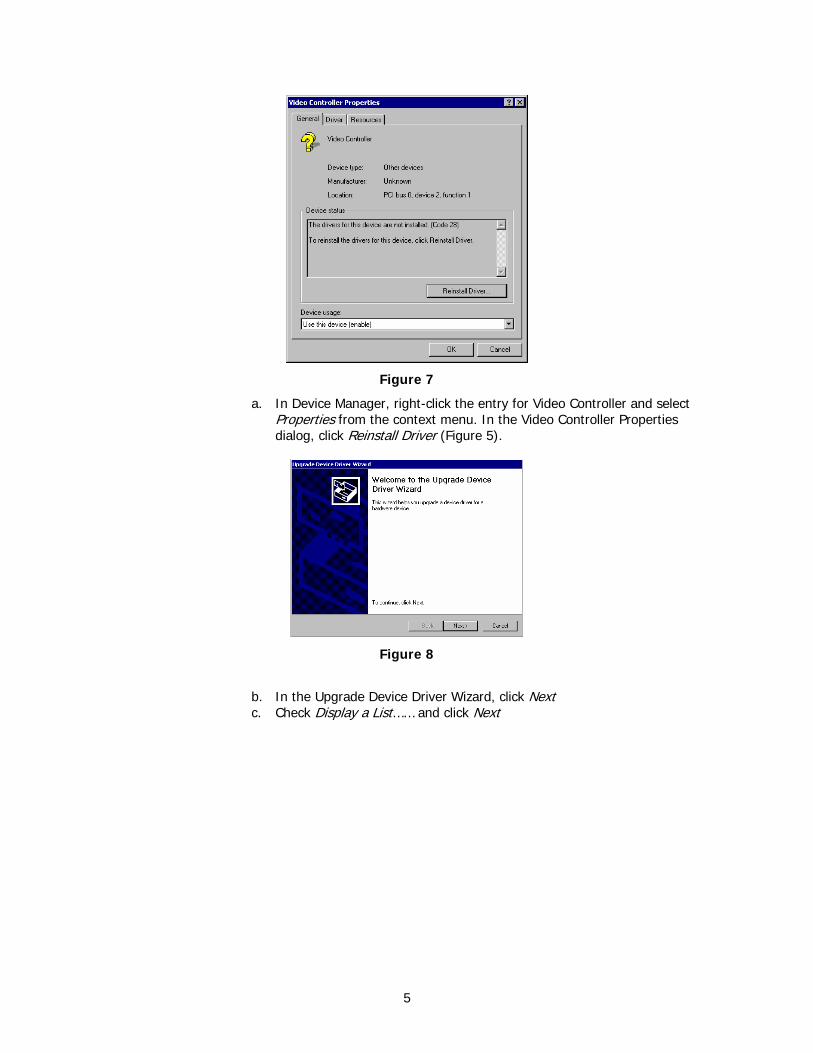
Figure 7
a. In Device Manager, right-click the entry for Video Controller and select Properties from the context menu. In the Video Controller Properties dialog, click Reinstall Driver (Figure 5).
Figure 8
b. In the Upgrade Device Driver Wizard, click Next c. Check Display a List…… and click Next
6
Figure 9
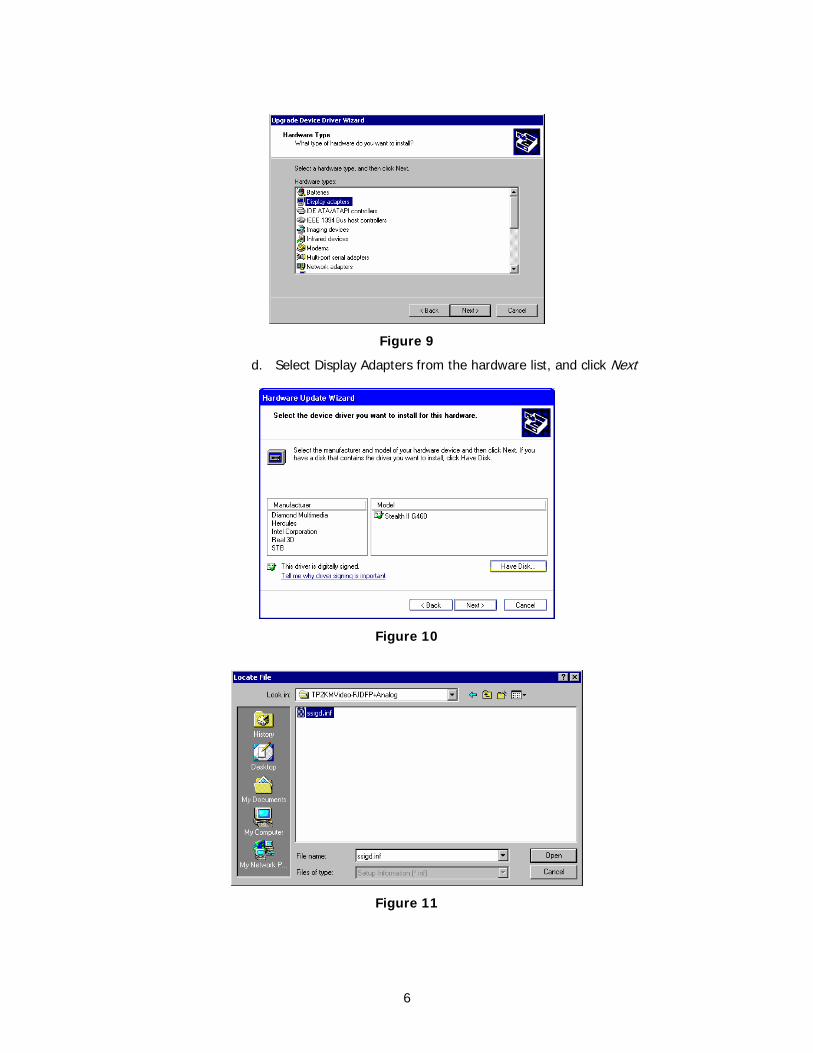
d. Select Display Adapters from the hardware list, and click Next
Figure 10
Figure 11

7
e. Click Have Disk and browse to the disk location where the video drivers are installed. Select the folder containing the Fujitsu D12 plus Analog video driver (C:\TeamPoS2000-M Drivers\Video\Tp@KMVideo-FJDFP+Analog in this example)
f. The driver .inf file will be highlighted. Click Open, and then click OK
when the Install From Disk dialog is displayed (Figures 10 and 11).
Figure 12
Figure 13
g. Several Intel 8xx series drivers are displayed. Scroll down and select
the driver Intel Corporation 855 Embedded Graphics Driver for Fujitsu. Highlight this driver and click Next (Figure13)
8
Figure 14
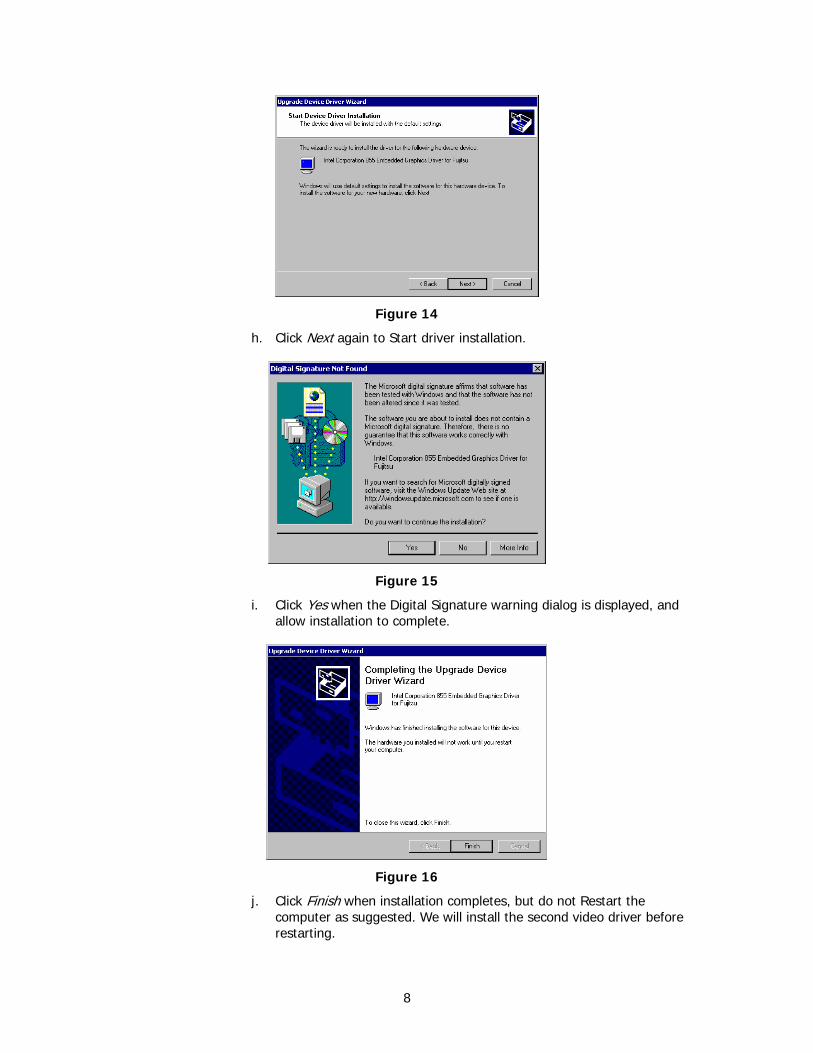
h. Click Next again to Start driver installation.
Figure 15
i. Click Yes when the Digital Signature warning dialog is displayed, and allow installation to complete.
Figure 16
j. Click Finish when installation completes, but do not Restart the computer as suggested. We will install the second video driver before restarting.

9
Figure 17
k. At this point the first display channel is installed. l. Repeat the above procedure for the second video channel device
named Video Controller (VGA Compatible). Restart the system when installation is complete.
6. Setting the Video Modes
Immediately after video driver installation, the resolution will be set to 640x480 256 colors, and only the analog video will be active. The Fujitsu D12 DFP will be blank. The following steps show setting of the resolution and dual video mode.
a. Open the Display Panel and select the Settings tab.
Figure 18
10
Figure 19
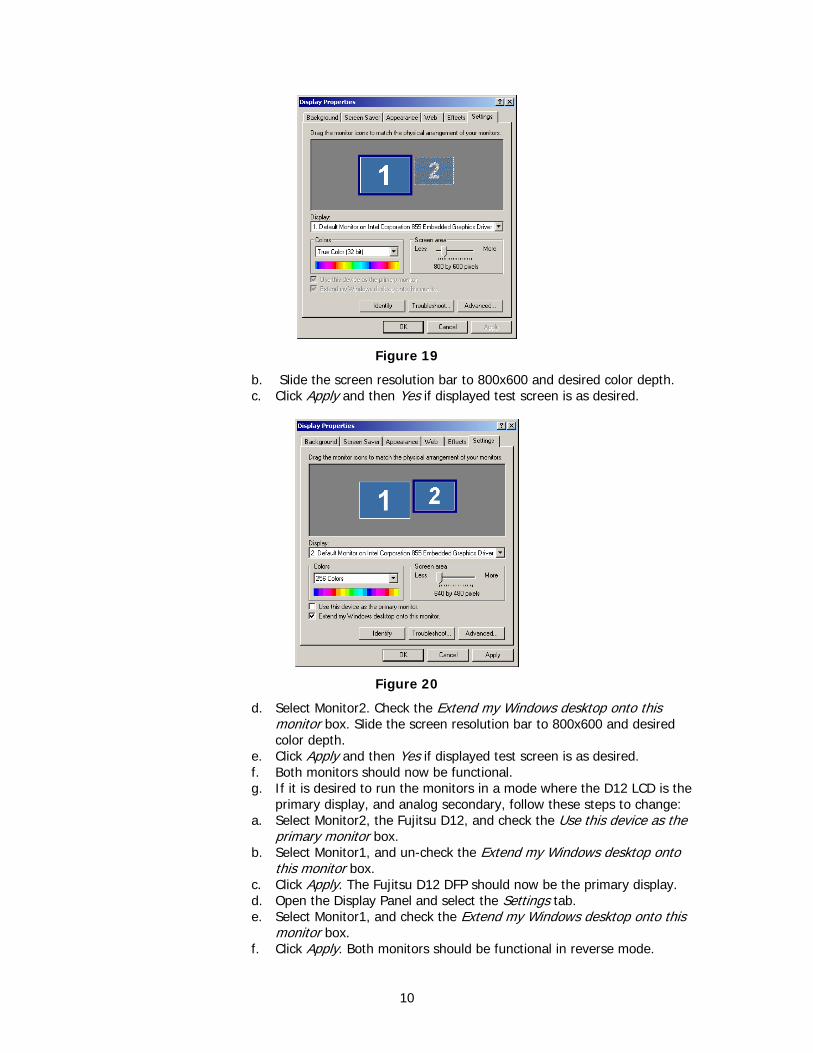
b. Slide the screen resolution bar to 800x600 and desired color depth. c. Click Apply and then Yes if displayed test screen is as desired.
Figure 20
d. Select Monitor2. Check the Extend my Windows desktop onto this monitor box. Slide the screen resolution bar to 800x600 and desired color depth.
e. Click Apply and then Yes if displayed test screen is as desired. f. Both monitors should now be functional. g. If it is desired to run the monitors in a mode where the D12 LCD is the
primary display, and analog secondary, follow these steps to change: a. Select Monitor2, the Fujitsu D12, and check the Use this device as the
primary monitor box. b. Select Monitor1, and un-check the Extend my Windows desktop onto
this monitor box. c. Click Apply. The Fujitsu D12 DFP should now be the primary display. d. Open the Display Panel and select the Settings tab. e. Select Monitor1, and check the Extend my Windows desktop onto this
monitor box. f. Click Apply. Both monitors should be functional in reverse mode.
11
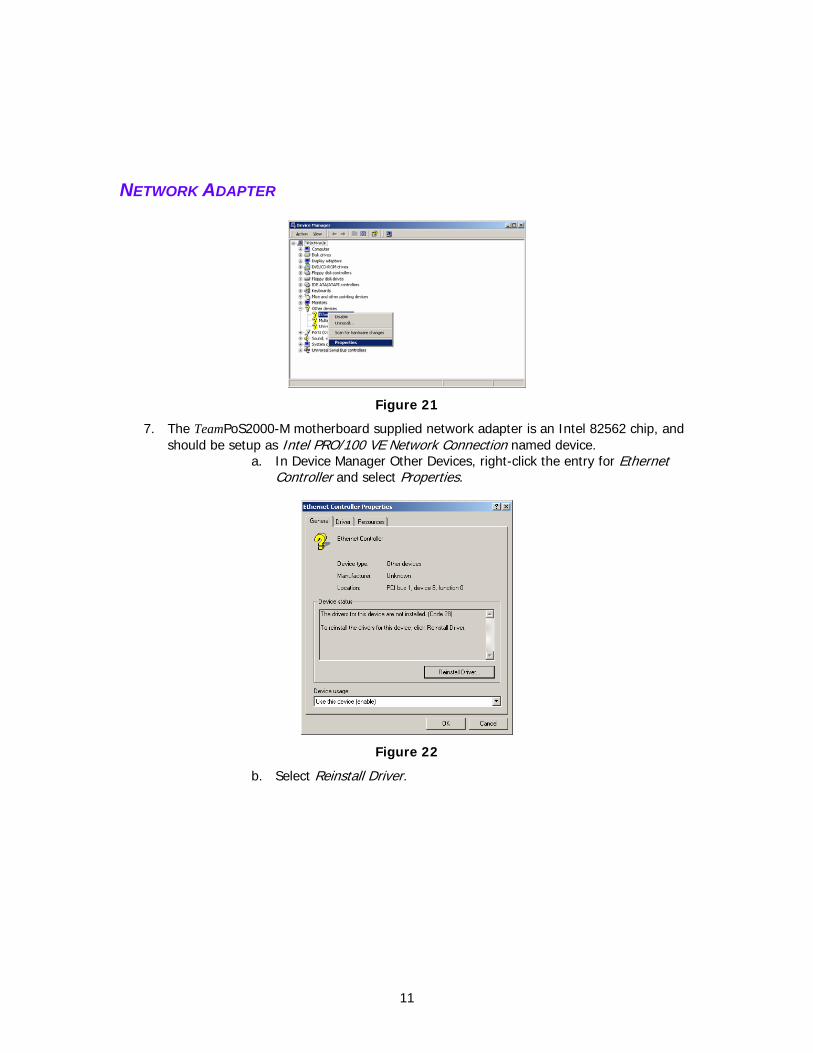
NETWORK ADAPTER
Figure 21
7. The TeamPoS2000-M motherboard supplied network adapter is an Intel 82562 chip, and should be setup as Intel PRO/100 VE Network Connection named device.
a. In Device Manager Other Devices, right-click the entry for Ethernet Controller and select Properties.
Figure 22
b. Select Reinstall Driver.
12
Figure 23
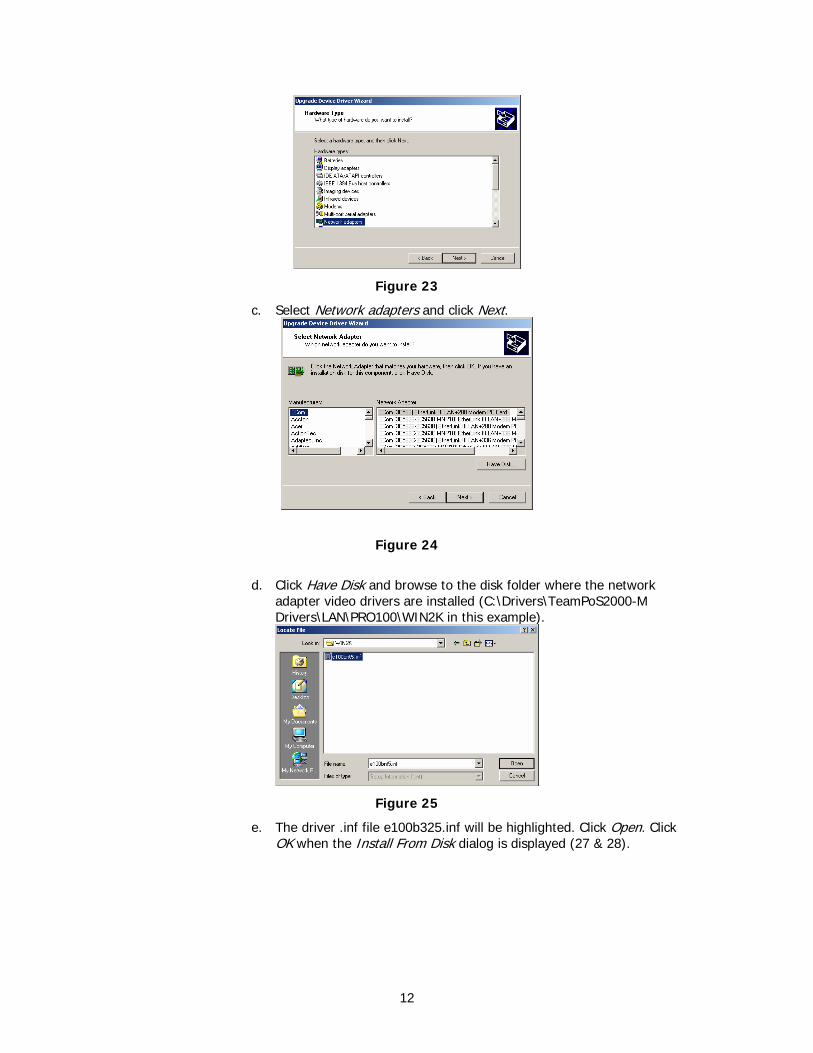
c. Select Network adapters and click Next.
Figure 24
d. Click Have Disk and browse to the disk folder where the network
adapter video drivers are installed (C:\Drivers\TeamPoS2000-M Drivers\LAN\PRO100\WIN2K in this example).
Figure 25
e. The driver .inf file e100b325.inf will be highlighted. Click Open. Click OK when the Install From Disk dialog is displayed (27 & 28).
13
Figure 26
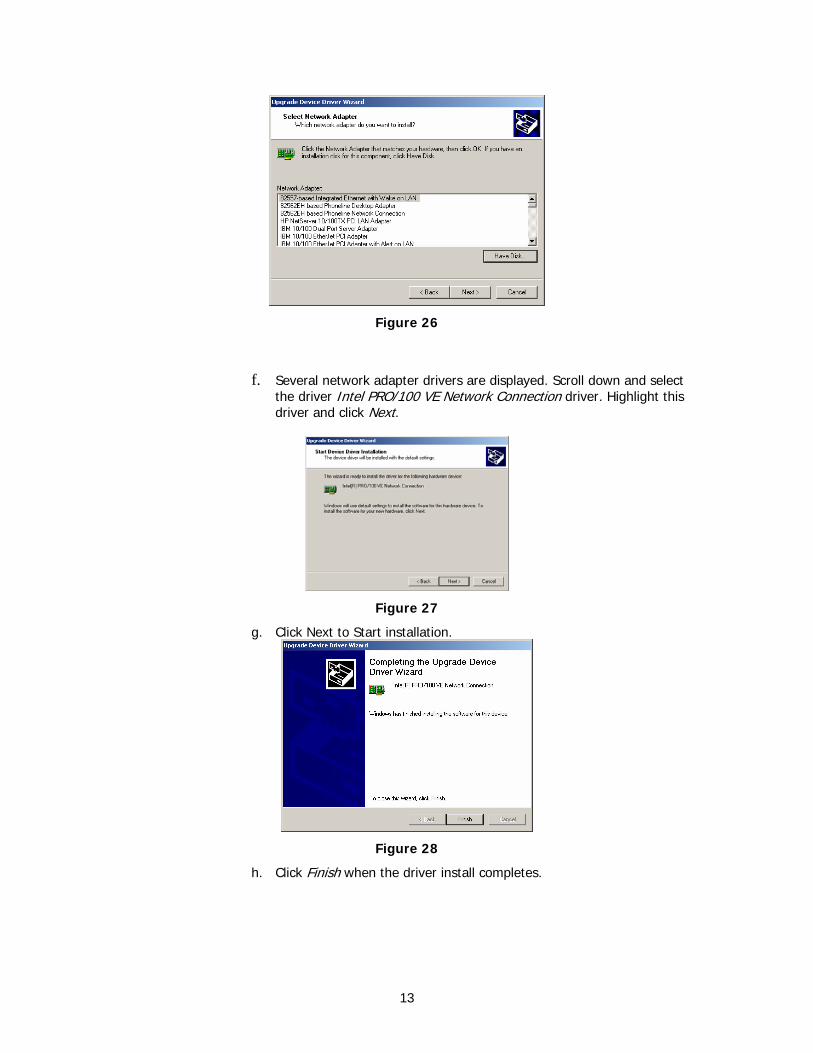
f. Several network adapter drivers are displayed. Scroll down and select the driver Intel PRO/100 VE Network Connection driver. Highlight this driver and click Next.
Figure 27
g. Click Next to Start installation.
Figure 28
h. Click Finish when the driver install completes.
14
Figure 29
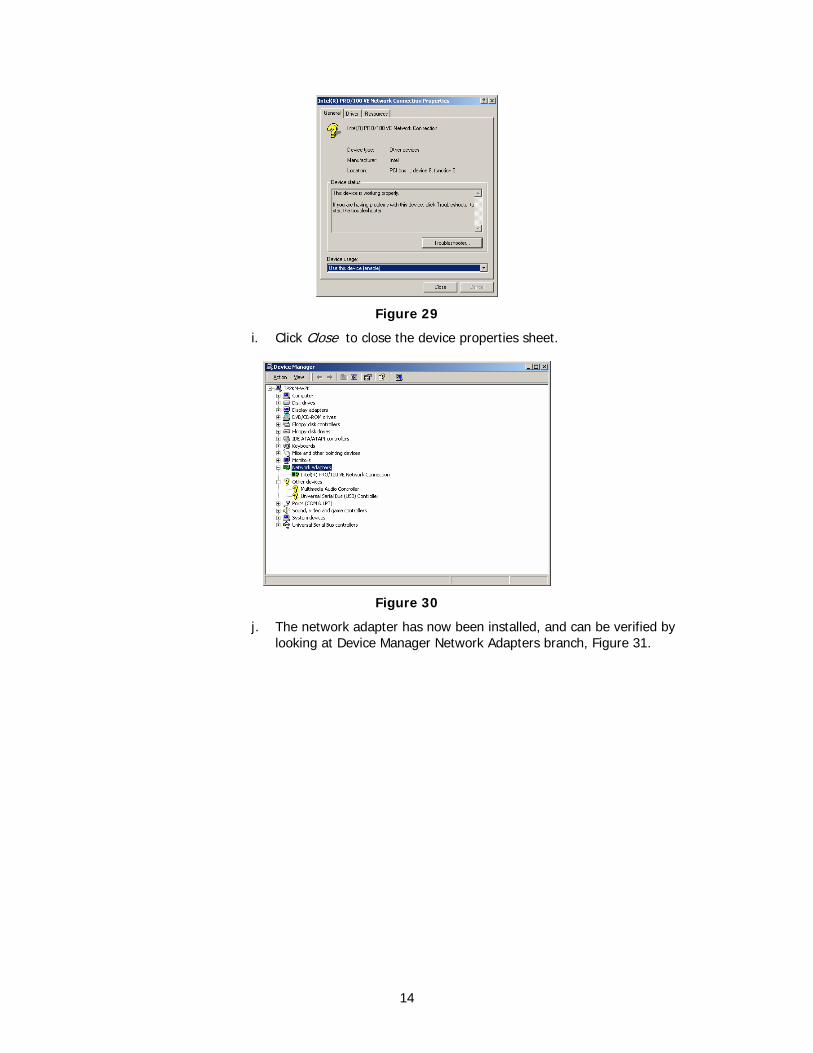
i. Click Close to close the device properties sheet.
Figure 30
j. The network adapter has now been installed, and can be verified by looking at Device Manager Network Adapters branch, Figure 31.
15
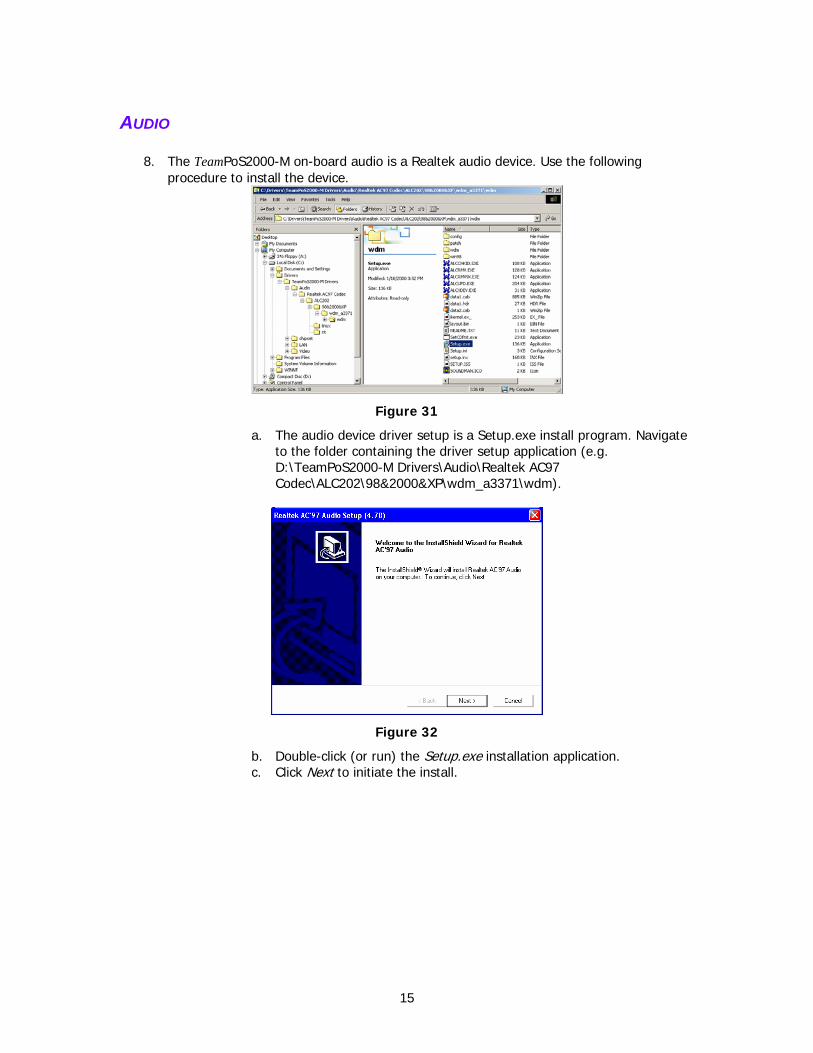
AUDIO
8. The TeamPoS2000-M on-board audio is a Realtek audio device. Use the following procedure to install the device.
Figure 31
a. The audio device driver setup is a Setup.exe install program. Navigate to the folder containing the driver setup application (e.g. D:\TeamPoS2000-M Drivers\Audio\Realtek AC97 Codec\ALC202\98&2000&XP\wdm_a3371\wdm).
Figure 32
b. Double-click (or run) the Setup.exe installation application. c. Click Next to initiate the install.
16
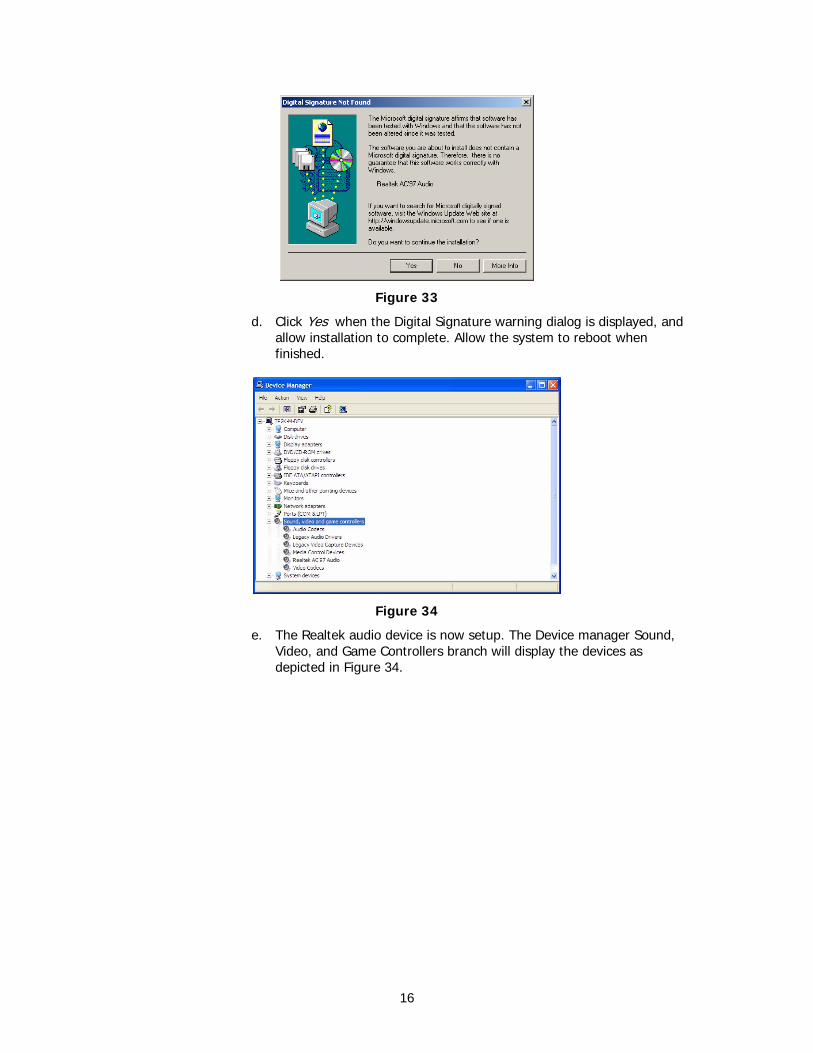
Figure 33
d. Click Yes when the Digital Signature warning dialog is displayed, and allow installation to complete. Allow the system to reboot when finished.
Figure 34
e. The Realtek audio device is now setup. The Device manager Sound, Video, and Game Controllers branch will display the devices as depicted in Figure 34.
17
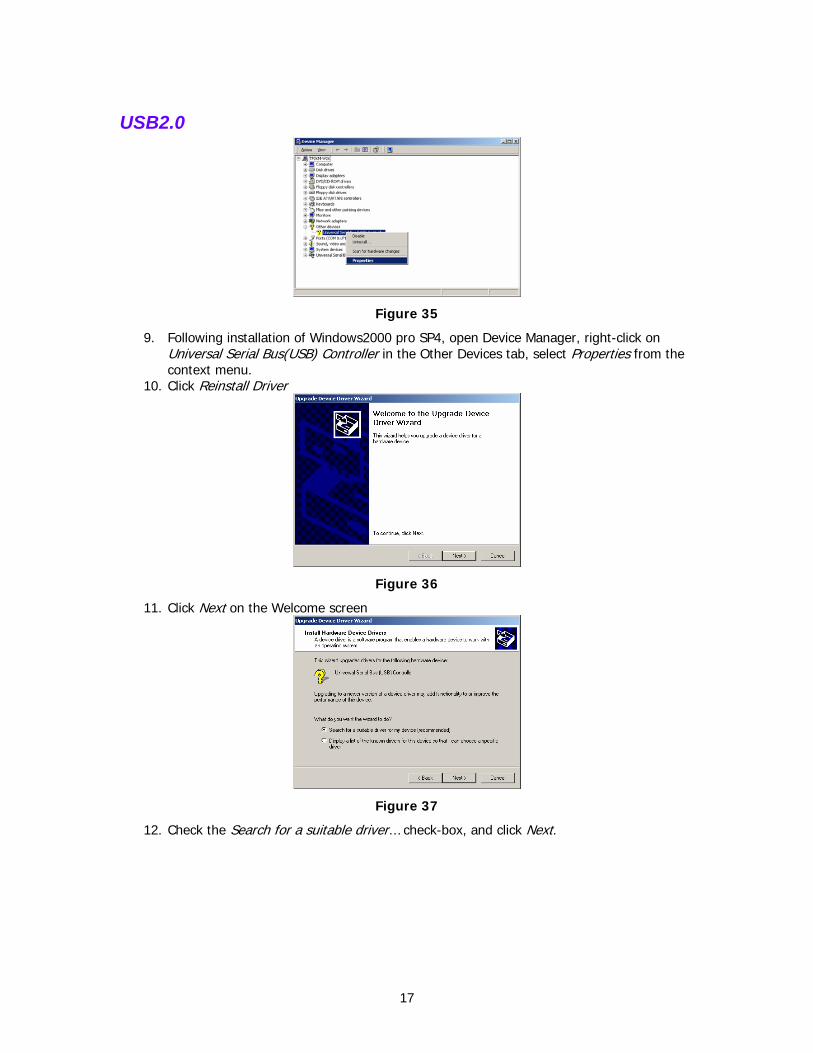
USB2.0
Figure 35
9. Following installation of Windows2000 pro SP4, open Device Manager, right-click on Universal Serial Bus(USB) Controller in the Other Devices tab, select Properties from the context menu.
10. Click Reinstall Driver
Figure 36
11. Click Next on the Welcome screen
Figure 37
12. Check the Search for a suitable driver… check-box, and click Next.
18
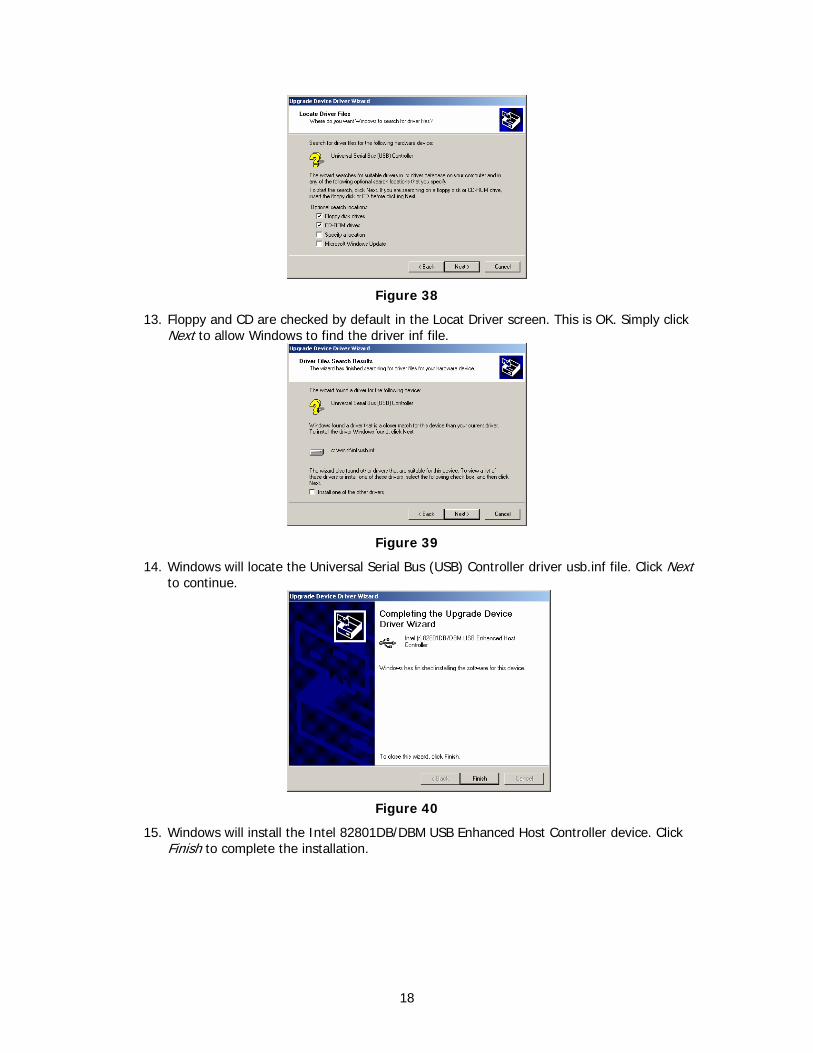
Figure 38
13. Floppy and CD are checked by default in the Locat Driver screen. This is OK. Simply click Next to allow Windows to find the driver inf file.
Figure 39
14. Windows will locate the Universal Serial Bus (USB) Controller driver usb.inf file. Click Next to continue.
Figure 40
15. Windows will install the Intel 82801DB/DBM USB Enhanced Host Controller device. Click Finish to complete the installation.
19
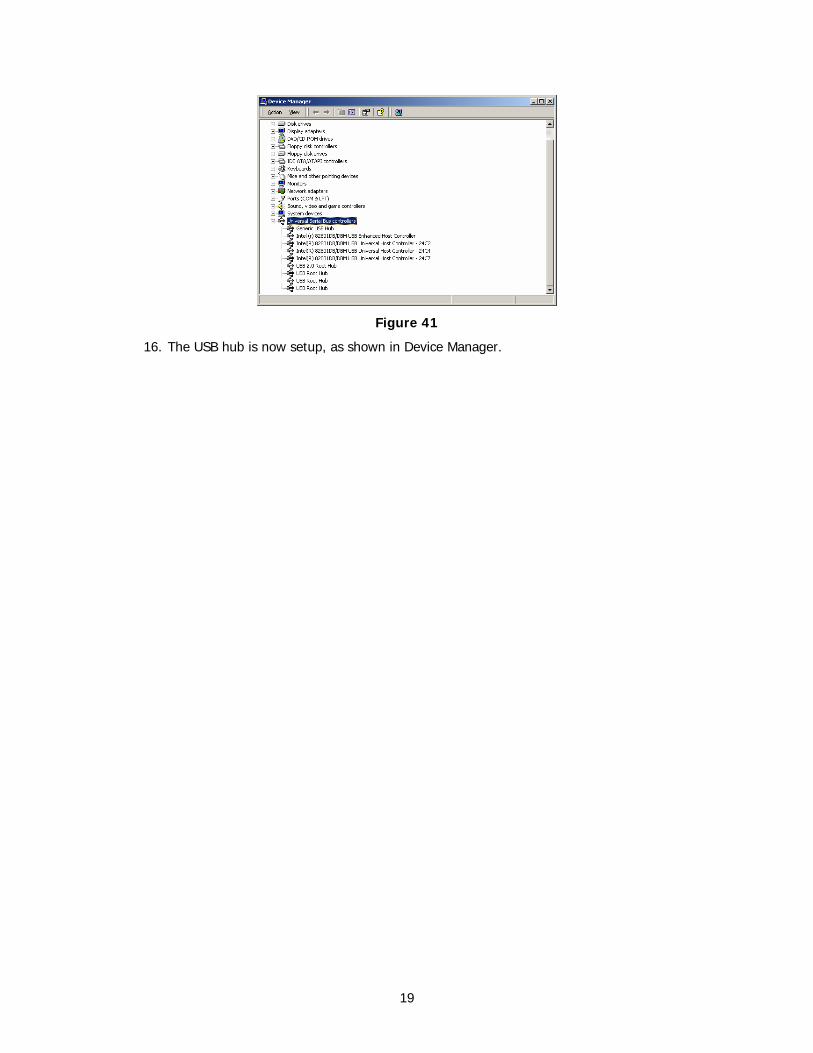
Figure 41
16. The USB hub is now setup, as shown in Device Manager.
20
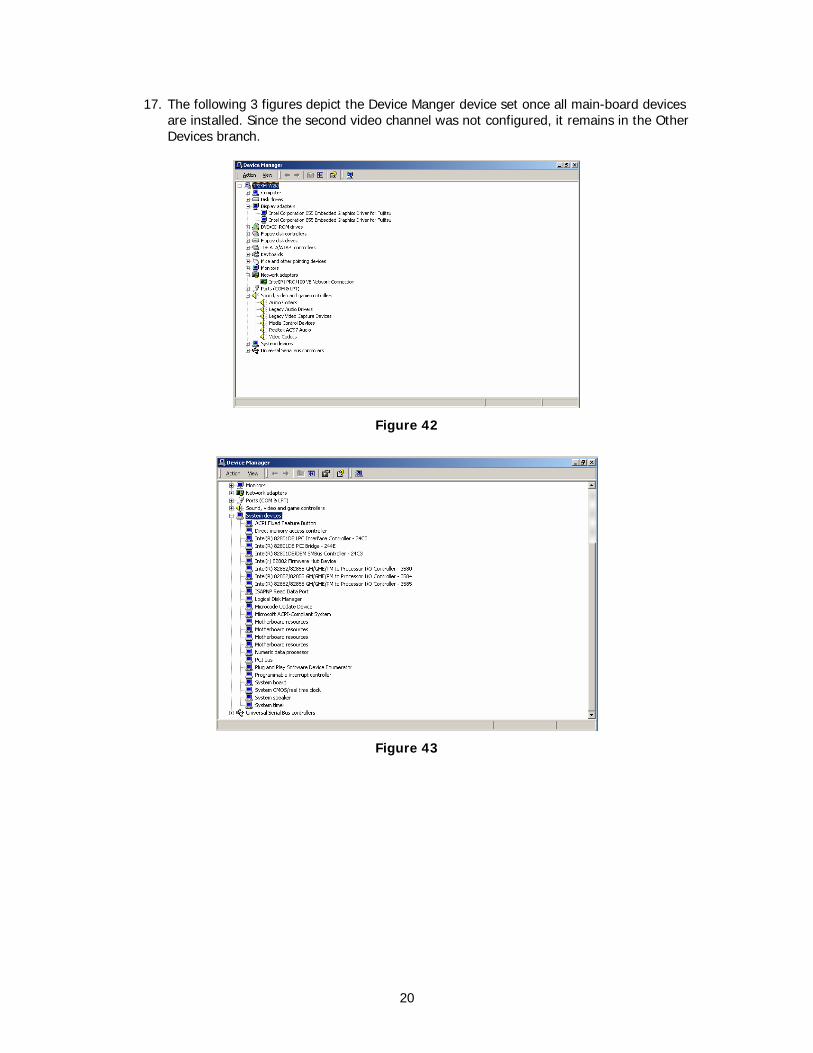
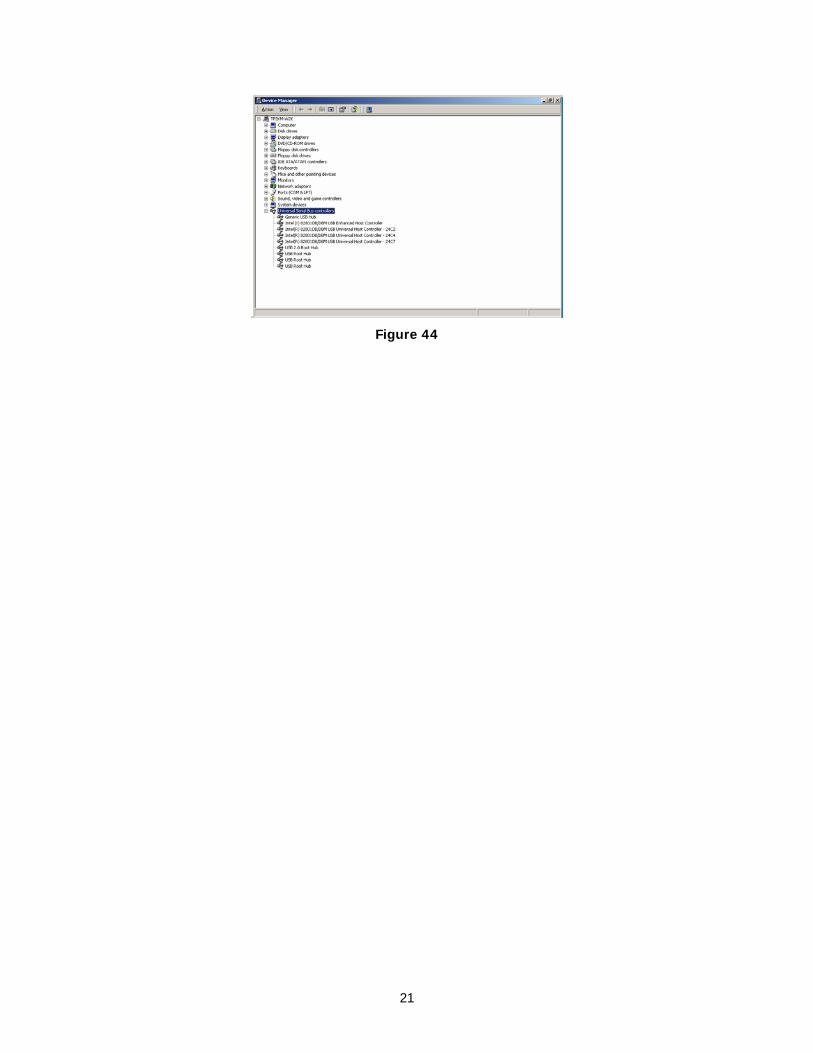
17. The following 3 figures depict the Device Manger device set once all main-board devices are installed. Since the second video channel was not configured, it remains in the Other Devices branch.
Figure 42
Figure 43
21
Figure 44

22
Communications I/O Board Options Setup and configuration of Retail I/O and/or TeamCOMBO I/O boards remains unchanged from earlier TeamPoS2000 systems.