team 4 bryan blancke mark heller jeremy martin daniel kim facilitator: dr. aviyente sponsor:...
TRANSCRIPT

ECE 480 – Hot Strip Centerline Tracking
Team 4
Bryan Blancke
Mark HellerJeremy Martin
Daniel Kim
Facilitator:Dr. Aviyente
Sponsor:ArcelorMittal
Source: SMS

Outline Problem Statement Background Design Specification Conceptual Design Final Design Team Roles Budget

Problem Statement Centerline Tracking in the Hot Strip mill
What is the hot strip mill? Why track centerline? What is cambering? What issues can this cause?

Background Material Slab
Thickness: 8-10 inches, 9.9 inches average.Width: 26-72 inchesLength: 110-383 inches
Weight: 10-40tons
Product: Hot Coil
Thickness: 0.06-0.5 inchesWidth: 25-75 inchesInside Diameter: 30 inches
Outside Diameter: 80 inches
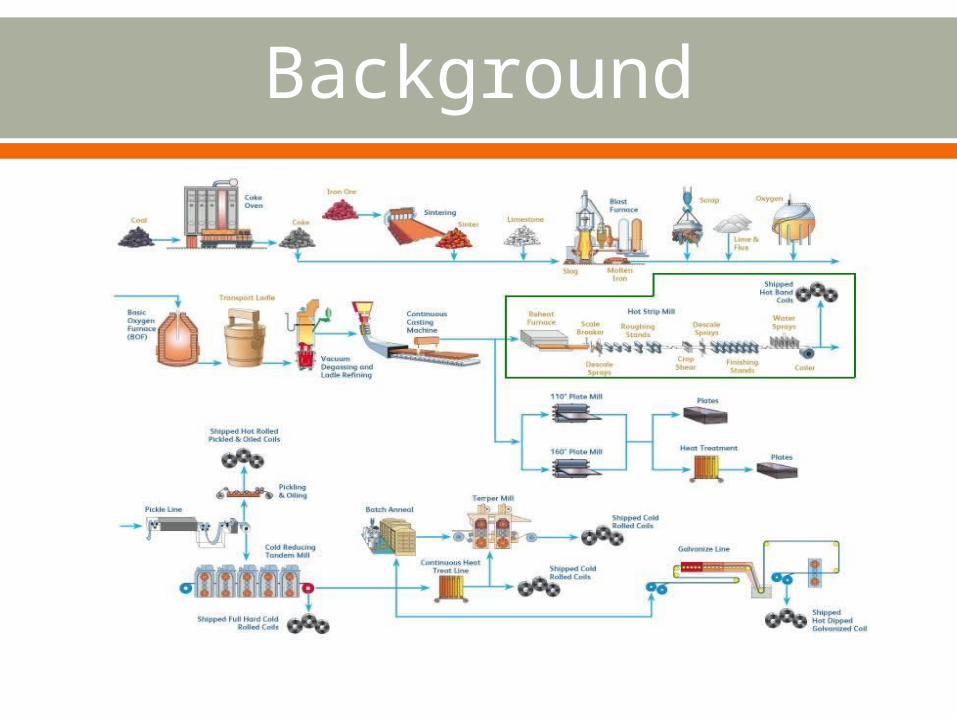
Background

Courtesy of ArcelorMittal

Finishing Mill Courtesy of ArcelorMittal

Design Specification High Resistance to Heat (2300◦F) High Resistance to Debris (scale) Waterproof Data processing at 50 Hz 540p resolution Image capture from an 8 meter distance

Conceptual Design 1 Centerline Tracking Production Monitor A camera mounted 6-8 meters above the stand. Records the metal strip and captures the image of
thecamber.
Cost: $130,000.00European Company: EMG AutomationStrengths Weaknesses
Ideal solution Expensive
No innovation
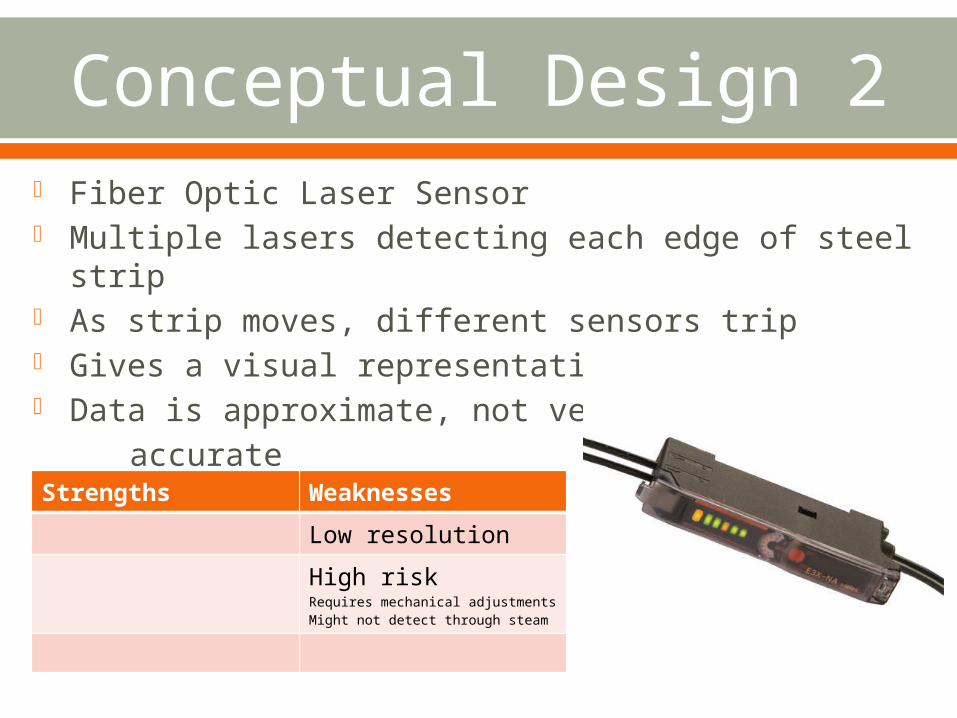
Conceptual Design 2 Fiber Optic Laser Sensor Multiple lasers detecting each edge of steel strip As strip moves, different sensors trip Gives a visual representation of the strip Data is approximate, not very accurate
Strengths Weaknesses
Low resolution
High riskRequires mechanical adjustmentsMight not detect through steam

Conceptual Design 3Low-power Micro-
cameras Initially a consideration due to
the ease of integration with a microcontroller
Lower capture speeds, less accurate data
Instead, we used a more powerful microcontroller in order to utilize a regular 1080p 30fps camera
Strengths Weaknesses
Fast processing Low resolution
price Low heat tolerance

Final Design Camera attached via USB to a Beaglebone Black
Microcontroller Captures images of position of strip Use OpenCV to detect and compare strip edges Output images and position data to a display screen

Block Diagram

Raspberry Pi vs. Beaglebone
Raspberry Pi Beaglebone
More resources available Easier set up
1080p display capability Faster clock speed
More available connections
But why not Arduino? Image processing requires heavy processing
power which Arduino cannot provide within the scope of this project.

Issues With the given budget, taking images and
processing them at 50 fps is unfeasible. Current cameras generally have a maximum of
30 fps. The microcontroller might not be able to process
the information as fast as the pictures are being captured.
We may have to sample the data at lower frequencies in order for our controller to be able to process the data.

Budget Beaglebone Black - $45 Logitech C920 Camera - $75 HDMI cable - $7 Ethernet cable - $7 5V 2.5A power supply - $10 Beaglebone casing - $20 Demonstration bench materials - $50
Total - $214

Project ManagementTeam Roles
Bryan BlanckeNon-Technical: Team ManagementTechnical: Demonstration Bench
Mark HellerNon-Technical: Document PreparationTechnical: Functionality Testing
Jeremy Martin
Non-Technical: Web DesignerTechnical: Software Integration
Daniel KimNon-Technical: Presentation PreparationTechnical: Hardware Specialist
Questions?