teacher handbook - amazon s3teacher+handbook.pdfwhy professionals & creatives teach on...
TRANSCRIPT

T E A C H E R H A N D B O O K
WHY PROFESSIONALS & CREATIVES TEACH ON SKILLSHARE
EARN MONEY
Teaching on Skillshare provides a passive income stream, and that’s the holy grail for someone in my shoes.
BRYN CHERNOFF, 20,000 students
LAUNCH YOUR SIDE HUSTLE OR CAREER
It’s enabled me to support my family as a freelancer… I never thought I’d be able to work from home like this.
JAKE BARTLETT, 30,000 students
GIVE BACK
“The most rewarding part is witness-ing other people embracing their creativity. Being a part of that process with them is such a gift.
RIA SHARON 11,000 students

CONTENTS
INTRODUCTION TO TEACHING ON SKILLSHARE 5
How Skillshare Classes Work 7
PLANNING YOUR CLASS 9
Choosing a Class Project 11
Creating a Class Outline 13
CLASS PRODUCTION 15
Preparing to Film 15
Filming 16
Editing 19
PREPARING TO PUBLISH YOUR CLASS 21
Using the Class Upload Tool 24
PAYMENTS 25
SETTING YOUR CLASS UP FOR SUCCESS 27
Reaching Students 29
Engaging Your Student Following 31
Building Your Channel 32
SKILLSHARE TEACHER COMMUNITY 34

welcome to the
T E A C H E R H A N D B O O K
This handbook provides a comprehensive overview of what it means to teach on Skillshare and covers everything from choosing a class topic to reaching Skillshare’s 3M members. Each aspect of creating a class is broken down into 3 sections:
OVERVIEW FAQS TELL ME MORE
fundamental information links to articles and resources that offer greater insight regarding topics addressed in the overview section
helpful but non-essential resources and tips
If short and sweet is more your style, you can also check out this guide that breaks teaching a Skillshare class into 4 easy steps.

INTRODUCTION TO TEACHING ON SKILLSHARE
Skillshare is an online learning platform where anyone can teach. Teaching a class is completely free and Skillshare teachers make real money! The average Skillshare teacher makes $1400 in their first 6 months and top teachers make up to 100k a year.
Our teachers are everyday creators, entrepreneurs, and professionals who are passionate about what they do – people like you, your friends and your colleagues. You don’t need to have teaching experience or be well known to publish your first class and grow a following out of Skillshare’s 3 million users.
You can work on or upload a class at your own pace using the resources in this handbook, the Skillshare Teacher Center, and the Skillshare blog. Or, if you prefer to publish your class alongside a supportive community, you can join our new teacher challenge we run every month. By joining our teacher challenge you can stay on track with weekly milestones, helpful tips, and fun prizes. Join this month’s training here. You can also always email our teacher support staff at [email protected].
However you chose to create your class, we can’t wait to have you join our Teacher Community!
Skillshare has really freed me up to do the projects I really enjoy. Having that foundational monthly income enables me to pursue the kind of projects I’m most passionate about. During the interim of client work, instead of creating filler work for my portfolio, I’m sharing my skills, cre-ating a tribe with others, and getting paid for it.
AMARILYS HENDERSON

FAQS I HAVE NO IDEA WHAT TO TEACH. WHAT TOPICS ARE MOST POPULAR?
You can teach any topic you’re passionate about! To get started, think about what skills you’d be most confident sharing with others. For more inspiration, check out a few trending topics as well as up and coming topics here. You can also always reach out to [email protected] and we can help you brain-storm a class topic.
I AM COMPLETELY NEW TO TEACHING, WILL I BE ABLE TO CREATE A SKILLSHARE CLASS?
Most of our Skillshare teachers are new to online teaching. It’s entirely possi-ble to publish a Skillshare class on your own by utilizing the resources in this handbook, the Teacher Center, our blog, and [email protected]. We’d also love to have you join our monthly teacher challenge if you’d like to publish your first class alongside a group of other new teachers! Head here to join this month’s challenge.
HOW LONG DOES IT TAKE TO PRODUCE A CLASS?
WHAT DOES A SUCCESSFUL SKILLSHARE CLASS LOOK LIKE?
All in all, most teachers spend 10-20 hours creating a class from thinking of their topic all the way to publishing their class and reaching Skillshare’s 3M members.
It’s hard to choose a favorite as we have so many wonderful classes on our platform! Instead, here are a few classes across an array of categories that are great examples of successful Skillshare classes:
Hand-Coding Your First Website: HTML and CSS Basics by Rich Armstrong Creating Webcomics: From Sketches to Final Comic by Sarah Andersen Bitesized Branding: How to Develop Your Design Personality by Faye Brown Sketchbook Practice: Make Everyday Objects Pop with Watercolour and Pen by Ohn Mar
I ALREADY HAVE CLASSES ON ANOTHER ONLINE PLAT-FORM, CAN I UPLOAD THESE CLASSES TO SKILLSHARE?
Yes! Check out our complete guide to uploading existing content onto Skill-share here.
TELL ME MORE! Teaching has unlocked incredible opportunity and success for some of our top teachers:
Behind the Scenes: Why Mary Kate McDevitt Teaches on Skillshare
Luna Vega: Unlock Career Opportunities with a Side Project
How Teaching on Skillshare Launched Jake Bartlett’s Freelance Career
How Teaching Helps Bryn Chernoff Grow Her Calligraphy Business
HOW SKILLSHARE CLASSES WORK
Skillshare classes are designed for the best online learning experience. Students watch classes at their own pace, cre-ate projects to practice what they’ve learned, and interact with each other from all around the globe. As a teacher, you get to facilitate this unique learning experience, and that all starts with understanding the 3 pillars of Skillshare classes:
In today’s fast-paced digital world, bite-sized content is the proven to be eas-iest for students to digest, understand, and remember. Skillshare classes, on average, include 20-60 minutes of pre-recorded video content broken down in a series of short 1-7 minute videos. Rather than teaching a broad, sweeping skill set, your class should hone in on one specific project, concept or skill. This di-gestible format allows for focused and engaged learning – anytime, anywhere.
All classes on Skillshare include a fun, quick project that helps students prac-tice what you’re teaching and share their process with the class community to get feedback, which leads to a more effective and lasting learning experience. For many teachers, seeing their students’ projects come to life is one of the most rewarding parts of teaching. Unsure of how a project would work with your topic? Email us at [email protected] and we can help you select one that’s right for you.
Students on Skillshare interact with each other by answering questions, shar-ing tips and resources, and providing each other with feedback and encour-agement. Often times, students learn just as much from one another as they learn from you. You’ll facilitate this by providing as many opportunities for collaboration as possible.
Lastly, all classes must adhere to our Class Guidelines
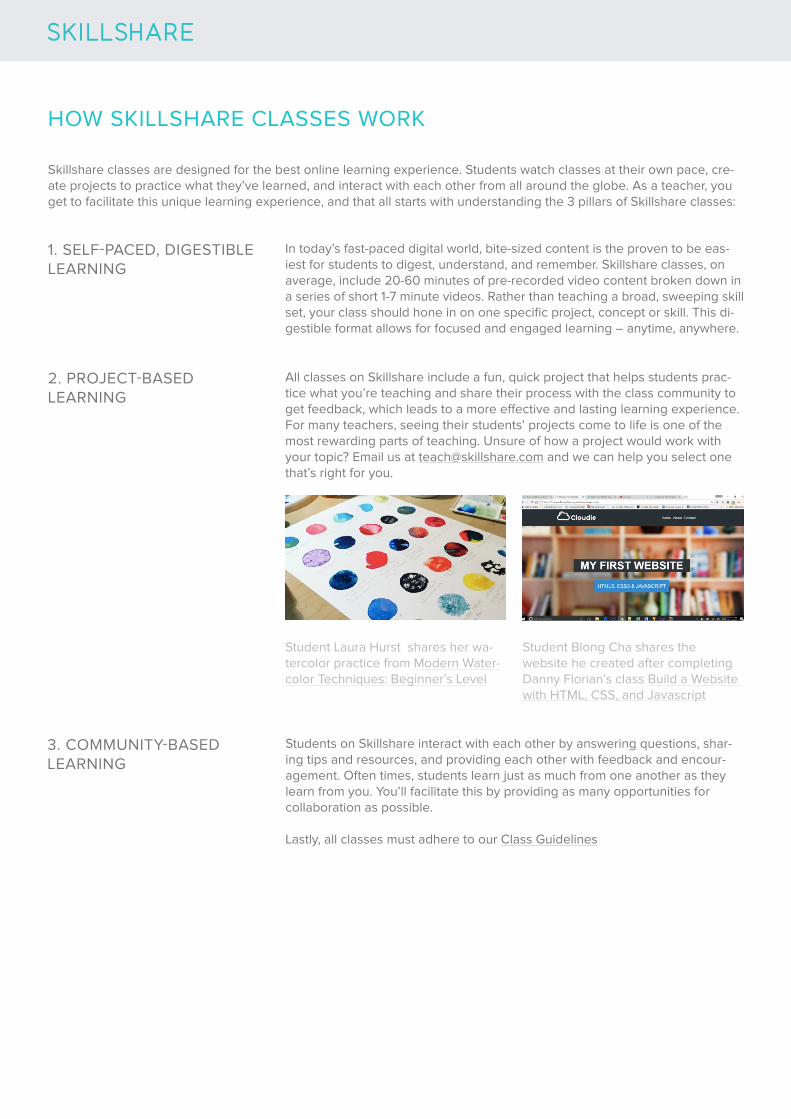
Student Laura Hurst shares her wa-tercolor practice from Modern Water-color Techniques: Beginner’s Level
Student Blong Cha shares the website he created after completing Danny Florian’s class Build a Website with HTML, CSS, and Javascript
1. SELF-PACED, DIGESTIBLE LEARNING
2. PROJECT-BASED LEARNING
3. COMMUNITY-BASED LEARNING

WHAT IS THE OPTIMAL CLASS LENGTH?
CAN MY CLASS BE SHORTER THAN 20 MINUTES OR LONGER THAN 60 MINUTES?
AM I REQUIRED TO GIVE MY STUDENTS FEEDBACK ON THEIR PROJECTS?
The most successful classes on Skillshare are typically between 20-60 minutes.
Your class must be a minimum of 10 minutes and can exceed the 60 minute mark but If your class is longer than 2-3 hours, consider breaking down your material into multiple classes.
Nope! You are not required to give feedback on student projects. However, offering students feedback is a wonderful way to engage your following and cultivate a positive community.
Up Next: All the tools you need to start planning your class.
FAQS
PLANNING YOUR CLASS
Planning is the first phase of creating your Skillshare class. Organized and engaged classes result in the best student experience, which means higher class reviews, longer watch times, and more students. In addition, putting in the effort to plan your class carefully will make the production phase much easier since you’ll be fully prepared to film.
On Skillshare, we welcome classes across a wide range of categories, includ-ing Design, Photography, Business, Tech, and many more. You can teach any topic you’re passionate about! Our students are always eager to learn from new teachers who bring a unique style and perspective - that’s you!
We suggest choosing a class topic that is as specific as possible. Specialized classes tend to be the most popular on Skillshare because they appeal directly to a certain set of students interested in the particular topic, style, or skillset. Keeping your topic focused on a specific topic or technique will also help to set it apart from other classes in your category.
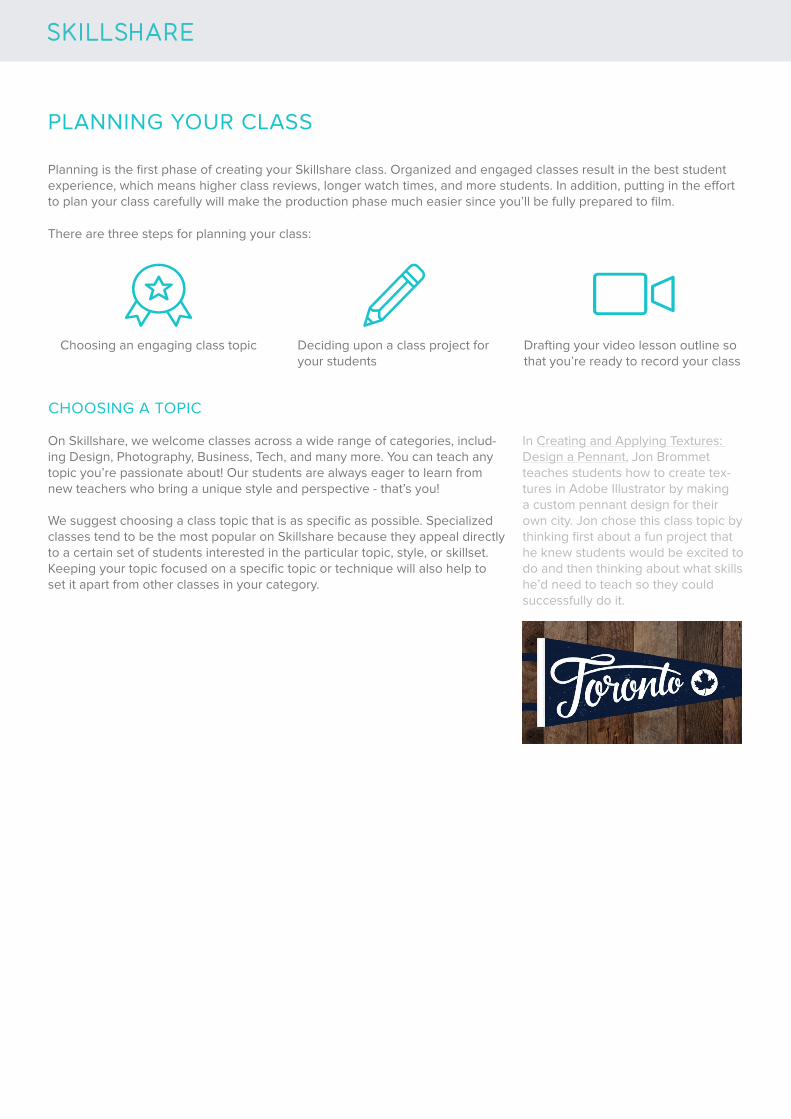
In Creating and Applying Textures: Design a Pennant, Jon Brommet teaches students how to create tex-tures in Adobe Illustrator by making a custom pennant design for their own city. Jon chose this class topic by thinking first about a fun project that he knew students would be excited to do and then thinking about what skills he’d need to teach so they could successfully do it.
Choosing an engaging class topic Deciding upon a class project for your students
Drafting your video lesson outline so that you’re ready to record your class
There are three steps for planning your class:
CHOOSING A TOPIC

FAQS
TELL ME MORE!
THERE ARE ALREADY TON OF CLASSES ON SKILLSHARE THAT COVER WHAT I WANT TO TEACH. DOES THIS MEAN IT ISN’T WORTH MAKING MY CLASS?
WHAT ARE THE MOST POPULAR CLASS CATEGORIES ON SKILLSHARE?
From Creative topics such as Graphic Design and Illustration to Business and Technology topics including Marketing, Business Analytics, UX, and more, Skill-share students are learning across a wide variety of skills. For a list of popular as well as up and coming class categories on Skillshare, head here.
I AM MORE OF A JACK OF ALL TRADES TYPE AND NOT AN EXPERT IN ANYONE THING. I AM AT A LOSS FOR WHAT TO TEACH.
Most of us at Skillshare feel this way so we completely empathize! To help get your wheels turning, this article has awesome ideas for brainstorming class topics such as thinking about a skill you wish you had known when you started your career. You can also email your ideas to [email protected] or share them with our teacher community in the Skillshare Teacher Center.
When a category has a high number of classes, this is often a sign that the de-mand for classes in this category is very high. Moreover, there are many ways to distinguish your class by creating a unique class project or narrowing on on a specific skill that hasn’t been covered yet. Lastly, students who are interested in a topic tend to love seeing it taught in different styles and from different angles.
How top teachers choose their class topics 4 tips for choosing your second class topic
All classes on Skillshare include a class project that helps students practice their new skills as they learn in your class. Think of it as a fun exercise students can do to apply what you’ve taught them and share their work with other stu-dents for feedback.
Here are three tips for creating a class project your students will do, enjoy and share:
1. MAKE YOUR PROJECT EASY TO START.
The best class projects are easy to start and encourage students to dive right in while watching your class videos. Students are more likely to do a light-weight exercise that allows them to jump right in and feel a quick sense of accomplishment in just a few minutes.
2. MAKE YOUR PROJECT INSTRUCTIONS EASY TO UNDERSTAND.
Your Project Description is your blank canvas for encouraging students to share their work - format it however you’d like, but be sure to keep it clear and straightforward. Feel free to attach files or include additional resources, arti-cles, or anything else students will find helpful. If your project requires multiple steps, list them out clearly to keep it digestible.
3. ENCOURAGE STUDENTS TO SHARE THEIR WORK ALONG THE WAY
Encourage your students to share their work in progress, rather than waiting to submit a “final” outcome. The more work students share along the way, the more feedback they’ll get from other students, which means a better learning experience. If relevant, break your project down into steps so students know when and what to share.
CHOOSING A CLASS PROJECT
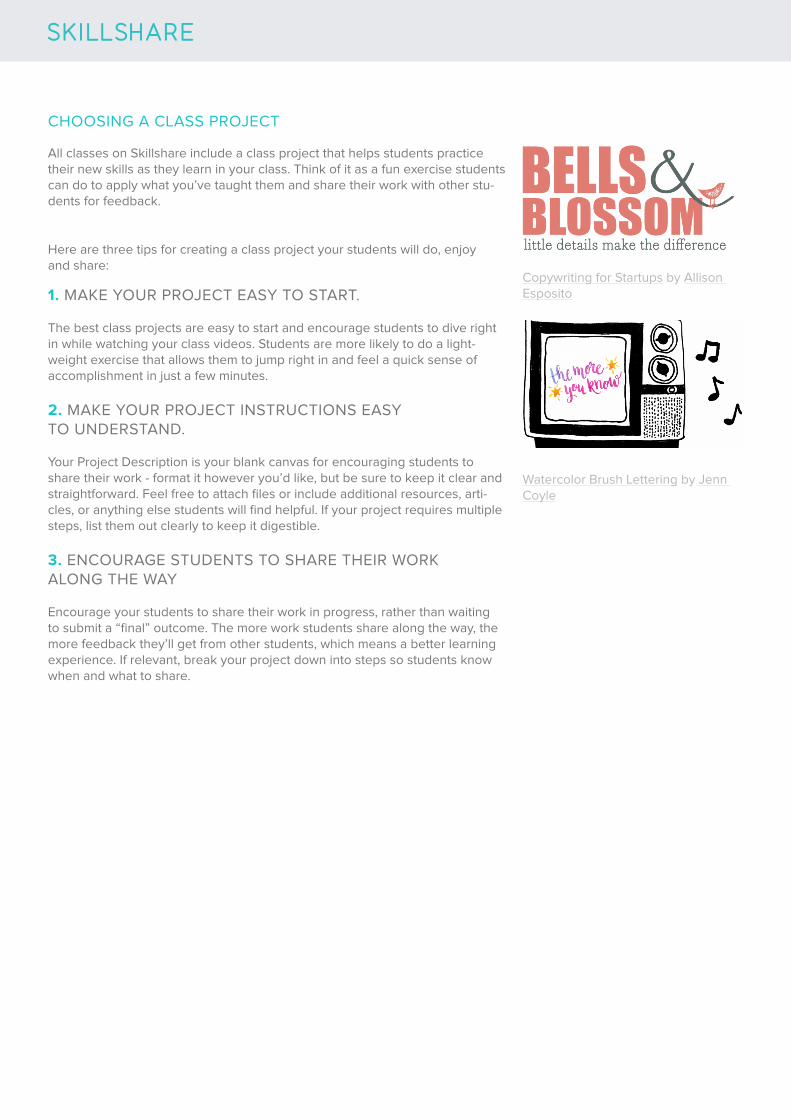
Copywriting for Startups by Allison Esposito
Watercolor Brush Lettering by Jenn Coyle
FAQS
TELL ME MORE!
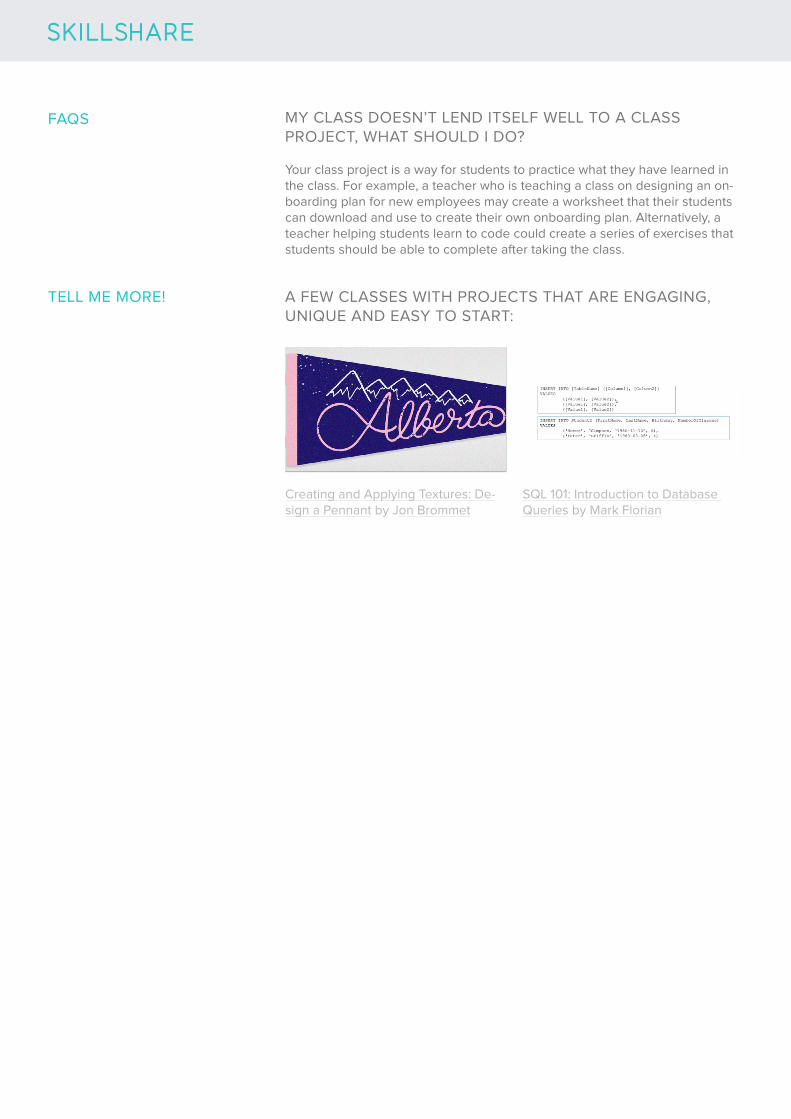
MY CLASS DOESN’T LEND ITSELF WELL TO A CLASS PROJECT, WHAT SHOULD I DO?
A FEW CLASSES WITH PROJECTS THAT ARE ENGAGING, UNIQUE AND EASY TO START:
Your class project is a way for students to practice what they have learned in the class. For example, a teacher who is teaching a class on designing an on-boarding plan for new employees may create a worksheet that their students can download and use to create their own onboarding plan. Alternatively, a teacher helping students learn to code could create a series of exercises that students should be able to complete after taking the class.
Creating and Applying Textures: De-sign a Pennant by Jon Brommet
SQL 101: Introduction to Database Queries by Mark Florian

Filming a Skillshare class is quick and easy when you prepare ahead of time by drafting a class outline. We highly rec-ommend this template which is designed especially for Skillshare teachers. As you draft your class, it’s important to keep in mind, the most popular classes on Skillshare include 20-60 minutes of total video content, broken down into a series of short 1-7 minute videos.
While constructing your outline, you’ll also need to think about the video format you’ll use for each lesson. Here are some video formats to consider (we recommend using a combination to hold student’s interest):
Next, sketch out your main talking points for each video lesson. Some teachers prefer to write out a full script for each video, while others are comfortable with detailed bullet points. Whatever style you choose, follow these best practices to ensure your video lessons are organized and engaging:
CREATING A CLASS OUTLINE
Slide presentation: A series of pictures or pages of information
Screencast workflow: Recording your computer screen
Talking head: Speaking to the camera head-on
Physical demonstration: Demonstrating your process in front of the camera
In the first video of your class, start with a quick 10-20 second overview of what your class will cover so that students know what to expect. Establish credibility by sharing examples of your work and let students know what they will learn to do or create in the class. Share visual examples of your work or stories from your experience. Stick to one major concept per lesson so that students aren’t overwhelmed with too much information, and reinforce key points by repeating them throughout your lessons. Find a balance with your visual style. For example, if you’re using a talking-head format in your video, cut to an image every so often to demonstrate your points. As you outline your class, think about where you’ll cut away to example images or slides to illustrate your points. Fill the gaps. The goal of your video lessons is to give students all the skills they need to successfully complete the class project. As you go through your project demonstration, be sure to cover all the necessary steps in the process so that students are fully equipped to get started. If your class is intermediate or advanced and assumes a certain level of previous knowledge, be sure to make this clear in your class description. Students prefer teachers who appear natural and conversational. Reference examples and anecdotes wherever possible to avoid dry content and keep students engaged. For example, tell students how you got into your field or about a favorite project you’ve done. Don’t be afraid to show your personality! Anticipate students misconceptions by asking yourself, “what is the most challenging part?” and narrate your decisions along the way. Tell students why taking this tip is valuable, why you made particular choices with your project or use certain techniques so that they can get to know your process and style.
Set the right expectations.
Keep it straightforward and direct.
Vary your visuals.
Be relatable.
Explain the why.

FAQS HOW CAN I GET FEEDBACK ON MY OUTLINE TO KNOW IF I AM HEADED IN THE RIGHT DIRECTION BEFORE I START FILMING?
Keep yourself on track with our class planning checklist!
Once you’ve drafted your outline, feel free to email it to our Teacher Support team at [email protected], or share it with our teacher community in the Skillshare Teacher Center to get helpful feedback.
Examples of the different video formats you can use in your class:
Slide presentation Screencast workflow Talking head Physical demonstration
TELL ME MORE!
Up Next: We walk you through everything you’ll need to know to film and edit your class!

CLASS PRODUCTION
Teachers are always surprised by how easy it is to record high-quality video lessons at home without breaking the bank. In fact, many of our most success-ful teachers use their computers to film themselves through a simple screen-cast. Lastly at the end of the day, students care more about your content than your production style. As long as you follow our best practices for achieving clear audio and video quality, your class content will shine.
Before you prepare to start filming, be sure to review the previous section “Creating a Class Outline” and make sure you have 1. created your outline, and 2. decided on the format(s) your class will take (screencast or physical demon-stration). The more thought you put into your class before filming, the easier the process will be. We promise!
Once you’re all set with your outline and have decided on the format of your class, follow these steps to make the filming process as smooth as possible.
Do a run-through of each video lesson so that you can iron out any kinks and make sure your class feels natural. Sit in front of a mirror, record a test on your computer, or grab a friend. Some teachers even choose to write out a full script so that they’re extra prepared when the camera starts rolling.
If you have photos, supplies, slides or anything else you need for or want to show in your class, be sure to have them ready before you start filming.
Make sure there are no distracting sounds or visuals in the background so that your viewers can focus on what’s most important: your content. If you’re using a screencast, clean up your desktop and turn off any notifications before you start recording.
Practice.
Have Your Materials Ready.
Prepare Your Filming Space.
PREPARING TO FILM
What hasn’t worked for me: Buying better, more expensive gear hasn’t made my videos better. Start where you are. Use what you have. Do what you can. I know lots of people waiting to start, “just as soon as they get the right camera or mic.”
DAN SCOTT
FAQS WHAT EQUIPMENT DO YOU RECOMMEND?
It is entirely possible to film a Skillshare class without any extra equipment aside from a computer. However, investing in a few pieces of equipment can take the quality of your class to the next level. For example, there are many microphones and pieces of lighting equipment all under $50 that can improve the A/V quality of your videos. If you are interested in additional equipment, see our list of recommended equipment here.

There are 2 overarching filming styles used in Skillshare classes: screencast and physical demonstration. The majority of Skillshare classes use a combina-tion of the 2 styles and we find that including a variety of visuals keeps stu-dents engaged. However, the decision of what filming style to use is up to you and will largely depend on what you are teaching!
Simply put, screencasting is filming your screen and a physical demonstration is filming yourself. Screencasting is used to share a slide presentation or go through a digital workflow (i.e. using Ruby on Rails, Photoshop, or HTML code). A physical demonstration is when you film yourself talking to the camera or demonstrating a skill or technique (i.e. cooking a meal, making a watercolor painting).
No matter which style you use, to ensure a smooth uploading process, refer to these basic video specifications before diving into filming:
Screencasting is the easiest way to record a Skillshare class. All you need is a computer and a microphone! Take your students through an engaging slide presentation or software demo by using a simple software on your computer. We offer an overview of screencasting below but for a more comprehensive step-by-step guide, check out this tutorial on preparing to record a screencast.
PREPARING TO RECORD A SCREENCAST
FILMING
Ceri Marsh and Laura Keogh’s class Make Ahead Breakfasts That Will Change Your Day uses physical demonstration.
Josh Cavin’s class Wordpress Web-site in 15 Minutes makes use of the screencast filming style.
Videos should be recorded at a reso-lution of 1280x720 or 1920x1080
Videos must include an audio track16:9 Aspect Ratio for slides + video format
SCREENCASTING
Skillshare’s video player uses a 16:9 aspect ratio, so you’ll want to make sure everything you record (your screen and your slides) match the same ratio. Head to System Preferences > Display to change your screen resolution to 1280 x 720 or above.
Be sure to add lots of high-resolution images to keep students engaged. See our tips for creating an engaging slide presentation.
We recommend using a USB microphone or your Apple headphones to record the audio for your class. Don’t forget to keep the mic as close to your mouth as possible and record in a quiet space! You don’t need to purchase a micro-phone to create a Skillshare class but if you would like to, our film team recom-mends this snowball microphone.
Set your resolution.
Make your slides.
Set up your audio.
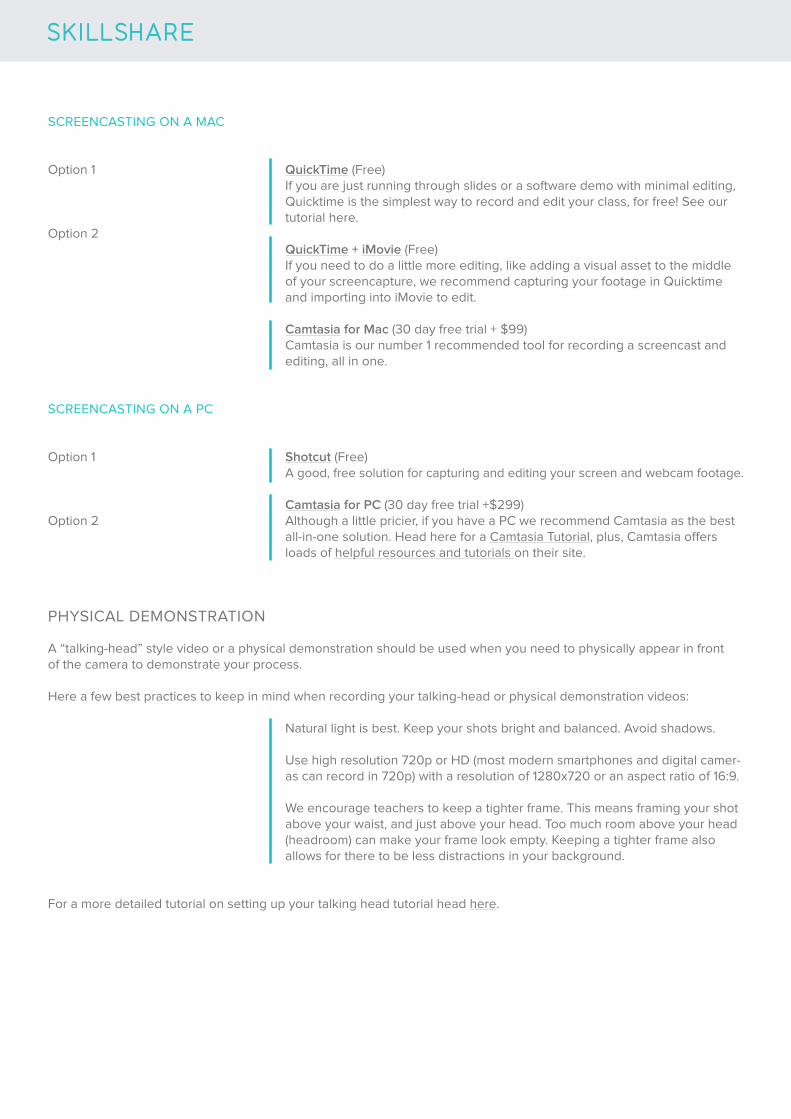
SCREENCASTING ON A MAC
SCREENCASTING ON A PC
QuickTime (Free)If you are just running through slides or a software demo with minimal editing, Quicktime is the simplest way to record and edit your class, for free! See our tutorial here.
QuickTime + iMovie (Free)If you need to do a little more editing, like adding a visual asset to the middle of your screencapture, we recommend capturing your footage in Quicktime and importing into iMovie to edit.
Camtasia for Mac (30 day free trial + $99)Camtasia is our number 1 recommended tool for recording a screencast and editing, all in one.
Shotcut (Free)A good, free solution for capturing and editing your screen and webcam footage. Camtasia for PC (30 day free trial +$299)Although a little pricier, if you have a PC we recommend Camtasia as the best all-in-one solution. Head here for a Camtasia Tutorial, plus, Camtasia offers loads of helpful resources and tutorials on their site.
Option 1
Option 1
Option 2
Option 2
A “talking-head” style video or a physical demonstration should be used when you need to physically appear in front of the camera to demonstrate your process.
Here a few best practices to keep in mind when recording your talking-head or physical demonstration videos:
For a more detailed tutorial on setting up your talking head tutorial head here.
Natural light is best. Keep your shots bright and balanced. Avoid shadows.
Use high resolution 720p or HD (most modern smartphones and digital camer-as can record in 720p) with a resolution of 1280x720 or an aspect ratio of 16:9.
We encourage teachers to keep a tighter frame. This means framing your shot above your waist, and just above your head. Too much room above your head (headroom) can make your frame look empty. Keeping a tighter frame also allows for there to be less distractions in your background.
PHYSICAL DEMONSTRATION

FAQS
TELL ME MORE!
I DON’T HAVE A SPECIAL RECORDING STUDIO. WHAT CAN I DO?
DO I REALLY NEED TO INCLUDE A TALKING HEAD VIDEO? I’D LIKE MY ENTIRE CLASS BE A SCREENCAST.
THE SPACE WHERE I AM FILMING IS VERY DARK. WHAT CAN I DO TO IMPROVE THE LIGHTING OF MY VIDEOS?
You don’t need a special recording studio but if you are filming a video with a demonstration, you may want to create your own at-home video setup. For tips such as using a stack of books as a tripod, head here.
It’s entirely up to you! However, we have found that including a talking head video allows students to connect with the teacher and keeps the student engaged. A few of our top teachers share their tips for creating a talking head video such as planning a shot list ahead of time here.
For tips on settings for an iPhone or webcam and best practices for utilizing natural light, head here.
Tips for appearing natural and relaxed on camera
Free class from the content team at Vimeo – DIY Filming: Creating Pro Videos with Tools You Already Own
Tips for framing your talking head video

Editing your footage can be broken down into 4 steps and will turn your videos into polished classes ready to be up-loaded on to Skillshare.
EDITING
FOUR EASY STEPS
Transfer your footage from your recording device using a USB cable or memory card reader. Once your footage is transferred to your computer, open your editing software and import all your raw video footage. Drag footage to your timeline and cut out “ums” and any bad takes. Don’t forget to save frequently! Most computers have built-in software that are very easy to use, like iMovie and Quicktime. Here are software-specific resources to help get you started.
QuicktimeEditing with QuicktimeQuicktime Support: Edit SectionVideo Tutorial: How to Trim Video in Quicktime
iMovieEditing with iMovieVideo Tutorial: Editing with iMovieiMovie Edits: Trim, Split, and Move Clips
CamtasiaEditing with Camtasia for WindowsEditing with Camtasia for MacVideo Tutorial: Basic Video Editing
Additional Easy-To-Use Video Editing Software:
MacScreenFlow ($129)
PCVSDC (Free)Filmora (Free + Paid Version) Lightworks (Free + Paid Version)
Transfer Your Footage
Import Your Footage
Cut + Edit Your Video Footage
Export and Publish Skillshare’s video player requires HD videos. Find the export menu in your editing software and select HD 1080 or 720.
Once you’ve wrapped up with filming and editing, follow these quick exporting specifications to make uploading your class videos a breeze!
Video bit rate of at least 300 kbits/second (3000-5000 kbits/second is ideal)
Videos should not be greater than 2GB in size
Use .mp4, .mov, .avi, or .flv when exporting your video files
Video compression format: H.264
EXPORTING SPECIFICATIONS
FAQS
TELL ME MORE!
I AM USING THE CORRECT VIDEO AND EXPORTING SPECIFICATIONS BUT SOMETHING IS GOING WRONG WHEN I UPLOAD MY VIDEOS. WHAT SHOULD I DO?
I’D REALLY LIKE SOME EXTRA HELP ON THE FILMING AND EDITING PROCESS AND DON’T WANT TO GO THE DIY ROUTE. WHAT SHOULD I DO?
Sometimes it can be as simple as refreshing the page or uploading only 1 video at a time. Head here for a our troubleshooting guide.
For extra help with filming and editing, VideoPixie – a freelance network for videographers and editors – offers a special discounted rate for Skillshare teachers! Learn more here.
Stay on track with our class production checklist.
The team at Vimeo shares the basics of shooting videos in this 4 minute video – Editing 101 with Vimeo
Three basic tips on editing your class from Skillshare Teacher Allan Michael
Up Next: From choosing a great cover image to making sure your class is in the correct category, we will cover a few small details that go a long way in setting your class up for success!

PREPARING TO PUBLISH YOUR CLASS
In this final phase, you’ll take a few easy steps to ensure your class is set up for success as small details can go a long way in making sure that students find your class on Skillshare and are excited to watch. You will add all of this information to the Skillshare Class Upload Tool.
A great class title is fun, catchy, and specifically explains what students will learn, create, or gain from taking your class. Your goal is to help both students and search engines understand exactly what your class is about. For example, instead of “Hand Lettering,” try “Hand-Lettering Basics with a Brush Pen.” If your class includes a specific software or tool, be sure to include the name of the software in the class title. Remember, specificity is key for making sure your class appear in student searches.
Together with your class title, your cover image should provide a clear depic-tion of your class topic. Choose a high-quality, visually-compelling image that will help your class stand out in our listings. To add your class cover image, head to the Video Lessons section of your draft, and click Replace Cover Im-age on the top right corner of your first video lesson. We recommend making your cover image 690x388.
Your class description should give students a quick understanding of what your class will cover. The first 3 sentences of your class description are also what will most likely show up in a Google search. Additionally, consider adding your name, class length, difficulty levels (beginner, intermediate, advanced), prerequisites, and key topics so that students immediately know what the class is about.
Classes are grouped in four main categories: Creative, Business, Tech and Lifestyle. Each category has 5-10 set subcategories. Select the class category and sub-category that best relates to your content. This will ensure that stu-dents who are interested in your topic will discover your class when browsing Skillshare.
Skill tags help us surface your content to interested students, so be sure that they are specific and include things you think your ideal student would be looking for. For instance if you teach a photoshop class, you might want your search terms to include “Design, Photoshop, Adobe, Photo Editing” etc.
CLASS TITLE
COVER IMAGE
CLASS DESCRIPTION
CATEGORY
SKILLS
This cover image for Helen Bradley’s class, Illustrator for Lunch – Create a Floral Alphabet Character clearly displays the title of the class and offers an example of what the student will learn by taking the class.
Faye Brown’s cover image for her class Bitesized Branding: How to De-velop Your Brand Personality is clean and well designed but also creative.

LEVELS
VIDEO LESSON TITLES
VIDEO LESSON NOTES
TEACHER PROFILE
No prerequisite knowledge required. The class includes everything students need to know to complete the project and/or deliverable. Some prerequisite knowledge required or, at minimum, helpful for students to learn the most from the lessons. Consider this label if there are specific software skills, conceptual knowledge, or disciplinary expertise students should have.
Significant prerequisite knowledge required for students to follow and learn from the lesson material.
You have the ability to label your class content as Beginning, Intermediate or Advanced. This helps students know what content is right for their skill level before they watch the class, providing a much better experience for beginners and experts alike.
Since your class will be broken down into multiple video lessons, you will need to name each lesson. These lesson titles should be clear, concise and relevant to the content. Ensure your class has a polished look by double-checking your titles for spelling and capitalization. Remove numbers and symbols (such as “Video #1) from the beginning of titles.
Notes are a way for you to add extra value to your video lessons by high-lighting important moments, linking to extra resources, or simply adding a fun line of encouragement or inspiration to keep students excited while watching your class. Add 1-3 notes to each of your lessons using the “Add a Note...” box
Your Skillshare profile is your very own page on Skillshare. Designing your profile is an important step to building credibility as a teacher and oftentimes members want to contact teachers about their work or freelancing projects! By customizing your Skillshare profile, you can showcase your classes, intro-duce yourself, and highlight your work by linking to your portfolio, online shop, articles you’ve written, or anything else you’d like your students to see! For an overview of the different sections of your profile with examples to check out for inspiration, head here.
Beginner
Intermediate
Advanced
beneath the video. You won’t be able to add these notes til after your class is published so as you review your videos and prepare to publish, jot down any notes you’d like to include and then go ahead and add these notes once you’ve published your class.

FAQS
TELL ME MORE!
WHAT ARE SOME GOOD CLASS TITLES?
A class title should be specific, concise, and give the student a clear idea of what they will learn in the class. Some of our favorite class titles: Bounce Let-ters: Adding Character to your Hand Lettering; Compressing .GIFS Like a Boss; Cinema 4D Basics: Model & Animate a 3D Robot
Make sure you have everything ready to go by using our publishing checklist
Optimize your skillshare class for SEO
5 tips for making your class as polished as possible
How to get your class noticed
Step-by-step guide to updating your Teacher Profile
USING THE CLASS UPLOAD TOOL
Once your class and the related materials are all set, you are ready to publish! The class upload tool is where you will upload all of your videos, the subsequent information about your class (class description, class project, category, sub-category, class type, level, and class skills) and hit the “publish” button to send your class live on the Skillshare platform!
Your class will automatically be set as “Premium” meaning only Premium members of Skillshare can watch your class. If your class is Premium, you will receive royalty payments for minutes watched in your class. Please note that you will not receive royalty payments for minutes watched in your class if it is free. If this is confusing to you, don’t worry! We will cover payments in the next section!
At this time you will also want to go into your settings and connect your PayPal account to your Skillshare account so you will be able to receive royalty and referral payments from Skillshare!
FAQS
TELL ME MORE!
I’VE UPLOADED ALL MY VIDEOS AND AM GETTING A “VIDEO PROCESSING” MESSAGE. HOW WILL I KNOW WHEN MY VIDEOS HAVE BEEN SUCCESSFULLY UPLOADED?
After the video is uploaded, you will see a “Video Processing” message. It typ-ically takes approximately 30 minutes to process your videos. When an image from the video appears, you will know your video is fully processed.
Our step-by-step guide walks you through the process of using our Class Up-load Tool.
Up Next: Skillshare teachers make real money! We tell you how.
PAYMENTS
There are 2 ways you can make money as a Skillshare teacher. You will be paid for the minutes students spend watching your class as well as for Pre-mium referrals ($10 for every new Premium member you refer to Skillshare). Teaching on Skillshare is a great form of passive income because you earn money for every minute watched in your classes, even in the months you don’t publish a class!
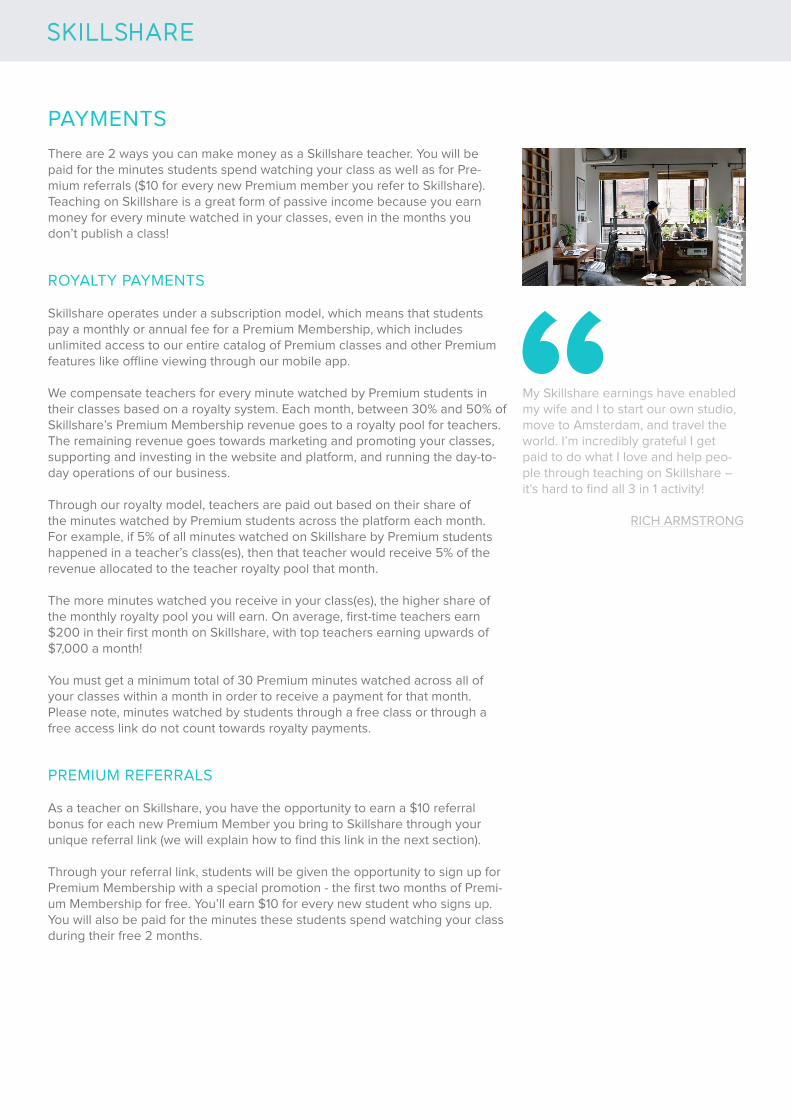
My Skillshare earnings have enabled my wife and I to start our own studio, move to Amsterdam, and travel the world. I’m incredibly grateful I get paid to do what I love and help peo-ple through teaching on Skillshare – it’s hard to find all 3 in 1 activity!
RICH ARMSTRONG
ROYALTY PAYMENTS
PREMIUM REFERRALS
Skillshare operates under a subscription model, which means that students pay a monthly or annual fee for a Premium Membership, which includes unlimited access to our entire catalog of Premium classes and other Premium features like offline viewing through our mobile app.
We compensate teachers for every minute watched by Premium students in their classes based on a royalty system. Each month, between 30% and 50% of Skillshare’s Premium Membership revenue goes to a royalty pool for teachers. The remaining revenue goes towards marketing and promoting your classes, supporting and investing in the website and platform, and running the day-to-day operations of our business.
Through our royalty model, teachers are paid out based on their share of the minutes watched by Premium students across the platform each month. For example, if 5% of all minutes watched on Skillshare by Premium students happened in a teacher’s class(es), then that teacher would receive 5% of the revenue allocated to the teacher royalty pool that month.
The more minutes watched you receive in your class(es), the higher share of the monthly royalty pool you will earn. On average, first-time teachers earn $200 in their first month on Skillshare, with top teachers earning upwards of $7,000 a month!
You must get a minimum total of 30 Premium minutes watched across all of your classes within a month in order to receive a payment for that month. Please note, minutes watched by students through a free class or through a free access link do not count towards royalty payments.
As a teacher on Skillshare, you have the opportunity to earn a $10 referral bonus for each new Premium Member you bring to Skillshare through your unique referral link (we will explain how to find this link in the next section).
Through your referral link, students will be given the opportunity to sign up for Premium Membership with a special promotion - the first two months of Premi-um Membership for free. You’ll earn $10 for every new student who signs up. You will also be paid for the minutes these students spend watching your class during their free 2 months.

FAQS HOW CAN I TRACK THE NUMBER OF MINUTES WATCHED IN MY CLASSES AND PREVIOUS PAYMENTS?
WILL MINUTES WATCHED OFFLINE THROUGH THE APP COUNT?
WHAT IF A STUDENT WATCHES MY CLASS IN 2X SPEED?
DOES THIS MEAN THAT LONGER CLASSES ARE BETTER?
You can view minutes watched data within the stats section of each one of your classes. View your total earnings and minutes watched in your Teacher Stats dashboard, located in the Teach dropdown menu in the upper right hand corner of your account.
Yes, offline watch time is recorded and incorporated just like online watch time the next time a member logs in online.
The actual amount of time a student spends watching your videos is what will count towards your total minutes watched. For example, if a student watches your 10 minute video in 2X speed, this would count as 5 minutes watched to-wards your payment. If a student watches your 10 minute video in 0.5X speed, this would count as 20 minutes watched.
No, the most important factor is that your classes are engaging and people spend time watching them. While a long class indeed has the potential for more minutes watched, if it’s not engaging, it is unlikely that students will con-tinue watching it for long. In contrast, if a shorter class is high-quality, it will be watched all the way through and receive positive reviews, attracting even more students to watch it.
5 ways to earn more on Skillshare 3 ways to make $1,000 on Skillshare this month Diversify your income pie & earn through a side hustle
TELL ME MORE!
Up Next: Now that your class is live on Skillshare and you understand how your Skillshare class will generate passive income, we help you find success on our platform.

SETTING YOUR CLASS UP FOR SUCCESS
Congrats on publishing your first class! This is no minor feat so you should be incredibly proud! Let’s get into how the platform works and what you can do next to make your class as successful as possible.
TRENDING ON SKILLSHARE
YOUR FOLLOWERS
MARKETING TOOLS
1. REFERRAL LINK
Your class has the opportunity to trend as soon as it goes lives. Your class’s position on the Trending page is deter-mined based on an algorithm we created to capture the attributes of our most enjoyable and engaging classes, ac-counting for both quality and student engagement. All classes are designated a Trending Score and displayed in order of their scores from highest to lowest.
To ensure freshness of content, newer classes are given a slight bump, which is why it’s important to get started sharing your class with your community and online following as soon as your class goes live. The more students engage in your class, the higher your class will rise and the more students on Skillshare who will discover it.
When students start watching your class, they are prompted to follow you on Skillshare. Your followers are notified each time you publish a new class or post a new Discussion from your profile. This means that once you’ve published your first class, you essentially have a built-in audience on the platform. With each class you share, you have an opportunity to gain new followers and grow your presence on Skillshare.
We’ve built three different tools to make sharing your class as easy as possible.
Skillshare operates as a subscription service, similar to other sites like Spotify and Netflix. Students sign up for a re-curring monthly or annual “Premium Membership,” which gives them access to all classes on the site. Most teachers choose to keep their classes in our Premium Membership catalog, which is the default choice when you publish your class, but you also have the option of making your class available for free, meaning anyone can access it on Skillshare regardless of whether they’ve signed up for Premium Membership.
Your referral link is the go-to way to share your Premium class with your community to earn your $10 referral bonus. When your friends and followers click your referral link to access your class, they’ll get their first two months of Premium Membership for free when they sign up for a Premium Membership.
Once your class is published, you’ll be able to locate your referral link in a few different places (don’t worry if the link looks slightly different in each place; each link will still operate in the same way).
On the left toolbar of your class: At the top of the Promote section of your class upload tool:
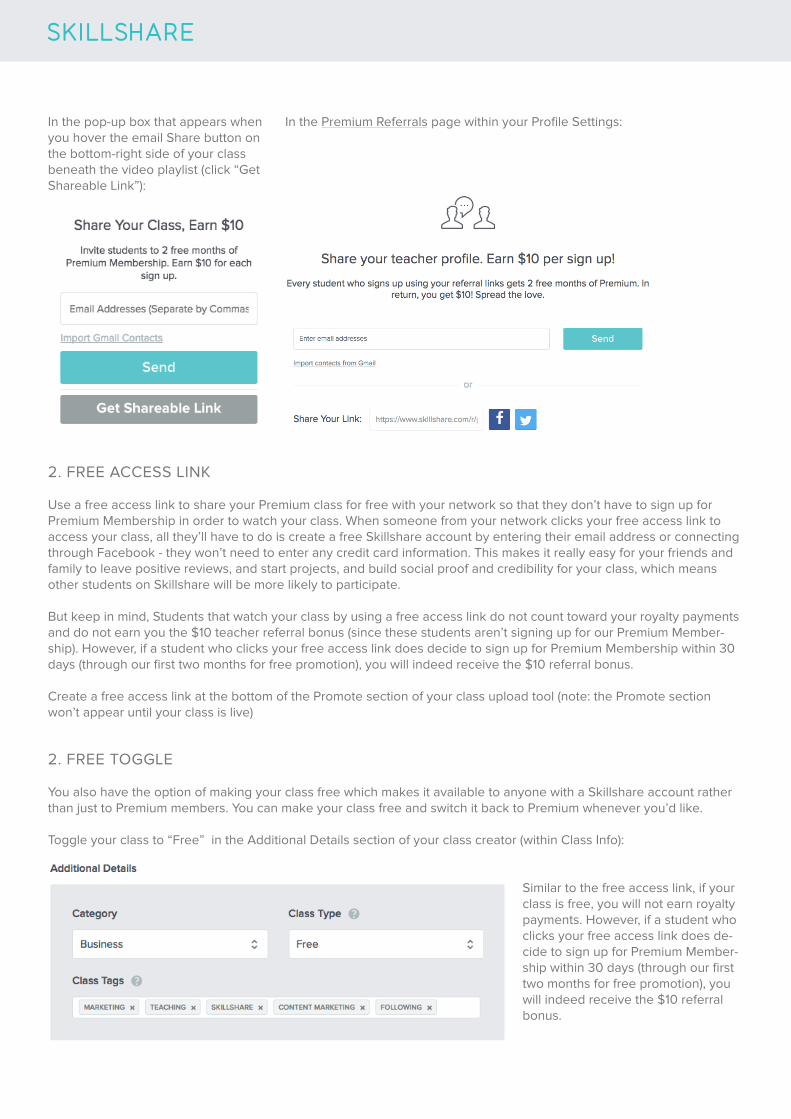
In the pop-up box that appears when you hover the email Share button on the bottom-right side of your class beneath the video playlist (click “Get Shareable Link”):
In the Premium Referrals page within your Profile Settings:
2. FREE ACCESS LINK
2. FREE TOGGLE
Use a free access link to share your Premium class for free with your network so that they don’t have to sign up for Premium Membership in order to watch your class. When someone from your network clicks your free access link to access your class, all they’ll have to do is create a free Skillshare account by entering their email address or connecting through Facebook - they won’t need to enter any credit card information. This makes it really easy for your friends and family to leave positive reviews, and start projects, and build social proof and credibility for your class, which means other students on Skillshare will be more likely to participate.
But keep in mind, Students that watch your class by using a free access link do not count toward your royalty payments and do not earn you the $10 teacher referral bonus (since these students aren’t signing up for our Premium Member-ship). However, if a student who clicks your free access link does decide to sign up for Premium Membership within 30 days (through our first two months for free promotion), you will indeed receive the $10 referral bonus.
Create a free access link at the bottom of the Promote section of your class upload tool (note: the Promote section won’t appear until your class is live)
You also have the option of making your class free which makes it available to anyone with a Skillshare account rather than just to Premium members. You can make your class free and switch it back to Premium whenever you’d like.
Toggle your class to “Free” in the Additional Details section of your class creator (within Class Info):
Similar to the free access link, if your class is free, you will not earn royalty payments. However, if a student who clicks your free access link does de-cide to sign up for Premium Member-ship within 30 days (through our first two months for free promotion), you will indeed receive the $10 referral bonus.

REACHING STUDENTS
Not all Skillshare teachers have a large following off Skillshare, and that’s okay! Many of our most successful teachers, had no online presence when they started teaching on Skillshare. Still, sharing your class with your network (even just family and friends) is a great way to jumpstart student engagement, earnings, and to get your class on the Trending page where it can be discovered by 3M+ students already learning on Skillshare.
You’ll also earn $10 for every new Premium member you refer to Skillshare in addition to monthly royalties. So if, 10 of your friends sign up for Skillshare Premium Membership, that’s an extra $100 in your next payment! Read below for the 8 steps we recommend taking to successfully market your class as a first-time teacher without an online presence.
Join our free class on marketing, where you can connect with our team and other awesome teachers for extra tips and tricks.
Download our marketing templates to make a plan! Already have a few classes on Skillshare? Head here for marketing tips for multi-class teachers.
Email your friends, family, and colleagues. Ask your closest community to support you using your referral link. Emphasize that their support will go a long way in helping you establish credibility and kickstart your success as a teacher. When sharing your referral link, be sure to tell your friends that they’ll get their first two months of Premium Membership for free through your special referral link. Use our editable email templates here to make reaching out a breeze.
Promote your class on social media. Announce your new class launch on your blog and email newsletter (if you have one) and on all of your social media channels - Facebook, Twitter, Instagram, Pinterest, Youtube, etc. - using your referral link. The more places you can share your class, the better (regardless of how few connections you have on these platforms). Feature an engaging image in your post or even one of your class videos. Follow up with another post a few days after your launch to remind your followers to check out your class. Overtime, you can also share a class project on social media or share when you hit major milestones - like 100 students!
Permanently feature your referral link on your website, instagram bio, blog, email signature, linkedin or anywhere else you live online. Adding information about your class(es) to your online profiles and website is one of the easiest ways to continually attract new students, forever.
Think about the networks you belong to or have access to - online forums, mailing lists, Facebook groups, etc. - and send them an email or message about your class! You can also spread the word to your in-person communities.
Reach out to blogs, influencers, and organizations who might be interested. Perhaps your friends don’t share your same passion for your class topic - find people who do! Do some research to identify 5-10 blogs, organizations or even individuals with a strong social presence who you think might be interested in sharing your class with their own community. For example, illustrator and Skill-share teacher Andrew Fairclough convinced an illustration agency that he had previously worked with to feature his design class to their community.
One of the most impactful ways to increase your referrals is by creating an email newsletter list and emailing your subscribers directly once you publish a new class. Direct messaging paired with a simple call to action (i.e. “Take my Skillshare class for free through this special offer!”) has helped a lot of teachers take their referrals to the next level. Head here to learn how to start an email following and check out the email that one of our top referrers Graham Co-chrane sent to his followers here.
1
2
3
4
5
6
7
8

FAQS
TELL ME MORE!
THIS ISN’T MY FIRST SKILLSHARE CLASS, HOW SHOULD I MARKET MULTIPLE CLASSES?
WHEN SOMEONE SIGNS UP FOR SKILLSHARE USING MY REFERRAL LINK, DO THEY HAVE TO ENTER THEIR CREDIT CARD INFORMATION?
WILL I STILL RECEIVE THE $10 REFERRAL FEE IF THEY CANCEL THEIR PREMIUM MEMBERSHIP BEFORE THE 2 MONTHS IS UP?
From growing an email list to permanently featuring your Skillshare referral link on your social media sites, check out our marketing tips for multi-class teachers here.
When a student signs up for Premium Membership for the first time, they’ll be prompted to select either our monthly or annual plan, but their first payment won’t happen until two months after they sign up. They can of course choose to cancel their Premium Membership before that second month is up, in which case, they won’t be charged the first two months or annual payment.
Even if they opt to cancel their Premium Membership before they receive their first full charge 2 months later, you’ll still get your $10 bonus!
Put all these tips into action by following this checklist
10 of our Favorite Social Media Posts From Teachers
5 Ways to Permanently Feature Your Class
Easy Tips for Offline Marketing

ENGAGING YOUR STUDENT FOLLOWING
USE YOUR COMMUNITY BOARD AND PROJECT GALLERY
Developing an engaged student following on Skillshare is one of the most important elements of becoming a success-ful teacher. Engaging your students not only ensures that they have a more active and enriching class experience, but it also helps you build their trust and loyalty. If your students are active and engaged, they will be more likely to partici-pate in your future classes because they are invested in you as a teacher.
The Community section of your class is an area for students to interact by asking questions and sharing tips and re-sources. The more students collaborate with one another, the more enriching their class experience. As the teacher, it’s your job to spark conversations by being active in the Community section and prompting students to interact.
Here are a few great ways to use your Community section:
After publishing your class, post a “welcome” message to thank students for joining the class and let them know that you’re available to answer any ques-tions that come up along the way. Let students know if you’ve published a new class or share resources that you think they’ll find helpful, like articles, interviews, or anything else. Use the “email all students” button to trigger an email notification with your post.
Your class Project Gallery is where students upload their class projects as they take your class. Since the number of projects uploaded in your class impacts how high it trends in our class listings, it’s important to encourage students to start their projects early and update them over time. Especially when your class is new, a great way to encourage students to share their work is to show that you’re actively reviewing projects and providing feedback. Students will find your individual feedback extremely valuable and inspiring.
Here are a few tips for leaving feedback in the Project Gallery:
Be upbeat and encouragingProvide constructive tipsPrompt students to continue updating their project
Post a welcome message
Make announcements and share resources
Check in regularly to answer questions
FAQS
TELL ME MORE!
WILL I RECEIVE A NOTIFICATION WHEN SOMEONE POSTS IN THE DISCUSSION BOARD OF MY CLASS?
You will not receive notifications when a student posts in the discussion board. We recommend checking the discussion board every few days to respond to questions and comments.
This checklist will help you ensure your students have the best learning expe-rience
Our free class on engaging your student following
A great example of a welcome message

BUILDING YOUR CHANNEL
BEST PRACTICES
The best way to maximize your impact and success on Skillshare is to continually add new classes to the platform. Each new class you publish is an opportunity to engage your existing students, capture new ones, and compound your monthly revenue. Teaching a whole series of classes will also allow you to cover a much broader range of content and make the learning experience even more comprehensive and engaging for your students.
Think of your channel as a representation of brand in the same way that you would with your blog or business website. Your brand needs a consistent and recognizable look to attract new students (through well-designed cover images, class merchandising) and to keep them coming back for more (through an engaging and consistent teaching style). Your channel brand should not only correspond with the type of educational content you’re producing, but it should commu-nicate your channel’s key themes so that viewers know what to expect by following you on Skillshare.
Keep in mind that our top teachers publish classes that are nonlinear - students bounce around to the classes they find most relevant and exciting and can take them in whatever order they like. This ensures that each class is as accessi-ble as possible. Here are a few different types of classes we recommend exploring as you build your curriculum (and remember that you can, and should, mix in all three):
Because leveraging your existing following is such a big piece of teaching, establishing a regular cadence for publish-ing classes on Skillshare is key to ensure your followers stay engaged and keep watching your newest classes. We recommend publishing a new class at least once a month to maximize the impact of your student following. The longer you wait, the harder it is to engage older followers.
The absolute best way to get serious about teaching on Skillshare is to publish new classes on a regular basis. Teach-ing a series of classes, rather than just one or two, allows you to attract more followers, earn more revenue, and create an engaging learning experience for your students.
CREATE A COHESIVE CHANNEL BRAND
PUBLISH NONLINEAR CLASSES THAT ARE ACCESSIBLE TO AS MANY STUDENTS AS POSSIBLE
ESTABLISH A CONSISTENT PUBLISHING SCHEDULE
WHY TEACH AGAIN?
A fundamentals class is an overview or introduction to the skill you’re teaching. As opposed to covering the fundamentals from A-Z, “deep dives” zoom in on a specific technique or part of a process so that students can really master it.
While all Skillshare classes are project-based, the difference with this type of class is that the project itself, rather than a skill or technique, is the focal point. The best part of project classes is that there are an unlimited number of proj-ects you can do to apply the skill you’re teaching, so technically you’ll never run out of things to teach!
Fundamentals
Deep Dives
Project-Focused
For a great example, see how Skillshare teacher Christine Fleming built her following on Skillshare by posting on social media, consistently publishing new classes, and utilizing her referral link.
5 ways that teaching on a regular basis optimizes your success on the platform
The more you teach, the more you earn
Your guide to getting serious about Skillshare
5 common Skillshare mistakes (and how to avoid them)! Earn $100/Hour 3 tips for maximizing your time and revenue on Skillshare with Helen Bradley 5 of our favorite teaching channels
FAQ
TELL ME MORE!
HOW HAVE SOME OF THE TOP TEACHERS ON THE PLATFORM BUILT A STUDENT FOLLOWING?
Up Next: We have over 5,000 Skillshare teachers! Learn what it means to be part of the Skillshare Teacher community and how we support our network of Teachers.
SKILLSHARE TEACHER COMMUNITY
We are so thrilled to have you join our growing community of Skillshare teachers from all around the globe! We keep in touch with our teachers a few different ways:
You’ll receive a bi-monthly “Inside Scoop” email from us with teaching tips, product updates, teacher success stories, and more.
Download the Skillshare Mobile app (available on Android & iOS) and search for the “New Skillshare Teachers Support” group. This group is a great place to connect with other Skillshare Teachers, brainstorm, ask questions, and network. We love hearing from our teachers! Drop us an email with any questions, ideas for the teacher community, or just to say hi!
Bi-monthly Teacher Newsletters
New Teachers Support Group (available on the free Skillshare mobile app)
TELL ME MORE! Head to the Teacher Center to network with other teachers! Drop up us a note here.
A small sampling of some of the amazing teachers on Skillshare: Rich Armstrong: Skillshare Teacher and UI/UX Designer Peggy Dean: Skillshare Teacher and Calligrapher Ohn Mar Win: Skillshare Teacher and Illustrator Jake Bartlett: Skillshare Teacher and Animator