tandberg e20 administrator guide (te2.1) - cisco.com · introductionintroduction deploying e20...
TRANSCRIPT

D14330.09 TANDBERG E20 ADMINISTRATOR GUIDE (TE2.1) February 2010 1
What’s in this Guide? Introduction Deploying E20 Using E20 The Settings Advanced settings
Software version TE 2.1
TANDBERG E20Administrator Guide

D14330.09 TANDBERG E20 ADMINISTRATOR GUIDE (TE2.1) February 2010 2
What’s in this Guide? Introduction Deploying E20 Using E20 The Settings Advanced settingsWhat’s in this guide?
Introduction
Intellectual Property Rights ............................. 5Trademark ..................................................... 5Disclaimer..................................................... 5Patent Information ........................................ 6Copyright Notice .......................................... 6
Safety Instructions .......................................... 7Water and Moisture ..................................... 7Cleaning ........................................................ 7Ventilation ..................................................... 7Lightning ....................................................... 7Dust .............................................................. 7Vibration ....................................................... 8Power Connection and Hazardous Voltage .. 8Servicing ....................................................... 8Accessories .................................................. 9Communication Lines .................................. 9
Environmental Issues ...................................... 9Digital User Guides .................................... 10European Environmental Directives ........... 10Waste Handling .......................................... 10Information for Recyclers ........................... 10
Deploying E20
Connecting the E20 ....................................... 12Using the Assistant to configure E20 ............ 13Using the keypad to configure the E20 ......... 14Setting up the E20 from a remote PC ........... 15HTTP Bootstrapping ...................................... 16
Using E20
Connecting the E20 ....................................... 18Adjusting the E20 camera ............................. 18The E20 keyboard.......................................... 19Operating the softkeys .................................. 19Navigation principles ..................................... 20Selfview ........................................................ 20Calling someone by dialing their number ...... 21Answering an incoming call ........................... 21Switching between handset, loudspeaker and headset ................................................... 21Calling someone using the phone book ........ 22Searching in the phone book ......................... 22Adding entries to My contacts ...................... 23Switching between two calls ........................ 23Blind transfer ................................................. 23Consultative transfer ..................................... 24Adding the screensaver of your choice ......... 24
Avoiding conflict with the standby function................................... 24
Multiple lines ................................................. 25Example ........................................................ 25
The Settings menu
Description of the Settings available ............. 27The Settings ............................................... 27
What’s in this guide?
The Advanced Settings
Description of the Advanced Settings ........... 30Speed dials .................................................... 30IP settings ..................................................... 30Advanced configuration ................................. 31
Audio .......................................................... 31Camera 1 .................................................... 31CapsetFilterDebug ..................................... 31Conference 1 .............................................. 31Experimental .............................................. 32Menu .......................................................... 32Network 1 .................................................. 33Network services ...................................... 33Phonebook ................................................. 34Provisioning ................................................ 34SIP .............................................................. 35Standby ...................................................... 37System Unit ................................................ 37HearingImpairedMode ............................... 37Name .......................................................... 37MenuLanguage .......................................... 37Time ........................................................... 37Video .......................................................... 37
Change password .......................................... 37Restart ........................................................... 37Mechanical dimensions ................................. 38

D14330.09 TANDBERG E20 ADMINISTRATOR GUIDE (TE2.1) February 2010 3
What’s in this Guide? Introduction Deploying E20 Using E20 The Settings Advanced settingsIntroduction
Chapter 1
Introduction

D14330.09 TANDBERG E20 ADMINISTRATOR GUIDE (TE2.1) February 2010 4
What’s in this Guide? Introduction Deploying E20 Using E20 The Settings Advanced settingsIntroduction
Thank you for choosing TANDBERG!
Your TANDBERG E20 has been designed to give you many years of safe, reliable operation.
This part of the TANDBERG E20 documentation is aimed at administrators working with the deployment and provisioning of the E20.
Our main objective with this Administrator Guide is to address your goals and needs. Please let us know how well we succeeded!
We recommend you visit the TANDBERG web site regularly for updated versions of this Administrator Guide.
This can be found on http://www.tandberg.com/docs

D14330.09 TANDBERG E20 ADMINISTRATOR GUIDE (TE2.1) February 2010 5
What’s in this Guide? Introduction Deploying E20 Using E20 The Settings Advanced settingsIntroduction
Intellectual Property RightsThis Administrator Guide and the Products to which it relates contain information that is proprietary to TANDBERG and its licensors.
Information regarding the Products is found on the page entitled License Agreements and Patent Information.
This Administrator Guide may be reproduced in its entirety, including all copyright and intellectual property notices, in limited quantities in connection with the use of the Products. Except for the limited exception set forth in the previous sentence, no part of this Administrator Guide may be reproduced, stored in a retrieval system, or transmitted, in any form, or by any means, electronically, mechanically, by photocopying, or otherwise, without the prior written permission of TANDBERG. Requests for such permission should be addressed to [email protected].
TrademarkTANDBERG® is a registered trademark belonging to Tandberg ASA. Other trademarks used in this document are the property of their respective holders.
COPYRIGHT © 2008–2010, TANDBERG
All rights reserved.Philip Pedersens vei 201366 Lysaker, NorwayTel: +47 67 125 125 Fax: +47 67 125 234E-mail: [email protected]
DisclaimerThe specifications for the Products and the information in this document are subject to change at any time, without notice, by TANDBERG.
Every effort has been made to supply complete and accurate information in this Administrator Guide, however, TANDBERG assumes no responsibility or liability for any errors or inaccuracies that may appear in this document
INTELLECTUAL PROPERTY RIGHTSThe Products that are covered by this Administrator Guide are protected under copyright, patent, and other intellectual property rights of various jurisdictions.
This Product is COPYRIGHT © 2008–2010, TANDBERG. All rights reserved.
D14330.09 TANDBERG E20 ADMINISTRATOR GUIDE (TE2.1) February 2010 6
What’s in this Guide? Introduction Deploying E20 Using E20 The Settings Advanced settingsIntroduction
Patent InformationThe products described in this manual is covered by the following patents:
US7,010,119, US,7,327,785 - US7,295,613 - US7,283,588
EP01953201 - GB1338127
An updated list of the patents applying can be found on www.tandberg.com/tandberg_pm.jsp.
Copyright NoticeThe product that is covered by this Administrator Guide is protected under copyright, patent, and other intellectual property rights of various jurisdictions. This product is Copyright © 2008–2010, Tandberg Telecom AS. All rights reserved. This product includes copyrighted software licensed from others.
A document describing the copyright notices and the terms and conditions of use can be found at: http://www.tandberg.com/docs.
IMPORTANT: USE OF THIS PRODUCT IS SUBJECT IN ALL CASES TO THE COPYRIGHT RIGHTS AND THE TERMS AND CONDITIONS OF USE REFERRED TO ABOVE. USE OF THIS PRODUCT CONSTITUTES AGREEMENT TO SUCH TERMS AND CONDITIONS.

D14330.09 TANDBERG E20 ADMINISTRATOR GUIDE (TE2.1) February 2010 7
What’s in this Guide? Introduction Deploying E20 Using E20 The Settings Advanced settingsIntroduction
Safety InstructionsFor your protection please read these safety instructions completely before you connect the equipment to the power source. Carefully observe all warnings, precautions and instructions both on the apparatus and in these operating instructions. Keep this manual for future reference.
Water and MoistureDo not operate the apparatus under or near water—for example near a bathtub, kitchen sink, or laundry tub, in a wet basement, near a swimming pool or in other areas with high humidity.
• Never install jacks for communication cables in wet locations unless the jack is specifically designed for wet locations.
• Do not touch the product with wet hands.
CleaningUnplug the apparatus from communication lines, line power-outlet or any power source before cleaning or polishing. Do not use liquid cleaners or aerosol cleaners. Use a lint-free cloth lightly moistened with water for cleaning the exterior of the apparatus.
VentilationDo not block any of the ventilation openings of the apparatus. Never cover the slots and openings with a cloth or other material. Never install the apparatus near heat sources such as radiators, heat registers, stoves, or other apparatus (including amplifiers) that produce heat.
Do not place the product in direct sunlight or close to a surface directly heated by the sun.
LightningNever use this apparatus, or connect/disconnect communication cables or power cables during lightning storms.
DustDo not operate the apparatus in areas with high concentration of dust.
D14330.09 TANDBERG E20 ADMINISTRATOR GUIDE (TE2.1) February 2010 8
What’s in this Guide? Introduction Deploying E20 Using E20 The Settings Advanced settingsIntroduction
VibrationDo not operate the apparatus in areas with vibration or place it on an unstable surface.
Power Connection and Hazardous VoltageThe product may have hazardous voltage inside.
• Never attempt to open this product, or any peripherals connected to the product, where this action requires a tool.
• This product should always be powered from an earthed power outlet.
• Never connect attached power supply cord to other products.
• In case any parts of the product has visual damage never attempt to connect main power, or any other power source, before consulting service personnel
• The plug connecting the power cord to the product/power supply serves as the main disconnect device for this equipment. The power cord must always be easily accessible.
• Route the power cord so as to avoid it being walked on or pinched by items placed upon or against it. Pay particular attention to the plugs, receptacles and the point where the cord exits from the apparatus.
• Do not tug the power cord.
• If the provided plug does not fit into your outlet, consult an electrician.
• Never install cables, or any peripherals, without first unplugging the device from its power source.
Servicing• Do not attempt to service the apparatus yourself as opening or removing
covers may expose you to dangerous voltages or other hazards, and will void the warranty. Refer all servicing to qualified service personnel.
• Unplug the apparatus from its power source and refer servicing to qualified personnel under the following conditions:
• If the power cord or plug is damaged or frayed.
• If liquid has been spilled into the apparatus.
• If objects have fallen into the apparatus.
• If the apparatus has been exposed to rain or moisture
• If the apparatus has been subjected to excessive shock by being dropped.
• If the cabinet has been damaged.
• If the apparatus seems to be overheated.
• If the apparatus emits smoke or abnormal odor.
• If the apparatus fails to operate in accordance with the operating instructions.
D14330.09 TANDBERG E20 ADMINISTRATOR GUIDE (TE2.1) February 2010 9
What’s in this Guide? Introduction Deploying E20 Using E20 The Settings Advanced settingsIntroduction
AccessoriesUse only accessories specified by the manufacturer, or sold with the apparatus.
Communication LinesDo not use communication equipment to report a gas leak in the vicinity of the leak.
Environmental IssuesThank you for buying a product which contributes to a reduction in pollution, and thereby helps save the environment. Our products reduce the need for travel and transport and thereby reduce pollution.
Our products have either none or few consumable parts (chemicals, toner, gas, paper).
TANDBERG’s Environmental Policy Environmental stewardship is important to TANDBERG’s culture. As a global company with strong corporate values, TANDBERG is committed to following international environmental legislation and designing technologies that help companies, individuals and communities creatively address environmental challenges.
TANDBERG’s environmental objectives are to: Develop products that reduce energy consumption, CO2 emissions, and traffic congestion.
• Provide products and services that improve quality of life for our customers.
• Produce products that can be recycled or disposed of safely at the end of product life.
• Comply with all relevant environmental legislation.

D14330.09 TANDBERG E20 ADMINISTRATOR GUIDE (TE2.1) February 2010 10
What’s in this Guide? Introduction Deploying E20 Using E20 The Settings Advanced settingsIntroduction
Digital User GuidesTANDBERG is pleased to announce that we have replaced the printed versions of our user guides with digital versions available on the TANDBERG web site: http://www.tandberg.com/docs. The environmental benefits of this are significant. The user guides can still be printed locally, whenever needed.
European Environmental DirectivesAs a manufacturer of electrical and electronic equipment TANDBERG is responsible for compliance with the requirements in the European Directives 2002/96/EC (WEEE—Waste Electrical and Electronic Equipment) and 2002/95/EC (RoHS).
The primary aim of the WEEE Directive and RoHS Directive is to reduce the impact of disposal of electrical and electronic equipment at end-of-life. The WEEE Directive aims to reduce the amount of waste electrical and electronic equipment sent for disposal to landfill or incineration by requiring producers to arrange for collection and recycling.
The RoHS Directive bans the use of certain heavy metals and brominated flame retardants to reduce the environmental impact of WEEE which is in landfill or incinerated. TANDBERG has implemented necessary process changes to comply with the European WEEE Directive (2002/96/EC) and the European RoHS Directive (2002/95/EC).
Waste HandlingIn order to avoid the dissemination of hazardous substances in our environment and to diminish the pressure on natural resources, we encourage you to use the appropriate recycling systems in your area. Those systems will reuse or recycle most of the materials of your end of life equipment in a sound way.
TANDBERG products put on the market after August 2005 are marked with a crossed-out wheelie bin symbol that invites you to use those take-back systems.
Please contact your local supplier, the regional waste administration or visit our web page http://www.tandberg.com/recycling if you need more information on the collection and recycling system in your area.
Information for RecyclersAs part of compliance with the European WEEE Directive, TANDBERG provides recycling information on request for all types of new equipment put on the market in Europe after 13 August 2005.
Please contact TANDBERG and provide the following details for the product for which you would like to receive recycling information:
• Model number of TANDBERG product• Your company’s name• Contact name• Address• Telephone number• E-mail.

D14330.09 TANDBERG E20 ADMINISTRATOR GUIDE (TE2.1) February 2010 11
What’s in this Guide? Introduction Deploying E20 Using E20 The Settings Advanced settingsDeploying E20
Chapter 2
Deploying E20

D14330.09 TANDBERG E20 ADMINISTRATOR GUIDE (TE2.1) February 2010 12
What’s in this Guide? Introduction Deploying E20 Using E20 The Settings Advanced settingsDeploying E20
Connecting the E20Connect the cables as shown. If you have one LAN connection only, and need that for your PC, the E20 has a built in Gigabit ethernet switch that enables you to connect your PC to the E20 to access the LAN through the E20.
Power supply HandsetLocal area network (LAN)
Optional PC connection
Optional telephone style headset connection
Attach USB stick with images for screen saver

D14330.09 TANDBERG E20 ADMINISTRATOR GUIDE (TE2.1) February 2010 13
What’s in this Guide? Introduction Deploying E20 Using E20 The Settings Advanced settingsDeploying E20
Deploying the E20There are four ways of deploying the E20:
• By using the Assistant• By using the keypad• By logging into the unit from a remote PC• By using HTTP Bootstrapping
This page explains how to set up the unit using the Wizard, while the alternatives are explained on the following pages.
Using the Assistant to configure E201. When you start the E20 the first time you will be prompted to choose the
language to be used in the menus and dialog boxes.
2. Once the language has been selected, the E20 will configure the correct language and a provisioning assistant will pop up.
3. The Assistant will help you configure the E20 with the correct parameters. Observe that TANDBERG has defined a set of DHCP options. The E20 will pick up these settings if they have been set by your network administrator.
4. The Assistant supports different provisioning or configuration schemes. TANDBERG VCS (TMS 12.5) is the default scheme and is the only provisioning scheme fully supported by the E20. The other schemes will only allow the E20 to be easily configured using a core set of configuration parameters. You will be prompted to supply username, password, domain, and external manager address.
5. Once you have completed the fields and selected the register button, the E20 will contact the external manager and try to provision the device. You will be notified whether the registration process succeeds or fails.
In case of failure to connect successfully, you may rectify the parameters and try again or you may choose to cancel the registration process.
6. Regardless of successful registration or not, the next step of the wizard will be to adjust the camera. Note that camera adjustment is optional at this stage—you may choose to do this later.
7. For the other configuration schemes, you will have to supply username, password, the SIP proxy and the SIP URI. In all other respects, the Assistant is similar.
8. HTTP configuration will enable the E20 to download configuration documents using HTTP/HTTPS.

D14330.09 TANDBERG E20 ADMINISTRATOR GUIDE (TE2.1) February 2010 14
What’s in this Guide? Introduction Deploying E20 Using E20 The Settings Advanced settingsDeploying E20
5. Go to Settings > Advanced > Advanced configuration > SIP > Profile1. Set Default Transport to Auto (which is the same as default), Proxy1 Discovery to Manual, You must also enter the IP address of the Proxy (Proxy is your PBX/VCS or OCS) and you must enter the URI of your E20. Set the SIP Mode back to On.
6. If your SIP Server/PBX uses user authorization you need to supply a user-id and password. This is done in Settings > Advanced > Advanced Configuration > SIP > Profile1 > Authentication 1.
7. You may want to use a TMS phonebook. If you have this and no entries are displayed after configuring, you must make sure that your unit is registered in TMS and a phonebook is assigned to your system.
Using the keypad to configure the E20There are several ways of setting up the E20. This page explains how to set up the unit using the keypad only, while how to set it up from a remote PC is explained on the next page.
Press the Home key to produce the Home menu and navigate down to Settings. Press the RigHt aRRow key to produce the Settings menu and navigate down to Advanced. Press the RigHt aRRow key.
Finally navigate down to Advanced configuration and press the RigHt aRRow key again. Navigation like this will hereinafter be shown as Settings > Advanced > Advanced configuration.
1. Navigate to SystemUnit > Name and press oK.
Select a name that is unique to avoid conflicts. We recommend that you use your name or initials, eg. AliceWonderland. This name will be seen as you by the others.
2. In most cases DHCP will be used for assignment:
Go to the previous menu—the Advanced (use Left aRRow key) and navigate to IP Settings > IP Assignment, if the cursor is not there already. Press oK and set to DHCP.
Alternatively, set it to Static and enter the IP address, Subnet Mask and Gateway IP address.
3. For remote administration the below settings are recommended. This should also make the system visible in TMS.
In the Settings > Advanced > Advanced configuration > Provisioning > ExternalManager set Address, Protocol, Path, Domain and Mode, which will be TMS, if used.
4. To be able to dial, you need to configure the SIP settings. In the Settings > Advanced > Advanced configuration > NetworkServices > SIP, set SIP Mode to Off before doing anything else.
Your TANDBERG E20 comes with no default administrator password set. This means that anyone with network access to the E20 can easily log onto the device with ssh.
We strongly recommend that you set up an administrator password by using the menu in Settings > Advanced > Change password.
D14330.09 TANDBERG E20 ADMINISTRATOR GUIDE (TE2.1) February 2010 15
What’s in this Guide? Introduction Deploying E20 Using E20 The Settings Advanced settingsDeploying E20
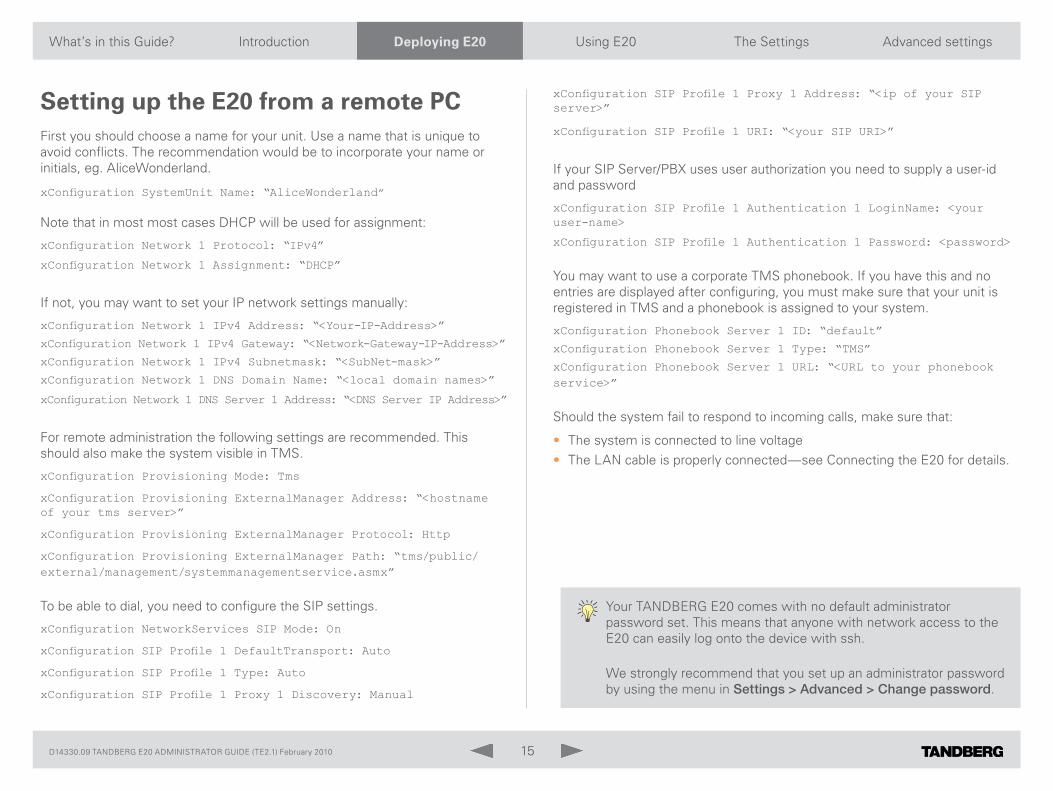
Setting up the E20 from a remote PCFirst you should choose a name for your unit. Use a name that is unique to avoid conflicts. The recommendation would be to incorporate your name or initials, eg. AliceWonderland.
xConfiguration SystemUnit Name: “AliceWonderland”
Note that in most most cases DHCP will be used for assignment:
xConfiguration Network 1 Protocol: “IPv4”
xConfiguration Network 1 Assignment: “DHCP”
If not, you may want to set your IP network settings manually:
xConfiguration Network 1 IPv4 Address: “<Your-IP-Address>”
xConfiguration Network 1 IPv4 Gateway: “<Network-Gateway-IP-Address>”
xConfiguration Network 1 IPv4 Subnetmask: “<SubNet-mask>”
xConfiguration Network 1 DNS Domain Name: “<local domain names>”
xConfiguration Network 1 DNS Server 1 Address: “<DNS Server IP Address>”
For remote administration the following settings are recommended. This should also make the system visible in TMS.
xConfiguration Provisioning Mode: Tms
xConfiguration Provisioning ExternalManager Address: “<hostname of your tms server>”
xConfiguration Provisioning ExternalManager Protocol: Http
xConfiguration Provisioning ExternalManager Path: “tms/public/external/management/systemmanagementservice.asmx”
To be able to dial, you need to configure the SIP settings.
xConfiguration NetworkServices SIP Mode: On
xConfiguration SIP Profile 1 DefaultTransport: Auto
xConfiguration SIP Profile 1 Type: Auto
xConfiguration SIP Profile 1 Proxy 1 Discovery: Manual
xConfiguration SIP Profile 1 Proxy 1 Address: “<ip of your SIP server>”
xConfiguration SIP Profile 1 URI: “<your SIP URI>”
If your SIP Server/PBX uses user authorization you need to supply a user-id and password
xConfiguration SIP Profile 1 Authentication 1 LoginName: <your user-name>
xConfiguration SIP Profile 1 Authentication 1 Password: <password>
You may want to use a corporate TMS phonebook. If you have this and no entries are displayed after configuring, you must make sure that your unit is registered in TMS and a phonebook is assigned to your system.
xConfiguration Phonebook Server 1 ID: “default”
xConfiguration Phonebook Server 1 Type: “TMS”
xConfiguration Phonebook Server 1 URL: “<URL to your phonebook service>”
Should the system fail to respond to incoming calls, make sure that:
• The system is connected to line voltage
• The LAN cable is properly connected—see Connecting the E20 for details.
Your TANDBERG E20 comes with no default administrator password set. This means that anyone with network access to the E20 can easily log onto the device with ssh.
We strongly recommend that you set up an administrator password by using the menu in Settings > Advanced > Change password.

D14330.09 TANDBERG E20 ADMINISTRATOR GUIDE (TE2.1) February 2010 16
What’s in this Guide? Introduction Deploying E20 Using E20 The Settings Advanced settingsDeploying E20
HTTP BootstrappingThere are situations where service providers prefer that users need not enter any information at all. Instead, they want the E20 to retrieve all the information necessary by itself—through pro-active behavior using HTTP or HTTPS.
The E20 will then typically contact a web service to get the information it needs to configure itself. This web service could include large databases enabling the E20s to do lookups based on specific device identifiers to retrieve provisioning information for specific E20 devices. The E20s will identify themselves to the web server using unique device identifiers such as serial number and Ethernet MAC address.
Since these identifiers are unique, they will enable the web server to convey targeted provisioning details to the specific E20 requesting the information.
For convenience, the system administrator or service provider may override a future global web service by setting up their own web service, if necessary.
This is possible through the use of different DNS names for the local and global web services. Overriding the global web service is possible for enterprises and service providers in control of their own DNS domain.
If you have no control of your own DNS domain, overriding the global web service will involve another party and therefore easily end up being more difficult.
Contact your local TANDBERG representative for more on this.
HTTP POST
<xml> redirect </xml>
Web serverE20
HTTP POST
<config> … </config>
Web serverE20
HTTP POST
<SW> … </SW>
Web serverE20

D14330.09 TANDBERG E20 ADMINISTRATOR GUIDE (TE2.1) February 2010 17
What’s in this Guide? Introduction Deploying E20 Using E20 The Settings Advanced settingsUsing E20
Chapter 3
Using E20

D14330.09 TANDBERG E20 ADMINISTRATOR GUIDE (TE2.1) February 2010 18
What’s in this Guide? Introduction Deploying E20 Using E20 The Settings Advanced settingsUsing E20
Optional PC connection: If you have a single LAN wall outlet only, you may connect your PC to the PC -socket of the E20.
Your PC and the E20 will then share the LAN connection.
Power supply HandsetLocal area network (LAN)
Optional PC connection
Optional telephone style headset connection
Connect USB stick for screensaver
Connecting the E20
Focus ring
Privacy shutter open / close
Before you start making video calls, make sure that your picture is displayed properly.
1. Open the privacy shutter by turning the front ring of the camera.
2. Display your own picture by pressing the key.
3. Adjust your picture vertically by using the up and down key.
4. Adjust sharpness by turning the focus ring on the camera.
Adjusting the E20 camera
D14330.09 TANDBERG E20 ADMINISTRATOR GUIDE (TE2.1) February 2010 19
What’s in this Guide? Introduction Deploying E20 Using E20 The Settings Advanced settingsUsing E20
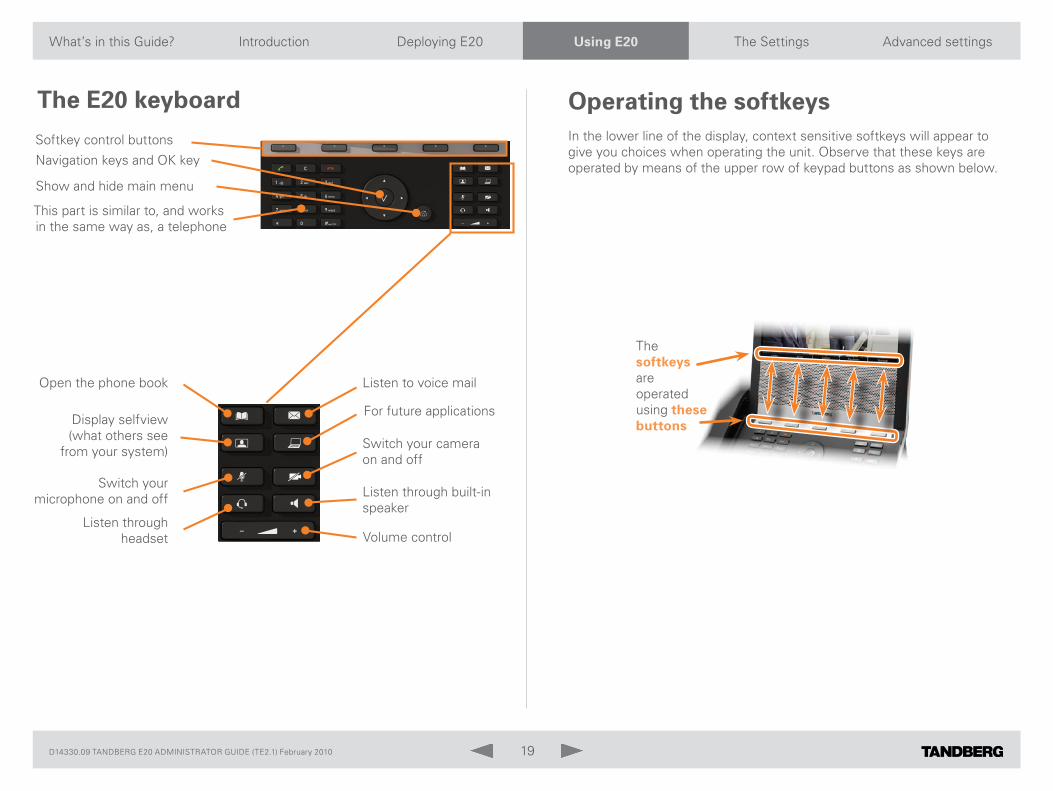
Listen to voice mail
For future applications
Open the phone book
Display selfview (what others see
from your system)
Switch your microphone on and off
Listen through headset Volume control
Listen through built-in speaker
Switch your camera on and off
Softkey control buttons
Show and hide main menu
Navigation keys and OK key
This part is similar to, and works in the same way as, a telephone
The E20 keyboard
The softkeys are operated using these buttons
Operating the softkeysIn the lower line of the display, context sensitive softkeys will appear to give you choices when operating the unit. Observe that these keys are operated by means of the upper row of keypad buttons as shown below.
D14330.09 TANDBERG E20 ADMINISTRATOR GUIDE (TE2.1) February 2010 20
What’s in this Guide? Introduction Deploying E20 Using E20 The Settings Advanced settingsUsing E20
Navigation principlesThe following navigation principles apply:
• Press the key to show the Main menu whenever no menu is shown. Press again to remove the menu.
• Use the up and down keys to navigate inside a menu.
• Open a submenu by pressing or the right key.
• Repeat, if needed, if there are more submenu levels.
• Inside a submenu, press left key to go one level back.
• Inside a menu, use the key to close all submenus and go directly back to Main menu.
• When entering information in a text or number field, use the C key to delete inputs to the left of the current cursor position.
• To switch between numeric and alphanumeric setting use the abc/123 softkey.
• The softkeys along the bottom of the screen are controlled by the Softkey buttons of the keypad.
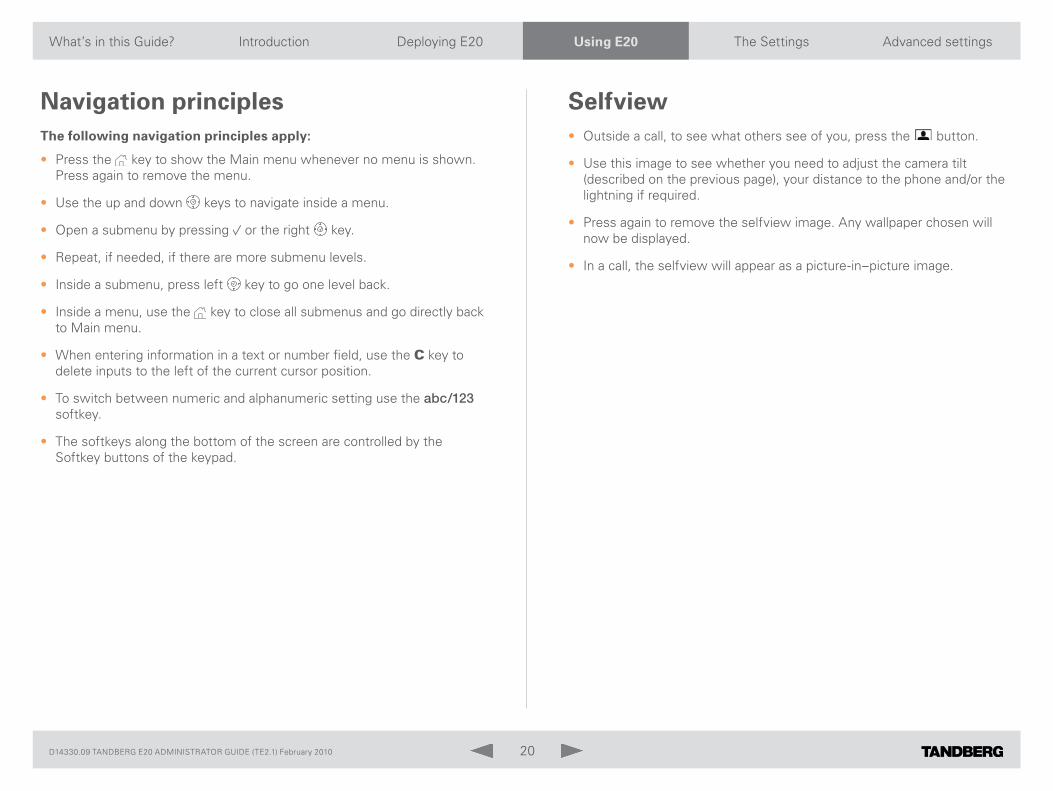
Selfview• Outside a call, to see what others see of you, press the button.
• Use this image to see whether you need to adjust the camera tilt (described on the previous page), your distance to the phone and/or the lightning if required.
• Press again to remove the selfview image. Any wallpaper chosen will now be displayed.
• In a call, the selfview will appear as a picture-in–picture image.

D14330.09 TANDBERG E20 ADMINISTRATOR GUIDE (TE2.1) February 2010 21
What’s in this Guide? Introduction Deploying E20 Using E20 The Settings Advanced settingsUsing E20
Calling someone by dialing their numberDial the number directly and press . You can lift off the handset both before and after dialing.
Alternatively, just press to show the Call menu, if needed. Position the cursor at Call and press to show the Call submenu:
Key in the “number” to call and press twice to start calling.
While doing this you may need to switch to alphanumeric setting by means of the abc/123 softkey. Activate SpeciaL cHaRacteRS, if needed.
Answering an incoming call• Lift the handset to answer the incoming call. Put the handset back in its
cradle to terminate the call.
• Alternatively, press to answer an incoming call. The call will then use the built-in loudspeaker or your headset (if attached and selected).
• To reject an incoming call press .
Switching between handset, loudspeaker and headset• To switch from handset to loudspeaker without terminating an ongoing
call, press the button before putting the handset back in its cradle.
• To switch from loudspeaker to handset, just lift the handset.
• To switch between loudspeaker and headset, press the corresponding button ( and ).
D14330.09 TANDBERG E20 ADMINISTRATOR GUIDE (TE2.1) February 2010 22
What’s in this Guide? Introduction Deploying E20 Using E20 The Settings Advanced settingsUsing E20
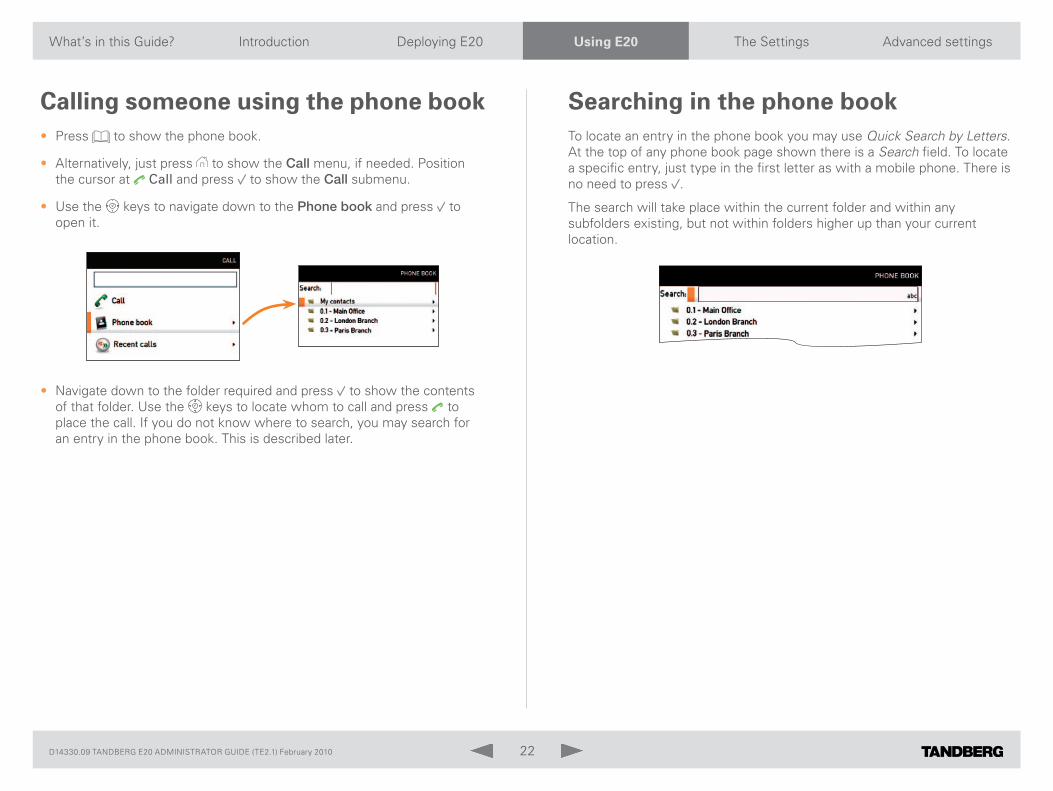
Calling someone using the phone book• Press to show the phone book.
• Alternatively, just press to show the Call menu, if needed. Position the cursor at Call and press to show the Call submenu.
• Use the keys to navigate down to the Phone book and press to open it.
• Navigate down to the folder required and press to show the contents of that folder. Use the keys to locate whom to call and press to place the call. If you do not know where to search, you may search for an entry in the phone book. This is described later.
Searching in the phone bookTo locate an entry in the phone book you may use Quick Search by Letters. At the top of any phone book page shown there is a Search field. To locate a specific entry, just type in the first letter as with a mobile phone. There is no need to press .
The search will take place within the current folder and within any subfolders existing, but not within folders higher up than your current location.

D14330.09 TANDBERG E20 ADMINISTRATOR GUIDE (TE2.1) February 2010 23
What’s in this Guide? Introduction Deploying E20 Using E20 The Settings Advanced settingsUsing E20
Adding entries to My contactsNew contacts can be added manually to My Contacts. Entries in other folders, such as the corporate phone book must be made by your system administrator.
Do as follows:
1. Open the Phone book
2. Navigate to My contacts:
3. Press to enter My contacts and show the contents. Press the softkey new contact. This will cause the Add new contact menu to be shown.
4. Enter Name and “Number” of the new contact
5. Navigate down to Save and press to save the the new contact, or navigate to Cancel and press to leave the menu without saving the new contact.
Switching between two callsWhen you are in a call you may put the other party on hold while you call someone else. You will then be in call with two parties, but only one at a time.
Do as follows:
1. While in a call, press the softkey HoLd. The softkeys will now change to show you three options:
• ReSume to go back the call you were in.
• tRanSfeR to transfer the other party to someone else, as described in Blind transfer.
• new caLL to let you call someone else, while at the same time keeping the first party on hold.
2. By using the softkey that will toggle between HoLd and ReSume you may switch between talking to either party.
Blind transferWhen you are in a call, you may transfer the other party to someone else, to let them communicate without your participance.
Do as follows:
1. While in a call, press the softkey tRanSfeR.
This will bring up the following menu:

D14330.09 TANDBERG E20 ADMINISTRATOR GUIDE (TE2.1) February 2010 24
What’s in this Guide? Introduction Deploying E20 Using E20 The Settings Advanced settingsUsing E20
2. You may now key in the “number” to which the other party shall be transferred.
Alternatively you may navigate down to the Phone book and search within this in the usual way, or you may enter Recent calls and select an entry there.
3. After the “number” has been located, proceed as if you were placing a call from the phone book in the usual way. The only difference is that the other party will be connected to the one you just called and you will be disconnected.
Consultative transferYou may also combine the two above options. Instead of just transferring the other party to someone else without consulting the one to receive the call, you may call this person first and then do the transfer.
Do as follows:
1. While in a call, press the softkey HoLd.
2. Press the softkey new caLL and place a new call in the usual way.
3. Press tRanSfeR. You will now be prompted to decide whether this new call shall be transferred to the one you have on Hold or as blind transfer to someone else.
Adding the screensaver of your choiceYou may add a screensaver of your choice to the E20. You will need a USB disk containing the pictures you want to use as screensaver. If the USB stick contains multiple pictures, the contents will be shown as a gallery, one picture at a time.
A few things to observe:
• Once you have plugged in the USB disk, the E20 will produce a dialog asking you whether the pictures on the USB disk should be displayed by the USB picture frame. TE 2.1 will read xcif data and even rotate images when necessary. The prompt will let you specify the time interval between the last time you operated (used) the E20 and when the screensaver should start to appear.
• The USB disk must remain connected to the E20 to make this work.
• The following file formats are supported:
*.bmp, *.gif, *.ico, *.jpeg, *.jpg, *.mng, *.pbm, *.pgm, *.png, *.ppm, *.svg, *.tif, *.tiff, *.xbm, *.xpm.
The E20 uses xcif information to scale the picture.
Avoiding conflict with the standby functionThere is a standby function in the E20. When activated, the standby function makes the screen go black after a time interval (delay) specified by you. This setting will override the screensaver feature.
To continuously display the screensaver, the standby function must be disabled.
You may, however, combine the two. Consider the following:
Assume that you specify the screensaver to start after 10 minutes and that you specify the standby to start after one hour. Five minutes after the last time you used your E20 (or pushed any button), the screensaver will start and it will then run for 55 minutes until the standby function starts.

D14330.09 TANDBERG E20 ADMINISTRATOR GUIDE (TE2.1) February 2010 25
What’s in this Guide? Introduction Deploying E20 Using E20 The Settings Advanced settingsUsing E20
Multiple linesTE 2.1 supports multiple lines. This means that it supports registration of multiple concurrent SIP profiles on the E20. Consequently, it is possible to be registered with more than one Address-Of-Record at the same time. The user can be reached through several SIP URIs at the same time and it is possible to call using a specified SIP profile. One example would be the use of a work (SIP-)profile for the home office and a private (SIP-)profile. Another example would be a secretary using both a personal (SIP-)profile and the (SIP-)profile for his/her boss.
There is one limitation to the multiple line support in the E20. In general, it is not possible to use different lines to different types of SIP servers (for example TANDBERG VCS vs OCS R2).
When dialing out from a system configured with multiple lines, you will need to select a line before making the call. The available lines will be shown in a multiple-line selection widget on the screen. The right-most softkey makes it possible to put focus on the multiple-line widget enabling you to select the preferred line.
ExampleTE 2.1 supports BroadWorks which is a software-based IP-PBX. You may provision the E20 using the BroadWorks provisioning system. In addition to supporting the BroadWorks provisioning scheme, TE 2.1 supports Shared Call Appearance, Click-to-dial, Push-to-talk. The former is a concept based on support for private and shared lines. Private lines are regular SIP-profiles similar to the line concept in TE 2.0 and earlier versions.
A shared line is a BroadWorks extension supported in TE 2.1. It means that several users (E20s with TE 2.1) can share a single line.
Whenever someone calls the shared line, all of the E20s configured with this shared line will start to ring. Whoever answers first will take the call. However, it is possible for other users of the shared line to barge-in and join the call.
Since Broadworks does not support video mixing in its current version, the joined call will be audio only. As soon as one of the users disconnects from the call, the video will be resumed.
It is also possible for one operator to put a shared line on hold and let another operator resume the same shared call on another E20.
Putting a current shared call on hold.
About to call another.
Resuming the call.
Click-to-dial is a concept where a web-based call-control manager can be used to set up and tear down video calls between different devices. The most common use case would be for a user to call another user from his/her own E20.
Push-to-talk is a concept similar to a walkie-talkie where the calling user will press the call button to immediately be connected to the remote party.

D14330.09 TANDBERG E20 ADMINISTRATOR GUIDE (TE2.1) February 2010 26
What’s in this Guide? Introduction Deploying E20 Using E20 The Settings Advanced settingsThe Settings
Chapter 5
The Settings menu
D14330.09 TANDBERG E20 ADMINISTRATOR GUIDE (TE2.1) February 2010 27
What’s in this Guide? Introduction Deploying E20 Using E20 The Settings Advanced settingsThe Settings
Description of the Settings availableOn the following pages you will find a list of the settings available.
We recommend you visit the TANDBERG web site regularly for updated versions of the manual. Go to: http://www.tandberg.com/docs.
To access the Settings, do as follows:
1. Press the key to produce the menu. Use the key to navigate down to Settings and press either or use the key to navigate to the right.
2. The menu contains the following topics:
• Call settings• Language• Date and time• Sounds and alerts• Standby• Screen saver• System information• Advanced
3. Some of these menus have their own submenus. To navigate further down in the menu hierarchy press either or use the key to navigate to the right.
4. To go one or more steps back in the hierarchy, use the key to navigate to the left, the required number of times.
5. To collapse all menus, press the key.
6. To put a change into effect, press as soon as the required setting has been selected or changed.
The Settings
Call settings
Call forward lets you forward all calls to a defined receiver. Just key in the identity and activate the feature.
Auto answer can be set to Off or On. When set to Off you must respond to an incoming call to accept it, either by lifting the handset or by pressing the key. When set to On, the call is automatically accepted.
Default bitrate in calls can be set to 1152, 768, 512, 384, 256 or 128 kbps.
Maximum upstream bitrate: 1152, 768, 512, 384, 256 or 128 kbps.
Maximum downstream bitrate 1152, 768, 512, 384, 256 or 128 kbps.
The reason for allowing different upstream and downstream bitrate is to meet the need to specify different settings in asymmetric internet connections—typically when operating the E20 from home.
Language
Language Currenly you may choose between English, Norwegian, Swedish, German, French, Korean, Italian, Japanese, Russian, Spanish and Turkish. New languages are added on a regular basis.
Date and time
Date and time can be set to either Manual or Automatic.
If set to Automatic the menu allows you to update Time zone, Date format and Time format only. When set to Manual you may change Day, Month, Year, Time upon 12/24 hrs, Date format and Time format.
Sounds and alerts
Ring tones allow you to select between the ring tones available. Use the key to navigate up and down as usual. You will hear the different ring tones as you move up and down.
Ring volume lets you set the volume of the incoming call signal. You will hear the level as you adjust.

D14330.09 TANDBERG E20 ADMINISTRATOR GUIDE (TE2.1) February 2010 28
What’s in this Guide? Introduction Deploying E20 Using E20 The Settings Advanced settingsThe Settings
Key tones let you determine whether you should hear a sound every time you press a key or not. Set to On to activate.
Standby
There is a standby function in the E20. When activated the standby function makes the screen go black after a time interval (delay) specified by you. This setting will override the screensaver feature.
To continuously display the screensaver, the standby function must be disabled.
Screen Saver
You may add a screensaver of your choice to the E20. You will need a USB disk containing the photos (illustrations) you want to use as screensaver. If the USB stick contains multiple pictures, the contents will be shown as a gallery, one picture at a time.
A few things to observe:
• Once you have plugged in the USB disk, the E20 will produce a dialog asking you whether the pictures on the USB disk should be displayed by the USB picture frame. TE 2.1 will read xcif data and even rotate images when necessary. The prompt will let you specify the time interval between the last time you operated (or used) the E20 and when the screensaver should start to appear.
• The USB disk must remain connected to the E20 to make this work.
• The following file formats are supported:
*.bmp, *.gif, *.ico, *.jpeg, *.jpg, *.mng, *.pbm, *.pgm, *.png, *.ppm, *.svg, *.tif, *.tiff, *.xbm, *.xpm
System information
This is an information panel only, providing information on
• System name• Uptime• Network IP address• SIP address
• SIP proxy address• SIP status• E20 software version• Hardware Module serial number• MAC address
When in a call the following is also provided:
• Remote URI• Call rate• Protocol• Video protocol• Video resolution• Video channel rate• Video Packet loss (in numbers and in %)• Video Jitter• Audio protocol• Audio Channel rate• Audio Packet loss (in numbers and in %)• Audio jitter• Encryption type• Encryption status
Bluetooth™
You may connect a Bluetooth™ headset to the E20. To do that, you have to turn the Bluetooth support in the E20 to <b>On</b> and set your Bluetooth device in pairing mode.
Advanced
The Advanced settings are described in detail in the next chapter.
D14330.09 TANDBERG E20 ADMINISTRATOR GUIDE (TE2.1) February 2010 29
What’s in this Guide? Introduction Deploying E20 Using E20 The Settings Advanced settingsAdvanced Settings
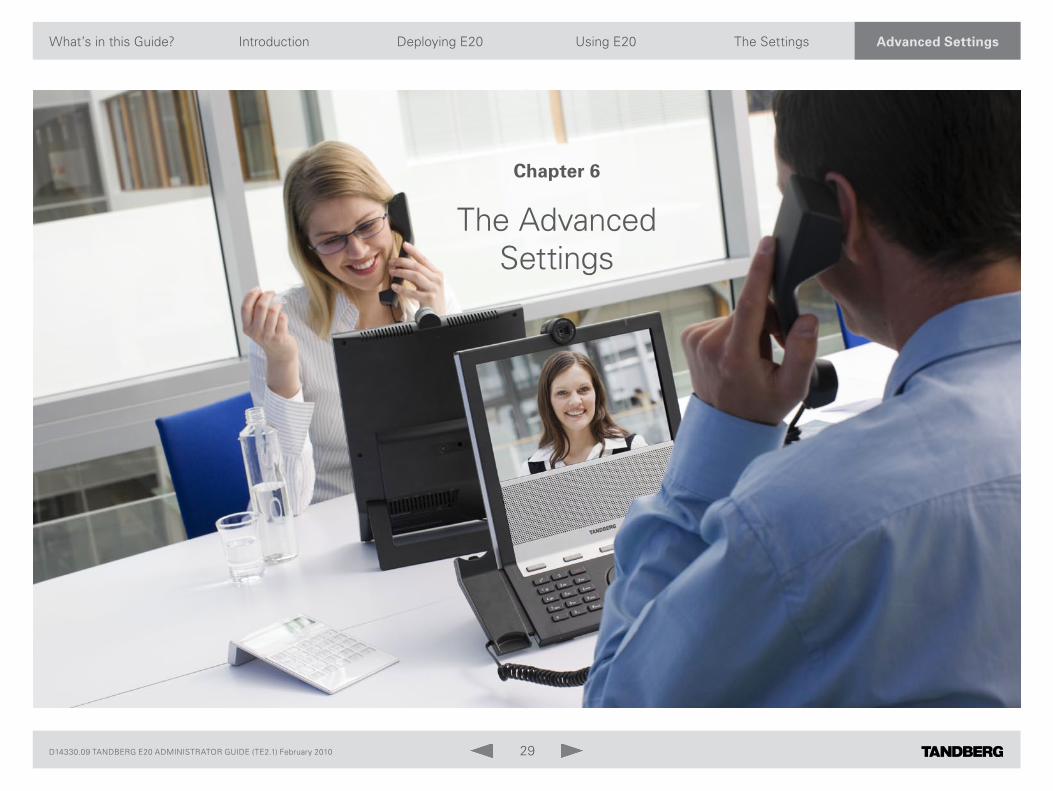
Chapter 6
The Advanced Settings
D14330.09 TANDBERG E20 ADMINISTRATOR GUIDE (TE2.1) February 2010 30
What’s in this Guide? Introduction Deploying E20 Using E20 The Settings Advanced settingsAdvanced Settings
Description of the Advanced SettingsOn the following pages you will find a list of the settings available to administrators—known as the Advanced settings.
We recommend you visit the TANDBERG web site regularly for updated versions of the manual. Go to: http://www.tandberg.com/docs.
To access the Advanced settings, do as follows:
1. Press the key to produce the menu. Use the key to navigate down to Settings and press either or use the key to navigate to the right.
2. Navigate down to Advanced.
3. To navigate further down in the menu hierarchy press either or use the key to navigate to the right.
4. To go one or more steps back in the hierarchy, use the key to navigate to the left, the required number of times.
5. To collapse all menus, press the key.
6. To put a change into effect, press as soon as the required setting has been selected or changed.
Speed dialsThis menu lets you configure up to four speed dials that will be readily available from the E20 soft keys. Each speed dial can be set up to call a phone book contact. When you press a configured soft key, the E20 will call the corresponding contact immediately.
IP settingsThis menu lets you
• Set IP assignment to Static or DHCP
When set to Static, you should also define:
• IP address
• Subnet mask
• Gateway

D14330.09 TANDBERG E20 ADMINISTRATOR GUIDE (TE2.1) February 2010 31
What’s in this Guide? Introduction Deploying E20 Using E20 The Settings Advanced settingsAdvanced Settings
Advanced configurationAll items in this menu are expandable whenever they have a sign to their left. To expand a menu item press the right arrow key to navigate to the right.
All items in a menu item are collapsible whenever they have a sign to their left. To collapse a menu press the left arrow key to navigate to the left.
AudioThe settings found here let you specify ring tone, ring volume, whether key tones should be audible or not and the volume of the handset, headset and the speaker. The three latter may be set individually.
Volume
Handset volume can be set to 0–100 in steps of 5.
Headset volume can be set to 0–100 in steps of 5.
Speaker volume can be set to 0–100 in steps of 5.
All these may be set individually (independent of each other).
Sounds and Alert
Key tones let you determine whether you should hear a sound every time you press a key or not. Set to On to activate.
Ring tones allow you to select between the ring tones available. Use the key to navigate up and down as usual. You will hear the different ring tones as you move up and down.
Ring volume lets you set the volume of the incoming call signal. You will hear the level as you adjust.
Camera 1Brightness can be set to Auto or Manual which can be anywhere in the range 1–20 in steps of 1.
Whitebalance can be set to Auto or Manual which can be anywhere in the range 1–32 in steps of 2.
CapsetFilterDebugNot used in this version
Conference 1
Autoanswer
Mode is set to On to enable automatic answer and to Off to require manual response to an incoming call.
Delay can be set anywhere in the range 0–50 seconds in steps of 2 seconds.
Do not disturb
Do not disturb can be set to On to disable incoming calls. The calling party will perceive your unit as being busy.
Encryption
Encryption can be set to Off (not recommended) or Best effort to let the system determine the best solution.
Default Call
Rate can be set in the range 64–1152 kbps.
D14330.09 TANDBERG E20 ADMINISTRATOR GUIDE (TE2.1) February 2010 32
What’s in this Guide? Introduction Deploying E20 Using E20 The Settings Advanced settingsAdvanced Settings
Call forward
Mode is set to On or Off. Set to On to forward all calls.
URI specifies whom the call will be forwarded to.
TTY
Mode can be set to On or Off.
FECC (Far End Camera Control)
Mode can be set to On or Off. Set to On this will enable you to control the far end camera position and zoom (provided that the far end system supports this)
BFCP (Binary Floor Control Protocol)
Mode can be set to On or Off.
Max upstream rate
This can be set in the range 64–1152 kbps.
Max downstream rate
This can be set in the range 64–1152 kbps.
The downstream and upstream rates can be set independently of each other to facility good transmission in asymmetric connections.
TelephonyPrefixExp
This parameter is used to set up regular expressions to force the E20 to set up an audio call when calling a peer with a number or URI that matches the regular expression given by this parameter.
ExperimentalVideo
PacketPacing On/Off/Auto
Experimental mechanism to smooth out packet burstiness.
Menu
CustomSoftButtons
This configuration option includes all the configuration parameters used by the speed dial mechanism. It is possible to configure all four speed dial buttons from here.
Screensaver
You may add a screensaver of your choice to the E20. You will need a USB disk containing the photos (illustrations) you want to use as screensaver. If the USB stick contains multiple pictures, the contents will be shown as a gallery, one picture at a time.
Available: Indicates whether the picture frame is enabled or not
PictureDirectory: Not in use
ChangePictureInterval: Indicates how long each picture will be shown
FillScreenMode: Not in use
OrderBy: Not in use
URLScreenSaver: Experimental feature
A few things to observe:
Once you have plugged in the USB disk, the E20 will produce a dialogue asking you whether the pictures on the USB disk should be displayed by the USB picture frame. TE 2.1 will read xcif data and even rotate images when necessary. The prompt will let you specify the time interval between the last time you operated (or used) the E20 and when the screensaver should start to appear.

D14330.09 TANDBERG E20 ADMINISTRATOR GUIDE (TE2.1) February 2010 33
What’s in this Guide? Introduction Deploying E20 Using E20 The Settings Advanced settingsAdvanced Settings
The USB disk must remain connected to the E20 to make this work.
The following file formats are supported:
*.bmp, *.gif, *.ico, *.jpeg, *.jpg, *.mng, *.pbm, *.pgm, *.png, *.ppm, *.svg, *.tif, *.tiff, *.xbm, *.xpm
EncryptionIndicator: On/Off(Default)
This setting will control whether the encryption indicator that slides in from the right during call setup etc is visible or not.
It the value is Off, you will never see the indicator. This is the default behavior.
Network 1IPv4 lets you specify Address, Gateway, Quality of Service with Diffserv (Differentiated Services) On or Off, and Subnet Mask.
Assignment can be DHCP or static
DNS allows you to specify name and the addresses of up to 5 servers.
VLAN Lets you decide which VLAN the E20 should be connected to or not. The VLAN feature is turned off by default.
IEEE8021x Allows you to set up IEEE 802.1x authentication for the E20. The 802.1x feature is by default turned off.
Protocol can be IPv4, IPv6 or both.
Network services
Telnet
Telnet is a network protocol used on the Internet or local area network (LAN) connections.
On: The Telnet protocol is enabled.
Off: The Telnet protocol is disabled. This is the default factory setting.
HTTP / HTTPS / HTTP test certificate
Determines whether or not to use secure management.
HTTP: Set to HTTP to disable secure management. Requires HTTP to be enabled in the Network Services HTTP Mode setting.
HTTPS: Set to HTTPS to enable secure management. Requires HTTPS to be enabled in the Network Services HTTPS Mode setting.
HTTPS test certificate: Set to On or Off.
SNMP (Simple Network Management Protocol)
Used in network management systems to monitor network-attached devices (routers, servers, switches, projectors, etc) for conditions that warrant administrative attention. SNMP exposes management data in the form of variables on the managed systems, which describe the system configuration. These variables can then be queried (set to ReadOnly) and sometimes set (set to ReadWrite) by managing applications.
Community name
Enter the name of the Network Services SNMP Community. SNMP Community names are used to authenticate SNMP requests. SNMP requests must have a ‘password’ (case sensitive) in order to receive a response from the SNMP Agent in the codec. The default password is “public”. If you have the TANDBERG Management Suite (TMS) you must make sure the same SNMP Community is configured there too. Note! The SNMP Community password is case sensitive.
Host IP address
Enter the IP address of the SNMP Manager. All traps will then be sent to the host listed.
The system’s SNMP Agent responds to requests from SNMP Managers (a PC program etc.). SNMP Traps are generated by the SNMP Agent to

D14330.09 TANDBERG E20 ADMINISTRATOR GUIDE (TE2.1) February 2010 34
What’s in this Guide? Introduction Deploying E20 Using E20 The Settings Advanced settingsAdvanced Settings
inform the SNMP Manager about important events. Can be used to send event created messages to the SNMP agent about different events like: system reboot, system dialing, system disconnecting, MCU call, packet loss etc. Traps can be sent to multiple SNMP Trap Hosts.
Mode
Off: Set to Off when you want to disable the SNMP network service.
ReadOnly: Set to ReadOnly when you want to enable the SNMP network service for queries only.
ReadWrite: Set to ReadOnly when you want to enable the SNMP network service for both queries and commands.
System contact
Enter the name of the Network Services SNMP System Contact.
System location
Enter the name of the Network Services SNMP System Location.
SIP
Determines whether the system should be able to place and receive SIP calls.
On: Set to On to enable the possibility to place and receive SIP calls. This is the default setting.
Off: Set to Off to disable the possibility to place and receive SIP calls.
NTP (Network Time Protocol)
The Network Time Protocol (NTP) is used to synchronize the time of the system with a reference time server. The time server will subsequently be queried every 24th hour for time updates. The time will be displayed on the top of the screen. The system will use the time to timestamp messages transmitted to Gatekeepers or Border Controllers requiring H.235 authentication. The system will use the
time to timestamp messages transmitted to Gatekeepers or Border Controllers that requires H.235 authentication. It is also used for timestamping Placed Calls, Missed Calls and Received Calls.
Auto: The system will use the NTP server, by which address is supplied from the DHCP server in the network. If no DHCP server is used, or the DHCP server does not provide the system with a NTP server address, the system will use the static defined NTP server address specified by the user.
Manual: The system will always use the static defined NTP server address specified by the user.
PhonebookID: Enter a name for the external phonebook. Addresses the specific phonebook.
Type: Can be TMS (TANDBERG Management System) or VCS (Video Communication Server)
URL: Enter the address (URL) to the external phonebook server. Addresses the specific phonebook server.
ProvisioningProvides the possibility of managing the E20 by using an external manager/management system.
External Manager
Address: Enter the name for the provisioning server.
Protocol: http or https
Path: Enter the path within the external manager to access the provisioning information (if http-based provisioning.)
Domain: Enter the domain of the provisioning server

D14330.09 TANDBERG E20 ADMINISTRATOR GUIDE (TE2.1) February 2010 35
What’s in this Guide? Introduction Deploying E20 Using E20 The Settings Advanced settingsAdvanced Settings
External manager Mode
Off: The system will not try to register to any management system.
TMS: If set to TMS the system will try to register with a TMS server as described in the address and path settings. TMS is short for TANDBERG Management System. Please contact your TANDBERG representative for more information.
VCS: If set to VCS the system will try to register with a VCS as described in described in the address and path settings. VCS is short for Video Communication Server. Please contact your TANDBERG representative for more information.
HTTP: If set, the E20 will try to download configuration from a web server. The URL is the concatenation of the External Manager address and the Path parameter. If the protocol is https, the E20 will use HTTPS during the download. If the HttpMethod parameter is POST, the E20 will do an HTTP post to the web server. Otherwise, it will do a HTTP Get to the web server. LoginName and password will be used if the web server requires username and password to download the configuration.
Auto: If set, the E20 will enter auto provisioning mode and look for both HTTP bootstrapping servers, VCS servers etc. This is the default mode.
Login name
This is the user name part of the credentials used to authenticate towards the HTTP server when using HTTP provisioning.
Password
This is the password part of the credentials used to authenticate towards the HTTP server when using HTTP provisioning.
HttpMethod
Post/Get This configuration parameter indicates whether the E20 should use HTTP GET or HTTP POST when contacting the HTTP server during HTTP provisioning.
SIPProfile 1–3
The SIP URI or number is used to address the system. This is the URI that is registered and used by the SIP services to route inbound calls to the system. A Uniform Resource Identifier (URI) is a compact string of characters used to identify or name a resource.
Default transport
Select the transport protocol to be used over the LAN.
UDP: The system will always use UDP as the default transport method.
TCP: The system will always use TCP as the default transport method.
TLS: The system will always use TLS as the default transport method. For TLS connections a SIP CA-list can be uploaded using the web interface. If no such CA-list is available on the system then anonymous Diffie Hellman will be used.
Auto: For future use.
TLS verify
For TLS connections a CA-list can be uploaded from the web interface.
On: Set to On to verify TLS connections. Only TLS connections to servers, whom x.509 certificate is validated against the CA-list, will be allowed.
Off: Set to Off to allow TLS connections without verifying them. The TLS connections are allowed to be set up without verifying the x.509 certificate received from the server against the local CA-list. This should typically be selected if no SIP CA-list has been uploaded.
D14330.09 TANDBERG E20 ADMINISTRATOR GUIDE (TE2.1) February 2010 36
What’s in this Guide? Introduction Deploying E20 Using E20 The Settings Advanced settingsAdvanced Settings
Type
Enables SIP extensions and special behaviour for a vendor or provider.
Standard: Should be used when registering to standard SIP proxy like OpenSer.
Alcatel: Must be used when registering to a Alcatel-Lucent OmniPCX Enterprise R7 or later.
Avaya: Must be used when registered to a Avaya Communication Manager.
Cisco: Must be used when registering to a Cisco CallManager version 5 or later.
Microsoft: Must be used when registering to a Microsoft LCS or OCS server.
Nortel: Must be used when registering to a Nortel MCS 5100 or MCS 5200 PBX.
Siemens: Must be used when registering to a Siemens HiPath 8000.
Broadsoft: Must be used when registering to a Broadsoft server.
Outbound: Off
Not used in this version
Mailbox
SIP URI of media mailbox (i.e. voicemail, videomail).
MultiWay conference
Name of the MultiWay conference.
Line
Select between Private and Shared. Private lines are regular SIP-
profiles similar to the line concept in TE 2.0 and earlier versions. A shared line is a BroadWorks extension that is supported in TE 2.1. It means that several users (E20s with TE 2.1) can share a line. Whenever someone calls the shared line, all of the E20s that configured with the shared line will start ring. Whoever answers first will take the call. However, it is possible for other users of the shared line to barge-in and join the call. Since Broadworks does not support video mixing in the current version, the joined call will be audio only. Once one of the users disconnects from the call, the video is resumed.
URI
Key in the URI of the E20 unit.
Proxy 1
Address: The Proxy Address is the manually configured address for the outbound proxy. It is possible to use a fully qualified domain name, or an IP address. The default port is 5060 for TCP and UDP but another can be provided.
Discovery: When Manual is selected, the manually configured SIP Proxy address will be used. When Auto is selected, the SIP Proxy address is obtained using Dynamic Host Configuration Protocol (DHCP).
Proxy 2–4
Identical to Proxy 1.
Authentication 1
Login name: This is the user name part of the credentials used to authenticate towards the SIP proxy.
Password: This is the password part of the credentials used to authenticate towards the SIP proxy.
D14330.09 TANDBERG E20 ADMINISTRATOR GUIDE (TE2.1) February 2010 37
What’s in this Guide? Introduction Deploying E20 Using E20 The Settings Advanced settingsAdvanced Settings
StandbyThe Standby Control setting determines whether the system should go into standby mode or not.
Control On: The system will go into standby mode when the Standby Delay has timed out. Requires the Standby Delay to be set to an appropriate value.
Control Off: The system will not go into standby.
Delay: Defines how long (in minutes) the system will wait before it goes into standby mode. Requires the Standby Control to be enabled. Range 1–480 minutes.
System UnitEnter a System Name to define a name of the system unit. The system name will be displayed when the E20 is acting as an SNMP Agent and towards a DHCP server.
Bluetooth™ can be set to On or Off.
HearingImpairedModeOn: If this setting is on, the device will play a blinking, orange video whenever there is an incoming call.
Off: Default
NameReadable name of the device, e.g. Joe’s E20
MenuLanguageThis setting allows you to set the menu language, if necessary.
TimeAllows you to set the time zone accordingly.
VideoSet the Selfview to On or Off. Selfview is the outgoing video (what the others see) from your E20, adjust the brightness of the image and select wallpaper.
Change passwordThis allows you to change the administrator password on the device. This is done by entering the password in the password field and pressing the Save button. The User can cancel the password update by pressing the Cancel button.
RestartUse this to reboot the E20 in a controlled manner.

D14330.09 TANDBERG E20 ADMINISTRATOR GUIDE (TE2.1) February 2010 38
What’s in this Guide? Introduction Deploying E20 Using E20 The Settings Advanced settingsAdvanced Settings
171
348
188
mmA3
1.9 kg
-
Telecom AS--
116700TANDBERG E20
rev. 03C+ is masterFlame class:UL reference:
-
---------
-Part weight:
Sheet size:Scale:
Surface treatmentSpecification: MaterialTolerances
Unit:
-
projection
Sheet 1 of 1
European
must comply with the RoHS directives
Dimensions without paint or finish
Flame class requirement: -
Processes
All materials, finishes, and proccesses------
Type:Manufacturer:Type number:Thickness:Color:Surface:Glossiness:
3D CAD model file 1167011:3
Rev. Date Prep. Checked Change01 26.11.2008 CHM PPE Initial drawing.
266
317
Mechanical dimensions
All dimensions are in mm.
1”= 25.4 mm

D14330.09 TANDBERG E20 ADMINISTRATOR GUIDE (TE2.1) February 2010 39
What’s in this Guide? Introduction Deploying E20 Using E20 The Settings Advanced settings
U.S. HEADQUARTERS
TANDBERG
1212 Avenue of the Americas
24th Floor
New York, NY 10036
Telephone: +1 212 692 6500
Fax: +1 212 692 6501
Video: +1 212 692 6535
E-mail: [email protected]
EUROPEAN HEADQUARTERS
TANDBERG
Philip Pedersens vei 20
1366 Lysaker
Norway
Telephone: +47 67 125 125
Fax: +47 67 125 234
Video: +47 67 126 126
E-mail: [email protected]
Copyright © TANDBERG 2008–2010. All rights reserved.