system monitor update guide for ps5000 series€¦ · system monitor update guide. for ps5000....
TRANSCRIPT

1
System Monitor Update Guide for PS5000
2017, NovemberSchneider Electric Japan Holdings Ltd.
2
Overview
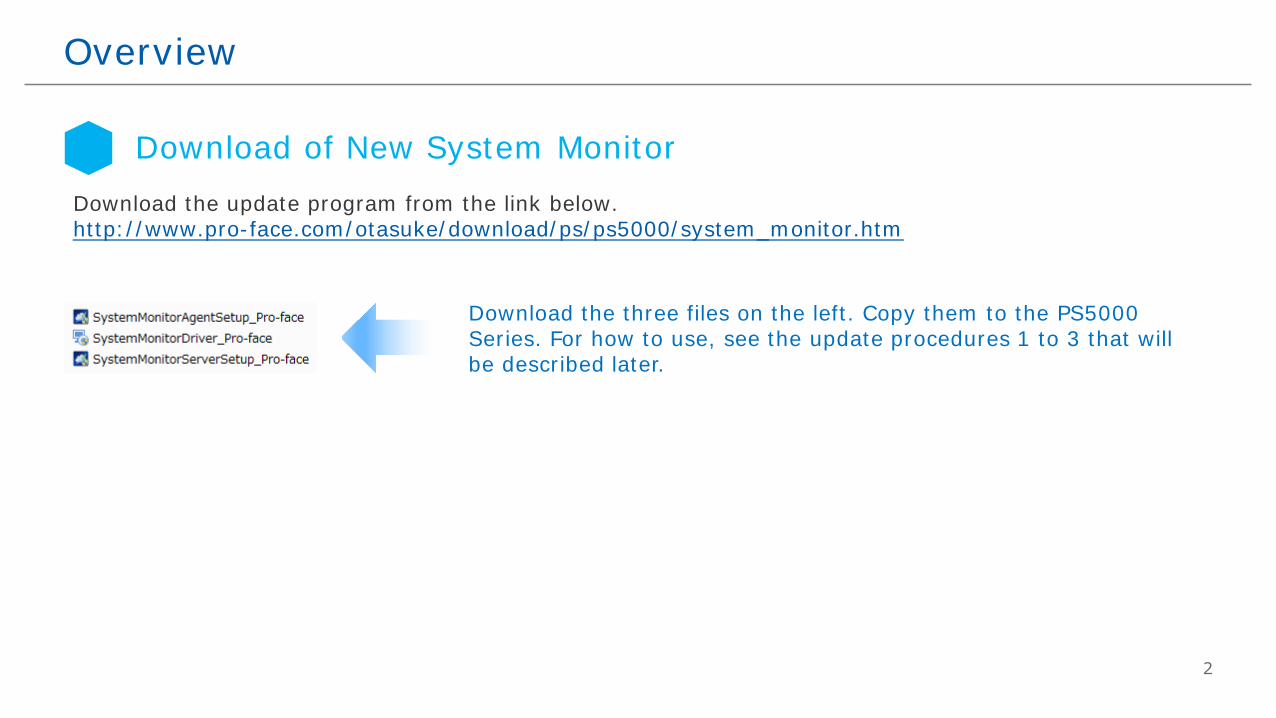
Download the update program from the link below.http://www.pro-face.com/otasuke/download/ps/ps5000/system_monitor.htm
Download the three files on the left. Copy them to the PS5000 Series. For how to use, see the update procedures 1 to 3 that will be described later.
Download of New System Monitor

3
Overview
For BTO products, the revision of SV was indicated below.
How to confirm target goods
Confirm with revision of SV
OS SVWindows® Embedded Standard 7 (64ビット)
1.0 to 3.0
Windows® 7 Ultimate (64ビット)
1.0 to 3.0
Windows® Embedded 8.1 Industry (64ビット)
1.0 to 3.0
If you can see below SV, you should update.

4
Overview
Procedure to update new System Monitor
Not SV3.0
Before
Ver. 3.0.30
Update
Procedure_A
Update
Procedure_C
Update
Procedure_B
Ver. 3.0.33Update
Procedure_A
Update
Procedure_B
System MonitorVersion check
Uninstall InstallFix program QFE
SV=1.0/2.0
SV=3.0&
Anyone updatedOnly System Monitor

55
Update Procedure_A
Uninstall the old System Monitor.* Uninstall it following the steps.Following the different order might result in failing to end properly.
6
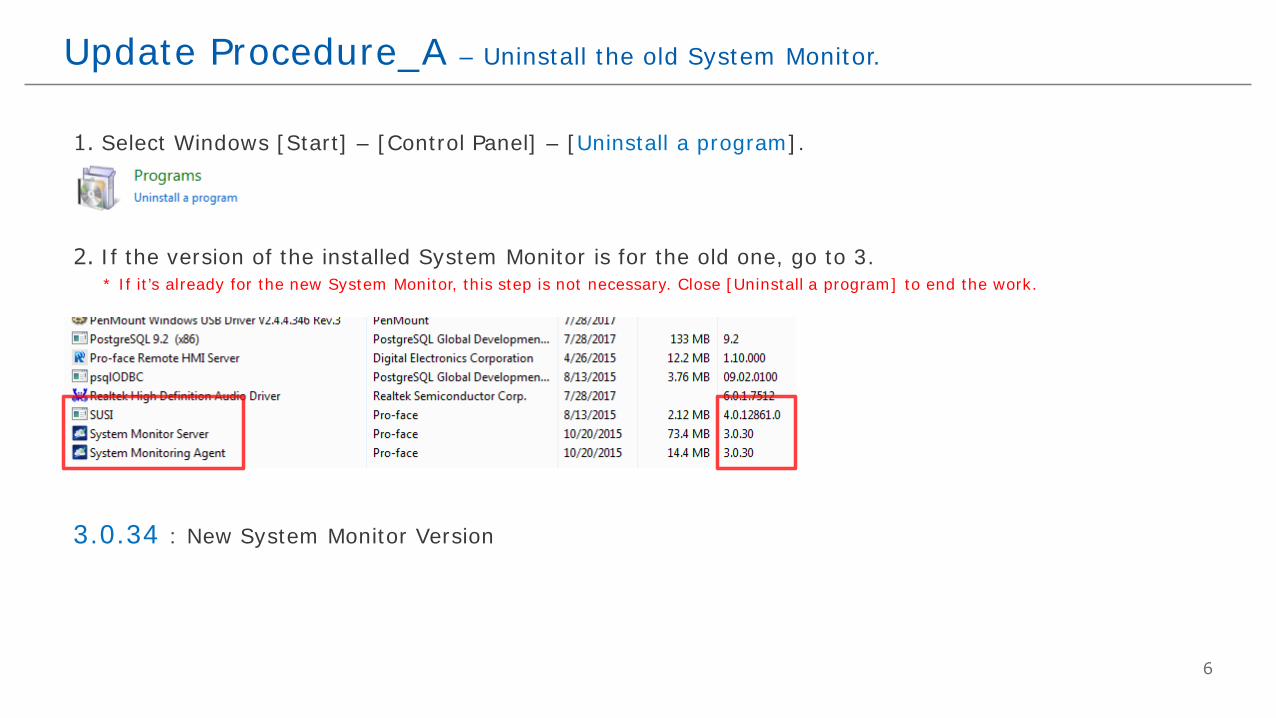
Update Procedure_A – Uninstall the old System Monitor.
1. Select Windows [Start] – [Control Panel] – [Uninstall a program].
2. If the version of the installed System Monitor is for the old one, go to 3.* If it’s already for the new System Monitor, this step is not necessary. Close [Uninstall a program] to end the work.
3.0.34 : New System Monitor Version

7
Update Procedure_A – Uninstall the old System Monitor.
3. Execute the downloaded file, “SystemMonitorServerSetup_Pro-face”.
4. The following window appears while it’s being executed. Select [Uninstall].
* Uninstall the System Monitor Server using the downloaded file instead of [Uninstall a program].

8
Update Procedure_A – Uninstall the old System Monitor.
5. The Apache Tomcat Uninstall window appears while it’s being executed. Select [Uninstall].
6. You are asked if you remove all files or choices are displayed. Select [Yes]. Uninstallation of ”Apache Tomcat” is completed.

9
Update Procedure_A – Uninstall the old System Monitor.
7. The following window appears while the “Apache Tomcat” is being removed. Select [Yes].
8. When the following window appears, press [OK].
9. Uninstallation of the System Monitor Server is completed.

10
Update Procedure_A – Uninstall the old System Monitor
10. On [Uninstall a program], select “System Monitoring Agent” and press [Uninstall].The following window appears. Select [Yes]. The process of uninstallation is completed.
11. Uninstall “SUSI” following the same step as 10.

1111
Update Procedure_B
Install the new System Monitor.

12
Update Procedure_B – Install the new System Monitor.
1. Execute the downloaded file for the new one, “SystemMonitorDriver_Pro-face”.
2. When a setup type of window appears while the file is being executed, select [Typical] to proceed.
3. Installation of SUSI (System Monitor Driver) is completed.
13
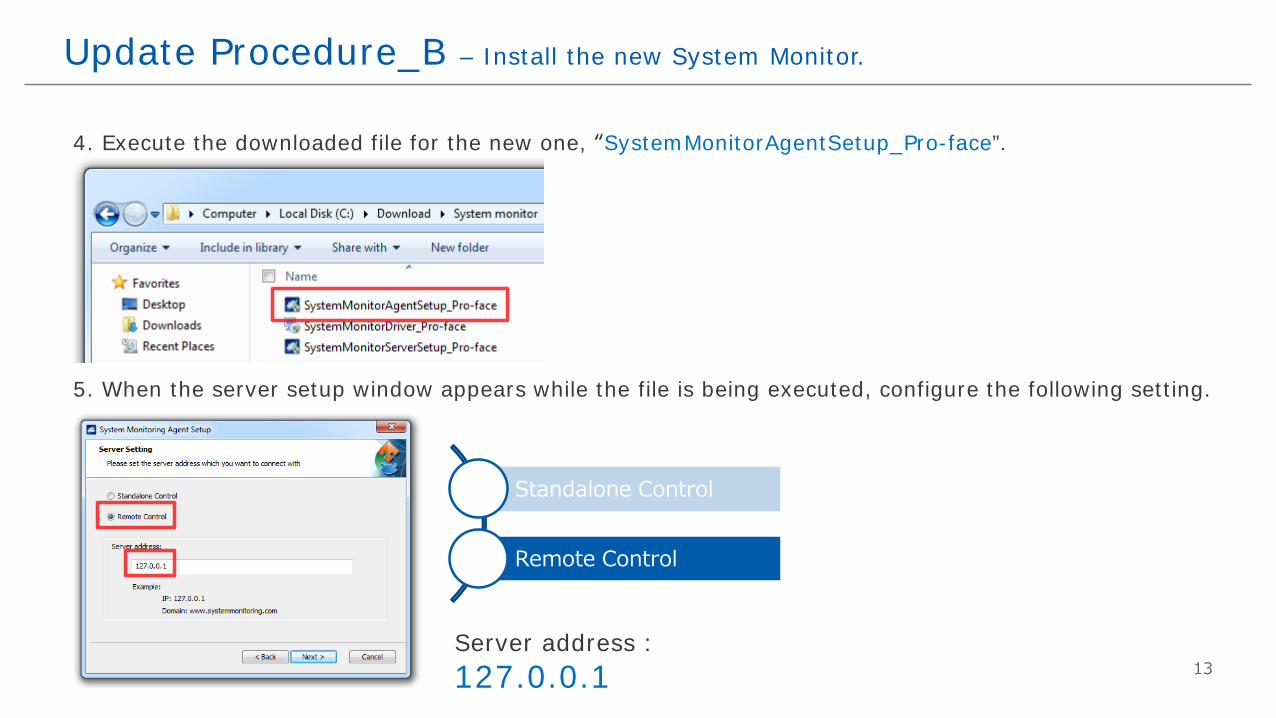
Update Procedure_B – Install the new System Monitor.
4. Execute the downloaded file for the new one, “SystemMonitorAgentSetup_Pro-face”.
5. When the server setup window appears while the file is being executed, configure the following setting.
Standalone Control
Remote Control
Server address : 127.0.0.1

14
Update Procedure_B – Install the new System Monitor.
6. When the VNC Setting window appears, select “Default Setting” to proceed.
7. Installation of the System Monitoring Agent is completed.
Default setting
VNC server
Third party KVM tool
8. Execute the downloaded file for the new one, “SystemMonitorServerSetup_Pro-face”.

15
Update Procedure_B – Install the new System Monitor.
9. When the Tomcat Server Setting window appears while the file is being executed, proceed with the following setting.
10. When the PostageSQL Server Password Setting window appears, enter the password as shown below and proceed.
HTTP Port Number : 8080
Password : admin *Retype password : admin
* It is the password specified on the System Monitor at shipping from the factory. If another password exists for management, enter it.
16
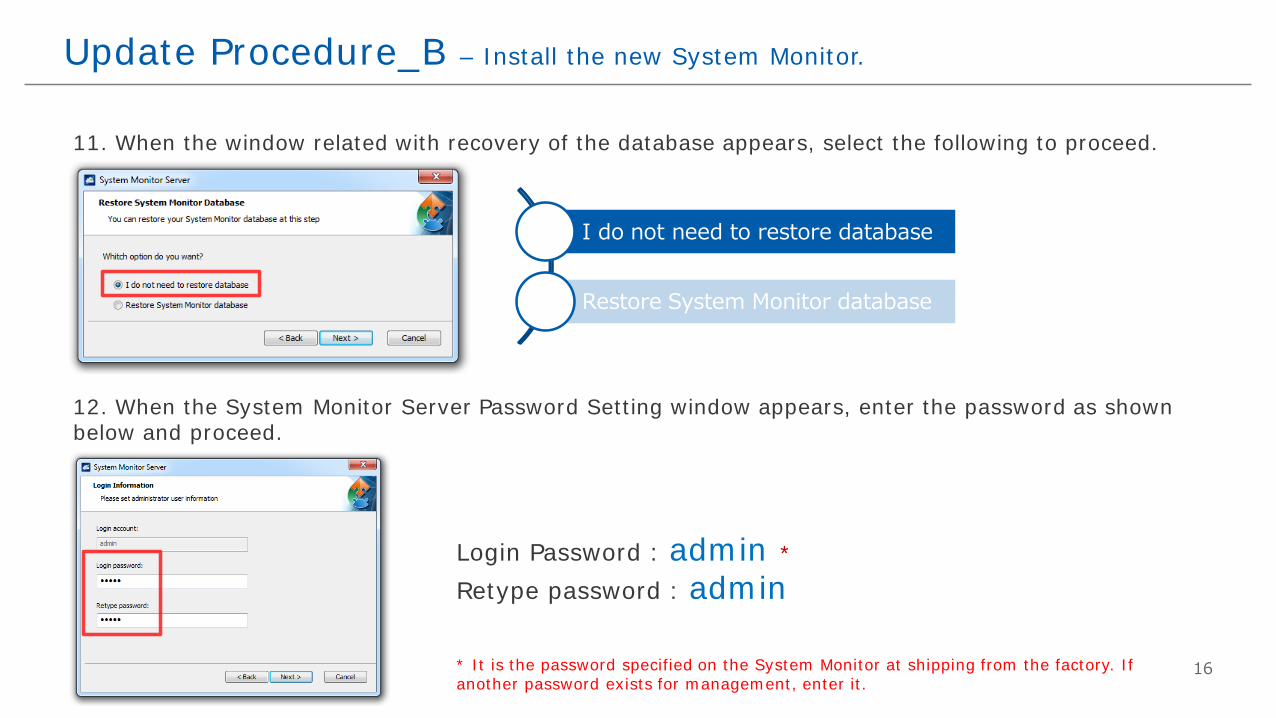
Update Procedure_B – Install the new System Monitor.
11. When the window related with recovery of the database appears, select the following to proceed.
12. When the System Monitor Server Password Setting window appears, enter the password as shown below and proceed.
Login Password : admin *Retype password : admin
* It is the password specified on the System Monitor at shipping from the factory. If another password exists for management, enter it.
I do not need to restore database
Restore System Monitor database
17
Update Procedure_B – Install the new System Monitor.
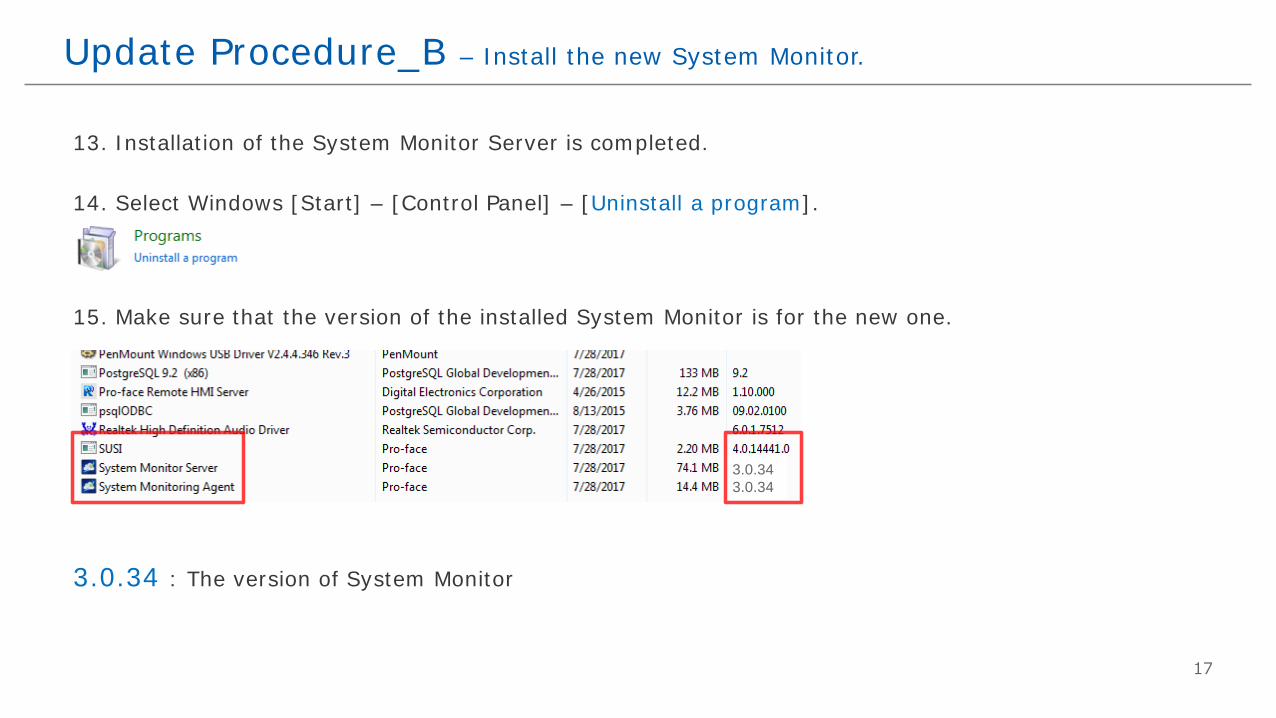
13. Installation of the System Monitor Server is completed.
14. Select Windows [Start] – [Control Panel] – [Uninstall a program].
15. Make sure that the version of the installed System Monitor is for the new one.
3.0.34 : The version of System Monitor
3.0.343.0.34
1818
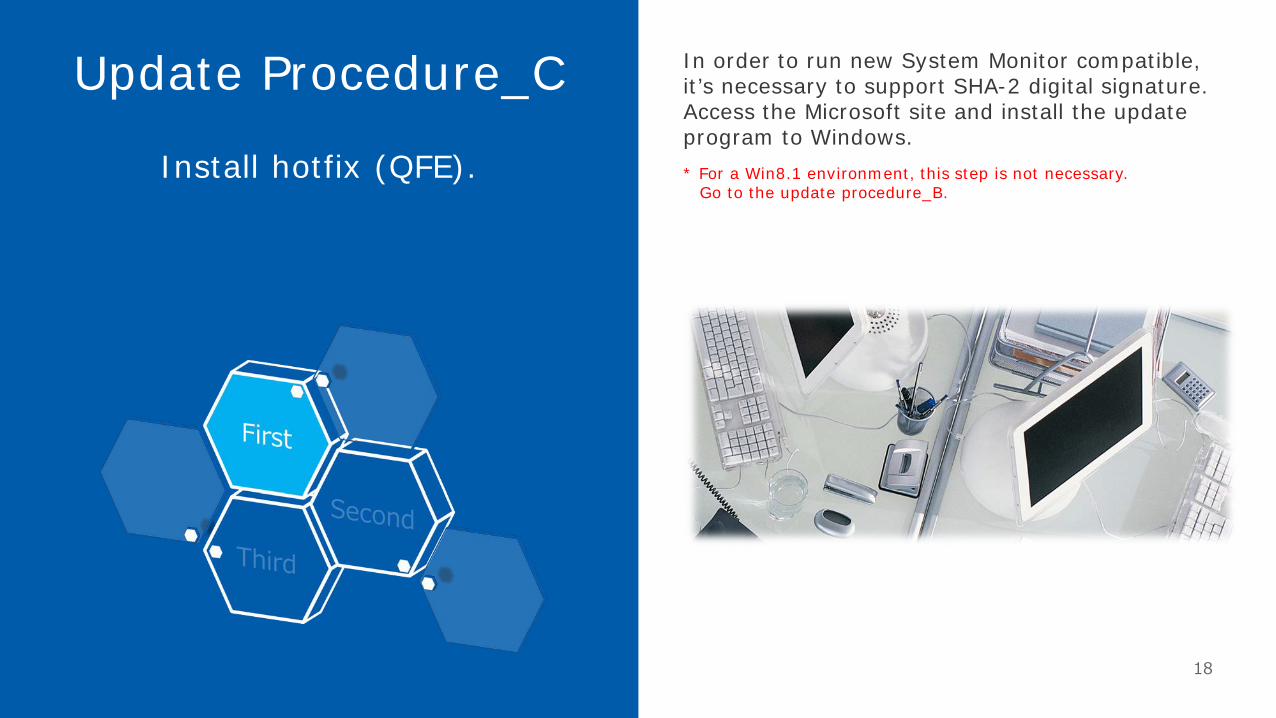
In order to run new System Monitor compatible, it’s necessary to support SHA-2 digital signature. Access the Microsoft site and install the update program to Windows.* For a Win8.1 environment, this step is not necessary.
Go to the update procedure_B.
Update Procedure_C
Install hotfix (QFE).

19
Update Procedure_C – Install hotfix (QFE).
1. Access the Microsoft site below.https://www.microsoft.com/en-US/download/details.aspx?id=46148
3. Copy the downloaded file called “Windows6.1-KB3033929-x64.msu” to any folder of the PS5000 and execute it.
2. Scroll the screen to find the following display. Select the OS language you are using and click on the Download button.
20
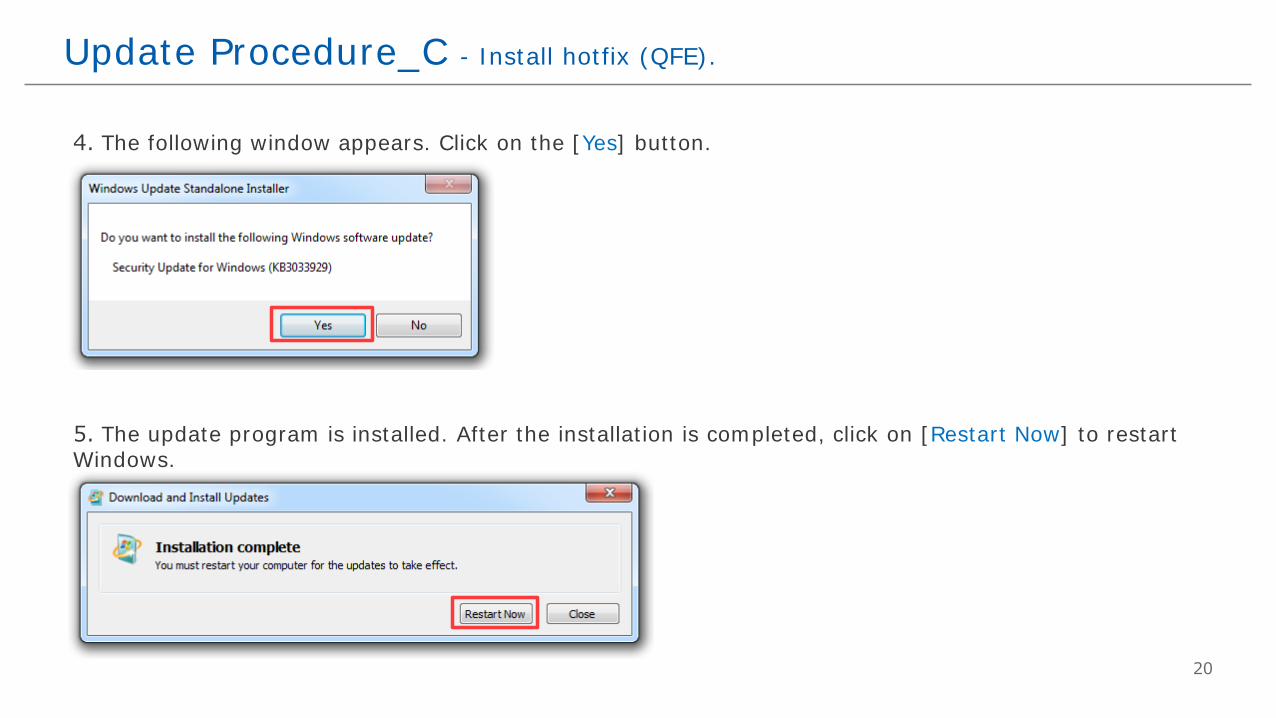
4. The following window appears. Click on the [Yes] button.
5. The update program is installed. After the installation is completed, click on [Restart Now] to restart Windows.
Update Procedure_C - Install hotfix (QFE).

21©2017 Schneider Electric Japan Holdings Ltd. All Rights Reserved.