symfony cookbook 2 5
DESCRIPTION
ÂTRANSCRIPT

The Cookbookfor Symfony 2.5
generated on October 23, 2014

The Cookbook (2.5)
This work is licensed under the “Attribution-Share Alike 3.0 Unported” license (http://creativecommons.org/licenses/by-sa/3.0/).
You are free to share (to copy, distribute and transmit the work), and to remix (to adapt the work) under thefollowing conditions:
• Attribution: You must attribute the work in the manner specified by the author or licensor (butnot in any way that suggests that they endorse you or your use of the work).
• Share Alike: If you alter, transform, or build upon this work, you may distribute the resulting workonly under the same, similar or a compatible license. For any reuse or distribution, you must makeclear to others the license terms of this work.
The information in this book is distributed on an “as is” basis, without warranty. Although every precautionhas been taken in the preparation of this work, neither the author(s) nor SensioLabs shall have any liability toany person or entity with respect to any loss or damage caused or alleged to be caused directly or indirectly bythe information contained in this work.
If you find typos or errors, feel free to report them by creating a ticket on the Symfony ticketing system(http://github.com/symfony/symfony-docs/issues). Based on tickets and users feedback, this book iscontinuously updated.

Contents at a Glance
How to Use Assetic for Asset Management ..........................................................................................6How to Minify CSS/JS Files (Using UglifyJS and UglifyCSS) ...............................................................12How to Minify JavaScripts and Stylesheets with YUI Compressor.......................................................16How to Use Assetic for Image Optimization with Twig Functions ......................................................19How to Apply an Assetic Filter to a specific File Extension .................................................................22How to Install 3rd Party Bundles .......................................................................................................24Best Practices for Reusable Bundles ...................................................................................................27How to Use Bundle Inheritance to Override Parts of a Bundle ............................................................34How to Override any Part of a Bundle ...............................................................................................36How to Remove the AcmeDemoBundle .............................................................................................39How to Load Service Configuration inside a Bundle ...........................................................................42How to Create Friendly Configuration for a Bundle ...........................................................................45How to Simplify Configuration of multiple Bundles ...........................................................................51How to Use Varnish to Speed up my Website ....................................................................................54How to Master and Create new Environments ...................................................................................59How to Override Symfony's default Directory Structure .....................................................................64Using Parameters within a Dependency Injection Class ......................................................................67Understanding how the Front Controller, Kernel and Environments Work together............................70How to Set external Parameters in the Service Container ....................................................................73How to Use PdoSessionHandler to Store Sessions in the Database ......................................................76How to Use the Apache Router .........................................................................................................79Configuring a Web Server .................................................................................................................82How to Organize Configuration Files ................................................................................................87How to Create a Console Command .................................................................................................92How to Use the Console....................................................................................................................97How to Generate URLs and Send Emails from the Console ................................................................99How to Enable Logging in Console Commands ............................................................................... 101How to Define Commands as Services ............................................................................................. 105How to Customize Error Pages ........................................................................................................ 107How to Define Controllers as Services ............................................................................................. 111How to Optimize your Development Environment for Debugging.................................................... 115How to Deploy a Symfony Application ............................................................................................ 117Deploying to Microsoft Azure Website Cloud.................................................................................. 121Deploying to Heroku Cloud ............................................................................................................ 129How to Handle File Uploads with Doctrine ..................................................................................... 133How to use Doctrine Extensions: Timestampable, Sluggable, Translatable, etc. ................................ 142
PDF brought to you bygenerated on October 23, 2014
Contents at a Glance | iii

How to Register Event Listeners and Subscribers ............................................................................. 143How to Use Doctrine's DBAL Layer................................................................................................. 146How to Generate Entities from an Existing Database........................................................................ 148How to Work with multiple Entity Managers and Connections........................................................ 152How to Register custom DQL Functions.......................................................................................... 155How to Define Relationships with Abstract Classes and Interfaces.................................................... 156How to Provide Model Classes for several Doctrine Implementations ............................................... 159How to Implement a simple Registration Form ................................................................................ 162Console Commands........................................................................................................................ 168How to Send an Email..................................................................................................................... 169How to Use Gmail to Send Emails ................................................................................................... 172How to Use the Cloud to Send Emails ............................................................................................. 173How to Work with Emails during Development............................................................................... 175How to Spool Emails....................................................................................................................... 177How to Test that an Email is Sent in a functional Test...................................................................... 179How to Setup before and after Filters............................................................................................... 181How to Extend a Class without Using Inheritance............................................................................ 185How to Customize a Method Behavior without Using Inheritance .................................................... 188How to use Expressions in Security, Routing, Services, and Validation ............................................. 190How to Customize Form Rendering ................................................................................................ 191How to Use Data Transformers ....................................................................................................... 204How to Dynamically Modify Forms Using Form Events ................................................................... 210How to Embed a Collection of Forms .............................................................................................. 222How to Create a Custom Form Field Type....................................................................................... 235How to Create a Form Type Extension ............................................................................................ 240How to Reduce Code Duplication with "inherit_data" ..................................................................... 245How to Unit Test your Forms.......................................................................................................... 249How to Configure empty Data for a Form Class............................................................................... 254How to Use the submit() Function to Handle Form Submissions...................................................... 256How to Use the virtual Form Field Option....................................................................................... 259How to Use Monolog to Write Logs ................................................................................................ 260How to Configure Monolog to Email Errors .................................................................................... 264How to Configure Monolog to Display Console Messages................................................................ 266How to Configure Monolog to Exclude 404 Errors from the Log ...................................................... 268How to Log Messages to different Files ............................................................................................ 269How to Create a custom Data Collector........................................................................................... 271How to Use Matchers to Enable the Profiler Conditionally ............................................................... 274Switching the Profiler Storage .......................................................................................................... 276How to Configure Symfony to Work behind a Load Balancer or a Reverse Proxy .............................. 277How to Register a new Request Format and Mime Type................................................................... 279How to Force Routes to always Use HTTPS or HTTP ...................................................................... 281How to Allow a "/" Character in a Route Parameter ......................................................................... 282How to Configure a Redirect without a custom Controller ............................................................... 283How to Use HTTP Methods beyond GET and POST in Routes ........................................................ 285How to Use Service Container Parameters in your Routes ................................................................ 287How to Create a custom Route Loader ............................................................................................ 289Redirect URLs with a Trailing Slash................................................................................................. 293
iv | Contents at a Glance Contents at a Glance | 4

How to Pass Extra Information from a Route to a Controller............................................................ 295How to Load Security Users from the Database (the Entity Provider)................................................ 296How to Add "Remember Me" Login Functionality ........................................................................... 310How to Impersonate a User ............................................................................................................. 313How to Implement your own Voter to Blacklist IP Addresses ........................................................... 315How to Use Voters to Check User Permissions................................................................................. 318How to Use Access Control Lists (ACLs) ......................................................................................... 322How to Use advanced ACL Concepts .............................................................................................. 326How to Force HTTPS or HTTP for different URLs........................................................................... 330How to Restrict Firewalls to a Specific Request ................................................................................ 331How to Customize your Form Login................................................................................................ 333How to Secure any Service or Method in your Application ............................................................... 336How to Create a custom User Provider ............................................................................................ 340How to Create a Custom Form Password Authenticator................................................................... 345How to Authenticate Users with API Keys ....................................................................................... 349How to Create a custom Authentication Provider............................................................................. 358Using pre Authenticated Security Firewalls ...................................................................................... 367How to Change the default Target Path Behavior ............................................................................. 369Using CSRF Protection in the Login Form........................................................................................ 371How to Choose the Password Encoder Algorithm Dynamically ........................................................ 373How to Use the Serializer ................................................................................................................ 375How to Create an Event Listener ..................................................................................................... 377How to Work with Scopes .............................................................................................................. 380How to Work with Compiler Passes in Bundles ............................................................................... 385Session Proxy Examples .................................................................................................................. 386Making the Locale "Sticky" during a User's Session .......................................................................... 388Configuring the Directory where Session Files are Saved .................................................................. 390Bridge a legacy Application with Symfony Sessions .......................................................................... 392Limit Session Metadata Writes ........................................................................................................ 394How Symfony2 Differs from Symfony1............................................................................................ 395How to Inject Variables into all Templates (i.e. global Variables) ...................................................... 400How to Use and Register Namespaced Twig Paths ........................................................................... 402How to Use PHP instead of Twig for Templates............................................................................... 404How to Write a custom Twig Extension .......................................................................................... 410How to Render a Template without a custom Controller.................................................................. 413How to Simulate HTTP Authentication in a Functional Test ............................................................ 415How to Simulate Authentication with a Token in a Functional Test.................................................. 416How to Test the Interaction of several Clients .................................................................................. 418How to Use the Profiler in a Functional Test.................................................................................... 420How to Test Code that Interacts with the Database.......................................................................... 422How to Test Doctrine Repositories .................................................................................................. 425How to Customize the Bootstrap Process before Running Tests........................................................ 427How to Create a custom Validation Constraint ................................................................................ 429How to Use PHP's built-in Web Server ............................................................................................ 433How to Create a SOAP Web Service in a Symfony Controller ........................................................... 435How to Create and Store a Symfony Project in Git ........................................................................... 439How to Create and Store a Symfony Project in Subversion................................................................ 443
PDF brought to you bygenerated on October 23, 2014
Contents at a Glance | v

Listing 1-1
Listing 1-2
Chapter 1
How to Use Assetic for Asset Management
Assetic combines two major ideas: assets and filters. The assets are files such as CSS, JavaScript and imagefiles. The filters are things that can be applied to these files before they are served to the browser. Thisallows a separation between the asset files stored in the application and the files actually presented to theuser.
Without Assetic, you just serve the files that are stored in the application directly:
1 <script src="{{ asset('js/script.js') }}" type="text/javascript"></script>
But with Assetic, you can manipulate these assets however you want (or load them from anywhere) beforeserving them. This means you can:
• Minify and combine all of your CSS and JS files• Run all (or just some) of your CSS or JS files through some sort of compiler, such as LESS,
SASS or CoffeeScript• Run image optimizations on your images
AssetsUsing Assetic provides many advantages over directly serving the files. The files do not need to be storedwhere they are served from and can be drawn from various sources such as from within a bundle.
You can use Assetic to process CSS stylesheets, JavaScript files and images. The philosophy behind addingeither is basically the same, but with a slightly different syntax.
Including JavaScript Files
To include JavaScript files, use the javascripts tag in any template:
123
{% javascripts '@AcmeFooBundle/Resources/public/js/*' %}<script type="text/javascript" src="{{ asset_url }}"></script>
{% endjavascripts %}
PDF brought to you bygenerated on October 23, 2014
Chapter 1: How to Use Assetic for Asset Management | 6

Listing 1-3
Listing 1-4
Listing 1-5
Listing 1-6
If you're using the default block names from the Symfony Standard Edition, the javascripts tagwill most commonly live in the javascripts block:
1234567
{# ... #}{% block javascripts %}
{% javascripts '@AcmeFooBundle/Resources/public/js/*' %}<script type="text/javascript" src="{{ asset_url }}"></script>
{% endjavascripts %}{% endblock %}{# ... #}
You can also include CSS Stylesheets: see Including CSS Stylesheets.
In this example, all of the files in the Resources/public/js/ directory of the AcmeFooBundle will beloaded and served from a different location. The actual rendered tag might simply look like:
1 <script src="/app_dev.php/js/abcd123.js"></script>
This is a key point: once you let Assetic handle your assets, the files are served from a different location.This will cause problems with CSS files that reference images by their relative path. See Fixing CSS Pathswith the cssrewrite Filter.
Including CSS Stylesheets
To bring in CSS stylesheets, you can use the same methodologies seen above, except with thestylesheets tag:
123
{% stylesheets 'bundles/acme_foo/css/*' filter='cssrewrite' %}<link rel="stylesheet" href="{{ asset_url }}" />
{% endstylesheets %}
If you're using the default block names from the Symfony Standard Edition, the stylesheets tagwill most commonly live in the stylesheets block:
1234567
{# ... #}{% block stylesheets %}
{% stylesheets 'bundles/acme_foo/css/*' filter='cssrewrite' %}<link rel="stylesheet" href="{{ asset_url }}" />
{% endstylesheets %}{% endblock %}{# ... #}
But because Assetic changes the paths to your assets, this will break any background images (or otherpaths) that uses relative paths, unless you use the cssrewrite filter.
PDF brought to you bygenerated on October 23, 2014
Chapter 1: How to Use Assetic for Asset Management | 7

Listing 1-7
Listing 1-8
Notice that in the original example that included JavaScript files, you referred to the files usinga path like @AcmeFooBundle/Resources/public/file.js, but that in this example, you referredto the CSS files using their actual, publicly-accessible path: bundles/acme_foo/css. You can useeither, except that there is a known issue that causes the cssrewrite filter to fail when using the@AcmeFooBundle syntax for CSS Stylesheets.
Including Images
To include an image you can use the image tag.
123
{% image '@AcmeFooBundle/Resources/public/images/example.jpg' %}<img src="{{ asset_url }}" alt="Example" />
{% endimage %}
You can also use Assetic for image optimization. More information in How to Use Assetic for ImageOptimization with Twig Functions.
Fixing CSS Paths with the cssrewrite Filter
Since Assetic generates new URLs for your assets, any relative paths inside your CSS files will break. Tofix this, make sure to use the cssrewrite filter with your stylesheets tag. This parses your CSS filesand corrects the paths internally to reflect the new location.
You can see an example in the previous section.
When using the cssrewrite filter, don't refer to your CSS files using the @AcmeFooBundle syntax.See the note in the above section for details.
Combining Assets
One feature of Assetic is that it will combine many files into one. This helps to reduce the number ofHTTP requests, which is great for front end performance. It also allows you to maintain the files moreeasily by splitting them into manageable parts. This can help with re-usability as you can easily splitproject-specific files from those which can be used in other applications, but still serve them as a singlefile:
123456
{% javascripts'@AcmeFooBundle/Resources/public/js/*''@AcmeBarBundle/Resources/public/js/form.js''@AcmeBarBundle/Resources/public/js/calendar.js' %}<script src="{{ asset_url }}"></script>
{% endjavascripts %}
In the dev environment, each file is still served individually, so that you can debug problems more easily.However, in the prod environment (or more specifically, when the debug flag is false), this will berendered as a single script tag, which contains the contents of all of the JavaScript files.
If you're new to Assetic and try to use your application in the prod environment (by using theapp.php controller), you'll likely see that all of your CSS and JS breaks. Don't worry! This is onpurpose. For details on using Assetic in the prod environment, see Dumping Asset Files.
PDF brought to you bygenerated on October 23, 2014
Chapter 1: How to Use Assetic for Asset Management | 8

Listing 1-9
Listing 1-10
Listing 1-11
Listing 1-12
And combining files doesn't only apply to your files. You can also use Assetic to combine third partyassets, such as jQuery, with your own into a single file:
12345
{% javascripts'@AcmeFooBundle/Resources/public/js/thirdparty/jquery.js''@AcmeFooBundle/Resources/public/js/*' %}<script src="{{ asset_url }}"></script>
{% endjavascripts %}
Using Named Assets
AsseticBundle configuration directives allow you to define named asset sets. You can do so by definingthe input files, filters and output files in your configuration under the assetic section. Read more in theassetic config reference.
1234567
# app/config/config.ymlassetic:
assets:jquery_and_ui:
inputs:- '@AcmeFooBundle/Resources/public/js/thirdparty/jquery.js'- '@AcmeFooBundle/Resources/public/js/thirdparty/jquery.ui.js'
After you have defined the named assets, you can reference them in your templates with the@named_asset notation:
12345
{% javascripts'@jquery_and_ui''@AcmeFooBundle/Resources/public/js/*' %}<script src="{{ asset_url }}"></script>
{% endjavascripts %}
FiltersOnce they're managed by Assetic, you can apply filters to your assets before they are served. This includesfilters that compress the output of your assets for smaller file sizes (and better front-end optimization).Other filters can compile JavaScript file from CoffeeScript files and process SASS into CSS. In fact, Assetichas a long list of available filters.
Many of the filters do not do the work directly, but use existing third-party libraries to do the heavy-lifting. This means that you'll often need to install a third-party library to use a filter. The great advantageof using Assetic to invoke these libraries (as opposed to using them directly) is that instead of having torun them manually after you work on the files, Assetic will take care of this for you and remove this stepaltogether from your development and deployment processes.
To use a filter, you first need to specify it in the Assetic configuration. Adding a filter here doesn't meanit's being used - it just means that it's available to use (you'll use the filter below).
For example to use the UglifyJS JavaScript minifier the following config should be added:
123
# app/config/config.ymlassetic:
filters:
PDF brought to you bygenerated on October 23, 2014
Chapter 1: How to Use Assetic for Asset Management | 9

Listing 1-13
Listing 1-14
Listing 1-15
45
uglifyjs2:bin: /usr/local/bin/uglifyjs
Now, to actually use the filter on a group of JavaScript files, add it into your template:
123
{% javascripts '@AcmeFooBundle/Resources/public/js/*' filter='uglifyjs2' %}<script src="{{ asset_url }}"></script>
{% endjavascripts %}
A more detailed guide about configuring and using Assetic filters as well as details of Assetic's debugmode can be found in How to Minify CSS/JS Files (Using UglifyJS and UglifyCSS).
Controlling the URL UsedIf you wish to, you can control the URLs that Assetic produces. This is done from the template and isrelative to the public document root:
123
{% javascripts '@AcmeFooBundle/Resources/public/js/*' output='js/compiled/main.js' %}<script src="{{ asset_url }}"></script>
{% endjavascripts %}
Symfony also contains a method for cache busting, where the final URL generated by Asseticcontains a query parameter that can be incremented via configuration on each deployment. Formore information, see the assets_version configuration option.
Dumping Asset FilesIn the dev environment, Assetic generates paths to CSS and JavaScript files that don't physically exist onyour computer. But they render nonetheless because an internal Symfony controller opens the files andserves back the content (after running any filters).
This kind of dynamic serving of processed assets is great because it means that you can immediately seethe new state of any asset files you change. It's also bad, because it can be quite slow. If you're using a lotof filters, it might be downright frustrating.
Fortunately, Assetic provides a way to dump your assets to real files, instead of being generateddynamically.
Dumping Asset Files in the prod Environment
In the prod environment, your JS and CSS files are represented by a single tag each. In other words,instead of seeing each JavaScript file you're including in your source, you'll likely just see something likethis:
1 <script src="/js/abcd123.js"></script>
Moreover, that file does not actually exist, nor is it dynamically rendered by Symfony (as the asset filesare in the dev environment). This is on purpose - letting Symfony generate these files dynamically in aproduction environment is just too slow.
PDF brought to you bygenerated on October 23, 2014
Chapter 1: How to Use Assetic for Asset Management | 10

Listing 1-16
Listing 1-17
Listing 1-18
Listing 1-19
Listing 1-20
Instead, each time you use your app in the prod environment (and therefore, each time you deploy), youshould run the following task:
1 $ php app/console assetic:dump --env=prod --no-debug
This will physically generate and write each file that you need (e.g. /js/abcd123.js). If you update anyof your assets, you'll need to run this again to regenerate the file.
Dumping Asset Files in the dev Environment
By default, each asset path generated in the dev environment is handled dynamically by Symfony. Thishas no disadvantage (you can see your changes immediately), except that assets can load noticeably slow.If you feel like your assets are loading too slowly, follow this guide.
First, tell Symfony to stop trying to process these files dynamically. Make the following change in yourconfig_dev.yml file:
123
# app/config/config_dev.ymlassetic:
use_controller: false
Next, since Symfony is no longer generating these assets for you, you'll need to dump them manually. Todo so, run the following:
1 $ php app/console assetic:dump
This physically writes all of the asset files you need for your dev environment. The big disadvantage isthat you need to run this each time you update an asset. Fortunately, by passing the --watch option, thecommand will automatically regenerate assets as they change:
1 $ php app/console assetic:dump --watch
Since running this command in the dev environment may generate a bunch of files, it's usually a goodidea to point your generated assets files to some isolated directory (e.g. /js/compiled), to keep thingsorganized:
123
{% javascripts '@AcmeFooBundle/Resources/public/js/*' output='js/compiled/main.js' %}<script src="{{ asset_url }}"></script>
{% endjavascripts %}
PDF brought to you bygenerated on October 23, 2014
Chapter 1: How to Use Assetic for Asset Management | 11

Listing 2-1
Chapter 2
How to Minify CSS/JS Files (Using UglifyJS andUglifyCSS)
UglifyJS1 is a JavaScript parser/compressor/beautifier toolkit. It can be used to combine and minifyJavaScript assets so that they require less HTTP requests and make your site load faster. UglifyCSS2 is aCSS compressor/beautifier that is very similar to UglifyJS.
In this cookbook, the installation, configuration and usage of UglifyJS is shown in detail. UglifyCSSworks pretty much the same way and is only talked about briefly.
Install UglifyJS
UglifyJS is available as an Node.js3 npm module and can be installed using npm. First, you need to installNode.js4. Afterwards you can install UglifyJS using npm:
1 $ npm install -g uglify-js
This command will install UglifyJS globally and you may need to run it as a root user.
1. https://github.com/mishoo/UglifyJS
2. https://github.com/fmarcia/UglifyCSS
3. http://nodejs.org/
4. http://nodejs.org/
PDF brought to you bygenerated on October 23, 2014
Chapter 2: How to Minify CSS/JS Files (Using UglifyJS and UglifyCSS) | 12

Listing 2-2
Listing 2-3
Listing 2-4
Listing 2-5
Listing 2-6
It's also possible to install UglifyJS inside your project only. To do this, install it without the -goption and specify the path where to put the module:
123
$ cd /path/to/symfony$ mkdir app/Resources/node_modules$ npm install uglify-js --prefix app/Resources
It is recommended that you install UglifyJS in your app/Resources folder and add thenode_modules folder to version control. Alternatively, you can create an npm package.json5 file andspecify your dependencies there.
Depending on your installation method, you should either be able to execute the uglifyjs executableglobally, or execute the physical file that lives in the node_modules directory:
123
$ uglifyjs --help
$ ./app/Resources/node_modules/.bin/uglifyjs --help
Configure the uglifyjs2 FilterNow we need to configure Symfony to use the uglifyjs2 filter when processing your JavaScripts:
123456
# app/config/config.ymlassetic:
filters:uglifyjs2:
# the path to the uglifyjs executablebin: /usr/local/bin/uglifyjs
The path where UglifyJS is installed may vary depending on your system. To find out where npmstores the bin folder, you can use the following command:
1 $ npm bin -g
It should output a folder on your system, inside which you should find the UglifyJS executable.
If you installed UglifyJS locally, you can find the bin folder inside the node_modules folder. It'scalled .bin in this case.
You now have access to the uglifyjs2 filter in your application.
Configure the node BinaryAssetic tries to find the node binary automatically. If it cannot be found, you can configure its locationusing the node key:
5. http://package.json.nodejitsu.com/
PDF brought to you bygenerated on October 23, 2014
Chapter 2: How to Minify CSS/JS Files (Using UglifyJS and UglifyCSS) | 13

Listing 2-7
Listing 2-8
12345678
# app/config/config.ymlassetic:
# the path to the node executablenode: /usr/bin/nodejsfilters:
uglifyjs2:# the path to the uglifyjs executablebin: /usr/local/bin/uglifyjs
Minify your AssetsIn order to use UglifyJS on your assets, you need to apply it to them. Since your assets are a part of theview layer, this work is done in your templates:
123
{% javascripts '@AcmeFooBundle/Resources/public/js/*' filter='uglifyjs2' %}<script src="{{ asset_url }}"></script>
{% endjavascripts %}
The above example assumes that you have a bundle called AcmeFooBundle and your JavaScriptfiles are in the Resources/public/js directory under your bundle. This isn't important however -you can include your JavaScript files no matter where they are.
With the addition of the uglifyjs2 filter to the asset tags above, you should now see minified JavaScriptscoming over the wire much faster.
Disable Minification in Debug Mode
Minified JavaScripts are very difficult to read, let alone debug. Because of this, Assetic lets you disable acertain filter when your application is in debug (e.g. app_dev.php) mode. You can do this by prefixingthe filter name in your template with a question mark: ?. This tells Assetic to only apply this filter whendebug mode is off (e.g. app.php):
123
{% javascripts '@AcmeFooBundle/Resources/public/js/*' filter='?uglifyjs2' %}<script src="{{ asset_url }}"></script>
{% endjavascripts %}
To try this out, switch to your prod environment (app.php). But before you do, don't forget to clear yourcache and dump your assetic assets.
Instead of adding the filter to the asset tags, you can also globally enable it by adding the apply_toattribute to the filter configuration, for example in the uglifyjs2 filter apply_to: "\.js$". Toonly have the filter applied in production, add this to the config_prod file rather than the commonconfig file. For details on applying filters by file extension, see Filtering Based on a File Extension.
Install, Configure and Use UglifyCSSThe usage of UglifyCSS works the same way as UglifyJS. First, make sure the node package is installed:
PDF brought to you bygenerated on October 23, 2014
Chapter 2: How to Minify CSS/JS Files (Using UglifyJS and UglifyCSS) | 14

Listing 2-9
Listing 2-10
Listing 2-11
1 $ npm install -g uglifycss
Next, add the configuration for this filter:
12345
# app/config/config.ymlassetic:
filters:uglifycss:
bin: /usr/local/bin/uglifycss
To use the filter for your CSS files, add the filter to the Assetic stylesheets helper:
123
{% stylesheets 'bundles/AcmeFoo/css/*' filter='uglifycss' filter='cssrewrite' %}<link rel="stylesheet" href="{{ asset_url }}" />
{% endstylesheets %}
Just like with the uglifyjs2 filter, if you prefix the filter name with ? (i.e. ?uglifycss), the minificationwill only happen when you're not in debug mode.
PDF brought to you bygenerated on October 23, 2014
Chapter 2: How to Minify CSS/JS Files (Using UglifyJS and UglifyCSS) | 15

Listing 3-1
Chapter 3
How to Minify JavaScripts and Stylesheets withYUI Compressor
Yahoo! provides an excellent utility for minifying JavaScripts and stylesheets so they travel over the wirefaster, the YUI Compressor1. Thanks to Assetic, you can take advantage of this tool very easily.
The YUI Compressor is no longer maintained by Yahoo2 but by an independent volunteer.Moreover, Yahoo has decided to stop all new development on YUI3 and to move to other modernalternatives such as Node.js.
That's why you are strongly advised to avoid using YUI utilities unless strictly necessary. ReadHow to Minify CSS/JS Files (Using UglifyJS and UglifyCSS) for a modern and up-to-date alternative.
Download the YUI Compressor JAR
The YUI Compressor is written in Java and distributed as a JAR. Download the JAR4 from the Yahoo! siteand save it to app/Resources/java/yuicompressor.jar.
Configure the YUI FiltersNow you need to configure two Assetic filters in your application, one for minifying JavaScripts with theYUI Compressor and one for minifying stylesheets:
12
# app/config/config.ymlassetic:
1. http://developer.yahoo.com/yui/compressor/
2. http://www.yuiblog.com/blog/2013/01/24/yui-compressor-has-a-new-owner/
3. http://yahooeng.tumblr.com/post/96098168666/important-announcement-regarding-yui
4. https://github.com/yui/yuicompressor/releases
PDF brought to you bygenerated on October 23, 2014
Chapter 3: How to Minify JavaScripts and Stylesheets with YUI Compressor | 16

Listing 3-2
Listing 3-3
Listing 3-4
345678
# java: "/usr/bin/java"filters:
yui_css:jar: "%kernel.root_dir%/Resources/java/yuicompressor.jar"
yui_js:jar: "%kernel.root_dir%/Resources/java/yuicompressor.jar"
Windows users need to remember to update config to proper Java location. In Windows7 x64 bitby default it's C:\Program Files (x86)\Java\jre6\bin\java.exe.
You now have access to two new Assetic filters in your application: yui_css and yui_js. These will usethe YUI Compressor to minify stylesheets and JavaScripts, respectively.
Minify your AssetsYou have YUI Compressor configured now, but nothing is going to happen until you apply one of thesefilters to an asset. Since your assets are a part of the view layer, this work is done in your templates:
123
{% javascripts '@AcmeFooBundle/Resources/public/js/*' filter='yui_js' %}<script src="{{ asset_url }}"></script>
{% endjavascripts %}
The above example assumes that you have a bundle called AcmeFooBundle and your JavaScriptfiles are in the Resources/public/js directory under your bundle. This isn't important however -you can include your JavaScript files no matter where they are.
With the addition of the yui_js filter to the asset tags above, you should now see minified JavaScriptscoming over the wire much faster. The same process can be repeated to minify your stylesheets.
123
{% stylesheets '@AcmeFooBundle/Resources/public/css/*' filter='yui_css' %}<link rel="stylesheet" type="text/css" media="screen" href="{{ asset_url }}" />
{% endstylesheets %}
Disable Minification in Debug ModeMinified JavaScripts and Stylesheets are very difficult to read, let alone debug. Because of this, Assetic letsyou disable a certain filter when your application is in debug mode. You can do this by prefixing the filtername in your template with a question mark: ?. This tells Assetic to only apply this filter when debugmode is off.
123
{% javascripts '@AcmeFooBundle/Resources/public/js/*' filter='?yui_js' %}<script src="{{ asset_url }}"></script>
{% endjavascripts %}
PDF brought to you bygenerated on October 23, 2014
Chapter 3: How to Minify JavaScripts and Stylesheets with YUI Compressor | 17

Instead of adding the filter to the asset tags, you can also globally enable it by adding the apply_toattribute to the filter configuration, for example in the yui_js filter apply_to: "\.js$". To onlyhave the filter applied in production, add this to the config_prod file rather than the commonconfig file. For details on applying filters by file extension, see Filtering Based on a File Extension.
PDF brought to you bygenerated on October 23, 2014
Chapter 3: How to Minify JavaScripts and Stylesheets with YUI Compressor | 18

Listing 4-1
Listing 4-2
Chapter 4
How to Use Assetic for Image Optimizationwith Twig Functions
Amongst its many filters, Assetic has four filters which can be used for on-the-fly image optimization.This allows you to get the benefits of smaller file sizes without having to use an image editor to processeach image. The results are cached and can be dumped for production so there is no performance hit foryour end users.
Using Jpegoptim
Jpegoptim1 is a utility for optimizing JPEG files. To use it with Assetic, add the following to the Asseticconfig:
12345
# app/config/config.ymlassetic:
filters:jpegoptim:
bin: path/to/jpegoptim
Notice that to use jpegoptim, you must have it already installed on your system. The bin optionpoints to the location of the compiled binary.
It can now be used from a template:
1234
{% image '@AcmeFooBundle/Resources/public/images/example.jpg'filter='jpegoptim' output='/images/example.jpg' %}<img src="{{ asset_url }}" alt="Example"/>
{% endimage %}
1. http://www.kokkonen.net/tjko/projects.html
PDF brought to you bygenerated on October 23, 2014
Chapter 4: How to Use Assetic for Image Optimization with Twig Functions | 19

Listing 4-3
Listing 4-4
Listing 4-5
Listing 4-6
Listing 4-7
Removing all EXIF Data
By default, running this filter only removes some of the meta information stored in the file. Any EXIFdata and comments are not removed, but you can remove these by using the strip_all option:
123456
# app/config/config.ymlassetic:
filters:jpegoptim:
bin: path/to/jpegoptimstrip_all: true
Lowering maximum Quality
The quality level of the JPEG is not affected by default. You can gain further file size reductions by settingthe max quality setting lower than the current level of the images. This will of course be at the expense ofimage quality:
123456
# app/config/config.ymlassetic:
filters:jpegoptim:
bin: path/to/jpegoptimmax: 70
Shorter Syntax: Twig FunctionIf you're using Twig, it's possible to achieve all of this with a shorter syntax by enabling and using aspecial Twig function. Start by adding the following config:
12345678
# app/config/config.ymlassetic:
filters:jpegoptim:
bin: path/to/jpegoptimtwig:
functions:jpegoptim: ~
The Twig template can now be changed to the following:
1 <img src="{{ jpegoptim('@AcmeFooBundle/Resources/public/images/example.jpg') }}"alt="Example"/>
You can specify the output directory in the config in the following way:
123456
# app/config/config.ymlassetic:
filters:jpegoptim:
bin: path/to/jpegoptimtwig:
PDF brought to you bygenerated on October 23, 2014
Chapter 4: How to Use Assetic for Image Optimization with Twig Functions | 20

78
functions:jpegoptim: { output: images/*.jpg }
PDF brought to you bygenerated on October 23, 2014
Chapter 4: How to Use Assetic for Image Optimization with Twig Functions | 21

Listing 5-1
Listing 5-2
Chapter 5
How to Apply an Assetic Filter to a specific FileExtension
Assetic filters can be applied to individual files, groups of files or even, as you'll see here, files that havea specific extension. To show you how to handle each option, suppose that you want to use Assetic'sCoffeeScript filter, which compiles CoffeeScript files into JavaScript.
The main configuration is just the paths to coffee, node and node_modules. An example configurationmight look like this:
1234567
# app/config/config.ymlassetic:
filters:coffee:
bin: /usr/bin/coffeenode: /usr/bin/nodenode_paths: [/usr/lib/node_modules/]
Filter a single FileYou can now serve up a single CoffeeScript file as JavaScript from within your templates:
123
{% javascripts '@AcmeFooBundle/Resources/public/js/example.coffee' filter='coffee' %}<script src="{{ asset_url }}" type="text/javascript"></script>
{% endjavascripts %}
This is all that's needed to compile this CoffeeScript file and serve it as the compiled JavaScript.
Filter multiple FilesYou can also combine multiple CoffeeScript files into a single output file:
PDF brought to you bygenerated on October 23, 2014
Chapter 5: How to Apply an Assetic Filter to a specific File Extension | 22

Listing 5-3
Listing 5-4
Listing 5-5
12345
{% javascripts '@AcmeFooBundle/Resources/public/js/example.coffee''@AcmeFooBundle/Resources/public/js/another.coffee'
filter='coffee' %}<script src="{{ asset_url }}" type="text/javascript"></script>
{% endjavascripts %}
Both the files will now be served up as a single file compiled into regular JavaScript.
Filtering Based on a File ExtensionOne of the great advantages of using Assetic is reducing the number of asset files to lower HTTP requests.In order to make full use of this, it would be good to combine all your JavaScript and CoffeeScript filestogether since they will ultimately all be served as JavaScript. Unfortunately just adding the JavaScriptfiles to the files to be combined as above will not work as the regular JavaScript files will not survive theCoffeeScript compilation.
This problem can be avoided by using the apply_to option in the config, which allows you to specifythat a filter should always be applied to particular file extensions. In this case you can specify that thecoffee filter is applied to all .coffee files:
# app/config/config.ymlassetic:
filters:coffee:
bin: /usr/bin/coffeenode: /usr/bin/nodenode_paths: [/usr/lib/node_modules/]apply_to: "\.coffee$"
With this, you no longer need to specify the coffee filter in the template. You can also list regularJavaScript files, all of which will be combined and rendered as a single JavaScript file (with only the.coffee files being run through the CoffeeScript filter):
12345
{% javascripts '@AcmeFooBundle/Resources/public/js/example.coffee''@AcmeFooBundle/Resources/public/js/another.coffee''@AcmeFooBundle/Resources/public/js/regular.js' %}
<script src="{{ asset_url }}" type="text/javascript"></script>{% endjavascripts %}
PDF brought to you bygenerated on October 23, 2014
Chapter 5: How to Apply an Assetic Filter to a specific File Extension | 23

Chapter 6
How to Install 3rd Party Bundles
Most bundles provide their own installation instructions. However, the basic steps for installing a bundleare the same:
• A) Add Composer Dependencies• B) Enable the Bundle• C) Configure the Bundle
A) Add Composer DependenciesDependencies are managed with Composer, so if Composer is new to you, learn some basics in theirdocumentation1. This has 2 steps:
1) Find out the Name of the Bundle on Packagist
The README for a bundle (e.g. FOSUserBundle2) usually tells you its name (e.g. friendsofsymfony/user-bundle). If it doesn't, you can search for the library on the Packagist.org3 site.
Looking for bundles? Try searching at KnpBundles.com4: the unofficial archive of SymfonyBundles.
2) Install the Bundle via Composer
Now that you know the package name, you can install it via Composer:
1. http://getcomposer.org/doc/00-intro.md
2. https://github.com/FriendsOfSymfony/FOSUserBundle
3. https://packagist.org
4. http://knpbundles.com/
PDF brought to you bygenerated on October 23, 2014
Chapter 6: How to Install 3rd Party Bundles | 24

Listing 6-1
Listing 6-2
Listing 6-3
Listing 6-4
Listing 6-5
1 $ php composer.phar require friendsofsymfony/user-bundle
This will choose the best version for your project, add it to composer.json and download the library intothe vendor/ directory. If you need a specific version, add a : and the version right after the library name(see composer require5).
B) Enable the BundleAt this point, the bundle is installed in your Symfony project (in vendor/friendsofsymfony/) and theautoloader recognizes its classes. The only thing you need to do now is register the bundle in AppKernel:
123456789
1011121314151617
// app/AppKernel.php
// ...class AppKernel extends Kernel{
// ...
public function registerBundles(){
$bundles = array(// ...,new FOS\UserBundle\FOSUserBundle(),
);
// ...}
}
C) Configure the BundleIt's pretty common for a bundle to need some additional setup or configuration in app/config/config.yml. The bundle's documentation will tell you about the configuration, but you can also get areference of the bundle's config via the config:dump-reference command.
For instance, in order to look the reference of the assetic config you can use this:
1 $ app/console config:dump-reference AsseticBundle
or this:
1 $ app/console config:dump-reference assetic
The output will look like this:
12
assetic:debug: %kernel.debug%
5. https://getcomposer.org/doc/03-cli.md#require
PDF brought to you bygenerated on October 23, 2014
Chapter 6: How to Install 3rd Party Bundles | 25

3456789
1011
use_controller:enabled: %kernel.debug%profiler: false
read_from: %kernel.root_dir%/../webwrite_to: %assetic.read_from%java: /usr/bin/javanode: /usr/local/bin/nodenode_paths: []# ...
Other SetupAt this point, check the README file of your brand new bundle to see what to do next. Have fun!
PDF brought to you bygenerated on October 23, 2014
Chapter 6: How to Install 3rd Party Bundles | 26

Chapter 7
Best Practices for Reusable Bundles
There are 2 types of bundles:
• Application-specific bundles: only used to build your application;• Reusable bundles: meant to be shared across many projects.
This article is all about how to structure your reusable bundles so that they're easy to configure andextend. Many of these recommendations do not apply to application bundles because you'll want to keepthose as simple as possible. For application bundles, just follow the practices shown throughout the bookand cookbook.
Bundle Name
A bundle is also a PHP namespace. The namespace must follow the technical interoperability standards1
for PHP 5.3 namespaces and class names: it starts with a vendor segment, followed by zero or morecategory segments, and it ends with the namespace short name, which must end with a Bundle suffix.
A namespace becomes a bundle as soon as you add a bundle class to it. The bundle class name mustfollow these simple rules:
• Use only alphanumeric characters and underscores;• Use a CamelCased name;• Use a descriptive and short name (no more than 2 words);• Prefix the name with the concatenation of the vendor (and optionally the category
namespaces);• Suffix the name with Bundle.
Here are some valid bundle namespaces and class names:
Namespace Bundle Class Name
Acme\Bundle\BlogBundle AcmeBlogBundle
Acme\Bundle\Social\BlogBundle AcmeSocialBlogBundle
1. http://www.php-fig.org/psr/psr-0/
PDF brought to you bygenerated on October 23, 2014
Chapter 7: Best Practices for Reusable Bundles | 27

Listing 7-1
Namespace Bundle Class Name
Acme\BlogBundle AcmeBlogBundle
By convention, the getName() method of the bundle class should return the class name.
If you share your bundle publicly, you must use the bundle class name as the name of therepository (AcmeBlogBundle and not BlogBundle for instance).
Symfony2 core Bundles do not prefix the Bundle class with Symfony and always add a Bundle sub-namespace; for example: FrameworkBundle2.
Each bundle has an alias, which is the lower-cased short version of the bundle name using underscores(acme_hello for AcmeHelloBundle, or acme_social_blog for Acme\Social\BlogBundle for instance).This alias is used to enforce uniqueness within a bundle (see below for some usage examples).
Directory StructureThe basic directory structure of a HelloBundle bundle must read as follows:
123456789
1011121314
XXX/...HelloBundle/
HelloBundle.phpController/Resources/
meta/LICENSE
config/doc/
index.rsttranslations/views/public/
Tests/
The XXX directory(ies) reflects the namespace structure of the bundle.
The following files are mandatory:
• HelloBundle.php;• Resources/meta/LICENSE: The full license for the code;• Resources/doc/index.rst: The root file for the Bundle documentation.
These conventions ensure that automated tools can rely on this default structure to work.
The depth of sub-directories should be kept to the minimal for most used classes and files (2 levels at amaximum). More levels can be defined for non-strategic, less-used files.
2. http://api.symfony.com/2.5/Symfony/Bundle/FrameworkBundle/FrameworkBundle.html
PDF brought to you bygenerated on October 23, 2014
Chapter 7: Best Practices for Reusable Bundles | 28

The bundle directory is read-only. If you need to write temporary files, store them under the cache/ orlog/ directory of the host application. Tools can generate files in the bundle directory structure, but onlyif the generated files are going to be part of the repository.
The following classes and files have specific emplacements:
Type Directory
Commands Command/
Controllers Controller/
Service Container Extensions DependencyInjection/
Event Listeners EventListener/
Configuration Resources/config/
Web Resources Resources/public/
Translation files Resources/translations/
Templates Resources/views/
Unit and Functional Tests Tests/
When building a reusable bundle, model classes should be placed in the Model namespace. SeeHow to Provide Model Classes for several Doctrine Implementations for how to handle the mappingwith a compiler pass.
ClassesThe bundle directory structure is used as the namespace hierarchy. For instance, a HelloControllercontroller is stored in Bundle/HelloBundle/Controller/HelloController.php and the fully qualifiedclass name is Bundle\HelloBundle\Controller\HelloController.
All classes and files must follow the Symfony2 coding standards.
Some classes should be seen as facades and should be as short as possible, like Commands, Helpers,Listeners, and Controllers.
Classes that connect to the event dispatcher should be suffixed with Listener.
Exceptions classes should be stored in an Exception sub-namespace.
VendorsA bundle must not embed third-party PHP libraries. It should rely on the standard Symfony2 autoloadinginstead.
A bundle should not embed third-party libraries written in JavaScript, CSS, or any other language.
TestsA bundle should come with a test suite written with PHPUnit and stored under the Tests/ directory.Tests should follow the following principles:
PDF brought to you bygenerated on October 23, 2014
Chapter 7: Best Practices for Reusable Bundles | 29

Listing 7-2
• The test suite must be executable with a simple phpunit command run from a sampleapplication;
• The functional tests should only be used to test the response output and some profilinginformation if you have some;
• The tests should cover at least 95% of the code base.
A test suite must not contain AllTests.php scripts, but must rely on the existence of aphpunit.xml.dist file.
DocumentationAll classes and functions must come with full PHPDoc.
Extensive documentation should also be provided in the reStructuredText format, under the Resources/doc/ directory; the Resources/doc/index.rst file is the only mandatory file and must be the entry pointfor the documentation.
Installation Instructions
In order to ease the installation of third-party bundles, consider using the following standardizedinstructions in your README.md file.
123456789
1011121314151617181920212223242526272829303132
Installation============
Step 1: Download the Bundle---------------------------
Open a command console, enter your project directory and execute thefollowing command to download the latest stable version of this bundle:
```bash$ composer require <package-name>```
This command requires you to have Composer installed globally, as explainedin the [installation chapter](https://getcomposer.org/doc/00-intro.md)of the Composer documentation.
Step 2: Enable the Bundle-------------------------
Then, enable the bundle by adding the following line in the `app/AppKernel.php`file of your project:
```php<?php// app/AppKernel.php
// ...class AppKernel extends Kernel{
public function registerBundles(){
PDF brought to you bygenerated on October 23, 2014
Chapter 7: Best Practices for Reusable Bundles | 30
Listing 7-3
Listing 7-4
333435363738394041424344
$bundles = array(// ...
new <vendor>\<bundle-name>\<bundle-long-name>(),);
// ...}
// ...}```
Optionally, you can add more installation steps (Step 3, Step 4, etc.) to explain other required installationtasks, such as registering routes or dumping assets.
RoutingIf the bundle provides routes, they must be prefixed with the bundle alias. For an AcmeBlogBundle forinstance, all routes must be prefixed with acme_blog_.
TemplatesIf a bundle provides templates, they must use Twig. A bundle must not provide a main layout, except ifit provides a full working application.
Translation FilesIf a bundle provides message translations, they must be defined in the XLIFF format; the domain shouldbe named after the bundle name (bundle.hello).
A bundle must not override existing messages from another bundle.
ConfigurationTo provide more flexibility, a bundle can provide configurable settings by using the Symfony2 built-inmechanisms.
For simple configuration settings, rely on the default parameters entry of the Symfony2 configuration.Symfony2 parameters are simple key/value pairs; a value being any valid PHP value. Each parametername should start with the bundle alias, though this is just a best-practice suggestion. The rest of theparameter name will use a period (.) to separate different parts (e.g. acme_hello.email.from).
The end user can provide values in any configuration file:
123
# app/config/config.ymlparameters:
acme_hello.email.from: [email protected]
Retrieve the configuration parameters in your code from the container:
PDF brought to you bygenerated on October 23, 2014
Chapter 7: Best Practices for Reusable Bundles | 31

Listing 7-5
1 $container->getParameter('acme_hello.email.from');
Even if this mechanism is simple enough, you are highly encouraged to use the semantic configurationdescribed in the cookbook.
If you are defining services, they should also be prefixed with the bundle alias.
Custom Validation ConstraintsStarting with Symfony 2.5, a new Validation API was introduced. In fact, there are 3 modes, which theuser can configure in their project:
• 2.4: the original 2.4 and earlier validation API;• 2.5: the new 2.5 and later validation API;• 2.5-BC: the new 2.5 API with a backwards-compatible layer so that the 2.4 API still works.
This is only available in PHP 5.3.9+.
As a bundle author, you'll want to support both API's, since some users may still be using the 2.4 API.Specifically, if your bundle adds a violation directly to the ExecutionContext3 (e.g. like in a customvalidation constraint), you'll need to check for which API is being used. The following code, would workfor all users:
123456789
101112131415161718192021222324
use Symfony\Component\Validator\ConstraintValidator;use Symfony\Component\Validator\Constraint;use Symfony\Component\Validator\Context\ExecutionContextInterface;// ...
class ContainsAlphanumericValidator extends ConstraintValidator{
public function validate($value, Constraint $constraint){
if ($this->context instanceof ExecutionContextInterface) {// the 2.5 API$this->context->buildViolation($constraint->message)
->setParameter('%string%', $value)->addViolation();
);} else {
// the 2.4 API$this->context->addViolation(
$constraint->message,array('%string%' => $value)
);}
}}
3. http://api.symfony.com/2.5/Symfony/Component/Validator/Context/ExecutionContext.html
PDF brought to you bygenerated on October 23, 2014
Chapter 7: Best Practices for Reusable Bundles | 32

Learn more from the Cookbook• How to Load Service Configuration inside a Bundle
PDF brought to you bygenerated on October 23, 2014
Chapter 7: Best Practices for Reusable Bundles | 33

Listing 8-1
Chapter 8
How to Use Bundle Inheritance to OverrideParts of a Bundle
When working with third-party bundles, you'll probably come across a situation where you want tooverride a file in that third-party bundle with a file in one of your own bundles. Symfony gives you a veryconvenient way to override things like controllers, templates, and other files in a bundle's Resources/directory.
For example, suppose that you're installing the FOSUserBundle1, but you want to override its baselayout.html.twig template, as well as one of its controllers. Suppose also that you have your ownAcmeUserBundle where you want the overridden files to live. Start by registering the FOSUserBundle asthe "parent" of your bundle:
123456789
101112
// src/Acme/UserBundle/AcmeUserBundle.phpnamespace Acme\UserBundle;
use Symfony\Component\HttpKernel\Bundle\Bundle;
class AcmeUserBundle extends Bundle{
public function getParent(){
return 'FOSUserBundle';}
}
By making this simple change, you can now override several parts of the FOSUserBundle simply bycreating a file with the same name.
Despite the method name, there is no parent/child relationship between the bundles, it is just away to extend and override an existing bundle.
1. https://github.com/friendsofsymfony/fosuserbundle
PDF brought to you bygenerated on October 23, 2014
Chapter 8: How to Use Bundle Inheritance to Override Parts of a Bundle | 34

Listing 8-2
Overriding ControllersSuppose you want to add some functionality to the registerAction of a RegistrationController thatlives inside FOSUserBundle. To do so, just create your own RegistrationController.php file, overridethe bundle's original method, and change its functionality:
123456789
101112131415
// src/Acme/UserBundle/Controller/RegistrationController.phpnamespace Acme\UserBundle\Controller;
use FOS\UserBundle\Controller\RegistrationController as BaseController;
class RegistrationController extends BaseController{
public function registerAction(){
$response = parent::registerAction();
// ... do custom stuffreturn $response;
}}
Depending on how severely you need to change the behavior, you might callparent::registerAction() or completely replace its logic with your own.
Overriding controllers in this way only works if the bundle refers to the controller using thestandard FOSUserBundle:Registration:register syntax in routes and templates. This is thebest practice.
Overriding Resources: Templates, Routing, etcMost resources can also be overridden, simply by creating a file in the same location as your parentbundle.
For example, it's very common to need to override the FOSUserBundle's layout.html.twig template sothat it uses your application's base layout. Since the file lives at Resources/views/layout.html.twig inthe FOSUserBundle, you can create your own file in the same location of AcmeUserBundle. Symfony willignore the file that lives inside the FOSUserBundle entirely, and use your file instead.
The same goes for routing files and some other resources.
The overriding of resources only works when you refer to resources with the @FosUserBundle/Resources/config/routing/security.xml method. If you refer to resources without using the@BundleName shortcut, they can't be overridden in this way.
Translation and validation files do not work in the same way as described above. Read"Translations" if you want to learn how to override translations and see "Validation Metadata" fortricks to override the validation.
PDF brought to you bygenerated on October 23, 2014
Chapter 8: How to Use Bundle Inheritance to Override Parts of a Bundle | 35

Chapter 9
How to Override any Part of a Bundle
This document is a quick reference for how to override different parts of third-party bundles.
TemplatesFor information on overriding templates, see
• Overriding Bundle Templates.• How to Use Bundle Inheritance to Override Parts of a Bundle
RoutingRouting is never automatically imported in Symfony2. If you want to include the routes from anybundle, then they must be manually imported from somewhere in your application (e.g. app/config/routing.yml).
The easiest way to "override" a bundle's routing is to never import it at all. Instead of importing a third-party bundle's routing, simply copying that routing file into your application, modify it, and import itinstead.
ControllersAssuming the third-party bundle involved uses non-service controllers (which is almost always the case),you can easily override controllers via bundle inheritance. For more information, see How to Use BundleInheritance to Override Parts of a Bundle. If the controller is a service, see the next section on how tooverride it.
PDF brought to you bygenerated on October 23, 2014
Chapter 9: How to Override any Part of a Bundle | 36

Listing 9-1
Listing 9-2
Services & ConfigurationIn order to override/extend a service, there are two options. First, you can set the parameter holding theservice's class name to your own class by setting it in app/config/config.yml. This of course is onlypossible if the class name is defined as a parameter in the service config of the bundle containing theservice. For example, to override the class used for Symfony's translator service, you would override thetranslator.class parameter. Knowing exactly which parameter to override may take some research.For the translator, the parameter is defined and used in the Resources/config/translation.xml file inthe core FrameworkBundle:
123
# app/config/config.ymlparameters:
translator.class: Acme\HelloBundle\Translation\Translator
Secondly, if the class is not available as a parameter, you want to make sure the class is always overriddenwhen your bundle is used, or you need to modify something beyond just the class name, you should usea compiler pass:
123456789
1011121314
// src/Acme/DemoBundle/DependencyInjection/Compiler/OverrideServiceCompilerPass.phpnamespace Acme\DemoBundle\DependencyInjection\Compiler;
use Symfony\Component\DependencyInjection\Compiler\CompilerPassInterface;use Symfony\Component\DependencyInjection\ContainerBuilder;
class OverrideServiceCompilerPass implements CompilerPassInterface{
public function process(ContainerBuilder $container){
$definition = $container->getDefinition('original-service-id');$definition->setClass('Acme\DemoBundle\YourService');
}}
In this example you fetch the service definition of the original service, and set its class name to your ownclass.
See How to Work with Compiler Passes in Bundles for information on how to use compiler passes. If youwant to do something beyond just overriding the class - like adding a method call - you can only use thecompiler pass method.
Entities & Entity MappingDue to the way Doctrine works, it is not possible to override entity mapping of a bundle. However,if a bundle provides a mapped superclass (such as the User entity in the FOSUserBundle) one canoverride attributes and associations. Learn more about this feature and its limitations in the Doctrinedocumentation1.
FormsIn order to override a form type, it has to be registered as a service (meaning it is tagged as "form.type").You can then override it as you would override any service as explained in Services & Configuration.This, of course, will only work if the type is referred to by its alias rather than being instantiated, e.g.:
1. http://docs.doctrine-project.org/projects/doctrine-orm/en/latest/reference/inheritance-mapping.html#overrides
PDF brought to you bygenerated on October 23, 2014
Chapter 9: How to Override any Part of a Bundle | 37
Listing 9-3
Listing 9-4
Listing 9-5
1 $builder->add('name', 'custom_type');
rather than:
1 $builder->add('name', new CustomType());
Validation MetadataSymfony loads all validation configuration files from every bundle and combines them into one validationmetadata tree. This means you are able to add new constraints to a property, but you cannot overridethem.
To override this, the 3rd party bundle needs to have configuration for validation groups. For instance,the FOSUserBundle has this configuration. To create your own validation, add the constraints to a newvalidation group:
123456789
10
# src/Acme/UserBundle/Resources/config/validation.ymlFos\UserBundle\Model\User:
properties:plainPassword:
- NotBlank:groups: [AcmeValidation]
- Length:min: 6minMessage: fos_user.password.shortgroups: [AcmeValidation]
Now, update the FOSUserBundle configuration, so it uses your validation groups instead of the originalones.
TranslationsTranslations are not related to bundles, but to domains. That means that you can override thetranslations from any translation file, as long as it is in the correct domain.
The last translation file always wins. That means that you need to make sure that the bundlecontaining your translations is loaded after any bundle whose translations you're overriding. Thisis done in AppKernel.
The file that always wins is the one that is placed in app/Resources/translations, as those filesare always loaded last.
PDF brought to you bygenerated on October 23, 2014
Chapter 9: How to Override any Part of a Bundle | 38
Listing 10-1
Chapter 10
How to Remove the AcmeDemoBundle
The Symfony2 Standard Edition comes with a complete demo that lives inside a bundle calledAcmeDemoBundle. It is a great boilerplate to refer to while starting a project, but you'll probably want toeventually remove it.
This article uses the AcmeDemoBundle as an example, but you can use these steps to remove anybundle.
1. Unregister the Bundle in the AppKernelTo disconnect the bundle from the framework, you should remove the bundle from theAppKernel::registerBundles() method. The bundle is normally found in the $bundles array but theAcmeDemoBundle is only registered in the development environment and you can find it inside the ifstatement below:
123456789
10111213141516
// app/AppKernel.php
// ...class AppKernel extends Kernel{
public function registerBundles(){
$bundles = array(...);
if (in_array($this->getEnvironment(), array('dev', 'test'))) {// comment or remove this line:// $bundles[] = new Acme\DemoBundle\AcmeDemoBundle();// ...
}}
}
PDF brought to you bygenerated on October 23, 2014
Chapter 10: How to Remove the AcmeDemoBundle | 39

Listing 10-2
2. Remove Bundle ConfigurationNow that Symfony doesn't know about the bundle, you need to remove any configuration and routingconfiguration inside the app/config directory that refers to the bundle.
2.1 Remove Bundle Routing
The routing for the AcmeDemoBundle can be found in app/config/routing_dev.yml. Remove the_acme_demo entry at the bottom of this file.
2.2 Remove Bundle Configuration
Some bundles contain configuration in one of the app/config/config*.yml files. Be sure to removethe related configuration from these files. You can quickly spot bundle configuration by looking for aacme_demo (or whatever the name of the bundle is, e.g. fos_user for the FOSUserBundle) string in theconfiguration files.
The AcmeDemoBundle doesn't have configuration. However, the bundle is used in the configuration forthe app/config/security.yml file. You can use it as a boilerplate for your own security, but you canalso remove everything: it doesn't matter to Symfony if you remove it or not.
3. Remove the Bundle from the FilesystemNow you have removed every reference to the bundle in your application, you should remove the bundlefrom the filesystem. The bundle is located in the src/Acme/DemoBundle directory. You should removethis directory and you can remove the Acme directory as well.
If you don't know the location of a bundle, you can use the getPath()1 method to get the path ofthe bundle:
1 echo $this->container->get('kernel')->getBundle('AcmeDemoBundle')->getPath();
3.1 Remove Bundle Assets
Remove the assets of the bundle in the web/ directory (e.g. web/bundles/acmedemo for theAcmeDemoBundle).
4. Remove Integration in other Bundles
This doesn't apply to the AcmeDemoBundle - no other bundles depend on it, so you can skip thisstep.
Some bundles rely on other bundles, if you remove one of the two, the other will probably not work. Besure that no other bundles, third party or self-made, rely on the bundle you are about to remove.
1. http://api.symfony.com/2.5/Symfony/Component/HttpKernel/Bundle/BundleInterface.html#getPath()
PDF brought to you bygenerated on October 23, 2014
Chapter 10: How to Remove the AcmeDemoBundle | 40

If one bundle relies on another, in most cases it means that it uses some services from thebundle. Searching for the bundle alias string may help you spot them (e.g. acme_demo for bundlesdepending on AcmeDemoBundle).
If a third party bundle relies on another bundle, you can find that bundle mentioned in thecomposer.json file included in the bundle directory.
PDF brought to you bygenerated on October 23, 2014
Chapter 10: How to Remove the AcmeDemoBundle | 41

Listing 11-1
Chapter 11
How to Load Service Configuration inside aBundle
In Symfony, you'll find yourself using many services. These services can be registered in the app/configdirectory of your application. But when you want to decouple the bundle for use in other projects, youwant to include the service configuration in the bundle itself. This article will teach you how to do that.
Creating an Extension ClassIn order to load service configuration, you have to create a Dependency Injection Extension for yourbundle. This class has some conventions in order to be detected automatically. But you'll later see howyou can change it to your own preferences. By default, the Extension has to comply with the followingconventions:
• It has to live in the DependencyInjection namespace of the bundle;• The name is equal to the bundle name with the Bundle suffix replaced by Extension (e.g. the
Extension class of AcmeHelloBundle would be called AcmeHelloExtension).
The Extension class should implement the ExtensionInterface1, but usually you would simply extendthe Extension2 class:
123456789
// src/Acme/HelloBundle/DependencyInjection/AcmeHelloExtension.phpnamespace Acme\HelloBundle\DependencyInjection;
use Symfony\Component\HttpKernel\DependencyInjection\Extension;use Symfony\Component\DependencyInjection\ContainerBuilder;
class AcmeHelloExtension extends Extension{
public function load(array $configs, ContainerBuilder $container)
1. http://api.symfony.com/2.5/Symfony/Component/DependencyInjection/Extension/ExtensionInterface.html
2. http://api.symfony.com/2.5/Symfony/Component/DependencyInjection/Extension/Extension.html
PDF brought to you bygenerated on October 23, 2014
Chapter 11: How to Load Service Configuration inside a Bundle | 42

Listing 11-2
Listing 11-3
10111213
{// ... you'll load the files here later
}}
Manually Registering an Extension Class
When not following the conventions, you will have to manually register your extension. To do this,you should override the Bundle::getContainerExtension()3 method to return the instance of theextension:
123456789
10
// ...use Acme\HelloBundle\DependencyInjection\UnconventionalExtensionClass;
class AcmeHelloBundle extends Bundle{
public function getContainerExtension(){
return new UnconventionalExtensionClass();}
}
Since the new Extension class name doesn't follow the naming conventions, you should also overrideExtension::getAlias()4 to return the correct DI alias. The DI alias is the name used to refer to thebundle in the container (e.g. in the app/config/config.yml file). By default, this is done by removingthe Extension prefix and converting the class name to underscores (e.g. AcmeHelloExtension's DI aliasis acme_hello).
Using the load() MethodIn the load() method, all services and parameters related to this extension will be loaded. This methoddoesn't get the actual container instance, but a copy. This container only has the parameters from theactual container. After loading the services and parameters, the copy will be merged into the actualcontainer, to ensure all services and parameters are also added to the actual container.
In the load() method, you can use PHP code to register service definitions, but it is more common if youput these definitions in a configuration file (using the Yaml, XML or PHP format). Luckily, you can usethe file loaders in the extension!
For instance, assume you have a file called services.xml in the Resources/config directory of yourbundle, your load method looks like:
123456789
use Symfony\Component\DependencyInjection\Loader\XmlFileLoader;use Symfony\Component\Config\FileLocator;
// ...public function load(array $configs, ContainerBuilder $container){
$loader = new XmlFileLoader($container,new FileLocator(__DIR__.'/../Resources/config')
3. http://api.symfony.com/2.5/Symfony/Component/HttpKernel/Bundle/Bundle.html#build()
4. http://api.symfony.com/2.5/Symfony/Component/DependencyInjection/Extension/Extension.html#getAlias()
PDF brought to you bygenerated on October 23, 2014
Chapter 11: How to Load Service Configuration inside a Bundle | 43

101112
);$loader->load('services.xml');
}
Other available loaders are the YamlFileLoader, PhpFileLoader and IniFileLoader.
The IniFileLoader can only be used to load parameters and it can only load them as strings.
Using Configuration to Change the Services
The Extension is also the class that handles the configuration for that particular bundle (e.g. theconfiguration in app/config/config.yml). To read more about it, see the "How to Create FriendlyConfiguration for a Bundle" article.
PDF brought to you bygenerated on October 23, 2014
Chapter 11: How to Load Service Configuration inside a Bundle | 44

Listing 12-1
Chapter 12
How to Create Friendly Configuration for aBundle
If you open your application configuration file (usually app/config/config.yml), you'll see a number ofdifferent configuration "namespaces", such as framework, twig and doctrine. Each of these configuresa specific bundle, allowing you to configure things at a high level and then let the bundle make all thelow-level, complex changes based on your settings.
For example, the following tells the FrameworkBundle to enable the form integration, which involves thedefinition of quite a few services as well as integration of other related components:
12
framework:form: true
Using Parameters to Configure your Bundle
If you don't have plans to share your bundle between projects, it doesn't make sense to use thismore advanced way of configuration. Since you use the bundle only in one project, you can justchange the service configuration each time.
If you do want to be able to configure something from within config.yml, you can always create aparameter there and use that parameter somewhere else.
Using the Bundle ExtensionThe basic idea is that instead of having the user override individual parameters, you let the userconfigure just a few, specifically created, options. As the bundle developer, you then parse through thatconfiguration and load correct services and parameters inside an "Extension" class.
As an example, imagine you are creating a social bundle, which provides integration with Twitter andsuch. To be able to reuse your bundle, you have to make the client_id and client_secret variablesconfigurable. Your bundle configuration would look like:
PDF brought to you bygenerated on October 23, 2014
Chapter 12: How to Create Friendly Configuration for a Bundle | 45

Listing 12-2
Listing 12-3
Listing 12-4
12345
# app/config/config.ymlacme_social:
twitter:client_id: 123client_secret: $ecret
Read more about the extension in How to Load Service Configuration inside a Bundle.
If a bundle provides an Extension class, then you should not generally override any servicecontainer parameters from that bundle. The idea is that if an Extension class is present, everysetting that should be configurable should be present in the configuration made available by thatclass. In other words, the extension class defines all the public configuration settings for whichbackward compatibility will be maintained.
For parameter handling within a Dependency Injection class see Using Parameters within a DependencyInjection Class.
Processing the $configs Array
First things first, you have to create an extension class as explained in How to Load Service Configurationinside a Bundle.
Whenever a user includes the acme_social key (which is the DI alias) in a configuration file, theconfiguration under it is added to an array of configurations and passed to the load() method of yourextension (Symfony2 automatically converts XML and YAML to an array).
For the configuration example in the previous section, the array passed to your load() method will looklike this:
12345678
array(array(
'twitter' => array('client_id' => 123,'client_secret' => '$ecret',
),),
)
Notice that this is an array of arrays, not just a single flat array of the configuration values. This isintentional, as it allows Symfony to parse several configuration resources. For example, if acme_socialappears in another configuration file - say config_dev.yml - with different values beneath it, theincoming array might look like this:
123456789
array(// values from config.ymlarray(
'twitter' => array('client_id' => 123,'client_secret' => '$secret',
),),// values from config_dev.yml
PDF brought to you bygenerated on October 23, 2014
Chapter 12: How to Create Friendly Configuration for a Bundle | 46

Listing 12-5
Listing 12-6
101112131415
array('twitter' => array(
'client_id' => 456,),
),)
The order of the two arrays depends on which one is set first.
But don't worry! Symfony's Config component will help you merge these values, provide defaults andgive the user validation errors on bad configuration. Here's how it works. Create a Configurationclass in the DependencyInjection directory and build a tree that defines the structure of your bundle'sconfiguration.
The Configuration class to handle the sample configuration looks like:
123456789
101112131415161718192021222324252627
// src/Acme/SocialBundle/DependencyInjection/Configuration.phpnamespace Acme\SocialBundle\DependencyInjection;
use Symfony\Component\Config\Definition\Builder\TreeBuilder;use Symfony\Component\Config\Definition\ConfigurationInterface;
class Configuration implements ConfigurationInterface{
public function getConfigTreeBuilder(){
$treeBuilder = new TreeBuilder();$rootNode = $treeBuilder->root('acme_social');
$rootNode->children()
->arrayNode('twitter')->children()
->integerNode('client_id')->end()->scalarNode('client_secret')->end()
->end()->end() // twitter
->end();
return $treeBuilder;}
}
The Configuration class can be much more complicated than shown here, supporting "prototype" nodes,advanced validation, XML-specific normalization and advanced merging. You can read more about this in theConfig component documentation. You can also see it in action by checking out some of the core Configurationclasses, such as the one from the FrameworkBundle Configuration1 or the TwigBundle Configuration2.
This class can now be used in your load() method to merge configurations and force validation (e.g. ifan additional option was passed, an exception will be thrown):
12
public function load(array $configs, ContainerBuilder $container){
1. https://github.com/symfony/symfony/blob/master/src/Symfony/Bundle/FrameworkBundle/DependencyInjection/Configuration.php
2. https://github.com/symfony/symfony/blob/master/src/Symfony/Bundle/TwigBundle/DependencyInjection/Configuration.php
PDF brought to you bygenerated on October 23, 2014
Chapter 12: How to Create Friendly Configuration for a Bundle | 47

Listing 12-7
Listing 12-8
34567
$configuration = new Configuration();
$config = $this->processConfiguration($configuration, $configs);// ...
}
The processConfiguration() method uses the configuration tree you've defined in the Configurationclass to validate, normalize and merge all of the configuration arrays together.
Instead of calling processConfiguration() in your extension each time you provide someconfiguration options, you might want to use the ConfigurableExtension3 to do thisautomatically for you:
123456789
1011121314
// src/Acme/HelloBundle/DependencyInjection/AcmeHelloExtension.phpnamespace Acme\HelloBundle\DependencyInjection;
use Symfony\Component\DependencyInjection\ContainerBuilder;use Symfony\Component\HttpKernel\DependencyInjection\ConfigurableExtension;
class AcmeHelloExtension extends ConfigurableExtension{
// note that this method is called loadInternal and not loadprotected function loadInternal(array $mergedConfig, ContainerBuilder $container){
// ...}
}
This class uses the getConfiguration() method to get the Configuration instance, you shouldoverride it if your Configuration class is not called Configuration or if it is not placed in the samenamespace as the extension.
Processing the Configuration yourself
Using the Config component is fully optional. The load() method gets an array of configurationvalues. You can simply parse these arrays yourself (e.g. by overriding configurations and usingisset4 to check for the existence of a value). Be aware that it'll be very hard to support XML.
123456789
10
public function load(array $configs, ContainerBuilder $container){
$config = array();// let resources override the previous set valueforeach ($configs as $subConfig) {
$config = array_merge($config, $subConfig);}
// ... now use the flat $config array}
3. http://api.symfony.com/2.5/Symfony/Component/HttpKernel/DependencyInjection/ConfigurableExtension.html
4. http://php.net/manual/en/function.isset.php
PDF brought to you bygenerated on October 23, 2014
Chapter 12: How to Create Friendly Configuration for a Bundle | 48

Listing 12-9
Modifying the Configuration of Another BundleIf you have multiple bundles that depend on each other, it may be useful to allow one Extension class tomodify the configuration passed to another bundle's Extension class, as if the end-developer has actuallyplaced that configuration in their app/config/config.yml file. This can be achieved using a prependextension. For more details, see How to Simplify Configuration of multiple Bundles.
Dump the ConfigurationThe config:dump-reference command dumps the default configuration of a bundle in the consoleusing the Yaml format.
As long as your bundle's configuration is located in the standard location(YourBundle\DependencyInjection\Configuration) and does not require arguments to be passed tothe constructor it will work automatically. If you have something different, your Extension class mustoverride the Extension::getConfiguration()5 method and return an instance of your Configuration.
Supporting XMLSymfony allows people to provide the configuration in three different formats: Yaml, XML and PHP.Both Yaml and PHP use the same syntax and are supported by default when using the Config component.Supporting XML requires you to do some more things. But when sharing your bundle with others, it isrecommended that you follow these steps.
Make your Config Tree ready for XML
The Config component provides some methods by default to allow it to correctly process XMLconfiguration. See "Normalization" of the component documentation. However, you can do someoptional things as well, this will improve the experience of using XML configuration:
Choosing an XML Namespace
In XML, the XML namespace6 is used to determine which elements belong to the configuration ofa specific bundle. The namespace is returned from the Extension::getNamespace()7 method. Byconvention, the namespace is a URL (it doesn't have to be a valid URL nor does it need to exists). Bydefault, the namespace for a bundle is http://example.org/dic/schema/DI_ALIAS, where DI_ALIAS isthe DI alias of the extension. You might want to change this to a more professional URL:
123456789
10
// src/Acme/HelloBundle/DependencyInjection/AcmeHelloExtension.php
// ...class AcmeHelloExtension extends Extension{
// ...
public function getNamespace(){
return 'http://acme_company.com/schema/dic/hello';
5. http://api.symfony.com/2.5/Symfony/Component/HttpKernel/DependencyInjection/Extension.html#getConfiguration()
6. http://en.wikipedia.org/wiki/XML_namespace
7. http://api.symfony.com/2.5/Symfony/Component/DependencyInjection/Extension/Extension.html#getNamespace()
PDF brought to you bygenerated on October 23, 2014
Chapter 12: How to Create Friendly Configuration for a Bundle | 49

Listing 12-10
Listing 12-11
1112
}}
Providing an XML Schema
XML has a very useful feature called XML schema8. This allows you to describe all possible elements andattributes and their values in an XML Schema Definition (an xsd file). This XSD file is used by IDEs forauto completion and it is used by the Config component to validate the elements.
In order to use the schema, the XML configuration file must provide an xsi:schemaLocation attributepointing to the XSD file for a certain XML namespace. This location always starts with the XMLnamespace. This XML namespace is then replaced with the XSD validation base path returned fromExtension::getXsdValidationBasePath()9 method. This namespace is then followed by the rest of thepath from the base path to the file itself.
By convention, the XSD file lives in the Resources/config/schema, but you can place it anywhere youlike. You should return this path as the base path:
123456789
101112
// src/Acme/HelloBundle/DependencyInjection/AcmeHelloExtension.php
// ...class AcmeHelloExtension extends Extension{
// ...
public function getXsdValidationBasePath(){
return __DIR__.'/../Resources/config/schema';}
}
Assume the XSD file is called hello-1.0.xsd, the schema location will be http://acme_company.com/schema/dic/hello/hello-1.0.xsd:
123456789
1011121314
<!-- app/config/config.xml --><?xml version="1.0" ?>
<container xmlns="http://symfony.com/schema/dic/services"xmlns:xsi="http://www.w3.org/2001/XMLSchema-instance"xmlns:acme-hello="http://acme_company.com/schema/dic/hello"xsi:schemaLocation="http://acme_company.com/schema/dic/hello http://acme_company.com/
schema/dic/hello/hello-1.0.xsd">
<acme-hello:config><!-- ... -->
</acme-hello:config>
<!-- ... --></container>
8. http://en.wikipedia.org/wiki/XML_schema
9. http://api.symfony.com/2.5/Symfony/Component/DependencyInjection/ExtensionInterface.html#getXsdValidationBasePath()
PDF brought to you bygenerated on October 23, 2014
Chapter 12: How to Create Friendly Configuration for a Bundle | 50

Listing 13-1
Chapter 13
How to Simplify Configuration of multipleBundles
When building reusable and extensible applications, developers are often faced with a choice: eithercreate a single large bundle or multiple smaller bundles. Creating a single bundle has the drawback thatit's impossible for users to choose to remove functionality they are not using. Creating multiple bundleshas the drawback that configuration becomes more tedious and settings often need to be repeated forvarious bundles.
Using the below approach, it is possible to remove the disadvantage of the multiple bundle approach byenabling a single Extension to prepend the settings for any bundle. It can use the settings defined in theapp/config/config.yml to prepend settings just as if they would have been written explicitly by the userin the application configuration.
For example, this could be used to configure the entity manager name to use in multiple bundles. Or itcan be used to enable an optional feature that depends on another bundle being loaded as well.
To give an Extension the power to do this, it needs to implement PrependExtensionInterface1:
123456789
10111213141516
// src/Acme/HelloBundle/DependencyInjection/AcmeHelloExtension.phpnamespace Acme\HelloBundle\DependencyInjection;
use Symfony\Component\HttpKernel\DependencyInjection\Extension;use Symfony\Component\DependencyInjection\Extension\PrependExtensionInterface;use Symfony\Component\DependencyInjection\ContainerBuilder;
class AcmeHelloExtension extends Extension implements PrependExtensionInterface{
// ...
public function prepend(ContainerBuilder $container){
// ...}
}
1. http://api.symfony.com/2.5/Symfony/Component/DependencyInjection/Extension/PrependExtensionInterface.html
PDF brought to you bygenerated on October 23, 2014
Chapter 13: How to Simplify Configuration of multiple Bundles | 51

Listing 13-2
Listing 13-3
Inside the prepend()2 method, developers have full access to the ContainerBuilder3 instance justbefore the load()4 method is called on each of the registered bundle Extensions. In order to prependsettings to a bundle extension developers can use the prependExtensionConfig()5 method on theContainerBuilder6 instance. As this method only prepends settings, any other settings done explicitlyinside the app/config/config.yml would override these prepended settings.
The following example illustrates how to prepend a configuration setting in multiple bundles as well asdisable a flag in multiple bundles in case a specific other bundle is not registered:
123456789
101112131415161718192021222324252627282930313233
public function prepend(ContainerBuilder $container){
// get all bundles$bundles = $container->getParameter('kernel.bundles');// determine if AcmeGoodbyeBundle is registeredif (!isset($bundles['AcmeGoodbyeBundle'])) {
// disable AcmeGoodbyeBundle in bundles$config = array('use_acme_goodbye' => false);foreach ($container->getExtensions() as $name => $extension) {
switch ($name) {case 'acme_something':case 'acme_other':
// set use_acme_goodbye to false in the config of acme_something andacme_other
// note that if the user manually configured use_acme_goodbye to truein the
// app/config/config.yml then the setting would in the end be true andnot false
$container->prependExtensionConfig($name, $config);break;
}}
}
// process the configuration of AcmeHelloExtension$configs = $container->getExtensionConfig($this->getAlias());// use the Configuration class to generate a config array with the settings
"acme_hello"$config = $this->processConfiguration(new Configuration(), $configs);
// check if entity_manager_name is set in the "acme_hello" configurationif (isset($config['entity_manager_name'])) {
// prepend the acme_something settings with the entity_manager_name$config = array('entity_manager_name' => $config['entity_manager_name']);$container->prependExtensionConfig('acme_something', $config);
}}
The above would be the equivalent of writing the following into the app/config/config.yml in caseAcmeGoodbyeBundle is not registered and the entity_manager_name setting for acme_hello is set tonon_default:
12
# app/config/config.ymlacme_something:
2. http://api.symfony.com/2.5/Symfony/Component/DependencyInjection/Extension/PrependExtensionInterface.html#prepend()
3. http://api.symfony.com/2.5/Symfony/Component/DependencyInjection/ContainerBuilder.html
4. http://api.symfony.com/2.5/Symfony/Component/DependencyInjection/Extension/ExtensionInterface.html#load()
5. http://api.symfony.com/2.5/Symfony/Component/DependencyInjection/ContainerBuilder.html#prependExtensionConfig()
6. http://api.symfony.com/2.5/Symfony/Component/DependencyInjection/ContainerBuilder.html
PDF brought to you bygenerated on October 23, 2014
Chapter 13: How to Simplify Configuration of multiple Bundles | 52

3456789
# ...use_acme_goodbye: falseentity_manager_name: non_default
acme_other:# ...use_acme_goodbye: false
PDF brought to you bygenerated on October 23, 2014
Chapter 13: How to Simplify Configuration of multiple Bundles | 53

Listing 14-1
Chapter 14
How to Use Varnish to Speed up my Website
Because Symfony's cache uses the standard HTTP cache headers, the Symfony Reverse Proxy can easilybe replaced with any other reverse proxy. Varnish1 is a powerful, open-source, HTTP accelerator capableof serving cached content quickly and including support for Edge Side Includes.
Trusting Reverse ProxiesFor ESI to work correctly and for the X-FORWARDED headers to be used, you need to configure Varnishas a trusted proxy.
ConfigurationAs seen previously, Symfony is smart enough to detect whether it talks to a reverse proxy thatunderstands ESI or not. It works out of the box when you use the Symfony reverse proxy, but you need aspecial configuration to make it work with Varnish. Thankfully, Symfony relies on yet another standardwritten by Akamai (Edge Architecture2), so the configuration tips in this chapter can be useful even if youdon't use Symfony.
Varnish only supports the src attribute for ESI tags (onerror and alt attributes are ignored).
First, configure Varnish so that it advertises its ESI support by adding a Surrogate-Capability headerto requests forwarded to the backend application:
12
sub vcl_recv {// Add a Surrogate-Capability header to announce ESI support.
1. https://www.varnish-cache.org
2. http://www.w3.org/TR/edge-arch
PDF brought to you bygenerated on October 23, 2014
Chapter 14: How to Use Varnish to Speed up my Website | 54

Listing 14-2
34
set req.http.Surrogate-Capability = "abc=ESI/1.0";}
The abc part of the header isn't important unless you have multiple "surrogates" that need toadvertise their capabilities. See Surrogate-Capability Header3 for details.
Then, optimize Varnish so that it only parses the Response contents when there is at least one ESI tag bychecking the Surrogate-Control header that Symfony adds automatically:
123456789
10111213141516171819202122
sub vcl_fetch {/*Check for ESI acknowledgementand remove Surrogate-Control header*/if (beresp.http.Surrogate-Control ~ "ESI/1.0") {
unset beresp.http.Surrogate-Control;
// For Varnish >= 3.0set beresp.do_esi = true;// For Varnish < 3.0// esi;
}/* By default Varnish ignores Cache-Control: nocache(https://www.varnish-cache.org/docs/3.0/tutorial/
increasing_your_hitrate.html#cache-control),so in order avoid caching it has to be done explicitly */if (beresp.http.Pragma ~ "no-cache" ||
beresp.http.Cache-Control ~ "no-cache" ||beresp.http.Cache-Control ~ "private") {
return (hit_for_pass);}
}
Compression with ESI was not supported in Varnish until version 3.0 (read GZIP and Varnish4). Ifyou're not using Varnish 3.0, put a web server in front of Varnish to perform the compression.
Cache InvalidationIf you want to cache content that changes frequently and still serve the most recent version to users, youneed to invalidate that content. While cache invalidation5 allows you to purge content from your proxybefore it has expired, it adds complexity to your caching setup.
The open source FOSHttpCacheBundle6 takes the pain out of cache invalidation by helping you toorganize your caching and invalidation setup.
3. http://www.w3.org/TR/edge-arch
4. https://www.varnish-cache.org/docs/3.0/phk/gzip.html
5. http://tools.ietf.org/html/rfc2616#section-13.10
PDF brought to you bygenerated on October 23, 2014
Chapter 14: How to Use Varnish to Speed up my Website | 55

Listing 14-3
Varnish can be configured to accept a special HTTP PURGE method that will invalidate the cache for agiven resource:
123456789
1011121314151617181920212223242526272829303132333435363738394041
/*Connect to the backend serveron the local machine on port 8080*/backend default {
.host = "127.0.0.1";
.port = "8080";}
sub vcl_recv {/*Varnish default behavior doesn't support PURGE.Match the PURGE request and immediately do a cache lookup,otherwise Varnish will directly pipe the request to the backendand bypass the cache*/if (req.request == "PURGE") {
return(lookup);}
}
sub vcl_hit {// Match PURGE requestif (req.request == "PURGE") {
// Force object expiration for Varnish < 3.0set obj.ttl = 0s;// Do an actual purge for Varnish >= 3.0// purge;error 200 "Purged";
}}
sub vcl_miss {/*Match the PURGE request andindicate the request wasn't stored in cache.*/if (req.request == "PURGE") {
error 404 "Not purged";}
}
6. http://foshttpcachebundle.readthedocs.org/
PDF brought to you bygenerated on October 23, 2014
Chapter 14: How to Use Varnish to Speed up my Website | 56

Listing 14-4
You must protect the PURGE HTTP method somehow to avoid random people purging your cacheddata. You can do this by setting up an access list:
123456789
10111213141516171819202122232425262728293031323334353637383940414243444546
/*Connect to the backend serveron the local machine on port 8080*/
backend default {.host = "127.0.0.1";.port = "8080";
}
// ACL's can contain IP's, subnets and hostnamesacl purge {
"localhost";"192.168.55.0"/24;
}
sub vcl_recv {// Match PURGE request to avoid cache bypassingif (req.request == "PURGE") {
// Match client IP to the ACLif (!client.ip ~ purge) {
// Deny accesserror 405 "Not allowed.";
}// Perform a cache lookupreturn(lookup);
}}
sub vcl_hit {// Match PURGE requestif (req.request == "PURGE") {
// Force object expiration for Varnish < 3.0set obj.ttl = 0s;// Do an actual purge for Varnish >= 3.0// purge;error 200 "Purged";
}}
sub vcl_miss {// Match PURGE requestif (req.request == "PURGE") {
// Indicate that the object isn't stored in cacheerror 404 "Not purged";
}}
Routing and X-FORWARDED HeadersTo ensure that the Symfony Router generates URLs correctly with Varnish, proper `X-Forwarded`headers must be added so that Symfony is aware of the original port number of the request. Exactly howthis is done depends on your setup. As a simple example, Varnish and your web server are on the samemachine and that Varnish is listening on one port (e.g. 80) and Apache on another (e.g. 8080). In thissituation, Varnish should add the X-Forwarded-Port header so that the Symfony application knows thatthe original port number is 80 and not 8080.
PDF brought to you bygenerated on October 23, 2014
Chapter 14: How to Use Varnish to Speed up my Website | 57

Listing 14-5
If this header weren't set properly, Symfony may append 8080 when generating absolute URLs:
1234567
sub vcl_recv {if (req.http.X-Forwarded-Proto == "https" ) {
set req.http.X-Forwarded-Port = "443";} else {
set req.http.X-Forwarded-Port = "80";}
}
Remember to configure framework.trusted_proxies in the Symfony configuration so that Varnish isseen as a trusted proxy and the X-Forwarded- headers are used.
PDF brought to you bygenerated on October 23, 2014
Chapter 14: How to Use Varnish to Speed up my Website | 58

Listing 15-1
Chapter 15
How to Master and Create new Environments
Every application is the combination of code and a set of configuration that dictates how that code shouldfunction. The configuration may define the database being used, whether or not something should becached, or how verbose logging should be. In Symfony, the idea of "environments" is the idea that thesame codebase can be run using multiple different configurations. For example, the dev environmentshould use configuration that makes development easy and friendly, while the prod environment shoulduse a set of configuration optimized for speed.
Different Environments, different Configuration FilesA typical Symfony application begins with three environments: dev, prod, and test. As discussed, each"environment" simply represents a way to execute the same codebase with different configuration. Itshould be no surprise then that each environment loads its own individual configuration file. If you'reusing the YAML configuration format, the following files are used:
• for the dev environment: app/config/config_dev.yml• for the prod environment: app/config/config_prod.yml• for the test environment: app/config/config_test.yml
This works via a simple standard that's used by default inside the AppKernel class:
123456789
10111213
// app/AppKernel.php
// ...
class AppKernel extends Kernel{
// ...
public function registerContainerConfiguration(LoaderInterface $loader){
$loader->load(__DIR__.'/config/config_'.$this->getEnvironment().'.yml');}
}
PDF brought to you bygenerated on October 23, 2014
Chapter 15: How to Master and Create new Environments | 59

Listing 15-2
Listing 15-3
Listing 15-4
Listing 15-5
As you can see, when Symfony is loaded, it uses the given environment to determine which configurationfile to load. This accomplishes the goal of multiple environments in an elegant, powerful and transparentway.
Of course, in reality, each environment differs only somewhat from others. Generally, all environmentswill share a large base of common configuration. Opening the "dev" configuration file, you can see howthis is accomplished easily and transparently:
1234
imports:- { resource: config.yml }
# ...
To share common configuration, each environment's configuration file simply first imports from a centralconfiguration file (config.yml). The remainder of the file can then deviate from the default configurationby overriding individual parameters. For example, by default, the web_profiler toolbar is disabled.However, in the dev environment, the toolbar is activated by modifying the default value in the devconfiguration file:
1234567
# app/config/config_dev.ymlimports:
- { resource: config.yml }
web_profiler:toolbar: true# ...
Executing an Application in different EnvironmentsTo execute the application in each environment, load up the application using either the app.php (for theprod environment) or the app_dev.php (for the dev environment) front controller:
12
http://localhost/app.php -> *prod* environmenthttp://localhost/app_dev.php -> *dev* environment
The given URLs assume that your web server is configured to use the web/ directory of theapplication as its root. Read more in Installing Symfony.
If you open up one of these files, you'll quickly see that the environment used by each is explicitly set:
123456
// web/app.php// ...
$kernel = new AppKernel('prod', false);
// ...
As you can see, the prod key specifies that this application will run in the prod environment. A Symfonyapplication can be executed in any environment by using this code and changing the environment string.
PDF brought to you bygenerated on October 23, 2014
Chapter 15: How to Master and Create new Environments | 60

Listing 15-6
Listing 15-7
The test environment is used when writing functional tests and is not accessible in the browserdirectly via a front controller. In other words, unlike the other environments, there is noapp_test.php front controller file.
Debug Mode
Important, but unrelated to the topic of environments is the false argument as the secondargument to the AppKernel constructor. This specifies whether or not the application should runin "debug mode". Regardless of the environment, a Symfony application can be run with debugmode set to true or false. This affects many things in the application, such as whether or noterrors should be displayed or if cache files are dynamically rebuilt on each request. Though not arequirement, debug mode is generally set to true for the dev and test environments and falsefor the prod environment.
Internally, the value of the debug mode becomes the kernel.debug parameter used inside theservice container. If you look inside the application configuration file, you'll see the parameter used,for example, to turn logging on or off when using the Doctrine DBAL:
1234
doctrine:dbal:
logging: "%kernel.debug%"# ...
As of Symfony 2.3, showing errors or not no longer depends on the debug mode. You'll need toenable that in your front controller by calling enable()1.
Creating a new EnvironmentBy default, a Symfony application has three environments that handle most cases. Of course, since anenvironment is nothing more than a string that corresponds to a set of configuration, creating a newenvironment is quite easy.
Suppose, for example, that before deployment, you need to benchmark your application. One way tobenchmark the application is to use near-production settings, but with Symfony's web_profiler enabled.This allows Symfony to record information about your application while benchmarking.
The best way to accomplish this is via a new environment called, for example, benchmark. Start bycreating a new configuration file:
123456
# app/config/config_benchmark.ymlimports:
- { resource: config_prod.yml }
framework:profiler: { only_exceptions: false }
1. http://api.symfony.com/2.5/Symfony/Component/Debug/Debug.html#enable()
PDF brought to you bygenerated on October 23, 2014
Chapter 15: How to Master and Create new Environments | 61

Listing 15-8
Listing 15-9
Listing 15-10
Listing 15-11
Listing 15-12
Due to the way in which parameters are resolved, you cannot use them to build paths in importsdynamically. This means that something like the following doesn't work:
123
# app/config/config.ymlimports:
- { resource: "%kernel.root_dir%/parameters.yml" }
And with this simple addition, the application now supports a new environment called benchmark.
This new configuration file imports the configuration from the prod environment and modifies it. Thisguarantees that the new environment is identical to the prod environment, except for any changesexplicitly made here.
Because you'll want this environment to be accessible via a browser, you should also create a frontcontroller for it. Copy the web/app.php file to web/app_benchmark.php and edit the environment to bebenchmark:
1234567
// web/app_benchmark.php
// change just this line$kernel = new AppKernel('benchmark', false);
// ...
The new environment is now accessible via:
1 http://localhost/app_benchmark.php
Some environments, like the dev environment, are never meant to be accessed on any deployedserver by the general public. This is because certain environments, for debugging purposes, maygive too much information about the application or underlying infrastructure. To be sure theseenvironments aren't accessible, the front controller is usually protected from external IP addressesvia the following code at the top of the controller:
123
if (!in_array(@$_SERVER['REMOTE_ADDR'], array('127.0.0.1', '::1'))) {die('You are not allowed to access this file. Check '.basename(__FILE__).' for
more information.');}
Environments and the Cache DirectorySymfony takes advantage of caching in many ways: the application configuration, routing configuration,Twig templates and more are cached to PHP objects stored in files on the filesystem.
By default, these cached files are largely stored in the app/cache directory. However, each environmentcaches its own set of files:
123
<your-project>/├─ app/│ ├─ cache/
PDF brought to you bygenerated on October 23, 2014
Chapter 15: How to Master and Create new Environments | 62

456
│ │ ├─ dev/ # cache directory for the *dev* environment│ │ └─ prod/ # cache directory for the *prod* environment│ ├─ ...
Sometimes, when debugging, it may be helpful to inspect a cached file to understand how somethingis working. When doing so, remember to look in the directory of the environment you're using (mostcommonly dev while developing and debugging). While it can vary, the app/cache/dev directoryincludes the following:
• appDevDebugProjectContainer.php - the cached "service container" that represents thecached application configuration;
• appDevUrlGenerator.php - the PHP class generated from the routing configuration and usedwhen generating URLs;
• appDevUrlMatcher.php - the PHP class used for route matching - look here to see thecompiled regular expression logic used to match incoming URLs to different routes;
• twig/ - this directory contains all the cached Twig templates.
You can easily change the directory location and name. For more information read the article Howto Override Symfony's default Directory Structure.
Going furtherRead the article on How to Set external Parameters in the Service Container.
PDF brought to you bygenerated on October 23, 2014
Chapter 15: How to Master and Create new Environments | 63

Listing 16-1
Listing 16-2
Chapter 16
How to Override Symfony's default DirectoryStructure
Symfony automatically ships with a default directory structure. You can easily override this directorystructure to create your own. The default directory structure is:
123456789
10111213
your-project/├─ app/│ ├─ cache/│ ├─ config/│ ├─ logs/│ └─ ...├─ src/│ └─ ...├─ vendor/│ └─ ...└─ web/
├─ app.php└─ ...
Override the cache DirectoryYou can override the cache directory by overriding the getCacheDir method in the AppKernel class ofyou application:
1234567
// app/AppKernel.php
// ...class AppKernel extends Kernel{
// ...
PDF brought to you bygenerated on October 23, 2014
Chapter 16: How to Override Symfony's default Directory Structure | 64

Listing 16-3
Listing 16-4
Listing 16-5
89
101112
public function getCacheDir(){
return $this->rootDir.'/'.$this->environment.'/cache';}
}
$this->rootDir is the absolute path to the app directory and $this->environment is the currentenvironment (i.e. dev). In this case you have changed the location of the cache directory to app/{environment}/cache.
You should keep the cache directory different for each environment, otherwise some unexpectedbehavior may happen. Each environment generates its own cached config files, and so each needsits own directory to store those cache files.
Override the logs DirectoryOverriding the logs directory is the same as overriding the cache directory, the only difference is thatyou need to override the getLogDir method:
123456789
101112
// app/AppKernel.php
// ...class AppKernel extends Kernel{
// ...
public function getLogDir(){
return $this->rootDir.'/'.$this->environment.'/logs';}
}
Here you have changed the location of the directory to app/{environment}/logs.
Override the web DirectoryIf you need to rename or move your web directory, the only thing you need to guarantee is that the pathto the app directory is still correct in your app.php and app_dev.php front controllers. If you simplyrenamed the directory, you're fine. But if you moved it in some way, you may need to modify the pathsinside these files:
12
require_once __DIR__.'/../Symfony/app/bootstrap.php.cache';require_once __DIR__.'/../Symfony/app/AppKernel.php';
You also need to change the extra.symfony-web-dir option in the composer.json file:
1234
{..."extra": {
...
PDF brought to you bygenerated on October 23, 2014
Chapter 16: How to Override Symfony's default Directory Structure | 65

Listing 16-6
Listing 16-7
567
"symfony-web-dir": "my_new_web_dir"}
}
Some shared hosts have a public_html web directory root. Renaming your web directory fromweb to public_html is one way to make your Symfony project work on your shared host. Anotherway is to deploy your application to a directory outside of your web root, delete your public_htmldirectory, and then replace it with a symbolic link to the web in your project.
If you use the AsseticBundle you need to configure this, so it can use the correct web directory:
123456
# app/config/config.yml
# ...assetic:
# ...read_from: "%kernel.root_dir%/../../public_html"
Now you just need to clear the cache and dump the assets again and your application should work:
12
$ php app/console cache:clear --env=prod$ php app/console assetic:dump --env=prod --no-debug
PDF brought to you bygenerated on October 23, 2014
Chapter 16: How to Override Symfony's default Directory Structure | 66

Listing 17-1
Listing 17-2
Chapter 17
Using Parameters within a DependencyInjection Class
You have seen how to use configuration parameters within Symfony service containers. There are specialcases such as when you want, for instance, to use the %kernel.debug% parameter to make the servicesin your bundle enter debug mode. For this case there is more work to do in order to make the systemunderstand the parameter value. By default your parameter %kernel.debug% will be treated as a simplestring. Consider this example with the AcmeDemoBundle:
123456789
1011
// Inside Configuration class$rootNode
->children()->booleanNode('logging')->defaultValue('%kernel.debug%')->end()// ...
->end();
// Inside the Extension class$config = $this->processConfiguration($configuration, $configs);var_dump($config['logging']);
Now, examine the results to see this closely:
123456789
101112
my_bundle:logging: true# true, as expected
my_bundle:logging: "%kernel.debug%"# true/false (depends on 2nd parameter of AppKernel),# as expected, because %kernel.debug% inside configuration# gets evaluated before being passed to the extension
my_bundle: ~# passes the string "%kernel.debug%".
PDF brought to you bygenerated on October 23, 2014
Chapter 17: Using Parameters within a Dependency Injection Class | 67

Listing 17-3
Listing 17-4
131415
# Which is always considered as true.# The Configurator does not know anything about# "%kernel.debug%" being a parameter.
In order to support this use case, the Configuration class has to be injected with this parameter via theextension as follows:
123456789
10111213141516171819202122232425262728293031
namespace Acme\DemoBundle\DependencyInjection;
use Symfony\Component\Config\Definition\Builder\ArrayNodeDefinition;use Symfony\Component\Config\Definition\Builder\TreeBuilder;use Symfony\Component\Config\Definition\ConfigurationInterface;
class Configuration implements ConfigurationInterface{
private $debug;
public function __construct($debug){
$this->debug = (Boolean) $debug;}
public function getConfigTreeBuilder(){
$treeBuilder = new TreeBuilder();$rootNode = $treeBuilder->root('acme_demo');
$rootNode->children()
// ...->booleanNode('logging')->defaultValue($this->debug)->end()// ...
->end();
return $treeBuilder;}
}
And set it in the constructor of Configuration via the Extension class:
123456789
10111213141516
namespace Acme\DemoBundle\DependencyInjection;
use Symfony\Component\DependencyInjection\ContainerBuilder;use Symfony\Component\DependencyInjection\Loader\XmlFileLoader;use Symfony\Component\HttpKernel\DependencyInjection\Extension;use Symfony\Component\Config\FileLocator;
class AcmeDemoExtension extends Extension{
// ...
public function getConfiguration(array $config, ContainerBuilder $container){
return new Configuration($container->getParameter('kernel.debug'));}
}
PDF brought to you bygenerated on October 23, 2014
Chapter 17: Using Parameters within a Dependency Injection Class | 68

Listing 17-5
Setting the Default in the Extension
There are some instances of %kernel.debug% usage within a Configurator class in TwigBundleand AsseticBundle, however this is because the default parameter value is set by the Extensionclass. For example in AsseticBundle, you can find:
1 $container->setParameter('assetic.debug', $config['debug']);
The string %kernel.debug% passed here as an argument handles the interpreting job to thecontainer which in turn does the evaluation. Both ways accomplish similar goals. AsseticBundlewill not use %kernel.debug% but rather the new %assetic.debug% parameter.
PDF brought to you bygenerated on October 23, 2014
Chapter 17: Using Parameters within a Dependency Injection Class | 69

Chapter 18
Understanding how the Front Controller,Kernel and Environments Work together
The section How to Master and Create new Environments explained the basics on how Symfony usesenvironments to run your application with different configuration settings. This section will explain a bitmore in-depth what happens when your application is bootstrapped. To hook into this process, you needto understand three parts that work together:
• The Front Controller• The Kernel Class• The Environments
Usually, you will not need to define your own front controller or AppKernel class as the SymfonyStandard Edition1 provides sensible default implementations.
This documentation section is provided to explain what is going on behind the scenes.
The Front Controller
The front controller2 is a well-known design pattern; it is a section of code that all requests served by anapplication run through.
In the Symfony Standard Edition3, this role is taken by the app.php4 and app_dev.php5 files in the web/directory. These are the very first PHP scripts executed when a request is processed.
The main purpose of the front controller is to create an instance of the AppKernel (more on that in asecond), make it handle the request and return the resulting response to the browser.
1. https://github.com/symfony/symfony-standard
2. http://en.wikipedia.org/wiki/Front_Controller_pattern
3. https://github.com/symfony/symfony-standard
4. https://github.com/symfony/symfony-standard/blob/master/web/app.php
5. https://github.com/symfony/symfony-standard/blob/master/web/app_dev.php
PDF brought to you bygenerated on October 23, 2014
Chapter 18: Understanding how the Front Controller, Kernel and Environments Work together | 70

Listing 18-1
Because every request is routed through it, the front controller can be used to perform globalinitializations prior to setting up the kernel or to decorate6 the kernel with additional features. Examplesinclude:
• Configuring the autoloader or adding additional autoloading mechanisms;• Adding HTTP level caching by wrapping the kernel with an instance of AppCache;• Enabling (or skipping) the ClassCache;• Enabling the Debug Component.
The front controller can be chosen by requesting URLs like:
1 http://localhost/app_dev.php/some/path/...
As you can see, this URL contains the PHP script to be used as the front controller. You can usethat to easily switch the front controller or use a custom one by placing it in the web/ directory (e.g.app_cache.php).
When using Apache and the RewriteRule shipped with the Standard Edition7, you can omit the filenamefrom the URL and the RewriteRule will use app.php as the default one.
Pretty much every other web server should be able to achieve a behavior similar to that of theRewriteRule described above. Check your server documentation for details or see Configuring aWeb Server.
Make sure you appropriately secure your front controllers against unauthorized access. Forexample, you don't want to make a debugging environment available to arbitrary users in yourproduction environment.
Technically, the app/console8 script used when running Symfony on the command line is also a frontcontroller, only that is not used for web, but for command line requests.
The Kernel ClassThe Kernel9 is the core of Symfony. It is responsible for setting up all the bundles that make up yourapplication and providing them with the application's configuration. It then creates the service containerbefore serving requests in its handle()10 method.
There are two methods declared in the KernelInterface11 that are left unimplemented in Kernel12 andthus serve as template methods13:
• registerBundles()14, which must return an array of all bundles needed to run theapplication;
• registerContainerConfiguration()15, which loads the application configuration.
6. http://en.wikipedia.org/wiki/Decorator_pattern
7. https://github.com/symfony/symfony-standard/blob/master/web/.htaccess
8. https://github.com/symfony/symfony-standard/blob/master/app/console
9. http://api.symfony.com/2.5/Symfony/Component/HttpKernel/Kernel.html
10. http://api.symfony.com/2.5/Symfony/Component/HttpKernel/HttpKernelInterface.html#handle()
11. http://api.symfony.com/2.5/Symfony/Component/HttpKernel/KernelInterface.html
12. http://api.symfony.com/2.5/Symfony/Component/HttpKernel/Kernel.html
13. http://en.wikipedia.org/wiki/Template_method_pattern
14. http://api.symfony.com/2.5/Symfony/Component/HttpKernel/KernelInterface.html#registerBundles()
15. http://api.symfony.com/2.5/Symfony/Component/HttpKernel/KernelInterface.html#registerContainerConfiguration()
PDF brought to you bygenerated on October 23, 2014
Chapter 18: Understanding how the Front Controller, Kernel and Environments Work together | 71

To fill these (small) blanks, your application needs to subclass the Kernel and implement these methods.The resulting class is conventionally called the AppKernel.
Again, the Symfony Standard Edition provides an AppKernel16 in the app/ directory. This class uses thename of the environment - which is passed to the Kernel's constructor17 method and is available viagetEnvironment()18 - to decide which bundles to create. The logic for that is in registerBundles(), amethod meant to be extended by you when you start adding bundles to your application.
You are, of course, free to create your own, alternative or additional AppKernel variants. All you need isto adapt your (or add a new) front controller to make use of the new kernel.
The name and location of the AppKernel is not fixed. When putting multiple Kernels into asingle application, it might therefore make sense to add additional sub-directories, for exampleapp/admin/AdminKernel.php and app/api/ApiKernel.php. All that matters is that your frontcontroller is able to create an instance of the appropriate kernel.
Having different AppKernels might be useful to enable different front controllers (on potentially differentservers) to run parts of your application independently (for example, the admin UI, the frontend UI anddatabase migrations).
There's a lot more the AppKernel can be used for, for example overriding the default directorystructure. But odds are high that you don't need to change things like this on the fly by havingseveral AppKernel implementations.
The EnvironmentsAs just mentioned, the AppKernel has to implement another method -registerContainerConfiguration()19. This method is responsible for loading the application'sconfiguration from the right environment.
Environments have been covered extensively in the previous chapter, and you probably remember thatthe Standard Edition comes with three of them - dev, prod and test.
More technically, these names are nothing more than strings passed from the front controller to theAppKernel's constructor. This name can then be used in the registerContainerConfiguration()20
method to decide which configuration files to load.
The Standard Edition's AppKernel21 class implements this method by simply loading the app/config/config_*environment*.yml file. You are, of course, free to implement this method differently if youneed a more sophisticated way of loading your configuration.
16. https://github.com/symfony/symfony-standard/blob/master/app/AppKernel.php
17. http://api.symfony.com/2.5/Symfony/Component/HttpKernel/Kernel.html#__construct()
18. http://api.symfony.com/2.5/Symfony/Component/HttpKernel/Kernel.html#getEnvironment()
19. http://api.symfony.com/2.5/Symfony/Component/HttpKernel/KernelInterface.html#registerContainerConfiguration()
20. http://api.symfony.com/2.5/Symfony/Component/HttpKernel/KernelInterface.html#registerContainerConfiguration()
21. https://github.com/symfony/symfony-standard/blob/master/app/AppKernel.php
PDF brought to you bygenerated on October 23, 2014
Chapter 18: Understanding how the Front Controller, Kernel and Environments Work together | 72

Listing 19-1
Chapter 19
How to Set external Parameters in the ServiceContainer
In the chapter How to Master and Create new Environments, you learned how to manage your applicationconfiguration. At times, it may benefit your application to store certain credentials outside of your projectcode. Database configuration is one such example. The flexibility of the Symfony service container allowsyou to easily do this.
Environment VariablesSymfony will grab any environment variable prefixed with SYMFONY__ and set it as a parameter in theservice container. Some transformations are applied to the resulting parameter name:
• SYMFONY__ prefix is removed;• Parameter name is lowercased;• Double underscores are replaced with a period, as a period is not a valid character in an
environment variable name.
For example, if you're using Apache, environment variables can be set using the following VirtualHostconfiguration:
123456789
101112
<VirtualHost *:80>ServerName SymfonyDocumentRoot "/path/to/symfony_2_app/web"DirectoryIndex index.php index.htmlSetEnv SYMFONY__DATABASE__USER userSetEnv SYMFONY__DATABASE__PASSWORD secret
<Directory "/path/to/symfony_2_app/web">AllowOverride AllAllow from All
</Directory></VirtualHost>
PDF brought to you bygenerated on October 23, 2014
Chapter 19: How to Set external Parameters in the Service Container | 73

Listing 19-2
Listing 19-3
Listing 19-4
The example above is for an Apache configuration, using the SetEnv1 directive. However, this willwork for any web server which supports the setting of environment variables.
Also, in order for your console to work (which does not use Apache), you must export these asshell variables. On a Unix system, you can run the following:
12
$ export SYMFONY__DATABASE__USER=user$ export SYMFONY__DATABASE__PASSWORD=secret
Now that you have declared an environment variable, it will be present in the PHP $_SERVER globalvariable. Symfony then automatically sets all $_SERVER variables prefixed with SYMFONY__ as parametersin the service container.
You can now reference these parameters wherever you need them.
123456
doctrine:dbal:
driver pdo_mysqldbname: symfony_projectuser: "%database.user%"password: "%database.password%"
Even in debug mode, setting or changing an environment variable requires your cache to becleared to make the parameter available. In debug mode, this is required since only a change to aconfiguration file that is loaded by Symfony triggers your configuration to be re-evaluated.
ConstantsThe container also has support for setting PHP constants as parameters. See Constants as Parameters formore details.
Miscellaneous ConfigurationThe imports directive can be used to pull in parameters stored elsewhere. Importing a PHP file givesyou the flexibility to add whatever is needed in the container. The following imports a file namedparameters.php.
123
# app/config/config.ymlimports:
- { resource: parameters.php }
A resource file can be one of many types. PHP, XML, YAML, INI, and closure resources are allsupported by the imports directive.
1. http://httpd.apache.org/docs/current/env.html
PDF brought to you bygenerated on October 23, 2014
Chapter 19: How to Set external Parameters in the Service Container | 74

Listing 19-5
In parameters.php, tell the service container the parameters that you wish to set. This is useful whenimportant configuration is in a non-standard format. The example below includes a Drupal databaseconfiguration in the Symfony service container.
123
// app/config/parameters.phpinclude_once('/path/to/drupal/sites/default/settings.php');$container->setParameter('drupal.database.url', $db_url);
PDF brought to you bygenerated on October 23, 2014
Chapter 19: How to Set external Parameters in the Service Container | 75

Listing 20-1
Chapter 20
How to Use PdoSessionHandler to StoreSessions in the Database
The default Symfony session storage writes the session information to file(s). Most medium to largewebsites use a database to store the session values instead of files, because databases are easier to use andscale in a multi-webserver environment.
Symfony has a built-in solution for database session storage called PdoSessionHandler1. To use it, youjust need to change some parameters in config.yml (or the configuration format of your choice):
123456789
101112131415161718192021222324
# app/config/config.ymlframework:
session:# ...handler_id: session.handler.pdo
parameters:pdo.db_options:
db_table: sessiondb_id_col: session_iddb_data_col: session_valuedb_time_col: session_time
services:pdo:
class: PDOarguments:
dsn: "mysql:dbname=mydatabase"user: myuserpassword: mypassword
calls:- [setAttribute, [3, 2]] # \PDO::ATTR_ERRMODE, \PDO::ERRMODE_EXCEPTION
session.handler.pdo:
1. http://api.symfony.com/2.5/Symfony/Component/HttpFoundation/Session/Storage/Handler/PdoSessionHandler.html
PDF brought to you bygenerated on October 23, 2014
Chapter 20: How to Use PdoSessionHandler to Store Sessions in the Database | 76

Listing 20-2
Listing 20-3
Listing 20-4
2526
class:Symfony\Component\HttpFoundation\Session\Storage\Handler\PdoSessionHandler
arguments: ["@pdo", "%pdo.db_options%"]
• db_table: The name of the session table in your database• db_id_col: The name of the id column in your session table (VARCHAR(255) or larger)• db_data_col: The name of the value column in your session table (TEXT or CLOB)• db_time_col: The name of the time column in your session table (INTEGER)
Sharing your Database Connection InformationWith the given configuration, the database connection settings are defined for the session storageconnection only. This is OK when you use a separate database for the session data.
But if you'd like to store the session data in the same database as the rest of your project's data, you canuse the connection settings from the parameters.yml file by referencing the database-related parametersdefined there:
123456
pdo:class: PDOarguments:
- "mysql:host=%database_host%;port=%database_port%;dbname=%database_name%"- "%database_user%"- "%database_password%"
Example SQL Statements
MySQL
The SQL statement for creating the needed database table might look like the following (MySQL):
123456
CREATE TABLE `session` (`session_id` varchar(255) NOT NULL,`session_value` text NOT NULL,`session_time` int(11) NOT NULL,PRIMARY KEY (`session_id`)
) ENGINE=InnoDB DEFAULT CHARSET=utf8;
PostgreSQL
For PostgreSQL, the statement should look like this:
123456
CREATE TABLE session (session_id character varying(255) NOT NULL,session_value text NOT NULL,session_time integer NOT NULL,CONSTRAINT session_pkey PRIMARY KEY (session_id)
);
PDF brought to you bygenerated on October 23, 2014
Chapter 20: How to Use PdoSessionHandler to Store Sessions in the Database | 77

Listing 20-5
Microsoft SQL Server
For MSSQL, the statement might look like the following:
123456789
1011121314
CREATE TABLE [dbo].[session]([session_id] [nvarchar](255) NOT NULL,[session_value] [ntext] NOT NULL,[session_time] [int] NOT NULL,PRIMARY KEY CLUSTERED(
[session_id] ASC) WITH (
PAD_INDEX = OFF,STATISTICS_NORECOMPUTE = OFF,IGNORE_DUP_KEY = OFF,ALLOW_ROW_LOCKS = ON,ALLOW_PAGE_LOCKS = ON
) ON [PRIMARY]) ON [PRIMARY] TEXTIMAGE_ON [PRIMARY]
PDF brought to you bygenerated on October 23, 2014
Chapter 20: How to Use PdoSessionHandler to Store Sessions in the Database | 78

Listing 21-1
Chapter 21
How to Use the Apache Router
Symfony, while fast out of the box, also provides various ways to increase that speed with a little bit oftweaking. One of these ways is by letting Apache handle routes directly, rather than using Symfony forthis task.
Apache router was deprecated in Symfony 2.5 and will be removed in Symfony 3.0. Since the PHPimplementation of the Router was improved, performance gains were no longer significant (whileit's very hard to replicate the same behavior).
Change Router Configuration ParametersTo dump Apache routes you must first tweak some configuration parameters to tell Symfony to use theApacheUrlMatcher instead of the default one:
1234
# app/config/config_prod.ymlparameters:
router.options.matcher.cache_class: ~ # disable router cacherouter.options.matcher_class: Symfony\Component\Routing\Matcher\ApacheUrlMatcher
Note that ApacheUrlMatcher1 extends UrlMatcher2 so even if you don't regenerate themod_rewrite rules, everything will work (because at the end of ApacheUrlMatcher::match() a callto parent::match() is done).
Generating mod_rewrite RulesTo test that it's working, create a very basic route for the AcmeDemoBundle:
1. http://api.symfony.com/2.5/Symfony/Component/Routing/Matcher/ApacheUrlMatcher.html
2. http://api.symfony.com/2.5/Symfony/Component/Routing/Matcher/UrlMatcher.html
PDF brought to you bygenerated on October 23, 2014
Chapter 21: How to Use the Apache Router | 79

Listing 21-2
Listing 21-3
Listing 21-4
Listing 21-5
Listing 21-6
1234
# app/config/routing.ymlhello:
path: /hello/{name}defaults: { _controller: AcmeDemoBundle:Demo:hello }
Now generate the mod_rewrite rules:
1 $ php app/console router:dump-apache -e=prod --no-debug
Which should roughly output the following:
1234567
# skip "real" requestsRewriteCond %{REQUEST_FILENAME} -fRewriteRule .* - [QSA,L]
# helloRewriteCond %{REQUEST_URI} ^/hello/([^/]+?)$RewriteRule .* app.php[QSA,L,E=_ROUTING__route:hello,E=_ROUTING_name:%1,E=_ROUTING__controller:AcmeDemoBundle\:Demo\:hello]
You can now rewrite web/.htaccess to use the new rules, so with this example it should look like this:
123456789
1011
<IfModule mod_rewrite.c>RewriteEngine On
# skip "real" requestsRewriteCond %{REQUEST_FILENAME} -fRewriteRule .* - [QSA,L]
# helloRewriteCond %{REQUEST_URI} ^/hello/([^/]+?)$RewriteRule .* app.php
[QSA,L,E=_ROUTING__route:hello,E=_ROUTING_name:%1,E=_ROUTING__controller:AcmeDemoBundle\:Demo\:hello]</IfModule>
The procedure above should be done each time you add/change a route if you want to take fulladvantage of this setup.
That's it! You're now all set to use Apache routes.
Additional TweaksTo save a little bit of processing time, change occurrences of Request to ApacheRequest in web/app.php:
1234567
// web/app.php
require_once __DIR__.'/../app/bootstrap.php.cache';require_once __DIR__.'/../app/AppKernel.php';// require_once __DIR__.'/../app/AppCache.php';
use Symfony\Component\HttpFoundation\ApacheRequest;
PDF brought to you bygenerated on October 23, 2014
Chapter 21: How to Use the Apache Router | 80

89
101112
$kernel = new AppKernel('prod', false);$kernel->loadClassCache();// $kernel = new AppCache($kernel);$kernel->handle(ApacheRequest::createFromGlobals())->send();
PDF brought to you bygenerated on October 23, 2014
Chapter 21: How to Use the Apache Router | 81

Listing 22-1
Chapter 22
Configuring a Web Server
The preferred way to develop your Symfony application is to use PHP's internal web server. However,when using an older PHP version or when running the application in the production environment, you'llneed to use a fully-featured web server. This article describes several ways to use Symfony with Apache2or Nginx.
When using Apache2, you can configure PHP as an Apache module or with FastCGI using PHP FPM.FastCGI also is the preferred way to use PHP with Nginx.
The Web Directory
The web directory is the home of all of your application's public and static files, including images,stylesheets and JavaScript files. It is also where the front controllers live. For more details, see theThe Web Directory.
The web directory services as the document root when configuring your web server. In theexamples below, the web/ directory will be the document root. This directory is /var/www/project/web/.
Apache2 with mod_php/PHP-CGI
For advanced Apache configuration options, see the official Apache1 documentation. The minimumbasics to get your application running under Apache2 are:
12345678
<VirtualHost *:80>ServerName domain.tldServerAlias www.domain.tld
DocumentRoot /var/www/project/web<Directory /var/www/project/web>
# enable the .htaccess rewritesAllowOverride All
1. http://httpd.apache.org/docs/current/mod/core.html#documentroot
PDF brought to you bygenerated on October 23, 2014
Chapter 22: Configuring a Web Server | 82

Listing 22-2
Listing 22-3
Listing 22-4
9101112131415
Order allow,denyAllow from All
</Directory>
ErrorLog /var/log/apache2/project_error.logCustomLog /var/log/apache2/project_access.log combined
</VirtualHost>
If your system supports the APACHE_LOG_DIR variable, you may want to use ${APACHE_LOG_DIR}/instead of /var/log/apache2/.
For performance reasons, you will probably want to set AllowOverride None and implement therewrite rules in the web/.htaccess into the VirtualHost config.
If you are using php-cgi, Apache does not pass HTTP basic username and password to PHP by default.To work around this limitation, you should use the following configuration snippet:
1 RewriteRule .* - [E=HTTP_AUTHORIZATION:%{HTTP:Authorization}]
In Apache 2.4, Order allow,deny has been replaced by Require all granted, and hence youneed to modify your Directory permission settings as follows:
12345
<Directory /var/www/project/web># enable the .htaccess rewritesAllowOverride AllRequire all granted
</Directory>
Apache2 with PHP-FPMTo make use of PHP5-FPM with Apache, you first have to ensure that you have the FastCGI processmanager php-fpm binary and Apache's FastCGI module installed (for example, on a Debian based systemyou have to install the libapache2-mod-fastcgi and php5-fpm packages).
PHP-FPM uses so-called pools to handle incoming FastCGI requests. You can configure an arbitrarynumber of pools in the FPM configuration. In a pool you configure either a TCP socket (IP and port) ora unix domain socket to listen on. Each pool can also be run under a different UID and GID:
12345678
; a pool called www[www]user = www-datagroup = www-data
; use a unix domain socketlisten = /var/run/php5-fpm.sock
PDF brought to you bygenerated on October 23, 2014
Chapter 22: Configuring a Web Server | 83

Listing 22-5
Listing 22-6
Listing 22-7
910
; or listen on a TCP socketlisten = 127.0.0.1:9000
Using mod_proxy_fcgi with Apache 2.4
If you are running Apache 2.4, you can easily use mod_proxy_fcgi to pass incoming requests to PHP-FPM. Configure PHP-FPM to listen on a TCP socket (mod_proxy currently does not support unix sockets2),enable mod_proxy and mod_proxy_fcgi in your Apache configuration and use the ProxyPassMatchdirective to pass requests for PHP files to PHP FPM:
123456789
10111213141516
<VirtualHost *:80>ServerName domain.tldServerAlias www.domain.tld
ProxyPassMatch ^/(.*\.php(/.*)?)$ fcgi://127.0.0.1:9000/var/www/project/web/$1
DocumentRoot /var/www/project/web<Directory /var/www/project/web>
# enable the .htaccess rewritesAllowOverride AllRequire all granted
</Directory>
ErrorLog /var/log/apache2/project_error.logCustomLog /var/log/apache2/project_access.log combined
</VirtualHost>
When you run your Symfony application on a subpath of your document root, the regularexpression used in ProxyPassMatch directive must be changed accordingly:
1 ProxyPassMatch ^/path-to-app/(.*\.php(/.*)?)$ fcgi://127.0.0.1:9000/var/www/project/web/$1
PHP-FPM with Apache 2.2
On Apache 2.2 or lower, you cannot use mod_proxy_fcgi. You have to use the FastCgiExternalServer3
directive instead. Therefore, your Apache configuration should look something like this:
123456789
1011
<VirtualHost *:80>ServerName domain.tldServerAlias www.domain.tld
AddHandler php5-fcgi .phpAction php5-fcgi /php5-fcgiAlias /php5-fcgi /usr/lib/cgi-bin/php5-fcgiFastCgiExternalServer /usr/lib/cgi-bin/php5-fcgi -host 127.0.0.1:9000 -pass-header
Authorization
DocumentRoot /var/www/project/web
2. https://issues.apache.org/bugzilla/show_bug.cgi?id=54101
3. http://www.fastcgi.com/mod_fastcgi/docs/mod_fastcgi.html#FastCgiExternalServer
PDF brought to you bygenerated on October 23, 2014
Chapter 22: Configuring a Web Server | 84

Listing 22-8
Listing 22-9
121314151617181920
<Directory /var/www/project/web># enable the .htaccess rewritesAllowOverride AllOrder allow,denyAllow from all
</Directory>
ErrorLog /var/log/apache2/project_error.logCustomLog /var/log/apache2/project_access.log combined
</VirtualHost>
If you prefer to use a unix socket, you have to use the -socket option instead:
1 FastCgiExternalServer /usr/lib/cgi-bin/php5-fcgi -socket /var/run/php5-fpm.sock-pass-header Authorization
Nginx
For advanced Nginx configuration options, see the official Nginx4 documentation. The minimum basicsto get your application running under Nginx are:
123456789
1011121314151617181920
server {server_name domain.tld www.domain.tld;root /var/www/project/web;
location / {# try to serve file directly, fallback to app.phptry_files $uri /app.php$is_args$args;
}
location ~ ^/(app|app_dev|config)\.php(/|$) {fastcgi_pass unix:/var/run/php5-fpm.sock;fastcgi_split_path_info ^(.+\.php)(/.*)$;include fastcgi_params;fastcgi_param SCRIPT_FILENAME $document_root$fastcgi_script_name;fastcgi_param HTTPS off;
}
error_log /var/log/nginx/project_error.log;access_log /var/log/nginx/project_access.log;
}
Depending on your PHP-FPM config, the fastcgi_pass can also be fastcgi_pass127.0.0.1:9000.
4. http://wiki.nginx.org/Symfony
PDF brought to you bygenerated on October 23, 2014
Chapter 22: Configuring a Web Server | 85

This executes only app.php, app_dev.php and config.php in the web directory. All other files willbe served as text. You must also make sure that if you do deploy app_dev.php or config.php thatthese files are secured and not available to any outside user (the IP checking code at the top of eachfile does this by default).
If you have other PHP files in your web directory that need to be executed, be sure to include themin the location block above.
PDF brought to you bygenerated on October 23, 2014
Chapter 22: Configuring a Web Server | 86

Listing 23-1
Listing 23-2
Chapter 23
How to Organize Configuration Files
The default Symfony Standard Edition defines three execution environments called dev, prod and test.An environment simply represents a way to execute the same codebase with different configurations.
In order to select the configuration file to load for each environment, Symfony executes theregisterContainerConfiguration() method of the AppKernel class:
123456789
10111213
// app/AppKernel.phpuse Symfony\Component\HttpKernel\Kernel;use Symfony\Component\Config\Loader\LoaderInterface;
class AppKernel extends Kernel{
// ...
public function registerContainerConfiguration(LoaderInterface $loader){
$loader->load(__DIR__.'/config/config_'.$this->getEnvironment().'.yml');}
}
This method loads the app/config/config_dev.yml file for the dev environment and so on. In turn,this file loads the common configuration file located at app/config/config.yml. Therefore, theconfiguration files of the default Symfony Standard Edition follow this structure:
123456789
1011
<your-project>/├─ app/│ └─ config/│ ├─ config.yml│ ├─ config_dev.yml│ ├─ config_prod.yml│ ├─ config_test.yml│ ├─ parameters.yml│ ├─ parameters.yml.dist│ ├─ routing.yml│ ├─ routing_dev.yml
PDF brought to you bygenerated on October 23, 2014
Chapter 23: How to Organize Configuration Files | 87

Listing 23-3
Listing 23-4
12131415
│ └─ security.yml├─ src/├─ vendor/└─ web/
This default structure was chosen for its simplicity — one file per environment. But as any other Symfonyfeature, you can customize it to better suit your needs. The following sections explain different ways toorganize your configuration files. In order to simplify the examples, only the dev and prod environmentsare taken into account.
Different Directories per EnvironmentInstead of suffixing the files with _dev and _prod, this technique groups all the related configuration filesunder a directory with the same name as the environment:
123456789
101112131415161718192021
<your-project>/├─ app/│ └─ config/│ ├─ common/│ │ ├─ config.yml│ │ ├─ parameters.yml│ │ ├─ routing.yml│ │ └─ security.yml│ ├─ dev/│ │ ├─ config.yml│ │ ├─ parameters.yml│ │ ├─ routing.yml│ │ └─ security.yml│ └─ prod/│ ├─ config.yml│ ├─ parameters.yml│ ├─ routing.yml│ └─ security.yml├─ src/├─ vendor/└─ web/
To make this work, change the code of the registerContainerConfiguration()1 method:
123456789
10111213
// app/AppKernel.phpuse Symfony\Component\HttpKernel\Kernel;use Symfony\Component\Config\Loader\LoaderInterface;
class AppKernel extends Kernel{
// ...
public function registerContainerConfiguration(LoaderInterface $loader){
$loader->load(__DIR__.'/config/'.$this->getEnvironment().'/config.yml');}
}
1. http://api.symfony.com/2.5/Symfony/Component/HttpKernel/KernelInterface.html#registerContainerConfiguration()
PDF brought to you bygenerated on October 23, 2014
Chapter 23: How to Organize Configuration Files | 88

Listing 23-5
Listing 23-6
Listing 23-7
Listing 23-8
Then, make sure that each config.yml file loads the rest of the configuration files, including the commonfiles. For instance, this would be the imports needed for the app/config/dev/config.yml file:
1234567
# app/config/dev/config.ymlimports:
- { resource: '../common/config.yml' }- { resource: 'parameters.yml' }- { resource: 'security.yml' }
# ...
Due to the way in which parameters are resolved, you cannot use them to build paths in importsdynamically. This means that something like the following doesn't work:
123
# app/config/config.ymlimports:
- { resource: "%kernel.root_dir%/parameters.yml" }
Semantic Configuration FilesA different organization strategy may be needed for complex applications with large configuration files.For instance, you could create one file per bundle and several files to define all application services:
123456789
101112131415161718192021222324
<your-project>/├─ app/│ └─ config/│ ├─ bundles/│ │ ├─ bundle1.yml│ │ ├─ bundle2.yml│ │ ├─ ...│ │ └─ bundleN.yml│ ├─ environments/│ │ ├─ common.yml│ │ ├─ dev.yml│ │ └─ prod.yml│ ├─ routing/│ │ ├─ common.yml│ │ ├─ dev.yml│ │ └─ prod.yml│ └─ services/│ ├─ frontend.yml│ ├─ backend.yml│ ├─ ...│ └─ security.yml├─ src/├─ vendor/└─ web/
Again, change the code of the registerContainerConfiguration() method to make Symfony aware ofthe new file organization:
PDF brought to you bygenerated on October 23, 2014
Chapter 23: How to Organize Configuration Files | 89

Listing 23-9
123456789
10111213
// app/AppKernel.phpuse Symfony\Component\HttpKernel\Kernel;use Symfony\Component\Config\Loader\LoaderInterface;
class AppKernel extends Kernel{
// ...
public function registerContainerConfiguration(LoaderInterface $loader){
$loader->load(__DIR__.'/config/environments/'.$this->getEnvironment().'.yml');}
}
Following the same technique explained in the previous section, make sure to import the appropriateconfiguration files from each main file (common.yml, dev.yml and prod.yml).
Advanced TechniquesSymfony loads configuration files using the Config component, which provides some advanced features.
Mix and Match Configuration Formats
Configuration files can import files defined with any other built-in configuration format (.yml, .xml,.php, .ini):
12345678
# app/config/config.ymlimports:
- { resource: 'parameters.yml' }- { resource: 'services.xml' }- { resource: 'security.yml' }- { resource: 'legacy.php' }
# ...
The IniFileLoader parses the file contents using the parse_ini_file2 function. Therefore, youcan only set parameters to string values. Use one of the other loaders if you want to use other datatypes (e.g. boolean, integer, etc.).
If you use any other configuration format, you have to define your own loader class extending it fromFileLoader3. When the configuration values are dynamic, you can use the PHP configuration file toexecute your own logic. In addition, you can define your own services to load configurations fromdatabases or web services.
Global Configuration Files
Some system administrators may prefer to store sensitive parameters in files outside the project directory.Imagine that the database credentials for your website are stored in the /etc/sites/mysite.com/parameters.yml file. Loading this file is as simple as indicating the full file path when importing it fromany other configuration file:
2. http://php.net/manual/en/function.parse-ini-file.php
3. http://api.symfony.com/2.5/Symfony/Component/DependencyInjection/Loader/FileLoader.html
PDF brought to you bygenerated on October 23, 2014
Chapter 23: How to Organize Configuration Files | 90

Listing 23-10
Listing 23-11
123456
# app/config/config.ymlimports:
- { resource: 'parameters.yml' }- { resource: '/etc/sites/mysite.com/parameters.yml' }
# ...
Most of the time, local developers won't have the same files that exist on the production servers. For thatreason, the Config component provides the ignore_errors option to silently discard errors when theloaded file doesn't exist:
123456
# app/config/config.ymlimports:
- { resource: 'parameters.yml' }- { resource: '/etc/sites/mysite.com/parameters.yml', ignore_errors: true }
# ...
As you've seen, there are lots of ways to organize your configuration files. You can choose one of these oreven create your own custom way of organizing the files. Don't feel limited by the Standard Edition thatcomes with Symfony. For even more customization, see "How to Override Symfony's default DirectoryStructure".
PDF brought to you bygenerated on October 23, 2014
Chapter 23: How to Organize Configuration Files | 91

Listing 24-1
Chapter 24
How to Create a Console Command
The Console page of the Components section (The Console Component) covers how to create a consolecommand. This cookbook article covers the differences when creating console commands within theSymfony framework.
Automatically Registering CommandsTo make the console commands available automatically with Symfony, create a Command directory insideyour bundle and create a PHP file suffixed with Command.php for each command that you want toprovide. For example, if you want to extend the AcmeDemoBundle to greet you from the command line,create GreetCommand.php and add the following to it:
123456789
1011121314151617181920212223
// src/Acme/DemoBundle/Command/GreetCommand.phpnamespace Acme\DemoBundle\Command;
use Symfony\Bundle\FrameworkBundle\Command\ContainerAwareCommand;use Symfony\Component\Console\Input\InputArgument;use Symfony\Component\Console\Input\InputInterface;use Symfony\Component\Console\Input\InputOption;use Symfony\Component\Console\Output\OutputInterface;
class GreetCommand extends ContainerAwareCommand{
protected function configure(){
$this->setName('demo:greet')->setDescription('Greet someone')->addArgument('name', InputArgument::OPTIONAL, 'Who do you want to greet?')->addOption('yell', null, InputOption::VALUE_NONE, 'If set, the task will yell
in uppercase letters');
}
protected function execute(InputInterface $input, OutputInterface $output)
PDF brought to you bygenerated on October 23, 2014
Chapter 24: How to Create a Console Command | 92

Listing 24-2
Listing 24-3
Listing 24-4
Listing 24-5
2425262728293031323334353637
{$name = $input->getArgument('name');if ($name) {
$text = 'Hello '.$name;} else {
$text = 'Hello';}
if ($input->getOption('yell')) {$text = strtoupper($text);
}
$output->writeln($text);}
}
This command will now automatically be available to run:
1 $ app/console demo:greet Fabien
Register Commands in the Service ContainerJust like controllers, commands can be declared as services. See the dedicated cookbook entry for details.
Getting Services from the Service ContainerBy using ContainerAwareCommand1 as the base class for the command (instead of the more basicCommand2), you have access to the service container. In other words, you have access to any configuredservice:
12345678
protected function execute(InputInterface $input, OutputInterface $output){
$name = $input->getArgument('name');$logger = $this->getContainer()->get('logger');
$logger->info('Executing command for '.$name);// ...
}
However, due to the container scopes3 this code doesn't work for some services. For instance, if you try toget the request service or any other service related to it, you'll get the following error:
1 You cannot create a service ("request") of an inactive scope ("request").
Consider the following example that uses the translator service to translate some contents using aconsole command:
1. http://api.symfony.com/2.5/Symfony/Bundle/FrameworkBundle/Command/ContainerAwareCommand.html
2. http://api.symfony.com/2.5/Symfony/Component/Console/Command/Command.html
3. #cookbook-console--cookbook-service_container-scopes
PDF brought to you bygenerated on October 23, 2014
Chapter 24: How to Create a Console Command | 93

Listing 24-6
Listing 24-7
123456789
10
protected function execute(InputInterface $input, OutputInterface $output){
$name = $input->getArgument('name');$translator = $this->getContainer()->get('translator');if ($name) {
$output->writeln($translator->trans('Hello %name%!', array('%name%' => $name)));} else {
$output->writeln($translator->trans('Hello!'));}
}
If you dig into the Translator component classes, you'll see that the request service is required to get thelocale into which the contents are translated:
123456789
10
// vendor/symfony/symfony/src/Symfony/Bundle/FrameworkBundle/Translation/Translator.phppublic function getLocale(){
if (null === $this->locale && $this->container->isScopeActive('request')&& $this->container->has('request')) {$this->locale = $this->container->get('request')->getLocale();
}
return $this->locale;}
Therefore, when using the translator service inside a command, you'll get the previous "You cannotcreate a service of an inactive scope" error message. The solution in this case is as easy as setting the localevalue explicitly before translating contents:
123456789
1011121314
protected function execute(InputInterface $input, OutputInterface $output){
$name = $input->getArgument('name');$locale = $input->getArgument('locale');
$translator = $this->getContainer()->get('translator');$translator->setLocale($locale);
if ($name) {$output->writeln($translator->trans('Hello %name%!', array('%name%' => $name)));
} else {$output->writeln($translator->trans('Hello!'));
}}
However for other services the solution might be more complex. For more details, see How to Work withScopes.
Testing CommandsWhen testing commands used as part of the full frameworkSymfony\Bundle\FrameworkBundle\Console\Application4 should be used instead ofSymfony\Component\Console\Application5:
4. http://api.symfony.com/2.5/Symfony/Bundle/FrameworkBundle/Console/Application.html
5. http://api.symfony.com/2.5/Symfony/Component/Console/Application.html
PDF brought to you bygenerated on October 23, 2014
Chapter 24: How to Create a Console Command | 94

Listing 24-8
Listing 24-9
123456789
1011121314151617181920212223242526
use Symfony\Component\Console\Tester\CommandTester;use Symfony\Bundle\FrameworkBundle\Console\Application;use Acme\DemoBundle\Command\GreetCommand;
class ListCommandTest extends \PHPUnit_Framework_TestCase{
public function testExecute(){
// mock the Kernel or create one depending on your needs$application = new Application($kernel);$application->add(new GreetCommand());
$command = $application->find('demo:greet');$commandTester = new CommandTester($command);$commandTester->execute(
array('name' => 'Fabien','--yell' => true,
));
$this->assertRegExp('/.../', $commandTester->getDisplay());
// ...}
}
New in version 2.4: Since Symfony 2.4, the CommandTester automatically detects the name of thecommand to execute. Prior to Symfony 2.4, you need to pass it via the command key.
In the specific case above, the name parameter and the --yell option are not mandatory forthe command to work, but are shown so you can see how to customize them when calling thecommand.
To be able to use the fully set up service container for your console tests you can extend your test fromKernelTestCase6:
123456789
1011121314
use Symfony\Component\Console\Tester\CommandTester;use Symfony\Bundle\FrameworkBundle\Console\Application;use Symfony\Bundle\FrameworkBundle\Test\KernelTestCase;use Acme\DemoBundle\Command\GreetCommand;
class ListCommandTest extends KernelTestCase{
public function testExecute(){
$kernel = $this->createKernel();$kernel->boot();
$application = new Application($kernel);$application->add(new GreetCommand());
6. http://api.symfony.com/2.5/Symfony/Bundle/FrameworkBundle/Test/KernelTestCase.html
PDF brought to you bygenerated on October 23, 2014
Chapter 24: How to Create a Console Command | 95

151617181920212223242526272829
$command = $application->find('demo:greet');$commandTester = new CommandTester($command);$commandTester->execute(
array('name' => 'Fabien','--yell' => true,
));
$this->assertRegExp('/.../', $commandTester->getDisplay());
// ...}
}
New in version 2.5: KernelTestCase7 was extracted from WebTestCase8 in Symfony 2.5.WebTestCase inherits from KernelTestCase. The WebTestCase creates an instance of Client9
via createClient(), while KernelTestCase creates an instance of KernelInterface10 viacreateKernel().
7. http://api.symfony.com/2.5/Symfony/Bundle/FrameworkBundle/Test/KernelTestCase.html
8. http://api.symfony.com/2.5/Symfony/Bundle/FrameworkBundle/Test/WebTestCase.html
9. http://api.symfony.com/2.5/Symfony/Bundle/FrameworkBundle/Client.html
10. http://api.symfony.com/2.5/Symfony/Component/HttpKernel/KernelInterface.html
PDF brought to you bygenerated on October 23, 2014
Chapter 24: How to Create a Console Command | 96

Listing 25-1
Listing 25-2
Listing 25-3
Listing 25-4
Listing 25-5
Chapter 25
How to Use the Console
The Using Console Commands, Shortcuts and Built-in Commands page of the components documentationlooks at the global console options. When you use the console as part of the full stack framework, someadditional global options are available as well.
By default, console commands run in the dev environment and you may want to change this forsome commands. For example, you may want to run some commands in the prod environment forperformance reasons. Also, the result of some commands will be different depending on the environment.For example, the cache:clear command will clear and warm the cache for the specified environmentonly. To clear and warm the prod cache you need to run:
1 $ php app/console cache:clear --env=prod
or the equivalent:
1 $ php app/console cache:clear -e prod
In addition to changing the environment, you can also choose to disable debug mode. This can be usefulwhere you want to run commands in the dev environment but avoid the performance hit of collectingdebug data:
1 $ php app/console list --no-debug
There is an interactive shell which allows you to enter commands without having to specify php app/console each time, which is useful if you need to run several commands. To enter the shell run:
12
$ php app/console --shell$ php app/console -s
You can now just run commands with the command name:
1 Symfony > list
When using the shell you can choose to run each command in a separate process:
PDF brought to you bygenerated on October 23, 2014
Chapter 25: How to Use the Console | 97

Listing 25-6 12
$ php app/console --shell --process-isolation$ php app/console -s --process-isolation
When you do this, the output will not be colorized and interactivity is not supported so you will need topass all command params explicitly.
Unless you are using isolated processes, clearing the cache in the shell will not have an effect onsubsequent commands you run. This is because the original cached files are still being used.
PDF brought to you bygenerated on October 23, 2014
Chapter 25: How to Use the Console | 98

Listing 26-1
Listing 26-2
Chapter 26
How to Generate URLs and Send Emails fromthe Console
Unfortunately, the command line context does not know about your VirtualHost or domain name. Thismeans that if you generate absolute URLs within a Console Command you'll probably end up withsomething like http://localhost/foo/bar which is not very useful.
To fix this, you need to configure the "request context", which is a fancy way of saying that you need toconfigure your environment so that it knows what URL it should use when generating URLs.
There are two ways of configuring the request context: at the application level and per Command.
Configuring the Request Context GloballyTo configure the Request Context - which is used by the URL Generator - you can redefine theparameters it uses as default values to change the default host (localhost) and scheme (http). You canalso configure the base path if Symfony is not running in the root directory.
Note that this does not impact URLs generated via normal web requests, since those will override thedefaults.
12345
# app/config/parameters.ymlparameters:
router.request_context.host: example.orgrouter.request_context.scheme: httpsrouter.request_context.base_url: my/path
Configuring the Request Context per CommandTo change it only in one command you can simply fetch the Request Context from the router serviceand override its settings:
PDF brought to you bygenerated on October 23, 2014
Chapter 26: How to Generate URLs and Send Emails from the Console | 99

Listing 26-3
123456789
101112131415
// src/Acme/DemoBundle/Command/DemoCommand.php
// ...class DemoCommand extends ContainerAwareCommand{
protected function execute(InputInterface $input, OutputInterface $output){
$context = $this->getContainer()->get('router')->getContext();$context->setHost('example.com');$context->setScheme('https');$context->setBaseUrl('my/path');
// ... your code here}
}
Using Memory Spooling
New in version 2.3: When using Symfony 2.3+ and SwiftmailerBundle 2.3.5+, the memory spool isnow handled automatically in the CLI and the code below is not necessary anymore.
Sending emails in a console command works the same way as described in the How to Send an Emailcookbook except if memory spooling is used.
When using memory spooling (see the How to Spool Emails cookbook for more information), you mustbe aware that because of how Symfony handles console commands, emails are not sent automatically.You must take care of flushing the queue yourself. Use the following code to send emails inside yourconsole command:
123456789
1011121314
$message = new \Swift_Message();
// ... prepare the message
$container = $this->getContainer();$mailer = $container->get('mailer');
$mailer->send($message);
// now manually flush the queue$spool = $mailer->getTransport()->getSpool();$transport = $container->get('swiftmailer.transport.real');
$spool->flushQueue($transport);
Another option is to create an environment which is only used by console commands and uses a differentspooling method.
Taking care of the spooling is only needed when memory spooling is used. If you are using filespooling (or no spooling at all), there is no need to flush the queue manually within the command.
PDF brought to you bygenerated on October 23, 2014
Chapter 26: How to Generate URLs and Send Emails from the Console | 100

Listing 27-1
Chapter 27
How to Enable Logging in Console Commands
The Console component doesn't provide any logging capabilities out of the box. Normally, you runconsole commands manually and observe the output, which is why logging is not provided. However,there are cases when you might need logging. For example, if you are running console commandsunattended, such as from cron jobs or deployment scripts, it may be easier to use Symfony's loggingcapabilities instead of configuring other tools to gather console output and process it. This can beespecially handful if you already have some existing setup for aggregating and analyzing Symfony logs.There are basically two logging cases you would need:
• Manually logging some information from your command;• Logging uncaught Exceptions.
Manually Logging from a Console CommandThis one is really simple. When you create a console command within the full framework as describedin "How to Create a Console Command", your command extends ContainerAwareCommand1. This meansthat you can simply access the standard logger service through the container and use it to do the logging:
123456789
1011121314
// src/Acme/DemoBundle/Command/GreetCommand.phpnamespace Acme\DemoBundle\Command;
use Symfony\Bundle\FrameworkBundle\Command\ContainerAwareCommand;use Symfony\Component\Console\Input\InputArgument;use Symfony\Component\Console\Input\InputInterface;use Symfony\Component\Console\Input\InputOption;use Symfony\Component\Console\Output\OutputInterface;use Psr\Log\LoggerInterface;
class GreetCommand extends ContainerAwareCommand{
// ...
1. http://api.symfony.com/2.5/Symfony/Bundle/FrameworkBundle/Command/ContainerAwareCommand.html
PDF brought to you bygenerated on October 23, 2014
Chapter 27: How to Enable Logging in Console Commands | 101

Listing 27-2
Listing 27-3
15161718192021222324252627282930313233343536
protected function execute(InputInterface $input, OutputInterface $output){
/** @var $logger LoggerInterface */$logger = $this->getContainer()->get('logger');
$name = $input->getArgument('name');if ($name) {
$text = 'Hello '.$name;} else {
$text = 'Hello';}
if ($input->getOption('yell')) {$text = strtoupper($text);$logger->warning('Yelled: '.$text);
} else {$logger->info('Greeted: '.$text);
}
$output->writeln($text);}
}
Depending on the environment in which you run your command (and your logging setup), you shouldsee the logged entries in app/logs/dev.log or app/logs/prod.log.
Enabling automatic Exceptions LoggingTo get your console application to automatically log uncaught exceptions for all of your commands, youcan use console events.
New in version 2.3: Console events were introduced in Symfony 2.3.
First configure a listener for console exception events in the service container:
12345678
# app/config/services.ymlservices:
kernel.listener.command_dispatch:class: Acme\DemoBundle\EventListener\ConsoleExceptionListenerarguments:
logger: "@logger"tags:
- { name: kernel.event_listener, event: console.exception }
Then implement the actual listener:
123456
// src/Acme/DemoBundle/EventListener/ConsoleExceptionListener.phpnamespace Acme\DemoBundle\EventListener;
use Symfony\Component\Console\Event\ConsoleExceptionEvent;use Psr\Log\LoggerInterface;
PDF brought to you bygenerated on October 23, 2014
Chapter 27: How to Enable Logging in Console Commands | 102

Listing 27-4
Listing 27-5
789
1011121314151617181920212223242526272829303132
class ConsoleExceptionListener{
private $logger;
public function __construct(LoggerInterface $logger){
$this->logger = $logger;}
public function onConsoleException(ConsoleExceptionEvent $event){
$command = $event->getCommand();$exception = $event->getException();
$message = sprintf('%s: %s (uncaught exception) at %s line %s while running console command `%s`',get_class($exception),$exception->getMessage(),$exception->getFile(),$exception->getLine(),$command->getName()
);
$this->logger->error($message);}
}
In the code above, when any command throws an exception, the listener will receive an event. Youcan simply log it by passing the logger service via the service configuration. Your method receivesa ConsoleExceptionEvent2 object, which has methods to get information about the event and theexception.
Logging non-0 Exit StatusesThe logging capabilities of the console can be further extended by logging non-0 exit statuses. This wayyou will know if a command had any errors, even if no exceptions were thrown.
First configure a listener for console terminate events in the service container:
12345678
# app/config/services.ymlservices:
kernel.listener.command_dispatch:class: Acme\DemoBundle\EventListener\ConsoleTerminateListenerarguments:
logger: "@logger"tags:
- { name: kernel.event_listener, event: console.terminate }
Then implement the actual listener:
1234
// src/Acme/DemoBundle/EventListener/ConsoleExceptionListener.phpnamespace Acme\DemoBundle\EventListener;
use Symfony\Component\Console\Event\ConsoleTerminateEvent;
2. http://api.symfony.com/2.5/Symfony/Component/Console/Event/ConsoleExceptionEvent.html
PDF brought to you bygenerated on October 23, 2014
Chapter 27: How to Enable Logging in Console Commands | 103

56789
101112131415161718192021222324252627282930313233343536
use Psr\Log\LoggerInterface;
class ConsoleExceptionListener{
private $logger;
public function __construct(LoggerInterface $logger){
$this->logger = $logger;}
public function onConsoleTerminate(ConsoleTerminateEvent $event){
$statusCode = $event->getExitCode();$command = $event->getCommand();
if ($statusCode === 0) {return;
}
if ($statusCode > 255) {$statusCode = 255;$event->setExitCode($statusCode);
}
$this->logger->warning(sprintf('Command `%s` exited with status code %d',$command->getName(),$statusCode
));}
}
PDF brought to you bygenerated on October 23, 2014
Chapter 27: How to Enable Logging in Console Commands | 104

Listing 28-1
Chapter 28
How to Define Commands as Services
New in version 2.4: Support for registering commands in the service container was introduced inSymfony 2.4.
By default, Symfony will take a look in the Command directory of each bundle and automatically registeryour commands. If a command extends the ContainerAwareCommand1, Symfony will even inject thecontainer. While making life easier, this has some limitations:
• Your command must live in the Command directory;• There's no way to conditionally register your service based on the environment or availability
of some dependencies;• You can't access the container in the configure() method (because setContainer hasn't been
called yet);• You can't use the same class to create many commands (i.e. each with different configuration).
To solve these problems, you can register your command as a service and tag it with console.command:
123456
# app/config/config.ymlservices:
acme_hello.command.my_command:class: Acme\HelloBundle\Command\MyCommandtags:
- { name: console.command }
Using Dependencies and Parameters to Set Default Values for OptionsImagine you want to provide a default value for the name option. You could pass one of the following asthe 5th argument of addOption():
• a hardcoded string;
1. http://api.symfony.com/2.5/Symfony/Bundle/FrameworkBundle/Command/ContainerAwareCommand.html
PDF brought to you bygenerated on October 23, 2014
Chapter 28: How to Define Commands as Services | 105

Listing 28-2
• a container parameter (e.g. something from parameters.yml);• a value computed by a service (e.g. a repository).
By extending ContainerAwareCommand, only the first is possible, because you can't access the containerinside the configure() method. Instead, inject any parameter or service you need into the constructor.For example, suppose you have some NameRepository service that you'll use to get your default value:
123456789
1011121314151617181920212223242526272829303132333435363738
// src/Acme/DemoBundle/Command/GreetCommand.phpnamespace Acme\DemoBundle\Command;
use Acme\DemoBundle\Entity\NameRepository;use Symfony\Component\Console\Command\Command;use Symfony\Component\Console\Input\InputInterface;use Symfony\Component\Console\Input\InputOption;use Symfony\Component\Console\Output\OutputInterface;
class GreetCommand extends Command{
protected $nameRepository;
public function __construct(NameRepository $nameRepository){
$this->nameRepository = $nameRepository;
parent::__construct();}
protected function configure(){
$defaultName = $this->nameRepository->findLastOne();
$this->setName('demo:greet')->setDescription('Greet someone')->addOption('name', '-n', InputOption::VALUE_REQUIRED, 'Who do you want to
greet?', $defaultName);
}
protected function execute(InputInterface $input, OutputInterface $output){
$name = $input->getOption('name');
$output->writeln($name);}
}
Now, just update the arguments of your service configuration like normal to inject the NameRepository.Great, you now have a dynamic default value!
Be careful not to actually do any work in configure (e.g. make database queries), as your code willbe run, even if you're using the console to execute a different command.
PDF brought to you bygenerated on October 23, 2014
Chapter 28: How to Define Commands as Services | 106

Chapter 29
How to Customize Error Pages
When an exception is thrown, the core HttpKernel class catches it and dispatches a kernel.exceptionevent. This gives you the power to convert the exception into a Response in a few different ways.
The core TwigBundle sets up a listener for this event which will run a configurable (but otherwisearbitrary) controller to generate the response. The default controller used has a sensible way of pickingone out of the available set of error templates.
Thus, error pages can be customized in different ways, depending on how much control you need:1. Use the default ExceptionController and create a few templates that allow you to customize how
your different error pages look (easy);2. Replace the default exception controller with your own (intermediate).3. Use the kernel.exception event to come up with your own handling (advanced).
Using the Default ExceptionControllerBy default, the showAction() method of the ExceptionController1 will be called when an exceptionoccurs.
This controller will either display an exception or error page, depending on the setting of thekernel.debug flag. While exception pages give you a lot of helpful information during development,error pages are meant to be shown to the user in production.
Testing Error Pages during Development
You should not set kernel.debug to false in order to see your error pages during development.This will also stop Symfony from recompiling your twig templates, among other things.
The third-party WebfactoryExceptionsBundle2 provides a special test controller that allows you todisplay your custom error pages for arbitrary HTTP status codes even with kernel.debug set totrue.
1. http://api.symfony.com/2.5/Symfony/Bundle/TwigBundle/Controller/ExceptionController.html
2. https://github.com/webfactory/exceptions-bundle
PDF brought to you bygenerated on October 23, 2014
Chapter 29: How to Customize Error Pages | 107

Listing 29-1
How the Template for the Error and Exception Pages Is Selected
The TwigBundle contains some default templates for error and exception pages in its Resources/views/Exception directory.
In a standard Symfony installation, the TwigBundle can be found at vendor/symfony/symfony/src/Symfony/Bundle/TwigBundle. In addition to the standard HTML error page, it also providesa default error page for many of the most common response formats, including JSON(error.json.twig), XML (error.xml.twig) and even JavaScript (error.js.twig), to name afew.
Here is how the ExceptionController will pick one of the available templates based on the HTTP statuscode and request format:
• For error pages, it first looks for a template for the given format and status code (likeerror404.json.twig);
• If that does not exist or apply, it looks for a general template for the given format (likeerror.json.twig or exception.json.twig);
• Finally, it ignores the format and falls back to the HTML template (like error.html.twig orexception.html.twig).
If the exception being handled implements the HttpExceptionInterface3, the getStatusCode()method will be called to obtain the HTTP status code to use. Otherwise, the status code will be"500".
Overriding or Adding Templates
To override these templates, simply rely on the standard method for overriding templates that live insidea bundle. For more information, see Overriding Bundle Templates.
For example, to override the default error template, create a new template located at app/Resources/TwigBundle/views/Exception/error.html.twig:
123456789
1011
<!DOCTYPE html><html><head>
<meta http-equiv="Content-Type" content="text/html; charset=utf-8" /><title>An Error Occurred: {{ status_text }}</title>
</head><body>
<h1>Oops! An Error Occurred</h1><h2>The server returned a "{{ status_code }} {{ status_text }}".</h2>
</body></html>
You must not use is_granted in your error pages (or layout used by your error pages), becausethe router runs before the firewall. If the router throws an exception (for instance, when the routedoes not match), then using is_granted will throw a further exception. You can use is_grantedsafely by saying {% if app.user and is_granted('...') %}.
3. http://api.symfony.com/2.5/Symfony/Component/HttpKernel/Exception/HttpExceptionInterface.html
PDF brought to you bygenerated on October 23, 2014
Chapter 29: How to Customize Error Pages | 108

Listing 29-2
If you're not familiar with Twig, don't worry. Twig is a simple, powerful and optional templatingengine that integrates with Symfony. For more information about Twig see Creating and UsingTemplates.
This works not only to replace the default templates, but also to add new ones.
For instance, create an app/Resources/TwigBundle/views/Exception/error404.html.twig templateto display a special page for 404 (page not found) errors. Refer to the previous section for the order inwhich the ExceptionController tries different template names.
Often, the easiest way to customize an error page is to copy it from the TwigBundle into app/Resources/TwigBundle/views/Exception and then modify it.
The debug-friendly exception pages shown to the developer can even be customized in the sameway by creating templates such as exception.html.twig for the standard HTML exception pageor exception.json.twig for the JSON exception page.
Replacing the Default ExceptionControllerIf you need a little more flexibility beyond just overriding the template, then you can change thecontroller that renders the error page. For example, you might need to pass some additional variablesinto your template.
Make sure you don't lose the exception pages that render the helpful error messages duringdevelopment.
To do this, simply create a new controller and set the twig.exception_controller option to point to it.
123
# app/config/config.ymltwig:
exception_controller: AcmeFooBundle:Exception:showException
You can also set up your controller as a service.
The default value of twig.controller.exception:showAction refers to the showAction methodof the ExceptionController described previously, which is registered in the DIC as thetwig.controller.exception service.
Your controller will be passed two parameters: exception, which is a FlattenException4 instancecreated from the exception being handled, and logger, an instance of DebugLoggerInterface5 (whichmay be null).
4. http://api.symfony.com/2.5//Symfony/Component/Debug/Exception/FlattenException.html
5. http://api.symfony.com/2.5//Symfony/Component/HttpKernel/Log/DebugLoggerInterface.html
PDF brought to you bygenerated on October 23, 2014
Chapter 29: How to Customize Error Pages | 109

The Request that will be dispatched to your controller is created in the ExceptionListener6. Thisevent listener is set up by the TwigBundle.
You can, of course, also extend the previously described ExceptionController7. In that case, you mightwant to override one or both of the showAction and findTemplate methods. The latter one locates thetemplate to be used.
As of writing, the ExceptionController is not part of the Symfony API, so be aware that it mightchange in following releases.
Working with the kernel.exception EventAs mentioned in the beginning, the kernel.exception event is dispatched whenever the Symfony Kernelneeds to handle an exception. For more information on that, see kernel.exception Event.
Working with this event is actually much more powerful than what has been explained before but alsorequires a thorough understanding of Symfony internals.
To give one example, assume your application throws specialized exceptions with a particular meaningto your domain.
In that case, all the default ExceptionListener and ExceptionController could do for you was tryingto figure out the right HTTP status code and display your nice-looking error page.
Writing your own event listener for the kernel.exception event allows you to have a closer look at theexception and take different actions depending on it. Those actions might include logging the exception,redirecting the user to another page or rendering specialized error pages.
If your listener calls setResponse() on the GetResponseForExceptionEvent8, event propagationwill be stopped and the response will be sent to the client.
This approach allows you to create centralized and layered error handling: Instead of catching (andhandling) the same exceptions in various controllers again and again, you can have just one (or several)listeners deal with them.
To see an example, have a look at the ExceptionListener9 in the Security Component.
It handles various security-related exceptions that are thrown in your application (likeAccessDeniedException10) and takes measures like redirecting the user to the login page, loggingthem out and other things.
Good luck!
6. http://api.symfony.com/2.5/Symfony/Component/HttpKernel/EventListener/ExceptionListener.html
7. http://api.symfony.com/2.5/Symfony/Bundle/TwigBundle/Controller/ExceptionController.html
8. http://api.symfony.com/2.5/Symfony/Component/HttpKernel/Event/GetResponseForExceptionEvent.html
9. https://github.com/symfony/symfony/blob/master/src/Symfony/Component/Security/Http/Firewall/ExceptionListener.php
10. http://api.symfony.com/2.5/Symfony/Component/Security/Core/Exception/AccessDeniedException.html
PDF brought to you bygenerated on October 23, 2014
Chapter 29: How to Customize Error Pages | 110

Listing 30-1
Chapter 30
How to Define Controllers as Services
In the book, you've learned how easily a controller can be used when it extends the base Controller1
class. While this works fine, controllers can also be specified as services.
Specifying a controller as a service takes a little bit more work. The primary advantage is that theentire controller or any services passed to the controller can be modified via the service containerconfiguration. This is especially useful when developing an open-source bundle or any bundle thatwill be used in many different projects.
A second advantage is that your controllers are more "sandboxed". By looking at the constructorarguments, it's easy to see what types of things this controller may or may not do. And becauseeach dependency needs to be injected manually, it's more obvious (i.e. if you have manyconstructor arguments) when your controller has become too big, and may need to be split intomultiple controllers.
So, even if you don't specify your controllers as services, you'll likely see this done in some open-source Symfony bundles. It's also important to understand the pros and cons of both approaches.
Defining the Controller as a ServiceA controller can be defined as a service in the same way as any other class. For example, if you have thefollowing simple controller:
123456789
// src/Acme/HelloBundle/Controller/HelloController.phpnamespace Acme\HelloBundle\Controller;
use Symfony\Component\HttpFoundation\Response;
class HelloController{
public function indexAction($name){
1. http://api.symfony.com/2.5/Symfony/Bundle/FrameworkBundle/Controller/Controller.html
PDF brought to you bygenerated on October 23, 2014
Chapter 30: How to Define Controllers as Services | 111

Listing 30-2
Listing 30-3
Listing 30-4
101112
return new Response('<html><body>Hello '.$name.'!</body></html>');}
}
Then you can define it as a service as follows:
12345678
# src/Acme/HelloBundle/Resources/config/services.ymlparameters:
# ...acme.controller.hello.class: Acme\HelloBundle\Controller\HelloController
services:acme.hello.controller:
class: "%acme.controller.hello.class%"
Referring to the ServiceTo refer to a controller that's defined as a service, use the single colon (:) notation. For example, toforward to the indexAction() method of the service defined above with the id acme.hello.controller:
1 $this->forward('acme.hello.controller:indexAction', array('name' => $name));
You cannot drop the Action part of the method name when using this syntax.
You can also route to the service by using the same notation when defining the route _controller value:
1234
# app/config/routing.ymlhello:
path: /hellodefaults: { _controller: acme.hello.controller:indexAction }
You can also use annotations to configure routing using a controller defined as a service. See theFrameworkExtraBundle documentation for details.
Alternatives to base Controller MethodsWhen using a controller defined as a service, it will most likely not extend the base Controller class.Instead of relying on its shortcut methods, you'll interact directly with the services that you need.Fortunately, this is usually pretty easy and the base Controller class source code2 is a great source on howto perform many common tasks.
For example, if you want to render a template instead of creating the Response object directly, then yourcode would look like this if you were extending Symfony's base controller:
2. https://github.com/symfony/symfony/blob/master/src/Symfony/Bundle/FrameworkBundle/Controller/Controller.php
PDF brought to you bygenerated on October 23, 2014
Chapter 30: How to Define Controllers as Services | 112
Listing 30-5
Listing 30-6
Listing 30-7
Listing 30-8
123456789
101112131415
// src/Acme/HelloBundle/Controller/HelloController.phpnamespace Acme\HelloBundle\Controller;
use Symfony\Bundle\FrameworkBundle\Controller\Controller;
class HelloController extends Controller{
public function indexAction($name){
return $this->render('AcmeHelloBundle:Hello:index.html.twig',array('name' => $name)
);}
}
If you look at the source code for the render function in Symfony's base Controller class3, you'll see thatthis method actually uses the templating service:
1234
public function render($view, array $parameters = array(), Response $response = null){
return $this->container->get('templating')->renderResponse($view, $parameters,$response);}
In a controller that's defined as a service, you can instead inject the templating service and use it directly:
123456789
1011121314151617181920212223
// src/Acme/HelloBundle/Controller/HelloController.phpnamespace Acme\HelloBundle\Controller;
use Symfony\Bundle\FrameworkBundle\Templating\EngineInterface;use Symfony\Component\HttpFoundation\Response;
class HelloController{
private $templating;
public function __construct(EngineInterface $templating){
$this->templating = $templating;}
public function indexAction($name){
return $this->templating->renderResponse('AcmeHelloBundle:Hello:index.html.twig',array('name' => $name)
);}
}
The service definition also needs modifying to specify the constructor argument:
12
# src/Acme/HelloBundle/Resources/config/services.ymlparameters:
3. https://github.com/symfony/symfony/blob/master/src/Symfony/Bundle/FrameworkBundle/Controller/Controller.php
PDF brought to you bygenerated on October 23, 2014
Chapter 30: How to Define Controllers as Services | 113

3456789
# ...acme.controller.hello.class: Acme\HelloBundle\Controller\HelloController
services:acme.hello.controller:
class: "%acme.controller.hello.class%"arguments: ["@templating"]
Rather than fetching the templating service from the container, you can inject only the exact service(s)that you need directly into the controller.
This does not mean that you cannot extend these controllers from your own base controller. Themove away from the standard base controller is because its helper methods rely on having thecontainer available which is not the case for controllers that are defined as services. It may be agood idea to extract common code into a service that's injected rather than place that code into abase controller that you extend. Both approaches are valid, exactly how you want to organize yourreusable code is up to you.
PDF brought to you bygenerated on October 23, 2014
Chapter 30: How to Define Controllers as Services | 114

Listing 31-1
Listing 31-2
Chapter 31
How to Optimize your DevelopmentEnvironment for Debugging
When you work on a Symfony project on your local machine, you should use the dev environment(app_dev.php front controller). This environment configuration is optimized for two main purposes:
• Give the developer accurate feedback whenever something goes wrong (web debug toolbar,nice exception pages, profiler, ...);
• Be as similar as possible as the production environment to avoid problems when deploying theproject.
Disabling the Bootstrap File and Class CachingAnd to make the production environment as fast as possible, Symfony creates big PHP files in yourcache containing the aggregation of PHP classes your project needs for every request. However, thisbehavior can confuse your IDE or your debugger. This recipe shows you how you can tweak this cachingmechanism to make it friendlier when you need to debug code that involves Symfony classes.
The app_dev.php front controller reads as follows by default:
12345678
// ...
$loader = require_once __DIR__.'/../app/bootstrap.php.cache';require_once __DIR__.'/../app/AppKernel.php';
$kernel = new AppKernel('dev', true);$kernel->loadClassCache();$request = Request::createFromGlobals();
To make your debugger happier, disable all PHP class caches by removing the call to loadClassCache()and by replacing the require statements like below:
PDF brought to you bygenerated on October 23, 2014
Chapter 31: How to Optimize your Development Environment for Debugging | 115

Listing 31-3
123456789
1011
// ...
// $loader = require_once __DIR__.'/../app/bootstrap.php.cache';$loader = require_once __DIR__.'/../app/autoload.php';require_once __DIR__.'/../app/AppKernel.php';
use Symfony\Component\HttpFoundation\Request;
$kernel = new AppKernel('dev', true);// $kernel->loadClassCache();$request = Request::createFromGlobals();
If you disable the PHP caches, don't forget to revert after your debugging session.
Some IDEs do not like the fact that some classes are stored in different locations. To avoid problems, youcan either tell your IDE to ignore the PHP cache files, or you can change the extension used by Symfonyfor these files:
1 $kernel->loadClassCache('classes', '.php.cache');
PDF brought to you bygenerated on October 23, 2014
Chapter 31: How to Optimize your Development Environment for Debugging | 116

Chapter 32
How to Deploy a Symfony Application
Deploying can be a complex and varied task depending on your setup and needs. This entrydoesn't try to explain everything, but rather offers the most common requirements and ideas fordeployment.
Symfony Deployment BasicsThe typical steps taken while deploying a Symfony application include:
1. Upload your modified code to the live server;2. Update your vendor dependencies (typically done via Composer, and may be done before
uploading);3. Running database migrations or similar tasks to update any changed data structures;4. Clearing (and perhaps more importantly, warming up) your cache.
A deployment may also include other things, such as:
• Tagging a particular version of your code as a release in your source control repository;• Creating a temporary staging area to build your updated setup "offline";• Running any tests available to ensure code and/or server stability;• Removal of any unnecessary files from web to keep your production environment clean;• Clearing of external cache systems (like Memcached1 or Redis2).
How to Deploy a Symfony ApplicationThere are several ways you can deploy a Symfony application.
Start with a few basic deployment strategies and build up from there.
1. http://memcached.org/
2. http://redis.io/
PDF brought to you bygenerated on October 23, 2014
Chapter 32: How to Deploy a Symfony Application | 117

Listing 32-1
Listing 32-2
Basic File Transfer
The most basic way of deploying an application is copying the files manually via ftp/scp (or similarmethod). This has its disadvantages as you lack control over the system as the upgrade progresses. Thismethod also requires you to take some manual steps after transferring the files (see Common Post-Deployment Tasks)
Using Source Control
If you're using source control (e.g. Git or SVN), you can simplify by having your live installation also be acopy of your repository. When you're ready to upgrade it is as simple as fetching the latest updates fromyour source control system.
This makes updating your files easier, but you still need to worry about manually taking other steps (seeCommon Post-Deployment Tasks).
Using Build Scripts and other Tools
There are also high-quality tools to help ease the pain of deployment. There are even a few tools whichhave been specifically tailored to the requirements of Symfony, and which take special care to ensure thateverything before, during, and after a deployment has gone correctly.
See The Tools for a list of tools that can help with deployment.
Common Post-Deployment TasksAfter deploying your actual source code, there are a number of common things you'll need to do:
A) Check Requirements
Check if your server meets the requirements by running:
1 $ php app/check.php
B) Configure your app/config/parameters.yml File
This file should be customized on each system. The method you use to deploy your source code shouldnot deploy this file. Instead, you should set it up manually (or via some build process) on your server(s).
C) Update your Vendors
Your vendors can be updated before transferring your source code (i.e. update the vendor/ directory,then transfer that with your source code) or afterwards on the server. Either way, just update yourvendors as you normally do:
1 $ php composer.phar install --no-dev --optimize-autoloader
The --optimize-autoloader flag makes Composer's autoloader more performant by buildinga "class map". The --no-dev flag ensures that development packages are not installed in theproduction environment.
PDF brought to you bygenerated on October 23, 2014
Chapter 32: How to Deploy a Symfony Application | 118

Listing 32-3
Listing 32-4
If you get a "class not found" error during this step, you may need to run exportSYMFONY_ENV=prod before running this command so that the post-install-cmd scripts run in theprod environment.
D) Clear your Symfony Cache
Make sure you clear (and warm-up) your Symfony cache:
1 $ php app/console cache:clear --env=prod --no-debug
E) Dump your Assetic Assets
If you're using Assetic, you'll also want to dump your assets:
1 $ php app/console assetic:dump --env=prod --no-debug
F) Other Things!
There may be lots of other things that you need to do, depending on your setup:
• Running any database migrations• Clearing your APC cache• Running assets:install (taken care of already in composer.phar install)• Add/edit CRON jobs• Pushing assets to a CDN• ...
Application Lifecycle: Continuous Integration, QA, etcWhile this entry covers the technical details of deploying, the full lifecycle of taking code fromdevelopment up to production may have a lot more steps (think deploying to staging, QA, running tests,etc).
The use of staging, testing, QA, continuous integration, database migrations and the capability to rollback in case of failure are all strongly advised. There are simple and more complex tools and one canmake the deployment as easy (or sophisticated) as your environment requires.
Don't forget that deploying your application also involves updating any dependency (typically viaComposer), migrating your database, clearing your cache and other potential things like pushing assetsto a CDN (see Common Post-Deployment Tasks).
The Tools
Capifony3:
This tool provides a specialized set of tools on top of Capistrano, tailored specifically to symfonyand Symfony projects.
3. http://capifony.org/
PDF brought to you bygenerated on October 23, 2014
Chapter 32: How to Deploy a Symfony Application | 119

sf2debpkg4:
This tool helps you build a native Debian package for your Symfony project.
Magallanes5:
This Capistrano-like deployment tool is built in PHP, and may be easier for PHP developers toextend for their needs.
Bundles:
There are many bundles that add deployment features6 directly into your Symfony console.
Basic scripting:
You can of course use shell, Ant7, or any other build tool to script the deploying of your project.
Platform as a Service Providers:
PaaS is a relatively new way to deploy your application. Typically a PaaS will use a singleconfiguration file in your project's root directory to determine how to build an environment on thefly that supports your software. One provider with confirmed Symfony support is PagodaBox8.
Looking for more? Talk to the community on the Symfony IRC channel9 #symfony (on freenode)for more information.
4. https://github.com/liip/sf2debpkg
5. https://github.com/andres-montanez/Magallanes
6. http://knpbundles.com/search?q=deploy
7. http://blog.sznapka.pl/deploying-symfony2-applications-with-ant
8. https://github.com/jmather/pagoda-symfony-sonata-distribution/blob/master/Boxfile
9. http://webchat.freenode.net/?channels=symfony
PDF brought to you bygenerated on October 23, 2014
Chapter 32: How to Deploy a Symfony Application | 120

Chapter 33
Deploying to Microsoft Azure Website Cloud
This step by step cookbook describes how to deploy a small Symfony web application to the MicrosoftAzure Website cloud platform. It will explain how to setup a new Azure website including configuring theright PHP version and global environment variables. The document also shows how to you can leverageGit and Composer to deploy your Symfony application to the cloud.
Setting up the Azure Website
To setup a new Microsoft Azure Website, first signup with Azure1 or sign in with your credentials. Onceyou're connected to your Azure Portal2 interface, scroll down to the bottom and select the New panel.On this panel, click Web Site and choose Custom Create:
Create a new custom Azure Website
Step 1: Create Web Site
Here, you will be prompted to fill in some basic information.
Setup the Azure Website
For the URL, enter the URL that you would like to use for your Symfony application, then pick Createnew web hosting plan in the region you want. By default, a free 20 MB SQL database is selected in thedatabase dropdown list. In this tutorial, the Symfony app will connect to a MySQL database. Pick theCreate a new MySQL database option in the dropdown list. You can keep the DefaultConnectionstring name. Finally, check the box Publish from source control to enable a Git repository and go tothe next step.
1. https://signup.live.com/signup.aspx
2. https://manage.windowsazure.com
PDF brought to you bygenerated on October 23, 2014
Chapter 33: Deploying to Microsoft Azure Website Cloud | 121

Step 2: New MySQL Database
On this step, you will be prompted to setup your MySQL database storage with a database name and aregion. The MySQL database storage is provided by Microsoft in partnership with ClearDB. Choose thesame region you selected for the hosting plan configuration in the previous step.
Setup the MySQL database
Agree to the terms and conditions and click on the right arrow to continue.
Step 3: Where Is your Source Code
Now, on the third step, select a Local Git repository item and click on the right arrow to configure yourAzure Website credentials.
Setup a local Git repository
Step 4: New Username and Password
Great! You're now on the final step. Create a username and a secure password: these will becomeessential identifiers to connect to the FTP server and also to push your application code to the Gitrepository.
Configure Azure Website credentials
Congratulations! Your Azure Website is now up and running. You can check it by browsing to theWebsite url you configured in the first step. You should see the following display in your web browser:
Azure Website is running
The Microsoft Azure portal also provides a complete control panel for the Azure Website.
Azure Website Control Panel
Your Azure Website is ready! But to run a Symfony site, you need to configure just a few additionalthings.
Configuring the Azure Website for SymfonyThis section of the tutorial details how to configure the correct version of PHP to run Symfony. It alsoshows you how to enable some mandatory PHP extensions and how to properly configure PHP for aproduction environment.
Configuring the latest PHP Runtime
Even though Symfony only requires PHP 5.3.3 to run, it's always recommended to use the most recentPHP version whenever possible. PHP 5.3 is no longer supported by the PHP core team, but you canupdate it easily in Azure.
To update your PHP version on Azure, go to the Configure tab of the control panel and select the versionyou want.
Enabling the most recent PHP runtime from Azure Website Control Panel
Click the Save button in the bottom bar to save your changes and restart the web server.
PDF brought to you bygenerated on October 23, 2014
Chapter 33: Deploying to Microsoft Azure Website Cloud | 122

Listing 33-1
Listing 33-2
Choosing a more recent PHP version can greatly improve runtime performance. PHP 5.5 ships witha new built-in PHP accelerator called OPCache that replaces APC. On an Azure Website, OPCacheis already enabled and there is no need to install and setup APC.
The following screenshot shows the output of a phpinfo3 script run from an Azure Website toverify that PHP 5.5 is running with OPCache enabled.
OPCache Configuration
Tweaking php.ini Configuration Settings
Microsoft Azure allows you to override the php.ini global configuration settings by creating a custom.user.ini file under the project root directory (site/wwwroot).
1234
; .user.iniexpose_php = Offmemory_limit = 256Mupload_max_filesize = 10M
None of these settings needs to be overridden. The default PHP configuration is already pretty good, sothis is just an example to show how you can easily tweak PHP internal settings by uploading your custom.ini file.
You can either manually create this file on your Azure Website FTP server under the site/wwwrootdirectory or deploy it with Git. You can get your FTP server credentials from the Azure Website Controlpanel under the Dashboard tab on the right sidebar. If you want to use Git, simply put your .user.inifile at the root of your local repository and push your commits to your Azure Website repository.
This cookbook has a section dedicated to explaining how to configure your Azure Website Gitrepository and how to push the commits to be deployed. See Deploying from Git. You can alsolearn more about configuring PHP internal settings on the official PHP MSDN documentation4
page.
Enabling the PHP intl Extension
This is the tricky part of the guide! At the time of writing this cookbook, Microsoft Azure Websiteprovided the intl extension, but it's not enabled by default. To enable the intl extension, there is noneed to upload any DLL files as the php_intl.dll file already exists on Azure. In fact, this file just needsto be moved into the custom website extension directory.
The Microsoft Azure team is currently working on enabling the intl PHP extension by default. Inthe near future, the following steps will no longer be necessary.
To get the php_intl.dll file under your site/wwwroot directory, simply access the online Kudu tool bybrowsing to the following url:
1 https://[your-website-name].scm.azurewebsites.net
3. http://php.net/manual/en/function.phpinfo.php
4. http://blogs.msdn.com/b/silverlining/archive/2012/07/10/configuring-php-in-windows-azure-websites-with-user-ini-files.aspx
PDF brought to you bygenerated on October 23, 2014
Chapter 33: Deploying to Microsoft Azure Website Cloud | 123

Listing 33-3
Listing 33-4
Kudu is a set of tools to manage your application. It comes with a file explorer, a command line prompt,a log stream and a configuration settings summary page. Of course, this section can only be accessed ifyou're logged in to your main Azure Website account.
The Kudu Panel
From the Kudu front page, click on the Debug Console navigation item in the main menu and chooseCMD. This should open the Debug Console page that shows a file explorer and a console promptbelow.
In the console prompt, type the following three commands to copy the original php_intl.dll extensionfile into a custom website ext/ directory. This new directory must be created under the main directorysite/wwwroot.
123
$ cd site\wwwroot$ mkdir ext$ copy "D:\Program Files (x86)\PHP\v5.5\ext\php_intl.dll" ext
The whole process and output should look like this:
Executing commands in the online Kudu Console prompt
To complete the activation of the php_intl.dll extension, you must tell Azure Website to load it fromthe newly created ext directory. This can be done by registering a global PHP_EXTENSIONS environmentvariable from the Configure tab of the main Azure Website Control panel.
In the app settings section, register the PHP_EXTENSIONS environment variable with the valueext\php_intl.dll as shown in the screenshot below:
Registering custom PHP extensions
Hit "save" to confirm your changes and restart the web server. The PHP Intl extension should now beavailable in your web server environment. The following screenshot of a phpinfo5 page verifies the intlextension is properly enabled:
Intl extension is enabled
Great! The PHP environment setup is now complete. Next, you'll learn how to configure the Gitrepository and push code to production. You'll also learn how to install and configure the Symfony appafter it's deployed.
Deploying from Git
First, make sure Git is correctly installed on your local machine using the following command in yourterminal:
1 $ git --version
Get your Git from the git-scm.com6 website and follow the instructions to install and configure iton your local machine.
5. http://php.net/manual/en/function.phpinfo.php
6. http://git-scm.com/download
PDF brought to you bygenerated on October 23, 2014
Chapter 33: Deploying to Microsoft Azure Website Cloud | 124

Listing 33-5
Listing 33-6
Listing 33-7
In the Azure Website Control panel, browse the Deployment tab to get the Git repository URL whereyou should push your code:
Git deployment panel
Now, you'll want to connect your local Symfony application with this remote Git repository on AzureWebsite. If your Symfony application is not yet stored with Git, you must first create a Git repository inyour Symfony application directory with the git init command and commit to it with the git commitcommand.
Also, make sure your Symfony repository has a .gitignore file at its root directory with at least thefollowing contents:
123456789
1011121314
/app/bootstrap.php.cache/app/cache/*/app/config/parameters.yml/app/logs/*!app/cache/.gitkeep!app/logs/.gitkeep/app/SymfonyRequirements.php/build//vendor//bin//composer.phar/web/app_dev.php/web/bundles//web/config.php
The .gitignore file asks Git not to track any of the files and directories that match these patterns. Thismeans these files won't be deployed to the Azure Website.
Now, from the command line on your local machine, type the following at the root of your Symfonyproject:
12
$ git remote add azure https://<username>@<your-website-name>.scm.azurewebsites.net:443/<your-website-name>.git$ git push azure master
Don't forget to replace the values enclosed by < and > with your custom settings displayed in theDeployment tab of your Azure Website panel. The git remote command connects the Azure Websiteremote Git repository and assigns an alias to it with the name azure. The second git push commandpushes all your commits to the remote master branch of your remote azure Git repository.
The deployment with Git should produce an output similar to the screenshot below:
Deploying files to the Git Azure Website repository
The code of the Symfony application has now been deployed to the Azure Website which you can browsefrom the file explorer of the Kudu application. You should see the app/, src/ and web/ directories underyour site/wwwroot directory on the Azure Website filesystem.
Configure the Symfony Application
PHP has been configured and your code has been pushed with Git. The last step is to configure theapplication and install the third party dependencies it requires that aren't tracked by Git. Switch back tothe online Console of the Kudu application and execute the following commands in it:
PDF brought to you bygenerated on October 23, 2014
Chapter 33: Deploying to Microsoft Azure Website Cloud | 125

Listing 33-8
Listing 33-9
123
$ cd site\wwwroot$ curl -sS https://getcomposer.org/installer | php$ php -d extension=php_intl.dll composer.phar install
The curl command retrieves and downloads the Composer command line tool and installs it at the rootof the site/wwwroot directory. Then, running the Composer install command downloads and installsall necessary third-party libraries.
This may take a while depending on the number of third-party dependencies you've configured in yourcomposer.json file.
The -d switch allows you to quickly override/add any php.ini settings. In this command, we areforcing PHP to use the intl extension, because it is not enabled by default in Azure Website atthe moment. Soon, this -d option will no longer be needed since Microsoft will enable the intlextension by default.
At the end of the composer install command, you will be prompted to fill in the values of someSymfony settings like database credentials, locale, mailer credentials, CSRF token protection, etc. Theseparameters come from the app/config/parameters.yml.dist file.
Configuring Symfony global parameters
The most important thing in this cookbook is to correctly setup your database settings. You can get yourMySQL database settings on the right sidebar of the Azure Website Dashboard panel. Simply click onthe View Connection Strings link to make them appear in a pop-in.
MySQL database settings
The displayed MySQL database settings should be something similar to the code below. Of course, eachvalue depends on what you've already configured.
1 Database=mysymfonyMySQL;Data Source=eu-cdbr-azure-north-c.cloudapp.net;UserId=bff2481a5b6074;Password=bdf50b42
Switch back to the console and answer the prompted questions and provide the following answers. Don'tforget to adapt the values below with your real values from the MySQL connection string.
1234567
database_driver: pdo_mysqldatabase_host: u-cdbr-azure-north-c.cloudapp.netdatabase_port: nulldatabase_name: mysymfonyMySQLdatabase_user: bff2481a5b6074database_password: bdf50b42// ...
Don't forget to answer all the questions. It's important to set a unique random string for the secretvariable. For the mailer configuration, Azure Website doesn't provide a built-in mailer service. Youshould consider configuring the host-name and credentials of some other third-party mailing service ifyour application needs to send emails.
Configuring Symfony
Your Symfony application is now configured and should be almost operational. The final step is to buildthe database schema. This can easily be done with the command line interface if you're using Doctrine.
PDF brought to you bygenerated on October 23, 2014
Chapter 33: Deploying to Microsoft Azure Website Cloud | 126

Listing 33-10
Listing 33-11
Listing 33-12
In the online Console tool of the Kudu application, run the following command to mount the tables intoyour MySQL database.
1 $ php app/console doctrine:schema:update --force
This command builds the tables and indexes for your MySQL database. If your Symfony application ismore complex than a basic Symfony Standard Edition, you may have additional commands to executefor setup (see How to Deploy a Symfony Application).
Make sure that your application is running by browsing the app.php front controller with your webbrowser and the following url:
1 http://<your-website-name>.azurewebsites.net/web/app.php
If Symfony is correctly installed, you should see the front page of your Symfony application showing.
Configure the Web Server
At this point, the Symfony application has been deployed and works perfectly on the Azure Website.However, the web folder is still part of the url, which you definitely don't want. But don't worry! You caneasily configure the web server to point to the web folder and remove the web in the URL (and guaranteethat nobody can access files outside of the web directory.)
To do this, create and deploy (see previous section about Git) the following web.config file. This filemust be located at the root of your project next to the composer.json file. This file is the Microsoft IISServer equivalent to the well-known .htaccess file from Apache. For a Symfony application, configureit with the following content:
123456789
10111213141516171819202122232425262728
<!-- web.config --><?xml version="1.0" encoding="UTF-8"?><configuration><system.webServer>
<rewrite><rules><clear /><rule name="BlockAccessToPublic" patternSyntax="Wildcard" stopProcessing="true">
<match url="*" /><conditions logicalGrouping="MatchAll" trackAllCaptures="false"><add input="{URL}" pattern="/web/*" />
</conditions><action type="CustomResponse" statusCode="403" statusReason="Forbidden: Access
is denied." statusDescription="You do not have permission to view this directory or pageusing the credentials that you supplied." />
</rule><rule name="RewriteAssetsToPublic" stopProcessing="true">
<match url="^(.*)(\.css|\.js|\.jpg|\.png|\.gif)$" /><conditions logicalGrouping="MatchAll" trackAllCaptures="false"></conditions><action type="Rewrite" url="web/{R:0}" />
</rule><rule name="RewriteRequestsToPublic" stopProcessing="true">
<match url="^(.*)$" /><conditions logicalGrouping="MatchAll" trackAllCaptures="false"></conditions><action type="Rewrite" url="web/app.php/{R:0}" />
</rule></rules>
PDF brought to you bygenerated on October 23, 2014
Chapter 33: Deploying to Microsoft Azure Website Cloud | 127

2930
</rewrite></system.webServer>
</configuration>
As you can see, the latest rule RewriteRequestsToPublic is responsible for rewriting any urls to theweb/app.php front controller which allows you to skip the web/ folder in the URL. The first rule calledBlockAccessToPublic matches all url patterns that contain the web/ folder and serves a 403 ForbiddenHTTP response instead. This example is based on Benjamin Eberlei's sample you can find on GitHub inthe SymfonyAzureEdition7 bundle.
Deploy this file under the site/wwwroot directory of the Azure Website and browse to your applicationwithout the web/app.php segment in the URL.
ConclusionNice work! You've now deployed your Symfony application to the Microsoft Azure Website Cloudplatform. You also saw that Symfony can be easily configured and executed on a Microsoft IIS web server.The process is simple and easy to implement. And as a bonus, Microsoft is continuing to reduce thenumber of steps needed so that deployment becomes even easier.
7. https://github.com/beberlei/symfony-azure-edition/
PDF brought to you bygenerated on October 23, 2014
Chapter 33: Deploying to Microsoft Azure Website Cloud | 128

Listing 34-1
Chapter 34
Deploying to Heroku Cloud
This step by step cookbook describes how to deploy a Symfony web application to the Heroku cloudplatform. Its contents are based on the original article1 published by Heroku.
Setting up
To setup a new Heroku website, first signup with Heroku2 or sign in with your credentials. Thendownload and install the Heroku Toolbelt3 on your local computer.
You can also check out the getting Started with PHP on Heroku4 guide to gain more familiarity with thespecifics of working with PHP applications on Heroku.
Preparing your Application
Deploying a Symfony application to Heroku doesn't require any change in its code, but it requires someminor tweaks to its configuration.
By default, the Symfony app will log into your application's app/log/ directory. This is not ideal asHeroku uses an ephemeral file system5. On Heroku, the best way to handle logging is using Logplex6. Andthe best way to send log data to Logplex is by writing to STDERR or STDOUT. Luckily, Symfony uses theexcellent Monolog library for logging. So, a new log destination is just a change to a config file away.
Open the app/config/config_prod.yml file, locate the monolog/handlers/nested section (or createit if it doesn't exist yet) and change the value of path from "%kernel.logs_dir%/%kernel.environment%.log" to "php://stderr":
12
# app/config/config_prod.ymlmonolog:
1. https://devcenter.heroku.com/articles/getting-started-with-symfony2
2. https://signup.heroku.com/signup/dc
3. https://devcenter.heroku.com/articles/getting-started-with-php#local-workstation-setup
4. https://devcenter.heroku.com/articles/getting-started-with-php
5. https://devcenter.heroku.com/articles/dynos#ephemeral-filesystem
6. https://devcenter.heroku.com/articles/logplex
PDF brought to you bygenerated on October 23, 2014
Chapter 34: Deploying to Heroku Cloud | 129

Listing 34-2
Listing 34-3
Listing 34-4
345678
# ...handlers:
# ...nested:
# ...path: "php://stderr"
Once the application is deployed, run heroku logs --tail to keep the stream of logs from Heroku openin your terminal.
Creating a new Application on HerokuTo create a new Heroku application that you can push to, use the CLI create command:
12345
$ heroku create
Creating mighty-hamlet-1981 in organization heroku... done, stack is cedarhttp://mighty-hamlet-1981.herokuapp.com/ | [email protected]:mighty-hamlet-1981.gitGit remote heroku added
You are now ready to deploy the application as explained in the next section.
Deploying your Application on HerokuTo deploy your application to Heroku, you must first create a Procfile, which tells Heroku whatcommand to use to launch the web server with the correct settings. After you've done that, you can simplygit push and you're done!
Creating a Procfile
By default, Heroku will launch an Apache web server together with PHP to serve applications. However,two special circumstances apply to Symfony applications:
1. The document root is in the web/ directory and not in the root directory of the application;2. The Composer bin-dir, where vendor binaries (and thus Heroku's own boot scripts) are
placed, is bin/ , and not the default vendor/bin.
Vendor binaries are usually installed to vendor/bin by Composer, but sometimes (e.g. whenrunning a Symfony Standard Edition project!), the location will be different. If in doubt, you canalways run composer config bin-dir to figure out the right location.
Create a new file called Procfile (without any extension) at the root directory of the application and addjust the following content:
1 web: bin/heroku-php-apache2 web/
If you prefer working on the command console, execute the following commands to create the Procfilefile and to add it to the repository:
PDF brought to you bygenerated on October 23, 2014
Chapter 34: Deploying to Heroku Cloud | 130
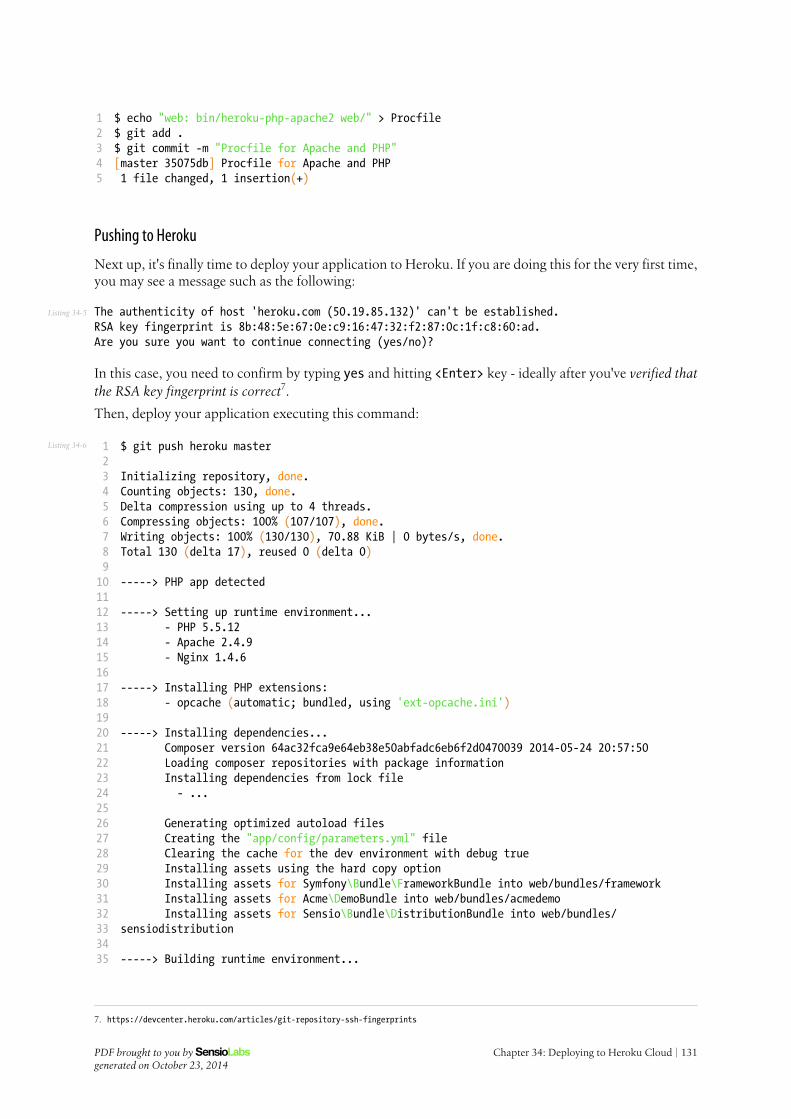
Listing 34-5
Listing 34-6
12345
$ echo "web: bin/heroku-php-apache2 web/" > Procfile$ git add .$ git commit -m "Procfile for Apache and PHP"[master 35075db] Procfile for Apache and PHP1 file changed, 1 insertion(+)
Pushing to Heroku
Next up, it's finally time to deploy your application to Heroku. If you are doing this for the very first time,you may see a message such as the following:
The authenticity of host 'heroku.com (50.19.85.132)' can't be established.RSA key fingerprint is 8b:48:5e:67:0e:c9:16:47:32:f2:87:0c:1f:c8:60:ad.Are you sure you want to continue connecting (yes/no)?
In this case, you need to confirm by typing yes and hitting <Enter> key - ideally after you've verified thatthe RSA key fingerprint is correct7.
Then, deploy your application executing this command:
123456789
1011121314151617181920212223242526272829303132333435
$ git push heroku master
Initializing repository, done.Counting objects: 130, done.Delta compression using up to 4 threads.Compressing objects: 100% (107/107), done.Writing objects: 100% (130/130), 70.88 KiB | 0 bytes/s, done.Total 130 (delta 17), reused 0 (delta 0)
-----> PHP app detected
-----> Setting up runtime environment...- PHP 5.5.12- Apache 2.4.9- Nginx 1.4.6
-----> Installing PHP extensions:- opcache (automatic; bundled, using 'ext-opcache.ini')
-----> Installing dependencies...Composer version 64ac32fca9e64eb38e50abfadc6eb6f2d0470039 2014-05-24 20:57:50Loading composer repositories with package informationInstalling dependencies from lock file
- ...
Generating optimized autoload filesCreating the "app/config/parameters.yml" fileClearing the cache for the dev environment with debug trueInstalling assets using the hard copy optionInstalling assets for Symfony\Bundle\FrameworkBundle into web/bundles/frameworkInstalling assets for Acme\DemoBundle into web/bundles/acmedemoInstalling assets for Sensio\Bundle\DistributionBundle into web/bundles/
sensiodistribution
-----> Building runtime environment...
7. https://devcenter.heroku.com/articles/git-repository-ssh-fingerprints
PDF brought to you bygenerated on October 23, 2014
Chapter 34: Deploying to Heroku Cloud | 131

Listing 34-7
36373839404142434445
-----> Discovering process typesProcfile declares types -> web
-----> Compressing... done, 61.5MB
-----> Launching... done, v3http://mighty-hamlet-1981.herokuapp.com/ deployed to Heroku
To [email protected]:mighty-hamlet-1981.git* [new branch] master -> master
And that's it! If you now open your browser, either by manually pointing it to the URL heroku creategave you, or by using the Heroku Toolbelt, the application will respond:
12
$ heroku openOpening mighty-hamlet-1981... done
You should be seeing your Symfony application in your browser.
PDF brought to you bygenerated on October 23, 2014
Chapter 34: Deploying to Heroku Cloud | 132

Listing 35-1
Chapter 35
How to Handle File Uploads with Doctrine
Handling file uploads with Doctrine entities is no different than handling any other file upload. In otherwords, you're free to move the file in your controller after handling a form submission. For examples ofhow to do this, see the file type reference page.
If you choose to, you can also integrate the file upload into your entity lifecycle (i.e. creation, update andremoval). In this case, as your entity is created, updated, and removed from Doctrine, the file uploadingand removal processing will take place automatically (without needing to do anything in your controller).
To make this work, you'll need to take care of a number of details, which will be covered in this cookbookentry.
Basic SetupFirst, create a simple Doctrine entity class to work with:
123456789
1011121314151617181920
// src/Acme/DemoBundle/Entity/Document.phpnamespace Acme\DemoBundle\Entity;
use Doctrine\ORM\Mapping as ORM;use Symfony\Component\Validator\Constraints as Assert;
/*** @ORM\Entity*/class Document{
/*** @ORM\Id* @ORM\Column(type="integer")* @ORM\GeneratedValue(strategy="AUTO")*/public $id;
/*** @ORM\Column(type="string", length=255)
PDF brought to you bygenerated on October 23, 2014
Chapter 35: How to Handle File Uploads with Doctrine | 133

Listing 35-2
21222324252627282930313233343536373839404142434445464748495051525354555657
* @Assert\NotBlank*/public $name;
/*** @ORM\Column(type="string", length=255, nullable=true)*/public $path;
public function getAbsolutePath(){
return null === $this->path? null: $this->getUploadRootDir().'/'.$this->path;
}
public function getWebPath(){
return null === $this->path? null: $this->getUploadDir().'/'.$this->path;
}
protected function getUploadRootDir(){
// the absolute directory path where uploaded// documents should be savedreturn __DIR__.'/../../../../web/'.$this->getUploadDir();
}
protected function getUploadDir(){
// get rid of the __DIR__ so it doesn't screw up// when displaying uploaded doc/image in the view.return 'uploads/documents';
}}
The Document entity has a name and it is associated with a file. The path property stores the relative pathto the file and is persisted to the database. The getAbsolutePath() is a convenience method that returnsthe absolute path to the file while the getWebPath() is a convenience method that returns the web path,which can be used in a template to link to the uploaded file.
If you have not done so already, you should probably read the file type documentation first tounderstand how the basic upload process works.
If you're using annotations to specify your validation rules (as shown in this example), be sure thatyou've enabled validation by annotation (see validation configuration).
To handle the actual file upload in the form, use a "virtual" file field. For example, if you're buildingyour form directly in a controller, it might look like this:
PDF brought to you bygenerated on October 23, 2014
Chapter 35: How to Handle File Uploads with Doctrine | 134

Listing 35-3
Listing 35-4
123456789
1011
public function uploadAction(){
// ...
$form = $this->createFormBuilder($document)->add('name')->add('file')->getForm();
// ...}
Next, create this property on your Document class and add some validation rules:
123456789
101112131415161718192021222324252627282930
use Symfony\Component\HttpFoundation\File\UploadedFile;
// ...class Document{
/*** @Assert\File(maxSize="6000000")*/private $file;
/*** Sets file.** @param UploadedFile $file*/public function setFile(UploadedFile $file = null){
$this->file = $file;}
/*** Get file.** @return UploadedFile*/public function getFile(){
return $this->file;}
}
123456
# src/Acme/DemoBundle/Resources/config/validation.ymlAcme\DemoBundle\Entity\Document:
properties:file:
- File:maxSize: 6000000
As you are using the File constraint, Symfony will automatically guess that the form field is a fileupload input. That's why you did not have to set it explicitly when creating the form above (->add('file')).
PDF brought to you bygenerated on October 23, 2014
Chapter 35: How to Handle File Uploads with Doctrine | 135

Listing 35-5
Listing 35-6
Listing 35-7
The following controller shows you how to handle the entire process:
123456789
101112131415161718192021222324252627282930
// ...use Acme\DemoBundle\Entity\Document;use Sensio\Bundle\FrameworkExtraBundle\Configuration\Template;use Symfony\Component\HttpFoundation\Request;// ...
/*** @Template()*/public function uploadAction(Request $request){
$document = new Document();$form = $this->createFormBuilder($document)
->add('name')->add('file')->getForm();
$form->handleRequest($request);
if ($form->isValid()) {$em = $this->getDoctrine()->getManager();
$em->persist($document);$em->flush();
return $this->redirect($this->generateUrl(...));}
return array('form' => $form->createView());}
The previous controller will automatically persist the Document entity with the submitted name, but itwill do nothing about the file and the path property will be blank.
An easy way to handle the file upload is to move it just before the entity is persisted and then set the pathproperty accordingly. Start by calling a new upload() method on the Document class, which you'll createin a moment to handle the file upload:
123456789
10
if ($form->isValid()) {$em = $this->getDoctrine()->getManager();
$document->upload();
$em->persist($document);$em->flush();
return $this->redirect(...);}
The upload() method will take advantage of the UploadedFile1 object, which is what's returned after afile field is submitted:
12
public function upload(){
1. http://api.symfony.com/2.5/Symfony/Component/HttpFoundation/File/UploadedFile.html
PDF brought to you bygenerated on October 23, 2014
Chapter 35: How to Handle File Uploads with Doctrine | 136

Listing 35-8
Listing 35-9
3456789
1011121314151617181920212223
// the file property can be empty if the field is not requiredif (null === $this->getFile()) {
return;}
// use the original file name here but you should// sanitize it at least to avoid any security issues
// move takes the target directory and then the// target filename to move to$this->getFile()->move(
$this->getUploadRootDir(),$this->getFile()->getClientOriginalName()
);
// set the path property to the filename where you've saved the file$this->path = $this->getFile()->getClientOriginalName();
// clean up the file property as you won't need it anymore$this->file = null;
}
Using Lifecycle Callbacks
Using lifecycle callbacks is a limited technique that has some drawbacks. If you want to remove thehardcoded __DIR__ reference inside the Document::getUploadRootDir() method, the best way isto start using explicit doctrine listeners. There you will be able to inject kernel parameters such askernel.root_dir to be able to build absolute paths.
Even if this implementation works, it suffers from a major flaw: What if there is a problem when theentity is persisted? The file would have already moved to its final location even though the entity's pathproperty didn't persist correctly.
To avoid these issues, you should change the implementation so that the database operation and themoving of the file become atomic: if there is a problem persisting the entity or if the file cannot be moved,then nothing should happen.
To do this, you need to move the file right as Doctrine persists the entity to the database. This can beaccomplished by hooking into an entity lifecycle callback:
1234567
/*** @ORM\Entity* @ORM\HasLifecycleCallbacks*/class Document{}
Next, refactor the Document class to take advantage of these callbacks:
123
use Symfony\Component\HttpFoundation\File\UploadedFile;
/**
PDF brought to you bygenerated on October 23, 2014
Chapter 35: How to Handle File Uploads with Doctrine | 137

456789
1011121314151617181920212223242526272829303132333435363738394041424344454647484950515253545556575859606162
* @ORM\Entity* @ORM\HasLifecycleCallbacks*/class Document{
private $temp;
/*** Sets file.** @param UploadedFile $file*/public function setFile(UploadedFile $file = null){
$this->file = $file;// check if we have an old image pathif (isset($this->path)) {
// store the old name to delete after the update$this->temp = $this->path;$this->path = null;
} else {$this->path = 'initial';
}}
/*** @ORM\PrePersist()* @ORM\PreUpdate()*/public function preUpload(){
if (null !== $this->getFile()) {// do whatever you want to generate a unique name$filename = sha1(uniqid(mt_rand(), true));$this->path = $filename.'.'.$this->getFile()->guessExtension();
}}
/*** @ORM\PostPersist()* @ORM\PostUpdate()*/public function upload(){
if (null === $this->getFile()) {return;
}
// if there is an error when moving the file, an exception will// be automatically thrown by move(). This will properly prevent// the entity from being persisted to the database on error$this->getFile()->move($this->getUploadRootDir(), $this->path);
// check if we have an old imageif (isset($this->temp)) {
// delete the old imageunlink($this->getUploadRootDir().'/'.$this->temp);// clear the temp image path$this->temp = null;
PDF brought to you bygenerated on October 23, 2014
Chapter 35: How to Handle File Uploads with Doctrine | 138
Listing 35-10
6364656667686970717273747576
}$this->file = null;
}
/*** @ORM\PostRemove()*/public function removeUpload(){
if ($file = $this->getAbsolutePath()) {unlink($file);
}}
}
If changes to your entity are handled by a Doctrine event listener or event subscriber, thepreUpdate() callback must notify Doctrine about the changes being done. For full reference onpreUpdate event restrictions, see preUpdate2 in the Doctrine Events documentation.
The class now does everything you need: it generates a unique filename before persisting, moves the fileafter persisting, and removes the file if the entity is ever deleted.
Now that the moving of the file is handled atomically by the entity, the call to $document->upload()should be removed from the controller:
12345678
if ($form->isValid()) {$em = $this->getDoctrine()->getManager();
$em->persist($document);$em->flush();
return $this->redirect(...);}
The @ORM\PrePersist() and @ORM\PostPersist() event callbacks are triggered before and afterthe entity is persisted to the database. On the other hand, the @ORM\PreUpdate() and@ORM\PostUpdate() event callbacks are called when the entity is updated.
The PreUpdate and PostUpdate callbacks are only triggered if there is a change in one of theentity's fields that are persisted. This means that, by default, if you modify only the $file property,these events will not be triggered, as the property itself is not directly persisted via Doctrine. Onesolution would be to use an updated field that's persisted to Doctrine, and to modify it manuallywhen changing the file.
Using the id as the FilenameIf you want to use the id as the name of the file, the implementation is slightly different as you need tosave the extension under the path property, instead of the actual filename:
2. http://docs.doctrine-project.org/projects/doctrine-orm/en/latest/reference/events.html#preupdate
PDF brought to you bygenerated on October 23, 2014
Chapter 35: How to Handle File Uploads with Doctrine | 139

Listing 35-11 123456789
1011121314151617181920212223242526272829303132333435363738394041424344454647484950515253545556575859
use Symfony\Component\HttpFoundation\File\UploadedFile;
/*** @ORM\Entity* @ORM\HasLifecycleCallbacks*/class Document{
private $temp;
/*** Sets file.** @param UploadedFile $file*/public function setFile(UploadedFile $file = null){
$this->file = $file;// check if we have an old image pathif (is_file($this->getAbsolutePath())) {
// store the old name to delete after the update$this->temp = $this->getAbsolutePath();
} else {$this->path = 'initial';
}}
/*** @ORM\PrePersist()* @ORM\PreUpdate()*/public function preUpload(){
if (null !== $this->getFile()) {$this->path = $this->getFile()->guessExtension();
}}
/*** @ORM\PostPersist()* @ORM\PostUpdate()*/public function upload(){
if (null === $this->getFile()) {return;
}
// check if we have an old imageif (isset($this->temp)) {
// delete the old imageunlink($this->temp);// clear the temp image path$this->temp = null;
}
// you must throw an exception here if the file cannot be moved// so that the entity is not persisted to the database// which the UploadedFile move() method does
PDF brought to you bygenerated on October 23, 2014
Chapter 35: How to Handle File Uploads with Doctrine | 140

606162636465666768697071727374757677787980818283848586878889909192
$this->getFile()->move($this->getUploadRootDir(),$this->id.'.'.$this->getFile()->guessExtension()
);
$this->setFile(null);}
/*** @ORM\PreRemove()*/public function storeFilenameForRemove(){
$this->temp = $this->getAbsolutePath();}
/*** @ORM\PostRemove()*/public function removeUpload(){
if (isset($this->temp)) {unlink($this->temp);
}}
public function getAbsolutePath(){
return null === $this->path? null: $this->getUploadRootDir().'/'.$this->id.'.'.$this->path;
}}
You'll notice in this case that you need to do a little bit more work in order to remove the file. Before it'sremoved, you must store the file path (since it depends on the id). Then, once the object has been fullyremoved from the database, you can safely delete the file (in PostRemove).
PDF brought to you bygenerated on October 23, 2014
Chapter 35: How to Handle File Uploads with Doctrine | 141

Chapter 36
How to use Doctrine Extensions:Timestampable, Sluggable, Translatable, etc.
Doctrine2 is very flexible, and the community has already created a series of useful Doctrine extensionsto help you with common entity-related tasks.
One library in particular - the DoctrineExtensions1 library - provides integration functionality forSluggable2, Translatable3, Timestampable4, Loggable5, Tree6 and Sortable7 behaviors.
The usage for each of these extensions is explained in that repository.
However, to install/activate each extension you must register and activate an Event Listener. To do this,you have two options:
1. Use the StofDoctrineExtensionsBundle8, which integrates the above library.2. Implement this services directly by following the documentation for integration with Symfony:
Install Gedmo Doctrine2 extensions in Symfony29
1. https://github.com/Atlantic18/DoctrineExtensions
2. https://github.com/Atlantic18/DoctrineExtensions/blob/master/doc/sluggable.md
3. https://github.com/Atlantic18/DoctrineExtensions/blob/master/doc/translatable.md
4. https://github.com/Atlantic18/DoctrineExtensions/blob/master/doc/timestampable.md
5. https://github.com/Atlantic18/DoctrineExtensions/blob/master/doc/loggable.md
6. https://github.com/Atlantic18/DoctrineExtensions/blob/master/doc/tree.md
7. https://github.com/Atlantic18/DoctrineExtensions/blob/master/doc/sortable.md
8. https://github.com/stof/StofDoctrineExtensionsBundle
9. https://github.com/Atlantic18/DoctrineExtensions/blob/master/doc/symfony2.md
PDF brought to you bygenerated on October 23, 2014
Chapter 36: How to use Doctrine Extensions: Timestampable, Sluggable, Translatable, etc. | 142

Listing 37-1
Chapter 37
How to Register Event Listeners andSubscribers
Doctrine packages a rich event system that fires events when almost anything happens inside the system.For you, this means that you can create arbitrary services and tell Doctrine to notify those objectswhenever a certain action (e.g. prePersist) happens within Doctrine. This could be useful, for example,to create an independent search index whenever an object in your database is saved.
Doctrine defines two types of objects that can listen to Doctrine events: listeners and subscribers. Bothare very similar, but listeners are a bit more straightforward. For more, see The Event System1 onDoctrine's website.
The Doctrine website also explains all existing events that can be listened to.
Configuring the Listener/SubscriberTo register a service to act as an event listener or subscriber you just have to tag it with the appropriatename. Depending on your use-case, you can hook a listener into every DBAL connection and ORM entitymanager or just into one specific DBAL connection and all the entity managers that use this connection.
123456789
101112
doctrine:dbal:
default_connection: defaultconnections:
default:driver: pdo_sqlitememory: true
services:my.listener:
class: Acme\SearchBundle\EventListener\SearchIndexertags:
1. http://docs.doctrine-project.org/projects/doctrine-orm/en/latest/reference/events.html
PDF brought to you bygenerated on October 23, 2014
Chapter 37: How to Register Event Listeners and Subscribers | 143

Listing 37-2
131415161718192021
- { name: doctrine.event_listener, event: postPersist }my.listener2:
class: Acme\SearchBundle\EventListener\SearchIndexer2tags:
- { name: doctrine.event_listener, event: postPersist, connection: default }my.subscriber:
class: Acme\SearchBundle\EventListener\SearchIndexerSubscribertags:
- { name: doctrine.event_subscriber, connection: default }
Creating the Listener ClassIn the previous example, a service my.listener was configured as a Doctrine listener on the eventpostPersist. The class behind that service must have a postPersist method, which will be called whenthe event is dispatched:
123456789
10111213141516171819
// src/Acme/SearchBundle/EventListener/SearchIndexer.phpnamespace Acme\SearchBundle\EventListener;
use Doctrine\ORM\Event\LifecycleEventArgs;use Acme\StoreBundle\Entity\Product;
class SearchIndexer{
public function postPersist(LifecycleEventArgs $args){
$entity = $args->getEntity();$entityManager = $args->getEntityManager();
// perhaps you only want to act on some "Product" entityif ($entity instanceof Product) {
// ... do something with the Product}
}}
In each event, you have access to a LifecycleEventArgs object, which gives you access to both the entityobject of the event and the entity manager itself.
One important thing to notice is that a listener will be listening for all entities in your application. So,if you're interested in only handling a specific type of entity (e.g. a Product entity but not a BlogPostentity), you should check for the entity's class type in your method (as shown above).
In Doctrine 2.4, a feature called Entity Listeners was introduced. It is a lifecycle listener class usedfor an entity. You can read about it in the Doctrine Documentation2.
Creating the Subscriber ClassA Doctrine event subscriber must implement the Doctrine\Common\EventSubscriber interface andhave an event method for each event it subscribes to:
2. http://docs.doctrine-project.org/projects/doctrine-orm/en/latest/reference/events.html#entity-listeners
PDF brought to you bygenerated on October 23, 2014
Chapter 37: How to Register Event Listeners and Subscribers | 144

Listing 37-3 123456789
101112131415161718192021222324252627282930313233343536373839
// src/Acme/SearchBundle/EventListener/SearchIndexerSubscriber.phpnamespace Acme\SearchBundle\EventListener;
use Doctrine\Common\EventSubscriber;use Doctrine\ORM\Event\LifecycleEventArgs;// for Doctrine 2.4: Doctrine\Common\Persistence\Event\LifecycleEventArgs;use Acme\StoreBundle\Entity\Product;
class SearchIndexerSubscriber implements EventSubscriber{
public function getSubscribedEvents(){
return array('postPersist','postUpdate',
);}
public function postUpdate(LifecycleEventArgs $args){
$this->index($args);}
public function postPersist(LifecycleEventArgs $args){
$this->index($args);}
public function index(LifecycleEventArgs $args){
$entity = $args->getEntity();$entityManager = $args->getEntityManager();
// perhaps you only want to act on some "Product" entityif ($entity instanceof Product) {
// ... do something with the Product}
}}
Doctrine event subscribers can not return a flexible array of methods to call for the events like theSymfony event subscriber can. Doctrine event subscribers must return a simple array of the eventnames they subscribe to. Doctrine will then expect methods on the subscriber with the same nameas each subscribed event, just as when using an event listener.
For a full reference, see chapter The Event System3 in the Doctrine documentation.
3. http://docs.doctrine-project.org/projects/doctrine-orm/en/latest/reference/events.html
PDF brought to you bygenerated on October 23, 2014
Chapter 37: How to Register Event Listeners and Subscribers | 145

Listing 38-1
Listing 38-2
Chapter 38
How to Use Doctrine's DBAL Layer
This article is about Doctrine DBAL's layer. Typically, you'll work with the higher level DoctrineORM layer, which simply uses the DBAL behind the scenes to actually communicate with thedatabase. To read more about the Doctrine ORM, see "Databases and Doctrine".
The Doctrine1 Database Abstraction Layer (DBAL) is an abstraction layer that sits on top of PDO2 andoffers an intuitive and flexible API for communicating with the most popular relational databases. Inother words, the DBAL library makes it easy to execute queries and perform other database actions.
Read the official Doctrine DBAL Documentation3 to learn all the details and capabilities ofDoctrine's DBAL library.
To get started, configure the database connection parameters:
12345678
# app/config/config.ymldoctrine:
dbal:driver: pdo_mysqldbname: Symfonyuser: rootpassword: nullcharset: UTF8
For full DBAL configuration options, or to learn how to configure multiple connections, see DoctrineDBAL Configuration.
You can then access the Doctrine DBAL connection by accessing the database_connection service:
1. http://www.doctrine-project.org
2. http://www.php.net/pdo
3. http://docs.doctrine-project.org/projects/doctrine-dbal/en/latest/index.html
PDF brought to you bygenerated on October 23, 2014
Chapter 38: How to Use Doctrine's DBAL Layer | 146

Listing 38-3
Listing 38-4
123456789
10
class UserController extends Controller{
public function indexAction(){
$conn = $this->get('database_connection');$users = $conn->fetchAll('SELECT * FROM users');
// ...}
}
Registering custom Mapping TypesYou can register custom mapping types through Symfony's configuration. They will be added to allconfigured connections. For more information on custom mapping types, read Doctrine's CustomMapping Types4 section of their documentation.
123456
# app/config/config.ymldoctrine:
dbal:types:
custom_first: Acme\HelloBundle\Type\CustomFirstcustom_second: Acme\HelloBundle\Type\CustomSecond
Registering custom Mapping Types in the SchemaToolThe SchemaTool is used to inspect the database to compare the schema. To achieve this task, it needs toknow which mapping type needs to be used for each database types. Registering new ones can be donethrough the configuration.
Now, map the ENUM type (not supported by DBAL by default) to the string mapping type:
12345
# app/config/config.ymldoctrine:
dbal:mapping_types:
enum: string
4. http://docs.doctrine-project.org/projects/doctrine-dbal/en/latest/reference/types.html#custom-mapping-types
PDF brought to you bygenerated on October 23, 2014
Chapter 38: How to Use Doctrine's DBAL Layer | 147

Listing 39-1
Chapter 39
How to Generate Entities from an ExistingDatabase
When starting work on a brand new project that uses a database, two different situations comesnaturally. In most cases, the database model is designed and built from scratch. Sometimes, however,you'll start with an existing and probably unchangeable database model. Fortunately, Doctrine comeswith a bunch of tools to help generate model classes from your existing database.
As the Doctrine tools documentation1 says, reverse engineering is a one-time process to get startedon a project. Doctrine is able to convert approximately 70-80% of the necessary mappinginformation based on fields, indexes and foreign key constraints. Doctrine can't discover inverseassociations, inheritance types, entities with foreign keys as primary keys or semantical operationson associations such as cascade or lifecycle events. Some additional work on the generated entitieswill be necessary afterwards to design each to fit your domain model specificities.
This tutorial assumes you're using a simple blog application with the following two tables: blog_postand blog_comment. A comment record is linked to a post record thanks to a foreign key constraint.
123456789
1011121314
CREATE TABLE `blog_post` (`id` bigint(20) NOT NULL AUTO_INCREMENT,`title` varchar(100) COLLATE utf8_unicode_ci NOT NULL,`content` longtext COLLATE utf8_unicode_ci NOT NULL,`created_at` datetime NOT NULL,PRIMARY KEY (`id`)
) ENGINE=InnoDB AUTO_INCREMENT=1 DEFAULT CHARSET=utf8 COLLATE=utf8_unicode_ci;
CREATE TABLE `blog_comment` (`id` bigint(20) NOT NULL AUTO_INCREMENT,`post_id` bigint(20) NOT NULL,`author` varchar(20) COLLATE utf8_unicode_ci NOT NULL,`content` longtext COLLATE utf8_unicode_ci NOT NULL,`created_at` datetime NOT NULL,
1. http://docs.doctrine-project.org/projects/doctrine-orm/en/latest/reference/tools.html#reverse-engineering
PDF brought to you bygenerated on October 23, 2014
Chapter 39: How to Generate Entities from an Existing Database | 148

Listing 39-2
Listing 39-3
Listing 39-4
15161718
PRIMARY KEY (`id`),KEY `blog_comment_post_id_idx` (`post_id`),CONSTRAINT `blog_post_id` FOREIGN KEY (`post_id`) REFERENCES `blog_post` (`id`) ON
DELETE CASCADE) ENGINE=InnoDB AUTO_INCREMENT=1 DEFAULT CHARSET=utf8 COLLATE=utf8_unicode_ci;
Before diving into the recipe, be sure your database connection parameters are correctly setup in theapp/config/parameters.yml file (or wherever your database configuration is kept) and that you haveinitialized a bundle that will host your future entity class. In this tutorial it's assumed that anAcmeBlogBundle exists and is located under the src/Acme/BlogBundle folder.
The first step towards building entity classes from an existing database is to ask Doctrine to introspectthe database and generate the corresponding metadata files. Metadata files describe the entity class togenerate based on table fields.
1 $ php app/console doctrine:mapping:import --force AcmeBlogBundle xml
This command line tool asks Doctrine to introspect the database and generate the XML metadata filesunder the src/Acme/BlogBundle/Resources/config/doctrine folder of your bundle. This generatestwo files: BlogPost.orm.xml and BlogComment.orm.xml.
It's also possible to generate the metadata files in YAML format by changing the last argument toyml.
The generated BlogPost.orm.xml metadata file looks as follows:
123456789
1011
<?xml version="1.0" encoding="utf-8"?><doctrine-mapping xmlns="http://doctrine-project.org/schemas/orm/doctrine-mapping"xmlns:xsi="http://www.w3.org/2001/XMLSchema-instance"xsi:schemaLocation="http://doctrine-project.org/schemas/orm/doctrine-mappinghttp://doctrine-project.org/schemas/orm/doctrine-mapping.xsd"><entity name="Acme\BlogBundle\Entity\BlogPost" table="blog_post">
<id name="id" type="bigint" column="id"><generator strategy="IDENTITY"/>
</id><field name="title" type="string" column="title" length="100" nullable="false"/><field name="content" type="text" column="content" nullable="false"/><field name="createdAt" type="datetime" column="created_at" nullable="false"/>
</entity></doctrine-mapping>
Once the metadata files are generated, you can ask Doctrine to build related entity classes by executingthe following two commands.
12
$ php app/console doctrine:mapping:convert annotation ./src$ php app/console doctrine:generate:entities AcmeBlogBundle
The first command generates entity classes with annotation mappings. But if you want to use YAML orXML mapping instead of annotations, you should execute the second command only.
If you want to use annotations, you can safely delete the XML (or YAML) files after running thesetwo commands.
PDF brought to you bygenerated on October 23, 2014
Chapter 39: How to Generate Entities from an Existing Database | 149

Listing 39-5
For example, the newly created BlogComment entity class looks as follow:
123456789
101112131415161718192021222324252627282930313233343536373839404142434445464748495051
// src/Acme/BlogBundle/Entity/BlogComment.phpnamespace Acme\BlogBundle\Entity;
use Doctrine\ORM\Mapping as ORM;
/*** Acme\BlogBundle\Entity\BlogComment** @ORM\Table(name="blog_comment")* @ORM\Entity*/class BlogComment{
/*** @var integer $id** @ORM\Column(name="id", type="bigint")* @ORM\Id* @ORM\GeneratedValue(strategy="IDENTITY")*/private $id;
/*** @var string $author** @ORM\Column(name="author", type="string", length=100, nullable=false)*/private $author;
/*** @var text $content** @ORM\Column(name="content", type="text", nullable=false)*/private $content;
/*** @var datetime $createdAt** @ORM\Column(name="created_at", type="datetime", nullable=false)*/private $createdAt;
/*** @var BlogPost** @ORM\ManyToOne(targetEntity="BlogPost")* @ORM\JoinColumn(name="post_id", referencedColumnName="id")*/private $post;
}
As you can see, Doctrine converts all table fields to pure private and annotated class properties. The mostimpressive thing is that it also discovered the relationship with the BlogPost entity class based on theforeign key constraint. Consequently, you can find a private $post property mapped with a BlogPostentity in the BlogComment entity class.
PDF brought to you bygenerated on October 23, 2014
Chapter 39: How to Generate Entities from an Existing Database | 150

If you want to have a one-to-many relationship, you will need to add it manually into the entityor to the generated XML or YAML files. Add a section on the specific entities for one-to-manydefining the inversedBy and the mappedBy pieces.
The generated entities are now ready to be used. Have fun!
PDF brought to you bygenerated on October 23, 2014
Chapter 39: How to Generate Entities from an Existing Database | 151

Listing 40-1
Chapter 40
How to Work with multiple Entity Managersand Connections
You can use multiple Doctrine entity managers or connections in a Symfony application. This isnecessary if you are using different databases or even vendors with entirely different sets of entities. Inother words, one entity manager that connects to one database will handle some entities while anotherentity manager that connects to another database might handle the rest.
Using multiple entity managers is pretty easy, but more advanced and not usually required. Be sureyou actually need multiple entity managers before adding in this layer of complexity.
The following configuration code shows how you can configure two entity managers:
123456789
1011121314151617181920
doctrine:dbal:
default_connection: defaultconnections:
default:driver: "%database_driver%"host: "%database_host%"port: "%database_port%"dbname: "%database_name%"user: "%database_user%"password: "%database_password%"charset: UTF8
customer:driver: "%database_driver2%"host: "%database_host2%"port: "%database_port2%"dbname: "%database_name2%"user: "%database_user2%"password: "%database_password2%"charset: UTF8
PDF brought to you bygenerated on October 23, 2014
Chapter 40: How to Work with multiple Entity Managers and Connections | 152

Listing 40-2
Listing 40-3
Listing 40-4
21222324252627282930313233
orm:default_entity_manager: defaultentity_managers:
default:connection: defaultmappings:
AcmeDemoBundle: ~AcmeStoreBundle: ~
customer:connection: customermappings:
AcmeCustomerBundle: ~
In this case, you've defined two entity managers and called them default and customer. The defaultentity manager manages entities in the AcmeDemoBundle and AcmeStoreBundle, while the customerentity manager manages entities in the AcmeCustomerBundle. You've also defined two connections, onefor each entity manager.
When working with multiple connections and entity managers, you should be explicit about whichconfiguration you want. If you do omit the name of the connection or entity manager, the default(i.e. default) is used.
When working with multiple connections to create your databases:
12345
# Play only with "default" connection$ php app/console doctrine:database:create
# Play only with "customer" connection$ php app/console doctrine:database:create --connection=customer
When working with multiple entity managers to update your schema:
12345
# Play only with "default" mappings$ php app/console doctrine:schema:update --force
# Play only with "customer" mappings$ php app/console doctrine:schema:update --force --em=customer
If you do omit the entity manager's name when asking for it, the default entity manager (i.e. default) isreturned:
123456789
101112
class UserController extends Controller{
public function indexAction(){
// All three return the "default" entity manager$em = $this->get('doctrine')->getManager();$em = $this->get('doctrine')->getManager('default');$em = $this->get('doctrine.orm.default_entity_manager');
// Both of these return the "customer" entity manager$customerEm = $this->get('doctrine')->getManager('customer');$customerEm = $this->get('doctrine.orm.customer_entity_manager');
PDF brought to you bygenerated on October 23, 2014
Chapter 40: How to Work with multiple Entity Managers and Connections | 153

Listing 40-5
1314
}}
You can now use Doctrine just as you did before - using the default entity manager to persist and fetchentities that it manages and the customer entity manager to persist and fetch its entities.
The same applies to repository calls:
123456789
1011121314151617181920212223
class UserController extends Controller{
public function indexAction(){
// Retrieves a repository managed by the "default" em$products = $this->get('doctrine')
->getRepository('AcmeStoreBundle:Product')->findAll()
;
// Explicit way to deal with the "default" em$products = $this->get('doctrine')
->getRepository('AcmeStoreBundle:Product', 'default')->findAll()
;
// Retrieves a repository managed by the "customer" em$customers = $this->get('doctrine')
->getRepository('AcmeCustomerBundle:Customer', 'customer')->findAll()
;}
}
PDF brought to you bygenerated on October 23, 2014
Chapter 40: How to Work with multiple Entity Managers and Connections | 154

Listing 41-1
Chapter 41
How to Register custom DQL Functions
Doctrine allows you to specify custom DQL functions. For more information on this topic, readDoctrine's cookbook article "DQL User Defined Functions1".
In Symfony, you can register your custom DQL functions as follows:
123456789
101112
# app/config/config.ymldoctrine:
orm:# ...dql:
string_functions:test_string: Acme\HelloBundle\DQL\StringFunctionsecond_string: Acme\HelloBundle\DQL\SecondStringFunction
numeric_functions:test_numeric: Acme\HelloBundle\DQL\NumericFunction
datetime_functions:test_datetime: Acme\HelloBundle\DQL\DatetimeFunction
1. http://docs.doctrine-project.org/projects/doctrine-orm/en/latest/cookbook/dql-user-defined-functions.html
PDF brought to you bygenerated on October 23, 2014
Chapter 41: How to Register custom DQL Functions | 155

Listing 42-1
Chapter 42
How to Define Relationships with AbstractClasses and Interfaces
One of the goals of bundles is to create discreet bundles of functionality that do not have many (if any)dependencies, allowing you to use that functionality in other applications without including unnecessaryitems.
Doctrine 2.2 includes a new utility called the ResolveTargetEntityListener, that functions byintercepting certain calls inside Doctrine and rewriting targetEntity parameters in your metadatamapping at runtime. It means that in your bundle you are able to use an interface or abstract class in yourmappings and expect correct mapping to a concrete entity at runtime.
This functionality allows you to define relationships between different entities without making them harddependencies.
BackgroundSuppose you have an InvoiceBundle which provides invoicing functionality and a CustomerBundle thatcontains customer management tools. You want to keep these separated, because they can be used inother systems without each other, but for your application you want to use them together.
In this case, you have an Invoice entity with a relationship to a non-existent object, anInvoiceSubjectInterface. The goal is to get the ResolveTargetEntityListener to replace anymention of the interface with a real object that implements that interface.
Set upThis article uses the following two basic entities (which are incomplete for brevity) to explain how to setup and use the ResolveTargetEntityListener.
A Customer entity:
PDF brought to you bygenerated on October 23, 2014
Chapter 42: How to Define Relationships with Abstract Classes and Interfaces | 156

Listing 42-2
Listing 42-3
123456789
1011121314151617
// src/Acme/AppBundle/Entity/Customer.php
namespace Acme\AppBundle\Entity;
use Doctrine\ORM\Mapping as ORM;use Acme\CustomerBundle\Entity\Customer as BaseCustomer;use Acme\InvoiceBundle\Model\InvoiceSubjectInterface;
/*** @ORM\Entity* @ORM\Table(name="customer")*/class Customer extends BaseCustomer implements InvoiceSubjectInterface{
// In this example, any methods defined in the InvoiceSubjectInterface// are already implemented in the BaseCustomer
}
An Invoice entity:
123456789
101112131415161718192021
// src/Acme/InvoiceBundle/Entity/Invoice.php
namespace Acme\InvoiceBundle\Entity;
use Doctrine\ORM\Mapping AS ORM;use Acme\InvoiceBundle\Model\InvoiceSubjectInterface;
/*** Represents an Invoice.** @ORM\Entity* @ORM\Table(name="invoice")*/class Invoice{
/*** @ORM\ManyToOne(targetEntity="Acme\InvoiceBundle\Model\InvoiceSubjectInterface")* @var InvoiceSubjectInterface*/protected $subject;
}
An InvoiceSubjectInterface:
123456789
10111213
// src/Acme/InvoiceBundle/Model/InvoiceSubjectInterface.php
namespace Acme\InvoiceBundle\Model;
/*** An interface that the invoice Subject object should implement.* In most circumstances, only a single object should implement* this interface as the ResolveTargetEntityListener can only* change the target to a single object.*/interface InvoiceSubjectInterface{
// List any additional methods that your InvoiceBundle
PDF brought to you bygenerated on October 23, 2014
Chapter 42: How to Define Relationships with Abstract Classes and Interfaces | 157

Listing 42-4
1415161718192021
// will need to access on the subject so that you can// be sure that you have access to those methods.
/*** @return string*/public function getName();
}
Next, you need to configure the listener, which tells the DoctrineBundle about the replacement:
1234567
# app/config/config.ymldoctrine:
# ...orm:
# ...resolve_target_entities:
Acme\InvoiceBundle\Model\InvoiceSubjectInterface: Acme\AppBundle\Entity\Customer
Final ThoughtsWith the ResolveTargetEntityListener, you are able to decouple your bundles, keeping them usableby themselves, but still being able to define relationships between different objects. By using this method,your bundles will end up being easier to maintain independently.
PDF brought to you bygenerated on October 23, 2014
Chapter 42: How to Define Relationships with Abstract Classes and Interfaces | 158

Listing 43-1
Chapter 43
How to Provide Model Classes for severalDoctrine Implementations
When building a bundle that could be used not only with Doctrine ORM but also the CouchDB ODM,MongoDB ODM or PHPCR ODM, you should still only write one model class. The Doctrine bundlesprovide a compiler pass to register the mappings for your model classes.
For non-reusable bundles, the easiest option is to put your model classes in the default locations:Entity for the Doctrine ORM or Document for one of the ODMs. For reusable bundles, rather thanduplicate model classes just to get the auto mapping, use the compiler pass.
New in version 2.3: The base mapping compiler pass was introduced in Symfony 2.3. The Doctrinebundles support it from DoctrineBundle >= 1.2.1, MongoDBBundle >= 3.0.0, PHPCRBundle>= 1.0.0-alpha2 and the (unversioned) CouchDBBundle supports the compiler pass since theCouchDB Mapping Compiler Pass pull request1 was merged.
If you want your bundle to support older versions of Symfony and Doctrine, you can provide a copyof the compiler pass in your bundle. See for example the FOSUserBundle mapping configuration2
addRegisterMappingsPass.
In your bundle class, write the following code to register the compiler pass. This one is written for theFOSUserBundle, so parts of it will need to be adapted for your case:
1234567
use Doctrine\Bundle\DoctrineBundle\DependencyInjection\Compiler\DoctrineOrmMappingsPass;use Doctrine\Bundle\MongoDBBundle\DependencyInjection\Compiler\DoctrineMongoDBMappingsPass;use Doctrine\Bundle\CouchDBBundle\DependencyInjection\Compiler\DoctrineCouchDBMappingsPass;use Doctrine\Bundle\PHPCRBundle\DependencyInjection\Compiler\DoctrinePhpcrMappingsPass;
class FOSUserBundle extends Bundle{
1. https://github.com/doctrine/DoctrineCouchDBBundle/pull/27
2. https://github.com/FriendsOfSymfony/FOSUserBundle/blob/master/FOSUserBundle.php
PDF brought to you bygenerated on October 23, 2014
Chapter 43: How to Provide Model Classes for several Doctrine Implementations | 159

89
10111213141516171819202122232425262728293031323334353637383940414243444546474849505152535455565758
public function build(ContainerBuilder $container){
parent::build($container);// ...
$modelDir = realpath(__DIR__.'/Resources/config/doctrine/model');$mappings = array(
$modelDir => 'FOS\UserBundle\Model',);
$ormCompilerClass ='Doctrine\Bundle\DoctrineBundle\DependencyInjection\Compiler\DoctrineOrmMappingsPass';
if (class_exists($ormCompilerClass)) {$container->addCompilerPass(
DoctrineOrmMappingsPass::createXmlMappingDriver($mappings,array('fos_user.model_manager_name'),'fos_user.backend_type_orm'
));}
$mongoCompilerClass ='Doctrine\Bundle\MongoDBBundle\DependencyInjection\Compiler\DoctrineMongoDBMappingsPass';
if (class_exists($mongoCompilerClass)) {$container->addCompilerPass(
DoctrineMongoDBMappingsPass::createXmlMappingDriver($mappings,array('fos_user.model_manager_name'),'fos_user.backend_type_mongodb'
));}
$couchCompilerClass ='Doctrine\Bundle\CouchDBBundle\DependencyInjection\Compiler\DoctrineCouchDBMappingsPass';
if (class_exists($couchCompilerClass)) {$container->addCompilerPass(
DoctrineCouchDBMappingsPass::createXmlMappingDriver($mappings,array('fos_user.model_manager_name'),'fos_user.backend_type_couchdb'
));}
$phpcrCompilerClass ='Doctrine\Bundle\PHPCRBundle\DependencyInjection\Compiler\DoctrinePhpcrMappingsPass';
if (class_exists($phpcrCompilerClass)) {$container->addCompilerPass(
DoctrinePhpcrMappingsPass::createXmlMappingDriver($mappings,array('fos_user.model_manager_name'),'fos_user.backend_type_phpcr'
));}
}}
PDF brought to you bygenerated on October 23, 2014
Chapter 43: How to Provide Model Classes for several Doctrine Implementations | 160

Listing 43-2
Note the class_exists3 check. This is crucial, as you do not want your bundle to have a harddependency on all Doctrine bundles but let the user decide which to use.
The compiler pass provides factory methods for all drivers provided by Doctrine: Annotations, XML,Yaml, PHP and StaticPHP. The arguments are:
• a map/hash of absolute directory path to namespace;• an array of container parameters that your bundle uses to specify the name of the Doctrine
manager that it is using. In the above example, the FOSUserBundle stores the manager namethat's being used under the fos_user.model_manager_name parameter. The compiler pass willappend the parameter Doctrine is using to specify the name of the default manager. The firstparameter found is used and the mappings are registered with that manager;
• an optional container parameter name that will be used by the compiler pass to determine ifthis Doctrine type is used at all. This is relevant if your user has more than one type of Doctrinebundle installed, but your bundle is only used with one type of Doctrine.
The factory method is using the SymfonyFileLocator of Doctrine, meaning it will only see XMLand YML mapping files if they do not contain the full namespace as the filename. This is by design:the SymfonyFileLocator simplifies things by assuming the files are just the "short" version of theclass as their filename (e.g. BlogPost.orm.xml)
If you also need to map a base class, you can register a compiler pass with theDefaultFileLocator like this. This code is simply taken from the DoctrineOrmMappingsPass andadapted to use the DefaultFileLocator instead of the SymfonyFileLocator:
123456789
10111213
private function buildMappingCompilerPass(){
$arguments = array(array(realpath(__DIR__ . '/Resources/config/doctrine-base')),'.orm.xml');
$locator = newDefinition('Doctrine\Common\Persistence\Mapping\Driver\DefaultFileLocator',$arguments);
$driver = new Definition('Doctrine\ORM\Mapping\Driver\XmlDriver',array($locator));
return new DoctrineOrmMappingsPass($driver,array('Full\Namespace'),array('your_bundle.manager_name'),'your_bundle.orm_enabled'
);}
Now place your mapping file into /Resources/config/doctrine-base with the fully qualifiedclass name, separated by . instead of \, for example Other.Namespace.Model.Name.orm.xml. Youmay not mix the two as otherwise the SymfonyFileLocator will get confused.
Adjust accordingly for the other Doctrine implementations.
3. http://php.net/manual/en/function.class-exists.php
PDF brought to you bygenerated on October 23, 2014
Chapter 43: How to Provide Model Classes for several Doctrine Implementations | 161

Listing 44-1
Chapter 44
How to Implement a simple Registration Form
Some forms have extra fields whose values don't need to be stored in the database. For example, youmay want to create a registration form with some extra fields (like a "terms accepted" checkbox field) andembed the form that actually stores the account information.
The simple User ModelYou have a simple User entity mapped to the database:
123456789
1011121314151617181920212223242526
// src/Acme/AccountBundle/Entity/User.phpnamespace Acme\AccountBundle\Entity;
use Doctrine\ORM\Mapping as ORM;use Symfony\Component\Validator\Constraints as Assert;use Symfony\Bridge\Doctrine\Validator\Constraints\UniqueEntity;
/*** @ORM\Entity* @UniqueEntity(fields="email", message="Email already taken")*/class User{
/*** @ORM\Id* @ORM\Column(type="integer")* @ORM\GeneratedValue(strategy="AUTO")*/protected $id;
/*** @ORM\Column(type="string", length=255)* @Assert\NotBlank()* @Assert\Email()*/protected $email;
PDF brought to you bygenerated on October 23, 2014
Chapter 44: How to Implement a simple Registration Form | 162

272829303132333435363738394041424344454647484950515253545556575859
/*** @ORM\Column(type="string", length=255)* @Assert\NotBlank()* @Assert\Length(max = 4096)*/protected $plainPassword;
public function getId(){
return $this->id;}
public function getEmail(){
return $this->email;}
public function setEmail($email){
$this->email = $email;}
public function getPlainPassword(){
return $this->plainPassword;}
public function setPlainPassword($password){
$this->plainPassword = $password;}
}
This User entity contains three fields and two of them (email and plainPassword) should display on theform. The email property must be unique in the database, this is enforced by adding this validation at thetop of the class.
If you want to integrate this User within the security system, you need to implement theUserInterface of the Security component.
Why the 4096 Password Limit?
Notice that the plainPassword field has a max length of 4096 characters. For security purposes(CVE-2013-57501), Symfony limits the plain password length to 4096 characters when encodingit. Adding this constraint makes sure that your form will give a validation error if anyone tries asuper-long password.
You'll need to add this constraint anywhere in your application where your user submits a plaintextpassword (e.g. change password form). The only place where you don't need to worry about thisis your login form, since Symfony's Security component handles this for you.
1. http://symfony.com/blog/cve-2013-5750-security-issue-in-fosuserbundle-login-form
PDF brought to you bygenerated on October 23, 2014
Chapter 44: How to Implement a simple Registration Form | 163

Listing 44-2
Listing 44-3
Create a Form for the ModelNext, create the form for the User model:
123456789
10111213141516171819202122232425262728293031
// src/Acme/AccountBundle/Form/Type/UserType.phpnamespace Acme\AccountBundle\Form\Type;
use Symfony\Component\Form\AbstractType;use Symfony\Component\Form\FormBuilderInterface;use Symfony\Component\OptionsResolver\OptionsResolverInterface;
class UserType extends AbstractType{
public function buildForm(FormBuilderInterface $builder, array $options){
$builder->add('email', 'email');$builder->add('plainPassword', 'repeated', array(
'first_name' => 'password','second_name' => 'confirm','type' => 'password',
));}
public function setDefaultOptions(OptionsResolverInterface $resolver){
$resolver->setDefaults(array('data_class' => 'Acme\AccountBundle\Entity\User'
));}
public function getName(){
return 'user';}
}
There are just two fields: email and plainPassword (repeated to confirm the entered password). Thedata_class option tells the form the name of the underlying data class (i.e. your User entity).
To explore more things about the Form component, read Forms.
Embedding the User Form into a Registration FormThe form that you'll use for the registration page is not the same as the form used to simply modify theUser (i.e. UserType). The registration form will contain further fields like "accept the terms", whose valuewon't be stored in the database.
Start by creating a simple class which represents the "registration":
1234
// src/Acme/AccountBundle/Form/Model/Registration.phpnamespace Acme\AccountBundle\Form\Model;
use Symfony\Component\Validator\Constraints as Assert;
PDF brought to you bygenerated on October 23, 2014
Chapter 44: How to Implement a simple Registration Form | 164

Listing 44-4
56789
1011121314151617181920212223242526272829303132333435363738394041
use Acme\AccountBundle\Entity\User;
class Registration{
/*** @Assert\Type(type="Acme\AccountBundle\Entity\User")* @Assert\Valid()*/protected $user;
/*** @Assert\NotBlank()* @Assert\True()*/protected $termsAccepted;
public function setUser(User $user){
$this->user = $user;}
public function getUser(){
return $this->user;}
public function getTermsAccepted(){
return $this->termsAccepted;}
public function setTermsAccepted($termsAccepted){
$this->termsAccepted = (Boolean) $termsAccepted;}
}
Next, create the form for this Registration model:
123456789
101112131415161718
// src/Acme/AccountBundle/Form/Type/RegistrationType.phpnamespace Acme\AccountBundle\Form\Type;
use Symfony\Component\Form\AbstractType;use Symfony\Component\Form\FormBuilderInterface;
class RegistrationType extends AbstractType{
public function buildForm(FormBuilderInterface $builder, array $options){
$builder->add('user', new UserType());$builder->add(
'terms','checkbox',array('property_path' => 'termsAccepted')
);$builder->add('Register', 'submit');
}
PDF brought to you bygenerated on October 23, 2014
Chapter 44: How to Implement a simple Registration Form | 165

Listing 44-5
Listing 44-6
Listing 44-7
192021222324
public function getName(){
return 'registration';}
}
You don't need to use a special method for embedding the UserType form. A form is a field, too - so youcan add this like any other field, with the expectation that the Registration.user property will hold aninstance of the User class.
Handling the Form SubmissionNext, you need a controller to handle the form. Start by creating a simple controller for displaying theregistration form:
123456789
1011121314151617181920212223
// src/Acme/AccountBundle/Controller/AccountController.phpnamespace Acme\AccountBundle\Controller;
use Symfony\Bundle\FrameworkBundle\Controller\Controller;
use Acme\AccountBundle\Form\Type\RegistrationType;use Acme\AccountBundle\Form\Model\Registration;
class AccountController extends Controller{
public function registerAction(){
$registration = new Registration();$form = $this->createForm(new RegistrationType(), $registration, array(
'action' => $this->generateUrl('account_create'),));
return $this->render('AcmeAccountBundle:Account:register.html.twig',array('form' => $form->createView())
);}
}
And its template:
12
{# src/Acme/AccountBundle/Resources/views/Account/register.html.twig #}{{ form(form) }}
Next, create the controller which handles the form submission. This performs the validation and savesthe data into the database:
123456
use Symfony\Component\HttpFoundation\Request;// ...
public function createAction(Request $request){
$em = $this->getDoctrine()->getManager();
PDF brought to you bygenerated on October 23, 2014
Chapter 44: How to Implement a simple Registration Form | 166

Listing 44-8
Listing 44-9
789
10111213141516171819202122232425
$form = $this->createForm(new RegistrationType(), new Registration());
$form->handleRequest($request);
if ($form->isValid()) {$registration = $form->getData();
$em->persist($registration->getUser());$em->flush();
return $this->redirect(...);}
return $this->render('AcmeAccountBundle:Account:register.html.twig',array('form' => $form->createView())
);}
Add new RoutesNext, update your routes. If you're placing your routes inside your bundle (as shown here), don't forgetto make sure that the routing file is being imported.
12345678
# src/Acme/AccountBundle/Resources/config/routing.ymlaccount_register:
path: /registerdefaults: { _controller: AcmeAccountBundle:Account:register }
account_create:path: /register/createdefaults: { _controller: AcmeAccountBundle:Account:create }
Update your Database SchemaOf course, since you've added a User entity during this tutorial, make sure that your database schema hasbeen updated properly:
1 $ php app/console doctrine:schema:update --force
That's it! Your form now validates, and allows you to save the User object to the database. The extraterms checkbox on the Registration model class is used during validation, but not actually usedafterwards when saving the User to the database.
PDF brought to you bygenerated on October 23, 2014
Chapter 44: How to Implement a simple Registration Form | 167

Listing 45-1
Listing 45-2
Listing 45-3
Chapter 45
Console Commands
The Doctrine2 ORM integration offers several console commands under the doctrine namespace. Toview the command list you can use the list command:
1 $ php app/console list doctrine
A list of available commands will print out. You can find out more information about any of thesecommands (or any Symfony command) by running the help command. For example, to get details aboutthe doctrine:database:create task, run:
1 $ php app/console help doctrine:database:create
Some notable or interesting tasks include:
• doctrine:ensure-production-settings - checks to see if the current environment isconfigured efficiently for production. This should always be run in the prod environment:
1 $ php app/console doctrine:ensure-production-settings --env=prod
• doctrine:mapping:import - allows Doctrine to introspect an existing database and createmapping information. For more information, see How to Generate Entities from an ExistingDatabase.
• doctrine:mapping:info - tells you all of the entities that Doctrine is aware of and whether ornot there are any basic errors with the mapping.
• doctrine:query:dql and doctrine:query:sql - allow you to execute DQL or SQL queriesdirectly from the command line.
PDF brought to you bygenerated on October 23, 2014
Chapter 45: Console Commands | 168

Listing 46-1
Listing 46-2
Chapter 46
How to Send an Email
Sending emails is a classic task for any web application and one that has special complications andpotential pitfalls. Instead of recreating the wheel, one solution to send emails is to use theSwiftmailerBundle, which leverages the power of the Swift Mailer1 library.
Don't forget to enable the bundle in your kernel before using it:
123456789
10
public function registerBundles(){
$bundles = array(// ...
new Symfony\Bundle\SwiftmailerBundle\SwiftmailerBundle(),);
// ...}
ConfigurationBefore using Swift Mailer, be sure to include its configuration. The only mandatory configurationparameter is transport:
12345678
# app/config/config.ymlswiftmailer:
transport: smtpencryption: sslauth_mode: loginhost: smtp.gmail.comusername: your_usernamepassword: your_password
1. http://swiftmailer.org/
PDF brought to you bygenerated on October 23, 2014
Chapter 46: How to Send an Email | 169

Listing 46-3
The majority of the Swift Mailer configuration deals with how the messages themselves should bedelivered.
The following configuration attributes are available:
• transport (smtp, mail, sendmail, or gmail)• username• password• host• port• encryption (tls, or ssl)• auth_mode (plain, login, or cram-md5)• spool
• type (how to queue the messages, file or memory is supported, see How to SpoolEmails)
• path (where to store the messages)
• delivery_address (an email address where to send ALL emails)• disable_delivery (set to true to disable delivery completely)
Sending EmailsThe Swift Mailer library works by creating, configuring and then sending Swift_Message objects. The"mailer" is responsible for the actual delivery of the message and is accessible via the mailer service.Overall, sending an email is pretty straightforward:
123456789
1011121314151617
public function indexAction($name){
$message = \Swift_Message::newInstance()->setSubject('Hello Email')->setFrom('[email protected]')->setTo('[email protected]')->setBody(
$this->renderView('HelloBundle:Hello:email.txt.twig',array('name' => $name)
))
;$this->get('mailer')->send($message);
return $this->render(...);}
To keep things decoupled, the email body has been stored in a template and rendered with therenderView() method.
The $message object supports many more options, such as including attachments, adding HTMLcontent, and much more. Fortunately, Swift Mailer covers the topic of Creating Messages2 in great detailin its documentation.
2. http://swiftmailer.org/docs/messages.html
PDF brought to you bygenerated on October 23, 2014
Chapter 46: How to Send an Email | 170

Several other cookbook articles are available related to sending emails in Symfony:
• How to Use Gmail to Send Emails• How to Work with Emails during Development• How to Spool Emails
PDF brought to you bygenerated on October 23, 2014
Chapter 46: How to Send an Email | 171

Listing 47-1
Listing 47-2
Chapter 47
How to Use Gmail to Send Emails
During development, instead of using a regular SMTP server to send emails, you might find using Gmaileasier and more practical. The SwiftmailerBundle makes it really easy.
Instead of using your regular Gmail account, it's of course recommended that you create a specialaccount.
In the development configuration file, change the transport setting to gmail and set the username andpassword to the Google credentials:
12345
# app/config/config_dev.ymlswiftmailer:
transport: gmailusername: your_gmail_usernamepassword: your_gmail_password
You're done!
If you are using the Symfony Standard Edition, configure the parameters in parameters.yml:
1234567
# app/config/parameters.ymlparameters:
# ...mailer_transport: gmailmailer_host: ~mailer_user: your_gmail_usernamemailer_password: your_gmail_password
The gmail transport is simply a shortcut that uses the smtp transport and sets encryption,auth_mode and host to work with Gmail.
PDF brought to you bygenerated on October 23, 2014
Chapter 47: How to Use Gmail to Send Emails | 172

Listing 48-1
Chapter 48
How to Use the Cloud to Send Emails
Requirements for sending emails from a production system differ from your development setup as youdon't want to be limited in the number of emails, the sending rate or the sender address. Thus, usingGmail or similar services is not an option. If setting up and maintaining your own reliable mail servercauses you a headache there's a simple solution: Leverage the cloud to send your emails.
This cookbook shows how easy it is to integrate Amazon's Simple Email Service (SES)1 into Symfony.
You can use the same technique for other mail services, as most of the time there is nothing moreto it than configuring an SMTP endpoint for Swift Mailer.
In the Symfony configuration, change the Swift Mailer settings transport, host, port and encryptionaccording to the information provided in the SES console2. Create your individual SMTP credentials inthe SES console and complete the configuration with the provided username and password:
12345678
# app/config/config.ymlswiftmailer:
transport: smtphost: email-smtp.us-east-1.amazonaws.comport: 465 # different ports are available, see SES consoleencryption: tls # TLS encryption is requiredusername: AWS_ACCESS_KEY # to be created in the SES consolepassword: AWS_SECRET_KEY # to be created in the SES console
The port and encryption keys are not present in the Symfony Standard Edition configuration by default,but you can simply add them as needed.
And that's it, you're ready to start sending emails through the cloud!
1. http://aws.amazon.com/ses
2. https://console.aws.amazon.com/ses
PDF brought to you bygenerated on October 23, 2014
Chapter 48: How to Use the Cloud to Send Emails | 173

Listing 48-2
If you are using the Symfony Standard Edition, configure the parameters in parameters.yml anduse them in your configuration files. This allows for different Swift Mailer configurations for eachinstallation of your application. For instance, use Gmail during development and the cloud inproduction.
123456789
# app/config/parameters.ymlparameters:
# ...mailer_transport: smtpmailer_host: email-smtp.us-east-1.amazonaws.commailer_port: 465 # different ports are available, see SES consolemailer_encryption: tls # TLS encryption is requiredmailer_user: AWS_ACCESS_KEY # to be created in the SES consolemailer_password: AWS_SECRET_KEY # to be created in the SES console
If you intend to use Amazon SES, please note the following:
• You have to sign up to Amazon Web Services (AWS)3;• Every sender address used in the From or Return-Path (bounce address) header needs
to be confirmed by the owner. You can also confirm an entire domain;• Initially you are in a restricted sandbox mode. You need to request production access
before being allowed to send to arbitrary recipients;• SES may be subject to a charge.
3. http://aws.amazon.com
PDF brought to you bygenerated on October 23, 2014
Chapter 48: How to Use the Cloud to Send Emails | 174

Listing 49-1
Listing 49-2
Listing 49-3
Chapter 49
How to Work with Emails during Development
When developing an application which sends email, you will often not want to actually send the emailto the specified recipient during development. If you are using the SwiftmailerBundle with Symfony,you can easily achieve this through configuration settings without having to make any changes toyour application's code at all. There are two main choices when it comes to handling email duringdevelopment: (a) disabling the sending of email altogether or (b) sending all email to a specific address.
Disabling SendingYou can disable sending email by setting the disable_delivery option to true. This is the default in thetest environment in the Standard distribution. If you do this in the test specific config then email willnot be sent when you run tests, but will continue to be sent in the prod and dev environments:
123
# app/config/config_test.ymlswiftmailer:
disable_delivery: true
If you'd also like to disable deliver in the dev environment, simply add this same configuration to theconfig_dev.yml file.
Sending to a Specified AddressYou can also choose to have all email sent to a specific address, instead of the address actually specifiedwhen sending the message. This can be done via the delivery_address option:
123
# app/config/config_dev.ymlswiftmailer:
delivery_address: [email protected]
Now, suppose you're sending an email to [email protected].
PDF brought to you bygenerated on October 23, 2014
Chapter 49: How to Work with Emails during Development | 175

Listing 49-4
123456789
1011121314151617
public function indexAction($name){
$message = \Swift_Message::newInstance()->setSubject('Hello Email')->setFrom('[email protected]')->setTo('[email protected]')->setBody(
$this->renderView('HelloBundle:Hello:email.txt.twig',array('name' => $name)
))
;$this->get('mailer')->send($message);
return $this->render(...);}
In the dev environment, the email will instead be sent to [email protected]. Swift Mailer will add an extraheader to the email, X-Swift-To, containing the replaced address, so you can still see who it would havebeen sent to.
In addition to the to addresses, this will also stop the email being sent to any CC and BCC addressesset for it. Swift Mailer will add additional headers to the email with the overridden addresses inthem. These are X-Swift-Cc and X-Swift-Bcc for the CC and BCC addresses respectively.
Viewing from the Web Debug ToolbarYou can view any email sent during a single response when you are in the dev environment using theWeb Debug Toolbar. The email icon in the toolbar will show how many emails were sent. If you click it,a report will open showing the details of the sent emails.
If you're sending an email and then immediately redirecting to another page, the web debug toolbar willnot display an email icon or a report on the next page.
Instead, you can set the intercept_redirects option to true in the config_dev.yml file, which willcause the redirect to stop and allow you to open the report with details of the sent emails.
123
# app/config/config_dev.ymlweb_profiler:
intercept_redirects: true
Alternatively, you can open the profiler after the redirect and search by the submit URL used onthe previous request (e.g. /contact/handle). The profiler's search feature allows you to load theprofiler information for any past requests.
PDF brought to you bygenerated on October 23, 2014
Chapter 49: How to Work with Emails during Development | 176

Listing 50-1
Listing 50-2
Chapter 50
How to Spool Emails
When you are using the SwiftmailerBundle to send an email from a Symfony application, it will defaultto sending the email immediately. You may, however, want to avoid the performance hit of thecommunication between Swift Mailer and the email transport, which could cause the user to wait forthe next page to load while the email is sending. This can be avoided by choosing to "spool" the emailsinstead of sending them directly. This means that Swift Mailer does not attempt to send the email butinstead saves the message to somewhere such as a file. Another process can then read from the spool andtake care of sending the emails in the spool. Currently only spooling to file or memory is supported bySwift Mailer.
Spool Using MemoryWhen you use spooling to store the emails to memory, they will get sent right before the kernelterminates. This means the email only gets sent if the whole request got executed without any unhandledException or any errors. To configure swiftmailer with the memory option, use the followingconfiguration:
1234
# app/config/config.ymlswiftmailer:
# ...spool: { type: memory }
Spool Using a FileIn order to use the spool with a file, use the following configuration:
1234
# app/config/config.ymlswiftmailer:
# ...spool:
PDF brought to you bygenerated on October 23, 2014
Chapter 50: How to Spool Emails | 177

Listing 50-3
Listing 50-4
Listing 50-5
Listing 50-6
56
type: filepath: /path/to/spool
If you want to store the spool somewhere with your project directory, remember that you can usethe %kernel.root_dir% parameter to reference the project's root:
1 path: "%kernel.root_dir%/spool"
Now, when your app sends an email, it will not actually be sent but instead added to the spool. Sendingthe messages from the spool is done separately. There is a console command to send the messages in thespool:
1 $ php app/console swiftmailer:spool:send --env=prod
It has an option to limit the number of messages to be sent:
1 $ php app/console swiftmailer:spool:send --message-limit=10 --env=prod
You can also set the time limit in seconds:
1 $ php app/console swiftmailer:spool:send --time-limit=10 --env=prod
Of course you will not want to run this manually in reality. Instead, the console command should betriggered by a cron job or scheduled task and run at a regular interval.
PDF brought to you bygenerated on October 23, 2014
Chapter 50: How to Spool Emails | 178
Listing 51-1
Listing 51-2
Chapter 51
How to Test that an Email is Sent in afunctional Test
Sending e-mails with Symfony is pretty straightforward thanks to the SwiftmailerBundle, which leveragesthe power of the Swift Mailer1 library.
To functionally test that an email was sent, and even assert the email subject, content or any otherheaders, you can use the Symfony Profiler.
Start with an easy controller action that sends an e-mail:
123456789
10111213
public function sendEmailAction($name){
$message = \Swift_Message::newInstance()->setSubject('Hello Email')->setFrom('[email protected]')->setTo('[email protected]')->setBody('You should see me from the profiler!')
;
$this->get('mailer')->send($message);
return $this->render(...);}
Don't forget to enable the profiler as explained in How to Use the Profiler in a Functional Test.
In your functional test, use the swiftmailer collector on the profiler to get information about themessages send on the previous request:
1. http://swiftmailer.org/
PDF brought to you bygenerated on October 23, 2014
Chapter 51: How to Test that an Email is Sent in a functional Test | 179

123456789
101112131415161718192021222324252627282930313233
// src/Acme/DemoBundle/Tests/Controller/MailControllerTest.phpuse Symfony\Bundle\FrameworkBundle\Test\WebTestCase;
class MailControllerTest extends WebTestCase{
public function testMailIsSentAndContentIsOk(){
$client = static::createClient();
// Enable the profiler for the next request (it does nothing if the profiler isnot available)
$client->enableProfiler();
$crawler = $client->request('POST', '/path/to/above/action');
$mailCollector = $client->getProfile()->getCollector('swiftmailer');
// Check that an e-mail was sent$this->assertEquals(1, $mailCollector->getMessageCount());
$collectedMessages = $mailCollector->getMessages();$message = $collectedMessages[0];
// Asserting e-mail data$this->assertInstanceOf('Swift_Message', $message);$this->assertEquals('Hello Email', $message->getSubject());$this->assertEquals('[email protected]', key($message->getFrom()));$this->assertEquals('[email protected]', key($message->getTo()));$this->assertEquals(
'You should see me from the profiler!',$message->getBody()
);}
}
PDF brought to you bygenerated on October 23, 2014
Chapter 51: How to Test that an Email is Sent in a functional Test | 180

Listing 52-1
Chapter 52
How to Setup before and after Filters
It is quite common in web application development to need some logic to be executed just before or justafter your controller actions acting as filters or hooks.
In symfony1, this was achieved with the preExecute and postExecute methods. Most major frameworkshave similar methods but there is no such thing in Symfony2. The good news is that there is a muchbetter way to interfere with the Request -> Response process using the EventDispatcher component.
Token Validation ExampleImagine that you need to develop an API where some controllers are public but some others are restrictedto one or some clients. For these private features, you might provide a token to your clients to identifythemselves.
So, before executing your controller action, you need to check if the action is restricted or not. If it isrestricted, you need to validate the provided token.
Please note that for simplicity in this recipe, tokens will be defined in config and neither databasesetup nor authentication via the Security component will be used.
Before Filters with the kernel.controller EventFirst, store some basic token configuration using config.yml and the parameters key:
12345
# app/config/config.ymlparameters:
tokens:client1: pass1client2: pass2
PDF brought to you bygenerated on October 23, 2014
Chapter 52: How to Setup before and after Filters | 181

Listing 52-2
Listing 52-3
Listing 52-4
Tag Controllers to Be Checked
A kernel.controller listener gets notified on every request, right before the controller is executed. So,first, you need some way to identify if the controller that matches the request needs token validation.
A clean and easy way is to create an empty interface and make the controllers implement it:
123456
namespace Acme\DemoBundle\Controller;
interface TokenAuthenticatedController{
// ...}
A controller that implements this interface simply looks like this:
123456789
10111213
namespace Acme\DemoBundle\Controller;
use Acme\DemoBundle\Controller\TokenAuthenticatedController;use Symfony\Bundle\FrameworkBundle\Controller\Controller;
class FooController extends Controller implements TokenAuthenticatedController{
// An action that needs authenticationpublic function barAction(){
// ...}
}
Creating an Event Listener
Next, you'll need to create an event listener, which will hold the logic that you want executed before yourcontrollers. If you're not familiar with event listeners, you can learn more about them at How to Createan Event Listener:
123456789
101112131415161718192021
// src/Acme/DemoBundle/EventListener/TokenListener.phpnamespace Acme\DemoBundle\EventListener;
use Acme\DemoBundle\Controller\TokenAuthenticatedController;use Symfony\Component\HttpKernel\Exception\AccessDeniedHttpException;use Symfony\Component\HttpKernel\Event\FilterControllerEvent;
class TokenListener{
private $tokens;
public function __construct($tokens){
$this->tokens = $tokens;}
public function onKernelController(FilterControllerEvent $event){
$controller = $event->getController();
/*
PDF brought to you bygenerated on October 23, 2014
Chapter 52: How to Setup before and after Filters | 182

Listing 52-5
Listing 52-6
22232425262728293031323334353637
* $controller passed can be either a class or a Closure.* This is not usual in Symfony but it may happen.* If it is a class, it comes in array format*/
if (!is_array($controller)) {return;
}
if ($controller[0] instanceof TokenAuthenticatedController) {$token = $event->getRequest()->query->get('token');if (!in_array($token, $this->tokens)) {
throw new AccessDeniedHttpException('This action needs a valid token!');}
}}
}
Registering the Listener
Finally, register your listener as a service and tag it as an event listener. By listening onkernel.controller, you're telling Symfony that you want your listener to be called just before anycontroller is executed.
1234567
# app/config/config.yml (or inside your services.yml)services:
demo.tokens.action_listener:class: Acme\DemoBundle\EventListener\TokenListenerarguments: ["%tokens%"]tags:
- { name: kernel.event_listener, event: kernel.controller, method:onKernelController }
With this configuration, your TokenListener onKernelController method will be executed on eachrequest. If the controller that is about to be executed implements TokenAuthenticatedController,token authentication is applied. This lets you have a "before" filter on any controller that you want.
After Filters with the kernel.response EventIn addition to having a "hook" that's executed before your controller, you can also add a hook that'sexecuted after your controller. For this example, imagine that you want to add a sha1 hash (with a saltusing that token) to all responses that have passed this token authentication.
Another core Symfony event - called kernel.response - is notified on every request, but after thecontroller returns a Response object. Creating an "after" listener is as easy as creating a listener class andregistering it as a service on this event.
For example, take the TokenListener from the previous example and first record the authenticationtoken inside the request attributes. This will serve as a basic flag that this request underwent tokenauthentication:
1234
public function onKernelController(FilterControllerEvent $event){
// ...
PDF brought to you bygenerated on October 23, 2014
Chapter 52: How to Setup before and after Filters | 183

Listing 52-7
Listing 52-8
56789
1011121314
if ($controller[0] instanceof TokenAuthenticatedController) {$token = $event->getRequest()->query->get('token');if (!in_array($token, $this->tokens)) {
throw new AccessDeniedHttpException('This action needs a valid token!');}
// mark the request as having passed token authentication$event->getRequest()->attributes->set('auth_token', $token);
}}
Now, add another method to this class - onKernelResponse - that looks for this flag on the request objectand sets a custom header on the response if it's found:
123456789
10111213141516
// add the new use statement at the top of your fileuse Symfony\Component\HttpKernel\Event\FilterResponseEvent;
public function onKernelResponse(FilterResponseEvent $event){
// check to see if onKernelController marked this as a token "auth'ed" requestif (!$token = $event->getRequest()->attributes->get('auth_token')) {
return;}
$response = $event->getResponse();
// create a hash and set it as a response header$hash = sha1($response->getContent().$token);$response->headers->set('X-CONTENT-HASH', $hash);
}
Finally, a second "tag" is needed on the service definition to notify Symfony that the onKernelResponseevent should be notified for the kernel.response event:
12345678
# app/config/config.yml (or inside your services.yml)services:
demo.tokens.action_listener:class: Acme\DemoBundle\EventListener\TokenListenerarguments: ["%tokens%"]tags:
- { name: kernel.event_listener, event: kernel.controller, method:onKernelController }
- { name: kernel.event_listener, event: kernel.response, method:onKernelResponse }
That's it! The TokenListener is now notified before every controller is executed (onKernelController)and after every controller returns a response (onKernelResponse). By making specific controllersimplement the TokenAuthenticatedController interface, your listener knows which controllers itshould take action on. And by storing a value in the request's "attributes" bag, the onKernelResponsemethod knows to add the extra header. Have fun!
PDF brought to you bygenerated on October 23, 2014
Chapter 52: How to Setup before and after Filters | 184

Listing 53-1
Listing 53-2
Chapter 53
How to Extend a Class without UsingInheritance
To allow multiple classes to add methods to another one, you can define the magic __call() method inthe class you want to be extended like this:
123456789
10111213141516171819
class Foo{
// ...
public function __call($method, $arguments){
// create an event named 'foo.method_is_not_found'$event = new HandleUndefinedMethodEvent($this, $method, $arguments);$this->dispatcher->dispatch('foo.method_is_not_found', $event);
// no listener was able to process the event? The method does not existif (!$event->isProcessed()) {
throw new \Exception(sprintf('Call to undefined method %s::%s.',get_class($this), $method));
}
// return the listener returned valuereturn $event->getReturnValue();
}}
This uses a special HandleUndefinedMethodEvent that should also be created. This is a generic class thatcould be reused each time you need to use this pattern of class extension:
12345
use Symfony\Component\EventDispatcher\Event;
class HandleUndefinedMethodEvent extends Event{
protected $subject;
PDF brought to you bygenerated on October 23, 2014
Chapter 53: How to Extend a Class without Using Inheritance | 185

Listing 53-3
6789
10111213141516171819202122232425262728293031323334353637383940414243444546474849505152
protected $method;protected $arguments;protected $returnValue;protected $isProcessed = false;
public function __construct($subject, $method, $arguments){
$this->subject = $subject;$this->method = $method;$this->arguments = $arguments;
}
public function getSubject(){
return $this->subject;}
public function getMethod(){
return $this->method;}
public function getArguments(){
return $this->arguments;}
/*** Sets the value to return and stops other listeners from being notified*/public function setReturnValue($val){
$this->returnValue = $val;$this->isProcessed = true;$this->stopPropagation();
}
public function getReturnValue(){
return $this->returnValue;}
public function isProcessed(){
return $this->isProcessed;}
}
Next, create a class that will listen to the foo.method_is_not_found event and add the method bar():
12345678
class Bar{
public function onFooMethodIsNotFound(HandleUndefinedMethodEvent $event){
// only respond to the calls to the 'bar' methodif ('bar' != $event->getMethod()) {
// allow another listener to take care of this unknown methodreturn;
PDF brought to you bygenerated on October 23, 2014
Chapter 53: How to Extend a Class without Using Inheritance | 186

Listing 53-4
910111213141516171819202122
}
// the subject object (the foo instance)$foo = $event->getSubject();
// the bar method arguments$arguments = $event->getArguments();
// ... do something
// set the return value$event->setReturnValue($someValue);
}}
Finally, add the new bar method to the Foo class by registering an instance of Bar with thefoo.method_is_not_found event:
12
$bar = new Bar();$dispatcher->addListener('foo.method_is_not_found', array($bar, 'onFooMethodIsNotFound'));
PDF brought to you bygenerated on October 23, 2014
Chapter 53: How to Extend a Class without Using Inheritance | 187

Listing 54-1
Chapter 54
How to Customize a Method Behavior withoutUsing Inheritance
Doing something before or after a Method CallIf you want to do something just before, or just after a method is called, you can dispatch an eventrespectively at the beginning or at the end of the method:
123456789
101112131415161718192021222324
class Foo{
// ...
public function send($foo, $bar){
// do something before the method$event = new FilterBeforeSendEvent($foo, $bar);$this->dispatcher->dispatch('foo.pre_send', $event);
// get $foo and $bar from the event, they may have been modified$foo = $event->getFoo();$bar = $event->getBar();
// the real method implementation is here$ret = ...;
// do something after the method$event = new FilterSendReturnValue($ret);$this->dispatcher->dispatch('foo.post_send', $event);
return $event->getReturnValue();}
}
PDF brought to you bygenerated on October 23, 2014
Chapter 54: How to Customize a Method Behavior without Using Inheritance | 188

Listing 54-2
In this example, two events are thrown: foo.pre_send, before the method is executed, andfoo.post_send after the method is executed. Each uses a custom Event class to communicateinformation to the listeners of the two events. These event classes would need to be created by you andshould allow, in this example, the variables $foo, $bar and $ret to be retrieved and set by the listeners.
For example, assuming the FilterSendReturnValue has a setReturnValue method, one listener mightlook like this:
1234567
public function onFooPostSend(FilterSendReturnValue $event){
$ret = $event->getReturnValue();// modify the original ``$ret`` value
$event->setReturnValue($ret);}
PDF brought to you bygenerated on October 23, 2014
Chapter 54: How to Customize a Method Behavior without Using Inheritance | 189

Chapter 55
How to use Expressions in Security, Routing,Services, and Validation
New in version 2.4: The expression functionality was introduced in Symfony 2.4.
In Symfony 2.4, a powerful ExpressionLanguage component was added to Symfony. This allows us toadd highly customized logic inside configuration.
The Symfony Framework leverages expressions out of the box in the following ways:
• Configuring services;• Route matching conditions;• Checking security and access controls with allow_if;• Validation.
For more information about how to create and work with expressions, see The Expression Syntax.
PDF brought to you bygenerated on October 23, 2014
Chapter 55: How to use Expressions in Security, Routing, Services, and Validation | 190

Listing 56-1
Listing 56-2
Listing 56-3
Listing 56-4
Chapter 56
How to Customize Form Rendering
Symfony gives you a wide variety of ways to customize how a form is rendered. In this guide, you'll learnhow to customize every possible part of your form with as little effort as possible whether you use Twigor PHP as your templating engine.
Form Rendering BasicsRecall that the label, error and HTML widget of a form field can easily be rendered by using the form_rowTwig function or the row PHP helper method:
1 {{ form_row(form.age) }}
You can also render each of the three parts of the field individually:
12345
<div>{{ form_label(form.age) }}{{ form_errors(form.age) }}{{ form_widget(form.age) }}
</div>
In both cases, the form label, errors and HTML widget are rendered by using a set of markup that shipsstandard with Symfony. For example, both of the above templates would render:
1234567
<div><label for="form_age">Age</label><ul>
<li>This field is required</li></ul><input type="number" id="form_age" name="form[age]" />
</div>
To quickly prototype and test a form, you can render the entire form with just one line:
PDF brought to you bygenerated on October 23, 2014
Chapter 56: How to Customize Form Rendering | 191

Listing 56-5
Listing 56-6
Listing 56-7
Listing 56-8
1 {{ form_widget(form) }}
The remainder of this recipe will explain how every part of the form's markup can be modified atseveral different levels. For more information about form rendering in general, see Rendering a Form in aTemplate.
What are Form Themes?Symfony uses form fragments - a small piece of a template that renders just one part of a form - to rendereach part of a form - field labels, errors, input text fields, select tags, etc.
The fragments are defined as blocks in Twig and as template files in PHP.
A theme is nothing more than a set of fragments that you want to use when rendering a form. In otherwords, if you want to customize one portion of how a form is rendered, you'll import a theme whichcontains a customization of the appropriate form fragments.
Symfony comes with a default theme (form_div_layout.html.twig1 in Twig and FrameworkBundle:Formin PHP) that defines each and every fragment needed to render every part of a form.
In the next section you will learn how to customize a theme by overriding some or all of its fragments.
For example, when the widget of an integer type field is rendered, an input number field is generated
1 {{ form_widget(form.age) }}
renders:
1 <input type="number" id="form_age" name="form[age]" required="required" value="33" />
Internally, Symfony uses the integer_widget fragment to render the field. This is because the field typeis integer and you're rendering its widget (as opposed to its label or errors).
In Twig that would default to the block integer_widget from the form_div_layout.html.twig2 template.
In PHP it would rather be the integer_widget.html.php file located in the FrameworkBundle/Resources/views/Form folder.
The default implementation of the integer_widget fragment looks like this:
12345
{# form_div_layout.html.twig #}{% block integer_widget %}
{% set type = type|default('number') %}{{ block('form_widget_simple') }}
{% endblock integer_widget %}
As you can see, this fragment itself renders another fragment - form_widget_simple:
12345
{# form_div_layout.html.twig #}{% block form_widget_simple %}
{% set type = type|default('text') %}<input type="{{ type }}" {{ block('widget_attributes') }} {% if value is not empty
%}value="{{ value }}" {% endif %}/>{% endblock form_widget_simple %}
1. https://github.com/symfony/symfony/blob/master/src/Symfony/Bridge/Twig/Resources/views/Form/form_div_layout.html.twig
2. https://github.com/symfony/symfony/blob/master/src/Symfony/Bridge/Twig/Resources/views/Form/form_div_layout.html.twig
PDF brought to you bygenerated on October 23, 2014
Chapter 56: How to Customize Form Rendering | 192

Listing 56-9
The point is, the fragments dictate the HTML output of each part of a form. To customize the formoutput, you just need to identify and override the correct fragment. A set of these form fragmentcustomizations is known as a form "theme". When rendering a form, you can choose which formtheme(s) you want to apply.
In Twig a theme is a single template file and the fragments are the blocks defined in this file.
In PHP a theme is a folder and the fragments are individual template files in this folder.
Knowing which Block to Customize
In this example, the customized fragment name is integer_widget because you want to overridethe HTML widget for all integer field types. If you need to customize textarea fields, you wouldcustomize textarea_widget.
As you can see, the fragment name is a combination of the field type and which part of the field isbeing rendered (e.g. widget, label, errors, row). As such, to customize how errors are renderedfor just input text fields, you should customize the text_errors fragment.
More commonly, however, you'll want to customize how errors are displayed across all fields.You can do this by customizing the form_errors fragment. This takes advantage of field typeinheritance. Specifically, since the text type extends from the form type, the Form componentwill first look for the type-specific fragment (e.g. text_errors) before falling back to its parentfragment name if it doesn't exist (e.g. form_errors).
For more information on this topic, see Form Fragment Naming.
Form ThemingTo see the power of form theming, suppose you want to wrap every input number field with a div tag.The key to doing this is to customize the integer_widget fragment.
Form Theming in TwigWhen customizing the form field block in Twig, you have two options on where the customized formblock can live:
Method Pros Cons
Inside the same template as theform
Quick and easy Can't be reused in other templates
Inside a separate template Can be reused by manytemplates
Requires an extra template to becreated
Both methods have the same effect but are better in different situations.
Method 1: Inside the same Template as the Form
The easiest way to customize the integer_widget block is to customize it directly in the template that'sactually rendering the form.
12
{% extends '::base.html.twig' %}
PDF brought to you bygenerated on October 23, 2014
Chapter 56: How to Customize Form Rendering | 193

Listing 56-10
Listing 56-11
Listing 56-12
3456789
10111213141516
{% form_theme form _self %}
{% block integer_widget %}<div class="integer_widget">
{% set type = type|default('number') %}{{ block('form_widget_simple') }}
</div>{% endblock %}
{% block content %}{# ... render the form #}
{{ form_row(form.age) }}{% endblock %}
By using the special {% form_theme form _self %} tag, Twig looks inside the same template forany overridden form blocks. Assuming the form.age field is an integer type field, when its widget isrendered, the customized integer_widget block will be used.
The disadvantage of this method is that the customized form block can't be reused when rendering otherforms in other templates. In other words, this method is most useful when making form customizationsthat are specific to a single form in your application. If you want to reuse a form customization acrossseveral (or all) forms in your application, read on to the next section.
Method 2: Inside a separate Template
You can also choose to put the customized integer_widget form block in a separate template entirely.The code and end-result are the same, but you can now re-use the form customization across manytemplates:
1234567
{# src/Acme/DemoBundle/Resources/views/Form/fields.html.twig #}{% block integer_widget %}
<div class="integer_widget">{% set type = type|default('number') %}{{ block('form_widget_simple') }}
</div>{% endblock %}
Now that you've created the customized form block, you need to tell Symfony to use it. Inside thetemplate where you're actually rendering your form, tell Symfony to use the template via the form_themetag:
123
{% form_theme form 'AcmeDemoBundle:Form:fields.html.twig' %}
{{ form_widget(form.age) }}
When the form.age widget is rendered, Symfony will use the integer_widget block from the newtemplate and the input tag will be wrapped in the div element specified in the customized block.
Multiple Templates
A form can also be customized by applying several templates. To do this, pass the name of all thetemplates as an array using the with keyword:
PDF brought to you bygenerated on October 23, 2014
Chapter 56: How to Customize Form Rendering | 194

Listing 56-13
Listing 56-14
Listing 56-15
Listing 56-16
Listing 56-17
1234
{% form_theme form with ['::common.html.twig', ':Form:fields.html.twig','AcmeDemoBundle:Form:fields.html.twig'] %}
{# ... #}
The templates can be located at different bundles and they can even be stored at the global app/Resources/views/ directory.
Child Forms
You can also apply a form theme to a specific child of your form:
1 {% form_theme form.child 'AcmeDemoBundle:Form:fields.html.twig' %}
This is useful when you want to have a custom theme for a nested form that's different than the one ofyour main form. Just specify both your themes:
123
{% form_theme form 'AcmeDemoBundle:Form:fields.html.twig' %}
{% form_theme form.child 'AcmeDemoBundle:Form:fields_child.html.twig' %}
Form Theming in PHPWhen using PHP as a templating engine, the only method to customize a fragment is to create a newtemplate file - this is similar to the second method used by Twig.
The template file must be named after the fragment. You must create a integer_widget.html.php filein order to customize the integer_widget fragment.
1234
<!-- src/Acme/DemoBundle/Resources/views/Form/integer_widget.html.php --><div class="integer_widget">
<?php echo $view['form']->block($form, 'form_widget_simple', array('type' =>isset($type) ? $type : "number")) ?></div>
Now that you've created the customized form template, you need to tell Symfony to use it. Inside thetemplate where you're actually rendering your form, tell Symfony to use the theme via the setThemehelper method:
123
<?php $view['form']->setTheme($form, array('AcmeDemoBundle:Form')); ?>
<?php $view['form']->widget($form['age']) ?>
When the form.age widget is rendered, Symfony will use the customized integer_widget.html.phptemplate and the input tag will be wrapped in the div element.
If you want to apply a theme to a specific child form, pass it to the setTheme method:
1 <?php $view['form']->setTheme($form['child'], 'AcmeDemoBundle:Form/Child'); ?>
PDF brought to you bygenerated on October 23, 2014
Chapter 56: How to Customize Form Rendering | 195

Listing 56-18
Listing 56-19
Listing 56-20
Referencing base Form Blocks (Twig specific)So far, to override a particular form block, the best method is to copy the default block fromform_div_layout.html.twig3, paste it into a different template, and then customize it. In many cases, youcan avoid doing this by referencing the base block when customizing it.
This is easy to do, but varies slightly depending on if your form block customizations are in the sametemplate as the form or a separate template.
Referencing Blocks from inside the same Template as the Form
Import the blocks by adding a use tag in the template where you're rendering the form:
1 {% use 'form_div_layout.html.twig' with integer_widget as base_integer_widget %}
Now, when the blocks from form_div_layout.html.twig4 are imported, the integer_widget block iscalled base_integer_widget. This means that when you redefine the integer_widget block, you canreference the default markup via base_integer_widget:
12345
{% block integer_widget %}<div class="integer_widget">
{{ block('base_integer_widget') }}</div>
{% endblock %}
Referencing base Blocks from an external Template
If your form customizations live inside an external template, you can reference the base block by usingthe parent() Twig function:
12345678
{# src/Acme/DemoBundle/Resources/views/Form/fields.html.twig #}{% extends 'form_div_layout.html.twig' %}
{% block integer_widget %}<div class="integer_widget">
{{ parent() }}</div>
{% endblock %}
It is not possible to reference the base block when using PHP as the templating engine. You haveto manually copy the content from the base block to your new template file.
Making Application-wide CustomizationsIf you'd like a certain form customization to be global to your application, you can accomplish this bymaking the form customizations in an external template and then importing it inside your applicationconfiguration.
3. https://github.com/symfony/symfony/blob/master/src/Symfony/Bridge/Twig/Resources/views/Form/form_div_layout.html.twig
4. https://github.com/symfony/symfony/blob/master/src/Symfony/Bridge/Twig/Resources/views/Form/form_div_layout.html.twig
PDF brought to you bygenerated on October 23, 2014
Chapter 56: How to Customize Form Rendering | 196
Listing 56-21
Listing 56-22
Listing 56-23
Listing 56-24
Listing 56-25
Listing 56-26
Twig
By using the following configuration, any customized form blocks inside theAcmeDemoBundle:Form:fields.html.twig template will be used globally when a form is rendered.
123456
# app/config/config.ymltwig:
form:resources:
- 'AcmeDemoBundle:Form:fields.html.twig'# ...
By default, Twig uses a div layout when rendering forms. Some people, however, may prefer to renderforms in a table layout. Use the form_table_layout.html.twig resource to use such a layout:
12345
# app/config/config.ymltwig:
form:resources: ['form_table_layout.html.twig']
# ...
If you only want to make the change in one template, add the following line to your template file ratherthan adding the template as a resource:
1 {% form_theme form 'form_table_layout.html.twig' %}
Note that the form variable in the above code is the form view variable that you passed to your template.
PHP
By using the following configuration, any customized form fragments inside the src/Acme/DemoBundle/Resources/views/Form folder will be used globally when a form is rendered.
1234567
# app/config/config.ymlframework:
templating:form:
resources:- 'AcmeDemoBundle:Form'
# ...
By default, the PHP engine uses a div layout when rendering forms. Some people, however, may prefer torender forms in a table layout. Use the FrameworkBundle:FormTable resource to use such a layout:
123456
# app/config/config.ymlframework:
templating:form:
resources:- 'FrameworkBundle:FormTable'
If you only want to make the change in one template, add the following line to your template file ratherthan adding the template as a resource:
1 <?php $view['form']->setTheme($form, array('FrameworkBundle:FormTable')); ?>
PDF brought to you bygenerated on October 23, 2014
Chapter 56: How to Customize Form Rendering | 197

Listing 56-27
Listing 56-28
Listing 56-29
Note that the $form variable in the above code is the form view variable that you passed to your template.
How to Customize an individual FieldSo far, you've seen the different ways you can customize the widget output of all text field types. Youcan also customize individual fields. For example, suppose you have two text fields in a product form- name and description - but you only want to customize one of the fields. This can be accomplishedby customizing a fragment whose name is a combination of the field's id attribute and which part of thefield is being customized. For example, to customize the name field only:
123456789
{% form_theme form _self %}
{% block _product_name_widget %}<div class="text_widget">
{{ block('form_widget_simple') }}</div>
{% endblock %}
{{ form_widget(form.name) }}
Here, the _product_name_widget fragment defines the template to use for the field whose id isproduct_name (and name is product[name]).
The product portion of the field is the form name, which may be set manually or generatedautomatically based on your form type name (e.g. ProductType equates to product). If you're notsure what your form name is, just view the source of your generated form.
If you want to change the product or name portion of the block name _product_name_widget youcan set the block_name option in your form type:
123456789
10
use Symfony\Component\Form\FormBuilderInterface;
public function buildForm(FormBuilderInterface $builder, array $options){
// ...
$builder->add('name', 'text', array('block_name' => 'custom_name',
));}
Then the block name will be _product_custom_name_widget.
You can also override the markup for an entire field row using the same method:
123456789
{% form_theme form _self %}
{% block _product_name_row %}<div class="name_row">
{{ form_label(form) }}{{ form_errors(form) }}{{ form_widget(form) }}
</div>{% endblock %}
PDF brought to you bygenerated on October 23, 2014
Chapter 56: How to Customize Form Rendering | 198
Listing 56-30
Listing 56-31
Listing 56-32
1011 {{ form_row(form.name) }}
Other common CustomizationsSo far, this recipe has shown you several different ways to customize a single piece of how a form isrendered. The key is to customize a specific fragment that corresponds to the portion of the form youwant to control (see naming form blocks).
In the next sections, you'll see how you can make several common form customizations. To apply thesecustomizations, use one of the methods described in the Form Theming section.
Customizing Error Output
The Form component only handles how the validation errors are rendered, and not the actualvalidation error messages. The error messages themselves are determined by the validationconstraints you apply to your objects. For more information, see the chapter on validation.
There are many different ways to customize how errors are rendered when a form is submitted witherrors. The error messages for a field are rendered when you use the form_errors helper:
1 {{ form_errors(form.age) }}
By default, the errors are rendered inside an unordered list:
123
<ul><li>This field is required</li>
</ul>
To override how errors are rendered for all fields, simply copy, paste and customize the form_errorsfragment.
123456789
101112
{# form_errors.html.twig #}{% block form_errors %}
{% spaceless %}{% if errors|length > 0 %}<ul>
{% for error in errors %}<li>{{ error.message }}</li>
{% endfor %}</ul>{% endif %}
{% endspaceless %}{% endblock form_errors %}
See Form Theming for how to apply this customization.
PDF brought to you bygenerated on October 23, 2014
Chapter 56: How to Customize Form Rendering | 199

Listing 56-33
Listing 56-34
Listing 56-35
You can also customize the error output for just one specific field type. To customize only the markupused for these errors, follow the same directions as above but put the contents in a relative _errors block(or file in case of PHP templates). For example: text_errors (or text_errors.html.php).
See Form Fragment Naming to find out which specific block or file you have to customize.
Certain errors that are more global to your form (i.e. not specific to just one field) are rendered separately,usually at the top of your form:
1 {{ form_errors(form) }}
To customize only the markup used for these errors, follow the same directions as above, but now checkif the compound variable is set to true. If it is true, it means that what's being currently rendered is acollection of fields (e.g. a whole form), and not just an individual field.
123456789
10111213141516
{# form_errors.html.twig #}{% block form_errors %}
{% spaceless %}{% if errors|length > 0 %}
{% if compound %}<ul>
{% for error in errors %}<li>{{ error.message }}</li>
{% endfor %}</ul>
{% else %}{# ... display the errors for a single field #}
{% endif %}{% endif %}
{% endspaceless %}{% endblock form_errors %}
Customizing the "Form Row"
When you can manage it, the easiest way to render a form field is via the form_row function, whichrenders the label, errors and HTML widget of a field. To customize the markup used for rendering allform field rows, override the form_row fragment. For example, suppose you want to add a class to thediv element around each row:
12345678
{# form_row.html.twig #}{% block form_row %}
<div class="form_row">{{ form_label(form) }}{{ form_errors(form) }}{{ form_widget(form) }}
</div>{% endblock form_row %}
See Form Theming for how to apply this customization.
PDF brought to you bygenerated on October 23, 2014
Chapter 56: How to Customize Form Rendering | 200

Listing 56-36
Listing 56-37
Listing 56-38
Adding a "Required" Asterisk to Field Labels
If you want to denote all of your required fields with a required asterisk (*), you can do this bycustomizing the form_label fragment.
In Twig, if you're making the form customization inside the same template as your form, modify the usetag and add the following:
123456789
{% use 'form_div_layout.html.twig' with form_label as base_form_label %}
{% block form_label %}{{ block('base_form_label') }}
{% if required %}<span class="required" title="This field is required">*</span>
{% endif %}{% endblock %}
In Twig, if you're making the form customization inside a separate template, use the following:
123456789
{% extends 'form_div_layout.html.twig' %}
{% block form_label %}{{ parent() }}
{% if required %}<span class="required" title="This field is required">*</span>
{% endif %}{% endblock %}
When using PHP as a templating engine you have to copy the content from the original template:
123456789
101112
<!-- form_label.html.php -->
<!-- original content --><?php if ($required) { $label_attr['class'] = trim((isset($label_attr['class']) ?$label_attr['class'] : '').' required'); } ?><?php if (!$compound) { $label_attr['for'] = $id; } ?><?php if (!$label) { $label = $view['form']->humanize($name); } ?><label <?php foreach ($label_attr as $k => $v) { printf('%s="%s" ', $view->escape($k),$view->escape($v)); } ?>><?php echo $view->escape($view['translator']->trans($label,array(), $translation_domain)) ?></label>
<!-- customization --><?php if ($required) : ?>
<span class="required" title="This field is required">*</span><?php endif ?>
See Form Theming for how to apply this customization.
PDF brought to you bygenerated on October 23, 2014
Chapter 56: How to Customize Form Rendering | 201

Listing 56-39
Listing 56-40
Listing 56-41
Listing 56-42
Using CSS only
By default, label tags of required fields are rendered with a required CSS class. Thus, you canalso add an asterisk using CSS only:
123
label.required:before {content: "* ";
}
Adding "help" Messages
You can also customize your form widgets to have an optional "help" message.
In Twig, if you're making the form customization inside the same template as your form, modify the usetag and add the following:
123456789
{% use 'form_div_layout.html.twig' with form_widget_simple as base_form_widget_simple %}
{% block form_widget_simple %}{{ block('base_form_widget_simple') }}
{% if help is defined %}<span class="help">{{ help }}</span>
{% endif %}{% endblock %}
In Twig, if you're making the form customization inside a separate template, use the following:
123456789
{% extends 'form_div_layout.html.twig' %}
{% block form_widget_simple %}{{ parent() }}
{% if help is defined %}<span class="help">{{ help }}</span>
{% endif %}{% endblock %}
When using PHP as a templating engine you have to copy the content from the original template:
123456789
10111213
<!-- form_widget_simple.html.php -->
<!-- Original content --><input
type="<?php echo isset($type) ? $view->escape($type) : 'text' ?>"<?php if (!empty($value)): ?>value="<?php echo $view->escape($value) ?>"<?php endif ?><?php echo $view['form']->block($form, 'widget_attributes') ?>
/>
<!-- Customization --><?php if (isset($help)) : ?>
<span class="help"><?php echo $view->escape($help) ?></span><?php endif ?>
To render a help message below a field, pass in a help variable:
PDF brought to you bygenerated on October 23, 2014
Chapter 56: How to Customize Form Rendering | 202
Listing 56-43
Listing 56-44
1 {{ form_widget(form.title, {'help': 'foobar'}) }}
See Form Theming for how to apply this customization.
Using Form VariablesMost of the functions available for rendering different parts of a form (e.g. the form widget, form label,form errors, etc.) also allow you to make certain customizations directly. Look at the following example:
12
{# render a widget, but add a "foo" class to it #}{{ form_widget(form.name, { 'attr': {'class': 'foo'} }) }}
The array passed as the second argument contains form "variables". For more details about this conceptin Twig, see More about Form Variables.
PDF brought to you bygenerated on October 23, 2014
Chapter 56: How to Customize Form Rendering | 203

Listing 57-1
Chapter 57
How to Use Data Transformers
You'll often find the need to transform the data the user entered in a form into something else for usein your program. You could easily do this manually in your controller, but what if you want to use thisspecific form in different places?
Say you have a one-to-one relation of Task to Issue, e.g. a Task optionally has an issue linked to it. Addinga listbox with all possible issues can eventually lead to a really long listbox in which it is impossible to findsomething. You might want to add a textbox instead, where the user can simply enter the issue number.
You could try to do this in your controller, but it's not the best solution. It would be better if this issuewere automatically converted to an Issue object. This is where Data Transformers come into play.
Creating the TransformerFirst, create an IssueToNumberTransformer class - this class will be responsible for converting to andfrom the issue number and the Issue object:
123456789
10111213141516171819
// src/Acme/TaskBundle/Form/DataTransformer/IssueToNumberTransformer.phpnamespace Acme\TaskBundle\Form\DataTransformer;
use Symfony\Component\Form\DataTransformerInterface;use Symfony\Component\Form\Exception\TransformationFailedException;use Doctrine\Common\Persistence\ObjectManager;use Acme\TaskBundle\Entity\Issue;
class IssueToNumberTransformer implements DataTransformerInterface{
/*** @var ObjectManager*/private $om;
/*** @param ObjectManager $om*/public function __construct(ObjectManager $om)
PDF brought to you bygenerated on October 23, 2014
Chapter 57: How to Use Data Transformers | 204

20212223242526272829303132333435363738394041424344454647484950515253545556575859606162636465666768
{$this->om = $om;
}
/*** Transforms an object (issue) to a string (number).** @param Issue|null $issue* @return string*/public function transform($issue){
if (null === $issue) {return "";
}
return $issue->getNumber();}
/*** Transforms a string (number) to an object (issue).** @param string $number** @return Issue|null** @throws TransformationFailedException if object (issue) is not found.*/public function reverseTransform($number){
if (!$number) {return null;
}
$issue = $this->om->getRepository('AcmeTaskBundle:Issue')->findOneBy(array('number' => $number))
;
if (null === $issue) {throw new TransformationFailedException(sprintf(
'An issue with number "%s" does not exist!',$number
));}
return $issue;}
}
If you want a new issue to be created when an unknown number is entered, you can instantiate itrather than throwing the TransformationFailedException.
PDF brought to you bygenerated on October 23, 2014
Chapter 57: How to Use Data Transformers | 205

Listing 57-2
Listing 57-3
When null is passed to the transform() method, your transformer should return an equivalentvalue of the type it is transforming to (e.g. an empty string, 0 for integers or 0.0 for floats).
Using the TransformerNow that you have the transformer built, you just need to add it to your issue field in some form.
You can also use transformers without creating a new custom form type by calling addModelTransformer(or addViewTransformer - see Model and View Transformers) on any field builder:
123456789
1011121314151617181920212223242526272829303132333435363738
use Symfony\Component\Form\FormBuilderInterface;use Acme\TaskBundle\Form\DataTransformer\IssueToNumberTransformer;
class TaskType extends AbstractType{
public function buildForm(FormBuilderInterface $builder, array $options){
// ...
// this assumes that the entity manager was passed in as an option$entityManager = $options['em'];$transformer = new IssueToNumberTransformer($entityManager);
// add a normal text field, but add your transformer to it$builder->add(
$builder->create('issue', 'text')->addModelTransformer($transformer)
);}
public function setDefaultOptions(OptionsResolverInterface $resolver){
$resolver->setDefaults(array(
'data_class' => 'Acme\TaskBundle\Entity\Task',))->setRequired(array(
'em',))->setAllowedTypes(array(
'em' => 'Doctrine\Common\Persistence\ObjectManager',));
// ...}
// ...}
This example requires that you pass in the entity manager as an option when creating your form. Later,you'll learn how you could create a custom issue field type to avoid needing to do this in your controller:
123
$taskForm = $this->createForm(new TaskType(), $task, array('em' => $this->getDoctrine()->getManager(),
));
PDF brought to you bygenerated on October 23, 2014
Chapter 57: How to Use Data Transformers | 206

Listing 57-4
Cool, you're done! Your user will be able to enter an issue number into the text field and it willbe transformed back into an Issue object. This means that, after a successful submission, the Formframework will pass a real Issue object to Task::setIssue() instead of the issue number.
If the issue isn't found, a form error will be created for that field and its error message can be controlledwith the invalid_message field option.
Notice that adding a transformer requires using a slightly more complicated syntax when addingthe field. The following is wrong, as the transformer would be applied to the entire form, insteadof just this field:
1234
// THIS IS WRONG - TRANSFORMER WILL BE APPLIED TO THE ENTIRE FORM// see above example for correct code$builder->add('issue', 'text')
->addModelTransformer($transformer);
Model and View Transformers
In the above example, the transformer was used as a "model" transformer. In fact, there are two differenttypes of transformers and three different types of underlying data.
../../_images/DataTransformersTypes.png
In any form, the three different types of data are:1. Model data - This is the data in the format used in your application (e.g. an Issue object). If
you call Form::getData or Form::setData, you're dealing with the "model" data.2. Norm Data - This is a normalized version of your data, and is commonly the same as your
"model" data (though not in our example). It's not commonly used directly.3. View Data - This is the format that's used to fill in the form fields themselves. It's also the
format in which the user will submit the data. When you call Form::submit($data), the $datais in the "view" data format.
The two different types of transformers help convert to and from each of these types of data:Model transformers:
• transform: "model data" => "norm data"• reverseTransform: "norm data" => "model data"
View transformers:
• transform: "norm data" => "view data"• reverseTransform: "view data" => "norm data"
Which transformer you need depends on your situation.
To use the view transformer, call addViewTransformer.
So why Use the Model Transformer?In this example, the field is a text field, and a text field is always expected to be a simple, scalar formatin the "norm" and "view" formats. For this reason, the most appropriate transformer was the "model"transformer (which converts to/from the norm format - string issue number - to the model format - Issueobject).
PDF brought to you bygenerated on October 23, 2014
Chapter 57: How to Use Data Transformers | 207

Listing 57-5
The difference between the transformers is subtle and you should always think about what the "norm"data for a field should really be. For example, the "norm" data for a text field is a string, but is a DateTimeobject for a date field.
Using Transformers in a custom Field TypeIn the above example, you applied the transformer to a normal text field. This was easy, but has twodownsides:
1) You need to always remember to apply the transformer whenever you're adding a field for issuenumbers.
2) You need to worry about passing in the em option whenever you're creating a form that uses thetransformer.
Because of these, you may choose to create a custom field type. First, create the custom field type class:
123456789
101112131415161718192021222324252627282930313233343536373839404142
// src/Acme/TaskBundle/Form/Type/IssueSelectorType.phpnamespace Acme\TaskBundle\Form\Type;
use Symfony\Component\Form\AbstractType;use Symfony\Component\Form\FormBuilderInterface;use Acme\TaskBundle\Form\DataTransformer\IssueToNumberTransformer;use Doctrine\Common\Persistence\ObjectManager;use Symfony\Component\OptionsResolver\OptionsResolverInterface;
class IssueSelectorType extends AbstractType{
/*** @var ObjectManager*/private $om;
/*** @param ObjectManager $om*/public function __construct(ObjectManager $om){
$this->om = $om;}
public function buildForm(FormBuilderInterface $builder, array $options){
$transformer = new IssueToNumberTransformer($this->om);$builder->addModelTransformer($transformer);
}
public function setDefaultOptions(OptionsResolverInterface $resolver){
$resolver->setDefaults(array('invalid_message' => 'The selected issue does not exist',
));}
public function getParent(){
return 'text';}
PDF brought to you bygenerated on October 23, 2014
Chapter 57: How to Use Data Transformers | 208

Listing 57-6
Listing 57-7
4344454647
public function getName(){
return 'issue_selector';}
}
Next, register your type as a service and tag it with form.type so that it's recognized as a custom fieldtype:
123456
services:acme_demo.type.issue_selector:
class: Acme\TaskBundle\Form\Type\IssueSelectorTypearguments: ["@doctrine.orm.entity_manager"]tags:
- { name: form.type, alias: issue_selector }
Now, whenever you need to use your special issue_selector field type, it's quite easy:
123456789
101112131415161718192021
// src/Acme/TaskBundle/Form/Type/TaskType.phpnamespace Acme\TaskBundle\Form\Type;
use Symfony\Component\Form\AbstractType;use Symfony\Component\Form\FormBuilderInterface;
class TaskType extends AbstractType{
public function buildForm(FormBuilderInterface $builder, array $options){
$builder->add('task')->add('dueDate', null, array('widget' => 'single_text'))->add('issue', 'issue_selector');
}
public function getName(){
return 'task';}
}
PDF brought to you bygenerated on October 23, 2014
Chapter 57: How to Use Data Transformers | 209

Listing 58-1
Chapter 58
How to Dynamically Modify Forms Using FormEvents
Often times, a form can't be created statically. In this entry, you'll learn how to customize your formbased on three common use-cases:
1. Customizing your Form Based on the Underlying DataExample: you have a "Product" form and need to modify/add/remove a field
based on the data on the underlying Product being edited.
2. How to dynamically Generate Forms Based on user Data
Example: you create a "Friend Message" form and need to build a drop-down that contains onlyusers that are friends with the current authenticated user.
3. Dynamic Generation for Submitted Forms
Example: on a registration form, you have a "country" field and a "state" field which shouldpopulate dynamically based on the value in the "country" field.
If you wish to learn more about the basics behind form events, you can take a look at the Form Eventsdocumentation.
Customizing your Form Based on the Underlying DataBefore jumping right into dynamic form generation, hold on and recall what a bare form class looks like:
12345678
// src/Acme/DemoBundle/Form/Type/ProductType.phpnamespace Acme\DemoBundle\Form\Type;
use Symfony\Component\Form\AbstractType;use Symfony\Component\Form\FormBuilderInterface;use Symfony\Component\OptionsResolver\OptionsResolverInterface;
class ProductType extends AbstractType
PDF brought to you bygenerated on October 23, 2014
Chapter 58: How to Dynamically Modify Forms Using Form Events | 210

Listing 58-2
9101112131415161718192021222324252627
{public function buildForm(FormBuilderInterface $builder, array $options){
$builder->add('name');$builder->add('price');
}
public function setDefaultOptions(OptionsResolverInterface $resolver){
$resolver->setDefaults(array('data_class' => 'Acme\DemoBundle\Entity\Product'
));}
public function getName(){
return 'product';}
}
If this particular section of code isn't already familiar to you, you probably need to take a step backand first review the Forms chapter before proceeding.
Assume for a moment that this form utilizes an imaginary "Product" class that has only two properties("name" and "price"). The form generated from this class will look the exact same regardless if a newProduct is being created or if an existing product is being edited (e.g. a product fetched from thedatabase).
Suppose now, that you don't want the user to be able to change the name value once the object has beencreated. To do this, you can rely on Symfony's EventDispatcher system to analyze the data on the objectand modify the form based on the Product object's data. In this entry, you'll learn how to add this levelof flexibility to your forms.
Adding an Event Listener to a Form Class
So, instead of directly adding that name widget, the responsibility of creating that particular field isdelegated to an event listener:
123456789
10111213141516
// src/Acme/DemoBundle/Form/Type/ProductType.phpnamespace Acme\DemoBundle\Form\Type;
// ...use Symfony\Component\Form\FormEvent;use Symfony\Component\Form\FormEvents;
class ProductType extends AbstractType{
public function buildForm(FormBuilderInterface $builder, array $options){
$builder->add('price');
$builder->addEventListener(FormEvents::PRE_SET_DATA, function (FormEvent $event) {// ... adding the name field if needed
});
PDF brought to you bygenerated on October 23, 2014
Chapter 58: How to Dynamically Modify Forms Using Form Events | 211

Listing 58-3
Listing 58-4
17181920
}
// ...}
The goal is to create a name field only if the underlying Product object is new (e.g. hasn't been persistedto the database). Based on that, the event listener might look like the following:
123456789
10111213141516
// ...public function buildForm(FormBuilderInterface $builder, array $options){
// ...$builder->addEventListener(FormEvents::PRE_SET_DATA, function (FormEvent $event) {
$product = $event->getData();$form = $event->getForm();
// check if the Product object is "new"// If no data is passed to the form, the data is "null".// This should be considered a new "Product"if (!$product || null === $product->getId()) {
$form->add('name', 'text');}
});}
The FormEvents::PRE_SET_DATA line actually resolves to the string form.pre_set_data.FormEvents1 serves an organizational purpose. It is a centralized location in which you can find allof the various form events available. You can view the full list of form events via the FormEvents2
class.
Adding an Event Subscriber to a Form Class
For better reusability or if there is some heavy logic in your event listener, you can also move the logic forcreating the name field to an event subscriber:
123456789
101112131415
// src/Acme/DemoBundle/Form/Type/ProductType.phpnamespace Acme\DemoBundle\Form\Type;
// ...use Acme\DemoBundle\Form\EventListener\AddNameFieldSubscriber;
class ProductType extends AbstractType{
public function buildForm(FormBuilderInterface $builder, array $options){
$builder->add('price');
$builder->addEventSubscriber(new AddNameFieldSubscriber());}
1. http://api.symfony.com/2.5/Symfony/Component/Form/FormEvents.html
2. http://api.symfony.com/2.5/Symfony/Component/Form/FormEvents.html
PDF brought to you bygenerated on October 23, 2014
Chapter 58: How to Dynamically Modify Forms Using Form Events | 212

Listing 58-5
Listing 58-6
1617
// ...}
Now the logic for creating the name field resides in it own subscriber class:
123456789
1011121314151617181920212223242526
// src/Acme/DemoBundle/Form/EventListener/AddNameFieldSubscriber.phpnamespace Acme\DemoBundle\Form\EventListener;
use Symfony\Component\Form\FormEvent;use Symfony\Component\Form\FormEvents;use Symfony\Component\EventDispatcher\EventSubscriberInterface;
class AddNameFieldSubscriber implements EventSubscriberInterface{
public static function getSubscribedEvents(){
// Tells the dispatcher that you want to listen on the form.pre_set_data// event and that the preSetData method should be called.return array(FormEvents::PRE_SET_DATA => 'preSetData');
}
public function preSetData(FormEvent $event){
$product = $event->getData();$form = $event->getForm();
if (!$product || null === $product->getId()) {$form->add('name', 'text');
}}
}
How to dynamically Generate Forms Based on user DataSometimes you want a form to be generated dynamically based not only on data from the form but alsoon something else - like some data from the current user. Suppose you have a social website where auser can only message people marked as friends on the website. In this case, a "choice list" of whom tomessage should only contain users that are the current user's friends.
Creating the Form Type
Using an event listener, your form might look like this:
123456789
1011
// src/Acme/DemoBundle/Form/Type/FriendMessageFormType.phpnamespace Acme\DemoBundle\Form\Type;
use Symfony\Component\Form\AbstractType;use Symfony\Component\Form\FormBuilderInterface;use Symfony\Component\Form\FormEvents;use Symfony\Component\Form\FormEvent;use Symfony\Component\Security\Core\SecurityContext;use Symfony\Component\OptionsResolver\OptionsResolverInterface;
class FriendMessageFormType extends AbstractType
PDF brought to you bygenerated on October 23, 2014
Chapter 58: How to Dynamically Modify Forms Using Form Events | 213

Listing 58-7
Listing 58-8
121314151617181920212223242526272829303132
{public function buildForm(FormBuilderInterface $builder, array $options){
$builder->add('subject', 'text')->add('body', 'textarea')
;$builder->addEventListener(FormEvents::PRE_SET_DATA, function (FormEvent $event) {
// ... add a choice list of friends of the current application user});
}
public function getName(){
return 'acme_friend_message';}
public function setDefaultOptions(OptionsResolverInterface $resolver){}
}
The problem is now to get the current user and create a choice field that contains only this user's friends.
Luckily it is pretty easy to inject a service inside of the form. This can be done in the constructor:
123456
private $securityContext;
public function __construct(SecurityContext $securityContext){
$this->securityContext = $securityContext;}
You might wonder, now that you have access to the User (through the security context), whynot just use it directly in buildForm and omit the event listener? This is because doing so in thebuildForm method would result in the whole form type being modified and not just this one forminstance. This may not usually be a problem, but technically a single form type could be used on asingle request to create many forms or fields.
Customizing the Form Type
Now that you have all the basics in place you can take advantage of the SecurityContext and fill in thelistener logic:
123456789
1011
// src/Acme/DemoBundle/FormType/FriendMessageFormType.php
use Symfony\Component\Security\Core\SecurityContext;use Doctrine\ORM\EntityRepository;// ...
class FriendMessageFormType extends AbstractType{
private $securityContext;
public function __construct(SecurityContext $securityContext)
PDF brought to you bygenerated on October 23, 2014
Chapter 58: How to Dynamically Modify Forms Using Form Events | 214

12131415161718192021222324252627282930313233343536373839404142434445464748495051525354555657
{$this->securityContext = $securityContext;
}
public function buildForm(FormBuilderInterface $builder, array $options){
$builder->add('subject', 'text')->add('body', 'textarea')
;
// grab the user, do a quick sanity check that one exists$user = $this->securityContext->getToken()->getUser();if (!$user) {
throw new \LogicException('The FriendMessageFormType cannot be used without an authenticated user!'
);}
$builder->addEventListener(FormEvents::PRE_SET_DATA,function (FormEvent $event) use ($user) {
$form = $event->getForm();
$formOptions = array('class' => 'Acme\DemoBundle\Entity\User','property' => 'fullName','query_builder' => function (EntityRepository $er) use ($user) {
// build a custom query// return $er->createQueryBuilder('u')->addOrderBy('fullName',
'DESC');
// or call a method on your repository that returns the querybuilder
// the $er is an instance of your UserRepository// return $er->createOrderByFullNameQueryBuilder();
},);
// create the field, this is similar the $builder->add()// field name, field type, data, options$form->add('friend', 'entity', $formOptions);
});
}
// ...}
The multiple and expanded form options will default to false because the type of the friend fieldis entity.
Using the Form
Our form is now ready to use and there are two possible ways to use it inside of a controller:1. create it manually and remember to pass the security context to it;
PDF brought to you bygenerated on October 23, 2014
Chapter 58: How to Dynamically Modify Forms Using Form Events | 215

Listing 58-9
Listing 58-10
Listing 58-11
Listing 58-12
Listing 58-13
or2. define it as a service.
a) Creating the Form manually
This is very simple, and is probably the better approach unless you're using your new form type in manyplaces or embedding it into other forms:
123456789
101112
class FriendMessageController extends Controller{
public function newAction(Request $request){
$securityContext = $this->container->get('security.context');$form = $this->createForm(
new FriendMessageFormType($securityContext));
// ...}
}
b) Defining the Form as a Service
To define your form as a service, just create a normal service and then tag it with form.type.
1234567
# app/config/config.ymlservices:
acme.form.friend_message:class: Acme\DemoBundle\Form\Type\FriendMessageFormTypearguments: ["@security.context"]tags:
- { name: form.type, alias: acme_friend_message }
If you wish to create it from within a controller or any other service that has access to the form factory,you then use:
123456789
1011
use Symfony\Component\DependencyInjection\ContainerAware;
class FriendMessageController extends ContainerAware{
public function newAction(Request $request){
$form = $this->get('form.factory')->create('acme_friend_message');
// ...}
}
If you extend the Symfony\Bundle\FrameworkBundle\Controller\Controller class, you can simplycall:
1 $form = $this->createForm('acme_friend_message');
You can also easily embed the form type into another form:
PDF brought to you bygenerated on October 23, 2014
Chapter 58: How to Dynamically Modify Forms Using Form Events | 216

Listing 58-14
12345
// inside some other "form type" classpublic function buildForm(FormBuilderInterface $builder, array $options){
$builder->add('message', 'acme_friend_message');}
Dynamic Generation for Submitted FormsAnother case that can appear is that you want to customize the form specific to the data that wassubmitted by the user. For example, imagine you have a registration form for sports gatherings. Someevents will allow you to specify your preferred position on the field. This would be a choice field forexample. However the possible choices will depend on each sport. Football will have attack, defense,goalkeeper etc... Baseball will have a pitcher but will not have a goalkeeper. You will need the correctoptions in order for validation to pass.
The meetup is passed as an entity field to the form. So we can access each sport like this:
123456789
101112131415161718192021222324252627282930313233343536373839
// src/Acme/DemoBundle/Form/Type/SportMeetupType.phpnamespace Acme\DemoBundle\Form\Type;
use Symfony\Component\Form\AbstractType;use Symfony\Component\Form\FormBuilderInterface;use Symfony\Component\Form\FormEvent;use Symfony\Component\Form\FormEvents;// ...
class SportMeetupType extends AbstractType{
public function buildForm(FormBuilderInterface $builder, array $options){
$builder->add('sport', 'entity', array(
'class' => 'AcmeDemoBundle:Sport','empty_value' => '',
));
$builder->addEventListener(FormEvents::PRE_SET_DATA,function (FormEvent $event) {
$form = $event->getForm();
// this would be your entity, i.e. SportMeetup$data = $event->getData();
$sport = $data->getSport();$positions = null === $sport ? array() : $sport->getAvailablePositions();
$form->add('position', 'entity', array('class' => 'AcmeDemoBundle:Position','empty_value' => '','choices' => $positions,
));}
);}
PDF brought to you bygenerated on October 23, 2014
Chapter 58: How to Dynamically Modify Forms Using Form Events | 217

Listing 58-15
404142
// ...}
When you're building this form to display to the user for the first time, then this example works perfectly.
However, things get more difficult when you handle the form submission. This is because thePRE_SET_DATA event tells us the data that you're starting with (e.g. an empty SportMeetup object), notthe submitted data.
On a form, we can usually listen to the following events:
• PRE_SET_DATA• POST_SET_DATA• PRE_SUBMIT• SUBMIT• POST_SUBMIT
New in version 2.3: The events PRE_SUBMIT, SUBMIT and POST_SUBMIT were introduced in Symfony2.3. Before, they were named PRE_BIND, BIND and POST_BIND.
The key is to add a POST_SUBMIT listener to the field that your new field depends on. If you add aPOST_SUBMIT listener to a form child (e.g. sport), and add new children to the parent form, the Formcomponent will detect the new field automatically and map it to the submitted client data.
The type would now look like:
123456789
1011121314151617181920212223242526272829
// src/Acme/DemoBundle/Form/Type/SportMeetupType.phpnamespace Acme\DemoBundle\Form\Type;
// ...use Symfony\Component\Form\FormInterface;use Acme\DemoBundle\Entity\Sport;
class SportMeetupType extends AbstractType{
public function buildForm(FormBuilderInterface $builder, array $options){
$builder->add('sport', 'entity', array(
'class' => 'AcmeDemoBundle:Sport','empty_value' => '',
));;
$formModifier = function (FormInterface $form, Sport $sport = null) {$positions = null === $sport ? array() : $sport->getAvailablePositions();
$form->add('position', 'entity', array('class' => 'AcmeDemoBundle:Position','empty_value' => '','choices' => $positions,
));};
$builder->addEventListener(
PDF brought to you bygenerated on October 23, 2014
Chapter 58: How to Dynamically Modify Forms Using Form Events | 218

Listing 58-16
30313233343536373839404142434445464748495051525354
FormEvents::PRE_SET_DATA,function (FormEvent $event) use ($formModifier) {
// this would be your entity, i.e. SportMeetup$data = $event->getData();
$formModifier($event->getForm(), $data->getSport());}
);
$builder->get('sport')->addEventListener(FormEvents::POST_SUBMIT,function (FormEvent $event) use ($formModifier) {
// It's important here to fetch $event->getForm()->getData(), as// $event->getData() will get you the client data (that is, the ID)$sport = $event->getForm()->getData();
// since we've added the listener to the child, we'll have to pass on// the parent to the callback functions!$formModifier($event->getForm()->getParent(), $sport);
});
}
// ...}
You can see that you need to listen on these two events and have different callbacks only because in twodifferent scenarios, the data that you can use is available in different events. Other than that, the listenersalways perform exactly the same things on a given form.
One piece that is still missing is the client-side updating of your form after the sport is selected. Thisshould be handled by making an AJAX call back to your application. Assume that you have a sportmeetup creation controller:
123456789
101112131415161718192021222324
// src/Acme/DemoBundle/Controller/MeetupController.phpnamespace Acme\DemoBundle\Controller;
use Symfony\Bundle\FrameworkBundle\Controller\Controller;use Symfony\Component\HttpFoundation\Request;use Acme\DemoBundle\Entity\SportMeetup;use Acme\DemoBundle\Form\Type\SportMeetupType;// ...
class MeetupController extends Controller{
public function createAction(Request $request){
$meetup = new SportMeetup();$form = $this->createForm(new SportMeetupType(), $meetup);$form->handleRequest($request);if ($form->isValid()) {
// ... save the meetup, redirect etc.}
return $this->render('AcmeDemoBundle:Meetup:create.html.twig',array('form' => $form->createView())
);
PDF brought to you bygenerated on October 23, 2014
Chapter 58: How to Dynamically Modify Forms Using Form Events | 219

Listing 58-17
Listing 58-18
25262728
}
// ...}
The associated template uses some JavaScript to update the position form field according to the currentselection in the sport field:
123456789
1011121314151617181920212223242526272829303132
{# src/Acme/DemoBundle/Resources/views/Meetup/create.html.twig #}{{ form_start(form) }}
{{ form_row(form.sport) }} {# <select id="meetup_sport" ... #}{{ form_row(form.position) }} {# <select id="meetup_position" ... #}{# ... #}
{{ form_end(form) }}
<script>var $sport = $('#meetup_sport');// When sport gets selected ...$sport.change(function() {// ... retrieve the corresponding form.var $form = $(this).closest('form');// Simulate form data, but only include the selected sport value.var data = {};data[$sport.attr('name')] = $sport.val();// Submit data via AJAX to the form's action path.$.ajax({
url : $form.attr('action'),type: $form.attr('method'),data : data,success: function(html) {// Replace current position field ...$('#meetup_position').replaceWith(// ... with the returned one from the AJAX response.$(html).find('#meetup_position')
);// Position field now displays the appropriate positions.
}});
});</script>
The major benefit of submitting the whole form to just extract the updated position field is that noadditional server-side code is needed; all the code from above to generate the submitted form can bereused.
Suppressing Form ValidationTo suppress form validation you can use the POST_SUBMIT event and prevent the ValidationListener3
from being called.
The reason for needing to do this is that even if you set group_validation to false there are still someintegrity checks executed. For example an uploaded file will still be checked to see if it is too large andthe form will still check to see if non-existing fields were submitted. To disable all of this, use a listener:
3. http://api.symfony.com/2.5/Symfony/Component/Form/Extension/Validator/EventListener/ValidationListener.html
PDF brought to you bygenerated on October 23, 2014
Chapter 58: How to Dynamically Modify Forms Using Form Events | 220

123456789
1011
use Symfony\Component\Form\FormBuilderInterface;use Symfony\Component\Form\FormEvents;
public function buildForm(FormBuilderInterface $builder, array $options){
$builder->addEventListener(FormEvents::POST_SUBMIT, function ($event) {$event->stopPropagation();
}, 900); // Always set a higher priority than ValidationListener
// ...}
By doing this, you may accidentally disable something more than just form validation, since thePOST_SUBMIT event may have other listeners.
PDF brought to you bygenerated on October 23, 2014
Chapter 58: How to Dynamically Modify Forms Using Form Events | 221

Listing 59-1
Chapter 59
How to Embed a Collection of Forms
In this entry, you'll learn how to create a form that embeds a collection of many other forms. This couldbe useful, for example, if you had a Task class and you wanted to edit/create/remove many Tag objectsrelated to that Task, right inside the same form.
In this entry, it's loosely assumed that you're using Doctrine as your database store. But if you'renot using Doctrine (e.g. Propel or just a database connection), it's all very similar. There are only afew parts of this tutorial that really care about "persistence".
If you are using Doctrine, you'll need to add the Doctrine metadata, including the ManyToManyassociation mapping definition on the Task's tags property.
First, suppose that each Task belongs to multiple Tag objects. Start by creating a simple Task class:
123456789
10111213141516171819202122
// src/Acme/TaskBundle/Entity/Task.phpnamespace Acme\TaskBundle\Entity;
use Doctrine\Common\Collections\ArrayCollection;
class Task{
protected $description;
protected $tags;
public function __construct(){
$this->tags = new ArrayCollection();}
public function getDescription(){
return $this->description;}
public function setDescription($description)
PDF brought to you bygenerated on October 23, 2014
Chapter 59: How to Embed a Collection of Forms | 222

Listing 59-2
Listing 59-3
232425262728293031
{$this->description = $description;
}
public function getTags(){
return $this->tags;}
}
The ArrayCollection is specific to Doctrine and is basically the same as using an array (but itmust be an ArrayCollection if you're using Doctrine).
Now, create a Tag class. As you saw above, a Task can have many Tag objects:
1234567
// src/Acme/TaskBundle/Entity/Tag.phpnamespace Acme\TaskBundle\Entity;
class Tag{
public $name;}
The name property is public here, but it can just as easily be protected or private (but then it wouldneed getName and setName methods).
Then, create a form class so that a Tag object can be modified by the user:
123456789
101112131415161718192021222324
// src/Acme/TaskBundle/Form/Type/TagType.phpnamespace Acme\TaskBundle\Form\Type;
use Symfony\Component\Form\AbstractType;use Symfony\Component\Form\FormBuilderInterface;use Symfony\Component\OptionsResolver\OptionsResolverInterface;
class TagType extends AbstractType{
public function buildForm(FormBuilderInterface $builder, array $options){
$builder->add('name');}
public function setDefaultOptions(OptionsResolverInterface $resolver){
$resolver->setDefaults(array('data_class' => 'Acme\TaskBundle\Entity\Tag',
));}
public function getName(){
return 'tag';
PDF brought to you bygenerated on October 23, 2014
Chapter 59: How to Embed a Collection of Forms | 223
Listing 59-4
Listing 59-5
2526
}}
With this, you have enough to render a tag form by itself. But since the end goal is to allow the tags of aTask to be modified right inside the task form itself, create a form for the Task class.
Notice that you embed a collection of TagType forms using the collection field type:
123456789
10111213141516171819202122232425262728
// src/Acme/TaskBundle/Form/Type/TaskType.phpnamespace Acme\TaskBundle\Form\Type;
use Symfony\Component\Form\AbstractType;use Symfony\Component\Form\FormBuilderInterface;use Symfony\Component\OptionsResolver\OptionsResolverInterface;
class TaskType extends AbstractType{
public function buildForm(FormBuilderInterface $builder, array $options){
$builder->add('description');
$builder->add('tags', 'collection', array('type' => new TagType()));}
public function setDefaultOptions(OptionsResolverInterface $resolver){
$resolver->setDefaults(array('data_class' => 'Acme\TaskBundle\Entity\Task',
));}
public function getName(){
return 'task';}
}
In your controller, you'll now initialize a new instance of TaskType:
123456789
10111213141516171819
// src/Acme/TaskBundle/Controller/TaskController.phpnamespace Acme\TaskBundle\Controller;
use Acme\TaskBundle\Entity\Task;use Acme\TaskBundle\Entity\Tag;use Acme\TaskBundle\Form\Type\TaskType;use Symfony\Component\HttpFoundation\Request;use Symfony\Bundle\FrameworkBundle\Controller\Controller;
class TaskController extends Controller{
public function newAction(Request $request){
$task = new Task();
// dummy code - this is here just so that the Task has some tags// otherwise, this isn't an interesting example$tag1 = new Tag();$tag1->name = 'tag1';
PDF brought to you bygenerated on October 23, 2014
Chapter 59: How to Embed a Collection of Forms | 224

Listing 59-6
20212223242526272829303132333435363738
$task->getTags()->add($tag1);$tag2 = new Tag();$tag2->name = 'tag2';$task->getTags()->add($tag2);// end dummy code
$form = $this->createForm(new TaskType(), $task);
$form->handleRequest($request);
if ($form->isValid()) {// ... maybe do some form processing, like saving the Task and Tag objects
}
return $this->render('AcmeTaskBundle:Task:new.html.twig', array('form' => $form->createView(),
));}
}
The corresponding template is now able to render both the description field for the task form as wellas all the TagType forms for any tags that are already related to this Task. In the above controller, I addedsome dummy code so that you can see this in action (since a Task has zero tags when first created).
123456789
101112131415161718
{# src/Acme/TaskBundle/Resources/views/Task/new.html.twig #}
{# ... #}
{{ form_start(form) }}{# render the task's only field: description #}{{ form_row(form.description) }}
<h3>Tags</h3><ul class="tags">
{# iterate over each existing tag and render its only field: name #}{% for tag in form.tags %}
<li>{{ form_row(tag.name) }}</li>{% endfor %}
</ul>{{ form_end(form) }}
{# ... #}
When the user submits the form, the submitted data for the tags field are used to construct anArrayCollection of Tag objects, which is then set on the tag field of the Task instance.
The tags collection is accessible naturally via $task->getTags() and can be persisted to the database orused however you need.
So far, this works great, but this doesn't allow you to dynamically add new tags or delete existing tags.So, while editing existing tags will work great, your user can't actually add any new tags yet.
PDF brought to you bygenerated on October 23, 2014
Chapter 59: How to Embed a Collection of Forms | 225

Listing 59-7
Listing 59-8
In this entry, you embed only one collection, but you are not limited to this. You can also embednested collection as many level down as you like. But if you use Xdebug in your development setup,you may receive a Maximum function nesting level of '100' reached, aborting! error.This is due to the xdebug.max_nesting_level PHP setting, which defaults to 100.
This directive limits recursion to 100 calls which may not be enough for rendering the form inthe template if you render the whole form at once (e.g form_widget(form)). To fix this you canset this directive to a higher value (either via a php.ini file or via ini_set1, for example in app/autoload.php) or render each form field by hand using form_row.
Allowing "new" Tags with the "Prototype"Allowing the user to dynamically add new tags means that you'll need to use some JavaScript. Previouslyyou added two tags to your form in the controller. Now let the user add as many tag forms as they needdirectly in the browser. This will be done through a bit of JavaScript.
The first thing you need to do is to let the form collection know that it will receive an unknown numberof tags. So far you've added two tags and the form type expects to receive exactly two, otherwise anerror will be thrown: This form should not contain extra fields. To make this flexible, add theallow_add option to your collection field:
123456789
1011121314
// src/Acme/TaskBundle/Form/Type/TaskType.php
// ...use Symfony\Component\Form\FormBuilderInterface;
public function buildForm(FormBuilderInterface $builder, array $options){
$builder->add('description');
$builder->add('tags', 'collection', array('type' => new TagType(),'allow_add' => true,
));}
In addition to telling the field to accept any number of submitted objects, the allow_add also makes a"prototype" variable available to you. This "prototype" is a little "template" that contains all the HTMLto be able to render any new "tag" forms. To render it, make the following change to your template:
123
<ul class="tags" data-prototype="{{ form_widget(form.tags.vars.prototype)|e }}">...
</ul>
If you render your whole "tags" sub-form at once (e.g. form_row(form.tags)), then the prototypeis automatically available on the outer div as the data-prototype attribute, similar to what yousee above.
1. http://php.net/manual/en/function.ini-set.php
PDF brought to you bygenerated on October 23, 2014
Chapter 59: How to Embed a Collection of Forms | 226

Listing 59-9
Listing 59-10
Listing 59-11
The form.tags.vars.prototype is a form element that looks and feels just like the individualform_widget(tag) elements inside your for loop. This means that you can call form_widget,form_row or form_label on it. You could even choose to render only one of its fields (e.g. the namefield):
1 {{ form_widget(form.tags.vars.prototype.name)|e }}
On the rendered page, the result will look something like this:
1 <ul class="tags" data-prototype="<div><label class="required">__name__</label><divid="task_tags___name__"><div><labelfor="task_tags___name___name" class=" required">Name</label><input type="text" id="task_tags___name___name"name="task[tags][__name__][name]" required="required"maxlength="255" /></div></div></div>">
The goal of this section will be to use JavaScript to read this attribute and dynamically add new tag formswhen the user clicks a "Add a tag" link. To make things simple, this example uses jQuery and assumesyou have it included somewhere on your page.
Add a script tag somewhere on your page so you can start writing some JavaScript.
First, add a link to the bottom of the "tags" list via JavaScript. Second, bind to the "click" event of thatlink so you can add a new tag form (addTagForm will be show next):
123456789
10111213141516171819202122232425
var $collectionHolder;
// setup an "add a tag" linkvar $addTagLink = $('<a href="#" class="add_tag_link">Add a tag</a>');var $newLinkLi = $('<li></li>').append($addTagLink);
jQuery(document).ready(function() {// Get the ul that holds the collection of tags$collectionHolder = $('ul.tags');
// add the "add a tag" anchor and li to the tags ul$collectionHolder.append($newLinkLi);
// count the current form inputs we have (e.g. 2), use that as the new// index when inserting a new item (e.g. 2)$collectionHolder.data('index', $collectionHolder.find(':input').length);
$addTagLink.on('click', function(e) {// prevent the link from creating a "#" on the URLe.preventDefault();
// add a new tag form (see next code block)addTagForm($collectionHolder, $newLinkLi);
});});
The addTagForm function's job will be to use the data-prototype attribute to dynamically add a newform when this link is clicked. The data-prototype HTML contains the tag text input element with aname of task[tags][__name__][name] and id of task_tags___name___name. The __name__ is a little"placeholder", which you'll replace with a unique, incrementing number (e.g. task[tags][3][name]).
PDF brought to you bygenerated on October 23, 2014
Chapter 59: How to Embed a Collection of Forms | 227

Listing 59-12
Listing 59-13
The actual code needed to make this all work can vary quite a bit, but here's one example:
123456789
101112131415161718
function addTagForm($collectionHolder, $newLinkLi) {// Get the data-prototype explained earliervar prototype = $collectionHolder.data('prototype');
// get the new indexvar index = $collectionHolder.data('index');
// Replace '__name__' in the prototype's HTML to// instead be a number based on how many items we havevar newForm = prototype.replace(/__name__/g, index);
// increase the index with one for the next item$collectionHolder.data('index', index + 1);
// Display the form in the page in an li, before the "Add a tag" link livar $newFormLi = $('<li></li>').append(newForm);$newLinkLi.before($newFormLi);
}
It is better to separate your JavaScript in real JavaScript files than to write it inside the HTML as isdone here.
Now, each time a user clicks the Add a tag link, a new sub form will appear on the page. When the formis submitted, any new tag forms will be converted into new Tag objects and added to the tags propertyof the Task object.
You can find a working example in this JSFiddle2.
To make handling these new tags easier, add an "adder" and a "remover" method for the tags in the Taskclass:
123456789
101112131415161718
// src/Acme/TaskBundle/Entity/Task.phpnamespace Acme\TaskBundle\Entity;
// ...class Task{
// ...
public function addTag(Tag $tag){
$this->tags->add($tag);}
public function removeTag(Tag $tag){
// ...}
}
Next, add a by_reference option to the tags field and set it to false:
2. http://jsfiddle.net/847Kf/4/
PDF brought to you bygenerated on October 23, 2014
Chapter 59: How to Embed a Collection of Forms | 228

Listing 59-14 123456789
101112
// src/Acme/TaskBundle/Form/Type/TaskType.php
// ...public function buildForm(FormBuilderInterface $builder, array $options){
// ...
$builder->add('tags', 'collection', array(// ...'by_reference' => false,
));}
With these two changes, when the form is submitted, each new Tag object is added to the Task class bycalling the addTag method. Before this change, they were added internally by the form by calling $task->getTags()->add($tag). That was just fine, but forcing the use of the "adder" method makes handlingthese new Tag objects easier (especially if you're using Doctrine, which we talk about next!).
If no addTag and removeTag method is found, the form will still use setTag even if by_referenceis false. You'll learn more about the removeTag method later in this article.
PDF brought to you bygenerated on October 23, 2014
Chapter 59: How to Embed a Collection of Forms | 229

Listing 59-15
Listing 59-16
Listing 59-17
Doctrine: Cascading Relations and saving the "Inverse" side
To save the new tags with Doctrine, you need to consider a couple more things. First, unless youiterate over all of the new Tag objects and call $em->persist($tag) on each, you'll receive an errorfrom Doctrine:
A new entity was found through the relationship Acme\TaskBundle\Entity\Task#tagsthat was not configured to cascade persist operations for entity...
To fix this, you may choose to "cascade" the persist operation automatically from the Task objectto any related tags. To do this, add the cascade option to your ManyToMany metadata:
12345678
// src/Acme/TaskBundle/Entity/Task.php
// ...
/*** @ORM\ManyToMany(targetEntity="Tag", cascade={"persist"})*/protected $tags;
A second potential issue deals with the Owning Side and Inverse Side3 of Doctrine relationships. Inthis example, if the "owning" side of the relationship is "Task", then persistence will work fine asthe tags are properly added to the Task. However, if the owning side is on "Tag", then you'll needto do a little bit more work to ensure that the correct side of the relationship is modified.
The trick is to make sure that the single "Task" is set on each "Tag". One easy way to do this is toadd some extra logic to addTag(), which is called by the form type since by_reference is set tofalse:
123456789
// src/Acme/TaskBundle/Entity/Task.php
// ...public function addTag(Tag $tag){
$tag->addTask($this);
$this->tags->add($tag);}
Inside Tag, just make sure you have an addTask method:
123456789
// src/Acme/TaskBundle/Entity/Tag.php
// ...public function addTask(Task $task){
if (!$this->tasks->contains($task)) {$this->tasks->add($task);
}}
If you have a one-to-many relationship, then the workaround is similar, except that you can simplycall setTask from inside addTag.
3. http://docs.doctrine-project.org/en/latest/reference/unitofwork-associations.html
PDF brought to you bygenerated on October 23, 2014
Chapter 59: How to Embed a Collection of Forms | 230

Listing 59-18
Listing 59-19
Listing 59-20
Allowing Tags to be RemovedThe next step is to allow the deletion of a particular item in the collection. The solution is similar toallowing tags to be added.
Start by adding the allow_delete option in the form Type:
123456789
101112
// src/Acme/TaskBundle/Form/Type/TaskType.php
// ...public function buildForm(FormBuilderInterface $builder, array $options){
// ...
$builder->add('tags', 'collection', array(// ...'allow_delete' => true,
));}
Now, you need to put some code into the removeTag method of Task:
123456789
101112
// src/Acme/TaskBundle/Entity/Task.php
// ...class Task{
// ...
public function removeTag(Tag $tag){
$this->tags->removeElement($tag);}
}
Template Modifications
The allow_delete option has one consequence: if an item of a collection isn't sent on submission, therelated data is removed from the collection on the server. The solution is thus to remove the form elementfrom the DOM.
First, add a "delete this tag" link to each tag form:
123456789
1011121314
jQuery(document).ready(function() {// Get the ul that holds the collection of tags$collectionHolder = $('ul.tags');
// add a delete link to all of the existing tag form li elements$collectionHolder.find('li').each(function() {
addTagFormDeleteLink($(this));});
// ... the rest of the block from above});
function addTagForm() {// ...
PDF brought to you bygenerated on October 23, 2014
Chapter 59: How to Embed a Collection of Forms | 231

Listing 59-21
15161718
// add a delete link to the new formaddTagFormDeleteLink($newFormLi);
}
The addTagFormDeleteLink function will look something like this:
123456789
101112
function addTagFormDeleteLink($tagFormLi) {var $removeFormA = $('<a href="#">delete this tag</a>');$tagFormLi.append($removeFormA);
$removeFormA.on('click', function(e) {// prevent the link from creating a "#" on the URLe.preventDefault();
// remove the li for the tag form$tagFormLi.remove();
});}
When a tag form is removed from the DOM and submitted, the removed Tag object will not be includedin the collection passed to setTags. Depending on your persistence layer, this may or may not be enoughto actually remove the relationship between the removed Tag and Task object.
PDF brought to you bygenerated on October 23, 2014
Chapter 59: How to Embed a Collection of Forms | 232

Listing 59-22
Doctrine: Ensuring the database persistence
When removing objects in this way, you may need to do a little bit more work to ensure that therelationship between the Task and the removed Tag is properly removed.
In Doctrine, you have two sides of the relationship: the owning side and the inverse side. Normallyin this case you'll have a many-to-many relationship and the deleted tags will disappear and persistcorrectly (adding new tags also works effortlessly).
But if you have a one-to-many relationship or a many-to-many relationship with a mappedBy on theTask entity (meaning Task is the "inverse" side), you'll need to do more work for the removed tagsto persist correctly.
In this case, you can modify the controller to remove the relationship on the removed tag. Thisassumes that you have some editAction which is handling the "update" of your Task:
123456789
101112131415161718192021222324252627282930313233343536373839404142434445
// src/Acme/TaskBundle/Controller/TaskController.php
use Doctrine\Common\Collections\ArrayCollection;
// ...public function editAction($id, Request $request){
$em = $this->getDoctrine()->getManager();$task = $em->getRepository('AcmeTaskBundle:Task')->find($id);
if (!$task) {throw $this->createNotFoundException('No task found for is '.$id);
}
$originalTags = new ArrayCollection();
// Create an ArrayCollection of the current Tag objects in the databaseforeach ($task->getTags() as $tag) {
$originalTags->add($tag);}
$editForm = $this->createForm(new TaskType(), $task);
$editForm->handleRequest($request);
if ($editForm->isValid()) {
// remove the relationship between the tag and the Taskforeach ($originalTags as $tag) {
if (false === $task->getTags()->contains($tag)) {// remove the Task from the Tag$tag->getTasks()->removeElement($task);
// if it was a many-to-one relationship, remove the relationshiplike this
// $tag->setTask(null);
$em->persist($tag);
// if you wanted to delete the Tag entirely, you can also do that// $em->remove($tag);
}}
$em->persist($task);
PDF brought to you bygenerated on October 23, 2014
Chapter 59: How to Embed a Collection of Forms | 233

46474849505152
$em->flush();
// redirect back to some edit pagereturn $this->redirect($this->generateUrl('task_edit', array('id' => $id)));
}
// render some form template}
As you can see, adding and removing the elements correctly can be tricky. Unless you have a many-to-many relationship where Task is the "owning" side, you'll need to do extra work to make surethat the relationship is properly updated (whether you're adding new tags or removing existingtags) on each Tag object itself.
PDF brought to you bygenerated on October 23, 2014
Chapter 59: How to Embed a Collection of Forms | 234

Listing 60-1
Chapter 60
How to Create a Custom Form Field Type
Symfony comes with a bunch of core field types available for building forms. However there are situationswhere you may want to create a custom form field type for a specific purpose. This recipe assumesyou need a field definition that holds a person's gender, based on the existing choice field. This sectionexplains how the field is defined, how you can customize its layout and finally, how you can register itfor use in your application.
Defining the Field TypeIn order to create the custom field type, first you have to create the class representing the field. In thissituation the class holding the field type will be called GenderType and the file will be stored in the defaultlocation for form fields, which is <BundleName>\Form\Type. Make sure the field extends AbstractType1:
123456789
1011121314151617181920
// src/Acme/DemoBundle/Form/Type/GenderType.phpnamespace Acme\DemoBundle\Form\Type;
use Symfony\Component\Form\AbstractType;use Symfony\Component\OptionsResolver\OptionsResolverInterface;
class GenderType extends AbstractType{
public function setDefaultOptions(OptionsResolverInterface $resolver){
$resolver->setDefaults(array('choices' => array(
'm' => 'Male','f' => 'Female',
)));
}
public function getParent(){
1. http://api.symfony.com/2.5/Symfony/Component/Form/AbstractType.html
PDF brought to you bygenerated on October 23, 2014
Chapter 60: How to Create a Custom Form Field Type | 235

Listing 60-2
2122232425262728
return 'choice';}
public function getName(){
return 'gender';}
}
The location of this file is not important - the Form\Type directory is just a convention.
Here, the return value of the getParent function indicates that you're extending the choice field type.This means that, by default, you inherit all of the logic and rendering of that field type. To see some ofthe logic, check out the ChoiceType2 class. There are three methods that are particularly important:
• buildForm() - Each field type has a buildForm method, which is where you configure andbuild any field(s). Notice that this is the same method you use to setup your forms, and itworks the same here.
• buildView() - This method is used to set any extra variables you'll need when rendering yourfield in a template. For example, in ChoiceType3, a multiple variable is set and used in thetemplate to set (or not set) the multiple attribute on the select field. See Creating a Templatefor the Field for more details.
• setDefaultOptions() - This defines options for your form type that can be used inbuildForm() and buildView(). There are a lot of options common to all fields (see form FieldType), but you can create any others that you need here.
If you're creating a field that consists of many fields, then be sure to set your "parent" type as formor something that extends form. Also, if you need to modify the "view" of any of your child typesfrom your parent type, use the finishView() method.
The getName() method returns an identifier which should be unique in your application. This is used invarious places, such as when customizing how your form type will be rendered.
The goal of this field was to extend the choice type to enable selection of a gender. This is achieved byfixing the choices to a list of possible genders.
Creating a Template for the FieldEach field type is rendered by a template fragment, which is determined in part by the value of yourgetName() method. For more information, see What are Form Themes?.
In this case, since the parent field is choice, you don't need to do any work as the custom field type willautomatically be rendered like a choice type. But for the sake of this example, suppose that when yourfield is "expanded" (i.e. radio buttons or checkboxes, instead of a select field), you want to always renderit in a ul element. In your form theme template (see above link for details), create a gender_widget blockto handle this:
2. https://github.com/symfony/symfony/blob/master/src/Symfony/Component/Form/Extension/Core/Type/ChoiceType.php
3. https://github.com/symfony/symfony/blob/master/src/Symfony/Component/Form/Extension/Core/Type/ChoiceType.php
PDF brought to you bygenerated on October 23, 2014
Chapter 60: How to Create a Custom Form Field Type | 236

Listing 60-3
Listing 60-4
Listing 60-5
123456789
101112131415161718
{# src/Acme/DemoBundle/Resources/views/Form/fields.html.twig #}{% block gender_widget %}
{% spaceless %}{% if expanded %}
<ul {{ block('widget_container_attributes') }}>{% for child in form %}
<li>{{ form_widget(child) }}{{ form_label(child) }}
</li>{% endfor %}</ul>
{% else %}{# just let the choice widget render the select tag #}{{ block('choice_widget') }}
{% endif %}{% endspaceless %}
{% endblock %}
Make sure the correct widget prefix is used. In this example the name should be gender_widget,according to the value returned by getName. Further, the main config file should point to thecustom form template so that it's used when rendering all forms.
When using Twig this is:
12345
# app/config/config.ymltwig:
form:resources:
- 'AcmeDemoBundle:Form:fields.html.twig'
For the PHP templating engine, your configuration should look like this:
123456
# app/config/config.ymlframework:
templating:form:
resources:- 'AcmeDemoBundle:Form'
Using the Field TypeYou can now use your custom field type immediately, simply by creating a new instance of the type inone of your forms:
12345678
// src/Acme/DemoBundle/Form/Type/AuthorType.phpnamespace Acme\DemoBundle\Form\Type;
use Symfony\Component\Form\AbstractType;use Symfony\Component\Form\FormBuilderInterface;
class AuthorType extends AbstractType{
PDF brought to you bygenerated on October 23, 2014
Chapter 60: How to Create a Custom Form Field Type | 237

Listing 60-6
Listing 60-7
Listing 60-8
9101112131415
public function buildForm(FormBuilderInterface $builder, array $options){
$builder->add('gender_code', new GenderType(), array('empty_value' => 'Choose a gender',
));}
}
But this only works because the GenderType() is very simple. What if the gender codes were storedin configuration or in a database? The next section explains how more complex field types solve thisproblem.
Creating your Field Type as a ServiceSo far, this entry has assumed that you have a very simple custom field type. But if you need access toconfiguration, a database connection, or some other service, then you'll want to register your custom typeas a service. For example, suppose that you're storing the gender parameters in configuration:
12345
# app/config/config.ymlparameters:
genders:m: Malef: Female
To use the parameter, define your custom field type as a service, injecting the genders parameter valueas the first argument to its to-be-created __construct function:
12345678
# src/Acme/DemoBundle/Resources/config/services.ymlservices:
acme_demo.form.type.gender:class: Acme\DemoBundle\Form\Type\GenderTypearguments:
- "%genders%"tags:
- { name: form.type, alias: gender }
Make sure the services file is being imported. See Importing Configuration with imports for details.
Be sure that the alias attribute of the tag corresponds with the value returned by the getName methoddefined earlier. You'll see the importance of this in a moment when you use the custom field type. Butfirst, add a __construct method to GenderType, which receives the gender configuration:
12345678
// src/Acme/DemoBundle/Form/Type/GenderType.phpnamespace Acme\DemoBundle\Form\Type;
use Symfony\Component\OptionsResolver\OptionsResolverInterface;
// ...
// ...
PDF brought to you bygenerated on October 23, 2014
Chapter 60: How to Create a Custom Form Field Type | 238

Listing 60-9
91011121314151617181920212223242526
class GenderType extends AbstractType{
private $genderChoices;
public function __construct(array $genderChoices){
$this->genderChoices = $genderChoices;}
public function setDefaultOptions(OptionsResolverInterface $resolver){
$resolver->setDefaults(array('choices' => $this->genderChoices,
));}
// ...}
Great! The GenderType is now fueled by the configuration parameters and registered as a service.Additionally, because you used the form.type alias in its configuration, using the field is now mucheasier:
123456789
10111213141516
// src/Acme/DemoBundle/Form/Type/AuthorType.phpnamespace Acme\DemoBundle\Form\Type;
use Symfony\Component\Form\FormBuilderInterface;
// ...
class AuthorType extends AbstractType{
public function buildForm(FormBuilderInterface $builder, array $options){
$builder->add('gender_code', 'gender', array('empty_value' => 'Choose a gender',
));}
}
Notice that instead of instantiating a new instance, you can just refer to it by the alias used in your serviceconfiguration, gender. Have fun!
PDF brought to you bygenerated on October 23, 2014
Chapter 60: How to Create a Custom Form Field Type | 239

Chapter 61
How to Create a Form Type Extension
Custom form field types are great when you need field types with a specific purpose, such as a genderselector, or a VAT number input.
But sometimes, you don't really need to add new field types - you want to add features on top of existingtypes. This is where form type extensions come in.
Form type extensions have 2 main use-cases:1. You want to add a generic feature to several types (such as adding a "help" text to every field
type);2. You want to add a specific feature to a single type (such as adding a "download" feature to
the "file" field type).
In both those cases, it might be possible to achieve your goal with custom form rendering, or customform field types. But using form type extensions can be cleaner (by limiting the amount of business logicin templates) and more flexible (you can add several type extensions to a single form type).
Form type extensions can achieve most of what custom field types can do, but instead of being field typesof their own, they plug into existing types.
Imagine that you manage a Media entity, and that each media is associated to a file. Your Media formuses a file type, but when editing the entity, you would like to see its image automatically rendered nextto the file input.
You could of course do this by customizing how this field is rendered in a template. But field typeextensions allow you to do this in a nice DRY fashion.
Defining the Form Type ExtensionYour first task will be to create the form type extension class (called ImageTypeExtension in this article).By standard, form extensions usually live in the Form\Extension directory of one of your bundles.
When creating a form type extension, you can either implement the FormTypeExtensionInterface1
interface or extend the AbstractTypeExtension2 class. In most cases, it's easier to extend the abstractclass:
1. http://api.symfony.com/2.5/Symfony/Component/Form/FormTypeExtensionInterface.html
2. http://api.symfony.com/2.5/Symfony/Component/Form/AbstractTypeExtension.html
PDF brought to you bygenerated on October 23, 2014
Chapter 61: How to Create a Form Type Extension | 240

Listing 61-1
Listing 61-2
123456789
1011121314151617
// src/Acme/DemoBundle/Form/Extension/ImageTypeExtension.phpnamespace Acme\DemoBundle\Form\Extension;
use Symfony\Component\Form\AbstractTypeExtension;
class ImageTypeExtension extends AbstractTypeExtension{
/*** Returns the name of the type being extended.** @return string The name of the type being extended*/public function getExtendedType(){
return 'file';}
}
The only method you must implement is the getExtendedType function. It is used to indicate the nameof the form type that will be extended by your extension.
The value you return in the getExtendedType method corresponds to the value returned by thegetName method in the form type class you wish to extend.
In addition to the getExtendedType function, you will probably want to override one of the followingmethods:
• buildForm()• buildView()• setDefaultOptions()• finishView()
For more information on what those methods do, you can refer to the Creating Custom Field Typescookbook article.
Registering your Form Type Extension as a ServiceThe next step is to make Symfony aware of your extension. All you need to do is to declare it as a serviceby using the form.type_extension tag:
12345
services:acme_demo_bundle.image_type_extension:
class: Acme\DemoBundle\Form\Extension\ImageTypeExtensiontags:
- { name: form.type_extension, alias: file }
The alias key of the tag is the type of field that this extension should be applied to. In your case, as youwant to extend the file field type, you will use file as an alias.
PDF brought to you bygenerated on October 23, 2014
Chapter 61: How to Create a Form Type Extension | 241

Listing 61-3
Listing 61-4
Adding the extension Business LogicThe goal of your extension is to display nice images next to file inputs (when the underlying modelcontains images). For that purpose, suppose that you use an approach similar to the one described inHow to handle File Uploads with Doctrine: you have a Media model with a file property (correspondingto the file field in the form) and a path property (corresponding to the image path in the database):
123456789
10111213141516171819202122232425262728293031323334
// src/Acme/DemoBundle/Entity/Media.phpnamespace Acme\DemoBundle\Entity;
use Symfony\Component\Validator\Constraints as Assert;
class Media{
// ...
/*** @var string The path - typically stored in the database*/private $path;
/*** @var \Symfony\Component\HttpFoundation\File\UploadedFile* @Assert\File(maxSize="2M")*/public $file;
// ...
/*** Get the image URL** @return null|string*/public function getWebPath(){
// ... $webPath being the full image URL, to be used in templates
return $webPath;}
}
Your form type extension class will need to do two things in order to extend the file form type:1. Override the setDefaultOptions method in order to add an image_path option;2. Override the buildForm and buildView methods in order to pass the image URL to the view.
The logic is the following: when adding a form field of type file, you will be able to specify a new option:image_path. This option will tell the file field how to get the actual image URL in order to display it inthe view:
12345678
// src/Acme/DemoBundle/Form/Extension/ImageTypeExtension.phpnamespace Acme\DemoBundle\Form\Extension;
use Symfony\Component\Form\AbstractTypeExtension;use Symfony\Component\Form\FormView;use Symfony\Component\Form\FormInterface;use Symfony\Component\PropertyAccess\PropertyAccess;use Symfony\Component\OptionsResolver\OptionsResolverInterface;
PDF brought to you bygenerated on October 23, 2014
Chapter 61: How to Create a Form Type Extension | 242

91011121314151617181920212223242526272829303132333435363738394041424344454647484950515253545556
class ImageTypeExtension extends AbstractTypeExtension{
/*** Returns the name of the type being extended.** @return string The name of the type being extended*/public function getExtendedType(){
return 'file';}
/*** Add the image_path option** @param OptionsResolverInterface $resolver*/public function setDefaultOptions(OptionsResolverInterface $resolver){
$resolver->setOptional(array('image_path'));}
/*** Pass the image URL to the view** @param FormView $view* @param FormInterface $form* @param array $options*/public function buildView(FormView $view, FormInterface $form, array $options){
if (array_key_exists('image_path', $options)) {$parentData = $form->getParent()->getData();
if (null !== $parentData) {$accessor = PropertyAccess::createPropertyAccessor();$imageUrl = $accessor->getValue($parentData, $options['image_path']);
} else {$imageUrl = null;
}
// set an "image_url" variable that will be available when rendering this field$view->vars['image_url'] = $imageUrl;
}}
}
Override the File Widget Template FragmentEach field type is rendered by a template fragment. Those template fragments can be overridden in orderto customize form rendering. For more information, you can refer to the What are Form Themes? article.
In your extension class, you have added a new variable (image_url), but you still need to take advantageof this new variable in your templates. Specifically, you need to override the file_widget block:
PDF brought to you bygenerated on October 23, 2014
Chapter 61: How to Create a Form Type Extension | 243

Listing 61-5
Listing 61-6
123456789
10111213
{# src/Acme/DemoBundle/Resources/views/Form/fields.html.twig #}{% extends 'form_div_layout.html.twig' %}
{% block file_widget %}{% spaceless %}
{{ block('form_widget') }}{% if image_url is not null %}
<img src="{{ asset(image_url) }}"/>{% endif %}
{% endspaceless %}{% endblock %}
You will need to change your config file or explicitly specify how you want your form to bethemed in order for Symfony to use your overridden block. See What are Form Themes? for moreinformation.
Using the Form Type ExtensionFrom now on, when adding a field of type file in your form, you can specify an image_path option thatwill be used to display an image next to the file field. For example:
123456789
1011121314151617181920
// src/Acme/DemoBundle/Form/Type/MediaType.phpnamespace Acme\DemoBundle\Form\Type;
use Symfony\Component\Form\AbstractType;use Symfony\Component\Form\FormBuilderInterface;
class MediaType extends AbstractType{
public function buildForm(FormBuilderInterface $builder, array $options){
$builder->add('name', 'text')->add('file', 'file', array('image_path' => 'webPath'));
}
public function getName(){
return 'media';}
}
When displaying the form, if the underlying model has already been associated with an image, you willsee it displayed next to the file input.
PDF brought to you bygenerated on October 23, 2014
Chapter 61: How to Create a Form Type Extension | 244

Listing 62-1
Listing 62-2
Chapter 62
How to Reduce Code Duplication with"inherit_data"
New in version 2.3: This inherit_data option was introduced in Symfony 2.3. Before, it wasknown as virtual.
The inherit_data form field option can be very useful when you have some duplicated fields in differententities. For example, imagine you have two entities, a Company and a Customer:
123456789
10111213
// src/Acme/HelloBundle/Entity/Company.phpnamespace Acme\HelloBundle\Entity;
class Company{
private $name;private $website;
private $address;private $zipcode;private $city;private $country;
}
12345678
// src/Acme/HelloBundle/Entity/Customer.phpnamespace Acme\HelloBundle\Entity;
class Customer{
private $firstName;private $lastName;
PDF brought to you bygenerated on October 23, 2014
Chapter 62: How to Reduce Code Duplication with "inherit_data" | 245

Listing 62-3
Listing 62-4
Listing 62-5
910111213
private $address;private $zipcode;private $city;private $country;
}
As you can see, each entity shares a few of the same fields: address, zipcode, city, country.
Start with building two forms for these entities, CompanyType and CustomerType:
123456789
101112131415
// src/Acme/HelloBundle/Form/Type/CompanyType.phpnamespace Acme\HelloBundle\Form\Type;
use Symfony\Component\Form\AbstractType;use Symfony\Component\Form\FormBuilderInterface;
class CompanyType extends AbstractType{
public function buildForm(FormBuilderInterface $builder, array $options){
$builder->add('name', 'text')->add('website', 'text');
}}
123456789
101112131415
// src/Acme/HelloBundle/Form/Type/CustomerType.phpnamespace Acme\HelloBundle\Form\Type;
use Symfony\Component\Form\FormBuilderInterface;use Symfony\Component\Form\AbstractType;
class CustomerType extends AbstractType{
public function buildForm(FormBuilderInterface $builder, array $options){
$builder->add('firstName', 'text')->add('lastName', 'text');
}}
Instead of including the duplicated fields address, zipcode, city and country in both of these forms,create a third form called LocationType for that:
123456789
101112
// src/Acme/HelloBundle/Form/Type/LocationType.phpnamespace Acme\HelloBundle\Form\Type;
use Symfony\Component\Form\AbstractType;use Symfony\Component\Form\FormBuilderInterface;use Symfony\Component\OptionsResolver\OptionsResolverInterface;
class LocationType extends AbstractType{
public function buildForm(FormBuilderInterface $builder, array $options){
$builder
PDF brought to you bygenerated on October 23, 2014
Chapter 62: How to Reduce Code Duplication with "inherit_data" | 246

Listing 62-6
Listing 62-7
131415161718192021222324252627282930
->add('address', 'textarea')->add('zipcode', 'text')->add('city', 'text')->add('country', 'text');
}
public function setDefaultOptions(OptionsResolverInterface $resolver){
$resolver->setDefaults(array('inherit_data' => true
));}
public function getName(){
return 'location';}
}
The location form has an interesting option set, namely inherit_data. This option lets the form inheritits data from its parent form. If embedded in the company form, the fields of the location form willaccess the properties of the Company instance. If embedded in the customer form, the fields will accessthe properties of the Customer instance instead. Easy, eh?
Instead of setting the inherit_data option inside LocationType, you can also (just like with anyoption) pass it in the third argument of $builder->add().
Finally, make this work by adding the location form to your two original forms:
123456789
// src/Acme/HelloBundle/Form/Type/CompanyType.phppublic function buildForm(FormBuilderInterface $builder, array $options){
// ...
$builder->add('foo', new LocationType(), array('data_class' => 'Acme\HelloBundle\Entity\Company'
));}
123456789
// src/Acme/HelloBundle/Form/Type/CustomerType.phppublic function buildForm(FormBuilderInterface $builder, array $options){
// ...
$builder->add('bar', new LocationType(), array('data_class' => 'Acme\HelloBundle\Entity\Customer'
));}
That's it! You have extracted duplicated field definitions to a separate location form that you can reusewherever you need it.
PDF brought to you bygenerated on October 23, 2014
Chapter 62: How to Reduce Code Duplication with "inherit_data" | 247

Forms with the inherit_data option set cannot have *_SET_DATA event listeners.
PDF brought to you bygenerated on October 23, 2014
Chapter 62: How to Reduce Code Duplication with "inherit_data" | 248

Listing 63-1
Chapter 63
How to Unit Test your Forms
The Form component consists of 3 core objects: a form type (implementing FormTypeInterface1), theForm2 and the FormView3.
The only class that is usually manipulated by programmers is the form type class which serves as a formblueprint. It is used to generate the Form and the FormView. You could test it directly by mocking itsinteractions with the factory but it would be complex. It is better to pass it to FormFactory like it is donein a real application. It is simple to bootstrap and you can trust the Symfony components enough to usethem as a testing base.
There is already a class that you can benefit from for simple FormTypes testing: TypeTestCase4. It is usedto test the core types and you can use it to test your types too.
New in version 2.3: The TypeTestCase has moved to the Symfony\Component\Form\Testnamespace in 2.3. Previously, the class was located inSymfony\Component\Form\Tests\Extension\Core\Type.
Depending on the way you installed your Symfony or Symfony Form component the tests may notbe downloaded. Use the --prefer-source option with Composer if this is the case.
The BasicsThe simplest TypeTestCase implementation looks like the following:
12
// src/Acme/TestBundle/Tests/Form/Type/TestedTypeTest.phpnamespace Acme\TestBundle\Tests\Form\Type;
1. http://api.symfony.com/2.5/Symfony/Component/Form/FormTypeInterface.html
2. http://api.symfony.com/2.5/Symfony/Component/Form/Form.html
3. http://api.symfony.com/2.5/Symfony/Component/Form/FormView.html
4. http://api.symfony.com/2.5/Symfony/Component/Form/Test/TypeTestCase.html
PDF brought to you bygenerated on October 23, 2014
Chapter 63: How to Unit Test your Forms | 249

Listing 63-2
Listing 63-3
3456789
101112131415161718192021222324252627282930313233343536
use Acme\TestBundle\Form\Type\TestedType;use Acme\TestBundle\Model\TestObject;use Symfony\Component\Form\Test\TypeTestCase;
class TestedTypeTest extends TypeTestCase{
public function testSubmitValidData(){
$formData = array('test' => 'test','test2' => 'test2',
);
$type = new TestedType();$form = $this->factory->create($type);
$object = new TestObject();$object->fromArray($formData);
// submit the data to the form directly$form->submit($formData);
$this->assertTrue($form->isSynchronized());$this->assertEquals($object, $form->getData());
$view = $form->createView();$children = $view->children;
foreach (array_keys($formData) as $key) {$this->assertArrayHasKey($key, $children);
}}
}
So, what does it test? Here comes a detailed explanation.
First you verify if the FormType compiles. This includes basic class inheritance, the buildForm functionand options resolution. This should be the first test you write:
12
$type = new TestedType();$form = $this->factory->create($type);
This test checks that none of your data transformers used by the form failed. The isSynchronized()5
method is only set to false if a data transformer throws an exception:
12
$form->submit($formData);$this->assertTrue($form->isSynchronized());
Don't test the validation: it is applied by a listener that is not active in the test case and it relies onvalidation configuration. Instead, unit test your custom constraints directly.
5. http://api.symfony.com/2.5/Symfony/Component/Form/FormInterface.html#isSynchronized()
PDF brought to you bygenerated on October 23, 2014
Chapter 63: How to Unit Test your Forms | 250

Listing 63-4
Listing 63-5
Listing 63-6
Listing 63-7
Next, verify the submission and mapping of the form. The test below checks if all the fields are correctlyspecified:
1 $this->assertEquals($object, $form->getData());
Finally, check the creation of the FormView. You should check if all widgets you want to display areavailable in the children property:
123456
$view = $form->createView();$children = $view->children;
foreach (array_keys($formData) as $key) {$this->assertArrayHasKey($key, $children);
}
Adding a Type your Form Depends onYour form may depend on other types that are defined as services. It might look like this:
1234
// src/Acme/TestBundle/Form/Type/TestedType.php
// ... the buildForm method$builder->add('acme_test_child_type');
To create your form correctly, you need to make the type available to the form factory in your test. Theeasiest way is to register it manually before creating the parent form using the PreloadedExtension class:
123456789
1011121314151617181920212223242526
// src/Acme/TestBundle/Tests/Form/Type/TestedTypeTests.phpnamespace Acme\TestBundle\Tests\Form\Type;
use Acme\TestBundle\Form\Type\TestedType;use Acme\TestBundle\Model\TestObject;use Symfony\Component\Form\Test\TypeTestCase;use Symfony\Component\Form\PreloadedExtension;
class TestedTypeTest extends TypeTestCase{
protected function getExtensions(){
$childType = new TestChildType();return array(new PreloadedExtension(array(
$childType->getName() => $childType,), array()));
}
public function testSubmitValidData(){
$type = new TestedType();$form = $this->factory->create($type);
// ... your test}
}
PDF brought to you bygenerated on October 23, 2014
Chapter 63: How to Unit Test your Forms | 251

Listing 63-8
Make sure the child type you add is well tested. Otherwise you may be getting errors that are notrelated to the form you are currently testing but to its children.
Adding custom ExtensionsIt often happens that you use some options that are added by form extensions. One of the cases may bethe ValidatorExtension with its invalid_message option. The TypeTestCase loads only the core formextension so an "Invalid option" exception will be raised if you try to use it for testing a class that dependson other extensions. You need add those extensions to the factory object:
123456789
101112131415161718192021222324252627282930313233343536373839404142
// src/Acme/TestBundle/Tests/Form/Type/TestedTypeTests.phpnamespace Acme\TestBundle\Tests\Form\Type;
use Acme\TestBundle\Form\Type\TestedType;use Acme\TestBundle\Model\TestObject;use Symfony\Component\Form\Test\TypeTestCase;use Symfony\Component\Form\Forms;use Symfony\Component\Form\FormBuilder;use Symfony\Component\Form\Extension\Validator\Type\FormTypeValidatorExtension;use Symfony\Component\Validator\ConstraintViolationList;
class TestedTypeTest extends TypeTestCase{
protected function setUp(){
parent::setUp();
$validator =$this->getMock('\Symfony\Component\Validator\Validator\ValidatorInterface');
$validator->method('validate')->will($this->returnValue(newConstraintViolationList()));
$this->factory = Forms::createFormFactoryBuilder()->addExtensions($this->getExtensions())->addTypeExtension(
new FormTypeValidatorExtension($validator
))->addTypeGuesser(
$this->getMockBuilder('Symfony\Component\Form\Extension\Validator\ValidatorTypeGuesser'
)->disableOriginalConstructor()->getMock()
)->getFormFactory();
$this->dispatcher =$this->getMock('Symfony\Component\EventDispatcher\EventDispatcherInterface');
$this->builder = new FormBuilder(null, null, $this->dispatcher, $this->factory);}
// ... your tests}
PDF brought to you bygenerated on October 23, 2014
Chapter 63: How to Unit Test your Forms | 252

Listing 63-9
Testing against different Sets of Data
If you are not familiar yet with PHPUnit's data providers6, this might be a good opportunity to use them:
123456789
101112131415161718192021222324252627282930313233343536373839
// src/Acme/TestBundle/Tests/Form/Type/TestedTypeTests.phpnamespace Acme\TestBundle\Tests\Form\Type;
use Acme\TestBundle\Form\Type\TestedType;use Acme\TestBundle\Model\TestObject;use Symfony\Component\Form\Test\TypeTestCase;
class TestedTypeTest extends TypeTestCase{
/*** @dataProvider getValidTestData*/public function testForm($data){
// ... your test}
public function getValidTestData(){
return array(array(
'data' => array('test' => 'test','test2' => 'test2',
),),array(
'data' => array(),),array(
'data' => array('test' => null,'test2' => null,
),),
);}
}
The code above will run your test three times with 3 different sets of data. This allows for decoupling thetest fixtures from the tests and easily testing against multiple sets of data.
You can also pass another argument, such as a boolean if the form has to be synchronized with the givenset of data or not etc.
6. http://www.phpunit.de/manual/current/en/writing-tests-for-phpunit.html#writing-tests-for-phpunit.data-providers
PDF brought to you bygenerated on October 23, 2014
Chapter 63: How to Unit Test your Forms | 253

Listing 64-1
Listing 64-2
Chapter 64
How to Configure empty Data for a Form Class
The empty_data option allows you to specify an empty data set for your form class. This empty data setwould be used if you submit your form, but haven't called setData() on your form or passed in datawhen you created your form. For example:
123456789
10
public function indexAction(){
$blog = ...;
// $blog is passed in as the data, so the empty_data option is not needed$form = $this->createForm(new BlogType(), $blog);
// no data is passed in, so empty_data is used to get the "starting data"$form = $this->createForm(new BlogType());
}
By default, empty_data is set to null. Or, if you have specified a data_class option for your form class,it will default to a new instance of that class. That instance will be created by calling the constructor withno arguments.
If you want to override this default behavior, there are two ways to do this.
Option 1: Instantiate a new ClassOne reason you might use this option is if you want to use a constructor that takes arguments.Remember, the default data_class option calls that constructor with no arguments:
1234567
// src/Acme/DemoBundle/Form/Type/BlogType.php
// ...use Symfony\Component\Form\AbstractType;use Acme\DemoBundle\Entity\Blog;use Symfony\Component\OptionsResolver\OptionsResolverInterface;
PDF brought to you bygenerated on October 23, 2014
Chapter 64: How to Configure empty Data for a Form Class | 254

Listing 64-3
89
101112131415161718192021222324
class BlogType extends AbstractType{
private $someDependency;
public function __construct($someDependency){
$this->someDependency = $someDependency;}// ...
public function setDefaultOptions(OptionsResolverInterface $resolver){
$resolver->setDefaults(array('empty_data' => new Blog($this->someDependency),
));}
}
You can instantiate your class however you want. In this example, we pass some dependency into theBlogType when we instantiate it, then use that to instantiate the Blog class. The point is, you can setempty_data to the exact "new" object that you want to use.
Option 2: Provide a ClosureUsing a closure is the preferred method, since it will only create the object if it is needed.
The closure must accept a FormInterface instance as the first argument:
123456789
101112
use Symfony\Component\OptionsResolver\OptionsResolverInterface;use Symfony\Component\Form\FormInterface;// ...
public function setDefaultOptions(OptionsResolverInterface $resolver){
$resolver->setDefaults(array('empty_data' => function (FormInterface $form) {
return new Blog($form->get('title')->getData());},
));}
PDF brought to you bygenerated on October 23, 2014
Chapter 64: How to Configure empty Data for a Form Class | 255
Listing 65-1
Chapter 65
How to Use the submit() Function to HandleForm Submissions
New in version 2.3: The handleRequest()1 method was introduced in Symfony 2.3.
With the handleRequest() method, it is really easy to handle form submissions:
123456789
101112131415161718192021
use Symfony\Component\HttpFoundation\Request;// ...
public function newAction(Request $request){
$form = $this->createFormBuilder()// ...->getForm();
$form->handleRequest($request);
if ($form->isValid()) {// perform some action...
return $this->redirect($this->generateUrl('task_success'));}
return $this->render('AcmeTaskBundle:Default:new.html.twig', array('form' => $form->createView(),
));}
1. http://api.symfony.com/2.5/Symfony/Component/Form/FormInterface.html#handleRequest()
PDF brought to you bygenerated on October 23, 2014
Chapter 65: How to Use the submit() Function to Handle Form Submissions | 256

Listing 65-2
Listing 65-3
To see more about this method, read Handling Form Submissions.
Calling Form::submit() manually
New in version 2.3: Before Symfony 2.3, the submit() method was known as bind().
In some cases, you want better control over when exactly your form is submitted and what data is passedto it. Instead of using the handleRequest()2 method, pass the submitted data directly to submit()3:
123456789
1011121314151617181920212223
use Symfony\Component\HttpFoundation\Request;// ...
public function newAction(Request $request){
$form = $this->createFormBuilder()// ...->getForm();
if ($request->isMethod('POST')) {$form->submit($request->request->get($form->getName()));
if ($form->isValid()) {// perform some action...
return $this->redirect($this->generateUrl('task_success'));}
}
return $this->render('AcmeTaskBundle:Default:new.html.twig', array('form' => $form->createView(),
));}
Forms consisting of nested fields expect an array in submit()4. You can also submit individualfields by calling submit()5 directly on the field:
1 $form->get('firstName')->submit('Fabien');
2. http://api.symfony.com/2.5/Symfony/Component/Form/FormInterface.html#handleRequest()
3. http://api.symfony.com/2.5/Symfony/Component/Form/FormInterface.html#submit()
4. http://api.symfony.com/2.5/Symfony/Component/Form/FormInterface.html#submit()
5. http://api.symfony.com/2.5/Symfony/Component/Form/FormInterface.html#submit()
PDF brought to you bygenerated on October 23, 2014
Chapter 65: How to Use the submit() Function to Handle Form Submissions | 257

Listing 65-4
Passing a Request to Form::submit() (Deprecated)
New in version 2.3: Before Symfony 2.3, the submit method was known as bind.
Before Symfony 2.3, the submit()6 method accepted a Request7 object as a convenient shortcut to theprevious example:
123456789
1011121314151617181920212223
use Symfony\Component\HttpFoundation\Request;// ...
public function newAction(Request $request){
$form = $this->createFormBuilder()// ...->getForm();
if ($request->isMethod('POST')) {$form->submit($request);
if ($form->isValid()) {// perform some action...
return $this->redirect($this->generateUrl('task_success'));}
}
return $this->render('AcmeTaskBundle:Default:new.html.twig', array('form' => $form->createView(),
));}
Passing the Request8 directly to submit()9 still works, but is deprecated and will be removed in Symfony3.0. You should use the method handleRequest()10 instead.
6. http://api.symfony.com/2.5/Symfony/Component/Form/FormInterface.html#submit()
7. http://api.symfony.com/2.5/Symfony/Component/HttpFoundation/Request.html
8. http://api.symfony.com/2.5/Symfony/Component/HttpFoundation/Request.html
9. http://api.symfony.com/2.5/Symfony/Component/Form/FormInterface.html#submit()
10. http://api.symfony.com/2.5/Symfony/Component/Form/FormInterface.html#handleRequest()
PDF brought to you bygenerated on October 23, 2014
Chapter 65: How to Use the submit() Function to Handle Form Submissions | 258

Chapter 66
How to Use the virtual Form Field Option
As of Symfony 2.3, the virtual option is renamed to inherit_data. You can read everything about thenew option in "How to Reduce Code Duplication with "inherit_data"".
PDF brought to you bygenerated on October 23, 2014
Chapter 66: How to Use the virtual Form Field Option | 259

Listing 67-1
Chapter 67
How to Use Monolog to Write Logs
Monolog1 is a logging library for PHP 5.3 used by Symfony. It is inspired by the Python LogBook library.
UsageTo log a message simply get the logger service from the container in your controller:
12345678
public function indexAction(){
$logger = $this->get('logger');$logger->info('I just got the logger');$logger->error('An error occurred');
// ...}
The logger service has different methods for different logging levels. See LoggerInterface2 for details onwhich methods are available.
Handlers and Channels: Writing Logs to different LocationsIn Monolog each logger defines a logging channel, which organizes your log messages into different"categories". Then, each channel has a stack of handlers to write the logs (the handlers can be shared).
When injecting the logger in a service you can use a custom channel control which "channel" thelogger will log to.
1. https://github.com/Seldaek/monolog
2. https://github.com/php-fig/log/blob/master/Psr/Log/LoggerInterface.php
PDF brought to you bygenerated on October 23, 2014
Chapter 67: How to Use Monolog to Write Logs | 260
Listing 67-2
Listing 67-3
The basic handler is the StreamHandler which writes logs in a stream (by default in the app/logs/prod.log in the prod environment and app/logs/dev.log in the dev environment).
Monolog comes also with a powerful built-in handler for the logging in prod environment:FingersCrossedHandler. It allows you to store the messages in a buffer and to log them only if a messagereaches the action level (error in the configuration provided in the Standard Edition) by forwarding themessages to another handler.
Using several Handlers
The logger uses a stack of handlers which are called successively. This allows you to log the messages inseveral ways easily.
123456789
1011121314151617
# app/config/config.ymlmonolog:
handlers:applog:
type: streampath: /var/log/symfony.loglevel: error
main:type: fingers_crossedaction_level: warninghandler: file
file:type: streamlevel: debug
syslog:type: sysloglevel: error
The above configuration defines a stack of handlers which will be called in the order where they aredefined.
The handler named "file" will not be included in the stack itself as it is used as a nested handler ofthe fingers_crossed handler.
If you want to change the config of MonologBundle in another config file you need to redefine thewhole stack. It cannot be merged because the order matters and a merge does not allow to controlthe order.
Changing the Formatter
The handler uses a Formatter to format the record before logging it. All Monolog handlers use aninstance of Monolog\Formatter\LineFormatter by default but you can replace it easily. Your formattermust implement Monolog\Formatter\FormatterInterface.
123456
# app/config/config.ymlservices:
my_formatter:class: Monolog\Formatter\JsonFormatter
monolog:handlers:
PDF brought to you bygenerated on October 23, 2014
Chapter 67: How to Use Monolog to Write Logs | 261

Listing 67-4
Listing 67-5
789
10
file:type: streamlevel: debugformatter: my_formatter
Adding some extra Data in the Log MessagesMonolog allows to process the record before logging it to add some extra data. A processor can be appliedfor the whole handler stack or only for a specific handler.
A processor is simply a callable receiving the record as its first argument.
Processors are configured using the monolog.processor DIC tag. See the reference about it.
Adding a Session/Request Token
Sometimes it is hard to tell which entries in the log belong to which session and/or request. The followingexample will add a unique token for each request using a processor.
123456789
1011121314151617181920212223242526272829
namespace Acme\MyBundle;
use Symfony\Component\HttpFoundation\Session\Session;
class SessionRequestProcessor{
private $session;private $token;
public function __construct(Session $session){
$this->session = $session;}
public function processRecord(array $record){
if (null === $this->token) {try {
$this->token = substr($this->session->getId(), 0, 8);} catch (\RuntimeException $e) {
$this->token = '????????';}$this->token .= '-' . substr(uniqid(), -8);
}$record['extra']['token'] = $this->token;
return $record;}
}
123456
# app/config/config.ymlservices:
monolog.formatter.session_request:class: Monolog\Formatter\LineFormatterarguments:
- "[%%datetime%%] [%%extra.token%%] %%channel%%.%%level_name%%: %%message%%\n"
PDF brought to you bygenerated on October 23, 2014
Chapter 67: How to Use Monolog to Write Logs | 262

Listing 67-6
Listing 67-7
789
1011121314151617181920
monolog.processor.session_request:class: Acme\MyBundle\SessionRequestProcessorarguments: ["@session"]tags:
- { name: monolog.processor, method: processRecord }
monolog:handlers:
main:type: streampath: "%kernel.logs_dir%/%kernel.environment%.log"level: debugformatter: monolog.formatter.session_request
If you use several handlers, you can also register a processor at the handler level or at the channellevel instead of registering it globally (see the following sections).
Registering Processors per HandlerYou can register a processor per handler using the handler option of the monolog.processor tag:
1234567
# app/config/config.ymlservices:
monolog.processor.session_request:class: Acme\MyBundle\SessionRequestProcessorarguments: ["@session"]tags:
- { name: monolog.processor, method: processRecord, handler: main }
Registering Processors per ChannelYou can register a processor per channel using the channel option of the monolog.processor tag:
1234567
# app/config/config.ymlservices:
monolog.processor.session_request:class: Acme\MyBundle\SessionRequestProcessorarguments: ["@session"]tags:
- { name: monolog.processor, method: processRecord, channel: main }
PDF brought to you bygenerated on October 23, 2014
Chapter 67: How to Use Monolog to Write Logs | 263

Listing 68-1
Chapter 68
How to Configure Monolog to Email Errors
Monolog1 can be configured to send an email when an error occurs with an application. The configurationfor this requires a few nested handlers in order to avoid receiving too many emails. This configurationlooks complicated at first but each handler is fairly straight forward when it is broken down.
123456789
101112131415161718
# app/config/config_prod.ymlmonolog:
handlers:mail:
type: fingers_crossedaction_level: criticalhandler: buffered
buffered:type: bufferhandler: swift
swift:type: swift_mailerfrom_email: [email protected]_email: [email protected]# or list of recipients# to_email: [[email protected], [email protected], ...]subject: An Error Occurred!level: debug
The mail handler is a fingers_crossed handler which means that it is only triggered when the actionlevel, in this case critical is reached. It then logs everything including messages below the action level.The critical level is only triggered for 5xx HTTP code errors. The handler setting means that theoutput is then passed onto the buffered handler.
If you want both 400 level and 500 level errors to trigger an email, set the action_level to errorinstead of critical.
1. https://github.com/Seldaek/monolog
PDF brought to you bygenerated on October 23, 2014
Chapter 68: How to Configure Monolog to Email Errors | 264
Listing 68-2
The buffered handler simply keeps all the messages for a request and then passes them onto the nestedhandler in one go. If you do not use this handler then each message will be emailed separately. This isthen passed to the swift handler. This is the handler that actually deals with emailing you the error. Thesettings for this are straightforward, the to and from addresses and the subject.
You can combine these handlers with other handlers so that the errors still get logged on the server aswell as the emails being sent:
123456789
1011121314151617181920212223
# app/config/config_prod.ymlmonolog:
handlers:main:
type: fingers_crossedaction_level: criticalhandler: grouped
grouped:type: groupmembers: [streamed, buffered]
streamed:type: streampath: "%kernel.logs_dir%/%kernel.environment%.log"level: debug
buffered:type: bufferhandler: swift
swift:type: swift_mailerfrom_email: [email protected]_email: [email protected]: An Error Occurred!level: debug
This uses the group handler to send the messages to the two group members, the buffered and thestream handlers. The messages will now be both written to the log file and emailed.
PDF brought to you bygenerated on October 23, 2014
Chapter 68: How to Configure Monolog to Email Errors | 265

Listing 69-1
Chapter 69
How to Configure Monolog to Display ConsoleMessages
New in version 2.4: This feature was introduced to the MonologBridge in Symfony 2.4.
It is possible to use the console to print messages for certain verbosity levels using the OutputInterface1
instance that is passed when a command gets executed.
Alternatively, you can use the standalone PSR-3 logger provided with the console component.
When a lot of logging has to happen, it's cumbersome to print information depending on the verbositysettings (-v, -vv, -vvv) because the calls need to be wrapped in conditions. The code quickly gets verboseor dirty. For example:
123456789
10111213
use Symfony\Component\Console\Input\InputInterface;use Symfony\Component\Console\Output\OutputInterface;
protected function execute(InputInterface $input, OutputInterface $output){
if ($output->getVerbosity() >= OutputInterface::VERBOSITY_DEBUG) {$output->writeln('Some info');
}
if ($output->getVerbosity() >= OutputInterface::VERBOSITY_VERBOSE) {$output->writeln('Some more info');
}}
1. http://api.symfony.com/2.5/Symfony/Component/Console/Output/OutputInterface.html
PDF brought to you bygenerated on October 23, 2014
Chapter 69: How to Configure Monolog to Display Console Messages | 266

Listing 69-2
Listing 69-3
Listing 69-4
Listing 69-5
Instead of using these semantic methods to test for each of the verbosity levels, the MonologBridge2
provides a ConsoleHandler3 that listens to console events and writes log messages to the console outputdepending on the current log level and the console verbosity.
The example above could then be rewritten as:
123456789
1011
use Symfony\Component\Console\Input\InputInterface;use Symfony\Component\Console\Output\OutputInterface;
protected function execute(InputInterface $input, OutputInterface $output){
// assuming the Command extends ContainerAwareCommand...$logger = $this->getContainer()->get('logger');$logger->debug('Some info');
$logger->notice('Some more info');}
Depending on the verbosity level that the command is run in and the user's configuration (see below),these messages may or may not be displayed to the console. If they are displayed, they are timestampedand colored appropriately. Additionally, error logs are written to the error output (php://stderr). Thereis no need to conditionally handle the verbosity settings anymore.
The Monolog console handler is enabled in the Monolog configuration. This is the default in SymfonyStandard Edition 2.4 too.
12345
# app/config/config.ymlmonolog:
handlers:console:
type: console
With the verbosity_levels option you can adapt the mapping between verbosity and log level. Inthe given example it will also show notices in normal verbosity mode (instead of warnings only).Additionally, it will only use messages logged with the custom my_channel channel and it changes thedisplay style via a custom formatter (see the MonologBundle reference for more information):
123456789
# app/config/config.ymlmonolog:
handlers:console:
type: consoleverbosity_levels:
VERBOSITY_NORMAL: NOTICEchannels: my_channelformatter: my_formatter
123456
# app/config/services.ymlservices:
my_formatter:class: Symfony\Bridge\Monolog\Formatter\ConsoleFormatterarguments:
- "[%%datetime%%] %%start_tag%%%%message%%%%end_tag%% (%%level_name%%)%%context%% %%extra%%\n"
2. https://github.com/symfony/MonologBridge
3. https://github.com/symfony/MonologBridge/blob/master/Handler/ConsoleHandler.php
PDF brought to you bygenerated on October 23, 2014
Chapter 69: How to Configure Monolog to Display Console Messages | 267

Listing 70-1
Chapter 70
How to Configure Monolog to Exclude 404Errors from the Log
New in version 2.4: This feature was introduced to the MonologBundle 2.4, which was firstpackaged with Symfony 2.4.
Sometimes your logs become flooded with unwanted 404 HTTP errors, for example, when an attackerscans your app for some well-known application paths (e.g. /phpmyadmin). When using afingers_crossed handler, you can exclude logging these 404 errors based on a regular expression in theMonologBundle configuration:
123456789
# app/config/config.ymlmonolog:
handlers:main:
# ...type: fingers_crossedhandler: ...excluded_404s:
- ^/phpmyadmin
PDF brought to you bygenerated on October 23, 2014
Chapter 70: How to Configure Monolog to Exclude 404 Errors from the Log | 268

Listing 71-1
Listing 71-2
Chapter 71
How to Log Messages to different Files
The Symfony Standard Edition contains a bunch of channels for logging: doctrine, event, securityand request. Each channel corresponds to a logger service (monolog.logger.XXX) in the container andis injected to the concerned service. The purpose of channels is to be able to organize different types oflog messages.
By default, Symfony logs every message into a single file (regardless of the channel).
Switching a Channel to a different HandlerNow, suppose you want to log the doctrine channel to a different file.
To do so, just create a new handler and configure it like this:
123456789
1011
# app/config/config.ymlmonolog:
handlers:main:
type: streampath: /var/log/symfony.logchannels: ["!doctrine"]
doctrine:type: streampath: /var/log/doctrine.logchannels: [doctrine]
YAML SpecificationYou can specify the configuration by many forms:
123
channels: ~ # Include all the channels
channels: foo # Include only channel "foo"
PDF brought to you bygenerated on October 23, 2014
Chapter 71: How to Log Messages to different Files | 269

Listing 71-3
4567
channels: "!foo" # Include all channels, except "foo"
channels: [foo, bar] # Include only channels "foo" and "bar"channels: ["!foo", "!bar"] # Include all channels, except "foo" and "bar"
Creating your own ChannelYou can change the channel monolog logs to one service at a time. This is done either via theconfiguration below or by tagging your service with monolog.logger and specifying which channel theservice should log to. With the tag, the logger that is injected into that service is preconfigured to use thechannel you've specified.
Configure Additional Channels without Tagged Services
New in version 2.4: This feature was introduced to the MonologBundle 2.4, which was firstpackaged with Symfony 2.4.
With MonologBundle 2.4 you can configure additional channels without the need to tag your services:
123
# app/config/config.ymlmonolog:
channels: ["foo", "bar"]
With this, you can now send log messages to the foo channel by using the automatically registered loggerservice monolog.logger.foo.
Learn more from the Cookbook• How to Use Monolog to Write Logs
PDF brought to you bygenerated on October 23, 2014
Chapter 71: How to Log Messages to different Files | 270

Listing 72-1
Chapter 72
How to Create a custom Data Collector
The Symfony Profiler delegates data collecting to data collectors. Symfony comes bundled with a few ofthem, but you can easily create your own.
Creating a custom Data CollectorCreating a custom data collector is as simple as implementing the DataCollectorInterface1:
123456789
101112131415161718
interface DataCollectorInterface{
/*** Collects data for the given Request and Response.** @param Request $request A Request instance* @param Response $response A Response instance* @param \Exception $exception An Exception instance*/function collect(Request $request, Response $response, \Exception $exception = null);
/*** Returns the name of the collector.** @return string The collector name*/function getName();
}
The getName() method must return a unique name. This is used to access the information later on (seeHow to Use the Profiler in a Functional Test for instance).
The collect() method is responsible for storing the data it wants to give access to in local properties.
1. http://api.symfony.com/2.5/Symfony/Component/HttpKernel/DataCollector/DataCollectorInterface.html
PDF brought to you bygenerated on October 23, 2014
Chapter 72: How to Create a custom Data Collector | 271

Listing 72-2
Listing 72-3
Listing 72-4
As the profiler serializes data collector instances, you should not store objects that cannot beserialized (like PDO objects), or you need to provide your own serialize() method.
Most of the time, it is convenient to extend DataCollector2 and populate the $this->data property (ittakes care of serializing the $this->data property):
123456789
10111213141516171819
class MemoryDataCollector extends DataCollector{
public function collect(Request $request, Response $response, \Exception $exception =null)
{$this->data = array(
'memory' => memory_get_peak_usage(true),);
}
public function getMemory(){
return $this->data['memory'];}
public function getName(){
return 'memory';}
}
Enabling custom Data CollectorsTo enable a data collector, add it as a regular service in one of your configuration, and tag it withdata_collector:
12345
services:data_collector.your_collector_name:
class: Fully\Qualified\Collector\Class\Nametags:
- { name: data_collector }
Adding Web Profiler TemplatesWhen you want to display the data collected by your data collector in the web debug toolbar or the webprofiler, create a Twig template following this skeleton:
12345
{% extends 'WebProfilerBundle:Profiler:layout.html.twig' %}
{% block toolbar %}{# the web debug toolbar content #}
{% endblock %}
2. http://api.symfony.com/2.5/Symfony/Component/HttpKernel/DataCollector/DataCollector.html
PDF brought to you bygenerated on October 23, 2014
Chapter 72: How to Create a custom Data Collector | 272

Listing 72-5
Listing 72-6
Listing 72-7
6789
1011121314151617
{% block head %}{# if the web profiler panel needs some specific JS or CSS files #}
{% endblock %}
{% block menu %}{# the menu content #}
{% endblock %}
{% block panel %}{# the panel content #}
{% endblock %}
Each block is optional. The toolbar block is used for the web debug toolbar and menu and panel areused to add a panel to the web profiler.
All blocks have access to the collector object.
Built-in templates use a base64 encoded image for the toolbar:
1 <img src="data:image/png;base64,..." />
You can easily calculate the base64 value for an image with this little script:
123
#!/usr/bin/env php<?phpecho base64_encode(file_get_contents($_SERVER['argv'][1]));
To enable the template, add a template attribute to the data_collector tag in your configuration. Forexample, assuming your template is in some AcmeDebugBundle:
12345
services:data_collector.your_collector_name:
class: Acme\DebugBundle\Collector\Class\Nametags:
- { name: data_collector, template: "AcmeDebugBundle:Collector:templatename",id: "your_collector_name" }
PDF brought to you bygenerated on October 23, 2014
Chapter 72: How to Create a custom Data Collector | 273

Listing 73-1
Chapter 73
How to Use Matchers to Enable the ProfilerConditionally
By default, the profiler is only activated in the development environment. But it's imaginable that adeveloper may want to see the profiler even in production. Another situation may be that you want toshow the profiler only when an admin has logged in. You can enable the profiler in these situations byusing matchers.
Using the built-in MatcherSymfony provides a built-in matcher1 which can match paths and IPs. For example, if you want to onlyshow the profiler when accessing the page with the 168.0.0.1 IP, then you can use this configuration:
123456
# app/config/config.ymlframework:
# ...profiler:
matcher:ip: 168.0.0.1
You can also set a path option to define the path on which the profiler should be enabled. For instance,setting it to ^/admin/ will enable the profiler only for the /admin/ URLs.
Creating a custom MatcherYou can also create a custom matcher. This is a service that checks whether the profiler should beenabled or not. To create that service, create a class which implements RequestMatcherInterface2. This
1. http://api.symfony.com/2.5/Symfony/Component/HttpFoundation/RequestMatcher.html
2. http://api.symfony.com/2.5/Symfony/Component/HttpFoundation/RequestMatcherInterface.html
PDF brought to you bygenerated on October 23, 2014
Chapter 73: How to Use Matchers to Enable the Profiler Conditionally | 274

Listing 73-2
Listing 73-3
Listing 73-4
interface requires one method: matches()3. This method returns false to disable the profiler and true toenable the profiler.
To enable the profiler when a ROLE_SUPER_ADMIN is logged in, you can use something like:
123456789
101112131415161718192021
// src/Acme/DemoBundle/Profiler/SuperAdminMatcher.phpnamespace Acme\DemoBundle\Profiler;
use Symfony\Component\Security\Core\SecurityContext;use Symfony\Component\HttpFoundation\Request;use Symfony\Component\HttpFoundation\RequestMatcherInterface;
class SuperAdminMatcher implements RequestMatcherInterface{
protected $securityContext;
public function __construct(SecurityContext $securityContext){
$this->securityContext = $securityContext;}
public function matches(Request $request){
return $this->securityContext->isGranted('ROLE_SUPER_ADMIN');}
}
Then, you need to configure the service:
1234567
parameters:acme_demo.profiler.matcher.super_admin.class: Acme\DemoBundle\Profiler\SuperAdminMatcher
services:acme_demo.profiler.matcher.super_admin:
class: "%acme_demo.profiler.matcher.super_admin.class%"arguments: ["@security.context"]
Now the service is registered, the only thing left to do is configure the profiler to use this service as thematcher:
123456
# app/config/config.ymlframework:
# ...profiler:
matcher:service: acme_demo.profiler.matcher.super_admin
3. http://api.symfony.com/2.5/Symfony/Component/HttpFoundation/RequestMatcherInterface.html#matches()
PDF brought to you bygenerated on October 23, 2014
Chapter 73: How to Use Matchers to Enable the Profiler Conditionally | 275
Listing 74-1
Chapter 74
Switching the Profiler Storage
By default the profile stores the collected data in files in the cache directory. You can control the storagebeing used through the dsn, username, password and lifetime options. For example, the followingconfiguration uses MySQL as the storage for the profiler with a lifetime of one hour:
1234567
# app/config/config.ymlframework:profiler:
dsn: "mysql:host=localhost;dbname=%database_name%"username: "%database_user%"password: "%database_password%"lifetime: 3600
The HttpKernel component currently supports the following profiler storage implementations:
• FileProfilerStorage1
• MemcachedProfilerStorage2
• MemcacheProfilerStorage3
• MongoDbProfilerStorage4
• MysqlProfilerStorage5
• RedisProfilerStorage6
• SqliteProfilerStorage7
1. http://api.symfony.com/2.5/Symfony/Component/HttpKernel/Profiler/FileProfilerStorage.html
2. http://api.symfony.com/2.5/Symfony/Component/HttpKernel/Profiler/MemcachedProfilerStorage.html
3. http://api.symfony.com/2.5/Symfony/Component/HttpKernel/Profiler/MemcacheProfilerStorage.html
4. http://api.symfony.com/2.5/Symfony/Component/HttpKernel/Profiler/MongoDbProfilerStorage.html
5. http://api.symfony.com/2.5/Symfony/Component/HttpKernel/Profiler/MysqlProfilerStorage.html
6. http://api.symfony.com/2.5/Symfony/Component/HttpKernel/Profiler/RedisProfilerStorage.html
7. http://api.symfony.com/2.5/Symfony/Component/HttpKernel/Profiler/SqliteProfilerStorage.html
PDF brought to you bygenerated on October 23, 2014
Chapter 74: Switching the Profiler Storage | 276

Listing 75-1
Chapter 75
How to Configure Symfony to Work behind aLoad Balancer or a Reverse Proxy
When you deploy your application, you may be behind a load balancer (e.g. an AWS Elastic LoadBalancer) or a reverse proxy (e.g. Varnish for caching).
For the most part, this doesn't cause any problems with Symfony. But, when a request passes through aproxy, certain request information is sent using special X-Forwarded-* headers. For example, instead ofreading the REMOTE_ADDR header (which will now be the IP address of your reverse proxy), the user's trueIP will be stored in an X-Forwarded-For header.
If you don't configure Symfony to look for these headers, you'll get incorrect information about theclient's IP address, whether or not the client is connecting via HTTPS, the client's port and the hostnamebeing requested.
Solution: trusted_proxiesThis is no problem, but you do need to tell Symfony that this is happening and which reverse proxy IPaddresses will be doing this type of thing:
1234
# app/config/config.yml# ...framework:
trusted_proxies: [192.0.0.1, 10.0.0.0/8]
In this example, you're saying that your reverse proxy (or proxies) has the IP address 192.0.0.1 ormatches the range of IP addresses that use the CIDR notation 10.0.0.0/8. For more details, see theframework.trusted_proxies option.
That's it! Symfony will now look for the correct X-Forwarded-* headers to get information like theclient's IP address, host, port and whether or not the request is using HTTPS.
PDF brought to you bygenerated on October 23, 2014
Chapter 75: How to Configure Symfony to Work behind a Load Balancer or a Reverse Proxy | 277

Listing 75-2
But what if the IP of my Reverse Proxy Changes Constantly!Some reverse proxies (like Amazon's Elastic Load Balancers) don't have a static IP address or even a rangethat you can target with the CIDR notation. In this case, you'll need to - very carefully - trust all proxies.
1. Configure your web server(s) to not respond to traffic from any clients other than your loadbalancers. For AWS, this can be done with security groups1.
2. Once you've guaranteed that traffic will only come from your trusted reverse proxies, configureSymfony to always trust incoming request. This is done inside of your front controller:
1234567
// web/app.php
// ...Request::setTrustedProxies(array($request->server->get('REMOTE_ADDR')));
$response = $kernel->handle($request);// ...
That's it! It's critical that you prevent traffic from all non-trusted sources. If you allow outside traffic, theycould "spoof" their true IP address and other information.
My Reverse Proxy Uses Non-Standard (not X-Forwarded) HeadersMost reverse proxies store information on specific X-Forwarded-* headers. But if your reverse proxy usesnon-standard header names, you can configure these (see "Trusting Proxies"). The code for doing this willneed to live in your front controller (e.g. web/app.php).
1. http://docs.aws.amazon.com/ElasticLoadBalancing/latest/DeveloperGuide/using-elb-security-groups.html
PDF brought to you bygenerated on October 23, 2014
Chapter 75: How to Configure Symfony to Work behind a Load Balancer or a Reverse Proxy | 278

Listing 76-1
Chapter 76
How to Register a new Request Format andMime Type
Every Request has a "format" (e.g. html, json), which is used to determine what type of content toreturn in the Response. In fact, the request format, accessible via getRequestFormat()1, is used toset the MIME type of the Content-Type header on the Response object. Internally, Symfony containsa map of the most common formats (e.g. html, json) and their associated MIME types (e.g. text/html, application/json). Of course, additional format-MIME type entries can easily be added. Thisdocument will show how you can add the jsonp format and corresponding MIME type.
New in version 2.5: The possibility to configure request formats was introduced in Symfony 2.5.
Configure your New FormatThe FrameworkBundle registers a subscriber that will add formats to incoming requests.
All you have to do is to configure the jsonp format:
12345
# app/config/config.ymlframework:
request:formats:
jsonp: 'application/javascript'
1. http://api.symfony.com/2.5/Symfony/Component/HttpFoundation/Request.html#getRequestFormat()
PDF brought to you bygenerated on October 23, 2014
Chapter 76: How to Register a new Request Format and Mime Type | 279

Listing 76-2
You can also associate multiple mime types to a format, but please note that the preferred one mustbe the first as it will be used as the content type:
12345
# app/config/config.ymlframework:
request:formats:
csv: ['text/csv', 'text/plain']
PDF brought to you bygenerated on October 23, 2014
Chapter 76: How to Register a new Request Format and Mime Type | 280

Listing 77-1
Listing 77-2
Chapter 77
How to Force Routes to always Use HTTPS orHTTP
Sometimes, you want to secure some routes and be sure that they are always accessed via the HTTPSprotocol. The Routing component allows you to enforce the URI scheme via schemes:
1234
secure:path: /securedefaults: { _controller: AcmeDemoBundle:Main:secure }schemes: [https]
The above configuration forces the secure route to always use HTTPS.
When generating the secure URL, and if the current scheme is HTTP, Symfony will automaticallygenerate an absolute URL with HTTPS as the scheme:
1234567
{# If the current scheme is HTTPS #}{{ path('secure') }}{# generates /secure #}
{# If the current scheme is HTTP #}{{ path('secure') }}{# generates https://example.com/secure #}
The requirement is also enforced for incoming requests. If you try to access the /secure path with HTTP,you will automatically be redirected to the same URL, but with the HTTPS scheme.
The above example uses https for the scheme, but you can also force a URL to always use http.
The Security component provides another way to enforce HTTP or HTTPS via therequires_channel setting. This alternative method is better suited to secure an "area" of yourwebsite (all URLs under /admin) or when you want to secure URLs defined in a third party bundle(see How to Force HTTPS or HTTP for different URLs for more details).
PDF brought to you bygenerated on October 23, 2014
Chapter 77: How to Force Routes to always Use HTTPS or HTTP | 281

Listing 78-1
Chapter 78
How to Allow a "/" Character in a RouteParameter
Sometimes, you need to compose URLs with parameters that can contain a slash /. For example, take theclassic /hello/{name} route. By default, /hello/Fabien will match this route but not /hello/Fabien/Kris. This is because Symfony uses this character as separator between route parts.
This guide covers how you can modify a route so that /hello/Fabien/Kris matches the /hello/{name}route, where {name} equals Fabien/Kris.
Configure the RouteBy default, the Symfony Routing component requires that the parameters match the following regexpath: [^/]+. This means that all characters are allowed except /.
You must explicitly allow / to be part of your parameter by specifying a more permissive regex path.
12345
_hello:path: /hello/{name}defaults: { _controller: AcmeDemoBundle:Demo:hello }requirements:
name: .+
That's it! Now, the {name} parameter can contain the / character.
PDF brought to you bygenerated on October 23, 2014
Chapter 78: How to Allow a "/" Character in a Route Parameter | 282

Listing 79-1
Chapter 79
How to Configure a Redirect without a customController
Sometimes, a URL needs to redirect to another URL. You can do that by creating a new controller actionwhose only task is to redirect, but using the RedirectController1 of the FrameworkBundle is eveneasier.
You can redirect to a specific path (e.g. /about) or to a specific route using its name (e.g. homepage).
Redirecting Using a PathAssume there is no default controller for the / path of your application and you want to redirect theserequests to /app. You will need to use the urlRedirect()2 action to redirect to this new url:
123456789
101112131415
# app/config/routing.yml
# load some routes - one should ultimately have the path "/app"AppBundle:
resource: "@AcmeAppBundle/Controller/"type: annotationprefix: /app
# redirecting the rootroot:
path: /defaults:
_controller: FrameworkBundle:Redirect:urlRedirectpath: /apppermanent: true
1. http://api.symfony.com/2.5/Symfony/Bundle/FrameworkBundle/Controller/RedirectController.html
2. http://api.symfony.com/2.5/Symfony/Bundle/FrameworkBundle/Controller/RedirectController.html#urlRedirect()
PDF brought to you bygenerated on October 23, 2014
Chapter 79: How to Configure a Redirect without a custom Controller | 283

Listing 79-2
In this example, you configured a route for the / path and let the RedirectController redirect it to/app. The permanent switch tells the action to issue a 301 HTTP status code instead of the default 302HTTP status code.
Redirecting Using a RouteAssume you are migrating your website from WordPress to Symfony, you want to redirect /wp-adminto the route sonata_admin_dashboard. You don't know the path, only the route name. This can beachieved using the redirect()3 action:
123456789
1011
# app/config/routing.yml
# ...
# redirecting the admin homeroot:
path: /wp-admindefaults:
_controller: FrameworkBundle:Redirect:redirectroute: sonata_admin_dashboardpermanent: true
Because you are redirecting to a route instead of a path, the required option is called route in theredirect action, instead of path in the urlRedirect action.
3. http://api.symfony.com/2.5/Symfony/Bundle/FrameworkBundle/Controller/RedirectController.html#redirect()
PDF brought to you bygenerated on October 23, 2014
Chapter 79: How to Configure a Redirect without a custom Controller | 284

Listing 80-1
Chapter 80
How to Use HTTP Methods beyond GET andPOST in Routes
The HTTP method of a request is one of the requirements that can be checked when seeing if it matchesa route. This is introduced in the routing chapter of the book "Routing" with examples using GET andPOST. You can also use other HTTP verbs in this way. For example, if you have a blog post entry thenyou could use the same URL path to show it, make changes to it and delete it by matching on GET, PUTand DELETE.
123456789
1011121314
blog_show:path: /blog/{slug}defaults: { _controller: AcmeDemoBundle:Blog:show }methods: [GET]
blog_update:path: /blog/{slug}defaults: { _controller: AcmeDemoBundle:Blog:update }methods: [PUT]
blog_delete:path: /blog/{slug}defaults: { _controller: AcmeDemoBundle:Blog:delete }methods: [DELETE]
Faking the Method with _method
The _method functionality shown here is disabled by default in Symfony 2.2 and enabled bydefault in Symfony 2.3. To control it in Symfony 2.2, you must callRequest::enableHttpMethodParameterOverride1 before you handle the request (e.g. in yourfront controller). In Symfony 2.3, use the http_method_override option.
PDF brought to you bygenerated on October 23, 2014
Chapter 80: How to Use HTTP Methods beyond GET and POST in Routes | 285

Unfortunately, life isn't quite this simple, since most browsers do not support sending PUT and DELETErequests. Fortunately, Symfony provides you with a simple way of working around this limitation. Byincluding a _method parameter in the query string or parameters of an HTTP request, Symfony will usethis as the method when matching routes. Forms automatically include a hidden field for this parameterif their submission method is not GET or POST. See the related chapter in the forms documentation formore information.
1. http://api.symfony.com/2.5/Symfony/Component/HttpFoundation/Request.html#enableHttpMethodParameterOverride()
PDF brought to you bygenerated on October 23, 2014
Chapter 80: How to Use HTTP Methods beyond GET and POST in Routes | 286

Listing 81-1
Listing 81-2
Listing 81-3
Chapter 81
How to Use Service Container Parameters inyour Routes
Sometimes you may find it useful to make some parts of your routes globally configurable. For instance,if you build an internationalized site, you'll probably start with one or two locales. Surely you'll add arequirement to your routes to prevent a user from matching a locale other than the locales your support.
You could hardcode your _locale requirement in all your routes. But a better solution is to use aconfigurable service container parameter right inside your routing configuration:
123456
# app/config/routing.ymlcontact:
path: /{_locale}/contactdefaults: { _controller: AcmeDemoBundle:Main:contact }requirements:
_locale: "%acme_demo.locales%"
You can now control and set the acme_demo.locales parameter somewhere in your container:
123
# app/config/config.ymlparameters:
acme_demo.locales: en|es
You can also use a parameter to define your route path (or part of your path):
1234
# app/config/routing.ymlsome_route:
path: /%acme_demo.route_prefix%/contactdefaults: { _controller: AcmeDemoBundle:Main:contact }
PDF brought to you bygenerated on October 23, 2014
Chapter 81: How to Use Service Container Parameters in your Routes | 287

Just like in normal service container configuration files, if you actually need a % in your route, youcan escape the percent sign by doubling it, e.g. /score-50%%, which would resolve to /score-50%.
However, as the % characters included in any URL are automatically encoded, the resulting URL ofthis example would be /score-50%25 (%25 is the result of encoding the % character).
For parameter handling within a Dependency Injection class see Using Parameters within a DependencyInjection Class.
PDF brought to you bygenerated on October 23, 2014
Chapter 81: How to Use Service Container Parameters in your Routes | 288

Listing 82-1
Chapter 82
How to Create a custom Route Loader
A custom route loader allows you to add routes to an application without including them, for example,in a YAML file. This comes in handy when you have a bundle but don't want to manually add the routesfor the bundle to app/config/routing.yml. This may be especially important when you want to makethe bundle reusable, or when you have open-sourced it as this would slow down the installation processand make it error-prone.
Alternatively, you could also use a custom route loader when you want your routes to be automaticallygenerated or located based on some convention or pattern. One example is the FOSRestBundle1 whererouting is generated based off the names of the action methods in a controller.
There are many bundles out there that use their own route loaders to accomplish cases likethose described above, for instance FOSRestBundle2, JMSI18nRoutingBundle3, KnpRadBundle4 andSonataAdminBundle5.
Loading RoutesThe routes in a Symfony application are loaded by the DelegatingLoader6. This loader uses several otherloaders (delegates) to load resources of different types, for instance YAML files or @Route and @Methodannotations in controller files. The specialized loaders implement LoaderInterface7 and therefore havetwo important methods: supports()8 and load()9.
Take these lines from the routing.yml in the AcmeDemoBundle of the Standard Edition:
1. https://github.com/FriendsOfSymfony/FOSRestBundle
2. https://github.com/FriendsOfSymfony/FOSRestBundle
3. https://github.com/schmittjoh/JMSI18nRoutingBundle
4. https://github.com/KnpLabs/KnpRadBundle
5. https://github.com/sonata-project/SonataAdminBundle
6. http://api.symfony.com/2.5/Symfony/Bundle/FrameworkBundle/Routing/DelegatingLoader.html
7. http://api.symfony.com/2.5/Symfony/Component/Config/Loader/LoaderInterface.html
8. http://api.symfony.com/2.5/Symfony/Component/Config/Loader/LoaderInterface.html#supports()
9. http://api.symfony.com/2.5/Symfony/Component/Config/Loader/LoaderInterface.html#load()
PDF brought to you bygenerated on October 23, 2014
Chapter 82: How to Create a custom Route Loader | 289

Listing 82-2
12345
# src/Acme/DemoBundle/Resources/config/routing.yml_demo:
resource: "@AcmeDemoBundle/Controller/DemoController.php"type: annotationprefix: /demo
When the main loader parses this, it tries all the delegate loaders and calls their supports()10 methodwith the given resource (@AcmeDemoBundle/Controller/DemoController.php) and type (annotation)as arguments. When one of the loader returns true, its load()11 method will be called, which shouldreturn a RouteCollection12 containing Route13 objects.
Creating a custom LoaderTo load routes from some custom source (i.e. from something other than annotations, YAML or XMLfiles), you need to create a custom route loader. This loader should implement LoaderInterface14.
The sample loader below supports loading routing resources with a type of extra. The type extra isn'timportant - you can just invent any resource type you want. The resource name itself is not actually usedin the example:
123456789
101112131415161718192021222324252627282930
namespace Acme\DemoBundle\Routing;
use Symfony\Component\Config\Loader\LoaderInterface;use Symfony\Component\Config\Loader\LoaderResolverInterface;use Symfony\Component\Routing\Route;use Symfony\Component\Routing\RouteCollection;
class ExtraLoader implements LoaderInterface{
private $loaded = false;
public function load($resource, $type = null){
if (true === $this->loaded) {throw new \RuntimeException('Do not add the "extra" loader twice');
}
$routes = new RouteCollection();
// prepare a new route$pattern = '/extra/{parameter}';$defaults = array(
'_controller' => 'AcmeDemoBundle:Demo:extra',);$requirements = array(
'parameter' => '\d+',);$route = new Route($pattern, $defaults, $requirements);
// add the new route to the route collection:
10. http://api.symfony.com/2.5/Symfony/Component/Config/Loader/LoaderInterface.html#supports()
11. http://api.symfony.com/2.5/Symfony/Component/Config/Loader/LoaderInterface.html#load()
12. http://api.symfony.com/2.5/Symfony/Component/Routing/RouteCollection.html
13. http://api.symfony.com/2.5/Symfony/Component/Routing/Route.html
14. http://api.symfony.com/2.5/Symfony/Component/Config/Loader/LoaderInterface.html
PDF brought to you bygenerated on October 23, 2014
Chapter 82: How to Create a custom Route Loader | 290

Listing 82-3
Listing 82-4
313233343536373839404142434445464748495051525354
$routeName = 'extraRoute';$routes->add($routeName, $route);
$this->loaded = true;
return $routes;}
public function supports($resource, $type = null){
return 'extra' === $type;}
public function getResolver(){
// needed, but can be blank, unless you want to load other resources// and if you do, using the Loader base class is easier (see below)
}
public function setResolver(LoaderResolverInterface $resolver){
// same as above}
}
Make sure the controller you specify really exists.
Now define a service for the ExtraLoader:
12345
services:acme_demo.routing_loader:
class: Acme\DemoBundle\Routing\ExtraLoadertags:
- { name: routing.loader }
Notice the tag routing.loader. All services with this tag will be marked as potential route loaders andadded as specialized routers to the DelegatingLoader15.
Using the custom Loader
If you did nothing else, your custom routing loader would not be called. Instead, you only need to add afew extra lines to the routing configuration:
1234
# app/config/routing.ymlAcmeDemoBundle_Extra:
resource: .type: extra
The important part here is the type key. Its value should be "extra". This is the type which theExtraLoader supports and this will make sure its load() method gets called. The resource key isinsignificant for the ExtraLoader, so it is set to ".".
15. http://api.symfony.com/2.5/Symfony/Bundle/FrameworkBundle/Routing/DelegatingLoader.html
PDF brought to you bygenerated on October 23, 2014
Chapter 82: How to Create a custom Route Loader | 291

Listing 82-5
The routes defined using custom route loaders will be automatically cached by the framework. Sowhenever you change something in the loader class itself, don't forget to clear the cache.
More advanced LoadersIn most cases it's better not to implement LoaderInterface16 yourself, but extend from Loader17. Thisclass knows how to use a LoaderResolver18 to load secondary routing resources.
Of course you still need to implement supports()19 and load()20. Whenever you want to load anotherresource - for instance a YAML routing configuration file - you can call the import()21 method:
123456789
1011121314151617181920212223242526
namespace Acme\DemoBundle\Routing;
use Symfony\Component\Config\Loader\Loader;use Symfony\Component\Routing\RouteCollection;
class AdvancedLoader extends Loader{
public function load($resource, $type = null){
$collection = new RouteCollection();
$resource = '@AcmeDemoBundle/Resources/config/import_routing.yml';$type = 'yaml';
$importedRoutes = $this->import($resource, $type);
$collection->addCollection($importedRoutes);
return $collection;}
public function supports($resource, $type = null){
return $type === 'advanced_extra';}
}
The resource name and type of the imported routing configuration can be anything that wouldnormally be supported by the routing configuration loader (YAML, XML, PHP, annotation, etc.).
16. http://api.symfony.com/2.5/Symfony/Component/Config/Loader/LoaderInterface.html
17. http://api.symfony.com/2.5/Symfony/Component/Config/Loader/Loader.html
18. http://api.symfony.com/2.5/Symfony/Component/Config/Loader/LoaderResolver.html
19. http://api.symfony.com/2.5/Symfony/Component/Config/Loader/LoaderInterface.html#supports()
20. http://api.symfony.com/2.5/Symfony/Component/Config/Loader/LoaderInterface.html#load()
21. http://api.symfony.com/2.5/Symfony/Component/Config/Loader/Loader.html#import()
PDF brought to you bygenerated on October 23, 2014
Chapter 82: How to Create a custom Route Loader | 292

Listing 83-1
Listing 83-2
Chapter 83
Redirect URLs with a Trailing Slash
The goal of this cookbook is to demonstrate how to redirect URLs with a trailing slash to the same URLwithout a trailing slash (for example /en/blog/ to /en/blog).
Create a controller that will match any URL with a trailing slash, remove the trailing slash (keeping queryparameters if any) and redirect to the new URL with a 301 response status code:
123456789
101112131415161718
// src/Acme/DemoBundle/Controller/RedirectingController.phpnamespace Acme\DemoBundle\Controller;
use Symfony\Bundle\FrameworkBundle\Controller\Controller;use Symfony\Component\HttpFoundation\Request;
class RedirectingController extends Controller{
public function removeTrailingSlashAction(Request $request){
$pathInfo = $request->getPathInfo();$requestUri = $request->getRequestUri();
$url = str_replace($pathInfo, rtrim($pathInfo, ' /'), $requestUri);
return $this->redirect($url, 301);}
}
After that, create a route to this controller that's matched whenever a URL with a trailing slash isrequested. Be sure to put this route last in your system, as explained below:
123456
remove_trailing_slash:path: /{url}defaults: { _controller: AcmeDemoBundle:Redirecting:removeTrailingSlash }requirements:
url: .*/$methods: [GET]
PDF brought to you bygenerated on October 23, 2014
Chapter 83: Redirect URLs with a Trailing Slash | 293

Redirecting a POST request does not work well in old browsers. A 302 on a POST request wouldsend a GET request after the redirection for legacy reasons. For that reason, the route here onlymatches GET requests.
Make sure to include this route in your routing configuration at the very end of your route listing.Otherwise, you risk redirecting real routes (including Symfony core routes) that actually do have atrailing slash in their path.
PDF brought to you bygenerated on October 23, 2014
Chapter 83: Redirect URLs with a Trailing Slash | 294

Listing 84-1
Listing 84-2
Chapter 84
How to Pass Extra Information from a Route toa Controller
Parameters inside the defaults collection don't necessarily have to match a placeholder in the routepath. In fact, you can use the defaults array to specify extra parameters that will then be accessible asarguments to your controller:
1234567
# app/config/routing.ymlblog:
path: /blog/{page}defaults:
_controller: AcmeBlogBundle:Blog:indexpage: 1title: "Hello world!"
Now, you can access this extra parameter in your controller:
1234
public function indexAction($page, $title){
// ...}
As you can see, the $title variable was never defined inside the route path, but you can still access itsvalue from inside your controller.
PDF brought to you bygenerated on October 23, 2014
Chapter 84: How to Pass Extra Information from a Route to a Controller | 295

Listing 85-1
Chapter 85
How to Load Security Users from the Database(the Entity Provider)
The security layer is one of the smartest tools of Symfony. It handles two things: the authenticationand the authorization processes. Although it may seem difficult to understand how it works internally,the security system is very flexible and allows you to integrate your application with any authenticationbackend, like Active Directory, an OAuth server or a database.
IntroductionThis article focuses on how to authenticate users against a database table managed by a Doctrine entityclass. The content of this cookbook entry is split in three parts. The first part is about designing aDoctrine User entity class and making it usable in the security layer of Symfony. The second partdescribes how to easily authenticate a user with the Doctrine EntityUserProvider1 object bundled withthe framework and some configuration. Finally, the tutorial will demonstrate how to create a customEntityUserProvider2 object to retrieve users from a database with custom conditions.
Code along with the Example
If you want to follow along with the example in this chapter, create an AcmeUserBundle via:
1 $ php app/console generate:bundle --namespace=Acme/UserBundle
1. http://api.symfony.com/2.5/Symfony/Bridge/Doctrine/Security/User/EntityUserProvider.html
2. http://api.symfony.com/2.5/Symfony/Bridge/Doctrine/Security/User/EntityUserProvider.html
PDF brought to you bygenerated on October 23, 2014
Chapter 85: How to Load Security Users from the Database (the Entity Provider) | 296

Listing 85-2
Listing 85-3
The Data ModelFor the purpose of this cookbook, the AcmeUserBundle bundle contains a User entity class with thefollowing fields: id, username, password, email and isActive. The isActive field tells whether or notthe user account is active.
To make it shorter, the getter and setter methods for each have been removed to focus on the mostimportant methods that come from the UserInterface3.
You can generate the missing getter and setters by running:
1 $ php app/console doctrine:generate:entities Acme/UserBundle/Entity/User
1234567891011121314151617181920212223242526272829303132333435363738394041
// src/Acme/UserBundle/Entity/User.phpnamespace Acme\UserBundle\Entity;
use Doctrine\ORM\Mapping as ORM;use Symfony\Component\Security\Core\User\UserInterface;
/*** Acme\UserBundle\Entity\User** @ORM\Table(name="acme_users")* @ORM\Entity(repositoryClass="Acme\UserBundle\Entity\UserRepository")*/class User implements UserInterface, \Serializable{
/*** @ORM\Column(type="integer")* @ORM\Id* @ORM\GeneratedValue(strategy="AUTO")*/private $id;
/*** @ORM\Column(type="string", length=25, unique=true)*/private $username;
/*** @ORM\Column(type="string", length=64)*/private $password;
/*** @ORM\Column(type="string", length=60, unique=true)*/private $email;
/*** @ORM\Column(name="is_active", type="boolean")*/private $isActive;
3. http://api.symfony.com/2.5/Symfony/Component/Security/Core/User/UserInterface.html
PDF brought to you bygenerated on October 23, 2014
Chapter 85: How to Load Security Users from the Database (the Entity Provider) | 297

42434445464748495051525354555657585960616263646566676869707172737475767778798081828384858687888990919293949596979899
100
public function __construct(){
$this->isActive = true;// may not be needed, see section on salt below// $this->salt = md5(uniqid(null, true));
}
/*** @inheritDoc*/public function getUsername(){
return $this->username;}
/*** @inheritDoc*/public function getSalt(){
// you *may* need a real salt depending on your encoder// see section on salt belowreturn null;
}
/*** @inheritDoc*/public function getPassword(){
return $this->password;}
/*** @inheritDoc*/public function getRoles(){
return array('ROLE_USER');}
/*** @inheritDoc*/public function eraseCredentials(){}
/*** @see \Serializable::serialize()*/public function serialize(){
return serialize(array($this->id,$this->username,$this->password,// see section on salt below// $this->salt,
PDF brought to you bygenerated on October 23, 2014
Chapter 85: How to Load Security Users from the Database (the Entity Provider) | 298

Listing 85-4
101102103104105106107108109110111112113114115116117
));}
/*** @see \Serializable::unserialize()*/public function unserialize($serialized){
list ($this->id,$this->username,$this->password,// see section on salt below// $this->salt
) = unserialize($serialized);}
}
If you choose to implement EquatableInterface4, you determine yourself which properties needto be compared to distinguish your user objects.
Generate the database table for your User entity by running:
1 $ php app/console doctrine:schema:update --force
In order to use an instance of the AcmeUserBundle:User class in the Symfony security layer, the entityclass must implement the UserInterface5. This interface forces the class to implement the five followingmethods:
• getRoles()6
• getPassword()7
• getSalt()8
• getUsername()9
• eraseCredentials()10
For more details on each of these, see UserInterface11.
4. http://api.symfony.com/2.5/Symfony/Component/Security/Core/User/EquatableInterface.html
5. http://api.symfony.com/2.5/Symfony/Component/Security/Core/User/UserInterface.html
6. http://api.symfony.com/2.5/Symfony/Component/Security/Core/User/UserInterface.html#getRoles()
7. http://api.symfony.com/2.5/Symfony/Component/Security/Core/User/UserInterface.html#getPassword()
8. http://api.symfony.com/2.5/Symfony/Component/Security/Core/User/UserInterface.html#getSalt()
9. http://api.symfony.com/2.5/Symfony/Component/Security/Core/User/UserInterface.html#getUsername()
10. http://api.symfony.com/2.5/Symfony/Component/Security/Core/User/UserInterface.html#eraseCredentials()
11. http://api.symfony.com/2.5/Symfony/Component/Security/Core/User/UserInterface.html
PDF brought to you bygenerated on October 23, 2014
Chapter 85: How to Load Security Users from the Database (the Entity Provider) | 299

Listing 85-5
What is the importance of serialize and unserialize?
The Serializable12 interface and its serialize and unserialize methods have been added toallow the User class to be serialized to the session. This may or may not be needed dependingon your setup, but it's probably a good idea. The id is the most important value that needs to beserialized because the refreshUser()13 method reloads the user on each request by using the id.In practice, this means that the User object is reloaded from the database on each request using theid from the serialized object. This makes sure all of the User's data is fresh.
Symfony also uses the username, salt, and password to verify that the User has not changedbetween requests. Failing to serialize these may cause you to be logged out on each request. If yourUser implements EquatableInterface14, then instead of these properties being checked, yourisEqualTo method is simply called, and you can check whatever properties you want. Unless youunderstand this, you probably won't need to implement this interface or worry about it.
Below is an export of the User table from MySQL with user admin and password admin (which has beenencoded). For details on how to create user records and encode their password, see Encoding the User'sPassword.
123456
$ mysql> SELECT * FROM acme_users;+----+----------+------------------------------------------+--------------------+-----------+| id | username | password | email | is_active |+----+----------+------------------------------------------+--------------------+-----------+| 1 | admin | d033e22ae348aeb5660fc2140aec35850c4da997 | [email protected] | 1 |+----+----------+------------------------------------------+--------------------+-----------+
The next part will focus on how to authenticate one of these users thanks to the Doctrine entity userprovider and a couple of lines of configuration.
Do you need to use a Salt?
Yes. Hashing a password with a salt is a necessary step so that encoded passwords can't bedecoded. However, some encoders - like Bcrypt - have a built-in salt mechanism. If you configurebcrypt as your encoder in security.yml (see the next section), then getSalt() should returnnull, so that Bcrypt generates the salt itself.
However, if you use an encoder that does not have a built-in salting ability (e.g. sha512), you must(from a security perspective) generate your own, random salt, store it on a salt property that issaved to the database, and return it from getSalt(). Some of the code needed is commented outin the above example.
Authenticating Someone against a DatabaseAuthenticating a Doctrine user against the database with the Symfony security layer is a piece of cake.Everything resides in the configuration of the SecurityBundle stored in the app/config/security.ymlfile.
Below is an example of configuration where the user will enter their username and password via HTTPbasic authentication. That information will then be checked against your User entity records in thedatabase:
12. http://php.net/manual/en/class.serializable.php
13. http://api.symfony.com/2.5/Symfony/Bridge/Doctrine/Security/User/EntityUserProvider.html#refreshUser()
14. http://api.symfony.com/2.5/Symfony/Component/Security/Core/User/EquatableInterface.html
PDF brought to you bygenerated on October 23, 2014
Chapter 85: How to Load Security Users from the Database (the Entity Provider) | 300

Listing 85-6
Listing 85-7
123456789
101112131415161718192021
# app/config/security.ymlsecurity:
encoders:Acme\UserBundle\Entity\User:
algorithm: bcrypt
role_hierarchy:ROLE_ADMIN: ROLE_USERROLE_SUPER_ADMIN: [ ROLE_ADMIN, ROLE_ALLOWED_TO_SWITCH ]
providers:administrators:
entity: { class: AcmeUserBundle:User, property: username }
firewalls:admin_area:
pattern: ^/adminhttp_basic: ~
access_control:- { path: ^/admin, roles: ROLE_ADMIN }
The encoders section associates the bcrypt password encoder to the entity class. This means thatSymfony will expect the password that's stored in the database to be encoded using this encoder. Fordetails on how to create a new User object with a properly encoded password, see the Encoding the User'sPassword section of the security chapter.
If you're using PHP 5.4 or lower, you'll need to install the ircmaxell/password-compat library viaComposer in order to be able to use the bcrypt encoder:
{"require": {
..."ircmaxell/password-compat": "~1.0.3"
}}
The providers section defines an administrators user provider. A user provider is a "source" of whereusers are loaded during authentication. In this case, the entity keyword means that Symfony will usethe Doctrine entity user provider to load User entity objects from the database by using the usernameunique field. In other words, this tells Symfony how to fetch the user from the database before checkingthe password validity.
PDF brought to you bygenerated on October 23, 2014
Chapter 85: How to Load Security Users from the Database (the Entity Provider) | 301

Listing 85-8
Listing 85-9
By default, the entity provider uses the default entity manager to fetch user information from thedatabase. If you use multiple entity managers, you can specify which manager to use with themanager_name option:
123456789
101112
# app/config/config.ymlsecurity:
# ...
providers:administrators:
entity:class: AcmeUserBundle:Userproperty: usernamemanager_name: customer
# ...
Forbid inactive UsersIf a User's isActive property is set to false (i.e. is_active is 0 in the database), the user will still beable to login access the site normally. To prevent "inactive" users from logging in, you'll need to do a littlemore work.
The easiest way to exclude inactive users is to implement the AdvancedUserInterface15 interfacethat takes care of checking the user's account status. The AdvancedUserInterface16 extends theUserInterface17 interface, so you just need to switch to the new interface in the AcmeUserBundle:Userentity class to benefit from simple and advanced authentication behaviors.
The AdvancedUserInterface18 interface adds four extra methods to validate the account status:
• isAccountNonExpired()19 checks whether the user's account has expired,• isAccountNonLocked()isAccountNonLocked()20
checks whether the user is locked,
• isCredentialsNonExpired()21 checks whether the user's credentials (password) has expired,
• isEnabled()22 checks whether the user is enabled.
For this example, the first three methods will return true whereas the isEnabled() method will returnthe boolean value in the isActive field.
123456
// src/Acme/UserBundle/Entity/User.phpnamespace Acme\UserBundle\Entity;
use Doctrine\ORM\Mapping as ORM;use Symfony\Component\Security\Core\User\AdvancedUserInterface;
15. http://api.symfony.com/2.5/Symfony/Component/Security/Core/User/AdvancedUserInterface.html
16. http://api.symfony.com/2.5/Symfony/Component/Security/Core/User/AdvancedUserInterface.html
17. http://api.symfony.com/2.5/Symfony/Component/Security/Core/User/UserInterface.html
18. http://api.symfony.com/2.5/Symfony/Component/Security/Core/User/AdvancedUserInterface.html
19. http://api.symfony.com/2.5/Symfony/Component/Security/Core/User/AdvancedUserInterface.html#isAccountNonExpired()
20. http://api.symfony.com/2.5/Symfony/Component/Security/Core/User/AdvancedUserInterface.html#isAccountNonLocked()http://api.symfony.com/2.5/Symfony/Component/Security/Core/User/AdvancedUserInterface.html#isAccountNonLocked()
21. http://api.symfony.com/2.5/Symfony/Component/Security/Core/User/AdvancedUserInterface.html#isCredentialsNonExpired()
22. http://api.symfony.com/2.5/Symfony/Component/Security/Core/User/AdvancedUserInterface.html#isEnabled()
PDF brought to you bygenerated on October 23, 2014
Chapter 85: How to Load Security Users from the Database (the Entity Provider) | 302

Listing 85-10
789
101112131415161718192021222324252627282930
class User implements AdvancedUserInterface, \Serializable{
// ...
public function isAccountNonExpired(){
return true;}
public function isAccountNonLocked(){
return true;}
public function isCredentialsNonExpired(){
return true;}
public function isEnabled(){
return $this->isActive;}
}
Now, if you try to authenticate as a user who's is_active database field is set to 0, you won't be allowed.
When using the AdvancedUserInterface, you should also add any of the properties used by thesemethods (like isActive()) to the serialize() method. If you don't do this, your user may not bedeserialized correctly from the session on each request.
The next session will focus on how to write a custom entity provider to authenticate a user with theirusername or email address.
Authenticating Someone with a Custom Entity ProviderThe next step is to allow a user to authenticate with their username or email address as they are bothunique in the database. Unfortunately, the native entity provider is only able to handle a single propertyto fetch the user from the database.
To accomplish this, create a custom entity provider that looks for a user whose username or email fieldmatches the submitted login username. The good news is that a Doctrine repository object can act asan entity user provider if it implements the UserProviderInterface23. This interface comes with threemethods to implement: loadUserByUsername($username), refreshUser(UserInterface $user), andsupportsClass($class). For more details, see UserProviderInterface24.
The code below shows the implementation of the UserProviderInterface25 in the UserRepositoryclass:
12
// src/Acme/UserBundle/Entity/UserRepository.phpnamespace Acme\UserBundle\Entity;
23. http://api.symfony.com/2.5/Symfony/Component/Security/Core/User/UserProviderInterface.html
24. http://api.symfony.com/2.5/Symfony/Component/Security/Core/User/UserProviderInterface.html
25. http://api.symfony.com/2.5/Symfony/Component/Security/Core/User/UserProviderInterface.html
PDF brought to you bygenerated on October 23, 2014
Chapter 85: How to Load Security Users from the Database (the Entity Provider) | 303

3456789
101112131415161718192021222324252627282930313233343536373839404142434445464748495051525354555657
use Symfony\Component\Security\Core\User\UserInterface;use Symfony\Component\Security\Core\User\UserProviderInterface;use Symfony\Component\Security\Core\Exception\UsernameNotFoundException;use Symfony\Component\Security\Core\Exception\UnsupportedUserException;use Doctrine\ORM\EntityRepository;use Doctrine\ORM\NoResultException;
class UserRepository extends EntityRepository implements UserProviderInterface{
public function loadUserByUsername($username){
$q = $this->createQueryBuilder('u')->where('u.username = :username OR u.email = :email')->setParameter('username', $username)->setParameter('email', $username)->getQuery();
try {// The Query::getSingleResult() method throws an exception// if there is no record matching the criteria.$user = $q->getSingleResult();
} catch (NoResultException $e) {$message = sprintf(
'Unable to find an active admin AcmeUserBundle:User object identified by"%s".',
$username);throw new UsernameNotFoundException($message, 0, $e);
}
return $user;}
public function refreshUser(UserInterface $user){
$class = get_class($user);if (!$this->supportsClass($class)) {
throw new UnsupportedUserException(sprintf(
'Instances of "%s" are not supported.',$class
));
}
return $this->find($user->getId());}
public function supportsClass($class){
return $this->getEntityName() === $class|| is_subclass_of($class, $this->getEntityName());
}}
To finish the implementation, the configuration of the security layer must be changed to tell Symfony touse the new custom entity provider instead of the generic Doctrine entity provider. It's trivial to achieve
PDF brought to you bygenerated on October 23, 2014
Chapter 85: How to Load Security Users from the Database (the Entity Provider) | 304

Listing 85-11
Listing 85-12
by removing the property field in the security.providers.administrators.entity section of thesecurity.yml file.
1234567
# app/config/security.ymlsecurity:
# ...providers:
administrators:entity: { class: AcmeUserBundle:User }
# ...
By doing this, the security layer will use an instance of UserRepository and call itsloadUserByUsername() method to fetch a user from the database whether they filled in their usernameor email address.
Managing Roles in the DatabaseThe end of this tutorial focuses on how to store and retrieve a list of roles from the database. Asmentioned previously, when your user is loaded, its getRoles() method returns the array of securityroles that should be assigned to the user. You can load this data from anywhere - a hardcoded listused for all users (e.g. array('ROLE_USER')), a Doctrine array property called roles, or via a Doctrinerelationship, as you'll learn about in this section.
In a typical setup, you should always return at least 1 role from the getRoles() method. Byconvention, a role called ROLE_USER is usually returned. If you fail to return any roles, it may appearas if your user isn't authenticated at all.
In order to work with the security configuration examples on this page all roles must be prefixedwith ROLE_ (see the section about roles in the book). For example, your roles will be ROLE_ADMIN orROLE_USER instead of ADMIN or USER.
In this example, the AcmeUserBundle:User entity class defines a many-to-many relationship with aAcmeUserBundle:Role entity class. A user can be related to several roles and a role can be composed ofone or more users. The previous getRoles() method now returns the list of related roles. Notice that__construct() and getRoles() methods have changed:
123456789
10111213141516
// src/Acme/UserBundle/Entity/User.phpnamespace Acme\UserBundle\Entity;
use Doctrine\Common\Collections\ArrayCollection;// ...
class User implements AdvancedUserInterface, \Serializable{
// ...
/*** @ORM\ManyToMany(targetEntity="Role", inversedBy="users")**/private $roles;
PDF brought to you bygenerated on October 23, 2014
Chapter 85: How to Load Security Users from the Database (the Entity Provider) | 305

Listing 85-13
17181920212223242526272829
public function __construct(){
$this->roles = new ArrayCollection();}
public function getRoles(){
return $this->roles->toArray();}
// ...
}
The AcmeUserBundle:Role entity class defines three fields (id, name and role). The unique role fieldcontains the role name (e.g. ROLE_ADMIN) used by the Symfony security layer to secure parts of theapplication:
123456789
10111213141516171819202122232425262728293031323334353637383940
// src/Acme/Bundle/UserBundle/Entity/Role.phpnamespace Acme\UserBundle\Entity;
use Symfony\Component\Security\Core\Role\RoleInterface;use Doctrine\Common\Collections\ArrayCollection;use Doctrine\ORM\Mapping as ORM;
/*** @ORM\Table(name="acme_role")* @ORM\Entity()*/class Role implements RoleInterface{
/*** @ORM\Column(name="id", type="integer")* @ORM\Id()* @ORM\GeneratedValue(strategy="AUTO")*/private $id;
/*** @ORM\Column(name="name", type="string", length=30)*/private $name;
/*** @ORM\Column(name="role", type="string", length=20, unique=true)*/private $role;
/*** @ORM\ManyToMany(targetEntity="User", mappedBy="roles")*/private $users;
public function __construct(){
$this->users = new ArrayCollection();}
PDF brought to you bygenerated on October 23, 2014
Chapter 85: How to Load Security Users from the Database (the Entity Provider) | 306
Listing 85-14
Listing 85-15
Listing 85-16
41424344454647484950
/*** @see RoleInterface*/public function getRole(){
return $this->role;}
// ... getters and setters for each property}
For brevity, the getter and setter methods are hidden, but you can generate them:
1 $ php app/console doctrine:generate:entities Acme/UserBundle/Entity/User
Don't forget also to update your database schema:
1 $ php app/console doctrine:schema:update --force
This will create the acme_role table and a user_role that stores the many-to-many relationship betweenacme_user and acme_role. If you had one user linked to one role, your database might look somethinglike this:
123456789
10111213
$ mysql> SELECT * FROM acme_role;+----+-------+------------+| id | name | role |+----+-------+------------+| 1 | admin | ROLE_ADMIN |+----+-------+------------+
$ mysql> SELECT * FROM user_role;+---------+---------+| user_id | role_id |+---------+---------+| 1 | 1 |+---------+---------+
And that's it! When the user logs in, Symfony security system will call the User::getRoles method. Thiswill return an array of Role objects that Symfony will use to determine if the user should have access tocertain parts of the system.
What's the purpose of the RoleInterface?
Notice that the Role class implements RoleInterface26. This is because Symfony's security systemrequires that the User::getRoles method returns an array of either role strings or objects thatimplement this interface. If Role didn't implement this interface, then User::getRoles wouldneed to iterate over all the Role objects, call getRole on each, and create an array of strings toreturn. Both approaches are valid and equivalent.
26. http://api.symfony.com/2.5/Symfony/Component/Security/Core/Role/RoleInterface.html
PDF brought to you bygenerated on October 23, 2014
Chapter 85: How to Load Security Users from the Database (the Entity Provider) | 307

Listing 85-17
Improving Performance with a Join
To improve performance and avoid lazy loading of roles when retrieving a user from the customentity provider, you can use a Doctrine join to the roles relationship in theUserRepository::loadUserByUsername() method. This will fetch the user and their associated roleswith a single query:
123456789
1011121314151617181920212223
// src/Acme/UserBundle/Entity/UserRepository.phpnamespace Acme\UserBundle\Entity;
// ...
class UserRepository extends EntityRepository implements UserProviderInterface{
public function loadUserByUsername($username){
$q = $this->createQueryBuilder('u')->select('u, r')->leftJoin('u.roles', 'r')->where('u.username = :username OR u.email = :email')->setParameter('username', $username)->setParameter('email', $username)->getQuery();
// ...}
// ...}
The QueryBuilder::leftJoin() method joins and fetches related roles from the AcmeUserBundle:Usermodel class when a user is retrieved by their email address or username.
Understanding serialize and how a User is Saved in the SessionIf you're curious about the importance of the serialize() method inside the User class or how the Userobject is serialized or deserialized, then this section is for you. If not, feel free to skip this.
Once the user is logged in, the entire User object is serialized into the session. On the next request, theUser object is deserialized. Then, value of the id property is used to re-query for a fresh User object fromthe database. Finally, the fresh User object is compared in some way to the deserialized User object tomake sure that they represent the same user. For example, if the username on the 2 User objects doesn'tmatch for some reason, then the user will be logged out for security reasons.
Even though this all happens automatically, there are a few important side-effects.
First, the Serializable27 interface and its serialize and unserialize methods have been added toallow the User class to be serialized to the session. This may or may not be needed depending onyour setup, but it's probably a good idea. In theory, only the id needs to be serialized, because therefreshUser()28 method refreshes the user on each request by using the id (as explained above).However in practice, this means that the User object is reloaded from the database on each request usingthe id from the serialized object. This makes sure all of the User's data is fresh.
Symfony also uses the username, salt, and password to verify that the User has not changed betweenrequests. Failing to serialize these may cause you to be logged out on each request. If your User
27. http://php.net/manual/en/class.serializable.php
28. http://api.symfony.com/2.5/Symfony/Bridge/Doctrine/Security/User/EntityUserProvider.html#refreshUser()
PDF brought to you bygenerated on October 23, 2014
Chapter 85: How to Load Security Users from the Database (the Entity Provider) | 308

implements the EquatableInterface29, then instead of these properties being checked, your isEqualTomethod is simply called, and you can check whatever properties you want. Unless you understand this,you probably won't need to implement this interface or worry about it.
New in version 2.1: In Symfony 2.1, the equals method was removed from UserInterface and theEquatableInterface was introduced in its place.
29. http://api.symfony.com/2.5/Symfony/Component/Security/Core/User/EquatableInterface.html
PDF brought to you bygenerated on October 23, 2014
Chapter 85: How to Load Security Users from the Database (the Entity Provider) | 309

Listing 86-1
Listing 86-2
Chapter 86
How to Add "Remember Me" LoginFunctionality
Once a user is authenticated, their credentials are typically stored in the session. This means that whenthe session ends they will be logged out and have to provide their login details again next time they wishto access the application. You can allow users to choose to stay logged in for longer than the session lastsusing a cookie with the remember_me firewall option. The firewall needs to have a secret key configured,which is used to encrypt the cookie's content. It also has several options with default values which areshown here:
12345678
# app/config/security.ymlfirewalls:
main:remember_me:
key: "%secret%"lifetime: 31536000 # 365 days in secondspath: /domain: ~ # Defaults to the current domain from $_SERVER
It's a good idea to provide the user with the option to use or not use the remember me functionality, asit will not always be appropriate. The usual way of doing this is to add a checkbox to the login form. Bygiving the checkbox the name _remember_me, the cookie will automatically be set when the checkbox ischecked and the user successfully logs in. So, your specific login form might ultimately looks like this:
123456789
10
{# src/Acme/SecurityBundle/Resources/views/Security/login.html.twig #}{% if error %}
<div>{{ error.message }}</div>{% endif %}
<form action="{{ path('login_check') }}" method="post"><label for="username">Username:</label><input type="text" id="username" name="_username" value="{{ last_username }}" />
<label for="password">Password:</label>
PDF brought to you bygenerated on October 23, 2014
Chapter 86: How to Add "Remember Me" Login Functionality | 310

Listing 86-3
11121314151617
<input type="password" id="password" name="_password" />
<input type="checkbox" id="remember_me" name="_remember_me" checked /><label for="remember_me">Keep me logged in</label>
<input type="submit" name="login" /></form>
The user will then automatically be logged in on subsequent visits while the cookie remains valid.
Forcing the User to Re-authenticate before Accessing certain ResourcesWhen the user returns to your site, they are authenticated automatically based on the information storedin the remember me cookie. This allows the user to access protected resources as if the user had actuallyauthenticated upon visiting the site.
In some cases, however, you may want to force the user to actually re-authenticate before accessingcertain resources. For example, you might allow "remember me" users to see basic account information,but then require them to actually re-authenticate before modifying that information.
The Security component provides an easy way to do this. In addition to roles explicitly assigned to them,users are automatically given one of the following roles depending on how they are authenticated:
• IS_AUTHENTICATED_ANONYMOUSLY - automatically assigned to a user who is in a firewallprotected part of the site but who has not actually logged in. This is only possible if anonymousaccess has been allowed.
• IS_AUTHENTICATED_REMEMBERED - automatically assigned to a user who was authenticated viaa remember me cookie.
• IS_AUTHENTICATED_FULLY - automatically assigned to a user that has provided their logindetails during the current session.
You can use these to control access beyond the explicitly assigned roles.
If you have the IS_AUTHENTICATED_REMEMBERED role, then you also have theIS_AUTHENTICATED_ANONYMOUSLY role. If you have the IS_AUTHENTICATED_FULLY role, then youalso have the other two roles. In other words, these roles represent three levels of increasing"strength" of authentication.
You can use these additional roles for finer grained control over access to parts of a site. For example,you may want your user to be able to view their account at /account when authenticated by cookie butto have to provide their login details to be able to edit the account details. You can do this by securingspecific controller actions using these roles. The edit action in the controller could be secured using theservice context.
In the following example, the action is only allowed if the user has the IS_AUTHENTICATED_FULLY role.
123456789
// ...use Symfony\Component\Security\Core\Exception\AccessDeniedException
public function editAction(){
if (false === $this->get('security.context')->isGranted('IS_AUTHENTICATED_FULLY')) {throw new AccessDeniedException();
PDF brought to you bygenerated on October 23, 2014
Chapter 86: How to Add "Remember Me" Login Functionality | 311

Listing 86-4
10111213
}
// ...}
You can also choose to install and use the optional JMSSecurityExtraBundle1, which can secure yourcontroller using annotations:
123456789
use JMS\SecurityExtraBundle\Annotation\Secure;
/*** @Secure(roles="IS_AUTHENTICATED_FULLY")*/public function editAction($name){
// ...}
If you also had an access control in your security configuration that required the user to have aROLE_USER role in order to access any of the account area, then you'd have the following situation:
• If a non-authenticated (or anonymously authenticated user) tries to access the accountarea, the user will be asked to authenticate.
• Once the user has entered their username and password, assuming the user receivesthe ROLE_USER role per your configuration, the user will have theIS_AUTHENTICATED_FULLY role and be able to access any page in the account section,including the editAction controller.
• If the user's session ends, when the user returns to the site, they will be able to accessevery account page - except for the edit page - without being forced to re-authenticate.However, when they try to access the editAction controller, they will be forced to re-authenticate, since they are not, yet, fully authenticated.
For more information on securing services or methods in this way, see How to Secure any Service orMethod in your Application.
1. https://github.com/schmittjoh/JMSSecurityExtraBundle
PDF brought to you bygenerated on October 23, 2014
Chapter 86: How to Add "Remember Me" Login Functionality | 312

Listing 87-1
Listing 87-2
Listing 87-3
Listing 87-4
Listing 87-5
Chapter 87
How to Impersonate a User
Sometimes, it's useful to be able to switch from one user to another without having to log out and login again (for instance when you are debugging or trying to understand a bug a user sees that you can'treproduce). This can be easily done by activating the switch_user firewall listener:
123456
# app/config/security.ymlsecurity:
firewalls:main:
# ...switch_user: true
To switch to another user, just add a query string with the _switch_user parameter and the username asthe value to the current URL:
1 http://example.com/somewhere?_switch_user=thomas
To switch back to the original user, use the special _exit username:
1 http://example.com/somewhere?_switch_user=_exit
During impersonation, the user is provided with a special role called ROLE_PREVIOUS_ADMIN. In atemplate, for instance, this role can be used to show a link to exit impersonation:
123
{% if is_granted('ROLE_PREVIOUS_ADMIN') %}<a href="{{ path('homepage', {'_switch_user': '_exit'}) }}">Exit impersonation</a>
{% endif %}
Of course, this feature needs to be made available to a small group of users. By default, access is restrictedto users having the ROLE_ALLOWED_TO_SWITCH role. The name of this role can be modified via the rolesetting. For extra security, you can also change the query parameter name via the parameter setting:
PDF brought to you bygenerated on October 23, 2014
Chapter 87: How to Impersonate a User | 313

123456
# app/config/security.ymlsecurity:
firewalls:main:
# ...switch_user: { role: ROLE_ADMIN, parameter: _want_to_be_this_user }
PDF brought to you bygenerated on October 23, 2014
Chapter 87: How to Impersonate a User | 314

Listing 88-1
Chapter 88
How to Implement your own Voter to BlacklistIP Addresses
The Symfony Security component provides several layers to authorize users. One of the layers is calleda "voter". A voter is a dedicated class that checks if the user has the rights to connect to the applicationor access a specific resource/URL. For instance, Symfony provides a layer that checks if the user is fullyauthorized or if it has some expected roles.
It is sometimes useful to create a custom voter to handle a specific case not handled by the framework.In this section, you'll learn how to create a voter that will allow you to blacklist users by their IP.
The Voter InterfaceA custom voter must implement VoterInterface1, which requires the following three methods:
123456
interface VoterInterface{
public function supportsAttribute($attribute);public function supportsClass($class);public function vote(TokenInterface $token, $object, array $attributes);
}
The supportsAttribute()2 method is used to check if the voter supports the given user attribute (i.e: arole like ROLE_USER, an ACL EDIT, etc.).
The supportsClass()3 method is used to check if the voter supports the class of the object whose accessis being checked.
The vote()4 method must implement the business logic that verifies whether or not the user has access.This method must return one of the following values:
1. http://api.symfony.com/2.5/Symfony/Component/Security/Core/Authorization/Voter/VoterInterface.html
2. http://api.symfony.com/2.5/Symfony/Component/Security/Core/Authorization/Voter/VoterInterface.html#supportsAttribute()
3. http://api.symfony.com/2.5/Symfony/Component/Security/Core/Authorization/Voter/VoterInterface.html#supportsClass()
4. http://api.symfony.com/2.5/Symfony/Component/Security/Core/Authorization/Voter/VoterInterface.html#vote()
PDF brought to you bygenerated on October 23, 2014
Chapter 88: How to Implement your own Voter to Blacklist IP Addresses | 315

Listing 88-2
• VoterInterface::ACCESS_GRANTED: The authorization will be granted by this voter;• VoterInterface::ACCESS_ABSTAIN: The voter cannot decide if authorization should be
granted;• VoterInterface::ACCESS_DENIED: The authorization will be denied by this voter.
In this example, you'll check if the user's IP address matches against a list of blacklisted addressesand "something" will be the application. If the user's IP is blacklisted, you'll returnVoterInterface::ACCESS_DENIED, otherwise you'll return VoterInterface::ACCESS_ABSTAIN as thisvoter's purpose is only to deny access, not to grant access.
Creating a custom VoterTo blacklist a user based on its IP, you can use the request_stack service and compare the IP addressagainst a set of blacklisted IP addresses:
123456789
10111213141516171819202122232425262728293031323334353637383940
// src/Acme/DemoBundle/Security/Authorization/Voter/ClientIpVoter.phpnamespace Acme\DemoBundle\Security\Authorization\Voter;
use Symfony\Component\HttpFoundation\RequestStack;use Symfony\Component\Security\Core\Authorization\Voter\VoterInterface;use Symfony\Component\Security\Core\Authentication\Token\TokenInterface;
class ClientIpVoter implements VoterInterface{
protected $requestStack;private $blacklistedIp;
public function __construct(RequestStack $requestStack, array $blacklistedIp = array()){
$this->requestStack = $requestStack;$this->blacklistedIp = $blacklistedIp;
}
public function supportsAttribute($attribute){
// you won't check against a user attribute, so return truereturn true;
}
public function supportsClass($class){
// your voter supports all type of token classes, so return truereturn true;
}
public function vote(TokenInterface $token, $object, array $attributes){
$request = $this->requestStack->getCurrentRequest();if (in_array($request->getClientIp(), $this->blacklistedIp)) {
return VoterInterface::ACCESS_DENIED;}
return VoterInterface::ACCESS_ABSTAIN;}
}
That's it! The voter is done. The next step is to inject the voter into the security layer. This can be doneeasily through the service container.
PDF brought to you bygenerated on October 23, 2014
Chapter 88: How to Implement your own Voter to Blacklist IP Addresses | 316
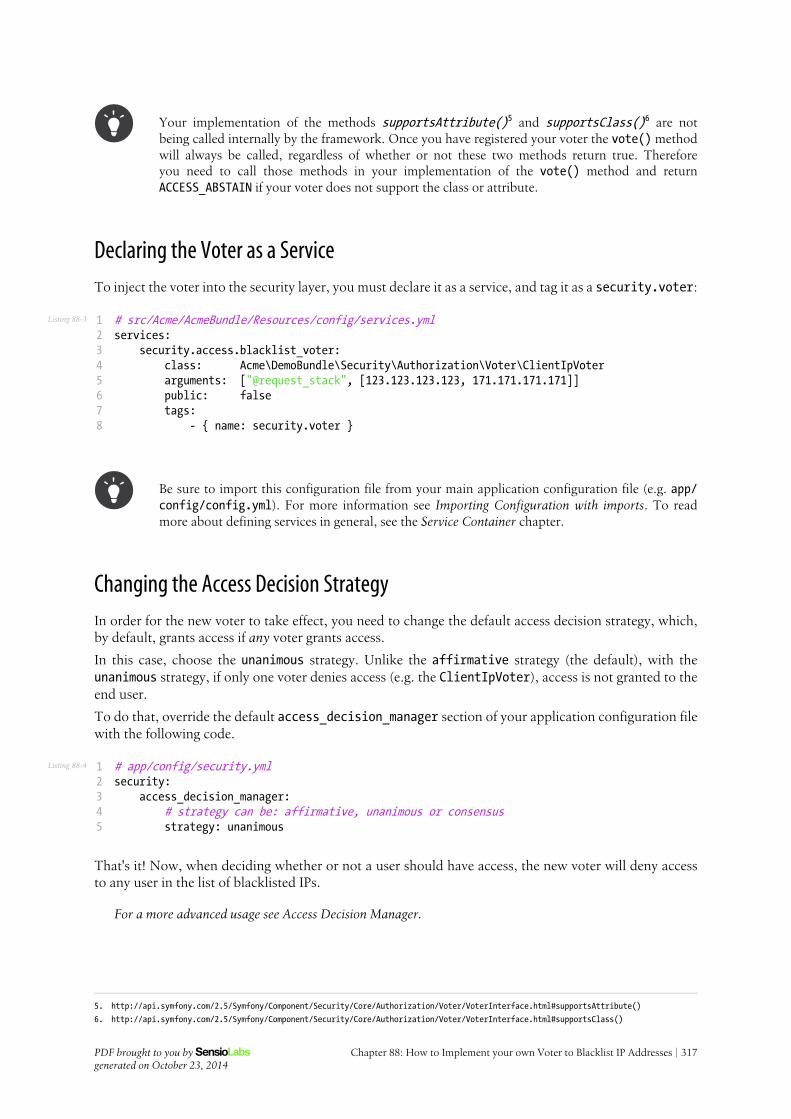
Listing 88-3
Listing 88-4
Your implementation of the methods supportsAttribute()5 and supportsClass()6 are notbeing called internally by the framework. Once you have registered your voter the vote() methodwill always be called, regardless of whether or not these two methods return true. Thereforeyou need to call those methods in your implementation of the vote() method and returnACCESS_ABSTAIN if your voter does not support the class or attribute.
Declaring the Voter as a ServiceTo inject the voter into the security layer, you must declare it as a service, and tag it as a security.voter:
12345678
# src/Acme/AcmeBundle/Resources/config/services.ymlservices:
security.access.blacklist_voter:class: Acme\DemoBundle\Security\Authorization\Voter\ClientIpVoterarguments: ["@request_stack", [123.123.123.123, 171.171.171.171]]public: falsetags:
- { name: security.voter }
Be sure to import this configuration file from your main application configuration file (e.g. app/config/config.yml). For more information see Importing Configuration with imports. To readmore about defining services in general, see the Service Container chapter.
Changing the Access Decision StrategyIn order for the new voter to take effect, you need to change the default access decision strategy, which,by default, grants access if any voter grants access.
In this case, choose the unanimous strategy. Unlike the affirmative strategy (the default), with theunanimous strategy, if only one voter denies access (e.g. the ClientIpVoter), access is not granted to theend user.
To do that, override the default access_decision_manager section of your application configuration filewith the following code.
12345
# app/config/security.ymlsecurity:
access_decision_manager:# strategy can be: affirmative, unanimous or consensusstrategy: unanimous
That's it! Now, when deciding whether or not a user should have access, the new voter will deny accessto any user in the list of blacklisted IPs.
For a more advanced usage see Access Decision Manager.
5. http://api.symfony.com/2.5/Symfony/Component/Security/Core/Authorization/Voter/VoterInterface.html#supportsAttribute()
6. http://api.symfony.com/2.5/Symfony/Component/Security/Core/Authorization/Voter/VoterInterface.html#supportsClass()
PDF brought to you bygenerated on October 23, 2014
Chapter 88: How to Implement your own Voter to Blacklist IP Addresses | 317

Listing 89-1
Chapter 89
How to Use Voters to Check User Permissions
In Symfony, you can check the permission to access data by using the ACL module, which is a bitoverwhelming for many applications. A much easier solution is to work with custom voters, which arelike simple conditional statements.
Voters can also be used in other ways, like, for example, blacklisting IP addresses from the entire application:How to Implement your own Voter to Blacklist IP Addresses.
Take a look at the authorization chapter for an even deeper understanding on voters.
How Symfony Uses VotersIn order to use voters, you have to understand how Symfony works with them. All voters are calledeach time you use the isGranted() method on Symfony's security context (i.e. the security.contextservice). Each one decides if the current user should have access to some resource.
Ultimately, Symfony uses one of three different approaches on what to do with the feedback from allvoters: affirmative, consensus and unanimous.
For more information take a look at the section about access decision managers.
The Voter InterfaceA custom voter must implement VoterInterface1, which has this structure:
12
interface VoterInterface{
1. http://api.symfony.com/2.5/Symfony/Component/Security/Core/Authorization/Voter/VoterInterface.html
PDF brought to you bygenerated on October 23, 2014
Chapter 89: How to Use Voters to Check User Permissions | 318

Listing 89-2
3456
public function supportsAttribute($attribute);public function supportsClass($class);public function vote(TokenInterface $token, $object, array $attributes);
}
The supportsAttribute()2 method is used to check if the voter supports the given user attribute (i.e: arole like ROLE_USER, an ACL EDIT, etc.).
The supportsClass()3 method is used to check if the voter supports the class of the object whose accessis being checked.
The vote()4 method must implement the business logic that verifies whether or not the user has access.This method must return one of the following values:
• VoterInterface::ACCESS_GRANTED: The authorization will be granted by this voter;• VoterInterface::ACCESS_ABSTAIN: The voter cannot decide if authorization should be
granted;• VoterInterface::ACCESS_DENIED: The authorization will be denied by this voter.
In this example, the voter will check if the user has access to a specific object according to yourcustom conditions (e.g. they must be the owner of the object). If the condition fails, you'll returnVoterInterface::ACCESS_DENIED, otherwise you'll return VoterInterface::ACCESS_GRANTED. In casethe responsibility for this decision does not belong to this voter, it will returnVoterInterface::ACCESS_ABSTAIN.
Creating the custom VoterThe goal is to create a voter that checks if a user has access to view or edit a particular object. Here's anexample implementation:
123456789
10111213141516171819202122
// src/Acme/DemoBundle/Security/Authorization/Voter/PostVoter.phpnamespace Acme\DemoBundle\Security\Authorization\Voter;
use Symfony\Component\Security\Core\Authorization\Voter\VoterInterface;use Symfony\Component\Security\Core\Authentication\Token\TokenInterface;use Symfony\Component\Security\Core\User\UserInterface;
class PostVoter implements VoterInterface{
const VIEW = 'view';const EDIT = 'edit';
public function supportsAttribute($attribute){
return in_array($attribute, array(self::VIEW,self::EDIT,
));}
public function supportsClass($class){
2. http://api.symfony.com/2.5/Symfony/Component/Security/Core/Authorization/Voter/VoterInterface.html#supportsAttribute()
3. http://api.symfony.com/2.5/Symfony/Component/Security/Core/Authorization/Voter/VoterInterface.html#supportsClass()
4. http://api.symfony.com/2.5/Symfony/Component/Security/Core/Authorization/Voter/VoterInterface.html#vote()
PDF brought to you bygenerated on October 23, 2014
Chapter 89: How to Use Voters to Check User Permissions | 319

2324252627282930313233343536373839404142434445464748495051525354555657585960616263646566676869707172737475767778798081
$supportedClass = 'Acme\DemoBundle\Entity\Post';
return $supportedClass === $class || is_subclass_of($class, $supportedClass);}
/*** @var \Acme\DemoBundle\Entity\Post $post*/public function vote(TokenInterface $token, $post, array $attributes){
// check if class of this object is supported by this voterif (!$this->supportsClass(get_class($post))) {
return VoterInterface::ACCESS_ABSTAIN;}
// check if the voter is used correct, only allow one attribute// this isn't a requirement, it's just one easy way for you to// design your voterif(1 !== count($attributes)) {
throw new \InvalidArgumentException('Only one attribute is allowed for VIEW or EDIT'
);}
// set the attribute to check against$attribute = $attributes[0];
// check if the given attribute is covered by this voterif (!$this->supportsAttribute($attribute)) {
return VoterInterface::ACCESS_ABSTAIN;}
// get current logged in user$user = $token->getUser();
// make sure there is a user object (i.e. that the user is logged in)if (!$user instanceof UserInterface) {
return VoterInterface::ACCESS_DENIED;}
switch($attribute) {case self::VIEW:
// the data object could have for example a method isPrivate()// which checks the Boolean attribute $privateif (!$post->isPrivate()) {
return VoterInterface::ACCESS_GRANTED;}break;
case self::EDIT:// we assume that our data object has a method getOwner() to// get the current owner user entity for this data objectif ($user->getId() === $post->getOwner()->getId()) {
return VoterInterface::ACCESS_GRANTED;}break;
}
return VoterInterface::ACCESS_DENIED;
PDF brought to you bygenerated on October 23, 2014
Chapter 89: How to Use Voters to Check User Permissions | 320

Listing 89-3
Listing 89-4
8283
}}
That's it! The voter is done. The next step is to inject the voter into the security layer.
Declaring the Voter as a ServiceTo inject the voter into the security layer, you must declare it as a service and tag it with security.voter:
1234567
# src/Acme/DemoBundle/Resources/config/services.ymlservices:
security.access.post_voter:class: Acme\DemoBundle\Security\Authorization\Voter\PostVoterpublic: falsetags:
- { name: security.voter }
How to Use the Voter in a ControllerThe registered voter will then always be asked as soon as the method isGranted() from the securitycontext is called.
123456789
10111213141516171819202122
// src/Acme/DemoBundle/Controller/PostController.phpnamespace Acme\DemoBundle\Controller;
use Symfony\Bundle\FrameworkBundle\Controller\Controller;use Symfony\Component\HttpFoundation\Response;use Symfony\Component\Security\Core\Exception\AccessDeniedException;
class PostController extends Controller{
public function showAction($id){
// get a Post instance$post = ...;
// keep in mind, this will call all registered security votersif (false === $this->get('security.context')->isGranted('view', $post)) {
throw new AccessDeniedException('Unauthorised access!');}
return new Response('<h1>'.$post->getName().'</h1>');}
}
It's that easy!
PDF brought to you bygenerated on October 23, 2014
Chapter 89: How to Use Voters to Check User Permissions | 321

Chapter 90
How to Use Access Control Lists (ACLs)
In complex applications, you will often face the problem that access decisions cannot only be basedon the person (Token) who is requesting access, but also involve a domain object that access is beingrequested for. This is where the ACL system comes in.
Alternatives to ACLs
Using ACL's isn't trivial, and for simpler use cases, it may be overkill. If your permission logiccould be described by just writing some code (e.g. to check if a Blog is owned by the current User),then consider using voters. A voter is passed the object being voted on, which you can use tomake complex decisions and effectively implement your own ACL. Enforcing authorization (e.g.the isGranted part) will look similar to what you see in this entry, but your voter class will handlethe logic behind the scenes, instead of the ACL system.
Imagine you are designing a blog system where your users can comment on your posts. Now, you want auser to be able to edit their own comments, but not those of other users; besides, you yourself want to beable to edit all comments. In this scenario, Comment would be the domain object that you want to restrictaccess to. You could take several approaches to accomplish this using Symfony, two basic approaches are(non-exhaustive):
• Enforce security in your business methods: Basically, that means keeping a reference inside eachComment to all users who have access, and then compare these users to the provided Token.
• Enforce security with roles: In this approach, you would add a role for each Comment object, i.e.ROLE_COMMENT_1, ROLE_COMMENT_2, etc.
Both approaches are perfectly valid. However, they couple your authorization logic to your business codewhich makes it less reusable elsewhere, and also increases the difficulty of unit testing. Besides, you couldrun into performance issues if many users would have access to a single domain object.
Fortunately, there is a better way, which you will find out about now.
PDF brought to you bygenerated on October 23, 2014
Chapter 90: How to Use Access Control Lists (ACLs) | 322

Listing 90-1
Listing 90-2
Listing 90-3
BootstrappingNow, before you can finally get into action, you need to do some bootstrapping. First, you need toconfigure the connection the ACL system is supposed to use:
1234
# app/config/security.ymlsecurity:
acl:connection: default
The ACL system requires a connection from either Doctrine DBAL (usable by default) or DoctrineMongoDB (usable with MongoDBAclBundle1). However, that does not mean that you have to useDoctrine ORM or ODM for mapping your domain objects. You can use whatever mapper you likefor your objects, be it Doctrine ORM, MongoDB ODM, Propel, raw SQL, etc. The choice is yours.
After the connection is configured, you have to import the database structure. Fortunately, there is a taskfor this. Simply run the following command:
1 $ php app/console init:acl
Getting StartedComing back to the small example from the beginning, you can now implement ACL for it.
Once the ACL is created, you can grant access to objects by creating an Access Control Entity (ACE) tosolidify the relationship between the entity and your user.
Creating an ACL and Adding an ACE
123456789
101112131415161718192021
// src/Acme/DemoBundle/Controller/BlogController.phpnamespace Acme\DemoBundle\Controller;
use Symfony\Bundle\FrameworkBundle\Controller\Controller;use Symfony\Component\Security\Core\Exception\AccessDeniedException;use Symfony\Component\Security\Acl\Domain\ObjectIdentity;use Symfony\Component\Security\Acl\Domain\UserSecurityIdentity;use Symfony\Component\Security\Acl\Permission\MaskBuilder;
class BlogController extends Controller{
// ...
public function addCommentAction(Post $post){
$comment = new Comment();
// ... setup $form, and submit data
if ($form->isValid()) {$entityManager = $this->getDoctrine()->getManager();
1. https://github.com/IamPersistent/MongoDBAclBundle
PDF brought to you bygenerated on October 23, 2014
Chapter 90: How to Use Access Control Lists (ACLs) | 323

Listing 90-4
22232425262728293031323334353637383940
$entityManager->persist($comment);$entityManager->flush();
// creating the ACL$aclProvider = $this->get('security.acl.provider');$objectIdentity = ObjectIdentity::fromDomainObject($comment);$acl = $aclProvider->createAcl($objectIdentity);
// retrieving the security identity of the currently logged-in user$securityContext = $this->get('security.context');$user = $securityContext->getToken()->getUser();$securityIdentity = UserSecurityIdentity::fromAccount($user);
// grant owner access$acl->insertObjectAce($securityIdentity, MaskBuilder::MASK_OWNER);$aclProvider->updateAcl($acl);
}}
}
There are a couple of important implementation decisions in this code snippet. For now, I only want tohighlight two:
First, you may have noticed that ->createAcl() does not accept domain objects directly, but onlyimplementations of the ObjectIdentityInterface. This additional step of indirection allows you towork with ACLs even when you have no actual domain object instance at hand. This will be extremelyhelpful if you want to check permissions for a large number of objects without actually hydrating theseobjects.
The other interesting part is the ->insertObjectAce() call. In the example, you are granting the userwho is currently logged in owner access to the Comment. The MaskBuilder::MASK_OWNER is a pre-defined integer bitmask; don't worry the mask builder will abstract away most of the technical details,but using this technique you can store many different permissions in one database row which gives aconsiderable boost in performance.
The order in which ACEs are checked is significant. As a general rule, you should place morespecific entries at the beginning.
Checking Access
123456789
1011121314
// src/Acme/DemoBundle/Controller/BlogController.php
// ...
class BlogController{
// ...
public function editCommentAction(Comment $comment){
$securityContext = $this->get('security.context');
// check for edit accessif (false === $securityContext->isGranted('EDIT', $comment)) {
PDF brought to you bygenerated on October 23, 2014
Chapter 90: How to Use Access Control Lists (ACLs) | 324

Listing 90-5
Listing 90-6
151617181920
throw new AccessDeniedException();}
// ... retrieve actual comment object, and do your editing here}
}
In this example, you check whether the user has the EDIT permission. Internally, Symfony maps thepermission to several integer bitmasks, and checks whether the user has any of them.
You can define up to 32 base permissions (depending on your OS PHP might vary between 30 to32). In addition, you can also define cumulative permissions.
Cumulative PermissionsIn the first example above, you only granted the user the OWNER base permission. While this effectivelyalso allows the user to perform any operation such as view, edit, etc. on the domain object, there arecases where you may want to grant these permissions explicitly.
The MaskBuilder can be used for creating bit masks easily by combining several base permissions:
12345678
$builder = new MaskBuilder();$builder
->add('view')->add('edit')->add('delete')->add('undelete')
;$mask = $builder->get(); // int(29)
This integer bitmask can then be used to grant a user the base permissions you added above:
12
$identity = new UserSecurityIdentity('johannes', 'Acme\UserBundle\Entity\User');$acl->insertObjectAce($identity, $mask);
The user is now allowed to view, edit, delete, and un-delete objects.
PDF brought to you bygenerated on October 23, 2014
Chapter 90: How to Use Access Control Lists (ACLs) | 325

Chapter 91
How to Use advanced ACL Concepts
The aim of this chapter is to give a more in-depth view of the ACL system, and also explain some of thedesign decisions behind it.
Design ConceptsSymfony's object instance security capabilities are based on the concept of an Access Control List. Everydomain object instance has its own ACL. The ACL instance holds a detailed list of Access ControlEntries (ACEs) which are used to make access decisions. Symfony's ACL system focuses on two mainobjectives:
• providing a way to efficiently retrieve a large amount of ACLs/ACEs for your domain objects,and to modify them;
• providing a way to easily make decisions of whether a person is allowed to perform an actionon a domain object or not.
As indicated by the first point, one of the main capabilities of Symfony's ACL system is a high-performance way of retrieving ACLs/ACEs. This is extremely important since each ACL might haveseveral ACEs, and inherit from another ACL in a tree-like fashion. Therefore, no ORM is leveraged,instead the default implementation interacts with your connection directly using Doctrine's DBAL.
Object Identities
The ACL system is completely decoupled from your domain objects. They don't even have to be storedin the same database, or on the same server. In order to achieve this decoupling, in the ACL system yourobjects are represented through object identity objects. Every time you want to retrieve the ACL for adomain object, the ACL system will first create an object identity from your domain object, and then passthis object identity to the ACL provider for further processing.
Security Identities
This is analog to the object identity, but represents a user, or a role in your application. Each role, or userhas its own security identity.
PDF brought to you bygenerated on October 23, 2014
Chapter 91: How to Use advanced ACL Concepts | 326

New in version 2.5: For users, the security identity is based on the username. This means that, iffor any reason, a user's username was to change, you must ensure its security identity is updatedtoo. The MutableAclProvider::updateUserSecurityIdentity()1 method is there to handle theupdate, it was introduced in Symfony 2.5.
Database Table StructureThe default implementation uses five database tables as listed below. The tables are ordered from leastrows to most rows in a typical application:
• acl_security_identities: This table records all security identities (SID) which hold ACEs. Thedefault implementation ships with two security identities: RoleSecurityIdentity2 andUserSecurityIdentity3.
• acl_classes: This table maps class names to a unique ID which can be referenced from othertables.
• acl_object_identities: Each row in this table represents a single domain object instance.• acl_object_identity_ancestors: This table allows all the ancestors of an ACL to be determined
in a very efficient way.• acl_entries: This table contains all ACEs. This is typically the table with the most rows. It can
contain tens of millions without significantly impacting performance.
Scope of Access Control EntriesAccess control entries can have different scopes in which they apply. In Symfony, there are basically twodifferent scopes:
• Class-Scope: These entries apply to all objects with the same class.• Object-Scope: This was the scope solely used in the previous chapter, and it only applies to
one specific object.
Sometimes, you will find the need to apply an ACE only to a specific field of the object. Suppose youwant the ID only to be viewable by an administrator, but not by your customer service. To solve thiscommon problem, two more sub-scopes have been added:
• Class-Field-Scope: These entries apply to all objects with the same class, but only to a specificfield of the objects.
• Object-Field-Scope: These entries apply to a specific object, and only to a specific field of thatobject.
Pre-Authorization DecisionsFor pre-authorization decisions, that is decisions made before any secure method (or secure action) isinvoked, the proven AccessDecisionManager service is used. The AccessDecisionManager is also usedfor reaching authorization decisions based on roles. Just like roles, the ACL system adds several newattributes which may be used to check for different permissions.
1. http://api.symfony.com/2.5/Symfony/Component/Security/Acl/Dbal/MutableAclProvider.html#updateUserSecurityIdentity()
2. http://api.symfony.com/2.5/Symfony/Component/Security/Acl/Domain/RoleSecurityIdentity.html
3. http://api.symfony.com/2.5/Symfony/Component/Security/Acl/Domain/UserSecurityIdentity.html
PDF brought to you bygenerated on October 23, 2014
Chapter 91: How to Use advanced ACL Concepts | 327
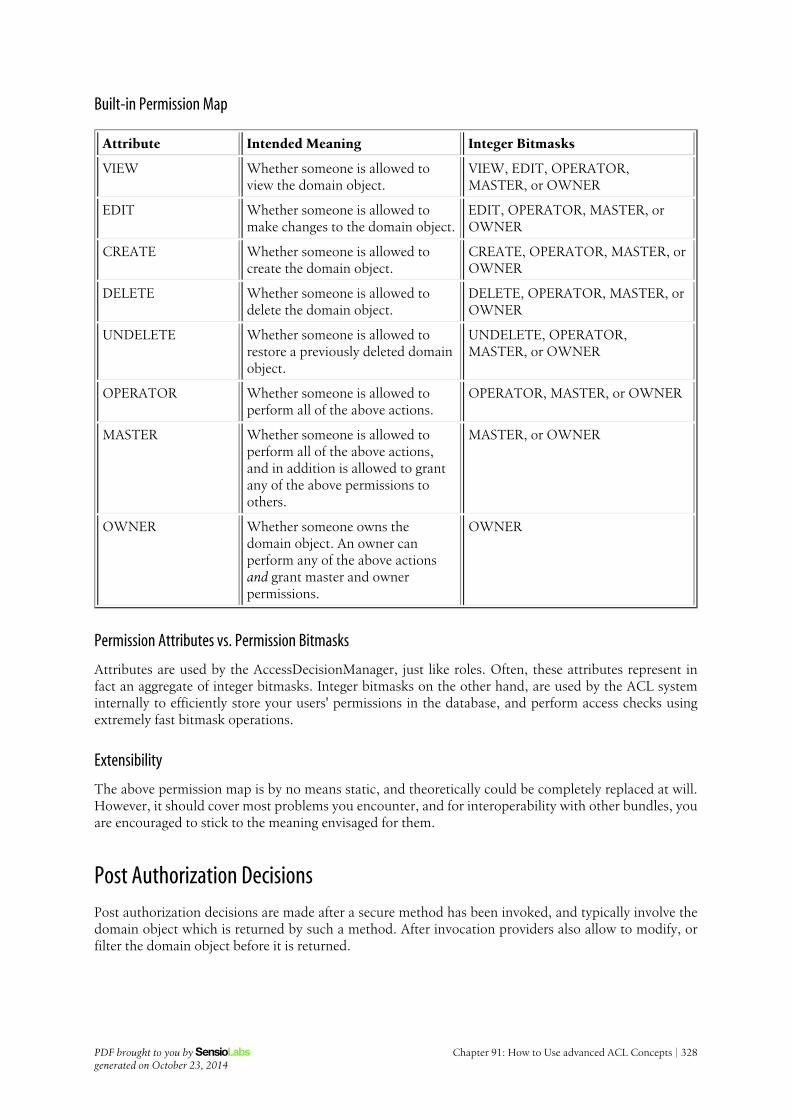
Built-in Permission Map
Attribute Intended Meaning Integer Bitmasks
VIEW Whether someone is allowed toview the domain object.
VIEW, EDIT, OPERATOR,MASTER, or OWNER
EDIT Whether someone is allowed tomake changes to the domain object.
EDIT, OPERATOR, MASTER, orOWNER
CREATE Whether someone is allowed tocreate the domain object.
CREATE, OPERATOR, MASTER, orOWNER
DELETE Whether someone is allowed todelete the domain object.
DELETE, OPERATOR, MASTER, orOWNER
UNDELETE Whether someone is allowed torestore a previously deleted domainobject.
UNDELETE, OPERATOR,MASTER, or OWNER
OPERATOR Whether someone is allowed toperform all of the above actions.
OPERATOR, MASTER, or OWNER
MASTER Whether someone is allowed toperform all of the above actions,and in addition is allowed to grantany of the above permissions toothers.
MASTER, or OWNER
OWNER Whether someone owns thedomain object. An owner canperform any of the above actionsand grant master and ownerpermissions.
OWNER
Permission Attributes vs. Permission Bitmasks
Attributes are used by the AccessDecisionManager, just like roles. Often, these attributes represent infact an aggregate of integer bitmasks. Integer bitmasks on the other hand, are used by the ACL systeminternally to efficiently store your users' permissions in the database, and perform access checks usingextremely fast bitmask operations.
Extensibility
The above permission map is by no means static, and theoretically could be completely replaced at will.However, it should cover most problems you encounter, and for interoperability with other bundles, youare encouraged to stick to the meaning envisaged for them.
Post Authorization DecisionsPost authorization decisions are made after a secure method has been invoked, and typically involve thedomain object which is returned by such a method. After invocation providers also allow to modify, orfilter the domain object before it is returned.
PDF brought to you bygenerated on October 23, 2014
Chapter 91: How to Use advanced ACL Concepts | 328

Due to current limitations of the PHP language, there are no post-authorization capabilities build into thecore Security component. However, there is an experimental JMSSecurityExtraBundle4 which adds thesecapabilities. See its documentation for further information on how this is accomplished.
Process for Reaching Authorization DecisionsThe ACL class provides two methods for determining whether a security identity has the requiredbitmasks, isGranted and isFieldGranted. When the ACL receives an authorization request throughone of these methods, it delegates this request to an implementation of PermissionGrantingStrategy5.This allows you to replace the way access decisions are reached without actually modifying the ACL classitself.
The PermissionGrantingStrategy first checks all your object-scope ACEs. If none is applicable, theclass-scope ACEs will be checked. If none is applicable, then the process will be repeated with the ACEsof the parent ACL. If no parent ACL exists, an exception will be thrown.
4. https://github.com/schmittjoh/JMSSecurityExtraBundle
5. http://api.symfony.com/2.5/Symfony/Component/Security/Acl/Domain/PermissionGrantingStrategy.html
PDF brought to you bygenerated on October 23, 2014
Chapter 91: How to Use advanced ACL Concepts | 329

Listing 92-1
Listing 92-2
Chapter 92
How to Force HTTPS or HTTP for different URLs
You can force areas of your site to use the HTTPS protocol in the security config. This is done through theaccess_control rules using the requires_channel option. For example, if you want to force all URLsstarting with /secure to use HTTPS then you could use the following configuration:
12
access_control:- { path: ^/secure, roles: ROLE_ADMIN, requires_channel: https }
The login form itself needs to allow anonymous access, otherwise users will be unable to authenticate.To force it to use HTTPS you can still use access_control rules by using theIS_AUTHENTICATED_ANONYMOUSLY role:
12
access_control:- { path: ^/login, roles: IS_AUTHENTICATED_ANONYMOUSLY, requires_channel: https }
It is also possible to specify using HTTPS in the routing configuration, see How to Force Routes to alwaysUse HTTPS or HTTP for more details.
PDF brought to you bygenerated on October 23, 2014
Chapter 92: How to Force HTTPS or HTTP for different URLs | 330

Listing 93-1
Chapter 93
How to Restrict Firewalls to a Specific Request
When using the Security component, you can create firewalls that match certain request options. In mostcases, matching against the URL is sufficient, but in special cases you can further restrict the initializationof a firewall against other options of the request.
You can use any of these restrictions individually or mix them together to get your desired firewallconfiguration.
Restricting by PatternThis is the default restriction and restricts a firewall to only be initialized if the request URL matches theconfigured pattern.
12345678
# app/config/security.yml
# ...security:
firewalls:secured_area:
pattern: ^/admin# ...
The pattern is a regular expression. In this example, the firewall will only be activated if the URL starts(due to the ^ regex character) with /admin. If the URL does not match this pattern, the firewall will notbe activated and subsequent firewalls will have the opportunity to be matched for this request.
PDF brought to you bygenerated on October 23, 2014
Chapter 93: How to Restrict Firewalls to a Specific Request | 331

Listing 93-2
Listing 93-3
Restricting by Host
New in version 2.4: Support for restricting security firewalls to a specific host was introduced inSymfony 2.4.
If matching against the pattern only is not enough, the request can also be matched against host. Whenthe configuration option host is set, the firewall will be restricted to only initialize if the host from therequest matches against the configuration.
12345678
# app/config/security.yml
# ...security:
firewalls:secured_area:
host: ^admin\.example\.com$# ...
The host (like the pattern) is a regular expression. In this example, the firewall will only be activatedif the host is equal exactly (due to the ^ and $ regex characters) to the hostname admin.example.com. Ifthe hostname does not match this pattern, the firewall will not be activated and subsequent firewalls willhave the opportunity to be matched for this request.
Restricting by HTTP Methods
New in version 2.5: Support for restricting security firewalls to specific HTTP methods wasintroduced in Symfony 2.5.
The configuration option methods restricts the initialization of the firewall to the provided HTTPmethods.
12345678
# app/config/security.yml
# ...security:
firewalls:secured_area:
methods: [GET, POST]# ...
In this example, the firewall will only be activated if the HTTP method of the request is either GET orPOST. If the method is not in the array of the allowed methods, the firewall will not be activated andsubsequent firewalls will again have the opportunity to be matched for this request.
PDF brought to you bygenerated on October 23, 2014
Chapter 93: How to Restrict Firewalls to a Specific Request | 332

Listing 94-1
Chapter 94
How to Customize your Form Login
Using a form login for authentication is a common, and flexible, method for handling authentication inSymfony. Pretty much every aspect of the form login can be customized. The full, default configurationis shown in the next section.
Form Login Configuration ReferenceTo see the full form login configuration reference, see SecurityBundle Configuration ("security"). Some ofthe more interesting options are explained below.
Redirecting after SuccessYou can change where the login form redirects after a successful login using the various config options.By default the form will redirect to the URL the user requested (i.e. the URL which triggered the loginform being shown). For example, if the user requested http://www.example.com/admin/post/18/edit,then after they successfully log in, they will eventually be sent back to http://www.example.com/admin/post/18/edit. This is done by storing the requested URL in the session. If no URL is present in thesession (perhaps the user went directly to the login page), then the user is redirected to the default page,which is / (i.e. the homepage) by default. You can change this behavior in several ways.
As mentioned, by default the user is redirected back to the page originally requested. Sometimes,this can cause problems, like if a background Ajax request "appears" to be the last visited URL,causing the user to be redirected there. For information on controlling this behavior, see How toChange the default Target Path Behavior.
Changing the default Page
First, the default page can be set (i.e. the page the user is redirected to if no previous page was stored inthe session). To set it to the default_security_target route use the following config:
PDF brought to you bygenerated on October 23, 2014
Chapter 94: How to Customize your Form Login | 333

Listing 94-2
Listing 94-3
Listing 94-4
1234567
# app/config/security.ymlsecurity:
firewalls:main:
form_login:# ...default_target_path: default_security_target
Now, when no URL is set in the session, users will be sent to the default_security_target route.
Always Redirect to the default Page
You can make it so that users are always redirected to the default page regardless of what URL they hadrequested previously by setting the always_use_default_target_path option to true:
1234567
# app/config/security.ymlsecurity:
firewalls:main:
form_login:# ...always_use_default_target_path: true
Using the Referring URL
In case no previous URL was stored in the session, you may wish to try using the HTTP_REFERER instead,as this will often be the same. You can do this by setting use_referer to true (it defaults to false):
1234567
# app/config/security.ymlsecurity:
firewalls:main:
form_login:# ...use_referer: true
Control the Redirect URL from inside the Form
You can also override where the user is redirected to via the form itself by including a hidden field withthe name _target_path. For example, to redirect to the URL defined by some account route, use thefollowing:
123456789
1011
{# src/Acme/SecurityBundle/Resources/views/Security/login.html.twig #}{% if error %}
<div>{{ error.message }}</div>{% endif %}
<form action="{{ path('login_check') }}" method="post"><label for="username">Username:</label><input type="text" id="username" name="_username" value="{{ last_username }}" />
<label for="password">Password:</label><input type="password" id="password" name="_password" />
PDF brought to you bygenerated on October 23, 2014
Chapter 94: How to Customize your Form Login | 334

Listing 94-5
Listing 94-6
1213141516
<input type="hidden" name="_target_path" value="account" />
<input type="submit" name="login" /></form>
Now, the user will be redirected to the value of the hidden form field. The value attribute can be a relativepath, absolute URL, or a route name. You can even change the name of the hidden form field by changingthe target_path_parameter option to another value.
123456
# app/config/security.ymlsecurity:
firewalls:main:
form_login:target_path_parameter: redirect_url
Redirecting on Login Failure
In addition to redirecting the user after a successful login, you can also set the URL that the user shouldbe redirected to after a failed login (e.g. an invalid username or password was submitted). By default, theuser is redirected back to the login form itself. You can set this to a different route (e.g. login_failure)with the following config:
1234567
# app/config/security.ymlsecurity:
firewalls:main:
form_login:# ...failure_path: login_failure
PDF brought to you bygenerated on October 23, 2014
Chapter 94: How to Customize your Form Login | 335

Listing 95-1
Listing 95-2
Chapter 95
How to Secure any Service or Method in yourApplication
In the security chapter, you can see how to secure a controller by requesting the security.contextservice from the Service Container and checking the current user's role:
123456789
1011
// ...use Symfony\Component\Security\Core\Exception\AccessDeniedException;
public function helloAction($name){
if (false === $this->get('security.context')->isGranted('ROLE_ADMIN')) {throw new AccessDeniedException();
}
// ...}
You can also secure any service in a similar way by injecting the security.context service into it. Fora general introduction to injecting dependencies into services see the Service Container chapter of thebook. For example, suppose you have a NewsletterManager class that sends out emails and you want torestrict its use to only users who have some ROLE_NEWSLETTER_ADMIN role. Before you add security, theclass looks something like this:
123456789
10
// src/Acme/HelloBundle/Newsletter/NewsletterManager.phpnamespace Acme\HelloBundle\Newsletter;
class NewsletterManager{
public function sendNewsletter(){
// ... where you actually do the work}
PDF brought to you bygenerated on October 23, 2014
Chapter 95: How to Secure any Service or Method in your Application | 336

Listing 95-3
Listing 95-4
Listing 95-5
111213
// ...}
Your goal is to check the user's role when the sendNewsletter() method is called. The first step towardsthis is to inject the security.context service into the object. Since it won't make sense not to performthe security check, this is an ideal candidate for constructor injection, which guarantees that the securitycontext object will be available inside the NewsletterManager class:
123456789
101112131415
namespace Acme\HelloBundle\Newsletter;
use Symfony\Component\Security\Core\SecurityContextInterface;
class NewsletterManager{
protected $securityContext;
public function __construct(SecurityContextInterface $securityContext){
$this->securityContext = $securityContext;}
// ...}
Then in your service configuration, you can inject the service:
12345678
# src/Acme/HelloBundle/Resources/config/services.ymlparameters:
newsletter_manager.class: Acme\HelloBundle\Newsletter\NewsletterManager
services:newsletter_manager:
class: "%newsletter_manager.class%"arguments: ["@security.context"]
The injected service can then be used to perform the security check when the sendNewsletter() methodis called:
123456789
1011121314151617
namespace Acme\HelloBundle\Newsletter;
use Symfony\Component\Security\Core\Exception\AccessDeniedException;use Symfony\Component\Security\Core\SecurityContextInterface;// ...
class NewsletterManager{
protected $securityContext;
public function __construct(SecurityContextInterface $securityContext){
$this->securityContext = $securityContext;}
public function sendNewsletter(){
PDF brought to you bygenerated on October 23, 2014
Chapter 95: How to Secure any Service or Method in your Application | 337

Listing 95-6
Listing 95-7
181920212223242526
if (false === $this->securityContext->isGranted('ROLE_NEWSLETTER_ADMIN')) {throw new AccessDeniedException();
}
// ...}
// ...}
If the current user does not have the ROLE_NEWSLETTER_ADMIN, they will be prompted to log in.
Securing Methods Using AnnotationsYou can also secure method calls in any service with annotations by using the optionalJMSSecurityExtraBundle1 bundle. This bundle is not included in the Symfony Standard Distribution, butyou can choose to install it.
To enable the annotations functionality, tag the service you want to secure with thesecurity.secure_service tag (you can also automatically enable this functionality for all services, seethe sidebar below):
12345678
# src/Acme/HelloBundle/Resources/config/services.yml
# ...services:
newsletter_manager:# ...tags:
- { name: security.secure_service }
You can then achieve the same results as above using an annotation:
123456789
101112131415161718
namespace Acme\HelloBundle\Newsletter;
use JMS\SecurityExtraBundle\Annotation\Secure;// ...
class NewsletterManager{
/*** @Secure(roles="ROLE_NEWSLETTER_ADMIN")*/public function sendNewsletter(){
// ...}
// ...}
1. https://github.com/schmittjoh/JMSSecurityExtraBundle
PDF brought to you bygenerated on October 23, 2014
Chapter 95: How to Secure any Service or Method in your Application | 338

Listing 95-8
The annotations work because a proxy class is created for your class which performs the securitychecks. This means that, whilst you can use annotations on public and protected methods, youcannot use them with private methods or methods marked final.
The JMSSecurityExtraBundle also allows you to secure the parameters and return values of methods. Formore information, see the JMSSecurityExtraBundle2 documentation.
Activating the Annotations Functionality for all Services
When securing the method of a service (as shown above), you can either tag each serviceindividually, or activate the functionality for all services at once. To do so, set thesecure_all_services configuration option to true:
1234
# app/config/config.ymljms_security_extra:
# ...secure_all_services: true
The disadvantage of this method is that, if activated, the initial page load may be very slowdepending on how many services you have defined.
2. https://github.com/schmittjoh/JMSSecurityExtraBundle
PDF brought to you bygenerated on October 23, 2014
Chapter 95: How to Secure any Service or Method in your Application | 339

Listing 96-1
Chapter 96
How to Create a custom User Provider
Part of Symfony's standard authentication process depends on "user providers". When a user submits ausername and password, the authentication layer asks the configured user provider to return a user objectfor a given username. Symfony then checks whether the password of this user is correct and generates asecurity token so the user stays authenticated during the current session. Out of the box, Symfony hasan "in_memory" and an "entity" user provider. In this entry you'll see how you can create your own userprovider, which could be useful if your users are accessed via a custom database, a file, or - as shown inthis example - a web service.
Create a User ClassFirst, regardless of where your user data is coming from, you'll need to create a User class that representsthat data. The User can look however you want and contain any data. The only requirement is thatthe class implements UserInterface1. The methods in this interface should therefore be defined in thecustom user class: getRoles()2, getPassword()3, getSalt()4, getUsername()5, eraseCredentials()6.It may also be useful to implement the EquatableInterface7 interface, which defines a method to checkif the user is equal to the current user. This interface requires an isEqualTo()8 method.
This is how your WebserviceUser class looks in action:
123456
// src/Acme/WebserviceUserBundle/Security/User/WebserviceUser.phpnamespace Acme\WebserviceUserBundle\Security\User;
use Symfony\Component\Security\Core\User\UserInterface;use Symfony\Component\Security\Core\User\EquatableInterface;
1. http://api.symfony.com/2.5/Symfony/Component/Security/Core/User/UserInterface.html
2. http://api.symfony.com/2.5/Symfony/Component/Security/Core/User/UserInterface.html#getRoles()
3. http://api.symfony.com/2.5/Symfony/Component/Security/Core/User/UserInterface.html#getPassword()
4. http://api.symfony.com/2.5/Symfony/Component/Security/Core/User/UserInterface.html#getSalt()
5. http://api.symfony.com/2.5/Symfony/Component/Security/Core/User/UserInterface.html#getUsername()
6. http://api.symfony.com/2.5/Symfony/Component/Security/Core/User/UserInterface.html#eraseCredentials()
7. http://api.symfony.com/2.5/Symfony/Component/Security/Core/User/EquatableInterface.html
8. http://api.symfony.com/2.5/Symfony/Component/Security/Core/User/EquatableInterface.html#isEqualTo()
PDF brought to you bygenerated on October 23, 2014
Chapter 96: How to Create a custom User Provider | 340

789
10111213141516171819202122232425262728293031323334353637383940414243444546474849505152535455565758596061626364
class WebserviceUser implements UserInterface, EquatableInterface{
private $username;private $password;private $salt;private $roles;
public function __construct($username, $password, $salt, array $roles){
$this->username = $username;$this->password = $password;$this->salt = $salt;$this->roles = $roles;
}
public function getRoles(){
return $this->roles;}
public function getPassword(){
return $this->password;}
public function getSalt(){
return $this->salt;}
public function getUsername(){
return $this->username;}
public function eraseCredentials(){}
public function isEqualTo(UserInterface $user){
if (!$user instanceof WebserviceUser) {return false;
}
if ($this->password !== $user->getPassword()) {return false;
}
if ($this->salt !== $user->getSalt()) {return false;
}
if ($this->username !== $user->getUsername()) {return false;
}
return true;
PDF brought to you bygenerated on October 23, 2014
Chapter 96: How to Create a custom User Provider | 341

Listing 96-2
6566
}}
If you have more information about your users - like a "first name" - then you can add a firstName fieldto hold that data.
Create a User ProviderNow that you have a User class, you'll create a user provider, which will grab user information from someweb service, create a WebserviceUser object, and populate it with data.
The user provider is just a plain PHP class that has to implement the UserProviderInterface9, whichrequires three methods to be defined: loadUserByUsername($username), refreshUser(UserInterface$user), and supportsClass($class). For more details, see UserProviderInterface10.
Here's an example of how this might look:
123456789
10111213141516171819202122232425262728293031323334353637
// src/Acme/WebserviceUserBundle/Security/User/WebserviceUserProvider.phpnamespace Acme\WebserviceUserBundle\Security\User;
use Symfony\Component\Security\Core\User\UserProviderInterface;use Symfony\Component\Security\Core\User\UserInterface;use Symfony\Component\Security\Core\Exception\UsernameNotFoundException;use Symfony\Component\Security\Core\Exception\UnsupportedUserException;
class WebserviceUserProvider implements UserProviderInterface{
public function loadUserByUsername($username){
// make a call to your webservice here$userData = ...// pretend it returns an array on success, false if there is no user
if ($userData) {$password = '...';
// ...
return new WebserviceUser($username, $password, $salt, $roles);}
throw new UsernameNotFoundException(sprintf('Username "%s" does not exist.', $username)
);}
public function refreshUser(UserInterface $user){
if (!$user instanceof WebserviceUser) {throw new UnsupportedUserException(
sprintf('Instances of "%s" are not supported.', get_class($user)));
}
9. http://api.symfony.com/2.5/Symfony/Component/Security/Core/User/UserProviderInterface.html
10. http://api.symfony.com/2.5/Symfony/Component/Security/Core/User/UserProviderInterface.html
PDF brought to you bygenerated on October 23, 2014
Chapter 96: How to Create a custom User Provider | 342

Listing 96-3
Listing 96-4
Listing 96-5
3839404142434445
return $this->loadUserByUsername($user->getUsername());}
public function supportsClass($class){
return $class === 'Acme\WebserviceUserBundle\Security\User\WebserviceUser';}
}
Create a Service for the User ProviderNow you make the user provider available as a service:
1234567
# src/Acme/WebserviceUserBundle/Resources/config/services.ymlparameters:
webservice_user_provider.class:Acme\WebserviceUserBundle\Security\User\WebserviceUserProvider
services:webservice_user_provider:
class: "%webservice_user_provider.class%"
The real implementation of the user provider will probably have some dependencies orconfiguration options or other services. Add these as arguments in the service definition.
Make sure the services file is being imported. See Importing Configuration with imports for details.
Modify security.ymlEverything comes together in your security configuration. Add the user provider to the list of providersin the "security" section. Choose a name for the user provider (e.g. "webservice") and mention the id ofthe service you just defined.
12345
# app/config/security.ymlsecurity:
providers:webservice:
id: webservice_user_provider
Symfony also needs to know how to encode passwords that are supplied by website users, e.g. by fillingin a login form. You can do this by adding a line to the "encoders" section in your security configuration:
12
# app/config/security.ymlsecurity:
PDF brought to you bygenerated on October 23, 2014
Chapter 96: How to Create a custom User Provider | 343

Listing 96-6
34
encoders:Acme\WebserviceUserBundle\Security\User\WebserviceUser: sha512
The value here should correspond with however the passwords were originally encoded when creatingyour users (however those users were created). When a user submits their password, the salt valueis appended to the password and then encoded using this algorithm before being compared to thehashed password returned by your getPassword() method. Additionally, depending on your options,the password may be encoded multiple times and encoded to base64.
Specifics on how Passwords are Encoded
Symfony uses a specific method to combine the salt and encode the password before comparing itto your encoded password. If getSalt() returns nothing, then the submitted password is simplyencoded using the algorithm you specify in security.yml. If a salt is specified, then the followingvalue is created and then hashed via the algorithm:
$password.'{'.$salt.'}';
If your external users have their passwords salted via a different method, then you'll need to doa bit more work so that Symfony properly encodes the password. That is beyond the scope ofthis entry, but would include sub-classing MessageDigestPasswordEncoder and overriding themergePasswordAndSalt method.
Additionally, the hash, by default, is encoded multiple times and encoded to base64. For specificdetails, see MessageDigestPasswordEncoder11. To prevent this, configure it in your configurationfile:
1234567
# app/config/security.ymlsecurity:
encoders:Acme\WebserviceUserBundle\Security\User\WebserviceUser:
algorithm: sha512encode_as_base64: falseiterations: 1
11. https://github.com/symfony/symfony/blob/master/src/Symfony/Component/Security/Core/Encoder/MessageDigestPasswordEncoder.php
PDF brought to you bygenerated on October 23, 2014
Chapter 96: How to Create a custom User Provider | 344

Listing 97-1
Chapter 97
How to Create a Custom Form PasswordAuthenticator
Imagine you want to allow access to your website only between 2pm and 4pm UTC. Before Symfony 2.4,you had to create a custom token, factory, listener and provider. In this entry, you'll learn how to do thisfor a login form (i.e. where your user submits their username and password).
The Password Authenticator
New in version 2.4: The SimpleFormAuthenticatorInterface interface was introduced inSymfony 2.4.
First, create a new class that implements SimpleFormAuthenticatorInterface1. Eventually, this willallow you to create custom logic for authenticating the user:
123456789
1011121314
// src/Acme/HelloBundle/Security/TimeAuthenticator.phpnamespace Acme\HelloBundle\Security;
use Symfony\Component\HttpFoundation\Request;use Symfony\Component\Security\Core\Authentication\SimpleFormAuthenticatorInterface;use Symfony\Component\Security\Core\Authentication\Token\TokenInterface;use Symfony\Component\Security\Core\Authentication\Token\UsernamePasswordToken;use Symfony\Component\Security\Core\Encoder\EncoderFactoryInterface;use Symfony\Component\Security\Core\Exception\AuthenticationException;use Symfony\Component\Security\Core\Exception\UsernameNotFoundException;use Symfony\Component\Security\Core\User\UserProviderInterface;
class TimeAuthenticator implements SimpleFormAuthenticatorInterface{
1. http://api.symfony.com/2.5/Symfony/Component/Security/Core/Authentication/SimpleFormAuthenticatorInterface.html
PDF brought to you bygenerated on October 23, 2014
Chapter 97: How to Create a Custom Form Password Authenticator | 345

1516171819202122232425262728293031323334353637383940414243444546474849505152535455565758596061626364656667
private $encoderFactory;
public function __construct(EncoderFactoryInterface $encoderFactory){
$this->encoderFactory = $encoderFactory;}
public function authenticateToken(TokenInterface $token, UserProviderInterface$userProvider, $providerKey)
{try {
$user = $userProvider->loadUserByUsername($token->getUsername());} catch (UsernameNotFoundException $e) {
throw new AuthenticationException('Invalid username or password');}
$encoder = $this->encoderFactory->getEncoder($user);$passwordValid = $encoder->isPasswordValid(
$user->getPassword(),$token->getCredentials(),$user->getSalt()
);
if ($passwordValid) {$currentHour = date('G');if ($currentHour < 14 || $currentHour > 16) {
throw new AuthenticationException('You can only log in between 2 and 4!',100
);}
return new UsernamePasswordToken($user,$user->getPassword(),$providerKey,$user->getRoles()
);}
throw new AuthenticationException('Invalid username or password');}
public function supportsToken(TokenInterface $token, $providerKey){
return $token instanceof UsernamePasswordToken&& $token->getProviderKey() === $providerKey;
}
public function createToken(Request $request, $username, $password, $providerKey){
return new UsernamePasswordToken($username, $password, $providerKey);}
}
PDF brought to you bygenerated on October 23, 2014
Chapter 97: How to Create a Custom Form Password Authenticator | 346

Listing 97-2
How it WorksGreat! Now you just need to setup some Configuration. But first, you can find out more about what eachmethod in this class does.
1) createToken
When Symfony begins handling a request, createToken() is called, where you create a TokenInterface2
object that contains whatever information you need in authenticateToken() to authenticate the user(e.g. the username and password).
Whatever token object you create here will be passed to you later in authenticateToken().
2) supportsToken
After Symfony calls createToken(), it will then call supportsToken() on your class (and any otherauthentication listeners) to figure out who should handle the token. This is just a way to allow severalauthentication mechanisms to be used for the same firewall (that way, you can for instance first try toauthenticate the user via a certificate or an API key and fall back to a form login).
Mostly, you just need to make sure that this method returns true for a token that has been created bycreateToken(). Your logic should probably look exactly like this example.
3) authenticateToken
If supportsToken returns true, Symfony will now call authenticateToken(). Your job here is to checkthat the token is allowed to log in by first getting the User object via the user provider and then, bychecking the password and the current time.
The "flow" of how you get the User object and determine whether or not the token is valid (e.g.checking the password), may vary based on your requirements.
Ultimately, your job is to return a new token object that is "authenticated" (i.e. it has at least 1 role set onit) and which has the User object inside of it.
Inside this method, an encoder is needed to check the password's validity:
123456
$encoder = $this->encoderFactory->getEncoder($user);$passwordValid = $encoder->isPasswordValid(
$user->getPassword(),$token->getCredentials(),$user->getSalt()
);
This is a service that is already available in Symfony and the password algorithm is configured in thesecurity configuration (e.g. security.yml) under the encoders key. Below, you'll see how to inject thatinto the TimeAuthenticator.
ConfigurationNow, configure your TimeAuthenticator as a service:
2. http://api.symfony.com/2.5/Symfony/Component/Security/Core/Authentication/Token/TokenInterface.html
PDF brought to you bygenerated on October 23, 2014
Chapter 97: How to Create a Custom Form Password Authenticator | 347

Listing 97-3
Listing 97-4
1234567
# app/config/config.ymlservices:
# ...
time_authenticator:class: Acme\HelloBundle\Security\TimeAuthenticatorarguments: ["@security.encoder_factory"]
Then, activate it in the firewalls section of the security configuration using the simple_form key:
123456789
101112
# app/config/security.ymlsecurity:
# ...
firewalls:secured_area:
pattern: ^/admin# ...simple_form:
authenticator: time_authenticatorcheck_path: login_checklogin_path: login
The simple_form key has the same options as the normal form_login option, but with the additionalauthenticator key that points to the new service. For details, see Form Login Configuration.
If creating a login form in general is new to you or you don't understand the check_path or login_pathoptions, see How to Customize your Form Login.
PDF brought to you bygenerated on October 23, 2014
Chapter 97: How to Create a Custom Form Password Authenticator | 348

Listing 98-1
Chapter 98
How to Authenticate Users with API Keys
Nowadays, it's quite usual to authenticate the user via an API key (when developing a web service forinstance). The API key is provided for every request and is passed as a query string parameter or via anHTTP header.
The API Key Authenticator
New in version 2.4: The SimplePreAuthenticatorInterface interface was introduced in Symfony2.4.
Authenticating a user based on the Request information should be done via a pre-authenticationmechanism. The SimplePreAuthenticatorInterface1 allows you to implement such a scheme reallyeasily.
Your exact situation may differ, but in this example, a token is read from an apikey query parameter, theproper username is loaded from that value and then a User object is created:
123456789
1011121314
// src/Acme/HelloBundle/Security/ApiKeyAuthenticator.phpnamespace Acme\HelloBundle\Security;
use Symfony\Component\Security\Core\Authentication\SimplePreAuthenticatorInterface;use Symfony\Component\Security\Core\Authentication\Token\TokenInterface;use Symfony\Component\Security\Core\Exception\AuthenticationException;use Symfony\Component\Security\Core\Authentication\Token\PreAuthenticatedToken;use Symfony\Component\HttpFoundation\Request;use Symfony\Component\Security\Core\User\UserProviderInterface;use Symfony\Component\Security\Core\Exception\UsernameNotFoundException;use Symfony\Component\Security\Core\Exception\BadCredentialsException;
class ApiKeyAuthenticator implements SimplePreAuthenticatorInterface{
1. http://api.symfony.com/2.5/Symfony/Component/Security/Core/Authentication/SimplePreAuthenticatorInterface.html
PDF brought to you bygenerated on October 23, 2014
Chapter 98: How to Authenticate Users with API Keys | 349

15161718192021222324252627282930313233343536373839404142434445464748495051525354555657585960616263646566
protected $userProvider;
public function __construct(ApiKeyUserProvider $userProvider){
$this->userProvider = $userProvider;}
public function createToken(Request $request, $providerKey){
// look for an apikey query parameter$apiKey = $request->query->get('apikey');
// or if you want to use an "apikey" header, then do something like this:// $apiKey = $request->headers->get('apikey');
if (!$apiKey) {throw new BadCredentialsException('No API key found');
}
return new PreAuthenticatedToken('anon.',$apiKey,$providerKey
);}
public function authenticateToken(TokenInterface $token, UserProviderInterface$userProvider, $providerKey)
{$apiKey = $token->getCredentials();$username = $this->userProvider->getUsernameForApiKey($apiKey);
if (!$username) {throw new AuthenticationException(
sprintf('API Key "%s" does not exist.', $apiKey));
}
$user = $this->userProvider->loadUserByUsername($username);
return new PreAuthenticatedToken($user,$apiKey,$providerKey,$user->getRoles()
);}
public function supportsToken(TokenInterface $token, $providerKey){
return $token instanceof PreAuthenticatedToken && $token->getProviderKey() ===$providerKey;
}}
Once you've configured everything, you'll be able to authenticate by adding an apikey parameter to thequery string, like http://example.com/admin/foo?apikey=37b51d194a7513e45b56f6524f2d51f2.
The authentication process has several steps, and your implementation will probably differ:
PDF brought to you bygenerated on October 23, 2014
Chapter 98: How to Authenticate Users with API Keys | 350

Listing 98-2
1. createToken
Early in the request cycle, Symfony calls createToken(). Your job here is to create a token objectthat contains all of the information from the request that you need to authenticate the user (e.g. theapikey query parameter). If that information is missing, throwing a BadCredentialsException2 willcause authentication to fail.
2. supportsToken
After Symfony calls createToken(), it will then call supportsToken() on your class (and any otherauthentication listeners) to figure out who should handle the token. This is just a way to allow severalauthentication mechanisms to be used for the same firewall (that way, you can for instance first try toauthenticate the user via a certificate or an API key and fall back to a form login).
Mostly, you just need to make sure that this method returns true for a token that has been created bycreateToken(). Your logic should probably look exactly like this example.
3. authenticateToken
If supportsToken() returns true, Symfony will now call authenticateToken(). One key part is the$userProvider, which is an external class that helps you load information about the user. You'll learnmore about this next.
In this specific example, the following things happen in authenticateToken():1. First, you use the $userProvider to somehow look up the $username that corresponds to the
$apiKey;2. Second, you use the $userProvider again to load or create a User object for the $username;3. Finally, you create an authenticated token (i.e. a token with at least one role) that has the proper
roles and the User object attached to it.
The goal is ultimately to use the $apiKey to find or create a User object. How you do this (e.g. query adatabase) and the exact class for your User object may vary. Those differences will be most obvious inyour user provider.
The User Provider
The $userProvider can be any user provider (see How to Create a custom User Provider). In thisexample, the $apiKey is used to somehow find the username for the user. This work is done in agetUsernameForApiKey() method, which is created entirely custom for this use-case (i.e. this isn't amethod that's used by Symfony's core user provider system).
The $userProvider might look something like this:
123456789
10111213
// src/Acme/HelloBundle/Security/ApiKeyUserProvider.phpnamespace Acme\HelloBundle\Security;
use Symfony\Component\Security\Core\User\UserProviderInterface;use Symfony\Component\Security\Core\User\User;use Symfony\Component\Security\Core\User\UserInterface;use Symfony\Component\Security\Core\Exception\UnsupportedUserException;
class ApiKeyUserProvider implements UserProviderInterface{
public function getUsernameForApiKey($apiKey){
// Look up the username based on the token in the database, via
2. http://api.symfony.com/2.5/Symfony/Component/Security/Core/Exception/BadCredentialsException.html
PDF brought to you bygenerated on October 23, 2014
Chapter 98: How to Authenticate Users with API Keys | 351

14151617181920212223242526272829303132333435363738394041424344
// an API call, or do something entirely different$username = ...;
return $username;}
public function loadUserByUsername($username){
return new User($username,null,// the roles for the user - you may choose to determine// these dynamically somehow based on the userarray('ROLE_USER')
);}
public function refreshUser(UserInterface $user){
// this is used for storing authentication in the session// but in this example, the token is sent in each request,// so authentication can be stateless. Throwing this exception// is proper to make things statelessthrow new UnsupportedUserException();
}
public function supportsClass($class){
return 'Symfony\Component\Security\Core\User\User' === $class;}
}
Read the dedicated article to learn how to create a custom user provider.
The logic inside getUsernameForApiKey() is up to you. You may somehow transform the API key (e.g.37b51d) into a username (e.g. jondoe) by looking up some information in a "token" database table.
The same is true for loadUserByUsername(). In this example, Symfony's core User3 class is simplycreated. This makes sense if you don't need to store any extra information on your User object (e.g.firstName). But if you do, you may instead have your own user class which you create and populate hereby querying a database. This would allow you to have custom data on the User object.
Finally, just make sure that supportsClass() returns true for User objects with the same class aswhatever user you return in loadUserByUsername(). If your authentication is stateless like in thisexample (i.e. you expect the user to send the API key with every request and so you don't save the login tothe session), then you can simply throw the UnsupportedUserException exception in refreshUser().
If you do want to store authentication data in the session so that the key doesn't need to be sent onevery request, see Storing Authentication in the Session.
3. http://api.symfony.com/2.5/Symfony/Component/Security/Core/User/User.html
PDF brought to you bygenerated on October 23, 2014
Chapter 98: How to Authenticate Users with API Keys | 352

Listing 98-3
Listing 98-4
Listing 98-5
Handling Authentication FailureIn order for your ApiKeyAuthentication to correctly display a 403 http status when either badcredentials or authentication fails you will need to implement theAuthenticationFailureHandlerInterface4 on your Authenticator. This will provide a methodonAuthenticationFailure which you can use to create an error Response.
123456789
101112131415161718
// src/Acme/HelloBundle/Security/ApiKeyAuthenticator.phpnamespace Acme\HelloBundle\Security;
use Symfony\Component\Security\Core\Authentication\SimplePreAuthenticatorInterface;use Symfony\Component\Security\Core\Exception\AuthenticationException;use Symfony\Component\Security\Http\Authentication\AuthenticationFailureHandlerInterface;use Symfony\Component\HttpFoundation\Response;use Symfony\Component\HttpFoundation\Request;
class ApiKeyAuthenticator implements SimplePreAuthenticatorInterface,AuthenticationFailureHandlerInterface{
// ...
public function onAuthenticationFailure(Request $request, AuthenticationException$exception)
{return new Response("Authentication Failed.", 403);
}}
ConfigurationOnce you have your ApiKeyAuthentication all setup, you need to register it as a service and use it inyour security configuration (e.g. security.yml). First, register it as a service. This assumes that you havealready setup your custom user provider as a service called your_api_key_user_provider (see How toCreate a custom User Provider).
1234567
# app/config/config.ymlservices:
# ...
apikey_authenticator:class: Acme\HelloBundle\Security\ApiKeyAuthenticatorarguments: ["@your_api_key_user_provider"]
Now, activate it in the firewalls section of your security configuration using the simple_preauth key:
1234567
# app/config/security.ymlsecurity:
# ...
firewalls:secured_area:
pattern: ^/admin
4. http://api.symfony.com/2.5/Symfony/Component/Security/Http/Authentication/AuthenticationFailureHandlerInterface.html
PDF brought to you bygenerated on October 23, 2014
Chapter 98: How to Authenticate Users with API Keys | 353

Listing 98-6
Listing 98-7
89
10
stateless: truesimple_preauth:
authenticator: apikey_authenticator
That's it! Now, your ApiKeyAuthentication should be called at the beginning of each request and yourauthentication process will take place.
The stateless configuration parameter prevents Symfony from trying to store the authenticationinformation in the session, which isn't necessary since the client will send the apikey on each request. Ifyou do need to store authentication in the session, keep reading!
Storing Authentication in the SessionSo far, this entry has described a situation where some sort of authentication token is sent on everyrequest. But in some situations (like an OAuth flow), the token may be sent on only one request. In thiscase, you will want to authenticate the user and store that authentication in the session so that the useris automatically logged in for every subsequent request.
To make this work, first remove the stateless key from your firewall configuration or set it to false:
123456789
10
# app/config/security.ymlsecurity:
# ...
firewalls:secured_area:
pattern: ^/adminstateless: falsesimple_preauth:
authenticator: apikey_authenticator
Even though the token is being stored in the session, the credentials - in this case the API key (i.e. $token->getCredentials()) - are not stored in the session for security reasons. To take advantage of the session,update ApiKeyAuthenticator to see if the stored token has a valid User object that can be used:
123456789
1011121314151617181920
// src/Acme/HelloBundle/Security/ApiKeyAuthenticator.php// ...
class ApiKeyAuthenticator implements SimplePreAuthenticatorInterface{
// ...public function authenticateToken(TokenInterface $token, UserProviderInterface
$userProvider, $providerKey){
$apiKey = $token->getCredentials();$username = $this->userProvider->getUsernameForApiKey($apiKey);
// User is the Entity which represents your user$user = $token->getUser();if ($user instanceof User) {
return new PreAuthenticatedToken($user,$apiKey,$providerKey,$user->getRoles()
PDF brought to you bygenerated on October 23, 2014
Chapter 98: How to Authenticate Users with API Keys | 354

Listing 98-8
21222324252627282930313233343536373839
);}
if (!$username) {throw new AuthenticationException(
sprintf('API Key "%s" does not exist.', $apiKey));
}
$user = $this->userProvider->loadUserByUsername($username);
return new PreAuthenticatedToken($user,$apiKey,$providerKey,$user->getRoles()
);}// ...
}
Storing authentication information in the session works like this:1. At the end of each request, Symfony serializes the token object (returned from
authenticateToken()), which also serializes the User object (since it's set on a property on thetoken);
2. On the next request the token is deserialized and the deserialized User object is passed to therefreshUser() function of the user provider.
The second step is the important one: Symfony calls refreshUser() and passes you the user object thatwas serialized in the session. If your users are stored in the database, then you may want to re-queryfor a fresh version of the user to make sure it's not out-of-date. But regardless of your requirements,refreshUser() should now return the User object:
123456789
101112131415161718192021
// src/Acme/HelloBundle/Security/ApiKeyUserProvider.php
// ...class ApiKeyUserProvider implements UserProviderInterface{
// ...
public function refreshUser(UserInterface $user){
// $user is the User that you set in the token inside authenticateToken()// after it has been deserialized from the session
// you might use $user to query the database for a fresh user// $id = $user->getId();// use $id to make a query
// if you are *not* reading from a database and are just creating// a User object (like in this example), you can just return itreturn $user;
}}
PDF brought to you bygenerated on October 23, 2014
Chapter 98: How to Authenticate Users with API Keys | 355

Listing 98-9
Listing 98-10
You'll also want to make sure that your User object is being serialized correctly. If your User objecthas private properties, PHP can't serialize those. In this case, you may get back a User object thathas a null value for each property. For an example, see How to Load Security Users from theDatabase (the Entity Provider).
Only Authenticating for Certain URLsThis entry has assumed that you want to look for the apikey authentication on every request. But insome situations (like an OAuth flow), you only really need to look for authentication information oncethe user has reached a certain URL (e.g. the redirect URL in OAuth).
Fortunately, handling this situation is easy: just check to see what the current URL is before creating thetoken in createToken():
123456789
101112131415161718192021222324252627282930
// src/Acme/HelloBundle/Security/ApiKeyAuthenticator.php
// ...use Symfony\Component\Security\Http\HttpUtils;use Symfony\Component\HttpFoundation\Request;
class ApiKeyAuthenticator implements SimplePreAuthenticatorInterface{
protected $userProvider;
protected $httpUtils;
public function __construct(ApiKeyUserProviderInterface $userProvider, HttpUtils$httpUtils)
{$this->userProvider = $userProvider;$this->httpUtils = $httpUtils;
}
public function createToken(Request $request, $providerKey){
// set the only URL where we should look for auth information// and only return the token if we're at that URL$targetUrl = '/login/check';if (!$this->httpUtils->checkRequestPath($request, $targetUrl)) {
return;}
// ...}
}
This uses the handy HttpUtils5 class to check if the current URL matches the URL you're looking for.In this case, the URL (/login/check) has been hardcoded in the class, but you could also inject it as thethird constructor argument.
Next, just update your service configuration to inject the security.http_utils service:
5. http://api.symfony.com/2.5/Symfony/Component/Security/Http/HttpUtils.html
PDF brought to you bygenerated on October 23, 2014
Chapter 98: How to Authenticate Users with API Keys | 356

1234567
# app/config/config.ymlservices:
# ...
apikey_authenticator:class: Acme\HelloBundle\Security\ApiKeyAuthenticatorarguments: ["@your_api_key_user_provider", "@security.http_utils"]
That's it! Have fun!
PDF brought to you bygenerated on October 23, 2014
Chapter 98: How to Authenticate Users with API Keys | 357

Chapter 99
How to Create a custom AuthenticationProvider
Creating a custom authentication system is hard, and this entry will walk you through that process.But depending on your needs, you may be able to solve your problem in a simpler way using thesedocuments:
• How to Create a Custom Form Password Authenticator• How to Authenticate Users with API Keys
If you have read the chapter on Security, you understand the distinction Symfony makes betweenauthentication and authorization in the implementation of security. This chapter discusses the coreclasses involved in the authentication process, and how to implement a custom authentication provider.Because authentication and authorization are separate concepts, this extension will be user-provideragnostic, and will function with your application's user providers, may they be based in memory, adatabase, or wherever else you choose to store them.
Meet WSSEThe following chapter demonstrates how to create a custom authentication provider for WSSEauthentication. The security protocol for WSSE provides several security benefits:
1. Username / Password encryption2. Safe guarding against replay attacks3. No web server configuration required
WSSE is very useful for the securing of web services, may they be SOAP or REST.
There is plenty of great documentation on WSSE1, but this article will focus not on the security protocol,but rather the manner in which a custom protocol can be added to your Symfony application. The basis
1. http://www.xml.com/pub/a/2003/12/17/dive.html
PDF brought to you bygenerated on October 23, 2014
Chapter 99: How to Create a custom Authentication Provider | 358

Listing 99-1
of WSSE is that a request header is checked for encrypted credentials, verified using a timestamp andnonce2, and authenticated for the requested user using a password digest.
WSSE also supports application key validation, which is useful for web services, but is outside thescope of this chapter.
The TokenThe role of the token in the Symfony security context is an important one. A token represents the userauthentication data present in the request. Once a request is authenticated, the token retains the user'sdata, and delivers this data across the security context. First, you'll create your token class. This will allowthe passing of all relevant information to your authentication provider.
123456789
101112131415161718192021222324
// src/Acme/DemoBundle/Security/Authentication/Token/WsseUserToken.phpnamespace Acme\DemoBundle\Security\Authentication\Token;
use Symfony\Component\Security\Core\Authentication\Token\AbstractToken;
class WsseUserToken extends AbstractToken{
public $created;public $digest;public $nonce;
public function __construct(array $roles = array()){
parent::__construct($roles);
// If the user has roles, consider it authenticated$this->setAuthenticated(count($roles) > 0);
}
public function getCredentials(){
return '';}
}
The WsseUserToken class extends the Security component's AbstractToken3 class, which providesbasic token functionality. Implement the TokenInterface4 on any class to use as a token.
The ListenerNext, you need a listener to listen on the security context. The listener is responsible for fieldingrequests to the firewall and calling the authentication provider. A listener must be an instance of
2. http://en.wikipedia.org/wiki/Cryptographic_nonce
3. http://api.symfony.com/2.5/Symfony/Component/Security/Core/Authentication/Token/AbstractToken.html
4. http://api.symfony.com/2.5/Symfony/Component/Security/Core/Authentication/Token/TokenInterface.html
PDF brought to you bygenerated on October 23, 2014
Chapter 99: How to Create a custom Authentication Provider | 359

Listing 99-2
ListenerInterface5. A security listener should handle the GetResponseEvent6 event, and set anauthenticated token in the security context if successful.
123456789
101112131415161718192021222324252627282930313233343536373839404142434445464748495051525354
// src/Acme/DemoBundle/Security/Firewall/WsseListener.phpnamespace Acme\DemoBundle\Security\Firewall;
use Symfony\Component\HttpFoundation\Response;use Symfony\Component\HttpKernel\Event\GetResponseEvent;use Symfony\Component\Security\Http\Firewall\ListenerInterface;use Symfony\Component\Security\Core\Exception\AuthenticationException;use Symfony\Component\Security\Core\SecurityContextInterface;use Symfony\Component\Security\Core\Authentication\AuthenticationManagerInterface;use Acme\DemoBundle\Security\Authentication\Token\WsseUserToken;
class WsseListener implements ListenerInterface{
protected $securityContext;protected $authenticationManager;
public function __construct(SecurityContextInterface $securityContext,AuthenticationManagerInterface $authenticationManager)
{$this->securityContext = $securityContext;$this->authenticationManager = $authenticationManager;
}
public function handle(GetResponseEvent $event){
$request = $event->getRequest();
$wsseRegex = '/UsernameToken Username="([^"]+)", PasswordDigest="([^"]+)",Nonce="([^"]+)", Created="([^"]+)"/';
if (!$request->headers->has('x-wsse') || 1 !== preg_match($wsseRegex,$request->headers->get('x-wsse'), $matches)) {
return;}
$token = new WsseUserToken();$token->setUser($matches[1]);
$token->digest = $matches[2];$token->nonce = $matches[3];$token->created = $matches[4];
try {$authToken = $this->authenticationManager->authenticate($token);$this->securityContext->setToken($authToken);
return;} catch (AuthenticationException $failed) {
// ... you might log something here
// To deny the authentication clear the token. This will redirect to the loginpage.
// Make sure to only clear your token, not those of other authenticationlisteners.
// $token = $this->securityContext->getToken();
5. http://api.symfony.com/2.5/Symfony/Component/Security/Http/Firewall/ListenerInterface.html
6. http://api.symfony.com/2.5/Symfony/Component/HttpKernel/Event/GetResponseEvent.html
PDF brought to you bygenerated on October 23, 2014
Chapter 99: How to Create a custom Authentication Provider | 360
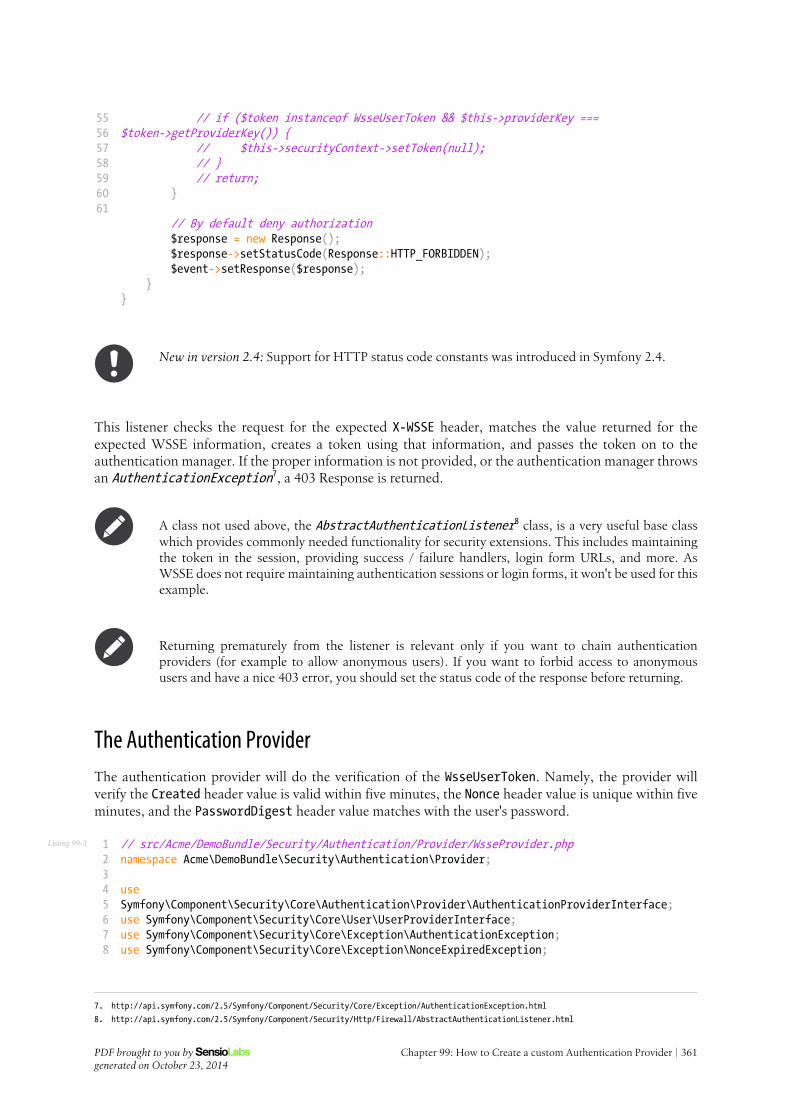
Listing 99-3
55565758596061
// if ($token instanceof WsseUserToken && $this->providerKey ===$token->getProviderKey()) {
// $this->securityContext->setToken(null);// }// return;
}
// By default deny authorization$response = new Response();$response->setStatusCode(Response::HTTP_FORBIDDEN);$event->setResponse($response);
}}
New in version 2.4: Support for HTTP status code constants was introduced in Symfony 2.4.
This listener checks the request for the expected X-WSSE header, matches the value returned for theexpected WSSE information, creates a token using that information, and passes the token on to theauthentication manager. If the proper information is not provided, or the authentication manager throwsan AuthenticationException7, a 403 Response is returned.
A class not used above, the AbstractAuthenticationListener8 class, is a very useful base classwhich provides commonly needed functionality for security extensions. This includes maintainingthe token in the session, providing success / failure handlers, login form URLs, and more. AsWSSE does not require maintaining authentication sessions or login forms, it won't be used for thisexample.
Returning prematurely from the listener is relevant only if you want to chain authenticationproviders (for example to allow anonymous users). If you want to forbid access to anonymoususers and have a nice 403 error, you should set the status code of the response before returning.
The Authentication ProviderThe authentication provider will do the verification of the WsseUserToken. Namely, the provider willverify the Created header value is valid within five minutes, the Nonce header value is unique within fiveminutes, and the PasswordDigest header value matches with the user's password.
12345678
// src/Acme/DemoBundle/Security/Authentication/Provider/WsseProvider.phpnamespace Acme\DemoBundle\Security\Authentication\Provider;
useSymfony\Component\Security\Core\Authentication\Provider\AuthenticationProviderInterface;use Symfony\Component\Security\Core\User\UserProviderInterface;use Symfony\Component\Security\Core\Exception\AuthenticationException;use Symfony\Component\Security\Core\Exception\NonceExpiredException;
7. http://api.symfony.com/2.5/Symfony/Component/Security/Core/Exception/AuthenticationException.html
8. http://api.symfony.com/2.5/Symfony/Component/Security/Http/Firewall/AbstractAuthenticationListener.html
PDF brought to you bygenerated on October 23, 2014
Chapter 99: How to Create a custom Authentication Provider | 361

910111213141516171819202122232425262728293031323334353637383940414243444546474849505152535455565758596061626364656667
use Symfony\Component\Security\Core\Authentication\Token\TokenInterface;use Acme\DemoBundle\Security\Authentication\Token\WsseUserToken;
class WsseProvider implements AuthenticationProviderInterface{
private $userProvider;private $cacheDir;
public function __construct(UserProviderInterface $userProvider, $cacheDir){
$this->userProvider = $userProvider;$this->cacheDir = $cacheDir;
}
public function authenticate(TokenInterface $token){
$user = $this->userProvider->loadUserByUsername($token->getUsername());
if ($user && $this->validateDigest($token->digest, $token->nonce, $token->created,$user->getPassword())) {
$authenticatedToken = new WsseUserToken($user->getRoles());$authenticatedToken->setUser($user);
return $authenticatedToken;}
throw new AuthenticationException('The WSSE authentication failed.');}
/*** This function is specific to Wsse authentication and is only used to help this
example** For more information specific to the logic here, see* https://github.com/symfony/symfony-docs/pull/3134#issuecomment-27699129*/protected function validateDigest($digest, $nonce, $created, $secret){
// Check created time is not in the futureif (strtotime($created) > time()) {
return false;}
// Expire timestamp after 5 minutesif (time() - strtotime($created) > 300) {
return false;}
// Validate that the nonce is *not* used in the last 5 minutes// if it has, this could be a replay attackif (file_exists($this->cacheDir.'/'.$nonce) &&
file_get_contents($this->cacheDir.'/'.$nonce) + 300 > time()) {throw new NonceExpiredException('Previously used nonce detected');
}// If cache directory does not exist we create itif (!is_dir($this->cacheDir)) {
mkdir($this->cacheDir, 0777, true);}file_put_contents($this->cacheDir.'/'.$nonce, time());
PDF brought to you bygenerated on October 23, 2014
Chapter 99: How to Create a custom Authentication Provider | 362
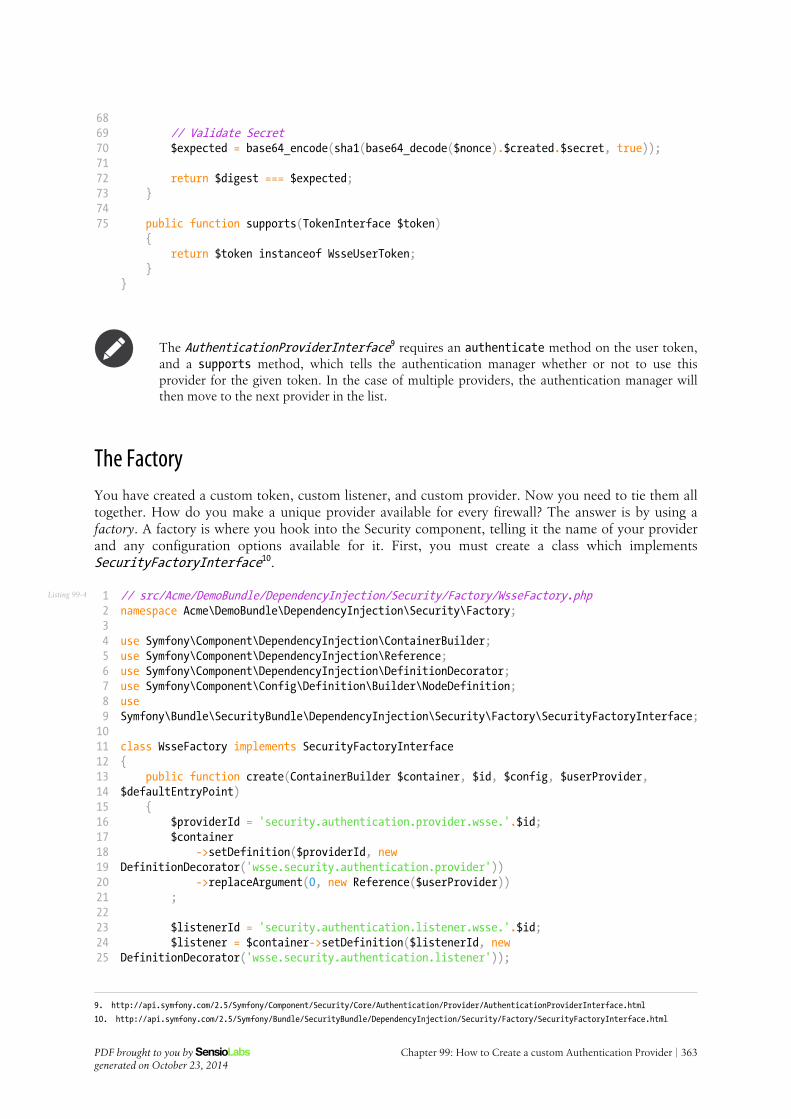
Listing 99-4
6869707172737475
// Validate Secret$expected = base64_encode(sha1(base64_decode($nonce).$created.$secret, true));
return $digest === $expected;}
public function supports(TokenInterface $token){
return $token instanceof WsseUserToken;}
}
The AuthenticationProviderInterface9 requires an authenticate method on the user token,and a supports method, which tells the authentication manager whether or not to use thisprovider for the given token. In the case of multiple providers, the authentication manager willthen move to the next provider in the list.
The FactoryYou have created a custom token, custom listener, and custom provider. Now you need to tie them alltogether. How do you make a unique provider available for every firewall? The answer is by using afactory. A factory is where you hook into the Security component, telling it the name of your providerand any configuration options available for it. First, you must create a class which implementsSecurityFactoryInterface10.
123456789
10111213141516171819202122232425
// src/Acme/DemoBundle/DependencyInjection/Security/Factory/WsseFactory.phpnamespace Acme\DemoBundle\DependencyInjection\Security\Factory;
use Symfony\Component\DependencyInjection\ContainerBuilder;use Symfony\Component\DependencyInjection\Reference;use Symfony\Component\DependencyInjection\DefinitionDecorator;use Symfony\Component\Config\Definition\Builder\NodeDefinition;useSymfony\Bundle\SecurityBundle\DependencyInjection\Security\Factory\SecurityFactoryInterface;
class WsseFactory implements SecurityFactoryInterface{
public function create(ContainerBuilder $container, $id, $config, $userProvider,$defaultEntryPoint)
{$providerId = 'security.authentication.provider.wsse.'.$id;$container
->setDefinition($providerId, newDefinitionDecorator('wsse.security.authentication.provider'))
->replaceArgument(0, new Reference($userProvider));
$listenerId = 'security.authentication.listener.wsse.'.$id;$listener = $container->setDefinition($listenerId, new
DefinitionDecorator('wsse.security.authentication.listener'));
9. http://api.symfony.com/2.5/Symfony/Component/Security/Core/Authentication/Provider/AuthenticationProviderInterface.html
10. http://api.symfony.com/2.5/Symfony/Bundle/SecurityBundle/DependencyInjection/Security/Factory/SecurityFactoryInterface.html
PDF brought to you bygenerated on October 23, 2014
Chapter 99: How to Create a custom Authentication Provider | 363

2627282930313233343536373839
return array($providerId, $listenerId, $defaultEntryPoint);}
public function getPosition(){
return 'pre_auth';}
public function getKey(){
return 'wsse';}
public function addConfiguration(NodeDefinition $node){}
}
The SecurityFactoryInterface11 requires the following methods:
• create method, which adds the listener and authentication provider to the DI container forthe appropriate security context;
• getPosition method, which must be of type pre_auth, form, http, and remember_me anddefines the position at which the provider is called;
• getKey method which defines the configuration key used to reference the provider in thefirewall configuration;
• addConfiguration method, which is used to define the configuration options underneath theconfiguration key in your security configuration. Setting configuration options are explainedlater in this chapter.
A class not used in this example, AbstractFactory12, is a very useful base class which providescommonly needed functionality for security factories. It may be useful when defining anauthentication provider of a different type.
Now that you have created a factory class, the wsse key can be used as a firewall in your securityconfiguration.
You may be wondering "why do you need a special factory class to add listeners and providers tothe dependency injection container?". This is a very good question. The reason is you can use yourfirewall multiple times, to secure multiple parts of your application. Because of this, each time yourfirewall is used, a new service is created in the DI container. The factory is what creates these newservices.
ConfigurationIt's time to see your authentication provider in action. You will need to do a few things in order tomake this work. The first thing is to add the services above to the DI container. Your factory class abovemakes reference to service ids that do not exist yet: wsse.security.authentication.provider andwsse.security.authentication.listener. It's time to define those services.
11. http://api.symfony.com/2.5/Symfony/Bundle/SecurityBundle/DependencyInjection/Security/Factory/SecurityFactoryInterface.html
12. http://api.symfony.com/2.5/Symfony/Bundle/SecurityBundle/DependencyInjection/Security/Factory/AbstractFactory.html
PDF brought to you bygenerated on October 23, 2014
Chapter 99: How to Create a custom Authentication Provider | 364

Listing 99-5
Listing 99-6
Listing 99-7
Listing 99-8
123456789
# src/Acme/DemoBundle/Resources/config/services.ymlservices:
wsse.security.authentication.provider:class: Acme\DemoBundle\Security\Authentication\Provider\WsseProviderarguments: ["", "%kernel.cache_dir%/security/nonces"]
wsse.security.authentication.listener:class: Acme\DemoBundle\Security\Firewall\WsseListenerarguments: ["@security.context", "@security.authentication.manager"]
Now that your services are defined, tell your security context about your factory in your bundle class:
123456789
1011121314151617
// src/Acme/DemoBundle/AcmeDemoBundle.phpnamespace Acme\DemoBundle;
use Acme\DemoBundle\DependencyInjection\Security\Factory\WsseFactory;use Symfony\Component\HttpKernel\Bundle\Bundle;use Symfony\Component\DependencyInjection\ContainerBuilder;
class AcmeDemoBundle extends Bundle{
public function build(ContainerBuilder $container){
parent::build($container);
$extension = $container->getExtension('security');$extension->addSecurityListenerFactory(new WsseFactory());
}}
You are finished! You can now define parts of your app as under WSSE protection.
123456
security:firewalls:
wsse_secured:pattern: /api/.*stateless: truewsse: true
Congratulations! You have written your very own custom security authentication provider!
A little ExtraHow about making your WSSE authentication provider a bit more exciting? The possibilities are endless.Why don't you start by adding some sparkle to that shine?
Configuration
You can add custom options under the wsse key in your security configuration. For instance, the timeallowed before expiring the Created header item, by default, is 5 minutes. Make this configurable, sodifferent firewalls can have different timeout lengths.
You will first need to edit WsseFactory and define the new option in the addConfiguration method.
PDF brought to you bygenerated on October 23, 2014
Chapter 99: How to Create a custom Authentication Provider | 365
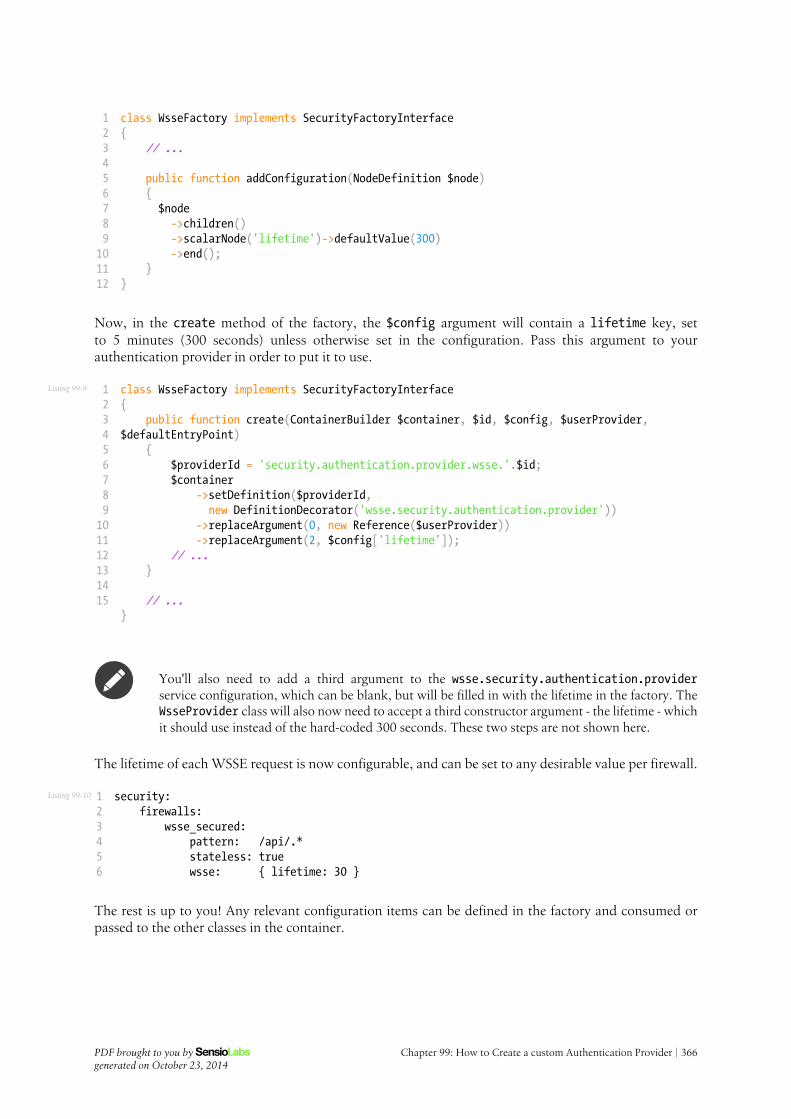
Listing 99-9
Listing 99-10
123456789
101112
class WsseFactory implements SecurityFactoryInterface{
// ...
public function addConfiguration(NodeDefinition $node){$node->children()->scalarNode('lifetime')->defaultValue(300)->end();
}}
Now, in the create method of the factory, the $config argument will contain a lifetime key, setto 5 minutes (300 seconds) unless otherwise set in the configuration. Pass this argument to yourauthentication provider in order to put it to use.
123456789
101112131415
class WsseFactory implements SecurityFactoryInterface{
public function create(ContainerBuilder $container, $id, $config, $userProvider,$defaultEntryPoint)
{$providerId = 'security.authentication.provider.wsse.'.$id;$container
->setDefinition($providerId,new DefinitionDecorator('wsse.security.authentication.provider'))
->replaceArgument(0, new Reference($userProvider))->replaceArgument(2, $config['lifetime']);
// ...}
// ...}
You'll also need to add a third argument to the wsse.security.authentication.providerservice configuration, which can be blank, but will be filled in with the lifetime in the factory. TheWsseProvider class will also now need to accept a third constructor argument - the lifetime - whichit should use instead of the hard-coded 300 seconds. These two steps are not shown here.
The lifetime of each WSSE request is now configurable, and can be set to any desirable value per firewall.
123456
security:firewalls:
wsse_secured:pattern: /api/.*stateless: truewsse: { lifetime: 30 }
The rest is up to you! Any relevant configuration items can be defined in the factory and consumed orpassed to the other classes in the container.
PDF brought to you bygenerated on October 23, 2014
Chapter 99: How to Create a custom Authentication Provider | 366

Listing 100-1
Chapter 100
Using pre Authenticated Security Firewalls
A lot of authentication modules are already provided by some web servers, including Apache. Thesemodules generally set some environment variables that can be used to determine which user is accessingyour application. Out of the box, Symfony supports most authentication mechanisms. These requestsare called pre authenticated requests because the user is already authenticated when reaching yourapplication.
X.509 Client Certificate AuthenticationWhen using client certificates, your webserver is doing all the authentication process itself. With Apache,for example, you would use the SSLVerifyClient Require directive.
Enable the x509 authentication for a particular firewall in the security configuration:
1234567
# app/config/security.ymlsecurity:
firewalls:secured_area:
pattern: ^/x509:
provider: your_user_provider
By default, the firewall provides the SSL_CLIENT_S_DN_Email variable to the user provider, and sets theSSL_CLIENT_S_DN as credentials in the PreAuthenticatedToken1. You can override these by setting theuser and the credentials keys in the x509 firewall configuration respectively.
1. http://api.symfony.com/2.5/Symfony/Component/Security/Core/Authentication/Token/PreAuthenticatedToken.html
PDF brought to you bygenerated on October 23, 2014
Chapter 100: Using pre Authenticated Security Firewalls | 367

An authentication provider will only inform the user provider of the username that made therequest. You will need to create (or use) a "user provider" that is referenced by the providerconfiguration parameter (your_user_provider in the configuration example). This provider willturn the username into a User object of your choice. For more information on creating orconfiguring a user provider, see:
• How to Create a custom User Provider• How to Load Security Users from the Database (the Entity Provider)
PDF brought to you bygenerated on October 23, 2014
Chapter 100: Using pre Authenticated Security Firewalls | 368

Listing 101-1
Listing 101-2
Chapter 101
How to Change the default Target PathBehavior
By default, the Security component retains the information of the last request URI in a session variablenamed _security.main.target_path (with main being the name of the firewall, defined insecurity.yml). Upon a successful login, the user is redirected to this path, as to help them continue fromthe last known page they visited.
In some situations, this is not ideal. For example, when the last request URI was an XMLHttpRequestwhich returned a non-HTML or partial HTML response, the user is redirected back to a page which thebrowser cannot render.
To get around this behavior, you would simply need to extend the ExceptionListener class and overridethe default method named setTargetPath().
First, override the security.exception_listener.class parameter in your configuration file. This canbe done from your main configuration file (in app/config) or from a configuration file being importedfrom a bundle:
1234
# src/Acme/HelloBundle/Resources/config/services.ymlparameters:
# ...security.exception_listener.class: Acme\HelloBundle\Security\Firewall\ExceptionListener
Next, create your own ExceptionListener:
123456789
10
// src/Acme/HelloBundle/Security/Firewall/ExceptionListener.phpnamespace Acme\HelloBundle\Security\Firewall;
use Symfony\Component\HttpFoundation\Request;use Symfony\Component\Security\Http\Firewall\ExceptionListener as BaseExceptionListener;
class ExceptionListener extends BaseExceptionListener{
protected function setTargetPath(Request $request){
PDF brought to you bygenerated on October 23, 2014
Chapter 101: How to Change the default Target Path Behavior | 369

11121314151617181920
// Do not save target path for XHR requests// You can add any more logic here you want// Note that non-GET requests are already ignoredif ($request->isXmlHttpRequest()) {
return;}
parent::setTargetPath($request);}
}
Add as much or few logic here as required for your scenario!
PDF brought to you bygenerated on October 23, 2014
Chapter 101: How to Change the default Target Path Behavior | 370

Listing 102-1
Chapter 102
Using CSRF Protection in the Login Form
When using a login form, you should make sure that you are protected against CSRF (Cross-site requestforgery1). The Security component already has built-in support for CSRF. In this article you'll learn howyou can use it in your login form.
Login CSRF attacks are a bit less well-known. See Forging Login Requests2 if you're curious aboutmore details.
Configuring CSRF ProtectionFirst, configure the Security component so it can use CSRF protection. The Security component needs aCSRF token provider. You can set this to use the default provider available in the Form component:
12345678
# app/config/security.ymlsecurity:
firewalls:secured_area:
# ...form_login:
# ...csrf_provider: form.csrf_provider
The Security component can be configured further, but this is all information it needs to be able to useCSRF in the login form.
1. http://en.wikipedia.org/wiki/Cross-site_request_forgery
2. http://en.wikipedia.org/wiki/Cross-site_request_forgery#Forging_login_requests
PDF brought to you bygenerated on October 23, 2014
Chapter 102: Using CSRF Protection in the Login Form | 371

Listing 102-2
Listing 102-3
Rendering the CSRF fieldNow that Security component will check for the CSRF token, you have to add a hidden field to thelogin form containing the CSRF token. By default, this field is named _csrf_token. That hidden fieldmust contain the CSRF token, which can be generated by using the csrf_token function. That functionrequires a token ID, which must be set to authenticate when using the login form:
123456789
101112
{# src/Acme/SecurityBundle/Resources/views/Security/login.html.twig #}
{# ... #}<form action="{{ path('login_check') }}" method="post">
{# ... the login fields #}
<input type="hidden" name="_csrf_token"value="{{ csrf_token('authenticate') }}"
>
<button type="submit">login</button></form>
After this, you have protected your login form against CSRF attacks.
You can change the name of the field by setting csrf_parameter and change the token ID bysetting intention in your configuration:
123456789
# app/config/security.ymlsecurity:
firewalls:secured_area:
# ...form_login:
# ...csrf_parameter: _csrf_security_tokenintention: a_private_string
PDF brought to you bygenerated on October 23, 2014
Chapter 102: Using CSRF Protection in the Login Form | 372

Listing 103-1
Listing 103-2
Chapter 103
How to Choose the Password EncoderAlgorithm Dynamically
New in version 2.5: Named encoders were introduced in Symfony 2.5.
Usually, the same password encoder is used for all users by configuring it to apply to all instances of aspecific class:
12345
# app/config/security.ymlsecurity:
# ...encoders:
Symfony\Component\Security\Core\User\User: sha512
Another option is to use a "named" encoder and then select which encoder you want to use dynamically.
In the previous example, you've set the sha512 algorithm for Acme\UserBundle\Entity\User. This maybe secure enough for a regular user, but what if you want your admins to have a stronger algorithm, forexample bcrypt. This can be done with named encoders:
1234567
# app/config/security.ymlsecurity:
# ...encoders:
harsh:algorithm: bcryptcost: 15
PDF brought to you bygenerated on October 23, 2014
Chapter 103: How to Choose the Password Encoder Algorithm Dynamically | 373

Listing 103-3
This creates an encoder named harsh. In order for a User instance to use it, the class must implementEncoderAwareInterface1. The interface requires one method - getEncoderName - which should returnthe name of the encoder to use:
123456789
1011121314151617
// src/Acme/UserBundle/Entity/User.phpnamespace Acme\UserBundle\Entity;
use Symfony\Component\Security\Core\User\UserInterface;use Symfony\Component\Security\Core\Encoder\EncoderAwareInterface;
class User implements UserInterface, EncoderAwareInterface{
public function getEncoderName(){
if ($this->isAdmin()) {return 'harsh';
}
return null; // use the default encoder}
}
1. http://api.symfony.com/2.5/Symfony/Component/Security/Core/Encoder/EncoderAwareInterface.html
PDF brought to you bygenerated on October 23, 2014
Chapter 103: How to Choose the Password Encoder Algorithm Dynamically | 374

Listing 104-1
Chapter 104
How to Use the Serializer
Serializing and deserializing to and from objects and different formats (e.g. JSON or XML) is a verycomplex topic. Symfony comes with a Serializer Component, which gives you some tools that you canleverage for your solution.
In fact, before you start, get familiar with the serializer, normalizers and encoders by reading the SerializerComponent. You should also check out the JMSSerializerBundle1, which expands on the functionalityoffered by Symfony's core serializer.
Activating the Serializer
New in version 2.3: The Serializer has always existed in Symfony, but prior to Symfony 2.3, youneeded to build the serializer service yourself.
The serializer service is not available by default. To turn it on, activate it in your configuration:
12345
# app/config/config.ymlframework:
# ...serializer:
enabled: true
Adding Normalizers and EncodersOnce enabled, the serializer service will be available in the container and will be loaded with twoencoders (JsonEncoder2 and XmlEncoder3) but no normalizers, meaning you'll need to load your own.
1. http://jmsyst.com/bundles/JMSSerializerBundle
2. http://api.symfony.com/2.5/Symfony/Component/Serializer/Encoder/JsonEncoder.html
3. http://api.symfony.com/2.5/Symfony/Component/Serializer/Encoder/XmlEncoder.html
PDF brought to you bygenerated on October 23, 2014
Chapter 104: How to Use the Serializer | 375

Listing 104-2
You can load normalizers and/or encoders by tagging them as serializer.normalizer and serializer.encoder.It's also possible to set the priority of the tag in order to decide the matching order.
Here is an example on how to load the GetSetMethodNormalizer4:
123456
# app/config/config.ymlservices:
get_set_method_normalizer:class: Symfony\Component\Serializer\Normalizer\GetSetMethodNormalizertags:
- { name: serializer.normalizer }
The GetSetMethodNormalizer5 is broken by design. As soon as you have a circular object graph,an infinite loop is created when calling the getters. You're encouraged to add your own normalizersthat fit your use-case.
4. http://api.symfony.com/2.5/Symfony/Component/Serializer/Normalizer/GetSetMethodNormalizer.html
5. http://api.symfony.com/2.5/Symfony/Component/Serializer/Normalizer/GetSetMethodNormalizer.html
PDF brought to you bygenerated on October 23, 2014
Chapter 104: How to Use the Serializer | 376

Listing 105-1
Chapter 105
How to Create an Event Listener
Symfony has various events and hooks that can be used to trigger custom behavior in your application.Those events are thrown by the HttpKernel component and can be viewed in the KernelEvents1 class.
To hook into an event and add your own custom logic, you have to create a service that will act as anevent listener on that event. In this entry, you will create a service that will act as an Exception Listener,allowing you to modify how exceptions are shown by your application. The KernelEvents::EXCEPTIONevent is just one of the core kernel events:
123456789
1011121314151617181920212223242526
// src/Acme/DemoBundle/EventListener/AcmeExceptionListener.phpnamespace Acme\DemoBundle\EventListener;
use Symfony\Component\HttpKernel\Event\GetResponseForExceptionEvent;use Symfony\Component\HttpFoundation\Response;use Symfony\Component\HttpKernel\Exception\HttpExceptionInterface;
class AcmeExceptionListener{
public function onKernelException(GetResponseForExceptionEvent $event){
// You get the exception object from the received event$exception = $event->getException();$message = sprintf(
'My Error says: %s with code: %s',$exception->getMessage(),$exception->getCode()
);
// Customize your response object to display the exception details$response = new Response();$response->setContent($message);
// HttpExceptionInterface is a special type of exception that// holds status code and header detailsif ($exception instanceof HttpExceptionInterface) {
1. http://api.symfony.com/2.5/Symfony/Component/HttpKernel/KernelEvents.html
PDF brought to you bygenerated on October 23, 2014
Chapter 105: How to Create an Event Listener | 377

Listing 105-2
Listing 105-3
27282930313233343536
$response->setStatusCode($exception->getStatusCode());$response->headers->replace($exception->getHeaders());
} else {$response->setStatusCode(Response::HTTP_INTERNAL_SERVER_ERROR);
}
// Send the modified response object to the event$event->setResponse($response);
}}
New in version 2.4: Support for HTTP status code constants was introduced in Symfony 2.4.
Each event receives a slightly different type of $event object. For the kernel.exception event, itis GetResponseForExceptionEvent2. To see what type of object each event listener receives, seeKernelEvents3.
Now that the class is created, you just need to register it as a service and notify Symfony that it is a"listener" on the kernel.exception event by using a special "tag":
123456
# app/config/config.ymlservices:
kernel.listener.your_listener_name:class: Acme\DemoBundle\EventListener\AcmeExceptionListenertags:
- { name: kernel.event_listener, event: kernel.exception, method:onKernelException }
There is an additional tag option priority that is optional and defaults to 0. This value can befrom -255 to 255, and the listeners will be executed in the order of their priority (highest to lowest).This is useful when you need to guarantee that one listener is executed before another.
Request Events, Checking Types
New in version 2.4: The isMasterRequest() method was introduced in Symfony 2.4. Prior, thegetRequestType() method must be used.
A single page can make several requests (one master request, and then multiple sub-requests), which iswhy when working with the KernelEvents::REQUEST event, you might need to check the type of therequest. This can be easily done as follow:
2. http://api.symfony.com/2.5/Symfony/Component/HttpKernel/Event/GetResponseForExceptionEvent.html
3. http://api.symfony.com/2.5/Symfony/Component/HttpKernel/KernelEvents.html
PDF brought to you bygenerated on October 23, 2014
Chapter 105: How to Create an Event Listener | 378

123456789
101112131415161718
// src/Acme/DemoBundle/EventListener/AcmeRequestListener.phpnamespace Acme\DemoBundle\EventListener;
use Symfony\Component\HttpKernel\Event\GetResponseEvent;use Symfony\Component\HttpKernel\HttpKernel;
class AcmeRequestListener{
public function onKernelRequest(GetResponseEvent $event){
if (!$event->isMasterRequest()) {// don't do anything if it's not the master requestreturn;
}
// ...}
}
Two types of request are available in the HttpKernelInterface4 interface:HttpKernelInterface::MASTER_REQUEST and HttpKernelInterface::SUB_REQUEST.
4. http://api.symfony.com/2.5/Symfony/Component/HttpKernel/HttpKernelInterface.html
PDF brought to you bygenerated on October 23, 2014
Chapter 105: How to Create an Event Listener | 379
Chapter 106
How to Work with Scopes
This entry is all about scopes, a somewhat advanced topic related to the Service Container. If you've evergotten an error mentioning "scopes" when creating services, then this entry is for you.
If you are trying to inject the request service, the simple solution is to inject the request_stackservice instead and access the current Request by calling the getCurrentRequest()1 method (seeInjecting the Request). The rest of this entry talks about scopes in a theoretical and more advancedway. If you're dealing with scopes for the request service, simply inject request_stack.
Understanding ScopesThe scope of a service controls how long an instance of a service is used by the container. TheDependencyInjection component provides two generic scopes:
• container (the default one): The same instance is used each time you request it from thiscontainer.
• prototype: A new instance is created each time you request the service.
The ContainerAwareHttpKernel2 also defines a third scope: request. This scope is tied to the request,meaning a new instance is created for each subrequest and is unavailable outside the request (for instancein the CLI).
An Example: Client Scope
Other than the request service (which has a simple solution, see the above note), no services in thedefault Symfony2 container belong to any scope other than container and prototype. But for thepurposes of this entry, imagine there is another scope client and a service client_configuration thatbelongs to it. This is not a common situation, but the idea is that you may enter and exit multiple clientscopes during a request, and each has its own client_configuration service.
1. http://api.symfony.com/2.5/Symfony/Component/HttpFoundation/RequestStack.html#getCurrentRequest()
2. http://api.symfony.com/2.5/Symfony/Component/HttpKernel/DependencyInjection/ContainerAwareHttpKernel.html
PDF brought to you bygenerated on October 23, 2014
Chapter 106: How to Work with Scopes | 380

Scopes add a constraint on the dependencies of a service: a service cannot depend on services froma narrower scope. For example, if you create a generic my_foo service, but try to inject theclient_configuration service, you will receive a ScopeWideningInjectionException3 whencompiling the container. Read the sidebar below for more details.
Scopes and Dependencies
Imagine you've configured a my_mailer service. You haven't configured the scope of the service,so it defaults to container. In other words, every time you ask the container for the my_mailerservice, you get the same object back. This is usually how you want your services to work.
Imagine, however, that you need the client_configuration service in your my_mailer service,maybe because you're reading some details from it, such as what the "sender" address should be.You add it as a constructor argument. There are several reasons why this presents a problem:
• When requesting my_mailer, an instance of my_mailer (called MailerA here) is createdand the client_configuration service ( called ConfigurationA here) is passed to it.Life is good!
• Your application now needs to do something with another client, and you'vearchitected your application in such a way that you handle this by entering a newclient_configuration scope and setting a new client_configuration service intothe container. Call this ConfigurationB.
• Somewhere in your application, you once again ask for the my_mailer service. Sinceyour service is in the container scope, the same instance (MailerA) is just re-used. Buthere's the problem: the MailerA instance still contains the old ConfigurationA object,which is now not the correct configuration object to have (ConfigurationB is now thecurrent client_configuration service). This is subtle, but the mis-match could causemajor problems, which is why it's not allowed.
So, that's the reason why scopes exist, and how they can cause problems. Keep readingto find out the common solutions.
A service can of course depend on a service from a wider scope without any issue.
Using a Service from a Narrower ScopeThere are several solutions to the scope problem:
• A) Use setter injection if the dependency is synchronized (see A) Using a SynchronizedService);
• B) Put your service in the same scope as the dependency (or a narrower one). If you depend onthe client_configuration service, this means putting your new service in the client scope(see B) Changing the Scope of your Service);
• C) Pass the entire container to your service and retrieve your dependency from the containereach time you need it to be sure you have the right instance -- your service can live in thedefault container scope (see C) Passing the Container as a Dependency of your Service).
Each scenario is detailed in the following sections.
3. http://api.symfony.com/2.5/Symfony/Component/DependencyInjection/Exception/ScopeWideningInjectionException.html
PDF brought to you bygenerated on October 23, 2014
Chapter 106: How to Work with Scopes | 381

Listing 106-1
Listing 106-2
Listing 106-3
A) Using a Synchronized Service
New in version 2.3: Synchronized services were introduced in Symfony 2.3.
Both injecting the container and setting your service to a narrower scope have drawbacks. Assume firstthat the client_configuration service has been marked as synchronized:
12345678
# app/config/config.ymlservices:
client_configuration:class: Acme\HelloBundle\Client\ClientConfigurationscope: clientsynchronized: truesynthetic: true# ...
Now, if you inject this service using setter injection, there are no drawbacks and everything workswithout any special code in your service or in your definition:
123456789
1011121314151617181920212223
// src/Acme/HelloBundle/Mail/Mailer.phpnamespace Acme\HelloBundle\Mail;
use Acme\HelloBundle\Client\ClientConfiguration;
class Mailer{
protected $clientConfiguration;
public function setClientConfiguration(ClientConfiguration $clientConfiguration = null){
$this->clientConfiguration = $clientConfiguration;}
public function sendEmail(){
if (null === $this->clientConfiguration) {// throw an error?
}
// ... do something using the client configuration here}
}
Whenever the client scope is active, the service container will automatically call thesetClientConfiguration() method when the client_configuration service is set in the container.
You might have noticed that the setClientConfiguration() method accepts null as a valid valuefor the client_configuration argument. That's because when leaving the client scope, theclient_configuration instance can be null. Of course, you should take care of this possibility in yourcode. This should also be taken into account when declaring your service:
123
# src/Acme/HelloBundle/Resources/config/services.ymlservices:
my_mailer:
PDF brought to you bygenerated on October 23, 2014
Chapter 106: How to Work with Scopes | 382

Listing 106-4
Listing 106-5
Listing 106-6
456
class: Acme\HelloBundle\Mail\Mailercalls:
- [setClientConfiguration, ["@?client_configuration="]]
B) Changing the Scope of your Service
Changing the scope of a service should be done in its definition. This example assumes that the Mailerclass has a __construct function whose first argument is the ClientConfiguration object:
123456
# src/Acme/HelloBundle/Resources/config/services.ymlservices:
my_mailer:class: Acme\HelloBundle\Mail\Mailerscope: clientarguments: ["@client_configuration"]
C) Passing the Container as a Dependency of your Service
Setting the scope to a narrower one is not always possible (for instance, a twig extension must be in thecontainer scope as the Twig environment needs it as a dependency). In these cases, you can pass theentire container into your service:
123456789
1011121314151617181920
// src/Acme/HelloBundle/Mail/Mailer.phpnamespace Acme\HelloBundle\Mail;
use Symfony\Component\DependencyInjection\ContainerInterface;
class Mailer{
protected $container;
public function __construct(ContainerInterface $container){
$this->container = $container;}
public function sendEmail(){
$request = $this->container->get('client_configuration');// ... do something using the client configuration here
}}
Take care not to store the client configuration in a property of the object for a future call of theservice as it would cause the same issue described in the first section (except that Symfony cannotdetect that you are wrong).
The service config for this class would look something like this:
123
# src/Acme/HelloBundle/Resources/config/services.ymlparameters:
# ...
PDF brought to you bygenerated on October 23, 2014
Chapter 106: How to Work with Scopes | 383

456789
10
my_mailer.class: Acme\HelloBundle\Mail\Mailer
services:my_mailer:
class: "%my_mailer.class%"arguments: ["@service_container"]# scope: container can be omitted as it is the default
Injecting the whole container into a service is generally not a good idea (only inject what you need).
PDF brought to you bygenerated on October 23, 2014
Chapter 106: How to Work with Scopes | 384

Listing 107-1
Chapter 107
How to Work with Compiler Passes in Bundles
Compiler passes give you an opportunity to manipulate other service definitions that have been registeredwith the service container. You can read about how to create them in the components section "Compilingthe Container". To register a compiler pass from a bundle you need to add it to the build method of thebundle definition class:
123456789
1011121314151617
// src/Acme/MailerBundle/AcmeMailerBundle.phpnamespace Acme\MailerBundle;
use Symfony\Component\HttpKernel\Bundle\Bundle;use Symfony\Component\DependencyInjection\ContainerBuilder;
use Acme\MailerBundle\DependencyInjection\Compiler\CustomCompilerPass;
class AcmeMailerBundle extends Bundle{
public function build(ContainerBuilder $container){
parent::build($container);
$container->addCompilerPass(new CustomCompilerPass());}
}
One of the most common use-cases of compiler passes is to work with tagged services (read more abouttags in the components section "Working with Tagged Services"). If you are using custom tags in a bundlethen by convention, tag names consist of the name of the bundle (lowercase, underscores as separators),followed by a dot, and finally the "real" name. For example, if you want to introduce some sort of"transport" tag in your AcmeMailerBundle, you should call it acme_mailer.transport.
PDF brought to you bygenerated on October 23, 2014
Chapter 107: How to Work with Compiler Passes in Bundles | 385

Listing 108-1
Listing 108-2
Chapter 108
Session Proxy Examples
The session proxy mechanism has a variety of uses and this example demonstrates two common uses.Rather than injecting the session handler as normal, a handler is injected into the proxy and registeredwith the session storage driver:
123456
use Symfony\Component\HttpFoundation\Session\Session;use Symfony\Component\HttpFoundation\Session\Storage\NativeSessionStorage;use Symfony\Component\HttpFoundation\Session\Storage\Handler\PdoSessionHandler;
$proxy = new YourProxy(new PdoSessionHandler());$session = new Session(new NativeSessionStorage(array(), $proxy));
Below, you'll learn two real examples that can be used for YourProxy: encryption of session data andreadonly guest sessions.
Encryption of Session DataIf you wanted to encrypt the session data, you could use the proxy to encrypt and decrypt the session asrequired:
123456789
1011121314
use Symfony\Component\HttpFoundation\Session\Storage\Proxy\SessionHandlerProxy;
class EncryptedSessionProxy extends SessionHandlerProxy{
private $key;
public function __construct(\SessionHandlerInterface $handler, $key){
$this->key = $key;
parent::__construct($handler);}
public function read($id)
PDF brought to you bygenerated on October 23, 2014
Chapter 108: Session Proxy Examples | 386

Listing 108-3
15161718192021222324252627
{$data = parent::read($id);
return mcrypt_decrypt(\MCRYPT_3DES, $this->key, $data);}
public function write($id, $data){
$data = mcrypt_encrypt(\MCRYPT_3DES, $this->key, $data);
return parent::write($id, $data);}
}
Readonly Guest SessionsThere are some applications where a session is required for guest users, but where there is no particularneed to persist the session. In this case you can intercept the session before it is written:
123456789
1011121314151617181920212223
use Foo\User;use Symfony\Component\HttpFoundation\Session\Storage\Proxy\SessionHandlerProxy;
class ReadOnlyGuestSessionProxy extends SessionHandlerProxy{
private $user;
public function __construct(\SessionHandlerInterface $handler, User $user){
$this->user = $user;
parent::__construct($handler);}
public function write($id, $data){
if ($this->user->isGuest()) {return;
}
return parent::write($id, $data);}
}
PDF brought to you bygenerated on October 23, 2014
Chapter 108: Session Proxy Examples | 387

Listing 109-1
Chapter 109
Making the Locale "Sticky" during a User'sSession
Prior to Symfony 2.1, the locale was stored in a session attribute called _locale. Since 2.1, it is stored inthe Request, which means that it's not "sticky" during a user's request. In this article, you'll learn how tomake the locale of a user "sticky" so that once it's set, that same locale will be used for every subsequentrequest.
Creating a LocaleListenerTo simulate that the locale is stored in a session, you need to create and register a new event listener.The listener will look something like this. Typically, _locale is used as a routing parameter to signify thelocale, though it doesn't really matter how you determine the desired locale from the request:
123456789
10111213141516171819
// src/Acme/LocaleBundle/EventListener/LocaleListener.phpnamespace Acme\LocaleBundle\EventListener;
use Symfony\Component\HttpKernel\Event\GetResponseEvent;use Symfony\Component\HttpKernel\KernelEvents;use Symfony\Component\EventDispatcher\EventSubscriberInterface;
class LocaleListener implements EventSubscriberInterface{
private $defaultLocale;
public function __construct($defaultLocale = 'en'){
$this->defaultLocale = $defaultLocale;}
public function onKernelRequest(GetResponseEvent $event){
$request = $event->getRequest();
PDF brought to you bygenerated on October 23, 2014
Chapter 109: Making the Locale "Sticky" during a User's Session | 388

Listing 109-2
Listing 109-3
202122232425262728293031323334353637383940
if (!$request->hasPreviousSession()) {return;
}
// try to see if the locale has been set as a _locale routing parameterif ($locale = $request->attributes->get('_locale')) {
$request->getSession()->set('_locale', $locale);} else {
// if no explicit locale has been set on this request, use one from the session$request->setLocale($request->getSession()->get('_locale',
$this->defaultLocale));}
}
public static function getSubscribedEvents(){
return array(// must be registered before the default Locale listenerKernelEvents::REQUEST => array(array('onKernelRequest', 17)),
);}
}
Then register the listener:
123456
services:acme_locale.locale_listener:
class: Acme\LocaleBundle\EventListener\LocaleListenerarguments: ["%kernel.default_locale%"]tags:
- { name: kernel.event_subscriber }
That's it! Now celebrate by changing the user's locale and seeing that it's sticky throughout the request.Remember, to get the user's locale, always use the Request::getLocale1 method:
1234567
// from a controller...use Symfony\Component\HttpFoundation\Request;
public function indexAction(Request $request){
$locale = $request->getLocale();}
1. http://api.symfony.com/2.5/Symfony/Component/HttpFoundation/Request.html#getLocale()
PDF brought to you bygenerated on October 23, 2014
Chapter 109: Making the Locale "Sticky" during a User's Session | 389

Listing 110-1
Listing 110-2
Chapter 110
Configuring the Directory where Session Filesare Saved
By default, the Symfony Standard Edition uses the global php.ini values for session.save_handlerand session.save_path to determine where to store session data. This is because of the followingconfiguration:
12345
# app/config/config.ymlframework:
session:# handler_id set to null will use default session handler from php.inihandler_id: ~
With this configuration, changing where your session metadata is stored is entirely up to your php.iniconfiguration.
However, if you have the following configuration, Symfony will store the session data in files in thecache directory %kernel.cache_dir%/sessions. This means that when you clear the cache, any currentsessions will also be deleted:
123
# app/config/config.ymlframework:
session: ~
Using a different directory to save session data is one method to ensure that your current sessions aren'tlost when you clear Symfony's cache.
Using a different session save handler is an excellent (yet more complex) method of sessionmanagement available within Symfony. See Configuring Sessions and Save Handlers for a discussionof session save handlers. There is also an entry in the cookbook about storing sessions in thedatabase.
To change the directory in which Symfony saves session data, you only need change the frameworkconfiguration. In this example, you will change the session directory to app/sessions:
PDF brought to you bygenerated on October 23, 2014
Chapter 110: Configuring the Directory where Session Files are Saved | 390

Listing 110-3 12345
# app/config/config.ymlframework:
session:handler_id: session.handler.native_filesave_path: "%kernel.root_dir%/sessions"
PDF brought to you bygenerated on October 23, 2014
Chapter 110: Configuring the Directory where Session Files are Saved | 391

Listing 111-1
Listing 111-2
Chapter 111
Bridge a legacy Application with SymfonySessions
New in version 2.3: The ability to integrate with a legacy PHP session was introduced in Symfony2.3.
If you're integrating the Symfony full-stack Framework into a legacy application that starts the sessionwith session_start(), you may still be able to use Symfony's session management by using the PHPBridge session.
If the application has sets it's own PHP save handler, you can specify null for the handler_id:
1234
framework:session:
storage_id: session.storage.php_bridgehandler_id: ~
Otherwise, if the problem is simply that you cannot avoid the application starting the session withsession_start(), you can still make use of a Symfony based session save handler by specifying the savehandler as in the example below:
1234
framework:session:
storage_id: session.storage.php_bridgehandler_id: session.handler.native_file
PDF brought to you bygenerated on October 23, 2014
Chapter 111: Bridge a legacy Application with Symfony Sessions | 392

If the legacy application requires its own session save-handler, do not override this. Instead sethandler_id: ~. Note that a save handler cannot be changed once the session has been started. Ifthe application starts the session before Symfony is initialized, the save-handler will have alreadybeen set. In this case, you will need handler_id: ~. Only override the save-handler if you are surethe legacy application can use the Symfony save-handler without side effects and that the sessionhas not been started before Symfony is initialized.
For more details, see Integrating with Legacy Sessions.
PDF brought to you bygenerated on October 23, 2014
Chapter 111: Bridge a legacy Application with Symfony Sessions | 393

Listing 112-1
Chapter 112
Limit Session Metadata Writes
New in version 2.4: The ability to limit session metadata writes was introduced in Symfony 2.4.
The default behavior of PHP session is to persist the session regardless of whether the session data haschanged or not. In Symfony, each time the session is accessed, metadata is recorded (session created/lastused) which can be used to determine session age and idle time.
If for performance reasons you wish to limit the frequency at which the session persists, this feature canadjust the granularity of the metadata updates and persist the session less often while still maintainingrelatively accurate metadata. If other session data is changed, the session will always persist.
You can tell Symfony not to update the metadata "session last updated" time until a certain amountof time has passed, by setting framework.session.metadata_update_threshold to a value in secondsgreater than zero:
123
framework:session:
metadata_update_threshold: 120
PHP default's behavior is to save the session whether it has been changed or not. When usingframework.session.metadata_update_threshold Symfony will wrap the session handler(configured at framework.session.handler_id) into the WriteCheckSessionHandler. This willprevent any session write if the session was not modified.
Be aware that if the session is not written at every request, it may be garbage collected sooner thanusual. This means that your users may be logged out sooner than expected.
PDF brought to you bygenerated on October 23, 2014
Chapter 112: Limit Session Metadata Writes | 394
Chapter 113
How Symfony2 Differs from Symfony1
The Symfony2 framework embodies a significant evolution when compared with the first version of theframework. Fortunately, with the MVC architecture at its core, the skills used to master a symfony1project continue to be very relevant when developing in Symfony2. Sure, app.yml is gone, but routing,controllers and templates all remain.
This chapter walks through the differences between symfony1 and Symfony2. As you'll see, many tasksare tackled in a slightly different way. You'll come to appreciate these minor differences as they promotestable, predictable, testable and decoupled code in your Symfony2 applications.
So, sit back and relax as you travel from "then" to "now".
Directory Structure
When looking at a Symfony2 project - for example, the Symfony2 Standard Edition1 - you'll notice a verydifferent directory structure than in symfony1. The differences, however, are somewhat superficial.
The app/ Directory
In symfony1, your project has one or more applications, and each lives inside the apps/ directory(e.g. apps/frontend). By default in Symfony2, you have just one application represented by the app/directory. Like in symfony1, the app/ directory contains configuration specific to that application. It alsocontains application-specific cache, log and template directories as well as a Kernel class (AppKernel),which is the base object that represents the application.
Unlike symfony1, almost no PHP code lives in the app/ directory. This directory is not meant to housemodules or library files as it did in symfony1. Instead, it's simply the home of configuration and otherresources (templates, translation files).
The src/ Directory
Put simply, your actual code goes here. In Symfony2, all actual application-code lives inside a bundle(roughly equivalent to a symfony1 plugin) and, by default, each bundle lives inside the src directory.
1. https://github.com/symfony/symfony-standard
PDF brought to you bygenerated on October 23, 2014
Chapter 113: How Symfony2 Differs from Symfony1 | 395

Listing 113-1
In that way, the src directory is a bit like the plugins directory in symfony1, but much more flexible.Additionally, while your bundles will live in the src/ directory, third-party bundles will live somewherein the vendor/ directory.
To get a better picture of the src/ directory, first think of the structure of a symfony1 application. First,part of your code likely lives inside one or more applications. Most commonly these include modules,but could also include any other PHP classes you put in your application. You may have also created aschema.yml file in the config directory of your project and built several model files. Finally, to help withsome common functionality, you're using several third-party plugins that live in the plugins/ directory.In other words, the code that drives your application lives in many different places.
In Symfony2, life is much simpler because all Symfony2 code must live in a bundle. In the pretendsymfony1 project, all the code could be moved into one or more plugins (which is a very good practice,in fact). Assuming that all modules, PHP classes, schema, routing configuration, etc. were moved into aplugin, the symfony1 plugins/ directory would be very similar to the Symfony2 src/ directory.
Put simply again, the src/ directory is where your code, assets, templates and most anything else specificto your project will live.
The vendor/ Directory
The vendor/ directory is basically equivalent to the lib/vendor/ directory in symfony1, which was theconventional directory for all vendor libraries and bundles. By default, you'll find the Symfony2 libraryfiles in this directory, along with several other dependent libraries such as Doctrine2, Twig and SwiftMailer. 3rd party Symfony2 bundles live somewhere in the vendor/.
The web/ Directory
Not much has changed in the web/ directory. The most noticeable difference is the absence of thecss/, js/ and images/ directories. This is intentional. Like with your PHP code, all assets should alsolive inside a bundle. With the help of a console command, the Resources/public/ directory of eachbundle is copied or symbolically-linked to the web/bundles/ directory. This allows you to keep assetsorganized inside your bundle, but still make them available to the public. To make sure that all bundlesare available, run the following command:
1 $ php app/console assets:install web
This command is the Symfony2 equivalent to the symfony1 plugin:publish-assets command.
AutoloadingOne of the advantages of modern frameworks is never needing to worry about requiring files. By makinguse of an autoloader, you can refer to any class in your project and trust that it's available. Autoloadinghas changed in Symfony2 to be more universal, faster, and independent of needing to clear your cache.
In symfony1, autoloading was done by searching the entire project for the presence of PHP class filesand caching this information in a giant array. That array told symfony1 exactly which file contained eachclass. In the production environment, this caused you to need to clear the cache when classes were addedor moved.
PDF brought to you bygenerated on October 23, 2014
Chapter 113: How Symfony2 Differs from Symfony1 | 396

Listing 113-2
Listing 113-3
In Symfony2, a tool named Composer2 handles this process. The idea behind the autoloader is simple:the name of your class (including the namespace) must match up with the path to the file containing thatclass. Take the FrameworkExtraBundle from the Symfony2 Standard Edition as an example:
123456789
namespace Sensio\Bundle\FrameworkExtraBundle;
use Symfony\Component\HttpKernel\Bundle\Bundle;// ...
class SensioFrameworkExtraBundle extends Bundle{
// ...}
The file itself lives at vendor/sensio/framework-extra-bundle/Sensio/Bundle/FrameworkExtraBundle/SensioFrameworkExtraBundle.php. As you can see, the second part of thepath follows the namespace of the class. The first part is equal to the package name of theSensioFrameworkExtraBundle.
The namespace, Sensio\Bundle\FrameworkExtraBundle, and package name, sensio/framework-extra-bundle, spells out the directory that the file should live in (vendor/sensio/framework-extra-bundle/Sensio/Bundle/FrameworkExtraBundle/). Composer can then look for the file at this specificplace and load it very fast.
If the file did not live at this exact location, you'd receive a Class"Sensio\Bundle\FrameworkExtraBundle\SensioFrameworkExtraBundle" does not exist. error. InSymfony2, a "class does not exist" error means that the namespace of the class and physical location donot match. Basically, Symfony2 is looking in one exact location for that class, but that location doesn'texist (or contains a different class). In order for a class to be autoloaded, you never need to clear yourcache in Symfony2.
As mentioned before, for the autoloader to work, it needs to know that the Sensio namespace lives inthe vendor/sensio/framework-extra-bundle directory and that, for example, the Doctrine namespacelives in the vendor/doctrine/orm/lib/ directory. This mapping is entirely controlled by Composer.Each third-party library you load through Composer has its settings defined and Composer takes care ofeverything for you.
For this to work, all third-party libraries used by your project must be defined in the composer.json file.
If you look at the HelloController from the Symfony2 Standard Edition you can see that it livesin the Acme\DemoBundle\Controller namespace. Yet, the AcmeDemoBundle is not defined in yourcomposer.json file. Nonetheless are the files autoloaded. This is because you can tell composer toautoload files from specific directories without defining a dependency:
"autoload": {"psr-0": { "": "src/" }
}
This means that if a class is not found in the vendor directory, Composer will search in the srcdirectory before throwing a "class does not exist" exception. Read more about configuring the Composerautoloader in the Composer documentation3.
Using the ConsoleIn symfony1, the console is in the root directory of your project and is called symfony:
2. http://getcomposer.org
3. http://getcomposer.org/doc/04-schema.md#autoload
PDF brought to you bygenerated on October 23, 2014
Chapter 113: How Symfony2 Differs from Symfony1 | 397

Listing 113-4
Listing 113-5
Listing 113-6
Listing 113-7
1 $ php symfony
In Symfony2, the console is now in the app sub-directory and is called console:
1 $ php app/console
ApplicationsIn a symfony1 project, it is common to have several applications: one for the frontend and one for thebackend for instance.
In a Symfony2 project, you only need to create one application (a blog application, an intranetapplication, ...). Most of the time, if you want to create a second application, you might instead createanother project and share some bundles between them.
And if you need to separate the frontend and the backend features of some bundles, you can createsub-namespaces for controllers, sub-directories for templates, different semantic configurations, separaterouting configurations, and so on.
Of course, there's nothing wrong with having multiple applications in your project, that's entirely up toyou. A second application would mean a new directory, e.g. my_app/, with the same basic setup as theapp/ directory.
Read the definition of a Project, an Application, and a Bundle in the glossary.
Bundles and PluginsIn a symfony1 project, a plugin could contain configuration, modules, PHP libraries, assets and anythingelse related to your project. In Symfony2, the idea of a plugin is replaced by the "bundle". A bundle iseven more powerful than a plugin because the core Symfony2 framework is brought in via a series ofbundles. In Symfony2, bundles are first-class citizens that are so flexible that even core code itself is abundle.
In symfony1, a plugin must be enabled inside the ProjectConfiguration class:
123456
// config/ProjectConfiguration.class.phppublic function setup(){
// some plugins here$this->enableAllPluginsExcept(array(...));
}
In Symfony2, the bundles are activated inside the application kernel:
12345
// app/AppKernel.phppublic function registerBundles(){
$bundles = array(new Symfony\Bundle\FrameworkBundle\FrameworkBundle(),
PDF brought to you bygenerated on October 23, 2014
Chapter 113: How Symfony2 Differs from Symfony1 | 398

Listing 113-8
Listing 113-9
Listing 113-10
Listing 113-11
Listing 113-12
6789
101112
new Symfony\Bundle\TwigBundle\TwigBundle(),...,new Acme\DemoBundle\AcmeDemoBundle(),
);
return $bundles;}
Routing (routing.yml) and Configuration (config.yml)
In symfony1, the routing.yml and app.yml configuration files were automatically loaded inside anyplugin. In Symfony2, routing and application configuration inside a bundle must be included manually.For example, to include a routing resource from a bundle called AcmeDemoBundle, you can do thefollowing:
123
# app/config/routing.yml_hello:
resource: "@AcmeDemoBundle/Resources/config/routing.yml"
This will load the routes found in the Resources/config/routing.yml file of the AcmeDemoBundle.The special @AcmeDemoBundle is a shortcut syntax that, internally, resolves to the full path to that bundle.
You can use this same strategy to bring in configuration from a bundle:
123
# app/config/config.ymlimports:
- { resource: "@AcmeDemoBundle/Resources/config/config.yml" }
In Symfony2, configuration is a bit like app.yml in symfony1, except much more systematic. Withapp.yml, you could simply create any keys you wanted. By default, these entries were meaningless anddepended entirely on how you used them in your application:
1234
# some app.yml file from symfony1all:email:from_address: [email protected]
In Symfony2, you can also create arbitrary entries under the parameters key of your configuration:
12
parameters:email.from_address: [email protected]
You can now access this from a controller, for example:
1234
public function helloAction($name){
$fromAddress = $this->container->getParameter('email.from_address');}
In reality, the Symfony2 configuration is much more powerful and is used primarily to configure objectsthat you can use. For more information, see the chapter titled "Service Container".
PDF brought to you bygenerated on October 23, 2014
Chapter 113: How Symfony2 Differs from Symfony1 | 399

Listing 114-1
Listing 114-2
Listing 114-3
Listing 114-4
Chapter 114
How to Inject Variables into all Templates (i.e.global Variables)
Sometimes you want a variable to be accessible to all the templates you use. This is possible inside yourapp/config/config.yml file:
12345
# app/config/config.ymltwig:
# ...globals:
ga_tracking: UA-xxxxx-x
Now, the variable ga_tracking is available in all Twig templates:
1 <p>The google tracking code is: {{ ga_tracking }}</p>
It's that easy!
Using Service Container ParametersYou can also take advantage of the built-in Service Parameters system, which lets you isolate or reuse thevalue:
123
# app/config/parameters.ymlparameters:
ga_tracking: UA-xxxxx-x
1234
# app/config/config.ymltwig:
globals:ga_tracking: "%ga_tracking%"
PDF brought to you bygenerated on October 23, 2014
Chapter 114: How to Inject Variables into all Templates (i.e. global Variables) | 400

Listing 114-5
The same variable is available exactly as before.
Referencing ServicesInstead of using static values, you can also set the value to a service. Whenever the global variable isaccessed in the template, the service will be requested from the service container and you get access tothat object.
The service is not loaded lazily. In other words, as soon as Twig is loaded, your service isinstantiated, even if you never use that global variable.
To define a service as a global Twig variable, prefix the string with @. This should feel familiar, as it's thesame syntax you use in service configuration.
12345
# app/config/config.ymltwig:
# ...globals:
user_management: "@acme_user.user_management"
Using a Twig ExtensionIf the global variable you want to set is more complicated - say an object - then you won't be able to usethe above method. Instead, you'll need to create a Twig Extension and return the global variable as one ofthe entries in the getGlobals method.
PDF brought to you bygenerated on October 23, 2014
Chapter 114: How to Inject Variables into all Templates (i.e. global Variables) | 401

Listing 115-1
Listing 115-2
Listing 115-3
Chapter 115
How to Use and Register Namespaced TwigPaths
Usually, when you refer to a template, you'll use the MyBundle:Subdir:filename.html.twig format (seeTemplate Naming and Locations).
Twig also natively offers a feature called "namespaced paths", and support is built-in automatically for allof your bundles.
Take the following paths as an example:
12
{% extends "AcmeDemoBundle::layout.html.twig" %}{% include "AcmeDemoBundle:Foo:bar.html.twig" %}
With namespaced paths, the following works as well:
12
{% extends "@AcmeDemo/layout.html.twig" %}{% include "@AcmeDemo/Foo/bar.html.twig" %}
Both paths are valid and functional by default in Symfony.
As an added bonus, the namespaced syntax is faster.
Registering your own NamespacesYou can also register your own custom namespaces. Suppose that you're using some third-party librarythat includes Twig templates that live in vendor/acme/foo-bar/templates. First, register a namespacefor this directory:
PDF brought to you bygenerated on October 23, 2014
Chapter 115: How to Use and Register Namespaced Twig Paths | 402

Listing 115-4
Listing 115-5
Listing 115-6
12345
# app/config/config.ymltwig:
# ...paths:
"%kernel.root_dir%/../vendor/acme/foo-bar/templates": foo_bar
The registered namespace is called foo_bar, which refers to the vendor/acme/foo-bar/templatesdirectory. Assuming there's a file called sidebar.twig in that directory, you can use it easily:
1 {% include '@foo_bar/sidebar.twig' %}
Multiple Paths per Namespace
You can also assign several paths to the same template namespace. The order in which paths areconfigured is very important, because Twig will always load the first template that exists, starting fromthe first configured path. This feature can be used as a fallback mechanism to load generic templateswhen the specific template doesn't exist.
1234567
# app/config/config.ymltwig:
# ...paths:
"%kernel.root_dir%/../vendor/acme/themes/theme1": theme"%kernel.root_dir%/../vendor/acme/themes/theme2": theme"%kernel.root_dir%/../vendor/acme/themes/common": theme
Now, you can use the same @theme namespace to refer to any template located in the previous threedirectories:
1 {% include '@theme/header.twig' %}
PDF brought to you bygenerated on October 23, 2014
Chapter 115: How to Use and Register Namespaced Twig Paths | 403

Listing 116-1
Listing 116-2
Listing 116-3
Chapter 116
How to Use PHP instead of Twig for Templates
Symfony defaults to Twig for its template engine, but you can still use plain PHP code if you want. Bothtemplating engines are supported equally in Symfony. Symfony adds some nice features on top of PHP tomake writing templates with PHP more powerful.
Rendering PHP TemplatesIf you want to use the PHP templating engine, first, make sure to enable it in your applicationconfiguration file:
12345
# app/config/config.ymlframework:
# ...templating:
engines: ['twig', 'php']
You can now render a PHP template instead of a Twig one simply by using the .php extension in thetemplate name instead of .twig. The controller below renders the index.html.php template:
123456789
10
// src/Acme/HelloBundle/Controller/HelloController.php
// ...public function indexAction($name){
return $this->render('AcmeHelloBundle:Hello:index.html.php',array('name' => $name)
);}
You can also use the @Template shortcut to render the defaultAcmeHelloBundle:Hello:index.html.php template:
PDF brought to you bygenerated on October 23, 2014
Chapter 116: How to Use PHP instead of Twig for Templates | 404

Listing 116-4
Listing 116-5
Listing 116-6
123456789
10111213
// src/Acme/HelloBundle/Controller/HelloController.php
use Sensio\Bundle\FrameworkExtraBundle\Configuration\Template;
// ...
/*** @Template(engine="php")*/public function indexAction($name){
return array('name' => $name);}
Enabling the php and twig template engines simultaneously is allowed, but it will produce anundesirable side effect in your application: the @ notation for Twig namespaces will no longer besupported for the render() method:
123456789
10
public function indexAction(){
// ...
// namespaced templates will no longer work in controllers$this->render('@Acme/Default/index.html.twig');
// you must use the traditional template notation$this->render('AcmeBundle:Default:index.html.twig');
}
12345
{# inside a Twig template, namespaced templates work as expected #}{{ include('@Acme/Default/index.html.twig') }}
{# traditional template notation will also work #}{{ include('AcmeBundle:Default:index.html.twig') }}
Decorating TemplatesMore often than not, templates in a project share common elements, like the well-known header andfooter. In Symfony, this problem is thought about differently: a template can be decorated by anotherone.
The index.html.php template is decorated by layout.html.php, thanks to the extend() call:
1234
<!-- src/Acme/HelloBundle/Resources/views/Hello/index.html.php --><?php $view->extend('AcmeHelloBundle::layout.html.php') ?>
Hello <?php echo $name ?>!
The AcmeHelloBundle::layout.html.php notation sounds familiar, doesn't it? It is the same notationused to reference a template. The :: part simply means that the controller element is empty, so thecorresponding file is directly stored under views/.
Now, have a look at the layout.html.php file:
PDF brought to you bygenerated on October 23, 2014
Chapter 116: How to Use PHP instead of Twig for Templates | 405

Listing 116-7
Listing 116-8
Listing 116-9
Listing 116-10
123456
<!-- src/Acme/HelloBundle/Resources/views/layout.html.php --><?php $view->extend('::base.html.php') ?>
<h1>Hello Application</h1>
<?php $view['slots']->output('_content') ?>
The layout is itself decorated by another one (::base.html.php). Symfony supports multiple decorationlevels: a layout can itself be decorated by another one. When the bundle part of the template name isempty, views are looked for in the app/Resources/views/ directory. This directory stores global viewsfor your entire project:
123456789
1011
<!-- app/Resources/views/base.html.php --><!DOCTYPE html><html>
<head><meta http-equiv="Content-Type" content="text/html; charset=utf-8" /><title><?php $view['slots']->output('title', 'Hello Application') ?></title>
</head><body>
<?php $view['slots']->output('_content') ?></body>
</html>
For both layouts, the $view['slots']->output('_content') expression is replaced by the contentof the child template, index.html.php and layout.html.php respectively (more on slots in the nextsection).
As you can see, Symfony provides methods on a mysterious $view object. In a template, the $viewvariable is always available and refers to a special object that provides a bunch of methods that makes thetemplate engine tick.
Working with SlotsA slot is a snippet of code, defined in a template, and reusable in any layout decorating the template. Inthe index.html.php template, define a title slot:
123456
<!-- src/Acme/HelloBundle/Resources/views/Hello/index.html.php --><?php $view->extend('AcmeHelloBundle::layout.html.php') ?>
<?php $view['slots']->set('title', 'Hello World Application') ?>
Hello <?php echo $name ?>!
The base layout already has the code to output the title in the header:
12345
<!-- app/Resources/views/base.html.php --><head>
<meta http-equiv="Content-Type" content="text/html; charset=utf-8" /><title><?php $view['slots']->output('title', 'Hello Application') ?></title>
</head>
The output() method inserts the content of a slot and optionally takes a default value if the slot is notdefined. And _content is just a special slot that contains the rendered child template.
PDF brought to you bygenerated on October 23, 2014
Chapter 116: How to Use PHP instead of Twig for Templates | 406

Listing 116-11
Listing 116-12
Listing 116-13
Listing 116-14
Listing 116-15
For large slots, there is also an extended syntax:
123
<?php $view['slots']->start('title') ?>Some large amount of HTML
<?php $view['slots']->stop() ?>
Including other TemplatesThe best way to share a snippet of template code is to define a template that can then be included intoother templates.
Create a hello.html.php template:
12
<!-- src/Acme/HelloBundle/Resources/views/Hello/hello.html.php -->Hello <?php echo $name ?>!
And change the index.html.php template to include it:
1234
<!-- src/Acme/HelloBundle/Resources/views/Hello/index.html.php --><?php $view->extend('AcmeHelloBundle::layout.html.php') ?>
<?php echo $view->render('AcmeHelloBundle:Hello:hello.html.php', array('name' => $name)) ?>
The render() method evaluates and returns the content of another template (this is the exact samemethod as the one used in the controller).
Embedding other ControllersAnd what if you want to embed the result of another controller in a template? That's very useful whenworking with Ajax, or when the embedded template needs some variable not available in the maintemplate.
If you create a fancy action, and want to include it into the index.html.php template, simply use thefollowing code:
1234567
<!-- src/Acme/HelloBundle/Resources/views/Hello/index.html.php --><?php echo $view['actions']->render(
new\Symfony\Component\HttpKernel\Controller\ControllerReference('AcmeHelloBundle:Hello:fancy',array(
'name' => $name,'color' => 'green',
))) ?>
Here, the AcmeHelloBundle:Hello:fancy string refers to the fancy action of the Hello controller:
1234
// src/Acme/HelloBundle/Controller/HelloController.php
class HelloController extends Controller{
PDF brought to you bygenerated on October 23, 2014
Chapter 116: How to Use PHP instead of Twig for Templates | 407

Listing 116-16
Listing 116-17
Listing 116-18
56789
1011121314151617
public function fancyAction($name, $color){
// create some object, based on the $color variable$object = ...;
return $this->render('AcmeHelloBundle:Hello:fancy.html.php', array('name' => $name,'object' => $object
));}
// ...}
But where is the $view['actions'] array element defined? Like $view['slots'], it's called a templatehelper, and the next section tells you more about those.
Using Template HelpersThe Symfony templating system can be easily extended via helpers. Helpers are PHP objects that providefeatures useful in a template context. actions and slots are two of the built-in Symfony helpers.
Creating Links between Pages
Speaking of web applications, creating links between pages is a must. Instead of hardcoding URLs intemplates, the router helper knows how to generate URLs based on the routing configuration. That way,all your URLs can be easily updated by changing the configuration:
123
<a href="<?php echo $view['router']->generate('hello', array('name' => 'Thomas')) ?>">Greet Thomas!
</a>
The generate() method takes the route name and an array of parameters as arguments. The route nameis the main key under which routes are referenced and the parameters are the values of the placeholdersdefined in the route pattern:
1234
# src/Acme/HelloBundle/Resources/config/routing.ymlhello: # The route name
path: /hello/{name}defaults: { _controller: AcmeHelloBundle:Hello:index }
Using Assets: Images, JavaScripts and Stylesheets
What would the Internet be without images, JavaScripts, and stylesheets? Symfony provides the assetstag to deal with them easily:
123
<link href="<?php echo $view['assets']->getUrl('css/blog.css') ?>" rel="stylesheet"type="text/css" />
<img src="<?php echo $view['assets']->getUrl('images/logo.png') ?>" />
PDF brought to you bygenerated on October 23, 2014
Chapter 116: How to Use PHP instead of Twig for Templates | 408

Listing 116-19
Listing 116-20
Listing 116-21
The assets helper's main purpose is to make your application more portable. Thanks to this helper,you can move the application root directory anywhere under your web root directory without changinganything in your template's code.
Profiling Templates
By using the stopwatch helper, you are able to time parts of your template and display it on the timelineof the WebProfilerBundle:
123
<?php $view['stopwatch']->start('foo') ?>... things that get timed<?php $view['stopwatch']->stop('foo') ?>
If you use the same name more than once in your template, the times are grouped on the same linein the timeline.
Output EscapingWhen using PHP templates, escape variables whenever they are displayed to the user:
1 <?php echo $view->escape($var) ?>
By default, the escape() method assumes that the variable is outputted within an HTML context. Thesecond argument lets you change the context. For instance, to output something in a JavaScript script,use the js context:
1 <?php echo $view->escape($var, 'js') ?>
PDF brought to you bygenerated on October 23, 2014
Chapter 116: How to Use PHP instead of Twig for Templates | 409

Listing 117-1
Chapter 117
How to Write a custom Twig Extension
The main motivation for writing an extension is to move often used code into a reusable class like addingsupport for internationalization. An extension can define tags, filters, tests, operators, global variables,functions, and node visitors.
Creating an extension also makes for a better separation of code that is executed at compilation time andcode needed at runtime. As such, it makes your code faster.
Before writing your own extensions, have a look at the Twig official extension repository1.
Create the Extension Class
This cookbook describes how to write a custom Twig extension as of Twig 1.12. If you are usingan older version, please read Twig extensions documentation legacy2.
To get your custom functionality you must first create a Twig Extension class. As an example you'll createa price filter to format a given number into price:
12345678
// src/Acme/DemoBundle/Twig/AcmeExtension.phpnamespace Acme\DemoBundle\Twig;
class AcmeExtension extends \Twig_Extension{
public function getFilters(){
return array(
1. https://github.com/fabpot/Twig-extensions
2. http://twig.sensiolabs.org/doc/advanced_legacy.html#creating-an-extension
PDF brought to you bygenerated on October 23, 2014
Chapter 117: How to Write a custom Twig Extension | 410

Listing 117-2
Listing 117-3
Listing 117-4
910111213141516171819202122232425
new \Twig_SimpleFilter('price', array($this, 'priceFilter')),);
}
public function priceFilter($number, $decimals = 0, $decPoint = '.', $thousandsSep =',')
{$price = number_format($number, $decimals, $decPoint, $thousandsSep);$price = '$'.$price;
return $price;}
public function getName(){
return 'acme_extension';}
}
Along with custom filters, you can also add custom functions and register global variables.
Register an Extension as a ServiceNow you must let the Service Container know about your newly created Twig Extension:
123456
# src/Acme/DemoBundle/Resources/config/services.ymlservices:
acme.twig.acme_extension:class: Acme\DemoBundle\Twig\AcmeExtensiontags:
- { name: twig.extension }
Keep in mind that Twig Extensions are not lazily loaded. This means that there's a higher chancethat you'll get a CircularReferenceException or a ScopeWideningInjectionException if anyservices (or your Twig Extension in this case) are dependent on the request service. For moreinformation take a look at How to Work with Scopes.
Using the custom ExtensionUsing your newly created Twig Extension is no different than any other:
12
{# outputs $5,500.00 #}{{ '5500'|price }}
Passing other arguments to your filter:
PDF brought to you bygenerated on October 23, 2014
Chapter 117: How to Write a custom Twig Extension | 411

12
{# outputs $5500,2516 #}{{ '5500.25155'|price(4, ',', '') }}
Learning further
For a more in-depth look into Twig Extensions, please take a look at the Twig extensions documentation3.
3. http://twig.sensiolabs.org/doc/advanced.html#creating-an-extension
PDF brought to you bygenerated on October 23, 2014
Chapter 117: How to Write a custom Twig Extension | 412

Listing 118-1
Listing 118-2
Chapter 118
How to Render a Template without a customController
Usually, when you need to create a page, you need to create a controller and render a template fromwithin that controller. But if you're rendering a simple template that doesn't need any data passedinto it, you can avoid creating the controller entirely, by using the built-inFrameworkBundle:Template:template controller.
For example, suppose you want to render a AcmeBundle:Static:privacy.html.twig template, whichdoesn't require that any variables are passed to it. You can do this without creating a controller:
12345
acme_privacy:path: /privacydefaults:
_controller: FrameworkBundle:Template:templatetemplate: 'AcmeBundle:Static:privacy.html.twig'
The FrameworkBundle:Template:template controller will simply render whatever template you'vepassed as the template default value.
You can of course also use this trick when rendering embedded controllers from within a template. Butsince the purpose of rendering a controller from within a template is typically to prepare some data ina custom controller, this is probably only useful if you'd like to cache this page partial (see Caching thestatic Template).
1 {{ render(url('acme_privacy')) }}
Caching the static TemplateSince templates that are rendered in this way are typically static, it might make sense to cache them.Fortunately, this is easy! By configuring a few other variables in your route, you can control exactly howyour page is cached:
PDF brought to you bygenerated on October 23, 2014
Chapter 118: How to Render a Template without a custom Controller | 413

Listing 118-3 1234567
acme_privacy:path: /privacydefaults:
_controller: FrameworkBundle:Template:templatetemplate: 'AcmeBundle:Static:privacy.html.twig'maxAge: 86400sharedAge: 86400
The maxAge and sharedAge values are used to modify the Response object created in the controller. Formore information on caching, see HTTP Cache.
There is also a private variable (not shown here). By default, the Response will be made public, as longas maxAge or sharedAge are passed. If set to true, the Response will be marked as private.
PDF brought to you bygenerated on October 23, 2014
Chapter 118: How to Render a Template without a custom Controller | 414

Listing 119-1
Listing 119-2
Listing 119-3
Chapter 119
How to Simulate HTTP Authentication in aFunctional Test
If your application needs HTTP authentication, pass the username and password as server variables tocreateClient():
1234
$client = static::createClient(array(), array('PHP_AUTH_USER' => 'username','PHP_AUTH_PW' => 'pa$$word',
));
You can also override it on a per request basis:
1234
$client->request('DELETE', '/post/12', array(), array(), array('PHP_AUTH_USER' => 'username','PHP_AUTH_PW' => 'pa$$word',
));
When your application is using a form_login, you can simplify your tests by allowing your testconfiguration to make use of HTTP authentication. This way you can use the above to authenticate intests, but still have your users log in via the normal form_login. The trick is to include the http_basickey in your firewall, along with the form_login key:
12345
# app/config/config_test.ymlsecurity:
firewalls:your_firewall_name:
http_basic: ~
PDF brought to you bygenerated on October 23, 2014
Chapter 119: How to Simulate HTTP Authentication in a Functional Test | 415
Listing 120-1
Chapter 120
How to Simulate Authentication with a Tokenin a Functional Test
Authenticating requests in functional tests might slow down the suite. It could become an issue especiallywhen form_login is used, since it requires additional requests to fill in and submit the form.
One of the solutions is to configure your firewall to use http_basic in the test environment as explainedin How to Simulate HTTP Authentication in a Functional Test. Another way would be to create a tokenyourself and store it in a session. While doing this, you have to make sure that an appropriate cookie issent with a request. The following example demonstrates this technique:
123456789
10111213141516171819202122232425
// src/Acme/DemoBundle/Tests/Controller/DemoControllerTest.phpnamespace Acme\DemoBundle\Tests\Controller;
use Symfony\Bundle\FrameworkBundle\Test\WebTestCase;use Symfony\Component\BrowserKit\Cookie;use Symfony\Component\Security\Core\Authentication\Token\UsernamePasswordToken;
class DemoControllerTest extends WebTestCase{
private $client = null;
public function setUp(){
$this->client = static::createClient();}
public function testSecuredHello(){
$this->logIn();
$crawler = $this->client->request('GET', '/demo/secured/hello/Fabien');
$this->assertTrue($this->client->getResponse()->isSuccessful());$this->assertGreaterThan(0, $crawler->filter('html:contains("Hello
Fabien")')->count());
PDF brought to you bygenerated on October 23, 2014
Chapter 120: How to Simulate Authentication with a Token in a Functional Test | 416

2627282930313233343536373839
}
private function logIn(){
$session = $this->client->getContainer()->get('session');
$firewall = 'secured_area';$token = new UsernamePasswordToken('admin', null, $firewall, array('ROLE_ADMIN'));$session->set('_security_'.$firewall, serialize($token));$session->save();
$cookie = new Cookie($session->getName(), $session->getId());$this->client->getCookieJar()->set($cookie);
}}
The technique described in How to Simulate HTTP Authentication in a Functional Test is cleanerand therefore the preferred way.
PDF brought to you bygenerated on October 23, 2014
Chapter 120: How to Simulate Authentication with a Token in a Functional Test | 417

Listing 121-1
Listing 121-2
Chapter 121
How to Test the Interaction of several Clients
If you need to simulate an interaction between different clients (think of a chat for instance), createseveral clients:
123456789
10
// ...
$harry = static::createClient();$sally = static::createClient();
$harry->request('POST', '/say/sally/Hello');$sally->request('GET', '/messages');
$this->assertEquals(Response::HTTP_CREATED, $harry->getResponse()->getStatusCode());$this->assertRegExp('/Hello/', $sally->getResponse()->getContent());
New in version 2.4: Support for HTTP status code constants was introduced in Symfony 2.4.
This works except when your code maintains a global state or if it depends on a third-party library thathas some kind of global state. In such a case, you can insulate your clients:
123456789
1011
// ...
$harry = static::createClient();$sally = static::createClient();
$harry->insulate();$sally->insulate();
$harry->request('POST', '/say/sally/Hello');$sally->request('GET', '/messages');
PDF brought to you bygenerated on October 23, 2014
Chapter 121: How to Test the Interaction of several Clients | 418

1213
$this->assertEquals(Response::HTTP_CREATED, $harry->getResponse()->getStatusCode());$this->assertRegExp('/Hello/', $sally->getResponse()->getContent());
Insulated clients transparently execute their requests in a dedicated and clean PHP process, thus avoidingany side-effects.
As an insulated client is slower, you can keep one client in the main process, and insulate the otherones.
PDF brought to you bygenerated on October 23, 2014
Chapter 121: How to Test the Interaction of several Clients | 419

Listing 122-1
Chapter 122
How to Use the Profiler in a Functional Test
It's highly recommended that a functional test only tests the Response. But if you write functional teststhat monitor your production servers, you might want to write tests on the profiling data as it gives youa great way to check various things and enforce some metrics.
The Symfony Profiler gathers a lot of data for each request. Use this data to check the number of databasecalls, the time spent in the framework, etc. But before writing assertions, enable the profiler and checkthat the profiler is indeed available (it is enabled by default in the test environment):
123456789
101112131415161718192021222324252627
class HelloControllerTest extends WebTestCase{
public function testIndex(){
$client = static::createClient();
// Enable the profiler for the next request (it does nothing if the profiler isnot available)
$client->enableProfiler();
$crawler = $client->request('GET', '/hello/Fabien');
// ... write some assertions about the Response
// Check that the profiler is enabledif ($profile = $client->getProfile()) {
// check the number of requests$this->assertLessThan(
10,$profile->getCollector('db')->getQueryCount()
);
// check the time spent in the framework$this->assertLessThan(
500,$profile->getCollector('time')->getDuration()
);}
PDF brought to you bygenerated on October 23, 2014
Chapter 122: How to Use the Profiler in a Functional Test | 420

Listing 122-2
Listing 122-3
2829
}}
If a test fails because of profiling data (too many DB queries for instance), you might want to use the WebProfiler to analyze the request after the tests finish. It's easy to achieve if you embed the token in the errormessage:
12345678
$this->assertLessThan(30,$profile->getCollector('db')->getQueryCount(),sprintf(
'Checks that query count is less than 30 (token %s)',$profile->getToken()
));
The profiler store can be different depending on the environment (especially if you use the SQLitestore, which is the default configured one).
The profiler information is available even if you insulate the client or if you use an HTTP layer foryour tests.
Read the API for built-in data collectors to learn more about their interfaces.
Speeding up Tests by not Collecting Profiler DataTo avoid collecting data in each test you can set the collect parameter to false:
1234567
# app/config/config_test.yml
# ...framework:
profiler:enabled: truecollect: false
In this way only tests that call $client->enableProfiler() will collect data.
PDF brought to you bygenerated on October 23, 2014
Chapter 122: How to Use the Profiler in a Functional Test | 421

Listing 123-1
Chapter 123
How to Test Code that Interacts with theDatabase
If your code interacts with the database, e.g. reads data from or stores data into it, you need to adjustyour tests to take this into account. There are many ways how to deal with this. In a unit test, you cancreate a mock for a Repository and use it to return expected objects. In a functional test, you may needto prepare a test database with predefined values to ensure that your test always has the same data towork with.
If you want to test your queries directly, see How to Test Doctrine Repositories.
Mocking the Repository in a Unit TestIf you want to test code which depends on a Doctrine repository in isolation, you need to mock theRepository. Normally you inject the EntityManager into your class and use it to get the repository. Thismakes things a little more difficult as you need to mock both the EntityManager and your repositoryclass.
It is possible (and a good idea) to inject your repository directly by registering your repository as afactory service. This is a little bit more work to setup, but makes testing easier as you only need tomock the repository.
Suppose the class you want to test looks like this:
1234
namespace Acme\DemoBundle\Salary;
use Doctrine\Common\Persistence\ObjectManager;
PDF brought to you bygenerated on October 23, 2014
Chapter 123: How to Test Code that Interacts with the Database | 422

Listing 123-2
56789
101112131415161718192021
class SalaryCalculator{
private $entityManager;
public function __construct(ObjectManager $entityManager){
$this->entityManager = $entityManager;}
public function calculateTotalSalary($id){
$employeeRepository =$this->entityManager->getRepository('AcmeDemoBundle::Employee');
$employee = $employeeRepository->find($id);
return $employee->getSalary() + $employee->getBonus();}
}
Since the ObjectManager gets injected into the class through the constructor, it's easy to pass a mockobject within a test:
123456789
1011121314151617181920212223242526272829303132333435
use Acme\DemoBundle\Salary\SalaryCalculator;
class SalaryCalculatorTest extends \PHPUnit_Framework_TestCase{
public function testCalculateTotalSalary(){
// First, mock the object to be used in the test$employee = $this->getMock('\Acme\DemoBundle\Entity\Employee');$employee->expects($this->once())
->method('getSalary')->will($this->returnValue(1000));
$employee->expects($this->once())->method('getBonus')->will($this->returnValue(1100));
// Now, mock the repository so it returns the mock of the employee$employeeRepository = $this->getMockBuilder('\Doctrine\ORM\EntityRepository')
->disableOriginalConstructor()->getMock();
$employeeRepository->expects($this->once())->method('find')->will($this->returnValue($employee));
// Last, mock the EntityManager to return the mock of the repository$entityManager =
$this->getMockBuilder('\Doctrine\Common\Persistence\ObjectManager')->disableOriginalConstructor()->getMock();
$entityManager->expects($this->once())->method('getRepository')->will($this->returnValue($employeeRepository));
$salaryCalculator = new SalaryCalculator($entityManager);$this->assertEquals(2100, $salaryCalculator->calculateTotalSalary(1));
}}
PDF brought to you bygenerated on October 23, 2014
Chapter 123: How to Test Code that Interacts with the Database | 423

Listing 123-3
In this example, you are building the mocks from the inside out, first creating the employee which getsreturned by the Repository, which itself gets returned by the EntityManager. This way, no real class isinvolved in testing.
Changing Database Settings for Functional TestsIf you have functional tests, you want them to interact with a real database. Most of the time you wantto use a dedicated database connection to make sure not to overwrite data you entered when developingthe application and also to be able to clear the database before every test.
To do this, you can specify a database configuration which overwrites the default configuration:
12345678
# app/config/config_test.ymldoctrine:
# ...dbal:
host: localhostdbname: testdbuser: testdbpassword: testdb
Make sure that your database runs on localhost and has the defined database and user credentials set up.
PDF brought to you bygenerated on October 23, 2014
Chapter 123: How to Test Code that Interacts with the Database | 424

Listing 124-1
Chapter 124
How to Test Doctrine Repositories
Unit testing Doctrine repositories in a Symfony project is not recommended. When you're dealing witha repository, you're really dealing with something that's meant to be tested against a real databaseconnection.
Fortunately, you can easily test your queries against a real database, as described below.
Functional TestingIf you need to actually execute a query, you will need to boot the kernel to get a valid connection. In thiscase, you'll extend the KernelTestCase, which makes all of this quite easy:
123456789
1011121314151617181920212223
// src/Acme/StoreBundle/Tests/Entity/ProductRepositoryFunctionalTest.phpnamespace Acme\StoreBundle\Tests\Entity;
use Symfony\Bundle\FrameworkBundle\Test\KernelTestCase;
class ProductRepositoryFunctionalTest extends KernelTestCase{
/*** @var \Doctrine\ORM\EntityManager*/private $em;
/*** {@inheritDoc}*/public function setUp(){
self::bootKernel();$this->em = static::$kernel->getContainer()
->get('doctrine')->getManager()
;}
PDF brought to you bygenerated on October 23, 2014
Chapter 124: How to Test Doctrine Repositories | 425

2425262728293031323334353637383940414243
public function testSearchByCategoryName(){
$products = $this->em->getRepository('AcmeStoreBundle:Product')->searchByCategoryName('foo')
;
$this->assertCount(1, $products);}
/*** {@inheritDoc}*/protected function tearDown(){
parent::tearDown();$this->em->close();
}}
PDF brought to you bygenerated on October 23, 2014
Chapter 124: How to Test Doctrine Repositories | 426

Listing 125-1
Listing 125-2
Listing 125-3
Chapter 125
How to Customize the Bootstrap Processbefore Running Tests
Sometimes when running tests, you need to do additional bootstrap work before running those tests. Forexample, if you're running a functional test and have introduced a new translation resource, then you willneed to clear your cache before running those tests. This cookbook covers how to do that.
First, add the following file:
123456789
10
// app/tests.bootstrap.phpif (isset($_ENV['BOOTSTRAP_CLEAR_CACHE_ENV'])) {
passthru(sprintf('php "%s/console" cache:clear --env=%s --no-warmup',__DIR__,$_ENV['BOOTSTRAP_CLEAR_CACHE_ENV']
));}
require __DIR__.'/bootstrap.php.cache';
Replace the test bootstrap file bootstrap.php.cache in app/phpunit.xml.dist withtests.bootstrap.php:
<!-- app/phpunit.xml.dist -->
<!-- ... --><phpunit
...bootstrap = "tests.bootstrap.php"
>
Now, you can define in your phpunit.xml.dist file which environment you want the cache to becleared:
PDF brought to you bygenerated on October 23, 2014
Chapter 125: How to Customize the Bootstrap Process before Running Tests | 427

1234
<!-- app/phpunit.xml.dist --><php>
<env name="BOOTSTRAP_CLEAR_CACHE_ENV" value="test"/></php>
This now becomes an environment variable (i.e. $_ENV) that's available in the custom bootstrap file(tests.bootstrap.php).
PDF brought to you bygenerated on October 23, 2014
Chapter 125: How to Customize the Bootstrap Process before Running Tests | 428

Listing 126-1
Chapter 126
How to Create a custom Validation Constraint
You can create a custom constraint by extending the base constraint class, Constraint1. As an exampleyou're going to create a simple validator that checks if a string contains only alphanumeric characters.
Creating the Constraint ClassFirst you need to create a Constraint class and extend Constraint2:
123456789
101112
// src/Acme/DemoBundle/Validator/Constraints/ContainsAlphanumeric.phpnamespace Acme\DemoBundle\Validator\Constraints;
use Symfony\Component\Validator\Constraint;
/*** @Annotation*/class ContainsAlphanumeric extends Constraint{
public $message = 'The string "%string%" contains an illegal character: it can onlycontain letters or numbers.';}
The @Annotation annotation is necessary for this new constraint in order to make it available foruse in classes via annotations. Options for your constraint are represented as public properties onthe constraint class.
1. http://api.symfony.com/2.5/Symfony/Component/Validator/Constraint.html
2. http://api.symfony.com/2.5/Symfony/Component/Validator/Constraint.html
PDF brought to you bygenerated on October 23, 2014
Chapter 126: How to Create a custom Validation Constraint | 429

Listing 126-2
Listing 126-3
Creating the Validator itselfAs you can see, a constraint class is fairly minimal. The actual validation is performed by another"constraint validator" class. The constraint validator class is specified by the constraint's validatedBy()method, which includes some simple default logic:
12345
// in the base Symfony\Component\Validator\Constraint classpublic function validatedBy(){
return get_class($this).'Validator';}
In other words, if you create a custom Constraint (e.g. MyConstraint), Symfony will automatically lookfor another class, MyConstraintValidator when actually performing the validation.
The validator class is also simple, and only has one required method validate():
123456789
101112131415161718192021222324252627
// src/Acme/DemoBundle/Validator/Constraints/ContainsAlphanumericValidator.phpnamespace Acme\DemoBundle\Validator\Constraints;
use Symfony\Component\Validator\Constraint;use Symfony\Component\Validator\ConstraintValidator;
class ContainsAlphanumericValidator extends ConstraintValidator{
public function validate($value, Constraint $constraint){
if (!preg_match('/^[a-zA-Za0-9]+$/', $value, $matches)) {// If you're using the new 2.5 validation API (you probably are!)$this->context->buildViolation($constraint->message)
->setParameter('%string%', $value)->addViolation();
);
// If you're using the old 2.4 validation API/*$this->context->addViolation(
$constraint->message,array('%string%' => $value)
);*/
}}
}
Inside validate, you don't need to return a value. Instead, you add violations to the validator's contextproperty and a value will be considered valid if it causes no violations. The buildViolation methodtakes the error message as its argument and returns an instance ofConstraintViolationBuilderInterface3. The addViolation method call finally adds the violation tothe context.
New in version 2.5: The buildViolation method was added in Symfony 2.5. For usage exampleswith older Symfony versions, see the corresponding versions of this documentation page.
3. http://api.symfony.com/2.5/Symfony/Component/Validator/Violation/ConstraintViolationBuilderInterface.html
PDF brought to you bygenerated on October 23, 2014
Chapter 126: How to Create a custom Validation Constraint | 430

Listing 126-4
Listing 126-5
Listing 126-6
Listing 126-7
Listing 126-8
Using the new ValidatorUsing custom validators is very easy, just as the ones provided by Symfony itself:
123456
# src/Acme/BlogBundle/Resources/config/validation.ymlAcme\DemoBundle\Entity\AcmeEntity:
properties:name:
- NotBlank: ~- Acme\DemoBundle\Validator\Constraints\ContainsAlphanumeric: ~
If your constraint contains options, then they should be public properties on the custom Constraint classyou created earlier. These options can be configured like options on core Symfony constraints.
Constraint Validators with Dependencies
If your constraint validator has dependencies, such as a database connection, it will need to be configuredas a service in the dependency injection container. This service must include thevalidator.constraint_validator tag and an alias attribute:
12345
services:validator.unique.your_validator_name:
class: Fully\Qualified\Validator\Class\Nametags:
- { name: validator.constraint_validator, alias: alias_name }
Your constraint class should now use this alias to reference the appropriate validator:
1234
public function validatedBy(){
return 'alias_name';}
As mentioned above, Symfony will automatically look for a class named after the constraint, withValidator appended. If your constraint validator is defined as a service, it's important that you overridethe validatedBy() method to return the alias used when defining your service, otherwise Symfony won'tuse the constraint validator service, and will instantiate the class instead, without any dependenciesinjected.
Class Constraint Validator
Beside validating a class property, a constraint can have a class scope by providing a target in itsConstraint class:
1234
public function getTargets(){
return self::CLASS_CONSTRAINT;}
With this, the validator validate() method gets an object as its first argument:
123
class ProtocolClassValidator extends ConstraintValidator{
public function validate($protocol, Constraint $constraint)
PDF brought to you bygenerated on October 23, 2014
Chapter 126: How to Create a custom Validation Constraint | 431

Listing 126-9
456789
1011121314
{if ($protocol->getFoo() != $protocol->getBar()) {
$this->context->addViolationAt('foo',$constraint->message,array(),null
);}
}}
Note that a class constraint validator is applied to the class itself, and not to the property:
1234
# src/Acme/BlogBundle/Resources/config/validation.ymlAcme\DemoBundle\Entity\AcmeEntity:
constraints:- Acme\DemoBundle\Validator\Constraints\ContainsAlphanumeric: ~
PDF brought to you bygenerated on October 23, 2014
Chapter 126: How to Create a custom Validation Constraint | 432
Listing 127-1
Listing 127-2
Chapter 127
How to Use PHP's built-in Web Server
Since PHP 5.4 the CLI SAPI comes with a built-in web server1. It can be used to run your PHP applicationslocally during development, for testing or for application demonstrations. This way, you don't have tobother configuring a full-featured web server such as Apache or Nginx.
The built-in web server is meant to be run in a controlled environment. It is not designed to beused on public networks.
Starting the Web ServerRunning a Symfony application using PHP's built-in web server is as easy as executing the server:runcommand:
1 $ php app/console server:run
This starts a server at localhost:8000 that executes your Symfony application. The command will waitand will respond to incoming HTTP requests until you terminate it (this is usually done by pressing Ctrland C).
By default, the web server listens on port 8000 on the loopback device. You can change the socket passingan ip address and a port as a command-line argument:
1 $ php app/console server:run 192.168.0.1:8080
1. http://www.php.net/manual/en/features.commandline.webserver.php
PDF brought to you bygenerated on October 23, 2014
Chapter 127: How to Use PHP's built-in Web Server | 433

Listing 127-3
Listing 127-4
Command Options
The built-in web server expects a "router" script (read about the "router" script on php.net2) as anargument. Symfony already passes such a router script when the command is executed in the prod or inthe dev environment. Use the --router option in any other environment or to use another router script:
1 $ php app/console server:run --env=test --router=app/config/router_test.php
If your application's document root differs from the standard directory layout, you have to pass thecorrect location using the --docroot option:
1 $ php app/console server:run --docroot=public_html
2. http://php.net/manual/en/features.commandline.webserver.php#example-401
PDF brought to you bygenerated on October 23, 2014
Chapter 127: How to Use PHP's built-in Web Server | 434

Listing 128-1
Chapter 128
How to Create a SOAP Web Service in aSymfony Controller
Setting up a controller to act as a SOAP server is simple with a couple tools. You must, of course, havethe PHP SOAP1 extension installed. As the PHP SOAP extension can not currently generate a WSDL, youmust either create one from scratch or use a 3rd party generator.
There are several SOAP server implementations available for use with PHP. Zend SOAP2 andNuSOAP3 are two examples. Although the PHP SOAP extension is used in these examples, thegeneral idea should still be applicable to other implementations.
SOAP works by exposing the methods of a PHP object to an external entity (i.e. the person using theSOAP service). To start, create a class - HelloService - which represents the functionality that you'llexpose in your SOAP service. In this case, the SOAP service will allow the client to call a method calledhello, which happens to send an email:
123456789
1011121314
// src/Acme/SoapBundle/Services/HelloService.phpnamespace Acme\SoapBundle\Services;
class HelloService{
private $mailer;
public function __construct(\Swift_Mailer $mailer){
$this->mailer = $mailer;}
public function hello($name){
1. http://php.net/manual/en/book.soap.php
2. http://framework.zend.com/manual/en/zend.soap.server.html
3. http://sourceforge.net/projects/nusoap
PDF brought to you bygenerated on October 23, 2014
Chapter 128: How to Create a SOAP Web Service in a Symfony Controller | 435

Listing 128-2
Listing 128-3
1516171819202122232425
$message = \Swift_Message::newInstance()->setTo('[email protected]')->setSubject('Hello Service')->setBody($name . ' says hi!');
$this->mailer->send($message);
return 'Hello, '.$name;}
}
Next, you can train Symfony to be able to create an instance of this class. Since the class sends an e-mail,it's been designed to accept a Swift_Mailer instance. Using the Service Container, you can configureSymfony to construct a HelloService object properly:
12345
# app/config/config.ymlservices:
hello_service:class: Acme\SoapBundle\Services\HelloServicearguments: ["@mailer"]
Below is an example of a controller that is capable of handling a SOAP request. If indexAction() isaccessible via the route /soap, then the WSDL document can be retrieved via /soap?wsdl.
123456789
10111213141516171819202122
namespace Acme\SoapBundle\Controller;
use Symfony\Bundle\FrameworkBundle\Controller\Controller;use Symfony\Component\HttpFoundation\Response;
class HelloServiceController extends Controller{
public function indexAction(){
$server = new \SoapServer('/path/to/hello.wsdl');$server->setObject($this->get('hello_service'));
$response = new Response();$response->headers->set('Content-Type', 'text/xml; charset=ISO-8859-1');
ob_start();$server->handle();$response->setContent(ob_get_clean());
return $response;}
}
Take note of the calls to ob_start() and ob_get_clean(). These methods control output buffering4
which allows you to "trap" the echoed output of $server->handle(). This is necessary because Symfonyexpects your controller to return a Response object with the output as its "content". You must alsoremember to set the "Content-Type" header to "text/xml", as this is what the client will expect. So, youuse ob_start() to start buffering the STDOUT and use ob_get_clean() to dump the echoed outputinto the content of the Response and clear the output buffer. Finally, you're ready to return the Response.
4. http://php.net/manual/en/book.outcontrol.php
PDF brought to you bygenerated on October 23, 2014
Chapter 128: How to Create a SOAP Web Service in a Symfony Controller | 436

Listing 128-4
Listing 128-5
Below is an example calling the service using a NuSOAP5 client. This example assumes that theindexAction in the controller above is accessible via the route /soap:
123
$client = new \Soapclient('http://example.com/app.php/soap?wsdl', true);
$result = $client->call('hello', array('name' => 'Scott'));
An example WSDL is below.
123456789
101112131415161718192021222324252627282930313233343536373839404142434445464748
<?xml version="1.0" encoding="ISO-8859-1"?><definitions xmlns:SOAP-ENV="http://schemas.xmlsoap.org/soap/envelope/"
xmlns:xsd="http://www.w3.org/2001/XMLSchema"xmlns:xsi="http://www.w3.org/2001/XMLSchema-instance"xmlns:SOAP-ENC="http://schemas.xmlsoap.org/soap/encoding/"xmlns:tns="urn:arnleadservicewsdl"xmlns:soap="http://schemas.xmlsoap.org/wsdl/soap/"xmlns:wsdl="http://schemas.xmlsoap.org/wsdl/"xmlns="http://schemas.xmlsoap.org/wsdl/"targetNamespace="urn:helloservicewsdl">
<types><xsd:schema targetNamespace="urn:hellowsdl">
<xsd:import namespace="http://schemas.xmlsoap.org/soap/encoding/" /><xsd:import namespace="http://schemas.xmlsoap.org/wsdl/" />
</xsd:schema></types>
<message name="helloRequest"><part name="name" type="xsd:string" />
</message>
<message name="helloResponse"><part name="return" type="xsd:string" />
</message>
<portType name="hellowsdlPortType"><operation name="hello">
<documentation>Hello World</documentation><input message="tns:helloRequest"/><output message="tns:helloResponse"/>
</operation></portType>
<binding name="hellowsdlBinding" type="tns:hellowsdlPortType"><soap:binding style="rpc" transport="http://schemas.xmlsoap.org/soap/http"/><operation name="hello">
<soap:operation soapAction="urn:arnleadservicewsdl#hello" style="rpc"/>
<input><soap:body use="encoded" namespace="urn:hellowsdl"
encodingStyle="http://schemas.xmlsoap.org/soap/encoding/"/></input>
<output><soap:body use="encoded" namespace="urn:hellowsdl"
encodingStyle="http://schemas.xmlsoap.org/soap/encoding/"/></output>
5. http://sourceforge.net/projects/nusoap
PDF brought to you bygenerated on October 23, 2014
Chapter 128: How to Create a SOAP Web Service in a Symfony Controller | 437

495051525354555657
</operation></binding>
<service name="hellowsdl"><port name="hellowsdlPort" binding="tns:hellowsdlBinding">
<soap:address location="http://example.com/app.php/soap" /></port>
</service></definitions>
PDF brought to you bygenerated on October 23, 2014
Chapter 128: How to Create a SOAP Web Service in a Symfony Controller | 438

Listing 129-1
Chapter 129
How to Create and Store a Symfony Project inGit
Though this entry is specifically about Git, the same generic principles will apply if you're storingyour project in Subversion.
Once you've read through Creating Pages in Symfony and become familiar with using Symfony, you'll no-doubt be ready to start your own project. In this cookbook article, you'll learn the best way to start a newSymfony project that's stored using the Git1 source control management system.
Initial Project SetupTo get started, you'll need to download Symfony and initialize your local git repository:
1. Download the Symfony Standard Edition2 using Composer:
1 $ php composer.phar create-project symfony/framework-standard-edition path/ '~2.5'
Add the -vvv flag to see everything that Composer is doing - this is especially useful on aslow connection where it may seem that nothing is happening.
Composer will now download the Standard Distribution along with all of the required vendorlibraries. For more information about downloading Symfony using Composer, see InstallingSymfony using Composer3.
1. http://git-scm.com/
2. http://symfony.com/download
3. http://symfony.com/doc/current/book/installation.html#option-1-composer
PDF brought to you bygenerated on October 23, 2014
Chapter 129: How to Create and Store a Symfony Project in Git | 439

Listing 129-2
Listing 129-3
Listing 129-4
2. Initialize your Git repository:
1 $ git init
3. Add all of the initial files to Git:
1 $ git add .
As you might have noticed, not all files that were downloaded by Composer in step1, have been staged for commit by Git. Certain files and folders, such as the project'sdependencies (which are managed by Composer), parameters.yml (which containssensitive information such as database credentials), log and cache files and dumpedassets (which are created automatically by your project), should not be committed inGit. To help you prevent committing those files and folders by accident, the StandardDistribution comes with a file called .gitignore, which contains a list of files and foldersthat Git should ignore.
You may also want to create a .gitignore file that can be used system-wide. This allowsyou to exclude files/folders for all your projects that are created by your IDE or operatingsystem. For details, see GitHub .gitignore4.
4. Create an initial commit with your started project:
1 $ git commit -m "Initial commit"
At this point, you have a fully-functional Symfony project that's correctly committed to Git. You canimmediately begin development, committing the new changes to your Git repository.
You can continue to follow along with the Creating Pages in Symfony chapter to learn more about howto configure and develop inside your application.
The Symfony Standard Edition comes with some example functionality. To remove the samplecode, follow the instructions in the "How to Remove the AcmeDemoBundle" article.
Managing Vendor Libraries with composer.json
How Does it Work?
Every Symfony project uses a group of third-party "vendor" libraries. One way or another the goal is todownload these files into your vendor/ directory and, ideally, to give you some sane way to manage theexact version you need for each.
By default, these libraries are downloaded by running a php composer.phar install "downloader"binary. This composer.phar file is from a library called Composer5 and you can read more aboutinstalling it in the Installation chapter.
4. https://help.github.com/articles/ignoring-files
5. http://getcomposer.org/
PDF brought to you bygenerated on October 23, 2014
Chapter 129: How to Create and Store a Symfony Project in Git | 440
Listing 129-5
The composer.phar file reads from the composer.json file at the root of your project. This is an JSON-formatted file, which holds a list of each of the external packages you need, the version to be downloadedand more. The composer.phar file also reads from a composer.lock file, which allows you to pin eachlibrary to an exact version. In fact, if a composer.lock file exists, the versions inside will override thosein composer.json. To upgrade your libraries to new versions, run php composer.phar update.
If you want to add a new package to your application, run the composer require command:
1 $ php composer.phar require doctrine/doctrine-fixtures-bundle
To learn more about Composer, see GetComposer.org6:
It's important to realize that these vendor libraries are not actually part of your repository. Instead, they'resimply un-tracked files that are downloaded into the vendor/. But since all the information needed todownload these files is saved in composer.json and composer.lock (which are stored in the repository),any other developer can use the project, run php composer.phar install, and download the exact sameset of vendor libraries. This means that you're controlling exactly what each vendor library looks like,without needing to actually commit them to your repository.
So, whenever a developer uses your project, they should run the php composer.phar install script toensure that all of the needed vendor libraries are downloaded.
Upgrading Symfony
Since Symfony is just a group of third-party libraries and third-party libraries are entirely controlledthrough composer.json and composer.lock, upgrading Symfony means simply upgrading each ofthese files to match their state in the latest Symfony Standard Edition.
Of course, if you've added new entries to composer.json, be sure to replace only the original parts(i.e. be sure not to also delete any of your custom entries).
Vendors and Submodules
Instead of using the composer.json system for managing your vendor libraries, you may instead chooseto use native git submodules7. There is nothing wrong with this approach, though the composer.jsonsystem is the official way to solve this problem and probably much easier to deal with. Unlike Gitsubmodules, Composer is smart enough to calculate which libraries depend on which other libraries.
Storing your Project on a remote ServerYou now have a fully-functional Symfony project stored in Git. However, in most cases, you'll also wantto store your project on a remote server both for backup purposes, and so that other developers cancollaborate on the project.
The easiest way to store your project on a remote server is via a web-based hosting service like GitHub8
or Bitbucket9. Of course, there are more services out there, you can start your research with a comparisonof hosting services10.
6. http://getcomposer.org/
7. http://git-scm.com/book/en/Git-Tools-Submodules
8. https://github.com/
9. https://bitbucket.org/
10. http://en.wikipedia.org/wiki/Comparison_of_open-source_software_hosting_facilities
PDF brought to you bygenerated on October 23, 2014
Chapter 129: How to Create and Store a Symfony Project in Git | 441

Alternatively, you can store your Git repository on any server by creating a barebones repository11 andthen pushing to it. One library that helps manage this is Gitolite12.
11. http://git-scm.com/book/en/Git-Basics-Getting-a-Git-Repository
12. https://github.com/sitaramc/gitolite
PDF brought to you bygenerated on October 23, 2014
Chapter 129: How to Create and Store a Symfony Project in Git | 442

Listing 130-1
Chapter 130
How to Create and Store a Symfony Project inSubversion
This entry is specifically about Subversion, and based on principles found in How to Create andStore a Symfony Project in Git.
Once you've read through Creating Pages in Symfony and become familiar with using Symfony, you'llno-doubt be ready to start your own project. The preferred method to manage Symfony projects is usingGit1 but some prefer to use Subversion2 which is totally fine!. In this cookbook article, you'll learn how tomanage your project using SVN3 in a similar manner you would do with Git4.
This is a method to tracking your Symfony project in a Subversion repository. There are severalways to do and this one is simply one that works.
The Subversion RepositoryFor this article it's assumed that your repository layout follows the widespread standard structure:
1234
myproject/branches/tags/trunk/
1. http://git-scm.com/
2. http://subversion.apache.org/
3. http://subversion.apache.org/
4. http://git-scm.com/
PDF brought to you bygenerated on October 23, 2014
Chapter 130: How to Create and Store a Symfony Project in Subversion | 443

Listing 130-2
Listing 130-3
Listing 130-4
Listing 130-5
Most Subversion hosting should follow this standard practice. This is the recommended layout inVersion Control with Subversion5 and the layout used by most free hosting (see Subversion HostingSolutions).
Initial Project SetupTo get started, you'll need to download Symfony and get the basic Subversion setup:
1. Download the Symfony Standard Edition6 with or without vendors.
2. Unzip/untar the distribution. It will create a folder called Symfony with your new projectstructure, config files, etc. Rename it to whatever you like.
3. Checkout the Subversion repository that will host this project. Suppose it is hosted on Googlecode7 and called myproject:
1 $ svn checkout http://myproject.googlecode.com/svn/trunk myproject
4. Copy the Symfony project files in the Subversion folder:
1 $ mv Symfony/* myproject/
5. Now, set the ignore rules. Not everything should be stored in your Subversion repository. Somefiles (like the cache) are generated and others (like the database configuration) are meant to becustomized on each machine. This makes use of the svn:ignore property, so that specific filescan be ignored.
123456789
101112
$ cd myproject/$ svn add --depth=empty app app/cache app/logs app/config web
$ svn propset svn:ignore "vendor" .$ svn propset svn:ignore "bootstrap*" app/$ svn propset svn:ignore "parameters.yml" app/config/$ svn propset svn:ignore "*" app/cache/$ svn propset svn:ignore "*" app/logs/
$ svn propset svn:ignore "bundles" web
$ svn ci -m "commit basic Symfony ignore list (vendor, app/bootstrap*, app/config/parameters.yml, app/cache/*, app/logs/*, web/bundles)"
6. The rest of the files can now be added and committed to the project:
12
$ svn add --force .$ svn ci -m "add basic Symfony Standard 2.X.Y"
7. Copy app/config/parameters.yml to app/config/parameters.yml.dist. Theparameters.yml file is ignored by svn (see above) so that machine-specific settings like databasepasswords aren't committed. By creating the parameters.yml.dist file, new developers canquickly clone the project, copy this file to parameters.yml, customize it, and start developing.
5. http://svnbook.red-bean.com/
6. http://symfony.com/download
7. http://code.google.com/hosting/
PDF brought to you bygenerated on October 23, 2014
Chapter 130: How to Create and Store a Symfony Project in Subversion | 444

Listing 130-6
8. Finally, download all of the third-party vendor libraries by executing Composer. For details, seeUpdating Vendors.
If you rely on any "dev" versions, then Git may be used to install those libraries, since there is noarchive available for download.
At this point, you have a fully-functional Symfony project stored in your Subversion repository. Thedevelopment can start with commits in the Subversion repository.
You can continue to follow along with the Creating Pages in Symfony chapter to learn more about howto configure and develop inside your application.
The Symfony Standard Edition comes with some example functionality. To remove the samplecode, follow the instructions in the "How to Remove the AcmeDemoBundle" article.
Managing Vendor Libraries with composer.json
How Does it Work?
Every Symfony project uses a group of third-party "vendor" libraries. One way or another the goal is todownload these files into your vendor/ directory and, ideally, to give you some sane way to manage theexact version you need for each.
By default, these libraries are downloaded by running a php composer.phar install "downloader"binary. This composer.phar file is from a library called Composer8 and you can read more aboutinstalling it in the Installation chapter.
The composer.phar file reads from the composer.json file at the root of your project. This is an JSON-formatted file, which holds a list of each of the external packages you need, the version to be downloadedand more. The composer.phar file also reads from a composer.lock file, which allows you to pin eachlibrary to an exact version. In fact, if a composer.lock file exists, the versions inside will override thosein composer.json. To upgrade your libraries to new versions, run php composer.phar update.
If you want to add a new package to your application, run the composer require command:
1 $ php composer.phar require doctrine/doctrine-fixtures-bundle
To learn more about Composer, see GetComposer.org9:
It's important to realize that these vendor libraries are not actually part of your repository. Instead, they'resimply un-tracked files that are downloaded into the vendor/. But since all the information needed todownload these files is saved in composer.json and composer.lock (which are stored in the repository),any other developer can use the project, run php composer.phar install, and download the exact sameset of vendor libraries. This means that you're controlling exactly what each vendor library looks like,without needing to actually commit them to your repository.
So, whenever a developer uses your project, they should run the php composer.phar install script toensure that all of the needed vendor libraries are downloaded.
8. http://getcomposer.org/
9. http://getcomposer.org/
PDF brought to you bygenerated on October 23, 2014
Chapter 130: How to Create and Store a Symfony Project in Subversion | 445

Upgrading Symfony
Since Symfony is just a group of third-party libraries and third-party libraries are entirely controlledthrough composer.json and composer.lock, upgrading Symfony means simply upgrading each ofthese files to match their state in the latest Symfony Standard Edition.
Of course, if you've added new entries to composer.json, be sure to replace only the original parts(i.e. be sure not to also delete any of your custom entries).
Subversion Hosting Solutions
The biggest difference between Git10 and SVN11 is that Subversion needs a central repository to work. Youthen have several solutions:
• Self hosting: create your own repository and access it either through the filesystem or thenetwork. To help in this task you can read Version Control with Subversion.
• Third party hosting: there are a lot of serious free hosting solutions available like GitHub12,Google code13, SourceForge14 or Gna15. Some of them offer Git hosting as well.
10. http://git-scm.com/
11. http://subversion.apache.org/
12. https://github.com/
13. http://code.google.com/hosting/
14. http://sourceforge.net/
15. http://gna.org/
PDF brought to you bygenerated on October 23, 2014
Chapter 130: How to Create and Store a Symfony Project in Subversion | 446

