sweetness sew persimmon dumpling pouch · sew sweetness persimmon dumpling pouch sewsweetness.com 1...
TRANSCRIPT
Sar
a L
awso
nSew
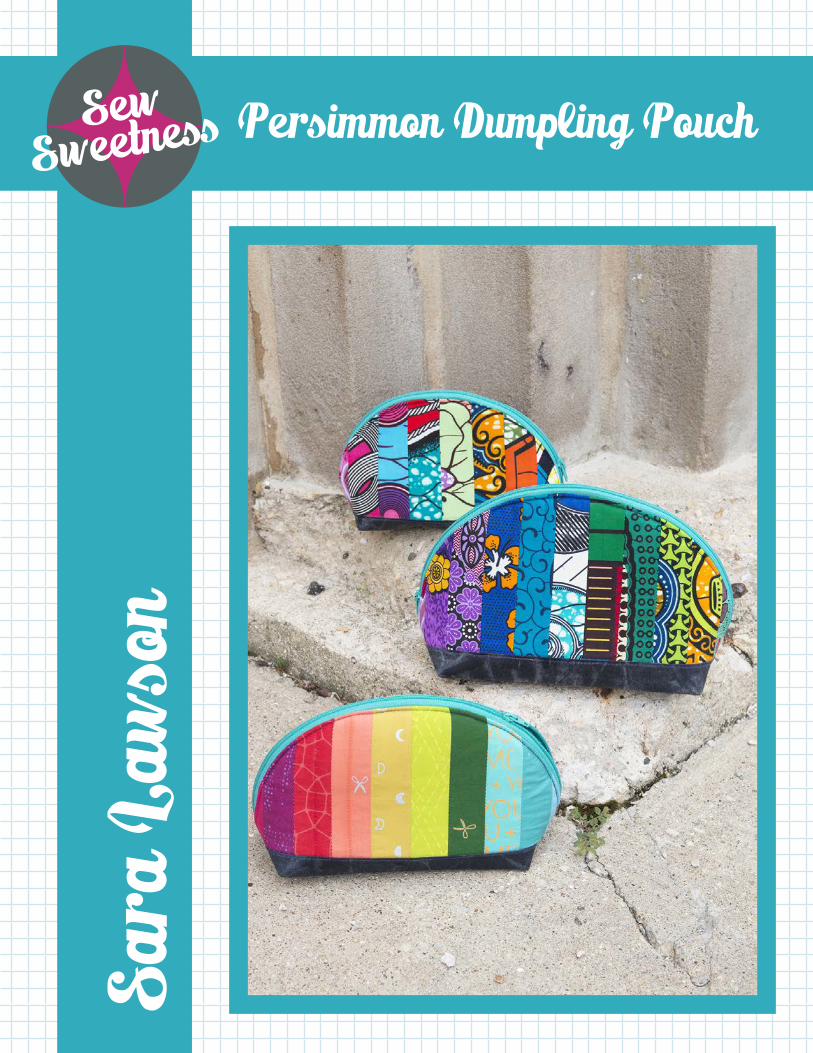
Sweetness Persimmon Dumpling Pouch

1© Sew Sweetness | Persimmon Dumpling Pouch | sewsweetness.com
This pouch comes in 3 different size options and comes together quickly with a top zip closure.
Seam allowance is 1/4” (6mm) unless otherwise noted.Please read all instructions before beginning.
Finished Size: Small - 7” long x 4-3/4” high x 3” deep (17.8cm x 12cm x 7.6cm) Medium - 8” long x 5-3/4” high x 3-1/2” deep (20.3cm x 14.6cm x 8.9cm) Large - 9” long x 6-1/2” high x 4” deep (22.9cm x 16.5cm x 10.1cm)
All cutting measurements given throughout the pattern are width x height.
SUPPLIES (will make 1 pouch)• Assorted 1-1/2” (3.8cm) strips of exterior fabric PLUS 24”x 3” strip of solid fabric for accent • 1/4 yard/metre of lining fabric• 24” x 9” (61cm x 22.9cm) piece of foam interfacing (By Annie’s Soft and Stable, Pellon Flex Foam, Bosal In-R-Form,
or automotive headliner)• 24” x 9” (61cm x 22.9cm) piece of Pellon SF-101 Shape Flex fusible woven interfacing (medium-weight fusible)• 20” (51cm) zipper (#3 dress/skirt zipper)
NOTIONS• Clover Wonder Clips or pins• Iron• Pressing cloth• Rotary Cutter and Cutting Mat• Scissors• Disappearing Ink Fabric Marker
Persimmon Dumpling Pouch

2© Sew Sweetness | Persimmon Dumpling Pouch | sewsweetness.com
CUTTING INSTRUCTIONS
Please cut your fabric pieces in the order listed, so that you will have plenty of fabric for the pouch. When printing pattern pieces, always make sure your printer is set to scaling at ‘none’ or ‘actual size’ so pieces print at correct size. IMPORTANT: Measure the tester 1” or 4cm square to make sure that your pattern pieces printed at the correct size.
Helpful Hint: If you plan to quilt your exterior pieces to interfacing, I recommend rough-cutting them approximately 1” (2.5cm)
larger to account for shrinkage when machine quilting.
Cut from Lining Fabric, foam, and Shape Flex:
(2) Using the pattern piece, cut on the fold
From Exterior Fabric, cut:
(2) For the patchwork strips: small - 9 strips of fabric 7” x 1-1/2” (17.8cm x 3.8cm)
medium - 11 strips of fabric 8” x 1-1/2” (20.3cm x 3.8cm)
large - 12 strips of fabric 9” x 1-1/2” (22.9cm x 3.8cm)
(2) Accent small - 9” x 3” (17.8cm x 7.6cmcm)
medium - 10-1/2” x 3-1/4” (26.7cm x 8.3cm) *if your Accent fabric is thin or see-through, please cut 2
large - 12” x 3-1/2” (30.5cm x 8.9cm) pieces of Pellon Shape Flex interfacing the same size
Step-by-step video available at www.sewsweetness.com
1. Sew 2 of the patchwork strips right sides together along one long edge. Press the seam open.
Continue adding fabric strips until you have used all that are required for the size pouch that you are making. This will now be referred to as the Exterior fabric.
Trim the fabric to the same size as the foam interfacing.
ASSEMBLE THE EXTERIOR

3© Sew Sweetness | Persimmon Dumpling Pouch | sewsweetness.com
2. Place the Exterior fabric with the wrong side of the fabric against the foam interfacing. Pin in place. Baste using a 1/8” (3mm) seam allowance. Repeat for the remaining Exterior piece.
Helpful Hint: I like to gently pull my fabric taut as I am basting it to the foam interfacing for a tight, crisp finish. If you would like, machine quilt the foam interfacing pieces at this time; if you rough-cut, cut to the final size in the cutting instructions.
3. Place the fusible (tacky) side of the Shape Flex against the wrong side of the Lining fabric. Fuse according to manu-facturer instructions. Repeat for the remaining Lining piece and also for the Accent (if you cut Shape Flex for it).
Helpful Hint: To fuse Shape Flex, first place the fabric face down, followed by the interfacing (tacky side down), then the pressing cloth. I lightly spritz the pressing cloth with water, then iron, overlapping each area, for approximately 10 seconds on each spot. When finished, it should be firmly attached to your fabric.
ATTACH THE INTERFACING
MAKE THE POUCH
4. Mark the center of the zipper. Also fold all Exterior and Lining pieces in half and mark the top (on the wrong side of the fabric).
3. Press the top edge of one Accent toward the wrong side by 1/4” (6mm). Lay the Accent, right side facing up, on top of the Exterior fabric, with the bottom edges aligned.
Topstitch the outer edge of the Accent using 1/8” (3mm) seam allowance. Trim so that the Accent is the same shape as the foam.
Repeat for the remaining Accent and Exterior fabric.
4© Sew Sweetness | Persimmon Dumpling Pouch | sewsweetness.com
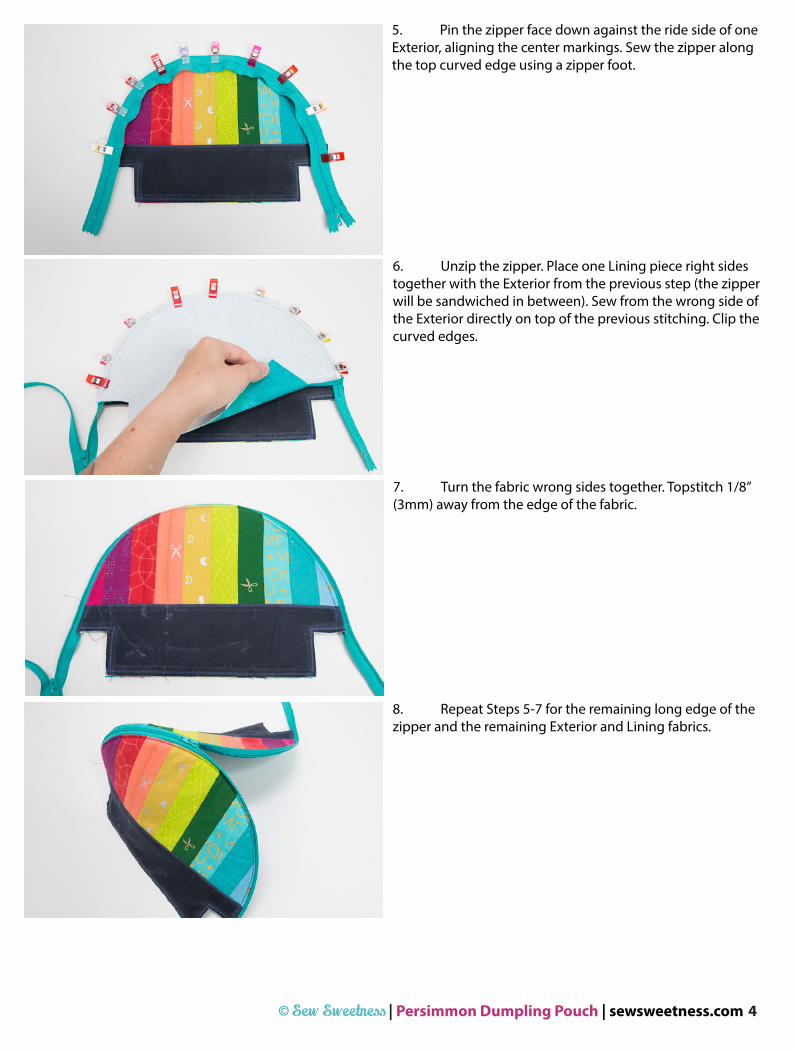
6. Unzip the zipper. Place one Lining piece right sides together with the Exterior from the previous step (the zipper will be sandwiched in between). Sew from the wrong side of the Exterior directly on top of the previous stitching. Clip the curved edges.
5. Pin the zipper face down against the ride side of one Exterior, aligning the center markings. Sew the zipper along the top curved edge using a zipper foot.
7. Turn the fabric wrong sides together. Topstitch 1/8” (3mm) away from the edge of the fabric.
8. Repeat Steps 5-7 for the remaining long edge of the zipper and the remaining Exterior and Lining fabrics.
5© Sew Sweetness | Persimmon Dumpling Pouch | sewsweetness.com
Congratulations, you’ve finished!
Need help?? E-mail me any time at [email protected]
Please add your finished bag to my group! https://www.facebook.com/groups/sewsweetnessfans/
Tag your finished bag on Instagram using hashtag #persimmondumplingpouch #sewsweetnesspattern
Copyright ©Sew Sweetness 2019 Cover design by Alison Glass.
Thank you for honoring the copyright law! Your support will enable me to design many more bag patterns!
http://www.sewsweetness.com Please check out my site for free tutorials on bags and bag-making techniques!
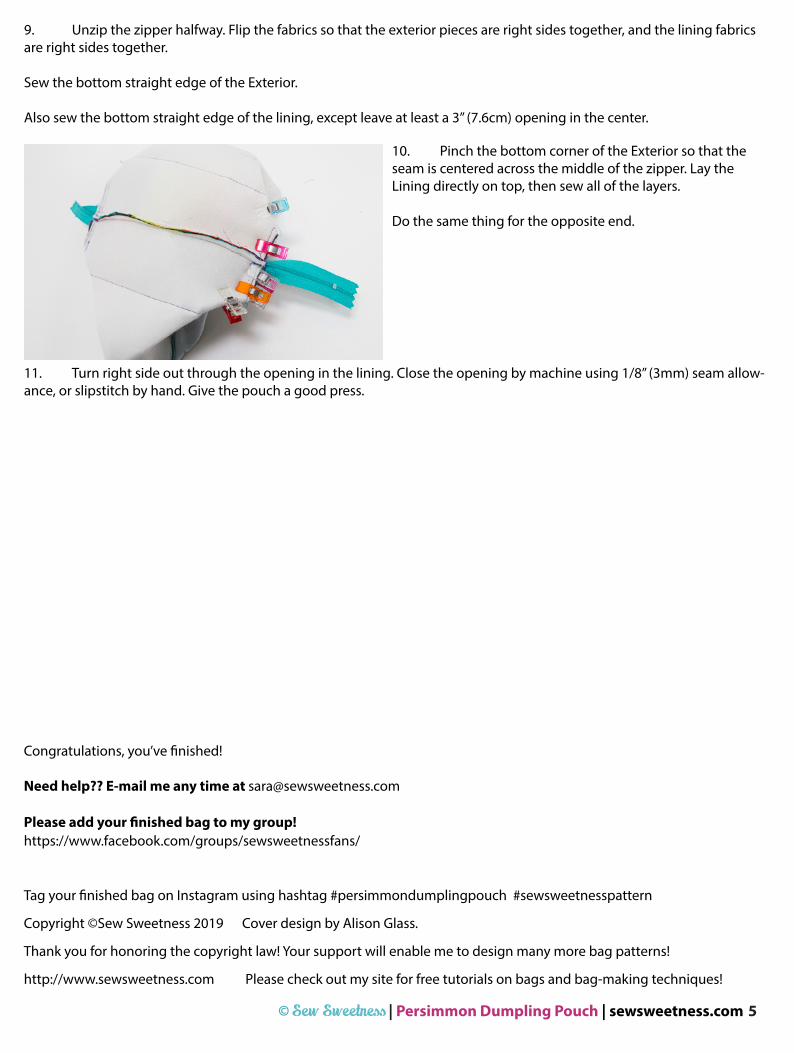
9. Unzip the zipper halfway. Flip the fabrics so that the exterior pieces are right sides together, and the lining fabrics are right sides together.
Sew the bottom straight edge of the Exterior.
Also sew the bottom straight edge of the lining, except leave at least a 3” (7.6cm) opening in the center.
10. Pinch the bottom corner of the Exterior so that the seam is centered across the middle of the zipper. Lay the Lining directly on top, then sew all of the layers.
Do the same thing for the opposite end.
11. Turn right side out through the opening in the lining. Close the opening by machine using 1/8” (3mm) seam allow-ance, or slipstitch by hand. Give the pouch a good press.

11” square4cm
Plac
e on
the
Fold
For size smallcut 2 exterior fabriccut 2 lining fabriccut 2 foam interfacingcut 2 Shape Flex
Persimmon Dumpling Pouch
1 21” square4cm
Plac
e on
the
Fold
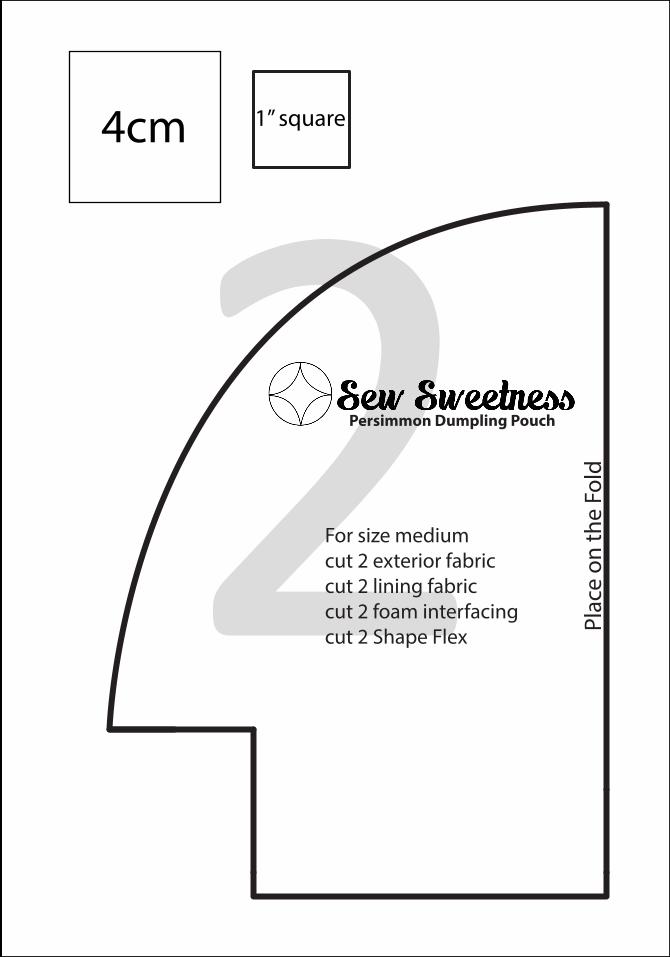
For size mediumcut 2 exterior fabriccut 2 lining fabriccut 2 foam interfacingcut 2 Shape Flex
Persimmon Dumpling Pouch

31” square4cm
Plac
e on
the
Fold
For size largecut 2 exterior fabriccut 2 lining fabriccut 2 foam interfacingcut 2 Shape Flex
Persimmon Dumpling Pouch