student registration note: please use windows...
TRANSCRIPT

STUDENT REGISTRATION
NOTE: PLEASE USE WINDOWS PC/LAPTOP FOR THE REGISTRATION. DO
NOT USE OTHER OPERATING SYSTEM, MOBILE AND TABLETS.
USE MOZILLA FIREFOX VERSION 45 AND ABOVE.
Enter the URL (http://misreg.nitt.edu/STUDENTREG/) in the Browser to load
the Login Screen.
Click the New User/Signup link.
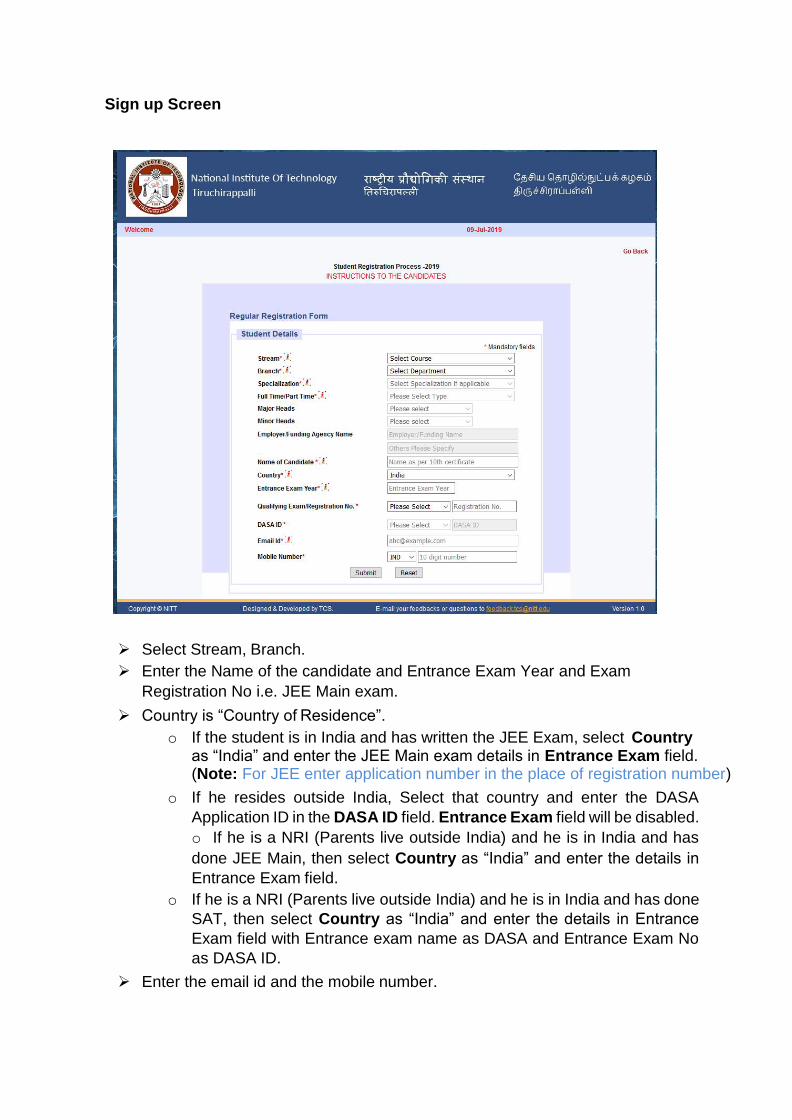
Sign up Screen
Select Stream, Branch.
Enter the Name of the candidate and Entrance Exam Year and Exam
Registration No i.e. JEE Main exam.
Country is “Country of Residence”.
o If the student is in India and has written the JEE Exam, select Country as “India” and enter the JEE Main exam details in Entrance Exam field. (Note: For JEE enter application number in the place of registration number)
o If he resides outside India, Select that country and enter the DASA
Application ID in the DASA ID field. Entrance Exam field will be disabled.
o If he is a NRI (Parents live outside India) and he is in India and has
done JEE Main, then select Country as “India” and enter the details in
Entrance Exam field.
o If he is a NRI (Parents live outside India) and he is in India and has done
SAT, then select Country as “India” and enter the details in Entrance
Exam field with Entrance exam name as DASA and Entrance Exam No
as DASA ID.
Enter the email id and the mobile number.

Press Submit button.
Note down the Login Id and Password. Then click on “Click” link.

Login Screen
Enter the login Id in the User Id field and password in the password field.
Click on the Sign-in button.

Change Password

Change Password
Now enter the current password in the Old Password field
Create a new password (Password must contain minimum 6 characters and it
should be Alpha-Numeric and special characters are not allowed).
Type the same new password in the Confirm New password field.
Click on Submit Button.

Once the password changed message pops up, click ok. Login Screen
Enter the login Id in the User Id field and password in the password field.
Click on the Sign-in button.
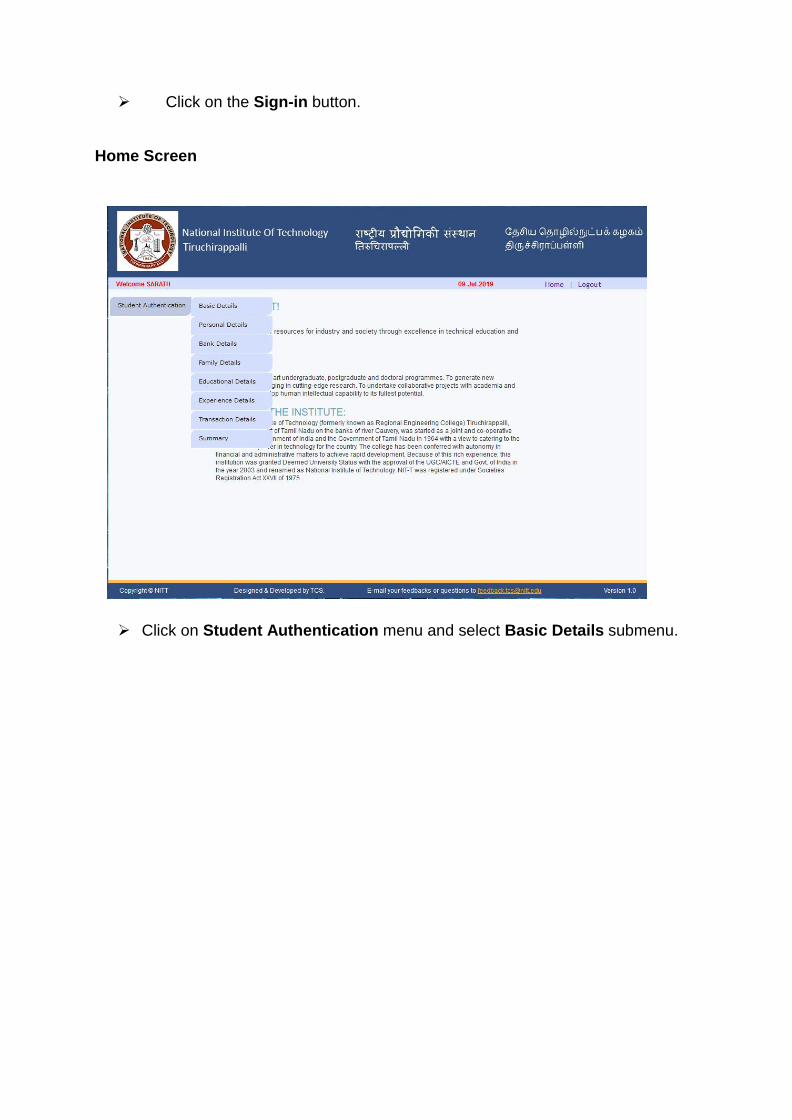
Home Screen
Click on Student Authentication menu and select Basic Details submenu.

Basic detail Page:
Verify the details and click on Draft Save button.
Click on Next Button.

Personal detail page:
Select the Date of Birth from the date picker.
Select the Gender, Blood Group, Category, Allotted Category, Sub
Category, Religion, Nationality, Country, State and District.
Verify the Mobile Number and Email.
Enter the Alternate contact number, Aadhar card number or Passport number or
Ration card number.
Provide Address, City and Pin code.
Click the Draft Save button.
After successful message shown, click the next button.

Bank Details
Select the Bank Name, State name, Branch name
Enter the IFSC code, Account number and Remarks
Click on Draft save

Bank details will be listed below

Family Details:
At least one relationship is needed (Father/Mother/Guardian).
Select the relationship detail.
Enter the name of the relation.
Select the qualification, Occupation and annual income of the relation.
Select the mobile number code and landline code (For India select IND) and
then type the mobile number and landline.
Enter the email id of the relation. If you do not have one, enter your email id.
Click on Draft Save button.
Please ensure the data is shown in the list of family details.
Then click the Next button.

Education Details:
Enter the JEE Main Score and Rank of the exam, if you have written JEE Main
exam. If you have written SAT exam, then enter score as 0 and enter your
rank.
For B. Tech & B.Arch., If you don’t have category and sub category rank then
enter ‘0’
If you don’t have scores and rank details for the exam, then provide 0.
Select the qualification, year of joining, year of passed out, name of Board
University and medium of study.
Enter programme and department Details. (Note: For SSLC, the
programme and department should be SSLC)

Education Details:
Enter the name of school/college.
Enter Total Marks / Marks Obtained or Maximum Grade / Grade Obtained.
Click the Draft Save button.
Please ensure the data is shown in the educational qualification details.
Then do the same procedure for the other educational details.
Click the Next button.

Experience Details:
Enter the Company name, Position Held
Select the Experience From date and To date from date picker
Enter the location
Click on Draft save
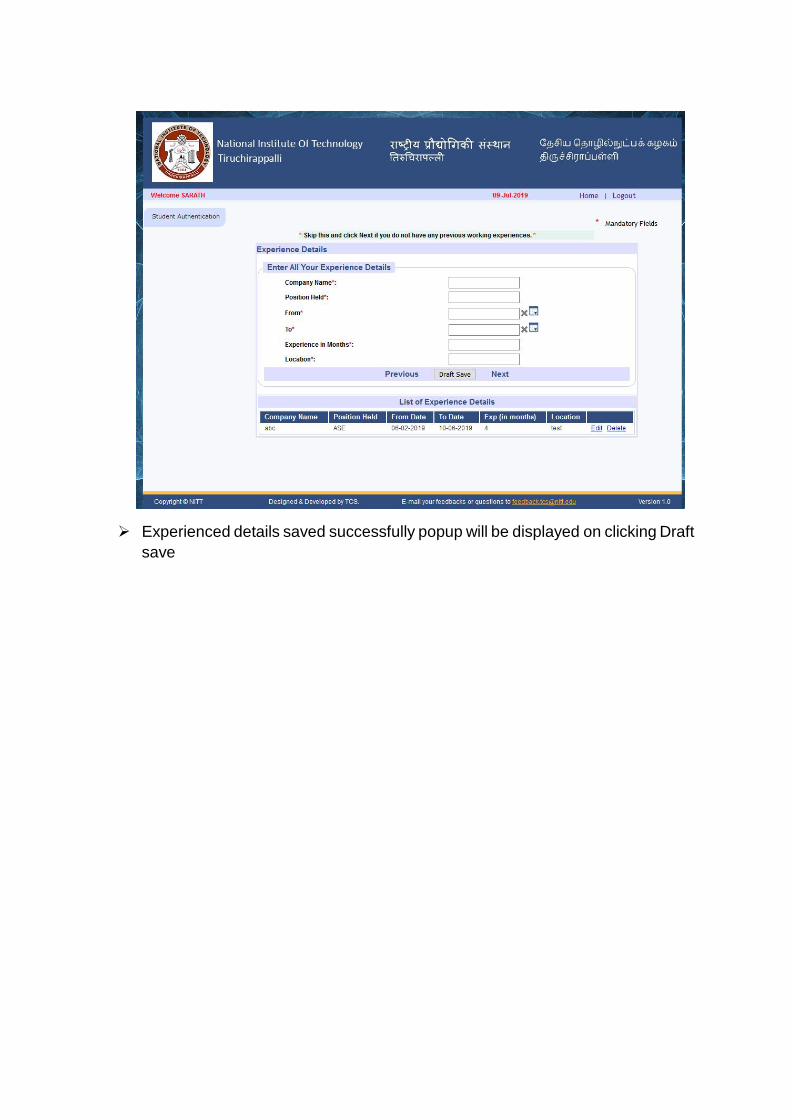
Experienced details saved successfully popup will be displayed on clicking Draft
save

Transaction Details
Use the Link https://www.onlinesbi.com/sbicollect/icollecthome.htm For Paying
Institute Fee and then Come Again to Enter the Transaction Id in the Below field
and Complete the Registration process
Enter the Institute Fee SB collect Reference number and Hostel Fee
Transaction Id and click on Draft save
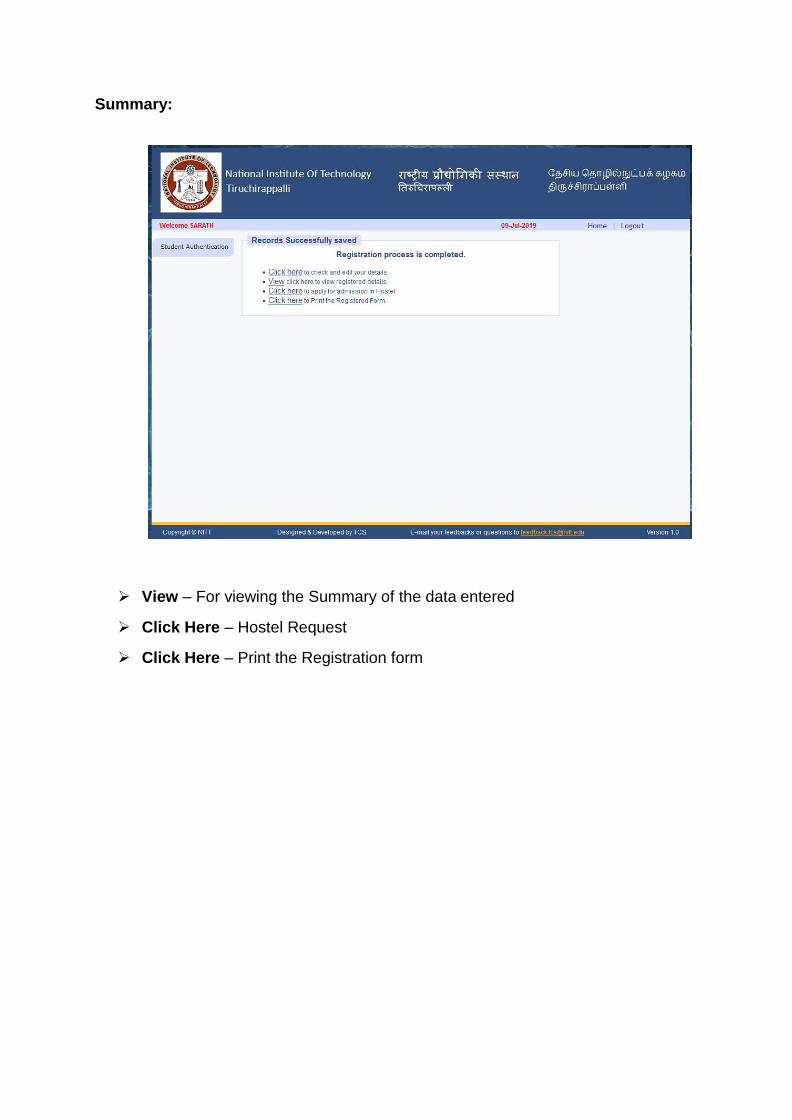
Summary:
View – For viewing the Summary of the data entered
Click Here – Hostel Request
Click Here – Print the Registration form

Summary Data:
Verify the Summary of the data entered

Hostel Admission
Click on the Send Request button.
It will send the request to hostel department and it also shows the basic details.

Print Copy .
Click here link will open the above report.
It can either be saved or printed out. Bring the print out for the admission
process.