straßenbahngleissystem - tillig.com¶r...fix the clip on the bottom side 1) 2) 3) oberseite / top...
TRANSCRIPT

116
Das Straßenbahngleissystem für H0 und H0m / TT The Tram track system for gauge H0 and H0m / TT
Das Prinzip unseres Straßenbahngleises ist sehr ein-fach: Zwischen und neben den Gleisgrundplatten
werden Halter montiert, in welche die Bodenflächen eingeklipst werden. Das 2,1 mm hohe Gleisprofil ist kontaktsicher und kann von allen Rädern problemlos befahren werden. Selbstverständlich kann das Gleis mit normalem Schwellengleis kombiniert werden.
This principle of our Tram track system is very simple: Hol-ders are installed between and next to the track bed-
plates into which the floor surfaces are clipped into place. The track profile that is 2.1 mm high has a reliable contact and can be easily driven on by all the wheels. Obviously the track can also be combined with a normal sleeper track.
Straßenbahngleissystem
StraßenbahngleissystemTram track system
D

117
Die Packungen mit Komplettsortimenten (siehe S. 133) enthalten mehrere Gleisgrundplatten mit und ohne An-schlussmöglichkeiten. In Kombination mit Isolierschie-nenverbindern lassen sich beliebig viele Einspeiseab-schnitte bilden.Die Halter werden bündig an die Gleisgrundplatten fixiert. Die Halter für den Parallelabstand ergeben bei mehrspurigen Gleisen den richtigen Gleisabstand.
The packages with complete ranges (refer to page 133) contain several track bed plates with and without connecti-on options on the underside. Any number of input sections can be formed in combination with insulating rail joiners.The holders are attached flush against the track bed pla-tes. The holders for the parallel distance ensure the correct track distance in the case of multi-track sets.
Der Gleisbau / The track construction
Grundplatten befestigen / Fortify the base-plates:
Die Grundplatten haben Lochungen für Senkkopf-schrauben oder Nägel. Durch diese Öffnungen sehen Sie die gezeichnete Grundlinie. Eine exakte Montage mit Nägeln ist schnell und einfach. Befestigen Sie zuerst nur die Grundplatten auf der Grundlinie. Legen Sie die Parallelhalter an die montierten Elemente. Schieben Sie die Grundplatten der Ausweiche an die Halter und befe-stigen Sie die restlichen Grundplatten.
The base-plates have perforations for screws (Senkkopf-schrauben) or nails. Through these openings, they see the drawn baseline. An exact montage with nails is fast and simple. Fortify only the base-plates on the baseline first. Put the parallel-holders at the mounted elements. Push the base-plates at the holders and fortify the remaining ba-se-plates.
Hinweis / Note:Montieren Sie die Halter nicht an die Stellen, wo die Laschen der Einspeisungen vorstehen.Don‘t install the holders at the po-
sitions where the tabs of the po-
werplace protrude.
Abb.: Unterseite des EinspeisgleisesImage: Underside of the feed track
Halter kürzen / Shorten the holders
Tram track system
118
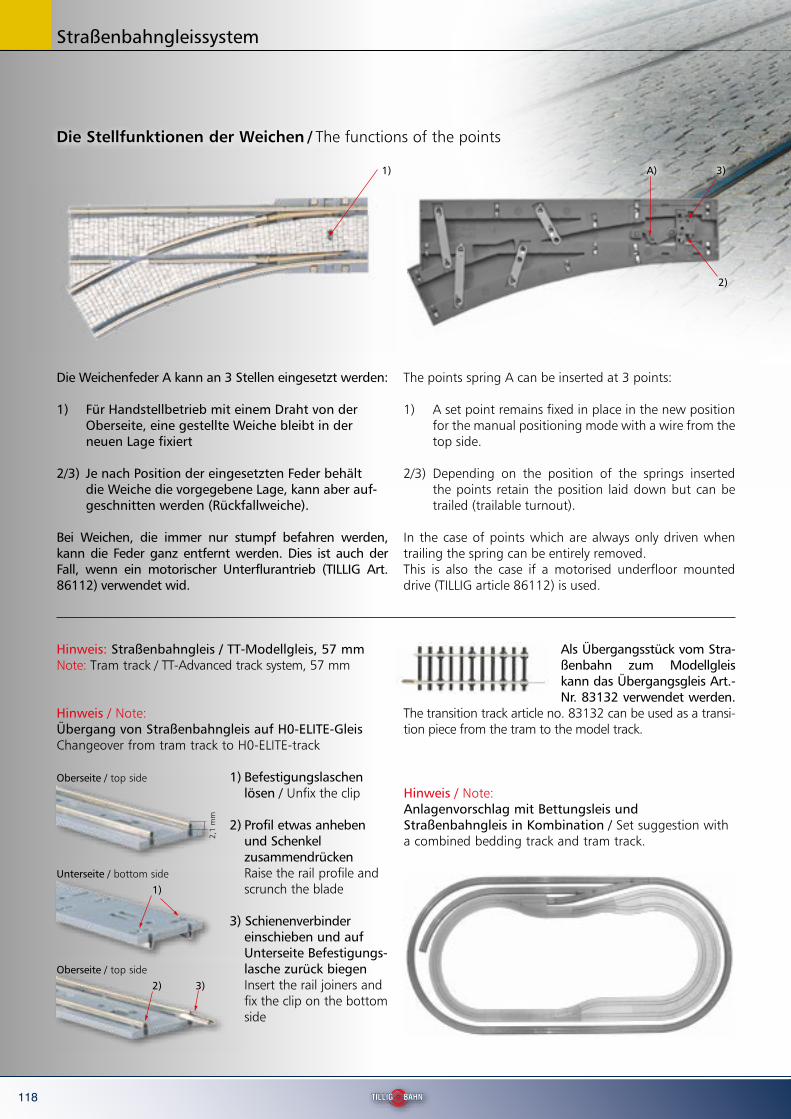
Hinweis / Note: Anlagenvorschlag mit Bettungsleis und Straßenbahngleis in Kombination / Set suggestion with a combined bedding track and tram track.
Die Weichenfeder A kann an 3 Stellen eingesetzt werden:
1) Für Handstellbetrieb mit einem Draht von der Oberseite, eine gestellte Weiche bleibt in der neuen Lage fixiert
2/3) Je nach Position der eingesetzten Feder behält die Weiche die vorgegebene Lage, kann aber auf- geschnitten werden (Rückfallweiche).
Bei Weichen, die immer nur stumpf befahren werden, kann die Feder ganz entfernt werden. Dies ist auch der Fall, wenn ein motorischer Unterflurantrieb (TILLIG Art. 86112) verwendet wid.
The points spring A can be inserted at 3 points:
1) A set point remains fixed in place in the new position for the manual positioning mode with a wire from the top side.
2/3) Depending on the position of the springs inserted the points retain the position laid down but can be trailed (trailable turnout).
In the case of points which are always only driven when trailing the spring can be entirely removed. This is also the case if a motorised underfloor mounted drive (TILLIG article 86112) is used.
1) 3)
2)
A)
Die Stellfunktionen der Weichen / The functions of the points
Hinweis / Note: Übergang von Straßenbahngleis auf H0-ELITE-GleisChangeover from tram track to H0-ELITE-track
1) Befestigungslaschen lösen / Unfix the clip
2) Profil etwas anheben und Schenkel zusammendrücken Raise the rail profile and scrunch the blade
3) Schienenverbinder einschieben und auf Unterseite Befestigungs- lasche zurück biegen Insert the rail joiners and fix the clip on the bottom side
1)
2) 3)
Oberseite / top side
Unterseite / bottom side
Oberseite / top side
2,1
mm
Hinweis: Straßenbahngleis / TT-Modellgleis, 57 mmNote: Tram track / TT-Advanced track system, 57 mm
Als Übergangsstück vom Stra-ßenbahn zum Modellgleis kann das Übergangsgleis Art.-Nr. 83132 verwendet werden.
The transition track article no. 83132 can be used as a transi-tion piece from the tram to the model track.
Straßenbahngleissystem

119
Abbildung zeigt den Einsatz des Straßenbahngleises für
Industrieanschlüsse / Image shows the
tram-track as connection for industry
1: Bodenfläche für Seite, gerade2: Bodenfläche für Parallelabstand, gerade3: Bodenfläche für (Gleis) Mitte, gerade4: Tram-Grundplatte, gerade 105,6 mm5: Halter für Paralellabstand6: Halter für Randfläche
1: Ground area for side, straight
2: Ground area for parallel distance, straight
3: Ground area for (track) middle, straight
4: Tram-Base plate, straight 105,6 mm
5: Bracket for parallel distance
6: Bracket for lateral face
1
2
3
4
5
6
6
Tram track system
120
Pflastersteine Paving-stones
Asphalt / Beton Bitumen / concrete
Bezeichnung Description
Spurweite Gauge
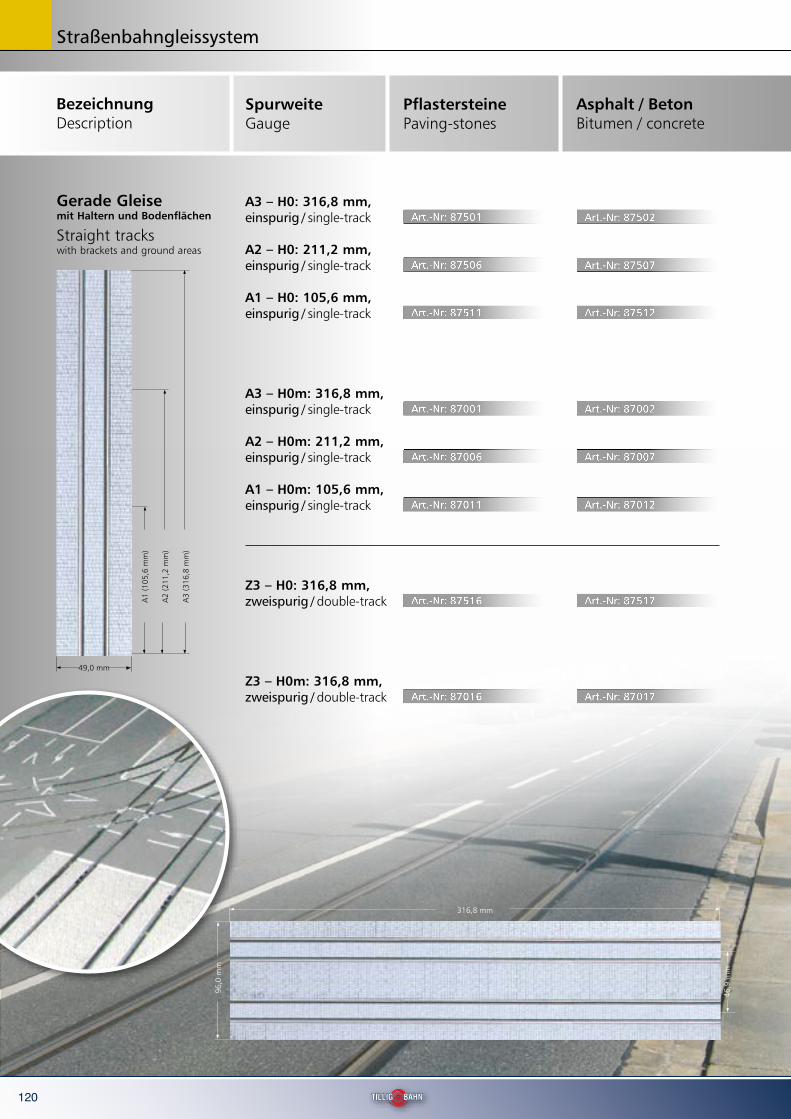
Gerade Gleise mit Haltern und Bodenflächen Straight tracks with brackets and ground areas
A3 – H0: 316,8 mm,einspurig / single-track
A3 – H0m: 316,8 mm,einspurig / single-track
Art.-Nr: 87501
Art.-Nr: 87001
Art.-Nr: 87502
Art.-Nr: 87002
A2 – H0: 211,2 mm,einspurig / single-track
A2 – H0m: 211,2 mm,einspurig / single-track
Art.-Nr: 87506
Art.-Nr: 87006
Art.-Nr: 87507
Art.-Nr: 87007
A1 – H0: 105,6 mm,einspurig / single-track
A1 – H0m: 105,6 mm,einspurig / single-track
Art.-Nr: 87511
Art.-Nr: 87011
Art.-Nr: 87512
Art.-Nr: 87012
Art.-Nr: 87516 Art.-Nr: 87517Z3 – H0: 316,8 mm,zweispurig / double-track
Z3 – H0m: 316,8 mm,zweispurig / double-track Art.-Nr: 87016 Art.-Nr: 87017
49,0 mm
96,0
mm
316,8 mm
A1
(105
,6 m
m)
A2
(211
,2 m
m)
A3
(316
,8 m
m)
46,9
mm
Straßenbahngleissystem
121
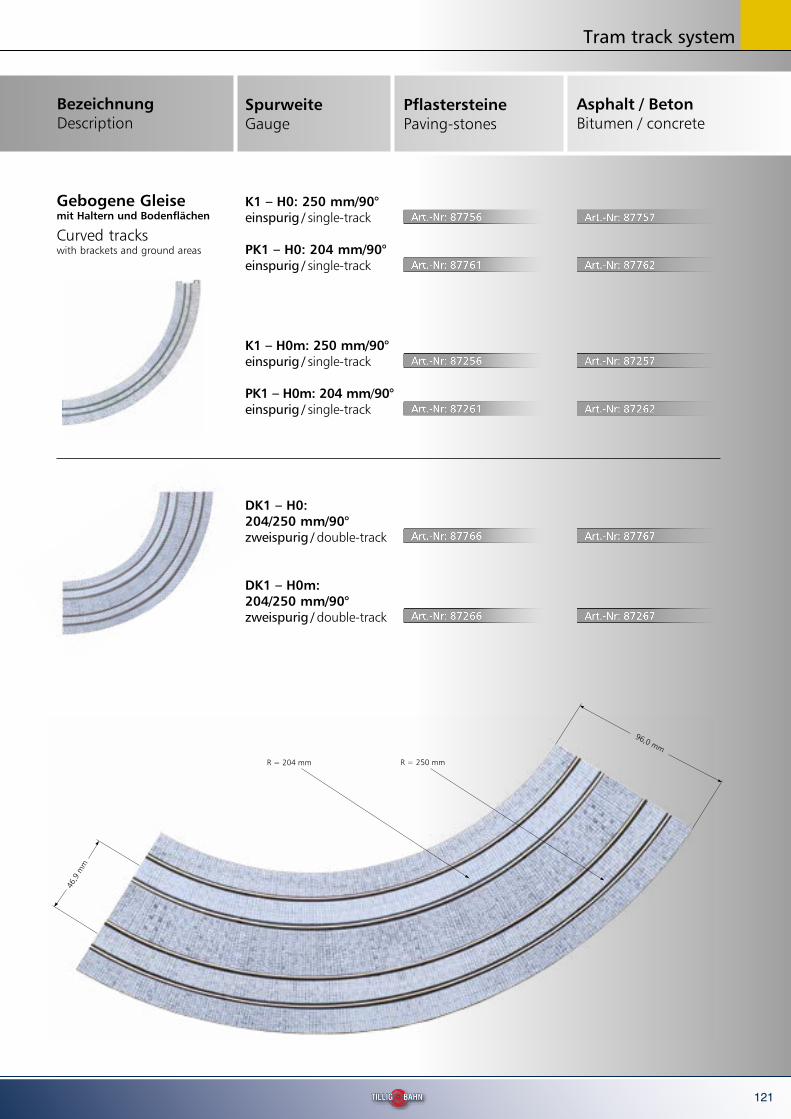
Gebogene Gleise mit Haltern und Bodenflächen Curved tracks with brackets and ground areas
Pflastersteine Paving-stones
Asphalt / BetonBitumen / concrete
Bezeichnung Description
Spurweite Gauge
K1 – H0: 250 mm/90°einspurig / single-track
K1 – H0m: 250 mm/90°einspurig / single-track
Art.-Nr: 87756
Art.-Nr: 87256
Art.-Nr: 87757
Art.-Nr: 87257
PK1 – H0: 204 mm/90°einspurig / single-track
PK1 – H0m: 204 mm/90°einspurig / single-track
Art.-Nr: 87761
Art.-Nr: 87261
Art.-Nr: 87762
Art.-Nr: 87262
DK1 – H0: 204/250 mm/90°zweispurig / double-track
DK1 – H0m: 204/250 mm/90°zweispurig / double-track
Art.-Nr: 87766
Art.-Nr: 87266
Art.-Nr: 87767
Art.-Nr: 87267
96,0 mm
R = 204 mm R = 250 mm
46,9
mm
Tram track system
122
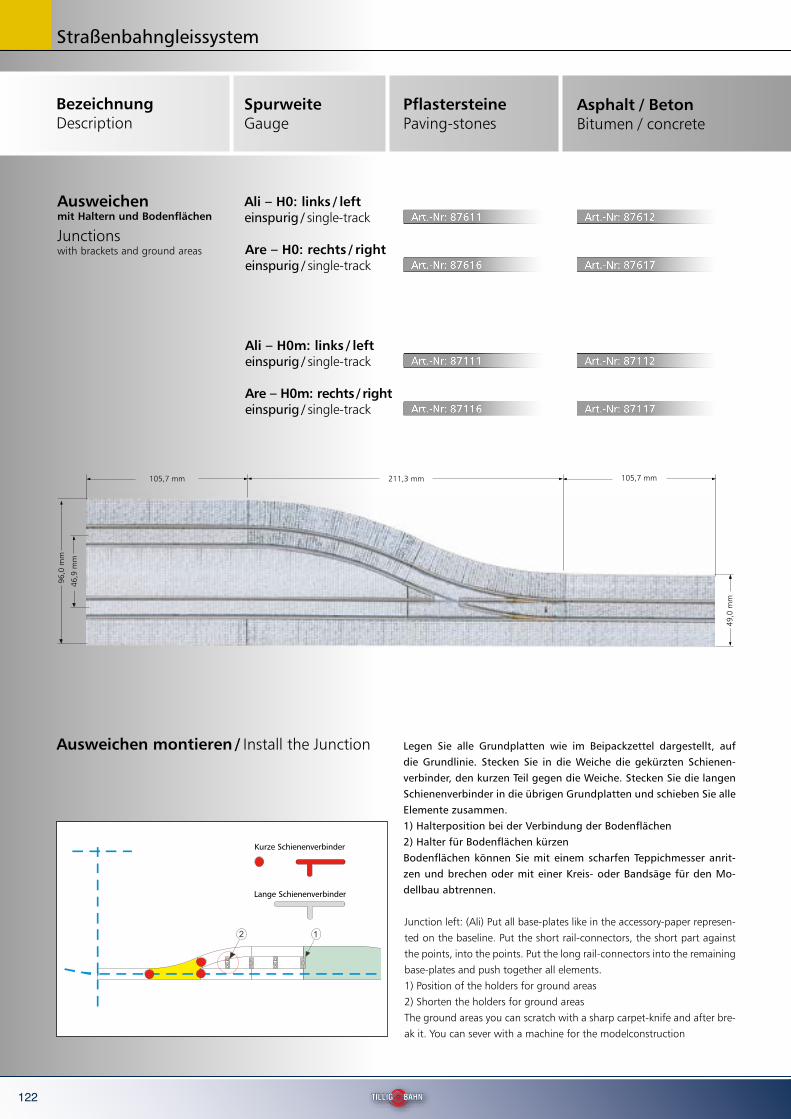
Ausweichen mit Haltern und Bodenflächen Junctions with brackets and ground areas
Ali – H0: links / lefteinspurig / single-track
Ali – H0m: links / lefteinspurig / single-track
Art.-Nr: 87611
Art.-Nr: 87111
Art.-Nr: 87612
Art.-Nr: 87112
Are – H0: rechts / righteinspurig / single-track
Are – H0m: rechts / righteinspurig / single-track
Art.-Nr: 87616
Art.-Nr: 87116
Art.-Nr: 87617
Art.-Nr: 87117
Ausweichen montieren / Install the Junction Legen Sie alle Grundplatten wie im Beipackzettel dargestellt, auf die Grundlinie. Stecken Sie in die Weiche die gekürzten Schienen-verbinder, den kurzen Teil gegen die Weiche. Stecken Sie die langen Schienenverbinder in die übrigen Grundplatten und schieben Sie alle Elemente zusammen. 1) Halterposition bei der Verbindung der Bodenflächen2) Halter für Bodenflächen kürzenBodenflächen können Sie mit einem scharfen Teppichmesser anrit-zen und brechen oder mit einer Kreis- oder Bandsäge für den Mo-dellbau abtrennen.
Junction left: (Ali) Put all base-plates like in the accessory-paper represen-
ted on the baseline. Put the short rail-connectors, the short part against
the points, into the points. Put the long rail-connectors into the remaining
base-plates and push together all elements.
1) Position of the holders for ground areas
2) Shorten the holders for ground areas
The ground areas you can scratch with a sharp carpet-knife and after bre-
ak it. You can sever with a machine for the modelconstruction
Kurze Schienenverbinder
Lange Schienenverbinder
96,0
mm
46,9
mm
105,7 mm 211,3 mm 105,7 mm
49,0
mm
Pflastersteine Paving-stones
Asphalt / Beton Bitumen / concrete
Bezeichnung Description
Spurweite Gauge
Straßenbahngleissystem

123
Weichen Points
WL – H0: R 250 mm/25° links / left
WL – H0m: R 250 mm/25°links / left
Art.-Nr: 87583
Art.-Nr: 87083
Art.-Nr: 87584
Art.-Nr: 87084
WR – H0: R 250 mm/25°rechts / right
WR – H0m: R 250 mm/25°rechts / right
Art.-Nr: 87588
Art.-Nr: 87088
Art.-Nr: 87589
Art.-Nr: 87089
Parallelweichen Parallel points
PWL – H0: R 204 mm/30° links / left
PWL – H0m: R 204 mm/30°links / left
Art.-Nr: 87593
Art.-Nr: 87093
Art.-Nr: 87594
Art.-Nr: 87094
PWR – H0: R 204 mm/30°rechts / right
PWR – H0m: R 204 mm/30°rechts / right
Art.-Nr: 87598
Art.-Nr: 87098
Art.-Nr: 87599
Art.-Nr: 87099
Y-Weichen Single-track branches
YWL – H0: R 204 mm/ R 250 mmlinks / left
YWL – H0m: R 204 mm/R 250 mmlinks / left
Art.-Nr: 87643
Art.-Nr: 87143
Art.-Nr: 87644
Art.-Nr: 87144
YWR – H0: R 250 mm/R 204 mmrechts / right
YWR – H0m: R 250 mm/ R 204 mmrechts / right
Art.-Nr: 87648
Art.-Nr: 87148
Art.-Nr: 87649
Art.-Nr: 87149
Abb. zeigt 87583 + 87588
Abb. zeigt 87593 + 87598
Abb. zeigt 87643 + 87648
R 250/25° 105,
6 m
m10
5,6
mmR 204/30°
WL WR
PWL PWR
YWR
Pflastersteine Paving-stones
Asphalt / Beton Bitumen / concrete
Bezeichnung Description
Spurweite Gauge
R 204/20°
R 25
0/15
°
YWL
Tram track system

124
Bogenkreuzungen Curve crossings
BK – H0: symmetrisch / symmetrical Art.-Nr: 87653 Art.-Nr: 87654
BKL – H0: links / left Art.-Nr: 87663 Art.-Nr: 87664
BKR – H0: rechts / right Art.-Nr: 87668 Art.-Nr: 87669
BK – H0m: symmetrisch / symmetrical
BKL – H0m: links / left
BKR – H0m: rechts / right
Abb. zeigt 87653
Abb. zeigt 87663+87668
R 250/25° R 25
0/25
°
R 250/20°
BK
105,6 mm
R 25
0/20
°BKL
BKR
Art.-Nr: 87153 Art.-Nr: 87154
Art.-Nr: 87164
Art.-Nr: 87169Art.-Nr: 87168
Art.-Nr: 87163
Pflastersteine Paving-stones
Asphalt / Beton Bitumen / concrete
Bezeichnung Description
SpurweiteGauge
105,
6 m
m
Straßenbahngleissystem

125
KG – H0: symmetrisch
symmetrical Art.-Nr: 87723 Art.-Nr: 87724
Art.-Nr: 87728 Art.-Nr: 87729
Kreuzungen Crossings
Abb. zeigt 87723 und 87728
KG – H0m: symmetrischsymmetrical
KA – H0:asymmetrisch
asymmetrical
KA – H0m: asymmetrisch
asymmetrical
Art.-Nr: 87223 Art.-Nr: 87224
Art.-Nr: 87228 Art.-Nr: 87229
76,0 mm
KG
62,0 mm
KA
Pflastersteine Paving-stones
Asphalt / Beton Bitumen / concrete
Bezeichnung Description
Spurweite Gauge
62,0
mm
76,0
mm
Tram track system
126
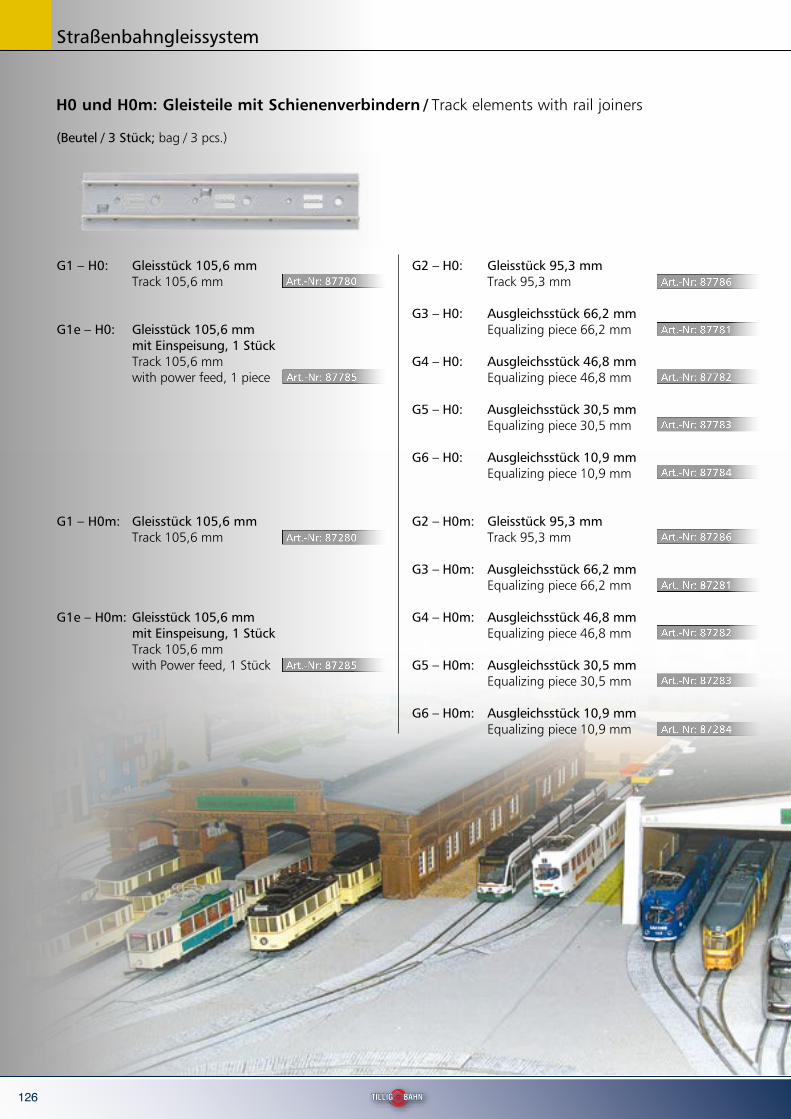
H0 und H0m: Gleisteile mit Schienenverbindern / Track elements with rail joiners
G1 – H0: Gleisstück 105,6 mm Track 105,6 mm
G1e – H0: Gleisstück 105,6 mm mit Einspeisung, 1 Stück Track 105,6 mm with power feed, 1 piece
G1 – H0m: Gleisstück 105,6 mm Track 105,6 mm
G1e – H0m: Gleisstück 105,6 mm mit Einspeisung, 1 Stück Track 105,6 mm with Power feed, 1 Stück
G2 – H0m: Gleisstück 95,3 mm Track 95,3 mm
G3 – H0m: Ausgleichsstück 66,2 mm Equalizing piece 66,2 mm
G4 – H0m: Ausgleichsstück 46,8 mm Equalizing piece 46,8 mm
G5 – H0m: Ausgleichsstück 30,5 mm Equalizing piece 30,5 mm
G6 – H0m: Ausgleichsstück 10,9 mm Equalizing piece 10,9 mm
(Beutel / 3 Stück; bag / 3 pcs.)
G2 – H0: Gleisstück 95,3 mm Track 95,3 mm
G3 – H0: Ausgleichsstück 66,2 mm Equalizing piece 66,2 mm
G4 – H0: Ausgleichsstück 46,8 mm Equalizing piece 46,8 mm
G5 – H0: Ausgleichsstück 30,5 mm Equalizing piece 30,5 mm
G6 – H0: Ausgleichsstück 10,9 mm Equalizing piece 10,9 mm
Art.-Nr: 87780
Art.-Nr: 87785
Art.-Nr: 87280
Art.-Nr: 87285
Art.-Nr: 87786
Art.-Nr: 87781
Art.-Nr: 87782
Art.-Nr: 87783
Art.-Nr: 87784
Art.-Nr: 87286
Art.-Nr: 87281
Art.-Nr: 87282
Art.-Nr: 87283
Art.-Nr: 87284
Straßenbahngleissystem
127
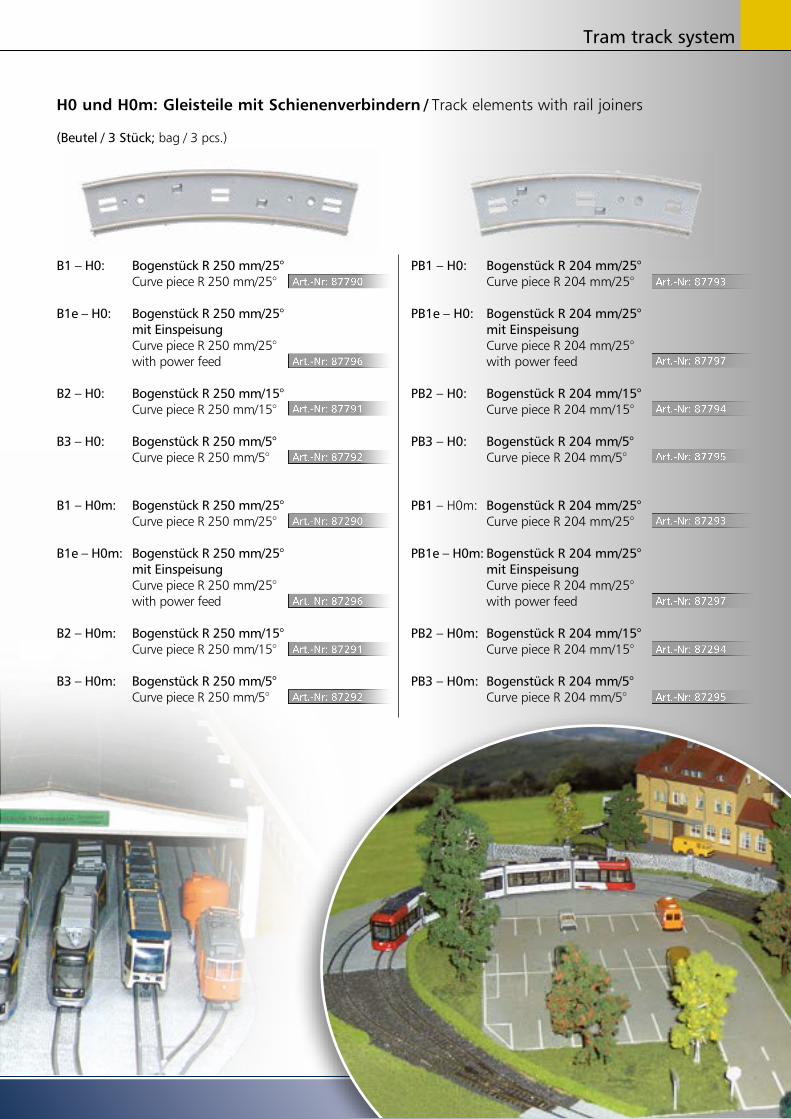
H0 und H0m: Gleisteile mit Schienenverbindern / Track elements with rail joiners
B1 – H0: Bogenstück R 250 mm/25° Curve piece R 250 mm/25°
B1e – H0: Bogenstück R 250 mm/25° mit Einspeisung Curve piece R 250 mm/25° with power feed
B2 – H0: Bogenstück R 250 mm/15° Curve piece R 250 mm/15°
B3 – H0: Bogenstück R 250 mm/5° Curve piece R 250 mm/5°
B1 – H0m: Bogenstück R 250 mm/25° Curve piece R 250 mm/25°
B1e – H0m: Bogenstück R 250 mm/25° mit Einspeisung Curve piece R 250 mm/25° with power feed
B2 – H0m: Bogenstück R 250 mm/15° Curve piece R 250 mm/15°
B3 – H0m: Bogenstück R 250 mm/5° Curve piece R 250 mm/5°
PB1 – H0: Bogenstück R 204 mm/25° Curve piece R 204 mm/25°
PB1e – H0: Bogenstück R 204 mm/25° mit Einspeisung Curve piece R 204 mm/25° with power feed
PB2 – H0: Bogenstück R 204 mm/15° Curve piece R 204 mm/15°
PB3 – H0: Bogenstück R 204 mm/5° Curve piece R 204 mm/5°
PB1 – H0m: Bogenstück R 204 mm/25° Curve piece R 204 mm/25°
PB1e – H0m: Bogenstück R 204 mm/25° mit Einspeisung Curve piece R 204 mm/25° with power feed
PB2 – H0m: Bogenstück R 204 mm/15° Curve piece R 204 mm/15°
PB3 – H0m: Bogenstück R 204 mm/5° Curve piece R 204 mm/5°
(Beutel / 3 Stück; bag / 3 pcs.)
Art.-Nr: 87790
Art.-Nr: 87796
Art.-Nr: 87791
Art.-Nr: 87792
Art.-Nr: 87290
Art.-Nr: 87296
Art.-Nr: 87291
Art.-Nr: 87292 Art.-Nr: 87295
Art.-Nr: 87793
Art.-Nr: 87797
Art.-Nr: 87794
Art.-Nr: 87795
Art.-Nr: 87293
Art.-Nr: 87297
Art.-Nr: 87294
Tram track system
128
Art.-Nr: 87818 Art.-Nr: 87819
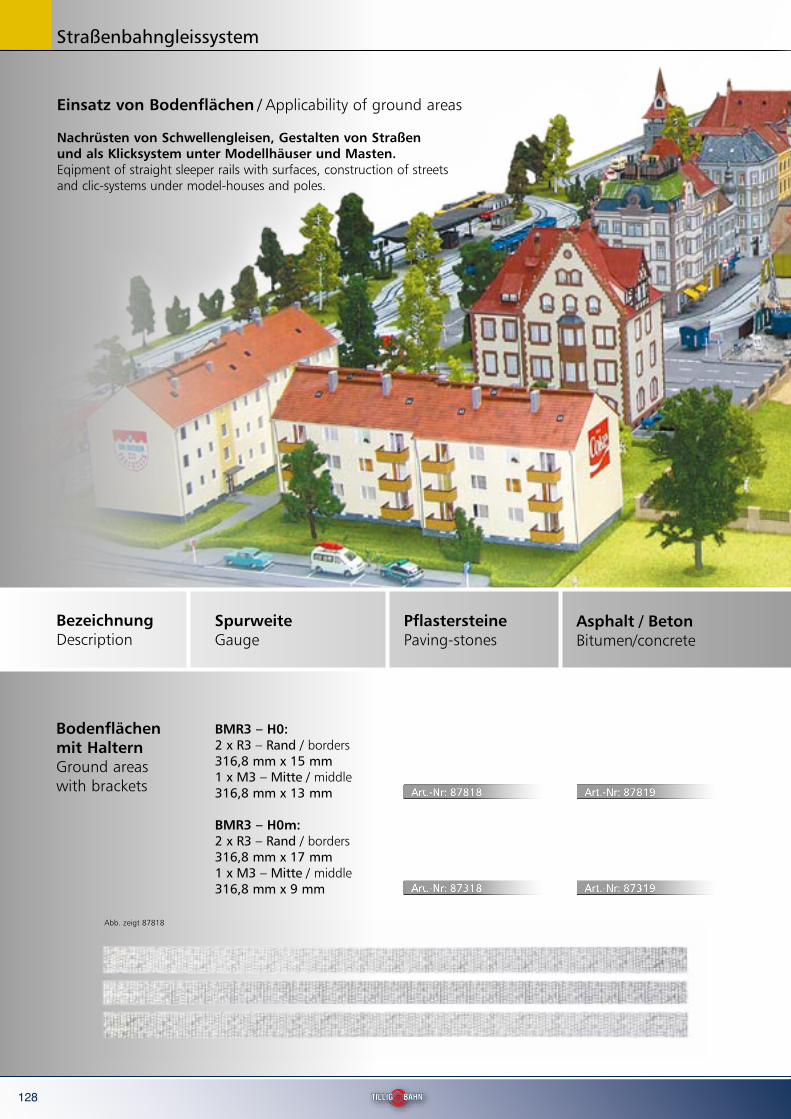
Bodenflächen mit Haltern Ground areaswith brackets
BMR3 – H0: 2 x R3 – Rand / borders316,8 mm x 15 mm1 x M3 – Mitte / middle316,8 mm x 13 mm
BMR3 – H0m: 2 x R3 – Rand / borders316,8 mm x 17 mm1 x M3 – Mitte / middle316,8 mm x 9 mm Art.-Nr: 87318 Art.-Nr: 87319
Abb. zeigt 87818
Einsatz von Bodenflächen / Applicability of ground areas
Nachrüsten von Schwellengleisen, Gestalten von Straßen und als Klicksystem unter Modellhäuser und Masten.
Eqipment of straight sleeper rails with surfaces, construction of streets and clic-systems under model-houses and poles.
Pflastersteine Paving-stones
Asphalt / Beton Bitumen/concrete
Bezeichnung Description
Spurweite Gauge
Straßenbahngleissystem
129
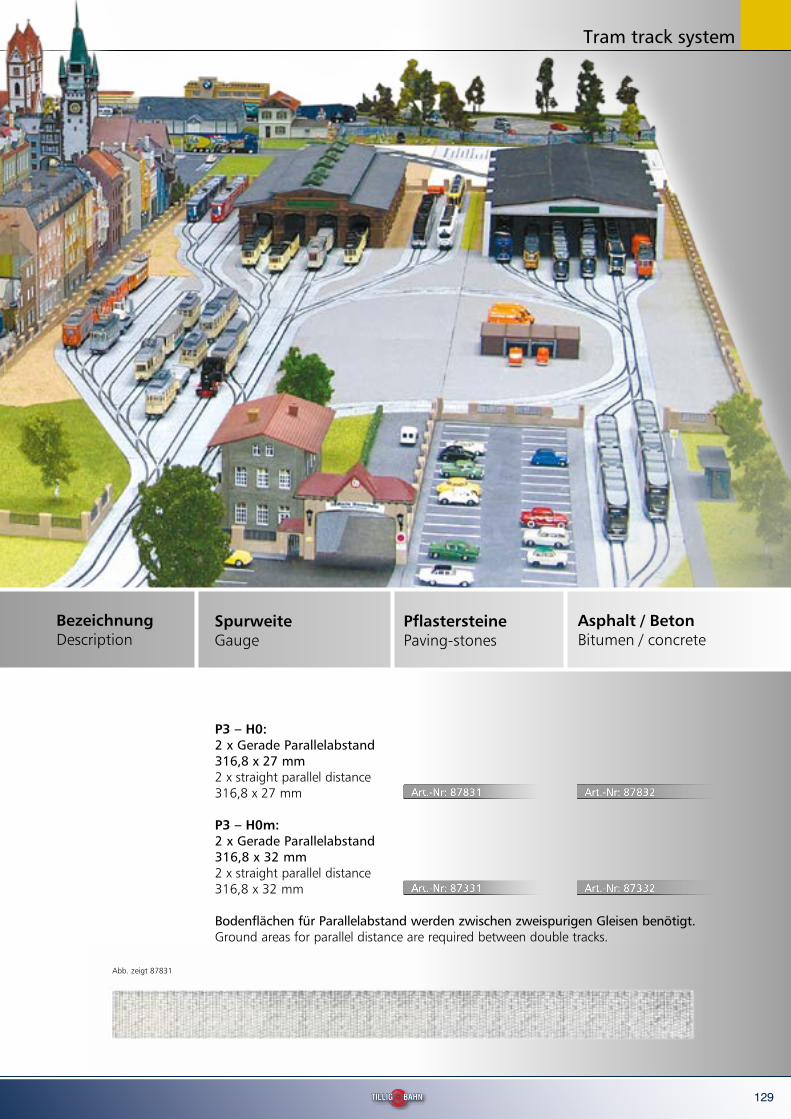
P3 – H0: 2 x Gerade Parallelabstand 316,8 x 27 mm
2 x straight parallel distance316,8 x 27 mm Art.-Nr: 87831 Art.-Nr: 87832
Art.-Nr: 87331 Art.-Nr: 87332
P3 – H0m: 2 x Gerade Parallelabstand316,8 x 32 mm
2 x straight parallel distance 316,8 x 32 mm
Abb. zeigt 87831
Bodenflächen für Parallelabstand werden zwischen zweispurigen Gleisen benötigt.Ground areas for parallel distance are required between double tracks.
PflastersteinePaving-stones
Asphalt / Beton Bitumen / concrete
Bezeichnung Description
Spurweite Gauge
Tram track system
130
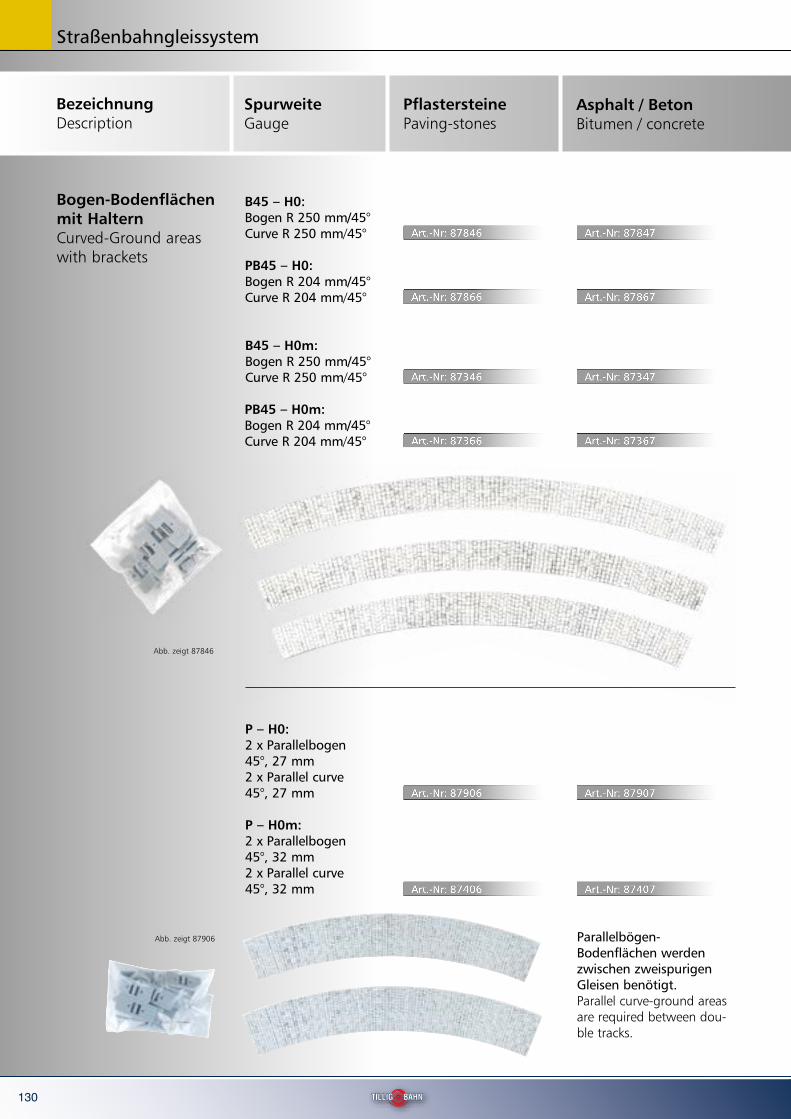
Bogen-Bodenflächen mit Haltern Curved-Ground areas with brackets
B45 – H0:Bogen R 250 mm/45° Curve R 250 mm/45° Art.-Nr: 87846 Art.-Nr: 87847
PB45 – H0: Bogen R 204 mm/45° Curve R 204 mm/45° Art.-Nr: 87866 Art.-Nr: 87867
B45 – H0m:Bogen R 250 mm/45° Curve R 250 mm/45° Art.-Nr: 87346 Art.-Nr: 87347
PB45 – H0m: Bogen R 204 mm/45° Curve R 204 mm/45° Art.-Nr: 87366 Art.-Nr: 87367
P – H0:2 x Parallelbogen 45°, 27 mm 2 x Parallel curve 45°, 27 mm Art.-Nr: 87906 Art.-Nr: 87907
P – H0m:2 x Parallelbogen 45°, 32 mm 2 x Parallel curve 45°, 32 mm Art.-Nr: 87406 Art.-Nr: 87407
Abb. zeigt 87846
Parallelbögen-Bodenflächen werden zwischen zweispurigen Gleisen benötigt.Parallel curve-ground areas are required between dou-ble tracks.
Pflastersteine Paving-stones
Asphalt / Beton Bitumen / concrete
Bezeichnung Description
Spurweite Gauge
Abb. zeigt 87906
Straßenbahngleissystem

131
Bodenflächen mit Haltern Ground areas with brackets
ZPGwR/L – H0: Zuschnitt li / re für Ausw. / Gleiswechsel blank left / right for junction / track change Art.-Nr: 87911 Art.-Nr: 87912
ZPGwR/L – H0m: Zuschnitt li / re für Ausw. / Gleiswechsel blank left / right for junction / track change Art.-Nr: 87411 Art.-Nr: 87412
ZPB – H0: Zuschnitt für Bogenkreuzung symmetrisch blank for curved crossing symmetrical Art.-Nr: 87916 Art.-Nr: 87917
ZPB – H0m: Zuschnitt für Bogenkreuzung symmetrisch blank for curved crossing symmetrical Art.-Nr: 87416 Art.-Nr: 87417
Abb. zeigt 87911
Abb. zeigt 87916
Pflastersteine Paving-stones
Asphalt / Beton Bitumen / concrete
Bezeichnung Description
Spurweite Gauge
Tram track system

132
Zubehör / Accessoires
Schienenverbinder, langRail joiners, long
Art.-Nr: 87970
Schienenverbinder, kurzRail joiners, short
Art.-Nr: 87971
Halter H0 / H0m, ParallelBracket H0 / H0m, parallel
Art.-Nr: 87973
Art.-Nr: 87974 Art.-Nr: 87976
Randhalter H0Edge-holders H0
Art.-Nr: 87977
Art.-Nr: 87978
Halter Nachrüstung H0, Mitte / Bracket retrofitting H0, middle
Randhalter H0mEdge-holders H0m
Art.-Nr: 87975
Halter Nachrüstung H0, Parallel / Bracket retrofitting H0, parallel
Halter Nachrüstung H0m, Parallel / Bracket retrofitting H0m, parallel
Halter Nachrüstung H0m, Mitte / Bracket retrofitting H0m, middle
IsolierschienenverbinderInsulating rail joiners
Art.-Nr: 87972
Legen Sie die Randhalter gleichmäßig verteilt an die Grundplatten. Achten Sie darauf, dass die Halter nicht über die Laschen der Einspeisung zu liegen kommen. Montieren Sie die Randhalter an allen Grundelementen. Die richtige Position der Randhalter: Legen Sie zuerst die Bodenflächen an die vorgesehenen Stellen und mar-kieren Sie die Enden. Um einen optimalen Halt zu er-reichen, montieren Sie Randhalter so, dass die beiden Enden der Bodenfläche je zur Hälfte auf den Raster des Halters eingeklickt werden können.
Put the edge-holders distributed at the base-plates evenly. Keep an eye on it that they come holder to lie over the tabs of the powerplace protrude. Install the edge-holders at all basic elements. The right position of the edge-holders Lay down the ground area at the right positions first and mark the ends. You install edge-holders in order to reach an op-timal hold. The two ends of the ground-area must be slid ever to the half in to the nose from de holder.
Randhalter montieren
Install the edge-holders
Schienenverbinder / Rail joiners
(Beutel / 10 Stück; bag / 10 pcs.)
Halter für Straßenbahngleis / Brackets for Tram-track
Halter für Schwellen- gleisnachrüstung Brackets for Sleeper track retrofitting
Straßenbahngleissystem
Art.-Nr: 87979
Kontaktblech für Straßenbahngleis (Beutel / 10 Stück) Contact sheed for Tram track (bag / 10 pcs.)
H0 Art.-Nr: 87980
H0m Art.-Nr: 87981

133133
Gleis-Startsets / Track-Beginner set
H0: Start-Set (ohne Tram), R = 250mmeinspurig mit Ausweiche in PflasterBeginner set (without tram), single-track with junction paving-stones
Art.-Nr: 87992
H0m: Start-Set (ohne Tram),einspurig mit Ausweiche in PflasterBeginner set (without tram), single-track with junction paving-stones
Komplettsortimente auf Vorbestellung / Complete ranges available on request
Pflastersteine Paving-stones
Asphalt / Beton Bitumen/concrete
Bezeichnung Description
Spurweite Gauge
H0: Depot 3-ständig Depot with 3 stands
H0m: Depot 3-ständig Depot with 3 stands
Art.-Nr: 87631 Art.-Nr: 87632
Art.-Nr: 87131 Art.-Nr: 87132
H0: Bogenkreuzung 2-spurig Curved crossing double-track
H0m: Bogenkreuzung 2-spurig Curved crossing double-track
Art.-Nr: 87656
Art.-Nr: 87156
H0: T-Kreuzung 2-spurig T-Crossing double-track Art.-Nr: 87701
Art.-Nr: 87201
H0m: T-Kreuzung 2-spurig T-Crossing double-track
528,3 mm
49,0
mm
142,
9 m
m
105,
7 m
m
R = 250
R = 204
96,0 mm
664,4 mm
96,0
mm
105,7 mm
R =
204
R = 250
105,
7
380,
2 m
m
Art.-Nr: 87492
~ 1400,0 mm
~ 6
00,0
mm
R 250
Tram track system
Kontaktblech für Straßenbahngleis (Beutel / 10 Stück) Contact sheed for Tram track (bag / 10 pcs.)

134
können, zum anderen bieten wir Ihnen auch ein Modellgleis-Set zur Vervollstän-digung des Dioramas.
Similarly to the method employed in the Track bedding with STYROSTONE® work-shop you will produce a mini-diorama here which you can take home with you after the event. And this concerns a TT showpiece on the subject of “industrial connection“ (60 cm x 25 cm). Despite the fact that our tramway track is mainly as the name suggests associated with trams we have deliberately opted for the „Industrial con-nection“ theme as this can ultimately be implemented for any set however small it may be. You will thus discover how a track set can be created with great ease using our system of track and paving tiles which is embedded with tarmac or plaster in addi-tion to a transition to a model track. At the workshop the base structure will initially be created which contains a base panel and the corresponding tramway track material. For the further development there will on the other hand be an appropriate accesso-ries set which you can therefore purchase for an attractive package price, and on the other hand we also offer you a model track set to complete the diorama.
Gleisbau mit TILLIG-StraßenbahngleisTrack construction with Tram track
Ähnlich wie bei dem Workshop Gleisbettung mit STYROSTONE®
werden Sie hier ein Mini-Diorama erstel-len, welches Sie nach der Veranstaltung mit nach Hause nehmen können. Und zwar handelt es sich um ein TT-Schaustück
zum Thema „Industrie-Anschluss“ (60 cm x 25 cm). Obwohl man unser Straßen-bahngleis – wie dessen Name bereits sagt – in erster Linie mit Straßenbahnen in Ver-bindung bringt, haben wir uns bewusst für die Thematik „Industrie-Anschluss“ entschieden, weil diese schließlich auf je-der (noch so kleinen) Anlage umsetzbar ist. So werden Sie miterleben, wie mit un-serem System aus Gleis und Bodenplatten spielend leicht eine Gleisanlage entste-hen kann, welche mit Asphalt oder Pfla-ster eingebettet ist, zusätzlich mit einem Übergang zum Modellgleis. Zum Work-shop wird hier zunächst der Grundaufbau entstehen, der eine Grundplatte und das entsprechende Straßenbahn-Gleismate-rial enthält. Zur weiteren Ausgestaltung wird es zum einen ein passendes Zube-hör-Set geben, welches Sie dann vor Ort zu einem attraktiven Paketpreis erwerben
Beitrag Workshop Straßenbahngleis
Ä
135
Hinweis / Note: Die Workshopplätze sind begrenzt. Wir empfehlen Ihnen daher, sich mög-lichst frühzeitig anzumelden! Die Anmeldeformulare erhalten Sie auf unserer Homepage www.tillig.com bzw. auf Anfrage per Post.
The workshop vacancies are limited. We therefore recommend that you register for this event as early as possible! You can obtain the registration forms from our website www.tillig.com or by sending a postal request.
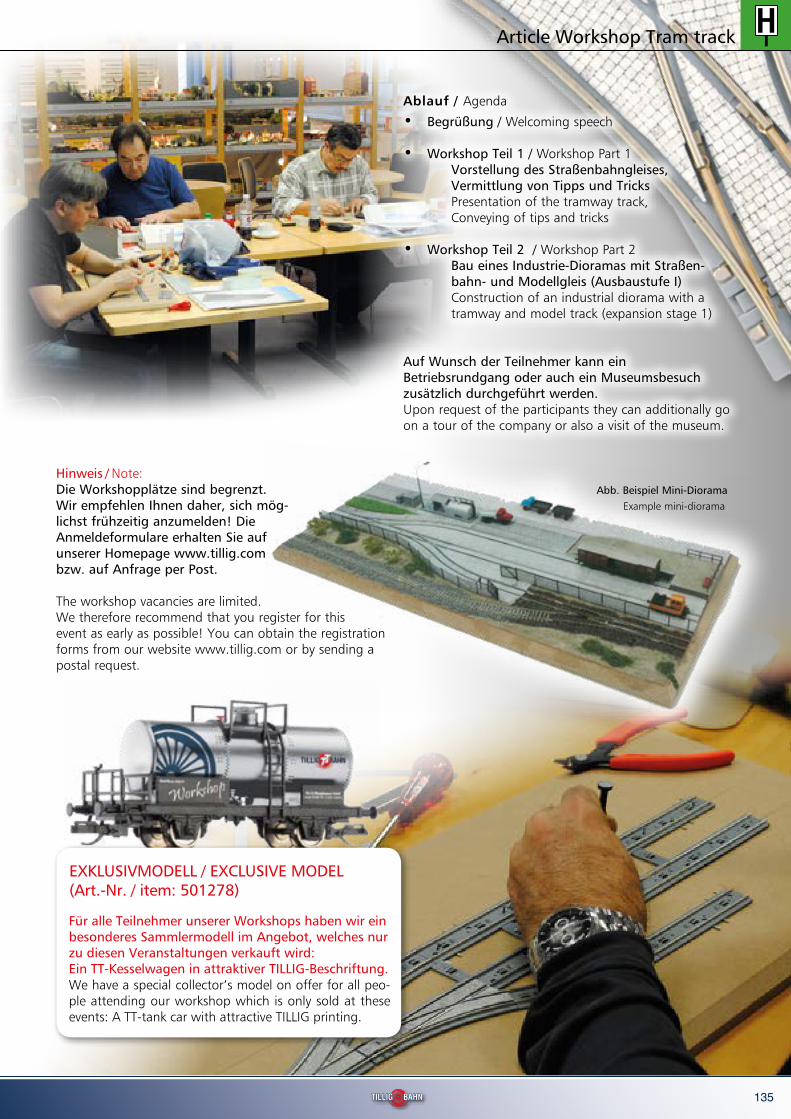
Abb. Beispiel Mini-DioramaExample mini-diorama
Article Workshop Tram track
Ablauf / Agenda
• Begrüßung / Welcoming speech
• Workshop Teil 1 / Workshop Part 1 Vorstellung des Straßenbahngleises, Vermittlung von Tipps und Tricks Presentation of the tramway track, Conveying of tips and tricks
• Workshop Teil 2 / Workshop Part 2 Bau eines Industrie-Dioramas mit Straßen- bahn- und Modellgleis (Ausbaustufe I) Construction of an industrial diorama with a tramway and model track (expansion stage 1)
Auf Wunsch der Teilnehmer kann ein Betriebsrundgang oder auch ein Museumsbesuch zusätzlich durchgeführt werden.Upon request of the participants they can additionally go on a tour of the company or also a visit of the museum.
Für alle Teilnehmer unserer Workshops haben wir ein besonderes Sammlermodell im Angebot, welches nur zu diesen Veranstaltungen verkauft wird: Ein TT-Kesselwagen in attraktiver TILLIG-Beschriftung.We have a special collector’s model on offer for all peo-ple attending our workshop which is only sold at these events: A TT-tank car with attractive TILLIG printing.
EXKLUSIVMODELL / EXCLUSIVE MODEL (Art.-Nr. / item: 501278)

136
Beitrag „Bau eines Anlagensegmentes“ (aus Club aktuell 1/2014)
Foto
: TIL
LIG
Wer
ksar
chiv
Für die Planung der Gleisgeometrie haben sich die Aus-schneideschablonen bewährt (Diese erhalten Sie bei TILLIG auf Anfrage bzw. in Kürze als Download unter www.tillig.com). Bei diesen Ausschneidebögen sind alle vorhandenen Gleisarten als Schablone hinterlegt.
So ist auf einfache Art eine genaue Planung möglich. The cut-out templates have proved their worth for the planning of the track geometry (You can obtain it from TILLIG upon request or in the near future as a download at www.tillig.com). In the case of all these cut-out models all the existing types of track are marked out as a template. In this way precise planning is possible in a simple way.
Einen kompletten Überblick über alle Elemente des Stra-ßenbahngleises (Gleisstücke, Bodenflächen in Asphalt und Pflaster, Halter, Komplettpakete) finden Sie im TIL-LIG-Gleiskatalog, der unter der Art.-Nr. 09588 erhältlich ist. You will find an entire overview of all the elements of the tramway track (rail section, tarmac and plastered floor sur-faces, holders, complete packages) in the TILLIG track cata-logue that can be obtained under article no. 09588.
Nachdem die Gleise besorgt worden, geht es an den Gleisbau. Dabei hatte ich folgende Herausforde-rung zu beachten: Damit das Segment auch an die bestehende Anlage angeknüpft werden kann, wird mittels der einer selbst angefertigten Gleisbauscha-blone der Abstand zur Anlagenkante genau fest-
Auch wenn in TT das Angebot an Straßenbahn-Mo- dellen bislang noch sehr überschaubar ist, so stellt
doch solch ein Anlagenteil mit Straßenbahn-Gleis mit Sicherheit einen interessanten Blickfang auf einer TT-Heimanlage dar. Um unser Straßenbahngleis seinen Kunden anschaulich zu präsentieren, entschloss sich un-ser Händler Dirk Bertram aus Leipzig vor einiger Zeit, als Vorführanlage ein Anlagensegment mit TILLIG-Straßen-bahngleis zu bauen. Dabei wurden die einzelnen Bau-phasen in Wort und Bild dokumentiert. Das Ergebnis möchten wir Ihnen im Folgenden vorstellen.
Even if the available tramway offer of tramway mo-dels has been very limited up to now a layout piece
with a tramway line certainly represents an interesting eye-catching element on a TT home railway set. Our tra-der Dirk Bertram from Leipzig decided some time ago to construct a layout segment with the TILLIG tramway track in order to present our tramway track as attractively as possible to our customers. In this process the indi-vidual construction phases were documented in writing and using images. We would like to present the results below.
Bau eines AnlagensegmentesConstruction of a layout segment
A

137
gelegt. Das Parallelgleis wird dann exakt mit Hil-fe der Halter für die mittlere Gleisfüllung verlegt. Once the tracks have been obtained, you go about constructing the tracks. In this process I had to address the following challenge: The distance to the existing set edge is precisely stipulated using a self-assembled track template to ensure that the segment can also be attached to the existing system. The parallel track is then precisely laid with the aid of the holder for the middle track filling.
Um die einzelnen Gleise miteinander zu verbinden, liegen jeder Gleispackung eine Vielzahl der Schienen-verbinder bei. Diese müssen für den Einbau von Kreu-zungen oder Weichen gekürzt werden. A large number of track connectors are included in each track pack to connect the individual tracks with one ano-ther. They must be shortened for the construction of cros-sings or points.
Zum Befestigen der Gleise auf der Grundplatte gibt es verschiedene Möglichkeiten. Ich entschloss mich, die Gleise zu schrauben, da dann eine Korrektur jederzeit möglich ist, auch ein Austausch ist jederzeit machbar. Vor dem Einbau der Weichen muss eine Bohrung für den
Weichenantrieb vorgesehen werden. Hierzu ist die ge-naue Position der Weiche anzuzeichnen um dann mittig der Stellschwelle ein ca. 10mm Loch in die Grundplatte zu bohren. Als Antrieb eignen sich beispielsweise die TILLIG-Unterflurantriebe (Art. 86112).There are various options for the attachment of tracks to the base panel. I decided to screw the tracks tight as a correction is possible at any time in this case, it is also pos-sible to replace a track at any time. A drill hole for the points drive must be provided before the installation of the points. To this end the precise position of the point must be marked out to then drill a hole that is approx. 10mm in diameter into the base panel to the centre of the throw bar. The TILLIG underfloor drives are one possible suitable version as a drive (article 86112).
Nach dem Verlegen der Gleisanlage werden rechts, in der Mitte und links die Halterungen für die Bodenflä-chen festgenagelt, ge-schraubt oder geklebt. Für das Zuschneiden der Bodenflächen hat sich eine Minikreissäge bewährt. Hierbei sollte so exakt wie möglich gearbeitet werden. Following the laying of the track systems the holders for the floor sur-faces will be nailed firmly into position, screwed into position or stuck to the right of it, in its cen-tre and to the left of it. A mini circular saw has proved itself for the cut-ting of the bottom surfaces. You need to work as precisely as possible in this process.
Nachdem die Gleisanlage fertig gestellt ist, kann be-gonnen werden, die Straße „zu bauen“. Hierzu habe ich folgende Technologie angewandt. Ich habe für die
Article „construction of a layout segment“

138
Alle
Fot
os: F
a. M
od
ellb
ahn
Bert
ram
geraden Flächen Sperrholz, welches die gleiche Höhe hat, zugeschnitten. Für die Bögen der Fahrbahn schnei-de ich Kunststoffleisten zu. Die können dann in die ge-wünschte Position gebogen werden und ergeben so eine Art Schalung für einen späteren Spachtelauftrag. Nach diesem Arbeitsschritt kann dann Spachtelmasse in diese Formen „gegossen“ werden. Nach Aushärten der ersten Schicht wird noch eine weitere Feinschicht aufgebracht. Danach kann man mit Straßenfarbe oder ähnlichem die Fahrbahn farblich behandeln. Der Fuß-weg wird aus einem 1,5 mm starken Pappstreifen ge-fertigt, auf dem z.B. gelaserte Pflastersteinplatten von Noch verarbeitet werden.
Once the track system has been completed you can start to construct the road.” I have used the following techno-logy to this end. I have cut plywood that has the same height for the straight surfaces. I will cut plastic strips for the bends of the track. They can then be bent into the de-sired position and thus result in a type of formwork for a later trowel application. Following this working step filler can then be “poured” into these moulds. Once the first layer has hardened an additional topcoat will be applied. Following this paint can be applied to the track using ro-adway paint or similar paint. The pavement is constructed from a cardboard strip that is 1.5 mm thick, on which for instance lasered paving slabs are processed by Noch.
Maik Mitdank, Fa. Modellbahn Bertram
Beitrag „Bau eines Anlagensegmentes“ (aus Club aktuell 1/2014)